- 投稿日:2020-09-24T23:19:46+09:00
(´ω`) 箇条書きを樹形図にするアプリを作った(ドッキングパネルを添えて...
わいや。おっさんとはわいのことや。おっさんが言ったことの全てが間違っているとは思わんが確かに受け入れにくい"きもちわるさ"みたいなものを感じ取ったと思う。殺伐とした世の中で、そういう気持ちを忘れないで欲しい。そう思ってこの記事を書いたんだ。って前置きはそのぐらいにして今のとこ毎日書きまくってるな。書きなぐって丸めてぽいするブログみたいな感覚だ。マークダウンも##と```のハイライトしか使ってない。フォロワーが増えることはもうないと悟った。4記事目にして住人として世界の無常さを悟るが如く俺の書く記事ではフォロワーが増えないという事実の目の当たりにし愕然とした。希望などない。だから俺が希望になるよ。QIITAに変わるサービスを作ろうと思った。って前置きを入れて解説してくよ。
何作った
箇条書き。ってよく書くはずだ。学生でも社会人でも隣のおばちゃん家もそうさ。多分誰もが書く。1マス空けて。2マス開けて...それを樹形図に出来たら更に判りやすくなるんじゃねぇかな。って発想で作った。議事録もメモ程度なら箇条書きにする。するとこうなる...
縦に長くなる箇条書きより判りやすい
機能について
save tree imageを押せばSVG形式でダウンロードできる。
save indented textを押せばTXT形式でダウンロードできる。
木の高さも深さも調整可能だ。ドラッグでパンできてホイールでズームできる。
resize:bothしてあるおかげでウィンドウ自体も拡縮できる
ドッキングパネル化するフレームワークのおかげでエディタもビュアーも移動可能だ
利用しているライブラリ
入力/設定/出力とドッキングパネル化する (golden-layout)
テキストエリアをタブ入力可能にする (TabIndent.js)
ウィンドウのリサイズを検知する (resize-event)
箇条書きをjSON化する (indent2obj)
樹形図を出力するソース
sample.html<!doctype html> <html> <head> <title></title> <meta charset='utf-8'> <meta content='' name='author'> <meta content='' name='application-name'> <meta content='' name='description'> <meta content='telephone=no,address=no,email=no,date=no,url=no' name='format-detection'> <meta content='noimageindex,notranslate,nosnippet,noarchive,nofollow,noindex' name='robots'> <meta content='width=device-width,initial-scale=1.0,minimum-scale=1.0,maximum-scale=1.0,user-scalable=no' name='viewport'> <link href='js/jquery/golden-layout/theme/base.css' rel='stylesheet'> <link href='asset/manifest.json' rel='manifest'> <link href='asset/favicon.ico' rel='icon'> <style> @font-face{ font-family:'M+2VM+IPAG circle'; src:url('asset/m+2vm+ipag-circle.ttf'); } html, body{ margin:0; width:100%; height:100%; font-size:12px; } /* * 中央 */ main{ top:50%; left:50%; position:absolute; transform:translate(-50%,-50%); } /* * 背景 */ .lm_goldenlayout .lm_content{ background:white; } /* * 変更 */ main .wrap{ width:80vw; height:80vh; resize:both; overflow:scroll; } /* * 見栄 */ main .wrap{ border-bottom:2px solid rgba(34,36,38,.15); box-shadow:rgba(16, 36, 94, 0.4) 0 2px 6px 0; } /* * 設定 */ .proper .dg, .proper .dg .close-button{ width:100% !important; } .proper .dg.main .close-button{ display:none; } </style> </head> <body> <main> <div id='ui' class='wrap'> </div> </main> </body> </html> <!-- native --> <script src='js/native/d3-5.12.0.min.js'></script> <script src='js/native/dat-gui/0.7.6.min.js'></script> <script src='js/native/tab-indent-0.1.8.min.js'></script> <script src='js/native/indent2obj-0.0.3.min.js'></script> <!-- jquery --> <script src='js/jquery/3.4.1.min.js'></script> <script src='js/jquery/golden-layout/1.5.9.min.js'></script> <script src='js/jquery/resize-event-1.2.1.min.js'></script> <script> var app={ layout:{ content: [ { type:'row', content: [ { width:29.3, type:'column', content: [ {type:'component',componentName:'view',title:'editor'}, {type:'component',componentName:'view',title:'proper'} ] }, { width:70.7, type:'stack', content: [ {type:'component',componentName:'view',title:'viewer'} ] } ] } ] }, plugin:{ editor:{ elem:'<textarea></textarea>', option:{ width:'100%', height:'100%', addClass:'tabIndent', css:{ font:"12px 'M+2VM+IPAG circle", outline:'none', border:'none' } } }, viewer:{ elem:'<div></div>', option:{ id:'svg', addClass:'tree', css:{ background:'white' } } } }, config:{ save:function(){ localStorage.setItem('tree',$editor.val()) }, download:function(){ var data = d3.select('svg').node().outerHTML var blob = new Blob([data]) var link = document.createElement("a") link.href = URL.createObjectURL(blob) link.download = new Date().toISOString() + '.svg' link.click() }, height:0.3, width:11, } } var $ui = $('#ui') /* * 最低限 */ var dat = new dat.GUI({autoPlace:false}) var golden = new GoldenLayout(app.layout,$ui) // GOLDENを初期化()すると呼び出されるDOM挿入先の$コンテナを準備 golden.registerComponent('view',function(container,state){ var key = container._config.title, ele = container.getElement() ele.addClass(key) golden[key]=ele }) /* * 1.初期化 */ function init(){ golden.init() } /* * DOM生成 */ var $editor = $(app.plugin.editor.elem,app.plugin.editor.option), $viewer = $(app.plugin.viewer.elem,app.plugin.viewer.option), $proper = $(this.dat.domElement) $editor.on('keyup',function(){ update() }) /* * 2.GOLDENにDOMを構築 */ function construct(){ // 生成したDOMを$コンテナに挿入 golden['proper'].append($proper) golden['editor'].append($editor) golden['viewer'].append($viewer) } /* * 3.ビュアーをセットアップ */ function setup(){ dat.add(app.config,'height').onChange(update).name('tree height') dat.add(app.config,'width').onChange(update).name('tree width') dat.add(app.config,'download').name('save tree image') dat.add(app.config,'save').name('save indented text') $(window).on('resize',function(){ golden.updateSize() }) $ui.onResize({},function(){ golden.updateSize() }) } /* * ツリーはSVG */ var view = d3.select($viewer.get(0)) .append('svg') view.append('g') view.attr("xmlns", "http://www.w3.org/2000/svg") view.append('style') .text(` circle { stroke-width:2px; stroke:#05668D; fill:white; r:6; } text { font:12px 'M+2VM+IPAG circle'; } rect { transform:translateY(-5px); stroke:#0cf; width:10px; heiht:10px; fill:white; } path { storke-width:2px; stroke:#ccc; fill:none; } `) function getLinks(arr) { return arr .enter() .append('path') .attr('d', d3.linkHorizontal() .x(function(d){ return d.y }) .y(function(d){ return d.x }) ) } function getNodes(arr) { return arr .enter() .append('g') .attr('class',function(d){ return 'node ' + (d.children ? 'node--internal' : 'node--leaf') }) .attr('transform',function(d){ return "translate(" + d.y + "," + d.x + ")"; }) } function update() { var w = golden.viewer.width() var h = golden.viewer.height() view .attr('width',w) .attr('height',h) var g = d3.select('svg > g') d3.select('svg > g').selectAll("*").remove() view.call(d3.zoom().on('zoom',function(){ g.attr('transform',d3.event.transform) }) ) var vData = indent2obj($editor.val(),'\t') var vRoot = d3.hierarchy(vData[0]); var vNodes = vRoot.descendants(); var vLayout = d3.tree().size([ app.config.width * vNodes.reverse().length, app.config.height * h ]); var vLinks = vLayout(vRoot).links(); var maxDepth = d3.max(vNodes,function(d) { return d.depth }) var links = getLinks(g.selectAll('.link').data(vLinks)) var nodes = getNodes(g.selectAll(".node").data(vNodes)) nodes.append('circle') nodes.append('text') .attr('dy','.35em') .attr('x',function(d){ return d.children ? -13 : 13; }) .attr('text-anchor',function(d){ return d.children || d._children ? 'end' : 'start' }) .text(function(d){ return d.data.name }) } document.addEventListener('DOMContentLoaded',function(){ init() construct() setup() if('tree' in localStorage){ $editor.val( localStorage.getItem('tree') ) update() } tabIndent.config.tab = '\t'; tabIndent.renderAll() }) </script> <style> @import url('js/jquery/golden-layout/theme/light.css'); @import url('js/native/dat-gui/theme/light.min.css'); </style/>備考
ウィンドウの陰影が恰好よくねぇ?


- 投稿日:2020-09-24T23:19:46+09:00
(´ω`) 箇条書き?樹形図にしたら見やすいっておっさんがいっとった
わいや。おっさんとはわいのことや。おっさんが言ったことの全てが間違っているとは思わんが確かに受け入れにくい"きもちわるさ"みたいなものを感じ取ったと思う。殺伐とした世の中で、そういう気持ちを忘れないで欲しい。そう思ってこの記事を書いたんだ。って前置きはそのぐらいにして今のとこ毎日書きまくってるな。書きなぐって丸めてぽいするブログみたいな感覚だ。マークダウンも##と```のハイライトしか使ってない。フォロワーが増えることはもうないと悟った。4記事目にして住人として世界の無常さを悟るが如く俺の書く記事ではフォロワーが増えないという事実の目の当たりにし愕然とした。希望などない。だから俺が希望になるよ。QIITAに変わるサービスを作ろうと思った。って前置きを入れて解説してくよ。
何作った
箇条書き。ってよく書くはずだ。学生でも社会人でも隣のおばちゃん家もそうさ。多分誰もが書く。1マス空けて。2マス開けて...それを樹形図に出来たら更に判りやすくなるんじゃねぇかな。って発想で作った。議事録もメモ程度なら箇条書きにする。するとこうなる...
縦に長くなる箇条書きより判りやすい
機能について
save tree imageを押せばSVG形式でダウンロードできる。
save indented textを押せばTXT形式でダウンロードできる。
木の高さも深さも調整可能だ。ドラッグでパンできてホイールでズームできる。
resize:bothしてあるおかげでウィンドウ自体も拡縮できる
ドッキングパネル化するフレームワークのおかげでエディタもビュアーも移動可能だ
利用しているライブラリ
入力/設定/出力とドッキングパネル化する (golden-layout)
テキストエリアをタブ入力可能にする (TabIndent.js)
ウィンドウのリサイズを検知する (resize-event)
箇条書きをjSON化する (indent2obj)ソース
sample.html<!doctype html> <html> <head> <title></title> <meta charset='utf-8'> <meta content='' name='author'> <meta content='' name='application-name'> <meta content='' name='description'> <meta content='telephone=no,address=no,email=no,date=no,url=no' name='format-detection'> <meta content='noimageindex,notranslate,nosnippet,noarchive,nofollow,noindex' name='robots'> <meta content='width=device-width,initial-scale=1.0,minimum-scale=1.0,maximum-scale=1.0,user-scalable=no' name='viewport'> <link href='js/jquery/golden-layout/theme/base.css' rel='stylesheet'> <link href='asset/manifest.json' rel='manifest'> <link href='asset/favicon.ico' rel='icon'> <style> @font-face{ font-family:'M+2VM+IPAG circle'; src:url('asset/m+2vm+ipag-circle.ttf'); } html, body{ margin:0; width:100%; height:100%; font-size:12px; } /* * 中央 */ main{ top:50%; left:50%; position:absolute; transform:translate(-50%,-50%); } /* * 背景 */ .lm_goldenlayout .lm_content{ background:white; } /* * 変更 */ main .wrap{ width:80vw; height:80vh; resize:both; overflow:scroll; } /* * 見栄 */ main .wrap{ border-bottom:2px solid rgba(34,36,38,.15); box-shadow:rgba(16, 36, 94, 0.4) 0 2px 6px 0; } /* * 設定 */ .proper .dg, .proper .dg .close-button{ width:100% !important; } .proper .dg.main .close-button{ display:none; } </style> </head> <body> <main> <div id='ui' class='wrap'> </div> </main> </body> </html> <!-- native --> <script src='js/native/d3-5.12.0.min.js'></script> <script src='js/native/dat-gui/0.7.6.min.js'></script> <script src='js/native/tab-indent-0.1.8.min.js'></script> <script src='js/native/indent2obj-0.0.3.min.js'></script> <!-- jquery --> <script src='js/jquery/3.4.1.min.js'></script> <script src='js/jquery/golden-layout/1.5.9.min.js'></script> <script src='js/jquery/resize-event-1.2.1.min.js'></script> <script> var app={ layout:{ content: [ { type:'row', content: [ { width:29.3, type:'column', content: [ {type:'component',componentName:'view',title:'editor'}, {type:'component',componentName:'view',title:'proper'} ] }, { width:70.7, type:'stack', content: [ {type:'component',componentName:'view',title:'viewer'} ] } ] } ] }, plugin:{ editor:{ elem:'<textarea></textarea>', option:{ width:'100%', height:'100%', addClass:'tabIndent', css:{ font:"12px 'M+2VM+IPAG circle", outline:'none', border:'none' } } }, viewer:{ elem:'<div></div>', option:{ id:'svg', addClass:'tree', css:{ background:'white' } } } }, config:{ save:function(){ localStorage.setItem('tree',$editor.val()) }, download:function(){ var data = d3.select('svg').node().outerHTML var blob = new Blob([data]) var link = document.createElement("a") link.href = URL.createObjectURL(blob) link.download = new Date().toISOString() + '.svg' link.click() }, height:0.3, width:11, } } var $ui = $('#ui') /* * 最低限 */ var dat = new dat.GUI({autoPlace:false}) var golden = new GoldenLayout(app.layout,$ui) // GOLDENを初期化()すると呼び出されるDOM挿入先の$コンテナを準備 golden.registerComponent('view',function(container,state){ var key = container._config.title, ele = container.getElement() ele.addClass(key) golden[key]=ele }) /* * 1.初期化 */ function init(){ golden.init() } /* * DOM生成 */ var $editor = $(app.plugin.editor.elem,app.plugin.editor.option), $viewer = $(app.plugin.viewer.elem,app.plugin.viewer.option), $proper = $(this.dat.domElement) $editor.on('keyup',function(){ update() }) /* * 2.GOLDENにDOMを構築 */ function construct(){ // 生成したDOMを$コンテナに挿入 golden['proper'].append($proper) golden['editor'].append($editor) golden['viewer'].append($viewer) } /* * 3.ビュアーをセットアップ */ function setup(){ dat.add(app.config,'height').onChange(update).name('tree height') dat.add(app.config,'width').onChange(update).name('tree width') dat.add(app.config,'download').name('save tree image') dat.add(app.config,'save').name('save indented text') $(window).on('resize',function(){ golden.updateSize() }) $ui.onResize({},function(){ golden.updateSize() }) } /* * ツリーはSVG */ var view = d3.select($viewer.get(0)) .append('svg') view.append('g') view.attr("xmlns", "http://www.w3.org/2000/svg") view.append('style') .text(` circle { stroke-width:2px; stroke:#05668D; fill:white; r:6; } text { font:12px 'M+2VM+IPAG circle'; } rect { transform:translateY(-5px); stroke:#0cf; width:10px; heiht:10px; fill:white; } path { storke-width:2px; stroke:#ccc; fill:none; } `) function getLinks(arr) { return arr .enter() .append('path') .attr('d', d3.linkHorizontal() .x(function(d){ return d.y }) .y(function(d){ return d.x }) ) } function getNodes(arr) { return arr .enter() .append('g') .attr('class',function(d){ return 'node ' + (d.children ? 'node--internal' : 'node--leaf') }) .attr('transform',function(d){ return "translate(" + d.y + "," + d.x + ")"; }) } function update() { var w = golden.viewer.width() var h = golden.viewer.height() view .attr('width',w) .attr('height',h) var g = d3.select('svg > g') d3.select('svg > g').selectAll("*").remove() view.call(d3.zoom().on('zoom',function(){ g.attr('transform',d3.event.transform) }) ) var vData = indent2obj($editor.val(),'\t') var vRoot = d3.hierarchy(vData[0]); var vNodes = vRoot.descendants(); var vLayout = d3.tree().size([ app.config.width * vNodes.reverse().length, app.config.height * h ]); var vLinks = vLayout(vRoot).links(); var maxDepth = d3.max(vNodes,function(d) { return d.depth }) var links = getLinks(g.selectAll('.link').data(vLinks)) var nodes = getNodes(g.selectAll(".node").data(vNodes)) nodes.append('circle') nodes.append('text') .attr('dy','.35em') .attr('x',function(d){ return d.children ? -13 : 13; }) .attr('text-anchor',function(d){ return d.children || d._children ? 'end' : 'start' }) .text(function(d){ return d.data.name }) } document.addEventListener('DOMContentLoaded',function(){ init() construct() setup() if('tree' in localStorage){ $editor.val( localStorage.getItem('tree') ) update() } tabIndent.config.tab = '\t'; tabIndent.renderAll() }) </script> <style> @import url('js/jquery/golden-layout/theme/light.css'); @import url('js/native/dat-gui/theme/light.min.css'); </style/>備考
ウィンドウの陰影が恰好よくねぇ?
- 投稿日:2020-09-24T14:53:46+09:00
Vue.js~Vuex~Jestでのテスト
はじめに
Vue.jsでVuexを使った時のテストの仕方が全然わからなくて
ちょっと前進したので忘れないうちにメモ
間違いがあったら教えていただけると嬉しいです。テスト対象
<template>
  <div class="hello">
   <p>{{nowNumber}}</p>
  </div>
</template>

<script>
import {mapState} from 'vuex'
export default {
  name: 'HelloWorld',

  computed: {
    ...mapState(['nowNumber'])
  },
}
</script>
stateの値を表示するだけのコンポーネントカウント用
インクリメント(足す)
<template>
  <div class="increment">
    <button class="increment__button" @click="incrementButton">足す</button>
  </div>
</template>
<script>
export default {
  methods: {
    incrementButton() {
      this.$store.dispatch("increment");
    },
  },
};
</script>
ボタンを押したら
actions経由でmutationsからstateに加算デクリメント(引く)
<template>
  <div class="decrement">
    <button @click="decrement">引く</button>
  </div>
</template>
<script>
export default {
  methods: {
    decrement() {
      this.$store.dispatch('decrement')
    },
  },
};
</script>
リセット
<template>
  <div class="reset">
    <button @click="reset">リセット</button>
  </div>
</template>
<script>
export default {
  methods: {
    reset() {
      this.$store.dispatch("reset");
    },
  },
};
</script>
基本的にこの3つはほぼ同じでメソッド名とかが違うくらい
Vuex(Store)
import Vue from 'vue'
import Vuex from 'vuex'

Vue.use(Vuex)

export const state = {
  nowNumber: 0
}

export const mutations = {
  increment(state) {
    state.nowNumber++
  },
  decrement(state) {
    if (state.nowNumber <= 0) return
    state.nowNumber--
  },
  reset(state) {
    state.nowNumber = 0
  }
}

export const actions = {
  increment({ commit }) {
    commit('increment')
  },
  decrement({ commit }) {
    commit('decrement')
  },
  reset({ commit }) {
    commit('reset')
  }
}

export default new Vuex.Store({
  state,
  mutations,
  actions
})
ストアの部分はこんな感じです
そしてこれをテストする
テストコード
import { createLocalVue } from '@vue/test-utils'
import Vuex from 'vuex'
import { cloneDeep } from 'lodash'
import { actions, mutations } from '../../store/index.js'

const state = {
  nowNumber: 0
}

const initStore = () => {
  return cloneDeep({
    state,
    mutations,
    actions
  })
}

let store
let localVue
beforeEach(() => {
  localVue = createLocalVue()
  localVue.use(Vuex)

  store = new Vuex.Store(initStore())
})
describe('store', () => {

  it('dispatch incremetnt', () => {
    expect(store.state.nowNumber).toBe(0)
    store.dispatch('increment')
    expect(store.state.nowNumber).toBe(1)
  })
  it('dispatch decrement', () => {
    store.state.nowNumber = 1
    expect(store.state.nowNumber).toBe(1)
    store.dispatch('decrement')
    expect(store.state.nowNumber).toBe(0)
    store.dispatch('decrement')
    expect(store.state.nowNumber).toBe(0)
  })
  it('dispatch reset', () => {
    store.state.nowNumber = 5
    expect(store.state.nowNumber).toBe(5)
    store.dispatch('reset')
    expect(store.state.nowNumber).toBe(0)
  })
  it('dispatch まとめテスト', () => {
    store.dispatch('increment')
    expect(store.state.nowNumber).toBe(1)
    store.dispatch('increment')
    expect(store.state.nowNumber).toBe(2)
    store.dispatch('decrement')
    expect(store.state.nowNumber).toBe(1)
    store.dispatch('reset')
    expect(store.state.nowNumber).toBe(0)

  })
})
この場合だとストアを
クローンしてそれを実行してテストしている感じになります。
なのでAPIとか使った物だとこれだと毎回通信してしまうと思うのでダメですね
ここは次の課題です
ひとまずこれでテストしたら無事に全部PASSしました。
- 投稿日:2020-09-24T12:00:00+09:00
【Vue.js】Error compiling template: .. outside root element will be ignored.エラーの対処
環境
PHP 7.3.8
Laravel 6.18.35
vue.js 2.6.12対処法
[Vue warn]: Error compiling template:
text ""="">" outside root element will be ignored.
文字通りテンプレートのコンパイルエラーという事で、
template内にタグに囲まれていない部分があるという指摘です。index.blade.php//"が多い <div style="width:calc(50% - .25rem);""> //不要な"を削除 <div style="width:calc(50% - .25rem);">これはvueファイル、コンポーネント内のテンプレだけでなく、読み込んでいるbladeでのタグ囲い漏れなども同様のエラーを検出します。
- 投稿日:2020-09-24T10:00:23+09:00
Nuxt.jsで認証認可入り掲示板APIのフロントエンド部分を構築する #1 環境構築
はじめに
この記事は、全18回で連載したRails 6で認証認可入り掲示板APIを構築するのフロントエンド側を構築する記事連載となります。
前提として、Rails編で構築したバックエンドAPIが必要になるのでご注意ください。
(そのため、実質#19です)目次
全6回、毎日更新です。
- Nuxt.jsで認証認可入り掲示板APIのフロントエンド部分を構築する #1 環境構築
- Nuxt.jsで認証認可入り掲示板APIのフロントエンド部分を構築する #2 NuxtとRailsとの疎通テスト
- Nuxt.jsで認証認可入り掲示板APIのフロントエンド部分を構築する #3 個別記事ページの作成
- Nuxt.jsで認証認可入り掲示板APIのフロントエンド部分を構築する #4 サインアップページの作成
- Nuxt.jsで認証認可入り掲示板APIのフロントエンド部分を構築する #5 ログイン・ログアウトの実装
- Nuxt.jsで認証認可入り掲示板APIのフロントエンド部分を構築する #6 記事投稿フォームの作成
環境構築
Rails編と同じ環境に構築します。
単純に環境もう1つ作るのが面倒なだけですyarnの導入
まずはyarnを入れます。
$ curl -o- -L https://yarnpkg.com/install.sh | bash一度ターミナルウィンドウを閉じて再度開けば、yarnコマンドが使えるようになっているはずです。
$ yarn -v
1.22.5
create nuxt-appを実行
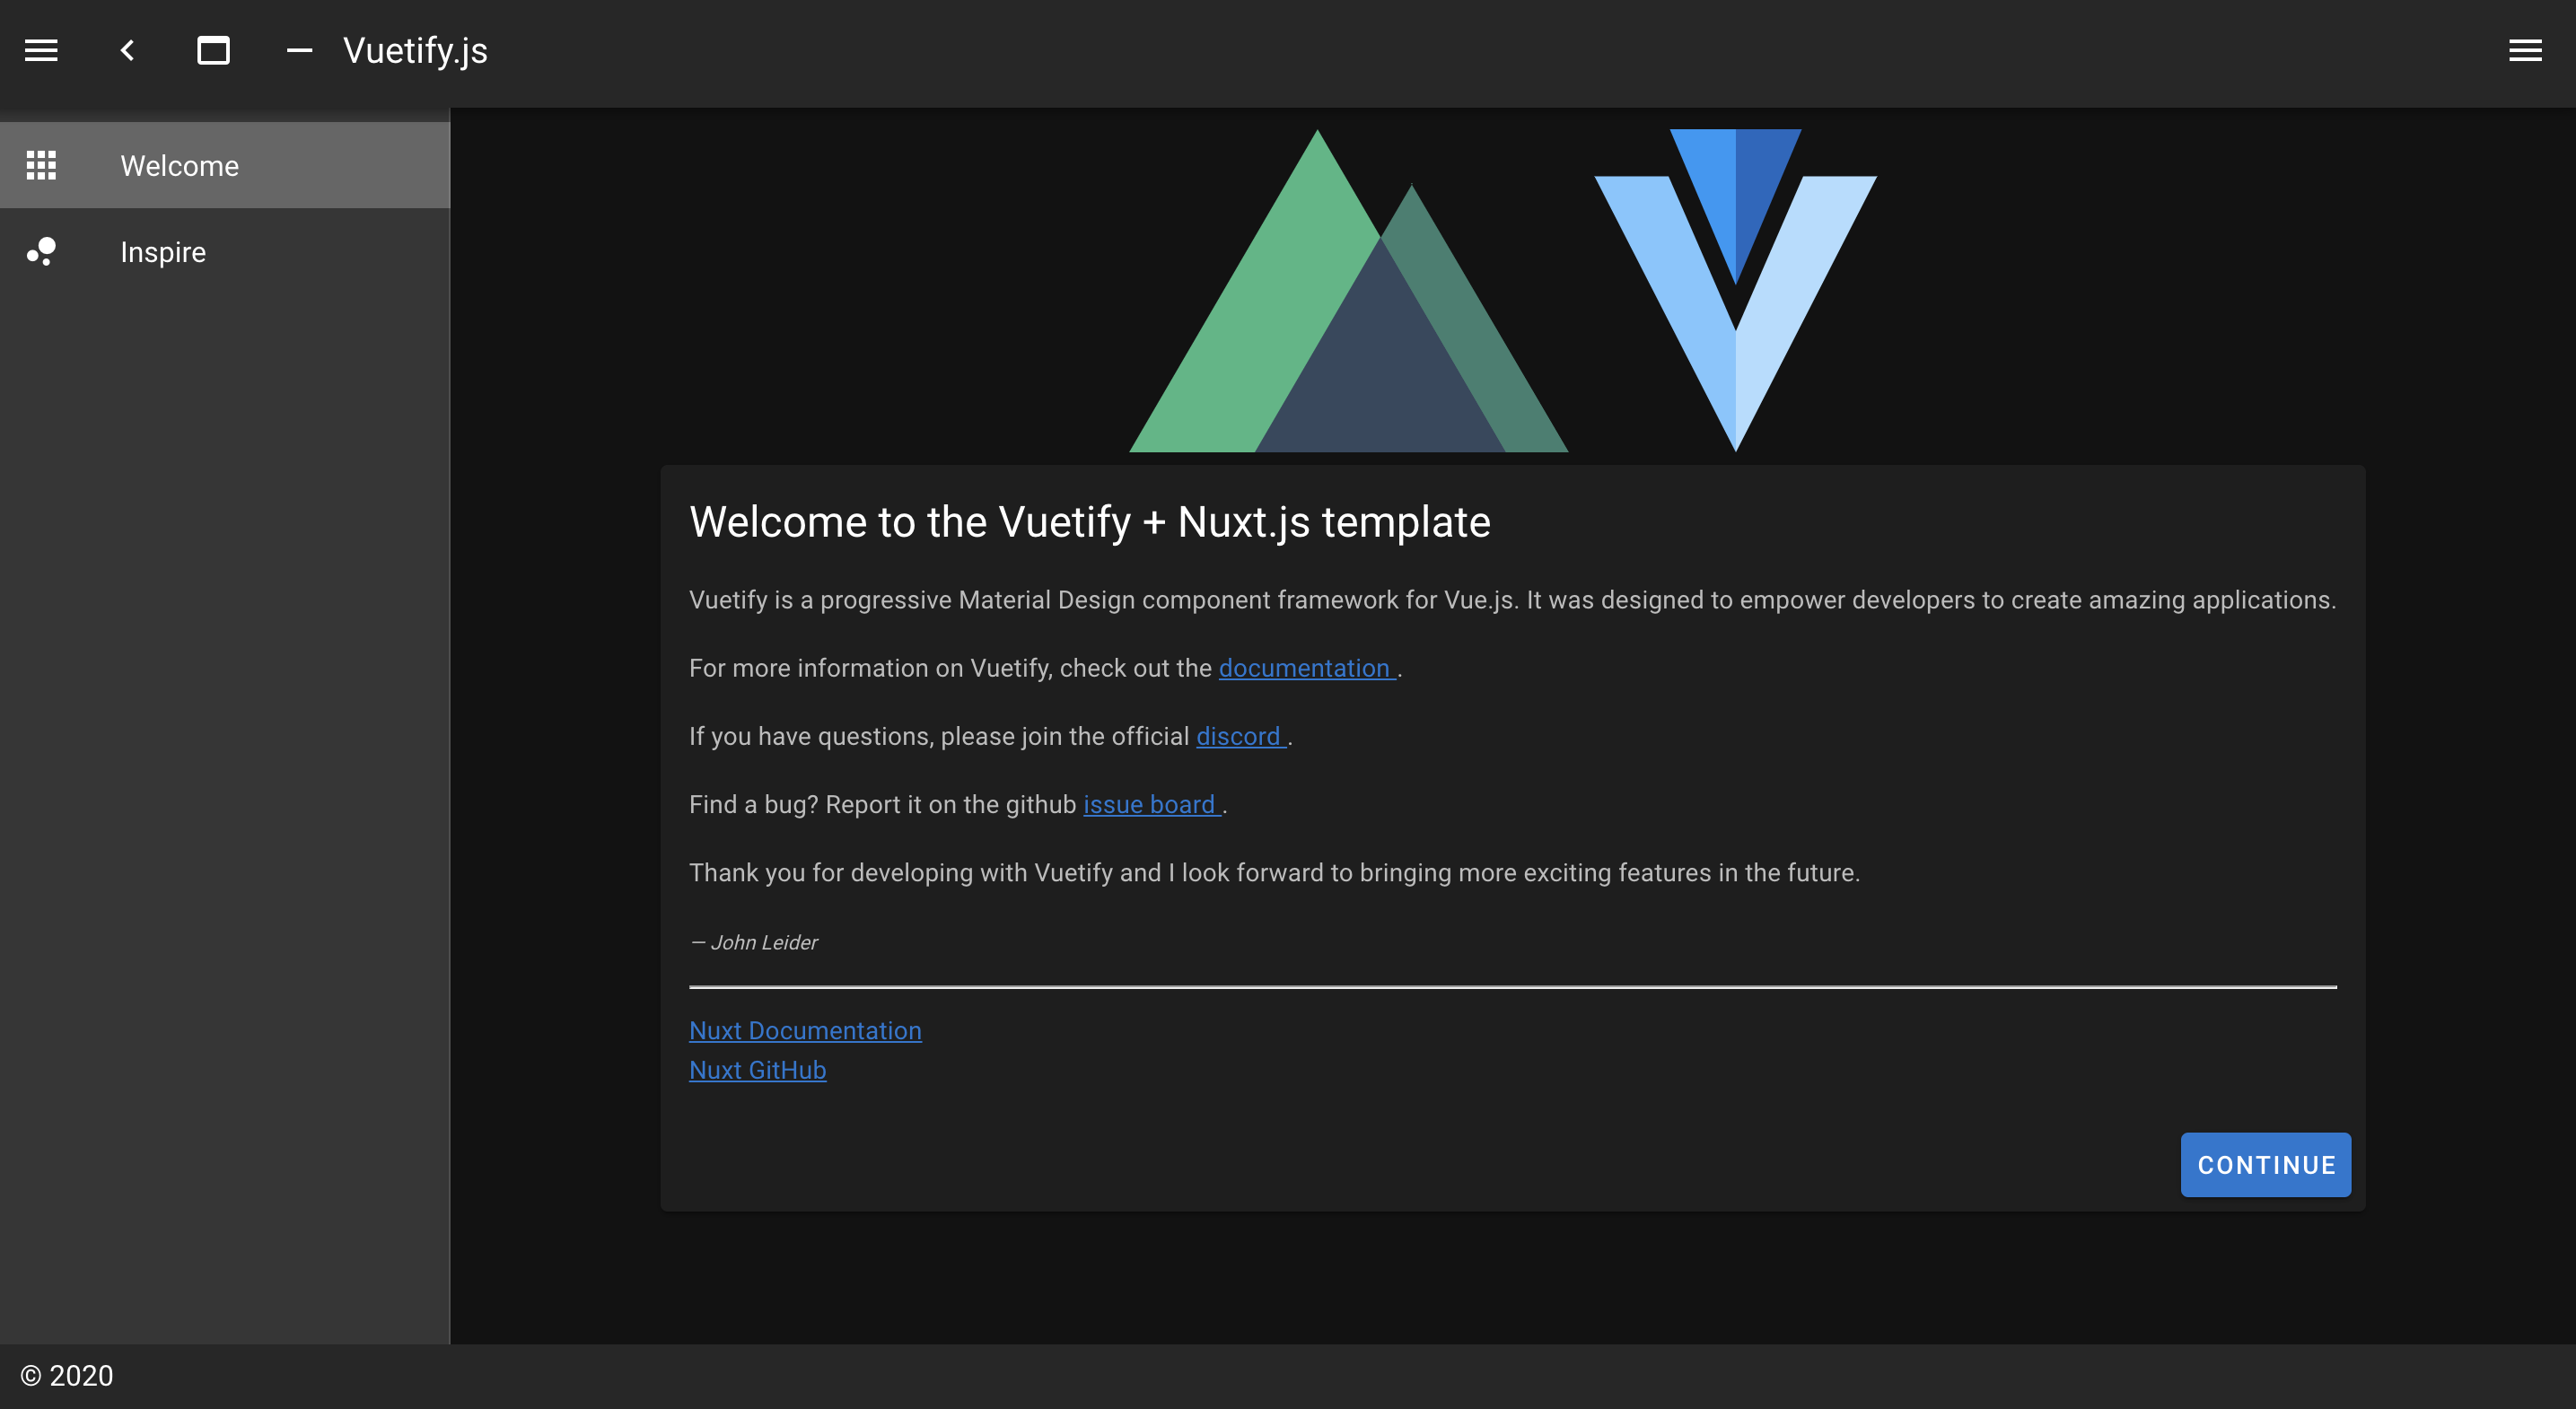
$ cd ~/environment/
$ yarn create nuxt-app bbs_nuxt_app
UI Frameworkで
Vuetify.jsを選び、modulesでAxios, LintでEsLintを選択(Spaceで選択します)。それ以外はデフォルトのままいきます。$ cd bbs_nuxt_app/ $ yarn dev ℹ NuxtJS collects completely anonymous data about usage. 04:44:17 This will help us improving Nuxt developer experience over the time. Read more on https://git.io/nuxt-telemetry ? Are you interested in participation? (Y/n)匿名データ送信をするか聞かれるので、ご自身で選択してください。
実行するとサーバが立ち上がりますが、8080ポートが恐らくrailsで埋まっているので適当なポートが振られます。
ですがcloud9で適当なポートは弾かれるので、ブラウザでポート指定して開いても見れないはずです。Cloud9の公式ドキュメントによれば使えるポートは8080, 8081, 8082のようなので、8081を指定します。
nuxt.config.jsexport default { ... build: { - } + }, + server: { + port: 8081, + } }$ yarn devこれで、8081ポートで立ち上がるはず!
Previewを押してPop Out Into New Windowアイコンを押すと別タブで開くので、URLの末尾にポート番号指定でNuxtのWelcomeページが出ます。
...cloud9.ap-northeast-1.amazonaws.com:8081←URL末尾こんな感じ
eslintを動かす
せっかくeslintを入れたので動かしてみます。
$ yarn run lint
/home/ec2-user/environment/bbs_nuxt_app/nuxt.config.js
  69:15  error  Unexpected trailing comma  comma-dangle

✖ 1 problem (1 error, 0 warnings)
  1 error and 0 warnings potentially fixable with the `--fix` option.

error Command failed with exit code 1.
info Visit https://yarnpkg.com/en/docs/cli/run for documentation about this command.
error Command failed with exit code 1.
どうやら今さっき追加したnuxt.config.jsのところで、最後の要素にカンマがあることで怒られています。
--fixオプションを付けると自動修正してくれます。nuxt.config.jsexport default { ... build: { }, server: { - port: 8081, + port: 8081 } }githubにpushする
フロントエンドとバックエンドは密結合となってしまうのを避けるため、同一リポジトリではなく分離した方が良いです。
というわけでフロントエンド用の新しいリポジトリを作ります。
あとはgit pushすればOK。
公開鍵の設定やらなんやらは、Rails#2で書いた方法で対応してください。$ git add -A $ git ci -m 'init' $ git remote add origin https://github.com/{YOUR_ACCOUNT}/{YOUR_REPOSITORY}.git $ git branch -M master $ git push -u origin master続き
→Nuxt.jsで認証認可入り掲示板APIのフロントエンド部分を構築する #2 NuxtとRailsとの疎通テスト
【連載目次へ】

- 投稿日:2020-09-24T01:44:56+09:00
TypeScript で気をつけたい機能
はじめに
TypeScript には便利ではあるものの間違った使い方をすると型の恩恵が受けづらくなるような機能がいくつかあります。
特に Vue では template ref などでasを使うことも多く、それらの機能を使う心理的ハードルが下がりやすいように感じました。
そこでどういった機能に気をつけるべきなのかをまとめようと思いこの記事を書きました。TypeScript の気をつけたい機能
anyいわずもがな。
あらゆるデータを受け付ける型で、乱用すると TypeScript を使っている意味がなくなってしまうためanyであることが正しいと説明できる場合以外は できる限り利用は避けましょう。
as: 型アサーション、 Type Assertion
asは正しく型推論できない場合などに 型をコンパイラに教える ための機能です。
ただし 値が変換されるわけではない ため間違った型を設定すると、実際のデータと型が一致しなくなり 実行時エラーとなる場合がある ので気をつけましょう。✗ Bad
userはUser型であるとasを使って コンパイラに教えているためuser.profile.genderはコンパイルエラーになりませんが、実際はprofileプロパティを持っていないため実行時エラーとなります。type User = { id: number; name: string; profile: { gender: string; } } const user = { id: 1, name: "yamagen0915", } as User; console.log(user.profile.gender); // Uncaught TypeError: Cannot read property 'gender' of undefined○ Good
どう対処すべきかはケースバイケースですが、データの形に合わせて型定義を変更したり、型定義に合わせてデータを作ったりしましょう。
// profile? で宣言する
type User = {
  id: number;
  name: string;
  profile?: {
    gender: string;
  }
}
// 型定義に合わせ profile を設定する const user: User = { id: 1, name: "yamagen0915", profile: { gender: 'male' } }
!.: Non Null AssertionNullable でないことをコンパイラに教える 機能です。
(Nullable =nullorundefined)
asと同様 Nullable になり得る場所で使ってしまうと 実行時エラーとなる場合がある ので気をつけましょう。✗ Bad
profile?へ!.でアクセスしているためコンパイルエラーになりませんが、実際はprofileプロパティを持っていないため実行時エラーとなります。type User = { id: number; name: string; profile?: { gender: string; } } const user: User = { id: 1, name: "yamagen0915", }; console.log(user.profile!.gender);○ Good
null チェックを行うようにしましょう
if (user.profile) {
  console.log(user.profile.gender);
}
Vue の具体例
Vue2, Vue3 Composition API において具体的にどのようにそれらの機能を使うか、または使わないべきかを紹介していきます。
methods や関数の引数
関数の引数は型を明示する必要 があります。
✗ Bad
引数に型を明示しないと
anyとなります。export default Vue.extend({ methods: { // id: any, name: any foo(id, name) {} } }); // id: any, name: any const foo = (id, name) => {}○ Good
export default Vue.extend({
  methods: {
    foo(id: number, name: string) {}
  }
});

const foo = (id: number, name: string) {}
○ Good
関数の引数に渡す関数などはその引数の定義から型推論されます。
// n: number
[1, 2, 3, 4, 5].map(n => n + 1);
○ Good
デフォルト値が存在する場合はデフォルト値の型から型推論されます。
export default Vue.extend({
  methods: {
    // id: number, name: string
    foo(id = 0, name = '') {}
  }
});

// id: number, name: string
const foo = (id = 0, name = '') => {}
template ref
template ref では as を利用しコンパイラに型を教える必要 があります。
✗ Bad
// <input ref="input">
// input: Vue | Vue[] | Element | Element[]
const input = this.$refs.input

// <custom-component ref="custom"/>
// custom: Vue | Vue[] | Element | Element[]
const custom = this.$refs.custom
○ Good
取得する値に応じて適切な型を
asを使って設定しましょう。
ただし$refsで取得できるデータに変更があってもコンパイルエラーにはならないため気をつけましょう。ちなみに input <-> HTMLInputElement のような対応は下記の定義通りです。
// <input ref="input">
// input: HTMLInputElement
const input = this.$refs.input as HTMLInputElement

// <custom-component ref="custom"/>
// custom: CustomComponent
const custom = this.$refs.custom as InstanceType<typeof CustomComponent>
Composition API template ref
Coposition API では ref を使って template ref と連携しますが、その ref の型引数に型を指定することができます。
ただしその変数の 宣言時には値を入れることができないため Nullable になります。
都度 null チェックを行うのは面倒なため Non Null Assertion の利用を検討しましょう。○ Good
Non Null Assertion を利用せず都度 null チェックを行ってももちろん問題ありません。
setup() {
  // input: HTMLInputElement | undefined
  const input = ref<HTMLInputElement>();

  // custom: CustomComponent | undefined
  const custom = ref<InstanceType<typeof CustomComponent>>();

  // 例えばボタンクリックで input, custom へアクセスする場合
  const click = () => {
    if (input.value) {
      console.log(input.value.value);
    }
    if (custom.value) {
      console.log(custom.value.foo);
    }
  };

  return {
    input,
    custom,
    click,
  };
}
○ Good
template ref の設定が適切な前提で Non Null Assertion を利用することも検討しましょう。
個人的には template ref の設定が間違っている場合に null チェックを行うと実行時エラーになりませんが、エラーになったほうがよいと思うのでこちらの書き方のほうがよいと思っています。setup() { // input: HTMLInputElement | undefined const input = ref<HTMLInputElement>(); // custom: CustomComponent | undefined const custom = ref<InstanceType<typeof CustomComponent>>(); // 例えばボタンクリックで input, custom へアクセスする場合 const click = () => { console.log(input.value!.value); console.log(custom.value!.foo); }; return { input, custom, click, }; }
data()期待通りに型推論されないこともあるため 変数として切り出したり
asを使って型を明示する必要 があります。
最終的にオブジェクトの型が正しく型推論されれば良いので対処方法は様々です。✗ Bad
[],undefined,nullは期待通りに型推論されません。data() { return { list: [], // any[] id: undefined, // undefined name: null, // null }; }○ Good
各プロパティを変数として切り出し型を明示したり、
undefined,nullの利用をさけるようにしましょう。data() { const list: string[] = []; return { list: list, // string[] id: 0, // number name: '', // string }; }○ Good
asを使って型を明示しましょう。
また初期値としてundefined,nullを使う必要がある場合は| nullを忘れずにつけるようにしましょう。data() { return { list: [] as string[], // string[] id: undefined as number | undefined, // number | undefined name: null as string | null, // string | null }; }✗ Bad
オブジェクトの型を
asで明示する場合、型の変更があった場合にエラーとならなため避けたほうが良い場合があります。type User = { id: number; name: string; }; data() { return { // 仮に gender: string が追加されてもエラーとならず型と値が一致しなくなってしまう。 user: { id: 1, name: "yamagen0915", } as User, }; }○ Good
変数として切り出し型を明示することで型に変更があった場合にコンパイルエラーとすることができます。
type User = {
  id: number;
  name: string;
};

data() {
  // 仮に gender: string が追加された場合にエラーとなる
  const user: User = {
    id: 1,
    name: "yamagen0915",
  };

  return {
    user,
  };
}
axios
Vue, TypeScript と直接は関係ありませんが API へのリクエストを axios を利用しているプロジェクトも多いと思うので紹介します。
axios.get等には レスポンスの型を型引数として指定することができる ため設定しましょう。✗ Bad
型引数に何も指定しない場合
response.dataはanyとなります。const response = await axios.get('/api/users'); response.data // any○ Good
型引数に API のレスポンスの型を指定します。
ただし API のレスポンスが本当にその型の通りかどうかは保証されないため API の仕様が変わった場合は合わせて型定義も合わせて修正するようにしましょう。type User = { id: number; name: string; }; const response = await axios.get<User[]>('/api/users'); response.data // User[]