- 投稿日:2020-07-13T23:06:57+09:00
ImageDataGeneratorが使えなくなったため、tensorflow>=2.0向けデータ拡張クラス作った話
背景
Tensorflowでは、画像のデータ拡張を行うために、KerasのImageDataGeneratorがよく使われていました。
これは、入力画像に対し、マルチプロセスで様々なデータ拡張を適用しながらtensorflowモデルの学習ができるため、広く使われていました。しかし、tensorflow 2.0以降multiprocessingが非推奨になった事により、マルチプロセス処理によりデータ拡張を行いながらtensorflowで学習を行っていると、突然エラーも吐かずプログレスバーが止まります。特に痛いのは、エラーが発生しないため、時間単位で使用料が発生するサービスを使っている場合、学習は進まないのに無駄に課金することになります...
私は複数のファイルに分割して書き込んだhdf5ファイルからマルチプロセスで読み込みながら学習するジェネレータを使っていたのですが、tensorflow<2.0でもmultiprocessingを使うと2日程度で学習が止まる事がありました。tensorflow>=2.0以降は、2時間程度でも止まるなど、更に頻繁に止まるようになりました。
そこで...
ImageDataGeneratorのように、簡単にマルチプロセスで様々なデータ拡張を画像に適用しながら、tensorflowで学習できるクラスを作りました。
方針
tensorflow推奨のデータ入力方法はtensorflow.data.Dataset(以下、tf.data.Datasetとする)を使ったものになります。これを使うことで、例えばこちらで言及されていているように、高速かつ、マルチプロセスのデータ入力処理を作成することが可能になります。
しかし、tf.dataはstack overflow等にも未だあまり情報がなく、各データ拡張それぞれのについて試している様な書き込みはありますが、ImageDataGeneratorのように入力画像に対し簡単に様々なデータ拡張しながら学習する方法が見つかりませんでした…tf.dataを使えば高速なデータ入力処理を作れますが、公式ドキュメントを見るといくつか落とし穴があることがわかります。
1. tf.data.Dataset.from_generatorではマルチプロセスでデータ拡張されない
tf.data.Dataset.from_generatorを使えば、pythonのジェネレータをラップして、tf.dataとしてfit()関数により学習できます。最初、ImageDataGeneratorをこの関数でラップすれば良いやん!と簡単に考えていました。
しかし、公式ドキュメント、from_generatorのNoteには次のような記載があります。Note: The current implementation of Dataset.from_generator() uses tf.numpy_function and inherits the same constraints. In particular, it requires the Dataset- and Iterator-related operations to be placed on a device in the same process as the Python program that called Dataset.from_generator(). The body of generator will not be serialized in a GraphDef, and you should not use this method if you need to serialize your model and restore it in a different environment.
tf.numpy_functionを使っていることにより、マルチプロセスに対応していないという事で諦めました。
2. 出来るだけtfのみで実装する
公式ドキュメントのtf.functionに記載されていますが、パフォーマンスを実現するために@tf.functionデコレータで囲うと、全てのコードがtfのコードに自動的に変換されます。その際に外部ライブラリやnumpy等を使っていると、tf.numpy_functionやtf.py_func等でラップすることになり、結局1.と同様の制限に引っかかることになります。
従って処理及びデータ型はなるべくtf.Tensor型を使い、そうではなくてもpython標準の型のみを使用するようにしました。
3. ラベル画像も同時に拡張する
入力画像を回転等の変形を行った場合、ラベルの元となる画像も全く同じ変形をする必要がありませんか?
私はそうでしたので、(オプションの)ラベル画像に対して、入力画像と全く同じ変形を適用するようにしました。インストール方法
python -m pip install git+https://github.com/piyop/tfaug使い方
1.初期化
from tfaug import augment_img
#set your augment parameters below:
arg_fun = augment_img(rotation=0,
                      standardize=False,
                      random_flip_left_right=True,
                      random_flip_up_down=True,
                      random_shift=(.1,.1),
                      random_zoom=.1,
                      random_brightness=.2,
                      random_saturation=None,
                      training=True)

"""
augment_img.__init__() setting up the parameters for augmantation.

Parameters
----------
rotation : float, optional
    rotation angle(degree). The default is 0.
standardize : bool, optional
    image standardization. The default is True.
random_flip_left_right : bool, optional
    The default is False.
random_flip_up_down : bool, optional
    The default is False.
random_shift : Tuple[float, float], optional
    random shift images.
    vartical direction (-list[0], list[0])
    holizontal direction  (-list[1], list[1])
    Each values shows ratio of image size.
    The default is None.
random_zoom : float, optional
    random zoom range -random_zoom to random_zoom.
    value of random_zoom is ratio of image size
    The default is None.
random_brightness : float, optional
    randomely adjust image brightness range
    [-max_delta, max_delta).
     The default is None.
random_saturation : Tuple[float, float], optional
    randomely adjust image brightness range between [lower, upper].
    The default is None.
training : bool, optional
    If false, this class don't augment image except standardize.
    The default is False.
Returns
-------
class instance : Callable[[tf.Tensor, tf.Tensor, bool], Tuple[tf.Tensor,tf.Tensor]]
"""
2.tf.data.Dataset.map()で使う
ds=tf.data.Dataset.zip((tf.data.Dataset.from_tensor_slices(image),
                      tf.data.Dataset.from_tensor_slices(label))) \
                    .shuffle(BATCH_SIZE*10).batch(BATCH_SIZE)\
                    .map(arg_fun, num_parallel_calls=tf.data.experimental.AUTOTUNE)
model.fit(ds)
詳細な使用方法例はtest参照。
(https://github.com/piyop/tfaug)
- 投稿日:2020-07-13T23:06:57+09:00
tensorflow>=2.0向けデータ拡張クラス作った話
背景
Tensorflowでは、画像のデータ拡張を行うために、KerasのImageDataGeneratorがよく使われていました。
これは、入力画像に対し、マルチプロセスで様々なデータ拡張を適用しながらtensorflowモデルの学習ができるため、広く使われていました。しかし、tensorflow 2.0以降multiprocessingが非推奨になった事により、マルチプロセス処理によりデータ拡張を行いながらtensorflowで学習を行っていると、突然エラーも吐かずプログレスバーが止まります。特に痛いのは、エラーが発生しないため、時間単位で使用料が発生するサービスを使っている場合、学習は進まないのに無駄に課金することになります...
私は複数のファイルに分割して書き込んだhdf5ファイルからマルチプロセスで読み込みながら学習するジェネレータを使っていたのですが、tensorflow<2.0でもmultiprocessingを使うと2日程度で学習が止まる事がありました。tensorflow>=2.0以降は、2時間程度でも止まるなど、更に頻繁に止まるようになりました。
そこで...
ImageDataGeneratorのように、簡単にマルチプロセスで様々なデータ拡張を画像に適用しながら、tensorflowで学習できるクラスを作りました。
方針
tensorflow推奨のデータ入力方法はtensorflow.data.Dataset(以下、tf.data.Datasetとする)を使ったものになります。これを使うことで、例えばこちらで言及されていているように、高速かつ、マルチプロセスのデータ入力処理を作成することが可能になります。
しかし、tf.dataはstack overflow等にも未だあまり情報がなく、各データ拡張それぞれのについて試している様な書き込みはありますが、ImageDataGeneratorのように入力画像に対し簡単に様々なデータ拡張しながら学習する方法が見つかりませんでした…tf.dataを使えば高速なデータ入力処理を作れますが、公式ドキュメントを見るといくつか落とし穴があることがわかります。
1. tf.data.Dataset.from_generatorではマルチプロセスでデータ拡張されない
tf.data.Dataset.from_generatorを使えば、pythonのジェネレータをラップして、tf.dataとしてfit()関数により学習できます。最初、ImageDataGeneratorをこの関数でラップすれば良いやん!と簡単に考えていました。
しかし、公式ドキュメント、from_generatorのNoteには次のような記載があります。Note: The current implementation of Dataset.from_generator() uses tf.numpy_function and inherits the same constraints. In particular, it requires the Dataset- and Iterator-related operations to be placed on a device in the same process as the Python program that called Dataset.from_generator(). The body of generator will not be serialized in a GraphDef, and you should not use this method if you need to serialize your model and restore it in a different environment.
tf.numpy_functionを使っていることにより、マルチプロセスに対応していないという事で諦めました。
2. 出来るだけtfのみで実装する
公式ドキュメントのtf.functionに記載されていますが、パフォーマンスを実現するために@tf.functionデコレータで囲うと、全てのコードがtfのコードに自動的に変換されます。その際に外部ライブラリやnumpy等を使っていると、tf.numpy_functionやtf.py_func等でラップすることになり、結局1.と同様の制限に引っかかることになります。
従って処理及びデータ型はなるべくtf.Tensor型を使い、そうではなくてもpython標準の型のみを使用するようにしました。
3. ラベル画像も同時に拡張する
入力画像を回転等の変形を行った場合、ラベルの元となる画像も全く同じ変形をする必要がありませんか?
私はそうでしたので、(オプションの)ラベル画像に対して、入力画像と全く同じ変形を適用するようにしました。インストール方法
python -m pip install git+https://github.com/piyop/tfaug使い方
1.初期化
from tfaug import augment_img
#set your augment parameters below:
arg_fun = augment_img(rotation=0,
                      standardize=False,
                      random_flip_left_right=True,
                      random_flip_up_down=True,
                      random_shift=(.1,.1),
                      random_zoom=.1,
                      random_brightness=.2,
                      random_saturation=None,
                      random_hue=.2,
                      random_crop=(256,256),
                      training=True)

"""
        augment_img.__init__() setting up the parameters for augmantation.

Parameters
----------
        rotation : float, optional
            rotation angle(degree). The default is 0.
        standardize : bool, optional
            image standardization. The default is True.
        random_flip_left_right : bool, optional
            The default is False.
        random_flip_up_down : bool, optional
            The default is False.
        random_shift : Tuple[float, float], optional
            random shift images.
            vartical direction (-list[0], list[0])
            holizontal direction  (-list[1], list[1])
            Each values shows ratio of image size.
            The default is None.
        random_zoom : float, optional
            random zoom range -random_zoom to random_zoom.
            value of random_zoom is ratio of image size
            The default is None.
        random_brightness : float, optional
            randomely adjust image brightness range
            [-max_delta, max_delta).
             The default is None.
        random_saturation : Tuple[float, float], optional
            randomely adjust image brightness range between [lower, upper].
            The default is None.
        random_hue : float, optional
            randomely adjust hue of RGB images between [-random_hue, random_hue]
        random_crop : Tuple[int, int], optional
            randomely crop image with size [crop_height, crop_width].
            The default is None.
        training : bool, optional
            If false, this class don't augment image except standardize.
            The default is False.
Returns
-------
        class instance : Callable[[tf.Tensor, tf.Tensor, bool], Tuple[tf.Tensor,tf.Tensor]]
"""
2.tf.data.Dataset.map()で使う
ds=tf.data.Dataset.zip((tf.data.Dataset.from_tensor_slices(image),
                      tf.data.Dataset.from_tensor_slices(label))) \
                    .shuffle(BATCH_SIZE*10).batch(BATCH_SIZE)\
                    .map(arg_fun, num_parallel_calls=tf.data.experimental.AUTOTUNE)
model.fit(ds)
詳細な使用方法例はtest参照。
(https://github.com/piyop/tfaug)
- 投稿日:2020-07-13T22:06:28+09:00
Tensorflow・kerasでCNNを構築して画像分類してみる(実装編1)
この記事ではCNNをTensorflow・kerasで構築していきます。CNNの概略については前回記事の
Tensorflow・kerasでCNNを構築して画像分類してみる(概要編)
で書いてきました。
今回はデータのダウンロードとデータの確認までを書きます。前提となる環境等は下記となります。前提/環境
前提となる環境とバージョンは下記となります。
・Anaconda3
・Python3.7.7
・pip 20.0
・TensorFlow 2.0.0この記事ではJupyter Notebookでプログラムを進めていきます。コードの部分をJupyter Notebookにコピー&ペーストし実行することで同様の結果が得られるようにしています。
今回はデータセットとしてCIFAR-10というデータセットを利用します。CIFAR-10のデータセットについては
The CIFAR-10 dataset を参照してください。データのダウンロード
tensorflowではデータセットをMNIST同様に自動的にダウンロードします。
codeimport tensorflow as tf #ヘルパー関数などもimport import numpy as np import matplotlib.pyplot as plt from tensorflow.keras.datasets import cifar10 (x_train, y_train), (x_test, y_test) = cifar10.load_data()結果
Downloading data from https://www.cs.toronto.edu/~kriz/cifar-10-python.tar.gz
170500096/170498071 [==============================] - 951s 6us/stepデータの確認
まずは各データの大きさの確認をします。データを確認するのは非常に重要なので必ず確認しましょう
codeprint('x_train.shape : ', x_train.shape) print('x_test.shape : ', x_test.shape) print('y_train.shape : ', y_train.shape) print('y_test.shape : ', y_test.shape)結果
x_train.shape : (50000, 32, 32, 3)
x_test.shape : (10000, 32, 32, 3)
y_train.shape : (50000, 1)
y_test.shape : (10000, 1)CIFAR-10データセットは上記のようなデータです。CIFAR-10データセットは60000枚の画像データセットです。訓練用データとして50000枚、評価用のデータとして10000枚からなります。ラベルについては10クラスに分類されています。airplane,automobile,bird,cat,dog,frog,horse,ship,truckの10種類です。画像は32×32×3のサイズです。縦32、横32、カラー画像なので色チャネルが3という形で表現されています。
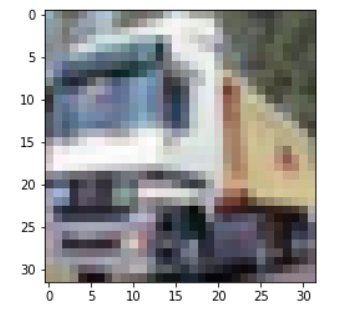
では実際の画像を見てみましょう。
codeplt.imshow(x_train[1]) plt.grid(False) plt.show()結果として下記のような画像が表示されます。
shapeを見てみると32×32×3となっていますが、データ自体を見ましょう多次元の配列になっていることがわかります。
codeprint(x_train[1])結果 (一部抜粋)
[[[154 177 187]
[126 137 136]
[105 104 95]
...
[ 91 95 71]
[ 87 90 71]
[ 79 81 70]][[140 160 169]
[145 153 154]
[125 125 118]
...
[ 96 99 78]
[ 77 80 62]
[ 71 73 61]][[140 155 164]
[139 146 149]
[115 115 112]
...というような行列になっています。
まとめ
ここまでデータを実際に確認しました。画像はMNISTの手書き文字セットと異なり、多次元の配列で表現されていることがわかりました。
データセットの構造を理解すると、処理のイメージもつきやすいとおもいます。
次回以降はデータの前処理、CNNの構築に入ります。