- 投稿日:2020-07-06T18:54:17+09:00
Laravel マイグレーション デフォルト値の設定 簡易版
目的
- マイグレーションファイルでのデフォルト値の設定方法を簡易的にまとめる
実施環境
- ハードウェア環境
項目 情報 OS macOS Catalina(10.15.5) ハードウェア MacBook Pro (13-inch, 2020, Four Thunderbolt 3 ports) プロセッサ 2 GHz クアッドコアIntel Core i5 メモリ 32 GB 3733 MHz LPDDR4 グラフィックス Intel Iris Plus Graphics 1536 MB
- ソフトウェア環境
項目 情報 備考 PHP バージョン 7.4.3 Homwbrewを用いて導入 Laravel バージョン 7.0.8 commposerを用いてこちらの方法で導入→Mac Laravelの環境構築を行う MySQLバージョン 8.0.19 for osx10.13 on x86_64 Homwbrewを用いてこちらの方法で導入→Mac HomebrewでMySQLをインストールする 記載例
下記の様に記載することで当該カラムのデフォルト値を指定することができる。
$table->データ型('カラム名', オプション)->default(デフォルト値に設定する文字列や値);
- 投稿日:2020-07-06T16:02:37+09:00
laravel queueではまった。
laravelの非同期処理を実現するためqueue(jobテーブル)機能にて実装。
supervisorにてphp artisan queue:workを定期実行。しばらく運用していたが、failed_jobsテーブルにログが出るように。
ErrorException: include(/var/www/html/vendor/composer/../egulias/email-validator/EmailValidator/EmailValidator.php): failed to open stream: No such file or directory in /var/www/html/vendor/composer/ClassLoader.php:444あれこれ調べても分らないのでcomposerのクリアや
composer dump-autoloadしてもダメだったが
supervisorのデーモンを再起動で直った。よくわからないけど
supervisorの子プロセスはphpのclassマップのリロードしないのかもしれない。
- 投稿日:2020-07-06T14:52:27+09:00
【Laravel7でユーザー認証_10】マルチ認証機能で作成した管理者のパスワード変更・リセット機能を追加する
はじめに
Laravelのユーザー認証機能に、管理者権限を追加(マルチ認証機能)した後、管理者のパスワードを変更・リセットする機能を追加する手順をまとめます。
環境
XAMPP環境でLaravelが使えるように設定してあります。
- Windows10 Pro 64bit
- PHP 7.3.18
- Laravel 7.12.0
- MariaDB 10.1.32
また、Laravelプロジェクトは以下の手順で作業を進めており、管理者はすでに作成されている状態です。
- 【Laravel7でユーザー認証_1】基本のき
- 【Laravel7でユーザー認証_2】ユーザー認証を日本語化
- 【Laravel7でユーザー認証_3】ユーザー認証をメールアドレスからユーザー名に変更する
- 【Laravel7でユーザー認証_4】パスワード変更フォームを作成する
- 【Laravel7でユーザー認証_5】ユーザーを倫理削除(SoftDelete)する
- 【Laravel7でユーザー認証_6】ユーザーの情報を表示・変更する設定画面を作成する
- 【Laravel7でユーザー認証_7】会員登録時にメール認証を行う
- 【Laravel7でユーザー認証_8】メールアドレス変更時にメール認証を行う
- 【Laravel7でユーザー認証_9】マルチ認証機能を使って管理者を作成する
パスワード変更 実装手順
コントローラの作成
パスワード変更用のコントローラを作成します。
今回は、ユーザー用に作成したAuth/ChangePasswordControllerをAdmin/Authディレクトリの中にコピーして利用します。namespaceをAdmin用に書き換えます。
また、パスワード変更の処理はadminログインを必須としたいので、コンストラクトでチェックするように指定します。app/Http/Controllers/Admin/Auth/ChangePasswordController.php<?php - namespace App\Http\Controllers\Auth; + namespace App\Http\Controllers\Admin\Auth; use App\Http\Controllers\Controller; use App\Http\Requests\ChangePasswordRequest; use Illuminate\Support\Facades\Auth; class ChangePasswordController extends Controller { public function __construct() { - $this->middleware('auth'); + $this->middleware('auth:admin'); $this->middleware('verified'); } public function showChangePasswordForm() { return view('auth\passwords\change'); } public function changePassword(ChangePasswordRequest $request) { //ValidationはChangePasswordRequestで処理 //パスワード変更処理 $user = Auth::user(); $user->password = bcrypt($request->get('password')); $user->save(); //homeにリダイレクト return redirect()->route('home')->with('status', __('Your password has been changed.')); } }ルーティングの設定
以下の仕様で、ルーティングを設定します。
通常のアクセス(GET)の場合は、「Admin/Auth/ChangePasswordController」コントローラの「showChangePasswordForm」メソッドを実行。
パスワードを変更の処理(POST)の場合は、「Admin/Auth/ChangePasswordController」コントローラの「changePassword」メソッドを実行。
それぞれのルーティングには、「admin.password.form」、「admin.password.change」という名前を付けました。/routes/web.phpRoute::namespace('Admin')->prefix('admin')->name('admin.')->group(function() { Route::get('home', 'HomeController@index')->name('home'); Route::get('login', 'Auth\LoginController@showLoginForm')->name('login'); Route::post('login', 'Auth\LoginController@login'); Route::post('logout', 'Auth\LoginController@logout')->name('logout'); + + Route::get('/setting/password', 'Auth\ChangePasswordController@showChangePasswordForm')->name('password.form'); + Route::post('/setting/password', 'Auth\ChangePasswordController@changePassword')->name('password.change'); });viewの作成
viewは、
auth/passwords/change.blade.phpをコピーして利用します。
formのアクション先は、ルーティングで付けた「admin.password.change」という名前を使います。resources/views/admin/auth/passwords/change.blade.php@extends('layouts.app') @section('content') <div class="container"> <div class="row justify-content-center"> <div class="col-md-8"> <div class="card"> <div class="card-header">{{ __('Change Password') }}</div> <div class="card-body"> <form method="POST" action="{{ route('admin.password.change') }}"> @csrf <div class="form-group row"> <label for="current_password" class="col-md-4 col-form-label text-md-right">{{ __('Current Password') }}</label> <div class="col-md-6"> <input id="current_password" type="password" class="form-control @error('current_password') is-invalid @enderror" name="current_password" required autocomplete="new_password"> @error('current_password') <span class="invalid-feedback" role="alert"> <strong>{{ $message }}</strong> </span> @enderror </div> </div> <div class="form-group row"> <label for="password" class="col-md-4 col-form-label text-md-right">{{ __('New Password') }}</label> <div class="col-md-6"> <input id="password" type="password" class="form-control @error('password') is-invalid @enderror" name="password" required autocomplete="new-password"> @error('password') <span class="invalid-feedback" role="alert"> <strong>{{ $message }}</strong> </span> @enderror </div> </div> <div class="form-group row"> <label for="password-confirm" class="col-md-4 col-form-label text-md-right">{{ __('Confirm New Password') }}</label> <div class="col-md-6"> <input id="password-confirm" type="password" class="form-control" name="password_confirmation" required autocomplete="new_password"> </div> </div> <div class="form-group row mb-0"> <div class="col-md-6 offset-md-4"> <button type="submit" class="btn btn-primary"> {{ __('Change Password') }} </button> </div> </div> </form> </div> </div> </div> </div> </div> @endsectionviewを指定
コントローラの
showChangePasswordFormメソッドで、作成したviewを指定します。app/Http/Controllers/Admin/Auth/ChangePasswordController.phppublic function showChangePasswordForm() { - return view('auth\passwords\change'); + return view('admin\auth\passwords\change'); }パスワード変更の処理
バリデーションチェック
FormRequest の設定
ユーザーのFormRequest
app/Http/Requests/ChangePasswordRequest.phpをapp/Http/Requests/Admin/ChangePasswordRequest.phpに複製します。app/Http/Request/Admin/ChangePasswordRequest.php<?php - namespace App\Http\Requests; + namespace App\Http\Requests\Admin; use Illuminate\Foundation\Http\FormRequest; use Illuminate\Contracts\Validation\Validator; use Illuminate\Http\Exceptions\HttpResponseException; use Illuminate\Support\Facades\Auth; use Illuminate\Support\Facades\Hash; class ChangePasswordRequest extends FormRequest { /** * Determine if the user is authorized to make this request. * * @return bool */ public function authorize() { return true; } /** * Get the validation rules that apply to the request. * * @return array */ public function rules() { return [ 'current_password' => ['required', 'string', 'min:8'], 'password' => ['required', 'string', 'min:8', 'confirmed'] ]; } public function withValidator(Validator $validator) { $validator->after(function ($validator) { $auth = Auth::user(); //現在のパスワードと新しいパスワードが合わなければエラー if (!(Hash::check($this->input('current_password'), $auth->password))) { $validator->errors()->add('current_password', __('The current password is incorrect.')); } }); } }コントローラに読み込み
FormRequest をコントローラから読み込むように修正します。
また、パスワード変更時のリダイレクト先が管理者のhomeになるよう変更します。app/Http/Controllers/Admin/Auth/ChangePasswordController.php<?php namespace App\Http\Controllers\Admin\Auth; use App\Http\Controllers\Controller; - use App\Http\Requests\ChangePasswordRequest; + use App\Http\Requests\Admin\ChangePasswordRequest; use Illuminate\Support\Facades\Auth; ===(中略)=== public function changePassword(ChangePasswordRequest $request) { //ValidationはChangePasswordRequestで処理 //パスワード変更処理 $user = Auth::user(); $user->password = bcrypt($request->get('password')); $user->save(); //homeにリダイレクト - return redirect()->route('home')->with('status', __('Your password has been changed.')); + return redirect()->route('admin.home')->with('status', __('Your password has been changed.')); } }ヘッダからリンクする
ログインした後、右上に表示されるメニューの中に、パスワード変更のリンクを張っておきます。
resource/views/layouts/app.blade.php<div class="dropdown-menu dropdown-menu-right" aria-labelledby="navbarDropdown"> <a class="dropdown-item" href="{{ route('admin.logout') }}" onclick="event.preventDefault(); document.getElementById('logout-form').submit();"> {{ __('Logout') }} </a> <form id="logout-form" action="{{ route('admin.logout') }}" method="POST" style="display: none;"> @csrf </form> + + <a class="dropdown-item" href="{{ route('admin.password.form') }}"> + {{ __('Change Password') }} + </a> </div>動作確認
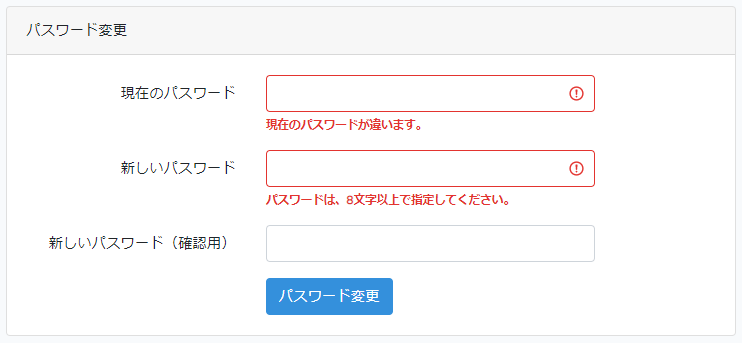
管理者のパスワード変更画面にアクセスして、希望の動作になるか確認します。
前回、secretという8桁以下のパスワードで設定したため、バリデーションがとおらなくなってしまいました。
tinkerを使ってDBを操作して、まずは直接パスワードを変更することにします。$ php artisan tinker $ \DB::table('admins')->where('id', 1)->update(['password' => \Hash::make('secretpassword')]);これでパスワードが「secretpassword」に変更されました。
現在のパスワード欄に「secretpassword」、新しいパスワード欄に任意の文字列を入力して動作を確認します。
パスワードリセット 実装手順
ルーティングの定義
管理者のパスワードリセットについて、
Auth::routes()を使うと、認証系に必要な定義を自動で追加してくれます。
管理者用は登録部分は利用しないことにするので、オプションで以下のように指定します。routes/web.phpRoute::namespace('Admin')->prefix('admin')->name('admin.')->group(function() { Route::get('home', 'HomeController@index')->name('home'); Route::get('login', 'Auth\LoginController@showLoginForm')->name('login'); Route::post('login', 'Auth\LoginController@login'); Route::post('logout', 'Auth\LoginController@logout')->name('logout'); Route::get('/setting/password', 'Auth\ChangePasswordController@showChangePasswordForm')->name('password.form'); Route::post('/setting/password', 'Auth\ChangePasswordController@changePassword')->name('password.change'); + + Auth::routes([ + 'register' => false, + 'reset' => true, + 'verify' => false + ]); });
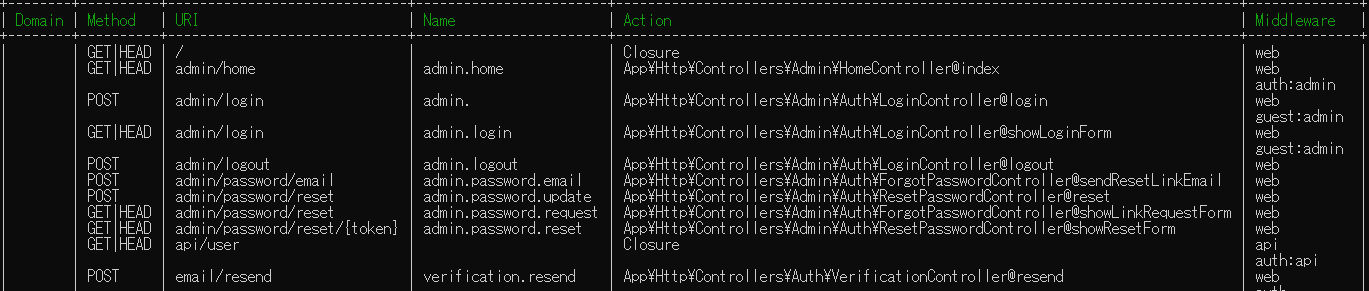
php artisan route:listをしてみると、admin.password.email や admin.password.update といったパスワードに関するルーティングが追加されているのが分かります。
このルーティングに沿って、コントローラを作成していきます。
コントローラの作成
ユーザー用のパスワードリセット用のコントローラ
app/Http/Controllers/Auth/ForgotPasswordController.phpとapp/Http/Controllers/Auth/ResetPasswordController.phpを、管理者用としてapp/Http/Controllers/Admin/Auth/以下にコピーします。コピー後、namespaceやリダイレクト先を管理者向けに変更します。
app/Http/Controllers/Admin/Auth/ForgotPasswordController.php<?php - namespace App\Http\Controllers\Auth; + namespace App\Http\Controllers\Admin\Auth; use App\Http\Controllers\Controller; use Illuminate\Foundation\Auth\SendsPasswordResetEmails; class ForgotPasswordController extends Controller { /* |-------------------------------------------------------------------------- | Password Reset Controller |-------------------------------------------------------------------------- | | This controller is responsible for handling password reset emails and | includes a trait which assists in sending these notifications from | your application to your users. Feel free to explore this trait. | */ use SendsPasswordResetEmails; }app/Http/Controllers/Admin/Auth/ResetPasswordController.php<?php - namespace App\Http\Controllers\Auth; + namespace App\Http\Controllers\Admin\Auth; use App\Http\Controllers\Controller; use App\Providers\RouteServiceProvider; use Illuminate\Foundation\Auth\ResetsPasswords; class ResetPasswordController extends Controller { /* |-------------------------------------------------------------------------- | Password Reset Controller |-------------------------------------------------------------------------- | | This controller is responsible for handling password reset requests | and uses a simple trait to include this behavior. You're free to | explore this trait and override any methods you wish to tweak. | */ use ResetsPasswords; /** * Where to redirect users after resetting their password. * * @var string */ - protected $redirectTo = RouteServiceProvider::HOME; + protected $redirectTo = RouteServiceProvider::ADMIN_HOME; }viewの作成
ユーザー用のパスワードリセット用のview
resources/views/auth/passwords/reset.blade.phpとresources/views/auth/passwords/email.blade.phpを、管理者用としてapp/Http/Controllers/Admin/Auth/以下にコピーします。
コピー後、レイアウトやformの送信先を変更します。resources/views/auth/passwords/reset.blade.php- @extends('layouts.app') + @extends('layouts.admin.app') @section('content') <div class="container"> <div class="row justify-content-center"> <div class="col-md-8"> <div class="card"> <div class="card-header">{{ __('Reset Password') }}</div> <div class="card-body"> - <form method="POST" action="{{ route('password.update') }}"> + <form method="POST" action="{{ route('admin.password.update') }}"> @csrf <input type="hidden" name="token" value="{{ $token }}"> <div class="form-group row"> <label for="email" class="col-md-4 col-form-label text-md-right">{{ __('E-Mail Address') }}</label> <div class="col-md-6"> <input id="email" type="email" class="form-control @error('email') is-invalid @enderror" name="email" value="{{ $email ?? old('email') }}" required autocomplete="email" autofocus> @error('email') <span class="invalid-feedback" role="alert"> <strong>{{ $message }}</strong> </span> @enderror </div> </div> <div class="form-group row"> <label for="password" class="col-md-4 col-form-label text-md-right">{{ __('Password') }}</label> <div class="col-md-6"> <input id="password" type="password" class="form-control @error('password') is-invalid @enderror" name="password" required autocomplete="new-password"> @error('password') <span class="invalid-feedback" role="alert"> <strong>{{ $message }}</strong> </span> @enderror </div> </div> <div class="form-group row"> <label for="password-confirm" class="col-md-4 col-form-label text-md-right">{{ __('Confirm Password') }}</label> <div class="col-md-6"> <input id="password-confirm" type="password" class="form-control" name="password_confirmation" required autocomplete="new-password"> </div> </div> <div class="form-group row mb-0"> <div class="col-md-6 offset-md-4"> <button type="submit" class="btn btn-primary"> {{ __('Reset Password') }} </button> </div> </div> </form> </div> </div> </div> </div> </div> @endsectionresources/views/auth/passwords/email.blade.php- @extends('layouts.app') + @extends('layouts.admin.app') @section('content') <div class="container"> <div class="row justify-content-center"> <div class="col-md-8"> <div class="card"> <div class="card-header">{{ __('Reset Password') }}</div> <div class="card-body"> @if (session('status')) <div class="alert alert-success" role="alert"> {{ session('status') }} </div> @endif + - <form method="POST" action="{{ route('password.email') }}"> + <form method="POST" action="{{ route('admin.password.email') }}"> @csrf <div class="form-group row"> <label for="email" class="col-md-4 col-form-label text-md-right">{{ __('E-Mail Address') }}</label> <div class="col-md-6"> <input id="email" type="email" class="form-control @error('email') is-invalid @enderror" name="email" value="{{ old('email') }}" required autocomplete="email" autofocus> @error('email') <span class="invalid-feedback" role="alert"> <strong>{{ $message }}</strong> </span> @enderror </div> </div> <div class="form-group row mb-0"> <div class="col-md-6 offset-md-4"> <button type="submit" class="btn btn-primary"> {{ __('Send Password Reset Link') }} </button> </div> </div> </form> </div> </div> </div> </div> </div> @endsection管理者用パスワードリセットトークン保存テーブル作成
ユーザー用のパスワードリセットトークン保存テーブル
password_resetsと、管理者用のものを分けるため、admin_password_resetsというテーブルを新たに作成します。php artisan make:migration create_admin_password_resets_table
日付_create_admin_password_resets_table.phpの中身は、日付_create_password_resets_table.phpを参考にします。database/migrations/日付_create_admin_password_resets_table.php<?php use Illuminate\Database\Migrations\Migration; use Illuminate\Database\Schema\Blueprint; use Illuminate\Support\Facades\Schema; class CreateAdminPasswordResetsTable extends Migration { /** * Run the migrations. * * @return void */ public function up() { Schema::create('admin_password_resets', function (Blueprint $table) { $table->string('email')->index(); $table->string('token'); $table->timestamp('created_at')->nullable(); }); } /** * Reverse the migrations. * * @return void */ public function down() { Schema::dropIfExists('admin_password_resets'); } }php artisan migrateパスワードブローカーの設定
管理者がパスワードリセット時に
admin_password_resetsテーブルを使用するため、config/auth.phpで、管理者用のパスワードブローカーを設定します。config/auth.php'passwords' => [ 'users' => [ 'provider' => 'users', 'table' => 'password_resets', 'expire' => 60, 'throttle' => 60, 'admins' => [ 'provider' => 'admins', 'table' => 'admin_password_resets', 'expire' => 60, 'throttle' => 60, ], ], ],configファイルを変更したので、キャッシュをクリアします。
php artisan config:cache
コントローラの修正
パスワードリセットのボタンを押すと、
ForgotPasswordControllerのshowLinkRequestForm()が実行されます。現状だと、SendsPasswordResetEmails(vendor/laravel/ui/auth-backend/SendsPasswordResetEmails.php) に処理がまとめられているため、このままだと管理者もユーザーと同じ挙動になってしまいます。
管理者は管理者向けの処理になるよう、ForgotPasswordController内で各メソッドをオーバーライドします。app\Http\Controllers\Admin\Auth\ForgotPasswordController.php<?php namespace App\Http\Controllers\Admin\Auth; use App\Http\Controllers\Controller; use Illuminate\Foundation\Auth\SendsPasswordResetEmails; + use Illuminate\Support\Facades\Password; class ForgotPasswordController extends Controller { /* |-------------------------------------------------------------------------- | Password Reset Controller |-------------------------------------------------------------------------- | | This controller is responsible for handling password reset emails and | includes a trait which assists in sending these notifications from | your application to your users. Feel free to explore this trait. | */ use SendsPasswordResetEmails; + + public function showLinkRequestForm() + { + return view('admin.auth.passwords.email'); + } + + public function broker() + { + return Password::broker('admins'); + } }app\Http\Controllers\Admin\Auth\ResetPasswordController.php<?php namespace App\Http\Controllers\Admin\Auth; use App\Http\Controllers\Controller; use App\Providers\RouteServiceProvider; use Illuminate\Foundation\Auth\ResetsPasswords; + use Illuminate\Http\Request; + use Illuminate\Support\Facades\Password; class ResetPasswordController extends Controller { ==(中略)== protected $redirectTo = RouteServiceProvider::ADMIN_HOME; + + public function showResetForm(Request $request, $token = null) + { + return view('admin.auth.passwords.reset')->with( + ['token' => $token, 'email' => $request->email] + ); + } + + public function broker() + { + return Password::broker('admins'); + } }リセットメールの変更
ここまでで一旦動作確認してみると、パスワードリセットメールは届きますが、本文中のURLがユーザー用のURLのままです。
管理者用の通知メールを作成し、そちらを利用するようにします。Notificationの作成
php artisan make:notificationコマンドを実行します。php artisan make:notification AdminResetPasswordNotification
app/Notifications/AdminResetPasswordNotification.phpが作成されるので、内容を修正します。
メールの送信は、vendor/laravel/framework/src/Illuminate/Auth/Notifications/ResetPassword.phpの中のtoMail()を使っているので、このメソッドをコピーしてURL部分だけ管理者用に変更しました。app/Notifications/AdminResetPasswordNotification.php<?php namespace App\Notifications; use Illuminate\Bus\Queueable; use Illuminate\Contracts\Queue\ShouldQueue; use Illuminate\Notifications\Messages\MailMessage; use Illuminate\Notifications\Notification; + use Illuminate\Support\Facades\Lang; class AdminResetPasswordNotification extends Notification { use Queueable; + public static $toMailCallback; + public static $createUrlCallback; /** * Create a new notification instance. * * @return void */ - public function __construct() + public function __construct($token) { + $this->token = $token; } ===(中略)=== public function toMail($notifiable) { return (new MailMessage) - ->line('The introduction to the notification.') - ->action('Notification Action', url('/')) - ->line('Thank you for using our application!'); + if (static::$toMailCallback) { + return call_user_func(static::$toMailCallback, $notifiable, $this->token); + } + + if (static::$createUrlCallback) { + $url = call_user_func(static::$createUrlCallback, $notifiable, $this->token); + } else { + $url = url(route('password.reset', [ + 'token' => $this->token, + 'email' => $notifiable->getEmailForPasswordReset(), + ], false)); + } + + return (new MailMessage) + ->subject(Lang::get('Reset Password Notification')) + ->line(Lang::get('You are receiving this email because we received a password reset request for your account.')) + ->action(Lang::get('Reset Password'), $url) + ->line(Lang::get('This password reset link will expire in :count minutes.', ['count' => config('auth.passwords.'.config('auth.defaults.passwords').'.expire')])) + ->line(Lang::get('If you did not request a password reset, no further action is required.')); }Adminモデルの修正
管理者は
AdminResetPasswordNotificationを使うように、Adminモデルを修正します。app/Admin.php<?php namespace App; use Illuminate\Contracts\Auth\MustVerifyEmail; use Illuminate\Foundation\Auth\User as Authenticatable; use Illuminate\Notifications\Notifiable; use Illuminate\Database\Eloquent\Model; use Illuminate\Database\Eloquent\SoftDeletes; + use App\Notifications\AdminResetPasswordNotification; class Admin extends Authenticatable implements MustVerifyEmail { ===(中略)=== + + public function AdminResetPasswordNotification($token) + { + $this->notify(new AdminResetPasswordNotification($token)); + } }おわりに
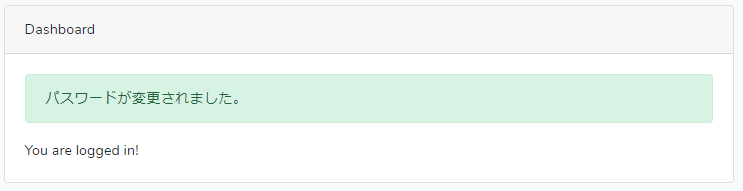
ここまでで、管理者のログイン・パスワード変更・パスワードリセットができるようになりました。
今回、管理者の登録・削除は作成しませんでしたが、同じようにして作成できそうです。
ユーザー認証についてのまとめは、ここまでで一旦完了としたいと思います。参考サイト
- 投稿日:2020-07-06T11:24:58+09:00
Laravel で FromRequest のバリデーションをテストする
Laravel の FormRequest クラスを利用すると各フィールドのバリデーションルールを array の形で定義することができます。
<?php

namespace App\Http\Requests\UserRegistration;

use Illuminate\Foundation\Http\FormRequest;

class UserRegistrationFormRequest extends FormRequest
{
    public function rules(): array
    {
        return [
            'name' => [
                'required',
                'string',
                'min:2',
                'regex:/^[A-Za-z0-9]+$/',
            ],
            'password' => [
                'required',
                'string',
                'min:8',
                'regex:/[a-z]/',
                'regex:/[A-Z]/',
                'regex:/[0-9]/',
                'regex:/@$!%*#?&/',
            ],
        ];
    }
}
一つ一つのルールをテストするメリットは特にないと思いますが、上記のような複数ルールの組み合わせやカスタムバリデーションを検証するために Unit Test を作成する際の Tips を紹介します。
テストコード
ベースとなるメソッドは Stack Overflow から拝借しています(というか、この記事の要点はこの方法の紹介です!)。
これをベースに汎用的な FormRequest 用の TestCase クラスを作ってみます。<?php namespace Tests\Unit\App\Requests\Base; use Illuminate\Foundation\Testing\TestCase; abstract class BaseFormRequestTestCase extends TestCase { /** * @var array */ protected $rules; /** * @var \Validator */ protected $validator; public function setUp(): void { parent::setUp(); $this->setRules(); $this->validator = $this->app['validator']; } /** * 子クラスで Request Class が持つ rules を set する。 */ abstract protected function setRules(): void; protected function getFieldValidator($field, $value) { return $this->validator->make( [$field => $value], [$field => $this->rules[$field]] ); } protected function validateField($field, $value) { return $this->getFieldValidator($field, $value)->passes(); } }これを継承した形で TestCase を作成すれば比較的シンプルにバリデーションのテストを書くことができます。
<?php

namespace Tests\Unit\App\Requests\UserRegistration\UserRegistrationFormRequest;

use App\Http\Requests\UserRegistration\UserRegistrationFormRequest;
use Tests\Unit\App\Requests\Base\BaseFormRequestTestCase;

class UserRegistrationFormRequestTest extends BaseFormRequestTestCase
{
    protected function setRules(): void
    {
        $this->rules = (new UserRegistrationFormRequest())->rules();
    }

    public function testNameRules() {
        $this->assertFalse($this->validateField('name', null));
        $this->assertFalse($this->validateField('name', 'a'));
        $this->assertTrue($this->validateField('name', 'ab'));
        $this->assertTrue($this->validateField('name', 'AB'));
        $this->assertTrue($this->validateField('name', '01'));
        $this->assertTrue($this->validateField('name', 'aA0'));
        $this->assertFalse($this->validateField('name', 'ab@'));
        $this->assertFalse($this->validateField('name', 'ab cd'));
    }

    public function testPasswordRules() {
        $this->assertFalse($this->validateField('password', null));
        $this->assertFalse($this->validateField('password', 'abAB01@'));
        $this->assertTrue($this->validateField('password', 'abAB01@$'));
        $this->assertFalse($this->validateField('password', 'abcABC012'));
        $this->assertFalse($this->validateField('password', 'ABC012@$!'));
        $this->assertFalse($this->validateField('password', '012@$!abc'));
        $this->assertFalse($this->validateField('password', '@$!abcABC'));
        $this->assertFalse($this->validateField('password', 'ab AB 01 @$'));
    }
}
- 投稿日:2020-07-06T03:31:02+09:00
Vue + Laravel + Firebaseで始めるWeb Push通知
はじめに
業務で FCM(Firebase Cloud Messaging)を使ったWeb Push通知をSPAで実装する機会がありました。
この記事では、いくつかポイントを設けながら段階的に実装できるように書きたいと思います。
またLaravelと記載していますが、HTTPクライアントライブラリのGuzzleを使ってリクエストを投げるだけです。この記事で説明する範囲
今回VueやLaravel、その他のライブラリなどの詳細な説明は省きます。あくまでもFCMを使ったフォアグラウンド・バックグラウンドへのPush通知がメインです。
FCM(Firebase Cloud Messaging)とは
公式ページには
Firebase Cloud Messaging(FCM)は、メッセージを無料で確実に送信するためのクロスプラットフォーム メッセージング ソリューションです。
と記載されています。
今回はWebを対象としますが仕組みは共通で、通知を受信する端末が一意なトークンをFCM側に発行してもらい、送信時に対象のトークンを用いてFCMを経由し、Push通知を送るという仕組みで、Firebaseが提供しているサービスの一つです。手順
- Firebaseでのプロジェクト作成・アプリ登録
- Voluntary Application Server Identification鍵(VAPID鍵)の取得
- 通知に対するPermissionの実装
- フォアグラウンド・バックグラウンドでの通知の受信
- Guzzleでリクエストを投げる
1. Firebaseでのプロジェクト作成・アプリ登録
Firebase を JavaScript プロジェクトに追加する
上記のリンクを確認しながら進めていけば問題ないかなと思います。
Laravelであれば Firebase SDK を追加して Firebase を初期化するという部分に関しては、Vueインスタンスを表示するbladeでFirebase SDKを追加しましょう。index.blade.php<head> <script src="https://www.gstatic.com/firebasejs/6.5.0/firebase-app.js"></script> <script src="https://www.gstatic.com/firebasejs/6.5.0/firebase-messaging.js"></script>また初期化に関しては、私の場合
resource/js/plugins/firebase.jsなどのようにディレクトリを構成し、firebase.jsif (!firebase.apps.length) { firebase.initializeApp({ apiKey: process.env.MIX_FIREBASE_API_KEY, authDomain: process.env.MIX_FIREBASE_AUTH_DOMAIN, databaseURL: process.env.MIX_FIREBASE_DATABASE_URL, projectId: process.env.MIX_FIREBASE_PROJECT_ID, storageBucket: process.env.MIX_FIREBASE_STORAGE_BUCKET, messagingSenderId: process.env.MIX_FIREBASE_MESSAGING_SENDER_ID, appId: process.env.MIX_FIREBASE_APP_ID, }) } export default firebaseexportしてオブジェクトを各ファイルで参照できるようにしていますが、オブジェクトを使用したいファイルで直接初期化を行っても問題ありません。
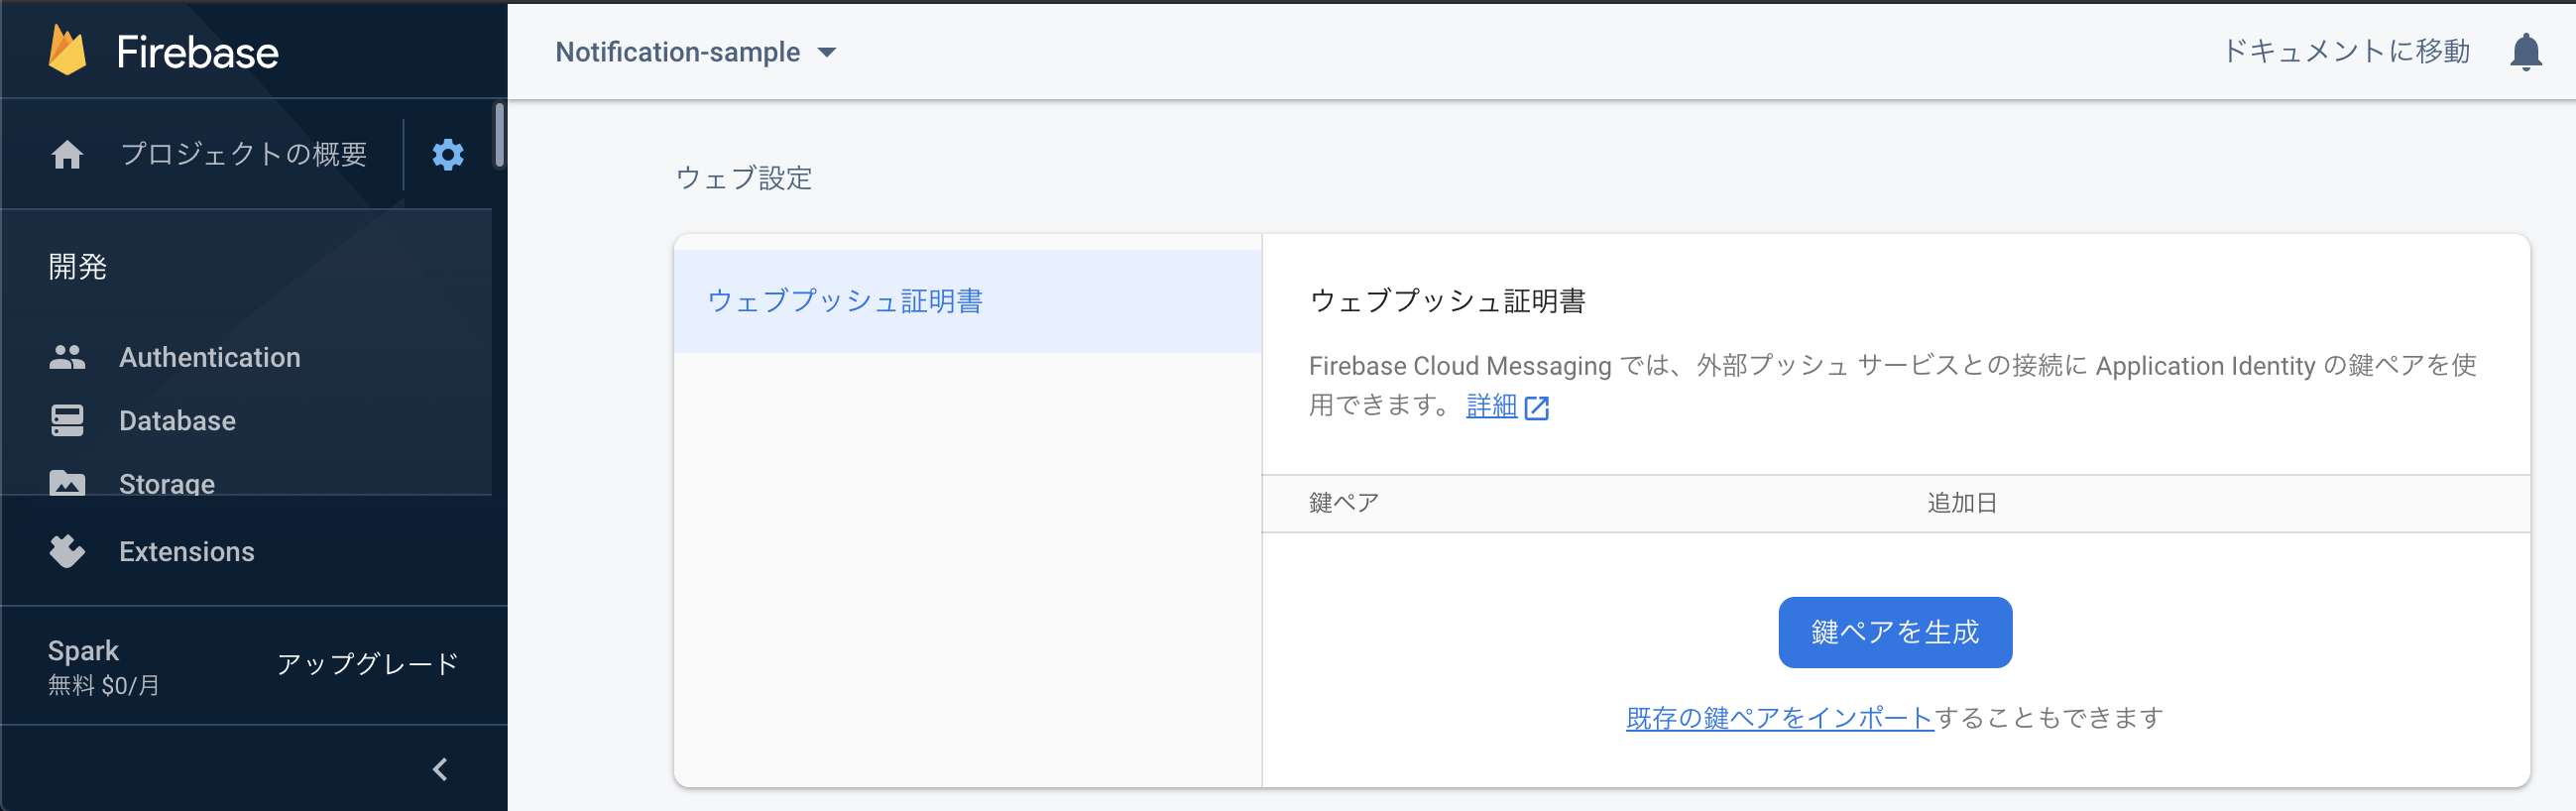
2. Voluntary Application Server Identification鍵(VAPID鍵)の取得・設定
Web Push通知をWebアプリケーションに飛ばす際FirebaseプロジェクトとWebアプリケーションを紐づける必要があります。Firebaseコンソールから新しく生成する方法、既存のリソースをインポートする方法の両方用意されています。
VAPID鍵を生成・インポートしたら
resource/js/App.vueに早速コードを書いていきます。
最初に私の場合はresource/js/plugins/firebase.jsでFirebaseの初期化を行ったので、そちらのファイルをimportし、ライフサイクルの中でfirebase.messagingを呼び出します。
これでメッセージングサービスを使用する事ができます。App.vueimport Firebase from './plugins/firebase' export default { created() { const messaging = Firebase.messaging()上記のようにメッセージオブジェクトを呼び出した後に、Voluntary Application Server Identification鍵(VAPID鍵)の取得を行った際に生成・インポートしたVAPID鍵をコードに追加します。
App.vueexport default { created() { const messaging = Firebase.messaging() messaging.usePublicVapidKey(process.env.MIX_FIREBASE_APP_VAPPI_KEY)こちらの
usePublicVapidKeyメソッドを使用するとFCMで各種プッシュサービスにメッセージリクエストを送信するときにVAPID鍵の認証情報を使用できます。3. 通知に対するPermissionの実装
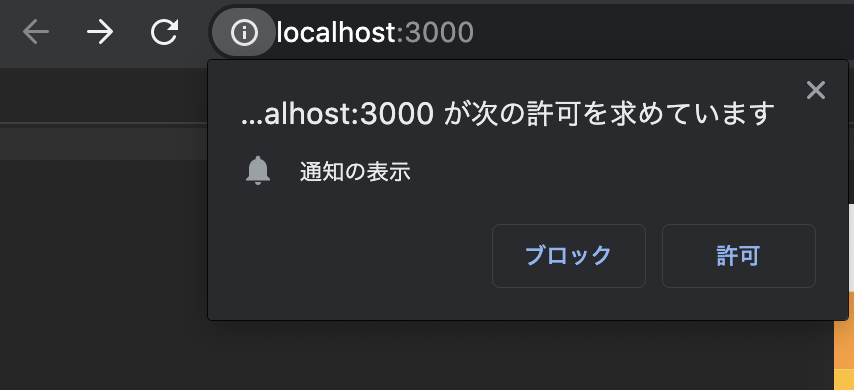
実際にPush通知を送信する為に、ユーザーからの許可を要請する必要があります。
そのためにはrequestPermissionメソッドを使用してユーザーに対する要請の結果をPromissで取得します。App.vueconst messaging = Firebase.messaging() messaging.usePublicVapidKey(process.env.MIX_FIREBASE_APP_VAPPI_KEY) Notification.requestPermission() .then(permission => { console.log('Have permission') }) .catch(err => { console.log('Error Occured') })この段階でローカル環境の画面にアクセスすると
このような形で通知を表示のダイアログが確認できると思います。
またこの段階で許可をタップすると、ブラウザのコンソールにHave permissionと表示されることも確認できるでしょう。次のステップに移る前にサービスワーカーファイルを作成しておきましょう。
ここではfirebase-messaging-sw.jsというファイル名で作成することが決まっているので、そのファイル名でファイルを作成したらドメインのルートに置きます。Laravelであれば、public/配下にファイルを設置します。今は作ったファイルは空でも構いません。4. フォアグラウンド・バックグラウンドでの通知の受信
まず始めにFCMから発行されるトークンを取得します。先ほど書いたユーザーへの許可を要請した処理で、成功した時にトークンを取得するメソッドを呼び出すだけです。
App.vueNotification.requestPermission() .then(permission => { console.log('Have permission') return messaging.getToken() }) .then(token => { console.log(`firebase cloud messaging token: ${token}`) }) .catch(err => { console.log('Error Occured') })ここまで書いて画面にアクセスするとトークンの取得が出来ていれば
このように表示されていると思います。
前述しましたが、こちらのFCMから発行されたトークンを使用して、対象の端末に通知を表示させます。ここでPush通知が表示される際に2つのパターンがある事を認識しておく必要があります。
- 1つ目はWebブラウザが閉じられていたり、ブラウザが閉じられていたりした場合は、3の通知に対するPermissionの実装の最後で作成したサービスワーカーファイル内でメッセージが受け取られます。
- 2つ目はユーザーがWebページを表示している時です。この場合は実際のWebページ内でメッセージを受け取ります。なのでメッセージを受け取った際に何かのイベント(ラベルやマーカーの表示)を考えている場合は、メッセージを受け取るイベントで処理を書く必要があります。
それではメッセージを受け取るために、空で作成したサービスワーカーファイルにFirebaseメッセージングService Worker定義しましょう。
firebase-messaging-sw.jsimportScripts('https://www.gstatic.com/firebasejs/6.3.4/firebase-app.js') importScripts('https://www.gstatic.com/firebasejs/6.3.4/firebase-messaging.js') firebase.initializeApp({ messagingSenderId: 'hogehogehoge' }) const messaging = firebase.messaging()ここでも特に変わった事はなく、Firebaseの初期化の後に
messagingを呼び出すだけです。フォアグラウンドでの受信
次にこの章の目的でもあるフォアグランドでの通知の取得を
onMessageイベントを呼び出して確認してみましょう。App.vueNotification.requestPermission() .then(permission => { console.log('Have permission') return messaging.getToken() }) .then(token => { console.log(`firebase cloud messaging token: ${token}`) }) .catch(err => { console.log('Error Occured') }) messaging.onMessage(function(payload) { console.log('onMessage: ', payload) })ここまで出来たらFCMのAPIにcurlでリクエストを投げて挙動を確認してみましょう。
curl -X POST \
-H "Authorization: key={MIX_FIREBASE_SERVER_KEY}" \
-H "Content-Type: application/json" \
-d '{
    "notification": {
        "title": "Hello",
        "body": "World",
        "icon": ""
    },
    "to": "{firebase return token}"
}'  \
"https://fcm.googleapis.com/fcm/send"
上記を実行すると
こちらのように表示されていて、通知をWebページ内で受信している事が確認できると思います。バックグラウンドでの受信
バックグラウンドで受信する際には、通知を受信するWebページにフォーカスがない状態をブラウザで作る(別タブで他のページを閲覧している)か、他のアプリにフォーカスが当たっている状態に先ほどのリクエストを投げると挙動が確認できると思います。
確認できましたね。
今回は対象としませんが、通知オプションを設定したい場合(データペイロードを使用する場合など)はこちらを参照してください
基本的には、サービスワーカーファイルにメソッドを一つ追加して、データオプションに設定するだけです。Guzzleでリクエストを投げる
ほぼおまけの内容ですが、先ほどのcurlで投げたリクエストを、Guzzleで投げる際のサンプルコードぐらいにみていただけると嬉しいです。
public static function handle($token, $content, $link)
    {
        $client = new Client();

        $server_key = env('MIX_FIREBASE_SERVER_KEY');

        $url = env('APP_URL');

        $fcm_endpoint = 'https://fcm.googleapis.com/fcm/send';

        $headers = [
            'Authorization' => 'key=' . $server_key,
            'Content-Type' => 'application/json'
        ];

        $fields = [
            'notification' => [
                'title' => 'Sample-Notification',
                'body' => $content,
                'icon' => asset('img/icon/logo-main.png'),
                'click_action' => $url . $link
            ],
            'to' => $token
        ];

        $client->post($fcm_endpoint, [
            'headers' => $headers,
            'json' => $fields
        ]);
    }
最後に
今回FCMを触るきっかけとなった実装では、フォアグラウンドでの処理にvue-notificationを使用して、ユーザーになんらかのアクションを行う導線を実装したりしました。
無料で始められ手軽に実装できるので使う際の利点は多そうです。


- 投稿日:2020-07-06T00:37:33+09:00
Docker Laravel6のアプリにユーザ認証機能を付与する
目的
- 環境構築とLaravelアプリ作成後にユーザ認証の機能を付与する方法をまとめる。
実施環境
- ハードウェア環境
項目 情報 OS macOS Catalina(10.15.5) ハードウェア MacBook Pro (13-inch, 2020, Four Thunderbolt 3 ports) プロセッサ 2 GHz クアッドコアIntel Core i5 メモリ 32 GB 3733 MHz LPDDR4 グラフィックス Intel Iris Plus Graphics 1536 MB 前提条件
- 下記の記事を参考にDockerを用いたLaravelアプリの作成が行われていること。
前提情報
- 特になし
読後感
- Laravelアプリにauthを用いたユーザ認証機能を付与することができる。
概要
- Dockerのphpコンテナに入る
- DBの作成と設定
- ライブラリのインストール
- Authファイルの取得
- 確認
詳細
Dockerのphpコンテナに入る
下記コマンドを実行してDockerの起動しているコンテナの一覧を表示する。
$ docker psPHPのコンテナを探し下記コマンドを実行する。
$ docker exec -it phpコンテナの名前 bashDockerコンテナ内で下記コマンドを実行してnginxのドキュメントルートに移動する。
$ cd /usr/share/nginx/html/appDBの設定
Dockerコンテナ内のappディレクトリで下記コマンドを実行して.envファイルを開く。
$ vi .envDBの記載を下記の様に修正・追記を行う。
/usr/share/nginx/html/app/.envDB_CONNECTION=mysql DB_HOST=mariadb DB_PORT=3306 DB_DATABASE=laravel DB_USERNAME=laravel DB_PASSWORD=larapass記載後の.envファイルの内容を下記に記載する。
/usr/share/nginx/html/app/.envAPP_NAME=Laravel APP_ENV=local APP_KEY=base64:3aQ51W/eAA0ICIpKCYhAygUc1SCWOcKBL9Sijrn8iOQ= APP_DEBUG=true APP_URL=http://localhost LOG_CHANNEL=stack DB_CONNECTION=mysql DB_HOST=mariadb DB_PORT=3306 DB_DATABASE=laravel DB_USERNAME=laravel DB_PASSWORD=larapass BROADCAST_DRIVER=log CACHE_DRIVER=file QUEUE_CONNECTION=sync SESSION_DRIVER=file SESSION_LIFETIME=120 REDIS_HOST=127.0.0.1 REDIS_PASSWORD=null REDIS_PORT=6379 MAIL_DRIVER=smtp MAIL_HOST=smtp.mailtrap.io MAIL_PORT=2525 MAIL_USERNAME=null MAIL_PASSWORD=null MAIL_ENCRYPTION=null MAIL_FROM_ADDRESS=null MAIL_FROM_NAME="${APP_NAME}" AWS_ACCESS_KEY_ID= AWS_SECRET_ACCESS_KEY= AWS_DEFAULT_REGION=us-east-1 AWS_BUCKET= PUSHER_APP_ID= PUSHER_APP_KEY= PUSHER_APP_SECRET= PUSHER_APP_CLUSTER=mt1 MIX_PUSHER_APP_KEY="${PUSHER_APP_KEY}" MIX_PUSHER_APP_CLUSTER="${PUSHER_APP_CLUSTER}"ライブラリのインストール
Dockerコンテナ内のappディレクトリで下記コマンドを実行してライブラリを取得する。(ライブラリのバージョン指定
1.*を行わず実行するとエラーになる。バージョン指定をせずエラーになった話はこちら→Laravel 6 $ composer require laravel/uiを実行するとエラーが発生する)$ composer require laravel/ui 1.*Authファイルの取得
Dockerコンテナ内のappディレクトリで下記コマンドを実行してAuthに必要なファイルを取得する。
$ php artisan ui bootstrap --authDockerコンテナ内で下記コマンド実行してnvmをインストールする。
$ curl -o- https://raw.githubusercontent.com/nvm-sh/nvm/v0.34.0/install.sh | bashDockerコンテナ内で下記コマンドを実行してnode.jsとyarnをインストールする。
$ . ~/.nvm/nvm.sh && nvm install node && npm i -g yarnDockerコンテナ内で下記コマンドを実行して必要なCSSファイルをインストールする。
$ npm install && npm run dev確認
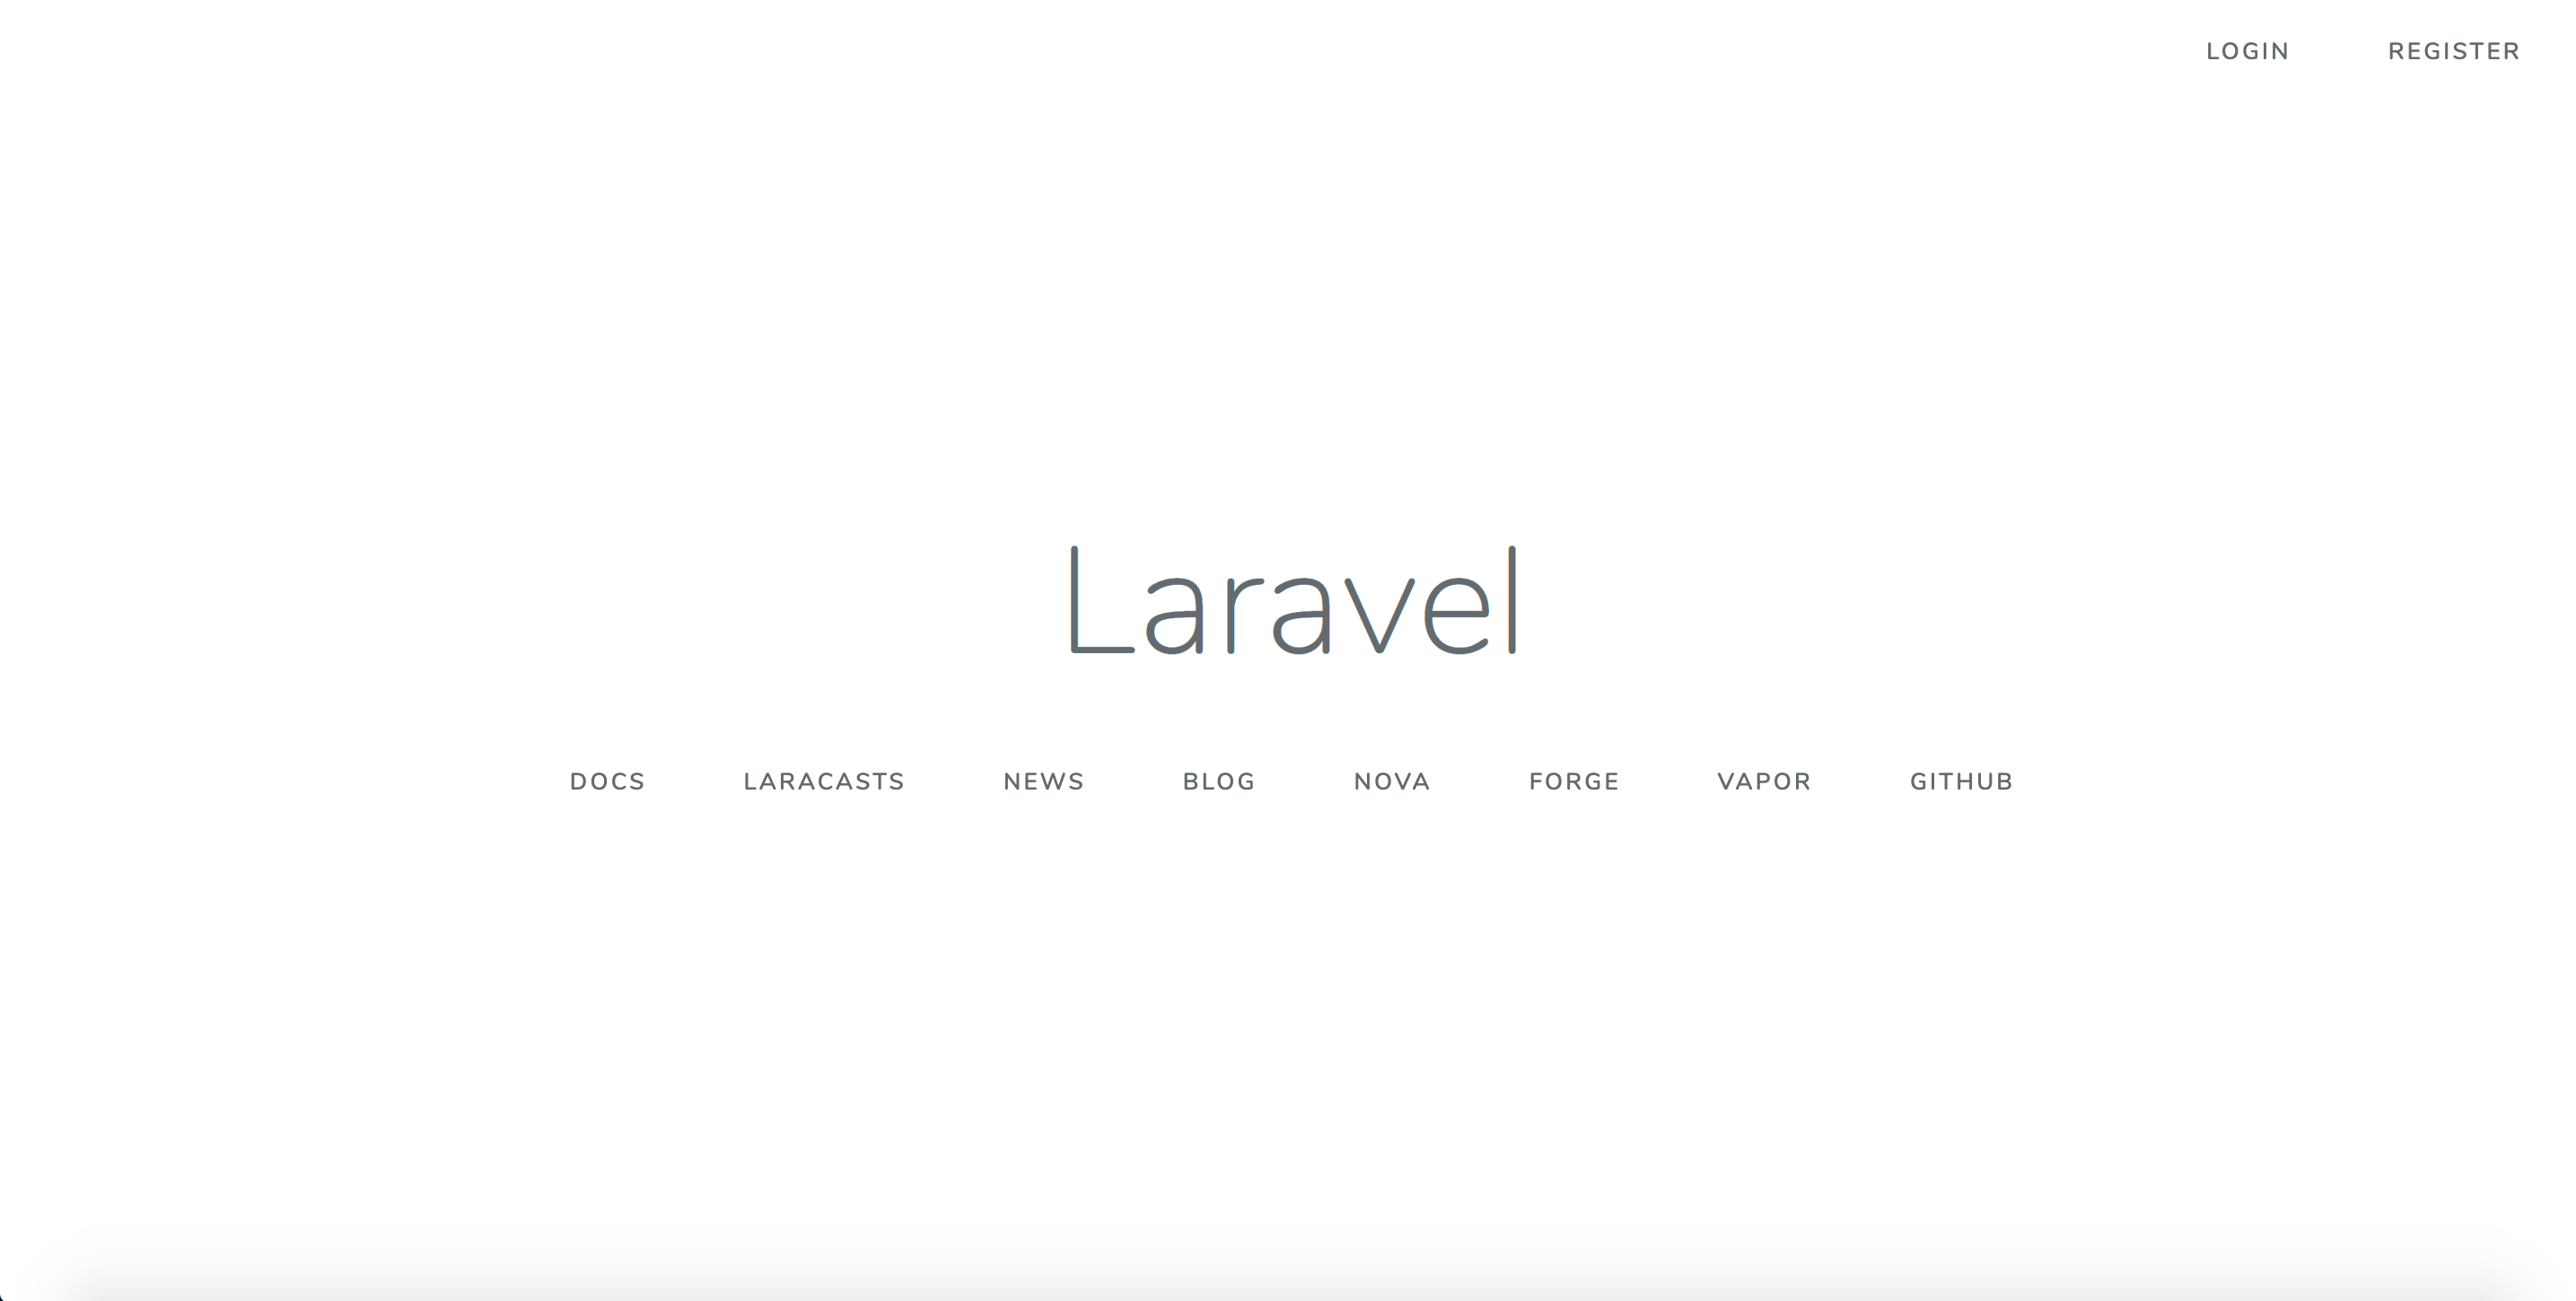
下記にアクセスし、Laravelのホーム画面が出力されることを確認する。
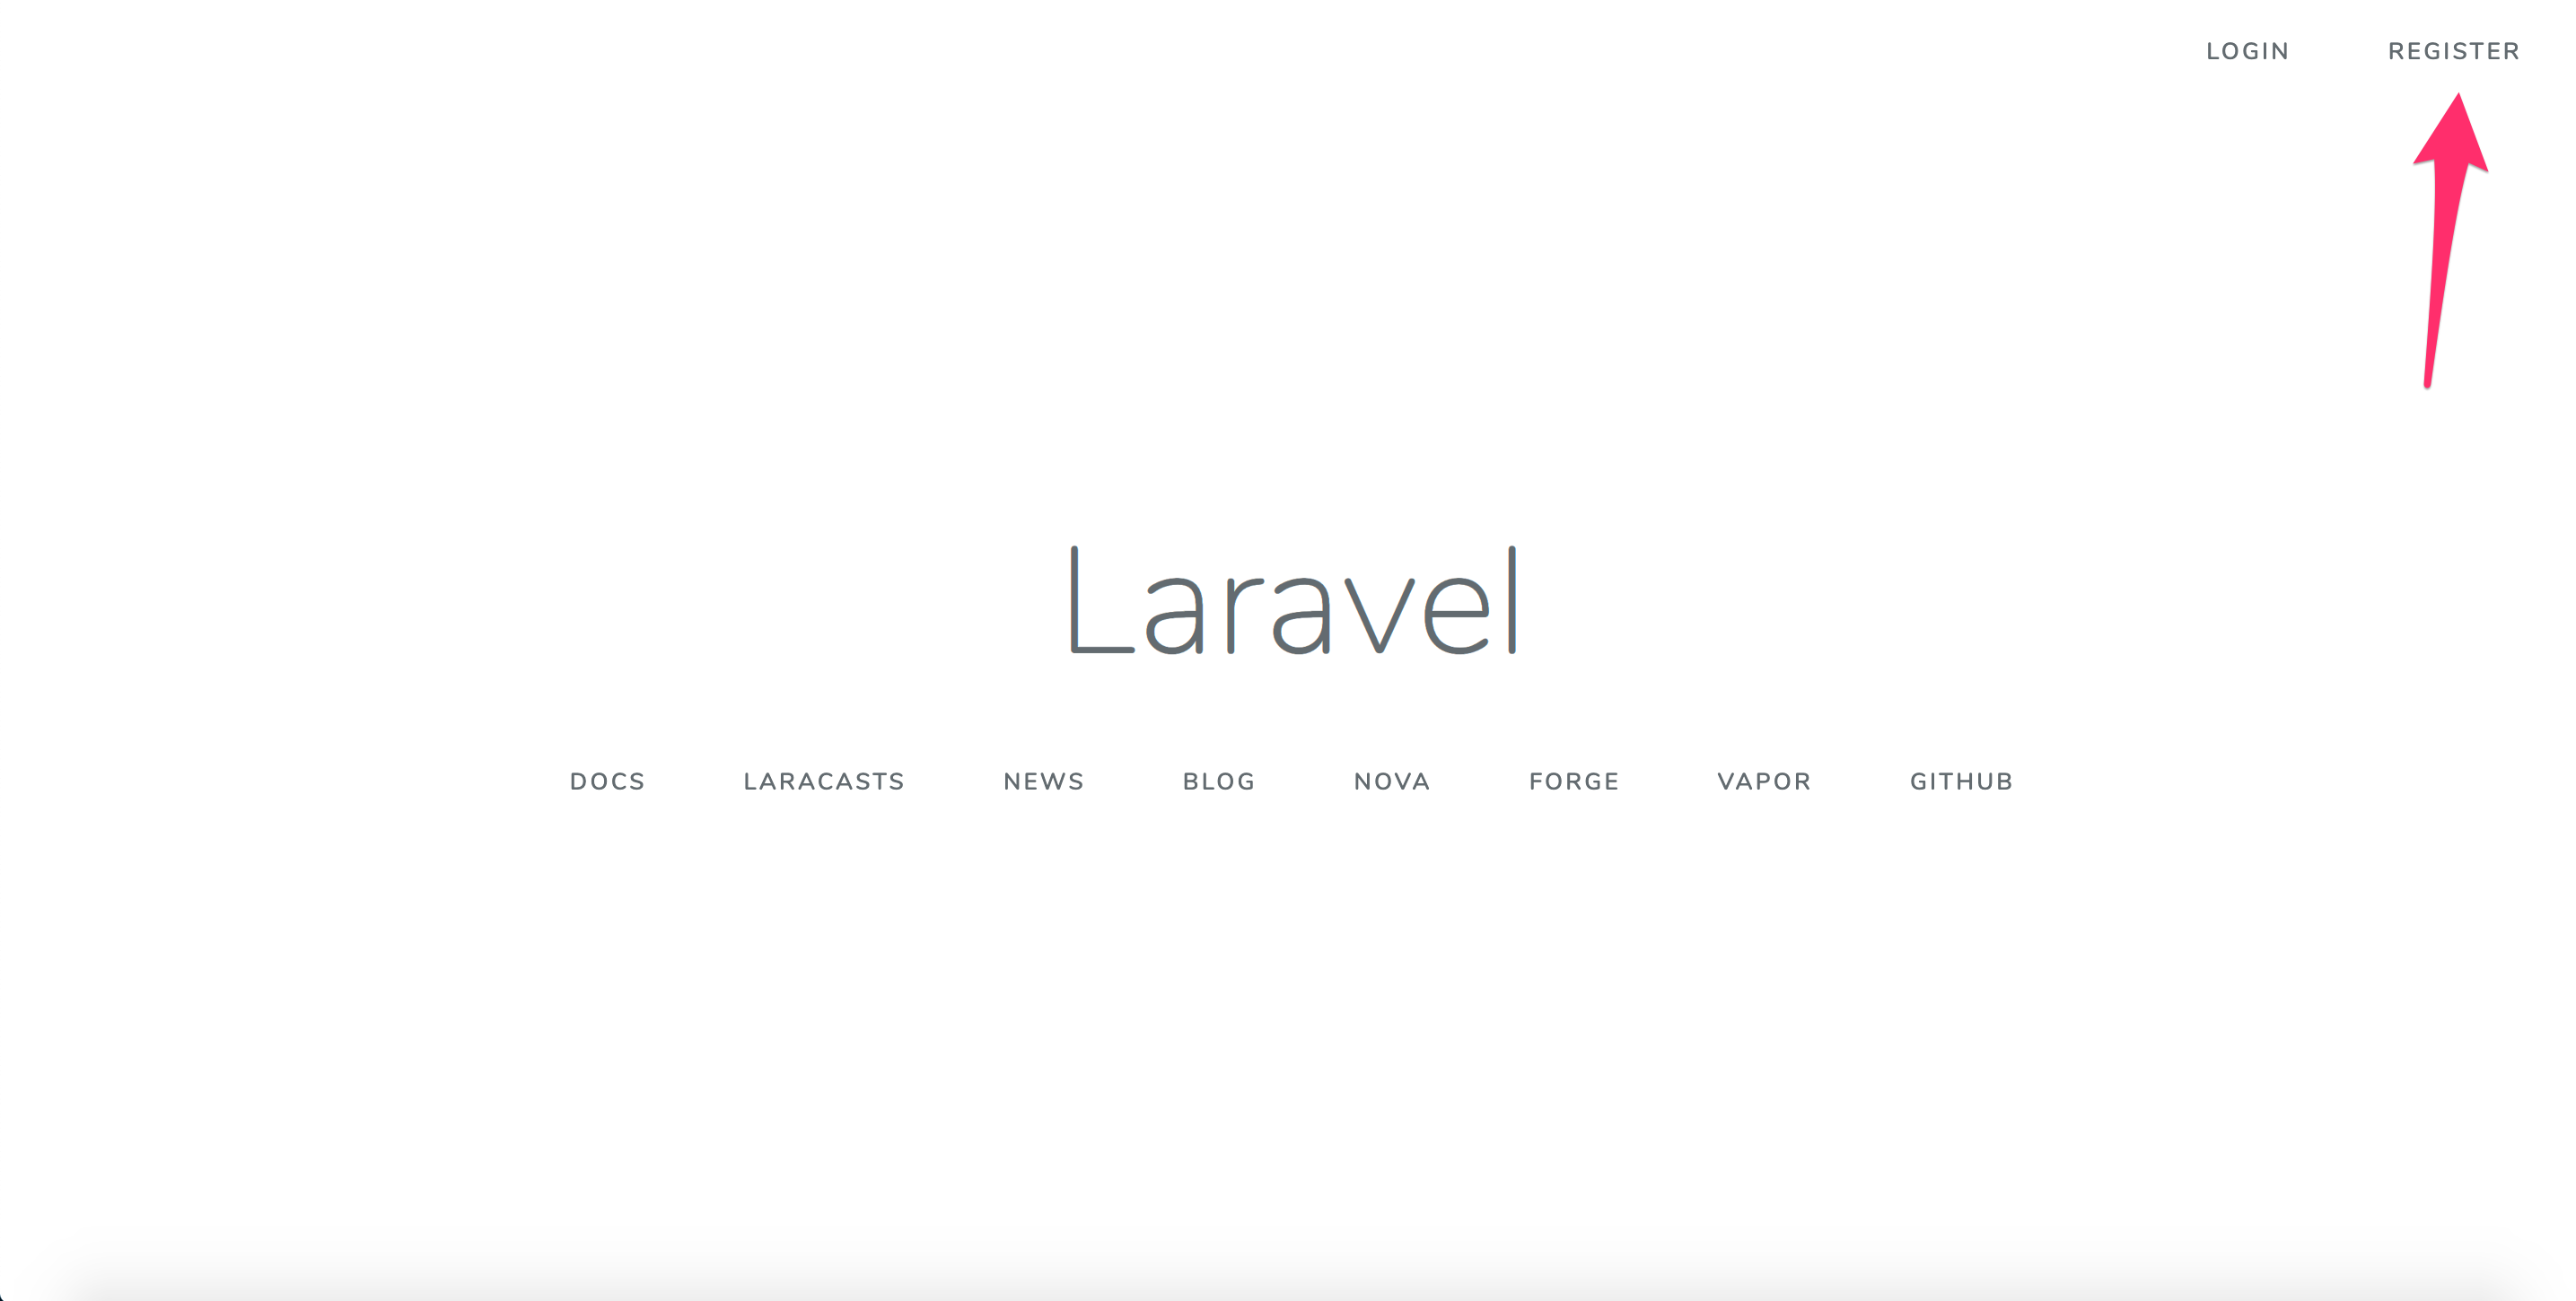
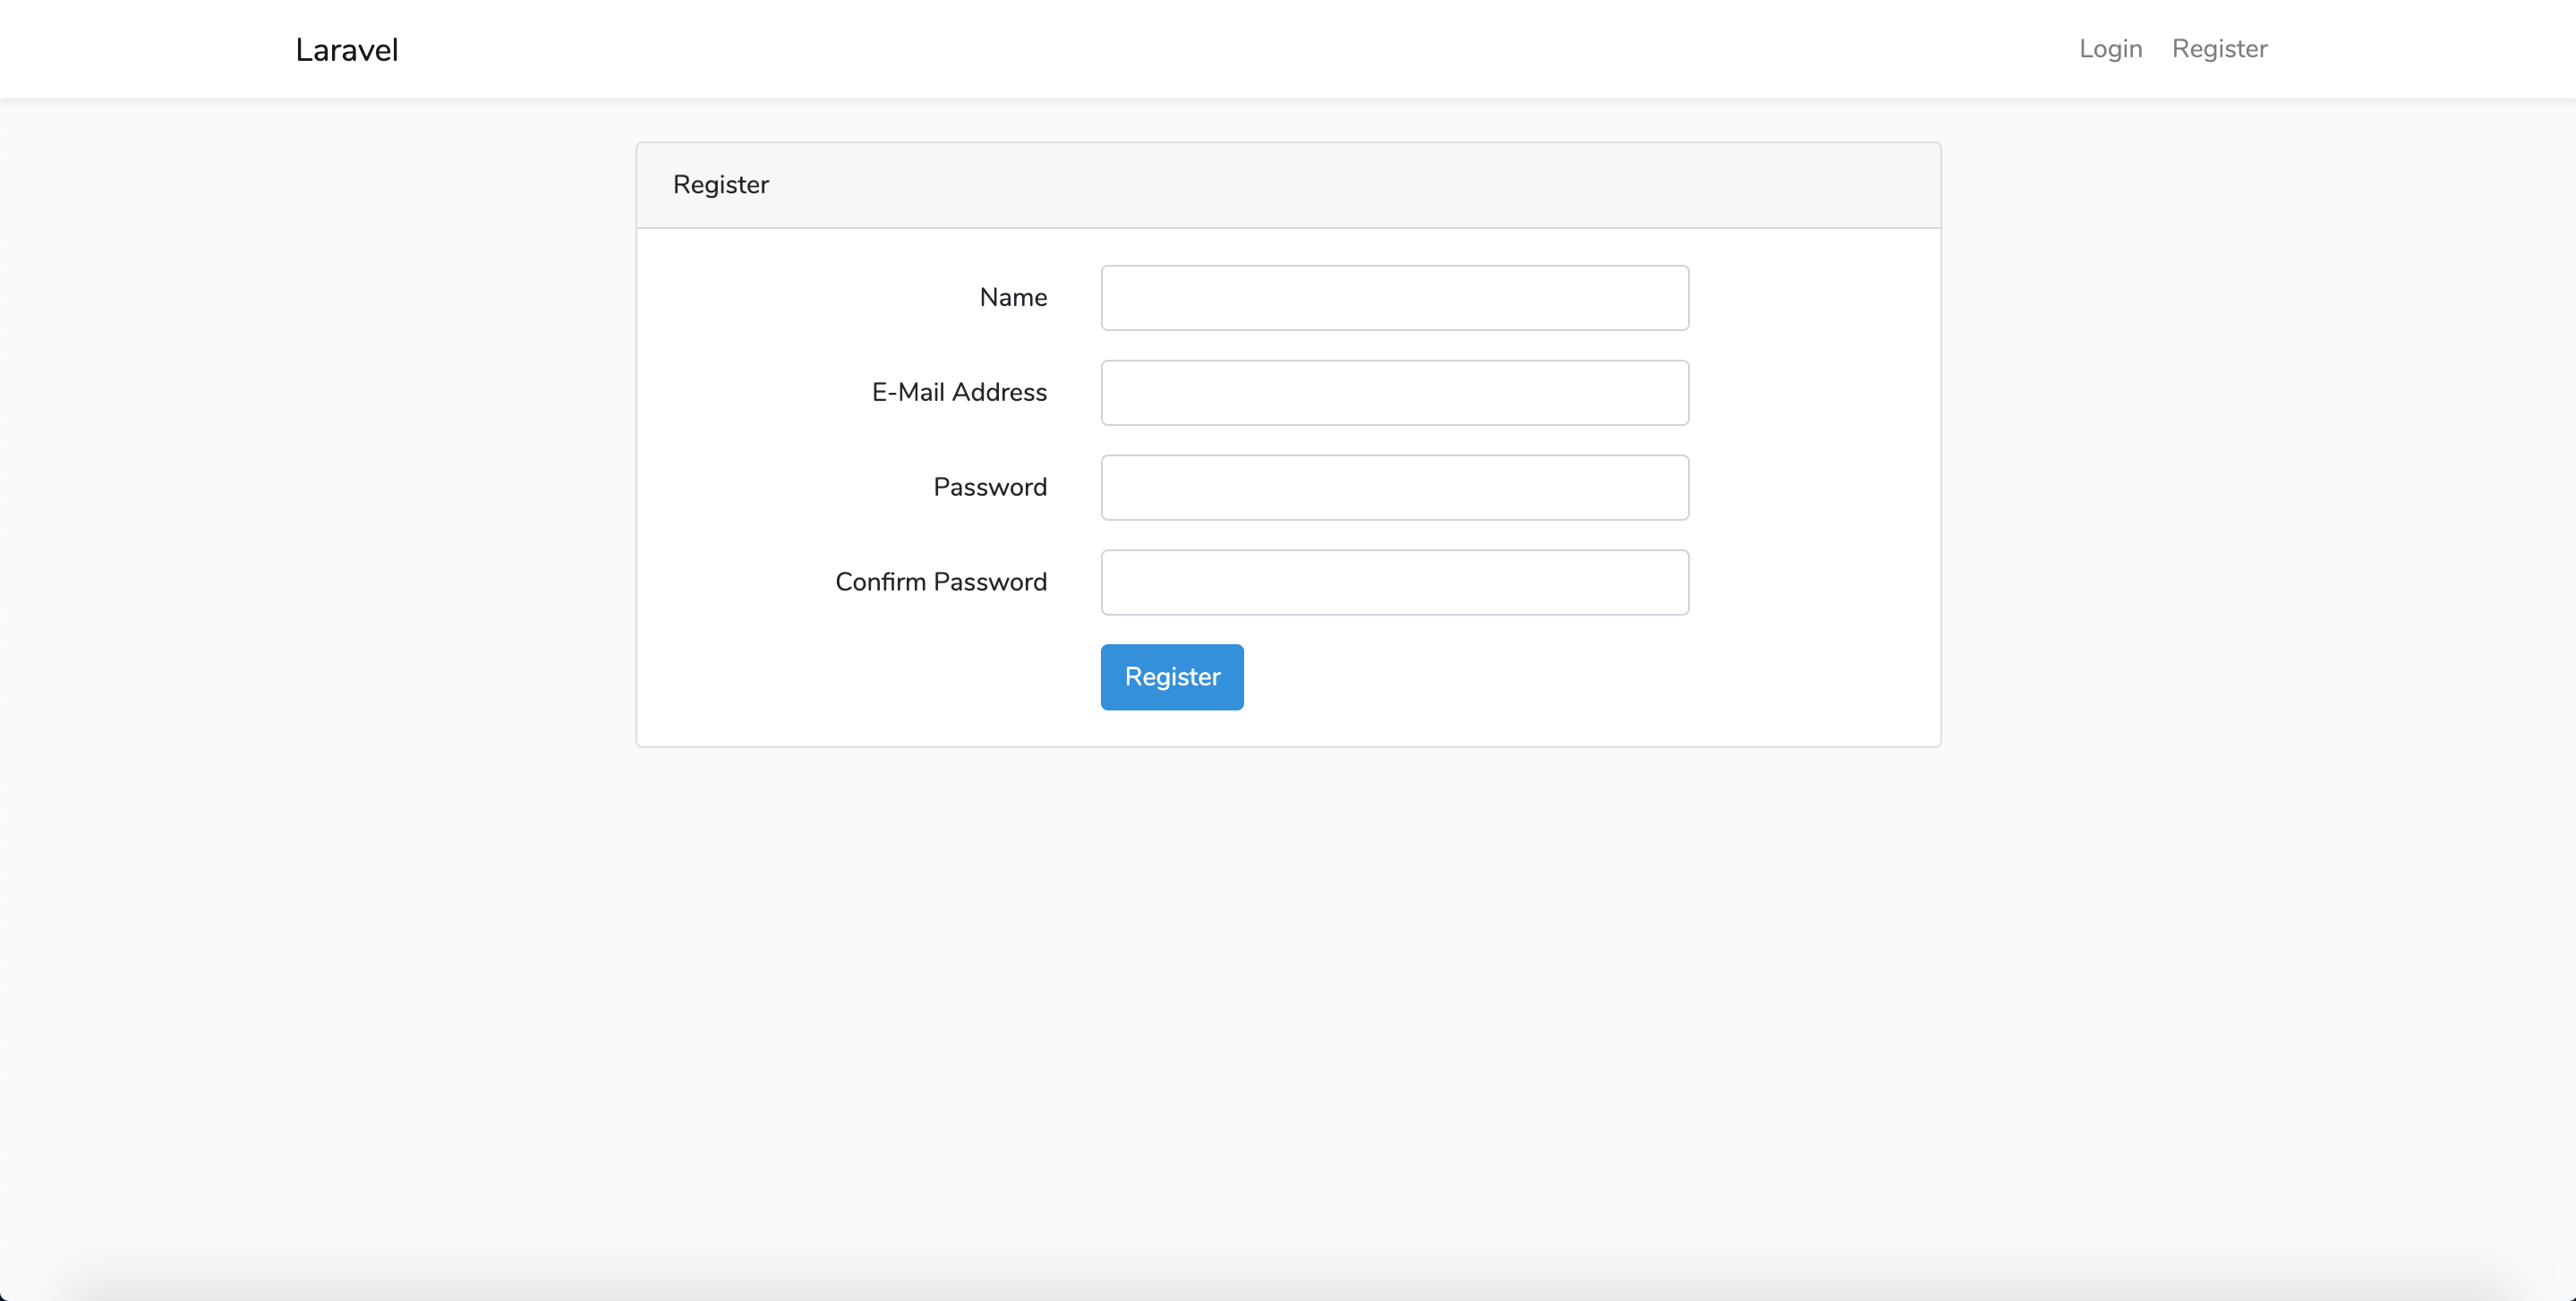
「REGISTER」をクリックする。
下記の画面が出力されることを確認する。
Dockerコンテナ内の
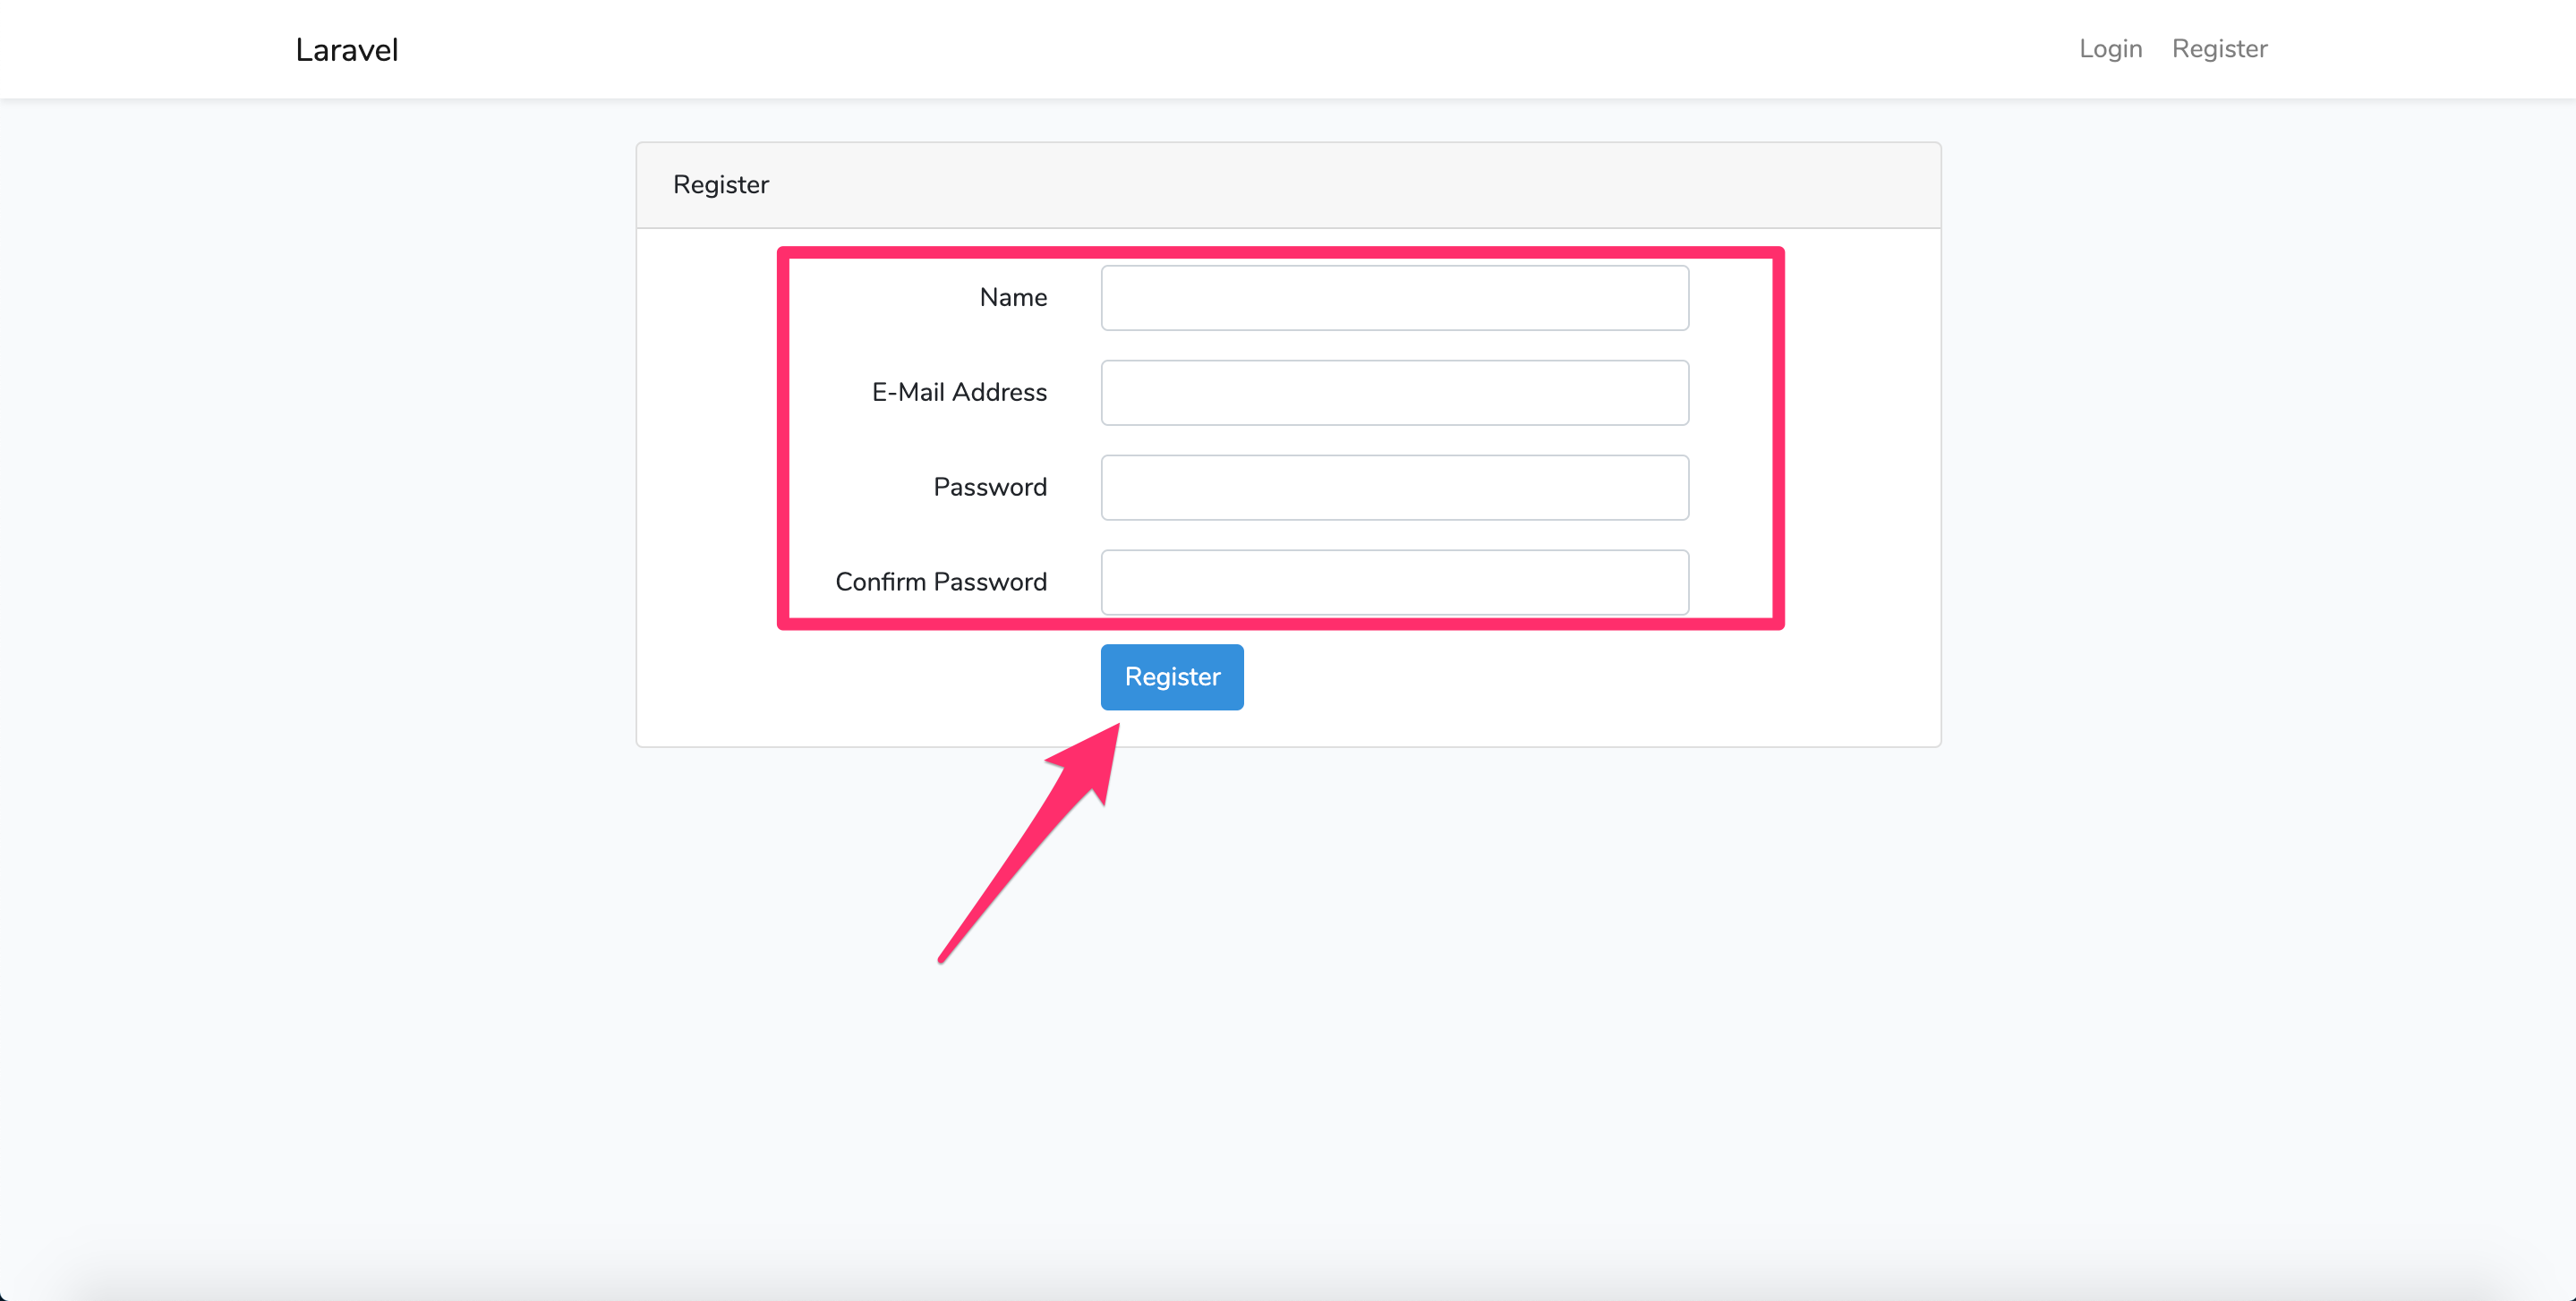
/usr/share/nginx/html/appディレクトリに移動し下記コマンドを実行する。$ php artisan migrate各認証情報を入力し「Registar」をクリックする。
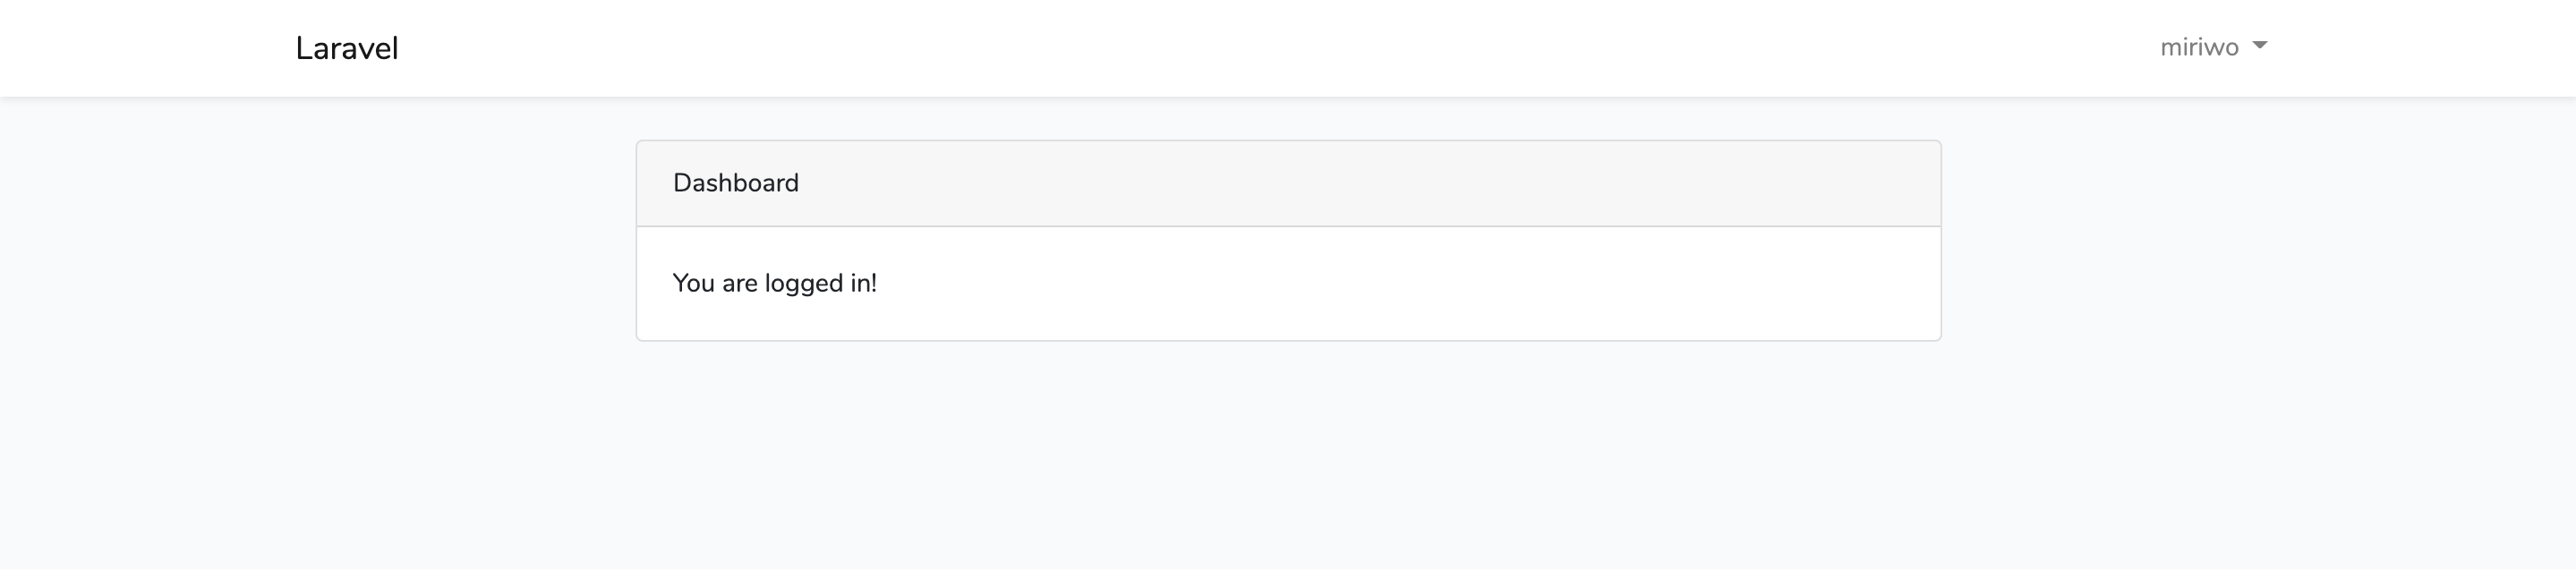
下記の様に初期登録とログインすることができればユーザ認証機能の付与は完了である。
参考文献
- 投稿日:2020-07-06T00:13:20+09:00
Laravelでページネーション
前提条件
eclipseでLaravel開発環境を構築する。デバッグでブレークポイントをつけて止める。(WindowsもVagrantもdockerも)
本記事は上記が完了している前提で書かれています
プロジェクトの作成もapacheの設定も上記で行っていますLaravelでデータベースを操作する(クエリビルダ編)
本記事は上記が完了している前提で書かれています
本記事は上記で作成したフォルダとファイルを使用しますサービスクラス修正
ここで修正するサービスクラスは
Laravelでデータベースを操作する(クエリビルダ編)
で作成したものです
(1) /sample/app/Services/Interfaces/Table2Service.php修正
selectメソッドの引数修正
引数に$limit = null, $page = null, $sort = null追加Table2Service.php‥‥ public function select($id, $varchar_col, $int_col, $datetime_col, $date_col, $time_col, $limit = null, $page = null, $sort = null); ‥‥(2) /sample/tests/Services/Impl/Table2ServiceImpl.php修正
selectメソッドの引数修正
引数に$limit = null, $page = null, $sort = null追加Tests\Services\Impl\Table2ServiceImpl.php‥‥ public function select($id, $varchar_col, $int_col, $datetime_col, $date_col, $time_col, $limit = null, $page = null, $sort = null) { } ‥‥(3) /sample/app/Services/Impl/Table2ServiceImpl.php修正
selectメソッド修正App\Services\Impl\Table2ServiceImpl.php‥‥ public function select($id, $varchar_col, $int_col, $datetime_col, $date_col, $time_col, $limit = null, $page = null, $sort = null) { $columns = [ 'table1.id as table1_id', 'table1.varchar_col as table1_varchar_col', 'table1.int_col as table1_int_col', 'table1.datetime_col as table1_datetime_col', 'table1.date_col as table1_date_col', 'table1.time_col as table1_time_col', 'table2.id as table2_id', 'table2.varchar_col as table2_varchar_col', 'table2.int_col as table2_int_col', 'table2.datetime_col as table2_datetime_col', 'table2.date_col as table2_date_col', 'table2.time_col as table2_time_col', 'table3.id as table3_id', 'table3.varchar_col as table3_varchar_col', 'table3.int_col as table3_int_col', 'table3.datetime_col as table3_datetime_col', 'table3.date_col as table3_date_col', 'table3.time_col as table3_time_col', ]; $db = DB::table('table2') ->leftJoin('table1', 'table2.table1_id', '=', 'table1.id') ->leftJoin('table3', 'table2.id', '=', 'table3.table2_id') ->select($columns); if (!is_null($id)) { $db->where('table2.id', '=', $id); } if (!is_null($varchar_col)) { $db->where('table2.varchar_col', 'like', '%'. addcslashes($varchar_col, '\\_%') . '%'); } if (!is_null($int_col)) { $db->where('table2.int_col', '=', $int_col); } if (!is_null($datetime_col)) { $db->where('table2.datetime_col', '=', $datetime_col); } if (!is_null($date_col)) { $db->where('table2.date_col', '=', $date_col); } if (!is_null($time_col)) { $db->where('table2.time_col', '=', $time_col); } if (!is_null($sort)) { $sortCol = ['table2.id', 'table2.varchar_col', 'table2.int_col', 'table2.datetime_col', 'table2.date_col', 'table2.time_col']; $db->orderBy($sortCol[$sort]); } if (!is_null($page) && !is_null($limit)) { $recordList = $db->paginate($limit, $columns, 'page', $page); } else { $recordList = $db->get(); } return $recordList; } ‥‥大きな修正は$db->paginateメソッドを追加したことです
paginateメソッドの
第1引数は1ページに表示する件数です。
第2引数はselectするカラムです。
今回は
DB::table('table2')
‥‥
->select($columns);
で取得するカラムを指定しているので意味ないです
第3引数はページ番号が送信されてくるHTTPリクエストパラメーター名です。
第4引数はページ番号です。select文ではこの引数-1がoffsetになります
第2引数から第4引数は省略できます。省略した場合、第2引数は[*]、第3引数は'page'、第4引数はnullになり、ページ番号は第3引数名のHTTPパラメーター値になります(第3引数、第4引数を省略すれば、pageという名前のHTTPパラメーター値となる)
今回はクエリビルダを使いましたが、paginateメソッドはEloquentでも使えます
Laravelでデータベースを操作する(Eloquent編)
でEloquentを使うサービスクラスを作成しました。そこではgetメソッドをつかってselectしましたが、getメソッドの部分を今回と同じpaginateメソッドに変更すれば、Eloquentでページネーションできます。クエリビルダのpaginateメソッドもEloquentのpaginateメソッドも引数は同じですフォームリクエストの修正
ここで修正するフォームリクエストは
Laravelでデータベースを操作する(クエリビルダ編)
で作成したものです
/sample/app/Http/Requests/Table2Request.php修正Table2Request.php‥‥ public function rules() { ‥‥ return [ 'id' => [$idRequire, 'numeric', 'max:18446744073709551615'], 'table1_id' => ['nullable', 'numeric', 'max:18446744073709551615'], 'varchar_col' => ['nullable', 'max:255'], 'int_col' => ['nullable', 'integer', 'max:2147483647'], 'datetime_col' => ['nullable', 'date_format:Y-m-d H:i:s'], 'date_col' => ['nullable', 'date_format:Y-m-d'], 'time_col' => ['nullable', 'date_format:H:i:s'], 'limit' => ['nullable', 'integer', 'min:1', 'max:200'], 'page' => ['nullable', 'integer', 'min:1', 'max:2147483647'], 'sort' => ['nullable', 'integer', 'min:0', 'max:5'], ]; } ‥‥limit、page、sortの入力制限を追加しました
Controllerにメソッド追加
(1) /sample/app/Http/Controllers/SampleController.phpにpaginateQueryBuilderメソッドを追記
フォームリクエスト、サービスクラスのuse文は
Laravelでデータベースを操作する(クエリビルダ編)
で書きましたSampleController.phppublic function paginateQueryBuilder(Table2Request $request, Table2Service $table2Service) { if (is_null($request->session()->get('errors'))) { $request->flash(); } $id = $request->input('id'); $varchar_col = $request->input('varchar_col'); $int_col = $request->input('int_col'); $datetime_col = $request->input('datetime_col'); $date_col = $request->input('date_col'); $time_col = $request->input('time_col'); $limit = $request->input('limit') ?? 5; $page = $request->input('page') ?? 1; $sort = $request->input('sort') ?? 0; $recordList = null; if (is_null($request->session()->get('errors'))) { $recordList = $table2Service->select($id, $varchar_col, $int_col, $datetime_col, $date_col, $time_col, $limit, $page, $sort); } $data = [ 'recordList' => $recordList, 'id' => $id, 'varchar_col' => $varchar_col, 'int_col' => $int_col, 'datetime_col' => $datetime_col, 'date_col' => $date_col, 'time_col' => $time_col, 'limit' => $limit, 'page' => $page, 'sort' => $sort ]; return view('sample.paginate', $data); }(2) /sample/routes/web.phpに下記を追記
Route::get('sample/paginate-query-builder', 'SampleController@paginateQueryBuilder');viewの作成
(1) ページネーションビューの作成
ページネーションビューとは前のページへリンク、次のページへリンク、ページ番号リンクを描画するビューです
コマンドラインで
cd sample
php artisan vendor:publish --tag=laravel-pagination
xdebugの設定をしているとeclipseが実行していいですかというプロンプトを出すのでOKを押します
eclipseプロジェクトを右クリック→リフレッシュ
resources/views/vendor/paginationフォルダが現れます。そのフォルダの中に5つファイルができています
その中のbootstrap-4.blade.phpが今回使うページネーションビューになります。
ページネーションビューを独自のデザインにする場合、bootstrap-4.blade.phpを修正してください
今回修正したサービスクラスで使ったpaginateメソッドの戻り値(LengthAwarePaginatorクラスのインスタンス)がデフォルトで使用するページネーションビューがpagination::bootstrap-4です。
LengthAwarePaginator::defaultViewメソッドでデフォルトビューを変えることができます。また、デフォルトビューを変えなくても、後程使うlinksメソッドの第1引数にビュー名を渡すことでもカスタムページネーションビューを使用できます(2) /sample/resources/views/sample/paginate.blade.phpファイル作成
paginate.blade.php<html> <head> <title>sample</title> <style> .sample-table { border-collapse:collapse; white-space: nowrap; border: 1px solid #000000; } .sample-table thead { background-color: #33CCFF; color: #FFFFFF; font-weight: bold; } .sample-table td { padding-left:10px; padding-right:10px; border: 1px solid #000000; } .pagination li { display: inline-block; } </style> </head> <body> <form action="{{ url('sample/paginate-query-builder') }}" method="get"> @error('id') @foreach ($errors->get('id') as $error) <div style="color:red;">{{ $error }}</div> @endforeach @enderror <div>id<input type="text" name="id" value="{{ old('id') }}"></div> @error('varchar_col') @foreach ($errors->get('varchar_col') as $error) <div style="color:red;">{{ $error }}</div> @endforeach @enderror <div>varchar_col<input type="text" name="varchar_col" value="{{ old('varchar_col') }}"></div> @error('int_col') @foreach ($errors->get('int_col') as $error) <div style="color:red;">{{ $error }}</div> @endforeach @enderror <div>int_col<input type="text" name="int_col" value="{{ old('int_col') }}"></div> @error('datetime_col') @foreach ($errors->get('datetime_col') as $error) <div style="color:red;">{{ $error }}</div> @endforeach @enderror <div>datetime_col<input type="text" name="datetime_col" value="{{ old('datetime_col') }}"></div> @error('date_col') @foreach ($errors->get('date_col') as $error) <div style="color:red;">{{ $error }}</div> @endforeach @enderror <div>date_col<input type="text" name="date_col" value="{{ old('date_col') }}"></div> @error('time_col') @foreach ($errors->get('time_col') as $error) <div style="color:red;">{{ $error }}</div> @endforeach @enderror <div>time_col<input type="text" name="time_col" value="{{ old('time_col') }}"></div> @error('limit') @foreach ($errors->get('limit') as $error) <div style="color:red;">{{ $error }}</div> @endforeach @enderror <div>1ページ表示件数<input type="text" name="limit" value="{{ old('limit', 5) }}"></div> <input type="submit" > </form> <br> @isset($recordList) @if ($recordList->total() === 0) <div> 検索結果は0件です </div> @else <table class="sample-table"> <thead> <tr> <td colspan=6>table1</td> <td colspan=6>table2</td> <td colspan=6>table3</td> </tr> <tr> <td>id</td> <td>varchar_col</td> <td>int_col</td> <td>datetime_col</td> <td>date_col</td> <td>time_col</td> <td><a href="{{ $recordList->appends([ 'id' => $id, 'varchar_col' => $varchar_col, 'int_col' => $int_col, 'datetime_col' => $datetime_col, 'date_col' => $date_col, 'time_col' => $time_col, 'limit' => $limit, 'page' => $page, 'sort' => 0]) ->url($recordList->currentPage()) }}" >id</a></td> <td><a href="{{ $recordList->appends([ 'id' => $id, 'varchar_col' => $varchar_col, 'int_col' => $int_col, 'datetime_col' => $datetime_col, 'date_col' => $date_col, 'time_col' => $time_col, 'limit' => $limit, 'page' => $page, 'sort' => 1]) ->url($recordList->currentPage()) }}" >varchar_col</a></td> <td><a href="{{ $recordList->appends([ 'id' => $id, 'varchar_col' => $varchar_col, 'int_col' => $int_col, 'datetime_col' => $datetime_col, 'date_col' => $date_col, 'time_col' => $time_col, 'limit' => $limit, 'page' => $page, 'sort' => 2]) ->url($recordList->currentPage()) }}" >int_col</a></td> <td><a href="{{ $recordList->appends([ 'id' => $id, 'varchar_col' => $varchar_col, 'int_col' => $int_col, 'datetime_col' => $datetime_col, 'date_col' => $date_col, 'time_col' => $time_col, 'limit' => $limit, 'page' => $page, 'sort' => 3]) ->url($recordList->currentPage()) }}" >datetime_col</a></td> <td><a href="{{ $recordList->appends([ 'id' => $id, 'varchar_col' => $varchar_col, 'int_col' => $int_col, 'datetime_col' => $datetime_col, 'date_col' => $date_col, 'time_col' => $time_col, 'limit' => $limit, 'page' => $page, 'sort' => 4]) ->url($recordList->currentPage()) }}" >date_col</a></td> <td><a href="{{ $recordList->appends([ 'id' => $id, 'varchar_col' => $varchar_col, 'int_col' => $int_col, 'datetime_col' => $datetime_col, 'date_col' => $date_col, 'time_col' => $time_col, 'limit' => $limit, 'page' => $page, 'sort' => 5]) ->url($recordList->currentPage()) }}" >time_col</a></td> <td>id</td> <td>varchar_col</td> <td>int_col</td> <td>datetime_col</td> <td>date_col</td> <td>time_col</td> </tr> </thead> <tbody> @foreach ($recordList as $record) <tr> <td>{{ $record->table1_id }}</td> <td>{{ $record->table1_varchar_col }}</td> <td>{{ $record->table1_int_col }}</td> <td>{{ $record->table1_datetime_col }}</td> <td>{{ $record->table1_date_col }}</td> <td>{{ $record->table1_time_col }}</td> <td>{{ $record->table2_id }}</td> <td>{{ $record->table2_varchar_col }}</td> <td>{{ $record->table2_int_col }}</td> <td>{{ $record->table2_datetime_col }}</td> <td>{{ $record->table2_date_col }}</td> <td>{{ $record->table2_time_col }}</td> <td>{{ $record->table3_id }}</td> <td>{{ $record->table3_varchar_col }}</td> <td>{{ $record->table3_int_col }}</td> <td>{{ $record->table3_datetime_col }}</td> <td>{{ $record->table3_date_col }}</td> <td>{{ $record->table3_time_col }}</td> </tr> @endforeach </tbody> </table> @endif @endisset @isset($recordList) {{ $recordList->appends([ 'id' => $id, 'varchar_col' => $varchar_col, 'int_col' => $int_col, 'datetime_col' => $datetime_col, 'date_col' => $date_col, 'time_col' => $time_col, 'limit' => $limit, 'page' => $page, 'sort' => $sort ]) ->links() }} @endisset </body> </html>thead->tr->tdタグ内のaタグのhref属性では
$recordList->appends()->url()を実行してます。$recordListはLengthAwarePaginatorクラスのインスタンスです。
$recordList->currentPage()は現在のページ番号を返します
url($recordList->currentPage())は$recordList->currentPage()ページのURLを返します。
$recordList->appendsはurl()が返すURLに付加するクエリ文字列です
よく見ていただくと、appendsメソッドに渡している配列のsort要素の値を変えていますpaginate.blade.php下部に書いた
$recordList->appends()->links()は先ほど生成したbootstrap-4.blade.phpを描画します
linksメソッドの第1引数にビュー名を渡すことでbootstrap-4.blade.phpではないカスタムページネーションビューを描画することもできます
appendsメソッドは先ほど説明した通りページリンクURLに付加するクエリ文字列です動作確認
http://localhost/laravelSample/sample/paginate-query-builder
にアクセスすると画面下部にページリンクが描画されていますPOSTに対応してみる
今作成したものはGETメソッドに対応したものでした。
多くの場合、検索はGETメソッドで大丈夫でしょうが、
検索条件がたくさん設置され、長い文字列カラムが検索条件に入っている場合など、GETメソッドにした場合、URLの文字列制限に引っかかり、URLのクエリ文字列が途中で切れてしまうこともあります
そのような事情で検索をPOSTメソッドで実装した場合に対応してみましょう(1) まず、resources/views/sample/paginate.blade.phpのformタグのmethod属性値をpostに変え、sample/routes/web.phpに定義した'sample/paginate-query-builder'のルーティングをRoute::getからRoute::match(['get', 'post']に変更します(今回は動作確認でsample/paginate-query-builderに直リンクするためgetも許容しておく)
(2) resources/views/vendor/pagination/bootstrap-4.blade.php修正
@if ($paginator->hasPages())直下(2行目)に下記を追記@php $___paginatorHiddenFunc = function ($name, $value) use (&$___paginatorHiddenFunc) { if (is_array($value)) { foreach ($value as $k => $v) { $___paginatorHiddenFunc($name . '[' . $k . ']', $v); } } else { echo '<input type="hidden" name="' . htmlspecialchars($name, ENT_QUOTES) . '" value="' . htmlspecialchars($value, ENT_QUOTES) . '">'; } }; $___paginatorQueryList = null; parse_str(parse_url($paginator->url(1), PHP_URL_QUERY), $___paginatorQueryList); @endphpやっていることは2つです
type属性値がhiddenのinputタグを出力するメソッドを定義している($___paginatorHiddenFunc)
1ページ目のページリンクのクエリ文字列を配列として取得している($___paginatorQueryList)bootstrap-4.blade.phpにはaタグが3つ書いてあります
前のページへリンク、ページ番号リンク、次のページへリンクです
これらをformタグに直します前のページへリンク
<form action="{{ $paginator->path() }}" method="post"> @csrf @foreach ($___paginatorQueryList as $___paginatorQueryName => $___paginatorQueryValue) @if ($___paginatorQueryName === $paginator->getPageName()) @php $___paginatorHiddenFunc($___paginatorQueryName, $paginator->currentPage() - 1); @endphp @elseif ($___paginatorQueryName !== '_token') @php $___paginatorHiddenFunc($___paginatorQueryName, $___paginatorQueryValue); @endphp @endif @endforeach <input type="submit" value="‹"> </form>ページ番号リンク
<form action="{{ $paginator->path() }}" method="post">
    @csrf
    @foreach ($___paginatorQueryList as $___paginatorQueryName => $___paginatorQueryValue)
        @if ($___paginatorQueryName === $paginator->getPageName())
            @php $___paginatorHiddenFunc($___paginatorQueryName, $page); @endphp
        @elseif ($___paginatorQueryName !== '_token')
            @php $___paginatorHiddenFunc($___paginatorQueryName, $___paginatorQueryValue); @endphp
        @endif
    @endforeach
    <input type="submit" value="{{$page}}">
</form>
次のページへリンク
<form action="{{ $paginator->path() }}" method="post"> @csrf @foreach ($___paginatorQueryList as $___paginatorQueryName => $___paginatorQueryValue) @if ($___paginatorQueryName === $paginator->getPageName()) @php $___paginatorHiddenFunc($___paginatorQueryName, $paginator->currentPage() + 1); @endphp @elseif ($___paginatorQueryName !== '_token') @php $___paginatorHiddenFunc($___paginatorQueryName, $___paginatorQueryValue); @endphp @endif @endforeach <input type="submit" value="›"> </form>やっていることは
配列として取得した1ページ目のページリンクのクエリ文字列($___paginatorQueryList)をループし
type属性値がhiddenのinputタグを出力するメソッド($___paginatorHiddenFunc)を実行しているだけです(3) resources/views/sample/paginate.blade.phpファイル作成
thead->tr->tdタグ内のaタグをformタグに変更します<form action="{{ $recordList->path() }}" method="post"> @csrf <input type="hidden" name="id" value="{{ $id }}"> <input type="hidden" name="varchar_col" value="{{ $varchar_col }}"> <input type="hidden" name="int_col" value="{{ $int_col }}"> <input type="hidden" name="datetime_col" value="{{ $datetime_col }}"> <input type="hidden" name="date_col" value="{{ $date_col }}"> <input type="hidden" name="time_col" value="{{ $time_col }}"> <input type="hidden" name="limit" value="{{ $limit }}"> <input type="hidden" name="sort" value="0">{{-- ここは各カラムの番号にする --}} <input type="hidden" name="page" value="{{ $page }}"> <input type="submit" value="id">{{-- ここは各カラム名にする --}} </form>動作確認
http://localhost/laravelSample/sample/paginate-query-builder
にアクセスします
ページリンクをクリックするとPOST送信できました
見た目は自由にCSSで変えてください