- 投稿日:2020-05-30T23:29:47+09:00
個人アプリ開発期間中のメモ
?5/30
jqueryは複数バージョン入れると起動しなくなる。
?5/27
= link_to の中に= link_to を埋め込むと上に定義した= link_to が消される(上書きされる)
ページネーションを真ん中に表示させる方法
.pagination {
justify-content: center;
}
ページネーションのビューを変える方法(bootstrap4を導入してる前提)
rails g kaminari:views bootstrap4?5/26
importantは多様使用しない
夢と魔法のeach文の使い方を覚えた
?cssには適用する優先順位が存在する。
上から順に読まれる
全称セレクタ * 0
タイプセレクタ p 1
擬似要素 :first-child 1
擬似クラス [type="text"] 10
classセレクタ .fugafuga 10
idセレクタ #piyopiyo 100
要素に直書き style="" 1000?5/25のアウトプット
empty?は配列が空か確認する
nil?は配列が存在するか確認する
:tag_idsで送られてくるからparamsも同じにする 勝手に[ ]をつけない
1cm=40px?undefined method `include?'
whereで出る場合はid系列を指定してないから?jQuery
html("")とempty()は同じ意味だけどemptyのほうが直感的に分かりやすい。
removeはdivごと消す。呼び出すまで復帰しないforegin_key = 入口
source = 出口?collectionとmember
7つの基本アクション以外でルーティングを定義する時には
collectionかmemberを利用します。
collectionはルーティングにidがつかない。全て出る
memberはURLにidがつく。条件指定可能。どのユーザーのIDの一覧かが指定できる。◎throughとsourceの関係性
情報をかき集めてきてuserテーブルに返ってくるイメージform_withはremote: trueがデフォルト
?findメソッドとfind_byメソッドの違いや使い分け
◎findメソッド
・検索するIDがわかっている場合
・最初の1件のテーブルのカラムしか持ってこれない(複数カラム持ってこれない)
例)@tweet = Tweet.find(id: params[:tweet_id])
これはカラム1つを持ってくるからok
@like = Like.find(tweet_id: params[:tweet_id], user_id: current_user.id)
これはエラーになる。複数のテーブルからカラムを持ってきてるから◎find_byメソッド
・検索するIDが不明で、別の条件でレコード検索をしたい場合
・2つ以上のIDで1つのライクを限定して検索する時はfind_by(複数条件指定できるから)
@like = Like.find_by(tweet_id: params[:tweet_id], user_id: current_user.id)
これはエラーにならない◎個人アプリ構想
紙に書いて書き出す
イメージして移せる
細かく書いておく。忘れたら見直す
大体紙に書いておく
トップは崩れてもいいぐらい
ビューは作り込みすぎない
とりあえず作る。何が足りないのかを知る
2個め作るくらいの勢い
理想としながら技術
分からないことがとても不安になるforeign_key
参照先を参照する外部キーの名前を指定できる(デフォルトは、参照先のモデル名_id)外部キー制約は、外部キーの対応するレコードが必ず存在しなくてはいけないという制約です。外部キーのカラムに値があっても、その値を主キーとして持つ他のテーブルのレコードがなければいけません。
buildとcreateの違い
記録する範囲が異なる
build()メソッドはインスタンスをメモリ上にのみ記録する
create()メソッドはテストデータベース上にも保存して、データを永続化させる
使い分け
DBに書き込むのは時間がかかるので、DBに保存する必要がないときはbuildを使う
属性のチェックだけの場合もbuildで済む外部キー制約を学びなおしたけど、親?にあたるtweet_id消えてもエラー起きなかった
?今日の学び
やたらめったら外部キー制約をかけるもんじゃない。
データの整合性を取るために削除できなくなる。お互いが引っ張り合うイメージ
記事が削除できなくて、commentsテーブルのreferences型のid達をintegerに変えたら削除できたから
削除する予定があるものに外部キー制約をかけてはいけない!!!!?今日の学び
外部キー制約をかけたカラムは、削除しようとするとMySQLエラーが出る。
対処するには、そのカラムに関連してるテーブルを全てdown状態にしてから編集する!!?kaminari の英語表記を日本語に変えられた!
ymlファイルを編集してdefalut_localeをja.ymlに変えたmargin 0 autoを使う時はwidthとセットだよ
jqueryで中のアクションでidを指定するときは'[id=id]'
?アソシエーションとは
① モデルクラスにhas_manyやbelongs_toなどのメソッドで関係が定義されている
② 所属する側のテーブルに所属するモデル名_idというカラムがある?references型を使う時の注意
_idがいらない(「tweet_id」が「:tweet」に)。自動的にindexが貼られる。ローカル変数とインスタンス変数の違い(スコープ)
@マーク付けたらどこでも使えるけど、なかったら、そのメソッド内でしか使えない復習の大切さを痛感
もう1度自分で1から作業をすることでかなりインプットになった。
理解はできてるけど忘れてるコードがたくさんあった。
nicknameカラムを送れるようにするdevise_parameter_sanitizerはrequireみたいな意味
カラムを消す時はrollbackじゃなくてちゃんとカラムを削除する。同じデータが2個できた◎labelとインプットで便利な仕組みづくり
labelにforを指定してinputにidを指定すると、labelをクリックしただけでinputが動く
facebookのログインページ
dependent: :destroyを貼る
◎今日の共有
rsとかのショートカットの説明
ナイトモードでドライアイ軽減1つのモデルの中に「1対多」の関係を見出したら、モデルを分けましょう。
?ER図
◎エンティティ
データのまとまり(顧客とか名前が入ったテーブルの)
◎アトリビュート
属性情報つまり中身のこと(顧客カラムとか名前カラムとか)
◎リレーション
テーブル間の関係
◎カーディナリティ
一対多の関係
・他にも様々な記法があるから、書くたびに調べる?referemces型
userって書くだけでuser_idの形にしてくれる
indexを自動で貼ってる
foreignキーとセット◎ajaxの404はurl(行き先)を確認する
500はサーバーが悪いエラー?404 Not Found
ページが見つからない場合に使われるステータスコードです。
画面に大きく「404」と表示されることも多いので一般の方でも知っている方が多いと思います。人によっては考え方が分かれるところかもしれませんが、私はリソースが見つからないことがクライアントにとって異常なのか正常なのかを考えて404と200を使い分けるようにしています。
イメージしやすいようにいくつか具体例を挙げます。GET /resources/:idでリソースが見つからない場合
クライアントが存在しないidを指定しているため404を返却TODOリストを取得するGET /todosでTODOが0件の場合
TODOが0件ということは正常動作なので200を返却お店検索で絞り込み条件を指定したら0件になった
クライアントが指定した条件に合致するお店がなかったの404を返却
SEO観点でも0件のお店検索結果ページを検索エンジンにインデックスさせたくないので404を指定することでインデックスさせない。?500 Internal Server Error
サーバーで予期せぬエラーが発生した場合に使用します。
プログラムで明示的に500エラーを発生させることはあまりないと思うので、明示的に500エラーを返却している箇所があったら適切なエラーを返却するように修正した方が良いと思います。?謎のmysql消失エラー
mysqlがディレクトリになってない
権限が変わってた?
mysqlと5.6を全部消した
rm -rf mysql
空っぽの残骸を1つずつ消していった。ohishikaido@ohishi-MacBook-Air mysql % rm -rf .local.pid
ohishikaido@ohishi-MacBook-Air ~ % brew uninstall mysql@5.6
ohishikaido@ohishi-MacBook-Air var % sudo chown -R "$(whoami)":admin /usr/local/var/mysql
ohishikaido@ohishi-MacBook-Air Cellar % rm -rf mysql
hishikaido@ohishi-MacBook-Air ~ % sudo rm -rf /usr/local/mysql
ohishikaido@ohishi-MacBook-Air ~ % sudo rm -rf /Library/StartupItems/MYSQL
ohishikaido@ohishi-MacBook-Air ~ % sudo rm -rf /Library/PreferencePanes/MySQL.prefPane
ohishikaido@ohishi-MacBook-Air ~ % sudo rm -rf /Library/Receipts/mysql-.pkg
ohishikaido@ohishi-MacBook-Air ~ % sudo rm -rf /usr/local/Cellar/mysql*
zsh: no matches found: /usr/local/Cellar/mysql*
ohishikaido@ohishi-MacBook-Air ~ % sudo rm -rf /usr/local/bin/mysql*
zsh: no matches found: /usr/local/bin/mysql*
ohishikaido@ohishi-MacBook-Air ~ % sudo rm -rf /usr/local/var/mysql*
ohishikaido@ohishi-MacBook-Air ~ % sudo rm -rf /usr/local/etc/my.cnf
ohishikaido@ohishi-MacBook-Air ~ % sudo rm -rf /usr/local/share/mysql*
zsh: no matches found: /usr/local/share/mysql*
ohishikaido@ohishi-MacBook-Air ~ % sudo rm -rf /usr/local/opt/mysql*
zsh: no matches found: /usr/local/opt/mysql*
ohishikaido@ohishi-MacBook-Air ~ % cd
ohishikaido@ohishi-MacBook-Air ~ % brew install mysql@5.6
ohishikaido@ohishi-MacBook-Air ~ % mysql.server start
- 投稿日:2020-05-30T22:42:41+09:00
rails newしたときにインストールしている最新のRailsバージョンでアプリが作成されない場合の対処法
rails newを実行したときにインストールしているRailsの最新バージョンでアプリが作成されず、どハマりしたので投稿します。はじめに
バージョンを指定せずに
rails newすると、インストールしているRailsの最新バージョンでアプリが作成されます。
が、私が遭遇したのはrails newすると最新版ではなく、古いバージョンでアプリが作成されるという現象でした。しかもそのバージョンはgem listコマンドでも表示されないバージョンでした。。問題の原因
先に原因を書くと、環境変数の設定に問題がありました。
/usr/local/binが/Users/user_name/.rbenv/shimsより先に定義されており、$PATHは先に書いたほうが優先されるため、/usr/local/bin/railsが使われたことが原因でした。
つまり、rbenvで管理されているRailsのバージョンではなく、macにインストールされているRailsが参照されていました。$ echo $PATH /usr/local/bin:(中略)/Users/user_name/.rbenv/shims:/Users/user_name/.rbenv/bin: (以下略)問題発生から解決までの流れ
起きたこと
新規のアプリを作成しようとして
rails newコマンドをバージョン指定無しで実行したところ、インストールしている最新バージョン(6.0.3)ではなく、古いバージョン(5.2.3)で作成されました。Gemfilesource 'https://rubygems.org' git_source(:github) { |repo| "https://github.com/#{repo}.git" } ruby '2.3.7' # Bundle edge Rails instead: gem 'rails', github: 'rails/rails' gem 'rails', '~> 5.2.3' (以下略)Railsのバージョンを確認したところ5.2.3になっていたのですが、
gem listコマンドで確認したバージョンには5.2.3は含まれていませんでした。$ rails -v Rails 5.2.3
which railsでRailsの実行場所を確認すると、/usr/local/bin/railsになっていました。こうなっていた原因は上に書いたとおり、環境変数でrbenvのパスより先に/usr/local/bin/railsが定義されていたためです。$ which rails /usr/local/bin/rails蓋を開けてみると単純な問題だったのですが、一度gemをすべてアンインストールしたりと無駄なこともしてしまったので、同じ問題で困った方の助けになれば幸いです。
他に原因として考えられること
rails -vで存在しないはずのRailsのバージョンが表示されるときは、railtiesも疑わしい場合があるようです。
Railsのバージョンがなんかおかしい時はrailtiesをチェック - かなりすごいブログ
- 投稿日:2020-05-30T21:16:19+09:00
【Ruby】親クラスと子クラスの関係。クラスとインスタンスの関係。
初学者の備忘録。
親クラスと子クラスの関係、クラスとインスタンスの関係について、少し混乱したので。
4つは全てオブジェクトであり、オブジェクトはクラスを包含する概念。
○クラスとインスタンスの関係
・クラスを元にして、インスタンスという「オブジェクト」が作られる。
・クラス内で定義されたメソッドは、「インスタンス.メソッド」のようにして呼び出すことができる。
・@〇〇〇のような、クラス内で定義されたインスタンス変数は、インスタンス内でも呼び出すことができる。○親クラスと子クラスの関係
・親クラスを元に、子クラスという新しい「クラス」が作られる。
・子クラスでは、親クラスで定義されたメソッドを、同名のメソッドを定義することで変更できる(オーバーライド )。
- 投稿日:2020-05-30T21:07:11+09:00
Ruby モジュール入門
Ruby モジュール入門
Rubyの機能であるモジュールですが、Rubyを始めた方にとって理解が難しい部分の一つではないかと感じています。
そこで今回はモジュールについてまとめていこうと思います。
モジュールの機能
● ミックスイン( includeとextend )
● 名前空間の作成
● 関数やメソッドを提供する他にも機能はありますが、3つ主要な機能を挙げてみました。
今日はこれらについてみていきたいと思います。ミックスイン
ミックスインと言われてもなんのことだかわからないと思いますが、
モジュールをクラスに組み込むことで多重継承を行えるようになります。
Rubyではclassの単一継承しかできませんが、moduleは多重継承が可能です。
またclassと違いis-aの関係(あるオブジェクトが「あるクラスもしくはその子孫クラスのインスタンスである」という関係)でなくても同じ機能を共有できます。追記:is-aの関係の説明について修正いたしました。コメントをいただきありがとうございます。
include
ruby.rbmodule Hoge def hello puts 'Hello' end end module Bar def bye puts 'Bye' end end class Greet #上で作ったモジュールをinclude include Hoge include Bar end greet = Greet.new greet.hello #=> "Hello" greet.bye #=> "Bye"以上のようにincludeすることでクラスはモジュールで定義されたメソッドを使えるようになります。
このようにモジュールをクラスにincludeして機能を追加することをミックスインといいます。extend
extendを使うとモジュール内のメソッドをクラスメソッドにすることができます。
ruby.rbmodule Hoge def hello puts 'Hello' end end class Greet #上で作ったモジュールをextend extend Hoge end #クラスメソッドとしてhelloを呼び出せる Greet.hello #=> "Hello"こんな感じでincludeやextendでモジュールで定義したメソッドをクラス内で使えるのが、
モジュールの使い方の一つであるミックスインです。名前空間を提供する
モジュール名の中にクラスを書くとモジュールに属するクラスという意味になり
名前の衝突を防ぐことができます。module Bar class Baz def self.foo puts 'foo' end end end #Barというモジュールに属するBazクラスよりfooメソッドを呼び出した。 Bar::Baz.foo #=> "foo"エンジニアとして働いてから感じたことですが、
名前空間ってかなり使う機会が多いんですよね。
というのもプロジェクトが大きくなればなるほど名前の衝突が起こる危険性があるので
こうして名前空間を設定して衝突を防ぐということを頻繁に行っています。関数やメソッドを定義する
定数
モジュール内で定義した定数は、モジュール名を経由して呼び出すことが可能。
ruby.rbmodule Hoge Year = "2020" end Hoge::Year #=> "2020"メソッド
インスタンスメソッドはmodule_functionメソッドを使って、メソッドをモジュール関数にすることで呼び出すことができるようになります。
ruby.rbmodule Hoge def hello puts 'Hello' end module_function :hello end Hoge.hello #=> "Hello"モジュールのまとめは以上になります。
本日で100日後に一人前になるエンジニアの連載10日目でした。1人前のエンジニアになるまであと90日
- 投稿日:2020-05-30T21:05:40+09:00
TECH CAMP 7,8週目
TECH CAMPは7週目より最終課題に入っています。最終課題はメルカリのクローンフリマアプリのチーム開発。ちなみに私がチームのスクラムマスターで、5名で開発を推進してます。ひとつひとつのタスクの工数がきちんと把握できていない中での調整は難しいですが、今のところバランス良く進められているかなと感じています。
進め方としては、全員でデータベース設計をし、完了後にまず全てのページの表示に必要なルーティング、コントローラー、ビューを用意、そこからそれぞれのページのマークアップを全員に振り分けます(1〜2ページ/人)。その後、サーバーサイドを全員に振り分けます。これにより全員が様々なページ/機能に触れられるかなと考えたんですが、タスクによっては時間がかかるものがあり、そのメンバーはひとつの機能実装の深堀ばっかりになってしまい、そこは少し申し訳なかったなと思います。【担当した実装】
・商品購入確認ページのマークアップ
・商品詳細ページのマークアップ
・ウィザード形式を用いたユーザー新規登録、ログイン、ログアウト機能
・カテゴリ表示、選択機能スクラムマスターは指示出しをしつつ、もちろん開発も行います。この中でも難しく感じたカテゴリ機能実装を以下に残しておきます。
・カテゴリ表示、選択機能
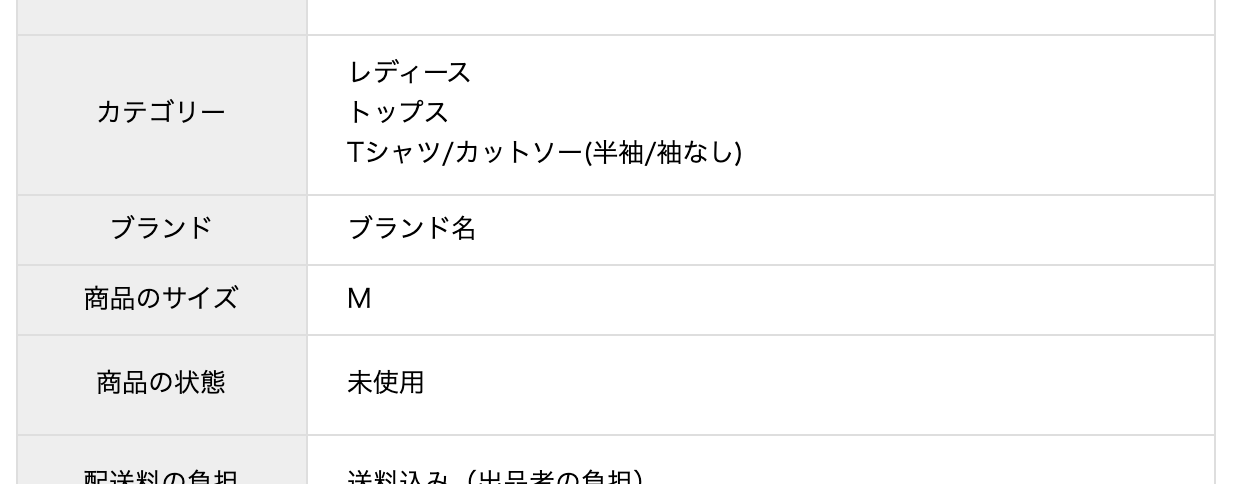
まずは商品詳細ページへの表示です。
このように、3階層のカテゴリの表示を行います。例えば、”レディース”の中の”トップス”の中の”Tシャツ”のような感じです。データベース設計時に3つのテーブルが必要では?との案もありましたが、調べてみると、以下のgemを使用する事でひとつのテーブルで可能ということがわかりました。gem 'ancestry'bundle installし、has_ancestryとモデルに記述。
app/models/category.rbclass Category < ApplicationRecord has_many :items has_ancestry endさて、データベースに大量のカテゴリ情報をどう入力するのか‥。ということで調べるとCSVファイルを読み込ませる方法が。まずはヘッダーに全カテゴリが入力済みだったので(メンバーよ、ありがとう!)これをスプレットシートにコピペし、関数でカテゴリ名のみ抜き出しました。そして下記ファイルにこのように記述。
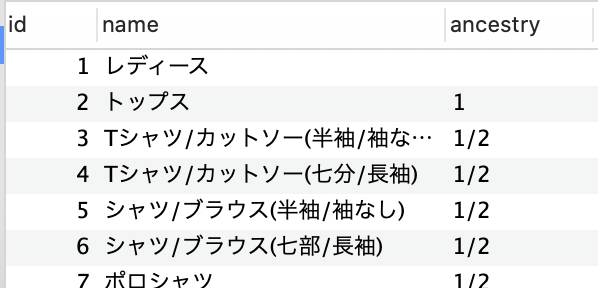
db/seeds.rbrequire "csv" CSV.foreach('db/category.csv', headers: true) do |row| Category.create( name: row['name'], ancestry: row['ancestry'] ) enddbファイル下にCSVファイルを移動し、ターミナルで$rake db:seedを行うとデータベースに読み込まれます。
こんな感じです。親カテゴリのancestryカラムはnullで、その子カテゴリのancestryカラムには親カテゴリのidが入ります。その孫カテゴリのancestryカラムには親カテゴリのid/子カテゴリのidが入ります。
そして表示させるためにコントローラーのshowアクションにこのように記述。こうする事でカテゴリテーブルの親、子、孫を呼び出せるそう(parentやchildで)。なんて便利なgemなんだ。app/controllers/items_controller.rbdef show @items = Item.find(params[:id]) @grandchild = Category.find(@items.category_id) @child = @grandchild.parent @parent = @child.parent endそしてビューを編集。これで表示は完了です。
app/views/items/show.html.haml%th カテゴリー %td = @parent.name %br = @child.name %br = @grandchild.name次は商品出品時のカテゴリ選択機能です。(苦手な)ajaxを使った動的な実装です。
こんな感じ。
まずはルーティングでアクション先を指定。
config/routes.rbresources :items do collection do get 'category/get_category_children', to: 'items#get_category_children', defaults: { format: 'json' } get 'category/get_category_grandchildren', to: 'items#get_category_grandchildren', defaults: { format: 'json' } end endコントローラーへ記述。
app/controllers/items_controller.rbdef new @category = Category.where(ancestry: "").limit(13) end def get_category_children @category_children = Category.find(params[:parent_id]).children end def get_category_grandchildren @category_grandchildren = Category.find(params[:child_id]).children endjbuilderファイルを作成。
app/views/items/get_category_children.json.jbuilderjson.array! @category_children do |child| json.id child.id json.name child.name endapp/views/items/get_category_grandchildren.json.jbuilderjson.array! @category_grandchildren do |grandchild| json.id grandchild.id json.name grandchild.name endビューを編集。
app/views/items/new.html.haml.status_register = form_with(model: @item, local: true) do |form| .status_register__status_category_group .status_register__status_category_group__category .status_register__status_category_group__category__register_title カテゴリー .status_register__status_category_group__category__choose = form.collection_select :category_id, @category, :id, :name,{prompt: '---'}, {id: 'parent_category'}最後にjsファイルを作成します。親カテゴリ選択後に子カテゴリのセレクトボックスが出現、がなかなかうまくいかず時間がかかりました。コンソールで見るとイベント発火が確認出来ていたので、単純にhtmlのところかなと思いますが、かなりいじったのできちんとした原因がわからず‥。しまった‥。
他のメンバー&自分のためにコメントアウト残してますが、そのまま貼ります。app/assets/javascripts/category.js//この1行目の記述でリロード時に動作。カリキュラムでは削除していたturbolinks関連の記述を削除しないよう注意 $(document).on('turbolinks:load', function(){ $(function(){ //オプション設定 function appendOption(category){ var html = `<option value="${category.id}" data-category="${category.id}">${category.name}</option>`; return html; } //子カテゴリー表示(items/new.html.hamlのカテゴリー選択部分を編集した場合は要確認) function appendChidrenBox(insertHTML){ var childSelectHtml = ''; childSelectHtml = `<div class='status_register__status_category_groupl__category__choose__added' id= 'children_wrapper'> <div class='status_register__status_category_group__category__choose1'> <i class='fas fa-chevron-down status_register__status_category_group__category__choose--arrow-down'></i> <select class="status_register__status_category_group__category__choose--select" id="child_category" name="item[category_id]"> <option value="---" data-category="---">---</option> ${insertHTML} <select> </div> </div>`; $('.status_register__status_category_group__category__choose').append(childSelectHtml); } //孫カテゴリー表示(items/new.html.hamlのカテゴリー選択部分を編集した場合は要確認) function appendGrandchidrenBox(insertHTML){ var grandchildSelectHtml = ''; grandchildSelectHtml = `<div class='status_register__status_category_group__category__choose__added' id= 'grandchildren_wrapper'> <div class='status_register__status_category_group__category__choose2'> <i class='fas fa-chevron-down status_register__status_category_group__category__choose--arrow-down'></i> <select class="status_register__status_category_group__category__choose__box--select" id="grandchild_category" name="item[category_id]"> <option value="---" data-category="---">---</option> ${insertHTML} </select> </div> </div>`; $('.status_register__status_category_group__category__choose').append(grandchildSelectHtml); } //親カテゴリー選択後イベント発火 $('#parent_category').on('change', function(){ //選択された親カテゴリーのidを取得 var parent_category_id = document.getElementById ('parent_category').value; $.ajax({ url: '/items/category/get_category_children', type: 'GET', data: { parent_id: parent_category_id }, dataType: 'json' }) .done(function(children){ //親カテゴリが変更された時に子・孫カテゴリを削除する $('#children_wrapper').remove(); $('#grandchildren_wrapper').remove(); var insertHTML = ''; children.forEach(function(child){ insertHTML += appendOption(child); }); appendChidrenBox(insertHTML); }) //エラー警告 .fail(function(){ alert('再度カテゴリーを選択してください'); }) }); //子カテゴリー選択後イベント発火 $('.status_register__status_category_group__category').on('change','#child_category', function(){ //選択された子カテゴリーのidを取得 var child_category_id = $('#child_category option:selected').data('category'); $.ajax({ url: '/items/category/get_category_grandchildren', type: 'GET', data: { child_id: child_category_id }, dataType: 'json' }) .done(function(grandchildren){ if (grandchildren.length != 0) { //子カテゴリが変更された時に孫カテゴリを削除する $('#grandchildren_wrapper').remove(); var insertHTML = ''; grandchildren.forEach(function(grandchild){ insertHTML += appendOption(grandchild); }); appendGrandchidrenBox(insertHTML); } }) //エラー警告 .fail(function(){ alert('再度カテゴリーを選択してください'); }) }); }); });これにて完了です。
参考記事があり大変助かりました。
データベース設計時にこのancestryを使用する方法に辿り着いて良かったです。みんなで検索して見つけたのかな?最初に親テーブル、子テーブル、孫テーブルがそれぞれ必要だ!と主張していたのは自分でしたが(笑)参考
・Rails5でjqueryを動かす方法
・多階層カテゴリでancestryを使ったら便利すぎた
・多階層セレクトボックスの実装
・f.collection_selectについて
・【Rails】rake seedコマンドでCSVファイルからDBに読み込ませる方法
- 投稿日:2020-05-30T20:56:43+09:00
Rails Deviseでユーザー編集をパスワードを入力しないで更新する方法
Rails Deviseでユーザー編集をパスワードを入力しないで更新する方法
Deviseで現在のパスワードを入力せずにユーザ情報を更新する方法をまとめます。
目次
動作環境
OS : macOS Mojave 10.14.6
ruby : 2.6.5p114
rails : 5.2.4
devise : 4.7.1前提条件
すでにgemのインストールからviewの作成までの手順が終わっていると仮定します。
- devise gemのインストール済
- rails generate devise install済
- rails generate devise:views済
- usersテーブルにnameなどのデフォルト以外のカラムが追加済
手順概略
STEP1. 新規登録のためのストロングパラメータを
application_controllerに追加STEP2.
registrations_controller.rbをcontrollers/users/に作成し,更新するためのストロングパラメータを追加, ルーティングを修正STEP3. パスワード無しでアップデートするためのメソッドを
registrations_controller.rbとuser.rbに記載STEP4. Viewからcurrent_passwordフィールドを削除する
詳細手順
新規登録のためのストロングパラメータの設定
現状では後から追加したnameのパラメータはstrongパラメータではじかれてしまうため
application_controllerに以下のコードを記載します.application_controller.rbclass ApplicationController < ActionController::Base before_action :configure_permitted_parameters, if: :devise_controller? protected def configure_permitted_parameters devise_parameter_sanitizer.permit(:sign_up, keys: [:name]) end endコンソールで確認するとnameパラメータを受け取りユーザを作成できています.
irb(main):001:0> User.create(name: 'abc' , email:'abc@example.com',password:'123456')
   (1.3ms)  COMMIT
=> #<User id: 2, email: "abc@example.com", created_at: "2020-05-30 10:41:46", updated_at: "2020-05-30 10:41:46", name: "abc">
次はviewにnameの入力フィールドを記載します.
new.html.erb<h2>Sign up</h2> <%= form_for(resource, as: resource_name, url: registration_path(resource_name)) do |f| %> <%= render "devise/shared/error_messages", resource: resource %> <div class="field"> <%= f.label :email %><br /> <%= f.email_field :email, autofocus: true, autocomplete: "email" %> </div> //追加 <div class="field"> <%= f.label :name %><br /> <%= f.text_field :name, autofocus: true, autocomplete: "name" %> </div> <div class="field"> <%= f.label :password %> <% if @minimum_password_length %> <em>(<%= @minimum_password_length %> characters minimum)</em> <% end %><br /> <%= f.password_field :password, autocomplete: "new-password" %> </div> <div class="field"> <%= f.label :password_confirmation %><br /> <%= f.password_field :password_confirmation, autocomplete: "new-password" %> </div> <div class="actions"> <%= f.submit "Sign up" %> </div> <% end %> <%= render "devise/shared/links" %>これでuserの新規登録は完了です。
アップデートのストロングパラメータの設定
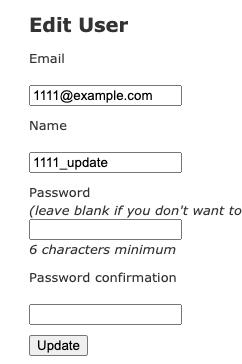
次にユーザ編集用のviewにもnameフィールドを追加します.
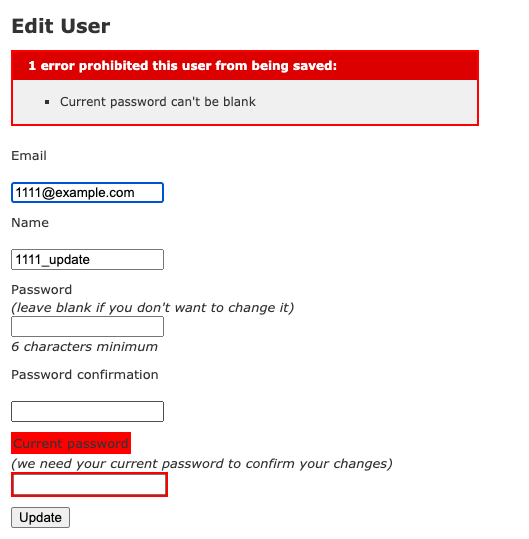
edit.html.erb//追加 <div class="field"> <%= f.label :name %><br /> <%= f.text_field :name, autofocus: true, autocomplete: "name" %> </div>ここでアップデートボタンを押してもnameはupdateされないことがわかります.
そこでnameカラムをアップデートするために
users/registrations_controller.rbを作成し,以下のように記載します.registrations_controller.rbclass Users::RegistrationsController < Devise::RegistrationsController before_action :configure_account_update_params, only: [:update] protected def configure_account_update_params devise_parameter_sanitizer.permit(:account_update, keys: [:name]) end endそして、この
registartions_controllerを参照するためにルーティングを修正します.routes.rbRails.application.routes.draw do root 'blogs#index' #変更箇所 devise_for :users, controllers: { registrations: 'users/registrations' } resources :blogs endするとUsersのnameカラムがアップデートできるようになります.
パスワード無しで更新するためのメソッドを定義
ただ,現時点ではcurrent_passwordを入力しないとupdateの際にエラーになります.
そこで, まずはuserモデルにパスワード無しでアップデートするメソッドを定義します.
user.rbclass User < ApplicationRecord # Include default devise modules. Others available are: # :confirmable, :lockable, :timeoutable, :trackable and :omniauthable devise :database_authenticatable, :registerable, :recoverable, :rememberable, :validatable //追加するメソッド def update_without_current_password(params, *options) params.delete(:current_password) if params[:password].blank? && params[:password_confirmation].blank? params.delete(:password) params.delete(:password_confirmation) end result = update_attributes(params, *options) clean_up_passwords result end endその後,
registrations_controllerからupdate_without_passwordを呼び出します.registrations_controller.rbclass Users::RegistrationsController < Devise::RegistrationsController before_action :configure_account_update_params, only: [:update] protected //追加(必須) def update_resource(resource, params) resource.update_without_password(params) end //必須ではないがupdate後にtop画面にリダイレクトするメソッド def after_update_path_for(_resource) blogs_path end def configure_account_update_params devise_parameter_sanitizer.permit(:account_update, keys: [:name]) end endviewファイルからcurrent_passwordフィールドの削除
viewファイルから
current_passwordを削除します.edit.html.erb//削除 <div class="field"> <%= f.label :current_password %> <i>(we need your current password to confirm your changes)</i><br /> <%= f.password_field :current_password, autocomplete: "current-password" %> </div>結果
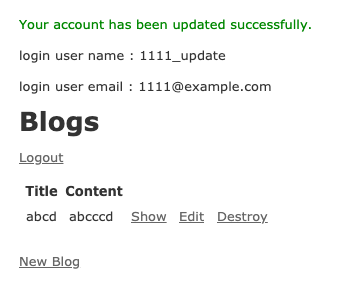
エラーが出ずにuser nameがアップデートされていることがわかります.
- 投稿日:2020-05-30T20:25:48+09:00
form_withで、フォームの大きさを変える
form_withとform_forどっちを使えばいいのか?
違いがわからずにいました。登録フォームを作る際に、
railsチュートリアルや、スクールのカリキュラムでは,form_forを使っていましたが、現場で使える Ruby on Rails 5速習実践ガイドでは、form_withが使われていました。どうやら、トレンドはform_withみたいですね。
この記事が、まとまっていてわかりやすかった。
【Rails】form_withの使い方を徹底解説!
form_withの使い方については、本記事では割愛します。フォームの初期値
実際にフォームを実装していると、初期設定のフォームは小さく感じる。
ユーザーの観点で考えると、かなり使いにくそう。よく使うであろう、form.text_fieldとform.text_areaの幅の初期値は以下の通り。
form.text_field#form.text_field #幅30文字。初期値について、以下はわざと記載しているが本来記載されていない。 <%= form.text_field :name, size: 30 %>form.text_area#form.text_area #初期値は40x20。初期値について、以下はわざと記載しているが本来記載されていない。 <%= form.text_area :description, , size: "40x20" %>フォームの大きさを変える
フォームの幅を指定する<%= form.text_field :name, size: 40 %> <%= form.text_area :description, size: "40x20" %>結論:
sizeの値を変えるだけで、幅が広がります。
form.text_fieldとform.text_areaの初期の幅が違うので、レイアウト的に合わせたいなら、
上記のように値を合わせれば、いいと思います。新規投稿画面
     <%= form_with model: @question, local: true do |form| %>

        <div class="form-group">
          <%= form.label :name, 'Title', class: 'form-control' %>
          <%= form.text_field :name, placeholder: "what is about?", size: "50" %>
        </div>
        <div class="form-group">
          <%= form.label :description, 'Content', class: 'form-control' %>
          <%= form.text_area :description,  placeholder: "Please your comments in 500 words", size: "50x10"%>
        </div>
        <div class="form-group, text-white">
          <%= form.label :image %>
          <%= form.file_field :image %>
        </div>
        <%= form.submit 'Submit', class:'btn-block btn-success btn-lg' %>

     <% end %>
作成中の登録フォームです。
自分はform.text_fieldとform.text_areaの幅は、50文字で合わせています。余談ですが、placeholderを設定しておくと、ユーザーがフォームを記入する際の助けになって良さげそうです。
にしても全然関係ないですが、labelを使うと見た目が、ガツガツしてて疲れるので、pタグにしてしまおうか悩み中です。(実際にpタグに置き換えてもform_withは正常に動きました。)
それと、form_withを実装するのに、以下の記事が大変役立ちました。
連日格闘したform_withとの戦いに決着をつけてきたそれでは!
- 投稿日:2020-05-30T20:16:21+09:00
【Rails】本番環境との画像参照の切り替え方について
この記事について
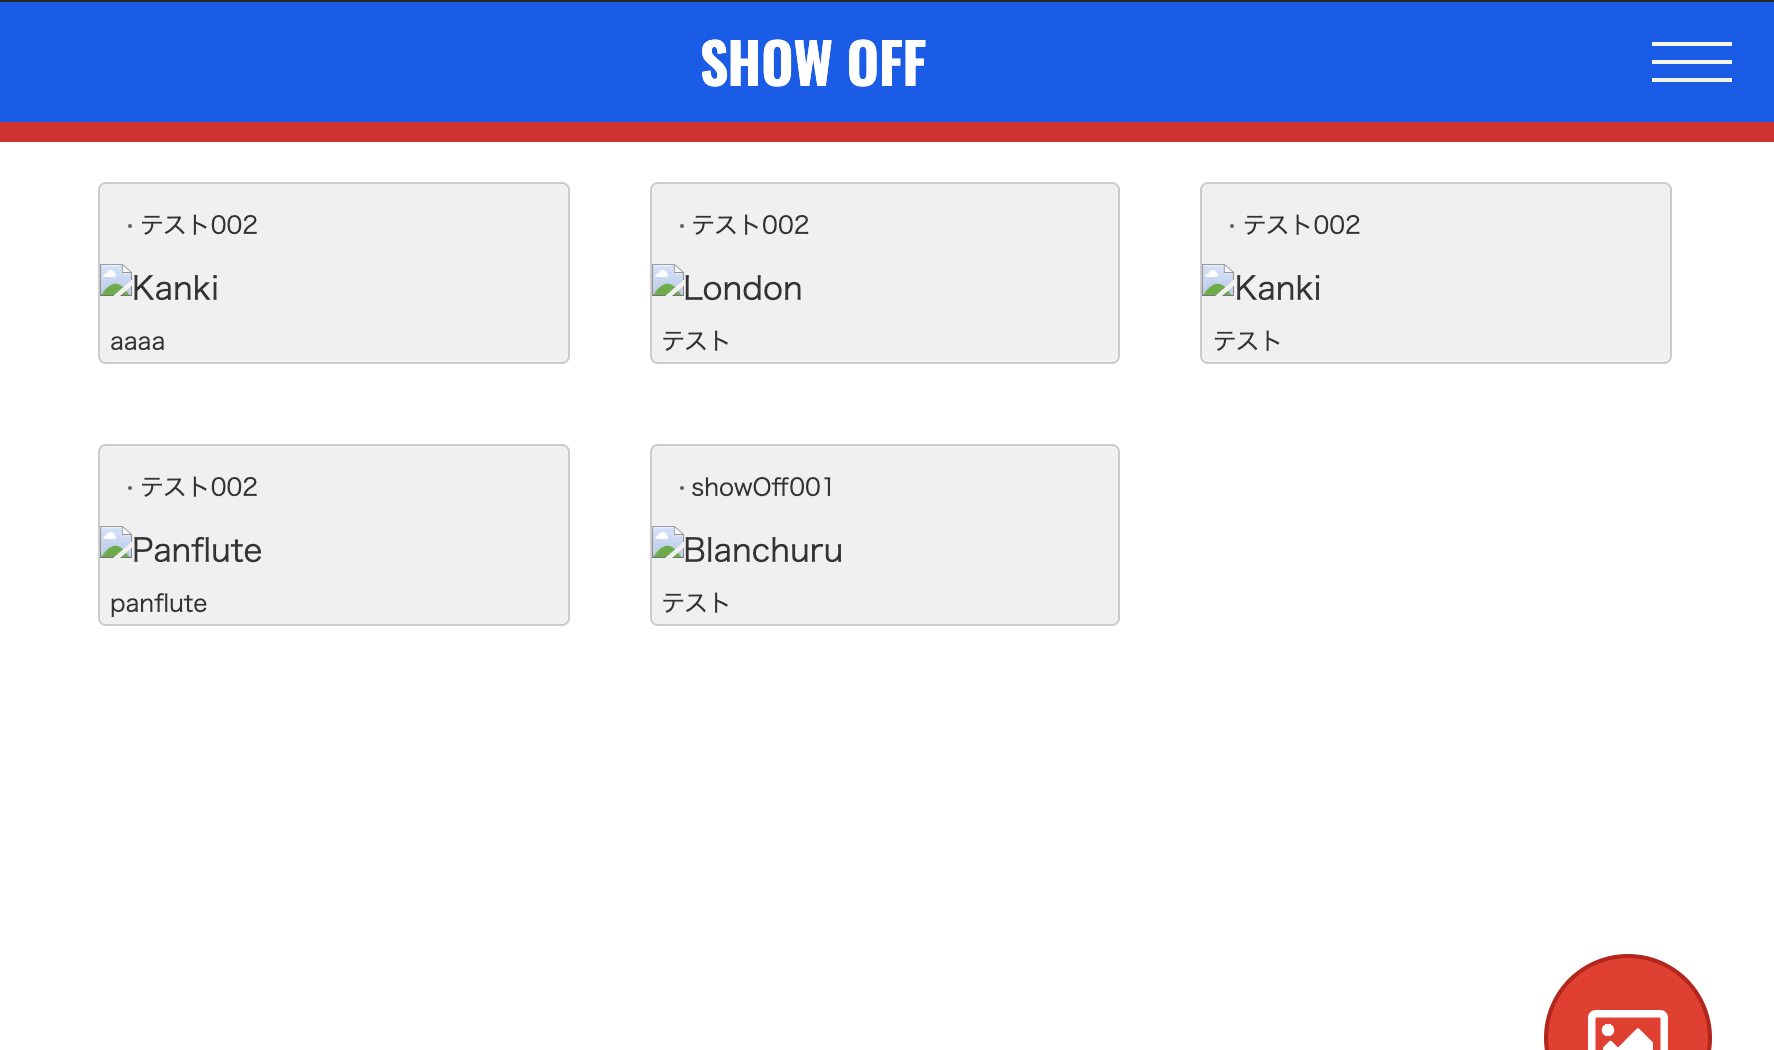
デプロイを済ませたアプリを、ローカル環境で画像投稿するとなぜか全てNoImageになってしまう!
それの原因がわかったので記事にします。
おそらく、僕と同じで某プログラミングスクールを卒業した人は高確率でこの問題にぶつかっているんじゃないかな?と思っています。
なぜなら、カリキュラムに書いてある内容には、この問題について触れていないから(笑こんな感じ
全部NoImageになっちゃってるじゃん!!(汗
解決方法
/config/initializers/carrierwave.rbの記述で、本番とローカルで参照を分岐させる処理がなかったので追加して解決しました。カリキュラムには
carrierwave.rbというファイルを作成して、修正前のソースコードを記述しましょう。としか書かれていなかったんですね。
なので、ここでこのファイルが何をしているのか。をしっかり理解できていないと、コピペして満足してしまいます(笑修正前carrierwave.rbrequire 'carrierwave/storage/abstract' require 'carrierwave/storage/file' require 'carrierwave/storage/fog' CarrierWave.configure do |config| config.storage = :fog config.fog_provider = 'fog/aws' config.fog_credentials = { provider: 'AWS', aws_access_key_id: Rails.application.secrets.aws_access_key_id, aws_secret_access_key: Rails.application.secrets.aws_secret_access_key, region: 'ap-northeast-1' } config.fog_directory = 'ここはアプリごとに異なる' config.asset_host = 'https://s3-ap-northeast-1.amazonaws.com/ここはアプリごとに異なる' endなので、
if Rails.env.production?で本番かローカルかで参照する箇所を分岐させます。
本番だったらAWS、ローカルだったらstorageを:fileに。といった感じですね。修正後carrierwave.rbrequire 'carrierwave/storage/abstract' require 'carrierwave/storage/file' require 'carrierwave/storage/fog' CarrierWave.configure do |config| if Rails.env.production? config.storage = :fog config.fog_provider = 'fog/aws' config.fog_credentials = { provider: 'AWS', aws_access_key_id: Rails.application.secrets.aws_access_key_id, aws_secret_access_key: Rails.application.secrets.aws_secret_access_key, region: 'ap-northeast-1' } config.fog_directory = 'ここはアプリごとに異なる' config.asset_host = 'https://s3-ap-northeast-1.amazonaws.com/ここはアプリごとに異なる' else config.storage :file config.enable_processing = false if Rails.env.test? end endこれを記述して、再度
rails sをし直しましょう!
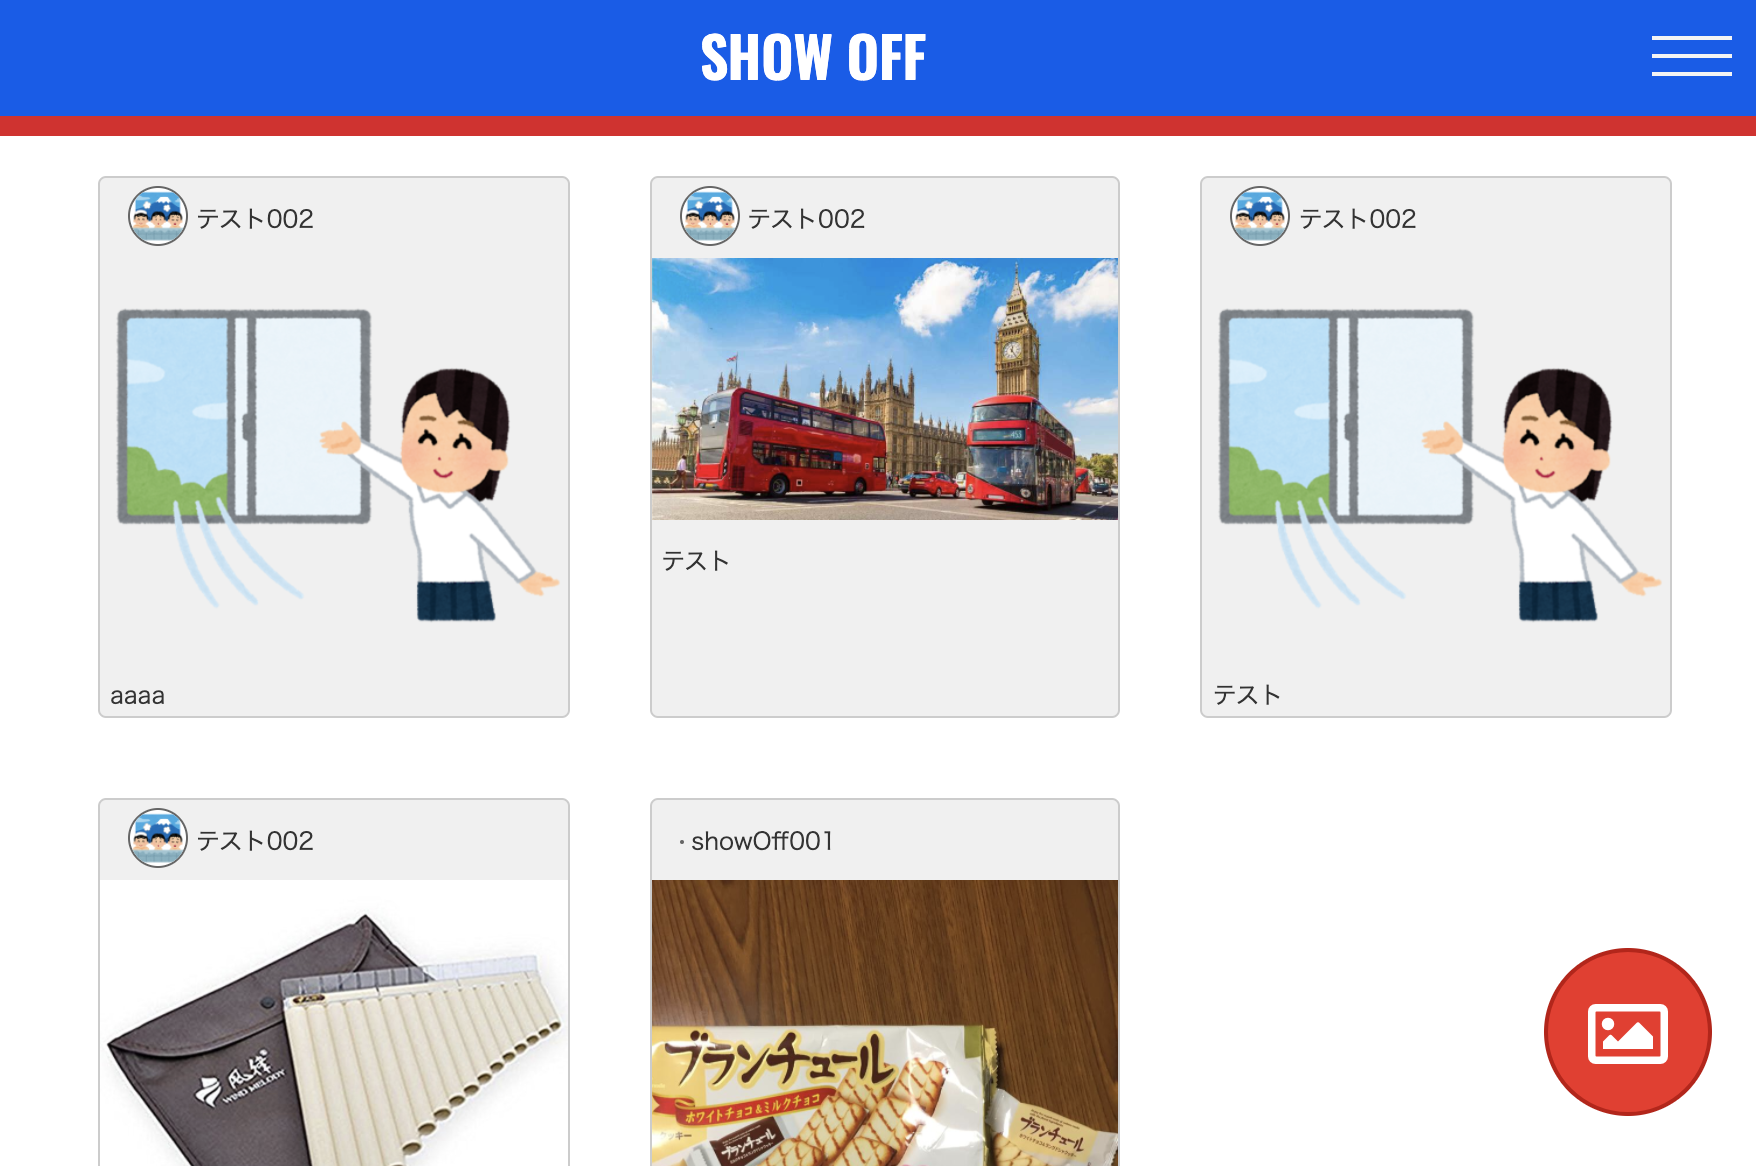
じゃないと修正内容が反映されないのでお気をつけて!はい。反映されました!
さいごに
理解している人からすれば「そりゃそうだ」っていう話ですが、やっぱり初学者はこういう当たり前の問題にぶつかりがちな気がします。
ですので、もし同じような事に悩まされている方がいて、この記事がお手伝いなったら嬉しいなぁ。と思っています。それでは、ありがとうございました!
- 投稿日:2020-05-30T20:14:22+09:00
アプリケーションサーバーとwebサーバーの違い
詳しくは、下記サイトがとてもわかりやすかったです!
https://kitsune.blog/affiliate-build結論
rubyなど、動的な動きを実現させるために必要なのが
アプリケーションサーバー。でも、大多数からのアクセスへの負荷には対応していいないため
webサーバーも必要になります。アプリケーションサーバー
- Puma
- Unicon など
webサーバー
- Nginx
- など
- 投稿日:2020-05-30T19:57:17+09:00
Rails consoleのIncorrect string valueエラー対応
概要
Rails Consoleでcsvインポート中に以下のエラーが出たのでその対応記録
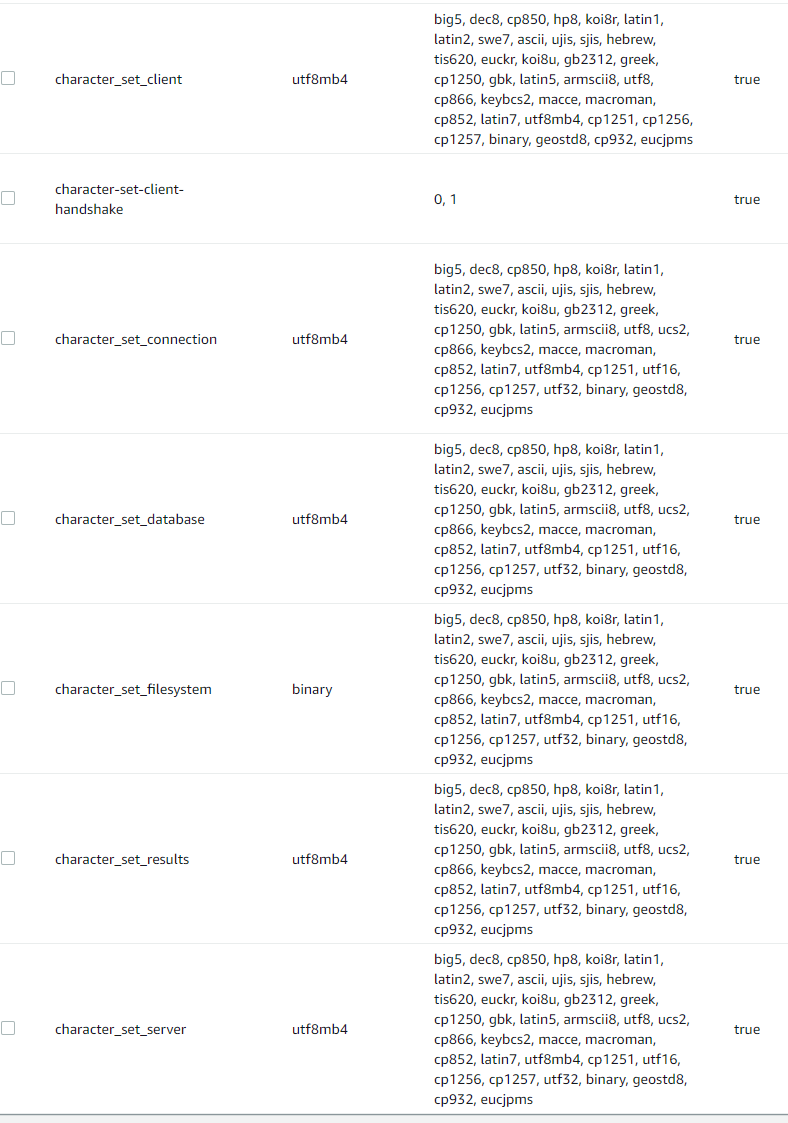
ActiveRecord::StatementInvalid:
Mysql2::Error: Incorrect string value: '\xE3\x82\xA8\xE3\x82\xB3...'
for column 'name' at row 1:
INSERT INTO `contracts` (`account_id`, `name`, `created_at`, `updated_at`)
VALUES (101, 'エコノミー', '2020-05-30 01:50:58', '2020-05-30 01:50:58')
from /usr/local/bundle/gems/mysql2-0.4.10/lib/mysql2/client.rb:120:in `_query'
character_set_databaseの対応
character_set_database、character_set_serverがlatin1になっていた。
MySQL [example]> show variables like "chara%";
+--------------------------+-------------------------------------------------+
| Variable_name            | Value                                           |
+--------------------------+-------------------------------------------------+
| character_set_client     | utf8mb4                                         |
| character_set_connection | utf8mb4                                         |
| character_set_database   | latin1                                          |
| character_set_filesystem | binary                                          |
| character_set_results    | utf8mb4                                         |
| character_set_server     | latin1                                          |
| character_set_system     | utf8                                            |
| character_sets_dir       | /rdsdbbin/oscar-5.7.12.200076.0/share/charsets/ |
+--------------------------+-------------------------------------------------+
8 rows in set (0.001 sec)
AWS RDS Auroraのパラメータグループでutf8mb4に設定
MySQL [example]> show variables like "chara%";
+--------------------------+-------------------------------------------------+
| Variable_name            | Value                                           |
+--------------------------+-------------------------------------------------+
| character_set_client     | utf8mb4                                         |
| character_set_connection | utf8mb4                                         |
| character_set_database   | utf8mb4                                         |
| character_set_filesystem | binary                                          |
| character_set_results    | utf8mb4                                         |
| character_set_server     | latin1                                          |
| character_set_system     | utf8                                            |
| character_sets_dir       | /rdsdbbin/oscar-5.7.12.200076.0/share/charsets/ |
+--------------------------+-------------------------------------------------+
8 rows in set (0.001 sec)
DEFAULT_CHARACTER_SET_NAMEの対応
それでもエラーが出たので継続調査。
DEFAULT_CHARACTER_SET_NAMEがlatin1になっていた。MySQL [example]> select * from INFORMATION_SCHEMA.SCHEMATA; +--------------+--------------------+----------------------------+------------------------+----------+ | CATALOG_NAME | SCHEMA_NAME | DEFAULT_CHARACTER_SET_NAME | DEFAULT_COLLATION_NAME | SQL_PATH | +--------------+--------------------+----------------------------+------------------------+----------+ | def | information_schema | utf8 | utf8_general_ci | NULL | | def | example | latin1 | latin1_swedish_ci | NULL | | def | mysql | latin1 | latin1_swedish_ci | NULL | | def | performance_schema | utf8 | utf8_general_ci | NULL | | def | sys | utf8 | utf8_general_ci | NULL | | def | tmp | latin1 | latin1_swedish_ci | NULL | +--------------+--------------------+----------------------------+------------------------+----------+ 6 rows in set (0.004 sec) MySQL [example]> SELECT @@character_set_database, @@collation_database; +--------------------------+----------------------+ | @@character_set_database | @@collation_database | +--------------------------+----------------------+ | latin1 | latin1_swedish_ci | +--------------------------+----------------------+ 1 row in set (0.000 sec)以下のSQLでutf8mb4に設定
MySQL [example]> ALTER DATABASE example CHARACTER SET utf8mb4 COLLATE utf8mb4_bin;

MySQL [example]> SELECT @@character_set_database, @@collation_database;
+--------------------------+----------------------+
| @@character_set_database | @@collation_database |
+--------------------------+----------------------+
| utf8mb4                  | utf8mb4_bin          |
+--------------------------+----------------------+
1 row in set (0.000 sec)
テーブルのDEFAULT CHARSETの対応
それでもエラーが出たので、テーブルを調査。
DEFAULT CHARSETがlatin1になっていた。MySQL [example]> SHOW CREATE TABLE contracts; +-----------+-----------------------------------------------------------------------------------------------------------------------------------------------------------------------------------------------------------------------------------------------------------------------------------------------------------------------------------------------------------------------------------------------------------------------------------------------------------------------------------------------------------------------------------------------+ | Table | Create Table | +-----------+-----------------------------------------------------------------------------------------------------------------------------------------------------------------------------------------------------------------------------------------------------------------------------------------------------------------------------------------------------------------------------------------------------------------------------------------------------------------------------------------------------------------------------------------------+ | contracts | CREATE TABLE `contracts` ( `id` int(11) NOT NULL AUTO_INCREMENT, `account_id` int(11) DEFAULT NULL, `name` varchar(255) DEFAULT NULL, `created_at` datetime NOT NULL, `updated_at` datetime NOT NULL, PRIMARY KEY (`id`) ) ENGINE=InnoDB DEFAULT CHARSET=latin1 | +-----------+-----------------------------------------------------------------------------------------------------------------------------------------------------------------------------------------------------------------------------------------------------------------------------------------------------------------------------------------------------------------------------------------------------------------------------------------------------------------------------------------------------------------------------------------------+ 1 row in set (0.006 sec)以下のSQLでutf8mb4に設定
MySQL [example]> ALTER TABLE contracts CONVERT TO CHARACTER SET utf8mb4;

MySQL [example]>  SHOW CREATE TABLE contracts;
+-----------+------------------------------------------------------------------------------------------------------------------------------------------------------------------------------------------------------------------------------------------------------------------------------------------------------------------------------------------------------------------------------------------------------------------------------------------------------------------------------------------------------------------------------------------------+
| Table     | Create Table                                                                                                                                                                                                                                                                                                                                                                                                                                                                                                                                   |
+-----------+------------------------------------------------------------------------------------------------------------------------------------------------------------------------------------------------------------------------------------------------------------------------------------------------------------------------------------------------------------------------------------------------------------------------------------------------------------------------------------------------------------------------------------------------+
| contracts | CREATE TABLE `contracts` (
  `id` int(11) NOT NULL AUTO_INCREMENT,
  `account_id` int(11) DEFAULT NULL,
  `name` varchar(255) DEFAULT NULL,
  `created_at` datetime NOT NULL,
  `updated_at` datetime NOT NULL,
  PRIMARY KEY (`id`)
) ENGINE=InnoDB DEFAULT CHARSET=utf8mb4 |
+-----------+------------------------------------------------------------------------------------------------------------------------------------------------------------------------------------------------------------------------------------------------------------------------------------------------------------------------------------------------------------------------------------------------------------------------------------------------------------------------------------------------------------------------------------------------+
1 row in set (0.005 sec)
これで正しく実行できるようになった。
テーブルの設定が最優先されていたので、
はじめからテーブルのDEFAULT CHARSETをutf8mb4に設定していれば解決したと思うが、
DBMS、DBの文字コード設定を見直す良い機会になったと思う。
- 投稿日:2020-05-30T19:26:23+09:00
【rails】GoogleMapsAPI 緯度、経度が保存できない時の記述
はじめに
以前書いた記事の追記でgooglemapAPIを使用した際に、住所は登録できているが緯度、経度が保存されないことでハマったので追記として残しておきます。
【rails】google maps api 地図情報含んだ投稿をして表示させる方法
実現したいこと
住所入力して投稿できてデータベースにも保存されているが、緯度、経度が保存されないことを解決させたい。
geocoderについて
いろいろな記事を調べているとgeocoderは何も設定しないと精度があまり良くないことがあるそうです。
解決するためにはGoogle Map APIの情報源を使えるように設定すれば良いそうです。geocoder.rbファイルを作成
ではさっそく実装していきましょう。
configフォルダ内にgeocoder.rbファイルを作成します。
ターミナル$ bin/rails g geocoder:config上記の記述によりconfig/initializers/geocoder.rb ファイルが作成されます。
作成されたファイルを編集していきます。
geocoder.rbGeocoder.configure( # Geocoding options # timeout: 3, # geocoding service timeout (secs) lookup: :google, # name of geocoding service (symbol) # ip_lookup: :ipinfo_io, # name of IP address geocoding service (symbol) # language: :en, # ISO-639 language code use_https: true, # use HTTPS for lookup requests? (if supported) # http_proxy: nil, # HTTP proxy server (user:pass@host:port) # https_proxy: nil, # HTTPS proxy server (user:pass@host:port) #YOUR_API_KEYにはご自身のAPIキーを記述してください。 api_key: YOUR_API_KEY, # API key for geocoding service # cache: nil, # cache object (must respond to #[], #[]=, and #del) # cache_prefix: 'geocoder:', # prefix (string) to use for all cache keys # Exceptions that should not be rescued by default # (if you want to implement custom error handling); # supports SocketError and Timeout::Error # always_raise: [], # Calculation options # units: :mi, # :km for kilometers or :mi for miles # distances: :linear # :spherical or :linear )これでgeocoderの精度をあげてより詳細な場所を調べられるようになるそうです。
終わりに
以上で自分の問題は解決できました!
他にも記述ミスや処理が抜けている事が原因として考えられる可能性がありますが参考になれば嬉しいです!
- 投稿日:2020-05-30T18:54:15+09:00
【rails】google maps api 地図情報含んだ投稿をして表示させる方法
はじめに
・Maps JavaScript API
・Geocoding API上記のAPIを使用して個人アプリの制作で地図を含んだ投稿をして、表示させる処理を実装しました。
いろいろな記事を参考にさせていただきでき結構ハマったのでまとめておきます。※地図以外の投稿機能はできているものとしてまとめています
追記
【rails】GoogleMapsAPI 緯度、経度が保存できない時の記述
自分は緯度、軽度がうまく取得できていなかったので、同じような方がいましたらこちらの記事も参考にしてください。実装内容・イメージ写真
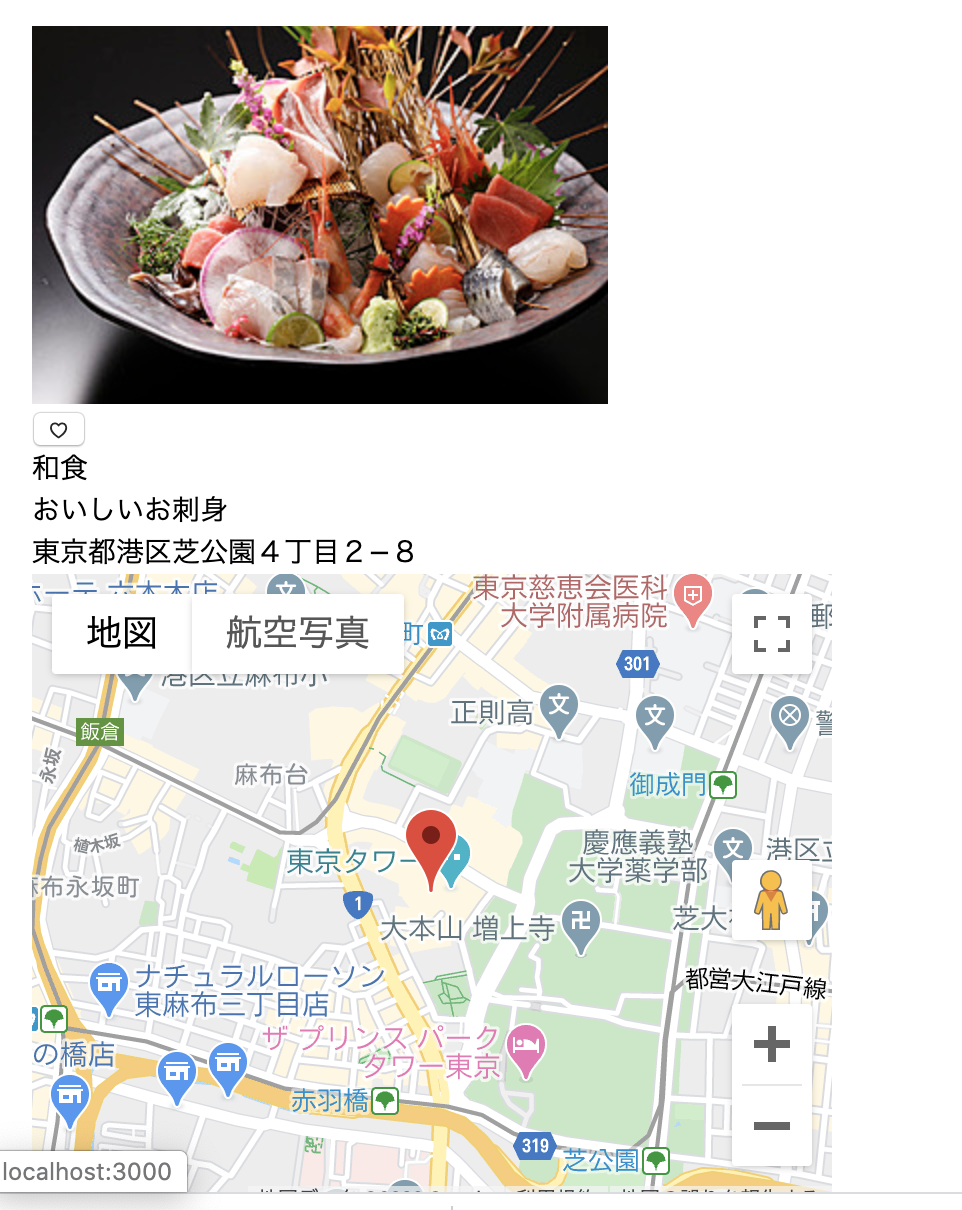
1.ユーザーに地名もしくは住所をぬ有力してもらう
2.詳細ページにてgooglemapにマーカーを落として表示させる
投稿時
※フロント部分はほぼデフォルトのままですご了承ください。
詳細ページ
Google API
googlemapを使用するときはAPIを取得しなければいけません。
下記リンクからAPIのKEYを取得してください。
Google Maps Platform
取得方法については今回は割愛します。今回作成たアプリでは
・Maps JavaScript API
・Geocoding API
を使用しますので有効にしておいてください。データベース作成
まずデータベースを作成します。
既に作成済みの場合はカラムを追加してください。postテーブル
Column Type Options title string null: false text text null: false Association
has_one :spot
spotテーブル
Column Type Options address string null: false latitude float null: false longitude float null: false review_id references foreign_key: true, null: false Association
belongs_to :post
gemのインストール
Gemfilegem "gmaps4rails" gem "geocoder" gem "gon" gem "dotenv-rails"Gemfileに記述できたらbundle installをしてください。
上から
・GoogleMapを簡単に作成できるgem "gmaps4rails"
・地名から緯度経度に変換できるgem "geocoder"
・JSでcontrollerの変数を使えるようにするgem "gon"
・GoogleMapAPIのkeyを隠すためのgem "dotenv-rails"のために使用します。
JS導入
application.html.hamlを編集う
application.html.haml!!! %html %head . . . = include_gon = stylesheet_link_tag 'application', media: 'all', 'data-turbolinks-track': 'reload' = javascript_include_tag 'application', 'data-turbolinks-track': 'reload' %body = yield %script{src: "https://maps.googleapis.com/maps/api/js?key=#{ENV["GOOGLE_MAP_KEY"]}&callback=initMap"} %script{src: "//cdn.rawgit.com/mahnunchik/markerclustererplus/master/dist/markerclusterer.min.js"} %script{src: "//cdn.rawgit.com/printercu/google-maps-utility-library-v3-read-only/master/infobox/src/infobox_packed.js", type:"text/javascript"}%head内にはgem "gon"を使えるようにするための記述をします。
%body内にはJSを使うための記述をしています。%head内に記述する方法もあると思いますが今回は%body内に記述しました。
ENV["GOOGLE_MAP_KEY"]には.envファイルに隠したAPIKEYを入れています。
.envGOOGLE_MAP_KEY = "取得したAPIKEYを記述してください".envファイルを作成して上記を記述します。
underscore.jsを作成
app/assets/javascripts下にunderscore.jsを作成して下記リンク先のコードをコピペして貼り付けます。
application.jsを編集
application.jsを編集します。
application.js//= require underscore //= require gmaps/googlemodelの編集
次に各modelを以下のように編集します。
post.rbclass Post < ApplicationRecord has_one :spot, dependent: :destroy accepts_nested_attributes_for :spot endspot.rbclass Spot < ApplicationRecord belongs_to :post geocoded_by :address after_validation :geocode endviewの編集
投稿ページを作成します。googlemapの投稿、表示のぶぶの記述しています。
住所や場所の名前を入力するフォームを作成します。
new.html.haml= form_with(model: @post, local: true, multipart: true) do |f| .spot = f.fields_for :spot do |s| = s.label :address, "レビュー場所(Google Mapで検索)", class: 'spot__title' = s.text_field :address, placeholder: "スポットを入力", id: "address", class: 'spot__text' %input{onclick: "codeAddress()", type: "button", value: "検索する"} .map{id: "map", style: "height: 320px; width: 640px;"}次に投稿された詳細ページのgooglemapの部分を記述します。
show.html.haml.show .show__address = @post.spot.address .show__maps{id: "show_map", style: "height: 320px; width: 400px;"}controllerの編集
controllerを編集します。
post.controllerdef new @post = Review.new @post.build_spot end def create @review = Review.new(review_params) if @post.save redirect_to root_path else redirect_to new_review_path end end def show @post = Review.find(params[:id]) @lat = @review.spot.latitude @lng = @review.spot.longitude gon.lat = @lat gon.lng = @lng end private def review_params params.require(:post).permit(:title, :text,spot_attributes: [:address]) endnewアクションの.buildメソッドではhas_oneの関係にあたるので
@post.build_spot
としています。showアクションで記述している
@lat = @review.spot.latitude

@lng = @review.spot.longitude

gon.lat = @lat

gon.lng = @lng
では、controllerで定義した
@latと@lngの変数をJavaScriptでも扱えるように、それぞれgon.latとgon.lngに代入しています。JavaScriptの作成
次にJavaScriptファイルを作成していきます。
asset/javascripts/ 内に googlemap.js を作成します。
googlemap.jslet map //変数の定義 let geocoder //変数の定義 function initMap(){ //コールバック関数 geocoder = new google.maps.Geocoder() //GoogleMapsAPIジオコーディングサービスにアクセス if(document.getElementById('map')){ //'map'というidを取得できたら実行 map = new google.maps.Map(document.getElementById('map'), { //'map'というidを取得してマップを表示 center: {lat: 35.6594666, lng: 139.7005536}, //最初に表示する場所(今回は「渋谷スクランブル交差点」が初期値) zoom: 15, //拡大率(1〜21まで設定可能) }); }else{ //'map'というidが無かった場合 map = new google.maps.Map(document.getElementById('show_map'), { //'show_map'というidを取得してマップを表示 center: {lat: gon.lat, lng: gon.lng}, //controllerで定義した変数を緯度・経度の値とする(値はDBに入っている) zoom: 15, //拡大率(1〜21まで設定可能) }); marker = new google.maps.Marker({ //GoogleMapにマーカーを落とす position: {lat: gon.lat, lng: gon.lng}, //マーカーを落とす位置を決める(値はDBに入っている) map: map //マーカーを落とすマップを指定 }); } } function codeAddress(){ //コールバック関数 let inputAddress = document.getElementById('address').value; //'address'というidの値(value)を取得 geocoder.geocode( { 'address': inputAddress}, function(results, status) { //ジオコードしたい住所を引数として渡す if (status == 'OK') { let lat = results[0].geometry.location.lat(); //ジオコードした結果の緯度 let lng = results[0].geometry.location.lng(); //ジオコードした結果の経度 let mark = { lat: lat, //緯度 lng: lng //経度 }; map.setCenter(results[0].geometry.location); //最も近い、判読可能な住所を取得したい場所の緯度・経度 let marker = new google.maps.Marker({ map: map, //マーカーを落とすマップを指定 position: results[0].geometry.location //マーカーを落とす位置を決める }); } else { alert('該当する結果がありませんでした'); } }); }上記の記述についてはhttps://qiita.com/kanato4/items/f2f3f7accd880224616a
を参考にさせていただきました。終わりに
以上なります!
初めてgoogleAPIを使用したアプリケーションの作成でこの部分だけでかなりの時間を使ってしまったので後学者のためにもし参考になれば幸いです。

- 投稿日:2020-05-30T17:59:05+09:00
【Rails】Action TextとActive Storageテーブルのデータ取得
概要
ArticleモデルでActionTextを使おうと思った場合、次のようにすれば「action_text_rich_texts」テーブルのデータを取得できるが、一緒に作成される他二つのテーブルのデータを取得できず四苦八苦した。。。
class Article < ApplicationRecord
  has_rich_text :content
end
$ Article.first.content結果
それぞれ次のコードで取り出せた。
$ ActiveStorage::Attachment
=> ActiveStorage::Attachment(
id:          integer,
name:        string,
record_type: string,
record_id:   integer,
blob_id:     integer,
created_at:  datetime
)

$ ActiveStorage::Blob
=> ActiveStorage::Blob(
id:           integer,
key:          string,
filename:     string,
content_type: string,
metadata:     text,
byte_size:    integer,
checksum:     string,
created_at:   datetime
)


$ ActionText::RichText
=> ActionText::RichText(
id:          integer,
name:        string,
body:        text,
record_type: string,
record_id:   integer,
created_at:  datetime,
updated_at:  datetime
)
やりたかったこと
ActionTextに関連づいた画像を一覧表示して、画像にArticleの詳細ページへのpathを指定したかった。
とりあえず実現はできたが以下のような回りくどいコードになった。
外部キーも設定されているようだし、もっとうまいこと呼びだせると思うけど分からず、、、、
わかる方、是非教えていただけないでしょうかm(_ _)mapp/controllers/pages_controller.rbdef photo # 関連付けされているBlobのみ取得 blob_ids = ActiveStorage::Attachment.pluck(:blob_id) @blob = ActiveStorage::Blob.where(id: blob_ids ) # Blobに対応したログのidを取得 attachment = ActiveStorage::Attachment.where(blob_id: @blob.ids) @link = attachment.pluck(:record_id) endhtml.erb<div> <% @blob.zip(@link).each do |img, link| %> <%= link_to article_path(link) do %> <%= image_tag img %> <% end %> <% end %> </div>
- 投稿日:2020-05-30T17:47:38+09:00
RSpecによるTDDでRailsAPIを実装してみた。part2
初めに
この記事は
RSpecによるTDDでRailsAPIを実装してみた。part1
この記事のpart2です。もしよろしければpart1からご覧ください。
今回の目標はoctokitを使ってUser認証のログイン機能とログアウト機能を扱えるようになるまでです。
この記事は結構長いです。記事だけの断片的なコードだと理解しづらい部分は多いですので、適度に自分のコードを読んで、内容を理解していってください。また、わかりづらい表現等がありましたら、コメントください。
それでは初めて行きます。GithubAPIとの通信
Githubに登録
まずはGithubのApiを使って通信をするためにgithubでアプリケーション登録をする必要がある。
https://github.com/settings/apps
このページに飛び、New Github Appから登録に行く。登録事項は以下。
Application name:
-> 一意で自由にアプリケーションの名前をつけるHomepage URL:
-> http://localhost:3000
開発用のurlを登録します。Application description:
-> 自由にわかりやすいように説明を入れるAuthorization callback URL:
-> http://localhost:3000/oauth/github/callback
リダイレクト用のURLの設定入力が終わったら、Register Applicationを押します。
するとかのよような表示が返ってくる。Owned by: @user_name App ID: xxxxx Client ID: Iv1.xxxxxxxxxxxxxxxxxxxxx Client secret: xxxxxxxxxxxxxxxxxxxxxxxxxxxxxxxxxxxxxxこのClientIDとClientSecreteを使ってgitubAPIに接続します。どこかにコピ-しておく。
octokit
次にoctokitというgemを導入していく。
公式
https://github.com/octokit/octokit.rboctokitを使うことで、より簡単にgithubとの連携をとることができるらしい。(中で何が起きているかはあまり知らない)
そして既に最初にoctokitのgemは追加してあるので、そのまま続けていく。
ターミナルに移る。
$ GITHUB_LOGIN='githubuser_name' GITHUB_PASSWORD='github_password' rails cまず、二つの値を環境変数に入れておく。これは普段githubにログインする時に使うusernameとpassword。そしてconsoleが開くことを確認する。
一応
ENV['GITHUB_LOGIN']
などを打って中身が入っていることを確認しておく。$ client = Octokit::Client.new(login: ENV['GITHUB_LOGIN'], password: ENV['GITHUB_PASSWORD']) $ client.userそしてoctokitに接続して、user情報がしっかりと取れていることを確認する。
これはただの演習です。今後、この仕組みを使って実装していく。
User.rb生成
では、Userモデルを作っていく。
$ rails g model login name url avatar_url providermigrationファイルにデータベースレベルの制限をつけていく。
xxxxxxxxx_create_users.rbclass CreateUsers < ActiveRecord::Migration[6.0] def change create_table :users do |t| t.string :login, null: false t.string :name t.string :url t.string :avatar_url t.string :provider t.timestamps end end endファイルが生成されているので、login属性にnull: falseをつけておく。
$ rails db:migrateバリデーションテスト
次にモデルレベルでの制限をつけていく。
validationをつけていきたいところですが、まずはテストから書いていく。spec/models/user_spec.rbrequire 'rails_helper' RSpec.describe User, type: :model do describe '#validations' do it 'should have valid factory' do user = build :user expect(user).to be_valid end it 'should validate presence of attributes' do user = build :user, login: nil, provider: nil expect(user).not_to be_valid expect(user.errors.messages[:login]).to include("can't be blank") expect(user.errors.messages[:provider]).to include("can't be blank") end it 'should validate uniqueness of login' do user = create :user other_user = build :user, login: user.login expect(other_user).not_to be_valid other_user.login = 'newlogin' expect(other_user).to be_valid end end end最初のテストはfactorybotが起動しているかを確認するテスト
二つ目は、loginとproviderが入っているかを確認するテスト
三つ目は、loginがuniqueかどうかを確認するテストあと、factorybotが現時点だと、何度createしても同じuserを追加してしまうので、それを修正する。
spec/factories/user.rbFactoryBot.define do factory :user do sequence(:login) { |n| "a.levine #{n}" } name { "Adam Levine" } url { "http://example.com" } avatar_url { "http://example.com/avatar" } provider { "github" } end endsequenceを使って解決する。これで毎回作ったuserのloginは一意になる。
これでテストを実行する。
$ rspec spec/models/user_spec.rbここで、typoがなく、正常にエラーが出ていることを確認する。最初のfactorybotが正常に動いているかを確認するテストは成功する。
validation実装
これからvalidationを実装していく。
models/user.rbclass User < ApplicationRecord validates :login, presence: true, uniqueness: true validates :provider, presence: true endテストを実行し成功することを確認する。
次に、githubとやりとりをするためのコードを書いていく。
UserAuthenticator.rb作成
app/libディレクトリを作成
その下に、app/lib/user_authenticator.rbを作成する。app/lib/user_authenticator.rbclass UserAuthenticator def initialize end end本来先にテストコードを書くのがTDDだが、先にclassを定義してしまった方が、正しいエラーが吐き出されるので、ファイル作成とclassの定義は先にしてしまった方が早い。
codeが正しくない場合のテスト
それからテストを書いていく。
libディレクトリと、ファイルを作成する。
spec/lib/user_authenticator_spec.rbspec/lib/user_authenticator_spec.rbrequire 'rails_helper' describe UserAuthenticator do describe '#perform' do context 'when code is incorrenct' do it 'should raise an error' do authenticator = described_class.new('sample_code') expect{ authenticator.perform }.to raise_error( UserAuthenticator::AuthenticationError ) expect(authenticator.user).to be_nil end end end end今回はperformというインスタンスメソッドを使って、サインインやログインを実行していく
まずは、codeが、不適切なものだった時。
(ちなみにcodeは、githubが発行する一度きりのtokenのことで、今回はそのcodeを実際に受け取ることがないので、codeはただの文字列を使い、そのコードに対して、どうgithubが振舞うか、という部分をモックを使うことで、実際に発行されたcodeなしでテストを完結させるようにしている。codeはgithubuser一意のtokenと交換するために使う。)described_class.newでインスタンスを作成、authenticator.performでメソッドを実行する。
UserAuthenticator::AuthenticationErrorは独自のクラスで定義する。テストを実行すると、
.performがないと言われる。そして、さらに.userが使えないと言われる。なので、実際に書いていく。
user_authentiator#perform実装
app/lib/user_authenticator.rbclass UserAuthenticator class AuthenticationError < StandardError; end attr_reader :user def initialize(code) end def perform raise AuthenticationError end endattr_readerdでいつでもuserを読み込めるようにしておく。
そして、performも定義しておく。
StandardErrorを継承したAuthenticationErrorを定義し、UserAuthenticatorにネストさせておく。
performのなかでraiseさせているのはとりあえずテストを成功させるため。これで、テストを実行すると成功する。
$ rspec spec/lib/user_authenticator_spec.rbcodeが正しい場合のテスト
そして次は、codeが正しい場合のテストを書く。しかしその前にshould raise an errorで使っている
authenticator = described_class.new('sample_code')

 authenticator.perform
この二つの部分を
spec/lib/user_authenticator_spec.rbdescribe '#perform' do let(:authenticator) { described_class.new('sample_code') } subject { authenticator.perform }このように定義しておいて、これから書くwhen code is correctでも使っていく。
なので今の全体像は以下のようになる。
spec/lib/user_authenticator_spec.rbdescribe '#perform' do let(:authenticator) { described_class.new('sample_code') } subject { authenticator.perform } context 'when code is incorrenct' do it 'should raise an error' do expect{ subject }.to raise_error( UserAuthenticator::AuthenticationError ) expect(authenticator.user).to be_nil end end endではcodeがただしい時のテストも書く
spec/lib/user_authenticator_spec.rbcontext 'when code is correct' do it 'should save the user when does not exists' do expect{ subject }.to change{ User.count }.by(1) end enduserがあらかじめdatabaseに存在しないuserだった場合は、User.countが1増える。
これはuserの新規登録という事。これで、テストを実行するがもちろん失敗する。それはperformアクションでは何があっても
raise AuthenticationErrorというふうに書いてあるから。
なので、performメソッドを実装していく。実行部分の記述
app/lib/user_authenticator.rbdef perform client = Octokit::Client.new( client_id: ENV['GITHUB_CILENT_ID'], client_secret: ENV['GITHUB_CILENT_SECRET'], ) res = client.exchange_code_for_token(code) if res.error.present? raise AuthenticationError else end endここでやっていることは、まず、記事の最初にプロジェクトをgithubに認証させている。
この記事の最初にこのプロジェクトをgithubに登録した時にclient_idとclient_secretを表示されたその二つの値を、この環境変数の中に入れる。しかし今回、実際の値は使わない。とりあえず、いったんそこは後で説明する。
client.exchange_code_for_token(code)
この部分がそのままではあるが、codeをtokenと交換している。
tokenは上記したようにgithubAPIが生成した一時的なものでしかない。そして、もしも、返ってきたresponseがエラーの場合はres.errorで取り出すことができるので、errorが入っていた場合にのみエラーをraiseする。
これでいったん、テストを実行する。
404 - Error: Not Foundおそらく404が吐き出される。これはGITHUB_CILENT_IDとGITHUB_CILENT_SECRETの中身がからだから。
しかし、これはテストなのでここで本当の値を入れるわけにはいかない。
できるだけ、テストはネットワーク環境などを排除して、テストのみで完結するようにするのが理想とされている。mock実装
そこでテストがわでモックを使う。モックとはgithubの通信の代わりとなるものをこちら側で作成して、テストで完結させるためのもの。
spec/lib/user_authenticator_spec.rbcontext 'when code is incorrenct' do before do allow_any_instance_of(Octokit::Client).to receive( :exchange_code_for_token).and_return(error) endそこでこのようにbeforeを使い、allow_any_instance_ofというメソッドを使う。
allow_any_instance_of(インスタンス名).to receive(:メソッド名).and_return(返り値)このようにして使う。これを使って、指定したインスタンスの指定したメソッドが呼び出されたときの返り値を指定することができる。
Octokit::Clientのインスタンスからexchange_code_for_tokenメソッドを呼び出した時にerrorが返る。
その返り値のerrorを定義する。
spec/lib/user_authenticator_spec.rbcontext 'when code is incorrenct' do let(:error) { double("Sawyer::Resource", error: "bad_verification_code") }doubleはモックを生成する時のメソッド。
Sawyer::Resourceはクラス名で、そのクラスのメソッドとして、errorを使うことができる。
実際のエラーを忠実に再現することができる。これでテストを実行すると一つめが成功するが、もう一つは失敗する。
404なので、先ほどと同じ。二つ目のテストもさっきのモックと同じ要領で定義していく。
spec/lib/user_authenticator_spec.rbcontext 'when code is correct' do before do allow_any_instance_of(Octokit::Client).to receive( :exchange_code_for_token).and_return('validaccesstoken') endしかし今度は、errorを出すのではなく、validaccesstokenを返す。実際に何か意味がある文字列ではないが、errorではないという意味でこの値でも、テストとしては十分有効なtokenとして機能する。
テストを実行。
undefined method `error' for "validaccesstoken":Stringというメッセージが出る。
これは
app/lib/user_authenticator.rbif res.error.present?この部分のことだが、resにerrorがない時にもerrorを読み込もうとしているのでエラーが出た。
なので、errorがない時はnilを返すように書く。app/lib/user_authenticator.rbif res.try(:error).present?これでテストを実行する。
expected User.count to have changed by 1, but was changed by 0まだ保存する操作を書いていないので正常なメッセージだと言える。
なので、データを保存していく処理を書いていく。#perform 保存処理実装
app/lib/user_authenticator.rbclient = Octokit::Client.new( client_id: ENV['GITHUB_CILENT_ID'], client_secret: ENV['GITHUB_CILENT_SECRET'], ) token = client.exchange_code_for_token(code) if token.try(:error).present? raise AuthenticationError else user_client = Octokit::Client.new( access_token: token ) user_data = user_client.user.to_h slice(:login, :avatar_url, :url, :name) User.create(user_data.merge(provider: 'github')) endこのように書き換える。
codeと交換して返ってきたtokenを使って、githubuserのインスタンスを作る。user_client = Octokit::Client.new( access_token: token )上記のこの部分だが、loginとpasswordを使ってインスタンスを生成するのと同じことをしている。tokenを使ってもloginとpasswordを使ってもどちらも同じ結果が出力される。
// ただのサンプルなので実際に打たなくても良い
$ client = Octokit::Client.new(login: ENV['GITHUB_LOGIN'], password: ENV['GITHUB_PASSWORD'])
$ client.user
この記事の最初の方で、このようなコマンドをコンソールで打ったが、これと全く同じことをしている。実際にclient.userをするとgithubuserのデータを取得できる。しかし、形式が、Sawyer::Resourceというもので、非常に扱いづらい。なので、一度to_hでハッシュに変換してからsliceメソッドで中身を取り出している。そしてそのままcreateメソッドを使ってdatabaseに保存している。providerをmergeしているのは、providerは取り出したデータの中にはないので、自分でつける必要がある。もしつけなかったらvalidationに引っかかる。
ついでにだが、resをtokenに変更しておいた。実際にロジック的にどういう意味を持つかを変数名にする方が好ましいから。
そしてテストを実行する。
401 - Bad credentials次はこのようなメッセージがかえる。
401はログインなどができなかったりする場合に返ってくるエラーのよう
しかし今回はただのモックで作ったインスタンスなので、実際に認証をするができている必要はない。app/lib/user_authenticator.rbuser_data = user_client.user.to_h. slice(:login, :avatar_url, :url, :name)現在このuser_client.userの部分でエラーが起きている。
なので、user_client.userをした時にどう返すかというものをモックで再現する。spec/lib/user_authenticator_spec.rballow_any_instance_of(Octokit::Client).to receive( :exchange_code_for_token).and_return('validaccesstoken') allow_any_instance_of(Octokit::Client).to receive( :user).and_return(user_data) endしたの:userの方を追加する。そして、変数のuser_dataを追加する。
spec/lib/user_authenticator_spec.rbcontext 'when code is correct' do let(:user_data) do { login: 'a.levine 1', url: 'http://example.com', avatar_url: 'http://example.com/avatar', name: 'Adam Levine' } endこれで、テストを実行して成功する。
ついでに、保存されている値が正しいかも確認しておく。
spec/lib/user_authenticator_spec.rballow_any_instance_of(Octokit::Client).to receive( :exchange_code_for_token).and_return('validaccesstoken') allow_any_instance_of(Octokit::Client).to receive( :user).and_return(user_data) end it 'should save the user when does not exists' do expect{ subject }.to change{ User.count }.by(1) expect(User.last.name).to eq('Adam Levine') end一番下の行を追加しておく。
これでテストを実行して通ることを確認する。
しかし、毎回新しいuserを生成しているが、一度createしたuserは使いまわしたい。当たり前だが、毎回新規登録をするようなものなので、効率が悪い。
なので使いまわせるようにコードを記述していく。一度保存したuserを使いまわす
まずはテストから書いていく。
spec/lib/user_authenticator_spec.rbit 'should reuse already registerd user' do user = create :user, user_data expect{ subject }.not_to change{ User.count } expect(authenticator.user).to eq(user) end一度userを作って、それと同じuser_dataを使って、authenticator.performを行う。
そして、そのauthenticator.performをして作ったuserとfactorybotで作ったuserが同じものかを確認する。テストを実行して、失敗することを確認する。今はまだ使い回すのではなく、毎回createをしている。
なので、使いまわせるように記述していく。app/lib/user_authenticator.rb- User.create(user_data.merge(provider: 'github')) + @user = if User.exists?(login: user_data[:login]) + User.find_by(login: user_data[:login]) + else + User.create(user_data.merge(provider: 'github')) + endこのように書き換える。もし同じuserが存在している時はfind_byを使うという分岐を作る。
テストを実行すると成功する。
リファクタリング
しかし現時点だと、performメソッドの記述量が多すぎることと、performメソッドの責任が曖昧になっている。performメソッドはいわゆる実行、という意味を持つので、実行するためだけのメソッドであることが好ましい。なので、値を生成したり、整えたりしているロジックを別のメソッドに書き出す。
app/lib/user_authenticator.rbdef perform - client = Octokit::Client.new( - client_id: ENV['GITHUB_CILENT_ID'], - client_secret: ENV['GITHUB_CILENT_SECRET'], - ) - token = client.exchange_code_for_token(code) if token.try(:error).present? raise AuthenticationError else - user_client = Octokit::Client.new( - access_token: token - ) - user_data = user_client.user.to_h. - slice(:login, :avatar_url, :url, :name) - @user = if User.exists?(login: user_data[:login]) - User.find_by(login: user_data[:login]) - else - User.create(user_data.merge(provider: 'github')) - end + prepare_user endこの部分をざくりと削除して他の場所に移していく。移す場所はprivateメソッドで定義する。理由は別に外部のクラスから呼び出す必要のない値を定義するから。
app/lib/user_authenticator.rbprivate + def client + @client ||= Octokit::Client.new( + client_id: ENV['GITHUB_CILENT_ID'], + client_secret: ENV['GITHUB_CILENT_SECRET'], + ) + end + + def token + @token ||= client.exchange_code_for_token(code) + end + + def user_data + @user_data ||= Octokit::Client.new( + access_token: token + ).user.to_h.slice(:login, :avatar_url, :url, :name) + end + + def prepare_user + @user = if User.exists?(login: user_data[:login]) + User.find_by(login: user_data[:login]) + else + User.create(user_data.merge(provider: 'github')) + end + end attr_reader :code endこんな感じで書きだす。下のメソッドが上のメソッドを呼び出すという構造になっていて、きれいに責任を分離している。
これで、テストを実行して失敗しないことを確認する。
これでいったんリファクタリングは終わり。
次にいく。
User認証用のtoken生成
次はこの今作っているrailsapi専用のaccess_tokenを作っていく。
exchange_code_for_tokenメソッドを使って手に入るtokenはあくまでもgithubAPIにアクセスしてuser情報を取得するためのtokenなのでそれを僕たちが作っているrailsAPIのリクエストを認証するために使うことはできない。今からは今作っているrailsAPIのリクエスト認証をするためのtokenを作っていく。このtokenが必要になるのは、createアクションをするときや、deleteアクションをする時に必要になる。逆に、indexアクションやshowアクションをする時はtokenがなくてもリクエストを受け付けるようにする。
しかしそれはそれぞれアプリケーション次第ではある。token生成のテスト
ではそのtokenを作っていくのだが、まずはテストから書いていく。
spec/lib/user_authenticator_spec.rbit "should create and set user's access token" do expect{ subject }.to change{ AccessToken.count }.by(1) expect(authenticator.access_token).to be_present end末尾のこのテストを追加。
そして、その後に、performメソッドを編集していく。
app/lib/user_authenticator.rbelse prepare_user + @access_token = if user.access_token.present? + user.access_token + else + user.create_access_token + end endこのように、tokenをインスタンスのattributeとしておく。
app/lib/user_authenticator.rbattr_reader :user, :access_tokenさらにaccess_tokenを呼び出せるようにしておく。
とりあえず説明はのちに詳しくする。AccessTokenモデル生成
$ rails g model access_token token user:referencesとりあえず、access_tokenモデルを作成していく。
これにより、belongs_to :userを持ったaccess_tokenモデルが作成される。userモデルの方にもアソシエーションを設定する。
app/models/user.rbclass User < ApplicationRecord validates :login, presence: true, uniqueness: true validates :provider, presence: true has_one :access_token, dependent: :destroy # 追加 enddb/migrate/xxxxxxxxx_create_access_tokne.rbclass CreateAccessTokens < ActiveRecord::Migration[6.0] def change create_table :access_tokens do |t| t.string :token, null: false t.references :user, null: false, foreign_key: true t.timestamps end end endmigrationファイルも確認しておく、tokenにはnill: falseをつけておく。
rails db:migrateを実行。次にaccesstokenのテストも準備しておく。
spec/models/access_token_spec.rbrequire 'rails_helper' RSpec.describe AccessToken, type: :model do describe '#validations' do it 'should have valid factory' do end it 'should validate token' do end end end諸々準備ができたのでテストを実行する。
$ rspec spec/lib/user_authenticator_spec.rbSQLite3::ConstraintException: NOT NULL constraint failed: access_tokens.tokenするとこのようなメッセージが吐かれる。
このエラーは、databaseレベルでのnull: falseをつけているのに、nullだった場合に起こるようだ。ではnullにならないようにtokenを生成するロジックを書く。その前にテストを書く。
spec/models/access_token_spec.rbdescribe '#new' do it 'should have a token present after initialize' do expect(AccessToken.new.token).to be_present end it 'should generate uniq token' do user = create :user expect{ user.create_access_token }.to change{ AccessToken.count }.by(1) expect(user.build_access_token).to be_valid end endこのコードを末尾に追加する。
一つ目は、AccessTokenをnewした時に、ちゃんと、tokenが入っているかどうか
後で記述するが、newした時に自動的にtokenが入るように後で書く。二つ目は、AccessTokenのcountが1増えるかどうかと、
validationにひっからないかどうか。
validationにひっからないかどうかだが、いつもならモデルをcreateして、二つ目に一つ目の値を使って、buildをして、validationにちゃんとひっかるかどうかを確認するが、今回は少し特殊でnewした時にtokenが自動生成されるので、そのテストはできない。なぜならAccessToken.new(old_token)のように引数を指定することができないから。AccessToken.newとすれば、tokenは自動ではいる。token生成ロジック実装
ではtokenを生成するロジックを書いていく。
app/models/access_token.rbclass AccessToken < ApplicationRecord belongs_to :user after_initialize :generate_token private def generate_token loop do break if token.present? && !AccessToken.exists?(token: token) self.token = SecureRandom.hex(10) end end endafter_inializeで指定したメソッドは、モデルが作成される時に実行される。
loopで回しているのはbreak ifで指定した条件に当てはまらない限り何度でもtokenを作成したいから。
SecureRandomクラスを使ってtokenを生成する。
値はランダムで作成されるので、全く同じ値が生成されないとは限りません。なのでloopさせる。
breakの条件はtokenに値が入っている。かつ、databaseに同じ値が存在していない。
それが当てはまらない限りは何度でもloopする。大抵は一度回ればbreakされる。テストを実行。
$ rspec spec/models/access_token_spec.rb
$ rspec spec/lib/user_authenticator_spec.rbこのテストが通ることを確認する。
ちなみに、user_authenticator.rbでの
user.create_access_tokenこのメソッドはどこかで定義したわけではなく、railsが自動生成してくれるもの。意味はそのままだが、わかりやすく置き換えると、
AccessToken.create(user_id: user.id)
これと同じ意味になる。では、token生成のロジックが終わったので、次に行く。
ログイン機能
次はログイン機能の全体像を実装していく。今はtokenを生成する仕組みはできているが、まだそのtokenを利用したログイン機能を実装はできていない。なのでそのあたりを実装していく。
エンドポイントのテスト
しかしまずはテストから書く。今はroutingがまだできていないので、routingのテストから書いていく。
記述するファイルはないので作成する。spec/routing/access_token_spec.rbrequire 'rails_helper' describe 'access tokens routes' do it 'should route to access_tokens create action' do expect(post '/login').to route_to('access_tokens#create') end end記述の説明は割愛。
テストを実行すると、no route match /loginと出るので、routes.rbを編集する。
config/routes.rbRails.application.routes.draw do + post 'login', to: 'access_tokens#create' resources :articles, only: [:index, :show] endテスト実行。
A route matches "/login", but references missing controller: AccessTokensControllercontrollerがないと言われているので、作っていく。
access_tokens_controller 生成
$ rails g controller access_tokenscreate app/controllers/access_tokens_controller.rb invoke rspec create spec/requests/access_tokens_request_spec.rb再度テスト実行。テストが通る。これでログインのエンドポイントの設置は終了。
access_tokens_controllerのテスト
ではcontrollerのテストをしていく。次のファイルを作成して記述する。
spec/controllers/access_tokens_controller_spec.rbrequire 'rails_helper' RSpec.describe AccessTokensController, type: :controller do describe '#create' do context 'when invalid request' do it 'should return 401 status code' do post :create expect(response).to have_http_status(401) end end context 'when success request' do end end end認証をせずに401が返ってくることを期待する。401はunauthorized(不許可)、だが、意味的にはunauthenticated(未認証)であるので、認証がされていない時のレスポンスとして用いることが多い。
今更ではあるが、rails g controllerをするとrequests/access_tokens_request_spec.rbのようなファイルが自動生成されている。これはcontrollerのテストの後継となるものだが、controller_specと書き方が少し変わってくるので、今回はわざわざ自分でファイルを作成して記述していいる。本来はrequest_specで書く方が推奨されている。
テストを実行する。
AbstractController::ActionNotFound:

       The action 'create' could not be found for AccessTokensController
createアクションが定義されていないので、記述する。
app/controllers/access_tokens_controller.rbclass AccessTokensController < ApplicationController def create end endテストを実行。401を期待しているが204が返って来ている。
204は:no_contentのこと。なのでとりあえず、テストを通すために、controllerに記述していく。
create実装
app/controllers/access_tokens_controller.rbclass AccessTokensController < ApplicationController def create render json: {}, status: 401 end endテストを実行して通ることを確認。
さらにテストを追記していく。
spec/controllers/access_token_controller_spec.rbcontext 'when invalid request' do + let(:error) do + { + "status" => "401", + "source" => { "pointer" => "/code" }, + "title" => "Authentication code is invalid", + "detail" => "You must privide valid code in order to exchange it for token." + } + end it 'should return 401 status code' do post :create expect(response).to have_http_status(401) end + it 'should return proper error body' do + post :create + expect(json['errors']).to include(error) + end end401の場合に正しいerrorのresが返ってくることを期待する。
error文は以下のサイトからコピーして来たものを編集して使っている。
https://jsonapi.org/examples/そして、テストを実行。
expected: {"detail"=>"You must privide valid code in order to exchange it for token.", "source"=>{"pointer"=>"/code"}, "status"=>"401", "title"=>"Authentication code is invalid"}
got: nil
nilが返って来ているので、controlle側できちんとerrorを返す処理を書く。
app/controllers/access_tokens_controller.rbclass AccessTokensController < ApplicationController def create error = { "status" => "401", "source" => { "pointer" => "/code" }, "title" => "Authentication code is invalid", "detail" => "You must privide valid code in order to exchange it for token." } render json: { "errors": [ error ] }, status: 401 end endこれでテストが通ることを確認する。
現在はcreateアクションが呼び出され時に全てにおいてerrorを出しているが、それを修正する。
app/controllers/access_tokens_controller.rbclass AccessTokensController < ApplicationController rescue_from UserAuthenticator::AuthenticationError, with: :authentication_error def create authenticator = UserAuthenticator.new(params[:code]) authenticator.perform end private def authentication_error error = { "status" => "401", "source" => { "pointer" => "/code" }, "title" => "Authentication code is invalid", "detail" => "You must privide valid code in order to exchange it for token." } endリファクタリングもかねて、コードを編集している。
ここでやっとUserAuthenticator.new(params[:code])を書くことになる。
これまでずっと書いていた、codeとtokenを交換して、userを作成するロジックがUserAuthenticatorには書かれているが、それをここで呼び出す。そして、performで実行する。
401エラーの本体はメソッドに書き出している。
現時点で想定される返ってくるerrorはUserAuthenticator::AuthenticationErrorなので、rescue_fromによって、rescueする。メソッドに書き出しているので、rescue_fromで呼び出す操作が可能。後、UserAuthenticator::AuthenticationErrorではcodeがblankの時も同じようにエラーを出したい。
ついでに、リファクタリングが必要なのでしていく。リファクタリングと修正
app/lib/user_authenticator.rbdef perform raise AuthenticationError if code.blank? || token.try(:error).present? prepare_user @access_token = if user.access_token.present? user.access_token else user.create_access_token end endこれでcodeがblankの時はerrorを出すことができる。
もう一度おさらいしておくとcodeはフロントエンドから送られてくるtokenのこと。フロントエンドがgithubからtokenを取得して来てくれてそれをapiに送ってくる。それがcode(github_access_code)。
APIはそのcodeを受け取ってGitHubと通信を行いcodeをtokenと交換してもらう(exchange_code_for_tokenメソッドによって)。そのtokenによって、githubuserの情報をgithubAPIから取得することができる。それを踏まえた上で、codeは十分にblankである可能性は考えられるので、errorを用意しておく。
テストを実行して通ることを確認。
さらにリファクタリングをする。
app/controlers/access_token_controller.rbclass AccessTokensController < ApplicationController - rescue_from UserAuthenticator::AuthenticationError, with: :authentication_error def create authenticator = UserAuthenticator.new(params[:code]) authenticator.perform end - private - - def authentication_error - error = { - "status" => "401", - "source" => { "pointer" => "/code" }, - "title" => "Authentication code is invalid", - "detail" => "You must privide valid code in order to exchange it for token." - } - render json: { "errors": [ error ] }, status: 401 - end endapp/controllers/application_controller.rbclass ApplicationController < ActionController::API + rescue_from UserAuthenticator::AuthenticationError, with: :authentication_error + private + def authentication_error + error = { + "status" => "401", + "source" => { "pointer" => "/code" }, + "title" => "Authentication code is invalid", + "detail" => "You must privide valid code in order to exchange it for token." + } + render json: { "errors": [ error ] }, status: 401 + end end完全にauthentication_errorはapplication_controllerに任せてしまい、全てのコントローラーでこのエラーを拾って来れるようにする。理由は認証エラーというのはどのコントローラーでも起きる可能性があるから。
テストを実行して、挙動が何も変わっていないことを確認する。
そして、この実装はテストでも同じように使いまわせるとなお良い。
説明が長くなってしまうので、コードはひとまず全ての変更を貼り付けるspec/controllers/access_token_controller_spec.rbRSpec.describe AccessTokensController, type: :controller do describe '#create' do - context 'when invalid request' do + shared_examples_for "unauthorized_requests" do let(:error) do { "status" => "401", @ -11,17 +11,34 @@ RSpec.describe AccessTokensController, type: :controller do "detail" => "You must privide valid code in order to exchange it for token." } end it 'should return 401 status code' do - post :create + subject expect(response).to have_http_status(401) end it 'should return proper error body' do - post :create + subject expect(json['errors']).to include(error) end end + context 'when no code privided' do + subject { post :create } + it_behaves_like "unauthorized_requests" + end + context 'when invalid code privided' do + let(:github_error) { + double("Sawyer::Resource", error: "bad_verification_code") + } + before do + allow_any_instance_of(Octokit::Client).to receive( + :exchange_code_for_token).and_return(github_error) + end + subject { post :create, params: { code: 'invalid_code' } } + it_behaves_like "unauthorized_requests" + end context 'when success request' do end何をしているかはコードをじっくりと読んで欲しいのだが、ここでは二つのテストをshared_examples_forによって使いまわしている。
should return 401 status code
should return proper error bodyこの二つのテストは今後も使い回すことが多い。また、shared_examples_forを呼び出すには、it_behaves_likeを使って呼び出すことができる。
subjectを使って、DRYにすることで、subjectにはcontextごとに自由に値を入れることができる。spec/controllers/access_token_controller_spec.rblet(:github_error) { double("Sawyer::Resource", error: "bad_verification_code") } before do allow_any_instance_of(Octokit::Client).to receive( :exchange_code_for_token).and_return(github_error) endまた、この部分だが、この記述は以前もテストで使ったもので、githubAPIに直接接続することなく、mockで再現している。これにより、githubに実際に接続しなくともgithubAPIを再現することができる。
次はcodeが正しい時のテストを書いていく。
spec/controllers/access_token_controller_spec.rbcontext 'when success request' do let(:user_data) do { login: 'a.levine 1', url: 'http://example.com', avatar_url: 'http://example.com/avatar', name: 'Adam Levine' } end before do allow_any_instance_of(Octokit::Client).to receive( :exchange_code_for_token).and_return('validaccesstoken') allow_any_instance_of(Octokit::Client).to receive( :user).and_return(user_data) end subject { post :create, params: { code: 'valid_code' } } it 'should return 201 status code' do subject expect(response).to have_http_status(:created) end endこれは単純にmockでcodeが正しいか正しくないかを操作している。
単純にcodeが正しい場合は201が返ってくることを期待している。テストを実行。
expected the response to have status code :created (201) but it was :no_content (204)このメッセージが表示される
なので、responseで201が返ってくるようにcontrollerを編集する。app/controlers/access_token_controller.rbdef create authenticator = UserAuthenticator.new(params[:code]) authenticator.perform render json: {}, status: :created endrenderを追加し、createdを返す。
これで再びテストを実行し、通ることを確認。
次にしっかりとresponseを返すように実装したい。なので、テストから書いていく。
spec/controllers/access_token_controller_spec.rbit 'should return proper json body' do expect{ subject }.to change{ User.count }.by(1) user = User.find_by(login: 'a.levine 1') expect(json_data['attributes']).to eq( { 'token' => user.access_token.token } ) endこのテストを末尾に追加。
テストの内容は、articleの時と同じように、json_data['attributes']で値を受け取り中身が正しいかを確認する。User.find_byで取り出しているuserは前に記述したuser_dataを使ったmockによって記述されているので、その値と、responseとして返ってくる値は同じである、というテスト。しかしテストを実行しても、json_dataでは取り出せていない、理由はserializerを使っていないから、json.dataが存在しないから。なので、きちんと整った形式でのresponseをするためにserializerを導入していく。
serializer生成
$ rails g serializer access_tokenこれにより、作られるファイルに記述していく。
app/serializers/access_token_serializer.rbclass AccessTokenSerializer < ActiveModel::Serializer attributes :id, :token endtokenの記述を足しておく。これにより、responseにtokenを含めることができる。
そしてcontrollerにもrenderで返す値を指定しておく。
access_tokens_controller.rb- render json: {}, status: :created + render json: authenticator.access_token, status: :created endこれにより、からのハッシュではなく、しっかりと整形されたresponseが返せるようになる。
テストを実行。するとメッセージが出る。
       expected: {"token"=>"6c7c4213cb78c782f6f6"}
            got: {"token"=>"2e4c724d374019f3fb26"}
どこかで、tokenが再度作られてしまい、値が切り替わっている。
これはリロードをすると、tokenがその度に作られてしまっているというバグ。なので、そのバグ修正のためのテストを書いていく。
spec/models/access_token_spec.rbit 'should generate token once' do user = create :user access_token = user.create_access_token expect(access_token.token).to eq(access_token.reload.token) endまずは、バグが再現できているかどうかを確認するために、テストを実行する。
expected: "3afe2f824789a229014c"

            got: "c5e04c73aa7ff89fd0a1"
きちんと再現できているので、メッセージが出た。
では改善していく。まず、バグが起きているgenerate_tokenメソッドを見てみる。
app/models/access_token.rbdef generate_token loop do break if token.present? && !AccessToken.exists?(token: token) self.token = SecureRandom.hex(10) end endここでおかしいところがある、問題はbreakの条件がいけなかった。
break if token.present? && !AccessToken.exists?(token: token)
この条件は、tokenにしっかりと値が入っている。かつそのtokenはデータベースに存在しない。という条件になる。しかしそれだと、少し矛盾したことになってしまう。tokenが存在しているということはデータベースに保存しているということなので、この条件式は満たされることがない。
なので、指定したtoken以外のtokenで同じtokenを持っているものが存在しないという条件にしていく。app/models/access_token.rb- break if token.present? && !AccessToken.exists?(token: token) + break if token.present? && !AccessToken.where.not(id: id).exists?(token: token)このように今指定のtoken以外のtokenという条件を作ることができる。
これで、テストを実行して通ることを確認する。ログアウト機能
エンドポイントの追加テスト
それでは、ログアウト機能を実装していく。
spec/routeing/access_token_spec.rbit 'should route to acces_tokens destroy action' do expect(delete '/logout').to route_to('access_tokens#destroy') endroutingのテストを書く。
config/routes.rbRails.application.routes.draw do post 'login', to: 'access_tokens#create' delete 'logout', to: 'access_tokens#destroy' resources :articles, only: [:index, :show] endlogoutの行を追加。
テストが通る。
実装
次にコントローラーのテストを書いていく。
spec/controllers/access_token_controller.rb@@ -1,9 +1,9 @@ require 'rails_helper' RSpec.describe AccessTokensController, type: :controller do - describe '#create' do + describe 'POST #create' do shared_examples_for "unauthorized_requests" do - let(:error) do + let(:authentication_error) do { "status" => "401", "source" => { "pointer" => "/code" }, @ -19,7 +19,7 @@ RSpec.describe AccessTokensController, type: :controller do it 'should return proper error body' do subject - expect(json['errors']).to include(error) + expect(json['errors']).to include(authentication_error) end end @ -74,4 +74,33 @@ RSpec.describe AccessTokensController, type: :controller do end end end + describe 'DELETE #destroy' do + context 'when invalid request' do + let(:authorization_error) do + { + "status" => "403", + "source" => { "pointer" => "/headers/authorization" }, + "title" => "Not authorized", + "detail" => "You have no right to access this resource." + } + end + + subject { delete :destroy } + + it 'should return 403 status code' do + subject + expect(response).to have_http_status(:forbidden) + end + + it 'should return proper error json' do + subject + expect(json['errors']).to include(authorization_error) + end + end + + context 'when valid request' do + + end + end end元々errorとして扱っていた403エラーだが、役割をはっきりさせるために、命名を変更。
そして、destroy専用のテストを丸々書いていく。
内容は読んだまま。@@の表記は何行の記述かを表しているコード、実際に書く必要はない。
そして、controllerを実装していく。
app/controllers/access_tokens_controller.rbdef destroy raise AuthorizationError enddestroyメソッドを定義する。まずはエラーのレスポンスのテストを通すために、AuthorizationErrorをraiseして、application_controllerに実際にそのエラーの実態を定義していく。
app/controllers/application_controller.rbclass ApplicationController < ActionController::API + class AuthorizationError < StandardError; end rescue_from UserAuthenticator::AuthenticationError, with: :authentication_error + rescue_from AuthorizationError, with: :authorization_error private @ -12,4 +14,14 @@ class ApplicationController < ActionController::API } render json: { "errors": [ error ] }, status: 401 end + def authorization_error + error = { + "status" => "403", + "source" => { "pointer" => "/headers/authorization" }, + "title" => "Not authorized", + "detail" => "You have no right to access this resource." + } + render json: { "errors": [ error ] }, status: 403 + end endエラーの内容はテストに書いたものと同じ。
これでテストを実行して、通ることを確認する。
しかし少し重複している記述があるのでDRYにしていく。
spec/controllers/access_tokens_controller_spec.rbdescribe 'DELETE #destroy' do shared_examples_for 'forbidden_requests' do endまず、describeの下にshared_examples_forを使って、記述をまとめていく。
shared_examples_forの中に、入れるのは以下の記述。
spec/controllers/access_tokens_controller_spec.rbshared_examples_for 'forbidden_requests' do let(:authorization_error) do { "status" => "403", "source" => { "pointer" => "/headers/authorization" }, "title" => "Not authorized", "detail" => "You have no right to access this resource." } end it 'should return 403 status code' do subject expect(response).to have_http_status(:forbidden) end it 'should return proper error json' do subject expect(json['errors']).to include(authorization_error) end end今まで記述していたテストを一つにまとめる。
spec/controllers/access_tokens_controller_spec.rbcontext 'when invalid request' do subject { delete :destroy } it_behaves_like 'forbidden_requests' endそしてshared_expample_forを呼び出すのはit_behaves_likesという記述なので、これで文字列でさっき指定したforbidden_requestsを呼び出す。
これでさっきと同じ環境を作り出す事ができたので再度実行して、テストが通ることを確認する。
次にこれらのshared_example_forを使いまわせるようにさらに一つのファイルにまとめていく。今の
access_tokens_controller_spec.rbにはshared_example_forが二つ存在しているのでその二つを同じファイルにまとめていく。
spec/support/shared/json_errors.rbを作成中にshared_example_forの記述を入れていく。
spec/support/shared/json_errors.rbrequire 'rails_helper' shared_examples_for 'forbidden_requests' do let(:authorization_error) do { "status" => "403", "source" => { "pointer" => "/headers/authorization" }, "title" => "Not authorized", "detail" => "You have no right to access this resource." } end it 'should return 403 status code' do subject expect(response).to have_http_status(:forbidden) end it 'should return proper error json' do subject expect(json['errors']).to include(authorization_error) end end shared_examples_for "unauthorized_requests" do let(:authentication_error) do { "status" => "401", "source" => { "pointer" => "/code" }, "title" => "Authentication code is invalid", "detail" => "You must privide valid code in order to exchange it for token." } end it 'should return 401 status code' do subject expect(response).to have_http_status(401) end it 'should return proper error body' do subject expect(json['errors']).to include(authentication_error) end endそして、切り取り元の記述は全て消しておく。
spec/controllers/access_tokens_controller_spec.rbdescribe 'DELETE #destroy' do subject { delete :destroy }subject定義のネストを一段上げておく。
そして、テストを二つ追加する。spec/controllers/access_tokens_controller_spec.rbdescribe 'DELETE #destroy' do subject { delete :destroy } context 'when no authorization header provided' do it_behaves_like 'forbidden_requests' end context 'when invalid authorization header provided' do before { request.headers['authorization'] = 'Invalid token' } it_behaves_like 'forbidden_requests' end context 'when valid request' do end endこのテストは、subjectを書かないのは、既にshared_example_forにsubject書いてあるので、自動で
subject { delete :destroy }が呼び出されるようになっている。
そして、beforeを使えば、requestの中身を編集する事ができる。
今回はtokenをInvalid_tokenを入れておく事で、認証ができていないuserを作り上げる。
もちろん認証エラーが出るので、それを期待するテスト。これでテストを実行して、成功することを確認する。
spec/controllers/access_tokens_controller_spec.rbcontext 'when valid request' do let(:user) { create :user } let(:access_token) { user.create_access_token } before { request.headers['authorization'] = "Bearer #{access_token.token}" } it 'should return 204 status code' do subject expect(response).to have_http_status(:no_content) end it 'should remove the proper access token' do expect{ subject }.to change{ AccessToken.count }.by(-1) end end次に、when valid requestのテストを書いていく。
正しいリクエストを送るためにはまず、headers['authorization']にトークンを入れて、アクセス権限を渡す必要がある。
Bearerとは無記名認証のことで、今回はこれを使う。テストではAccessTokenモデルがデータベースから一つ減っていることを期待している。
では正しくテストが失敗することを確認する。
ここで、正しく失敗することを確認するとtypoが見つかる事が多い。
expected the response to have status code :no_content (204) but it was :forbidden (403)テストを実行するとこのようなメッセージが表示される。
forbiddenが返って来ているのは、destroyアクションで常にエラーを返すように記述をしているから。
なので実際にdestroyアクションを実装していく。
app/controllers/access_tokens_controller.rbdef destroy raise AuthorizationError endまずこのdestroyでしたいことはrequestを送って来たuserのaccess_tokenをdestroyすること。なので以下のように記述する。
app/controllers/access_tokens_controller.rbdef destroy raise AuthorizationError unless current_user current_user.access_token.destroy endcurrent_userは現在ログインしているuserのことを指す。
current_userをどのようにして、持ってくるかを考える。current_userはrequestから一気に取得する事ができない。しかし、request.authorizationとすると、さっきテストで送った
Bearer xxxxxxxxxxxxxxxxxxxxxというようなtokenを取得する事ができる。
なのでそのtokenを使って、current_userを取得していく。app/controllers/access_tokens_controller.rbdef destroy provided_token = request.authorization&.gsub(/\ABearer\s/, '') access_token = AccessToken.find_by(token: provided_token) current_user = access_token&.user raise AuthorizationError unless current_user current_user.access_token.destroy endまず、request.authorizationでtokenを取得し、データベースでそのtokenを検索するために、gsubメソッドを使って、正規表現で切り取りをしている。tokenの数字の部分だけが取り出せたら、それでAccessToken.find_byで検索をかけて、取り出している。
そして、そのaccess_token.userとすれば、requestを送って来たuserを取り出す事ができる。そして、そのtokenをdestroy
すればログアウトが完了する。
&.の記述はボッチ演算子と言って、nilが帰って来て、undifind methodというふうになるかもしれない事があらかじめわかっているメソッドに対してつけておくと、nilの場合にエラーが出ずにそのままnilを返り値として返してくれるので、エラーが出ない。というもの。今回は、requestでInvalid_tokenが混ざっている場合があるので、その場合はnilが返ってしまうので、ボッチ演算子を使わないとエラーが出る。これでテストを実行して、テストが全て通ることを確認する。
次にこのコードをリファクタリングしていく。
app/controllers/access_tokens_controller.rbdef destroy - provided_token = request.authorization&.gsub(/\ABearer\s/, '') - access_token = AccessToken.find_by(token: provided_token) - current_user = access_token&.user - - raise AuthorizationError unless current_user current_user.access_token.destroy endまず、このように記述を切り取る。そして、その記述をapplication_controller.rbに移していく。なぜうつすかというと、まさにこのrequestを受けとり、current_userを生成するロジックはどのコントローラーでも使いたい記述だから。
app/controllers/application_controller.rbprivate def authorize! raise AuthorizationError unless current_user end def access_token provided_token = request.authorization&.gsub(/\ABearer\s/, '') @access_token = AccessToken.find_by(token: provided_token) end def current_user @current_user = access_token&.user endそして、privateしたにこのようにメソッドを記述していく。
authorize!メソッドはcurrent_userが入っていない時に401エラーを出す。
access_tokenメソッドで正しいaccess_tokenを取り出し、
current_userメソッドで、そのtokenのuserを取り出している。
ここでaccess_tokenとcurrent_userを分けているのは、それぞれの役割をはっきりとさせ責任の分離を行うため。そして、最後にその定義したauthorize!メソッドを常に呼び出せるように記述していく。
app/controllers/access_tokens_controller.rbclass AccessTokensController < ApplicationController before_action :authorize!, only: :destroybefore_actionで常に呼び出している状況にしている。destroyのみの指定にしているのは、createアクションの時に呼び出してしまうと、呼び出し不可能なメソッドになってしまうため。
これらのアプローチは一般的だが、before_actionを書き忘れたり、もしくは記述があまりにも多くなってしまう。なので、skip_before_actionを使い、逆にskipするメソッドを指定しておく。基本的にauthorize!メソッドに限って言えばcreateさえskipしてしまえば良さそう。
app/controllers/application_controller.rbbefore_action :authorize! privateprivateの上に常に呼び出す記述を追記。
app/controllers/access_tokens_controller.rbclass AccessTokensController < ApplicationController skip_before_action :authorize!, only: :createbefore_actionとメソッドを変更しておく。
app/controllers/articles_controller.rbclass ArticlesController < ApplicationController skip_before_action :authorize!, only: [:index, :show]そして、article_controllerも忘れずにskipさせておく。
indexとshowは認証をしていなくても行いたいから。これでテストを実行して、リファクタリング前と同じ結果が得られるかを確認する。
$ bundle exec rspec全てのテストを実行して、全てが緑になることを確認する。
最後に
お疲れ様でした。これで最初に目標としていたuser認証機能を実装する事ができました。これらはdeviseというgemを使えば代用してしまえるかもしれませんが、その仕組みを知っているかどうかでuser認証周りの問題への対応が変わって来ますし、理解度が全く違うと思います。token周りは非常に想像しづらい部分ですし、oauthを使う場合は、やはり、gemで全てが代用されてしまうものもありますので、仕組みがブラックボックス化されてしまいがちです。なので今回はこのようにuser認証を行いました。
- 投稿日:2020-05-30T17:10:41+09:00
マークアップ共通化:アクション毎にurlパスの変更
概要
前回の記事で、マークアップの共通化を掲載しました
コチラ↓↓
https://qiita.com/kazuko___3o3___/items/019174474f4f258ba19b実は、この記事がメインでございましたっ
newアクション、editアクション毎に指定したいURLが異なり、最初はif文でコードを書くもエラー続きでした
その解消法を備忘録として残します!事象
以前、【form_forが自動的に生成してくれるパスは複数形のみ】という記事を書かせていただきました(https://qiita.com/kazuko___3o3___/items/cf8e6966772d629d5927 )
そのため、HTMLは下記のように記載されています。
_form.html.haml#省略 .new_display = form_for @task, url: group_tasks_path do |f| #省略【group_tasks_path】はnewアクションの時のみに有効で、editアクションではエラーになってしまいます
解決方法
共通ビューに記載されているform_forの箇所を別ファイルに記載します
before
new.html.haml/edit.html.haml= render "form"after
new.html.haml= form_for @task, url: group_tasks_path do |f| = render partial: "form", locals: {f: f} |= render "new_main"edit.html.haml= form_for @task, url: group_task_path do |f| = render partial: "form", locals: {f: f} |= render "new_main"上記内容に変更することで、newアクション時には新規登録画面、editアクション時には編集画面(入力されている内容も反映)されるようになり、create、updateもバッチリでした
参考
- 投稿日:2020-05-30T16:51:21+09:00
マークアップの共通化【new,edit】
概要
新規登録画面(newアクション)や編集画面(editアクション)は登録項目は同じなので画面共通にしちゃた方が楽
ということで備忘録のため残します。
変更点
①viewフォルダ内に _form.html.hamlファイルを作成し、表示内容を記載する
②viewフォルダ内にある edit.html.hamlと new.html.hamlに下記のコードを記載するnew.html.haml/edit.html.haml= render "form"感想
あら!簡単
何ということでしょう!いとも簡単に画面の表示ができました!しかし、、、
私が実装しているアプリには問題が発生。。。
form_forにurlを指定していたためエラーが発生してしまいました。。。。
こちらの解決法は下記URLをご覧くださいませURL
https://qiita.com/kazuko___3o3___/items/37579db477c5f398c472
- 投稿日:2020-05-30T16:03:02+09:00
【第2回】LINE×Ruby on Railsで作ろう!シゴトに生かすLINE Bot!
はじめに
以下の2つを利用します。 まだ準備できていない方は準備をおねがいします。
- Ruby 2.7.1
- ngrok
- 準備がまだの方はこちらから準備ください:https://bit.ly/36ctimN
前回参加されていない方はこちらから
clone& 環境変数の設定をしてLINE Botがメッセージを返すところまで進めてください$ git clone https://github.com/4geru/rails-line-bot-lecture.git $ cd rails-line-bot-lecture $ cp .env.sample .env $ bundle install環境変数はこちらから: https://developers.line.biz/console/
前回の資料: 【第1回】LINE×Ruby on Railsで作ろう!シゴトに生かすLINE Bot! - Speaker Deck
今回のやること
- おみくじbotを作る
- 前回の復習で新しいメッセージを追加する
- じゃんけんbotを作る
- Flex Messageでボタンを押すことができる
- リッチメニューからじゃんけんを始める
今回のゴール
- LINEからのイベント/LINEに送れるメッセージを学ぶ
- FlexMessageの実装ができるようになる
- リッチメニューの実装ができるようになる
次回予告
レシピお問い合わせBot
LINE Botと外部APIをつなげるだけで、活用できる幅が非常に広がります
コロナも終息になりつつありますが、コロナの影響で自炊する機会も増えたのではないでしょうか?
ということで次回は楽天レシピAPIと連携をしてみます
前回学んだことの応用
Railsのサーバーを起動する
前回から今回用に新たにデータの追加したので、最新のプロジェクトをローカルに持ってきます
$ cd rails-line-bot-lecture/
$ git pull origin
$ git checkout origin/master
Railsのサーバーを起動させます
$ bundle exec rails s -p 3000
ngrokの起動
※ ngrokとは一時的に外部にportを解放するものです。
webhookの登録
以下にアクセスします。
LINE Developers:https://developers.line.biz/console/
- 「Messaging API」をクリック
- 前項でコピーしたngrokが生成したURLの末尾に
/linebotsを加えたものをWebhook URLの欄に入力します。
前回の復習
おみくじメッセージの実装
app/controller/linebots_controller.rbに下記を記述しますapp/controller/linebots_controller.rb... if event['message']['text'] =~ /カテゴリ/ LineBot::Messages::LargeCategoriesMessage.new.send # ==== ここから新しく追加 ==== elsif event['message']['text'] =~ /おみくじ/ { type: 'text', text: '今日の運勢は' + ['大吉', '中吉', '小吉', '凶'].sample + 'です' } # ==== ここまで新しく追加 ==== else ...
じゃんけんBotの作成
関係するファイル
Flex Messageの概要
Flex MessageはNativeでいうAlertやDialogのようなリッチなインターフェースをLINE Bot上で実現することが出来る機能です。
バブルメッセージとカルーセルメッセージが存在があります。
- バブルメッセージ:1つのメッセージを表示
- カルーセルメッセージ:複数のバブルメッセージを表示
Flex Messageの構築ツール
Flex Messageは自由度が高い分デザインが大変なのですが、以下のようなツールを使うと手軽に構築することができます。
- FlexMessageSimulator:Webアプリ
- LINE Bot Designer:デスクトップアプリ
Flex Mesage Simulator
Flex Message Simulator:https://developers.line.biz/flex-simulator/LINE Bot Designer
LINE Bot Designer:https://developers.line.biz/ja/services/bot-designer/
Flex Messageを作る
Flex Message Simulator:https://developers.line.biz/flex-simulator/
データのコピー
- View as JSON > Copy からJSONデータを内容は編集せずそのままコピーします
Messageファイルの作成
app/service/linebots/messages/sample_message.rb# class TemplateMessage 以下に変更 class SampleMessage include LineBot::Messages::Concern::Carouselable def send carousel('alter_text', [bubble]) end def bubble # ここにペースト end
- class名をTemplateMessageから SampleMessageに変更します
- Flex Message SimulatorのJSONをコピーしてbubbleの中に貼り付けます
LinebotsControllerに追加
app/controller/linebots_controller.rbを開きますapp/controller/linebots_controller.rbwhen Line::Bot::Event::Message if event['message']['text'] =~ /カテゴリ/ LineBot::Messages::LargeCategoriesMessage.new.send elsif event['message']['text'] =~ /おみくじ/ { type: 'text', text: '今日の運勢は' + ['大吉', '中吉', '小吉', '凶'].sample + 'です' } # ==== ここから新しく追加 ==== elsif event['message']['text'] =~ /FlexMessage/ LineBot::Messages::SampleMessage.new.send # ==== ここまで新しく追加 ==== else { type: 'text', text: event['message']['text'] } endユーザーが送ってきたメッセージに 「FlexMessage」が含まれていた場合、今回作成したSampleMessageに保存された、FlexMessageを返します。
確認
- テキストで「FlexMessage」とメッセージを送ると Flex Messageが返って来くるはずです。
じゃんけんメッセージを送る
app/controller/linebots_controller.rbを開きます
ユーザーが送ってきたメッセージに「じゃんけん」が含まれていた場合に、じゃんけんの選択肢を返すFlexMessageが記述されているJankenMessageクラスを返しますapp/controller/linebots_controller.rbwhen Line::Bot::Event::Message if event['message']['text'] =~ /カテゴリ/ LineBot::Messages::LargeCategoriesMessage.new.send elsif event['message']['text'] =~ /おみくじ/ { type: 'text', text: '今日の運勢は' + ['大吉', '中吉', '小吉', '凶'].sample + 'です' } elsif event['message']['text'] =~ /FlexMessage/ LineBot::Messages::SampleMessage.new.send # ==== ここから新しく追加 ==== elsif event['message']['text'] =~ /じゃんけん/ LineBot::Messages::JankenMessage.new.send # ==== ここまで新しく追加 ==== else { type: 'text', text: event['message']['text'] } end
JankenMessage
LINE Botに「じゃんけん」とメッセージを送ると、下のようなメッセージが返ってきます。
JankenMessageの解説
実際に
LineBot::Messages::JankenMessage.new.sendを見ていきます。app/services/line_bot/messages/janken_message.rbに記述されています。「グー」では、messegeのtypeは
buttonです。
buttonには、actionを設定することができます。actionでボタンを押した時の挙動を設定できます。
actionには、postback,message,uri,datetimepickerなどがあります。
参考:Home > ドキュメント > Messaging API > アクション今回は、
postbackを利用します。postbackはdisplayTextでボタンを押したメッセージを、
任意データをdataをサーバーに返すことができます。{ "type": "button", "style": "link", "height": "sm", "action": { "type": "postback", "label": "ぐー", "displayText": "ぐー", "data": "type=janken_result&result=gu" } }
リッチメニューの設定
次にリッチメニューを実装していきます
リッチメニューとは
リッチメニューの設定
- 以下のURLにアクセスし、対象のbotを選択します
こちらから: https://manager.line.biz/
- 「ホーム」→「リッチメニュー」→「作成」 を選択
確認
これで今回は終了です!
トラブルシューティング
- プログラムのコードは
finished_part2のブランチにまとまっていますgit checkout finished_part2でハンズオン終了時のコード を見が見れます- ハンズオン開始時と終了時のコードを比べたい場合は、以下 のURLを参照してください
- https://github.com/4geru/rails-line-bot-lecture/compare/finished_part2
時間が余った方へ
コンピュータとユーザーのメッセージを変えてみよう
app/services/line_bot/postback_event.rbの中にコンピュータが出した手を返すメッセージが格納されています。ここを拡張して、ユーザーの出した手も返してみましょうapp/services/line_bot/postback_event.rbmodule LineBot class PostbackEvent def self.send(data) ... when 'janken_result' { type: 'text', text: 'コンピュータは' + ['ぐー', 'ちょき', 'ぱー'].sample + 'を出しました' } when 'middle_search'じゃんけんの結果を返すclassを追加してみよう
app/services/line_bot/messages/template_message.rbを元にして、じゃんけんの結果を返す
app/services/line_bot/messages/janken_result_message.rbを追記してみましょう。じゃんけんがあいこだった場合の処理を追加みよう
回答は
finished_part2ブランチのapp/services/line_bot/messages/janken_result_message.rbの中にあります。
参照:https://github.com/4geru/rails-line-bot-lecture/compare/finished_part2#diff-b7aaf0c0f1afc44c5fab758532c3f936R6-R32

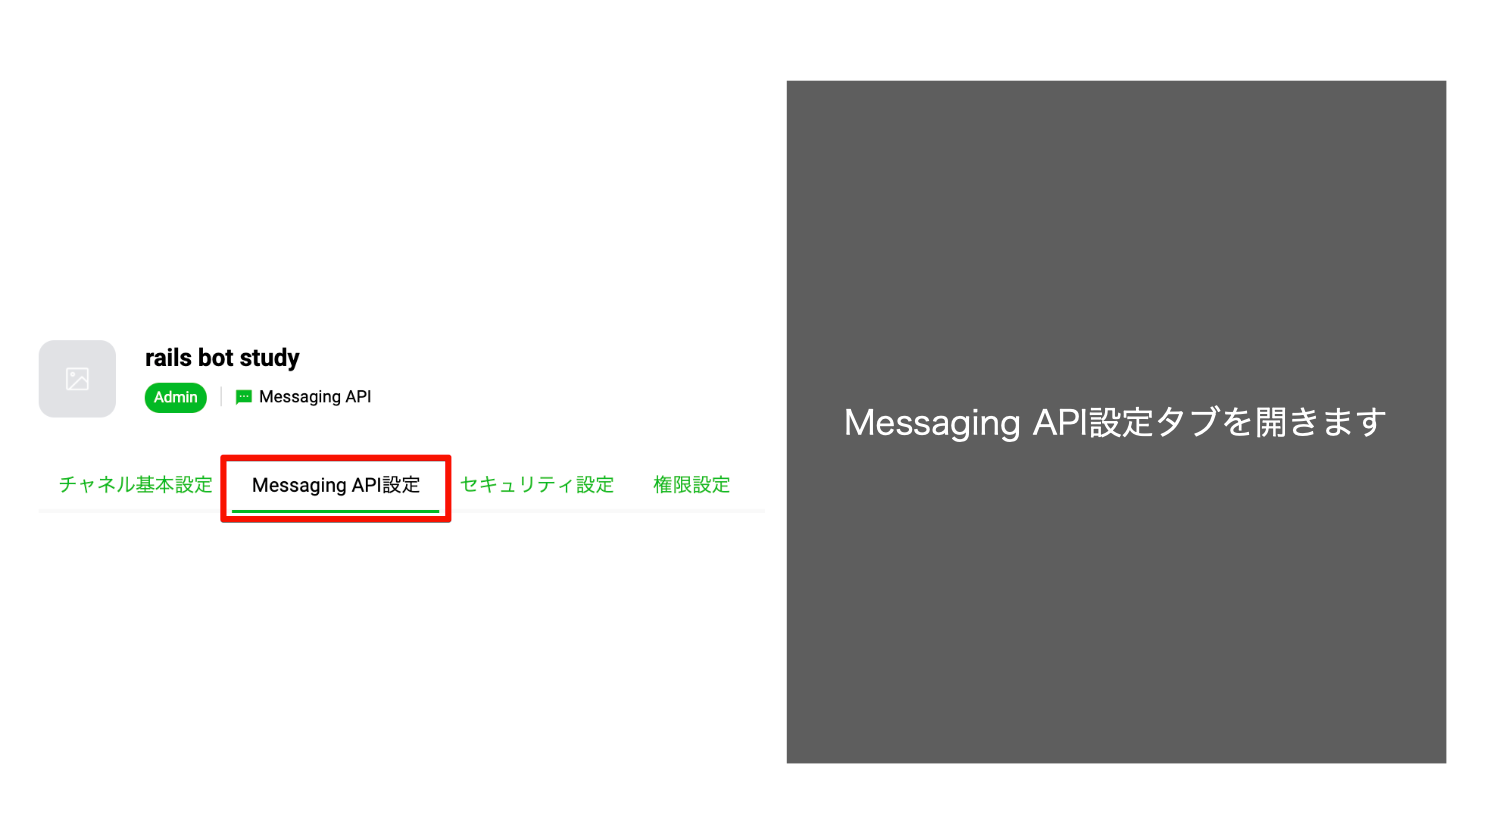
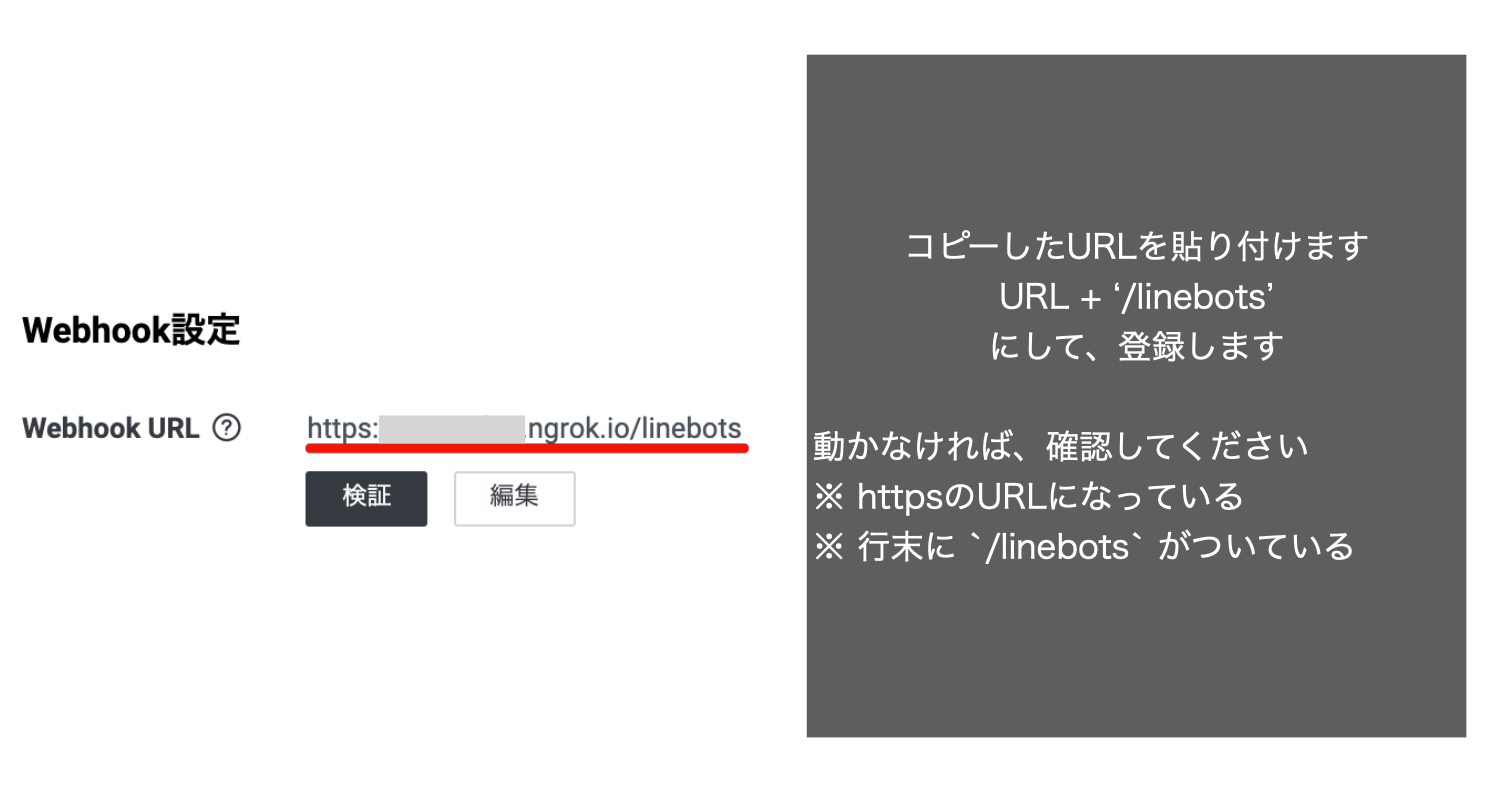
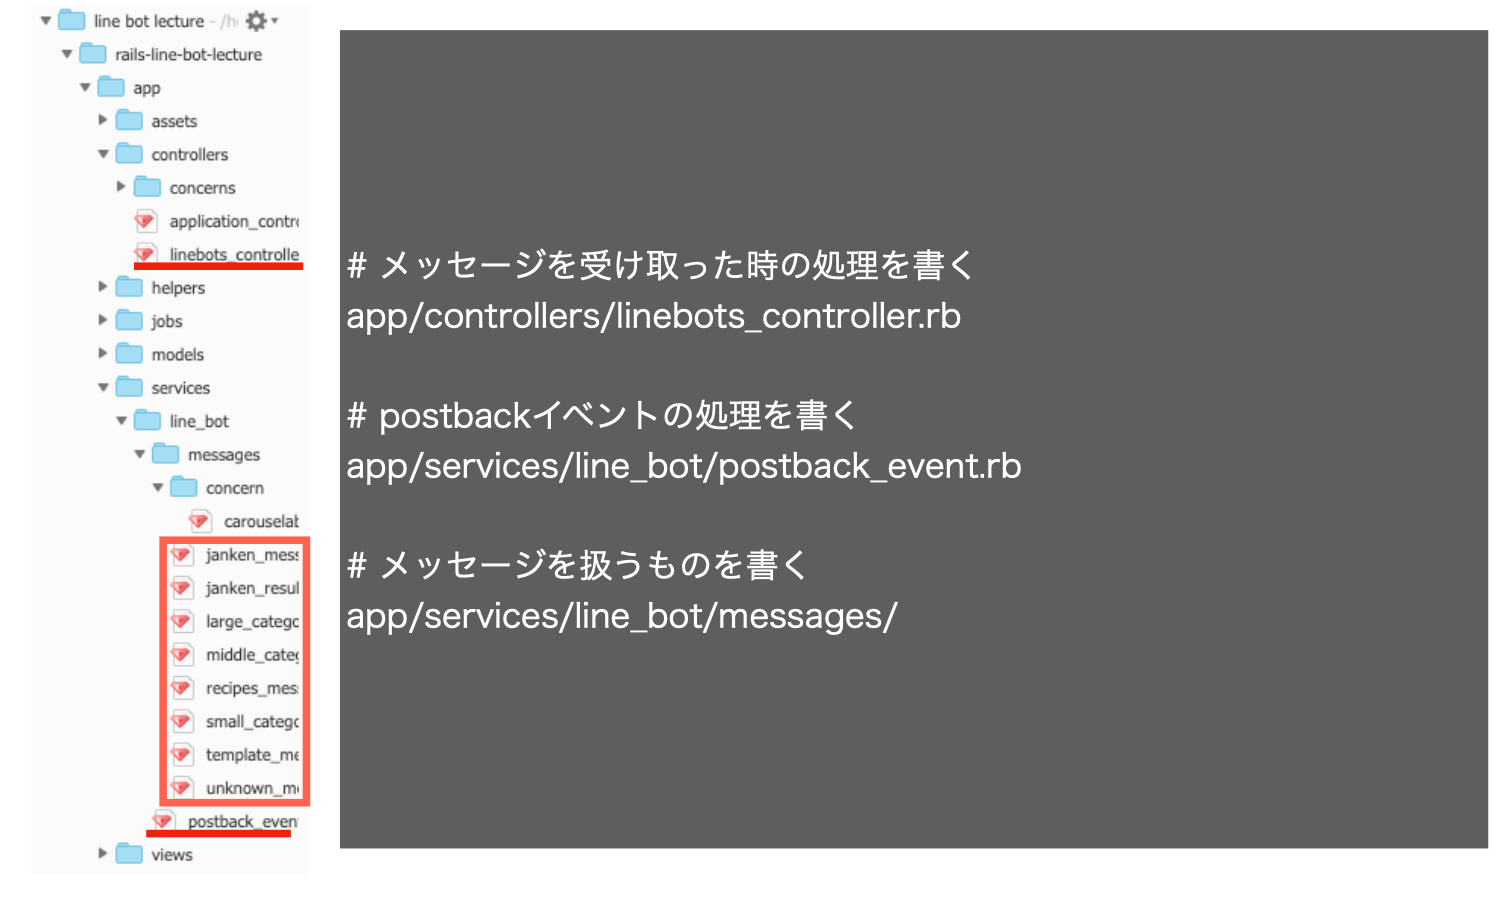

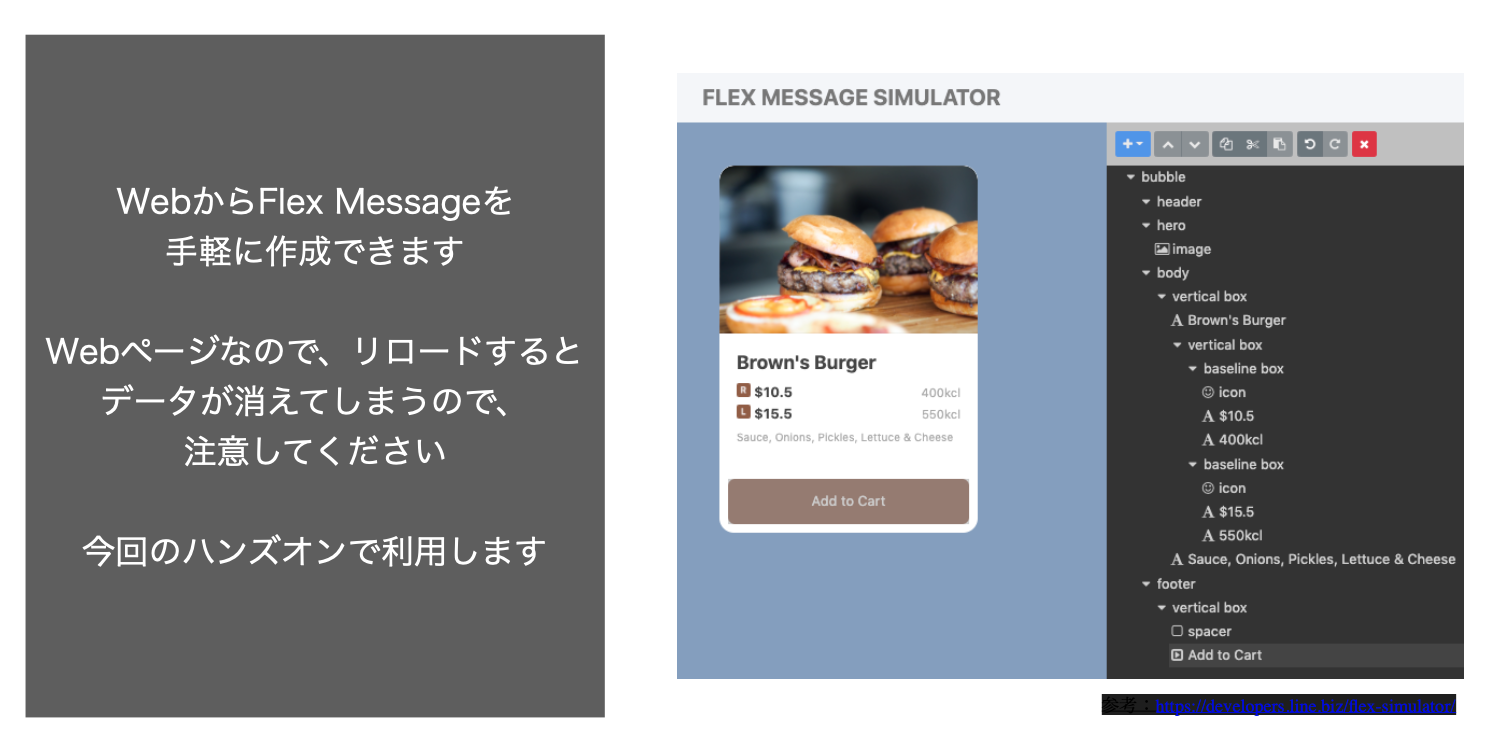

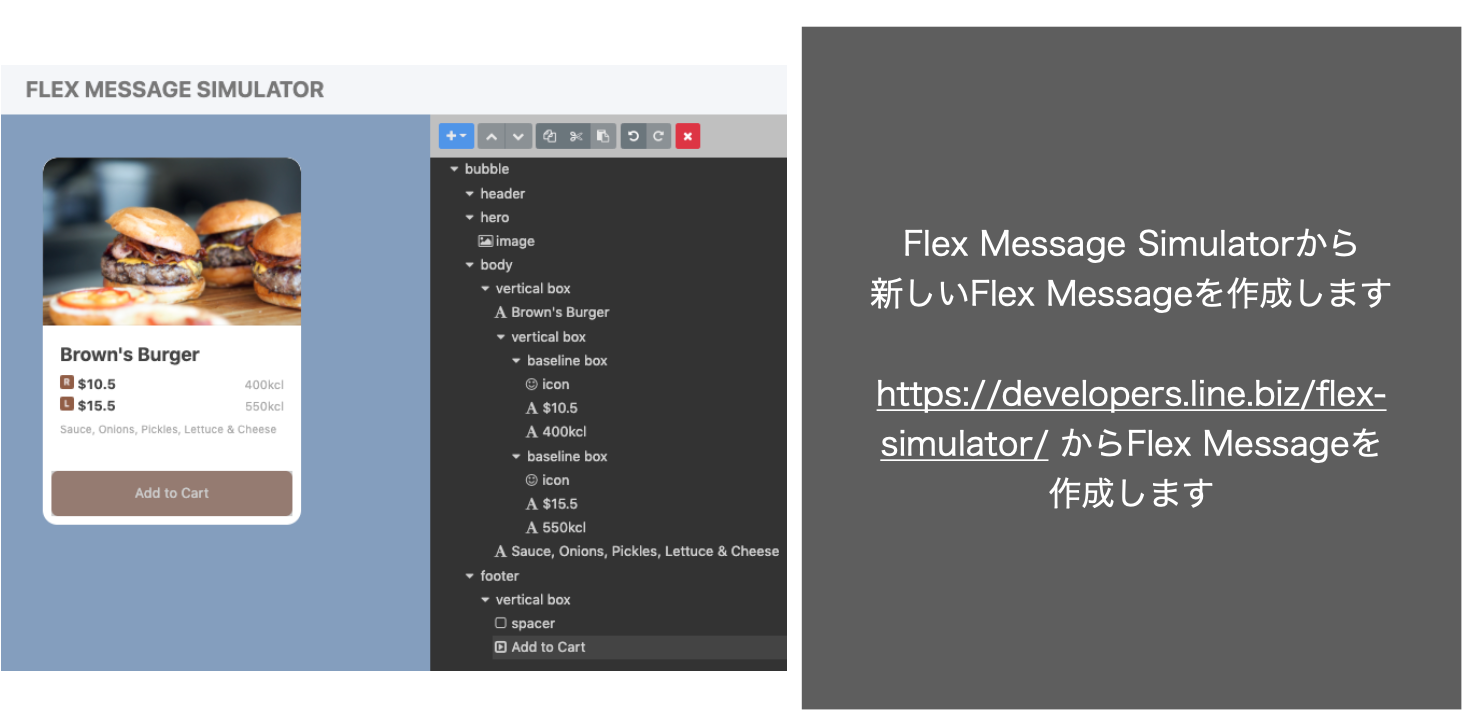

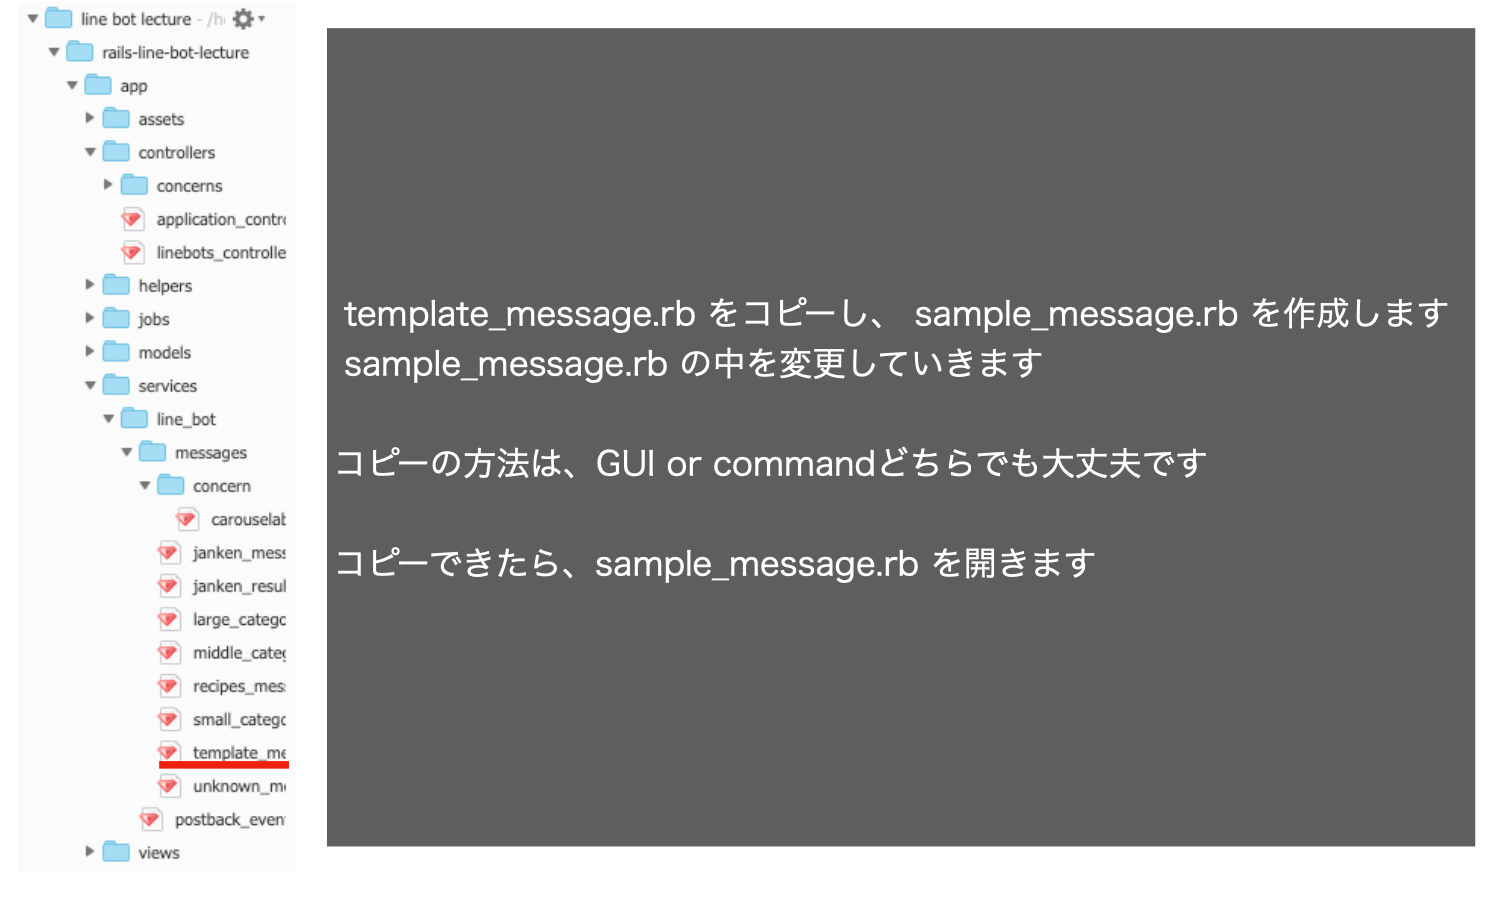

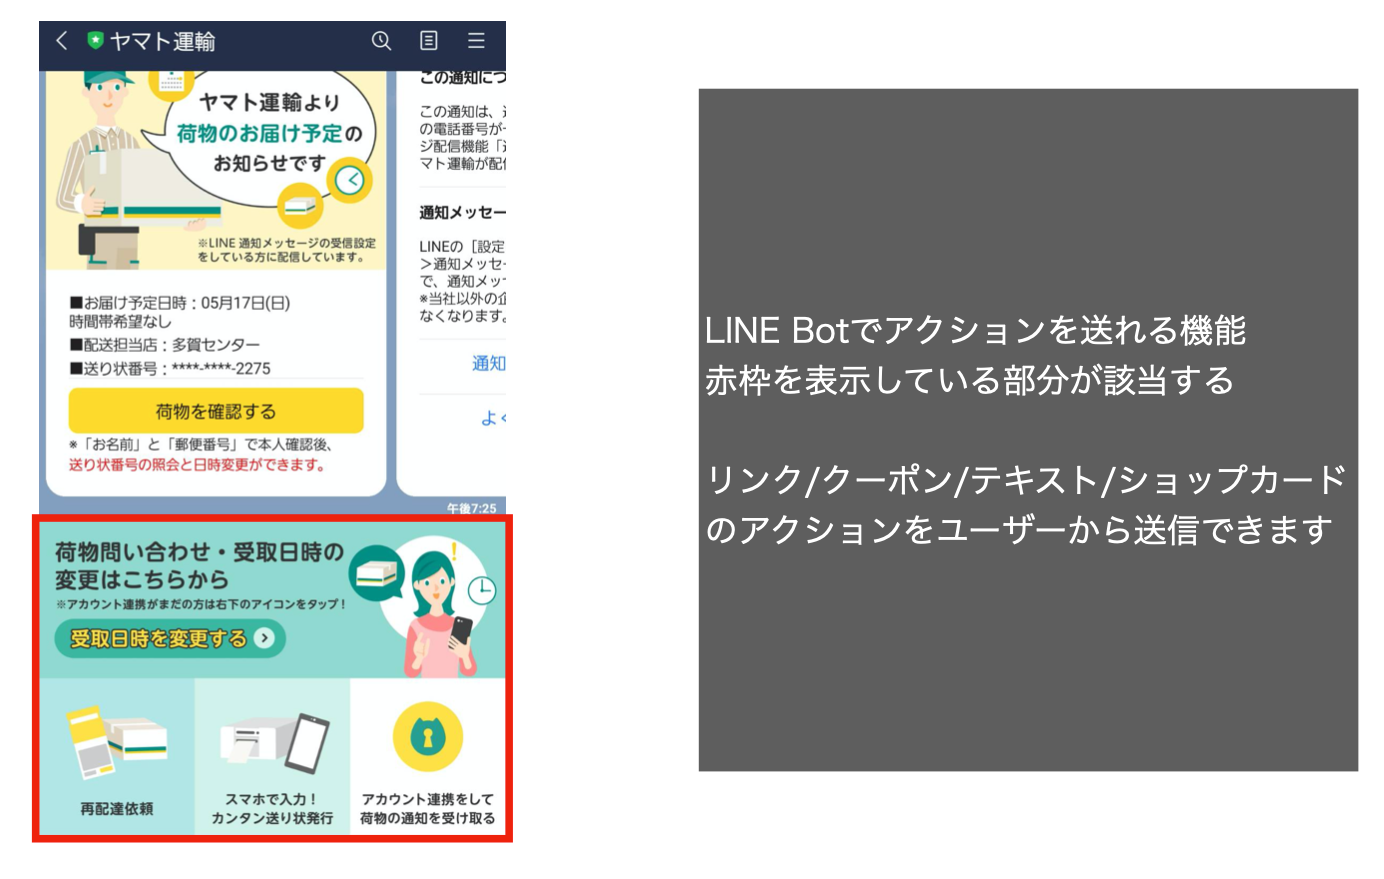

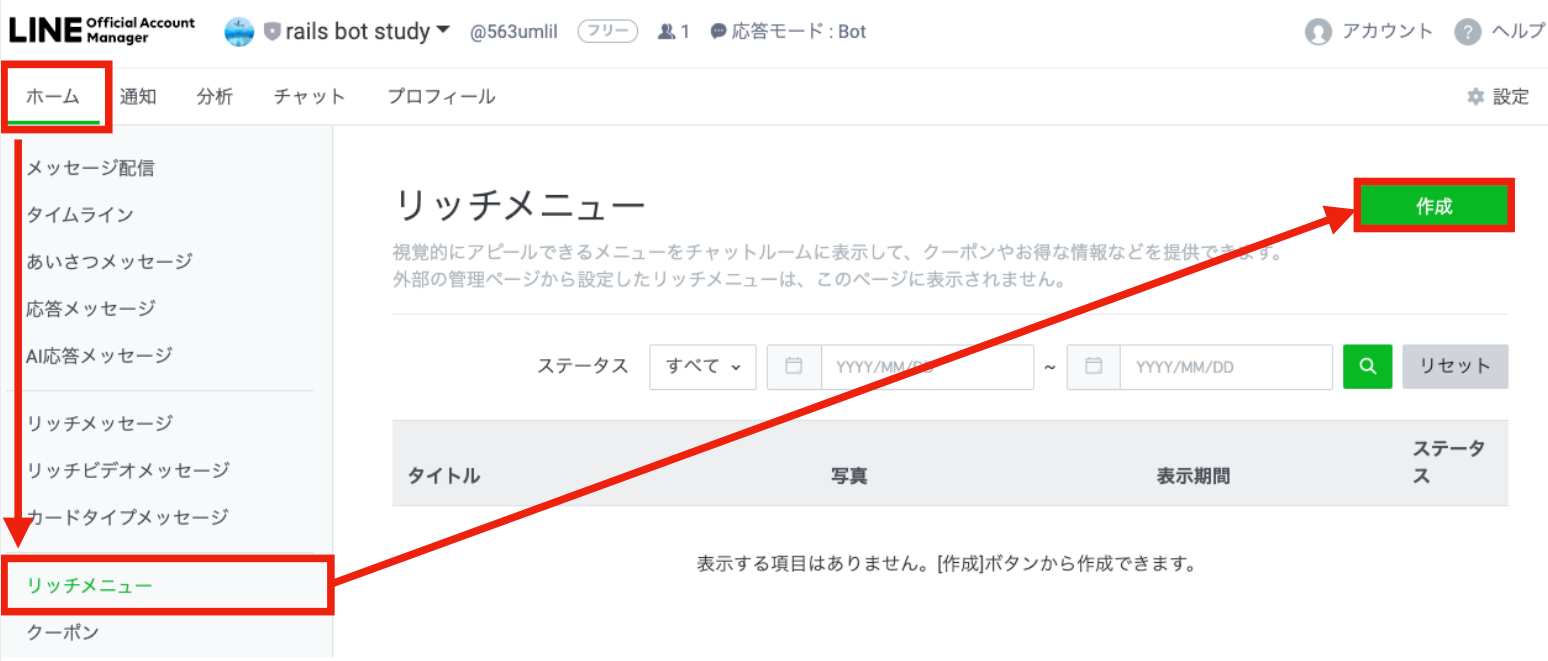
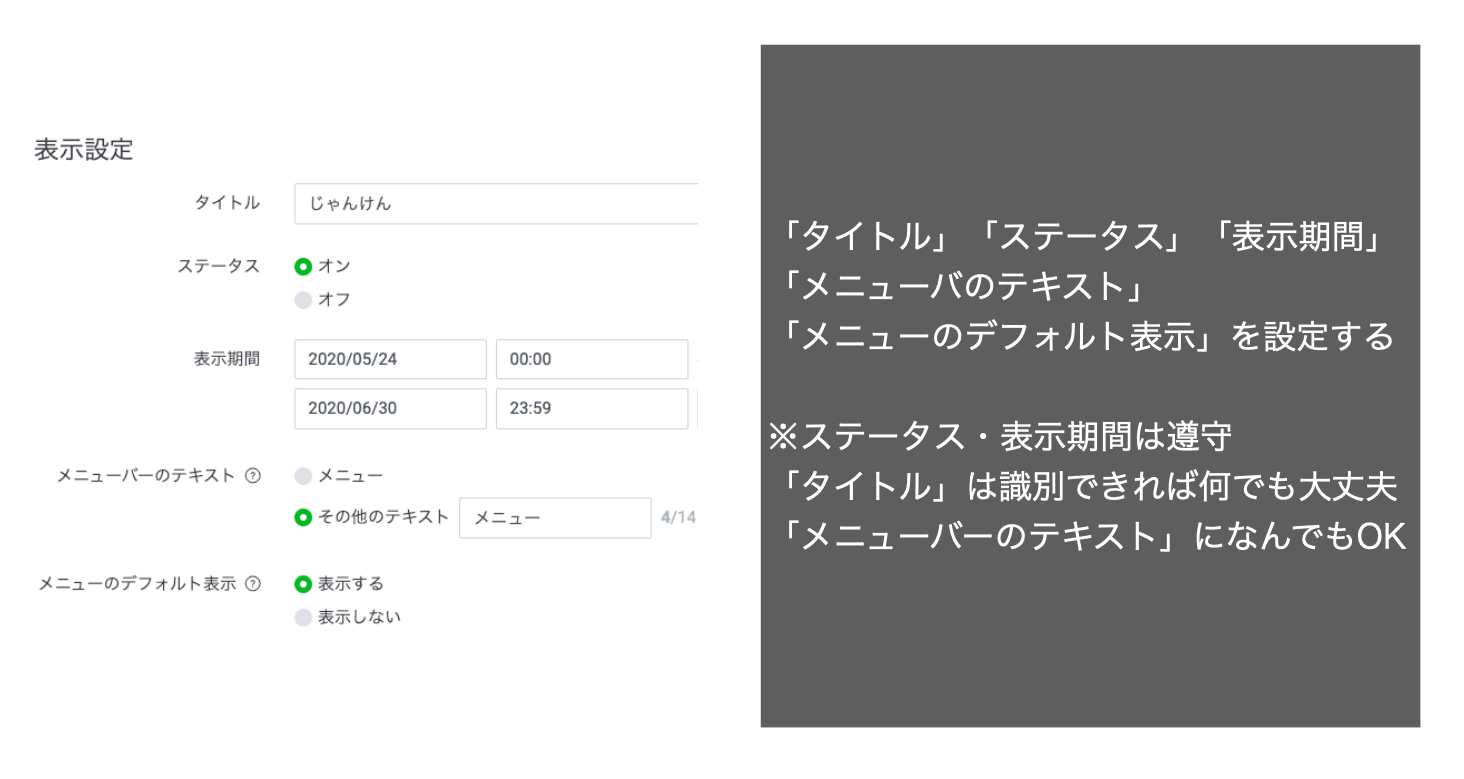
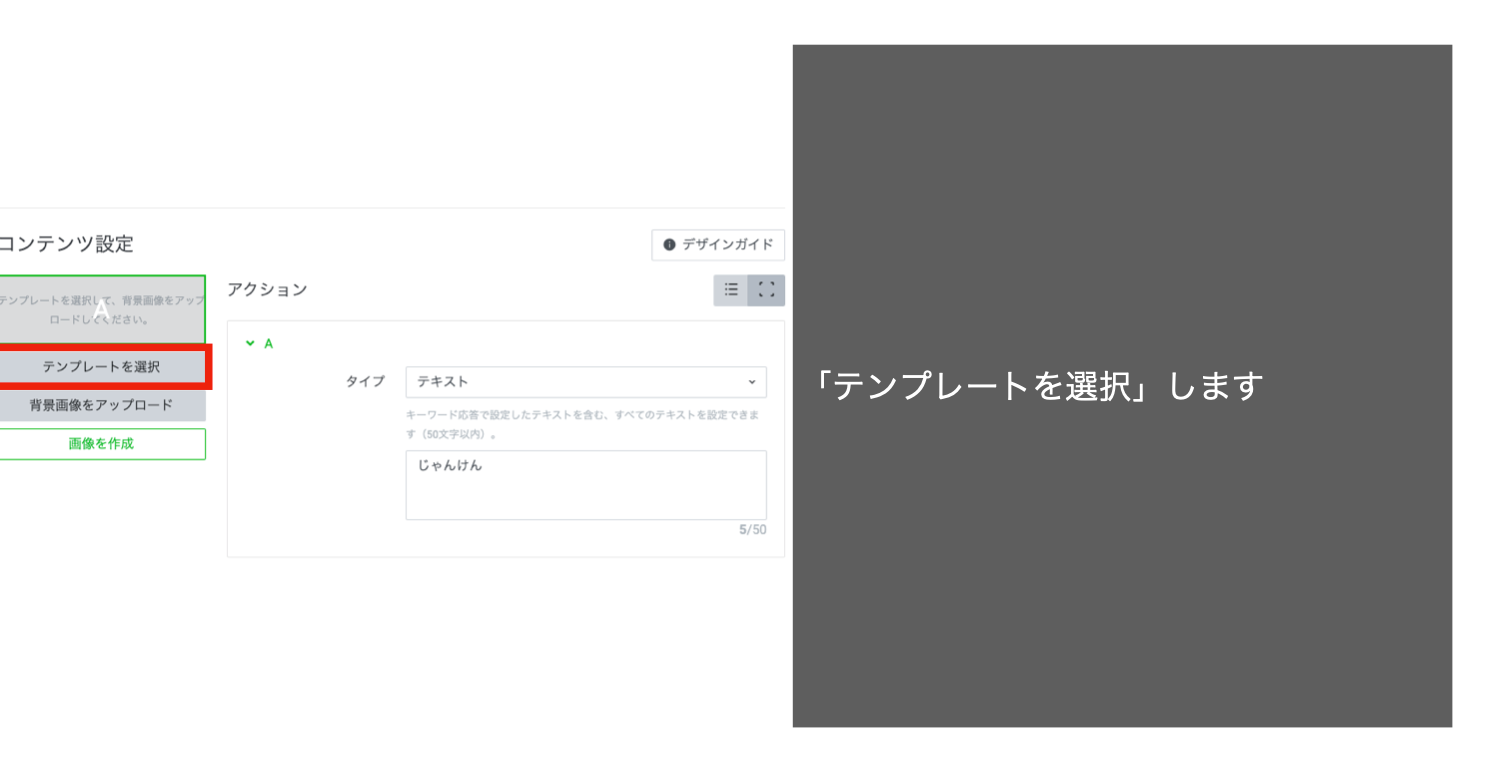
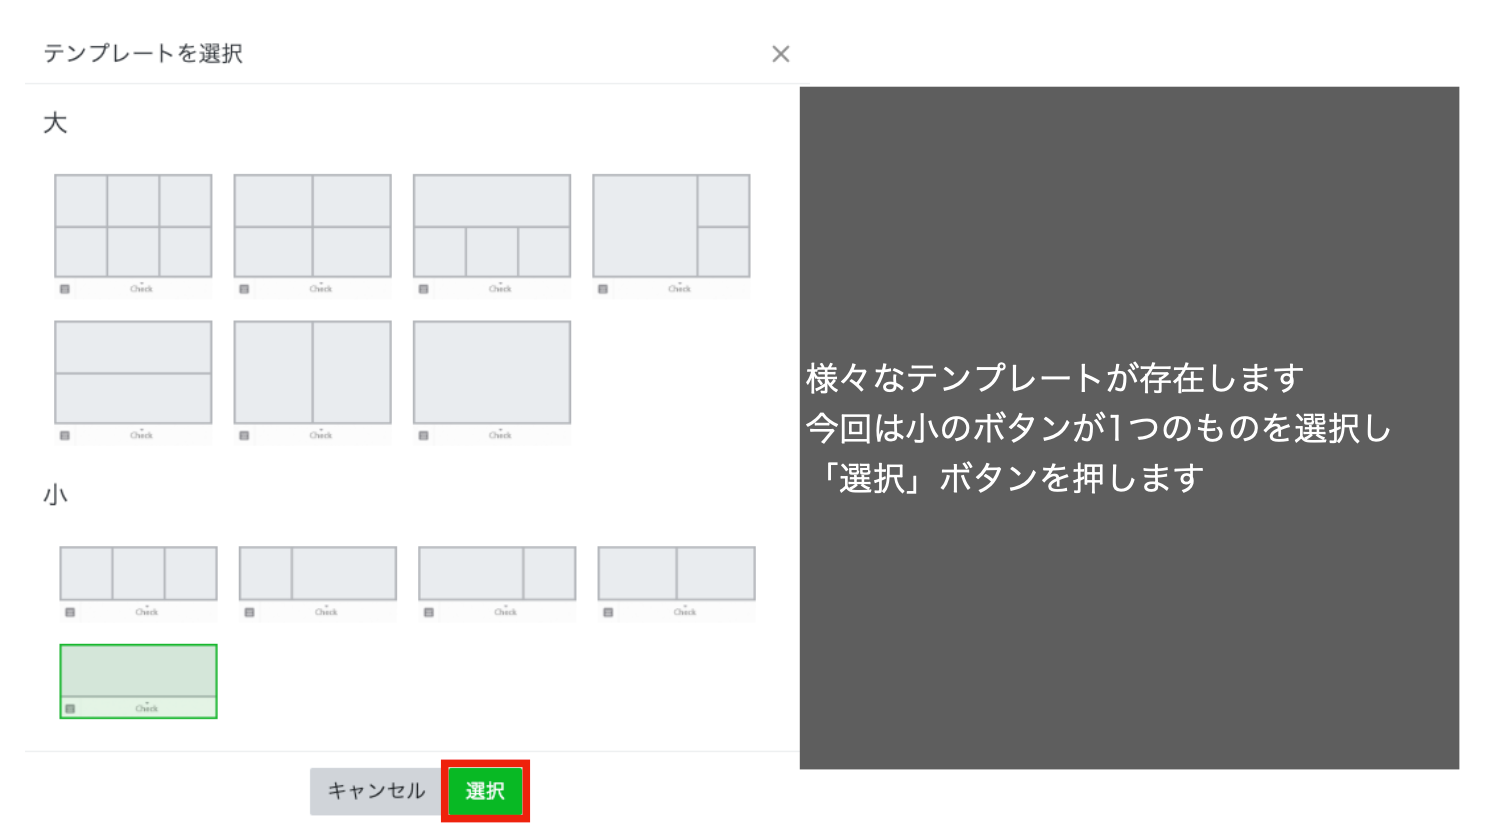
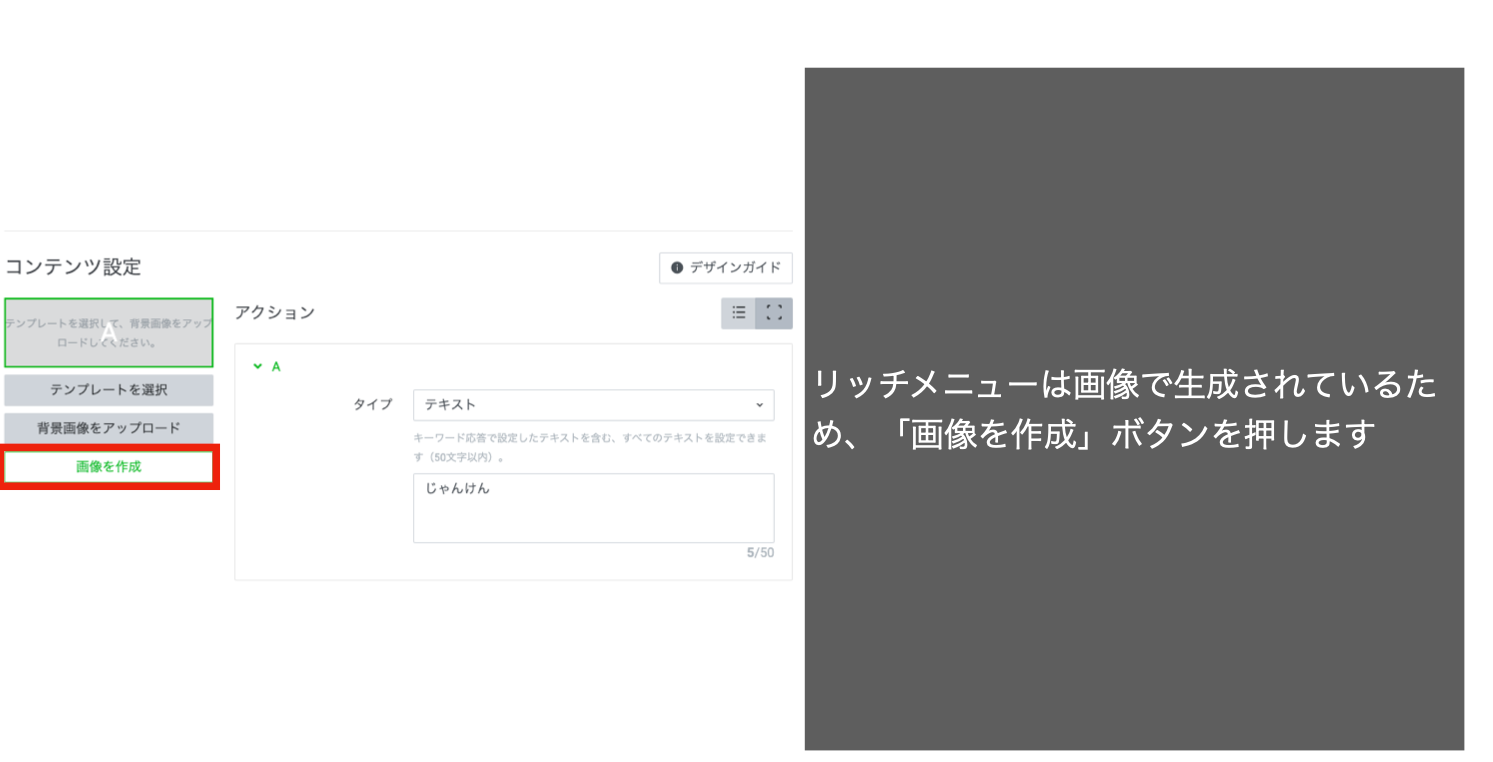
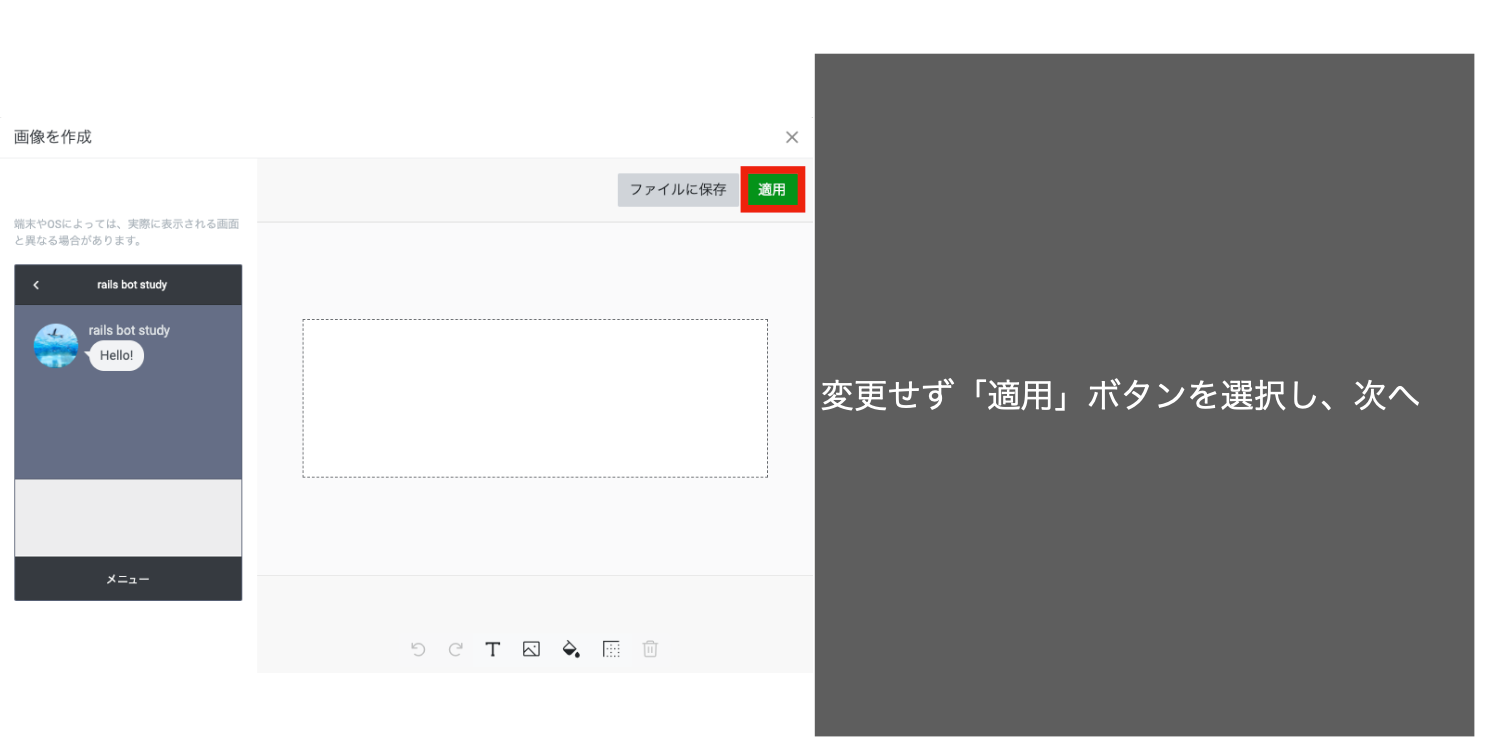

- 投稿日:2020-05-30T15:55:00+09:00
[Rails] herokuデプロイエラー Precompiling assets failed.
備忘録です
Railsでアプリ作成し、herokuにデプロイしようとしたところgit push heroku masterでエラーが出たので、解決方法を残しておきます。
デプロイまでの流れ
【初心者向け】railsアプリをherokuを使って確実にデプロイする方法【決定版】を参考にしました。
エラー解決参考記事
Uglifier::Error: Unexpected character '`' Herokuデプロイ時のエラー解消方法を参考にしました。
本題
herokuへデプロイするぞというところから書きます。
git push heroku masterを実行したところ、「Precompiling assets failed.」エラーが、、、remote: ! remote: ! Precompiling assets failed. remote: ! remote: ! Push rejected, failed to compile Ruby app. remote: remote: ! Push failed remote: Verifying deploy... remote: remote: ! Push rejected to golfmatch. remote: To https://git.heroku.com/golfmatch.git ! [remote rejected] master -> master (pre-receive hook declined) error: failed to push some refs to 'https://git.heroku.com/アプリ名'Precompiling assets failed.
プリコンパイルってなんだ?
調べました。プリコンパイルとは、
コンパイルするための事前処理(読んで字の如し)
コンパイラ(翻訳者)が理解できるソースにする処理だそう。コンパイルとは、
コンパイルとは、エディタで書いたプログラミング言語(高水準言語)を機械語に変換する作業。
PC:機械語で命令
人間:機械語は書きにくいからプログラミング言語(高水準言語)で記述ニュアンスが掴めればでいいでしょう。
調べていくうちに、目立つところばかり見るな、ログを見よと言われた。
上に辿ってくと、rake aborted! remote: Uglifier::Error: Unexpected character '`'非同期通信の際に書いた、バックティック文字がUnexpectedですと。
ローカルではちゃんと動いていたので記述ミスではない。とりあえずエラー文で検索。ドンピシャヒットしました。
config>environments>production.rbの下記を通り編集しました。production.rbconfig.assets.js_compressor = :uglifier #これをコメントアウトする # config.assets.js_compressor = :uglifierこれで再度git push heroku masterを実行したらデプロイできました!
ログを辿る大切さが身に染みて分かりました。
ありがとうございました!!
- 投稿日:2020-05-30T14:06:14+09:00
【置換】コメントアウトを削除して改行を残さない方法【正規表現】
はじめに
rails newで作成されたファイルにあるデフォルトのコメントアウトをテキストエディタでまとめて削除したい。
でも普通に置換えたら改行が残ってしまう。
そんな時に少し便利な正規表現。使用環境
- Visual Studio Code (version 1.45)
やり方
検索する文字列:
^\s*#.+\n^[ \t]*#[^\n]*(?:\n|$)
置換え後の文字列:指定しない(空白)サンプル
置換前
require_relative 'boot'

require 'rails/all'

# Require the gems listed in Gemfile, including any gems
# you've limited to :test, :development, or :production.
Bundler.require(*Rails.groups)

module SampleApp
  class Application < Rails::Application
    # Initialize configuration defaults for originally generated Rails version.
    config.load_defaults 6.0

    # Settings in config/environments/* take precedence over those specified here.
    # Application configuration can go into files in config/initializers
    # -- all .rb files in that directory are automatically loaded after loading
    # the framework and any gems in your application.
  end
end
置換後
require_relative 'boot'

require 'rails/all'

Bundler.require(*Rails.groups)

module SampleApp
  class Application < Rails::Application
    config.load_defaults 6.0

  end
end
注意点
使用するテキストエディタによっては挙動が異なるかもしれませんので、異なる環境で使用する際は調整をお願いします。
元々ある空行は基本的に削除しないのですが、コメントアウトの前行が空行の場合、その空行は削除されてしまいます。
※2020.5.31追記 上記の点は解決することができました。ご協力をいただきました@earthdiver1さん、誠にありがとうございます!
- 投稿日:2020-05-30T13:31:20+09:00
font-awesome-sassを使用する[rails, slim, FontAwesome]
参考文献
- RailsでFontAwesomeを使う (https://qiita.com/fumikao/items/59ab20af33047d06e6e3)
- gem 'font-awesome-rails'は最新版に対応してない... 代わりにfont-awesome-sassを使おう! (https://qiita.com/paudorino/items/d54348f6d48eefcee6c7)
- FontAwesome::Sass (https://github.com/FortAwesome/font-awesome-sass)
FontAwesome
Get vector icons and social logos on your website with Font Awesome, the web's most popular icon set and toolkit.
webで人気のあるアイコンセットやツールキットのFontAwesomeを使うことで, ベクターアイコンやソーシャルロゴを取得することができます。
FontAwesome公式サイト: (https://fontawesome.com/)font-awesome-sass
利用手順
今回はfont-awesome-sassを利用します。
詳細な情報については以下のサイトを参照してください。
https://github.com/FortAwesome/font-awesome-sassGemfileに記述
Gemfilegem 'font-awesome-sass', '~> 5.13.0'実行
terminalで以下のコマンドを入力
bundle installapplication.scssへ記述
app/assets/stylesheets/application.scss@import "font-awesome-sprockets"; @import "font-awesome";使用例[slim]
今回使用するアイコン
記述
p
  |
    test
  = icon 'far', 'surprise'
/<p>
/  test
/  <i class="far fa-surprise"></i>
/</p>
出力結果

- 投稿日:2020-05-30T13:30:21+09:00
【Rails/RSpec】mockの戻り値はOpenStructを使えば仕事が捗る
こういうコードに対して
class SomeClass
  def initialize(foo)
    @foo = foo
  end

  def call
    response = YourClass.call(@foo)
    unless response.success?
      raise StandardError, 'your error message comes here'
    end
    ...
  end
end
こういう mock と mock response を書く。
let(:mock_response) { OpenStruct.new(success?: true, body: { bar: 'bar' }.to_json) }

before do
  allow(YourClass).to receive(:call).and_return(mock_response)
end
異常系のテストをする時は、
mock_responseをsuccess?: falseとする。let(:mock_response) { OpenStruct.new(success?: false, body: { bar: 'bar' }.to_json) }
- 投稿日:2020-05-30T11:54:31+09:00
【grover】RailsでPDFの生成をする【2020年度版】
Rails で PDF を生成する際はどうされていますか?
少し調べると wicked_pdf や prawn などの gem が出てきます。今回は grover という Puppeteer/Chromium を使って HTML から PDF や画像を生成する gem の存在を知り、試してみたのでメモを残します。
手順
puppeteer をインストール
npm install puppeteerGemfile に記述
gem 'grover'config/initializers/grover.rb に以下を追加。
# frozen_string_literal: true

Grover.configure do |config|
  config.options = {
    format: 'A4',
    margin: {
      top: '5px',
      bottom: '10cm'
    },
    viewport: {
      width: 640,
      height: 480
    },
    prefer_css_page_size: true,
    emulate_media: 'screen',
    cache: false,
    timeout: 0, # Timeout in ms. A value of `0` means 'no timeout'
    launch_args: ['--font-render-hinting=medium', '--lang=ja'], # 日本語表示のため --lang=ja を追加
    wait_until: 'domcontentloaded'
  }
end
controllers/api/sample_controller.rb に以下を記述。
ルーティングの記述も忘れずに。# frozen_string_literal: true module Api class SampleController < ApplicationController include ActionController::MimeResponds # API モードで respond_to を使うために必要 def show controller = ActionController::Base.new html = controller.render_to_string(template: 'api/hoges/show', layout: 'pdf') pdf = Grover.new(html).to_pdf respond_to do |format| format.html format.pdf do send_data(pdf, filename: 'your_filename.pdf', type: 'application/pdf') end end endpdf 生成用の layout ファイルを作成
views/layouts/pdf.html.erb
<!DOCTYPE html>
<html>
  <head>
    <meta http-equiv="content-type" content="text/html; charset=utf-8" />
    <style>
    </style>
  </head>
  <body>
    <%= yield %>
  </body>
</html>
api/sample/show.html.erb
<p>請求書</p>

<style>
p { font-size: 20px; }
</style>
結果
最後に
簡単に pdf を生成することができました。
処理時間も気にならないレベルです。 puppeteer を入れればフォントの設定など不要そうなので良さそうです。
- 投稿日:2020-05-30T11:03:09+09:00
【Rails】request specでsigned/encrypted cookiesにアクセスする
環境
- Rails 5.2.3
- RSpec 3.9.0
問題/やりたいこと
そのままでは request spec 内で signed cookie 及び encrypted cookie にアクセス出来ません。
具合的には、以下のようなエラーが出ます。NoMethodError: undefined method `signed' for #<Rack::Test::CookieJar:0x00007fbc6751fa38>これは、request spec 内で使われている cookies オブジェクトが
ActionDispatch::Cookies::CookieJarではなくRack::Test::CookieJarのインスタンスであり、signedやencryptedメソッドを実装していないためです。解決方法
it do
  get some_url
  expect(response).to have_http_status(:success)

  jar = ActionDispatch::Cookies::CookieJar.build(request, cookies.to_hash)
  expect(jar.signed['your_cookie_comers_here']).to eq('something')
  expect(jar.encrypted['another_cookie_comers_here']).to eq('something_else')
end
補足
ただこれだけでは、
secure: true(httpsサーバにだけcookieを送信する設定)の場合には動きません。(jar.signed['your_cookie_comers_here']の部分がnilになってしまいます)cookies.signed[:your_key_comers_here] = { value: 'your_value_comers_here', expires: 1.day.from_now, secure: true, # この設定 httponly: true }rspec を ssl モードで動かす必要がある気がしますが、↓に書かれているように
protocol: 'https://'やprotocol: :https'を試しても駄目でした。と言われるので、そもそも
ArgumentError: unknown keyword: protocolprotocolが rspec でサポートされていないようです。https://stackoverflow.com/questions/6785261/test-an-https-ssl-request-in-rspec-rails
元ネタ
こちらの記事を参考にさせてもらいました。
https://philna.sh/blog/2020/01/15/test-signed-cookies-in-rails/
- 投稿日:2020-05-30T10:42:00+09:00
RailsでJavascriptを使う
Rails5.1以降では、webpackがJSの管理パッケージとして導入されており、以前で使われていたsprocketsはデフォルトでは装備されなくなっています。
ApplicationHtmlをみてみると、application_pack_includeなんちゃらみたいなコードがありますが、これがファイルにあるjsのコードを全て読み込んでapplication.jsに送っています。
sprocketsの場合だと、application_something_includeなんちゃらだったと思います。
- 投稿日:2020-05-30T10:37:34+09:00
link_toメソッドの使い方
link_toメソッドはerbに埋め込みます。
アセットパイプラインにより、erbファイルをhtmlに変換する事でlink_toからaタグに変わります。
このように、Rubyのコードを自動で変換する機能がついているのがRuby on Railsです。
えへへ
- 投稿日:2020-05-30T08:33:41+09:00
【Rails】APIモードでcookieを使う
環境
- Rails 5.2.3
前提
または
ActionController::APIを継承して API用のcontrollerを使っている。問題/やりたいこと
そのままでは cookiesにアクセスできないので、アクセスできるようにしていきます。
やり方
ここでは後者(
ActionController::APIを継承して API用のcontrollerを使っている)前提とします。ActionController::Cookies を include する
ActionController::APIを継承しているベースコントローラー、または実際にcookiesにアクセスしたいコントローラーでinclude ActionController::Cookiesします。つまり
  class YourApiBaseController < ActionController::API
    include ActionController::Cookies
または
  class YourApiController < YourApiBaseController
    include ActionController::Cookies
アプリケーションで ActionDispatch::Cookies を使えるようにする
config/application.rbmodule YourApi class Application < Rails::Application config.middleware.use ActionDispatch::Cookiesその他
別途
session_storeとcredentials.yml.enc(旧バージョンの場合はsecrets.yml*)の設定はされている必要があります。config/initializers/session_store.rbRails.application.config.session_store :cookie_store, key: 'your-cookie-key-comes-here'
- 投稿日:2020-05-30T00:38:21+09:00
bundle install時に、libv8やtherubyracerでエラーが出た
概要
既存のプロジェクトに参画する際、Railsの環境を構築するとき、libv8やtherubyracerにより以下のようなエラーが出たので対処方法を記載する。
# libv8のエラー
An error occurred while installing libv8(3.16.14.19), and Bundler
cannot continue.
Make sure that `gem install libv8 -v '3.16.14.19' --source
'http://rubygems.org/'` succeeds before bundling

# therubyracerのエラー
An error occurred while installing therubyracer(0.12.3), and Bundler
cannot continue.
Make sure that `gem install therubyracer -v '0.12.3' --source
'http://rubygems.org/'` succeeds before bundling
解決方法
下記の参考資料を参考にし、以下のコマンドにより解決した。
> brew install v8@3.15
> bundle config --local build.libv8 --with-system-v8
> bundle config --local build.therubyracer --with-v8-dir=$(brew --prefix v8@3.15)
上記コマンドを実行した後に、bundle installをすると成功した。
終わりに
今回は解決策のみ記載したが、libv8やtherubyracerの内容もしっかりと記載したい。
参考資料
・ https://gist.github.com/fernandoaleman/868b64cd60ab2d51ab24e7bf384da1ca
・ https://www.task-notes.com/entry/20170402/1491058800