- 投稿日:2020-05-19T17:14:24+09:00
[InvalidArgumentException] Could not find a matching version of package “laravel/install”. Check the package spelling, your version constraint and that the package is available in a stability which matches your minimum-stability (stable).
Could not find a matching version of package “laravel/install”でつまづいた点
背景
Laravelのインストールの際に添付のエラーが出たので、そのときの対処法をまとめます。
エラー$ composer global require “laravel/install” [InvalidArgumentException] Could not find a matching version of package “laravel/install”. Check the p ackage spelling, your version constraint and that the package is available in a stability which matches your minimum-stability (stable).動作環境
OS : macOS Mojave 10.14.6
Composer version 1.10.6結論
コマンドが間違えていたようでした.
正composer global require "laravel/installer"誤composer global require "laravel/install"原因
公式サイトを調べて見ると以下の記述がありましたので
"laravel/installer"が正しいようです.composer global require "laravel/installer=~1.1"
- 投稿日:2020-05-19T02:53:49+09:00
Laravelで環境(開発環境と本番環境等)ごとに異なる値を定義する
環境(開発環境と本番環境等)ごとに異なる値
データベースの接続先とかメールの送信元等、開発環境と本番環境で異なる値にしたいことがあります
それを実現するためにわざわざif文を書く必要はありません前提条件
eclipseでLaravel開発環境を構築する。デバッグでブレークポイントをつけて止める。(WindowsもVagrantもdockerも)
本記事は上記が完了している前提で書かれています
プロジェクトの作成もapacheの設定も上記で行っていますenvファイルの作成
(1) envファイル作成
/sample/.envがすでに存在していると思います
/sample/.envをコピーして/sample/.env.localという名前のファイルにします(2) 値の追記
/sample/.envに下記を追記
SAMPLE_KEY=SAMPLE_VALUE_PRD/sample/.env.localに下記を追記
SAMPLE_KEY=SAMPLE_VALUE_LOCALconfigファイルの作成
(1) /sample/config/sample.phpを作成
sample.php<?php return [ 'sampleKey' => env('SAMPLE_KEY'), ];env('SAMPLE_KEY')で先ほどenvファイルに追記したSAMPLE_KEYの値が取れます
Controllerにメソッド追加
(1) /sample/app/Http/Controllers/SampleController.phpにsettingメソッドを追記
    public function setting()
    {
        $data = ['key' => config('sample.sampleKey')];
        return view('sample.setting', $data);
    }
config('sample.sampleKey')で先ほどconfig/sample.phpに書いたsampleKey要素を取得できます
なぜここでenv('SAMPLE_KEY')ではなく、config('sample.sampleKey')で値を取得するのかは後述します(2) /sample/routes/web.phpに下記を追記
Route::get('sample/setting', 'SampleController@setting');viewの作成
/sample/resources/views/sample/setting.blade.phpファイル作成
setting.blade.php<html> <head> <title>sample</title> </head> <body> {{$key}} </body> </html>動作確認
apacheのhttpd.confに下記を追記
もしapacheにmod_envモジュールをインストールしていない方は、mod_envモジュールをインストールしてくださいhttpd.confSetEnv APP_ENV localapache再起動してアクセス
http://localhost/laravelSample/sample/setting実行結果
SAMPLE_VALUE_LOCAL先ほど追記したSetEnvをコメントにする
httpd.conf#SetEnv APP_ENV localapache再起動してアクセス
http://localhost/laravelSample/sample/setting実行結果
SAMPLE_VALUE_PRDこのようにapacheに設定した環境変数APP_ENVの値が.envファイルの接尾辞となり、
Laravelアプリケーションで読み込まれる.envファイルを変えることができますconfigのキャッシュ
(1) コマンドラインで
cd sample
php artisan config:cache
xdebugの設定をしているとeclipseが実行していいですかというプロンプトを出すのでOKを押します
eclipseプロジェクトを右クリック→リフレッシュ
/sample/bootstrap/cache/config.phpが現れます/sample/config配下のファイルが/sample/bootstrap/cache/config.php一つにまとめられました
Laravelは/sample/bootstrap/cache/config.phpを読むようになります
これによりアプリケーションの処理速度があがります(2) コマンドラインで
cd sample
php artisan config:clear
xdebugの設定をしているとeclipseが実行していいですかというプロンプトを出すのでOKを押します
eclipseプロジェクトを右クリック→リフレッシュ
/sample/bootstrap/cache/config.phpが消えました(3) Controllerでconfig関数を使った理由
先ほどControllerでenv('SAMPLE_KEY')ではなく、config('sample.sampleKey')で値を取得しました
その理由は
bootstrap/cache/config.phpをつくると、env関数の呼び出しはすべてnullを返すようになるLaravelの仕様のためです
したがって、.envファイルに記載した値は一度configファイルの配列に設定して、Controller以降ではconfig関数を使用して取得することになります開発時は
php artisan config:cacheを実行することはないと思います
しかし、本番環境ではphp artisan config:cacheを実行してデプロイすることになると思います
- 投稿日:2020-05-19T02:23:42+09:00
Laravelで例外発生時Slackに通知する方法
概要
Laravelの通知と例外処理の勉強のために実装してみました。
Notificationに関する記事は数多くあり、公式ドキュメントでも解説されていますが、備忘録としてかんたんな流れを残しておきます。
環境
- Laravel 6.0
- PHP 7.2
事前準備
Guzzleとslack-notification-channelのインストール
$ composer install guzzlehttp/guzzle
$ composer install laravel/slack-notification-channel
SlackのWebhookURLを取得する
今回はenvの値をconfig経由で使用します。
webhookURL取得手順については割愛しますね...slack.phpreturn [ 'name' => env('SLACK_NAME'), 'channel' => env('SLACK_CHANNEL'), 'webhook_url' => env('SLACK_WEBHOOK_URL'), ];通知用クラスの作成
ひとまず,slackにメッセージを送信できるように実装します。
初期状態では,メール送信がデフォルトになっているので,slack用に変更してあげます。App\Notifications\Slack.php;<?php namespace App\Notifications; use Exception; use Illuminate\Bus\Queueable; use Illuminate\Notifications\Notification; use Illuminate\Contracts\Queue\ShouldQueue; use Illuminate\Notifications\Messages\MailMessage; use Illuminate\Notifications\Messages\SlackMessage; class Slack extends Notification { use Queueable; protected $name; protected $channnel; protected $content; /** * Create a new notification instance. * * @return void */ public function __construct($message) { $this->name = config(slack.name); $this->channel = config(slack.channnel); $this->content = $message; } /** * Get the notification's delivery channels. * * @param mixed $notifiable * @return array */ public function via($notifiable) { return ['slack']; } /** * Get the array representation of the notification. * * @param mixed $notifiable * @return array */ public function toArray($notifiable) { return [ // ]; } /** * @param $notifiable * @return $this */ public function toSlack($notifiable) { return (new SlackMessage) ->from($this->name) ->to($this->channel) ->content($this->content); } }コンストラクタでmessageを受け取り、toSlack()でそのまま送信するシンプルな処理です。
通知を配信するチャンネルをslackにするため、via()の中を'slack'に変更します。Slack通知用のルートを作成する
App\Service\Slack\SlackNotifiable.php<?php namespace App\Service\Slack; use Illuminate\Notifications\Notifiable; use App\Notifications\SlackNotification; use Exception; use Illuminate\Notifications\RoutesNotifications; class SlackNotifiable { use Notifiable; protected function routeNotificationForSlack() { return config('slack.webhook_url'); } }実際にSlack通知をルートするために,routeNotificationForSlackを定義しWebhookURLを返しています。
Notifiableトレイトを読み込むことでnotify()で通知を送信できます。
これで,Slackにメッセージを送信する準備はOKです!例外処理に通知を組み込む
Laravelのエラーハンドリングは基本的にapp\Exceptions\Handler.phpが担っています。
ざっくりした流れとしては
- report()で例外をキャッチ
- 親クラスであるIlluminate\Foundation\Exceptions\Handler.phpでrenderレスポンスのために条件分岐 ログインエラーなのか,バリデーションエラーなのか等々...
- render()でレスポンスを返す。
今回は、例外検知時に通知を送りたいので、report()を編集します。
App\ExceptionsHandler.phppublic function report(Exception $exception) { $slackHook = new SlackNotifiable(); $slackHook->notify(new Slack($exception)); parent::report($exception); }SlackNotifiableのインスタンスを作成し,notify()メソッドを実行することで通知を送っています。
引数にキャッチした例外$exceptionを渡しています。Slack通知用クラスの修正
最後にpp\Notifications\Slack.phpで例外内容を通知するように修正します。
App\Notifications\Slack.php;<?php namespace App\Notifications; use Exception; use Illuminate\Bus\Queueable; use Illuminate\Notifications\Notification; use Illuminate\Contracts\Queue\ShouldQueue; use Illuminate\Notifications\Messages\MailMessage; use Illuminate\Notifications\Messages\SlackMessage; class Slack extends Notification { use Queueable; protected $name; protected $channnel; protected $exception; /** * Create a new notification instance. * * @return void */ public function __construct(Exception $e) { $this->name = config(slack.name); $this->channel = config(slack.channnel); $this->exception = $e; } /** * Get the notification's delivery channels. * * @param mixed $notifiable * @return array */ public function via($notifiable) { return ['slack']; } /** * Get the array representation of the notification. * * @param mixed $notifiable * @return array */ public function toArray($notifiable) { return [ // ]; } /** * @param $notifiable * @return $this */ public function toSlack($notifiable) { $exception = $this->exception; return (new SlackMessage) ->from($this->name) ->to($this->channel) ->error() ->content('エラーを検知しました') ->attachment(function ($attachment) use ($exception) { $attachment ->title(get_class($exception)) ->content($exception->getMessage()); }); } }コンストラクタでExceptionを受け取るように修正しています。
これでエラー内容をSlackで確認することができるようになりました!
おわりに
最後まで読んでくださってありがとうございました。
至らぬ点など有りましたら、コメントで指摘して頂けるとありがたいです...Laravelの通知処理を理解するのに良い勉強になりました。
次はキューとか使った非同期処理もやってみたいなぁ。参考記事

- 投稿日:2020-05-19T02:23:42+09:00
Laravelで例外発生時にSlack通知する方法
概要
Laravelの通知と例外処理の勉強のために実装してみました。
Notificationに関する記事は数多くあり、公式ドキュメントでも解説されていますが、備忘録としてかんたんな流れを残しておきます。
環境
- Laravel 6.0
- PHP 7.2
事前準備
Guzzleとslack-notification-channelのインストール
$ composer install guzzlehttp/guzzle
$ composer install laravel/slack-notification-channel
SlackのWebhookURLを取得する
今回はenvの値をconfig経由で使用します。
webhookURL取得手順については割愛しますね...config\slack.phpreturn [ 'name' => env('SLACK_NAME'), 'channel' => env('SLACK_CHANNEL'), 'webhook_url' => env('SLACK_WEBHOOK_URL'), ];通知用クラスの作成
ひとまずslackにメッセージを送信できるように実装します。
初期状態ではメール送信がデフォルトになっているので、slack用に変更してあげます。App\Notifications\Slack.php;<?php namespace App\Notifications; use Exception; use Illuminate\Bus\Queueable; use Illuminate\Notifications\Notification; use Illuminate\Contracts\Queue\ShouldQueue; use Illuminate\Notifications\Messages\MailMessage; use Illuminate\Notifications\Messages\SlackMessage; class Slack extends Notification { use Queueable; protected $name; protected $channnel; protected $content; /** * Create a new notification instance. * * @return void */ public function __construct($message) { $this->name = config(slack.name); $this->channel = config(slack.channnel); $this->content = $message; } /** * Get the notification's delivery channels. * * @param mixed $notifiable * @return array */ public function via($notifiable) { return ['slack']; } /** * Get the array representation of the notification. * * @param mixed $notifiable * @return array */ public function toArray($notifiable) { return [ // ]; } /** * @param $notifiable * @return $this */ public function toSlack($notifiable) { return (new SlackMessage) ->from($this->name) ->to($this->channel) ->content($this->content); } }コンストラクタでmessageを受け取り、toSlack()でそのまま送信するシンプルな処理です。
通知を配信するチャンネルをslackにするため、via()の中を'slack'に変更します。Slack通知用のルートを作成する
App\Service\Slack\SlackNotifiable.php<?php namespace App\Service\Slack; use Illuminate\Notifications\Notifiable; use App\Notifications\SlackNotification; use Exception; use Illuminate\Notifications\RoutesNotifications; class SlackNotifiable { use Notifiable; protected function routeNotificationForSlack() { return config('slack.webhook_url'); } }実際にSlack通知をルートするために、routeNotificationForSlack()を定義しWebhookURLを返しています。
Notifiableトレイトを読み込み、notify()で通知を送信できます。これでSlackにメッセージを送信する準備はOKです!
例外処理に通知を組み込む
Laravelのエラーハンドリングは基本的にapp\Exceptions\Handler.phpが担っています。
ざっくりした流れとしては
- report()で例外をキャッチ
- 親クラスであるIlluminate\Foundation\Exceptions\Handler.phpでrenderレスポンスのために条件分岐 ログインエラーなのか,バリデーションエラーなのか等々...
- render()でレスポンスを返す。
今回は、例外検知時に通知を送りたいので、report()を編集します。
App\ExceptionsHandler.phppublic function report(Exception $exception) { $slackHook = new SlackNotifiable(); $slackHook->notify(new Slack($exception)); parent::report($exception); }SlackNotifiableのインスタンスを作成し,notify()メソッドを実行することで通知を送っています。
引数にキャッチした例外$exceptionを渡しています。Slack通知用クラスの修正
最後にApp\Notifications\Slack.phpで例外内容を通知するように修正します。
App\Notifications\Slack.php;<?php namespace App\Notifications; use Exception; use Illuminate\Bus\Queueable; use Illuminate\Notifications\Notification; use Illuminate\Contracts\Queue\ShouldQueue; use Illuminate\Notifications\Messages\MailMessage; use Illuminate\Notifications\Messages\SlackMessage; class Slack extends Notification { use Queueable; protected $name; protected $channnel; protected $exception; /** * Create a new notification instance. * * @return void */ public function __construct(Exception $e) { $this->name = config(slack.name); $this->channel = config(slack.channnel); $this->exception = $e; } /** * Get the notification's delivery channels. * * @param mixed $notifiable * @return array */ public function via($notifiable) { return ['slack']; } /** * Get the array representation of the notification. * * @param mixed $notifiable * @return array */ public function toArray($notifiable) { return [ // ]; } /** * @param $notifiable * @return $this */ public function toSlack($notifiable) { $exception = $this->exception; return (new SlackMessage) ->from($this->name) ->to($this->channel) ->error() ->content('エラーを検知しました') ->attachment(function ($attachment) use ($exception) { $attachment ->title(get_class($exception)) ->content($exception->getMessage()); }); } }コンストラクタでExceptionを受け取るように修正しています。
これでエラー内容をSlackで確認することができるようになりました!
おわりに
最後まで読んでくださってありがとうございました。
至らぬ点など有りましたら、コメントで指摘して頂けるとありがたいです...Laravelの通知処理を理解するのに良い勉強になりました。
次はキューとか使った非同期処理もやってみたいなぁ。参考記事

- 投稿日:2020-05-19T02:23:42+09:00
Laravelの例外をSlackで通知する方法
概要
Laravelの通知と例外処理の勉強のために実装してみました。
Notificationに関する記事は数多くあり、公式ドキュメントでも解説されていますが、備忘録としてかんたんな流れを残しておきます。
環境
- Laravel 6.0
- PHP 7.2
事前準備
Guzzleとslack-notification-channelのインストール
$ composer install guzzlehttp/guzzle
$ composer install laravel/slack-notification-channel
SlackのWebhookURLを取得する
今回はenvの値をconfig経由で使用します。
webhookURL取得手順については割愛しますね...config\slack.phpreturn [ 'name' => env('SLACK_NAME'), 'channel' => env('SLACK_CHANNEL'), 'webhook_url' => env('SLACK_WEBHOOK_URL'), ];通知用クラスの作成
ひとまずslackにメッセージを送信できるように実装します。
初期状態ではメール送信がデフォルトになっているので、slack用に変更してあげます。App\Notifications\Slack.php;<?php namespace App\Notifications; use Exception; use Illuminate\Bus\Queueable; use Illuminate\Notifications\Notification; use Illuminate\Contracts\Queue\ShouldQueue; use Illuminate\Notifications\Messages\MailMessage; use Illuminate\Notifications\Messages\SlackMessage; class Slack extends Notification { use Queueable; protected $name; protected $channnel; protected $content; /** * Create a new notification instance. * * @return void */ public function __construct($message) { $this->name = config(slack.name); $this->channel = config(slack.channnel); $this->content = $message; } /** * Get the notification's delivery channels. * * @param mixed $notifiable * @return array */ public function via($notifiable) { return ['slack']; } /** * Get the array representation of the notification. * * @param mixed $notifiable * @return array */ public function toArray($notifiable) { return [ // ]; } /** * @param $notifiable * @return $this */ public function toSlack($notifiable) { return (new SlackMessage) ->from($this->name) ->to($this->channel) ->content($this->content); } }コンストラクタでmessageを受け取り、toSlack()でそのまま送信するシンプルな処理です。
通知を配信するチャンネルをslackにするため、via()の中を'slack'に変更します。Slack通知用のルートを作成する
App\Service\Slack\SlackNotifiable.php<?php namespace App\Service\Slack; use Illuminate\Notifications\Notifiable; use App\Notifications\SlackNotification; use Exception; use Illuminate\Notifications\RoutesNotifications; class SlackNotifiable { use Notifiable; protected function routeNotificationForSlack() { return config('slack.webhook_url'); } }実際にSlack通知をルートするために、routeNotificationForSlack()を定義しWebhookURLを返しています。
Notifiableトレイトを読み込み、notify()で通知を送信できます。これでSlackにメッセージを送信する準備はOKです!
例外処理に通知を組み込む
Laravelのエラーハンドリングは基本的にapp\Exceptions\Handler.phpが担っています。
ざっくりした流れとしては
- report()で例外をキャッチ
- 親クラスであるIlluminate\Foundation\Exceptions\Handler.phpでrenderレスポンスのために条件分岐 ログインエラーなのか,バリデーションエラーなのか等々...
- render()でレスポンスを返す。
今回は、例外検知時に通知を送りたいので、report()を編集します。
App\ExceptionsHandler.phppublic function report(Exception $exception) { $slackHook = new SlackNotifiable(); $slackHook->notify(new Slack($exception)); parent::report($exception); }SlackNotifiableのインスタンスを作成し,notify()メソッドを実行することで通知を送っています。
引数にキャッチした例外$exceptionを渡しています。Slack通知用クラスの修正
最後にApp\Notifications\Slack.phpで例外内容を通知するように修正します。
App\Notifications\Slack.php;<?php namespace App\Notifications; use Exception; use Illuminate\Bus\Queueable; use Illuminate\Notifications\Notification; use Illuminate\Contracts\Queue\ShouldQueue; use Illuminate\Notifications\Messages\MailMessage; use Illuminate\Notifications\Messages\SlackMessage; class Slack extends Notification { use Queueable; protected $name; protected $channnel; protected $exception; /** * Create a new notification instance. * * @return void */ public function __construct(Exception $e) { $this->name = config(slack.name); $this->channel = config(slack.channnel); $this->exception = $e; } /** * Get the notification's delivery channels. * * @param mixed $notifiable * @return array */ public function via($notifiable) { return ['slack']; } /** * Get the array representation of the notification. * * @param mixed $notifiable * @return array */ public function toArray($notifiable) { return [ // ]; } /** * @param $notifiable * @return $this */ public function toSlack($notifiable) { $exception = $this->exception; return (new SlackMessage) ->from($this->name) ->to($this->channel) ->error() ->content('エラーを検知しました') ->attachment(function ($attachment) use ($exception) { $attachment ->title(get_class($exception)) ->content($exception->getMessage()); }); } }コンストラクタでExceptionを受け取るように修正しています。
これでエラー内容をSlackで確認することができるようになりました!
おわりに
最後まで読んでくださってありがとうございました。
至らぬ点など有りましたら、コメントで指摘して頂けるとありがたいです...Laravelの通知処理を理解するのに良い勉強になりました。
次はキューとか使った非同期処理もやってみたいなぁ。参考記事
- 投稿日:2020-05-19T02:23:42+09:00
LaravelのExceptionをSlackで通知する
概要
Laravelの通知と例外処理の勉強のために実装してみました。
Notificationに関する記事は数多くあり、公式ドキュメントでも解説されていますが、備忘録としてかんたんな流れを残しておきます。
環境
- Laravel 6.0
- PHP 7.2
事前準備
Guzzleとslack-notification-channelのインストール
$ composer install guzzlehttp/guzzle
$ composer install laravel/slack-notification-channel
SlackのWebhookURLを取得する
今回はenvの値をconfig経由で使用します。
webhookURL取得手順については割愛しますね...config\slack.phpreturn [ 'name' => env('SLACK_NAME'), 'channel' => env('SLACK_CHANNEL'), 'webhook_url' => env('SLACK_WEBHOOK_URL'), ];通知用クラスの作成
ひとまずslackにメッセージを送信できるように実装します。
初期状態ではメール送信がデフォルトになっているので、slack用に変更してあげます。App\Notifications\Slack.php;<?php namespace App\Notifications; use Exception; use Illuminate\Bus\Queueable; use Illuminate\Notifications\Notification; use Illuminate\Contracts\Queue\ShouldQueue; use Illuminate\Notifications\Messages\MailMessage; use Illuminate\Notifications\Messages\SlackMessage; class Slack extends Notification { use Queueable; protected $name; protected $channnel; protected $content; /** * Create a new notification instance. * * @return void */ public function __construct($message) { $this->name = config(slack.name); $this->channel = config(slack.channnel); $this->content = $message; } /** * Get the notification's delivery channels. * * @param mixed $notifiable * @return array */ public function via($notifiable) { return ['slack']; } /** * Get the array representation of the notification. * * @param mixed $notifiable * @return array */ public function toArray($notifiable) { return [ // ]; } /** * @param $notifiable * @return $this */ public function toSlack($notifiable) { return (new SlackMessage) ->from($this->name) ->to($this->channel) ->content($this->content); } }コンストラクタでmessageを受け取り、toSlack()でそのまま送信するシンプルな処理です。
通知を配信するチャンネルをslackにするため、via()の中を'slack'に変更します。Slack通知用のルートを作成する
App\Service\Slack\SlackNotifiable.php<?php namespace App\Service\Slack; use Illuminate\Notifications\Notifiable; use App\Notifications\SlackNotification; use Exception; use Illuminate\Notifications\RoutesNotifications; class SlackNotifiable { use Notifiable; protected function routeNotificationForSlack() { return config('slack.webhook_url'); } }実際にSlack通知をルートするために、routeNotificationForSlack()を定義しWebhookURLを返しています。
Notifiableトレイトを読み込み、notify()で通知を送信できます。これでSlackにメッセージを送信する準備はOKです!
例外処理に通知を組み込む
Laravelのエラーハンドリングは基本的にapp\Exceptions\Handler.phpが担っています。
ざっくりした流れとしては
- report()で例外をキャッチ
- 親クラスであるIlluminate\Foundation\Exceptions\Handler.phpでrenderレスポンスのために条件分岐 ログインエラーなのか,バリデーションエラーなのか等々...
- render()でレスポンスを返す。
今回は、例外検知時に通知を送りたいので、report()を編集します。
App\ExceptionsHandler.phppublic function report(Exception $exception) { $slackHook = new SlackNotifiable(); $slackHook->notify(new Slack($exception)); parent::report($exception); }SlackNotifiableのインスタンスを作成し,notify()メソッドを実行することで通知を送っています。
引数にキャッチした例外$exceptionを渡しています。Slack通知用クラスの修正
最後にApp\Notifications\Slack.phpで例外内容を通知するように修正します。
App\Notifications\Slack.php;<?php namespace App\Notifications; use Exception; use Illuminate\Bus\Queueable; use Illuminate\Notifications\Notification; use Illuminate\Contracts\Queue\ShouldQueue; use Illuminate\Notifications\Messages\MailMessage; use Illuminate\Notifications\Messages\SlackMessage; class Slack extends Notification { use Queueable; protected $name; protected $channnel; protected $exception; /** * Create a new notification instance. * * @return void */ public function __construct(Exception $e) { $this->name = config(slack.name); $this->channel = config(slack.channnel); $this->exception = $e; } /** * Get the notification's delivery channels. * * @param mixed $notifiable * @return array */ public function via($notifiable) { return ['slack']; } /** * Get the array representation of the notification. * * @param mixed $notifiable * @return array */ public function toArray($notifiable) { return [ // ]; } /** * @param $notifiable * @return $this */ public function toSlack($notifiable) { $exception = $this->exception; return (new SlackMessage) ->from($this->name) ->to($this->channel) ->error() ->content('エラーを検知しました') ->attachment(function ($attachment) use ($exception) { $attachment ->title(get_class($exception)) ->content($exception->getMessage()); }); } }コンストラクタでExceptionを受け取るように修正しています。
これでエラー内容をSlackで確認することができるようになりました!
おわりに
最後まで読んでくださってありがとうございました。
至らぬ点など有りましたら、コメントで指摘して頂けるとありがたいです...Laravelの通知処理を理解するのに良い勉強になりました。
次はキューとか使った非同期処理もやってみたいなぁ。参考記事
- 投稿日:2020-05-19T00:29:31+09:00
route 書き方の違い
どこかでパラメータ付きURLを生成する
$url = route('users.edit', ['user' => $user->id]);
$url = route('users.edit', ['user' => $user]);
第二引数のuserがidでもmodelでも動く理由
結論
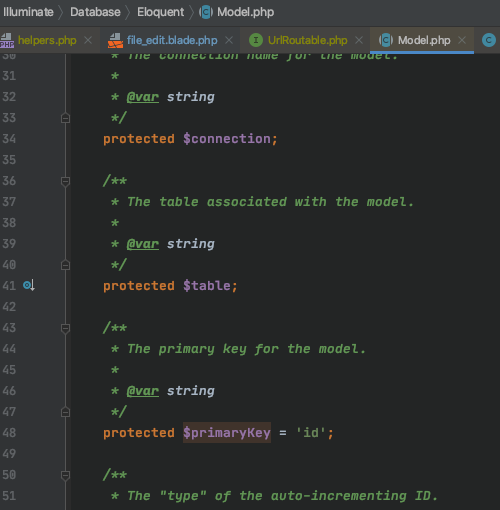
route関数を司るDatabase/eloquent/Model.phpにある$primarykeyで決定する
$primarykeにidが代入されているため['user' => $user]と書いてもidが参照され、取ることができる
ここまでの過程
どこかでroute関数を定義する。
indexController.phppublic function index () { route(); }このrouteを⌘+クリックすると
laravelのhelper関数が集約されてるところに飛ぶ
ここではフォーマットを整えるぐらいhelpers.phpfunction route($name, $parameters = [], $absolute = true) { return app('url')->route($name, $parameters, $absolute); }次にこのapp->のrouteが何かを辿る
ここでは
getByNameはよくて、toRouteに飛びますUrlGenerater.phppublic function route($name, $parameters = [], $absolute = true) { if (! is_null($route = $this->routes->getByName($name))) { return $this->toRoute($route, $parameters, $absolute); } throw new InvalidArgumentException("Route [{$name}] not defined."); }次に
routeUrlはいいので、formatParametersに飛びますUrlGenerater.phpprotected function toRoute($route, $parameters, $absolute) { return $this->routeUrl()->to( $route, $this->formatParameters($parameters), $absolute ); }肝心なのは
getRouteKey()です。UrlGenerater.phppublic function formatParameters($parameters) { $parameters = Arr::wrap($parameters); foreach ($parameters as $key => $parameter) { if ($parameter instanceof UrlRoutable) { $parameters[$key] = $parameter->getRouteKey(); } } return $parameters; }コメントアウトされている様にmodelのkeyでvalueをget
そして、UrlRoutabeleがinterfaceされてます。
この親はDatabase/eloquent/Model.phpになるのでそこで、結論が定義されてます。UrlRoutable.phpinterface UrlRoutable { /** * Get the value of the model's route key. * * @return mixed */ public function getRouteKey();2番目の書き方の注意であり前提
①tableにidが設定されていること
②結論の$primarykeyでidが定義されていること
- 投稿日:2020-05-19T00:05:16+09:00
Laravel Telescopeのタイムゾーンを強制的に日本時間にする
LaravelのTelescopeにおいて、タイムゾーンを指定してるにもかかわらず日本時間表示ができなかったので、強制的に変えてみました!
localTime()を下記のように修正
vendor/laravel/telescope/resources/js/base.jslocalTime(time) { return moment.tz(time,'Asia/Tokyo') .format('YYYY-MM-DD HH:mm:ss'); },cd /LARAVEL_PATH/vendor/telescope npm run prod cd /LARAVEL_PATH php artisan telescope:publish --forcecross-envをインストールする必要あり
ない場合はnpm install cross-env以上です(^^)