- 投稿日:2020-04-04T23:35:36+09:00
【knex】this.dialectに関してのエラー解決
エラー文
Using 'this.dialect' to identify the client is deprecated and support for it will be removed in the future. Please use configuration option 'client' instead.
解決法
var knex = require('knex')({
    dialect: 'mysql',
    connection: {
        host: 'localhost',
        user: 'root',
        password: '(パスワード)',
        database: '(データベース名)',
        charset: 'utf-8'
    }
});
上の文の、dialectをclientに変更する。
- 投稿日:2020-04-04T21:26:39+09:00
Glitchで、ERROR EACCES: permission denied がコンソールに表示され動かないときの対処法
- 投稿日:2020-04-04T20:34:20+09:00
問いかけると柴犬の画像を返してくれるLINE botを作ってみた
概要
LINE botでできることを調べていたら、画像を返すことが可能とのことで試してみました。
ただ画像を返すだけでは面白くないので、柴犬APIで画像を拾ってきて表示することにしました。最後にソースコードの全体を載せています。柴犬APIについてはこちらをご参照ください。実際の動きは次のようになります。
【デモ】
LINE botって、画像を返してくれる機能もあるのですね!ということで、問いかけると柴犬の画像を返してくれるLINE botを作ってみました?#protoout pic.twitter.com/iHNFAQvcfR
— まえぷー@出窓菜園 BWG (@kmaepu) April 4, 2020構成
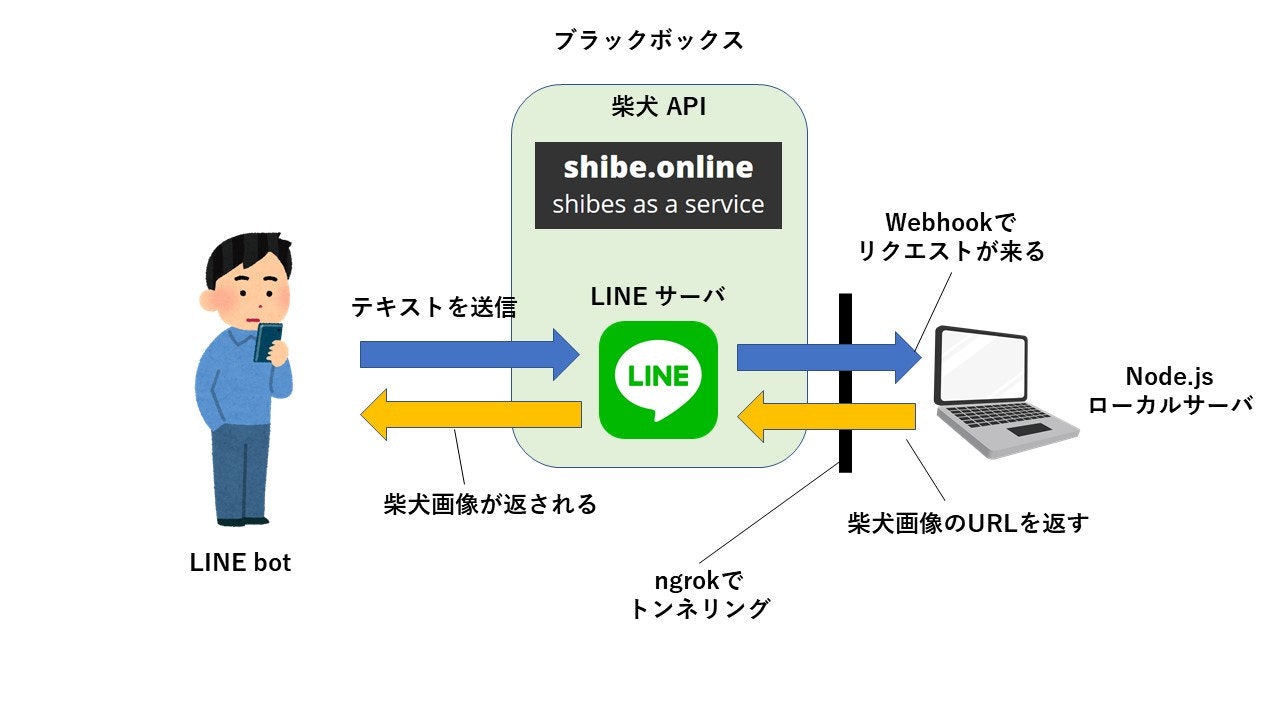
主な構成は次の通りです。LINE botからテキストを送ると、ローカルにあるNode.jsサーバにWebhookが投げられ、LINE Messaging APIのフォーマットに従って画像URlが返されます。
作ってみる
開発環境
OS:Windows 10
Node.js:v10.15.3【ライブラリバージョン】
@line/bot-sdk:6.8.4
express:4.17.1
axios:0.19.2プログラム解説
プログラムの全体は最後に載せるとして、ここでは重要なところのみ解説します。
LINE botのサーバで、画像を返すフォーマットは次の通りです。return client.replyMessage(event.replyToken, { type: 'image', originalContentUrl: 'オリジナルサイズの画像URL', previewImageUrl: 'LINEアプリのトーク画面にプレビューされるサイズの画像URL' });画像URLを指定するため、GoogleドライブやDropboxなどのストレージを使う必要があります。
また、使用できる画像サイズに限度があるようです。詳しくはこちらのLINE Developerサイトを参照してください。今回の例では、次のように柴犬APiを利用して得られた画像URLを、固定で入力しています。
return client.replyMessage(event.replyToken, {
    type: 'image',
    originalContentUrl: 'https://cdn.shibe.online/shibes/907fed97467e36f3075211872d98f407398126c4.jpg',
    previewImageUrl: 'https://cdn.shibe.online/shibes/907fed97467e36f3075211872d98f407398126c4.jpg'
  });
余談
ここまで至るにも苦労しました(;'∀')
なぜか画像が送れないなーと色々悩んでいて、最終的にはDiscordのProtoOutStudioの技術質問チャンネルに投げかけました。嬉しいことに2期生の方が動作確認して誤り個所を教えていただきました。本当に感謝しています。
結局は返すフォーマットが間違っていただけなんて....。次からはもっとちゃんと仕様を読んで理解せねば!と、いうことで画像を送ることができました。次は自宅で稼働している菜園管理システムとつなげて、画像を一定時間ごとに送れるようにしていこうと思います。
参考
LINE Messaging API でできることまとめ【送信編】
ソースコード
'use strict';

const axios = require('axios');         // 追加
const express = require('express');
const line = require('@line/bot-sdk');
const PORT = process.env.PORT || 3000;

const config = {
    channelSecret: 'LINE botのチャンネルシークレット',
    channelAccessToken: 'LINE botのアクセストークン'
};

const app = express();

app.get('/', (req, res) => res.send('Hello LINE BOT!(GET)')); //ブラウザ確認用(無くても問題ない)
app.post('/webhook', line.middleware(config), (req, res) => {
    console.log(req.body.events);

    //ここのif文はdeveloper consoleの"接続確認"用なので後で削除して問題ないです。
    if(req.body.events[0].replyToken === '00000000000000000000000000000000' && req.body.events[1].replyToken === 'ffffffffffffffffffffffffffffffff'){
        res.send('Hello LINE BOT!(POST)');
        console.log('疎通確認用');
        return;
    }

    Promise
      .all(req.body.events.map(handleEvent))
      .then((result) => res.json(result));
});

const client = new line.Client(config);

function handleEvent(event) {

  if (event.type !== 'message' || event.message.type !== 'text') {
    return Promise.resolve(null);
  }

  return client.replyMessage(event.replyToken, {
    type: 'image',
    originalContentUrl: 'https://cdn.shibe.online/shibes/907fed97467e36f3075211872d98f407398126c4.jpg',
    previewImageUrl: 'https://cdn.shibe.online/shibes/907fed97467e36f3075211872d98f407398126c4.jpg'
  });
}
app.listen(PORT);
console.log(`Server running at ${PORT}`);
- 投稿日:2020-04-04T20:34:20+09:00
【LINE botから画像送信する方法】問いかけると柴犬の画像を返してくれるLINE botを作ってみた
概要
LINE botでできることを調べていたら、画像を返すことが可能とのことで試してみました。
ただ画像を返すだけでは面白くないので、柴犬APIで画像を拾ってきて表示することにしました。最後にソースコードの全体を載せています。柴犬APIについてはこちらをご参照ください。実際の動きは次のようになります。
【デモ】
LINE botって、画像を返してくれる機能もあるのですね!ということで、問いかけると柴犬の画像を返してくれるLINE botを作ってみました?#protoout pic.twitter.com/iHNFAQvcfR
— まえぷー@出窓菜園 BWG (@kmaepu) April 4, 2020構成
主な構成は次の通りです。LINE botからテキストを送ると、ローカルにあるNode.jsサーバにWebhookが投げられ、LINE Messaging APIのフォーマットに従って画像URlが返されます。
作ってみる
開発環境
OS:Windows 10
Node.js:v10.15.3【ライブラリバージョン】
@line/bot-sdk:6.8.4
express:4.17.1
axios:0.19.2プログラム解説
プログラムの全体は最後に載せるとして、ここでは重要なところのみ解説します。
LINE botのサーバで、画像を返すフォーマットは次の通りです。return client.replyMessage(event.replyToken, { type: 'image', originalContentUrl: 'オリジナルサイズの画像URL', previewImageUrl: 'LINEアプリのトーク画面にプレビューされるサイズの画像URL' });画像URLを指定するため、GoogleドライブやDropboxなどのストレージを使う必要があります。
また、使用できる画像サイズに限度があるようです。詳しくはこちらのLINE Developerサイトを参照してください。今回の例では、次のように柴犬APiを利用して得られた画像URLを、固定で入力しています。
return client.replyMessage(event.replyToken, {
    type: 'image',
    originalContentUrl: 'https://cdn.shibe.online/shibes/907fed97467e36f3075211872d98f407398126c4.jpg',
    previewImageUrl: 'https://cdn.shibe.online/shibes/907fed97467e36f3075211872d98f407398126c4.jpg'
  });
余談
ここまで至るにも苦労しました(;'∀')
なぜか画像が送れないなーと色々悩んでいて、最終的にはDiscordのProtoOutStudioの技術質問チャンネルに投げかけました。嬉しいことに2期生の方が動作確認して誤り個所を教えていただきました。本当に感謝しています。
結局は返すフォーマットが間違っていただけなんて....。次からはもっとちゃんと仕様を読んで理解せねば!と、いうことで画像を送ることができました。次は自宅で稼働している菜園管理システムとつなげて、画像を一定時間ごとに送れるようにしていこうと思います。
参考
LINE Messaging API でできることまとめ【送信編】
ソースコード
'use strict';

const axios = require('axios');         // 追加
const express = require('express');
const line = require('@line/bot-sdk');
const PORT = process.env.PORT || 3000;

const config = {
    channelSecret: 'LINE botのチャンネルシークレット',
    channelAccessToken: 'LINE botのアクセストークン'
};

const app = express();

app.get('/', (req, res) => res.send('Hello LINE BOT!(GET)')); //ブラウザ確認用(無くても問題ない)
app.post('/webhook', line.middleware(config), (req, res) => {
    console.log(req.body.events);

    //ここのif文はdeveloper consoleの"接続確認"用なので後で削除して問題ないです。
    if(req.body.events[0].replyToken === '00000000000000000000000000000000' && req.body.events[1].replyToken === 'ffffffffffffffffffffffffffffffff'){
        res.send('Hello LINE BOT!(POST)');
        console.log('疎通確認用');
        return;
    }

    Promise
      .all(req.body.events.map(handleEvent))
      .then((result) => res.json(result));
});

const client = new line.Client(config);

function handleEvent(event) {

  if (event.type !== 'message' || event.message.type !== 'text') {
    return Promise.resolve(null);
  }

  return client.replyMessage(event.replyToken, {
    type: 'image',
    originalContentUrl: 'https://cdn.shibe.online/shibes/907fed97467e36f3075211872d98f407398126c4.jpg',
    previewImageUrl: 'https://cdn.shibe.online/shibes/907fed97467e36f3075211872d98f407398126c4.jpg'
  });
}
app.listen(PORT);
console.log(`Server running at ${PORT}`);
- 投稿日:2020-04-04T20:34:20+09:00
LINE botから画像送信~問いかけると柴犬の画像を返してくれるLINE botを作ってみた
概要
LINE botでできることを調べていたら、画像を返すことが可能とのことで試してみました。
ただ画像を返すだけでは面白くないので、柴犬APIで画像を拾ってきて表示することにしました。最後にソースコードの全体を載せています。柴犬APIについてはこちらをご参照ください。実際の動きは次のようになります。
【デモ】
LINE botって、画像を返してくれる機能もあるのですね!ということで、問いかけると柴犬の画像を返してくれるLINE botを作ってみました?#protoout pic.twitter.com/iHNFAQvcfR
— まえぷー@出窓菜園 BWG (@kmaepu) April 4, 2020構成
主な構成は次の通りです。LINE botからテキストを送ると、ローカルにあるNode.jsサーバにWebhookが投げられ、LINE Messaging APIのフォーマットに従って画像URlが返されます。
作ってみる
開発環境
OS:Windows 10
Node.js:v10.15.3【ライブラリバージョン】
@line/bot-sdk:6.8.4
express:4.17.1
axios:0.19.2プログラム解説
プログラムの全体は最後に載せるとして、ここでは重要なところのみ解説します。
LINE botのサーバで、画像を返すフォーマットは次の通りです。return client.replyMessage(event.replyToken, { type: 'image', originalContentUrl: 'オリジナルサイズの画像URL', previewImageUrl: 'LINEアプリのトーク画面にプレビューされるサイズの画像URL' });画像URLを指定するため、GoogleドライブやDropboxなどのストレージを使う必要があります。
また、使用できる画像サイズに限度があるようです。詳しくはこちらのLINE Developerサイトを参照してください。今回の例では、次のように柴犬APiを利用して得られた画像URLを、固定で入力しています。
return client.replyMessage(event.replyToken, {
    type: 'image',
    originalContentUrl: 'https://cdn.shibe.online/shibes/907fed97467e36f3075211872d98f407398126c4.jpg',
    previewImageUrl: 'https://cdn.shibe.online/shibes/907fed97467e36f3075211872d98f407398126c4.jpg'
  });
余談
ここまで至るにも苦労しました(;'∀')
なぜか画像が送れないなーと色々悩んでいて、最終的にはDiscordのProtoOutStudioの技術質問チャンネルに投げかけました。嬉しいことに2期生の方が動作確認して誤り個所を教えていただきました。本当に感謝しています。
結局は返すフォーマットが間違っていただけなんて....。次からはもっとちゃんと仕様を読んで理解せねば!と、いうことで画像を送ることができました。次は自宅で稼働している菜園管理システムとつなげて、画像を一定時間ごとに送れるようにしていこうと思います。
参考
LINE Messaging API でできることまとめ【送信編】
ソースコード
'use strict';

const axios = require('axios');         // 追加
const express = require('express');
const line = require('@line/bot-sdk');
const PORT = process.env.PORT || 3000;

const config = {
    channelSecret: 'LINE botのチャンネルシークレット',
    channelAccessToken: 'LINE botのアクセストークン'
};

const app = express();

app.get('/', (req, res) => res.send('Hello LINE BOT!(GET)')); //ブラウザ確認用(無くても問題ない)
app.post('/webhook', line.middleware(config), (req, res) => {
    console.log(req.body.events);

    //ここのif文はdeveloper consoleの"接続確認"用なので後で削除して問題ないです。
    if(req.body.events[0].replyToken === '00000000000000000000000000000000' && req.body.events[1].replyToken === 'ffffffffffffffffffffffffffffffff'){
        res.send('Hello LINE BOT!(POST)');
        console.log('疎通確認用');
        return;
    }

    Promise
      .all(req.body.events.map(handleEvent))
      .then((result) => res.json(result));
});

const client = new line.Client(config);

function handleEvent(event) {

  if (event.type !== 'message' || event.message.type !== 'text') {
    return Promise.resolve(null);
  }

  return client.replyMessage(event.replyToken, {
    type: 'image',
    originalContentUrl: 'https://cdn.shibe.online/shibes/907fed97467e36f3075211872d98f407398126c4.jpg',
    previewImageUrl: 'https://cdn.shibe.online/shibes/907fed97467e36f3075211872d98f407398126c4.jpg'
  });
}
app.listen(PORT);
console.log(`Server running at ${PORT}`);
- 投稿日:2020-04-04T20:03:33+09:00
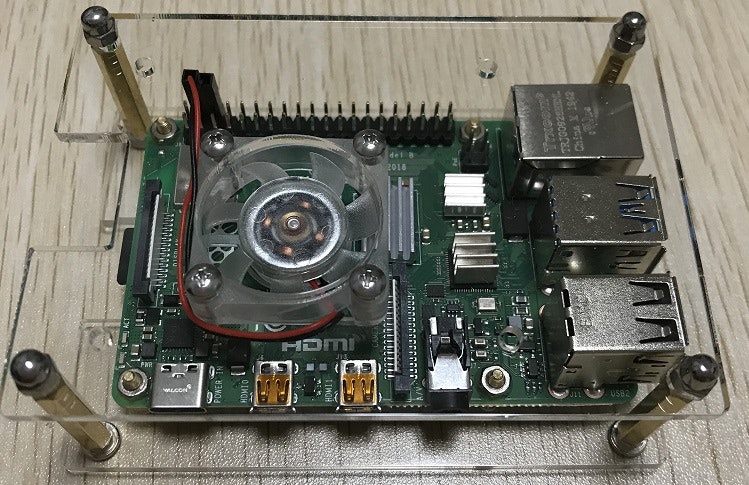
Raspberry Pi 4(1台)でKubernetes環境を構築 (Raspberry Pi 4 + Ubuntu 19.10 + MicroK8s) Part2 (Webアプリ編)
前回の記事
Raspberry Pi 4(1台)でKubernetes環境を構築 (Raspberry Pi 4 + Ubuntu 19.10 + MicroK8s)
前回の記事では「Raspberry Pi 4」に「Ubuntu 19.10」OSを入れ、「MicroK8s」をインストールし、Kubernetes環境構築と簡単な動作確認するところまで行いました。
今回の記事
今回の記事では実際にkubernetesのマニフェストファイルを作成し、ラズパイ上でWebアプリケーション(express)を動かしてみたいと思います。
環境については前回の記事まで出来ている前提で進めています。とりあえず何か動くもの?
試すWebアプリケーションは何でもよかったのですが、Dockerイメージ作成から行ってみたかったので
少し調べてみたところ、Node公式のexpressの記事が丁寧に書いていたのでこれをもとにdockerイメージを作成してみようと思います。docker のインストール
docker イメージ作成のため docker build を行いたいので、まずはdockerをインストールします。
sudo apt install docker.io
sudo systemctl enable --now docker
sudo usermod -aG docker $USER
Node.js Web アプリケーション の Docker イメージ作成
Node.js公式の
Node.js Web アプリケーションを Docker 化する
を参考にDockerイメージを作成していきます。ファイルを準備
適当なフォルダを作成し、そこにファイルを作っていきます。
※ 文字コード: UTF-8 , 改行コード: LF$ mkdir docker_web_apppackage.json{ "name": "docker_web_app", "version": "1.0.0", "description": "Node.js on Docker", "author": "First Last <first.last@example.com>", "main": "server.js", "scripts": { "start": "node server.js" }, "dependencies": { "express": "^4.16.1" } }server.js'use strict'; const express = require('express'); // Constants const PORT = 8080; const HOST = '0.0.0.0'; // App const app = express(); app.get('/', (req, res) => { res.send('Hello World'); }); app.listen(PORT, HOST); console.log(`Running on http://${HOST}:${PORT}`);Dockerイメージを作成するためのDockerfile
FROM node:12

# アプリケーションディレクトリを作成する
WORKDIR /usr/src/app

# アプリケーションの依存関係をインストールする
# ワイルドカードを使用して、package.json と package-lock.json の両方が確実にコピーされるようにします。
# 可能であれば (npm@5+)
COPY package*.json ./

RUN npm install
# 本番用にコードを作成している場合
# RUN npm install --only=production

# アプリケーションのソースをバンドルする
COPY . .

EXPOSE 8080
CMD [ "node", "server.js" ]
dockerイメージを作成
ubuntu@ubuntu:~/node-web-app$ docker build -t node-web-app-test .
Sending build context to Docker daemon  4.608kB
Step 1/7 : FROM node:12
12: Pulling from library/node
84582781a9f0: Already exists
2aaedfc98967: Already exists
cfa6bb03021f: Already exists
6a4110ff81d0: Already exists
e867f7ebdcf1: Already exists
2f16af5fb418: Already exists
cfc1102c13fa: Pull complete
9e6855539b2a: Pull complete
b5c194de032e: Pull complete
Digest: sha256:46f4c17e1edbde36d60a9f6362db7912cfe301bac89afef7cc92421ab3e7ca18
Status: Downloaded newer image for node:12
 ---> 694bb044bce1
Step 2/7 : WORKDIR /usr/src/app
 ---> Running in 536f08e477ba
Removing intermediate container 536f08e477ba
 ---> 12ccd9c86b57
Step 3/7 : COPY package*.json ./
 ---> ef6d92e05eba
Step 4/7 : RUN npm install
 ---> Running in ce1481d407dc
npm notice created a lockfile as package-lock.json. You should commit this file.
npm WARN docker_web_app@1.0.0 No repository field.
npm WARN docker_web_app@1.0.0 No license field.

added 50 packages from 37 contributors and audited 126 packages in 4.84s
found 0 vulnerabilities

Removing intermediate container ce1481d407dc
 ---> c83c3ed164a4
Step 5/7 : COPY . .
 ---> 1d1529685c13
Step 6/7 : EXPOSE 8080
 ---> Running in 4641a7aeda76
Removing intermediate container 4641a7aeda76
 ---> 667730c72077
Step 7/7 : CMD [ "node", "server.js" ]
 ---> Running in 28e2e97e3e4b
Removing intermediate container 28e2e97e3e4b
 ---> 8a4d60b76312
Successfully built 8a4d60b76312
Successfully tagged node-web-app-test:latest
作成できたイメージを、確認のため動かしてみる
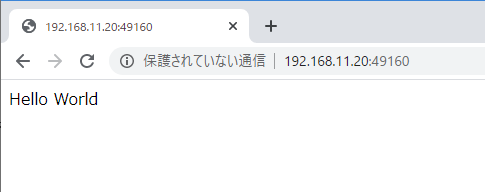
ubuntu@ubuntu:~/node-web-app$ docker run -p 49160:8080 -d node-web-app-test
1ca0cb8ecb347fdc66ce1c1d6a6e9580f5733e58fa66bb3b34da68411aa0184a
ブラウザでアクセスしてみる
私のラズパイのIPが192.168.11.20だったので
http://192.168.11.20:49160
で確認
アクセス出来ましたね
とりあえず一度掃除します
docker stop と docker rm を実行
ubuntu@ubuntu:~/node-web-app$ docker ps
CONTAINER ID        IMAGE                   COMMAND                  CREATED             STATUS              PORTS                     NAMES
1ca0cb8ecb34        node-web-app-test       "docker-entrypoint.s…"   7 minutes ago       Up 7 minutes        0.0.0.0:49160->8080/tcp   lucid_dubinsky
ubuntu@ubuntu:~/node-web-app$ docker stop 1ca0cb8ecb34
1ca0cb8ecb34
ubuntu@ubuntu:~/node-web-app$ docker rm 1ca0cb8ecb34
1ca0cb8ecb34
これできれいになりましたね。
MicroK8sでローカルのdockerイメージを使用
MicroK8sでローカルのdockerイメージを使用するためには一工夫いるみたいです。
イメージ確認
ubuntu@ubuntu:~/node-web-app$ docker images | grep node-web-app
node-web-app-test           latest              8a4d60b76312        36 minutes ago      868MB
イメージタグを:localに変更
ubuntu@ubuntu:~/node-web-app$ docker tag node-web-app-test:latest node-web-app-test:localイメージ確認
ubuntu@ubuntu:~/node-web-app$ docker images | grep node-web-app
node-web-app-test           latest              8a4d60b76312        37 minutes ago      868MB
node-web-app-test           local               8a4d60b76312        37 minutes ago      868MB
イメージをセーブ
ubuntu@ubuntu:~/node-web-app$ docker save node-web-app-test:local > image.tarイメージを microk8s へロード
ubuntu@ubuntu:~/node-web-app$ microk8s ctr image import image.tar
unpacking docker.io/library/node-web-app-test:local (sha256:2e85de5a19c3cd98f07d8ae3f039ff6f47076e717a41a35b4da23ce0309d9243)...done
microk8s のイメージを確認
ubuntu@ubuntu:~/node-web-app$ microk8s ctr images ls | grep node-web-app
docker.io/library/node-web-app-test:local
application/vnd.oci.image.manifest.v1+json
sha256:2e85de5a19c3cd98f07d8ae3f039ff6f47076e717a41a35b4da23ce0309d9243 856.4 MiB linux/arm64
io.cri-containerd.image=managed
これでローカルのdockerイメージを使用できるようになりました。
kubernetesのマニフェストファイル作成
Deploymentを作成しておくと、何か障害が起きてシステムエラーでコンテナ(pod)が落ちても、コンテナ(pod)を再度起動してくれるようになります。
※ マニフェストファイル作成の単位の基準はないのですが、私はkindごとに分けるようにしています。deployment.yamlapiVersion: apps/v1 kind: Deployment metadata: name: node-web-app-test spec: replicas: 1 selector: matchLabels: app: node-web-app-test template: metadata: labels: app: node-web-app-test spec: containers: - name: node-web-app-test image: node-web-app-test:local imagePullPolicy: Never # ローカルのイメージ使用の場合のみ restartPolicy: Alwaysservice.yamlapiVersion: v1 kind: Service metadata: name: node-web-app-test spec: selector: app: node-web-app-test ports: - protocol: TCP port: 8080 nodePort: 31200 type: NodePortデプロイ実行
ubuntu@ubuntu:~/node-web-app$ kubectl apply -f deployment.yaml
deployment.apps/node-web-app-test created
ポッドの確認
ubuntu@ubuntu:~/node-web-app$ kubectl get po
NAME                                 READY   STATUS    RESTARTS   AGE
node-web-app-test-69f4c59b6f-bwsrv   1/1     Running   0          56m
サービス実行
ubuntu@ubuntu:~/node-web-app$ kubectl apply -f service.yaml
service/node-web-app-test configured
サービスの確認
ubuntu@ubuntu:~/node-web-app$ kubectl get svc
NAME                TYPE        CLUSTER-IP       EXTERNAL-IP   PORT(S)          AGE
kubernetes          ClusterIP   10.152.183.1     <none>        443/TCP          35d
node-web-app-test   NodePort    10.152.183.157   <none>        8080:31200/TCP   74m
ブラウザでアクセスしてみる
私のラズパイのIPが192.168.11.20だったので
http://192.168.11.20:31200
で確認
アクセス出来ましたね!!!
まとめ
とりあえずWebアプリケーションを起動できましたね(●´ω`●)
確認したソースもgithub/microk8s-node-web-app-testにあげています。
少し調べるところもありましたが、比較的簡単に起動できました。
Dockerイメージはローカル分を使うのではなく、DockerHub にでもPushしたほうがもっと楽に出来そうですね(´・ω・`)気力があれば、ラズパイらしくGPIO周りも試していきたいと思います!!

- 投稿日:2020-04-04T18:10:53+09:00
LINE BOTで天気を返すサンプルがngrokで動いてnowで動かない件
こちらのサンプルがngrokで動いて、Nowだとうまく動かない件の対応。
axiosを使って別のサーバーにリクエストを出してるので非同期処理のあたりが怪しいですね。
もとのコード
これだとngrokでうまく動くけど、now上でうまく動かないというレポート
server.js・ ・ 省略 ・ ・ function handleEvent(event) { if (event.type !== 'message' || event.message.type !== 'text') { return Promise.resolve(null); } let mes = '' if(event.message.text === '天気教えて!'){ mes = 'ちょっとまってね'; //待ってねってメッセージだけ先に処理 getNodeVer(event.source.userId); //スクレイピング処理が終わったらプッシュメッセージ }else{ mes = event.message.text; } return client.replyMessage(event.replyToken, { type: 'text', text: mes }); } const getNodeVer = async (userId) => { const res = await axios.get('http://weather.livedoor.com/forecast/webservice/json/v1?city=400040'); const item = res.data; await client.pushMessage(userId, { type: 'text', text: item.description.text, }); } ・ ・ 省略 ・ ・書き換え
replyとpushのタイミングを変えてみる。
server.js・ ・ 省略 ・ ・ async function handleEvent(event) { if (event.type !== 'message' || event.message.type !== 'text') { return Promise.resolve(null); } //"天気教えて"以外の場合は反応しない if(event.message.text !== '天気教えて') { return client.replyMessage(event.replyToken, { type: 'text', text: '"天気教えて"と言ってね' }); } let mes = ''; mes = 'ちょっと待ってね'; //"ちょっと待ってね"ってメッセージだけ先に処理 await client.replyMessage(event.replyToken, { type: 'text', text: mes }); //axiosを使って天気APIにアクセス const CITY_ID = `400040`; //ライドアのAPIから取得したいシティのIDを const URL = `http://weather.livedoor.com/forecast/webservice/json/v1?city=${CITY_ID}`; const res = await axios.get(URL); const item = res.data; return client.pushMessage(event.source.userId, { type: 'text', text: item.description.text, }); } ・ ・ 省略 ・ ・おまけ: 関数分けサンプル
関数に分けるとこんな感じ。
server.js・ ・ 省略 ・ ・ async function handleEvent(event) { if (event.type !== 'message' || event.message.type !== 'text') { return Promise.resolve(null); } //"天気教えて"以外の場合は反応しない if(event.message.text !== '天気教えて') { return client.replyMessage(event.replyToken, { type: 'text', text: '"天気教えて"と言ってね' }); } let mes = ''; mes = 'ちょっと待ってね'; //"ちょっと待ってね"ってメッセージだけ先に処理 await client.replyMessage(event.replyToken, { type: 'text', text: mes }); const CITY_ID = `400040`; //ライドアのAPIから取得したいシティのIDを return getWeather(event.source.userId, CITY_ID); } const getWeather = async (userId, CITY_ID) => { //axiosを使って天気APIにアクセス const URL = `http://weather.livedoor.com/forecast/webservice/json/v1?city=${CITY_ID}`; const res = await axios.get(URL); const item = res.data; return client.pushMessage(userId, { type: 'text', text: item.description.text, }); } ・ ・ 省略 ・ ・
- 投稿日:2020-04-04T13:56:34+09:00
nowのデプロイで古い書き方からのマイグレートメモ
now.shを使うときにv2系の書き方でも警告が出るようになってますね。
もう1系は使えないのかも。nowで詰まった人がいたのでメモ。
今まで書いてたやり方と修正点
これまでは、これでよかったのですが......
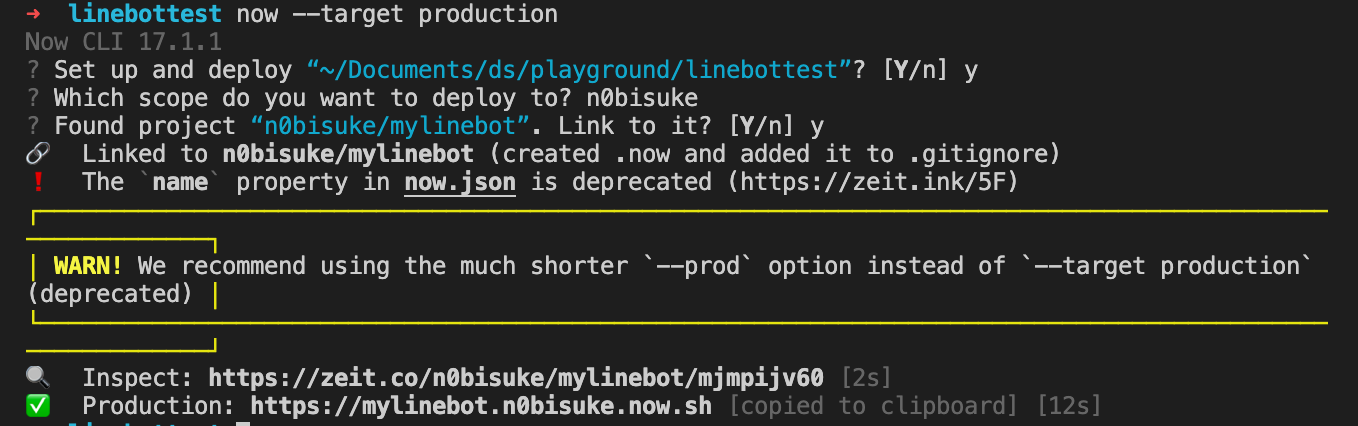
now.json{ "version": 2, "name": "mylinebot", "builds": [{ "src": "server.js", "use": "@now/node" }], "routes": [ { "src": "/", "dest": "server.js" }, { "src": "/webhook", "dest": "server.js" } ] }now --target production
nameプロパティの注意
まずはここ。
❗️ The `name` property in now.json is deprecated (https://zeit.ink/5F)ここを読むと、書いてますが
NOTE: The name property has been deprecated in favor of Project Linking, which allows you to link a ZEIT Now Project to your local codebase when you run now.
nameプロパティが非推奨と言われます。
なのでnameプロパティを外します。修正版はこちら。
now.json{ "version": 2, "builds": [{ "src": "server.js", "use": "@now/node" }], "routes": [ { "src": "/", "dest": "server.js" }, { "src": "/webhook", "dest": "server.js" } ] }デプロイコマンド
次にここです。
WARN! We recommend using the much shorter `--prod` option instead of `--target production` (deprecated)もともとの書き方の
now --target productionがnow --prodで良いよと言われます。短い方が良いですね。now --prodこれでOKです。
おまけ: 実行時
実際のデプロイで表示されるコンソールの紹介です。
対話的に質問されます。"deployの設定をしますか?"的な質問です。エンターかYをタイプして進みましょう。
Now CLI 17.1.1
? Set up and deploy “~/Documents/ds/playground/mylinebot”? [Y/n] ←ここでエンターもしくはY
次にデプロイ先のアカウントを選択。 たぶんチームアカウントとかあると選択肢に載ってくるんだと思いますが、たぶん最初は自分のアカウントだけなので自分のアカウントが表示されるのを確認したらエンター。
? Which scope do you want to deploy to?
● n0bisuke ←ここでエンター
次になんて名前でデプロイするか聞かれます。package.jsonのnameプロパティに書いてある名前が表示されるので、エンターかYをタイプして進みます。
? Found project “n0bisuke/mylinebot”. Link to it? [Y/n] ←ここでエンターもしくはYこれでデプロイできるはず......!
- 投稿日:2020-04-04T11:32:34+09:00
JavaScript の非同期処理とシングルスレッド
本記事の目的
JavaScript や Node.js はよくシングルスレッドだ〜、と言われますが、では非同期処理はどうやって実行されているのか (Non-Blocking I/O) をざっくりと (私の身内に) 説明する為のサンプルコードです。
検証環境
- iMac (Retina 5K, 27-inch Late 2014), 4 GHz Intel Core i7
- Node.js v12.13.0
$ nodebrew install-binary v12.13.0
$ nodebrew use v12.13.0
ブラウザ JavaScript の Event loop はまたちょっと違います。
早速サンプルコードから
以下の様な JavaScript
index.jsを、Node.js で実行します。
- 【処理 1】ミリ秒で終わる処理を
setTimeout()で 5 秒後に発火.- 【処理 2】ミリ秒で終わる処理を
setTimeout()で 0 秒後に発火.- 【処理 3】10 秒かかる同期処理を実行.
- 時間の計測には Node.js 標準 API の perf_hooks モジュールを使用しています。 Node.js プロセス実行開始からのミリ秒を得られます
- コード中では、ミリ秒 → 秒、に変換して表示しています
index.jsconst { performance } = require('perf_hooks'); /** * @return 本スクリプトを実行してからの経過秒数. */ const seconds = () => performance.now() / 1000; const secondsPadded = () => seconds().toFixed(6).padStart(10, ' '); // 長さ揃える. //////////////// 処理3つ //////////////// /** * 処理 1 (非同期, 5 秒後に発火). */ const func1 = () => { console.log(`${secondsPadded()} seconds --> 処理 1 (非同期, 5 秒後に発火)`); }; /** * 処理 2 (非同期, 0 秒後に発火). */ const func2 = () => { console.log(`${secondsPadded()} seconds --> 処理 2 (非同期, 0 秒後に発火)`); }; /** * 処理 3 (同期. 10 秒かかる). */ const func3 = () => { while (seconds() < 10) { /* consuming a single cpu for 10 seconds... */ } console.log(`${secondsPadded()} seconds --> 処理 3 (同期, 10 秒かかる)`); }; //////////////// 計測開始 //////////////// console.log(`${secondsPadded()} seconds --> index.js START`); // [非同期] 5 秒後に実行. setTimeout(func1, 5000); // [非同期] 即時実行. setTimeout(func2); // 同期実行. func3(); console.log(`${secondsPadded()} seconds --> index.js END`); //////////////// 計測終了 ////////////////期待値?
なんとなく 「こう動作するだろう...」 という気分になるのは ↓ でしょう。
$ node index.js

  0.000000 seconds --> index.js START
  0.000000 seconds --> 処理 2 (非同期, 0 秒後に発火)
  5.000000 seconds --> 処理 1 (非同期, 5 秒後に発火)
 10.000000 seconds --> 処理 3 (同期, 10 秒かかる)
 10.000000 seconds --> index.js END
実際は...
現実はこうです。何故でしょうか。
$ node index.js

  0.175104 seconds --> index.js START
 10.000085 seconds --> 処理 3 (同期, 10 秒かかる)
 10.000210 seconds --> index.js END
 10.000955 seconds --> 処理 2 (非同期, 0 秒後に発火)
 10.001161 seconds --> 処理 1 (非同期, 5 秒後に発火)
シングルスレッドだから、順番に処理している
おおよそ、Node.js の内部では ↓ のように処理がシングルスレッドで行われています。
- JavaScript コンテキストの生成時にイベントループが生成されます
- 最初のエントリ JavaScript
index.jsがタスクとして、未実行キューに乗ります- イベントループ
- 未実行キューから
index.jsタスクが取り出され、実行が開始されます
setTimeout(処理1, 5秒)が実行され、【処理 1】がタイマーキューに追加されますsetTimeout(処理2, 0秒)が実行され、【処理 2】がタイマーキューに追加されます- 【処理 3】が同期的に実行され、10 秒間、CPU (シングルコア) を専有します
index.jsタスクの実行が終了します- イベントループ
- タイマーキューから 有効期限が切れたタスク【処理 2】 を取り出し、実行が開始されます
- 【処理 2】タスクの実行が終了します
- イベントループ
- タイマーキューから 有効期限が切れたタスク【処理 1】 を取り出し、実行が開始されます
- 【処理 1】タスクの実行が終了します
実際はタイマー Phase はキューではない (FIFO でもない) ですが、説明の都合上そう表記しました。
要はイベントループにて、実行可能なタスクがあれば即時実行し、なければ I/O 待ち (epoll) をすることになります。
結論
つまり、
setTimeout()等の非同期タイマー処理は...
- 指定した時間が来たら即座に Callback を実行する. (OS 割り込みみたいに)
ではなく...
- 指定した時間を 過ぎてたら Callback を できるだけ早く 実行する
ですね。
それは Promise や、Network Socket I/O 待ちである fetch でも同じで...
- Callback が実行可能になってから (現在実行中の他の処理を待って) 順番が来たら (やっと) 実行開始する
です。
参考文献

- 投稿日:2020-04-04T11:32:34+09:00
JavaScript (Node.js) の非同期処理とシングルスレッド
本記事の目的
JavaScript や Node.js はよくシングルスレッドだ〜、と言われますが、では非同期処理はどうやって実行されているのか (Non-Blocking I/O) をざっくりと (私の身内に) 説明する為のサンプルコードです。
検証環境
- iMac (Retina 5K, 27-inch Late 2014), 4 GHz Intel Core i7
- Node.js v12.13.0
$ nodebrew install-binary v12.13.0
$ nodebrew use v12.13.0
ブラウザ JavaScript の Event loop はまたちょっと違います。
早速サンプルコードから
以下の様な JavaScript
index.jsを、Node.js で実行します。
- 【処理 1】ミリ秒で終わる処理を
setTimeout()で 5 秒後に発火.- 【処理 2】ミリ秒で終わる処理を
setTimeout()で 0 秒後に発火.- 【処理 3】10 秒かかる同期処理を実行.
- 時間の計測には Node.js 標準 API の perf_hooks モジュールを使用しています。 Node.js プロセス実行開始からのミリ秒を得られます
- コード中では、ミリ秒 → 秒、に変換して表示しています
index.jsconst { performance } = require('perf_hooks'); /** * @return 本スクリプトを実行してからの経過秒数. */ const seconds = () => performance.now() / 1000; const secondsPadded = () => seconds().toFixed(6).padStart(10, ' '); // 長さ揃える. //////////////// 処理3つ //////////////// /** * 処理 1 (非同期, 5 秒後に発火). */ const func1 = () => { console.log(`${secondsPadded()} seconds --> 処理 1 (非同期, 5 秒後に発火)`); }; /** * 処理 2 (非同期, 0 秒後に発火). */ const func2 = () => { console.log(`${secondsPadded()} seconds --> 処理 2 (非同期, 0 秒後に発火)`); }; /** * 処理 3 (同期. 10 秒かかる). */ const func3 = () => { while (seconds() < 10) { /* consuming a single cpu for 10 seconds... */ } console.log(`${secondsPadded()} seconds --> 処理 3 (同期, 10 秒かかる)`); }; //////////////// 計測開始 //////////////// console.log(`${secondsPadded()} seconds --> index.js START`); // [非同期] 5 秒後に実行. setTimeout(func1, 5000); // [非同期] 即時実行. setTimeout(func2); // 同期実行. func3(); console.log(`${secondsPadded()} seconds --> index.js END`); //////////////// 計測終了 ////////////////期待値?
なんとなく 「こう動作するだろう...」 という気分になるのは ↓ でしょう。
$ node index.js

  0.000000 seconds --> index.js START
  0.000000 seconds --> 処理 2 (非同期, 0 秒後に発火)
  5.000000 seconds --> 処理 1 (非同期, 5 秒後に発火)
 10.000000 seconds --> 処理 3 (同期, 10 秒かかる)
 10.000000 seconds --> index.js END
実際は...
現実はこうです。何故でしょうか。
$ node index.js

  0.175104 seconds --> index.js START
 10.000085 seconds --> 処理 3 (同期, 10 秒かかる)
 10.000210 seconds --> index.js END
 10.000955 seconds --> 処理 2 (非同期, 0 秒後に発火)
 10.001161 seconds --> 処理 1 (非同期, 5 秒後に発火)
シングルスレッドだから、順番に処理している
おおよそ、Node.js の内部では ↓ のように処理がシングルスレッドで行われています。
- JavaScript コンテキストの生成時にイベントループが生成されます
- 最初のエントリ JavaScript
index.jsがタスクとして、未実行キューに乗ります- イベントループ
- 未実行キューから
index.jsタスクが取り出され、実行が開始されます
setTimeout(処理1, 5秒)が実行され、【処理 1】がタイマーキューに追加されますsetTimeout(処理2, 0秒)が実行され、【処理 2】がタイマーキューに追加されます- 【処理 3】が同期的に実行され、10 秒間、CPU (シングルコア) を専有します
index.jsタスクの実行が終了します- イベントループ
- タイマーキューから 有効期限が切れたタスク【処理 2】 を取り出し、実行が開始されます
- 【処理 2】タスクの実行が終了します
- イベントループ
- タイマーキューから 有効期限が切れたタスク【処理 1】 を取り出し、実行が開始されます
- 【処理 1】タスクの実行が終了します
実際はタイマー Phase はキューではない (FIFO でもない) ですが、説明の都合上そう表記しました。
要はイベントループにて、実行可能なタスクがあれば即時実行し、なければ I/O 待ち (epoll) をすることになります。
結論
つまり、
setTimeout()等の非同期タイマー処理は...
- 指定した時間が来たら即座に Callback を実行する. (OS 割り込みみたいに)
ではなく...
- 指定した時間を 過ぎてたら Callback を できるだけ早く 実行する
ですね。
それは Promise や、Network Socket I/O 待ちである fetch でも同じで...
- Callback が実行可能になってから (現在実行中の他の処理を待って) 順番が来たら (やっと) 実行開始する
です。
参考文献
- 投稿日:2020-04-04T10:51:02+09:00
[Node.JS] StreamAPIを使ったCSVの書き読み出し
今回は、Stream使って配列をCSVにして保存したり、CSVから配列を読み込んだりとかを業務で使ったのでそれの共有です。
今回やること
data.write(['a','b'])みたいに書いたらファイルにa,b\nみたいに追加されて欲しい。- 逆にファイルに
a,b\nって書いてあったら、['a','b']みたいに1行づつの情報が欲しい。そもそもStremAPIとは?
streamAPIの素晴らしさを知らない人のために少し解説します。
すでに使ってる人は飛ばしても大丈夫です。公式リンク
Stream API
曰くstreamはデータストリームをするための抽象的インターフェースです。
A stream is an abstract interface for working with streaming data in Node.js.
YoutTubeとかでは動画一気に読み込むとクソ重くなるからちょっとづつ読み込むようになっていますが、これがデータストリーミング。
でもこれは動画だけの話ではありません。
例えば、配列をtxtファイルに1列に保存したいとかってよくあると思います。
その時に、配列を文字列に変換して一気にファイルに保存しちゃうとデカイ配列を変換すると変換と保存に時間とメモリを食われてあまりいい手ではありません。
そこでStreamAPIです。
これを使うと、1要素ごとに保存させたりができるのですごく楽です。しかもPromiseとかコールバックは使わない点も良き
例えば以下のコードのようになります。import * as fs from 'fs' import * as path from 'path' const DATA_PATH = path.join(__dirname, '../data/data.txt') const dataWriteStream = fs.createWriteStream(DATA_PATH) const arr = ['Hello', 'World', 'Hoge'] arr.forEach(val => dataWriteStream.write(val + '\n'))
fsはファイルの読み書き取りでよく使われるモジュールですが、createWriteStreamでファイルを書き出すstreamを作ります。そしてwrite関数にファイルの末尾に追加したい文字列を入れるだけです。逆に読み取るときは以下になります。
import * as fs from 'fs'
import * as path from 'path'

const DATA_PATH = path.join(__dirname, '../data/data.txt')
const dataReadStream = fs.createReadStream(DATA_PATH, { encoding: 'utf-8' })

dataReadStream.on('data', chunk => console.log(chunk))
on関数の第一引数にdataを入れて1行づつ読み取り、成功した時にコールバック関数を実行します。配列をCSVに保存する方法
さてここからが本題です。
具体的に今回作るstreamの流れは1行分の配列のデータを渡す(
['a','bb']みたいな)
↓
そのデータをCSV形式の文字列に変換
↓
その文字列をファイルに保存みたいな形です。
今回CSV文字列に変換するのにはcsv-stringifyというモジュールを使います。これを実装するためにはまずWritableというクラスを継承したクラスを作ります。
そして、write関数が呼ばれた時にそのデータをcsv-stringifyに渡す。
そしてその結果をwriteStreamでファイルに追加みたいな感じです。コードは以下になります。
import * as fs from 'fs'
import { Writable, Readable } from 'stream'
import * as stringify from 'csv-stringify'

export class WritableCSVStream extends Writable {
  private stringifier: stringify.Stringifier
  private writeStream: fs.WriteStream

  constructor(path: string, options: stringify.Options = {}) {
    super({ objectMode: true })
    this.writeStream = fs.createWriteStream(path)
    this.stringifier = stringify(options)

    this.stringifier
      .on('data', chunk => {
        this.writeStream.write(chunk)
      })
      .on('error', err => {
        this.destroy(err)
      })
    this.writeStream.on('error', err => this.destroy(err))
  }

  _write(chunk: any, encoding: string, next: (error?: Error) => void) {
    this.stringifier.write(chunk, next)
  }

  _final(next: () => void) {
    this.writeStream.close()
    this.stringifier.end()
    next()
  }

  _destroy(err?: Error, next?: (err?: Error) => void) {
    this.writeStream.close()
    this.stringifier.end()
    next()
  }
}
_writeにはwrite関数が呼ばれた時の動作、_destroyはエラー終了した時、_finalは終了時に呼ばれます。
closeやend関数はストリームを終了させる役割を持ちます。
そして一番大事なのは、コンストラクターの中身です。
objectModeをtrueにすることでwrite関数にオブジェクトや配列を入れても大丈夫になります。
そしてオブジェクトをCSV形式に変換するstringifierとファイルに出力するwriteStreamをon関数を使って繋げます。
そして_write関数でthisとstringifierを繋げます。CSVファイルの読み出し
CSVファイルの読み出しも上と同じようにもできるのですが、
pipe関数でもっと簡単に書けます。
pipe関数はストリームを別のストリームにデータを受け渡しをできるようにします。import * as parse from 'csv-parse' export const createCSVReadStream = ( path: string, options: parse.Options = {} ) => fs.createReadStream(path).pipe(parse(options))これで
fs.createReadStreamからファイル1行づつ読み出し、それをparseでオブジェクトに変換するようになってます。終わりに
最初はCSV書き出しの方ももっと簡単に書きたかったのですが、
stringify部分がうまくいかずにクラスを実装してみました。データをjsonで保存するのもstreamでできたりするのですが、暇だったらその記事も書きます。
- 投稿日:2020-04-04T00:11:23+09:00
Spotify Developer Platform: SpotifyデータをAPIアクセスしてデータ取得してみてみた
Spotifyは2019年現在、2億3,200万人(うち有料会員数1億800万人)のユーザー音楽配信サービスとしては世界最大手で、5000万以上の音楽やコンテンツが揃っていて、ドライブ、エクササイズ、パーティやリラックスタイムなどに、気分に合った音楽、また、友達、アーティストが作ったプレイリストを聴いたりできます。
そんなSpotifyでは Developer Platformが用意されており、Web API、AndroidやiOS向けのSDKなどがあるので、Play ListやTrackに関する詳細な分析データをAPIアクセスしてでデータ取得し分析できます。
ということで、この取得したデータをDatabsaeへ入れて、Analytics, Machine Learning, BIなどしてみてみたいので、まずはAPIアクセスしてデータ取得してみてみます。・参考: Spotify Developer Platform
ここで必要な技術は、Node.js, JavaScript, Curl, Python, JSONなどです。
ということでやってみてみます。■Spotify Developers アプリケーション作成
Web API Tutorialを参考に、Node.JSで作成した Spotify API へ認証アクセスするための access Tokenを 取得し,Play List情報をJSONデータで取得してみてみます
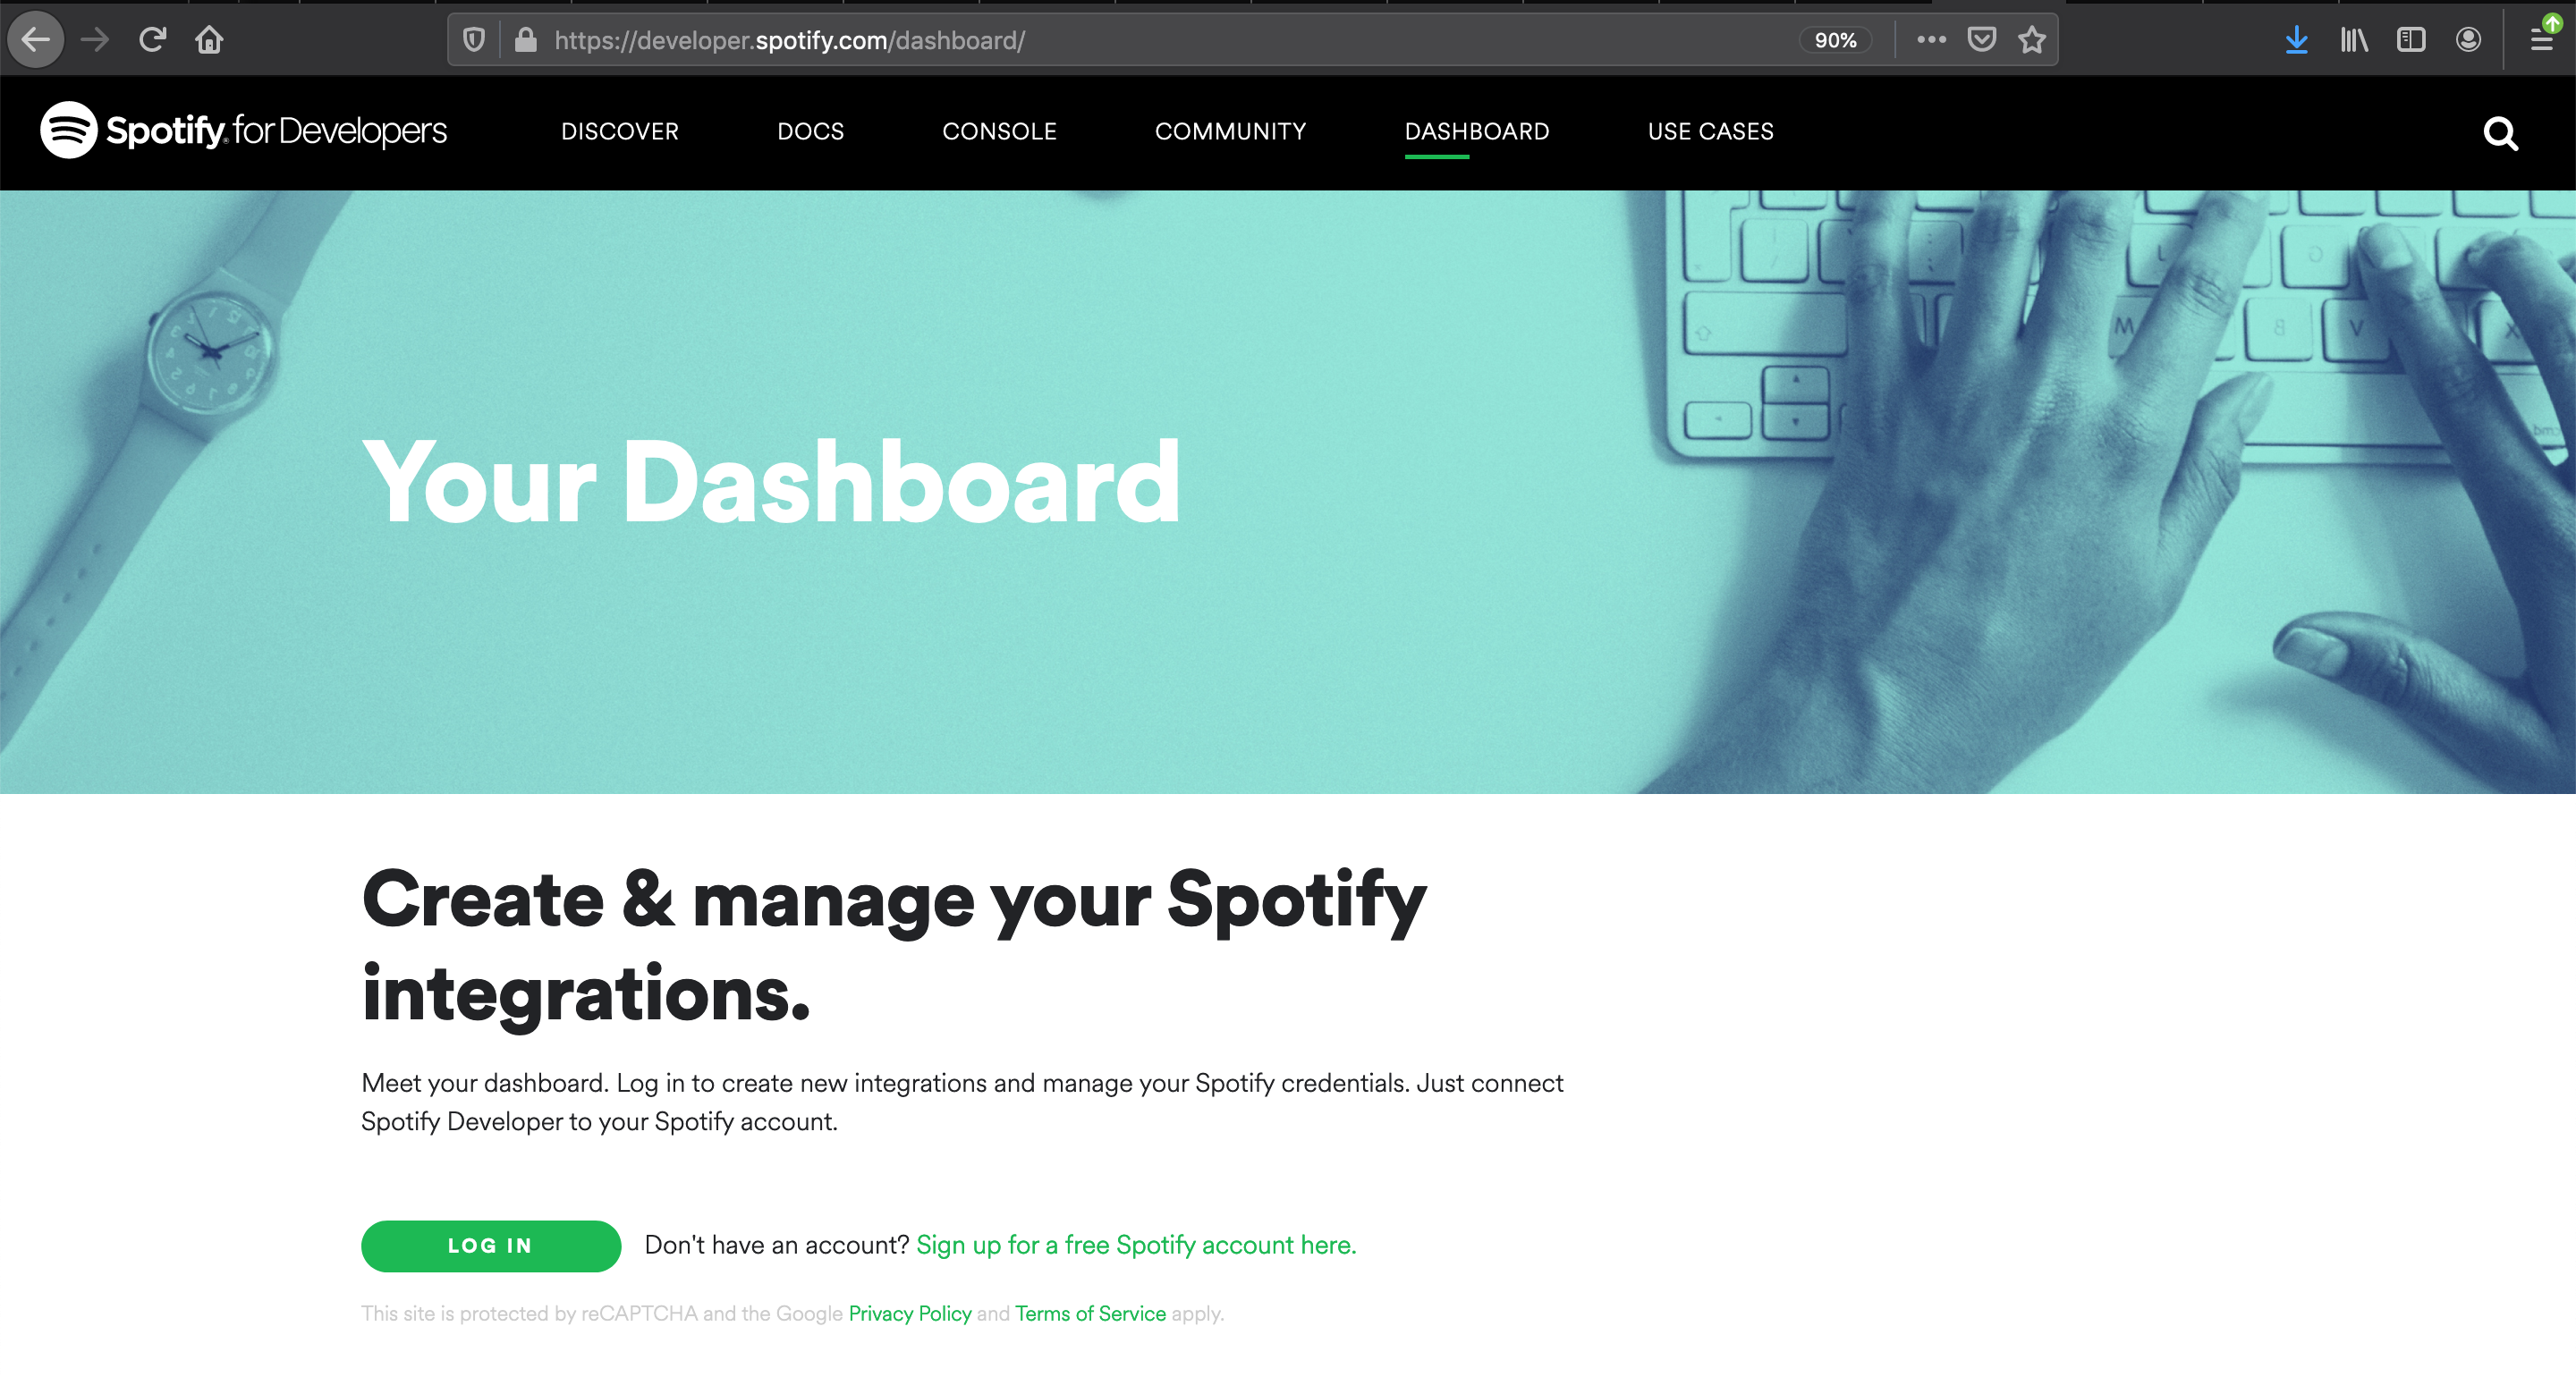
● Spotify Developers ユーザー作成とログイン
Spotify Developers ユーザー作成とログイン
① Spotify Developers ユーザー作成
まず、Spotify Developersサイトへアクセスし、Sign up for a free Spotify account here.をクリックして、ユーザーアカウントを作成
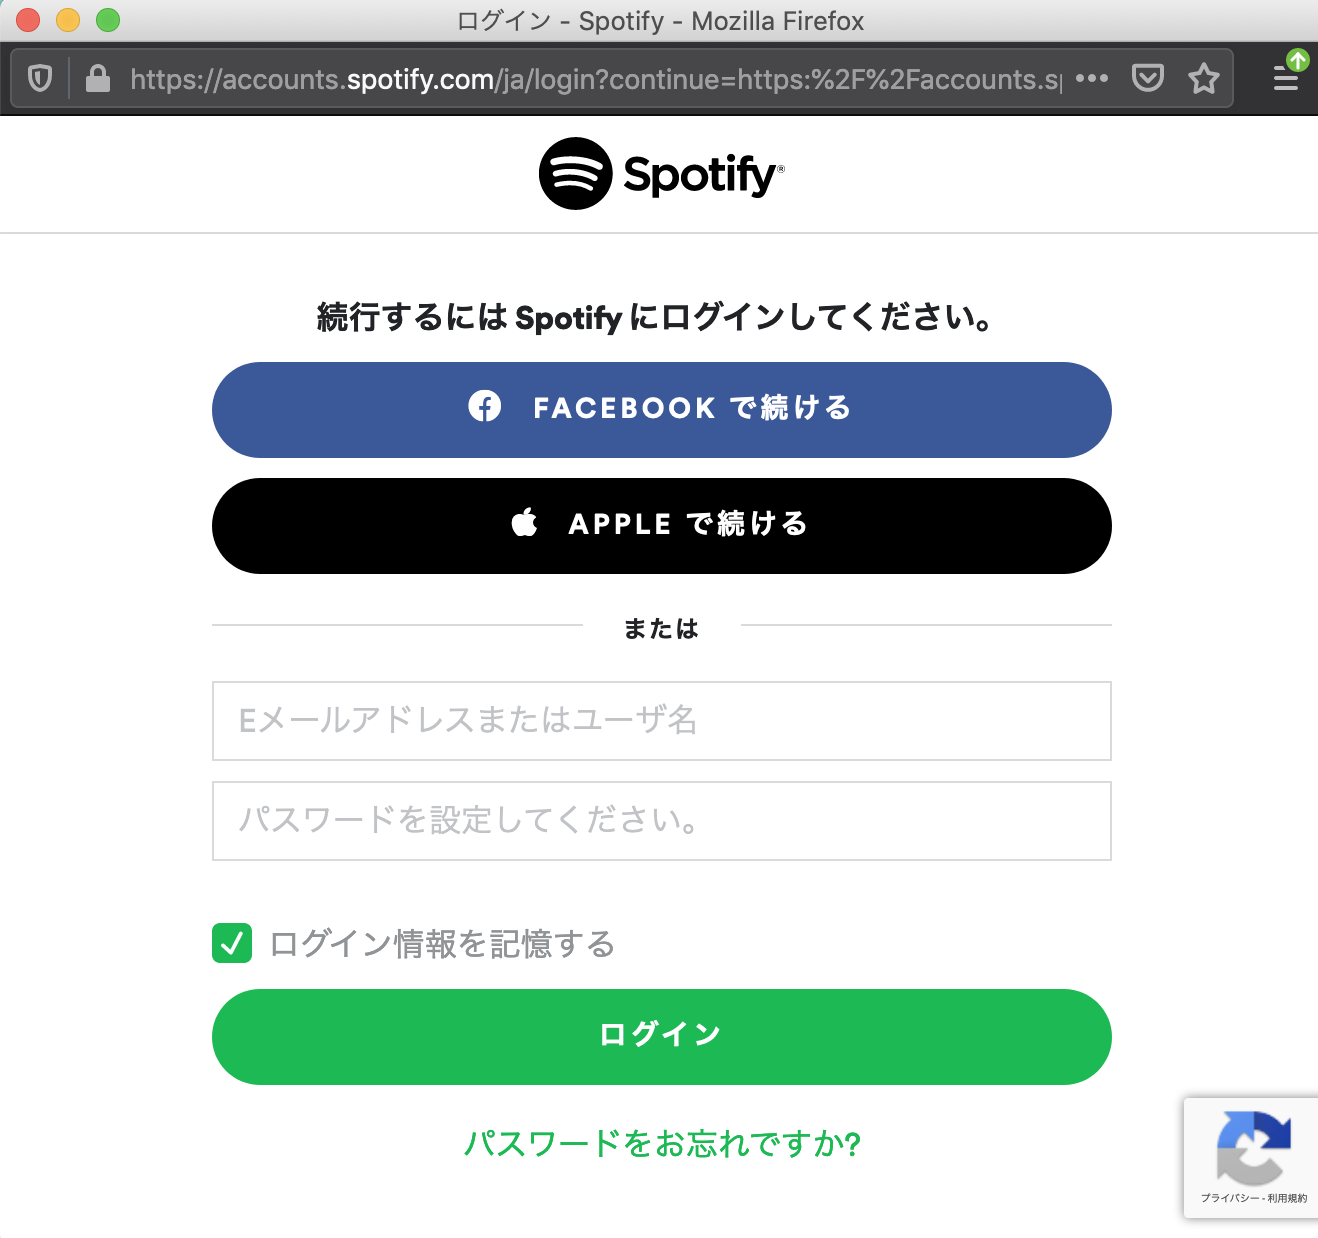
② Spotify Developers ログイン
作成したユーザーでログイン
● Register Your Application
① CREATE A CLIENT ID
ClientプログラムでアクセスするためのClient IDを作成
[CREATE A CLIENT ID]をクリック
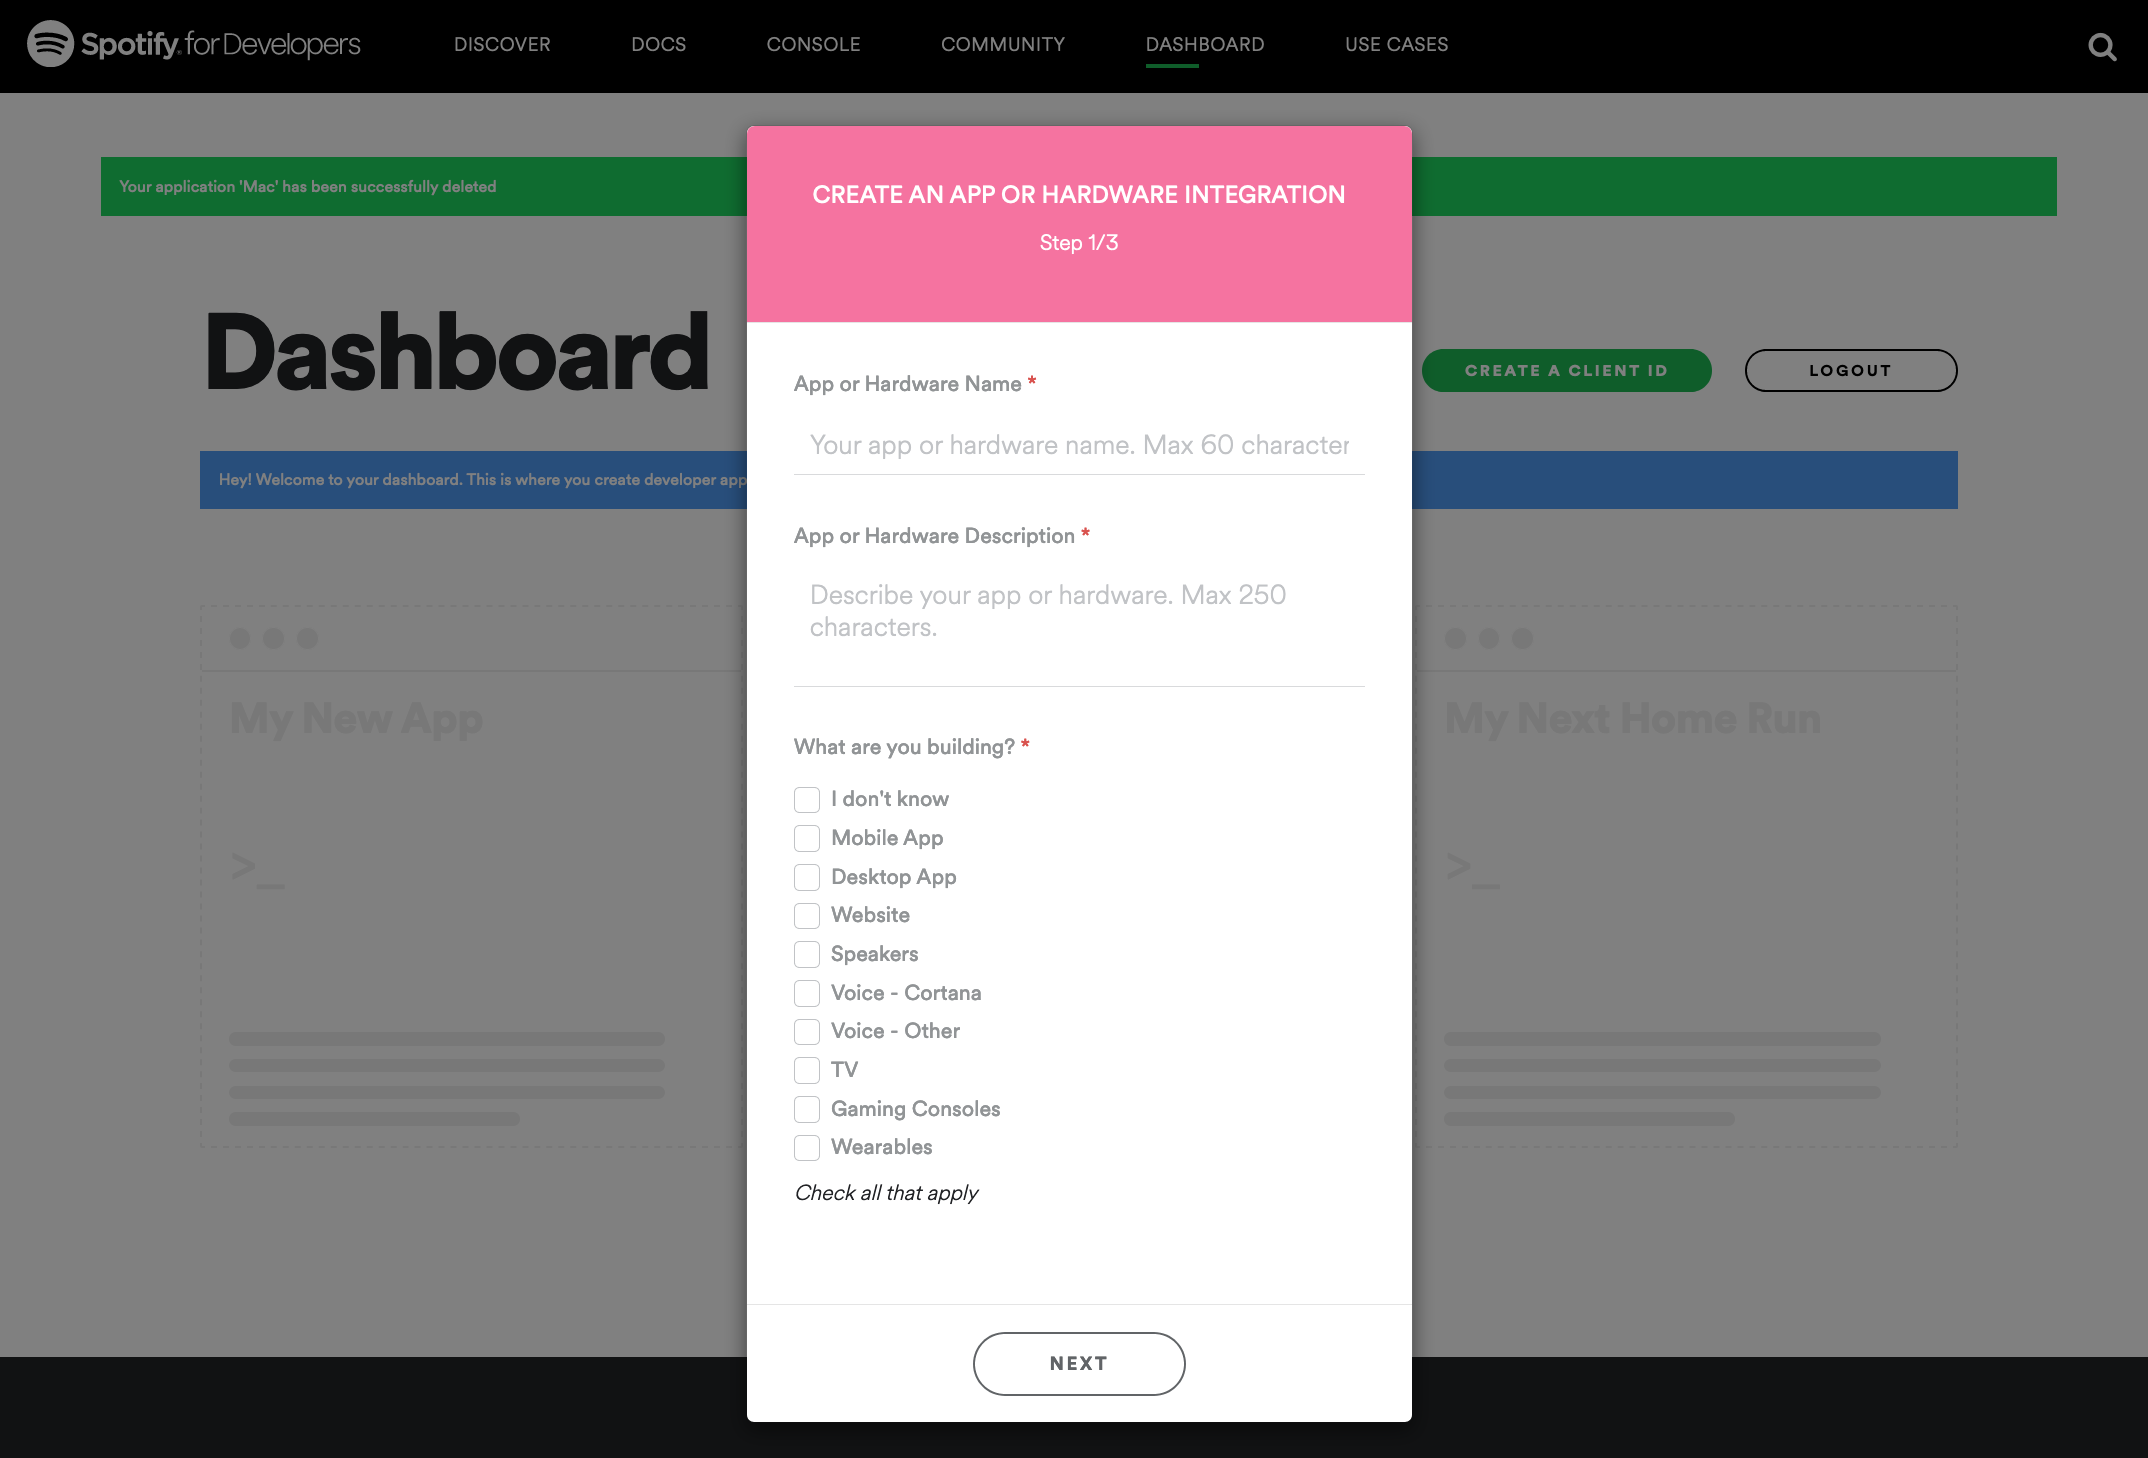
② CREATE AN APP OR HARDWARE INTEGRATION Step 1/3
REATE AN APP OR HARDWARE INTEGRATION画面で必要情報を入力し[NEXT]をクリック
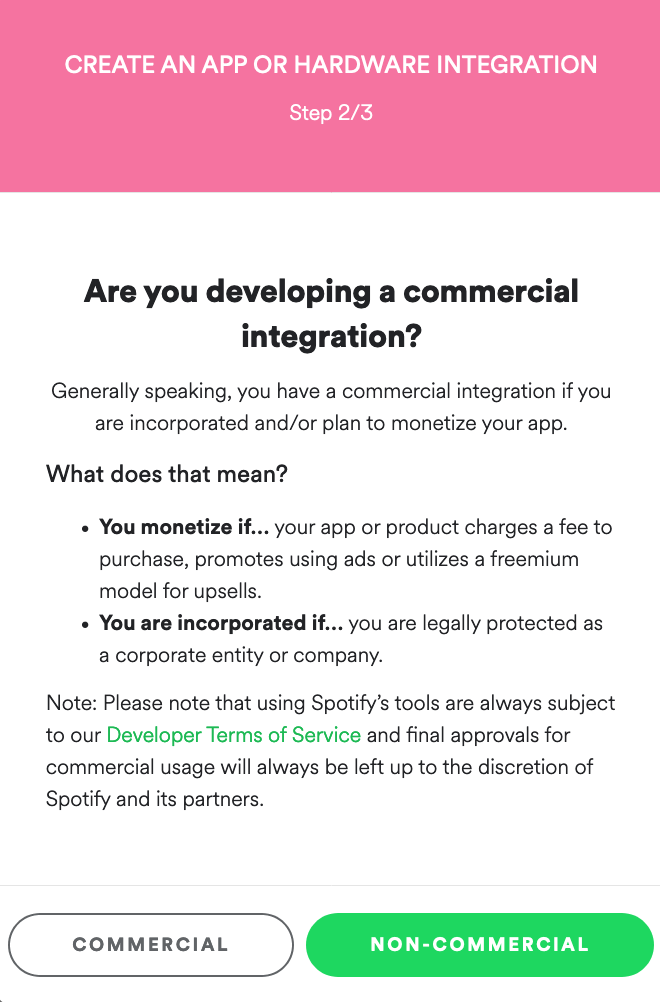
③ CREATE AN APP OR HARDWARE INTEGRATION Step 2/3
ここでは商用利用ではないので、[NON-COMMERCIAL]をクリック
④ CREATE AN APP OR HARDWARE INTEGRATION Step 4/3
確認事項を確認し了承した内容にチェックを入れて、[SUBMIT]をクリック
● App Settings
① Application(Spotify-demo01)画面
ApplicationをRegisterするとこの画面になり、[EDIT SETTING]をクリック
ここでは、Spotify-demo01という名前で作成しました
API アクセスするための Client ID と Client Secret を確認
- Client ID: d9ef929bnjoierg8820bsvkeoi9bo9
- Client Secret: 18308i390dfb829ves89238erv8932
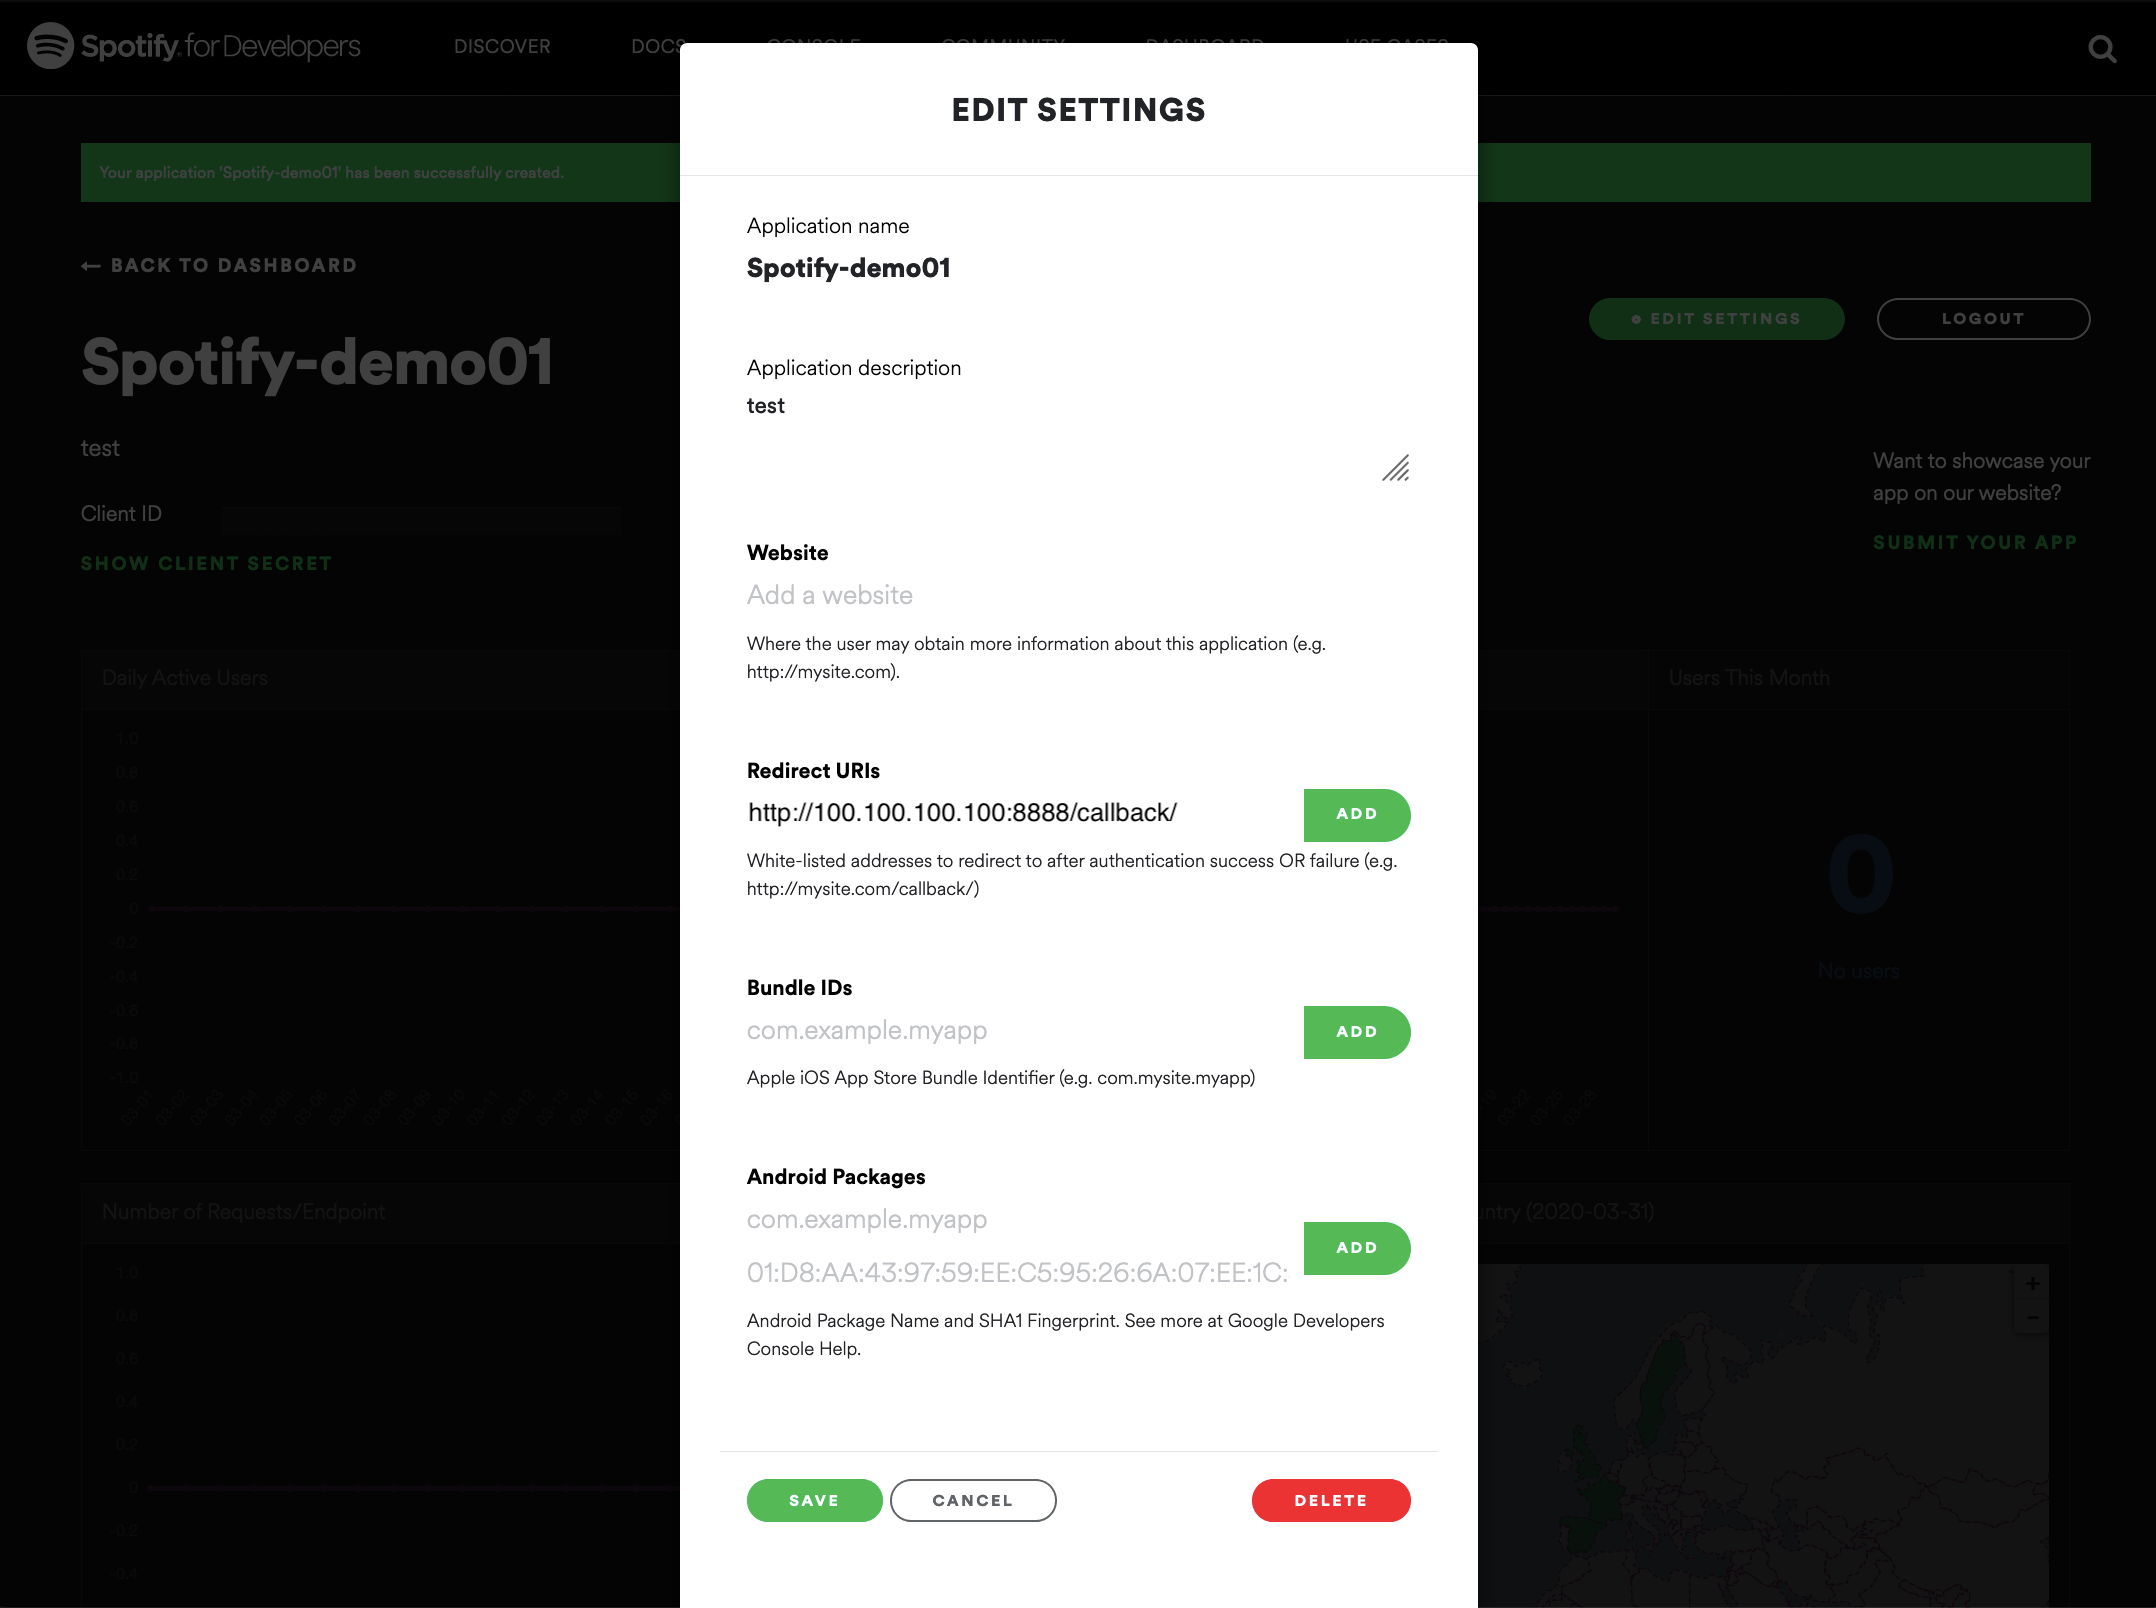
②EDIT SETTINGS画面
アクセスするには、Redirect URIが必要なので、ここでは、Node.jsサーバーのIP(100.100.100.100)でアクセスできるように Redirect URIs項に、 http://100.100.100.100:8888/callback/ を入力
リダイレクトURIに、Spotifyでホワイトリストに登録するアドレスを1つ以上入力します。
このURIにより、OAuth 2.0によるユーザー認証がされます。
ということで、このURI用のサーバーをNode.jsで作成します。・参考:
- Authorization Guide
- Web API Tutorial● Node.jsインストール
① Node.jsインストール
yumでode.jsをインストール[opc@tokyo-inst01 〜]$ sudo yum install nodejs 読み込んだプラグイン:langpacks, ulninfo 依存性の解決をしています --> トランザクションの確認を実行しています。 ---> パッケージ nodejs.x86_64 1:6.17.1-1.el7 を インストール --> 依存性の処理をしています: npm = 1:3.10.10-1.6.17.1.1.el7 のパッケージ: 1:nodejs-6.17.1-1.el7.x86_64 --> 依存性の処理をしています: libuv >= 1:1.9.1 のパッケージ: 1:nodejs-6.17.1-1.el7.x86_64 --> 依存性の処理をしています: libuv.so.1()(64bit) のパッケージ: 1:nodejs-6.17.1-1.el7.x86_64 --> トランザクションの確認を実行しています。 ---> パッケージ libuv.x86_64 1:1.34.0-1.el7 を インストール ---> パッケージ npm.x86_64 1:3.10.10-1.6.17.1.1.el7 を インストール --> 依存性解決を終了しました。 依存性を解決しました ======================================================================================================== Package アーキテクチャー バージョン リポジトリー 容量 ======================================================================================================== インストール中: nodejs x86_64 1:6.17.1-1.el7 ol7_developer_EPEL 4.7 M 依存性関連でのインストールをします: libuv x86_64 1:1.34.0-1.el7 ol7_developer_EPEL 143 k npm x86_64 1:3.10.10-1.6.17.1.1.el7 ol7_developer_EPEL 2.5 M ・・・ インストール: git.x86_64 0:1.8.3.1-21.el7_7 依存性関連をインストールしました: perl-Error.noarch 1:0.17020-2.el7 perl-Git.noarch 0:1.8.3.1-21.el7_7 perl-TermReadKey.x86_64 0:2.30-20.el7 完了しました!③ web-api-auth-examplesインストール
GitHubリポジトリからOAuthサンプルを GitHub: spotify/web-api-auth-examplesからインストール
[opc@tokyo-inst01 spotify]$ git clone https://github.com/spotify/web-api-auth-examples
    Cloning into 'web-api-auth-examples'...
    remote: Enumerating objects: 112, done.
    remote: Total 112 (delta 0), reused 0 (delta 0), pack-reused 112
    Receiving objects: 100% (112/112), 27.26 KiB | 0 bytes/s, done.
    Resolving deltas: 100% (41/41), done.
・ web-api-auth-examplesディレクトリ作成確認
[opc@tokyo-inst01 spotify]$ ls
    web-api-auth-examples
④ npmインストール
OAuthサンプルのコードは、express、request、およびquerystringパッケージに依存します。
作成したフォルダー内に次のコマンドを実行して依存関係をインストールします![opc@tokyo-inst01 spotify]$ cd web-api-auth-examples/ [opc@tokyo-inst01 web-api-auth-examples]$ ls LICENSE README.md authorization_code client_credentials implicit_grant package.json [opc@tokyo-inst01 web-api-auth-examples]$ npm install npm WARN deprecated request@2.83.0: request has been deprecated, see https://github.com/request/request/issues/3142 npm WARN deprecated hawk@6.0.2: This module moved to @hapi/hawk. Please make sure to switch over as this distribution is no longer supported and may contain bugs and critical security issues. npm WARN deprecated cryptiles@3.1.4: This version has been deprecated in accordance with the hapi support policy (hapi.im/support). Please upgrade to the latest version to get the best features, bug fixes, and security patches. If you are unable to upgrade at this time, paid support is available for older versions (hapi.im/commercial). npm WARN deprecated boom@4.3.1: This version has been deprecated in accordance with the hapi support policy (hapi.im/support). Please upgrade to the latest version to get the best features, bug fixes, and security patches. If you are unable to upgrade at this time, paid support is available for older versions (hapi.im/commercial). npm WARN deprecated sntp@2.1.0: This module moved to @hapi/sntp. Please make sure to switch over as this distribution is no longer supported and may contain bugs and critical security issues. npm WARN deprecated hoek@4.2.1: This version has been deprecated in accordance with the hapi support policy (hapi.im/support). Please upgrade to the latest version to get the best features, bug fixes, and security patches. If you are unable to upgrade at this time, paid support is available for older versions (hapi.im/commercial). npm WARN deprecated boom@5.2.0: This version has been deprecated in accordance with the hapi support policy (hapi.im/support). Please upgrade to the latest version to get the best features, bug fixes, and security patches. If you are unable to upgrade at this time, paid support is available for older versions (hapi.im/commercial). web-api-auth-examples@0.0.2 /home/opc/spotify/web-api-auth-examples ├─┬ cookie-parser@1.3.2 │ ├── cookie@0.1.2 │ └── cookie-signature@1.0.4 ├─┬ cors@2.8.5 │ ├── object-assign@4.1.1 │ └── vary@1.1.2 ├─┬ express@4.16.4 │ ├─┬ accepts@1.3.7 │ │ └── negotiator@0.6.2 │ ├── array-flatten@1.1.1 │ ├─┬ body-parser@1.18.3 │ │ ├── bytes@3.0.0 │ │ ├─┬ http-errors@1.6.3 │ │ │ └── inherits@2.0.3 │ │ ├─┬ iconv-lite@0.4.23 │ │ │ └── safer-buffer@2.1.2 │ │ └── raw-body@2.3.3 │ ├── content-disposition@0.5.2 │ ├── content-type@1.0.4 │ ├── cookie@0.3.1 │ ├── cookie-signature@1.0.6 │ ├─┬ debug@2.6.9 │ │ └── ms@2.0.0 │ ├── depd@1.1.2 │ ├── encodeurl@1.0.2 │ ├── escape-html@1.0.3 │ ├── etag@1.8.1 │ ├─┬ finalhandler@1.1.1 │ │ └── unpipe@1.0.0 │ ├── fresh@0.5.2 │ ├── merge-descriptors@1.0.1 │ ├── methods@1.1.2 │ ├─┬ on-finished@2.3.0 │ │ └── ee-first@1.1.1 │ ├── parseurl@1.3.3 │ ├── path-to-regexp@0.1.7 │ ├─┬ proxy-addr@2.0.6 │ │ ├── forwarded@0.1.2 │ │ └── ipaddr.js@1.9.1 │ ├── qs@6.5.2 │ ├── range-parser@1.2.1 │ ├── safe-buffer@5.1.2 │ ├─┬ send@0.16.2 │ │ ├── destroy@1.0.4 │ │ └── mime@1.4.1 │ ├── serve-static@1.13.2 │ ├── setprototypeof@1.1.0 │ ├── statuses@1.4.0 │ ├─┬ type-is@1.6.18 │ │ └── media-typer@0.3.0 │ └── utils-merge@1.0.1 ├── querystring@0.2.0 └─┬ request@2.83.0 ├── aws-sign2@0.7.0 ├── aws4@1.9.1 ├── caseless@0.12.0 ├─┬ combined-stream@1.0.8 │ └── delayed-stream@1.0.0 ├── extend@3.0.2 ├── forever-agent@0.6.1 ├─┬ form-data@2.3.3 │ └── asynckit@0.4.0 ├─┬ har-validator@5.0.3 │ ├─┬ ajv@5.5.2 │ │ ├── co@4.6.0 │ │ ├── fast-deep-equal@1.1.0 │ │ ├── fast-json-stable-stringify@2.1.0 │ │ └── json-schema-traverse@0.3.1 │ └── har-schema@2.0.0 ├─┬ hawk@6.0.2 │ ├── boom@4.3.1 │ ├─┬ cryptiles@3.1.4 │ │ └── boom@5.2.0 │ ├── hoek@4.2.1 │ └── sntp@2.1.0 ├─┬ http-signature@1.2.0 │ ├── assert-plus@1.0.0 │ ├─┬ jsprim@1.4.1 │ │ ├── extsprintf@1.3.0 │ │ ├── json-schema@0.2.3 │ │ └─┬ verror@1.10.0 │ │ └── core-util-is@1.0.2 │ └─┬ sshpk@1.16.1 │ ├── asn1@0.2.4 │ ├── bcrypt-pbkdf@1.0.2 │ ├── dashdash@1.14.1 │ ├── ecc-jsbn@0.1.2 │ ├── getpass@0.1.7 │ ├── jsbn@0.1.1 │ └── tweetnacl@0.14.5 ├── is-typedarray@1.0.0 ├── isstream@0.1.2 ├── json-stringify-safe@5.0.1 ├─┬ mime-types@2.1.26 │ └── mime-db@1.43.0 ├── oauth-sign@0.8.2 ├── performance-now@2.1.0 ├── stringstream@0.0.6 ├─┬ tough-cookie@2.3.4 │ └── punycode@1.4.1 ├── tunnel-agent@0.6.0 └── uuid@3.4.0 npm WARN web-api-auth-examples@0.0.2 No repository field. npm WARN web-api-auth-examples@0.0.2 No license field.●index.html作成
Web rootディレクトリ authorization_codeへindex.htmlファイルを設定
① Web rootディレクトリ authorization_codeへ移動
[opc@tokyo-inst01 web-api-auth-examples]$ cd authorization_code
[opc@tokyo-inst01 authorization_code]$ pwd
    /home/opc/spotify/web-api-auth-examples/authorization_code
[opc@tokyo-inst01 authorization_code]$ ls
    app.js  app.js.org  public
② index.htmlファイル設定
Web API Tutorialにおるように以下内容を設定
[opc@tokyo-inst01 authorization_code]$ vi index.html
    <html>
    <head>
    ...
    <style type="text/css">
    #login {
        display: none;
    }

    #loggedin {
        display: none;
    }
    ...
    </style>
    <body>
    <div>
        <div id="login">
        <h1>First, log in to spotify</h1>
        <a href="/login">Log in</a>
        </div>
        <div id="loggedin">
        </div>
    </div>

    <script id="loggedin-template" type="text/x-handlebars-template">
        <h1>Logged in as </h1>
        <img id="avatar" width="200" src="" />
        <dl>
        <dt>Display name</dt><dd></dd>
        <dt>Username</dt><dd></dd>
        <dt>Email</dt><dd></dd>
        <dt>Spotify URI</dt><dd><a href=""></a></dd>
        <dt>Link</dt><dd><a href=""></a></dd>
        <dt>Profile Image</dt><dd></dd>
        </dl>
        <p><a href="/">Log in again</a></p>
    </script>
    </body>
    </html>
●Provide the Application Credentials
app.jsファイルには、アプリケーションのメインコードが含まれおり、
Spotify Developersで作成したアプリケーションの'CLIENT_ID,'CLIENT_SECRET','REDIRECT_URI' 情報を設定します。・app.jsファイル設定箇所 var client_id = 'CLIENT_ID'; // Your client id var client_secret = 'CLIENT_SECRET'; // Your secret var redirect_uri = 'REDIRECT_URI'; // Your redirect uri① app.jsファイル設定
ということで、'CLIENT_ID', 'CLIENT_SECRET, 'REDIRECT_URI'部分を代入変更します。
[opc@tokyo-inst01 authorization_code]$ vi app.js
    /**
    * This is an example of a basic node.js script that performs
    * the Authorization Code oAuth2 flow to authenticate against
    * the Spotify Accounts.
    *
    * For more information, read
    * https://developer.spotify.com/web-api/authorization-guide/#authorization_code_flow
    */

    ・・・

    var client_id = 'e15bfd0dccb54db5a1757b'; // Your client id
    var client_secret = 'e17644952de94c6baebef'; // Your secret
    var redirect_uri = 'http://100.100.100.100:8888/callback'; // Your redirect uri
    ・・・
■Running the Application
設定した Node.jsアプリケーションを起動し、Spotifyへ認証アクセスするためのAccess tokenを取得します
① 設定した Node.jsアプリケーションを起動
[opc@tokyo-inst01 authorization_code]$ node app.js
    Listening on 8888
② Node.jsアプリケーションのURLへアクセス
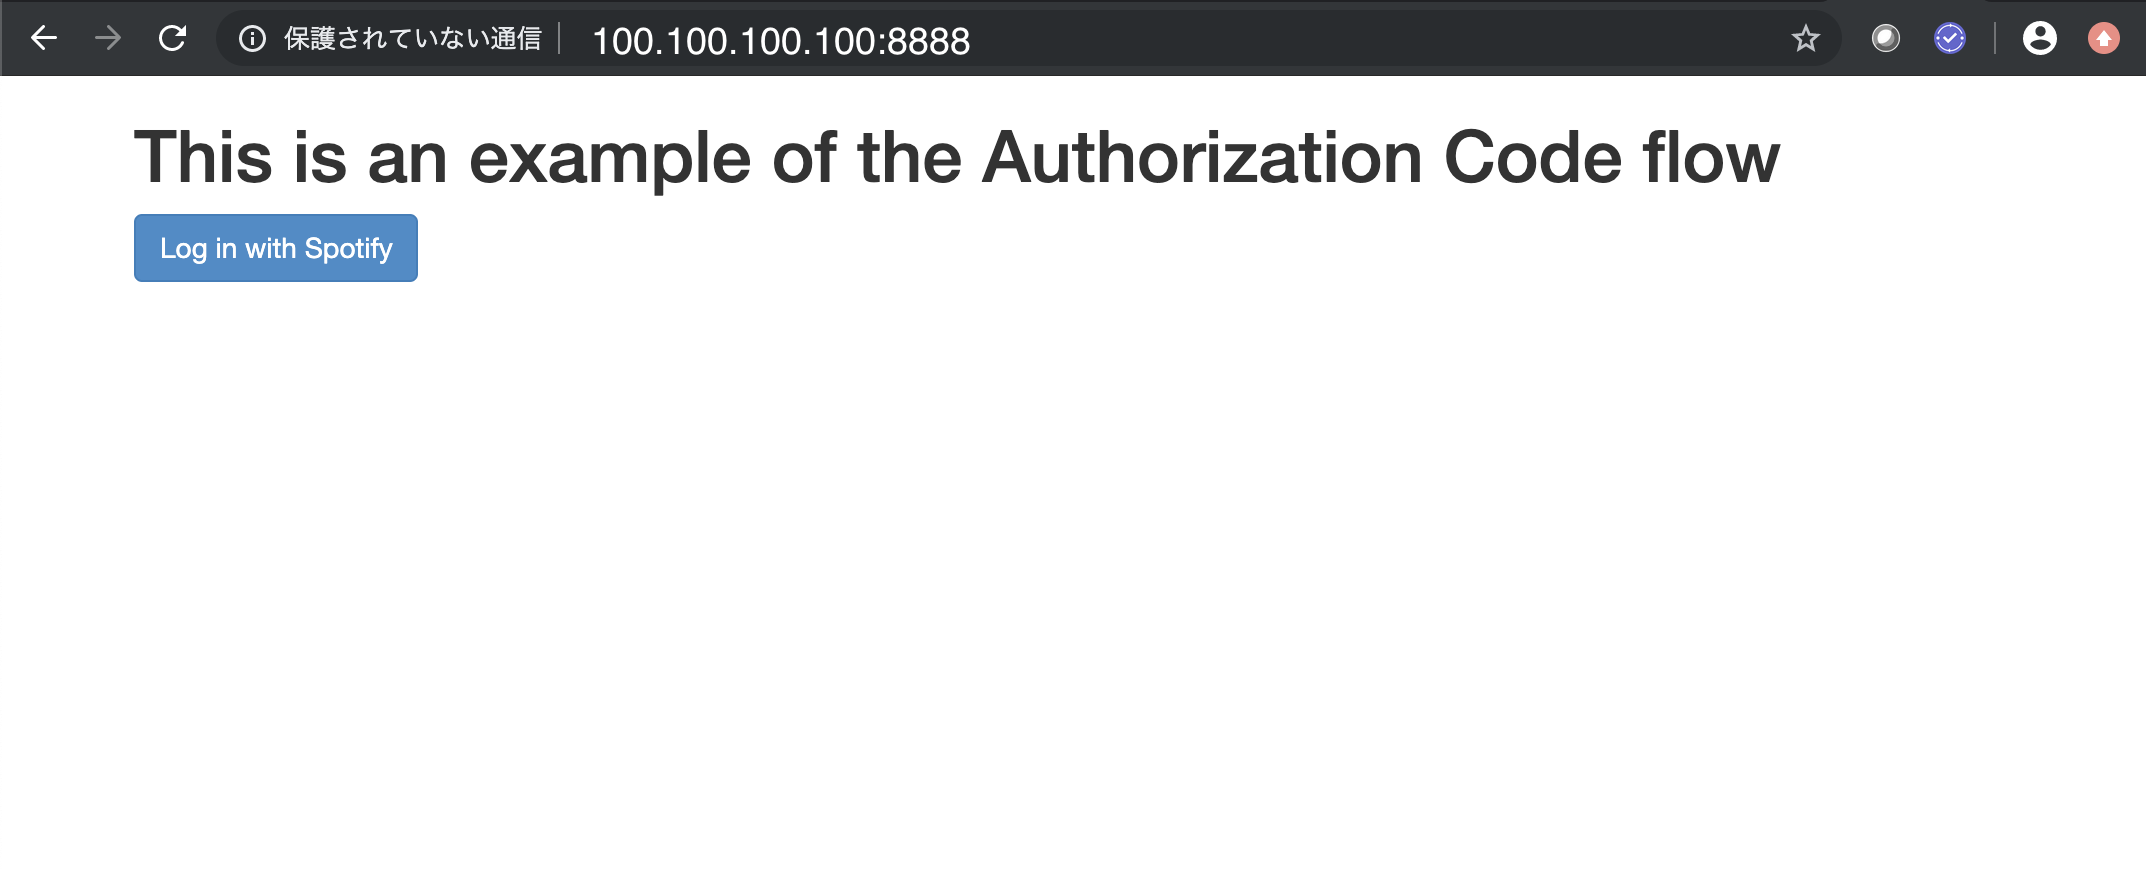
設定したURL http://100.100.100.100:8888 へWebブラウザでアクセス
③ ログイン
[Log in with Spotify]をクリック
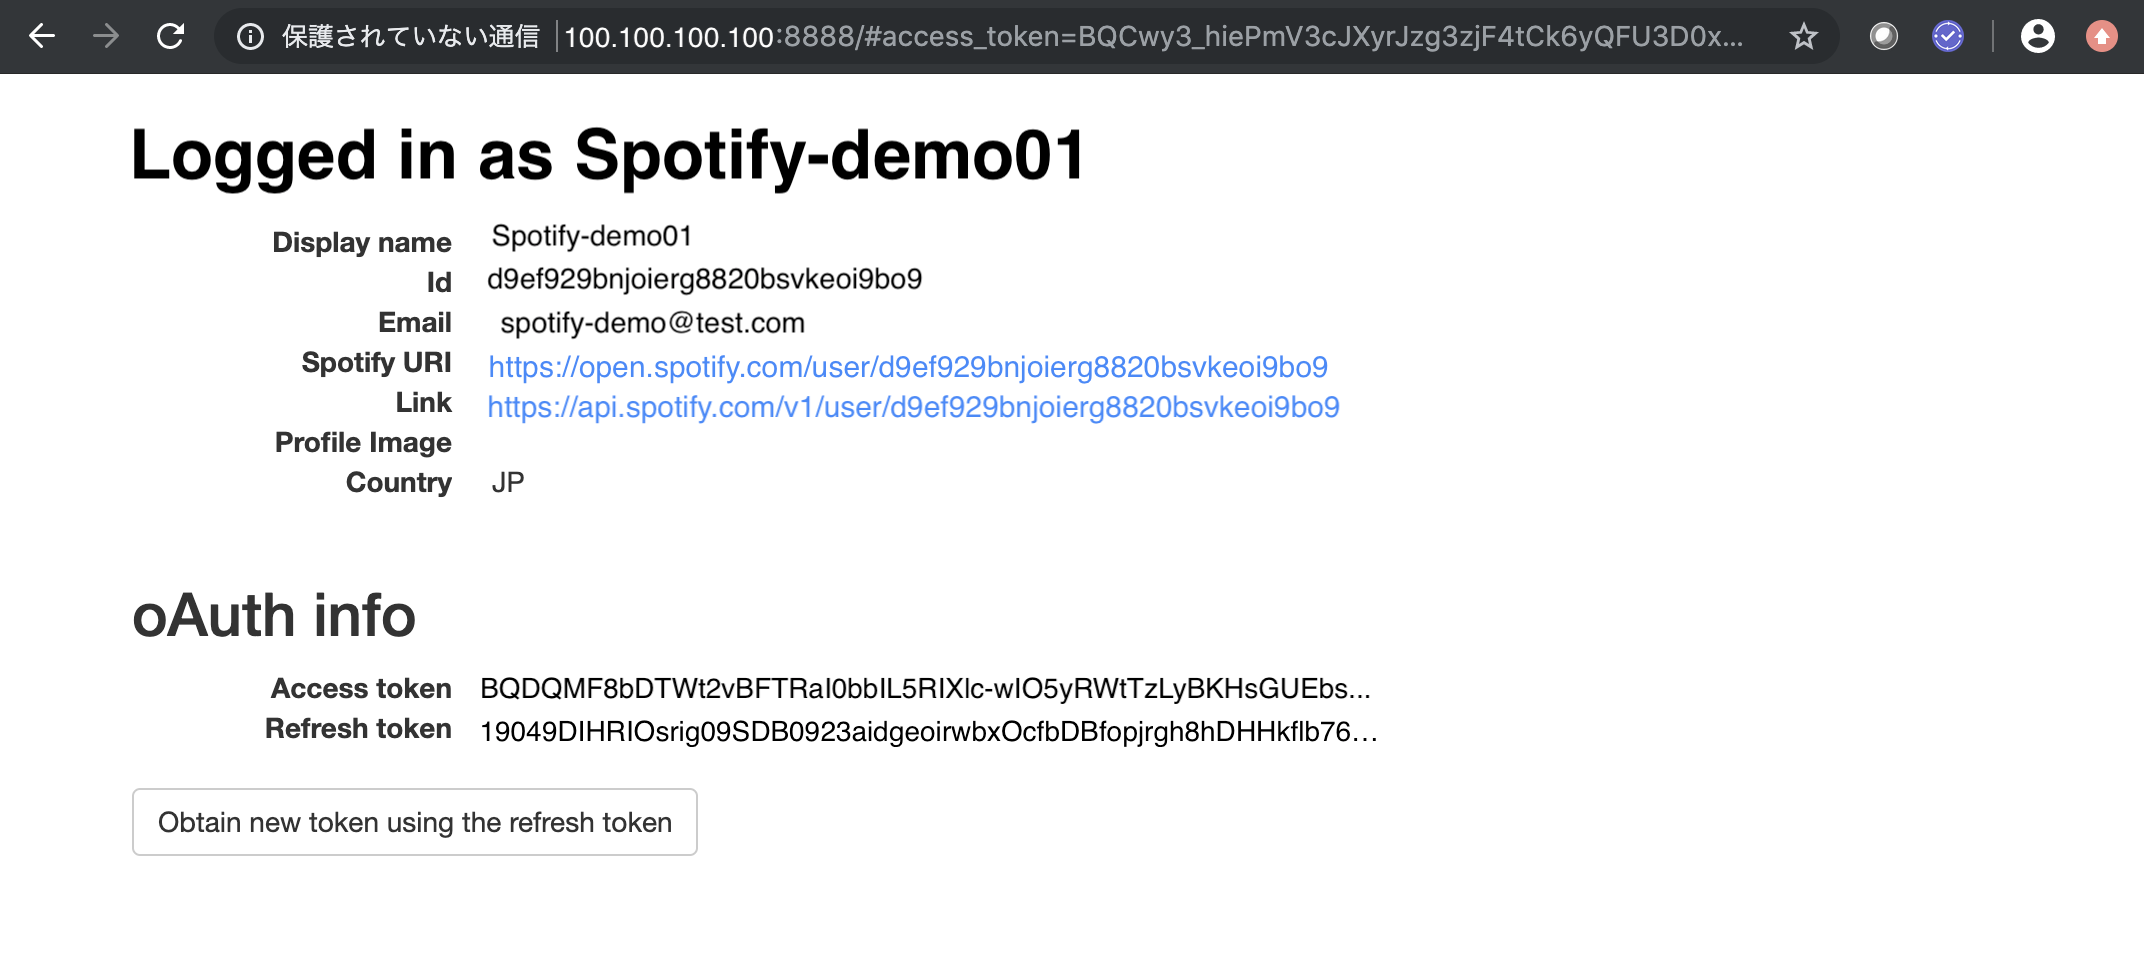
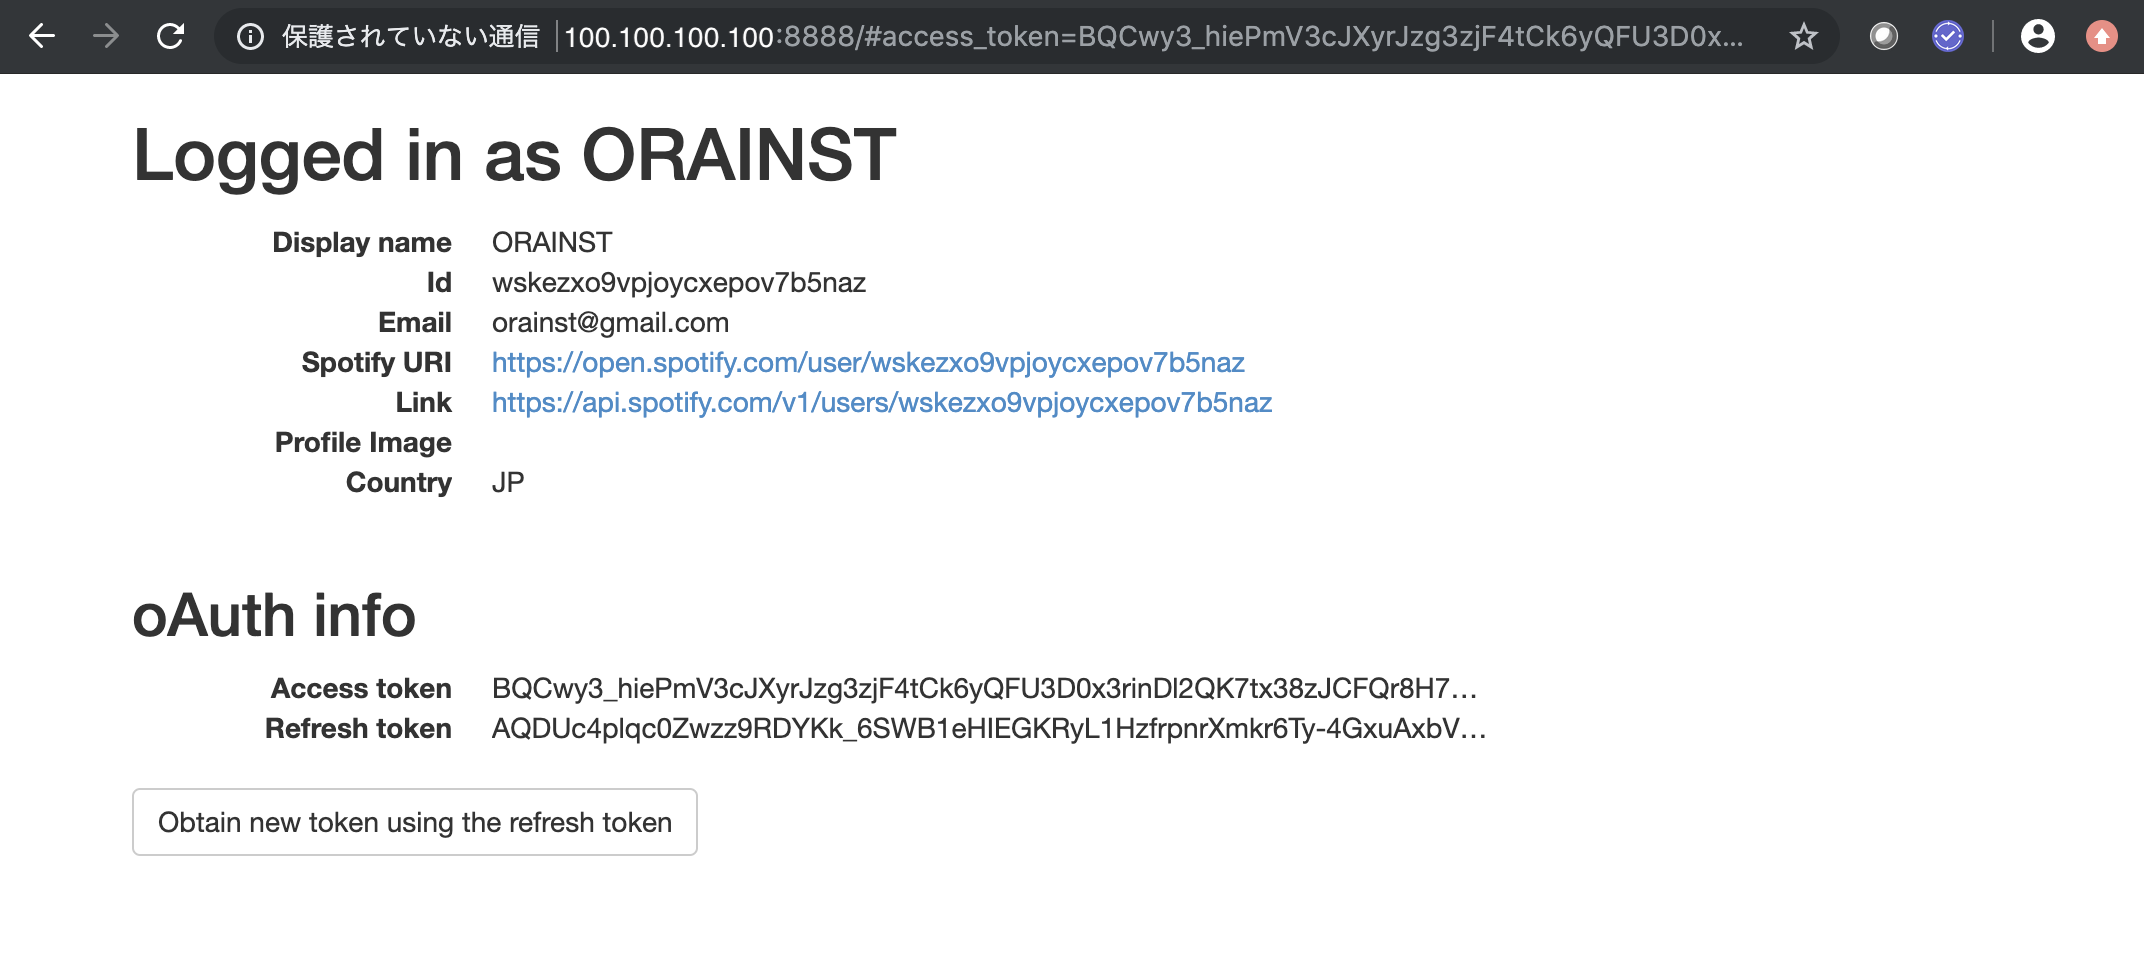
④ Access Token取得
ログインすると Access tokenが出力されます。
これを使用して、Spotifyへ認証アクセスして、Play Listやアーティスト情報を取得します。
■テスト:Play List情報取得
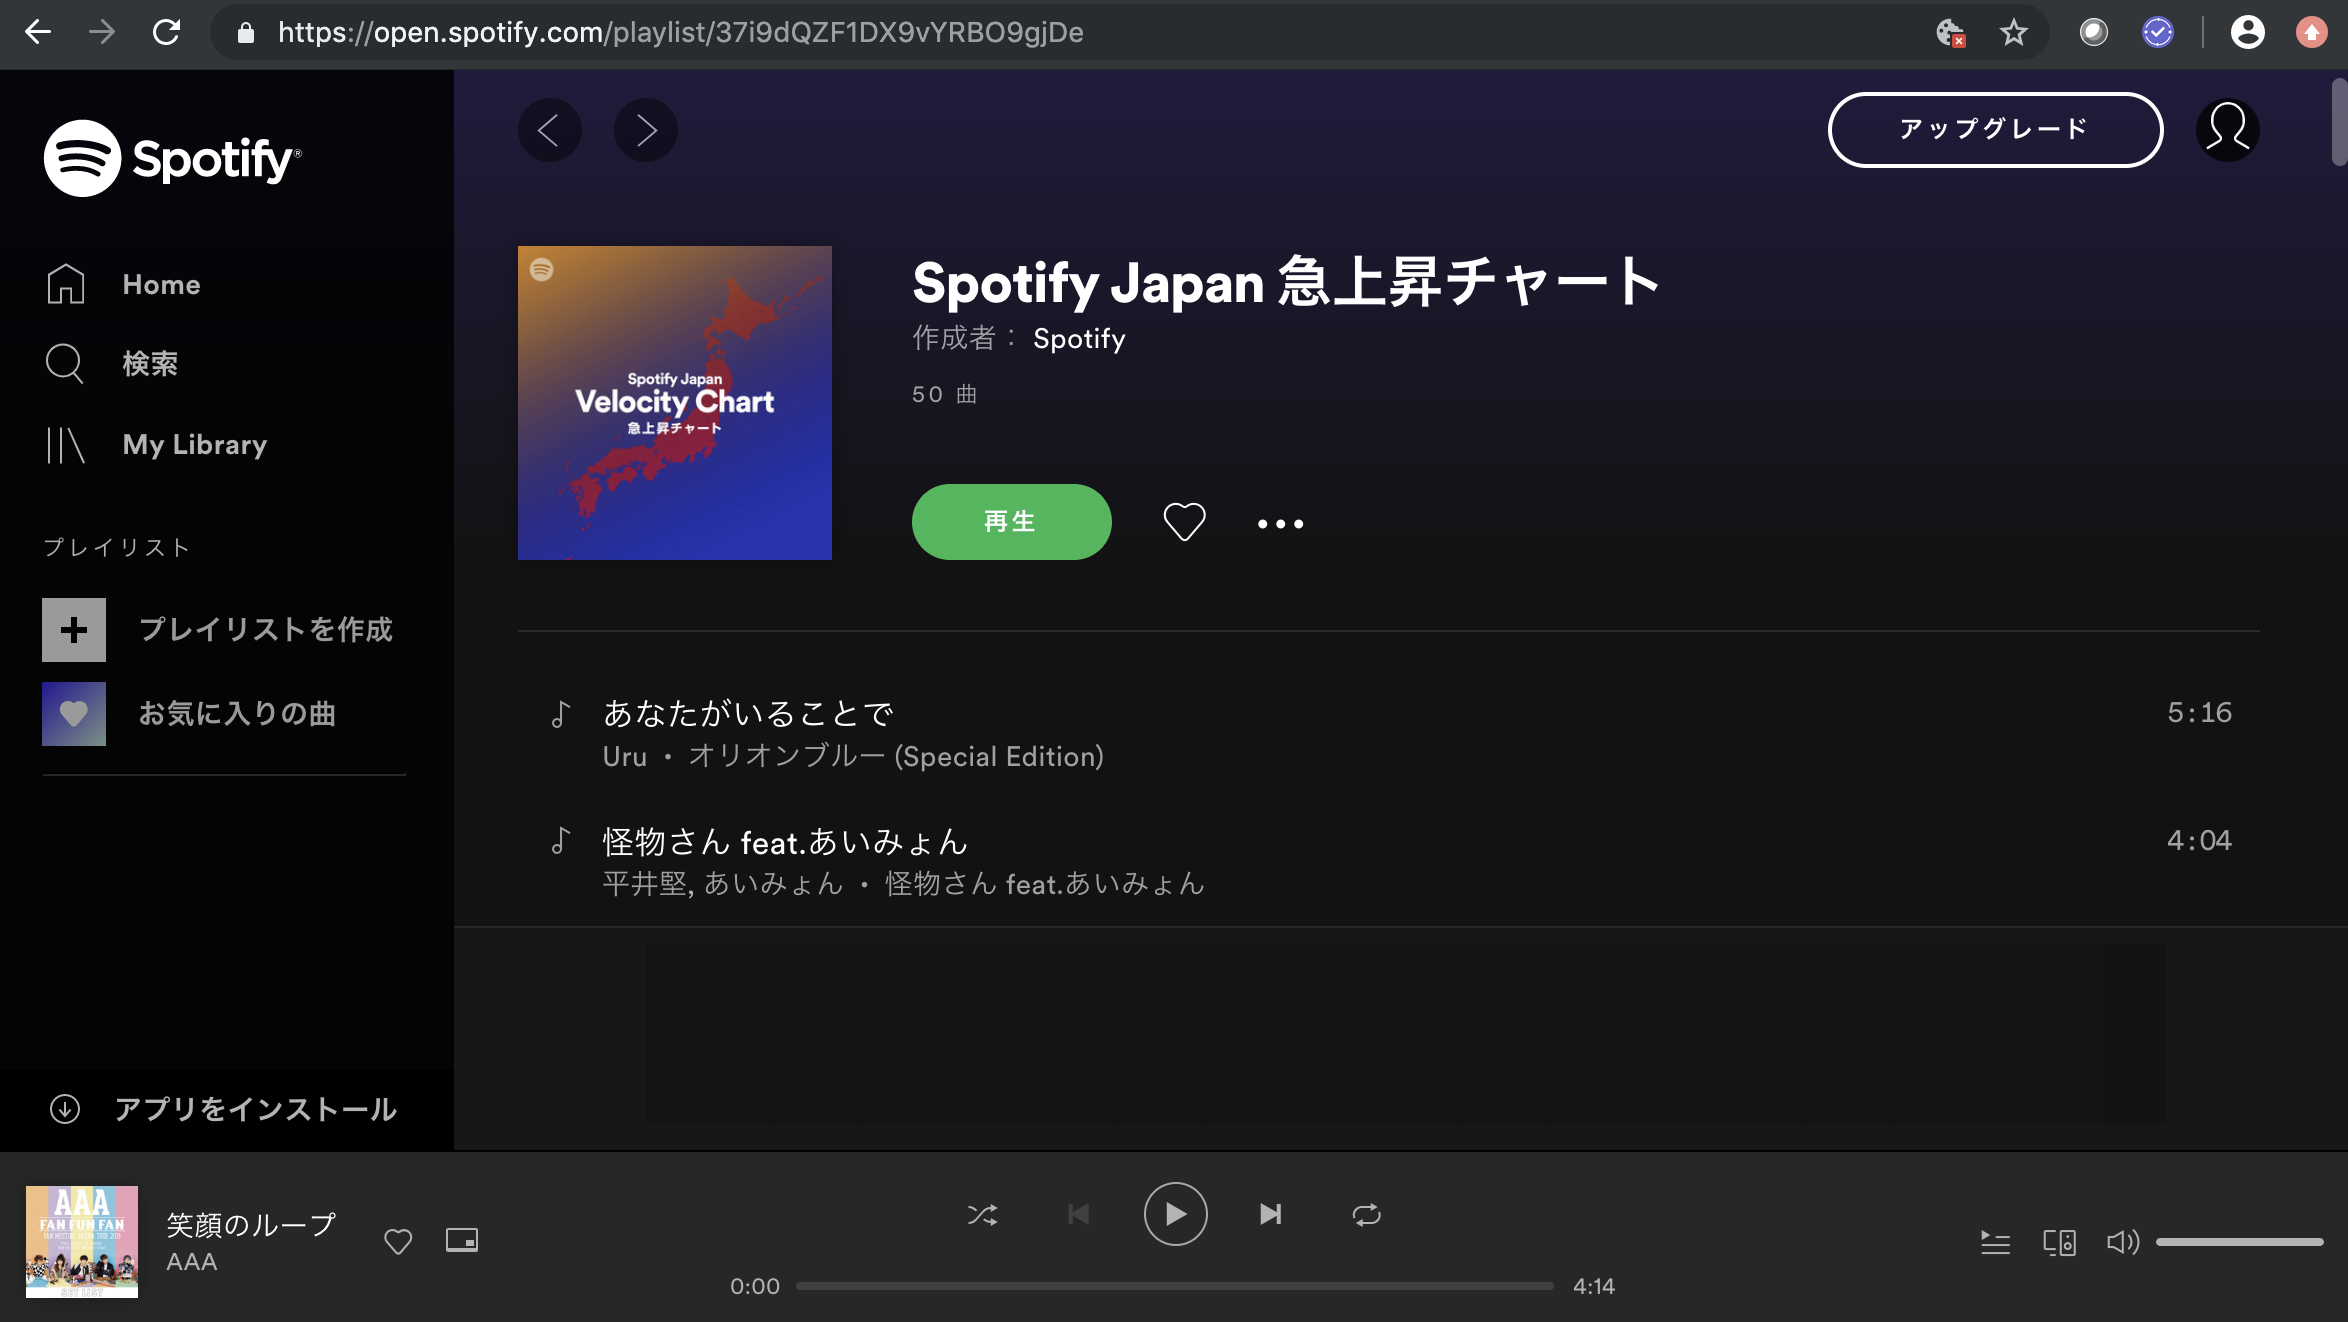
Play List「Spotify Japan 急上昇チャート」の情報を取得してみています。
・potify Japan 急上昇チャート: https://open.spotify.com/playlist/37i9dQZF1DX9vYRBO9gjDe
① Play list ID取得
APIリファレンス: API ENDPOINT REFERENCEを参考にlay list情報を取得例) エンドポイントに以下「id」を指定する必要があります
- playlists:/v1/playlists/{playlist_id}/tracks
- partists:/v1/artists/{id}/albums「id」は以下になります。
・プレイリスト例:Sporify Japan 急上昇チャート: https://open.spotify.com/playlist/37i9dQZF1DX9vYRBO9gjDe
-->「37i9dQZF1DX9vYRBO9gjDe」がプレイリストid
・アーティスト例:チャイコフスキー: https://open.spotify.com/artist/3MKCzCnpzw3TjUYs2v7vDA
-->3MKCzCnpzw3TjUYs2v7vDA 」がアーティストidになります。② Access token確認とPlay List取得Curl作成
上記Node.jsアプリケーションで取得した、Access token: BQDQMF8bDTWt2vBFTRaI0bbIL5RIXlc-wIO5yRWtTzLyBKHsGUEbs1-668aBJ3bIRYpdZnKT...を
以下Curl文のへ代入curl -H "Authorization: Bearer <Access token>" https://api.spotify.com/v1/playlists/37i9dQZF1DX9vYRBO9gjDe/tracks② 実行
作成したcurl実行しPlay Listデータを取得
データはJSONで出力されます[opc@tokyo-inst01 ~]$ curl -H "Authorization: Bearer BQDQMF8bDTWt2vBFTRaI0bbIL5RIXlc-wIO5yRWtTzLyBKHsGUEbs1-668aBJ3bIRYpdZnKT..." https://api.spotify.com/v1/playlists/37i9dQZF1DX9vYRBO9gjDe/ { "collaborative" : false, "description" : "Spotify Japanのデイリー急上昇チャート。4月1日付。", "external_urls" : { "spotify" : "https://open.spotify.com/playlist/37i9dQZF1DX9vYRBO9gjDe" }, "followers" : { "href" : null, "total" : 148523 }, ・・・<省略>・・・ } ], "limit" : 100, "next" : null, "offset" : 0, "previous" : null, "total" : 50 }, "type" : "playlist", "uri" : "spotify:playlist:37i9dQZF1DX9vYRBO9gjDe"\( ^o^ )/
ということで、今度はこの一連の処理を Python3で作成して実行してみてみます。
つづく・・・


- 投稿日:2020-04-04T00:11:23+09:00
Spotify Developer Platform: Spotify APIアクセスしてデータ取得してみてみた
Spotifyは2019年現在、2億3,200万人(うち有料会員数1億800万人)のユーザー音楽配信サービスとしては世界最大手で、5000万以上の音楽やコンテンツが揃っていて、ドライブ、エクササイズ、パーティやリラックスタイムなどに、気分に合った音楽、また、友達、アーティストが作ったプレイリストを聴いたりできます。
そんなSpotifyでは Developer Platformが用意されており、Web API、AndroidやiOS向けのSDKなどがあるので、Play ListやTrackに関する詳細な分析データをAPIアクセスしてでデータ取得し分析できます。
ということで、この取得したデータをDatabsaeへ入れて、Analytics, Machine Learning, BIなどData Scienceしてみてみたいので、まずはAPIアクセスしてデータ取得してみてみます。・参考: Spotify Developer Platform
ここで必要な技術は、Node.js, JavaScript, Curl, Python, JSONなどです。
ということでやってみてみます。■Spotify Developers アプリケーション作成
Web API Tutorialを参考に、Node.JSで作成した Spotify API へ認証アクセスするための access Tokenを 取得し,Play List情報をJSONデータで取得してみてみます
● Spotify Developers ユーザー作成とログイン
Spotify Developers ユーザー作成とログイン
① Spotify Developers ユーザー作成
まず、Spotify Developersサイトへアクセスし、Sign up for a free Spotify account here.をクリックして、ユーザーアカウントを作成
② Spotify Developers ログイン
作成したユーザーでログイン
● Register Your Application
① CREATE A CLIENT ID
ClientプログラムでアクセスするためのClient IDを作成
[CREATE A CLIENT ID]をクリック
② CREATE AN APP OR HARDWARE INTEGRATION Step 1/3
REATE AN APP OR HARDWARE INTEGRATION画面で必要情報を入力し[NEXT]をクリック
③ CREATE AN APP OR HARDWARE INTEGRATION Step 2/3
ここでは商用利用ではないので、[NON-COMMERCIAL]をクリック
④ CREATE AN APP OR HARDWARE INTEGRATION Step 4/3
確認事項を確認し了承した内容にチェックを入れて、[SUBMIT]をクリック
● App Settings
① Application(Spotify-demo01)画面
ApplicationをRegisterするとこの画面になり、[EDIT SETTING]をクリック
ここでは、Spotify-demo01という名前で作成しました
API アクセスするための Client ID と Client Secret を確認
- Client ID: d9ef929bnjoierg8820bsvkeoi9bo9
- Client Secret: 18308i390dfb829ves89238erv8932
②EDIT SETTINGS画面
アクセスするには、Redirect URIが必要なので、ここでは、Node.jsサーバーのIP(100.100.100.100)でアクセスできるように Redirect URIs項に、 http://100.100.100.100:8888/callback/ を入力
リダイレクトURIに、Spotifyでホワイトリストに登録するアドレスを1つ以上入力します。
このURIにより、OAuth 2.0によるユーザー認証がされます。
ということで、このURI用のサーバーをNode.jsで作成します。・参考:
- Authorization Guide
- Web API Tutorial● Node.jsインストール
① Node.jsインストール
yumでode.jsをインストール[opc@tokyo-inst01 〜]$ sudo yum install nodejs 読み込んだプラグイン:langpacks, ulninfo 依存性の解決をしています --> トランザクションの確認を実行しています。 ---> パッケージ nodejs.x86_64 1:6.17.1-1.el7 を インストール --> 依存性の処理をしています: npm = 1:3.10.10-1.6.17.1.1.el7 のパッケージ: 1:nodejs-6.17.1-1.el7.x86_64 --> 依存性の処理をしています: libuv >= 1:1.9.1 のパッケージ: 1:nodejs-6.17.1-1.el7.x86_64 --> 依存性の処理をしています: libuv.so.1()(64bit) のパッケージ: 1:nodejs-6.17.1-1.el7.x86_64 --> トランザクションの確認を実行しています。 ---> パッケージ libuv.x86_64 1:1.34.0-1.el7 を インストール ---> パッケージ npm.x86_64 1:3.10.10-1.6.17.1.1.el7 を インストール --> 依存性解決を終了しました。 依存性を解決しました ======================================================================================================== Package アーキテクチャー バージョン リポジトリー 容量 ======================================================================================================== インストール中: nodejs x86_64 1:6.17.1-1.el7 ol7_developer_EPEL 4.7 M 依存性関連でのインストールをします: libuv x86_64 1:1.34.0-1.el7 ol7_developer_EPEL 143 k npm x86_64 1:3.10.10-1.6.17.1.1.el7 ol7_developer_EPEL 2.5 M ・・・ インストール: git.x86_64 0:1.8.3.1-21.el7_7 依存性関連をインストールしました: perl-Error.noarch 1:0.17020-2.el7 perl-Git.noarch 0:1.8.3.1-21.el7_7 perl-TermReadKey.x86_64 0:2.30-20.el7 完了しました!③ web-api-auth-examplesインストール
GitHubリポジトリからOAuthサンプルを GitHub: spotify/web-api-auth-examplesからインストール
[opc@tokyo-inst01 spotify]$ git clone https://github.com/spotify/web-api-auth-examples
    Cloning into 'web-api-auth-examples'...
    remote: Enumerating objects: 112, done.
    remote: Total 112 (delta 0), reused 0 (delta 0), pack-reused 112
    Receiving objects: 100% (112/112), 27.26 KiB | 0 bytes/s, done.
    Resolving deltas: 100% (41/41), done.
・ web-api-auth-examplesディレクトリ作成確認
[opc@tokyo-inst01 spotify]$ ls
    web-api-auth-examples
④ npmインストール
OAuthサンプルのコードは、express、request、およびquerystringパッケージに依存します。
作成したフォルダー内に次のコマンドを実行して依存関係をインストールします![opc@tokyo-inst01 spotify]$ cd web-api-auth-examples/ [opc@tokyo-inst01 web-api-auth-examples]$ ls LICENSE README.md authorization_code client_credentials implicit_grant package.json [opc@tokyo-inst01 web-api-auth-examples]$ npm install npm WARN deprecated request@2.83.0: request has been deprecated, see https://github.com/request/request/issues/3142 npm WARN deprecated hawk@6.0.2: This module moved to @hapi/hawk. Please make sure to switch over as this distribution is no longer supported and may contain bugs and critical security issues. npm WARN deprecated cryptiles@3.1.4: This version has been deprecated in accordance with the hapi support policy (hapi.im/support). Please upgrade to the latest version to get the best features, bug fixes, and security patches. If you are unable to upgrade at this time, paid support is available for older versions (hapi.im/commercial). npm WARN deprecated boom@4.3.1: This version has been deprecated in accordance with the hapi support policy (hapi.im/support). Please upgrade to the latest version to get the best features, bug fixes, and security patches. If you are unable to upgrade at this time, paid support is available for older versions (hapi.im/commercial). npm WARN deprecated sntp@2.1.0: This module moved to @hapi/sntp. Please make sure to switch over as this distribution is no longer supported and may contain bugs and critical security issues. npm WARN deprecated hoek@4.2.1: This version has been deprecated in accordance with the hapi support policy (hapi.im/support). Please upgrade to the latest version to get the best features, bug fixes, and security patches. If you are unable to upgrade at this time, paid support is available for older versions (hapi.im/commercial). npm WARN deprecated boom@5.2.0: This version has been deprecated in accordance with the hapi support policy (hapi.im/support). Please upgrade to the latest version to get the best features, bug fixes, and security patches. If you are unable to upgrade at this time, paid support is available for older versions (hapi.im/commercial). web-api-auth-examples@0.0.2 /home/opc/spotify/web-api-auth-examples ├─┬ cookie-parser@1.3.2 │ ├── cookie@0.1.2 │ └── cookie-signature@1.0.4 ├─┬ cors@2.8.5 │ ├── object-assign@4.1.1 │ └── vary@1.1.2 ├─┬ express@4.16.4 │ ├─┬ accepts@1.3.7 │ │ └── negotiator@0.6.2 │ ├── array-flatten@1.1.1 │ ├─┬ body-parser@1.18.3 │ │ ├── bytes@3.0.0 │ │ ├─┬ http-errors@1.6.3 │ │ │ └── inherits@2.0.3 │ │ ├─┬ iconv-lite@0.4.23 │ │ │ └── safer-buffer@2.1.2 │ │ └── raw-body@2.3.3 │ ├── content-disposition@0.5.2 │ ├── content-type@1.0.4 │ ├── cookie@0.3.1 │ ├── cookie-signature@1.0.6 │ ├─┬ debug@2.6.9 │ │ └── ms@2.0.0 │ ├── depd@1.1.2 │ ├── encodeurl@1.0.2 │ ├── escape-html@1.0.3 │ ├── etag@1.8.1 │ ├─┬ finalhandler@1.1.1 │ │ └── unpipe@1.0.0 │ ├── fresh@0.5.2 │ ├── merge-descriptors@1.0.1 │ ├── methods@1.1.2 │ ├─┬ on-finished@2.3.0 │ │ └── ee-first@1.1.1 │ ├── parseurl@1.3.3 │ ├── path-to-regexp@0.1.7 │ ├─┬ proxy-addr@2.0.6 │ │ ├── forwarded@0.1.2 │ │ └── ipaddr.js@1.9.1 │ ├── qs@6.5.2 │ ├── range-parser@1.2.1 │ ├── safe-buffer@5.1.2 │ ├─┬ send@0.16.2 │ │ ├── destroy@1.0.4 │ │ └── mime@1.4.1 │ ├── serve-static@1.13.2 │ ├── setprototypeof@1.1.0 │ ├── statuses@1.4.0 │ ├─┬ type-is@1.6.18 │ │ └── media-typer@0.3.0 │ └── utils-merge@1.0.1 ├── querystring@0.2.0 └─┬ request@2.83.0 ├── aws-sign2@0.7.0 ├── aws4@1.9.1 ├── caseless@0.12.0 ├─┬ combined-stream@1.0.8 │ └── delayed-stream@1.0.0 ├── extend@3.0.2 ├── forever-agent@0.6.1 ├─┬ form-data@2.3.3 │ └── asynckit@0.4.0 ├─┬ har-validator@5.0.3 │ ├─┬ ajv@5.5.2 │ │ ├── co@4.6.0 │ │ ├── fast-deep-equal@1.1.0 │ │ ├── fast-json-stable-stringify@2.1.0 │ │ └── json-schema-traverse@0.3.1 │ └── har-schema@2.0.0 ├─┬ hawk@6.0.2 │ ├── boom@4.3.1 │ ├─┬ cryptiles@3.1.4 │ │ └── boom@5.2.0 │ ├── hoek@4.2.1 │ └── sntp@2.1.0 ├─┬ http-signature@1.2.0 │ ├── assert-plus@1.0.0 │ ├─┬ jsprim@1.4.1 │ │ ├── extsprintf@1.3.0 │ │ ├── json-schema@0.2.3 │ │ └─┬ verror@1.10.0 │ │ └── core-util-is@1.0.2 │ └─┬ sshpk@1.16.1 │ ├── asn1@0.2.4 │ ├── bcrypt-pbkdf@1.0.2 │ ├── dashdash@1.14.1 │ ├── ecc-jsbn@0.1.2 │ ├── getpass@0.1.7 │ ├── jsbn@0.1.1 │ └── tweetnacl@0.14.5 ├── is-typedarray@1.0.0 ├── isstream@0.1.2 ├── json-stringify-safe@5.0.1 ├─┬ mime-types@2.1.26 │ └── mime-db@1.43.0 ├── oauth-sign@0.8.2 ├── performance-now@2.1.0 ├── stringstream@0.0.6 ├─┬ tough-cookie@2.3.4 │ └── punycode@1.4.1 ├── tunnel-agent@0.6.0 └── uuid@3.4.0 npm WARN web-api-auth-examples@0.0.2 No repository field. npm WARN web-api-auth-examples@0.0.2 No license field.●index.html作成
Web rootディレクトリ authorization_codeへindex.htmlファイルを設定
① Web rootディレクトリ authorization_codeへ移動
[opc@tokyo-inst01 web-api-auth-examples]$ cd authorization_code
[opc@tokyo-inst01 authorization_code]$ pwd
    /home/opc/spotify/web-api-auth-examples/authorization_code
[opc@tokyo-inst01 authorization_code]$ ls
    app.js  app.js.org  public
② index.htmlファイル設定
Web API Tutorialにおるように以下内容を設定
[opc@tokyo-inst01 authorization_code]$ vi index.html
    <html>
    <head>
    ...
    <style type="text/css">
    #login {
        display: none;
    }

    #loggedin {
        display: none;
    }
    ...
    </style>
    <body>
    <div>
        <div id="login">
        <h1>First, log in to spotify</h1>
        <a href="/login">Log in</a>
        </div>
        <div id="loggedin">
        </div>
    </div>

    <script id="loggedin-template" type="text/x-handlebars-template">
        <h1>Logged in as </h1>
        <img id="avatar" width="200" src="" />
        <dl>
        <dt>Display name</dt><dd></dd>
        <dt>Username</dt><dd></dd>
        <dt>Email</dt><dd></dd>
        <dt>Spotify URI</dt><dd><a href=""></a></dd>
        <dt>Link</dt><dd><a href=""></a></dd>
        <dt>Profile Image</dt><dd></dd>
        </dl>
        <p><a href="/">Log in again</a></p>
    </script>
    </body>
    </html>
●Provide the Application Credentials
app.jsファイルには、アプリケーションのメインコードが含まれおり、
Spotify Developersで作成したアプリケーションの'CLIENT_ID,'CLIENT_SECRET','REDIRECT_URI' 情報を設定します。・app.jsファイル設定箇所 var client_id = 'CLIENT_ID'; // Your client id var client_secret = 'CLIENT_SECRET'; // Your secret var redirect_uri = 'REDIRECT_URI'; // Your redirect uri① app.jsファイル設定
ということで、'CLIENT_ID', 'CLIENT_SECRET, 'REDIRECT_URI'部分を代入変更します。
[opc@tokyo-inst01 authorization_code]$ vi app.js
    /**
    * This is an example of a basic node.js script that performs
    * the Authorization Code oAuth2 flow to authenticate against
    * the Spotify Accounts.
    *
    * For more information, read
    * https://developer.spotify.com/web-api/authorization-guide/#authorization_code_flow
    */

    ・・・

    var client_id = 'e15bfd0dccb54db5a1757b'; // Your client id
    var client_secret = 'e17644952de94c6baebef'; // Your secret
    var redirect_uri = 'http://100.100.100.100:8888/callback'; // Your redirect uri
    ・・・
■Running the Application
設定した Node.jsアプリケーションを起動し、Spotifyへ認証アクセスするためのAccess tokenを取得します
① 設定した Node.jsアプリケーションを起動
[opc@tokyo-inst01 authorization_code]$ node app.js
    Listening on 8888
② Node.jsアプリケーションのURLへアクセス
設定したURL http://100.100.100.100:8888 へWebブラウザでアクセス
③ ログイン
[Log in with Spotify]をクリック
④ Access Token取得
ログインすると Access tokenが出力されます。
これを使用して、Spotifyへ認証アクセスして、Play Listやアーティスト情報を取得します。
■テスト:Play Listデータ取得
Play List「Spotify Japan 急上昇チャート」の情報を取得してみています。
・potify Japan 急上昇チャート: https://open.spotify.com/playlist/37i9dQZF1DX9vYRBO9gjDe
① Play list ID取得
APIリファレンス: API ENDPOINT REFERENCEを参考にPlay List情報を取得例) エンドポイントに以下「id」を指定する必要があります
- playlists:/v1/playlists/{playlist_id}/tracks
- partists:/v1/artists/{id}/albums「id」は以下になります。
・プレイリスト例:Sporify Japan 急上昇チャート: https://open.spotify.com/playlist/37i9dQZF1DX9vYRBO9gjDe
-->「37i9dQZF1DX9vYRBO9gjDe」がプレイリストid
・アーティスト例:チャイコフスキー: https://open.spotify.com/artist/3MKCzCnpzw3TjUYs2v7vDA
-->3MKCzCnpzw3TjUYs2v7vDA 」がアーティストidになります。② Access token確認とPlay List取得Curl作成
上記Node.jsアプリケーションで取得した、Access token: BQDQMF8bDTWt2vBFTRaI0bbIL5RIXlc-wIO5yRWtTzLyBKHsGUEbs1-668aBJ3bIRYpdZnKT...を
以下Curl文のへ代入curl -H "Authorization: Bearer <Access token>" https://api.spotify.com/v1/playlists/37i9dQZF1DX9vYRBO9gjDe/tracks② 実行
作成したcurl実行しPlay Listデータを取得
データはJSONで出力されます[opc@tokyo-inst01 ~]$ curl -H "Authorization: Bearer BQDQMF8bDTWt2vBFTRaI0bbIL5RIXlc-wIO5yRWtTzLyBKHsGUEbs1-668aBJ3bIRYpdZnKT..." https://api.spotify.com/v1/playlists/37i9dQZF1DX9vYRBO9gjDe/ { "collaborative" : false, "description" : "Spotify Japanのデイリー急上昇チャート。4月1日付。", "external_urls" : { "spotify" : "https://open.spotify.com/playlist/37i9dQZF1DX9vYRBO9gjDe" }, "followers" : { "href" : null, "total" : 148523 }, ・・・<省略>・・・ } ], "limit" : 100, "next" : null, "offset" : 0, "previous" : null, "total" : 50 }, "type" : "playlist", "uri" : "spotify:playlist:37i9dQZF1DX9vYRBO9gjDe"\( ^o^ )/
ということで、今度はこの一連の処理を Python3で作成して実行してみてみます。
つづく・・・■参考
● Spotify Developer
・Spotify Developer
・Web API Reference
・Web API Tutorial
・Authorization Guide● Git
- spotify-web-api-node
- Spotify Charts● Google Chormeプラグイン