- 投稿日:2019-12-01T22:43:19+09:00
Laravelで超簡単に検索機能を作成するPackageを作成した
この記事はLaravel #2 Advent Calendar 2019の2日目になります。
検索機能?
Webアプリを作成していると、よく検索機能作成しますよね?
↓こんな検索画面です。
このくらいシンプルであれば、
ifやEloquentを使って条件を追加するのも悪くないですが、検索項目が多くなってきたり、複雑になってくると、途端に可読性が悪くなったり、めんどくさくなったりすると思います。その為、Laravelの検索機能の作り方や、検索に特化したPackageなどを、ググったりしたのですが、簡単に検索を実装できるものがなかったので作ってみました。
作ったPackage
https://github.com/fusic/Seaaaaarch/
作るときに気にしたポイント
- 簡単に検索機能を実装できること(検索実装の為に処理をなるべく書きたくない)
- どんな状況にも柔軟に検索できること
- Laravelっぽいこと
- Searchableクラスを作成することで、検索条件を書く場所を別クラスに分けれる
- 検索条件にcallbackを受け付けることで、柔軟に検索できる
- 簡単な検索は設定を書くだけで検索を実装できる
- Filterクラスを作成することで、検索条件を共通化できる
基本的な使い方
インストール
composer require fusic/Seaaaaarchbladeの準備
index.blade.php等に検索用の画面を作成します。
ここは普通のbladeになります。
※名前と住所で検索することを想定index.blade.php<form action="{{ route('users.search') }}" method="post"> @csrf <div class='row'> <div class='col-md-6'> <div class='form-group'> <input name="name" /> </div> </div> <div class='col-md-6'> <div class='form-group'> <input name="address" /> </div> </div> </div> <div style="text-align: center;"> <button class='btn-default'>検索</button> </div> </form>Searchableの作成
Seaaaaarchをインストールすると、
Searchableが作成できるようになります。
Searchableは検索の実態を記載するクラスになります。php artisan make:searchable UsersSearchシンプルな検索であれば、下記のような
設定だけで検索を実装することが可能になります。UsersSearch.php<?php namespace App\Search; use Search\Searchable; class UserSearch extends Searchable { public function __construct() { $this->params = [ // ここに検索条件を記載します // 名前 と 住所を検索できるようにします 'name' => [ // typeにvalueを設定すると、入力値を完全一致で検索します。 'type' => 'value' ], 'address' => [ // typeにvalueを設定すると、入力値を部分一致で検索します。 'type' => 'like' ], ]; } }※検索用にvalue、like、in、callback等準備しています。
※Searchableの詳細な設定項目についてはSearchableの設定を参照してください。コントローラーに検索用アクションを作成
検索用に、上記で作成したformからPOSTを受け取るアクションを作成します。
QueryParser::parse に Searchableクラス のインスタンスを渡すことで、POST値から検索に必要な値を取り出します。
※routesの設定してください。UsersController.phppublic function search() { $query = QueryParser::parse(new UsersSearch()); return redirect()->route('users.index', $query); }検索の実行
SeaaaaachをインストールするとEloquentに
searchメソッドを追加します。
searchに対してSearchableインスタンスを渡すことで、 Searchableに設定された検索条件で検索を行います。
searchメソッドの前後にEloquentの機能で条件やソートなどを追加することも可能です。UsersController.phppublic function index() { UserModel::search(new UserSearch())->where('example', 'test'); // or UserModel::where('example', 'test')->search(new UserSearch()) }柔軟な検索
Searchableに検索条件を書くことになりますが、完全一致や部分一致ではなく、
JoinやPHPの処理を挟む等複雑な処理をすることもあると思います。
そういう状況では、Searchableのcallbackを利用します。callbackの引数に渡ってくる
$builderでEloquentの機能を利用することが出来ます。UsersSearch.php<?php namespace App\Search; use Search\Searchable; class UserSearch extends Searchable { public function __construct() { $this->params = [ 'name' => [ // typeにcallbackを指定すると、methodに検索処理を書くことが出来ます。 'type' => 'callback', 'method' => function (Builder $builder, $key, $value) { // ここで条件を組み立てます $name = mb_convert_kana($value, 'Hc'); $builder->where('name', $name); } ] ]; } }処理の共通化
プロジェクト全体等、共通的に利用したい検索条件を作成する機能も
Seaaaaarchは準備しています。
Filterクラスを作成することで共通化することが可能です。Filterの作成
Filterを作成することで、検索条件を作成することが可能です。
php artisan make:filter ExampleFilterApp\Search\Filter\ExampleFilter.php<?php namespace App\Search\Filter; use Illuminate\Database\Eloquent\Builder; use Search\Filter\Filter; use Search\Filter\FilterInterface; class ExampleFilter extends Filter implements FilterInterface { protected $defaultOptions = []; public function process(Builder $builder, $field, $value) { // ここに検索条件の処理を記載します // 例:20歳以上を検索条件にする $builder->where('age', '>=', 20); } }Filterの使い方
UsersSearch.php<?php namespace App\Search; use Search\Searchable; class UserSearch extends Searchable { public function __construct() { $this->params = [ 'age' => [ // この指定で、20歳以上の条件がかかるので検索条件の共通化をすることが可能です。 'type' => ExampleFilter::class ] ]; } }その他細かい利用方法
GitHubに記載してありますので確認してください。
https://github.com/fusic/Seaaaaarch/tree/master/docs/ja気に入ったらPull requestやstarよろしくお願いします

- 投稿日:2019-12-01T17:50:46+09:00
IT業界4ヶ月の人間が、ある記事に触発されてTrelloダミーを作ってみたお話し。
Trelloダミー作ってみた!!
この記事【トップデベロッパーになるために作成したいアプリ8選】に触発されて、Trelloダミーなるものを作ってみました。
作品はこちら→TODOdo?Trelloって何?
TODOリストです。
タスクを自由に作成し、ドラッグ&ドロップで並び替えもできます。
Trello開発環境
バック: Laravel 6.5
フロント: Vue.js
DBは使用してません。
使ったライブラリ: Vue.Draggable仕組み
localStorageを使用し、曜日単位でTODOリストを管理しています。
ちなみにlocalStorageへ保存するときはkey: valueの形なので
[key]: [valiue]
[曜日]: [TODOリスト]
と言った形で保存しています。
なので、タスクの保存や並び替え時の順番保持なども全てlocalStorageへ保存しています。工夫点
・上記の記事のサンプルは消去ができなかったこと、Trelloでは消去の方法が分かりにくかったので、タスクの消去を直感的にできるようにしました。
・Trelloでもサンプルでも大枠を自由に作ることができますが、今回作成したものの大枠は、月から日曜日の一週間のみとし利便性を追求してみました。
・どの曜日を選んでも
するべきこと
作業中
完成
と言ったものをテンプレートで表示させるようにし、最初のリスト作成する手間を減らしました。流れ
メインのシステムのや工夫した点を一部載せていきいます。
作品→TODOdo?1,home画面
曜日の表示
こちらは見たままです。
vue-routerを使い曜日に対する画面を切り替えるために、定義した配列の中で曜日に応じたパスも定義しております。
sample.vue<script> import draggable from 'vuedraggable' export default { name: 'App', components: { draggable }, data() { return { weeks: [ {path: 'mon', week: '月'}, {path: 'tue', week: '火'}, {path: 'wed', week: '水'}, {path: 'thu', week: '木'}, {path: 'fri', week: '金'}, {path: 'sat', week: '土'}, {path: 'sun', week: '日'} ], } }, } </script>こんな感じ〜
2,メイン画面
左上の「新しくリストを作る」で新規のカードを作成し、その中の「するべきことを追加」「作業中を追加」「完了を追加」でリストを追加できます。
そして、ゴミ箱にリストを持っていくと削除することができます。並び替えしたときの順番の保持
このカードが追加されたり、リストが追加or削除されたりするとlocalStorageに保存されるようになっています。
ちなみに、並び替えはVue.Draggableで行なっています。
ここで工夫した点は、並び替え時の順番は保存する点です。
Vue.Draggableの機能で、並び替えしたときの順番も保持できるのですが、それを使うとゴミ箱にリストを捨てる際、選択していないリストも一緒にゴミ箱に捨てられるといった挙動になってしまいました。なので、Vue.Draggableに備わっているeventの
endを使い並び替えしたときの順番を保持させました。
endは選択したリストを掴んで、離したときに発火するイベントです。選択したリストの情報はeventobjectで取得できるので、その中からいろんなデータを引っ張り出しあーだこーだして並び替えしたときの順番を保持しlocalStorageへ保存しました。
trash
リストをゴミ箱に移動させた際もeventobjectでDOMを抜き出して、
display: none;を付与し消えたように見せています。
今後はゴミ箱をクリックするとゴミ箱の中身が見れるようにし、そこから削除をできるようにしていきたいと思っています。まとめ
実際作ってみてどうだった?
実はTODOリストを作成するのが初めてなのもあって「まぁこんな感じかな〜」とシステムを頭の中で思い描いていたのですが、記述した並び替えの保持やtrash機能などについては少し悩みました。
「どうやって選択したDOMの情報を取得するんだ??」と。
結果的にeventobjectを見つけてからは早かったのですが、documentをよく読まねばなと思いました。そして、何より楽しかったです。
普段TODOリストは使わないのですが、Trelloにしろ参考にした記事のDEMOにしろ、「凄いな〜」と思う反面「こうだったらもっと使いやすくなるのにな〜」とか思いついてそのアイディアを実装していく過程がとても楽しかったです。この後も機能追加したり、他の作品を作っていきます。
おまけ
今後追加していきたい機能
・レスポンシブ化
・携帯と同期させられるようにする
・作業中から完了までの時間を可視化させる
・スケジュール張と同期させるようにする。
作品はこちら→TODOdo?
至らぬ点もありますが、良かったら使ってみてください。
そして、アドバイス等頂ければ幸いです。

- 投稿日:2019-12-01T16:32:33+09:00
Docker+Laravel+OpenAPIGenerator
はじめに
OpenAPIGeneratorを使って生成されたLaravelのソースコードで環境構築してみました。
DockerでLaravel環境の構築~スタブサーバの生成、リクエストの確認まで行います。プロジェクトディレクトリ構成
project/
 ├ www/                 # Laravel Project Container
 ├ generator/           # generator Container
 ├ docker-compose.yml
 ├ oas.yml
Sample OAS
プロジェクト直下に
oas.ymlを用意します。
簡易的なCRUDが行えるAPIを想定しています。oas.ymlopenapi: 3.0.0 info: title: Task API version: 0.0.1 servers: - url: http://localhost description: Laravel Server tags: - name: Task paths: /api/task: get: tags: [ "Task" ] summary: Show Task List. description: Show Task List. operationId: listTask responses: '200': description: Successful response post: tags: [ "Task" ] summary: Create Task One operationId: createTask requestBody: content: application/x-www-form-urlencoded: schema: type: object properties: title: type: string sort: type: integer responses: '200': description: Successful response /api/task/{tid}: get: tags: [ "Task" ] summary: Show Task One. description: Show Task One. operationId: showTask parameters: - name: tid in: path required: true schema: type: string responses: '200': description: Successful response put: tags: [ "Task" ] summary: Update Task One. operationId: updateTask description: Update Task One. parameters: - name: tid in: path required: true schema: type: string requestBody: content: application/x-www-form-urlencoded: schema: type: object properties: title: type: string sort: type: integer responses: '200': description: Successful response delete: tags: [ "Task" ] summary: Delete Task One. operationId: deleteTask description: Delete Task One. parameters: - name: tid in: path required: true schema: type: string responses: '200': description: Successful responseDocker環境を用意する
docker-compose.ymlをproject直下に用意します。docker-compose.ymlversion: '3.4' services: generator: build: ./generator volumes: - .:/app tty: true command: sh www: build: ./www volumes: - ./www:/var/www ports: - 80:80
generatorコンテナはOASからPHPコードを生成するコンテナになります。
wwwコンテナはApacheで動作するLaravel環境のコンテナになります。続いて、
generatorコンテナを構築するためのDockerfileをgenerator/配下に用意します。FROM openjdk:8-jdk-alpine WORKDIR /app RUN apk --update add bash maven git RUN rm -rf /var/cache/apk/*ls RUN git clone https://github.com/openapitools/openapi-generator /generator RUN cd /generator && mvn clean packageOpenAPIGeneratorはJVMでありJava環境が必要なため
openjdk:8-jdk-alpineをベースにしています。
ライブラリのインストーラとしてmavenを使用します。続いて、
wwwコンテナを構築するためのDockerfileをwww/配下に用意します。FROM php:7.3-apache RUN apt-get update && apt-get install -y git libzip-dev libxml2-dev RUN docker-php-ext-configure zip --with-libzip RUN docker-php-ext-install pdo_mysql mbstring zip xml RUN curl -sS https://getcomposer.org/installer | php RUN mv composer.phar /usr/local/bin/composer RUN a2enmod rewrite && a2enmod headers RUN sed -ri -e 's!/var/www/html!/var/www/public!g' /etc/apache2/sites-available/*.conf RUN sed -ri -e 's!/var/www/!/var/www/public!g' /etc/apache2/apache2.conf /etc/apache2/conf-available/*.conf RUN usermod -u 1000 www-data && groupmod -g 1000 www-data ENV COMPOSER_ALLOW_SUPERUSER 1 ENV COMPOSER_HOME /composer ENV PATH $PATH:/composer/vendor/bin WORKDIR /var/www RUN composer global require "laravel/installer"今回はApache上で動作するPHP(
php:7.3-apache)をベースにしています。
Laravelを使いたいのでcomposerをインストールしています。
URLを書き換えやリダイレクトを有効にするため、a2enmod rewrite && a2enmod headersを実行しています。
sedでLaravel用のドキュメントルートに変更しています。
Apacheを動かすwww-dataユーザがLaravelから吐き出されるlogファイルにアクセスできるように権限を付与しています。上記の準備ができたらコンテナを起動します。
各リソースのDLやInstall処理が一気に走るため結構な時間を要するかと思います。$ docker-compose up -d --buildLaravel用のソースコードを自動生成する
OpenAPIGeneratorを使用してソースコードを生成します。
generatorコンテナに入って作業します。$ docker-compose exec generator bash bash-4.4# java -jar /generator/modules/openapi-generator-cli/target/openapi-generator-cli.jar generate \ -i oas.yml \ -g php-laravel \ -o server-generate bash-4.4# cp -rf server-generate/lib/. www上記を実行すると、
server-generateに自動生成されたPHPのソースコードが出来上がると思います。
生成されたソースコード一式はwwwコンテナへコピーします。
ちなみに、自動生成できるコードの種類はこちらから確認できます。生成されたソースコードからLaravel環境を立ち上げる
$ docker-compose exec www bash root@5295f267d6a1:/var/www# composer install root@5295f267d6a1:/var/www# cp .env.example .env root@5295f267d6a1:/var/www# php artisan key:generate上記の実行が済めば、http://localhost にアクセスして下記の画面を確認することができると思います。
続いて、生成されたコードが機能しているのか確認してみます。
php artisan route:listを実行してAPIのエンドポイントを確認してみます。$ docker-compose exec www bash root@5295f267d6a1:/var/www# php artisan route:list +--------+----------+----------------+------+------------------------------------------------+------------+ | Domain | Method | URI | Name | Action | Middleware | +--------+----------+----------------+------+------------------------------------------------+------------+ | | GET|HEAD | / | | App\Http\Controllers\Controller@welcome | web | | | POST | api/task | | App\Http\Controllers\TaskController@createTask | api | | | GET|HEAD | api/task | | App\Http\Controllers\TaskController@listTask | api | | | DELETE | api/task/{tid} | | App\Http\Controllers\TaskController@deleteTask | api | | | GET|HEAD | api/task/{tid} | | App\Http\Controllers\TaskController@showTask | api | | | PUT | api/task/{tid} | | App\Http\Controllers\TaskController@updateTask | api | +--------+----------+----------------+------+------------------------------------------------+------------+エンドポイントの確認が行えたので、続いてswagger-editorからGETリクエストを試したいと思います。
ただ、現時点のままだとCORSに引っかかりリクエストできません。
そのため、リクエストのテストを行う前にCORS対策を行います。
まずはbarryvdh/laravel-corsをインストールします。$ docker-compose exec www bash root@5295f267d6a1:/var/www# composer require barryvdh/laravel-cors
www\config\app.phpに下記を追加します。'providers' => [ // ... Barryvdh\Cors\ServiceProvider::class, ]
app/Http/Kernel.phpに下記を追加します。'api' => [ // ... \Barryvdh\Cors\HandleCors::class, ],設定ファイルを以下のコマンドで作成します。
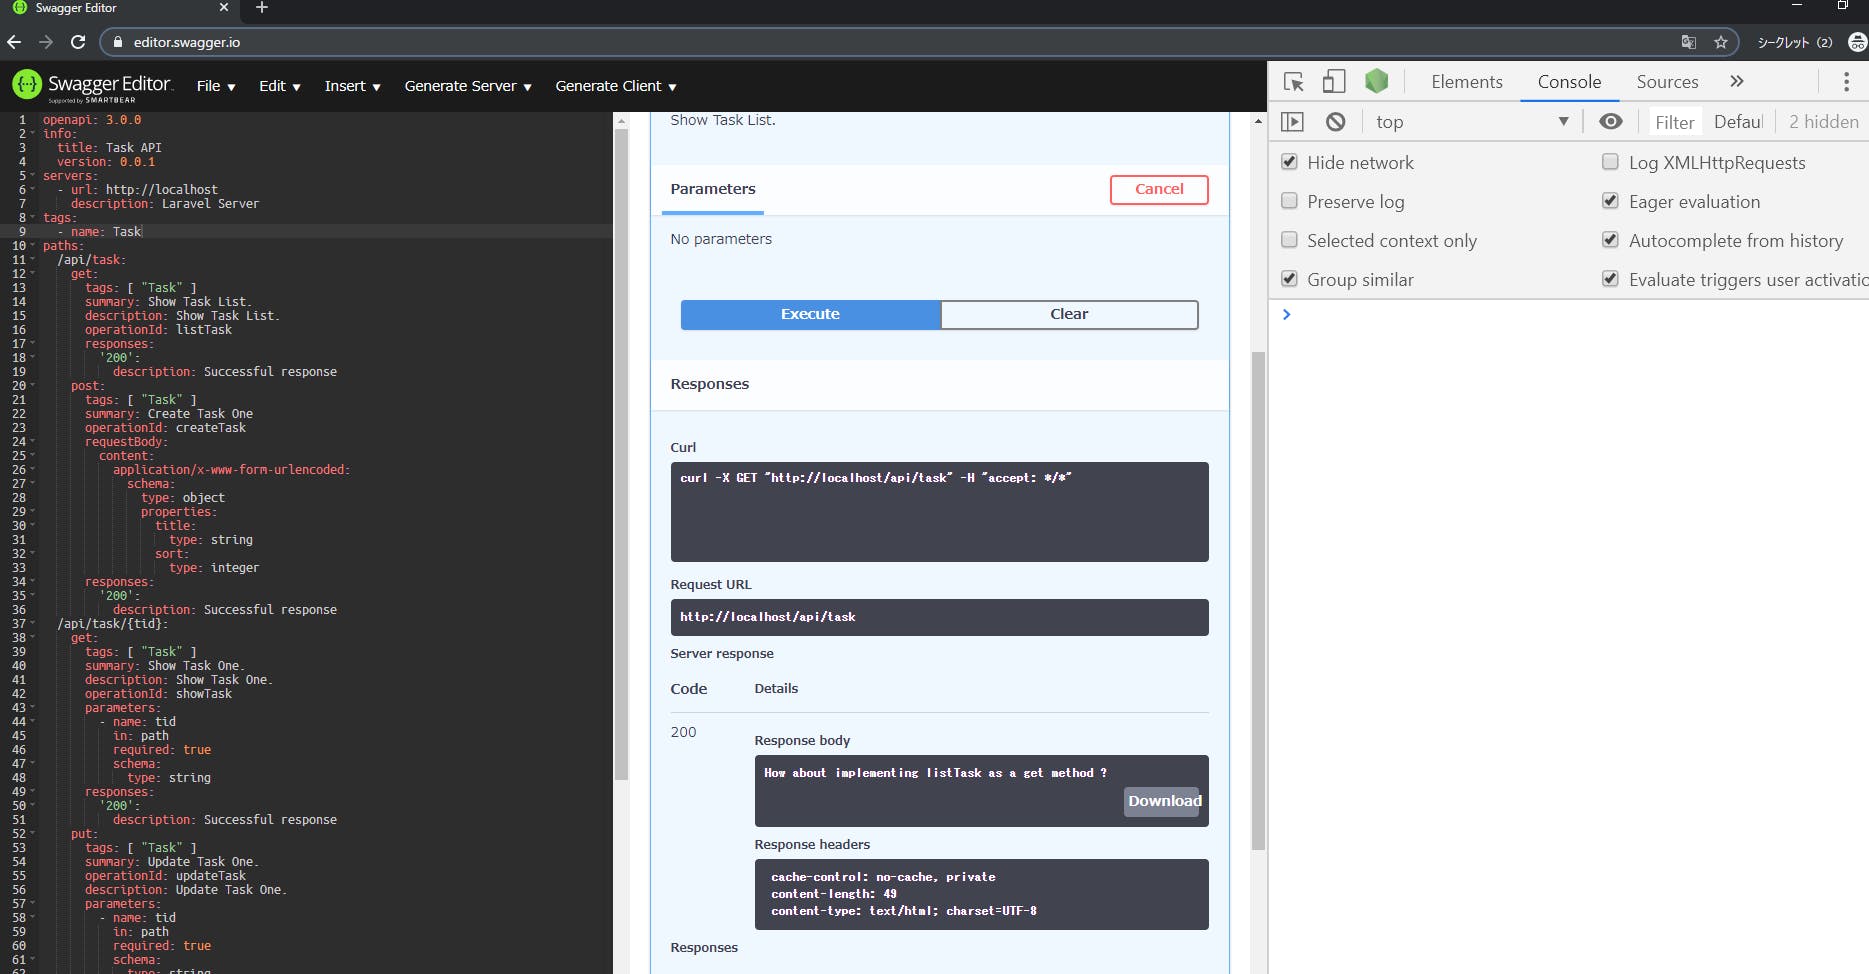
root@02eec0e47db9:/var/www# php artisan vendor:publish --provider="Barryvdh\Cors\ServiceProvider"設定が完了したので、swagger-editorでリクエストテストを行ってみます。
無事にGETリクエスト出来たことを確認しました。以上、Laravel用のスタブサーバの生成および構築までの流れでした。
自動生成されたコードはスタブなため、実処理は開発者が実装していくことになります。
何かの参考になれば幸いです。
- 投稿日:2019-12-01T15:48:20+09:00
認証機能
- 投稿日:2019-12-01T08:02:06+09:00
Laravel × Dacapo で始める快適マイグレーション生活!
Laravel Advent Calendar 2019 - Qiita の 1日目 の記事です。
去年(Laravel Advent Calendar 2018)の記事
実際に弊社の実務でDacapoを運用し、他の会社さんから使ってもらったフィードバックを活かして去年より大幅アップデートしてます。
リポジトリ
https://github.com/ucan-lab/laravel-dacapo
何をするツールか
Laravelのマイグレーションファイル生成をサポートするライブラリです。
困っていること
- 開発中はテーブル構成を変更する頻度が高い
- 不要なマイグレーションファイルが増える
- 似た構成のテーブルをコピペして作るにも変更箇所が多い
- ファイル名、クラス名、テーブル名を直すのがめんどう...
- 手動で直すとオートローダーがバグる
- 最新のテーブル構成は実際のDBを見ないと分からない
- インデックスや外部キーが入るとさらにややこしく...
ダカーポ開発の流れ
database/schemas/*.ymlテーブル定義をymlファイルに記述する
- 「スキーマ」と呼びます。
php artisan dacapo:generateマイグレーションファイルを生成php artisan migrate:freshマイグレーション実行
fresh全テーブルをドロップし、migrateコマンドを実行します。php artisan db:seedシーディング実行スキーマを変更した場合は必ず、
dacapo:generateして、マイグレーションファイルを生成し直す流れになります。ダカーポの注意・留意事項
- 特性上、プロジェクトの初期フェーズに使用するライブラリです。
- 運用フェーズに入ったらダカーポはアンインストールし、通常のマイグレーション運用に戻します。
本番のデータが全部消えてしまうので...。。
schema.yml の記述を元に常に最新のマイグレーションファイルを生成します。(上書き)
php artisan migrate:freshで全テーブルの削除し、マイグレーションを実行する運用です。生成されるマイグレーションファイルの種類
1970_01_01_000000_*.phpテーブル作成のマイグレーションファイル1970_01_01_000001_*.php一意制約、インデックスのマイグレーションファイル1970_01_01_000002_*.php外部キー制約のマイグレーションファイルマイグレーションファイルが
database/migrationsに出力されます。
マイグレーションはファイル名順に実行されます。
テーブルを作成したあとに制約を貼るようにしています。整理整頓されたマイグレーションファイルが出力されます☺️
インストール手順
$ composer require --dev ucan-lab/laravel-dacapoLaravelの初期マイグレーションを生成(任意)
Laravelでは、標準で下記の3テーブルのマイグレーションが用意されています。
- users
- password_resets
- failed_jobs
これと同じ構成のスキーマファイルを生成するダカーポコマンドを用意しました。
dacapo:init コマンド
$ php artisan dacapo:init
database/schemas/default.ymlファイルが生成されます。users: columns: id: bigIncrements name: string email: type: string unique: true email_verified_at: type: timestamp nullable: true password: string rememberToken: true timestamps: true password_resets: columns: email: type: string index: true token: string created_at: type: timestamp nullable: true failed_jobs: columns: id: bigIncrements connection: text queue: text payload: longText exception: longText failed_at: type: timestamp useCurrent: truedacapo:init オプション
また、Laravelのバージョンによって初期マイグレーションの構成が異なるので、オプションを用意しています。
# Laravel 5.7 〜 5.8
$ php artisan dacapo:init --laravel57

# Laravel 5.0 〜 5.6
$ php artisan dacapo:init --laravel50
dacapo:generate コマンド
先ほどの
dacapo:initで生成したdefault.ymlがある状態でdacapo:generateを実行します。$ php artisan dacapo:generate
1970_01_01_000000_create_users_table.php<?php use Illuminate\Support\Facades\Schema; use Illuminate\Database\Schema\Blueprint; use Illuminate\Database\Migrations\Migration; class CreateUsersTable extends Migration { /** * Run the migrations. * * @return void */ public function up() { Schema::create('users', function (Blueprint $table) { $table->bigIncrements('id'); $table->string('name'); $table->string('email')->unique(); $table->timestamp('email_verified_at')->nullable(); $table->string('password'); $table->rememberToken(); $table->timestamps(); }); } /** * Reverse the migrations. * * @return void */ public function down() { Schema::dropIfExists('users'); } }
1970_01_01_000000_create_password_resets_table.php<?php use Illuminate\Support\Facades\Schema; use Illuminate\Database\Schema\Blueprint; use Illuminate\Database\Migrations\Migration; class CreatePasswordResetsTable extends Migration { /** * Run the migrations. * * @return void */ public function up() { Schema::create('password_resets', function (Blueprint $table) { $table->string('email')->index(); $table->string('token'); $table->timestamp('created_at')->nullable(); }); } /** * Reverse the migrations. * * @return void */ public function down() { Schema::dropIfExists('password_resets'); } }
1970_01_01_000000_create_failed_jobs_table.php<?php use Illuminate\Support\Facades\Schema; use Illuminate\Database\Schema\Blueprint; use Illuminate\Database\Migrations\Migration; class CreateFailedJobsTable extends Migration { /** * Run the migrations. * * @return void */ public function up() { Schema::create('failed_jobs', function (Blueprint $table) { $table->bigIncrements('id'); $table->text('connection'); $table->text('queue'); $table->longText('payload'); $table->longText('exception'); $table->timestamp('failed_at')->useCurrent(); }); } /** * Reverse the migrations. * * @return void */ public function down() { Schema::dropIfExists('failed_jobs'); } }このように最小限のテーブル構成をymlに記述すればマイグレーションファイルを生成してくれます。
dacapo:generate オプション
# freshコマンドを実行
$ php artisan dacapo:generate --fresh

# fresh&seedコマンドを実行
$ php artisan dacapo:generate --seed
マイグレーション生成&マイグレーション実行&シーディング実行をオプション付けて一緒に実行できます。
スキーマの書き方
database/schemas/*.ymlと配置します。- 複数ファイルを配置できます。
スキーマのフォーマット
テーブル名:
  columns:
    カラム名: カラムタイプ
    カラム名:
      type: カラムタイプ
      args: カラムタイプの引数
カラムタイプの指定
テーブルを構築する時に使用する様々なカラムタイプを指定できます。
how_to_column_types:
  columns:
    id: bigIncrements
    name1: string
    name2:
      type: string
    name3:
      type: string
      args: 100
    name4:
      type: string
      args: [100]
    amount1: decimal
    amount2:
      type: decimal
    amount3:
      type: decimal
      args: 8
    amount4:
      type: decimal
      args: [8]
    amount5:
      type: decimal
      args: [8, 2]
    level:
      type: enum
      args: ['easy', 'hard']
    timestamps:
    # timestamps: 0
    # timestamps: [0]
    softDeletes:
    # softDeletes: 'deleted_at'
    # softDeletes: ['deleted_at']
    # softDeletes: ['deleted_at', 0]
database/migrations/1970_01_01_000000_create_how_to_column_types_table.phppublic function up() { Schema::create('how_to_column_types', function (Blueprint $table) { $table->bigIncrements('id'); $table->string('name1'); $table->string('name2'); $table->string('name3', 100); $table->string('name4', 100); $table->decimal('amount1'); $table->decimal('amount2'); $table->decimal('amount3', 8); $table->decimal('amount4', 8); $table->decimal('amount5', 8, 2); $table->enum('level', ['easy', 'hard']); $table->timestamps(); // $table->timestamps(0); // timestamps: 0 // $table->timestamps(0); // timestamps: [0] $table->softDeletes(); // $table->softDeletes('deleted_at'); // softDeletes: 'deleted_at' // $table->softDeletes('deleted_at'); // softDeletes: ['deleted_at'] // $table->softDeletes('deleted_at', 0); // softDeletes: ['deleted_at', 0] }); }カラム修飾子
カラム修飾子 |
Laravel 6.x データベース:マイグレーション上記のカラムタイプに付け加え、カラムを追加するときに使用できる様々な修飾子もあります。たとえばカラムを「NULL値設定可能(
nullable)」にしたい場合は、nullableメソッドを使います。また、ダカーポの特性上
after,firstのカラム修飾子は使用できません。how_to_column_modifiers: columns: id: type: integer autoIncrement: true name: type: string charset: utf8 collation: utf8_unicode_ci comment: my comment default: test value nullable: true price: type: integer unsigned: true count: type: integer unsigned: true total_stored: type: integer storedAs: price * count total_virtual: type: integer virtualAs: price * count total_generated: type: integer generatedAs: price * count created_at: type: timestamp useCurrent: true seq: type: integer always: true
database/migrations/1970_01_01_000000_create_how_to_column_modifiers_table.phpSchema::create('how_to_column_modifiers', function (Blueprint $table) { $table->integer('id')->autoIncrement(); $table->string('name')->charset('utf8')->collation('utf8_unicode_ci')->comment('my comment')->default('test value')->nullable(); $table->integer('price')->unsigned(); $table->integer('count')->unsigned(); $table->integer('total_stored')->storedAs('price * count'); $table->integer('total_virtual')->virtualAs('price * count'); $table->integer('total_generated')->generatedAs('price * count'); $table->timestamp('created_at')->useCurrent(); $table->integer('seq')->always(); });インデックス
users1:
  indexes:
    email_index:
      columns: name
      type: index
  columns:
    id: bigIncrements
    name:
      type: string
    email:
      type: string

users2:
  indexes:
    email_index:
      columns:
        - name
        - email
      type: index
      alias: users_name_index
  columns:
    id: bigIncrements
    name:
      type: string
    email:
      type: string

users3:
  indexes:
    email_index:
      columns:
        - name
        - email
      type: index
      alias: custom_index
  columns:
    id: bigIncrements
    name:
      type: string
    email:
      type: string
実際に出力されるファイル:
https://github.com/ucan-lab/laravel-dacapo/tree/master/tests/Storage/index一意制約
users1:
  indexes:
    email_index:
      columns: name
      type: unique
  columns:
    id: bigIncrements
    name:
      type: string
    email:
      type: string

users2:
  indexes:
    email_index:
      columns:
        - name
        - email
      type: unique
      alias: users_name_unique_index
  columns:
    id: bigIncrements
    name:
      type: string
    email:
      type: string

users3:
  indexes:
    email_index:
      columns:
        - name
        - email
      type: unique
      alias: custom_index
  columns:
    id: bigIncrements
    name:
      type: string
    email:
      type: string
実際に出力されるファイル:
https://github.com/ucan-lab/laravel-dacapo/tree/master/tests/Storage/unique_index外部キー制約
users:
  columns:
    id: bigIncrements
    name: string

tags:
  columns:
    id: bigIncrements
    title: string

tasks:
  relations:
    - foreign: user_id
      references: id
      on: users
      onUpdate: cascade
      onDelete: cascade
  columns:
    id: bigIncrements
    user_id: unsignedBigInteger
    content: string

task_tag:
  relations:
    - name: task_tag_custom_task_id_foreign
      foreign: task_id
      references: id
      on: tasks
    - foreign: tag_id
      references: id
      on: tags
  columns:
    task_id: unsignedBigInteger
    tag_id: unsignedBigInteger
実際に出力されるファイル:
https://github.com/ucan-lab/laravel-dacapo/tree/master/tests/Storage/relation/migrationsダカーポのアンインストール
開発時は全テーブルドロップしてマイグレーション、シーディング実行で問題ありませんが、
運用開始してしまうと、本番テーブルをドロップする訳にはいきません...運用フェーズに移行したらダカーポを削除して通常のマイグレーション運用に戻しましょう。
$ php artisan dacapo:uninstall
$ composer remove --dev ucan-lab/laravel-dacapo
Dacapo (ダカーポ) の由来
ライブラリ名の由来ですが、演奏記号のダ・カーポから命名しました。
ダカーポは「最初に戻って繰り返す。」という意味があります。
PHPのパッケージ管理ツールComposerが作曲家という意味なので音楽用語でこれだと思った名前に決めました!
着想
ダカーポライブラリの着想は Laravel/Vue.js勉強会#3 - connpass に参加して @mpyw さんのLTに影響を受けて作成しました。
また、Symfony1.4系の頃にあったDoctrineのDBスキーマ定義も参考にしてます。Laravel × Dacapo で快適なマイグレーション生活を!
- 投稿日:2019-12-01T08:02:06+09:00
Laravel × Dacapo で快適マイグレーション生活!
Laravel Advent Calendar 2019 - Qiita の 1日目 の記事です。
去年(Laravel Advent Calendar 2018)の記事
実際に弊社の実務でDacapoを運用し、他の会社さんから使ってもらったフィードバックを活かして去年より大幅アップデートしてます。
リポジトリ
https://github.com/ucan-lab/laravel-dacapo
何をするツールか
Laravelのマイグレーションファイル生成をサポートするライブラリです。
困っていること
- 開発中はテーブル構成を変更する頻度が高い
- 不要なマイグレーションファイルが増える
- 似た構成のテーブルをコピペして作るにも変更箇所が多い
- ファイル名、クラス名、テーブル名を直すのがめんどう...
- 手動で直すとオートローダーがバグる
- 最新のテーブル構成は実際のDBを見ないと分からない
- インデックスや外部キーが入るとさらにややこしく...
ダカーポ開発の流れ
database/schemas/*.ymlテーブル定義をymlファイルに記述する
- 「スキーマ」と呼びます。
php artisan dacapo:generateマイグレーションファイルを生成php artisan migrate:freshマイグレーション実行
fresh全テーブルをドロップし、migrateコマンドを実行します。php artisan db:seedシーディング実行スキーマを変更した場合は必ず、
dacapo:generateして、マイグレーションファイルを生成し直す流れになります。ダカーポの注意・留意事項
- 特性上、プロジェクトの初期フェーズに使用するライブラリです。
- 運用フェーズに入ったらダカーポはアンインストールし、通常のマイグレーション運用に戻します。
本番のデータが全部消えてしまうので...。。
schema.yml の記述を元に常に最新のマイグレーションファイルを生成します。(上書き)
php artisan migrate:freshで全テーブルの削除し、マイグレーションを実行する運用です。生成されるマイグレーションファイルの種類
1970_01_01_000000_*.phpテーブル作成のマイグレーションファイル1970_01_01_000001_*.php一意制約、インデックスのマイグレーションファイル1970_01_01_000002_*.php外部キー制約のマイグレーションファイルマイグレーションファイルが
database/migrationsに出力されます。
マイグレーションはファイル名順に実行されます。
テーブルを作成したあとに制約を貼るようにしています。整理整頓されたマイグレーションファイルが出力されます☺️
インストール手順
$ composer require --dev ucan-lab/laravel-dacapoLaravelの初期マイグレーションを生成(任意)
Laravelでは、標準で下記の3テーブルのマイグレーションが用意されています。
- users
- password_resets
- failed_jobs
これと同じ構成のスキーマファイルを生成するダカーポコマンドを用意しました。
dacapo:init コマンド
$ php artisan dacapo:init
database/schemas/default.ymlファイルが生成されます。users: columns: id: bigIncrements name: string email: type: string unique: true email_verified_at: type: timestamp nullable: true password: string rememberToken: true timestamps: true password_resets: columns: email: type: string index: true token: string created_at: type: timestamp nullable: true failed_jobs: columns: id: bigIncrements connection: text queue: text payload: longText exception: longText failed_at: type: timestamp useCurrent: truedacapo:init オプション
また、Laravelのバージョンによって初期マイグレーションの構成が異なるので、オプションを用意しています。
# Laravel 5.7 〜 5.8
$ php artisan dacapo:init --laravel57

# Laravel 5.0 〜 5.6
$ php artisan dacapo:init --laravel50
dacapo:generate コマンド
先ほどの
dacapo:initで生成したdefault.ymlがある状態でdacapo:generateを実行します。$ php artisan dacapo:generate
1970_01_01_000000_create_users_table.php<?php use Illuminate\Support\Facades\Schema; use Illuminate\Database\Schema\Blueprint; use Illuminate\Database\Migrations\Migration; class CreateUsersTable extends Migration { /** * Run the migrations. * * @return void */ public function up() { Schema::create('users', function (Blueprint $table) { $table->bigIncrements('id'); $table->string('name'); $table->string('email')->unique(); $table->timestamp('email_verified_at')->nullable(); $table->string('password'); $table->rememberToken(); $table->timestamps(); }); } /** * Reverse the migrations. * * @return void */ public function down() { Schema::dropIfExists('users'); } }
1970_01_01_000000_create_password_resets_table.php<?php use Illuminate\Support\Facades\Schema; use Illuminate\Database\Schema\Blueprint; use Illuminate\Database\Migrations\Migration; class CreatePasswordResetsTable extends Migration { /** * Run the migrations. * * @return void */ public function up() { Schema::create('password_resets', function (Blueprint $table) { $table->string('email')->index(); $table->string('token'); $table->timestamp('created_at')->nullable(); }); } /** * Reverse the migrations. * * @return void */ public function down() { Schema::dropIfExists('password_resets'); } }
1970_01_01_000000_create_failed_jobs_table.php<?php use Illuminate\Support\Facades\Schema; use Illuminate\Database\Schema\Blueprint; use Illuminate\Database\Migrations\Migration; class CreateFailedJobsTable extends Migration { /** * Run the migrations. * * @return void */ public function up() { Schema::create('failed_jobs', function (Blueprint $table) { $table->bigIncrements('id'); $table->text('connection'); $table->text('queue'); $table->longText('payload'); $table->longText('exception'); $table->timestamp('failed_at')->useCurrent(); }); } /** * Reverse the migrations. * * @return void */ public function down() { Schema::dropIfExists('failed_jobs'); } }このように最小限のテーブル構成をymlに記述すればマイグレーションファイルを生成してくれます。
dacapo:generate オプション
# freshコマンドを実行
$ php artisan dacapo:generate --fresh

# fresh&seedコマンドを実行
$ php artisan dacapo:generate --seed
マイグレーション生成&マイグレーション実行&シーディング実行をオプション付けて一緒に実行できます。
スキーマの書き方
database/schemas/*.ymlと配置します。- 複数ファイルを配置できます。
スキーマのフォーマット
テーブル名:
  columns:
    カラム名: カラムタイプ
    カラム名:
      type: カラムタイプ
      args: カラムタイプの引数
カラムタイプの指定
テーブルを構築する時に使用する様々なカラムタイプを指定できます。
how_to_column_types:
  columns:
    id: bigIncrements
    name1: string
    name2:
      type: string
    name3:
      type: string
      args: 100
    name4:
      type: string
      args: [100]
    amount1: decimal
    amount2:
      type: decimal
    amount3:
      type: decimal
      args: 8
    amount4:
      type: decimal
      args: [8]
    amount5:
      type: decimal
      args: [8, 2]
    level:
      type: enum
      args: ['easy', 'hard']
    timestamps:
    # timestamps: 0
    # timestamps: [0]
    softDeletes:
    # softDeletes: 'deleted_at'
    # softDeletes: ['deleted_at']
    # softDeletes: ['deleted_at', 0]
database/migrations/1970_01_01_000000_create_how_to_column_types_table.phppublic function up() { Schema::create('how_to_column_types', function (Blueprint $table) { $table->bigIncrements('id'); $table->string('name1'); $table->string('name2'); $table->string('name3', 100); $table->string('name4', 100); $table->decimal('amount1'); $table->decimal('amount2'); $table->decimal('amount3', 8); $table->decimal('amount4', 8); $table->decimal('amount5', 8, 2); $table->enum('level', ['easy', 'hard']); $table->timestamps(); // $table->timestamps(0); // timestamps: 0 // $table->timestamps(0); // timestamps: [0] $table->softDeletes(); // $table->softDeletes('deleted_at'); // softDeletes: 'deleted_at' // $table->softDeletes('deleted_at'); // softDeletes: ['deleted_at'] // $table->softDeletes('deleted_at', 0); // softDeletes: ['deleted_at', 0] }); }カラム修飾子
カラム修飾子 |
Laravel 6.x データベース:マイグレーション上記のカラムタイプに付け加え、カラムを追加するときに使用できる様々な修飾子もあります。たとえばカラムを「NULL値設定可能(
nullable)」にしたい場合は、nullableメソッドを使います。また、ダカーポの特性上
after,firstのカラム修飾子は使用できません。how_to_column_modifiers: columns: id: type: integer autoIncrement: true name: type: string charset: utf8 collation: utf8_unicode_ci comment: my comment default: test value nullable: true price: type: integer unsigned: true count: type: integer unsigned: true total_stored: type: integer storedAs: price * count total_virtual: type: integer virtualAs: price * count total_generated: type: integer generatedAs: price * count created_at: type: timestamp useCurrent: true seq: type: integer always: true
database/migrations/1970_01_01_000000_create_how_to_column_modifiers_table.phpSchema::create('how_to_column_modifiers', function (Blueprint $table) { $table->integer('id')->autoIncrement(); $table->string('name')->charset('utf8')->collation('utf8_unicode_ci')->comment('my comment')->default('test value')->nullable(); $table->integer('price')->unsigned(); $table->integer('count')->unsigned(); $table->integer('total_stored')->storedAs('price * count'); $table->integer('total_virtual')->virtualAs('price * count'); $table->integer('total_generated')->generatedAs('price * count'); $table->timestamp('created_at')->useCurrent(); $table->integer('seq')->always(); });インデックス
users1:
  indexes:
    email_index:
      columns: name
      type: index
  columns:
    id: bigIncrements
    name:
      type: string
    email:
      type: string

users2:
  indexes:
    email_index:
      columns:
        - name
        - email
      type: index
      alias: users_name_index
  columns:
    id: bigIncrements
    name:
      type: string
    email:
      type: string

users3:
  indexes:
    email_index:
      columns:
        - name
        - email
      type: index
      alias: custom_index
  columns:
    id: bigIncrements
    name:
      type: string
    email:
      type: string
実際に出力されるファイル:
https://github.com/ucan-lab/laravel-dacapo/tree/master/tests/Storage/index一意制約
users1:
  indexes:
    email_index:
      columns: name
      type: unique
  columns:
    id: bigIncrements
    name:
      type: string
    email:
      type: string

users2:
  indexes:
    email_index:
      columns:
        - name
        - email
      type: unique
      alias: users_name_unique_index
  columns:
    id: bigIncrements
    name:
      type: string
    email:
      type: string

users3:
  indexes:
    email_index:
      columns:
        - name
        - email
      type: unique
      alias: custom_index
  columns:
    id: bigIncrements
    name:
      type: string
    email:
      type: string
実際に出力されるファイル:
https://github.com/ucan-lab/laravel-dacapo/tree/master/tests/Storage/unique_index外部キー制約
users:
  columns:
    id: bigIncrements
    name: string

tags:
  columns:
    id: bigIncrements
    title: string

tasks:
  relations:
    - foreign: user_id
      references: id
      on: users
      onUpdate: cascade
      onDelete: cascade
  columns:
    id: bigIncrements
    user_id: unsignedBigInteger
    content: string

task_tag:
  relations:
    - name: task_tag_custom_task_id_foreign
      foreign: task_id
      references: id
      on: tasks
    - foreign: tag_id
      references: id
      on: tags
  columns:
    task_id: unsignedBigInteger
    tag_id: unsignedBigInteger
実際に出力されるファイル:
https://github.com/ucan-lab/laravel-dacapo/tree/master/tests/Storage/relation/migrationsダカーポのアンインストール
開発時は全テーブルドロップしてマイグレーション、シーディング実行で問題ありませんが、
運用開始してしまうと、本番テーブルをドロップする訳にはいきません...運用フェーズに移行したらダカーポを削除して通常のマイグレーション運用に戻しましょう。
$ php artisan dacapo:uninstall
$ composer remove --dev ucan-lab/laravel-dacapo
Dacapo (ダカーポ) の由来
ライブラリ名の由来ですが、演奏記号のダ・カーポから命名しました。
ダカーポは「最初に戻って繰り返す。」という意味があります。
PHPのパッケージ管理ツールComposerが作曲家という意味なので音楽用語でこれだと思った名前に決めました!
着想
ダカーポライブラリの着想は Laravel/Vue.js勉強会#3 - connpass に参加して @mpyw さんのLTに影響を受けて作成しました。
また、Symfony1.4系の頃にあったDoctrineのDBスキーマ定義も参考にしてます。Laravel × Dacapo で快適なマイグレーション生活を!
- 投稿日:2019-12-01T00:52:34+09:00
Laravel + Nuxtで複数画像を投稿する
概要
Nuxt + Laravel構成で複数ファイルをアップロードを行えるようにしたい
構成
Laravel 5.8
Nuxt 2.4参考資料
Vue + Vue Router + Vuex + Laravelで写真共有アプリを作ろう (9) 写真投稿API
Vue + Vue Router + Vuex + Laravelで写真共有アプリを作ろう (10) 写真投稿フォーム
仕様方針
- 写真の実態はS3に保存し、ファイルパスのみをDBに保存する処理方式にする。
- 今回は最大4枚まで保存できるようにする
フロント(Nuxt)の実装
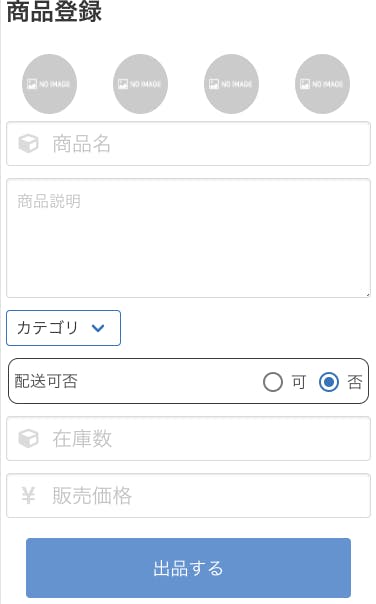
今回は最大で4枚まで画像を登録できるデザインにしています。
画像表示
      <!-- 商品画像 -->
      <div class="field image-area">
        <div v-for="(file, index) in files" :key="index" class="product-image">
          <img :src="file" @click="selectProductImage(index)" />
          <input
            :id="`product_image_` + index"
            type="file"
            accept="image/png,image/jpeg,image/gif"
            @change="uploadProductImage($event, index)"
          />
        </div>
      </div>
画像選択した際に、選択した画像をプレビューさせ、登録画像を取得する
// inputタグは非表示にしており、画像イメージをクリック時にinputタグのクリックイベントを発火させる
    selectProductImage(index) {
      const input = document.querySelector('#product_image_' + index)

      // 既に画像が選択されているかチェックする
      if (input.value !== '') {
        // 既に画像が選択されている場合は削除する
        if (window.confirm('画像を削除してよろしいですか?')) {
          input.value = ''

          // 表示用の変数は指定場所の画像情報を削除して削除したところをNoImageで末尾に追加する
          this.files.splice(index, 1, require('@/assets/img/NoImage.png'))

          // 登録用の画像データは削除する
          this.form.images.splice(index, 1, null)
        }
      } else {
        // 画像選択されていない場合、選択ダイアログを表示させる
        input.click()
      }
    },
    uploadProductImage(event, index) {
      // nothing to do when 'files' is empty
      if (event.target.files.length === 0) {
        return null
      }

      // ファイルのオブジェクトURLを生成する
      const productImageUrl = (window.URL || window.webkitURL).createObjectURL(
        event.target.files[0]
      )

      // $setを利用する、Vueが監視出来る配列のメソッドを使う
      // https://jp.vuejs.org/v2/guide/list.html#%E9%85%8D%E5%88%97%E3%81%AE%E5%A4%89%E5%8C%96%E3%82%92%E6%A4%9C%E5%87%BA
      this.$set(this.files, index, productImageUrl)
      this.$set(this.form.images, index, event.target.files[0])
    }
画像を登録APIを呼び出す
  async register() {
      this.form.shop_id = this.$auth.user.id

      // ファイル送信
      const formData = new FormData()

      formData.append('shop_id', this.form.shop_id)
      formData.append('product_name', this.form.product_name)
      formData.append('category_id', this.form.category_id)
      formData.append('description_product', this.form.description_product)
      formData.append('price', this.form.price)
      formData.append('stock', this.form.stock)
      formData.append('shipping', this.form.shipping)
      formData.append('shipping_method', this.form.shipping_method)
      formData.append('shipping_origin', this.form.shipping_origin)
      formData.append('shipping_estimated', this.form.shipping_estimated)
      formData.append('shipping_cost', this.form.shipping_cost)

      // ファイル情報を取得する
      for (let index = 0; index < 4; index++) {
        // inputタグにファイルが設定されているかチェックを行う
        if (this.form.images[index] === null) {
          continue
        }

        // 存在すればファイル情報を登録情報に追加する
        formData.append('images[]', this.form.images[index])
        formData.append('order[]', index + 1)
      }

      await this.$axios
        .$post('/api/shop/product', formData)
        .then(data => {
          this.$router.push('/shop')
        })
        .catch(errors => {})
    },
バックエンド(Laravel)の実装
- 画像保存用のS3 バケットを作成し、LaravelからS3にアップロードするためのIAMユーザを作成
- envファイルに IAM ユーザーおよび S3 バケットの接続情報を記述する
- APIの実装
1. 画像保存用のS3 バケットを作成し、LaravelからS3にアップロードするためのIAMユーザを作成
Vue + Vue Router + Vuex + Laravelで写真共有アプリを作ろう (9) 写真投稿API
上記を参考に、バケット作成とIAMユーザの作成を行う
Storage::cloud()のデフォルトをS3に設定するfilesystems.php'cloud' => env('FILESYSTEM_CLOUD', 's3'),S3 にアクセスするために必要なライブラリをインストール
composer require league/flysystem-aws-s3-v32. envファイルに IAM ユーザーおよび S3 バケットの接続情報を記述する
AWS_ACCESS_KEY_ID=アクセスキーID
AWS_SECRET_ACCESS_KEY=シークレットアクセスキー
AWS_DEFAULT_REGION=ap-northeast-1
AWS_BUCKET=バケット名
AWS_URL=https://s3-ap-northeast-1.amazonaws.com/バケット名/
3. APIの実装
基本的には、下記のサイトを参考に実装しました。
Vue + Vue Router + Vuex + Laravelで写真共有アプリを作ろう (9) 写真投稿API
サムネイルの作成は書きを参考
LaravelでIntervention Imageを使って加工した画像をS3へ保存する
サムネイルの作成
サムネイルを作成するために
画像処理のライブラリであるIntervention Imageをサーバへインストール$ composer require intervention/imageLaravelの設定ファイルの下記を追加する
return [
    ......
    'providers' => [
        ......
        ......,
        Intervention\Image\ImageServiceProvider::class,
    ],

    'aliases' => [
        .....
        .....,
        'Image' => Intervention\Image\Facades\Image::class,
    ]
]
キャッシュをクリアする
$ php artisan config:clearコントローラの実装
バリデーションの実装部分
<?php

namespace App\Http\Requests;

use Illuminate\Contracts\Validation\Validator;
use Illuminate\Foundation\Http\FormRequest;
use Illuminate\Http\Exceptions\HttpResponseException;

class StoreProductRequest extends FormRequest
{
    /**
     * Determine if the user is authorized to make this request.
     *
     * @return bool
     */
    public function authorize()
    {
        return true;
    }

    /**
     * Get the validation rules that apply to the request.
     *
     * @return array
     */
    public function rules()
    {
        return [
            'shop_id' => ['required', 'numeric'],
            'product_name' => ['required', 'string', 'max:255'],
            'category_id' => ['required', 'numeric'],
            'description_product' => ['required', 'string', 'max:1000'],
            'price' => ['required', 'numeric'],
            'stock' => ['required', 'numeric'],
            'shipping' => ['required', 'boolean'],
            'shipping_method' => ['required_if:shipping,1', 'numeric', 'nullable'],
            'shipping_origin' => ['required_if:shipping,1', 'numeric', 'nullable'],
            'shipping_estimated' => ['required_if:shipping,1', 'numeric', 'nullable'],
            'shipping_cost' => ['required_if:shipping,1', 'numeric', 'nullable'],
            'images.*' => ['file', 'mimes:jpg,jpeg,png,gif', 'max:10240']
        ];
    }

    /**
     * [Override] バリデーション失敗時
     *
     * @param Validator $validator
     * @throw HttpResponseException
     */
    protected function failedValidation( Validator $validator )
    {
        $response['success'] = false;
        $response['errors']  = $validator->errors()->toArray();

        throw new HttpResponseException(
            response()->json( $response, 422 )
        );
    }
}
画像のアップロードAPIの実装
    /**
     * 商品登録
     * @param Request $request
     * @return \Illuminate\Http\Response
     */
    public function create(StoreProductRequest $request)
    {

        // データベースエラー時にファイル削除を行うため
        // トランザクションを利用する
        DB::beginTransaction();

        $imagePaths[] = null;

//        dd($request['images']);

        // 画像情報を取得する
        $images = $request['images'];
        $order = $request['order'];


        try {
            // 商品情報を登録する
            $product = Product::create([
                'shop_id' => $request['shop_id'],
                'product_name' => $request['product_name'],
                'category_id' => $request['category_id'],
                'description_product' => $request['description_product'],
                'price' => $request['price'],
                'stock' => $request['stock'],
                'shipping' => $request['shipping'],
                'shipping_method' => $request['shipping_method'],
                'shipping_origin' => $request['shipping_origin'],
                'shipping_estimated' => $request['shipping_estimated'],
                'shipping_cost' => $request['shipping_cost'],
            ]);

            // 並び順の要素数を初期化する
            $index = 0;

            // 対象画像が存在する場合、画像登録処理を行う
            if($images != null) {

                foreach ($images as $image) {

                    // 投稿写真の拡張子を取得する
                    $extension = $image->extension();

                    $productImage = new ProductImage();

                    // インスタンス生成時に割り振られたランダムなID値と
                    // 本来の拡張子を組み合わせてファイル名とする
                    $fileName = $product->id . $product->shop_id . $this->getRandomFileName() . '.' . $extension;

                    // S3にファイルを保存する
                    // 第三引数の'public'はファイルを公開状態で保存するため
                    Storage::cloud()->putFileAs('', $image, $fileName, 'public');

                    // S3にアップロードしたファイルのURLをDBに保存する
                    $productImage->product_image = Storage::cloud()->url($fileName);
                    $imagePaths[] = $productImage->product_image;

                    // 一時保存するためのファイル名とファイルパスを生成する
                    $now = date_format(Carbon::now(), 'YmdHis');
                    $tmpFile = $now . '.' . $extension;
                    $tmpPath = storage_path('app/tmp/') . $tmpFile;

                    // 画像を横幅300px・縦幅アスペクト比維持の自動サイズへリサイズ
                    $image = Image::make($image)
                        ->resize(300, null, function ($constraint) {
                            $constraint->aspectRatio();
                        })
                        ->save($tmpPath);

                    // サムネイルを作成し、S3を保存する
                    $thumbnailFileName = 'thumbnail_' . $fileName;

                    // configファイルに定義したS3のパスへ指定したファイル名で画像をアップロード
                    Storage::cloud()->putFileAs('', new File($tmpPath), $thumbnailFileName, 'public');

                    // S3にアップロードしたファイルのURLをDBに保存する
                    $productImage->product_thumbnail_image = Storage::cloud()->url($thumbnailFileName);
                    $imagePaths[] = $productImage->product_thumbnail_image;

                    // 一時ファイルを削除
                    Storage::disk('local')->delete('tmp/' . $tmpFile);

                    // 商品IDと表示順を設定する
                    $productImage->product_id = $product->id;
                    $productImage->order_number = $order[$index];
                    $productImage->save();

                    $index++;

                }

            }

            DB::commit();

        } catch (\Exception $exception) {
            DB::rollBack();

            foreach ($imagePaths as $imagePath) {
                // DBとの不整合を避けるためアップロードしたファイルを削除
                Storage::cloud()->delete($imagePath);
            }

            throw $exception;
        }

        return response()->json([
            'success' => true,
            'data' => $product,
            'message' => '商品の登録が完了しました。',
        ], 201);


    }