- 投稿日:2021-03-25T21:26:50+09:00
【Rails&heroku】MySQLで出来てた「あいまい検索」がPostgreSQLで出来ない場合にやること
AWSでコード完成、いざherokuへデプロイ!・・・したけどエラー。
調べてみると、あいまい検索の部分がおかしいらしい。【ページ内リンク】
0.環境
1.ソースコード
2.そもそもあいまい検索部分が原因だと分かった経緯
3.解決策0.環境
・AWS
・heroku/7.48.0 linux-x64 node-v12.16.2
・Rails 5.2.4.5
・ruby 2.6.3p62 (2019-04-16 revision 67580) [x86_64-linux]
・MySQL 5.7.31
・PostgreSQL 9.2.241.ソースコード
Example.rb@teams = Team.where("#{key} like ?", "%#{value}%")・いたって普通のあいまい検索。
keyがキー、valueが値。
【例:key = "id"、`value = "(検索用に入力した値)"】
・MySQLだと上手くいったのに、PostgreSQLだとエラーが生じた。※ちなみに、下記に2通り完全一致検索方法を書いたが、方法1はどちらでも作動し、方法2は
PostgreSQLでは作動しなかった。Example2.rb@teams = Team.where("#{key} = #{value}") #方法1 @teams = Team.where("#{key} like ?", "#{value}") #方法2たぶん「
like」が悪そう。2.そもそもあいまい検索部分が原因だと分かった経緯
$ heroku logs -t
heroku logs --tailの略。これを打てば、どこでエラーが出たか一発で分かる。3.解決策
調べてみると、
keyとvalueの型が違うのが原因らしい。Example.rb@teams = Team.where("cast(#{key} as text) like ?", "%#{value}%")PostgreSQLなら、これで良い。
cast、RubyやRailsというよりSQL寄り?
でもMySQLだとこれはエラーとなった。絶対何か他にいい方法あるよなぁ。
- 投稿日:2021-03-25T17:42:43+09:00
AWS VPC + EC2 でWeb Server・DB Serverを構築する②
こんにちは!
TWクライアントチームで、フロントエンドエンジニアをやっていますTKと申します。普段はReact + TypeScriptな環境で、webアプリの開発を行っています。この記事は、前回の記事の続きになります。
前回は、EC2インスタンスを作成しsshで接続するまで行いました。今回は、前回作ったEC2インスタンスにnginxをインストールしWeb Serverとして機能するようにします。
筆者は、AWS初心者かつインフラ初心者ですので、暖かく見守っていただけると幸いです。アドバイスやコメント等もお待ちしております!
手順
- nginxインストール・起動
- index.htmlを配置する
1. nginxインストール・起動
nginxをインストールします。
Amazon Linux 2にnginxをインストールする際には、amazon-linux-extrasからインストールするようです。
下記コマンドをEC2インスタンスの中に入って実行します。(EC2インスタンスへ入るには、AWSコンソールから対象インスタンスを選択し「接続」ボタンを押して入ることもできますし、前回記述したsshで接続して操作することもできます。)$ amazon-linux-extrasすると、nginx1というパッケージがあることが確認できます。
では、nginx1をインストールしてみます。$ sudo amazon-linux-extras install -y nginx1正常にインストールがされているか確認します。
$ nginx -vバージョンが返ってくれば、OKです!
nginxを起動します。$ sudo systemctl start nginx起動しているか確認します。
$ systemctl status nginxactive(running)と表記があれば起動しています。
EC2インスタンスが起動したら、自動でnginxを起動するようにしておきます。$ sudo systemctl enable nginxnginxはデフォルトでは、80番ポートでlistenしているので80番を開きます。
AWSコンソールのEC2ページから、インスタンスにアタッチしたセキュリティグループを選択します。
- サイドバーにある【セキュリティグループ】を選択し、アタッチしたセキュリティグループにチェックを付ける
- 下部に詳細が表示されるため、【インバウンドルール】タブを選択し、【インバウンドルールを編集】をクリックする
- 【ルールを追加】をクリック後、タイプに HTTP / ソースに 0.0.0.0/0 を入力する => 今回ソースは全公開にしております。IP制限するなら、0.0.0.0/0ではないIPを入力してください。
ここまで設定したらブラウザで、「EC2インスタンスのパブリックIP」にアクセスしたら、nginxのデフォルトページが表示されるはずです。
2. index.htmlを配置する
次にindex.htmlを配置し、ページを公開していきます。
nginxのドキュメントルートを調べます。$ grep "root" -r /etc/nginx/ | grep "html"root /usr/share/nginx/html;と出ましたので、/usr/share/nginx/html以下にindex.htmlを配置すれば、公開できることがわかりました。
用意したindex.htmlをサーバにsshで送ります。scp [コピーするファイル名] [接続先のユーザ名@接続先のホスト名:ディレクトリ]複数ある場合、空白の後に続けて記載します。
ディレクトリがある場合 -r を付けます。
ディレクトリの中身を全てコピーするなら、*が便利です。scp -r ./* [接続先のユーザ名@接続先のホスト名:ディレクトリ]scpを実行したときに、Permission deniedが発生しました。
コピー先の権限の問題だと思います。
下記コマンドを実行して、パーミッションを変更すると消えました。chmod 777 /usr/share/nginx/html上記が完了したらブラウザで、「EC2インスタンスのパブリックIP」にアクセスしたら、index.htmlの内容が表示されているはずです。
おまけ1(リバースプロキシ編)
nginxをリバースプロキシとして動作させる場合、nginx.confファイルをいじります。
Amazon Linux2では、/etc/nginx/の下にnginxの設定ファイル等配置されます。
いじる前に、念の為バックアップをとります。$ cp /etc/nginx/nginx.conf /etc/nginx/nginx.conf.bakup自分はvimが使えないので、nanoを使用して設定を変えていきます。(すみません。nanoは分かりやすくてありがたい!)
$ nano /etc/nginx/nginx.confnginx.confファイルのserverの下にlocationがあります。
そこをlocation / { proxy_pass [リダイレクト先]; }このように変更すると、80番ポートに送られてきたリクエストを転送できます。
自分は、Express(node.js)で作成したApiを配置してみました。
4000番ポートでlistenしていたのでlocation / { proxy_pass http://127.0.0.1:4000; }に設定しました。
ブラウザから確認したところ、動作が確認できました。おまけ2 (dockerを入れる)
Web Serverとは直接関係ありませんが、EC2にdockerを入れる必要がありましたので、ついでに記載しておこうと思います。
dockerもamazon-linux-extrasコマンドから、インストールできるようです。
念の為、dockerがあるか確認する。$ amazon-linux-extrasdockerをインストールします。
$ sudo amazon-linux-extras install dockersudoをつけずにdockerを実行するために、ec2-userをdokcerグループに追加します。
これで、sudoをつけずにdockerが実行できます。$ sudo usermod -a -G docker ec2-userdockerが使えるか確認します。
$ docker info上記を実行し、情報が帰ってきたら成功です!
あとは、Dockerfileなりdocker-compose.ymlなりを用意して、dockerを使用してください。まとめ
今回は、短いですがここまでにします。前回用意したEC2インスタンスにnginxをインストールし、Web Serverを構築しました。nginxの設定は、他にもたくさんあります。実運用する際は、詳細に設定を入れるべきだと思います。インフラ初心者ですので、これから調べつつ設定を増やしていきたいです!
ここまで読んでくださった方、ありがとうございます!
次回は、DB Serverを構築していきたいと思います。
冒頭に申しました通り、AWS初心者かつインフラ初心者ですのでアドバイスをお待ちしております!【参考文献】
https://qiita.com/sakkuntyo/items/807f25f9eb13525eebef
https://www.digitalocean.com/community/tutorials/how-to-install-nginx-on-ubuntu-20-04-ja
https://qiita.com/shisama/items/5f4c4fa768642aad9e06
https://hacknote.jp/archives/49429/
https://qiita.com/pugiemonn/items/3c80522f477bbbfa1302
https://hacknote.jp/archives/49429/
http://mogile.web.fc2.com/nginx/admin-guide/reverse-proxy.html
https://docs.aws.amazon.com/AmazonECS/latest/developerguide/docker-basics.html
- 投稿日:2021-03-25T16:18:18+09:00
MySQL8.0にrootの初期パスワードを変更しログインする
概要
前回インストールしたMySQL8.xにrootの初期パスワードを変更しログインする
mysql_secure_installationを使用してパスワードを変更する初期パスワードの確認方法
$ sudo grep password /var/log/mysqld.log
2021-03-25T05:10:11.664767Z 6 [Note] [MY-010454]
[Server] A temporary password is generated for root@localhost: 初期パスワード

$ mysql -u root -p
Enter password:
パスワードの設定
前回のログインはパスワードが見れてしまうので、別のパスワードに変更する
例として、初期パスワードはRoot()1234とする
(パスワードポリシーが存在し、パスワードの強度が弱いと拒否されてしまう。ポリシーの強弱は設定することができる)以下はMySQL8.0.23
$ sudo mysql_secure_installation

Securing the MySQL server deployment.

Enter password for user root: [初期パスワード]

The existing password for the user account root has expired. Please set a new password.

New password: [新しいパスワード]

Re-enter new password: [新しいパスワード]
The 'validate_password' component is installed on the server.
The subsequent steps will run with the existing configuration
of the component.
Using existing password for root.

Estimated strength of the password: 100
Change the password for root ? ((Press y|Y for Yes, any other key for No) : y

New password: [新しいパスワード]

Re-enter new password: [新しいパスワード]

[このパスワードで続けますか?]
Estimated strength of the password: 100
Do you wish to continue with the password provided?(Press y|Y for Yes, any other key for No) : y
By default, a MySQL installation has an anonymous user,
allowing anyone to log into MySQL without having to have
a user account created for them. This is intended only for
testing, and to make the installation go a bit smoother.
You should remove them before moving into a production
environment.

[匿名ユーザを削除しますか?]
Remove anonymous users? (Press y|Y for Yes, any other key for No) : y
Success.


Normally, root should only be allowed to connect from
'localhost'. This ensures that someone cannot guess at
the root password from the network.

[リモートからの root ログインを禁止しますか?]
Disallow root login remotely? (Press y|Y for Yes, any other key for No) : y
Success.

By default, MySQL comes with a database named 'test' that
anyone can access. This is also intended only for testing,
and should be removed before moving into a production
environment.

[test データベースとそのデータベースへのアクセスを削除しますか?]
Remove test database and access to it? (Press y|Y for Yes, any other key for No) : y
 - Dropping test database...
Success.

 - Removing privileges on test database...
Success.

Reloading the privilege tables will ensure that all changes
made so far will take effect immediately.

[今すぐ権限テーブルを再読み込みしますか?]
Reload privilege tables now? (Press y|Y for Yes, any other key for No) : y
Success.

All done!
mysql_secure_installationの文はコロコロ変わっているイメージがある
mysql_secure_installationの翻訳と公式
mysql_secure_installation - MariaDB Knowledge Baseログイン
ログインできるか確認してみる
$ mysql -u root -p
Enter password:
Welcome to the MySQL monitor.  Commands end with ; or \g.
Your MySQL connection id is 11
Server version: 8.0.23 MySQL Community Server - GPL

Copyright (c) 2000, 2021, Oracle and/or its affiliates.

Oracle is a registered trademark of Oracle Corporation and/or its
affiliates. Other names may be trademarks of their respective
owners.

Type 'help;' or '\h' for help. Type '\c' to clear the current input statement.

mysql>
- 投稿日:2021-03-25T16:18:18+09:00
[MySQL8.0] rootの初期パスワードを変更しログインする
概要
前回インストールしたMySQL8.xにrootの初期パスワードを変更しログインする
mysql_secure_installationを使用してパスワードを変更する初期パスワードの確認方法
$ sudo grep password /var/log/mysqld.log
2021-03-25T05:10:11.664767Z 6 [Note] [MY-010454]
[Server] A temporary password is generated for root@localhost: 初期パスワード

$ mysql -u root -p
Enter password:
パスワードの設定
前回のログインはパスワードが見れてしまうので、別のパスワードに変更する
例として、初期パスワードはRoot()1234とする
(パスワードポリシーが存在し、パスワードの強度が弱いと拒否されてしまう。ポリシーの強弱は設定することができる)以下はMySQL8.0.23
$ sudo mysql_secure_installation

Securing the MySQL server deployment.

Enter password for user root: [初期パスワード]

The existing password for the user account root has expired. Please set a new password.

New password: [新しいパスワード]

Re-enter new password: [新しいパスワード]
The 'validate_password' component is installed on the server.
The subsequent steps will run with the existing configuration
of the component.
Using existing password for root.

Estimated strength of the password: 100
Change the password for root ? ((Press y|Y for Yes, any other key for No) : y

New password: [新しいパスワード]

Re-enter new password: [新しいパスワード]

[このパスワードで続けますか?]
Estimated strength of the password: 100
Do you wish to continue with the password provided?(Press y|Y for Yes, any other key for No) : y
By default, a MySQL installation has an anonymous user,
allowing anyone to log into MySQL without having to have
a user account created for them. This is intended only for
testing, and to make the installation go a bit smoother.
You should remove them before moving into a production
environment.

[匿名ユーザを削除しますか?]
Remove anonymous users? (Press y|Y for Yes, any other key for No) : y
Success.


Normally, root should only be allowed to connect from
'localhost'. This ensures that someone cannot guess at
the root password from the network.

[リモートからの root ログインを禁止しますか?]
Disallow root login remotely? (Press y|Y for Yes, any other key for No) : y
Success.

By default, MySQL comes with a database named 'test' that
anyone can access. This is also intended only for testing,
and should be removed before moving into a production
environment.

[test データベースとそのデータベースへのアクセスを削除しますか?]
Remove test database and access to it? (Press y|Y for Yes, any other key for No) : y
 - Dropping test database...
Success.

 - Removing privileges on test database...
Success.

Reloading the privilege tables will ensure that all changes
made so far will take effect immediately.

[今すぐ権限テーブルを再読み込みしますか?]
Reload privilege tables now? (Press y|Y for Yes, any other key for No) : y
Success.

All done!
mysql_secure_installationの文はコロコロ変わっているイメージがある
mysql_secure_installationの翻訳と公式
mysql_secure_installation - MariaDB Knowledge Baseログイン
ログインできるか確認してみる
$ mysql -u root -p
Enter password:
Welcome to the MySQL monitor.  Commands end with ; or \g.
Your MySQL connection id is 11
Server version: 8.0.23 MySQL Community Server - GPL

Copyright (c) 2000, 2021, Oracle and/or its affiliates.

Oracle is a registered trademark of Oracle Corporation and/or its
affiliates. Other names may be trademarks of their respective
owners.

Type 'help;' or '\h' for help. Type '\c' to clear the current input statement.

mysql>
- 投稿日:2021-03-25T15:44:23+09:00
AWSでアプリをデプロイする方法(データベース作成編)
EC2の初期設定後本番環境でデータベースを作成する手順を紹介します(学習記録)

ここでは、MySQLから派生した「MariaDB」というデータベースを利用します。Amazon Linux 2を利用している場合、MariaDBは 「yumコマンド」からインストールできます。
# EC2内で実行
[ec2-user@<自身のElasiticIP> ~]$ sudo yum -y install mysql56-server mysql56-devel mysql56 mariadb-server mysql-devel
データベースの起動
・systemctlコマンド
systemctlコマンドは、Amazon LinuxやCentOSに含まれているもので、インストールしたソフトウェアの起動を一括して行えるツールです。# データベースを起動 [ec2-user@<自身のElasiticIP> ~]$ sudo systemctl start mariadb # 確認 [ec2-user@<自身のElasiticIP> ~]$ sudo systemctl status mariadb # 「active (running) 」と緑色の表示がされれば、データベースの起動は成功です。データベースのrootパスワードの設定
yumでインストールしたMariaDBには、デフォルトで「root」というユーザーでアクセスできるようになっていますが、パスワードは設定されていません。なので、パスワードを設定する必要があります。
[ec2-user@<自身のElasticIP> ~]$ sudo /usr/bin/mysql_secure_installation
# その後以下のステップを踏む
1.Enter current password for root (enter for none): 」と表示されたらEnterキーを押す
2.「Set root password? [Y/n]」と表示されたら「Y」を入力してEnterキーを押す
3.「New password:」と表示されたら自身で決めたパスワードを入力(※とくに画面には何も表示されませんが入力できています)
4.「Re-enter new password:」と表示されたら、同じパスワードを入力(とくに画面には何も表示されませんが入力できています)
5.「Remove anonymous users? [Y/n]」と表示されたら「Y」を入力してEnterキーを押す
6.「Disallow root login remotely? [Y/n]」と表示されたら「Y」を入力してEnterキーを押す
7.「Remove test database and access to it? [Y/n]」と表示されたら「Y」を入力してEnterキーを押す
8.「Reload privilege tables now? [Y/n]」と表示されたら「Y」を入力してEnterキーを押す

# データベースへの接続を確認
[ec2-user@<自身のElasticIP> ~]$ mysql -u root -p

# 「Enter password:」とパスワードを入力するように表示されるので、さきほど設定したパスワードを入力して、Enterキーを押してください
# 「exit」と入力すれば抜け出すことができます。
以上が本番環境でデータベースを作成する手順になります!参考までにどうぞ!
- 投稿日:2021-03-25T15:29:30+09:00
MySQL8.xをアンインストールする
概要
AmazonLinux2にインストールしたMySQL8.xをアンインストールする
手順
インストール済みパッケージを確認
$ yum list installed | grep mysql
mysql-community-client.x86_64         8.0.23-1.el7                   @mysql80-community
mysql-community-client-plugins.x86_64 8.0.23-1.el7                   @mysql80-community
mysql-community-common.x86_64         8.0.23-1.el7                   @mysql80-community
mysql-community-libs.x86_64           8.0.23-1.el7                   @mysql80-community
mysql-community-server.x86_64         8.0.23-1.el7                   @mysql80-community
mysql80-community-release.noarch      el7-1                          installed
アンインストール
すべてアンインストール
$ sudo yum remove mysql*再度確認
$ yum list installed | grep mysql
- 投稿日:2021-03-25T14:52:03+09:00
[MySQL]my.cnfの読み込み順 MySQL8.x
概要
my.cnfの読み込み順
公式ドキュメント
MySQL :: MySQL 8.0 Reference Manual :: 4.2.2.2 Using Option Files読み込み順はバージョンによって異なるのでドキュメントを確認しておく
コマンドでの確認
mysqlの --help から確認できる
$ mysql --help | grep -A1 "Default options"Default options are read from the following files in the given order: /etc/my.cnf /etc/mysql/my.cnf /usr/etc/my.cnf ~/.my.cnf/etc/my.cnf /etc/mysql/my.cnf /usr/etc/my.cnf ~/.my.cnf の順
これは環境によって異なる
ファイル配置と読み込み手順
上からの順番で読み込まれる
あとから読み込まれたファイルが優先される以下はUnix系
File Purpose /etc/my.cnf グローバルオプション /etc/mysql/my.cnf グローバルオプション SYSCONFDIR/my.cnf グローバルオプション $MYSQL_HOME/my.cnf サーバー固有のオプション(サーバーのみ) defaults-extra-file –defaults-extra-file=path によって指定されるファイル(ある場合) ~/.my.cnf ユーザー固有のオプション ~/.mylogin.cnf ユーザー固有のログインパスオプション(クライアントのみ) DATADIR/mysqld-auto.cnf SET PERSISTまたは SE PERSIST_ONLY(サーバーのみ)で永続化されたシステム変数 SYSCONFDIR は、MySQL がビルドされたときに SYSCONFDIR オプションとともに CMake に指定されたディレクトリを示します。デフォルトでは、これはコンパイル済みのインストールディレクトリの下にある etc ディレクトリです。
一般的に、DATADIR はバイナリインストールでは /usr/local/mysql/data、ソースインストールでは /usr/local/var です。これは構成時に指定されたデータディレクトリの場所であって、mysqld が起動したとき --datadir オプションで指定されるものではないということに注意してください。実行時に --datadir を使用しても、サーバーがオプションファイルを探す際に何の影響ももたらしません。これはサーバーがオプションを処理する前にオプションファイルを探すからです。
まとめ
- MySQLの設定ファイルは複数、自由に配置することができる
- 設定ファイルはあらかじめ決められた順番で読み込まれる
- 複数配置されたファイルはあとから読み込まれたものが優先される
- 読み込まれる順番は--helpに記載されている
- 投稿日:2021-03-25T12:37:26+09:00
SQL基礎 sum,avg,maxなど
こちらの記事では、私が学んだSQLについて記載しております。
自身の忘れないためのメモとしております。
間違っている部分もあるかもしれませんので、ご了承ください。sumで合計値を出す
select
    sum(カラム)
from
    テーブル名
where
    カラム名 >= '日付'
and カラム名 < '日付';    ←範囲の条件式
avgで平均を出す
select avg(カラム名) from テーブル名;minで最小値を出す
select min(カラム名) from テーブル名;maxで最大値を出す
select max(カラム名) from テーブル名;countで数を数える
count(*)とすると、テーブルの行数を取得できる!

select count(*) from テーブル名;
countを使用して限定を行う(ユニークユーザー数を求める場合)
・count(distinct カラム名) を入れることで重複を避けるcount方法になります。
同じuserをカウントしないため!

select
  count(distinct user_id) ←カラム名
from
    access_logs  ←テーブル名
where
    month = '日付'; ←カラム名
group byを使用して、グループ化を作成する
・カラム名_aをグループ化して分ける
select カラム名_a, count(*) from テーブル名 group by カラム名_a;

・下記は、重複したuser_idは避けて、月毎にユーザー数をカウントしてます。
select
  month, count(distinct user_id) 同じuserは省かれる!
from
  access_logs
where
  month >= '2020-01-01'  where...and...で期間の限定!
and
  month < '2021-01-01'
group by
  month;   月ごとの結果を出すよう指定!
havingを使用して条件式の追加を行う
・記述方法 havingは、group byの後に書くことが重要!!!!!!
select
  カラム名
from
 テーブル名
where
 条件式
group by
 カラム名
having
 条件式

・having テーブルのデータを集約した結果に大して、条件式を適用する
select
  month, count(distinct user_id)
from
  access_logs
where
  month >= '2020-01-01'
and
  month < '2021-01-01'
group by
  month
having count(distinct user_id) >= 500;  500以上のユーザー数をカウント 重複は省かれる!
補足
null(コラム)
0という意味ではなく、値がないことを示す特別な表現になる。
nullを使用する前に、別の方法で使用できないか検討した方が良い!!
SQLの記述の順序/実行順序
記述順序                   実行順序
select・・・・・取得カラムの指定          from・・・・・・・対象テーブルの指定
from・・・・・・・対象テーブルの指定         where・・・・・・絞り込み条件式の指定
where・・・・・・絞り込み条件の指定         group by・・グループ化の条件を指定
group by・・グループ化の条件指定        having・・・・・グループ化した後の絞り込み条件を指定
having・・・・・グループ化した後の絞り込み条件指定  select・・・・・取得カラムの指定
order by・・・並び替え条件指定          order by・・並び替え条件を指定
limt・・・・・・・・取得する行数の制限         limit・・・・・・取得する行数の制限
- 投稿日:2021-03-25T10:00:16+09:00
GitHub ActionsでLaravelのテストをするのにMySQLを利用する
GitHub ActionsでLaravelテストするのにMySQLを利用するのにハマったのでメモ。
前提
こちらの記事で利用したLaravelプロジェクトとGitHub Actionsのワークフローをカスタマイズします。
手順
ワークフロー作成
以下のようにワークフローを作成します。
name: Laravel

on:
  push:
    branches:
    - main
    - feature/**
  pull_request:
    branches:
    - develop
    - main

jobs:
  laravel-tests:

    runs-on: ubuntu-latest

    services:
      mysql:
        image: mysql:5.7
        ports:
          - 3306:3306
        env:
          MYSQL_ROOT_PASSWORD:
          MYSQL_DATABASE: hoge_app
          MYSQL_USER: root
          MYSQL_PASSWORD:
          MYSQL_ALLOW_EMPTY_PASSWORD: 'yes'
        options: --health-cmd "mysqladmin ping -h localhost" --health-interval 20s --health-timeout 10s --health-retries 10

    steps:
    - uses: actions/checkout@v2
    - name: cache vendor
      id: cache
      uses: actions/cache@v1
      with:
        path: ./vendor
        key: ${{ runner.os }}-composer-${{ hashFiles('**/composer.lock') }}
        restore-keys: |
          ${{ runner.os }}-composer-
    - name: composer install
      if: steps.cache.outputs.cache-hit != 'true'
      run: composer install -n --prefer-dist
    - name: copy .env
      run: cp .env.example .env
    - name: generate key
      run: php artisan key:generate
    - name: migrate
      run: php artisan migrate
      env:
        DB_HOST: 127.0.0.1
    - name: Execute tests (Unit and Feature tests) via PHPUnit
      env:
        DB_HOST: 127.0.0.1
      run: vendor/bin/phpunit
MySQLの設定
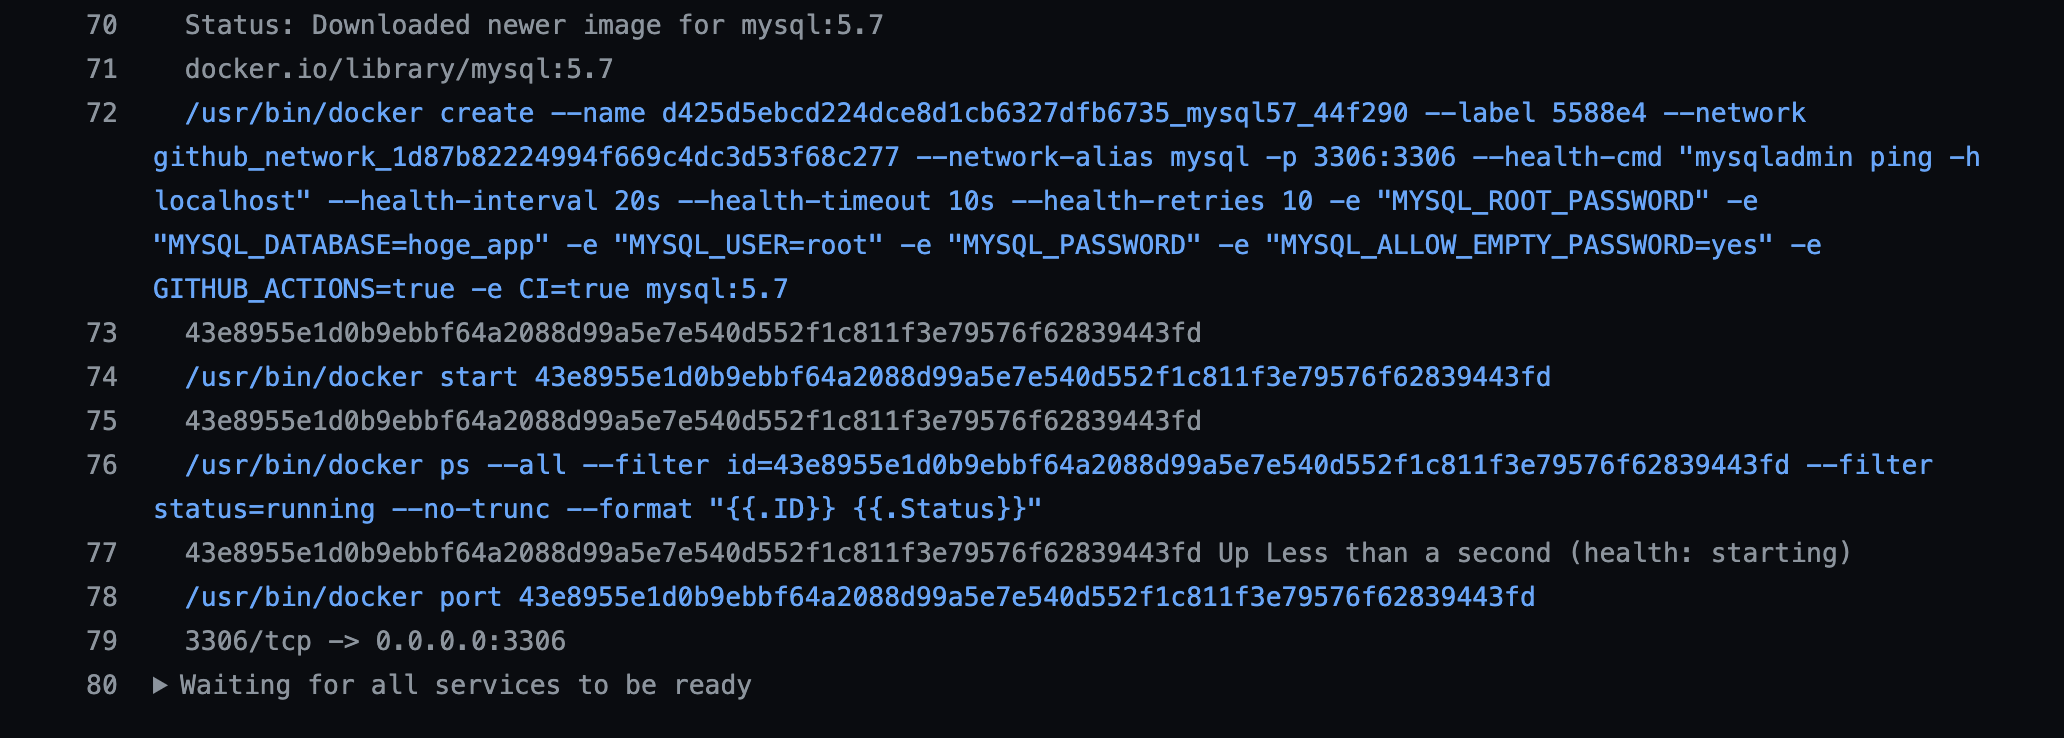
servicesでmysqlを定義します。環境変数は.envの内容を反映できないので、そのまま指定します。
GitHubのSecretsを利用するとパスワードはそちらから指定することもできますが今回はプロジェクトの.env.exampleの内容と同じにしています。GitHubのSecretsを活用して、GitHub Actionsで安全に機密情報を扱う - Qiita
https://qiita.com/developer-kikikaikai/items/60b209c065f076dca7a1
optionsでMySQLが起動したかヘルスチェックするようにします。services: mysql: image: mysql:5.7 ports: - 3306:3306 env: MYSQL_ROOT_PASSWORD: MYSQL_DATABASE: hoge_app MYSQL_USER: root MYSQL_PASSWORD: MYSQL_ALLOW_EMPTY_PASSWORD: 'yes' options: --health-cmd "mysqladmin ping -h localhost" --health-interval 20s --health-timeout 10s --health-retries 10マイグレーションとテスト
envでDB_HOSTを指定します。開発環境だと.env.exampleでmysqlとDockerコンテナの名前を指定していますが、それだとGitHub上だと接続できません。- name: migrate run: php artisan migrate env: DB_HOST: 127.0.0.1 - name: Execute tests (Unit and Feature tests) via PHPUnit env: DB_HOST: 127.0.0.1 run: vendor/bin/phpunitローカルで動作確認
こちらのツールを利用するとローカル環境で動作確認ができます。
nektos/act: Run your GitHub Actions locally ?
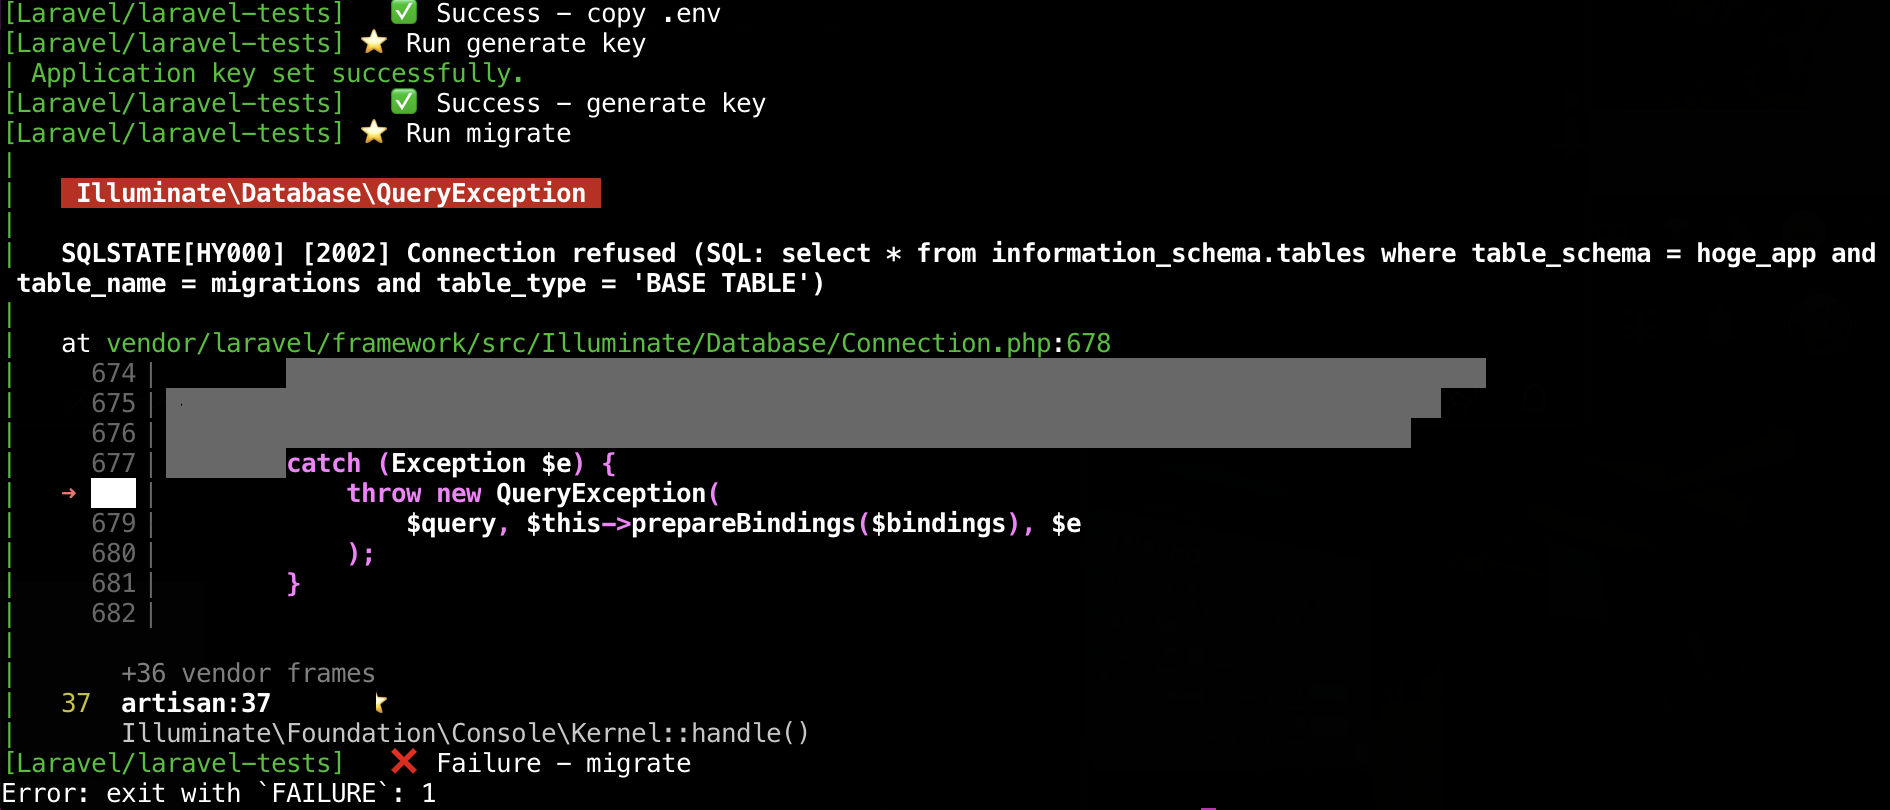
https://github.com/nektos/act#installation1点ハマりどころがあり、GitHub Actionsが提供するサービスコンテナがnektos/actでは現状未実装となるため、ローカルとGitHubとで差異があります。
サービスコンテナについて - GitHub Docs
https://docs.github.com/ja/actions/guides/about-service-containersGithub actions - Services fails locally · Issue #247 · nektos/act
https://github.com/nektos/act/issues/173ただ、ワークフローで
DB_HOST: 127.0.0.1と指定することで、開発環境のMySQLへ接続できるので、開発環境のDockerコンテナを起動したまま、actコマンドを実行してあげるとローカル環境でもワークフローが実行できます。> cd <プロジェクトのディレクトリ> > ./vendor/bin/sail up -d > act -P ubuntu-latest=nektos/act-environments-ubuntu:18.04
実行結果をみると、Run migrateは実行されているものの、マイグレーション自体は実行されていないことが確認できます。(開発環境でマイグレーションが実行済みの場合)開発環境のDockerコンテナを落とすと、ワークフローがエラーになることも確認できます。
> ./vendor/bin/sail down
> act -P ubuntu-latest=nektos/act-environments-ubuntu:18.04
GitHub上で動作確認
ワークフローをGitHubリポジトリにpushしてワークフローが動作するか確認します。
> git branch feature/use-mysql-on-github-actions
> git checkout feature/use-mysql-on-github-actions
> git add .github/workflows/unittest.yml
> git commit -m 'Fix: GitHub ActionsのワークフローでMySQLを利用するようにしました。'
> git push git push --set-upstream origin feature/use-mysql-on-github-actions
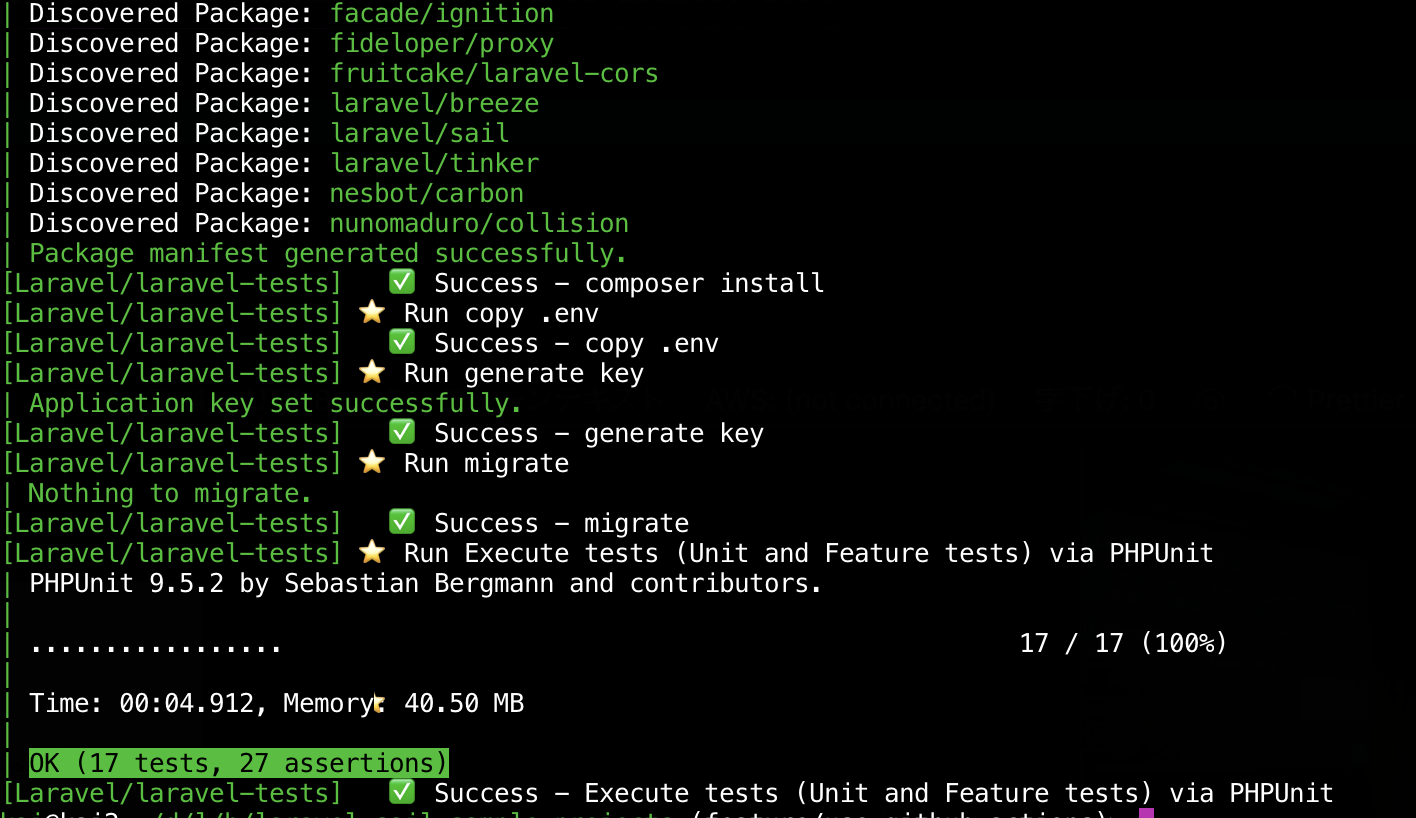
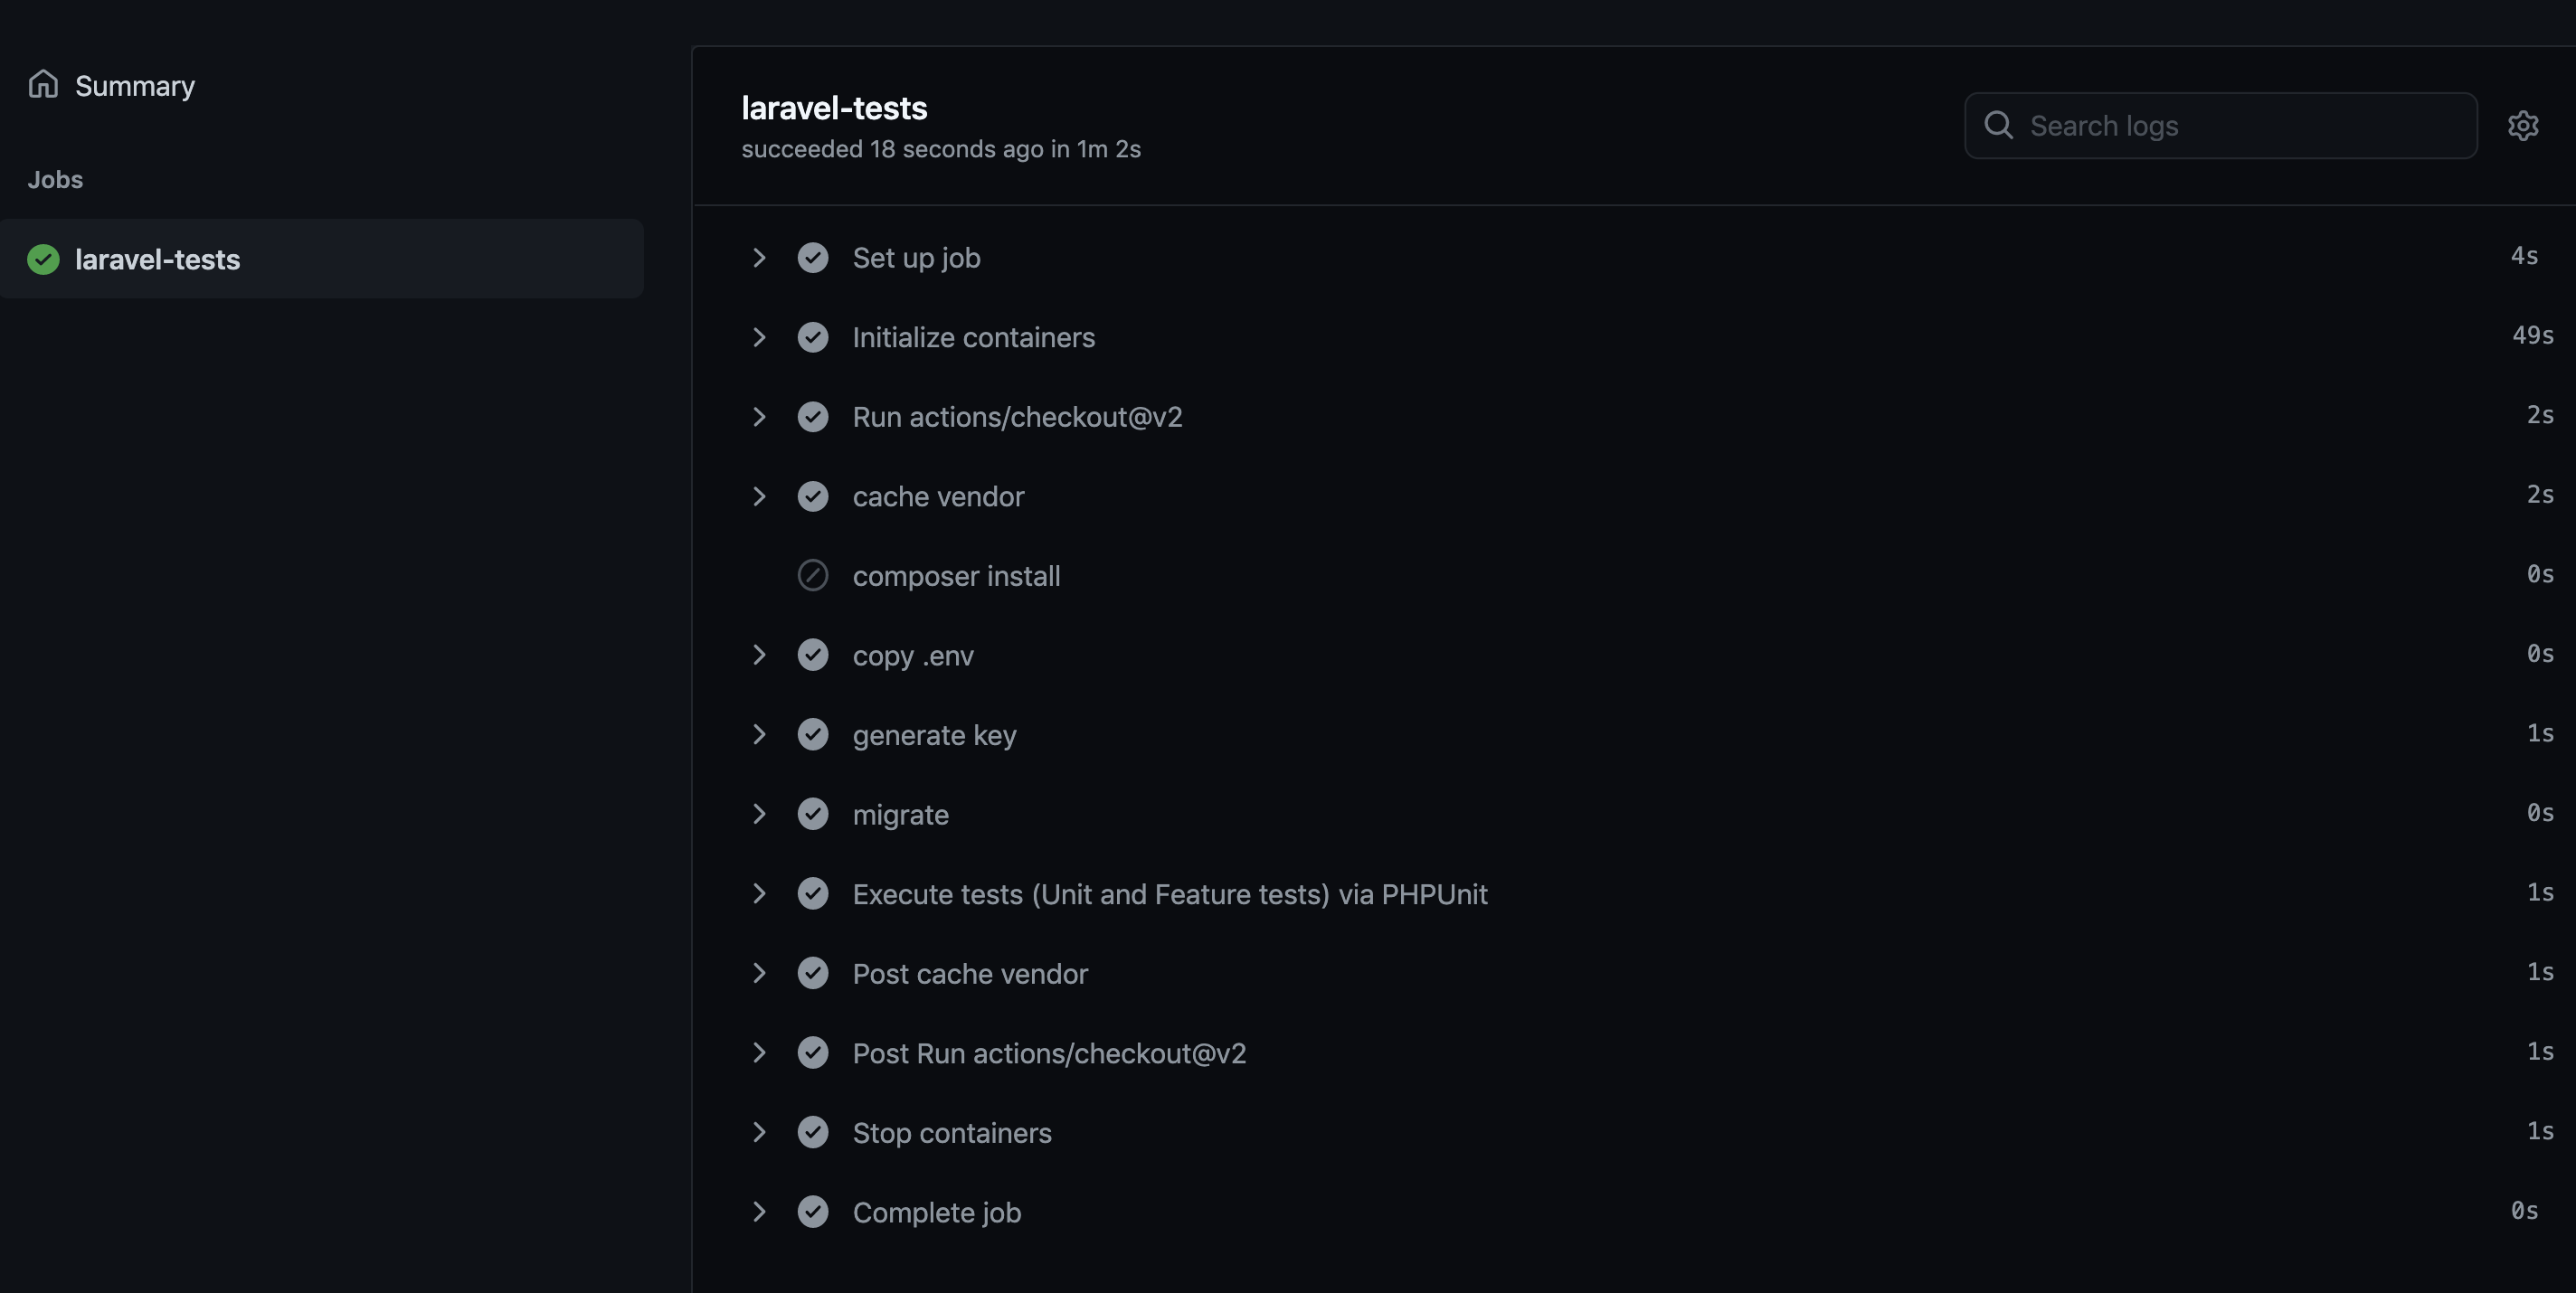
GitHubで確認するとエラーなくテストが実行できたことが確認できます。
やったぜ参考
GitHub Actionsを利用してLaravelのテストを自動化してみた - Qiita
https://qiita.com/kai_kou/items/4f850f7308eb0d3e0b48GitHubのSecretsを活用して、GitHub Actionsで安全に機密情報を扱う - Qiita
https://qiita.com/developer-kikikaikai/items/60b209c065f076dca7a1nektos/act: Run your GitHub Actions locally ?
https://github.com/nektos/act#installationNumber of ways to setup database in Github actions | by Darren Liew | Medium https://medium.com/@ldarren/number-of-ways-to-setup-database-in-github-actions-2cd48df9faae
GitHub Actionsを使ってLaravelアプリケーションをCI/CDする | SEEDS Creators' Blog | 株式会社シーズ https://www.seeds-std.co.jp/blog/creators/2020-08-19-233031/
Mysql service never comes up healthy in action - Code to Cloud / GitHub Actions - GitHub Support Community
https://github.community/t/mysql-service-never-comes-up-healthy-in-action/16890
- 投稿日:2021-03-25T00:17:29+09:00
Laravel学習、始めました。(Laravel、MySQL環境構築)
こんにちは!
ここ数日でphp、Laravelの学習をし始めました。
とりあえず環境構築関係から投稿していきます。先週に2日間くらいphpの基礎構文と、Laravel,Lumenドキュメントや色々なソースコードを拝見しました。
正直あまりわかっていませんが、細かくアウトプットするのも重要だと思い記事にしました。目次
Laravel環境構築
Homebrew installまずphpをインストールするのにHomebrewが必要なので、入っていない方は下記コマンドでinstall。
/bin/bash -c "$(curl -fsSL https://raw.githubusercontent.com/Homebrew/install/master/install.sh)"バージョン確認。
% brew -v
Homebrew 3.0.9
オッケーですね。
php install次にphpのインストール。ここが少し時間かかりますね。
% brew install phpバージョン確認。
% php -v
PHP 8.0.3 (cli) (built: Mar  4 2021 20:45:17) ( NTS )
オッケーです。
Composer installLaravelの導入で必要になるcomposerをインストールします。
brew install composerバージョン確認。
% composer
   ______
  / ____/___  ____ ___  ____  ____  ________  _____
 / /   / __ \/ __ `__ \/ __ \/ __ \/ ___/ _ \/ ___/
/ /___/ /_/ / / / / / / /_/ / /_/ (__  )  __/ /
\____/\____/_/ /_/ /_/ .___/\____/____/\___/_/
                    /_/
Composer version 2.0.11 2021-02-24 14:57:23
なんかカッコイイ。オッケーですね。
Laravel install下記コマンドでLaravelのインストールとプロジェクトを作成をできます
% composer create-project "laravel/laravel=8.*" {プロジェクト名}バージョン確認。
% cd {プロジェクト名}
% php artisan --version
Laravel Framework 8.34.0
できました!
MySQL環境構築
私が今Laravelの学習で実際にプロジェクトを作って動かしながら学習しており、MySQLを使ってますので環境構築を記載いたします。
brew install mysql@5.7なぜ5.7なのかといいますと、入社前にJavaを学習していた時に5.7ならできるのに8だとできない!という状況に陥ったため、ここでも5.7にしてます。それだけなのです。。。。
上記コマンドを打つと、ターミナルに
こんな文章が出てきます。
「まずパスを通してね!」的な感じなので、% echo 'export PATH="/usr/local/opt/mysql@5.7/bin:$PATH"' >> ~/.zshrc % source ~/.zshrcコピペします。
バージョン確認します。
 % mysql --version
mysql  Ver 14.14 Distrib 5.7.32, for osx10.16 (x86_64) using  EditLine wrapper
オッケーです。
起動してみます。
% brew services start mysql@5.7
==> Successfully started `mysql@5.7` (label: homebrew.mxcl.mysql@5.7)
うむ。大丈夫ですね。
ではログインしてみましょう
% mysql -u root -pパスワードは初期状態なら何も入力せずにEnterでログインできます。
無事にログインできたら、ターミナルがzshではなく、mysqlになってるはずです。musql>こんな感じで。
感想
いかがでしたでしょうか。
本当は実際に今Laravelで制作しているものの途中経過や、現時点で使うコマンドや説明を載せたかったのですが、
また別の記事でまとめたいと思います。数日前まで
「echo」ってなんぞや。から始まり、
「INSERT文もSELECT文も無いのになんでDBの操作できてるんだ!?」という状態でしたが、
なんとなくふんわりと理解できてきたので、またアウトプットしていきたいと思います。
フレームワークって便利ですね。
初心者日記みたいな投稿で申し訳ありません。
以上です。
- 投稿日:2021-03-25T00:00:07+09:00
【備忘】rails db:migrateしても対象ファイルのバージョンが更新されないとき【反省】
背景
マイグレーションファイルを作成、マイグレート、削除、DBドロップ、DBクリエイトなどを思いつく度に実行しました。
問題
テーブル作成をするマイグレーションファイルに対して
rails db:migrate後、テーブルは作成されましたが、該当ファイルのstatusがdownのままでした。
 Status   Migration ID    Migration Name
--------------------------------------------------
  down    20210324135108  Devise create users
調査
マイグレーションのバージョンを確認するために、
rails db:versionを実行したところ
Current version: 0と出力されました。
結果
schema_migrationsテーブルを確認すると、値が格納されていませんでした。
そこで、schema_migrationsテーブルに「20210324135108」を格納したところ、
マイグレーションのバージョンがupに変更されていました。Status Migration ID Migration Name -------------------------------------------------- up 20210324135108 Devise create users学習
・schema_migrations
マイグレーションの最新バージョンの値を持つテーブル。
マイグレーションをどこまで実行済なのかを記録する。今回は、DBに対してでたらめな処理をしたため、
schema_migrationsの値が削除されてしまったと考えられます。反省反省。。


