- 投稿日:2019-07-10T23:47:28+09:00
How to Add and Install New Fonts in Fedora Linux
To get started, open the Software tool in your FedoraWorkstation, or another tool that uses the official repositories. Choose the Add-ons category in the group of banners shown. Then in the add-on categories, select Fonts.
Follow the below steps to Add and install New Fonts in Fedora 30 Linux Workstation:
[mangesh@localhost ~]$ sudo dnf install https://download1.rpmfusion.org/free/fedora/rpmfusion-free-release-$(rpm -E %fedora).noarch.rpm https://download1.rpmfusion.org/nonfree/fedora/rpmfusion-nonfree-release-$(rpm -E %fedora).noarch.rpm[mangesh@localhost ~]$ sudo dnf search fonts
[mangesh@localhost ~]$ sudo dnf install libreoffice-opensymbol-fonts.noarch
[mangesh@localhost ~]$ sudo dnf search fontsRead More https://www.itsmarttricks.com/how-to-add-and-install-new-fonts-in-fedora-30-linux-workstation/
- 投稿日:2019-07-10T21:45:01+09:00
Linux(CentOS7)にTomcatを手動でインストールする手順
2017/06/03に作成した資料をアップします。
Linux(CentOS7)にTomcatをインストールする手順を紹介する。
(Tomcatはjre上で動作するため、あらかじめjreまたはjdkをインストールしておく必要がある。)
jdkのインストールはこちら1. CentOS7にログインし、rootユーザーにスイッチする。
$ su -
#
2. Tomcat専用のtomcatユーザーを追加する。
# useradd -s /sbin/nologin tomcat3. Apache Tomcatのウェブページから「apache-tomcat-8.5.15.tar.gz」をダウンロードする。
# curl -OL http://ftp.jaist.ac.jp/pub/apache/tomcat/tomcat-8/v8.5.15/bin/apache-tomcat-8.5.15.tar.gz(リンク先のURLは変わっているかも?)
(コマンドではなく、ブラウザからダウンロードしても良い。)4. 「apache-tomcat-8.5.15.tar.gz」を解凍する。
# tar xvzf ./apache-tomcat-8.5.15.tar.gz(「apache-tomcat-8.5.15」が作成される。)
5. 「/opt」配下に「apache-tomcat-8.5.15」をコピー(移動)する。
# mv apache-tomcat-8.5.15 /opt6. 「/opt/apache-tomcat-8.5.15」の所有者をtomcatユーザーに変更する。
# chown -R tomcat:tomcat /opt/apache-tomcat-8.5.157. Apache Tomcatの今後のバージョンアップによるパス変更を吸収するため、シンボリックリンクを作成する。
# ln -s /opt/apache-tomcat-8.5.15 /opt/tomcat8. Tomcatのサービス起動ファイルを作成する。
/etc/systemd/system/tomcat.service[Unit] Description=Apache Tomcat 8 After=syslog.target network.target [Service] User=tomcat Group=tomcat Type=oneshot PIDFile=/var/run/tomcat.pid RemainAfterExit=yes EnvironmentFile=/etc/sysconfig/tomcat ExecStart=/opt/tomcat/bin/startup.sh ExecStop=/opt/tomcat/bin/shutdown.sh ExecReStart=/opt/tomcat/bin/shutdown.sh;/opt/tomcat/bin/startup.sh [Install] WantedBy=multi-user.target/etc/sysconfig/tomcatJAVA_HOME=/opt/java JAVA_OPTS="-Djava.security.egd=file:/dev/./urandom"9. Tomcatのサービス起動ファイルに実行権限を付与する。
# chmod 755 /etc/systemd/system/tomcat.service10. Tomcatのサービス起動を有効にする。
# systemctl enable tomcat11. サーバーを再起動する。
# shutdown –r now12. 再起動後、Tomcatのプロセスを確認する。
# ps –ef | grep tomcat

tomcat    1479     1  0  6月03 ?      00:00:10 /opt/java/jdk1.8.0_131/bin/java -Djava.util.logging.config.file=/opt/tomcat/conf/logging.properties -Djava.util.logging.manager=org.apache.juli.ClassLoaderLogManager -Djava.security.egd=file:/dev/./urandom -Djdk.tls.ephemeralDHKeySize=2048 -Djava.protocol.handler.pkgs=org.apache.catalina.webresources -classpath /opt/tomcat/bin/bootstrap.jar:/opt/tomcat/bin/tomcat-juli.jar -Dcatalina.base=/opt/tomcat -Dcatalina.home=/opt/tomcat -Djava.io.tmpdir=/opt/tomcat/temp org.apache.catalina.startup.Bootstrap start
13. Firewalld設定(tcp 8080ポートを開ける)のため、以下のファイルを作成する。
/etc/firewalld/services/tomcat.xml<?xml version="1.0" encoding="utf-8"?> <service> <short>Tomcat (HTTP)</short> <description>Tomcat HTTP Server.</description> <port protocol="tcp" port="8080"/> </service>14. 作成した「tomcat.xml」をFirewalldに読み込ませてサービスを再起動する。
# firewall-cmd --permanent --add-service=tomcat
# systemctl restart firewalld.service
15. servicesにtomcatが追加されていることを確認する。
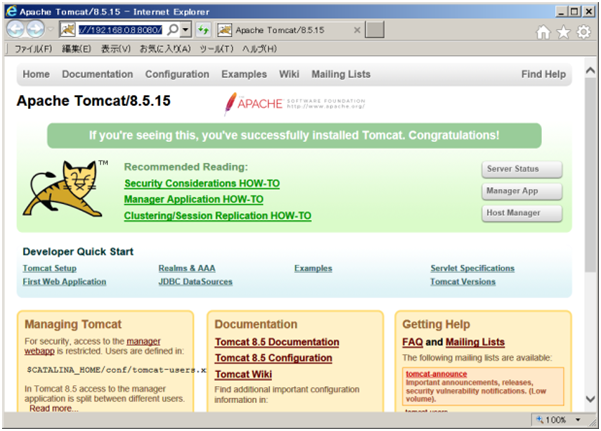
# firewall-cmd --list-all16. ブラウザから以下のURLに接続する。
http://ホスト名またはIPアドレス:8080/
【Tomcatの起動及び停止】
- 起動
# systemctl start tomcat
- 停止
# systemctl stop tomcat
- 再起動
# systemctl restart tomcat以上
- 投稿日:2019-07-10T21:18:46+09:00
Linux(CentOS7)にJava(jdk1.8)を手動でインストールする手順
2017/06/03に作成した資料をアップします。
Linux(CentOS7)にJavaをインストールする簡単な方法として、yumコマンドやrpmコマンドでインストールする方法があるが、ここでは手動でインストールする方法を紹介する。
1. CentOS7にログインし、rootユーザーにスイッチする。
$ su -
#
2. Oracleのウェブページから「jdk-8u131-linux-x64.tar.gz」をダウンロードする。
# curl -OL --header "Cookie: oraclelicense=accept-securebackup-cookie" "http://download.oracle.com/otn-pub/java/jdk/8u131-b11/d54c1d3a095b4ff2b6607d096fa80163/jdk-8u131-linux-x64.tar.gz"(リンク先のURLは変わっているかも?)
(コマンドではなく、ブラウザからダウンロードしても良い。)3. 「jdk-8u131-linux-x64.tar.gz」を解凍する。
# tar xvzf ./jdk-8u131-linux-x64.tar.gz(「jdk1.8.0_131」が作成される。)
4. 「jdk1.8.0_131」を/opt」配下にコピー(移動)
# mv ./jdk1.8.0_131 /opt5. jdkの今後のバージョンアップによるパス変更を吸収するため、シンボリックリンクを作成する。
# ln -s /opt/jdk1.8.0_131 /opt/java6. rootユーザーを抜け、ログインしたユーザーに戻る。
# exit
$
7. Java環境ファイルを「.java.env」を作成する。
.java.envexport JAVA_HOME=/opt/java export PATH=$JAVA_HOME/bin:$PATH export CLASSPATH=.8. 作成したjava環境ファイルを読み込む。
$ source .java.env9. Javaコマンドでインストールされたjdkのバージョンを確認する。
$ java –version
(以下が表示される。)
java version "1.8.0_131"
Java(TM) SE Runtime Environment (build 1.8.0_131-b11)
Java HotSpot(TM) 64-Bit Server VM (build 25.131-b11, mixed mode)
10. ログイン時に環境変数が設定されるようにユーザーのホームディレクトリの「.bash_profile」に、以下を追加しておく。
.bash_profile・・・・・・・・ source .java.env ←この行を追加【環境変数について】
今回は「.java.env」を作成し、sourceコマンドで環境を設定したが、「/etc/profile.d」ディレクトリ配下に、以下のファイルを配置するとログイン時に環境変数が設定される。
./etc/profile.d/java.sh#!/bin/sh export JAVA_HOME=/opt/java export PATH=$JAVA_HOME/bin:$PATH export CLASSPATH=.以上
- 投稿日:2019-07-10T19:01:03+09:00
Ubuntu16の公式Dockerイメージには/etc/servicesや/etc/protocolsが入っていない
Ubuntu16の公式Dockerイメージには/etc/servicesや/etc/protocolsが入っていない
初期状態では一部のネットワーク系API(getprotobynameとかgetaddrinfoとか)が失敗する。
ネットワーク系のアプリやライブラリを使う際にエラーが起きると、原因究明に難渋する場合がある。
(こんなファイルがないとか、なかなか想像しないですよね?)対策
問題のファイル群は
netbaseパッケージに含まれている模様。入れましょう。sudo apt install netbase問題の実例
例えば、こんな問題が起きた:
メッセージキューのライブラリであるQpid Protonを使用。
通信先のポート番号を明示的に指定した場合は問題なく動くが、明示指定しないと処理が永久に進まなくなるという不具合が発生。調べたところ、以下の機序で無限ループしていた。
- Qpid ProtonがAMQPのデフォルトポート番号をgetaddrinfo()で解決しようとする
- /etc/servicesがないので、APIが失敗
- Qpid Protonが(なぜか)失敗時に無限にリトライする実装になっているため、最初に戻る
その他
Ubuntu16のdockerイメージの他、それをベースにしたdockerイメージにも入っていない場合があるので注意。
Ubuntu16ベースのNVIDIA cudaイメージとか。
Dockerfileを書くときはパッケージを--no-install-recommendsで入れることが多いので、依存関係による自動導入もされにくい。Ubuntuをミニマム構成でインストールした場合にも入らないかも?(未確認)。
ぐち
これくらい最初から入れといてくれてもいいのに…
(障害票の閉じられ方を見るに、by designなのか?)
- 投稿日:2019-07-10T18:28:16+09:00
実行ユーザーを指定してsshをした時にHost key verification failedが出たときの対処法
経緯
ansibleを書いている時に実行ユーザーに依存したフォルダ構造がある場合にansibleの実行ユーザーを明示的に指定したい時が稀にある。
例えば以下のようなtempalte moduleの対象ファイルがtemplatesフォルダ以下にない場合。(ちゃんと各roles配下に置けよ、って話は置いておいて)- name: get the username running the deploy local_action: command whoami register: username_on_the_host - name: Set zabbix proxy on elasticsearch.userparam.j2 to elasticsearch.userparam template: src: "/home/{{ username_on_the_host.stdout }}/hoge.sh.j2" dest: /dest/forlder/hoge.sh問題
sudo su -l user -c 'ansible-playbbok entry.yml'
のようにコマンド実行したところ、以下のエラーで怒られるHost key verification failed公開キーの配置、秘密鍵の配置、秘密鍵のファイル権限も問題なさそうなことは確認。
もう少し詳しくデバッグするために直接sshコマンドを打ってデバッグする
sudo su -l user -c 'ssh -vvvvv -i key.prm user@ip'するとpassphraseの処理で落ちていることが分かる
debug1: read_passphrase: can't open /dev/tty: No such device or address
Host key verification failed.
/dev/ttyって?
tty自体は標準入出力を制御する端末デバイスを表示するコマンド。
このエラーから分かることは鍵の検証処理中に標準入出力が存在しなくて落ちている、とうい状態。
が、このansible自体はインタラクティブに標準入出力を制御する想定でないので何かがおかしい。普通にsshしてみる
普通にユーザーを変更してsshしてみる
sudo su user
ssh -i key.prm user@ip
するとはじめてのログイン時に求められる(known_hostsに登録されていない)おなじみの警告が出て、標準入力を求められていることが判明。
Are you sure you want to continue connecting (yes/no)?結論
どうやら
su -l user -cでユーザーを指定した時に標準入力の処理に入った時点で実行ユーザーの仮想ターミナルが存在しなくて、処理が落ちるらしい。なのでsshの場合は
ssh -o StrictHostKeyChecking=no -i key.prm user@ipのようにオプションを付与する。ansibleの場合は ~/.ansible.cfgに以下の設定を付けることで回避可能です
~/.ansible.cfg[defaults] host_key_checking = False
- 投稿日:2019-07-10T17:38:54+09:00
シェルって何?とりあえず調べてみた。
こんにちは!
現在プログラミング勉強中のものです。
インターン先のカリキュラムの中で「シェル」について調べないといけないのでこの記事を書こうと思います!シェルって何?
「シェル」とはユーザーが打ち込んだコマンドをOSに伝えてくれる役割を持ったプログラムのことです。
「シェルスクリプト」とも言うそうです。
Linuxの中核には「カーネル」というものがあります。
ユーザーはシェルにコマンドを入力することで、カーネルのプログラムを実行することができます。そこで、カーネルって何?ってなると思います。
カーネルとはハードウェアとソフトウェアの仲立ちをしてくれるOSの中核をなすものです。
このカーネルに命令を伝えるためにシェルが存在しています。
Bash Zshの違いについて
そして、このシェルの中には種類があり、今回はBashとZshの違いについてご紹介します。
・Bashって何?
Bashはシェルとして使うことができます。
BashはLinuxで標準で採用されていて、shというシェルを強化したものらしいです。
また変数や関数などの機能も兼ね備えているので、ちょっとしたプログラムなら実行することもできます。・Zshって何?
Zshは同様にシェルとして使用できます。
調べてみたところ、今までのシェルで導入されてきた機能を兼ね備えているものらしいです。
Bashの上位互換的存在なのでしょうか。TMUXって何?
最後にTMUXについて紹介します。
TMUXとは仮想端末管理ソフトウェアのことらしいです。
複数のサーバーに接続するときにはターミナルも複数起動する必要があります。
しかし、これはどう考えても生産性が悪いです。
そこで、TMUXです。
TMUXを使用することでターミナルを複数開くこともなくサーバーにログインすることができるのです。
つまり、ターミナル上での作業効率を大幅に向上させるもののようです。参考文献
【初心者向け】Linuxカーネルって一体なんだ?
Shellってなに?BashとZshの違いとTmuxも
zshとは
初心者が調べた。shellとは
Bashとは
TMUXとは何か
シェルとは?Bashなどどんな種類がある?
- 投稿日:2019-07-10T14:16:29+09:00
[linux]音声ファイルの情報を一括表示させる方法
個別のファイルはこれで
sox --i filename
ワイルドカードが使えるので
sox --i dir/*wav
で一括で調べられるし
sox --i dir/*wav|grep Encod
とかやればエンコーディングだけを抽出したり。あとはにるなりやくなり
- 投稿日:2019-07-10T11:16:57+09:00
django heroku
実行環境
win10
python3.7.2
herokuゴール
ローカルでdjangoを利用するのではなく、サーバにデプロイしweb公開(herokuを利用しdjangoをデプロイ)する事を目的としてみました。出来るイメージは以下です。
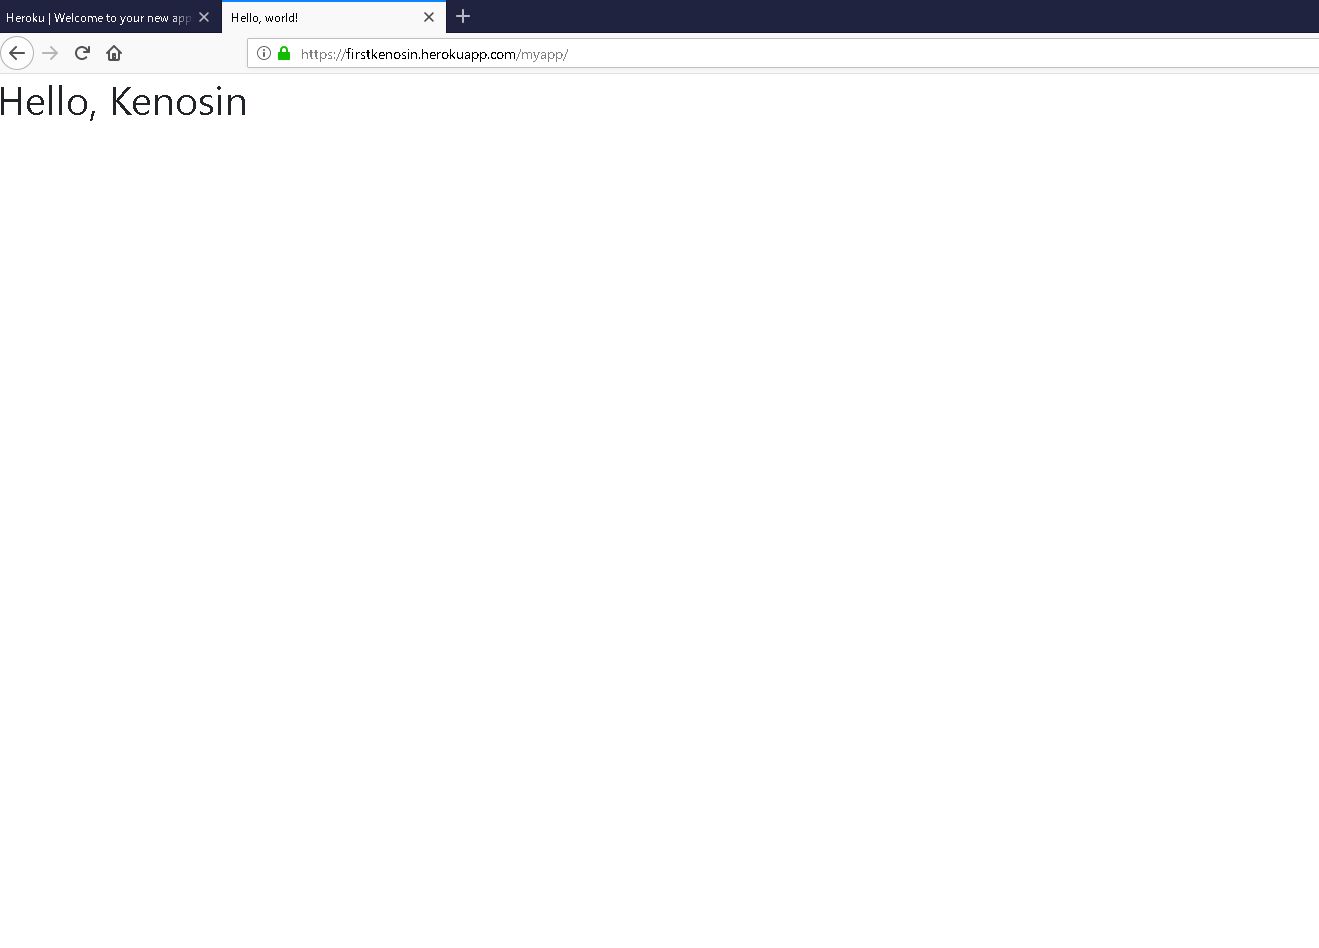
djangoで作成したアプリをweb公開する
https://firstkenosin.herokuapp.com/myapp/
これ以上ない程シンプルですが中身はdjango+herokuが稼働しています。
herokuとは
Heroku はpaasです。Paasはアプリケーションの開発から実行、運用までのすべてをクラウドで完結できるサービスです。一言で言うとサーバやOS、データベースなどプラットフォーム部分を簡単に設定する事ができます。アプリの構築、提供、監視、スケールが容易でインフラストラクチャの管理問題から大部分は解放されるとても便利なサービスです。
詳細は以下をご覧ください。
https://jp.heroku.com/whatherokuのプランやプライスは以下を参考にしてください。
https://jp.heroku.com/pricing1 herokuユーザ登録
まずユーザ登録しましょう。
heroku CLI Heroku Dev Center
https://devcenter.heroku.com/articles/heroku-cli
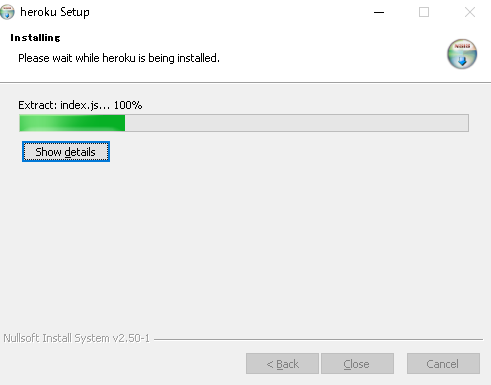
【Winodwsの場合】
インストーラを起動させたら『Next >』をクリック任意のインストール先(デフォルトで良い)を設定して『Install』します。
正常終了したらPowerShellかコマンドプロンプトでバージョン確認します。
heroku --version
heroku/7.22.9 win32-x64 node-v11.10.1
バージョンが表示していればOKです。
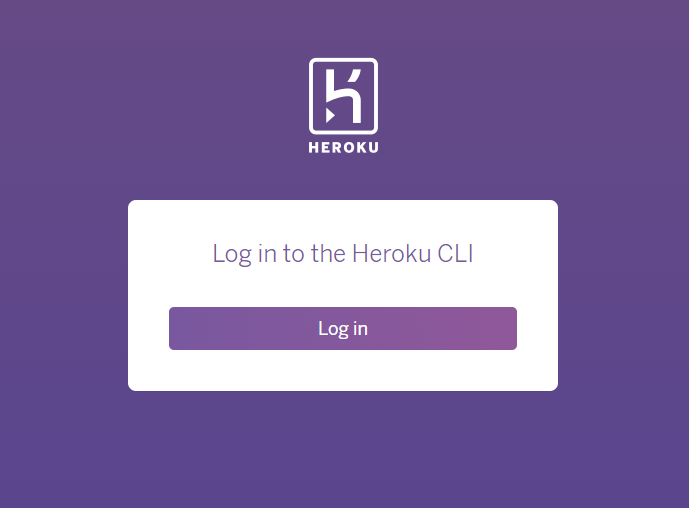
Herokuにログイン
heroku loginコマンドを叩くとブラウザ起動してログインを求められるのでエンターを押してください。> heroku login heroku: Press any key to open up the browser to login or q to exit: Opening browser to https://cli-auth.heroku.com/auth/browser/xxxxxxxxxxxxxxxxxxxxx Logging in... done Logged in as xxxxxxxxxxxx@xxxxx.com
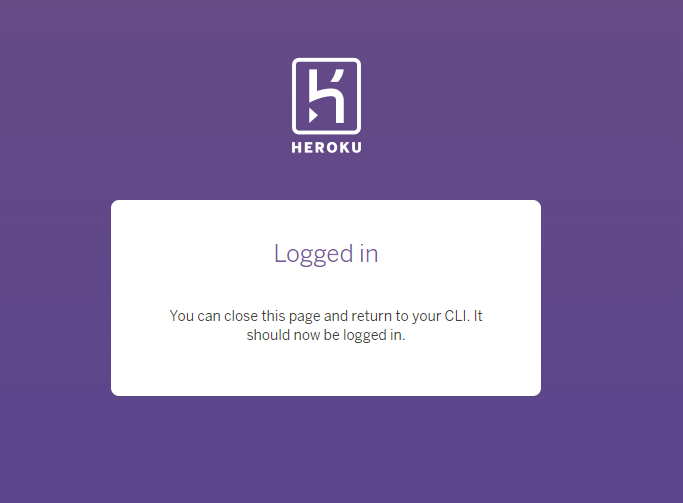
六本木
Loginを押すと自動的にloggedinされます。
Logged in が表示されていれば正常にログインできています。
2 各ライブラリインストール
ローカル環境上(win10)で必要となるライブラリをインストールします。
django
dj-database-url
django-heroku
gunicorn
whitenoisepsycopg2
pytzpip install django dj-database-url gunicorn whitenoise django-herokudjangoでプロジェクトとアプリを作成する
djangoをインストールしたらプロジェクトとアプリを作成し各種設定をしましょう。djangoにはプロジェクトとアプリという概念があります。ここでは説明は割愛します。
プロジェクト名:first
アプリ名:myappプロジェクトを作る
$ django-admin startproject firstfirstというプロジェクトが作成されました。firstフォルダは違う階層に2つできややこしいですが正常稼働ですので注意してください。
first/
 first/
     manage.py
     mysite/
         __init__.py
         settings.py
         urls.py
         wsgi.py
settings.pyと新しく作るlocal_settings.pyの作成方法は後述します。
urls.py
"""first URL Configuration

The `urlpatterns` list routes URLs to views. For more information please see:
    https://docs.djangoproject.com/en/2.0/topics/http/urls/
Examples:
Function views
    1. Add an import:  from my_app import views
    2. Add a URL to urlpatterns:  path('', views.home, name='home')
Class-based views
    1. Add an import:  from other_app.views import Home
    2. Add a URL to urlpatterns:  path('', Home.as_view(), name='home')
Including another URLconf
    1. Import the include() function: from django.urls import include, path
    2. Add a URL to urlpatterns:  path('blog/', include('blog.urls'))
"""
from django.contrib import admin
from django.urls import path, include

urlpatterns = [
    path('admin/', admin.site.urls),
    path('myapp/', include('myapp.urls'))
]
アプリを作る
$ python manage.py startapp myappmyappというアプリが作成されます。
myapp/
    __init__.py
    admin.py
    apps.py
    migrations/
        __init__.py
    models.py
    tests.py
    views.py
アプリの中の各ファイルを修正・追加していきます。
views.pyは以下のように修正しています。
from django.shortcuts import render

def index(request):
    """/ トップページ"""
    context = {
        'name': 'Kenosin',
    }
    return render(request, 'myapp/index.html', context)


def about(request):
    """/about アバウトページ"""
    return render(request, 'myapp/about.html')


def info(request):
    """/info インフォページ"""
    return render(request, 'myapp/info.html')
apps.py
from django.apps import AppConfig


class MyappConfig(AppConfig):
    name = 'myapp'
urls.pyは新規にファイルを作成します。
from django.urls import path
from . import views

app_name = 'myapp'

urlpatterns = [
    path('', views.index, name='index'),  # 127.0.0.1:8000/myapp
    path('about/', views.about, name='about'),  # 127.0.0.1:8000/myapp/about
    path('info/', views.info, name='info'),  # 127.0.0.1:8000/myapp/info
]
起動を確認する
必ずmanage.pyがある場所ディレクトリに移動してサーバーを起動してみる。$ python manage.py runserver3 herokuを利用する為herokuで利用する各設定ファイルを追加する
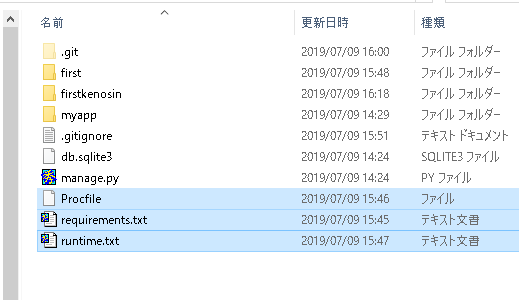
新しく3つのファイルを作成する必要があります。
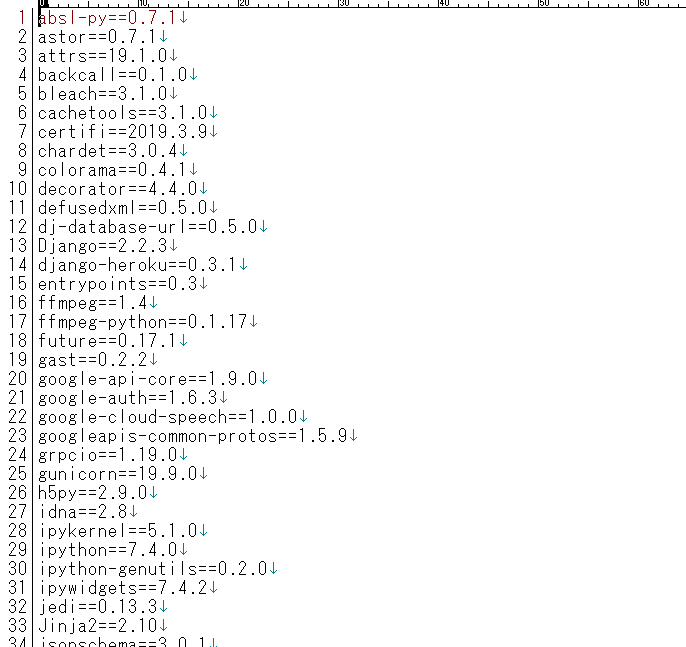
ファイル名 役割 一言TIPS runtime.txt Pythonのバージョン指定 ローカルでtxt作成すればOKです Procfile Herokuプロセスの起動コマンド 拡張子はないので注意してください requirements.txt 依存パッケージのリスト ローカルtxt作成すればokです プロジェクト名:first
アプリ名:app
※今後はみなさんの環境で上記を読み替えてください。
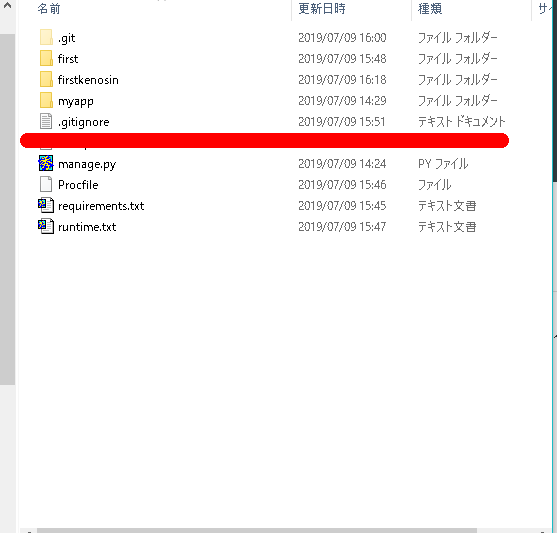
3つのファイルがどこに格納するべきかを以下のディレクトリ構造をチェックし再度確認してください。
first
│  db.sqlite3
│  manage.py
│  Procfile?????
│  requirements.txt?????
│  runtime.txt?????
│  __init__.py
│
├─first
│      settings.py
│      urls.py
│      wsgi.py
│      __init__.py
│
└─app
    │  admin.py
    │  apps.py
    │  models.py
    │  tests.py
    │  urls.py
    │  views.py
    │  __init__.py
    │
    ├─migrations
    │
    ├─static
    │  └─app
    │          style.css
    │
    └─templates
        └─app
                detail.html
                index.html
                results.html
runtime.txt
Pythonのバージョンはお使いのPythonのバージョンに変更してください。python --versionでOKです。
python-3.7.2Procfile
firstと書いてある部分はあなたのプロジェクト名に変更して下さい。
web: gunicorn first.wsgi --log-file -requirements.txt
必ずディレクトリをfirstフォルダ(上の階層の方)にcdで移動してから以下コマンドを入力します。pip freeze > requirements.txtちゃんとrequirements.txtの中身が入っているかを確認してください。
4 django側ファイル作成
django側は2ファイルを作成・修正します。local_settings.pyは新規にファイルを作ります。
settings.pyは既存にある設定ファイルを編集します。
ファイル名 役割 first/local_settings.py 新規作成です。開発環境用設定ファイル first/settings.py 本番環境用設定ファイル first │ db.sqlite3 │ manage.py │ Procfile │ requirements.txt │ runtime.txt │ __init__.py │ ├─first │ settings.py????? │ local_settings.py????? │ urls.py │ wsgi.py │ __init__.py │ └─app │ admin.py │ apps.py │ models.py │ tests.py │ urls.py │ views.py │ __init__.py │ ├─migrations │ ├─static │ └─app │ style.css │ └─templates └─app detail.html index.html results.htmlfirst/local_settings.py
ローカル環境でアプリを動かすための設定です。プロジェクトの下の「first」フォルダの下に、「local_settings.py」を作成して以下のように編集します。import os BASE_DIR = os.path.dirname(os.path.dirname(__file__)) DATABASES = { 'default': { 'ENGINE': 'django.db.backends.sqlite3', 'NAME': os.path.join(BASE_DIR, 'db.sqlite3'), } } DEBUG = Truefirst/settings.py
Herokuで動くための設定を追加します。settings.pyの最後に以下を追加します。なお以下ファイルをまるまるコピーするではありませんので気を付けてくださいね。あくまで以下コードは最後に追加してください。import dj_database_url DATABASES['default'] = dj_database_url.config() SECURE_PROXY_SSL_HEADER = ('HTTP_X_FORWARDED_PROTO', 'https') ALLOWED_HOSTS = ['*'] STATIC_ROOT = 'staticfiles' DEBUG = False try: from .local_settings import * except ImportError: pass.gitignore ファイル作成
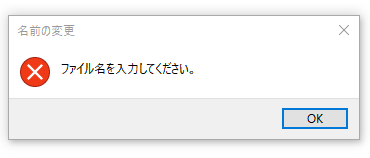
.gitignoreというファイルを作成します。しかし.gitignoreの最初は[.]です。windowsでは通常のファイルの作成方法だと名前の一番最初に[.]が付くファイルは以下のようにエラーがでます。
そこで以下方法で.gitignoreファイルを作成します。
1gitignore.txtを作る。(gitignore.txtは.gitignoreファイルを保存したいフォルダに保存しておく。)
2gitignore.txtに.gitignoreに書きたい内容を書く。
3gitignore.txtを保存したフォルダ上を、SHIFTを押しながら右クリックして、"コマンドウインドウをここで開く"を選択。
コマンドプロンプト(黒い画面)を開いたら以下コマンドを入力してEnterを押してください。ren gitignore.txt .gitignoreファイルの格納場所は以下になります。
実際の.gitignoreファイルの中身は以下を入力しましょう
### Django ### __pycache__ staticfiles local_settings.py db.sqlite3 *.py[co]5 Gitでリモートリポジトリにプッシュ
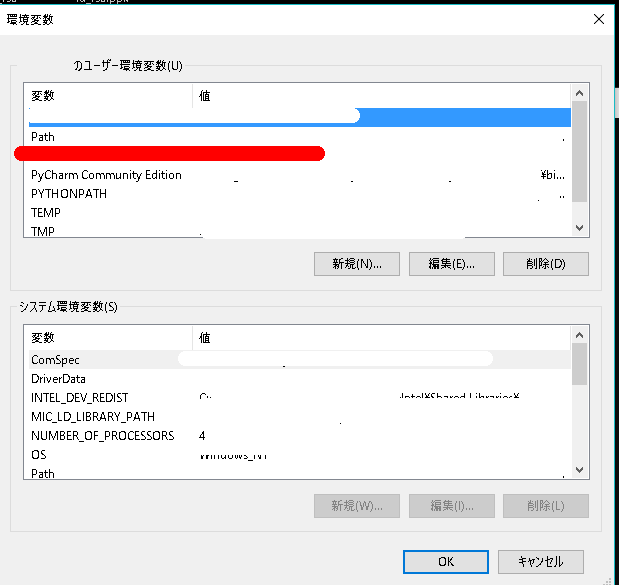
※heroku, gitコマンドはあらかじめwindows環境変数のpathを追加しておきます。以下のパスを環境変数に追加してください。
C:\Program Files\Git\bin C:\Program Files\heroku\binwindowsで環境変数を開き上記パスをpath欄に追加してください。
ファイルを格納する場所は以下を参照してください。
first │ .gitignore???????新規作成します。 │ db.sqlite3 │ manage.py │ Procfile │ requirements.txt │ runtime.txt │ __init__.py │ ├─first │ local_settings.py?????????新規作成します。 │ settings.py????????既存ファイルの修正です。 │ urls.py │ wsgi.py │ __init__.py │ └─app │ admin.py │ apps.py │ models.py │ tests.py │ urls.py │ views.py │ __init__.py │ ├─migrations │ ├─static │ └─app │ style.css │ └─templates └─app detail.html index.html results.htmlherokuにログインします。
heroku login 結果 heroku: Press any key to open up the browser to login or q to exit: Opening browser to https://cli-auth.heroku.com/auth/browser/66295473-1184-419f-b9c7-1bac9c80edb7 Logging in... done Logged in as keno@gmail.comログインしたら、まず作成したプロジェクトの直下にディレクトリをcdで移動します。
cd first 作ったプロジェクトの直下に移動します。(manag.pyと並列の階層です)git init Initialized empty Git repository in C:/Users/kenosin/first/.git/ご自身の名前で登録します。例えばgit config user.name "kenosin"
git config user.name "Your Name"メールアドレスを入力します。例えばgit config user.email keno@gmail.com
git config user.email xxxxx@mail.comgit add -A . 結果以下のようなワーニングが出るかもしれません。 warning: LF will be replaced by CRLF in first/settings.py. The file will have its original line endings in your working directory warning: LF will be replaced by CRLF in first/urls.py. The file will have its original line endings in your working directory warning: LF will be replaced by CRLF in first/wsgi.py. The file will have its original line endings in your working directory warning: LF will be replaced by CRLF in manage.py. The file will have its original line endings in your working directory warning: LF will be replaced by CRLF in myapp/admin.py. The file will have its original line endings in your working directory warning: LF will be replaced by CRLF in myapp/apps.py. The file will have its original line endings in your working directory warning: LF will be replaced by CRLF in myapp/models.py. The file will have its original line endings in your working directory warning: LF will be replaced by CRLF in myapp/templates/myapp/about.html. The file will have its original line endings in your working directory warning: LF will be replaced by CRLF in myapp/templates/myapp/base.html. The file will have its original line endings in your working directory warning: LF will be replaced by CRLF in myapp/templates/myapp/index.html. The file will have its original line endings in your working directory warning: LF will be replaced by CRLF in myapp/templates/myapp/info.html. The file will have its original line endings in your working directory warning: LF will be replaced by CRLF in myapp/tests.py. The file will have its original line endings in your working directory warning: LF will be replaced by CRLF in myapp/urls.py. The file will have its original line endings in your working directory warning: LF will be replaced by CRLF in myapp/views.py. The file will have its original line endings in your working directoryコミット用のコメントを入力します。
git commit -m "first commit" 結果 [master (root-commit) 76d9fbd] first commit 21 files changed, 364 insertions(+) create mode 100644 .gitignore create mode 100644 Procfile create mode 100644 first/__init__.py create mode 100644 first/settings.py create mode 100644 first/urls.py create mode 100644 first/wsgi.py create mode 100644 manage.py create mode 100644 myapp/__init__.py create mode 100644 myapp/admin.py create mode 100644 myapp/apps.py create mode 100644 myapp/migrations/__init__.py create mode 100644 myapp/models.py create mode 100644 myapp/templates/myapp/about.html create mode 100644 myapp/templates/myapp/base.html create mode 100644 myapp/templates/myapp/index.html create mode 100644 myapp/templates/myapp/info.html create mode 100644 myapp/tests.py create mode 100644 myapp/urls.py create mode 100644 myapp/views.py create mode 100644 requirements.txt create mode 100644 runtime.txtHerokuへデプロイ
重複しないURLを入力してください。ここでURLが決まります。
heroku create firstkenosin 結果 Creating ⬢ firstkenosin... done https://firstkenosin.herokuapp.com/ | https://git.heroku.com/firstkenosin.githerokuのアプリにローカルリポジトリからpushします。
git push heroku master 結果 Enumerating objects: 26, done. Counting objects: 100% (26/26), done. Delta compression using up to 4 threads Compressing objects: 100% (21/21), done. Writing objects: 100% (26/26), 5.71 KiB | 307.00 KiB/s, done. Total 26 (delta 1), reused 0 (delta 0) remote: Compressing source files... done. remote: Building source: remote: remote: -----> Python app detected remote: ! Python has released a security update! Please consider upgrading to python-3.7.3 remote: Learn More: https://devcenter.heroku.com/articles/python-runtimes remote: -----> Installing python-3.7.2 remote: -----> Installing pip remote: -----> Installing SQLite3 remote: -----> Installing requirements with pip 省略 remote: -----> Compressing... remote: Done: 207.4M remote: -----> Launching... remote: Released v5 remote: https://firstkenosin.herokuapp.com/ deployed to Heroku remote: remote: Verifying deploy... done. To ssh://heroku.com/firstkenosin.git * [new branch] master -> master続いて以下コマンドを打ちます。push した後はアプリケーションのプロセスを動かす必要がありますので以下のコマンドで起動します。
heroku ps:scale web=1 結果 Scaling dynos... done, now running web at 1:Freeデータベースが空の状態なので、ローカルにデータベースをセットアップした時のように、再度migrate コマンドを実行します。
heroku run python manage.py migrate 結果 Running python manage.py migrate on ⬢ firstkenosin... up, run.2676 (Free) Operations to perform: Apply all migrations: admin, auth, contenttypes, sessions Running migrations: Applying contenttypes.0001_initial... OK Applying auth.0001_initial... OK Applying admin.0001_initial... OK Applying admin.0002_logentry_remove_auto_add... OK Applying admin.0003_logentry_add_action_flag_choices... OK Applying contenttypes.0002_remove_content_type_name... OK Applying auth.0002_alter_permission_name_max_length... OK Applying auth.0003_alter_user_email_max_length... OK Applying auth.0004_alter_user_username_opts... OK Applying auth.0005_alter_user_last_login_null... OK Applying auth.0006_require_contenttypes_0002... OK Applying auth.0007_alter_validators_add_error_messages... OK Applying auth.0008_alter_user_username_max_length... OK Applying auth.0009_alter_user_last_name_max_length... OK Applying auth.0010_alter_group_name_max_length... OK Applying auth.0011_update_proxy_permissions... OK Applying sessions.0001_initial... OK任意でsuperuserを作成し管理画面にログインできるように設定してください。
heroku run python manage.py createsuperuser 結果 Running python manage.py createsuperuser on ⬢ firstkenosin... up, run.8935 (Free) ユーザー名 (leave blank to use 'u18723'): xxxxxx メールアドレス: keno@gmail.com Password: Password (again): Superuser created successfully.最後に下記を入力すると、ブラウザが立ち上がり、自分で作ったアプリが表示されます。
heroku openhttps://firstkenosin.herokuapp.com/myapp/
6 herokuのURLをムームードメイン独自ドメインと紐づける
djangoのweb公開ができたら次は独自ドメインを設定しましょう。
ムームードメイン側:
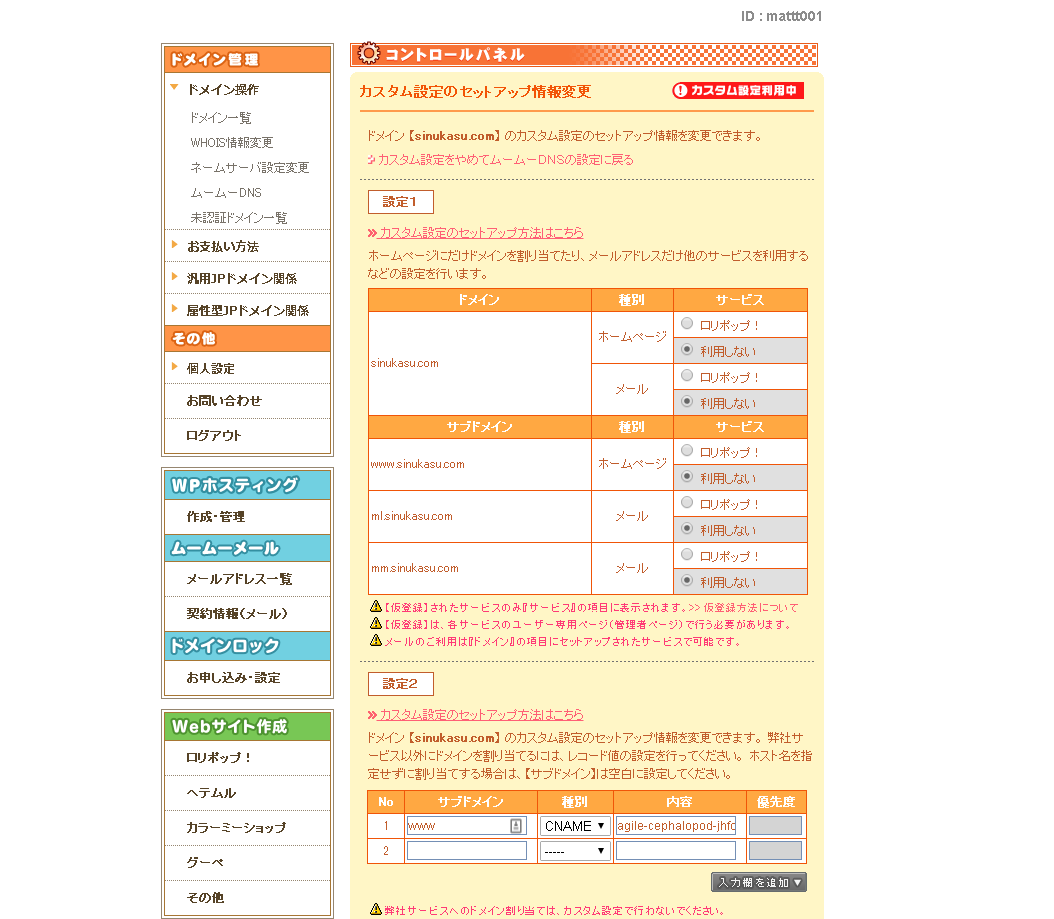
1.「ドメイン管理」→「ムームーDNS」→設定したい独自ドメインの「変更」を選択します。
2.「カスタム設定のセットアップ方法はこちら」というボタンを押してください。
3.設定2が現れるのでサブドメインを「www」、種別を[CNAME]、内容を[www.アプリの名前.herokudns.com]にしますサブドメイン:www
種別:CNAME
内容:agile-cephalopod-adここはそれぞれ違いますfakjnefhoo60.herokudns.com
※内容はherokuのDNS Targetをそのまま入れて下さい。
4.「セットアップ情報変更」を押し完了です。
5.24~48時間ほどで適用されます。
heroku側:
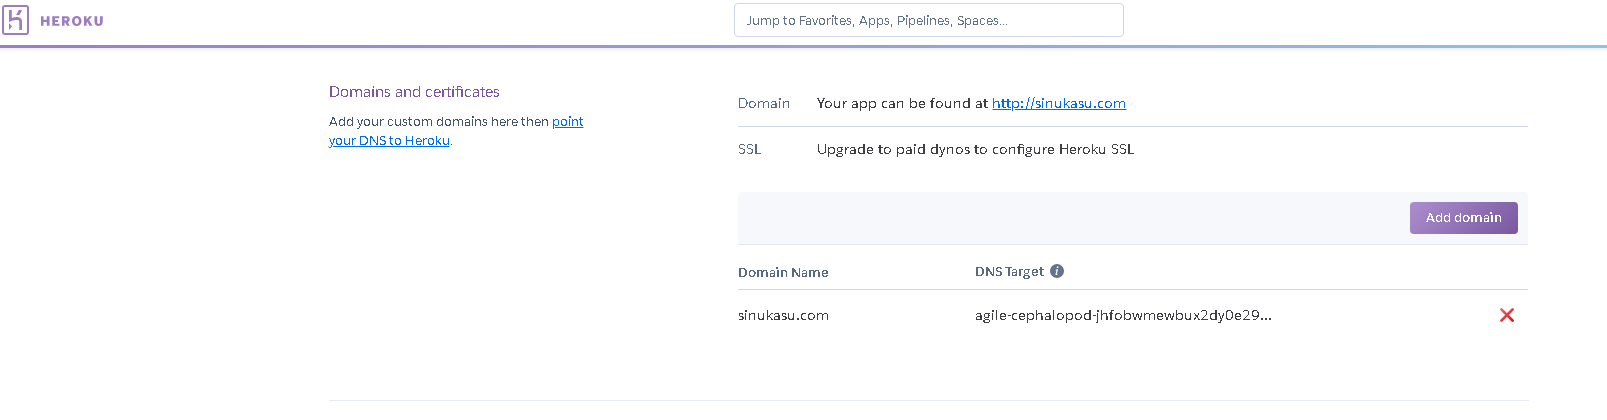
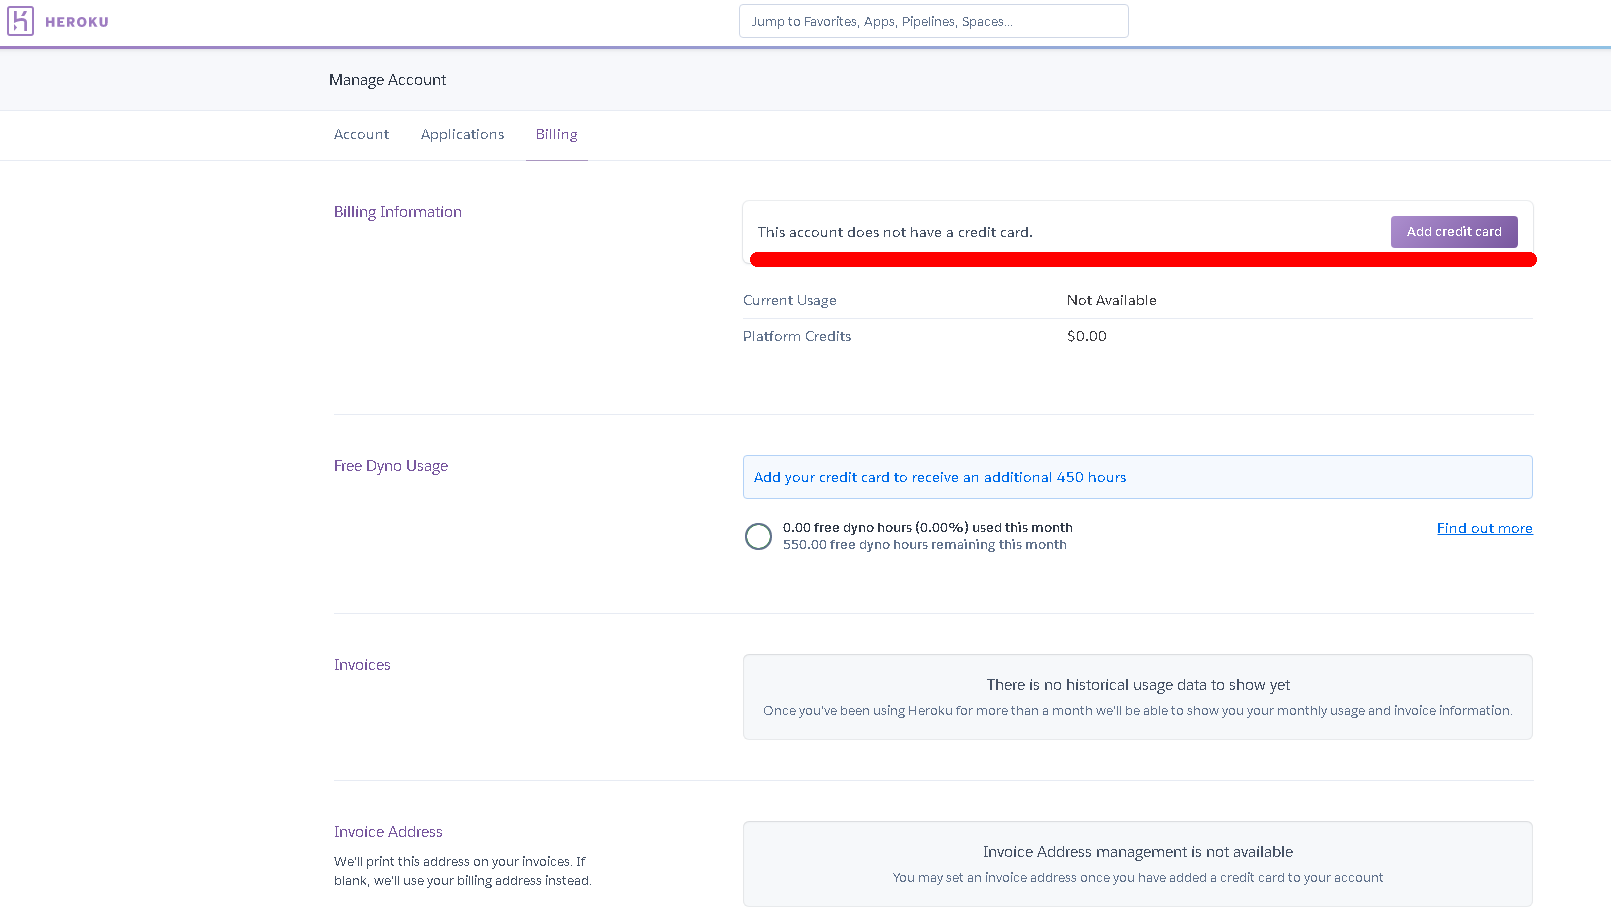
続いてheroku側の設定をGUI上で実施します。まずはDomains and certificatesページでドメインを登録してください。登録しようとした時にもしも以下のようなエラーが出たらheroku側にクレジットカード登録が済んでいない可能性があります。請求ページに行きクレジットカードを登録してください。
https://dashboard.heroku.com/account/billingDomain "xxx.com" could not be created: Please verify your account in order to add domain s (please enter a credit card) For more information, seeここからクレジットカードを登録します。
アプリのドメインが設定されているかをコマンドプロンプトで確認しましょう。
C:\Users\kenosin>heroku domains -a firstkenosin === firstkenosin Heroku Domain firstkenosin.herokuapp.com === firstkenosin Custom Domains Domain Name DNS Record Type DNS Target ──────────── ─────────────── ───────────────────────────────────────────────────── sinukasu.com ALIAS or ANAME agile-cephalopod-joghoehgoehgoehgoehgoe.herokudns.comしばらく待ってから独自ドメインでweb公開されているか確認しましょう。
番外編
gitにメール、ユーザを登録していないと、commit時にエラーになります。
*** Please tell me who you are. Run git config --global user.email "you@example.com" git config --global user.name "Your Name" to set your account's default identity. Omit --global to set the identity only in this repository.fatal: unable to auto-detect email address (got 'ycnp4@DESKTOP-B5N6I3B.(none)')
その場合は登録してください。git config --global user.email "hogehoge@gmail.com" git config --global user.name "taro yamada"settings.py
""" Django settings for first project. Generated by 'django-admin startproject' using Django 2.0. For more information on this file, see https://docs.djangoproject.com/en/2.0/topics/settings/ For the full list of settings and their values, see https://docs.djangoproject.com/en/2.0/ref/settings/ """ import os # Build paths inside the project like this: os.path.join(BASE_DIR, ...) BASE_DIR = os.path.dirname(os.path.dirname(os.path.abspath(__file__))) # Quick-start development settings - unsuitable for production # See https://docs.djangoproject.com/en/2.0/howto/deployment/checklist/ # SECURITY WARNING: keep the secret key used in production secret! SECRET_KEY = 'urfaj;foanjdfnaewlufnawefhnawoenfawefaj'?????#ここは毎回違うので注意してください。 # SECURITY WARNING: don't run with debug turned on in production! DEBUG = True????? ALLOWED_HOSTS = []????? # Application definition INSTALLED_APPS = [ 'myapp.apps.MyappConfig', 'django.contrib.admin', 'django.contrib.auth', 'django.contrib.contenttypes', 'django.contrib.sessions', 'django.contrib.messages', 'django.contrib.staticfiles', ] MIDDLEWARE = [ 'django.middleware.security.SecurityMiddleware', 'django.contrib.sessions.middleware.SessionMiddleware', 'django.middleware.common.CommonMiddleware', 'django.middleware.csrf.CsrfViewMiddleware', 'django.contrib.auth.middleware.AuthenticationMiddleware', 'django.contrib.messages.middleware.MessageMiddleware', 'django.middleware.clickjacking.XFrameOptionsMiddleware', ] ROOT_URLCONF = 'first.urls' TEMPLATES = [ { 'BACKEND': 'django.template.backends.django.DjangoTemplates', 'DIRS': [], 'APP_DIRS': True, 'OPTIONS': { 'context_processors': [ 'django.template.context_processors.debug', 'django.template.context_processors.request', 'django.contrib.auth.context_processors.auth', 'django.contrib.messages.context_processors.messages', ], }, }, ] WSGI_APPLICATION = 'first.wsgi.application' # Database # https://docs.djangoproject.com/en/2.0/ref/settings/#databases DATABASES = { 'default': { 'ENGINE': 'django.db.backends.sqlite3', 'NAME': os.path.join(BASE_DIR, 'db.sqlite3'), } } # Password validation # https://docs.djangoproject.com/en/2.0/ref/settings/#auth-password-validators AUTH_PASSWORD_VALIDATORS = [ { 'NAME': 'django.contrib.auth.password_validation.UserAttributeSimilarityValidator', }, { 'NAME': 'django.contrib.auth.password_validation.MinimumLengthValidator', }, { 'NAME': 'django.contrib.auth.password_validation.CommonPasswordValidator', }, { 'NAME': 'django.contrib.auth.password_validation.NumericPasswordValidator', }, ] # Internationalization # https://docs.djangoproject.com/en/2.0/topics/i18n/ LANGUAGE_CODE = 'ja' ?????#変更対象です。 TIME_ZONE = 'Asia/Tokyo' ?????#変更対象です。 USE_I18N = True USE_L10N = True USE_TZ = True # Static files (CSS, JavaScript, Images) # https://docs.djangoproject.com/en/2.0/howto/static-files/ STATIC_URL = '/static/' # 今回heroku用に以下を追加します DEBUG = False try: from .local_settings import * except ImportError: pass if not DEBUG: import django_heroku django_heroku.settings(locals())以上、お疲れ様でした。

- 投稿日:2019-07-10T11:16:57+09:00
herokuでdjango
実行環境
win10
python3.7.2
herokuゴール
ローカルでdjangoを利用するのではなく、サーバにデプロイしweb公開(herokuを利用しdjangoをデプロイ)する事を目的としてみました。出来るイメージは以下です。
djangoで作成したアプリをweb公開する
https://firstkenosin.herokuapp.com/myapp/
これ以上ない程シンプルですが中身はdjango+herokuが稼働しています。
herokuとは
Heroku はpaasです。Paasはアプリケーションの開発から実行、運用までのすべてをクラウドで完結できるサービスです。一言で言うとサーバやOS、データベースなどプラットフォーム部分を簡単に設定する事ができます。アプリの構築、提供、監視、スケールが容易でインフラストラクチャの管理問題から大部分は解放されるとても便利なサービスです。
詳細は以下をご覧ください。
https://jp.heroku.com/whatherokuのプランやプライスは以下を参考にしてください。
https://jp.heroku.com/pricing1 herokuユーザ登録
まずユーザ登録しましょう。
heroku CLI Heroku Dev Center
https://devcenter.heroku.com/articles/heroku-cli
【Winodwsの場合】
インストーラを起動させたら『Next >』をクリック任意のインストール先(デフォルトで良い)を設定して『Install』します。
正常終了したらPowerShellかコマンドプロンプトでバージョン確認します。
heroku --version heroku/7.22.9 win32-x64 node-v11.10.1バージョンが表示していればOKです。
Herokuにログイン
heroku loginコマンドを叩くとブラウザ起動してログインを求められるのでエンターを押してください。> heroku login heroku: Press any key to open up the browser to login or q to exit: Opening browser to https://cli-auth.heroku.com/auth/browser/xxxxxxxxxxxxxxxxxxxxx Logging in... done Logged in as xxxxxxxxxxxx@xxxxx.com
Loginを押すと自動的にloggedinされます。
Logged in が表示されていれば正常にログインできています。
2 各ライブラリインストール
ローカル環境上(win10)で必要となるライブラリをインストールします。
django
dj-database-url
django-heroku
gunicorn
whitenoisepsycopg2
pytzpip install django dj-database-url gunicorn whitenoise django-herokudjangoでプロジェクトとアプリを作成する
djangoをインストールしたらプロジェクトとアプリを作成し各種設定をしましょう。djangoにはプロジェクトとアプリという概念があります。ここでは説明は割愛します。
プロジェクト名:first
アプリ名:myappプロジェクトを作る
$ django-admin startproject firstfirstというプロジェクトが作成されました。firstフォルダは違う階層に2つできややこしいですが正常稼働ですので注意してください。
first/ first/ manage.py mysite/ __init__.py settings.py urls.py wsgi.pysettings.pyと新しく作るlocal_settings.pyの作成方法は後述します。
urls.py
"""first URL Configuration The `urlpatterns` list routes URLs to views. For more information please see: https://docs.djangoproject.com/en/2.0/topics/http/urls/ Examples: Function views 1. Add an import: from my_app import views 2. Add a URL to urlpatterns: path('', views.home, name='home') Class-based views 1. Add an import: from other_app.views import Home 2. Add a URL to urlpatterns: path('', Home.as_view(), name='home') Including another URLconf 1. Import the include() function: from django.urls import include, path 2. Add a URL to urlpatterns: path('blog/', include('blog.urls')) """ from django.contrib import admin from django.urls import path, include urlpatterns = [ path('admin/', admin.site.urls), path('myapp/', include('myapp.urls')) ]アプリを作る
$ python manage.py startapp myappmyappというアプリが作成されます。
myapp/ __init__.py admin.py apps.py migrations/ __init__.py models.py tests.py views.pyアプリの中の各ファイルを修正・追加していきます。
views.pyは以下のように修正しています。
from django.shortcuts import render def index(request): """/ トップページ""" context = { 'name': 'Kenosin', } return render(request, 'myapp/index.html', context) def about(request): """/about アバウトページ""" return render(request, 'myapp/about.html') def info(request): """/info インフォページ""" return render(request, 'myapp/info.html')apps.py
from django.apps import AppConfig class MyappConfig(AppConfig): name = 'myapp'urls.pyは新規にファイルを作成します。
from django.urls import path from . import views app_name = 'myapp' urlpatterns = [ path('', views.index, name='index'), # 127.0.0.1:8000/myapp path('about/', views.about, name='about'), # 127.0.0.1:8000/myapp/about path('info/', views.info, name='info'), # 127.0.0.1:8000/myapp/info ]起動を確認する
必ずmanage.pyがある場所ディレクトリに移動してサーバーを起動してみる。$ python manage.py runserver3 herokuを利用する為herokuで利用する各設定ファイルを追加する
新しく3つのファイルを作成する必要があります。
ファイル名 役割 一言TIPS runtime.txt Pythonのバージョン指定 ローカルでtxt作成すればOKです Procfile Herokuプロセスの起動コマンド 拡張子はないので注意してください requirements.txt 依存パッケージのリスト ローカルtxt作成すればokです プロジェクト名:first
アプリ名:app
※今後はみなさんの環境で上記を読み替えてください。
3つのファイルがどこに格納するべきかを以下のディレクトリ構造をチェックし再度確認してください。
first │ db.sqlite3 │ manage.py │ Procfile????? │ requirements.txt????? │ runtime.txt????? │ __init__.py │ ├─first │ settings.py │ urls.py │ wsgi.py │ __init__.py │ └─app │ admin.py │ apps.py │ models.py │ tests.py │ urls.py │ views.py │ __init__.py │ ├─migrations │ ├─static │ └─app │ style.css │ └─templates └─app detail.html index.html results.htmlruntime.txt
Pythonのバージョンはお使いのPythonのバージョンに変更してください。python --versionでOKです。
python-3.7.2Procfile
firstと書いてある部分はあなたのプロジェクト名に変更して下さい。はまりポイントです。さりげなくwsgiファイル名称が異なるのでご自身のファイル名称を記載するよう注意してくださいね。
web: gunicorn first.wsgi --log-file -requirements.txt
必ずディレクトリをfirstフォルダ(上の階層の方)にcdで移動してから以下コマンドを入力します。pip freeze > requirements.txtちゃんとrequirements.txtの中身が入っているかを確認してください。
4 django側ファイル作成
django側は2ファイルを作成・修正します。local_settings.pyは新規にファイルを作ります。
settings.pyは既存にある設定ファイルを編集します。
ファイル名 役割 first/local_settings.py 新規作成です。開発環境用設定ファイル first/settings.py 本番環境用設定ファイル first │ db.sqlite3 │ manage.py │ Procfile │ requirements.txt │ runtime.txt │ __init__.py │ ├─first │ settings.py????? │ local_settings.py????? │ urls.py │ wsgi.py │ __init__.py │ └─app │ admin.py │ apps.py │ models.py │ tests.py │ urls.py │ views.py │ __init__.py │ ├─migrations │ ├─static │ └─app │ style.css │ └─templates └─app detail.html index.html results.htmlfirst/local_settings.py
ローカル環境でアプリを動かすための設定です。プロジェクトの下の「first」フォルダの下に、「local_settings.py」を作成して以下のように編集します。
import os
BASE_DIR = os.path.dirname(os.path.dirname(__file__))

DATABASES = {
    'default': {
        'ENGINE': 'django.db.backends.sqlite3',
        'NAME': os.path.join(BASE_DIR, 'db.sqlite3'),
    }
}

DEBUG = True
first/settings.py
Herokuで動くための設定を追加します。settings.pyの最後に以下を追加します。なお以下ファイルをまるまるコピーするではありませんので気を付けてくださいね。あくまで以下コードは最後に追加してください。
# 今回heroku用に以下を追加します DEBUG = False try: from .local_settings import * except ImportError: pass if not DEBUG: import django_heroku django_heroku.settings(locals()).gitignore ファイル作成
.gitignoreというファイルを作成します。しかし.gitignoreの最初は[.]です。windowsでは通常のファイルの作成方法だと名前の一番最初に[.]が付くファイルは以下のようにエラーがでます。
そこで以下方法で.gitignoreファイルを作成します。
1gitignore.txtを作る。(gitignore.txtは.gitignoreファイルを保存したいフォルダに保存しておく。)
2gitignore.txtに.gitignoreに書きたい内容を書く。
3gitignore.txtを保存したフォルダ上を、SHIFTを押しながら右クリックして、"コマンドウインドウをここで開く"を選択。
コマンドプロンプト(黒い画面)を開いたら以下コマンドを入力してEnterを押してください。ren gitignore.txt .gitignoreファイルの格納場所は以下になります。
実際の.gitignoreファイルの中身は以下を入力しましょう
### Django ###
__pycache__
staticfiles
local_settings.py
db.sqlite3
*.py[co]
5 Gitでリモートリポジトリにプッシュ
※heroku, gitコマンドはあらかじめwindows環境変数のpathを追加しておきます。以下のパスを環境変数に追加してください。
C:\Program Files\Git\bin
C:\Program Files\heroku\bin
windowsで環境変数を開き上記パスをpath欄に追加してください。
ファイルを格納する場所は以下を参照してください。
first
│  .gitignore???????新規作成します。
│  db.sqlite3
│  manage.py
│  Procfile
│  requirements.txt
│  runtime.txt
│  __init__.py
│
├─first
│      local_settings.py?????????新規作成します。
│      settings.py????????既存ファイルの修正です。
│      urls.py
│      wsgi.py
│      __init__.py
│
└─app
    │  admin.py
    │  apps.py
    │  models.py
    │  tests.py
    │  urls.py
    │  views.py
    │  __init__.py
    │
    ├─migrations
    │
    ├─static
    │  └─app
    │          style.css
    │
    └─templates
        └─app
                detail.html
                index.html
                results.html
herokuにログインします。
heroku login
結果
heroku: Press any key to open up the browser to login or q to exit:
Opening browser to https://cli-auth.heroku.com/auth/browser/66295473-1184-419f-b9c7-1bac9c80edb7
Logging in... done
Logged in as keno@gmail.com
ログインしたら、まず作成したプロジェクトの直下にディレクトリをcdで移動します。
cd first 作ったプロジェクトの直下に移動します。(manag.pyと並列の階層です)git init Initialized empty Git repository in C:/Users/kenosin/first/.git/ご自身の名前で登録します。例えばgit config user.name "kenosin"
git config user.name "Your Name"メールアドレスを入力します。例えばgit config user.email keno@gmail.com
git config user.email xxxxx@mail.comgit add -A . 結果以下のようなワーニングが出るかもしれません。 warning: LF will be replaced by CRLF in first/settings.py. The file will have its original line endings in your working directory warning: LF will be replaced by CRLF in first/urls.py. The file will have its original line endings in your working directory warning: LF will be replaced by CRLF in first/wsgi.py. The file will have its original line endings in your working directory warning: LF will be replaced by CRLF in manage.py. The file will have its original line endings in your working directory warning: LF will be replaced by CRLF in myapp/admin.py. The file will have its original line endings in your working directory warning: LF will be replaced by CRLF in myapp/apps.py. The file will have its original line endings in your working directory warning: LF will be replaced by CRLF in myapp/models.py. The file will have its original line endings in your working directory warning: LF will be replaced by CRLF in myapp/templates/myapp/about.html. The file will have its original line endings in your working directory warning: LF will be replaced by CRLF in myapp/templates/myapp/base.html. The file will have its original line endings in your working directory warning: LF will be replaced by CRLF in myapp/templates/myapp/index.html. The file will have its original line endings in your working directory warning: LF will be replaced by CRLF in myapp/templates/myapp/info.html. The file will have its original line endings in your working directory warning: LF will be replaced by CRLF in myapp/tests.py. The file will have its original line endings in your working directory warning: LF will be replaced by CRLF in myapp/urls.py. The file will have its original line endings in your working directory warning: LF will be replaced by CRLF in myapp/views.py. The file will have its original line endings in your working directoryコミット用のコメントを入力します。
git commit -m "first commit"

結果
[master (root-commit) 76d9fbd] first commit
 21 files changed, 364 insertions(+)
 create mode 100644 .gitignore
 create mode 100644 Procfile
 create mode 100644 first/__init__.py
 create mode 100644 first/settings.py
 create mode 100644 first/urls.py
 create mode 100644 first/wsgi.py
 create mode 100644 manage.py
 create mode 100644 myapp/__init__.py
 create mode 100644 myapp/admin.py
 create mode 100644 myapp/apps.py
 create mode 100644 myapp/migrations/__init__.py
 create mode 100644 myapp/models.py
 create mode 100644 myapp/templates/myapp/about.html
 create mode 100644 myapp/templates/myapp/base.html
 create mode 100644 myapp/templates/myapp/index.html
 create mode 100644 myapp/templates/myapp/info.html
 create mode 100644 myapp/tests.py
 create mode 100644 myapp/urls.py
 create mode 100644 myapp/views.py
 create mode 100644 requirements.txt
 create mode 100644 runtime.txt
Herokuへデプロイ
重複しないURLを入力してください。ここでURLが決まります。
heroku create firstkenosin

結果
Creating ⬢ firstkenosin... done
https://firstkenosin.herokuapp.com/ | https://git.heroku.com/firstkenosin.git
herokuのアプリにローカルリポジトリからpushします。
git push heroku master

結果
Enumerating objects: 26, done.
Counting objects: 100% (26/26), done.
Delta compression using up to 4 threads
Compressing objects: 100% (21/21), done.
Writing objects: 100% (26/26), 5.71 KiB | 307.00 KiB/s, done.
Total 26 (delta 1), reused 0 (delta 0)
remote: Compressing source files... done.
remote: Building source:
remote:
remote: -----> Python app detected
remote:  !     Python has released a security update! Please consider upgrading to python-3.7.3
remote:        Learn More: https://devcenter.heroku.com/articles/python-runtimes
remote: ----->
Installing python-3.7.2
remote: -----> Installing pip
remote: -----> Installing SQLite3
remote: -----> Installing requirements with pip

省略

remote: -----> Compressing...
remote:        Done: 207.4M
remote: -----> Launching...
remote:        Released v5
remote:        https://firstkenosin.herokuapp.com/ deployed to Heroku
remote:
remote: Verifying deploy... done.
To ssh://heroku.com/firstkenosin.git
 * [new branch]      master -> master
続いて以下コマンドを打ちます。push した後はアプリケーションのプロセスを動かす必要がありますので以下のコマンドで起動します。
heroku ps:scale web=1

結果
Scaling dynos... done, now running web at 1:Free
データベースが空の状態なので、ローカルにデータベースをセットアップした時のように、再度migrate コマンドを実行します。
heroku run python manage.py migrate

結果
Running python manage.py migrate on ⬢ firstkenosin... up, run.2676 (Free)
Operations to perform:
  Apply all migrations: admin, auth, contenttypes, sessions
Running migrations:
  Applying contenttypes.0001_initial... OK
  Applying auth.0001_initial... OK
  Applying admin.0001_initial... OK
  Applying admin.0002_logentry_remove_auto_add... OK
  Applying admin.0003_logentry_add_action_flag_choices... OK
  Applying contenttypes.0002_remove_content_type_name... OK
  Applying auth.0002_alter_permission_name_max_length... OK
  Applying auth.0003_alter_user_email_max_length... OK
  Applying auth.0004_alter_user_username_opts... OK
  Applying auth.0005_alter_user_last_login_null... OK
  Applying auth.0006_require_contenttypes_0002... OK
  Applying auth.0007_alter_validators_add_error_messages... OK
  Applying auth.0008_alter_user_username_max_length... OK
  Applying auth.0009_alter_user_last_name_max_length... OK
  Applying auth.0010_alter_group_name_max_length... OK
  Applying auth.0011_update_proxy_permissions... OK
  Applying sessions.0001_initial... OK
任意でsuperuserを作成し管理画面にログインできるように設定してください。
heroku run python manage.py createsuperuser

結果
Running python manage.py createsuperuser on ⬢ firstkenosin... up, run.8935 (Free)
ユーザー名 (leave blank to use 'u18723'): xxxxxx
メールアドレス: keno@gmail.com
Password:
Password (again):
Superuser created successfully.
最後に下記を入力すると、ブラウザが立ち上がり、自分で作ったアプリが表示されます。
heroku openhttps://firstkenosin.herokuapp.com/myapp/
6 herokuのURLをムームードメイン独自ドメインと紐づける
djangoのweb公開ができたら次は独自ドメインを設定しましょう。
ムームードメイン側:
1.「ドメイン管理」→「ムームーDNS」→設定したい独自ドメインの「変更」を選択します。
2.「カスタム設定のセットアップ方法はこちら」というボタンを押してください。
3.設定2が現れるのでサブドメインを「www」、種別を[CNAME]、内容を[www.アプリの名前.herokudns.com]にしますサブドメイン:www
種別:CNAME
内容:agile-cephalopod-adここはそれぞれ違いますfakjnefhoo60.herokudns.com
※内容はherokuのDNS Targetをそのまま入れて下さい。
4.「セットアップ情報変更」を押し完了です。
5.24~48時間ほどで適用されます。
heroku側:
続いてheroku側の設定をGUI上で実施します。まずはDomains and certificatesページでドメインを登録してください。登録しようとした時にもしも以下のようなエラーが出たらheroku側にクレジットカード登録が済んでいない可能性があります。請求ページに行きクレジットカードを登録してください。
https://dashboard.heroku.com/account/billingDomain "xxx.com" could not be created: Please verify your account in order to add domain s (please enter a credit card) For more information, seeここからクレジットカードを登録します。
アプリのドメインが設定されているかをコマンドプロンプトで確認しましょう。
C:\Users\kenosin>heroku domains -a firstkenosin
=== firstkenosin Heroku Domain
firstkenosin.herokuapp.com

=== firstkenosin Custom Domains
Domain Name   DNS Record Type  DNS Target
────────────  ───────────────  ─────────────────────────────────────────────────────
sinukasu.com  ALIAS or ANAME   agile-cephalopod-joghoehgoehgoehgoehgoe.herokudns.com
しばらく待ってから独自ドメインでweb公開されているか確認しましょう。
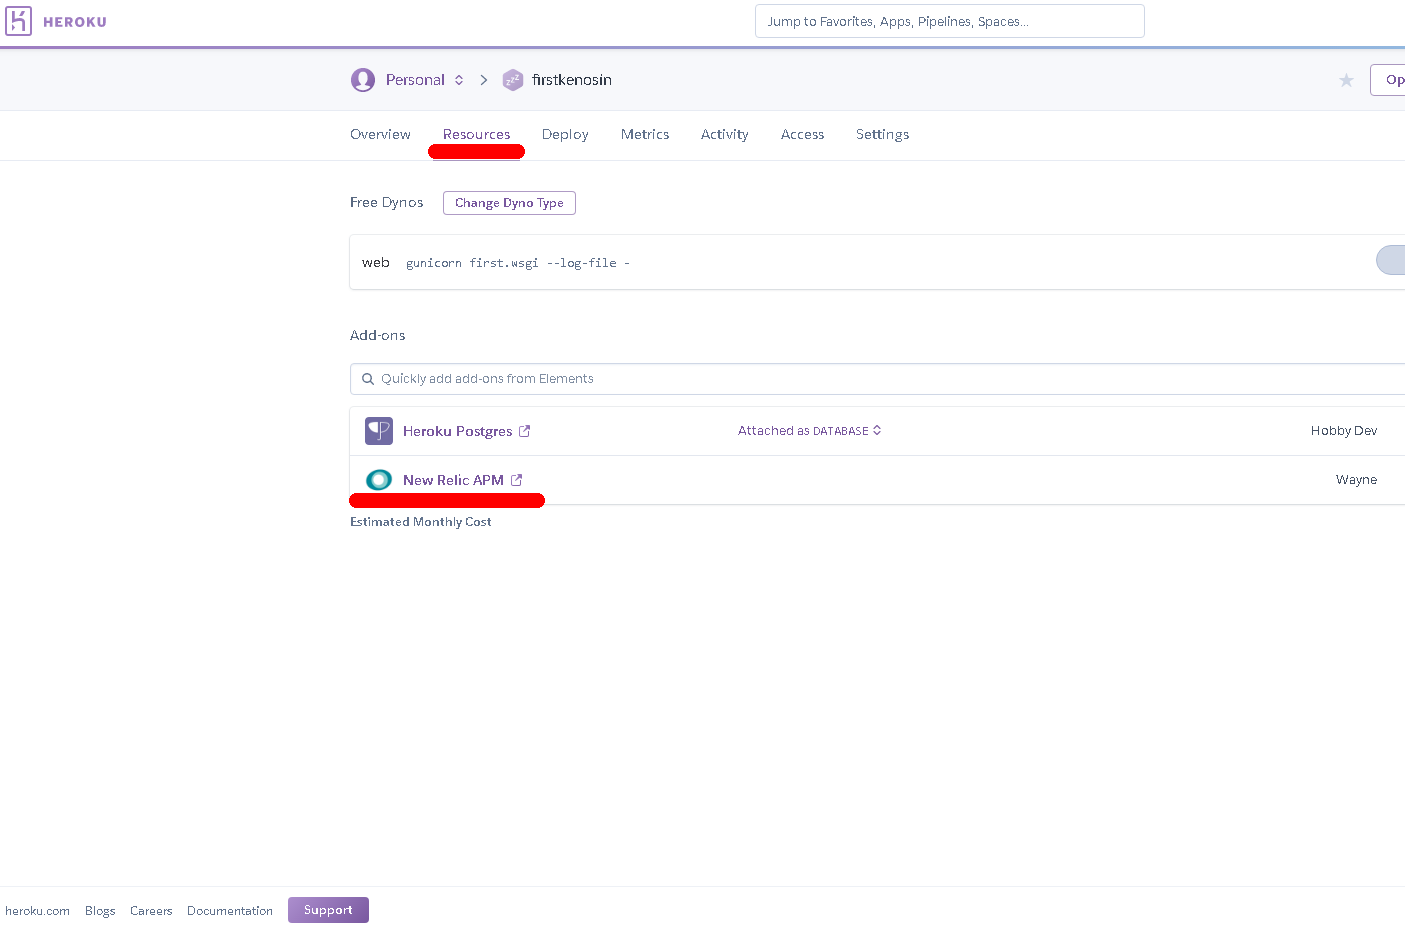
7 New Relicの設定
Herokuでは無料で月に1000時間の稼働稼働枠が確保されますが30分アプリ(URL)にアクセスがないとアプリがSleep状態になってしまいます。簡単にいえばURLに30分誰からもアクセスがないと、スリープに入る為次の閲覧ユーザはURLがすぐに見れません。サーバーがスリープしてしまうと、サーバーを復帰させるために5~10秒ほど待たなければならなくなります。つまりその間は画面が真っ白になります。ユーザのほどんとは画面が白い事を好みませんのでサーバのスリープを阻止しましょう。New Relicというアドオンでは定期的にリクエストを送信することができるのでアプリがSleep状態になることを防ぐ事ができます。
New Relic
New Relicはアプリケーションの運用監視を行うクラウドサービスで、サーバーの状況をリアルタイムでモニタリングできます。New Relicは定期的にサーバーへpingしてモニタリングを行なっています。pingはサーバーへのアクセスになります。つまりpingを30分以内の間隔で行えばサーバーはスリープさせずに運用できる仕組みです。
Herokuのダッシュボードから運用しているアプリケーションを選択し「Resources」ページに遷移しAdd-onsメニューから「New Relic」を検索します。プランは「Wayne – Free」を選択します。Wayneは無料プランになります。
追加されたアドオンをクリックすると、New Relicのページに遷移します。NewRelicの画面に入ってアプリケーションの各運用メニューが表示されている為「SYNTHETICS」を選択します。
- Choose your monitor type には ping を選択しましょう。
- Enter the details 1つ目の項目欄はアプリケーションの名前を入力(任意の名前でOK) 2つ目の項目欄には監視するアプリケーションのURL https://firstkenosin.herokuapp.com/myapp/ 3つ目の項目欄は空欄
- Select monitoring locations には Tokyo,JP」を選択しましょう。
- Set the schedule 15M を選択
- Get notified メアドを入力してください。 「Create my monitor」をクリックするとアプリケーション監視の設定が完了します。
CATION
Herokuは月1000時間まで無料稼働枠がありこの時間は全アプリの稼働時間の合計です。つまりアプリを3つ運用する場合、3つのアプリ稼働時間を合わせた合計時間が1000時間未満であれば無料で利用できます。今回のNewRelicの方法だと3つのアプリだと1000時間は超えるので注意して下さい。番外編
gitにメール、ユーザを登録していないと、commit時にエラーになります。
*** Please tell me who you are.
Run
  git config --global user.email "you@example.com"
  git config --global user.name "Your Name"
to set your account's default identity.
Omit --global to set the identity only in this repository.
fatal: unable to auto-detect email address (got 'ycnp4@DESKTOP-B5N6I3B.(none)')
その場合は登録してください。git config --global user.email "hogehoge@gmail.com" git config --global user.name "taro yamada"settings.py
"""
Django settings for first project.

Generated by 'django-admin startproject' using Django 2.0.

For more information on this file, see
https://docs.djangoproject.com/en/2.0/topics/settings/

For the full list of settings and their values, see
https://docs.djangoproject.com/en/2.0/ref/settings/
"""

import os

# Build paths inside the project like this: os.path.join(BASE_DIR, ...)
BASE_DIR = os.path.dirname(os.path.dirname(os.path.abspath(__file__)))


# Quick-start development settings - unsuitable for production
# See https://docs.djangoproject.com/en/2.0/howto/deployment/checklist/

# SECURITY WARNING: keep the secret key used in production secret!
SECRET_KEY = 'urfaj;foanjdfnaewlufnawefhnawoenfawefaj'?????#ここは毎回違うので注意してください。

# SECURITY WARNING: don't run with debug turned on in production!
DEBUG = True?????

ALLOWED_HOSTS = []?????


# Application definition

INSTALLED_APPS = [
    'myapp.apps.MyappConfig',
    'django.contrib.admin',
    'django.contrib.auth',
    'django.contrib.contenttypes',
    'django.contrib.sessions',
    'django.contrib.messages',
    'django.contrib.staticfiles',
]

MIDDLEWARE = [
    'django.middleware.security.SecurityMiddleware',
    'django.contrib.sessions.middleware.SessionMiddleware',
    'django.middleware.common.CommonMiddleware',
    'django.middleware.csrf.CsrfViewMiddleware',
    'django.contrib.auth.middleware.AuthenticationMiddleware',
    'django.contrib.messages.middleware.MessageMiddleware',
    'django.middleware.clickjacking.XFrameOptionsMiddleware',
]

ROOT_URLCONF = 'first.urls'

TEMPLATES = [
    {
        'BACKEND': 'django.template.backends.django.DjangoTemplates',
        'DIRS': [],
        'APP_DIRS': True,
        'OPTIONS': {
            'context_processors': [
                'django.template.context_processors.debug',
                'django.template.context_processors.request',
                'django.contrib.auth.context_processors.auth',
                'django.contrib.messages.context_processors.messages',
            ],
        },
    },
]

WSGI_APPLICATION = 'first.wsgi.application'


# Database
# https://docs.djangoproject.com/en/2.0/ref/settings/#databases

DATABASES = {
    'default': {
        'ENGINE': 'django.db.backends.sqlite3',
        'NAME': os.path.join(BASE_DIR, 'db.sqlite3'),
    }
}


# Password validation
# https://docs.djangoproject.com/en/2.0/ref/settings/#auth-password-validators

AUTH_PASSWORD_VALIDATORS = [
    {
        'NAME': 'django.contrib.auth.password_validation.UserAttributeSimilarityValidator',
    },
    {
        'NAME': 'django.contrib.auth.password_validation.MinimumLengthValidator',
    },
    {
        'NAME': 'django.contrib.auth.password_validation.CommonPasswordValidator',
    },
    {
        'NAME': 'django.contrib.auth.password_validation.NumericPasswordValidator',
    },
]


# Internationalization
# https://docs.djangoproject.com/en/2.0/topics/i18n/

LANGUAGE_CODE = 'ja' ?????#変更対象です。

TIME_ZONE = 'Asia/Tokyo' ?????#変更対象です。

USE_I18N = True

USE_L10N = True

USE_TZ = True


# Static files (CSS, JavaScript, Images)
# https://docs.djangoproject.com/en/2.0/howto/static-files/

STATIC_URL = '/static/'

# 今回heroku用に以下を追加します?????
DEBUG = False

try:
    from .local_settings import *
except ImportError:
    pass

if not DEBUG:
    import django_heroku
    django_heroku.settings(locals())
以上、お疲れ様でした。今回はherokuとdjangoのデプロイを中心に独自ドメインの設定までを記載してみました。今後は具体的webサービスについて公開していきたいと思います。御忙しい所最後までご覧いただきありがとうございました。

- 投稿日:2019-07-10T09:09:27+09:00
Sed で文字列置換をするときはリダイレクトではなく -i オプションを使う
久々に sed を使ったらハマったので備忘録としてメモ。
やりたかったこと
以下のようなファイルがありました。
$ cat sample.txt
password=secret_password
この
secret_passwordをdummy_passwordに書き換えたいと思いました。sed だと次のようにすれば書けます。
$ sed -e 's/secret_password/dummy_password/' sample.txt
password=dummy_password
出力を見る限り問題なさそうなので、これを元ファイルにリダイレクトしましょう。
$ sed -e 's/secret_password/dummy_password/' sample.txt > sample.txt
$ cat sample.txt
$ wc sample.txt
0 0 0 sample.txt
…あれ?
なぜファイルが空になるのか
結論から言うと、リダイレクトの仕様によるものです。
UNIX 系のシェルでは>でリダイレクトを行うと、まずリダイレクト先のファイルを空で初期化します。
つまり、 sed が実行される時点で sample.txtの中身は空になっているのです。
空のファイルに対して置換を実行しても、結果が空文字になるのは当たり前で、それを書き込んでも当然空のファイルになります。これは sed に限らず、
catなんかでも同じ事が起こせます。$ touch sample.txt $ echo "abc" > sample.txt $ cat sample.txt abc $ cat sample.txt > sample.txt $ cat sample.txt $同じファイルに対してリダイレクトする、というのは危険です。
ちなみに、一次ソースを探して Bash のドキュメント も見てみたのですが
> filename
# The > truncates file "filename" to zero length.
# If file not present, creates zero-length file (same effect as 'touch').
# (Same result as ": >", above, but this does not work with some shells.)と書かれているだけで、コマンドを実行した場合の実行順序までは書かれていませんでした。
が、実行してみたら確かにファイルが空になるので、そうなんだろうと納得するしかないのですが、イマイチ釈然としません…Sed で置換を行う場合は -i オプションを使う
じゃあ、どうすればいいのかという話です。
Sed は
-i(または--in-place) というオプションをつけることで、実行結果にファイルを置換することができます。
なので、最初の例の正解はこうなります。$ cat sample.txt password=secret_password $ sed -i -e 's/secret_password/dummy_password/' sample.txt $ cat sample.txt password=dummy_password無事置換ができました。Sed の使い方が間違っているのかと思ったら、そもそも UNIX シェルの仕様を理解していなかったという話でした。
なお、上記は Linux 等で使われる GNU Sed の話です。 macOS や FreeBSD などに入っている BSD Sed については微妙にコマンドが違います。こちらの記事がとても分かりやすく説明しています。
参考
- 投稿日:2019-07-10T02:07:00+09:00
omxplayer の全画面表示を阻止する
omxplayer
omxplayer は Raspberry Pi 向けに作られ、Raspberry Pi の GPU の動画再生支援機能をサポートしている動画再生ソフトで、コマンドラインから起動します。また、操作は全てキーボードからとなります。
全画面を阻止したい
動画再生支援機能をサポートしていて、vlc メディアプレーヤーでコマ飛び・音飛びが発生する動画でもスムーズに再生できるのは良いのですが、全画面で再生されてしまいます。
しかし、全画面で再生したくないときもあるので、全画面表示を阻止する方法を調べました。
まず、通常の起動方法
$ omxplayer ファイル名全画面表示を阻止
$ omxplayer --win 'x1 y1 x2 y2' ファイル名x1 と x2 には、それぞれ表示させたいウィンドウの左端の X 座標と右端の X 座標、y1 と y2 には、それぞれ表示させたいウィンドウの最上部の Y 座標と最下部の Y 座標を入力します。
例えば、画面の左上に480x270のウィンドウで表示させたい場合は
$ omxplayer --win '0 0 480 270' ファイル名となります。また、ループ再生をするなら
$ omxplayer --loop --win '0 0 480 270' ファイル名となります。
ただし、この方法で作られたウィンドウは、移動などをすることはできません。ウィンドウを動かしたい場合は、他のソフトを使いましょう。