- 投稿日:2021-03-06T23:34:21+09:00
FragmentのActivityとContextの使い分け
はじめに
Fragmentにおける
ActivityとContextの意味や使い分けがわからなかったので、調べてみました。結論
Contextで済む
- nullを許容する →
this.context- nullを許容しない →
requireContext()Activityを渡す必要がある
- nullを許容する →
this.activity- nullを許容しない →
requireActivity()環境
- OS:macOS Big Sur 11.1
- Android Studio:4.1.2
- Kotlin:1.4.20
- Gradle:6.8
- Gradle plugin:4.1.2
- Timber:4.7.1
調査
各処理の戻り値
Fragmentで以下を実行しました。
MonsterListFragment.ktTimber.d("${this.activity}") Timber.d("${requireActivity()}") Timber.d("${this.context}") Timber.d("${requireContext()}")Logcatの出力結果2021-03-06 19:07:40.162 24680-24680/com.theuhooi.uhooipicbook D/MonsterListFragment: com.theuhooi.uhooipicbook.MainActivity@95e20bb 2021-03-06 19:07:40.162 24680-24680/com.theuhooi.uhooipicbook D/MonsterListFragment: com.theuhooi.uhooipicbook.MainActivity@95e20bb 2021-03-06 19:07:40.163 24680-24680/com.theuhooi.uhooipicbook D/MonsterListFragment: dagger.hilt.android.internal.managers.ViewComponentManager$FragmentContextWrapper@e47f888 2021-03-06 19:07:40.166 24680-24680/com.theuhooi.uhooipicbook D/MonsterListFragment: dagger.hilt.android.internal.managers.ViewComponentManager$FragmentContextWrapper@e47f888
this.activityとrequireActivity()、this.contextとrequireContext()の出力結果は同じです。
つまり同じインスタンスを返しています。require○○() vs this.○○
requireActivity()とrequireContext()の実装を見てみます。Fragment.java/** * Return the {@link FragmentActivity} this fragment is currently associated with. * * @throws IllegalStateException if not currently associated with an activity or if associated * only with a context. * @see #getActivity() */ @NonNull public final FragmentActivity requireActivity() { FragmentActivity activity = getActivity(); if (activity == null) { throw new IllegalStateException("Fragment " + this + " not attached to an activity."); } return activity; }Fragment.java/** * Return the {@link Context} this fragment is currently associated with. * * @throws IllegalStateException if not currently associated with a context. * @see #getContext() */ @NonNull public final Context requireContext() { Context context = getContext(); if (context == null) { throw new IllegalStateException("Fragment " + this + " not attached to a context."); } return context; }見てわかる通り、
activity (context)がnullだったら例外が発生し、nullでなかったらインスタンスを返す、というシンプルな実装になっています。渡す先が
nullを許容する場合、nullのエラーハンドリングを任せられるため、require○○()を呼ばずにthis.○○で渡すべきだと考えます。
require○○()を呼ぶと例外が発生し、他でハンドリングできなくなるためです。逆に
nullでないcontextやactivityが必要なのにrequire○○()を使わないのは冗長なので避けるべきです。MonsterListFragment.ktclass MonsterListFragment : Fragment() { override fun onOptionsItemSelected(item: MenuItem): Boolean { // ×冗長 this.context?.let { MaterialAlertDialogBuilder(it) } // ○簡潔 MaterialAlertDialogBuilder(requireContext()) } }Activity vs Context
出力結果と
require○○()メソッドの実装より、Fragmentが持つactivityの型はFragmentActivity、contextの型はContextということがわかりました。
FragmentActivityの継承を追っていくと、Contextに辿り着きます。Context ↑ ContextWrapper ↑ ContextThemeWrapper ↑ Activity ↑ androidx.core.app.ComponentActivity ↑ ComponentActivity ↑ FragmentActivityできる限り小さく済ませたいので、
Contextで済むところにActivityを渡す必要はないと考えます。Contextの種類
FragmentActivityの継承図よりActivityがContextの子孫であることがわかりました。同様に
ApplicationもContextの子孫であることがわかります。Context ↑ ContextWrapper ↑ ApplicationContextを区別するため、Applicationのことを「Application Context」、Activityのことを「Activity Context」と呼ぶことがあります。
Fragmentで取得できるContextは「Activity Context」であり、「Application Context」はActivityを介さないと取得できません(間違っていたらご指摘ください)。
Activityからはthis.applicationContextでApplication Contextを取得できます。Application Contextのほうが生存期間が長いので安全です。
しかし基本的にはActivityのライフサイクルに従ってActivity Contextを使うのがよさそうです。未検証ですが、Fragmentの
this.activityとthis.contextは同じインスタンス(今回はMainActivity)を参照していると思われます。つまり 基本的にはどちらを使っても変わりません 。
this.activityとthis.contextの中身が異なったり、片方のみnullになるケースがあるかどうかが気になります。おわりに
本記事の内容はあくまで私が出した結論です。
他にご意見やご指摘などありましたら、お気軽にコメントなどお願いします
参考リンク
- Androidの基礎知識 - mixi-inc/AndroidTraining
- Androidで使われているApplication ContextとActivity Contextの使い所まとめ。 - GA technologies GROUP Tech Blog
- https://twitter.com/the_uhooi/status/1368107727961026563?s=20
- https://twitter.com/yt8492/status/1368113367412473860?s=20
- https://twitter.com/the_uhooi/status/1368208335703449603?s=20
- 投稿日:2021-03-06T23:31:12+09:00
【個人開発】リモートでビンゴゲームができるアプリを作成しました【iOS,Android】
はじめに
最近Androidアプリ開発の勉強会に参加しAndroid開発に関して学ぶ機会がありました。そこで学んだ知識をアウトプットしたいと思いリモートでビンゴができるアプリを作成しました。
(Androidアプリのみだと実用性がないためiOS版もリリースすることにしました)
この記事ではアプリの概要と使用した技術に関して記述しようと思います。Android
iOS
サービス概要
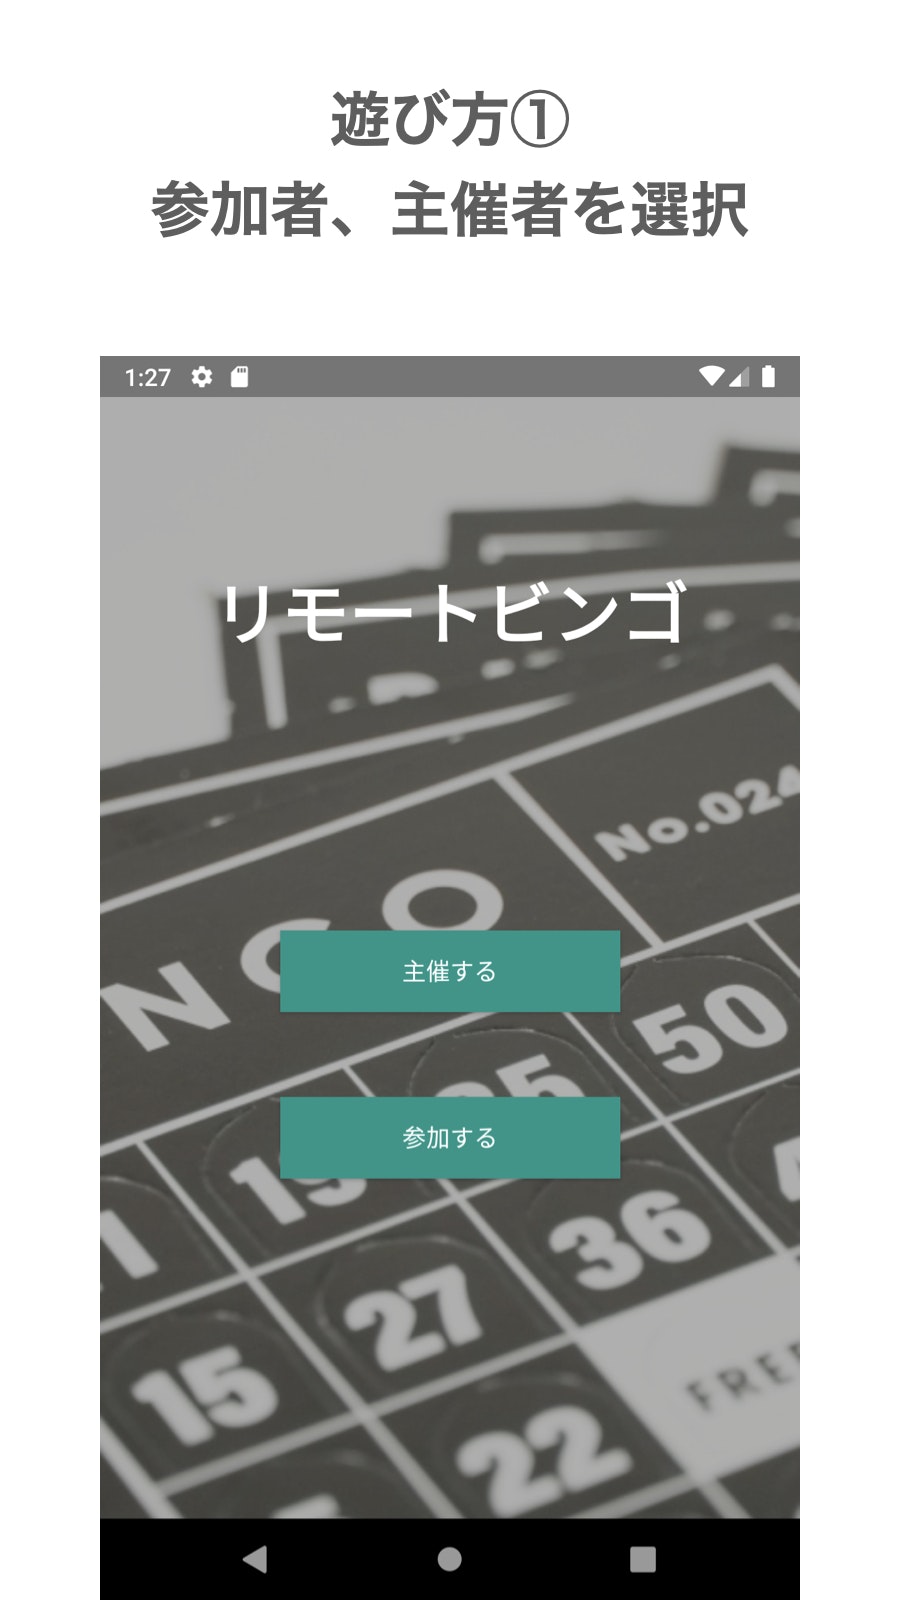
オンライン・リモートで遊べるビンゴアプリです。
特徴としてはビンゴカードなしで遊ぶことができ、無料で遊べるアプリになっています。使い方
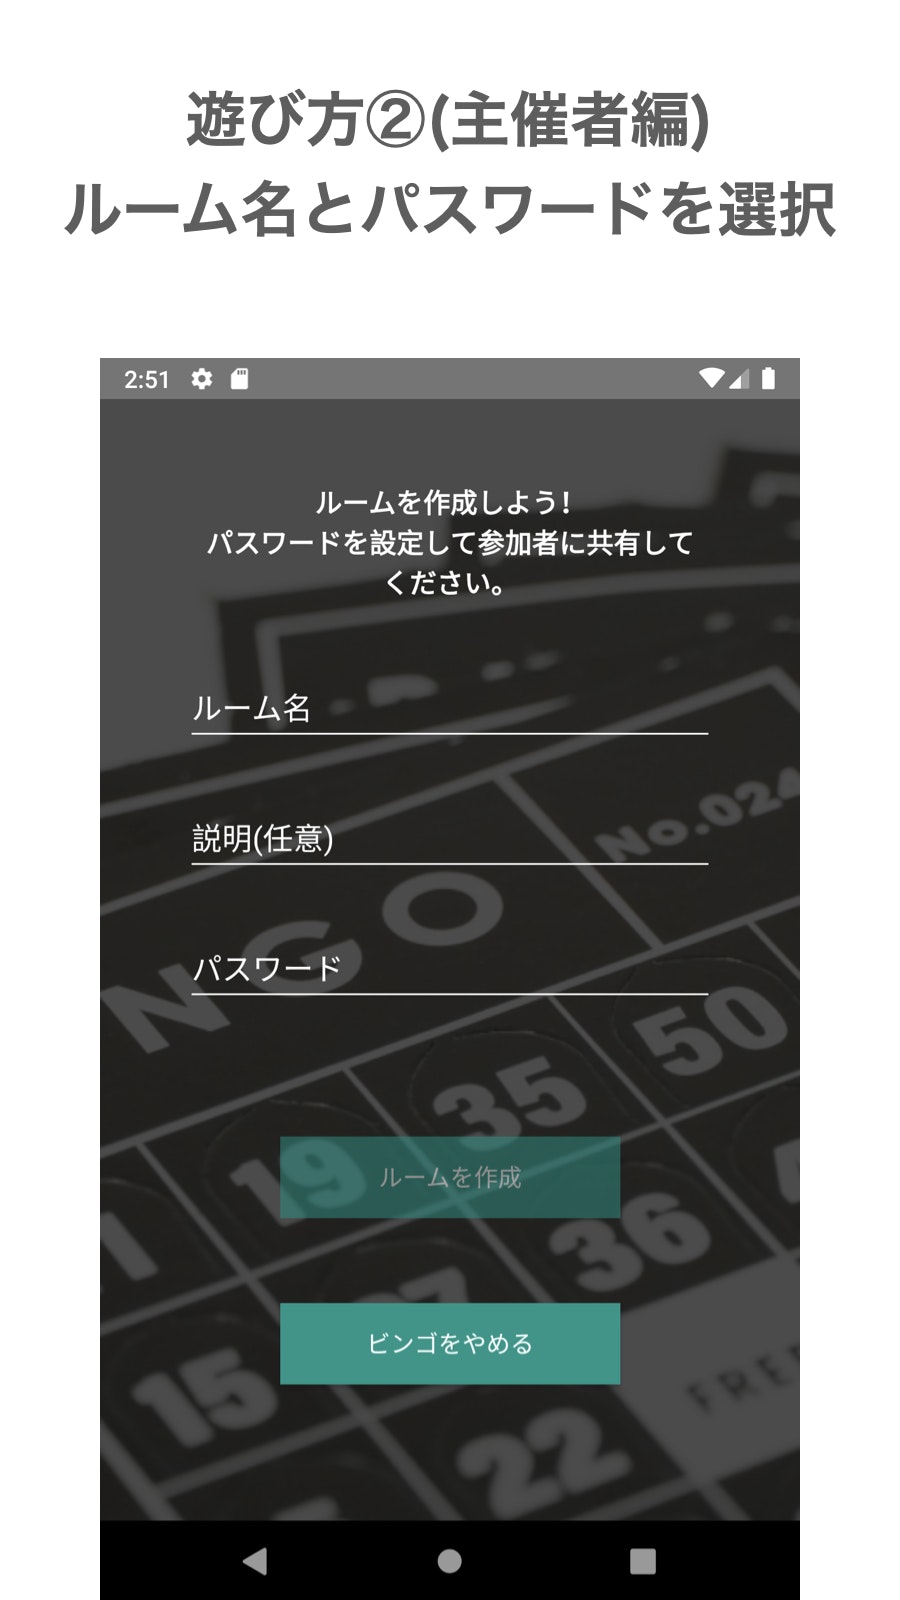
最初に表示される画面で主催者か参加者を選びます。主催者編
主催者としてルームを作成します。
ルーム名、説明(任意)、パスワードを入力します。上記の入力が完了したらルーム作成ボタンをタップしてください。
※パスワードをルームに参加する際に必要になりますので参加者全員に共有してください。
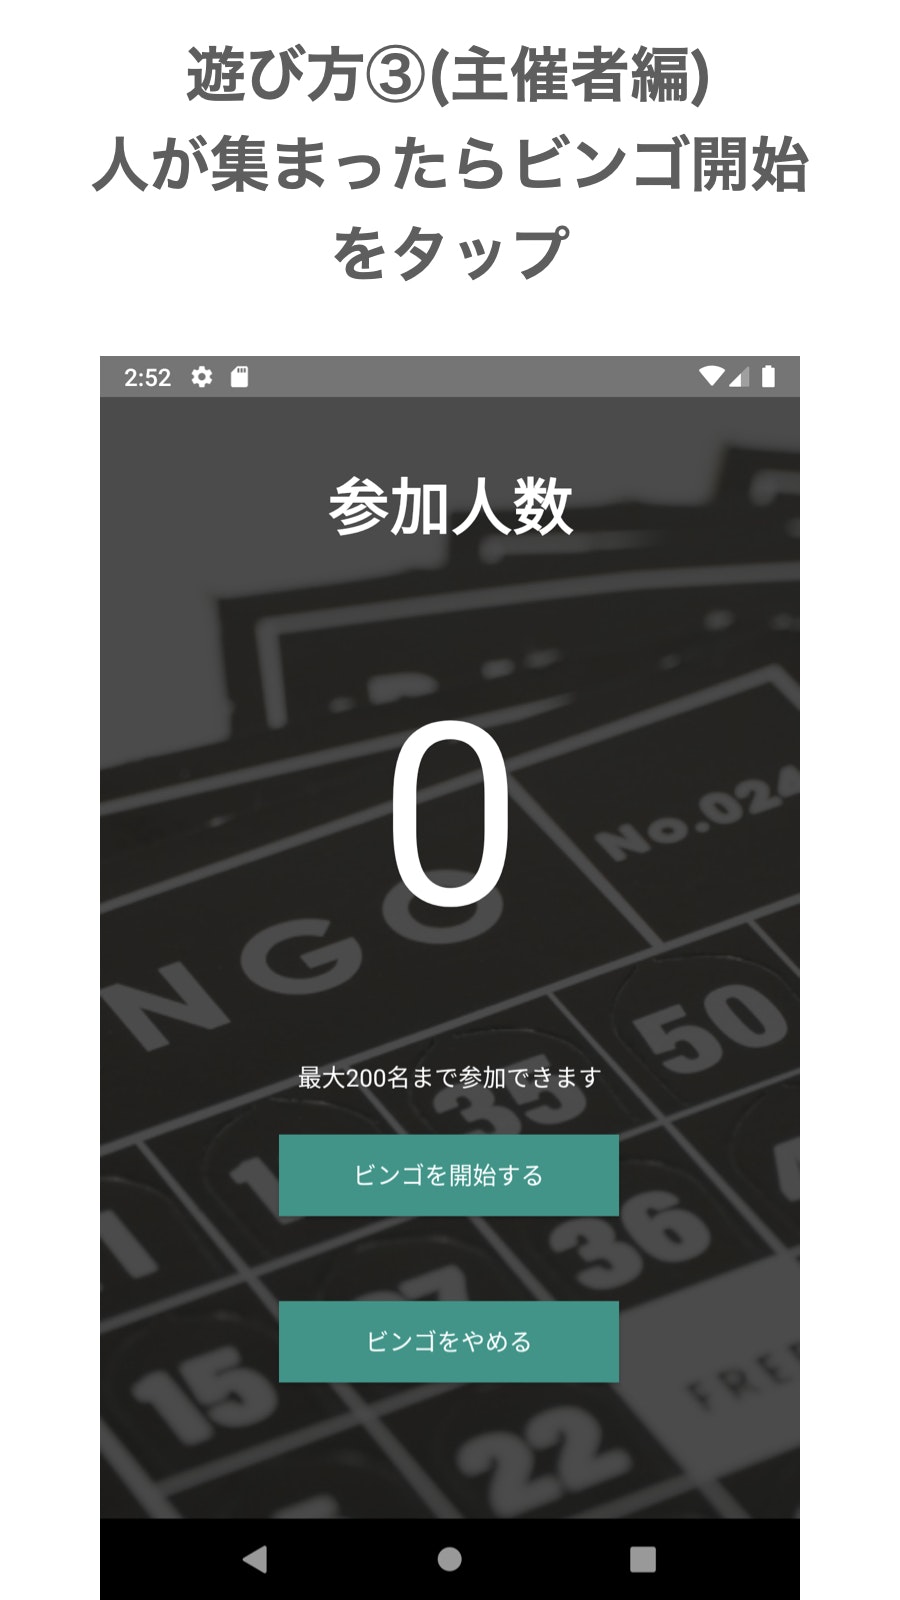
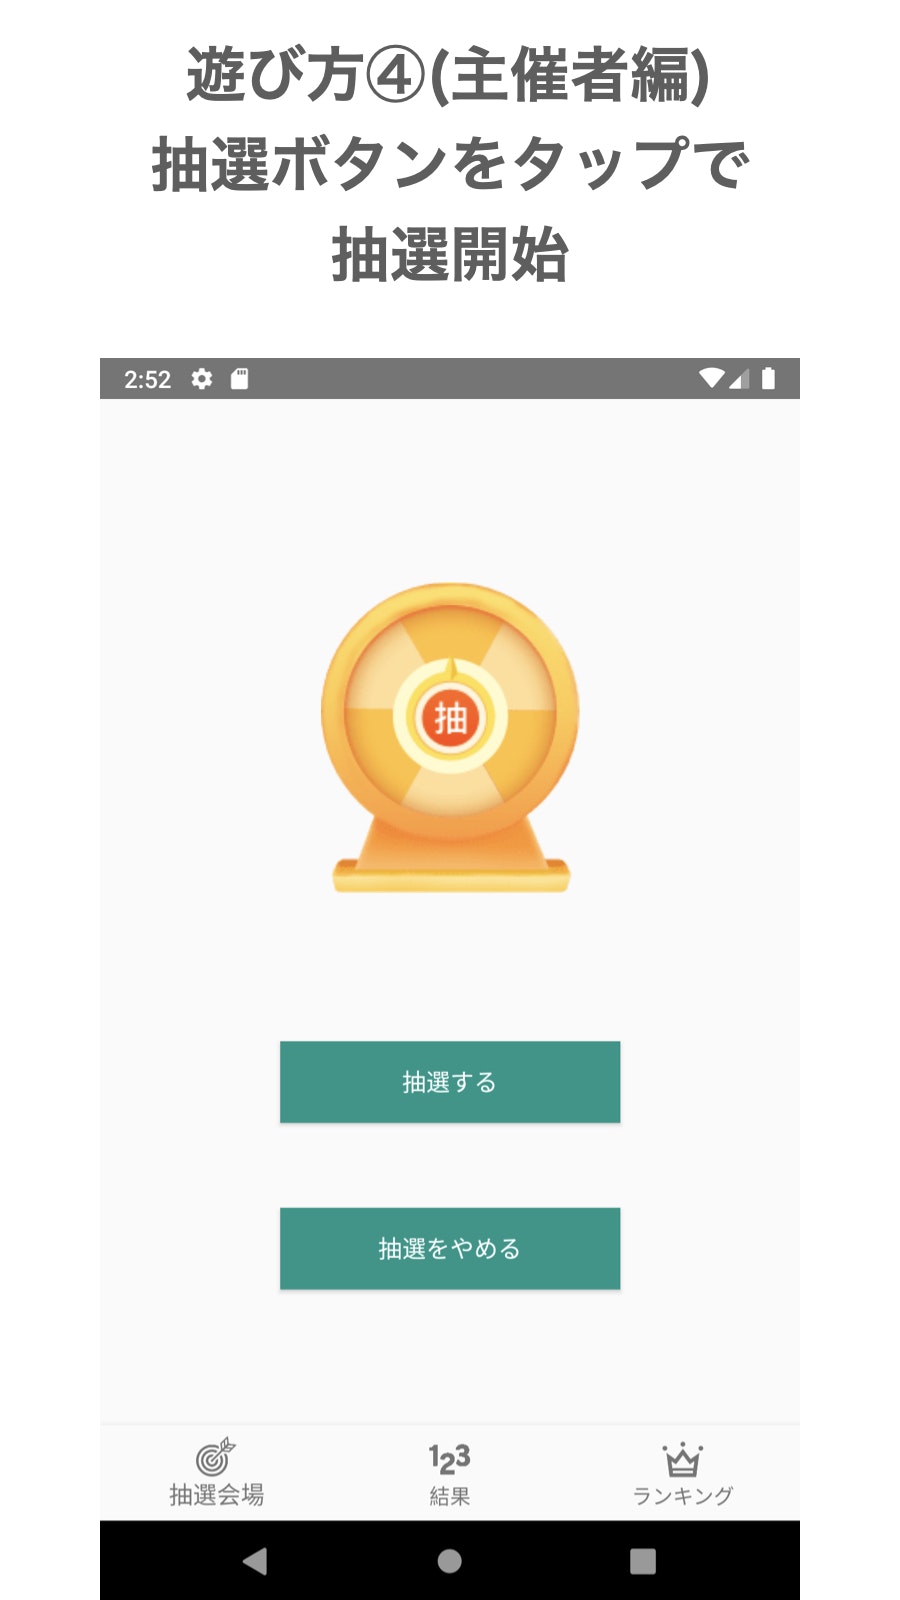
参加者が集まったら「ビンゴを開始する」をタップしてください。
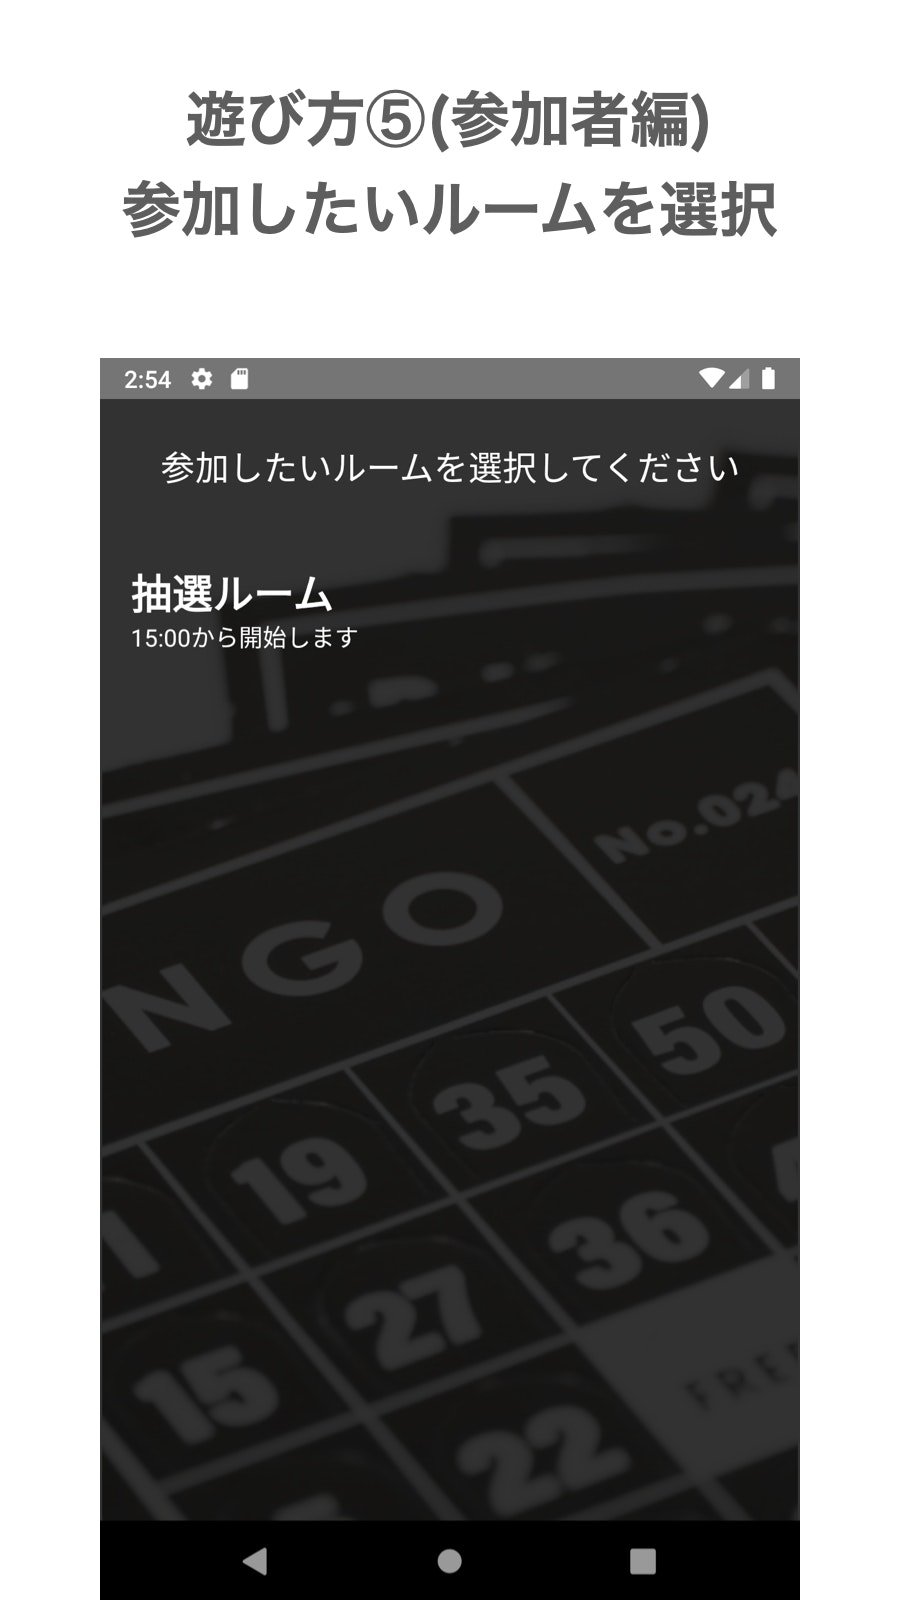
準備完了です。抽選ボタンをタップしたらビンゴが開始されます。参加者編
参加したいルームをタップしてください。
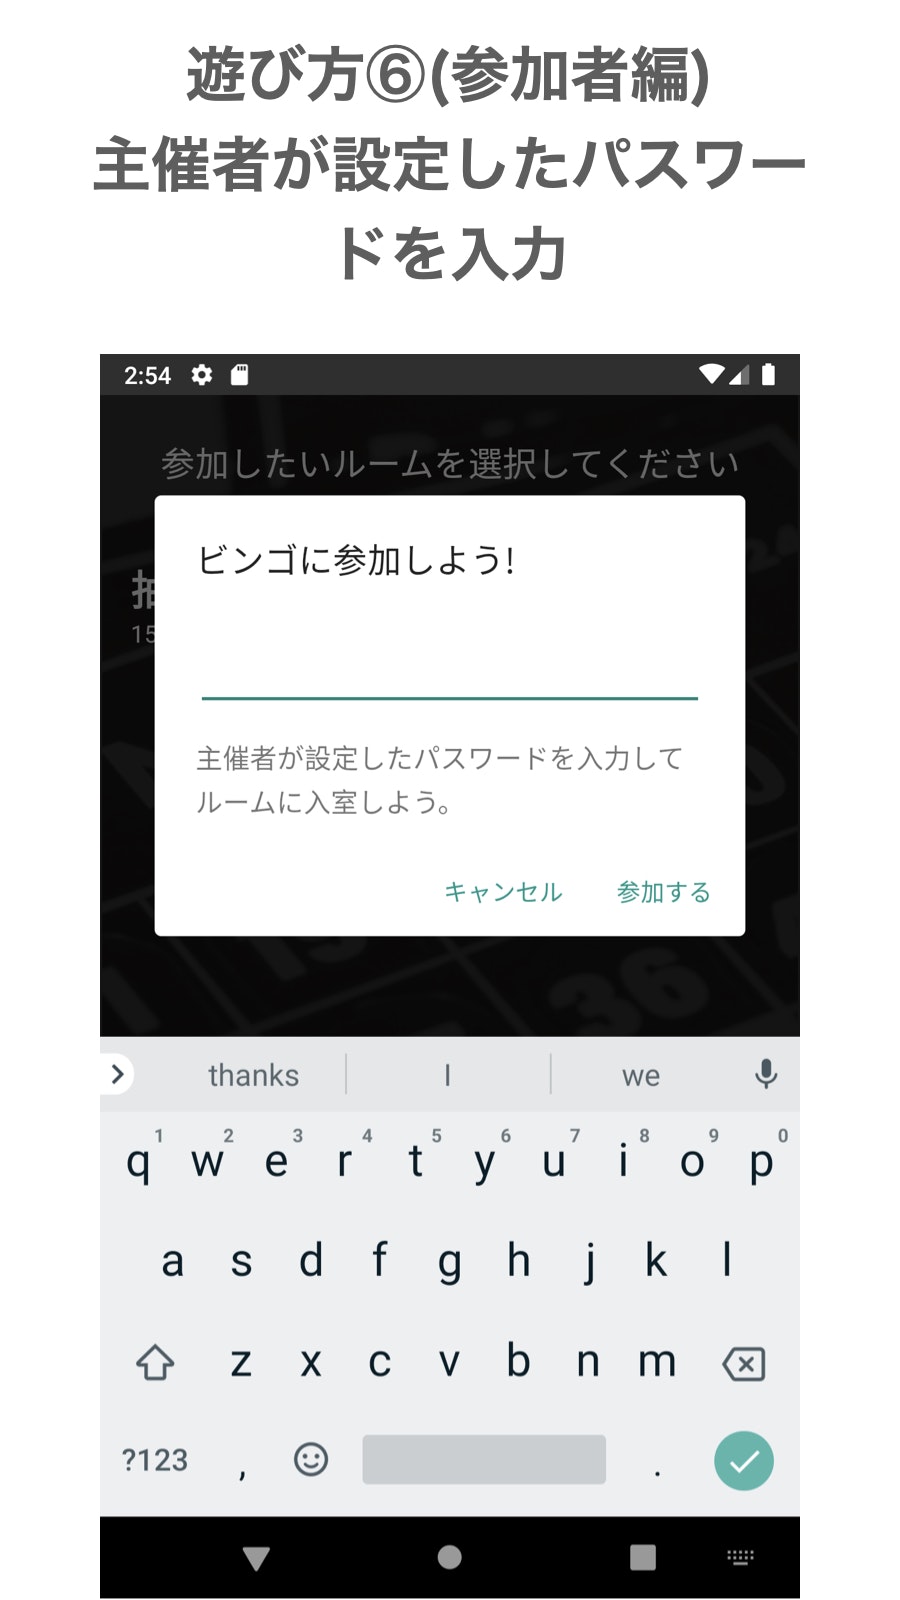
主催者が設定したパスワードを入力し参加するボタンをタップします。
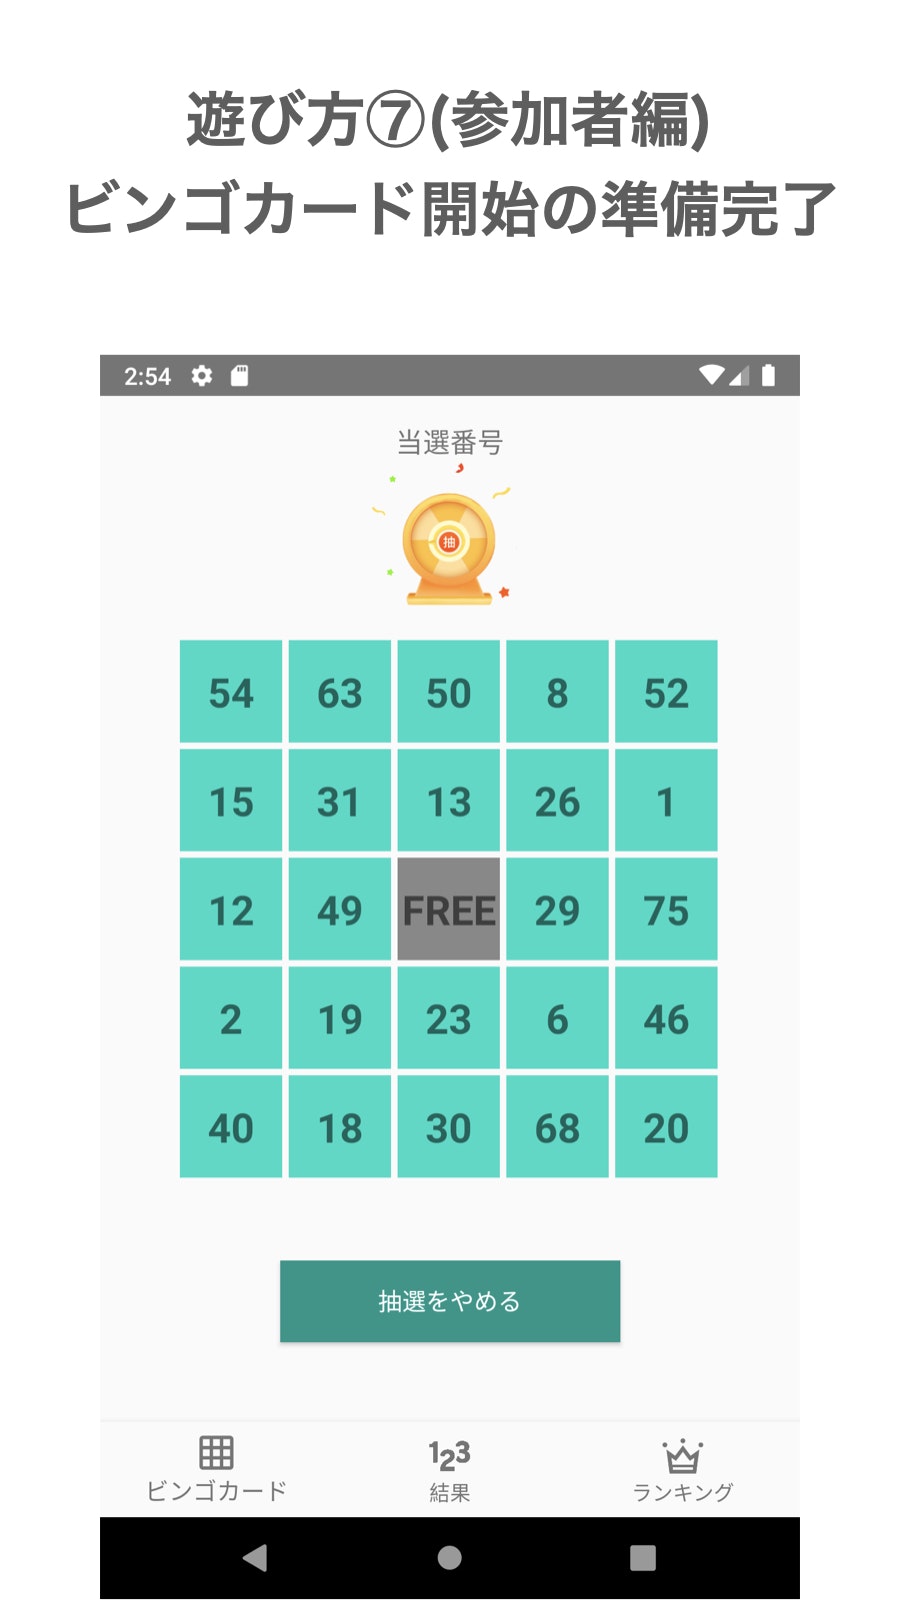
これで参加完了です。
使用した技術
サーバー側の実装はすべてFirebaseに任せました。
Cloud FirestoreやFunctionsの使用経験がほとんどなかったため苦戦しました。
「実践Firestore」という書籍で細かくFirestoreの使い方に関して記載されており非常に参考になりました。
Firebase
- Authentication(匿名認証)
- Cloud Firestore
- Functions
- Hosting (プライバシーポリシーをデプロイするため)
- Crashlytics
- Analytics
- AdMob(インタースティシャル広告)
Android
言語 Kotlin
アーキテクチャー AAC
ライブラリー material-dialogs,lottie等iOS
言語 Swift
アーキテクチャー MVVM
ライブラリー RxSwift,RxCocoa,RxDataSources,lottie-ios等その他
プライバシーポリシー
下記サイトで自動でプライバシーポリシーのHTMLを生成しました。そのHTMLをFirebaseのhostingを用いてデプロイしました。
https://app-privacy-policy-generator.firebaseapp.com/問合せページ
アプリを公開するには問合せ先のwebページを作成します。
1から作成するのはかなり手間がかかるので「ペライチ」というサービスを用いてお問い合わせページを作成しました。無料で使えるかつ15分ぐらいで問合せフォームが作れるので非常に便利です。
https://peraichi.com/landing_pages/view/remotebingoおわりに
Androidアプリ開発をしてみるとiOSとの共通点が多くあり簡単なアプリを作れるレベルには成長できた気がします。(コードは汚いので時間があるタイミングで綺麗にしたい泣)
また実際にアプリを作って公開しようと思うとプライバシーポリシーの作成やストア用の画像の準備、証明書関係の整理等思ったよりやるべき事が多く苦労しました。
しかしながら自分の作りたいアプリを好きな時間で作れるのが個人開発のいい点だと思います。
今後も時間を見つけて個人開発をしていきたいです。

- 投稿日:2021-03-06T19:23:02+09:00
Android Studio ストップウォッチアプリ制作(動画有り)
今回はストップウォッチアプリを制作しました。
YouTubeに作っている動画をアップしています。
https://www.youtube.com/watch?v=1c0LvmCW5EU&list=PLhg2PHSq8bjjjBpOPll39ZAUgtbnlDOvUstrings.xml<resources> <string name="app_name">StopWatchApp</string> <string name="btn_start">START</string> <string name="btn_stop">STOP</string> <string name="btn_reset">RESET</string> <string name="btn_lap">LAP</string> </resources>list_items.xml<?xml version="1.0" encoding="utf-8"?> <TextView xmlns:android="http://schemas.android.com/apk/res/android" android:layout_width="match_parent" android:layout_height="wrap_content" android:gravity="center" android:textSize="24sp"></TextView>activity_main.xml<?xml version="1.0" encoding="utf-8"?> <LinearLayout xmlns:android="http://schemas.android.com/apk/res/android" xmlns:tools="http://schemas.android.com/tools" android:layout_width="match_parent" android:layout_height="match_parent" android:orientation="vertical" android:weightSum="5" tools:context=".MainActivity"> <TextView android:id="@+id/text_timer" android:layout_width="match_parent" android:layout_height="0dp" android:layout_weight="1" android:text="00:00.000" android:gravity="center" android:textSize="36sp"></TextView> <LinearLayout android:layout_width="match_parent" android:layout_height="0dp" android:gravity="center" android:layout_weight="1"> <Button android:id="@+id/btn_start" android:layout_width="wrap_content" android:layout_height="wrap_content" android:layout_margin="2dp" android:onClick="startTimer" android:text="@string/btn_start"></Button> <Button android:id="@+id/btn_stop" android:layout_width="wrap_content" android:layout_height="wrap_content" android:layout_margin="2dp" android:onClick="stopTimer" android:text="@string/btn_stop"></Button> <Button android:id="@+id/btn_reset" android:layout_width="wrap_content" android:layout_height="wrap_content" android:layout_margin="2dp" android:onClick="resetTimer" android:text="@string/btn_reset"></Button> </LinearLayout> <ListView android:layout_width="match_parent" android:layout_height="0dp" android:layout_weight="2.5" android:id="@+id/list"></ListView> <LinearLayout android:layout_width="match_parent" android:layout_height="0dp" android:gravity="center" android:layout_weight="0.5"> <Button android:layout_width="wrap_content" android:layout_height="wrap_content" android:text="@string/btn_lap" android:id="@+id/btn_lap" android:onClick="tapLap"></Button> </LinearLayout> </LinearLayout>MainActivity.xmlpackage com.example.stopwatchapp; import androidx.appcompat.app.AppCompatActivity; import android.os.Bundle; import android.os.Handler; import android.view.View; import android.widget.ArrayAdapter; import android.widget.Button; import android.widget.ListView; import android.widget.TextView; import java.text.SimpleDateFormat; import java.util.ArrayList; import java.util.Locale; public class MainActivity extends AppCompatActivity { Handler handler = new Handler(); Runnable runnable; Button btn_start, btn_stop, btn_reset; long startTime; TextView text_timer; long t, elapsedTime; ArrayList<String> lapTime; ListView listView; @Override protected void onCreate(Bundle savedInstanceState) { super.onCreate(savedInstanceState); setContentView(R.layout.activity_main); btn_start = (Button) findViewById(R.id.btn_start); btn_stop = (Button) findViewById(R.id.btn_stop); btn_reset = (Button) findViewById(R.id.btn_reset); text_timer = (TextView) findViewById(R.id.text_timer); listView = findViewById(R.id.list); lapTime = new ArrayList<String>(); btnState(true, false, false); } public void btnState(boolean start, boolean stop, boolean reset) { btn_start.setEnabled(start); btn_stop.setEnabled(stop); btn_reset.setEnabled(reset); } public void startTimer(View view) { startTime = System.currentTimeMillis(); runnable = new Runnable() { @Override public void run() { t = System.currentTimeMillis() - startTime + elapsedTime; SimpleDateFormat sdf = new SimpleDateFormat("mm:ss.SSS", Locale.US); text_timer.setText(sdf.format(t)); handler.removeCallbacks(runnable); handler.postDelayed(runnable, 10); } }; handler.postDelayed(runnable, 10); btnState(false, true, false); } public void stopTimer(View view) { elapsedTime += System.currentTimeMillis() - startTime; handler.removeCallbacks(runnable); btnState(true, false, true); } public void resetTimer(View view) { elapsedTime = 0; t = 0; text_timer.setText("00:00.000"); btnState(true, false, false); lapTime.clear(); listView.setAdapter(new ArrayAdapter<String>(MainActivity.this,R.layout.list_items,lapTime)); } public void tapLap(View view){ lapTime.add(text_timer.getText().toString()); ArrayAdapter<String> adapter = new ArrayAdapter<String>(MainActivity.this,R.layout.list_items,lapTime); listView.setAdapter(adapter); } }YouTubeに作っている動画をアップしています。
https://www.youtube.com/watch?v=1c0LvmCW5EU&list=PLhg2PHSq8bjjjBpOPll39ZAUgtbnlDOvU
以上
- 投稿日:2021-03-06T19:23:02+09:00
Android Studio ストップウォッチアプリ制作
今回はストップウォッチアプリを制作しました。
YouTubeに作っている動画をアップしています。
https://www.youtube.com/watch?v=1c0LvmCW5EU&list=PLhg2PHSq8bjjjBpOPll39ZAUgtbnlDOvUstrings.xml<resources> <string name="app_name">StopWatchApp</string> <string name="btn_start">START</string> <string name="btn_stop">STOP</string> <string name="btn_reset">RESET</string> <string name="btn_lap">LAP</string> </resources>list_items.xml<?xml version="1.0" encoding="utf-8"?> <TextView xmlns:android="http://schemas.android.com/apk/res/android" android:layout_width="match_parent" android:layout_height="wrap_content" android:gravity="center" android:textSize="24sp"></TextView>activity_main.xml<?xml version="1.0" encoding="utf-8"?> <LinearLayout xmlns:android="http://schemas.android.com/apk/res/android" xmlns:tools="http://schemas.android.com/tools" android:layout_width="match_parent" android:layout_height="match_parent" android:orientation="vertical" android:weightSum="5" tools:context=".MainActivity"> <TextView android:id="@+id/text_timer" android:layout_width="match_parent" android:layout_height="0dp" android:layout_weight="1" android:text="00:00.000" android:gravity="center" android:textSize="36sp"></TextView> <LinearLayout android:layout_width="match_parent" android:layout_height="0dp" android:gravity="center" android:layout_weight="1"> <Button android:id="@+id/btn_start" android:layout_width="wrap_content" android:layout_height="wrap_content" android:layout_margin="2dp" android:onClick="startTimer" android:text="@string/btn_start"></Button> <Button android:id="@+id/btn_stop" android:layout_width="wrap_content" android:layout_height="wrap_content" android:layout_margin="2dp" android:onClick="stopTimer" android:text="@string/btn_stop"></Button> <Button android:id="@+id/btn_reset" android:layout_width="wrap_content" android:layout_height="wrap_content" android:layout_margin="2dp" android:onClick="resetTimer" android:text="@string/btn_reset"></Button> </LinearLayout> <ListView android:layout_width="match_parent" android:layout_height="0dp" android:layout_weight="2.5" android:id="@+id/list"></ListView> <LinearLayout android:layout_width="match_parent" android:layout_height="0dp" android:gravity="center" android:layout_weight="0.5"> <Button android:layout_width="wrap_content" android:layout_height="wrap_content" android:text="@string/btn_lap" android:id="@+id/btn_lap" android:onClick="tapLap"></Button> </LinearLayout> </LinearLayout>MainActivity.xmlpackage com.example.stopwatchapp; import androidx.appcompat.app.AppCompatActivity; import android.os.Bundle; import android.os.Handler; import android.view.View; import android.widget.ArrayAdapter; import android.widget.Button; import android.widget.ListView; import android.widget.TextView; import java.text.SimpleDateFormat; import java.util.ArrayList; import java.util.Locale; public class MainActivity extends AppCompatActivity { Handler handler = new Handler(); Runnable runnable; Button btn_start, btn_stop, btn_reset; long startTime; TextView text_timer; long t, elapsedTime; ArrayList<String> lapTime; ListView listView; @Override protected void onCreate(Bundle savedInstanceState) { super.onCreate(savedInstanceState); setContentView(R.layout.activity_main); btn_start = (Button) findViewById(R.id.btn_start); btn_stop = (Button) findViewById(R.id.btn_stop); btn_reset = (Button) findViewById(R.id.btn_reset); text_timer = (TextView) findViewById(R.id.text_timer); listView = findViewById(R.id.list); lapTime = new ArrayList<String>(); btnState(true, false, false); } public void btnState(boolean start, boolean stop, boolean reset) { btn_start.setEnabled(start); btn_stop.setEnabled(stop); btn_reset.setEnabled(reset); } public void startTimer(View view) { startTime = System.currentTimeMillis(); runnable = new Runnable() { @Override public void run() { t = System.currentTimeMillis() - startTime + elapsedTime; SimpleDateFormat sdf = new SimpleDateFormat("mm:ss.SSS", Locale.US); text_timer.setText(sdf.format(t)); handler.removeCallbacks(runnable); handler.postDelayed(runnable, 10); } }; handler.postDelayed(runnable, 10); btnState(false, true, false); } public void stopTimer(View view) { elapsedTime += System.currentTimeMillis() - startTime; handler.removeCallbacks(runnable); btnState(true, false, true); } public void resetTimer(View view) { elapsedTime = 0; t = 0; text_timer.setText("00:00.000"); btnState(true, false, false); lapTime.clear(); listView.setAdapter(new ArrayAdapter<String>(MainActivity.this,R.layout.list_items,lapTime)); } public void tapLap(View view){ lapTime.add(text_timer.getText().toString()); ArrayAdapter<String> adapter = new ArrayAdapter<String>(MainActivity.this,R.layout.list_items,lapTime); listView.setAdapter(adapter); } }YouTubeに作っている動画をアップしています。
https://www.youtube.com/watch?v=1c0LvmCW5EU&list=PLhg2PHSq8bjjjBpOPll39ZAUgtbnlDOvU
以上
- 投稿日:2021-03-06T19:10:06+09:00
[Flutter] Flutter 2.0 Migration方法
Migration
- 方法
> dart migrate
- Process
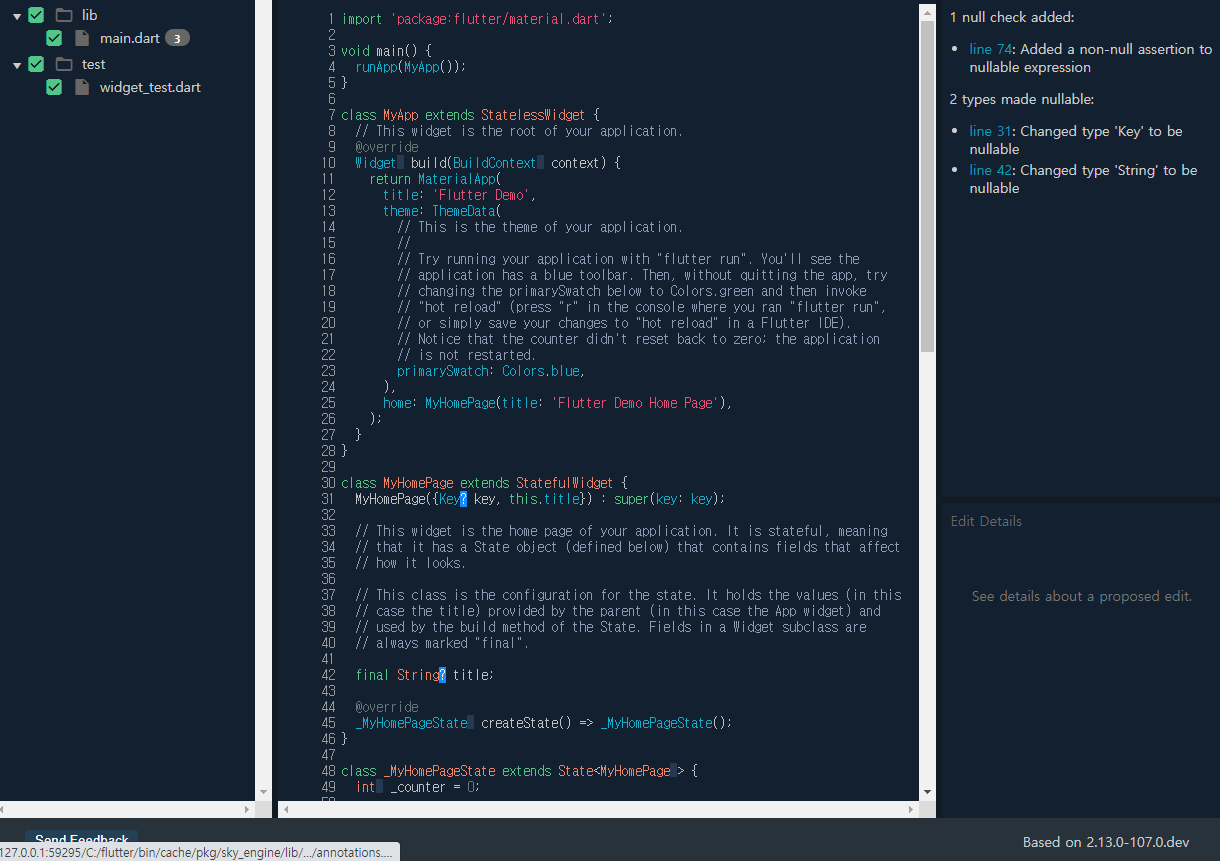
C:/Users/itsme/Documents/GitHub/flutter_migration> dart migrate
Migrating C:/Users/itsme/Documents/GitHub/flutter_migration

See https://dart.dev/go/null-safety-migration for a migration guide.

Analyzing project...
[------------------------------------------------------------------------------------------------------------------------------------------------------------------------------------------------\]
No analysis issues found.

Generating migration suggestions...
[-------------------------------------------------------------------------------------------------------------------------------------------------------------------------------------------------]

Compiling instrumentation information...
[-------------------------------------------------------------------------------------------------------------------------------------------------------------------------------------------------]

View the migration suggestions by visiting:

  http://127.0.0.1:59295/C:/Users/itsme/Documents/GitHub/flutter_migration?authToken=SLX1RWDeq6Y%3D

Use this interactive web view to review, improve, or apply the results.
When finished with the preview, hit ctrl-c to terminate this process.

If you make edits outside of the web view (in your IDE), use the 'Rerun from
sources' action.
migrateをすると、Null safety Previewのリンクかでます。
Proposed null safety changes
- リンクはプロジェクトによって、違います。
http://127.0.0.1:59295/C:/Users/itsme/Documents/GitHub/flutter_migration?authToken=SLX1RWDeq6Y%3D
Apply Migration
- マイグレーションにすると、environmentの変えます。


- 投稿日:2021-03-06T15:27:50+09:00
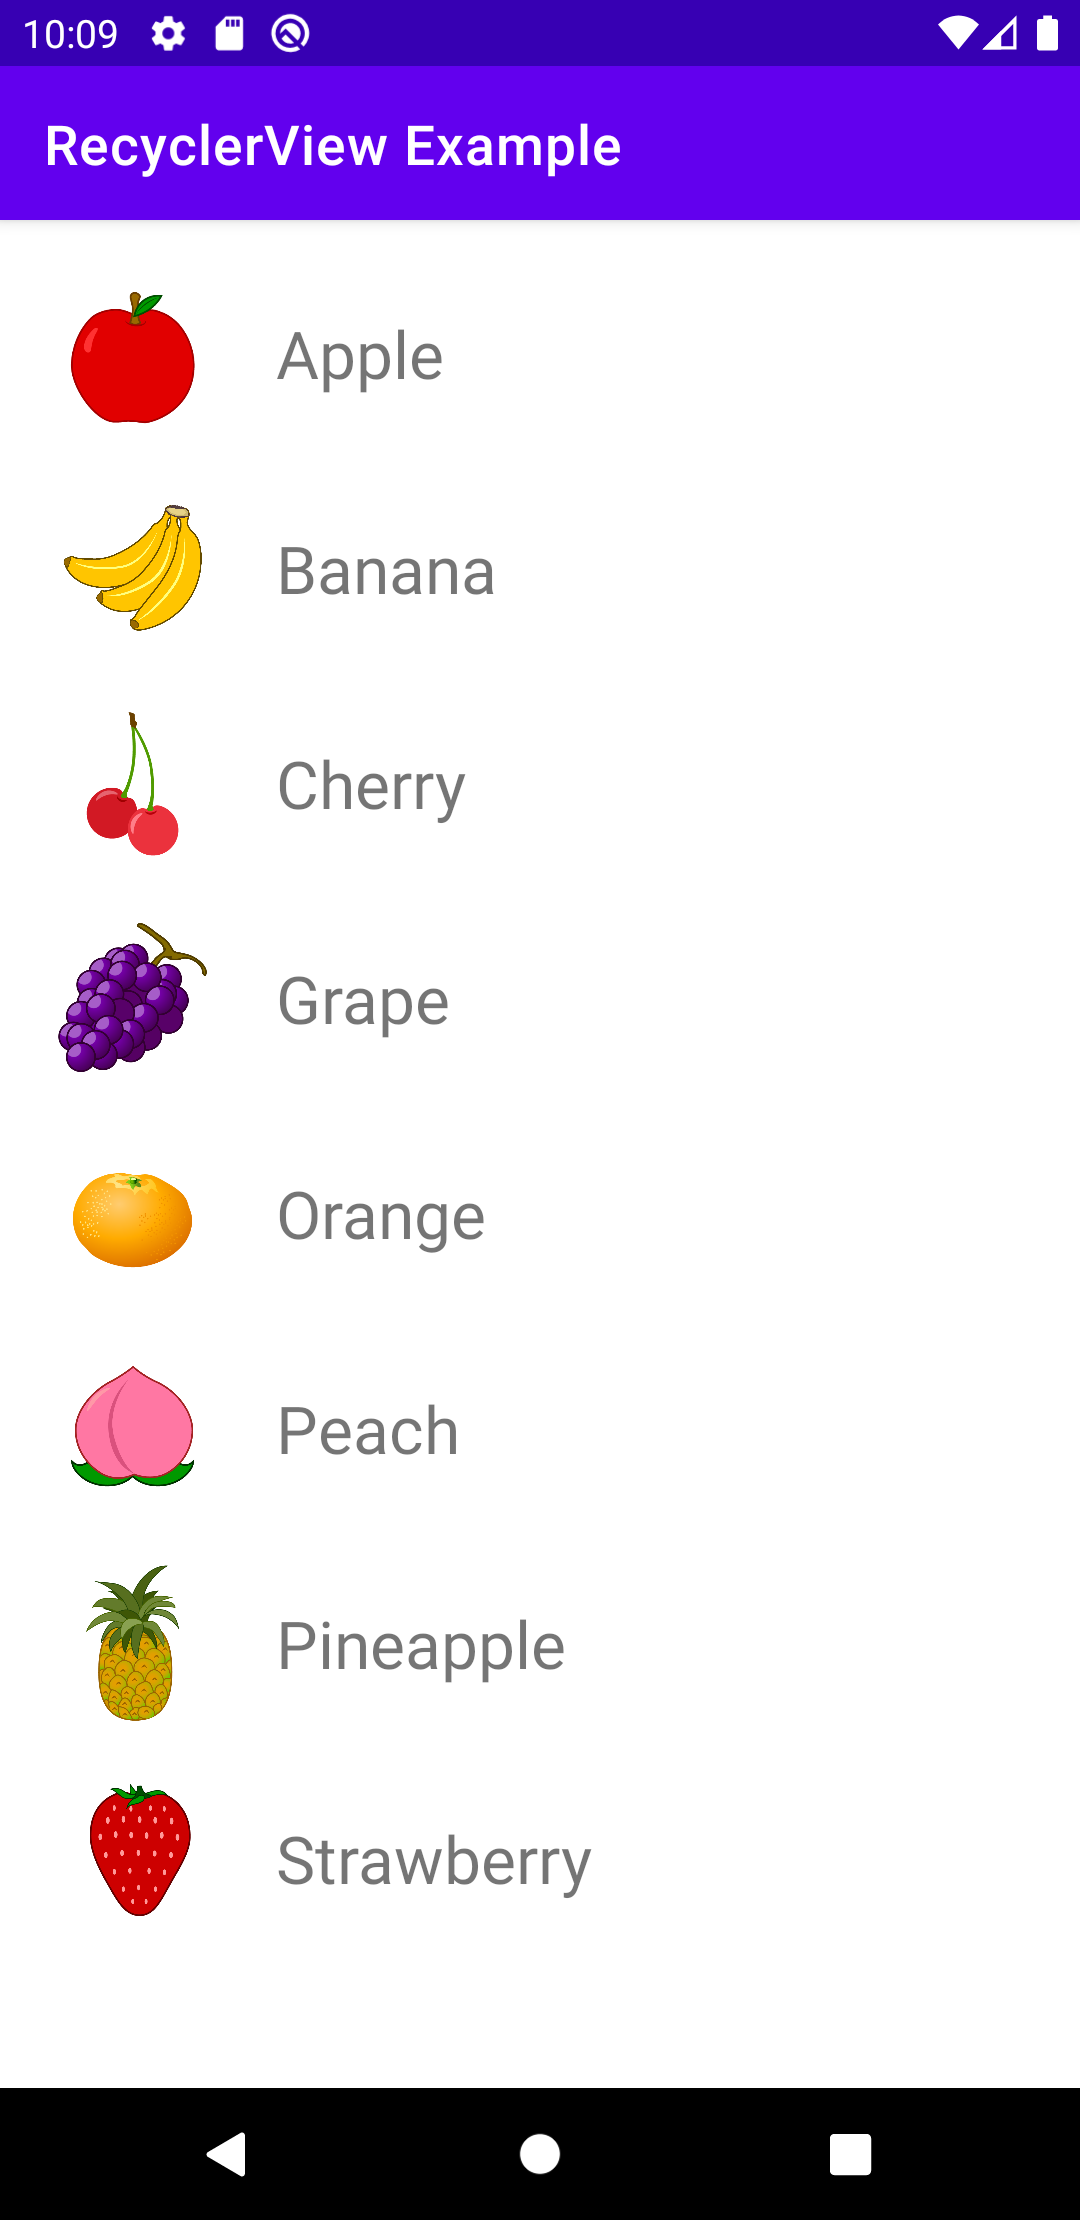
RecyclerViewでリスト表示を実装する
やりたいこと
RecyclerViewを使用して、あるデータをリスト表示するシンプルなアプリです。
環境
Android Studio: 4.1.1
Kotlin: 1.4.10実装
データクラスを作成する
表示する情報のデータクラスを作成します。
classの前にdataをつけることでデータクラスとして作成されます。
今回はFruitという名前にしています。Fruit.ktdata class Fruit( var name: String, var imageId: Int )アイテムのレイアウトファイルを作成する
次に、RecyclerView内にリスト表示される1つ1つのアイテムのレイアウトファイルを作成します。
list_item.xml<?xml version="1.0" encoding="utf-8"?> <androidx.constraintlayout.widget.ConstraintLayout xmlns:tools="http://schemas.android.com/tools" xmlns:android="http://schemas.android.com/apk/res/android" android:layout_width="match_parent" android:layout_height="wrap_content" xmlns:app="http://schemas.android.com/apk/res-auto"> <ImageView android:id="@+id/fruit_image" android:layout_width="60dp" android:layout_height="60dp" android:layout_marginTop="18dp" android:layout_marginEnd="18dp" android:layout_marginStart="18dp" app:layout_constraintTop_toTopOf="parent" app:layout_constraintStart_toStartOf="parent" app:layout_constraintEnd_toStartOf="@id/fruit_name" tools:src="@drawable/apple" /> <TextView android:id="@+id/fruit_name" android:layout_width="0dp" android:layout_height="wrap_content" android:layout_marginStart="4dp" android:layout_marginEnd="4dp" android:textSize="24sp" app:layout_constraintStart_toEndOf="@id/fruit_image" app:layout_constraintEnd_toEndOf="parent" app:layout_constraintTop_toTopOf="@id/fruit_image" app:layout_constraintBottom_toBottomOf="@id/fruit_image" tools:text="apple" /> </androidx.constraintlayout.widget.ConstraintLayout>レイアウトにRecyclerViewを設置する
このアプリでは、一部データバインディングを使用するので、アプリモジュールの
build.gradleにdataBindingを追加します。build.gradle(:app)
android {
        ...
        dataBinding {
            enabled = true
        }
    }
RecyclerViewにはリストの表示方法を設定する
layoutManagerが必須なので、忘れないように注意が必要です。fragment_fruit.xml<?xml version="1.0" encoding="utf-8"?> <layout xmlns:android="http://schemas.android.com/apk/res/android" xmlns:tools="http://schemas.android.com/tools" xmlns:app="http://schemas.android.com/apk/res-auto"> <androidx.constraintlayout.widget.ConstraintLayout android:layout_width="match_parent" android:layout_height="match_parent" tools:context=".FruitFragment"> <androidx.recyclerview.widget.RecyclerView android:id="@+id/fruit_list" android:layout_width="match_parent" android:layout_height="match_parent" app:layoutManager="androidx.recyclerview.widget.LinearLayoutManager"/> </androidx.constraintlayout.widget.ConstraintLayout> </layout>Adapterを作成する
1. Adapterクラスの作成
FruitAdapter.ktclass FruitAdapter: RecyclerView.Adapter<FruitAdapter.ViewHolder>() { }
class FruitAdapterにカーソルを合わせ、option+Enter(Macの場合) -> Implement membersを選択することで、Adapterクラスに必要な3つのメソッドを自動で生成してくれます。FruitAdapter.ktclass FruitAdapter: RecyclerView.Adapter<FruitAdapter.ViewHolder>() { override fun onCreateViewHolder(parent: ViewGroup, viewType: Int): FruitAdapter.ViewHolder { TODO("Not yet implemented") } override fun onBindViewHolder(holder: FruitAdapter.ViewHolder, position: Int) { TODO("Not yet implemented") } override fun getItemCount(): Int { TODO("Not yet implemented") } }onCreateViewHolder:新しい
ViewHolderを作成する必要があるたびに呼ばれる。Viewを生成して、ViewHolderを返す。
onBindViewHolder:positionから適切なデータを取得して、各アイテムのレイアウトと関連付ける。
getItemCount:表示するアイテム数を設定する。2. ViewHolderを作成
まだViewHolderを作成していないため、
<FruitAdapter.ViewHolder>の部分でエラーが出るので、FruitAdapterクラス内にViewHolderを作成します。FruitAdapter.ktclass ViewHolder(itemView: View) : RecyclerView.ViewHolder(itemView) { val fruitName: TextView = itemView.findViewById(R.id.fruit_name) val fruitImage: ImageView = itemView.findViewById(R.id.fruit_image) }3. Adapterクラス内の実装
- データを保持する変数を作成
FruitAdapter.ktvar data = ArrayList<Fruit>()
- getItemCount()
この値がRecyclerView内に表示されるアイテムの数になります。
FruitAdapter.ktoverride fun getItemCount() = data.size
- onBindViewHolder()
onBindViewHolder()関数では、positionから取得した適切なデータを、textViewなどに設定します。FruitAdapter.ktoverride fun onBindViewHolder(holder: FruitAdapter.ViewHolder, position: Int) { val item = data[position] holder.fruitName.text = item.name holder.fruitImage.setImageResource(item.imageId) }
- onCreateViewHolder()
layoutInflaterでViewを作成して、ViewHolderを返します。
FruitAdapter.ktoverride fun onCreateViewHolder(parent: ViewGroup, viewType: Int): FruitAdapter.ViewHolder { val layoutInflater = LayoutInflater.from(parent.context) val view = layoutInflater.inflate(R.layout.list_item, parent, false) return ViewHolder(view) }コード
最終的にこのようになれば、Adapterクラスの完成です。
FruitAdapter.ktclass FruitAdapter: RecyclerView.Adapter<FruitAdapter.ViewHolder>() { var data = ArrayList<Fruit>() override fun onCreateViewHolder(parent: ViewGroup, viewType: Int): FruitAdapter.ViewHolder { val layoutInflater = LayoutInflater.from(parent.context) val view = layoutInflater.inflate(R.layout.list_item, parent, false) return ViewHolder(view) } override fun onBindViewHolder(holder: FruitAdapter.ViewHolder, position: Int) { val item = data[position] holder.fruitName.text = item.name holder.fruitImage.setImageResource(item.imageId) } override fun getItemCount() = data.size class ViewHolder(itemView: View) : RecyclerView.ViewHolder(itemView) { val fruitName: TextView = itemView.findViewById(R.id.fruit_name) val fruitImage: ImageView = itemView.findViewById(R.id.fruit_image) } }RecyclerViewにAdapterを設定する
Adapterの設定は全て
onCreateView()メソッド内で行います。
(アクティビティの場合は、onCreate()メソッド)1. Adapterを初期化する
FruitFragmentval adapter = FruitAdapter()2. データを格納する
今回はサンプルなので、あらかじめ用意したデータを表示させるようにしています。
基本的にはデータベース等から取得した動的なデータを使ったりすると思います。FruitFragmentval adapter = FruitAdapter() val fruitData = arrayListOf( Fruit("Apple", R.drawable.apple), Fruit("Banana", R.drawable.banana), Fruit("Cherry", R.drawable.cherry), Fruit("Grape", R.drawable.grape), Fruit("Orange", R.drawable.orange), Fruit("Peach", R.drawable.peach), Fruit("Pineapple", R.drawable.pineapple), Fruit("Strawberry", R.drawable.strawberry) ) adapter.data = fruitData3. RecyclerViewにアダプターをセットする
FruitFragmentbinding.itemList.adapter = adapterコード
FruitFragmentclass FruitFragment : Fragment() { override fun onCreateView( inflater: LayoutInflater, container: ViewGroup?, savedInstanceState: Bundle? ): View? { val binding: FragmentFruitBinding = DataBindingUtil.inflate(inflater, R.layout.fragment_fruit, container, false) val adapter = FruitAdapter() val fruitData = arrayListOf( Fruit("Apple", R.drawable.apple), Fruit("Banana", R.drawable.banana), Fruit("Cherry", R.drawable.cherry), Fruit("Grape", R.drawable.grape), Fruit("Orange", R.drawable.orange), Fruit("Peach", R.drawable.peach), Fruit("Pineapple", R.drawable.pineapple), Fruit("Strawberry", R.drawable.strawberry) ) adapter.data = fruitData binding.itemList.adapter = adapter return binding.root } }今回はRecyclerViewの使い方がメインのため、データバインディングの説明は省いています。
- 投稿日:2021-03-06T14:04:57+09:00
UbuntuにAndroid Studioをインストール
UbuntuにAndroid Studioをインストール
環境
・Ubuntu 18.04.05
・Android Studio 4.1.2 for Linux 64-bitインストール
下記のサイトに従う。
https://developer.android.com/studio/install?hl=ja事前準備
64BitのUbuntuのためライブラリをapt
$ sudo apt-get install libc6:i386 libncurses5:i386 libstdc++6:i386 lib32z1 libbz2-1.0:i386本体のダウンロード&インストール
以下から最新のAndroidStudioをダウンロード(執筆時点は4.1.2)
https://developer.android.com/studio?hl=jaArchive Managerを使用して、圧縮ファイルを解凍する。
今回は個人仕様であるため、local下に展開したフォルドごと移動する。
(解凍先はArchibe Managerで指定できる。今回はDownloads直下で解凍した。)
$ mv ~/Downloads/android-studio /usr/local/
実行
”android-studio”を移動した場所に移動し、studio.shを実行する。
$ cd /usr/local/android-studio
$ sh ./bin/studio.sh
設定ファイルをImportするか聞かれるが、今回始めてAndroidStudioを使用するためSkip。
datashareするかはお好みで。Setup Wizardが実行するため、設定を確認する。
Custom設定を選んでみたが、基本的に変更せずにポチポチしていけば問題なさそう。最後にSDK等のコンポーネントがダウンロード(5分程度)したら終了。
今後起動する際は、以下のコマンドで起動できる。
$ sh /usr/local/android-studio/bin/studio.sh最後に
以下にある動画をスクリプト化しただけの記事でした。
- 投稿日:2021-03-06T08:27:43+09:00
adbでAndroidのIMEIを取得する方法が大体間違っている件
TL;DR
以下のように、
iphonesubinfoサービスに4を渡すのがAndroid 8以降は正しい。adb shell service call iphonesubinfo 4よくある以下のやり方は、 API Level 30(Android 11相当)以降で deprecated指定されるので注意が必要
adb shell service call iphonesubinfo 1以下、ちょっとだけ詳しい解説をします。
そもそも一体何をしているのか
もう一度コードを貼ります。
adb shell service call iphonesubinfo 4このうち
adb shellについてはadbのshellにコマンドを引き渡すための記述に過ぎないので、実際にAndroidの中で実行されているのはservice call iphonesubinfo 4となります。
serviceとはなにか
serviceはAndroid上で動作しているサービスの操作を行うものです。Linuxにも同盟のコマンドはありますが、それとは似て非なるものと言えます。
-hで表示される文言は以下のようなものです。Usage: service [-h|-?] service list service check SERVICE service call SERVICE CODE [i32 N | i64 N | f N | d N | s16 STR | null | fd f | nfd n | afd f ] ... Options: i32: Write the 32-bit integer N into the send parcel. i64: Write the 64-bit integer N into the send parcel. f: Write the 32-bit single-precision number N into the send parcel. d: Write the 64-bit double-precision number N into the send parcel. s16: Write the UTF-16 string STR into the send parcel. null: Write a null binder into the send parcel. fd: Write a file descriptor for the file f to the send parcel. nfd: Write file descriptor n to the send parcel. afd: Write an ashmem file descriptor for a region containing the data from file f to the send parcel.上記を見ると、
service call iphonesubinfo 4の意味が見えてきます。
callはサービスの呼び出しを行い、iphonesubinfoはサービス名、4はコードというわけですね。Android上で動作するサービス
Android上で動作するサービスの取得方法も先程のヘルプを見ればなんとなくわかりますね。そう、
service listです。やってみましょう。Found 199 services: 0 DockObserver: [] 1 SurfaceFlinger: [android.ui.ISurfaceComposer] 2 accessibility: [android.view.accessibility.IAccessibilityManager] 3 account: [android.accounts.IAccountManager] 4 activity: [android.app.IActivityManager] 5 activity_task: [android.app.IActivityTaskManager] 6 adb: [android.debug.IAdbManager] 7 alarm: [android.app.IAlarmManager] 8 android.hardware.identity.IIdentityCredentialStore/default: [] 9 android.hardware.power.IPower/default: [] 10 android.hardware.rebootescrow.IRebootEscrow/default: [] (以下省略)ここで注目すべきは、多くのサービスがサービス名と合わせて、
android.view.accessibility.IAccessibilityManagerのようなインタフェース名を公開していることです。実はこれらのファイルの多くはAndroidのソースコードに含まれており、例えばIAccesibilityManagerは以下になります。
拡張子
*.aidlはAndroidのインタフェース定義言語(AIDL)を表し、名前通りそのAndroidサービスとやり取りする際のインターフェースが記述されています(記述はすごくJavaっぽいです)Androidサービスの呼び出し方
同様に
iphonesubinfoを探すと、以下のコードが見つかります。
中身は以下のような感じです。
interface IPhoneSubInfo {
    /** @deprecated Use {@link #getDeviceIdWithFeature(String, String) instead */
    @UnsupportedAppUsage(maxTargetSdk = 30, trackingBug = 170729553)
    String getDeviceId(String callingPackage);
    /**
     * Retrieves the unique device ID, e.g., IMEI for GSM phones.
     */
    String getDeviceIdWithFeature(String callingPackage, String callingFeatureId);
     /**
     * Retrieves the unique Network Access ID
     */
    String getNaiForSubscriber(int subId, String callingPackage, String callingFeatureId);
    /**
     * Retrieves the unique device ID of a phone for the device, e.g., IMEI
     * for GSM phones.
     */
    String getDeviceIdForPhone(int phoneId, String callingPackage, String callingFeatureId);
    /**
     * Retrieves the IMEI.
     */
    String getImeiForSubscriber(int subId, String callingPackage, String callingFeatureId);
    /**
     * Retrieves the software version number for the device, e.g., IMEI/SV
     * for GSM phones.
     */
    String getDeviceSvn(String callingPackage, String callingFeatureId);

    //(中略)
}
ではこのAIDLのメソッドを呼び出すに当たり、最後の
4という数字は何を意味するのか。
実はこの数字は、AIDLに定義されているメソッドの順番(1スタート)になっています。したがって、
service call iphonesubinfo 4で呼び出されるメソッドは、getImeiForSubscriberとなります。そう、これがIMEIを取得するメソッドだったのです。では
service call iphonesubinfo 1で呼び出されるメソッドは、当然戦闘のメソッドですが、それは以下のようなアノテーションが付されています。/** @deprecated Use {@link #getDeviceIdWithFeature(String, String) instead */ @UnsupportedAppUsage(maxTargetSdk = 30, trackingBug = 170729553) String getDeviceId(String callingPackage);そう、30以降ではサポートされず、別のメソッドを使うように、と書いてあります。
ただ、そもそもその「別のメソッド」というのが
getImeiForSubscriberじゃないじゃないか、という話もあると思います。使うべきとされているのはこちらのメソッドです。/** * Retrieves the unique device ID, e.g., IMEI for GSM phones. */ String getDeviceIdWithFeature(String callingPackage, String callingFeatureId);はい、記述どおり、このメソッドはIMEIを返すことを保証しないのです。それは実は内部の実装依存です。したがってIMEIと明確に指定して抜き出したい場合には、
getImeiForSubscriberを、すなわちservice call iphonesubinfo 4をコールするのが望ましい、という話になります。おつかれさまでした。