- 投稿日:2021-01-27T16:16:48+09:00
Ubuntu20.10で作るラズパイUbuntu20.10用ミラーサーバ
前書き
ミラーサーバはPCで動くUbuntu20.10で動作しました。
基本は↓の通りです。
「Ubuntu20.10でapt-mirrorに失敗する為debmirrorを使うことにする」
https://qiita.com/t-yamanashi/items/362ef78b5b7c33bee36b上記差分
PC用との差分を書きます。
mirrorbuild.shを変更
Ubuntu20.10の日本語環境に動作する設定に変更します。
変更箇所は4箇所arch=amd64 → #arch=amd64 arch=arm64,armhf を追加 release=bionic,bionic-security,bionic-updates,bionic-backports ↓ release=focal,focal-security,focal-updates,focal-backports inPath=/ubuntu ↓ inPath=/ubuntu-ports outPath=/mirror/mirror/$server/ubuntu ↓ outPath=/mirror/mirror/$server/ubuntu-ports debmirrorの引数に--i18n を追加変更後のファイル
#### Start script to automate building of Ubuntu mirror #####
## THE NEXT LINE IS NEEDED THE REST OF THE LINES STARTING WITH A # CAN BE DELETED

#!/bin/bash

## Setting variables with explanations.

#
# Don't touch the user's keyring, have our own instead
#
export GNUPGHOME=/mirrorkeyring

# Arch=         -a      # Architecture. For Ubuntu can be i386, powerpc or amd64.
# sparc, only starts in dapper, it is only the later models of sparc.
#
#arch=amd64
arch=arm64,armhf

# Minimum Ubuntu system requires main, restricted
# Section=      -s      # Section (One of the following - main/restricted/universe/multiverse).
# You can add extra file with $Section/debian-installer. ex: main/debian-installer,universe/debian-installer,multiverse/debian-installer,restricted/debian-installer
#
section=main,restricted,universe,multiverse

# Release=      -d      # Release of the system (...Hardy, Intrepid... Lucid, Precise, Quantal, Saucy, Trusty ), and the -updates and -security ( -backports can be added if desired)
# List of updated releases in: https://wiki.ubuntu.com/Releases
#

release=groovy,groovy-security,groovy-updates,groovy-backports

# Server=       -h      # Server name, minus the protocol and the path at the end
# CHANGE "*" to equal the mirror you want to create your mirror from. au. in Australia  ca. in Canada.
# This can be found in your own /etc/apt/sources.list file, assuming you have Ubuntu installed.
#
server=ports.ubuntu.com

# Dir=          -r      # Path from the main server, so http://my.web.server/$dir, Server dependant
#
inPath=/ubuntu-ports

# Proto=        --method=       # Protocol to use for transfer (http, ftp, hftp, rsync)
# Choose one - http is most usual the service, and the service must be available on the server you point at.
#
proto=http

# Outpath=              # Directory to store the mirror in
# Make this a full path to where you want to mirror the material.
#
outPath=/mirror/mirror/$server/ubuntu-ports

# The --nosource option only downloads debs and not deb-src's
# The --progress option shows files as they are downloaded
# --source \ in the place of --no-source \ if you want sources also.
# --nocleanup  Do not clean up the local mirror after mirroring is complete. Use this option to keep older repository
# Start script
#
debmirror       -a $arch \
                --no-source \
                -s $section \
                -h $server \
                -d $release \
                -r $inPath \
                --progress \
                --method=$proto \
        --i18n \
                $outPath

#### End script to automate building of Ubuntu mirror ####
クライアントの設定差分
/etc/apt/sources.listを管理者権限で変更
deb http://から始まるURLを
http://apt:8080/ports.ubuntu.com/ubuntu-ports/
に置き換えます。# See http://help.ubuntu.com/community/UpgradeNotes for how to upgrade to # newer versions of the distribution. deb http://apt:8080/ports.ubuntu.com/ubuntu-ports/ groovy main restricted # deb-src http://apt:8080/ports.ubuntu.com/ubuntu-ports/ groovy main restricted ## Major bug fix updates produced after the final release of the ## distribution. deb http://apt:8080/ports.ubuntu.com/ubuntu-ports/ groovy-updates main restricted # deb-src http://apt:8080/ports.ubuntu.com/ubuntu-ports/ groovy-updates main restricted ## N.B. software from this repository is ENTIRELY UNSUPPORTED by the Ubuntu ## team. Also, please note that software in universe WILL NOT receive any ## review or updates from the Ubuntu security team. deb http://apt:8080/ports.ubuntu.com/ubuntu-ports/ groovy universe # deb-src http://apt:8080/ports.ubuntu.com/ubuntu-ports/ groovy universe deb http://apt:8080/ports.ubuntu.com/ubuntu-ports/ groovy-updates universe # deb-src http://apt:8080/ports.ubuntu.com/ubuntu-ports/ groovy-updates universe ## N.B. software from this repository is ENTIRELY UNSUPPORTED by the Ubuntu ## team, and may not be under a free licence. Please satisfy yourself as to ## your rights to use the software. Also, please note that software in ## multiverse WILL NOT receive any review or updates from the Ubuntu ## security team. deb http://apt:8080/ports.ubuntu.com/ubuntu-ports/ groovy multiverse # deb-src http://apt:8080/ports.ubuntu.com/ubuntu-ports/ groovy multiverse deb http://apt:8080/ports.ubuntu.com/ubuntu-ports/ groovy-updates multiverse # deb-src http://apt:8080/ports.ubuntu.com/ubuntu-ports/ groovy-updates multiverse ## N.B. software from this repository may not have been tested as ## extensively as that contained in the main release, although it includes ## newer versions of some applications which may provide useful features. ## Also, please note that software in backports WILL NOT receive any review ## or updates from the Ubuntu security team. deb http://apt:8080/ports.ubuntu.com/ubuntu-ports/ groovy-backports main restricted universe multiverse # deb-src http://apt:8080/ports.ubuntu.com/ubuntu-ports/ groovy-backports main restricted universe multiverse ## Uncomment the following two lines to add software from Canonical's ## 'partner' repository. ## This software is not part of Ubuntu, but is offered by Canonical and the ## respective vendors as a service to Ubuntu users. # deb http://archive.canonical.com/ubuntu groovy partner # deb-src http://archive.canonical.com/ubuntu groovy partner deb http://apt:8080/ports.ubuntu.com/ubuntu-ports/ groovy-security main restricted # deb-src http://apt:8080/ports.ubuntu.com/ubuntu-ports/ groovy-security main restricted deb http://apt:8080/ports.ubuntu.com/ubuntu-ports/ groovy-security universe # deb-src http://apt:8080/ports.ubuntu.com/ubuntu-ports/ groovy-security universe deb http://apt:8080/ports.ubuntu.com/ubuntu-ports/ groovy-security multiverse # deb-src http://apt:8080/ports.ubuntu.com/ubuntu-ports/ groovy-security multiverse
- 投稿日:2021-01-27T10:23:31+09:00
samba(cifs)をfstabに書いても自動マウントしてくれない件
事象
あれあれ?Ansibleからcifsでmoutnedしても、ブート時にマウントしてくれないぞ?
という事象にハマっておりました。解決策
困っている皆様のために、結論から書くのが私の流儀。(どやぁ)
ジャーナルを見るとネットワーク接続する前にmountしようとしていたので、fstabに以下オプションを付けましょう。noauto,x-systemd.automount原因
解決策にも少し書きましたが、ジャーナルを見たらWi-Fiの接続を確立する前にマウントしようとして失敗しているようです。
SSHしてmount -aすると普通にマウントできるので、ネットワーク関連を疑っていたらビンゴでした。Jan 26 09:56:28 raspberrypi dhcpcd-run-hooks[460]: wlan0: starting wpa_supplicant Jan 26 09:56:28 raspberrypi kernel: [ 7.399312] IPv6: ADDRCONF(NETDEV_UP): wlan0: link is not ready Jan 26 09:56:28 raspberrypi kernel: [ 7.399346] brcmfmac: brcmf_cfg80211_set_power_mgmt: power save enabled Jan 26 09:56:29 raspberrypi kernel: [ 7.412947] FS-Cache: Netfs 'cifs' registered for caching Jan 26 09:56:29 raspberrypi kernel: [ 7.413464] Key type cifs.spnego registered Jan 26 09:56:29 raspberrypi kernel: [ 7.413490] Key type cifs.idmap registered Jan 26 09:56:29 raspberrypi kernel: [ 7.418147] No dialect specified on mount. Default has changed to a more secure dialect, SMB2.1 or later (e.g. SMB3), from CIFS (SMB1). To use the less secure SMB1 dialect to access old servers which do not support SMB3 (or SMB2.1) specify vers=1.0 on mount. Jan 26 09:56:29 raspberrypi mount[454]: mount error(101): Network is unreachable Jan 26 09:56:29 raspberrypi mount[454]: Refer to the mount.cifs(8) manual page (e.g. man mount.cifs) Jan 26 09:56:29 raspberrypi kernel: [ 7.460238] CIFS VFS: Error connecting to socket. Aborting operation. Jan 26 09:56:29 raspberrypi kernel: [ 7.460254] CIFS VFS: cifs_mount failed w/return code = -101 Jan 26 09:56:29 raspberrypi systemd[1]: mnt-brains.mount: Mount process exited, code=exited, status=32/n/a Jan 26 09:56:29 raspberrypi systemd[1]: mnt-brains.mount: Failed with result 'exit-code'. Jan 26 09:56:29 raspberrypi systemd[1]: Failed to mount /mnt/shared.Ansibleだとこう書く
AnsibleでマウントしようとしていたのでついでにAnsibleのコードも載せておきます。(v2.10)
- name: Mount a directory
  become: yes
  ansible.posix.mount:
    path: /mnt/shared
    src: //x.x.x.x/shared
    opts: rw,async,user,uid=1000,gid=1000,password=ENTER_THE_PASSWORD!,noauto,x-systemd.automount
    state: mounted
    fstype: cifs
- 投稿日:2021-01-27T00:56:55+09:00
yum update したら perforce が死んだ話
久しぶりに AWS サーバーにログインして yum update したら P4 が繋がんなくなったお話です。死ぬかと思った。
インスタンスを再起動 ~ p4d 復旧まで
ひとまず EC2 インスタンスを再起動するかー、とコンソールから実行。
あれ、でも P4 サーバーってどうやって起動したんだっけ・・・?としばらくググる。
P4 コマンドさえも $P4PORT を設定していないので通らない状態でした。Perforce client error:
Connect to server failed; check $P4PORT.
TCP connect to perforce:1666 failed.
perforce: host unknown.備忘録として残しておきます。
p4 set P4USER=username
p4 set P4PORT=1666
p4d コマンドの実行
まずは P4 サーバーのルートディレクトリ探しから。
自分の場合は /opt/perforce/servers/master/root に構築してました。
何のドキュメントを見ながら作ったのか、全く覚えてないのだが perforce ユーザー権限で作成されていた。こういうのはメモしておくべきだと激しく後悔。-bash-4.2$ ls db.bodresolve db.graphindex db.logger db.revpx db.templatesx db.bodresolvex db.graphperm db.message db.revsh db.templatewx db.bodtext db.group db.monitor db.revstg db.ticketこういった db ファイルがたくさん並んでいるのがルートディレクトリのようです。
さっそく再起動コマンドを実行する。-bash-4.2$ p4d -r /opt/perforce/servers/master/root -p 1666 -bash-4.2$しかし、なにもおこらなかった!
ログ調査
/opt/perforce/servers/master/logs/log
cd コマンドを唯々繰り返していると logs ディレクトリが存在していることに気づく。
Perforce server error:
        Database is at old upgrade level 36.  Use 'p4d -r /opt/perforce/servers/master/root -xu' to upgrade to level 39.
これだ!これだよ!
-bash-4.2$ p4d -r /opt/perforce/servers/master/root -xu
Upgrades will be applied at server startup.
そして再び起動コマンドを実行。
-bash-4.2$ p4d -r /opt/perforce/servers/master/root -p 1666 -d
Perforce Server starting...
-r で P4ROOT の指定、-p でポートの指定、-d でバックグラウンド実行となります。
P4V からの接続テスト
ssl:{address}:1666
いつも通り SSL での接続を試みる。
SSL connect to ssl:dev.nanae.online:1666 failed (既存の接続はリモート ホストに強制的に切断されました。 ).
Remove SSL protocol prefix from P4PORT or fix the TLS settings.??? SSL プロトコルで繋がんない?
tcp:{address}:1666
繋がったァァァ!?!??
TLS 設定とはなんぞや?
ついにTLS 1.0/1.1の無効化が決定!影響や確認・対応方法とは?
簡単に説明すると、TLSは「暗号化通信をするための手順書」のようなものですが、TLS 1.0/1.1などの古いバージョンには脆弱性がある(一定の条件下であれば暗号解読が可能である)ため、利用は非推奨とされていました。
どうやら脆弱性のある規格のようで。もしかすると yum update でその辺も更新されちゃったのかもしれないですね。
Perforce の設定
Perforce を調べるにもなかなかに文献が少なく苦労します。
SSL and TLS Protocol Versionsp4d -r /opt/perforce/servers/master/root -c"set ssl.tls.version.min=10"ブログにある通り、一旦 TLS v1.0 でも接続できるように設定。"p4 admin restart" だけじゃ反映されないそうな。めんどくさいので sudo reboot しました。ここでようやく SSL でも接続可能に。
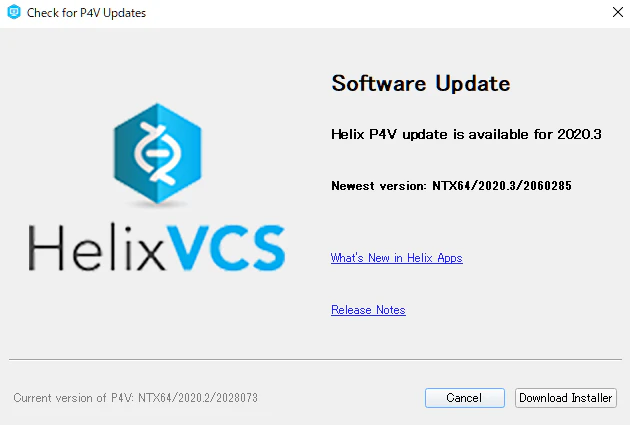
P4V クライアントの更新
Version: P4V/NTX64/2020.2/2028073
って書いてあるんで
更新ポチ。TLS 1.1 に戻しても無事繋がるようになりました。