- 投稿日:2021-01-17T22:34:29+09:00
【Android】Android Studioで使えるショートカット(Windows)
プログラミング勉強日記
2021年1月17日
基本的なショートカットしか使っていなかったけど、使って便利だと思ったショートカットをまとめる。個人的に覚えておきたいショートカット
説明 ショートカットキー クラス、ファイルなどを全体から検索 shift +shift タブの移動 Alt + → / Alt + ← 戻る Ctrl + Alt + ← 進む Ctrl + Alt + → 1行削除 Ctrl + Y アプリをビルドして実行 shift + F10 行またはブロックのエラーの修正方法を表示 Alt + Enter 名前の変更 shift + F6 プロジェクトのクイック修正 Alt + Enter 置換 Ctrl + R 参考文献
- 投稿日:2021-01-17T22:25:49+09:00
ViewのonDrawでいくつかアークの円を描く
onDraw()を通じて、いくつかアークの円を一緒に描きましょう。
Viewのサブクラスを作る
class MyPieView(context: Context?, attrs: AttributeSet?):
View(context,attrs){

    override fun onDraw(canvas: Canvas?) {
        super.onDraw(canvas)
    }
}
Viewを作る時、普段はdpを使います。
KotlinのExtension Functions/Propertiesでpx→dpに切替
val Float.px
    get()=TypedValue.applyDimension(
            TypedValue.COMPLEX_UNIT_DIP,
            this,
            Resources.getSystem().displayMetrics
    )
val Int.dp
get() = this.toFloat().px
円を作る
//丸のredius
private val RADIUS=150f.px

class MyPieView(context: Context?, attrs: AttributeSet?):
View(context,attrs){

    private val paint= Paint(Paint.ANTI_ALIAS_FLAG)

    override fun onDraw(canvas: Canvas) {
        canvas.drawArc(width/2f- RADIUS,height/2f- RADIUS,width/2f+ RADIUS,height/2f+ RADIUS
                ,0f,360f,true,paint)

    }
}
drawArcのstartAngleとsweepAngleの属性を設定すると角度が控えます
ペンのカラーを変化します
//円のredius
private val RADIUS=150f.px
//角度の設定
private val ANGLES= floatArrayOf(60f,90f,150f,60f)
//色の設定
private val COLORS= listOf(Color.parseColor("#C21858"), Color.parseColor("#00ACC1")
        , Color.parseColor("#558B2F"), Color.parseColor("#5D4037"))
class MyPieView(context: Context?, attrs: AttributeSet?):
View(context,attrs){

    private val paint= Paint(Paint.ANTI_ALIAS_FLAG)

    override fun onDraw(canvas: Canvas) {

        //開始角度 startAngle
        //完了角度 sweepAngle
        var startAngle=0f

        for((index,angle) in ANGLES.withIndex()){
            //ペンのカラーの設定
            paint.color= COLORS[index]

            canvas.drawArc(width/2f- RADIUS,height/2f- RADIUS,width/2f+ RADIUS,height/2f+ RADIUS
                    ,startAngle,angle,true,paint)
            //開始角度の増加
            startAngle+=angle
        }


    }
}
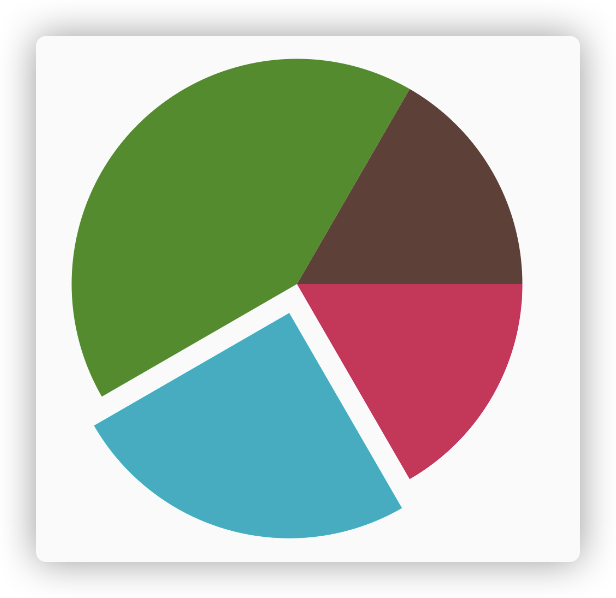
引き続き、一つのアークを出します。アークを出すために、角度の設定が必要です。
//丸のredius
private val RADIUS=150f.px
private val OFFSET_LENGTH=20.dp
//角度の設定
private val ANGLES= floatArrayOf(60f,90f,150f,60f)
//色の設定
private val COLORS= listOf(Color.parseColor("#C21858"), Color.parseColor("#00ACC1")
        , Color.parseColor("#558B2F"), Color.parseColor("#5D4037"))
class MyPieView(context: Context?, attrs: AttributeSet?):
View(context,attrs){

    private val paint= Paint(Paint.ANTI_ALIAS_FLAG)

    override fun onDraw(canvas: Canvas) {

        //開始角度 startAngle
        //完了角度 sweepAngle
        var startAngle=0f

        for((index,angle) in ANGLES.withIndex()){
            //ペンのカラーの設定
            paint.color= COLORS[index]
            if (index==1){
                //canvasの移動の距離計算 三角関数
                canvas.translate(OFFSET_LENGTH* cos(Math.toRadians(startAngle+angle/2f.toDouble())).toFloat(),
                        OFFSET_LENGTH* sin(Math.toRadians(startAngle+angle/2f.toDouble())).toFloat()
                )
            }


            canvas.drawArc(width/2f- RADIUS,height/2f- RADIUS,width/2f+ RADIUS,height/2f+ RADIUS
                    ,startAngle,angle,true,paint)
            //開始角度の増加
            startAngle+=angle
        }


    }
}
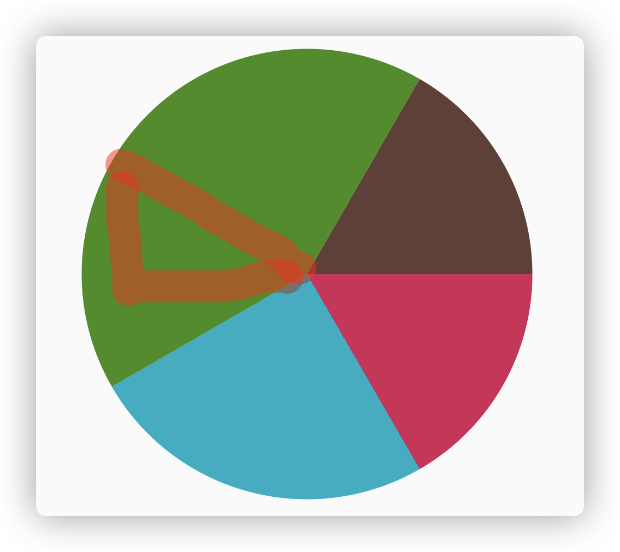
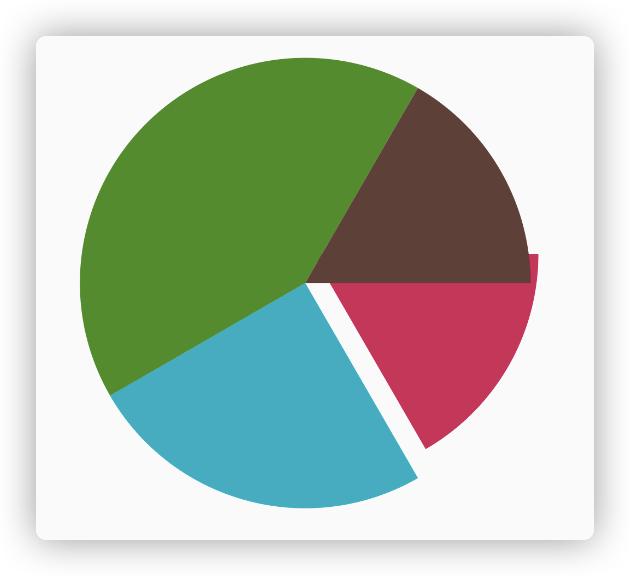
何でこのようななりましたか
canvaの背景第一回を変更したあと、戻るのが必要です。
canvas.save()とcanvas.restore()を使えば解消できます。//丸のredius private val RADIUS=150f.px private val OFFSET_LENGTH=20.dp //角度の設定 private val ANGLES= floatArrayOf(60f,90f,150f,60f) //色の設定 private val COLORS= listOf(Color.parseColor("#C21858"), Color.parseColor("#00ACC1") , Color.parseColor("#558B2F"), Color.parseColor("#5D4037")) class MyPieView(context: Context?, attrs: AttributeSet?): View(context,attrs){ private val paint= Paint(Paint.ANTI_ALIAS_FLAG) override fun onDraw(canvas: Canvas) { //開始角度 startAngle //完了角度 sweepAngle var startAngle=0f for((index,angle) in ANGLES.withIndex()){ //ペンのカラーの設定 paint.color= COLORS[index] if (index==1){ //canvasの移動の距離計算 三角関数 canvas.save() canvas.translate(OFFSET_LENGTH* cos(Math.toRadians(startAngle+angle/2f.toDouble())).toFloat(), OFFSET_LENGTH* sin(Math.toRadians(startAngle+angle/2f.toDouble())).toFloat() ) } canvas.drawArc(width/2f- RADIUS,height/2f- RADIUS,width/2f+ RADIUS,height/2f+ RADIUS ,startAngle,angle,true,paint) //開始角度の増加 startAngle+=angle if (index==1){ canvas.restore() } } } }具体的なソースを説明ソースに置きました。
- 投稿日:2021-01-17T21:58:53+09:00
【Android】【初心者】Custom Viewの作り方
【Android】【初心者】Custom Viewの作り方
概要
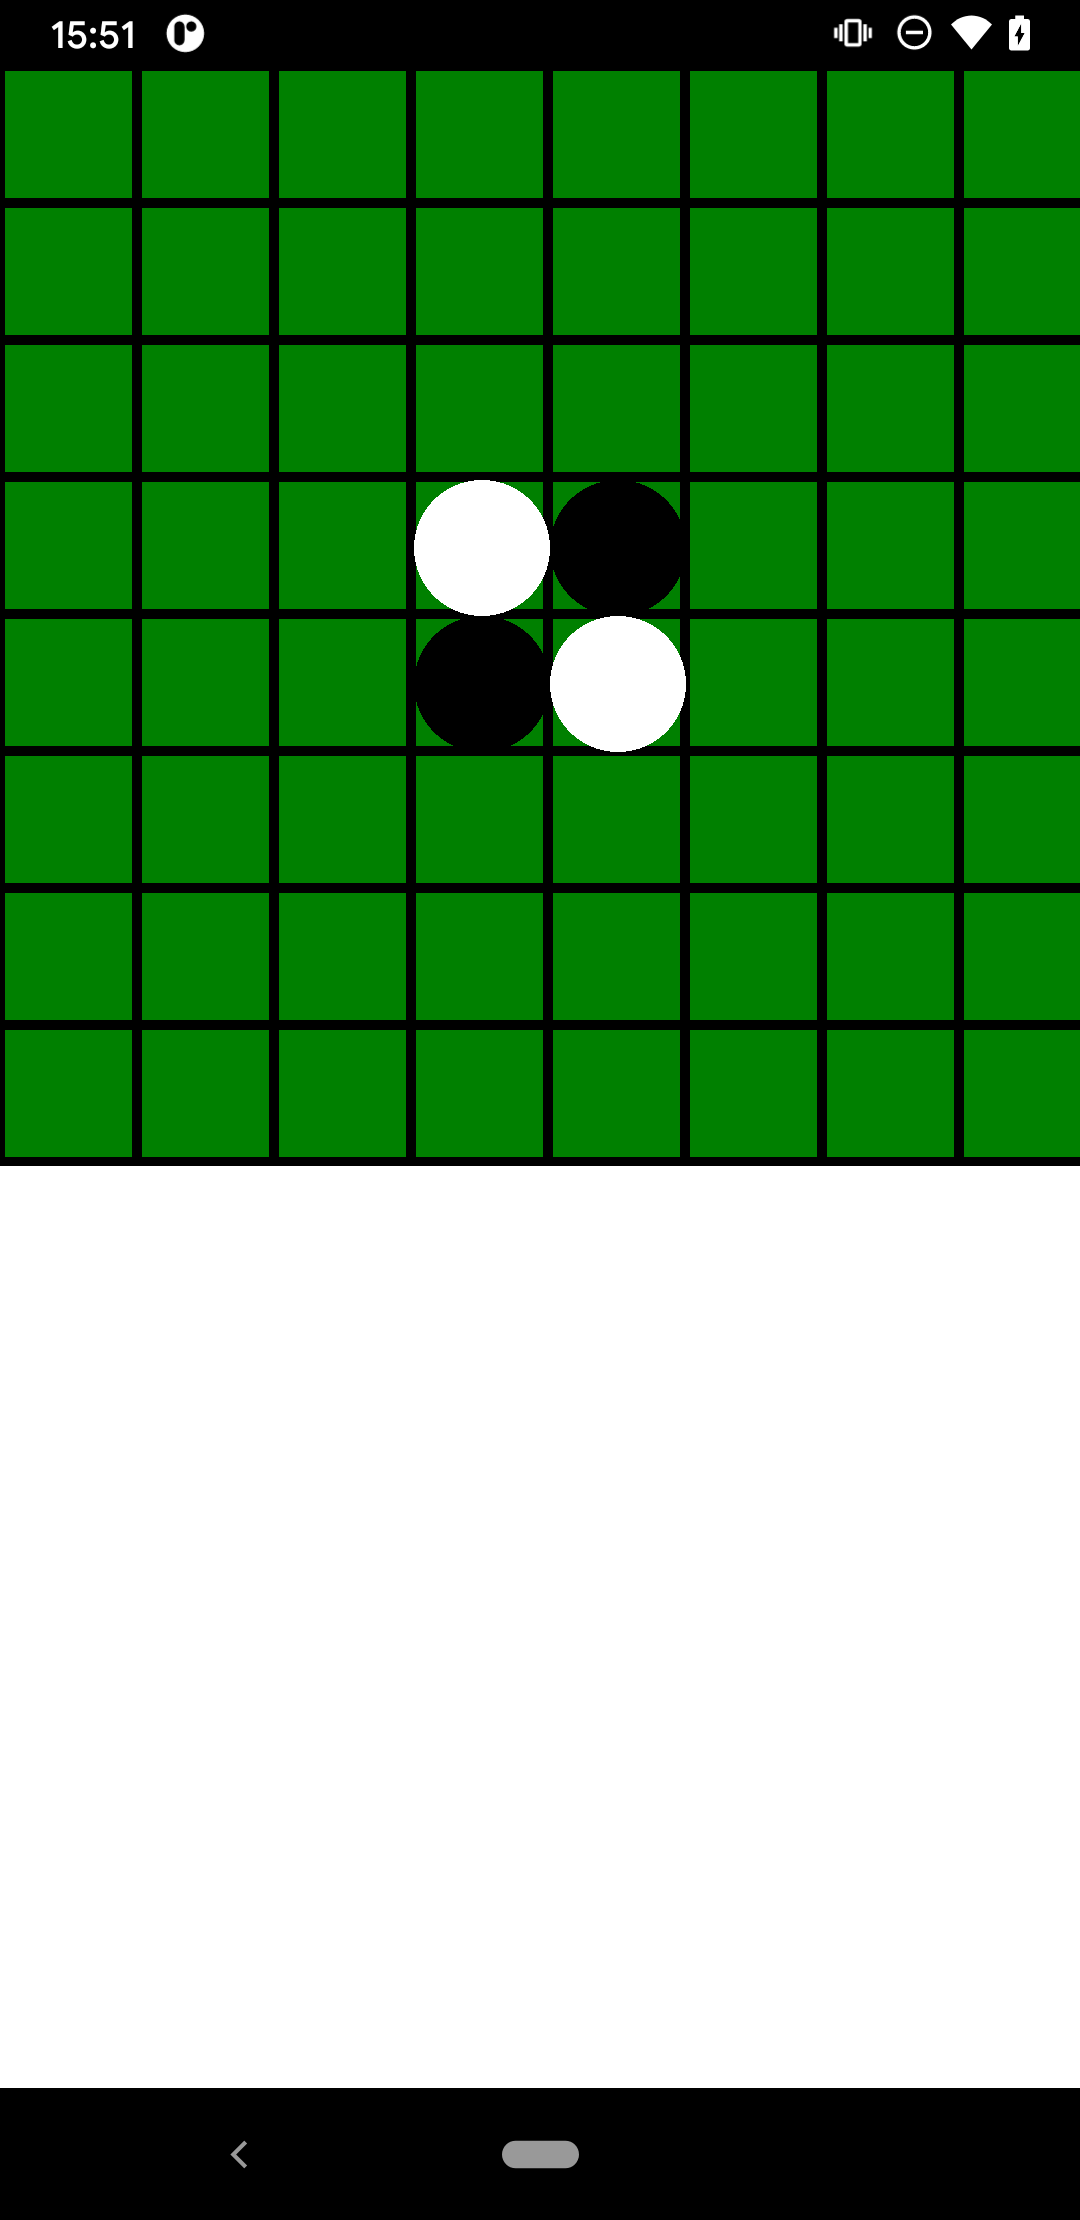
オセロのアプリを作ってみようという思いで、オセロの初期状態のレイアウトを独自Viewで、作ってみたので、Custom Viewの作りかたのまとめという感じです。
大した内容ではないです、すみません。
基本的には、Android Developerのカスタムビュー コンポーネントの項目を参照して作成しました。作成したレイアウト
作成手順
大まかな手順としては、以下の3つでした。
1. Viewを継承した独自Viewのクラスを作成
2. XMLから作成したViewを取得できるように、attrs.xmlに作成したViewのリソースを定義
3. 独自Viewに描画したいもの記述していくViewを継承した独自Viewのクラスを作成
- Viewを継承したクラスを定義
- コンストラクタに、Contextのオブジェクトと、AttributeSetのオブジェクトを渡さないといけません。
CustomView.ktclass CustomView(context: Context, attrs: AttributeSet): View(context, attrs) {}XMLで、作成したViewを取得できるように、
attrs.xmlに作成したViewのリソースを定義
res/values/以下に、attrs.xmlというファイルを新規作成し、以下のように記述
- Android Developerには、他にもStyleの記述とかありますが、最低限動かすのはこれで十分です。
attrs.xml<resources> <!-- 作成したクラス名 --> <declare-styleable name="CustomView"> </declare-styleable> </resources>
- ActivityなどのXMLで、作成したViewを記述する
activity_sample.xml<androidx.constraintlayout.widget.ConstraintLayout xmlns:android="http://schemas.android.com/apk/res/android" xmlns:app="http://schemas.android.com/apk/res-auto" xmlns:tools="http://schemas.android.com/tools" android:layout_width="match_parent" android:layout_height="match_parent" tools:context=".SampleActivity"> // 作成したクラスを記述 <com.sample.app.CustomView app:layout_constraintStart_toStartOf="parent" app:layout_constraintTop_toTopOf="parent"/> </androidx.constraintlayout.widget.ConstraintLayout>独自Viewに描画したいものを記述していく
最後に、独自Viewに描画したいものを記述する処理についてです。
描画処理の記述は、作成したViewを継承したクラスCustomView.ktのonDrawというメソッドに色々と記述していきます。
- 作成したViewクラスで、
onDrawをオーバーライドCustomView.ktclass CustomView(context: Context, attrs: AttributeSet): View(context, attrs) { // onDrawをオーバーライド override fun onDraw(canvas: Canvas?) { super.onDraw(canvas) } }
onDrawで何かを描画するのに、重要な登場人物
- Canvas
- 描画するメソッドを持つクラス
- 例えば、線を描画する
drawLine()、円を描画するdrawCircle- Paint
- 描画する際のスタイルや、フォントなどを定義する
- 例えば、線を太くする
strokeWidth例: 線の描画や、円の描画
CustomView.ktclass CustomView(context: Context, attrs: AttributeSet): View(context, attrs) { // Paintなどのオブジェクト作成は、onDrawでやらない方が良いとのこと // パフォーマンスに影響を及ぼして、描画に時間がかかってしまう場合があるようです。 init { // 線の太さを、10Fに設定したPaint // これを、drawLineなどに設定すると、設定された状態で、線が描画される。 val paint = Paint().apply { strokeWidth = 10F style = Paint.Style.STROKE } } override fun onDraw(canvas: Canvas) { super.onDraw(canvas) // 線を描画 // 始点(x, y)と終点(x, y)とPaintオブジェクトを渡すことで描画できる canvas?.drawLine(startX: Float, startY: Float, endX: Float, endY: Float, paint: Paint) // 円を描画 // 中心(x, y)と半径、Paintオブジェクトを渡すことで描画できる canvas?.drawCircle(cx: Float, cy: Float, radius: Float, paint:Paint) } }参考にしたサイト、記事
- 投稿日:2021-01-17T16:28:40+09:00
Dagger Hiltで @Singleton を使うときの @InstallIn は ApplicationComponent
一行で言うと
@Singletonは@InstallInがApplicationComponentじゃないと使えません。事象
@InstallInがApplicationComponentの Module で@Singletonすると、以下のビルドエラーとなる。
error: [Dagger/IncompatiblyScopedBindings] com.example.XXXApplication_HiltComponents.ActivityC scoped with @dagger.hilt.android.scopes.ActivityScoped may not reference bindings with different scopes: public abstract static class SingletonC implements XXXApplication_GeneratedInjector
Hilt を使用した依存関係の注入 | Android デベロッパー | Android Developers の例だと
@InstallInが ActivityComponent になっているので、注意しましょう。その他
Dagger Hiltは2021年1月時点で、2.29-alphaです。
- 投稿日:2021-01-17T11:15:36+09:00
【自分用メモ】Firestore、前と1個もコード変わってないのになぜかアプリが動かない時
久々にアプリをビルドすると何故か動かん
前とコード変わってないのに。
Firebase周りで日付が関連する部分はここ。
Firestore > ルールの部分↓rules_version = '2'; service cloud.firestore { match /databases/{database}/documents { match /{document=**} { allow read, write: if request.time < timestamp.date(2021, 12, 1); } } }
timestamp.date()の中の日付が過去の日付になっている時、アプリがビルドできなくなります。対処法
とりあえず未来の日付に打ち直す。直接いじっていいです。
おまけ
こんなところで躓くこともあるのかぁと思いました。忘れちゃいそうなので一応メモ。
これで上手くいかない場合はSHA1を登録し直すとかしてみよう。


