- 投稿日:2021-01-09T23:50:03+09:00
第6回 AWSに自動でテスト/デプロイしてくれるインフラの設定・構築(総集編)。
本シリーズ集
タイトル 0 目標・やりたいこと 1 AWS編 2 rails開発環境構築編 3 Nginx・MySQL編 4 Capistrano編 5 CircleCI編 6 総集編 本記事について
第1回~第5回まで全てやってきた結果の『ファイルの内容』・『ディレクトリ構造』(・今後の課題) を、本記事にまとめて、本シリーズ集は終了とする。
APサーバ
ディレクトリ構造
/sample
├ .circleci
|  └ config.yml
├ Dockerfile
├ Dockerfile_pro
├ docker-compose.yml
├ docker-compose_pro.yml
└ ~ $ rails new / その他gem(bundle)固有のコマンドで生成されたファイル群 ~
CircleCI関連
.circleci/config.yml
.circleci/config.ymlversion: 2.1 jobs: build: docker: - image: circleci/ruby:2.7.1-node-browsers steps: - checkout - restore_cache: key: Sample_Cache_{{ checksum "Gemfile.lock" }} - run: name: install Gemfile command: bundle install --path vendor/bundle - save_cache: key: Sample_Cache_{{ checksum "Gemfile.lock" }} paths: - ./vendor/bundle test: docker: - image: circleci/ruby:2.7.1-node-browsers environment: DB_HOST: 127.0.0.1 DB_PASSWORD: root - image: circleci/mysql:5.7 environment: MYSQL_USER: root MYSQL_ROOT_PASSWORD: root steps: - checkout - restore_cache: key: Sample_Cache_{{ checksum "Gemfile.lock" }} - run: name: if do not execute this, an error occurs. command: yarn install --check-files - run: name: Wait for DB command: dockerize -wait tcp://127.0.0.1:3306 -timeout 120s - run: name: setup bundler target path command: bundle config --local path vendor/bundle - run: name: Set up DB command: | bundle exec rake db:create bundle exec rails db:migrate - run: name: implement test command: bundle exec rspec ./spec/ deploy: docker: - image: circleci/ruby:2.7.1-node-browsers steps: - checkout - restore_cache: key: Sample_Cache_{{ checksum "Gemfile.lock" }} - run: name: setup bundler target path command: bundle config --local path vendor/bundle - run: name: deploy app by capistrano command: bundle exec cap production deploy workflows: version: 2.1 test-deploy: jobs: - build - test: requires: - build - deploy: requires: - test filters: branches: only: masterDatabase周り
config/database.yml
config/database.ymldefault: &default adapter: mysql2 encoding: utf8 pool: <%= ENV.fetch("RAILS_MAX_THREADS") { 5 } %> username: <%= ENV.fetch("DB_USER") { "root" } %> password: <%= ENV.fetch("DB_PASSWORD") { "password" } %> host: <%= ENV.fetch("DB_HOST") { "db" } %> development: <<: *default database: app_development test: <<: *default database: app_test production: <<: *default database: app_production username: root password: root host: xx.xx.xx.xx #(APサーバのIPアドレス(ドメイン))Capistrano周り
config/deploy.rb
config/deploy.rblock "~> 3.14.1" set :application, "sample" set :repo_url, "git@github.com:{accout}/{repository}" set :deploy_to, "/home/ec2-user/#{fetch :application}" set :pty, true set :keep_releases, 5 set :linked_files, %w[config/master-pro.key config/database-pro.yml]
config/deploy/production.rb
config/deploy/production.rbset :ip, "xx.xx.xx.xx" # APサーバのIPアドレス server "#{fetch :ip}", user: "ec2-user", roles: %w{app}, ssh_options: { keys: %w(/path/to/key), auth_methods: %w(publickey) } task :upload do shared_path = fetch :shared_path on roles(:app) do upload! "config/database.yml", "#{shared_path}/config/database-pro.yml" unless test "[ -f #{shared_path}/config/database-pro.yml" upload! "config/master.key", "#{shared_path}/config/master-pro.key" unless test "[ -f #{shared_path}/config/master-pro.key ]" end end task :deploy => :upload do release_path = fetch :release_path on roles(:app) do execute "cp #{release_path}/config/database-pro.yml #{release_path}/databsae.yml; rm #{release_path}/config/database-pro.yml" execute "cp #{release_path}/config/master-pro.key #{release_path}/master.key; rm #{release_path}/config/master-pro.key" execute "sudo service docker start" container = capture "docker container ls -a -q -f name=test-rails-container" if container.present? execute "docker stop test-rails-container" execute "docker rm test-rails-container" end image = capture "docker image ls -q test-rails-image" if image.present? execute "docker rmi test-rails-image" end execute "docker-compose -f #{release_path}/docker-compose_pro.yml up -d" end end
Dockerfile_pro
Dockerfile_proFROM ruby:2.7.1 ENV DEBIAN_FRONTEND noninteractive RUN apt-get update && apt-get install -y \ build-essential \ nodejs RUN curl -sS https://dl.yarnpkg.com/debian/pubkey.gpg | apt-key add - && \ echo "deb https://dl.yarnpkg.com/debian/ stable main" | tee /etc/apt/sources.list.d/yarn.list && \ apt-get update && apt-get install -y --no-install-recommends yarn WORKDIR /sample COPY Gemfile /sample/Gemfile COPY Gemfile.lock /sample/Gemfile.lock RUN bundle install --without test development COPY . /sample
docker-compose_pro.yml
docker-compose_pro.ymlversion: '3' services: web: build: context: . dockerfile: Dockerfile_pro image: test-rails-image container_name: test-rails-container command: bundle exec rails s -p 3000 -b '0.0.0.0' -e production ports: - 3000:3000以下二つは、コマンド一つでローカルからWEBサーバ、DBサーバを起動できるようにしたもの。
config/deploy/production_web.rb(追加)
{application}ディレクトリ内にnginx ディレクトリを入れて。
config/deploy/production_web.rbset :ip, "xx.xx.xx.xx" # WEBサーバのIPアドレス server "#{fetch :ip}", user: "ec2-user", roles: %w{web}, ssh_options: { keys: %w(/path/to/key), auth_methods: %w(publickey) } task :webtask do on roles(:web) do upload! "./nginx" "/home/ec2-user/nginx" execute "sudo service docker start" container = capture "docker container ls -a -q -f name=test-nginx-container" if !container.empty? execute "docker stop test-nginx-container" execute "docker rm test-nginx-container" end execute "docker run --name test-nginx-container -p 80:80 -d test-nginx" # あらかじめ # $ docker build -t test-nginx . # というコマンドを打っており、『test-nginx』という名前のDockerイメージがある体の設定 end end
config/deploy/production_db.rb(追加)
config/deploy/production_db.rbset :ip, "xx.xx.xx.xx" # DBサーバのIPアドレス server "#{fetch :ip}", user: "ec2-user", roles: %w{db}, ssh_options: { keys: %w(/path/to/key), auth_methods: %w(publickey) } task :dbtask do on roles(:db) do execute "sudo service docker start" container = capture "docker container ls -a -q -f name=test-db-container" if !container.empty? execute "docker stop test-db-container" execute "docker rm test-db-container" end execute "docker run --name test-db-container -p 3306:3306 -e MYSQL_ROOT_PASSWORD=root -d mysql:5.7" end end
※注意
環境設定周り
そのままproduction環境で始めると、エラーが起きてしまうので、config/environments/production.rbファイルを一部書き換える。前者は、エラーが発生した際に、開発環境と同じエラーを表示してくれるようにするもの。後者が特に重要で、これをtrueにしておかないと、production環境では強制的にエラーとなってしまう。config/environments/production.rb# config.consider_all_requests_local = false # => trueにする config.consider_all_requests_local = true # config.assets.compile = false # => trueにする config.assets.compile = trueWebサーバ
ディレクトリ構成
/nginx
├ public
|  ├ 404.html
|  ├ 422.html
|  └ 500.html
├ nginx.conf
└ Dockerfile
public ディレクトリ配下は、
rails newコマンドで生成されたものを移植してきたものである。
nginx.conf
nginx.confserver { listen 80; access_log /var/log/nginx/access.log; error_log /var/log/nginx/error.log; root /public; error_page 404 /404.html; error_page 505 502 503 504 /500.html; location / { try_files $uri @app; } location @app { proxy_set_header HOST $http_host proxy_set_header X-Real-IP $remote_addr; proxy_set_header X-Forwarded-HOST $host; proxy_set_header X-Forwarded-For $proxy_add_x_forwarded_for; proxy_set_header X-Forwarded-Proto $scheme; proxy_pass http://xx.xx.xx.xx:3000; } }
Dockerfile
DockerfileFROM nginx:latest RUN rm -f /etc/nginx/conf.d/* COPY ./public /public COPY nginx.conf /etc/nginx/conf.d/nginx.conf CMD nginx -g 'daemon off;' -c /etc/nginx/nginx.confDBサーバ
DBサーバはネット上のDockerイメージとコマンドのみ
各種コンテナを起動して、通信してみる
ローカル(コンテナ内)で、以下のコマンドを打ち、
$ bundle exec cap production deploy
$ bundle exec cap production_web webtask
$ bundle exec cap production_db dbtask
ブラウザから
『http://xx.xx.xx.xx』とWebサーバにアクセスすると、、、
できたー!(あんまり見た目はパッとしませんが笑)
※ 少々心配になったので、$ rails g scaffoldコマンドでモデル・ビュー・コントローラを生成してきちんとパスにアクセスしたら表示されることを確認しました。まとめ
CapistranoやCircleCI・Nginxなど、一から調べながらやったのもあって、このシリーズの記事を書くのに正味10日ぐらいかかりました。笑
実際の開発現場では、セキュリティの強固性を保つために、WEB・AP・DBサーバ(特にAP・DB)へのアクセスを厳格化し、デプロイ時には、webサーバを踏み台とした、
web->ap、web->db等のアクセス手法が取られる(?)と予想できるので、そうした サーバを経由した 方法に対応するデプロイも覚えていきたいと思ってます。あと今回未実装の部分で、実際の現場でやることといえば、
rails db:create(migrate) RAILS_ENV=production等のコマンドをどうCapistranoに組み込むかぐらい?かな?ちなみに、この記事を書いてて気付いたのですが、Nginxの
publicフォルダがなくてもエラーのページが開かれました。
もしかしたら、nginxの設定ファイルのrootは関係なく、rails(puma)側のpublicフォルダを参照してるんだと思います。(軽く手を動かして調べました)。
多分ですが、try_files $uri/index.html $uri @railsApp;の部分に依存しているのかな?try_files について -> https://tsyama.hatenablog.com/entry/try_files_is_difficult
最後に
なんだかんだあってここまで来れました!
(各技術の基本的なものは他の方が既に上げているので)ブログみたいな記事になってしまいましたが、本シリーズをご一読してくださった方ありがとうございました!
- 投稿日:2021-01-09T23:50:03+09:00
第6回 AWSに自動でテスト/デプロイしてくれるインフラの設定・構築(総集編)
本シリーズ集
タイトル 0 目標・やりたいこと 1 AWS編 2 rails開発環境構築編 3 Nginx・MySQL編 4 Capistrano編 5 CircleCI編 6 総集編 本記事について
第1回~第5回まで全てやってきた結果の『ファイルの内容』・『ディレクトリ構造』(・今後の課題) を、本記事にまとめて、本シリーズ集は終了とする。
APサーバ
ディレクトリ構造
/sample
├ .circleci
|  └ config.yml
├ Dockerfile
├ Dockerfile_pro
├ docker-compose.yml
├ docker-compose_pro.yml
└ ~ $ rails new / その他gem(bundle)固有のコマンドで生成されたファイル群 ~
CircleCI関連
.circleci/config.yml
.circleci/config.ymlversion: 2.1 jobs: build: docker: - image: circleci/ruby:2.7.1-node-browsers steps: - checkout - restore_cache: key: Sample_Cache_{{ checksum "Gemfile.lock" }} - run: name: install Gemfile command: bundle install --path vendor/bundle - save_cache: key: Sample_Cache_{{ checksum "Gemfile.lock" }} paths: - ./vendor/bundle test: docker: - image: circleci/ruby:2.7.1-node-browsers environment: DB_HOST: 127.0.0.1 DB_PASSWORD: root - image: circleci/mysql:5.7 environment: MYSQL_USER: root MYSQL_ROOT_PASSWORD: root steps: - checkout - restore_cache: key: Sample_Cache_{{ checksum "Gemfile.lock" }} - run: name: if do not execute this, an error occurs. command: yarn install --check-files - run: name: Wait for DB command: dockerize -wait tcp://127.0.0.1:3306 -timeout 120s - run: name: setup bundler target path command: bundle config --local path vendor/bundle - run: name: Set up DB command: | bundle exec rake db:create bundle exec rails db:migrate - run: name: implement test command: bundle exec rspec ./spec/ deploy: docker: - image: circleci/ruby:2.7.1-node-browsers steps: - checkout - restore_cache: key: Sample_Cache_{{ checksum "Gemfile.lock" }} - run: name: setup bundler target path command: bundle config --local path vendor/bundle - run: name: deploy app by capistrano command: bundle exec cap production deploy workflows: version: 2.1 test-deploy: jobs: - build - test: requires: - build - deploy: requires: - test filters: branches: only: masterDatabase周り
config/database.yml
config/database.ymldefault: &default adapter: mysql2 encoding: utf8 pool: <%= ENV.fetch("RAILS_MAX_THREADS") { 5 } %> username: <%= ENV.fetch("DB_USER") { "root" } %> password: <%= ENV.fetch("DB_PASSWORD") { "password" } %> host: <%= ENV.fetch("DB_HOST") { "db" } %> development: <<: *default database: app_development test: <<: *default database: app_test production: <<: *default database: app_production username: root password: root host: xx.xx.xx.xx #(APサーバのIPアドレス(ドメイン))Capistrano周り
config/deploy.rb
config/deploy.rblock "~> 3.14.1" set :application, "sample" set :repo_url, "git@github.com:{accout}/{repository}" set :deploy_to, "/home/ec2-user/#{fetch :application}" set :pty, true set :keep_releases, 5 set :linked_files, %w[config/master-pro.key config/database-pro.yml]
config/deploy/production.rb
config/deploy/production.rbset :ip, "xx.xx.xx.xx" # APサーバのIPアドレス server "#{fetch :ip}", user: "ec2-user", roles: %w{app}, ssh_options: { keys: %w(/path/to/key), auth_methods: %w(publickey) } task :upload do shared_path = fetch :shared_path on roles(:app) do upload! "config/database.yml", "#{shared_path}/config/database-pro.yml" unless test "[ -f #{shared_path}/config/database-pro.yml" upload! "config/master.key", "#{shared_path}/config/master-pro.key" unless test "[ -f #{shared_path}/config/master-pro.key ]" end end task :deploy => :upload do release_path = fetch :release_path on roles(:app) do execute "cp #{release_path}/config/database-pro.yml #{release_path}/databsae.yml; rm #{release_path}/config/database-pro.yml" execute "cp #{release_path}/config/master-pro.key #{release_path}/master.key; rm #{release_path}/config/master-pro.key" execute "sudo service docker start" container = capture "docker container ls -a -q -f name=test-rails-container" if container.present? execute "docker stop test-rails-container" execute "docker rm test-rails-container" end image = capture "docker image ls -q test-rails-image" if image.present? execute "docker rmi test-rails-image" end execute "docker-compose -f #{release_path}/docker-compose_pro.yml up -d" end end
Dockerfile_pro
Dockerfile_proFROM ruby:2.7.1 ENV DEBIAN_FRONTEND noninteractive RUN apt-get update && apt-get install -y \ build-essential \ nodejs RUN curl -sS https://dl.yarnpkg.com/debian/pubkey.gpg | apt-key add - && \ echo "deb https://dl.yarnpkg.com/debian/ stable main" | tee /etc/apt/sources.list.d/yarn.list && \ apt-get update && apt-get install -y --no-install-recommends yarn WORKDIR /sample COPY Gemfile /sample/Gemfile COPY Gemfile.lock /sample/Gemfile.lock RUN bundle install --without test development COPY . /sample
docker-compose_pro.yml
docker-compose_pro.ymlversion: '3' services: web: build: context: . dockerfile: Dockerfile_pro image: test-rails-image container_name: test-rails-container command: bundle exec rails s -p 3000 -b '0.0.0.0' -e production ports: - 3000:3000以下二つは、コマンド一つでローカルからWEBサーバ、DBサーバを起動できるようにしたもの。
config/deploy/production_web.rb(追加)
{application}ディレクトリ内にnginx ディレクトリを入れて。
config/deploy/production_web.rbset :ip, "xx.xx.xx.xx" # WEBサーバのIPアドレス server "#{fetch :ip}", user: "ec2-user", roles: %w{web}, ssh_options: { keys: %w(/path/to/key), auth_methods: %w(publickey) } task :webtask do on roles(:web) do upload! "./nginx" "/home/ec2-user/nginx" execute "sudo service docker start" container = capture "docker container ls -a -q -f name=test-nginx-container" if !container.empty? execute "docker stop test-nginx-container" execute "docker rm test-nginx-container" end execute "docker run --name test-nginx-container -p 80:80 -d test-nginx" # あらかじめ # $ docker build -t test-nginx . # というコマンドを打っており、『test-nginx』という名前のDockerイメージがある体の設定 end end
config/deploy/production_db.rb(追加)
config/deploy/production_db.rbset :ip, "xx.xx.xx.xx" # DBサーバのIPアドレス server "#{fetch :ip}", user: "ec2-user", roles: %w{db}, ssh_options: { keys: %w(/path/to/key), auth_methods: %w(publickey) } task :dbtask do on roles(:db) do execute "sudo service docker start" container = capture "docker container ls -a -q -f name=test-db-container" if !container.empty? execute "docker stop test-db-container" execute "docker rm test-db-container" end execute "docker run --name test-db-container -p 3306:3306 -e MYSQL_ROOT_PASSWORD=root -d mysql:5.7" end end
※注意
環境設定周り
そのままproduction環境で始めると、エラーが起きてしまうので、config/environments/production.rbファイルを一部書き換える。前者は、エラーが発生した際に、開発環境と同じエラーを表示してくれるようにするもの。後者が特に重要で、これをtrueにしておかないと、production環境では強制的にエラーとなってしまう。config/environments/production.rb# config.consider_all_requests_local = false # => trueにする config.consider_all_requests_local = true # config.assets.compile = false # => trueにする config.assets.compile = trueWebサーバ
ディレクトリ構成
/nginx
├ public
|  ├ 404.html
|  ├ 422.html
|  └ 500.html
├ nginx.conf
└ Dockerfile
public ディレクトリ配下は、
rails newコマンドで生成されたものを移植してきたものである。
nginx.conf
nginx.confserver { listen 80; access_log /var/log/nginx/access.log; error_log /var/log/nginx/error.log; root /public; error_page 404 /404.html; error_page 505 502 503 504 /500.html; location / { try_files $uri @app; } location @app { proxy_set_header HOST $http_host proxy_set_header X-Real-IP $remote_addr; proxy_set_header X-Forwarded-HOST $host; proxy_set_header X-Forwarded-For $proxy_add_x_forwarded_for; proxy_set_header X-Forwarded-Proto $scheme; proxy_pass http://xx.xx.xx.xx:3000; } }
Dockerfile
DockerfileFROM nginx:latest RUN rm -f /etc/nginx/conf.d/* COPY ./public /public COPY nginx.conf /etc/nginx/conf.d/nginx.conf CMD nginx -g 'daemon off;' -c /etc/nginx/nginx.confDBサーバ
DBサーバはネット上のDockerイメージとコマンドのみ
各種コンテナを起動して、通信してみる
ローカル(コンテナ内)で、以下のコマンドを打ち、
$ bundle exec cap production deploy
$ bundle exec cap production_web webtask
$ bundle exec cap production_db dbtask
ブラウザから
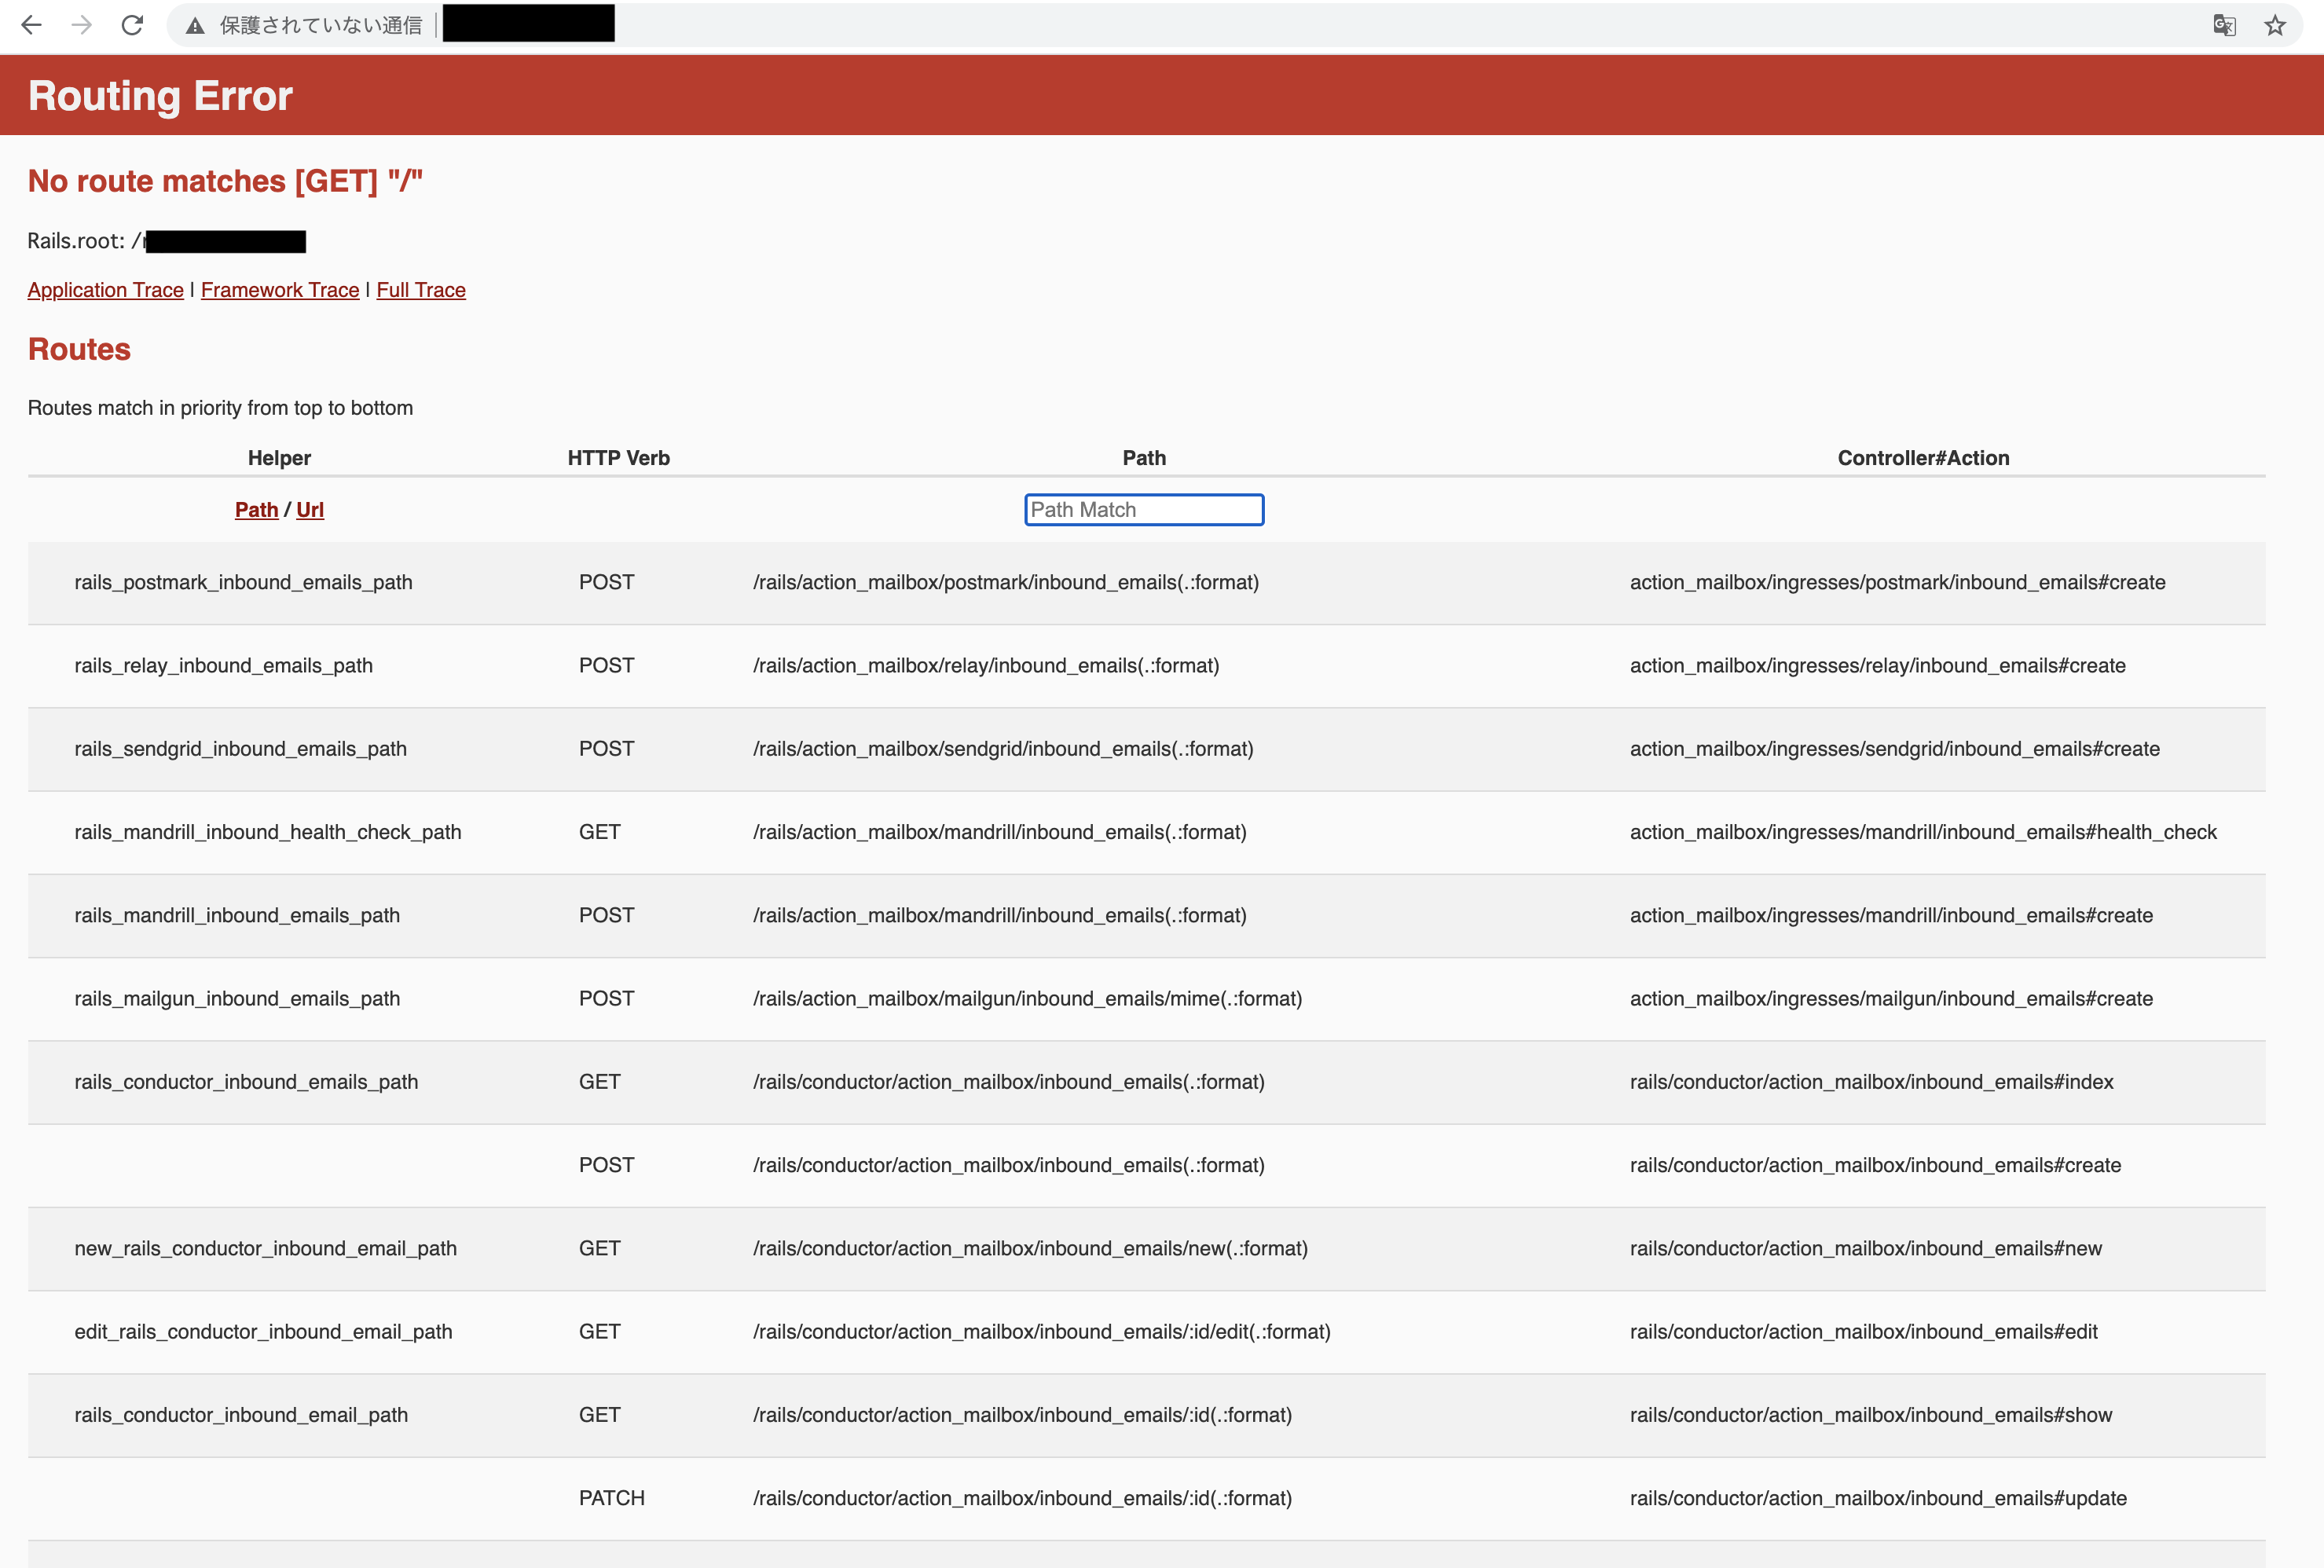
『http://xx.xx.xx.xx』とWebサーバにアクセスすると、、、
できたー!(あんまり見た目はパッとしませんが笑)
※ 少々心配になったので、$ rails g scaffoldコマンドでモデル・ビュー・コントローラを生成してきちんとパスにアクセスしたら表示されることを確認しました。まとめ
CapistranoやCircleCI・Nginxなど、一から調べながらやったのもあって、このシリーズの記事を書くのに正味10日ぐらいかかりました。笑
実際の開発現場では、セキュリティの強固性を保つために、WEB・AP・DBサーバ(特にAP・DB)へのアクセスを厳格化し、デプロイ時には、webサーバを踏み台とした、
web->ap、web->db等のアクセス手法が取られる(?)と予想できるので、そうした サーバを経由した 方法に対応するデプロイも覚えていきたいと思ってます。あと今回未実装の部分で、実際の現場でやることといえば、
rails db:create(migrate) RAILS_ENV=production等のコマンドをどうCapistranoに組み込むかぐらい?かな?ちなみに、この記事を書いてて気付いたのですが、Nginxの
publicフォルダがなくてもエラーのページが開かれました。
もしかしたら、nginxの設定ファイルのrootは関係なく、rails(puma)側のpublicフォルダを参照してるんだと思います。(軽く手を動かして調べました)。
多分ですが、try_files $uri/index.html $uri @railsApp;の部分に依存しているのかな?try_files について -> https://tsyama.hatenablog.com/entry/try_files_is_difficult
最後に
なんだかんだあってここまで来れました!
(各技術の基本的なものは他の方が既に上げているので)ブログみたいな記事になってしまいましたが、本シリーズをご一読してくださった方ありがとうございました!
- 投稿日:2021-01-09T23:38:22+09:00
Rails+React+QuaggaJSを使ってバーコードスキャンしてみた
はじめに
チーム開発したい方たちと集まりRuby on RailsとReactを使ってアプリ作成しており、
バーコード読み取り機能の実装を担当することとなったためざっくり動くところまで作ってみました。環境
- Ruby: 2.6.5
- Ruby on Rails: 6.0.3
セットアップ
rails _6.0.3_ new barcode_app -d postgresql cd barcode_app yarn add quagga rails webpacker:install rails webpacker:install:react rails generate react:installapp/javascript/components/scanners/config.json{ "inputStream": { "type": "LiveStream", "constraints": { "width": { "min": 450 }, "height": { "min": 300 }, "facingMode": "environment", "aspectRatio": { "min": 1, "max": 2 } } }, "locator": { "patchSize": "medium", "halfSample": true }, "numOfWorkers": 2, "frequency": 10, "decoder": { "readers": ["ean_reader"] }, "locate": true }app/javascript/components/scanners/Index.jsximport React, { useState } from "react"; import Scanner from "./Scanner"; const Index = () => { const [camera, setCamera] = useState(true); const [result, setResult] = useState(null); const onDetected = result => { setResult(result); setCamera(!camera) window.location.href = '/scanners/' + result }; return ( <section className="section-wrapper"> <div className="section-title"> <h1 className="section-title-text"> {camera ? <Scanner onDetected={onDetected} /> : <p>読み込み中...</p> } </h1> </div> </section> ); } export default Indexapp/javascript/components/scanners/Scanner.jsximport React, { useEffect } from "react"; import config from "./config.json"; import Quagga from "quagga"; const Scanner = props => { const { onDetected } = props; useEffect(() => { Quagga.init(config, err => { if (err) { console.log(err, "error msg"); } Quagga.start(); return () => { Quagga.stop() } }); Quagga.onProcessed(result => { var drawingCtx = Quagga.canvas.ctx.overlay, drawingCanvas = Quagga.canvas.dom.overlay; if (result) { if (result.boxes) { drawingCtx.clearRect( 0, 0, Number(drawingCanvas.getAttribute("width")), Number(drawingCanvas.getAttribute("height")) ); result.boxes .filter(function(box) { return box !== result.box; }) .forEach(function(box) { Quagga.ImageDebug.drawPath(box, { x: 0, y: 1 }, drawingCtx, { color: "green", lineWidth: 2 }); }); } if (result.box) { Quagga.ImageDebug.drawPath(result.box, { x: 0, y: 1 }, drawingCtx, { color: "#00F", lineWidth: 2 }); } if (result.codeResult && result.codeResult.code) { Quagga.ImageDebug.drawPath( result.line, { x: "x", y: "y" }, drawingCtx, { color: "red", lineWidth: 3 } ); } } }); Quagga.onDetected(detected); }, []); const detected = result => { onDetected(result.codeResult.code); }; return ( <div id="interactive" className="viewport" /> ); }; export default Scanner;はまったポイント
参考にした記事
https://github.com/visgl/react-map-gl/issues/874
対応箇所
config/webpack/environment.jsconst { environment } = require('@rails/webpacker') // 追記 environment.loaders.delete('nodeModules'); module.exports = environment完成
GitHub
https://github.com/yodev21/scanner_app参考記事
- 投稿日:2021-01-09T22:33:47+09:00
Couldn't find Item without an IDというエラーが出た時の対処法
idが見つからない時の対処法
自分がエラーが出た時のコントローラーはこちらでした。
order_controller.rbdef index @item = Item.find(params[:id]) @user_item = UserItem.new end解決方法
結論は、ネストしている時のID名が変わることを知らなかったが故に起きたエラーでした。
rails routesで検索したところitem_orders GET /items/:item_id/orders(.:format) orders#index
という結果が返ってきたのですが、注意すべきは/:item_id/の部分。
ネストで子要素となっている要素のid名は[:(親要素の名前)_id]に変わるのだそうです。
つまり、正解の記述はこちらになります。order_controller.rbdef index @item = Item.find(params[:item_id]) @user_item = UserItem.new endメモ
ネストしている子要素にあたるモデルのID名が変わることが知れて良かった。
- 投稿日:2021-01-09T22:27:10+09:00
【初めてのチーム開発②】Dockerで環境構築するまで
前回からの続きです。
Docker+Rails+Vue+MySQLの開発環境を作ったので、その備忘録。
(※本記事は適宜編集します。)手順
- 前準備
- Dockerfile作成 (Rails, Vue)
- docker-compose.yml作成
- プロジェクト作成
- 動作確認
- GitHubにpush
1. 前準備
・作業用ブランチ作成
$ git branch (→developブランチにいることを確認)
$ git checkout -b feature/docker-test

[この時点でのブランチの構造]
main
develop
 └── feature/docker-test   <- New!
・バージョン確認etc.
$ docker -v Docker version 19.03.8, build afacb8b $ docker-compose -v docker-compose version 1.25.4, build 8d51620a・最終的なディレクトリ構成はこちら。【参考】
[project_name]
├── api
│   ├── Dockerfile
│   ├── Gemfile
│   └── Gemfile.lock
├── docker-compose.yml
└── front
    ├── Dockerfile
    ├── ...
2. Dockerfile作成
RailsとVueのDockerfileをそれぞれ作成していきます。
まずはディレクトリを作成。
(現在のディレクトリ: project_name)
$ mkdir api front
$ ls
api front
2.1 Rails
RailsのDockerfileを作ります。
$ touch api/Dockerfileapi/DockerfileFROM ruby:2.7.1 RUN apt-get update -qq && \ apt-get install -y build-essential \ libpq-dev \ nodejs \ && rm -rf /var/lib/apt/lists/* RUN mkdir /app ENV APP_ROOT /app WORKDIR $APP_ROOT ADD ./Gemfile $APP_ROOT/Gemfile ADD ./Gemfile.lock $APP_ROOT/Gemfile.lock RUN bundle installこのDockerfileは「Railsを含むGemfile」を別途必要とします。
そこでapi下にGemfile, および空のGemfile.lockを作成します。
$ touch api/Gemfile
$ touch api/Gemfile.lockapi/Gemfilesource 'https://rubygems.org' gem 'rails', '~> 6.0.3'2.2 Vue
次にVueのDockerfileを作ります。
$ touch front/Dockerfilefront/DockerfileFROM node:12.18.3-alpine ENV APP_HOME /app RUN mkdir -p $APP_HOME WORKDIR $APP_HOME RUN apk update && npm install -g @vue/cli3. docker-compose.yml作成
次に、プロジェクトディレクトリ下にdocker-compose.ymlを作成します。
docker-compose.ymlversion: '3' services: web: build: ./api command: bundle exec rails s -p 3000 -b '0.0.0.0' ports: - '3000:3000' depends_on: - db volumes: - ./api:/app - bundle:/usr/local/bundle tty: true stdin_open: true db: image: mysql:5.7 volumes: - mysql_data:/var/lib/mysql/ environment: MYSQL_ROOT_PASSWORD: password ports: - '3306:3306' front: build: ./front volumes: - ./front:/app - node_modules:/app/node_modules ports: - '8080:8080' tty: true stdin_open: true command: npm run serve volumes: mysql_data: bundle: node_modules:4. プロジェクト作成
ここからが本番!
RailsプロジェクトとVueプロジェクトを順番に作っていきます。
Vueはvue-cliというものを使って、対話的に作成していきます。4-1. Rails
Railsプロジェクト作成
まず
rails newでRailsプロジェクトを作成。
apiディレクトリ下に、Railsのファイル群が作成されます。
※ 少し時間かかります。$ docker-compose run web rails new . --force --database=mysql --apidockerイメージ更新
Gemfileが更新されたので、buildしてdockerイメージを更新しておきます。
$ docker-compose builddatabase.ymlの修正
RailsのDB設定ファイル
api/config/database.ymlを修正します。
なお(password)はdocker-compose.ymlの環境変数MYSQL_ROOT_PASSWORDで指定したものを記述してください。api/config/database.ymldefault: &default adapter: mysql2 encoding: utf8mb4 pool: <%= ENV.fetch("RAILS_MAX_THREADS") { 5 } %> username: root - password: + password: (password) - host: localhost + host: dbDBの作成
$ docker-compose run web rails db:create[追記] 上記コマンドでエラー発生→解決しました。
自分の対応$ docker-compose run web rails db:create → Access Denied エラー $ docker-compose down --volumes $ docker-compose up -d $ docker-compose run web rails db:create → Errno::ENOENT エラー $ docker-compose down $ docker-compose run web rails db:create → 成功 Created database 'app_development' Created database 'app_test'参考:https://qiita.com/fujisawatk/items/80da801c7e2ac68e4887
…原因はvolume周り? Dockerの理解がまだまだ十分ではないですね…(^_^;)
$ docker-compose up -dをしてみて、localhost:3000にアクセスし、正常に表示されれば成功です!4-2. Vue
vue-cliでVueプロジェクトを作成します。
コンテナ内に入り、vue-cliを使って対話的にVueプロジェクトを作成します。
※設定内容は一例です。参考:https://qiita.com/Kyou13/items/be9cdc10c54d39cded15
$ docker-compose run front sh (←Vueコンテナでシェルを実行)以下、設定内容です。
$ vue create .
# 現在のディレクトリ(/app)に作成するかの確認
? Generate project in current directory? (Y/n) Yes

# プリセットを使用するかどうか
? Please pick a preset: (Use arrow keys)
  Default ([Vue 2] babel, eslint)
  Default (Vue 3 Preview) ([Vue 3] babel, eslint)
❯ Manually select features # TypeScriptをインストールするためこちらを選択

# プロジェクトにインストールするライブラリの選択
? Check the features needed for your project:
 ◉ Choose Vue version #
 ◉ Babel
❯◉ TypeScript # TypeScriptをインストールする場合はこれを選択
 ◯ Progressive Web App (PWA) Support
 ◯ Router
 ◯ Vuex
 ◯ CSS Pre-processors
 ◉ Linter / Formatter
 ◯ Unit Testing
 ◯ E2E Testing

# Vueバージョンの選択
? Choose a version of Vue.js that you want to start the project with (Use arrow keys)
❯ 2.x
  3.x (Preview)

# Class styleを使用するかどうか。私はObject styleを使うため No
? Use class-style component syntax? (Y/n) No

# TypeScriptと一緒にbabelを使うか
? Use Babel alongside TypeScript (required for modern mode, auto-detected polyfills, transpiling JSX)? (Y/n) Yes

# LintとFormatterの設定に何を使うか
? Pick a linter / formatter config:
  ESLint with error prevention only
  ESLint + Airbnb config
  ESLint + Standard config
❯ ESLint + Prettier
  TSLint (deprecated)

# Lintの実行タイミング
? Pick additional lint features: (Press <space> to select, <a> to toggle all, <i> to invert selection)
❯◉ Lint on save # 保存時にLintを実行
 ◯ Lint and fix on commit (requires Git)

# Babel, ESLintなどの設定をどこに記述するか
? Where do you prefer placing config for Babel, ESLint, etc.? (Use arrow keys)
❯ In dedicated config files # 各設定ファイルにする
  In package.json

# 今回設定した内容をプリセットで保存するか。基本的にはプロジェクトを以降作成することはないため No
? Save this as a preset for future projects? No

# パッケージマネージャーに何を使うか
? Pick the package manager to use when installing dependencies: (Use arrow keys)
  Use Yarn
❯ Use NPM
インストール完了後、
Ctrl+Dでコンテナを停止します。
またfront/Dockerfileを以下のように書き換えます。FROM node:12.18.3-alpine ENV APP_HOME /app RUN mkdir -p $APP_HOME WORKDIR $APP_HOME RUN apk update (変更) COPY package.json . (追加) RUN npm install (追加)5. 動作確認
Rails
localhost:3000にアクセスし、「Yay! you are on Rails!」が表示されたら成功。
Vue
localhost:8080にアクセスし、
が表示されたら成功。6. GitHubにpush
$ git status
On branch feature/docker-test
nothing to commit, working tree clean
$ git push origin feature/docker-test
参考記事
(本記事)
・DockerでRails + Vue + MySQLの環境構築をする方法【2020/09最新版】
・Docker Rails Vue.js MySQL環境構築
・開発環境をDockerに乗せる方法とメリットを3ステップで学ぶチュートリアル
・【Mac】Dockerと開発環境の作り方(その他、チーム開発手法)
・git develop, feature branch作成からmergeするまで (自分用メモ)
★Githubでチーム開発するためのマニュアル
- 投稿日:2021-01-09T22:27:10+09:00
【初めてのチーム開発②】Dockerで環境構築する
前回からの続きです。
Docker+Rails+Vue+MySQLの開発環境を作ったので、その備忘録。
(※本記事は適宜編集します。)手順
- 前準備
- Dockerfile作成 (Rails, Vue)
- docker-compose.yml作成
- プロジェクト作成
- 動作確認
- GitHubにpush
1. 前準備
・作業用ブランチ作成
$ git branch (→developブランチにいることを確認)
$ git checkout -b feature/docker-test

[この時点でのブランチの構造]
main
develop
 └── feature/docker-test   <- New!
・バージョン確認etc.
$ docker -v Docker version 19.03.8, build afacb8b $ docker-compose -v docker-compose version 1.25.4, build 8d51620a・最終的なディレクトリ構成はこちら。【参考】
[project_name]
├── api
│   ├── Dockerfile
│   ├── Gemfile
│   └── Gemfile.lock
├── docker-compose.yml
└── front
    ├── Dockerfile
    ├── ...
2. Dockerfile作成
RailsとVueのDockerfileをそれぞれ作成していきます。
まずはディレクトリを作成。
(現在のディレクトリ: project_name)
$ mkdir api front
$ ls
api front
2.1 Rails
RailsのDockerfileを作ります。
$ touch api/Dockerfileapi/DockerfileFROM ruby:2.7.1 RUN apt-get update -qq && \ apt-get install -y build-essential \ libpq-dev \ nodejs \ && rm -rf /var/lib/apt/lists/* RUN mkdir /app ENV APP_ROOT /app WORKDIR $APP_ROOT ADD ./Gemfile $APP_ROOT/Gemfile ADD ./Gemfile.lock $APP_ROOT/Gemfile.lock RUN bundle installこのDockerfileは「Railsを含むGemfile」を別途必要とします。
そこでapi下にGemfile, および空のGemfile.lockを作成します。
$ touch api/Gemfile
$ touch api/Gemfile.lockapi/Gemfilesource 'https://rubygems.org' gem 'rails', '~> 6.0.3'2.2 Vue
次にVueのDockerfileを作ります。
$ touch front/Dockerfilefront/DockerfileFROM node:12.18.3-alpine ENV APP_HOME /app RUN mkdir -p $APP_HOME WORKDIR $APP_HOME RUN apk update && npm install -g @vue/cli3. docker-compose.yml作成
次に、プロジェクトディレクトリ下にdocker-compose.ymlを作成します。
docker-compose.ymlversion: '3' services: web: build: ./api command: bundle exec rails s -p 3000 -b '0.0.0.0' ports: - '3000:3000' depends_on: - db volumes: - ./api:/app - bundle:/usr/local/bundle tty: true stdin_open: true db: image: mysql:5.7 volumes: - mysql_data:/var/lib/mysql/ environment: MYSQL_ROOT_PASSWORD: password ports: - '3306:3306' front: build: ./front volumes: - ./front:/app - node_modules:/app/node_modules ports: - '8080:8080' tty: true stdin_open: true command: npm run serve volumes: mysql_data: bundle: node_modules:4. プロジェクト作成
ここからが本番!
RailsプロジェクトとVueプロジェクトを順番に作っていきます。
Vueはvue-cliというものを使って、対話的に作成していきます。4-1. Rails
Railsプロジェクト作成
まず
rails newでRailsプロジェクトを作成。
apiディレクトリ下に、Railsのファイル群が作成されます。
※ 少し時間かかります。$ docker-compose run web rails new . --force --database=mysql --apidockerイメージ更新
Gemfileが更新されたので、buildしてdockerイメージを更新しておきます。
$ docker-compose builddatabase.ymlの修正
RailsのDB設定ファイル
api/config/database.ymlを修正します。
なお(password)はdocker-compose.ymlの環境変数MYSQL_ROOT_PASSWORDで指定したものを記述してください。api/config/database.ymldefault: &default adapter: mysql2 encoding: utf8mb4 pool: <%= ENV.fetch("RAILS_MAX_THREADS") { 5 } %> username: root - password: + password: (password) - host: localhost + host: dbDBの作成
$ docker-compose run web rails db:create[追記] 上記コマンドでエラー発生→解決しました。
自分の対応$ docker-compose run web rails db:create → Access Denied エラー $ docker-compose down --volumes $ docker-compose up -d $ docker-compose run web rails db:create → Errno::ENOENT エラー $ docker-compose down $ docker-compose run web rails db:create → 成功 Created database 'app_development' Created database 'app_test'参考:https://qiita.com/fujisawatk/items/80da801c7e2ac68e4887
…原因はvolume周り? Dockerの理解がまだまだ十分ではないですね…(^_^;)
$ docker-compose up -dをしてみて、localhost:3000にアクセスし、正常に表示されれば成功です!4-2. Vue
vue-cliでVueプロジェクトを作成します。
コンテナ内に入り、vue-cliを使って対話的にVueプロジェクトを作成します。
※設定内容は一例です。参考:https://qiita.com/Kyou13/items/be9cdc10c54d39cded15
$ docker-compose run front sh (←Vueコンテナでシェルを実行)以下、設定内容です。
$ vue create .
# 現在のディレクトリ(/app)に作成するかの確認
? Generate project in current directory? (Y/n) Yes

# プリセットを使用するかどうか
? Please pick a preset: (Use arrow keys)
  Default ([Vue 2] babel, eslint)
  Default (Vue 3 Preview) ([Vue 3] babel, eslint)
❯ Manually select features # TypeScriptをインストールするためこちらを選択

# プロジェクトにインストールするライブラリの選択
? Check the features needed for your project:
 ◉ Choose Vue version #
 ◉ Babel
❯◉ TypeScript # TypeScriptをインストールする場合はこれを選択
 ◯ Progressive Web App (PWA) Support
 ◯ Router
 ◯ Vuex
 ◯ CSS Pre-processors
 ◉ Linter / Formatter
 ◯ Unit Testing
 ◯ E2E Testing

# Vueバージョンの選択
? Choose a version of Vue.js that you want to start the project with (Use arrow keys)
❯ 2.x
  3.x (Preview)

# Class styleを使用するかどうか。私はObject styleを使うため No
? Use class-style component syntax? (Y/n) No

# TypeScriptと一緒にbabelを使うか
? Use Babel alongside TypeScript (required for modern mode, auto-detected polyfills, transpiling JSX)? (Y/n) Yes

# LintとFormatterの設定に何を使うか
? Pick a linter / formatter config:
  ESLint with error prevention only
  ESLint + Airbnb config
  ESLint + Standard config
❯ ESLint + Prettier
  TSLint (deprecated)

# Lintの実行タイミング
? Pick additional lint features: (Press <space> to select, <a> to toggle all, <i> to invert selection)
❯◉ Lint on save # 保存時にLintを実行
 ◯ Lint and fix on commit (requires Git)

# Babel, ESLintなどの設定をどこに記述するか
? Where do you prefer placing config for Babel, ESLint, etc.? (Use arrow keys)
❯ In dedicated config files # 各設定ファイルにする
  In package.json

# 今回設定した内容をプリセットで保存するか。基本的にはプロジェクトを以降作成することはないため No
? Save this as a preset for future projects? No

# パッケージマネージャーに何を使うか
? Pick the package manager to use when installing dependencies: (Use arrow keys)
  Use Yarn
❯ Use NPM
インストール完了後、
Ctrl+Dでコンテナを停止します。
またfront/Dockerfileを以下のように書き換えます。FROM node:12.18.3-alpine ENV APP_HOME /app RUN mkdir -p $APP_HOME WORKDIR $APP_HOME RUN apk update (変更) COPY package.json . (追加) RUN npm install (追加)5. 動作確認
Rails
localhost:3000にアクセスし、「Yay! you are on Rails!」が表示されたら成功。
Vue
localhost:8080にアクセスし、
が表示されたら成功。6. GitHubにpush
$ git status
On branch feature/docker-test
nothing to commit, working tree clean
$ git push origin feature/docker-test
参考記事
(本記事)
・DockerでRails + Vue + MySQLの環境構築をする方法【2020/09最新版】
・Docker Rails Vue.js MySQL環境構築
・開発環境をDockerに乗せる方法とメリットを3ステップで学ぶチュートリアル
・【Mac】Dockerと開発環境の作り方(その他、チーム開発手法)
・git develop, feature branch作成からmergeするまで (自分用メモ)
★Githubでチーム開発するためのマニュアル
- 投稿日:2021-01-09T22:26:14+09:00
【Git】masterブランチを削除した世にも恐ろしい話〜答えは英語の中に〜
オリジナルアプリを作って今日で3日目。
要件定義をしっかりしたつもりだったがあれやこれやと出てきてしまい、
「あ、これもやらなきゃ」
「あれ?スペルミス」
「あれ?ここどうしたらいいんだっけ?」
こんなことの連発。
こまめにcommitしなければいけないと思いつつ作業ブランチのことをやっていて、他のブランチに戻る、そんなことを繰り返していてわけがわからなくなってしまったので、
「一度マージし終わっているブランチを削除しよう!」
そう思いついたのが地獄の始まりじゃったそうな・・・やっちゃったこと
% git branch -D master「記事を見ながらやった。なぜこうなってしまったのかはわからない。後悔はしている。」
(プライバシー保護のため音声を加工してありますmasterブランチって消えるんですね。恐ろしいよ。
その後、下記コマンドでreflogを抽出% git reflog ⬇️⬇️⬇️以下結果⬇️⬇️⬇️ 0422208 (HEAD -> master) HEAD@{0}: checkout: moving from ユーザー管理機能 to master 444f2b7 (origin/ユーザー管理機能, ユーザー管理機能) HEAD@{1}: checkout: moving from master to ユーザー管理機能 0422208 (HEAD -> master) HEAD@{2}: checkout: moving from ユーザー管理機能 to master 444f2b7 (origin/ユーザー管理機能, ユーザー管理機能) HEAD@{3}: checkout: moving from master to ユーザー管理機能 0422208 (HEAD -> master) HEAD@{4}: checkout: moving from ユーザー管理機能 to master 444f2b7 (origin/ユーザー管理機能, ユーザー管理機能) HEAD@{5}: checkout: moving from master to ユーザー管理機能 0422208 (HEAD -> master) HEAD@{6}: checkout: moving from ユーザー管理機能 to master 〜以下略〜出てきたHEADの表示を確認し、該当の数字を入力
% git branch master HEAD@{21}ザオリク成功。やったね!
そして時は流れ、新たなブランチでの作業が終わった時に事件は起こった。
コミット→プッシュ→
Delete Branchする前にmasterに反映されているか確認するか・・・
・・・あれ?
・・・おかしいな
・・・Fetch Origin、ん?
・・・なんでViewファイルが更新されてないんだ?
え?!他のファイルも更新されてない!なんで?!
Fetch Originすると
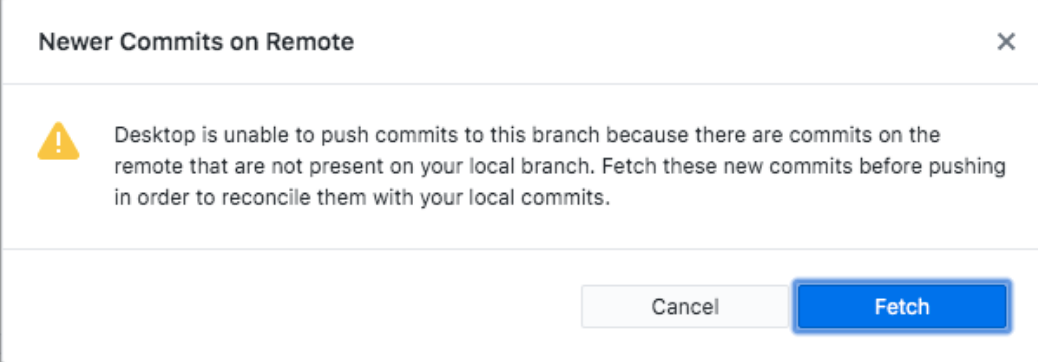
Newer Commmits on Remote
もうコミットされてるよ!と怒られた。
え、どこに?反映されてないんだけど・・・
確認するとこんな状態。% git branch -a * master テーブル新規作成 ユーザー管理機能 remotes/origin/master remotes/origin/テーブル新規作成 remotes/origin/ユーザー管理機能remotesあるじゃない!なんで反映されないのかわからない。
ここで2時間ぐらいハマる。
復活の呪文がうまくいってなかったのか?あれはザオリクじゃなくてザオラルだったのか?
そんなことを考えながらどうにもこうにもうまくいかなくなってエラー文で検索をかけて出てきた英語の記事を読む。どうやらローカルリポジトリのmasterブランチにトラッキングブランチが設定されていないことで出るエラーらしい(ちょっと何言ってるかよくわかんない
リポジトリのクローンを作成することで回復するとのこと。感覚としては削除しちゃったから完全な状態でmasterブランチが復活してなかったよ!ってこと?
とりあえずやってみる。% git branch -u origin/masterこれで見事にpullできるようになりました!ホッとした・・・
色々調べたんですが「-u」コマンドってどういう意味なのかわかりません。
何をしてくれているコマンドなんでしょうか?
remotes/origin/master
ってリモートブランチのことだと思ってましたけど違うんですね。
何回か読んだけどめちゃくちゃ難しい。
まだまだわからないことがいっぱい。やりがい。参照させて頂きました
https://qiita.com/forest1/items/db5ac003d310449743ca
ありがとうございました。
- 投稿日:2021-01-09T21:50:48+09:00
ViewComponentReflex触って見たメモ
これは何?
ViewComponentReflexという「ajaxで値を書き換える処理をRails側だけで実装できてしまうようなもの」を試してみたくなったので、色々試して見たメモ。
https://github.com/joshleblanc/view_component_reflex
モチベーション
- JavaScriptがあまり好きではないので、画面内のデータの更新だけであればサーバー側だけで書きたかった
- JavaScript + APIで色々やりたい人とは相容れない考え方かもしれない
事前知識
ViewComponentReflexはViewComponentの拡張である。
そのため、まずは最低限のViewComponentの知識が必要。また、ajax的な感じで通信する部分(雑)は stimulus_reflex をベースに書かれているが、ざっくりの処理を行うだけだと意識しないで良い形となっている。
ここからは、まずはざっくりViewComponentについての記述を行った後、ViewComponentReflexをみていく。
ViewComponentってそもそも何?
概略
- Railsで吐き出されるHTMLを、React等々のようにコンポーネント化出来るようにするためのもの
- コンポーネント化すると、Viewのテストも便利だし、データも追いやすい
partialsと何が違うの?
RailsにはHTMLの一部をコンポーネント化するためのpartialsというものがすでにある。
こんな感じのやつ// 呼び出す側 <div> <%= render :partial => "(template_name))" %> </div> // 呼び出される側 <p>こいつが表示される</p> // 結果 <div> <p>こいつが表示される</p> </div>ざっくりいえば下記が違う。
- ViewComponentの方が読み込みが速い
- 10倍くらい早いと書かれているが、状況次第
- Viewのテストがしやすい
- Viewのテストコードを書きやすくなる
素直に考えると、partialの進化版みたいなイメージ。
(個人的には...)
GoogleAnalyticsのタグを埋め込むなど、静的HTMLであればpartialの方がシンプル。
一覧等で変数を展開していくのであれば、ViewComponentの方が速いし良い、、位の切り分け。
CSSなどを分けてコンポーネント化しておきたい場合は、変数展開なしでもViewComponentの方が良さそう。
ここからはガイドに従ってサンプルを実装した時のメモ。
slimで実装しているので適宜読み替えてほしい。
Installation
Rails6.1だとすんなり入る。
Rails5.0+の場合は モンキーパッチが必要。
先にRails6.1に上げてしまったほうが楽かもしれない。gem "view_component", require: "view_component/engine"基本的な動き
ComponentをRubyで定義すると、同じディレクトリにあるHTMLが自動で読み込まれる。
Componentに変数を指定する場合は、initializeで指定する。app/components/example/component.rbmodule Example class Component < ViewComponent::Base def initialize(title:) @title = title end end endapp/components/example/component.html.slimh1 = @title呼び出す時はView側で
render Example::Component.newしてあげる。
変数がない場合はnewだけでよい。呼び出し側.slim= render Example::Component.new(title: 'hogehoge')これくらいをざっと書くと、コンポーネントが展開されたHTMLが出力される。
出力結果.html<h1>hogehoge</h1>コンテンツのエリアを指定したいとき
変数だけでなく、HTMLそのものをコンポーネントに渡したいケースなどは下記のようにする。
呼び出し時にブロック要素を渡す方法
ここは上述の通常時と変わらない。
特別な変数を用いなくとも、ブロック要素をcontentに自動で展開してくれるため。app/components/example2/component.rbmodule Example2 class Component < ViewComponent::Base def initialize(title:) @title = title end end endブロック要素を展開したい場所に
contentを配置する。app/components/example2/component.html.slimh1 = @title div = content呼び出し時にブロック要素でHTMLを渡してあげる。
呼び出し側.slim= render Example2::Component.new(title: 'hogehoge') do |component| h2 | 色んなHTMLをここに書けるよブロック要素が
contentに自動で展開される。出力結果.html<h1>hogehoge</h1> <div><h2>色んなHTMLをここに書けるよ</h2></div>コンテンツそれぞれに名前をつける方法
contentだけでなく、展開したい場所に応じて名前をつけることが出来る。
headerやhooterなどを分けて記載したい場合に便利。
with_content_areasでコンテンツエリアに名前をつける。app/components/example3/component.rbmodule Example3 class Component < ViewComponent::Base with_content_areas :header, :footer def initialize(title:) @title = title end end end名前をつけたコンテンツエリアを配置。
contentはいつでも使える。app/components/example3/component.html.slimdiv = header div = content div = footer呼び出し時に
component.with(:コンテンツエリアの名前)のブロックを作ることで、コンテンツエリア内にその要素が展開される。呼び出し側.slim= render Example3::Component.new(title: 'hogehoge') do |component| = component.with(:header) do | ここはヘッダーだよ = component.with(:footer) do | ここはフッターだよ h2 | ここはコンテンツとして展開されるよ
headerやfooterが対応する場所に展開される。
また、component.withで指定しない部分はcontentとして展開されるため、h2の内容が真ん中に表示されている。出力結果.html<div>ここはヘッダーだよ</div> <div> <h2>ここはコンテンツとして展開されるよ</h2> </div> <div>ここはフッターだよ</div>Slots
ViewComponentにはSlotsという謎な概念がある。
Slotsを使うと、複数のブロックから成るコンテンツを、ひとつのViewComponentから呼び出すことができる。ざっくりいえば、呼び出し側は一行だが、ネストしたコンポーネントを扱えるようになる。
Slotsの種類
一回しか読み込まないか、複数回読み込むかで種類が変わる。
renders_one
ヘッダなど、一回しか読み込まれないコンポーネントをslotとして設定するときに使う。
例:
renders_one :headerrenders_many
記事へのコメントなど、ひとつの親コンポーネントから複数回呼び出されるコンポーネントに設定する。
例:
renders_many :commentsSlotsの呼び出し方
三種類にわかれる。
移譲
シンプルな形だとこれ。
親コンポーネントを定義。
app/components/example4/component.rbmodule Example4 class Component < ViewComponent::Base include ViewComponent::SlotableV2 # 同じクラス内の場合は文字列でコンポーネントを指定 renders_one :header, 'HeaderComponent' # 別ファイルから呼び出す場合はクラスを直接指定 # postのコンポーネントを複数回呼び出すため、renders_manyを指定している renders_many :posts, ExamplePost::Component class HeaderComponent < ViewComponent::Base attr_reader :title def initialize(title:) @title = title end end end end親コンポーネントの中から上記で定義した
headerやpostsを呼び出すことが出来る。
そうすることで、子コンポーネントがそれぞれ呼び出されるようになる。app/components/example4/component.html.slimdiv / TODO: なぜかhtmlが文字列として展開されてしまうのでhtml_escapeをつけている = html_escape header div - posts.each do |post| = html_escape post子コンポーネントの中身はそれぞれこのような形。
app/components/example4/header_component.html.slimdiv h1 = @title div = contentapp/components/example_post/component.html.slimh5 = @titleapp/components/example_post/component.rbmodule ExamplePost class Component < ViewComponent::Base def initialize(title:) @title = title end end end呼び出し側からは親コンポーネントを直接呼び出す。
また、renders_one,renders_manyで設定したコンポーネントに呼び出し側から値を設定する。
もちろんここは@posts.each〜〜のような形で呼び出し側でループを回しても良い。呼び出し側.slimdiv = render Example4::Component.new do |c| = c.header(title: "hogehoge") do p ヘッダの中身だよ = c.post(title: "1つ目") = c.post(title: "2つ目")親コンポーネントを呼び出すだけで、子コンポーネントも勝手に展開されているのがわかる。
出力結果.html<div> <div> <h1>hogehoge</h1> <div> <p>ヘッダの中身だよ</p> </div> </div> </div> <div> <h5>1つ目</h5> <h5>2つ目</h5> </div>なお、
renders_oneはひとつしか読み込めない。
下記のように複数した場合は後勝ち(つまりはhogehoge2が表示)となる。複数のrenders_oneの例.slimdiv = render Example4::Component.new do |c| = c.header(title: "hogehoge1") do = c.header(title: "hogehoge2")また、
renders_manyで複数回呼び出す場合は、postsのような形で配列を渡すことも出来る。div = render Example4::Component.new do |c| = c.posts([{title: "1つ目"}, {title: "2つ目"}])ラムダ式での呼び出し
移譲のケースは、下記のように書くことも出来る。
間に処理をはさみたいときなどはこちらのほうが便利。app/components/example4/component.rbmodule Example4 class Component < ViewComponent::Base include ViewComponent::SlotableV2 renders_one :header, -> (title:) do HeaderComponent.new(title: title) end renders_many :posts, -> (title:) do # titleをちょっと変更したいときや、変数を渡して表示内容を制御したいときなどは便利 ExamplePost::Component.new(title: title + '_hogehoge') end class HeaderComponent < ViewComponent::Base attr_reader :title def initialize(title:) @title = title end end end end直接呼び出し
app/components/example5/component.rbmodule Example5 class Component < ViewComponent::Base include ViewComponent::SlotableV2 renders_one :header renders_many :posts end end上記のようにラフに定義だけして呼び出すことも出来る。
コンポーネントの設計が綺麗にできているのであれば、この形がシンプルではある。呼び出し側.slimdiv = render Example5::Component.new do |c| = c.header(title: "hogehoge") = c.posts([{title: "1つ目"}, {title: "2つ目"}])インラインコンポーネント
テンプレートを書かずにrbのみでコンポーネントを作ることも出来る。
app/components/example6/component.rbmodule Example6 class Component < ViewComponent::Base # デフォルトでcallという名前が設定されている def call link_to 'link to root', root_path end # call_xxxという名前にした場合、publicなメソッドとして呼び出すことが出来る def call_other link_to 'link to other', root_path end end end呼び出し側.slimdiv = render Example6::Component.new br / with_variant(:other)を指定することで、 call_otherを呼び出している = render Example6::Component.new.with_variant(:other)条件によってレンダリングするか分けたいとき
render?を使うことで制御できる。
これによって、表示制御のロジックをViewから排除することが出来る。app/components/example7/component.rbmodule Example7 class Component < ViewComponent::Base def initialize(is_show:) @is_show = is_show end def render? @is_show == true end end end呼び出し側.slimdiv = render Example7::Component.new(is_show: true) = render Example7::Component.new(is_show: false)出力結果.html<div><p>1件だけ表示される</p></div>レンダリングの前処理
レンダリングする前に前処理を行うことが出来る。
initializeで行えば良い気もするが、複数回ループさせるときなどはこっちのほうが速そう。app/components/example8/component.rbmodule Example8 class Component < ViewComponent::Base def before_render @title = '事前にレンダリングされたタイトル' end def initialize; end end endコレクションをパラメーターとして渡したいとき
app/components/example/component.rbmodule Example class Component < ViewComponent::Base # コレクションの場合に渡されるパラメーター名はデフォルトでは hoge_component.rb のhogeの部分 # これを変更する場合はwith_collection_parameterとして名前を設定する必要がある with_collection_parameter :title def initialize(title:) @title = title end end end呼び出し側.slimdiv - titles = ["hoge", "fuga"] = render Example::Component.with_collection(titles)コレクションのカウントを取りたいとき
app/components/example9/component.rbmodule Example9 class Component < ViewComponent::Base with_collection_parameter :title # _counterという名前の場合、コレクションをループした回数のカウントが設定される def initialize(title:, title_counter:) @title = title @counter = title_counter end end end呼び出し側.slimdiv - titles = ["hoge", "fuga"] = render Example9::Component.with_collection(titles)ディレクトリ構造
app/componentsディレクトリの配下に色々置く。
コンポーネントとしてわかりやすくする観点だと、app/components/example用に、コンポーネント単位でディレクトリを作り、その中に必要なファイルを置く形が良いと考えている。もちろん、
app/components直下に色々置く形でも問題ない。app/components ├── ... ├── example | ├── component.rb | ├── component.css | ├── component.html.slim | └── component.js ├── ... // 呼び出す時はフォルダ名をネームスペースとして考慮してくれるので、下記の形となる <%= render(Example::Component.new(title: "my title")) do %> Hello, World! <% end %>ViewComponentのテスト
以下はrspecの場合。
設定
render_inlineなどの便利メソッドを生やすための設定が必要。spec/rails_helper.rbrequire "view_component/test_helpers" RSpec.configure do |config| config.include ViewComponent::TestHelpers, type: :component endテストの例
Viewのテストが書きやすくなって便利かなと思う。
require 'rails_helper'

RSpec.describe Example::Component, type: :component do
  it 'renders something useful' do
    render_inline(described_class.new(title: 'hoge'))
    assert_includes rendered_component, 'hoge'

   # capybaraが入っている時はcapybaraのマッチャも使える
    assert_text('hoge')
  end
end
コンポーネントのプレビュー
ActionMailer::Previewのように、コンポーネントのプレビューを見ることが出来る。
個別でCSS書く場合なんかは便利に使えそう。初期設定として下記が必要。
config/application.rbconfig.view_component.preview_paths << "#{Rails.root}/spec/components/previews"プレビューを見るための設定は下記。
プレビュー用のクラスとメソッドを作成し、そこから呼び出してあげるだけ。spec/components/previews/example_preview.rbclass TestComponentPreview < ViewComponent::Preview # コンポーネントということを考えると、layoutは設定しない方が良さそう # 好みによって設定かな layout false def default_title render(Example::Component.new(title: 'Test component default')) end end上記のファイルの場合はこちらからアクセスできる。
http://127.0.0.1:3000/rails/view_components
ここからやっとViewComponentReflexの話に入る。
ViewComponentReflexってそもそも何?
自分もよくわかっていないからこうやって試している。
雑にいえば、ajaxで値を変えたりする何かを、全てサーバー側で記載してしまおうというもの。準備
ActionCableでRedisが必要になるため、何かしらの形でRedisを準備する。
ViewComponentの諸々の設定が終わっていれば、他は特に不要。使い方
app/components/example10/component.rbmodule Example10 class Component < ViewComponentReflex::Component def initialize @count = 0 end def increment @count += 1 end end end
refrex_tagを書いて、コンポーネント側で定義したメソッドを指定するだけで終わり。app/components/example10/component.html.slim= component_controller do p = @count = reflex_tag :increment, :button, "Click"呼び出し側.slimdiv = render Example10::Component.newこれだけしか書いてないけどサーバー側と通信して数字がインクリメントされている。
クリックイベントではなく、マウスエンター等に変更する場合は下記の感じで書く。
app/components/example10/component.html.slim= component_controller do p = @count = reflex_tag "mouseenter->increment", :button, "Click"マウスカーソルを合わせるだけで数字が増えるようになる。
他の要素を動かしたいとき
component_controllerを利用すると、変数keyが自動で生成される。
こののkeyを利用すると、他のコンポーネントの処理を動かすことが出来るようになる。parent.slim= component_controller do div#loader - if @loading p ロード中 = reflex_tag :do_action, :button, "Click" / component_controllerによってkeyが自動生成されている = render Child::Component.new(parent_key: key)parent.rbmodule Parent class Component < ViewComponentReflex::Component def initialize @loading = false end # 子から呼ばれる処理 def update_loading @loading = !@loading # コンポーネント内の特定のセレクタを更新する処理 # prevent_refresh!という、更新を受け付けない処理もある # refresh_all!すると、body要素全てを更新する refresh! '#loader' end end endchild.rbmodule Child class Component < ViewComponentReflex::Component def initialize(parent_key:) @parent_key = parent_key end def stimulate_parent # 親の処理をstimulateで叩く # parent_keyでコンポーネントの紐付けを行っている stimulate("Parent::Component#update_loading", { key: @parent_key }) end end endコレクションに要素を追加したいとき
要素のコレクション自体を保持する親要素と、要素のコレクションを表示する子要素に分けて実装する。
parent.rbclass MyUserModel attr_accessor :id, :name def initialize(id:, name:) @id = id @name = name end end module Parent class Component < ViewComponentReflex::Component def initialize(users:) @users = users end def add_user # 普通は外部からデータを渡すと思うが、サンプルなので。 # ViewComponentの中でどこまでやるかは悩ましい。データ保存からの再表示等々もやることもあるとは。 @users.append(MyUserModel.new(id: @users.length + 1, name: "#{(@users.length + 1).to_s}郎")) end end endchild.rbmodule Child class Component < ViewComponentReflex::Component # これを定義し忘れるとうまく引数を読み込まない¥ with_collection_parameter :user def initialize(user:) @user = user end # こいつを設定しておかないと怒られる def collection_key @user.id end end endparent.slim= component_controller do / コレクションを表示するコンポーネント(子)を呼び出し = render Child::Component.with_collection(@users) = reflex_tag :add_user, :button, "太郎を増やす"child.slim/ 表示しているだけ = component_controller do = @user.id = @user.name呼び出し元.slimdiv = render Parent::Component.new(users: [MyUserModel.new(id:1, name:'1郎')])あとはこれらを応用していくだけ。
雑感
多少癖はあるし、まだまだ足りない部分は多いが、軽めのサービスだったらトライしてみて良さそう。
掲示板等のコメント投稿後のリロード等々だと使い勝手は良さそう。
データの更新等々を誰がやるべきかは難しい。ベストプラクティスはわからない。

- 投稿日:2021-01-09T21:17:17+09:00
【Rails】アプリ新規作成--備忘録--
アプリ新規作成
作成したいディレクトリに移動してから
ターミナルrails new [アプリ名] -d mysql「-d mysql」でデータベース作成時にmysqlを指定
データベース作成
作成されたアプリのディレクトリまで移動する。
下記のコマンドで、database.ymlに記述された設定通りにデータベースが作成される。ターミナルrake db:create想定通りに作成されなければ、database.ymlを確認する。
sqliteが初期のデータベースに指定されているので、必要ならばgemにmysqlを記述し、bundle installする。参考: Railsアプリケーション開発をしよう! 〜開発の準備編〜
コントローラーの作成
ターミナルrails g controller [コントローラー名]ルーティング設定
routes.rbroot "[コントローラー名]#index"rootはurlでアクセスした時に、トップページに表示されるコントローラーとアクションを表示しています。
今回は[index]アクションを指定しています。コントローラーアクション記述
必要なアクションを記述していきます。
[コントローラー名]_controller.rbdef index endビューファイル作成
[app/views/コントローラ名/]ディレクトリが作成されれいるので、index.html.erbのファイルを作成します。
index.html.erb<p>Hello, World!</p>こちらで、railsサーバーを立ち上げて、ローカルでアクセスすると「Hello, World!」と表示されます。
テーブル作成
ターミナルrails g model [モデル名]モデルを作成すると、テーブルを作成する為のマイグレーションファイルが自動生成されます。
マイグレーションファイルを記述し、マイグレーションファイルを実行します。ターミナルrails db:migrate参考 Active Record マイグレーション
参考 RailsのMigrationに関する基本まとめ以上。
- 投稿日:2021-01-09T20:26:10+09:00
【Rails6】非同期(Ajax)でフォロー機能を実装する
前提
- deviseでユーザーに関する機能作成済み
- jqueryが使える環境を構築済み
概要
フォロー機能の仕組みについては、RailsTutorialに詳しく書かれているので、参照することをお勧めします。今回用いるカラム名やモデル名は以下の通りです。メモ程度ですが参考程度に載せておきます。
Relationshipモデルを作成
コンソールでrelationshipモデルを作成
rails g model relationships
- 参照
- フォロワー: userテーブルを参照する
- フォロー :
followという名前でuserテーブルを参照する- index
- user_idとfollow_idが一致することが無い様に、複合キーインデックスを追加
- これにより、「自分が自分をフォローする」ということを防げる
20210104064312_create_relationships.rbclass CreateRelationships < ActiveRecord::Migration[6.0] def change create_table :relationships do |t| t.references :user, foreign_key: true t.references :follow, foreign_key: { to_table: :users } t.timestamps t.index [:user_id, :follow_id], unique: true end end endマイグレーションを実行
rails db:migraterelationshipモデルとuserモデルのリレーションは以下の通り記述する。
また、validationも記述。relationship.rbclass Relationship < ApplicationRecord belongs_to :user belongs_to :follow, class_name: 'User' validates :user_id, presence: true validates :follow_id, presence: true end
- 関連付けについては、上記画像を参照していただけると幸いです。
- 「フォローする」「フォローを外す」「フォローしているか確認」のメソッドは何度も使用するので、定義しておきます。
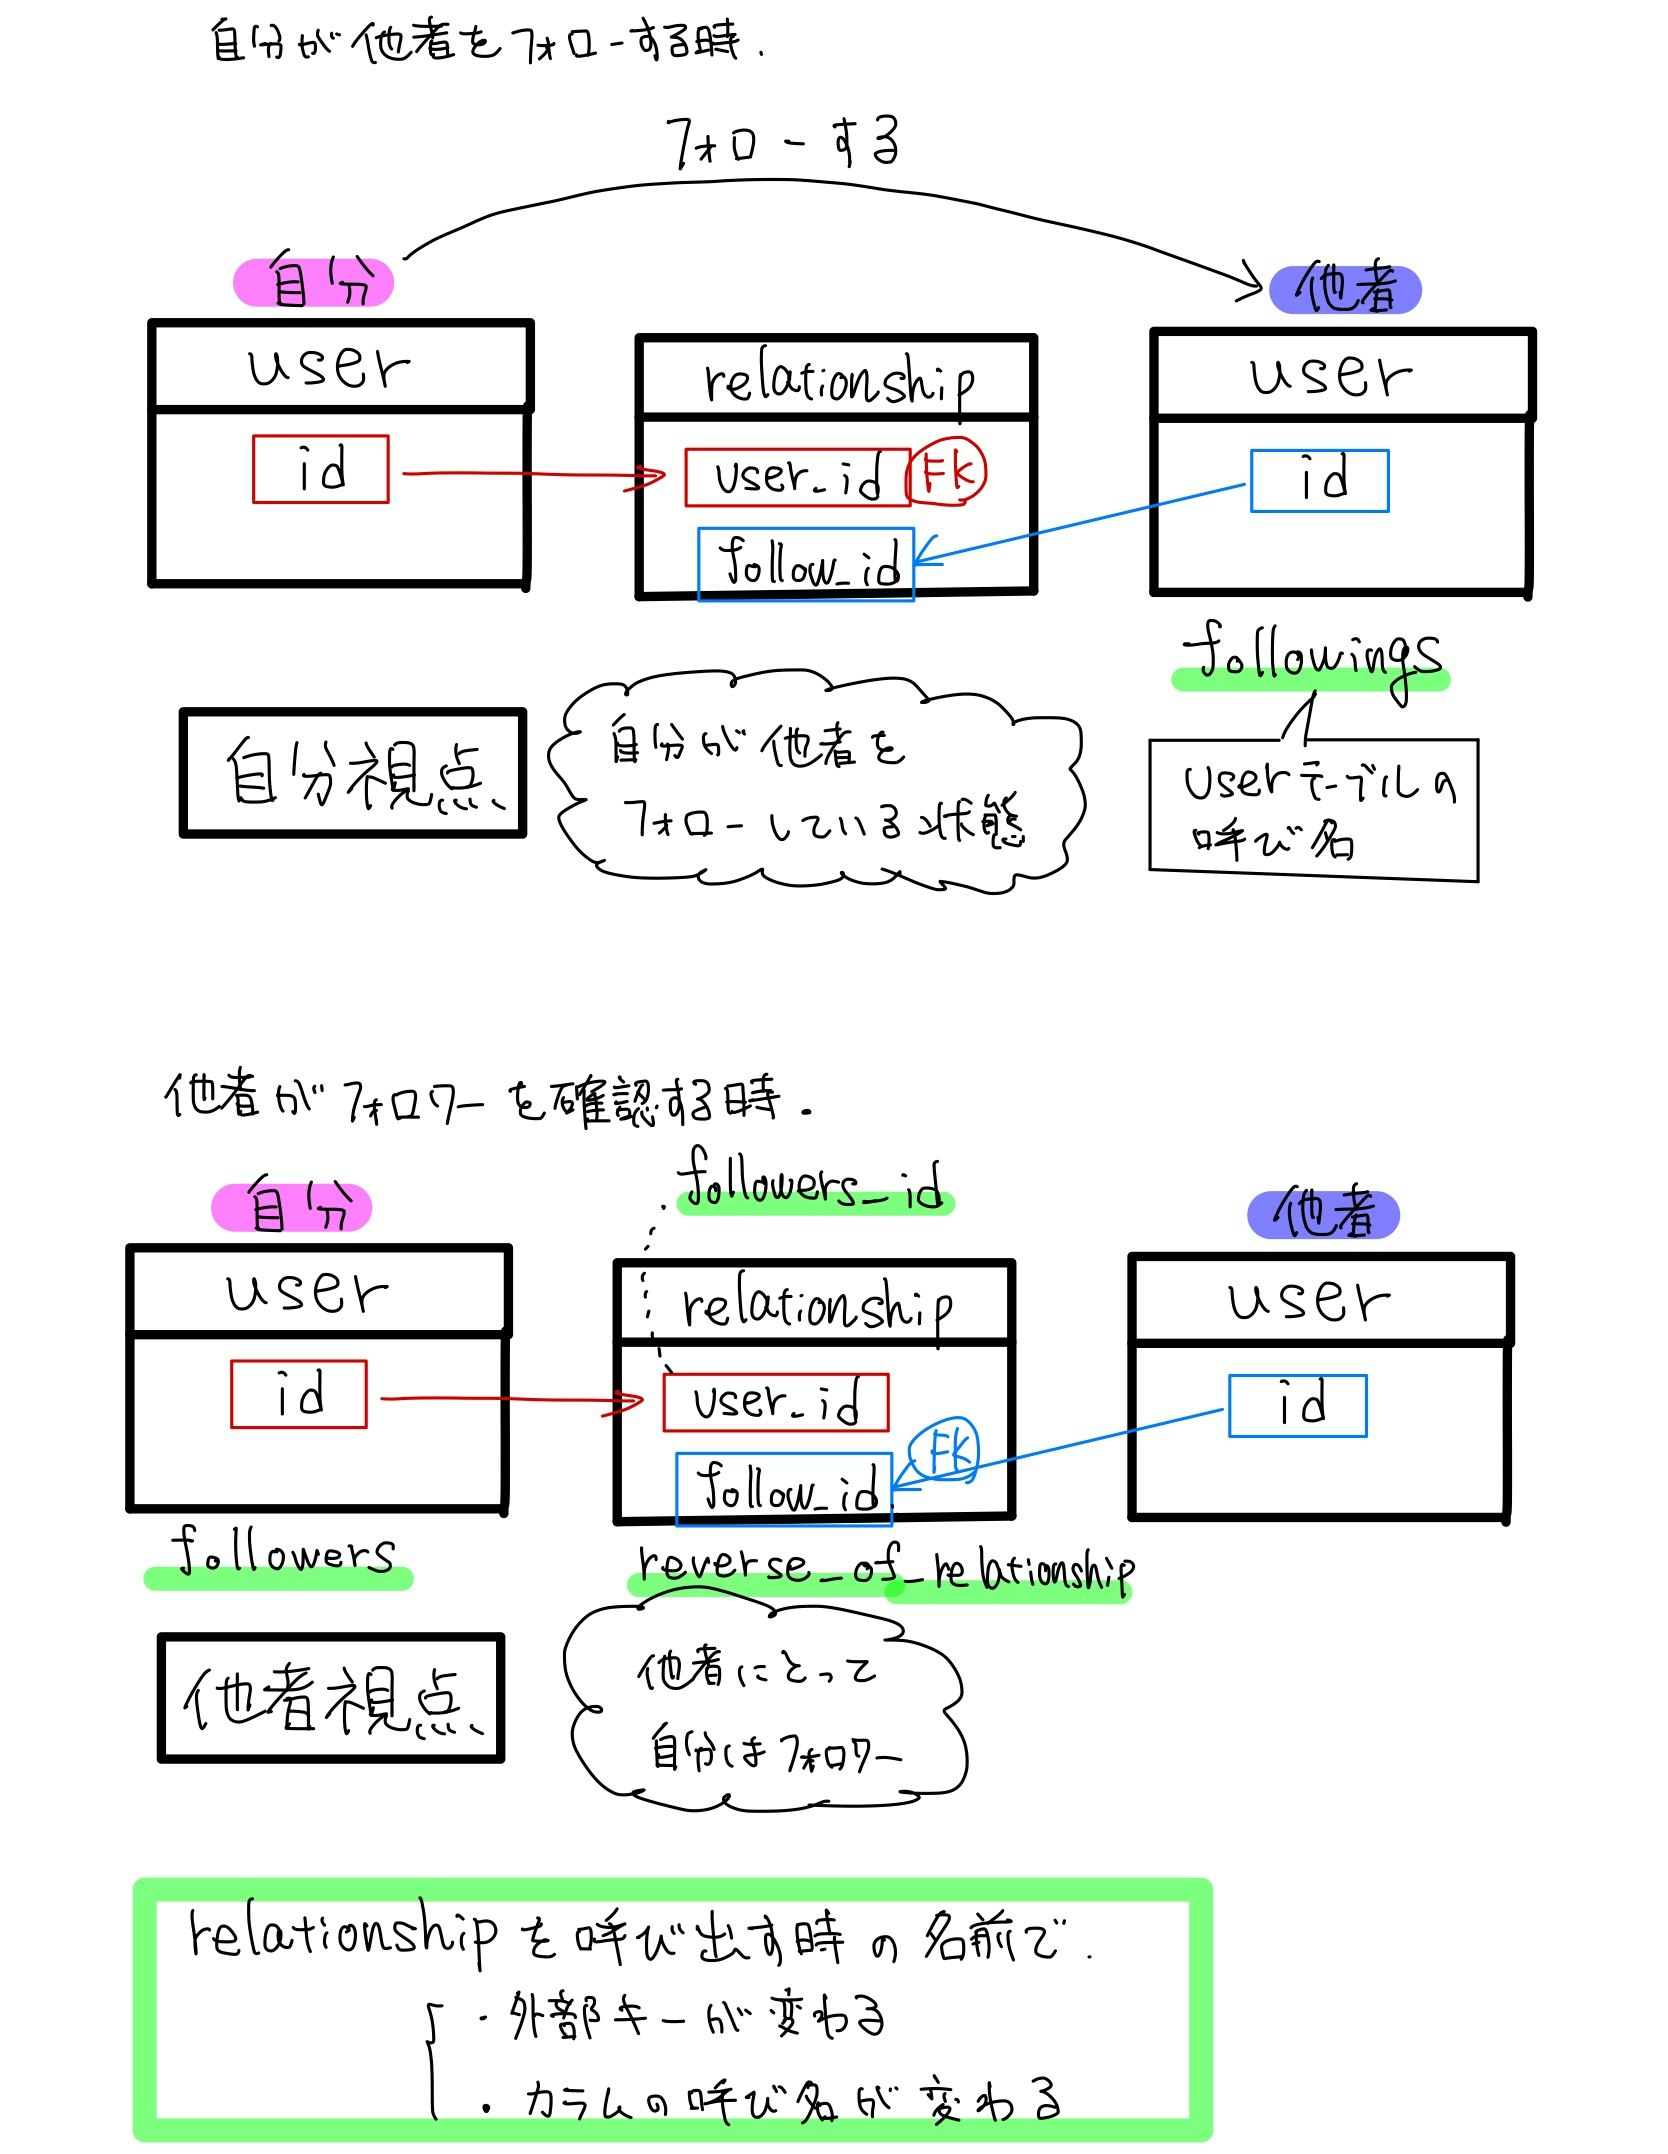
relationship.rbclass User < ApplicationRecord has_many :relationships, dependent: :destroy has_many :followings, through: :relationships, source: :follow has_many :reverse_of_relationships, class_name: 'Relationship', foreign_key: 'follow_id', dependent: :destroy has_many :followers, through: :reverse_of_relationships, source: :user def follow(other_user_id) relationships.find_or_create_by(follow_id: other_user_id) unless id == other_user_id.to_i end def unfollow(other_user_id) relationship = relationships.find_by(follow_id: other_user_id) relationship.destroy if relationship end def following?(other_user) followings.include?(other_user) end endview controllerの作成
- 自ユーザページの場合は、「編集ボタン」、他ユーザページの場合は、「フォローボタン」を表示する様にします。
app/views/users/show.html.erb<div> <% if @user.id == current_user.id %> <%= link_to 'Edit', edit_user_registration_path(current_user) %> <% else %> <%= render partial: 'follow' %> <%= render partial: 'follow_count'%> <% end %> </div>app/views/users/_follow.html.erb<span id="follow"> <%= follow_button(@user) %> </span>
- follow_buttonを定義しています。
- Bootstrapを使用している方は、フォロー中かどうかに応じてkeyにprimaryかsecondaryが入るため、ボタンの色を変えることができます。(Bootstrap不使用の方は消してしまって問題ないです。)
remote: trueを入れることによって、Ajax通信をすることができます。app/helpers/application_helper.html.erbmodule ApplicationHelper def follow_button(user) label, key = current_user.following?(user) ? %w[フォロー中 secondary] : %w[フォローする primary] link_to(label, user_follow_path(@user), method: :post, remote: true, class: "btn btn-#{key} rounded-pill") end end
- javascriptで書かれています。
html内のidがfollowの中身をrenderすることができます。app/views/users/follow.js.erb$('#follow').html('<%= j(render partial: "follow") %>');
- 忘れずにrouteも変えましょう。
- post通信を行うために指定が必要です。
routes.rbRails.application.routes.draw do resources :users, only: %w[index show] do post :follow end end最後に
@user.followers.countや@user.followings.countで、フォロワー数やフォロー数をカウントして表示することが可能です。こちらの記事を理解することができていれば、簡単にAjaxで実装できるので、やってみてください。
- 投稿日:2021-01-09T19:28:18+09:00
[Rails]多対多のリレーションで、カラムのペアにunique制約を付ける(最初から&後から)
駆け出しエンジニアの簡単なメモです。
間違いや誤解を招くような書き方があればご指摘いただけると幸いです。1.中間テーブル作成
ユーザー(User)が投稿(Post)をお気に入り登録できる機能を作成しよう→
postsテーブルとusersテーブルの間にbookmarksという中間テーブルを作成→rails g model Bookmark user:references post:referencesこれによりusersテーブルとpostsテーブルの両方を参照するように指定できます。
user_idとpost_idのペアを作成する事で、「お気に入り登録している」という状態を作ります。
しかしながらこの場合、user_idとpost_idのペアが重複することは有り得ません。(既にお気に入り登録している投稿に更にお気に入り登録はできない)
データベースで矛盾が生じないように、二つのペアがuniqueであることを明示する必要が有ります。2.1. unique制約を付ける(最初から)
作成されたマイグレーションファイルに追記します。
class CreateBookmarks < ActiveRecord::Migration[6.0]
  def change
    create_table :bookmarks do |t|
      t.references :user, null: false, foreign_key: true
      t.references :post, null: false, foreign_key: true

      t.timestamps

      #以下を追記
      t.index [:user_id, :post_id], unique: true
    end
  end
end
あとはrails db:migrateすればオーケーです。
2.2 unique制約を付ける(後から)
今回メモするきっかけになったことです。
「あっやべ!付け忘れた!」となって後から追加する方法を調べました。migrationファイルを作成
rails g migration AddIndexUserIdAndPostIdToBookmarks中身を記述
class AddIndexUserIdAndPostIdToBookmarks < ActiveRecord::Migration[6.0]
  def change
    add_index :bookmarks, [:user_id, :post_id], unique: true
  end
end
とてもシンプルで簡単でした。
あとはrails db:migrateでオーケー!参考にさせていただいた記事
Ruby on RailsでDBにユニーク制約を付与する方法
Railsドキュメント
- 投稿日:2021-01-09T19:05:19+09:00
【RailsAPI】Active Storageをでファイルを保存する!
前書き
先日、業務で
RailsAPIでActive Storageを使う機会がありました。忘備録として、導入~設定方法~実装を解説したいと思います。
RailsAPIの環境構築はこちらの記事から。
Active Storageとは
Railsにデフォルトで備わっている機能の一つです。ドキュメントによると下記のように説明されています。Active StorageとはAmazon S3、Google Cloud Storage、Microsoft Azure Storageなどの クラウドストレージサービスへのファイルのアップロードや、ファイルをActive Recordオブジェクトにアタッチする機能を提供します。
まとめると下記のようなイメージです。
Active RecordオブジェクトにファイルデータをアタッチできるAWS,GCP,Azureなどのクラウドストレージサービスに手軽に保存できる手軽にファイルデータを扱うのに必要な機能を提供してくれる、という感じでしょうか。
実際に
Active Storageを使ってみるでは、以降からコード+文章で解説していきます!!
Active Storageの設定
【1】DB周りの設定
rails active_storage:installこのコマンドを実行すると2つのテーブルを作成するためのマイグレーションファイルが作成されます。
active_storage_blobsテーブルactive_storage_attachmentsテーブル内容としては下記の通り。(ちょっと変えているところがあります。)
active_storage_attachmentscreate_table :active_storage_attachments do |t| t.string :name, null: false t.references :record, null: false, polymorphic: true, index: false t.references :blob, null: false t.datetime :created_at, null: false t.index [ :record_type, :record_id, :name, :blob_id ], name: "index_active_storage_attachments_uniqueness", unique: true t.string :active_storage_blob_id, column: :blob_id end
active_storage_blobscreate_table :active_storage_blobs do |t| t.string :key, null: false t.string :filename, null: false t.string :content_type t.text :metadata t.bigint :byte_size, null: false t.string :checksum, null: false t.datetime :created_at, null: false t.index [ :key ], unique: true end確認したら、下記のコマンドを実行してマイグレートしてください。
rails db:migrate【2】保存先の設定をする。
config/environments/development.rbとconfig/environments/production.rbに下記のようなコードがデフォルトであると思います。config.active_storage.service = :localこの
:localはconfig/storage.ymlに下記のように定義されています。config/storage.ymltest: service: Disk root: <%= Rails.root.join("tmp/storage") %> local: service: Disk root: <%= Rails.root.join("storage") %> # Use rails credentials:edit to set the AWS secrets (as aws:access_key_id|secret_access_key) # amazon: # service: S3 # access_key_id: <%= Rails.application.credentials.dig(:aws, :access_key_id) %> # secret_access_key: <%= Rails.application.credentials.dig(:aws, :secret_access_key) %> # region: us-east-1 # bucket: your_own_bucket # Remember not to checkin your GCS keyfile to a repository # google: # service: GCS # project: your_project # credentials: <%= Rails.root.join("path/to/gcs.keyfile") %> # bucket: your_own_bucket # Use rails credentials:edit to set the Azure Storage secret (as azure_storage:storage_access_key) # microsoft: # service: AzureStorage # storage_account_name: your_account_name # storage_access_key: <%= Rails.application.credentials.dig(:azure_storage, :storage_access_key) %> # container: your_container_name # mirror: # service: Mirror # primary: local # mirrors: [ amazon, google, microsoft ]この
localの部分にどこに保存されるか定義されています。デフォルトでは、Diskに保存されるようになっていますね。ちなみに、S3などのクラウドストレージサービスに保存させる場合には、このconfig/storage.ymlに諸々の設定を書き込めばOKです。設定は以上です。次から実際の使い方について見ていきます!
Active Storageを実際に使ってみる
基本的な使い方は下記のような感じです。
post.rbclass Post < ApplicationRecord has_one_attached :image end上記のようにモデル層に、ファイル情報をアタッチすることでPostモデルがファイル情報を持っているように挙動してくれます。
コントローラ側では以下のような感じです。
posts_controller.rbclass PostsController < ApplicationController def create post = Post.new(post_params) if post.save render json: post else render json: post.errors, status: 422 end end def post_params params.permit(:name, :image) end end
postモデルがimageカラムを持っているように動いてくれていますね。基本的な使い方は以上です。次から
Active Storageの詳細な機能について解説していきます。保存済みのファイルのURLを返す
最初に設定として
config/environments/development.rbにコードを追加します。config/environments/development.rbRails.application.configure do ... # 下記のコードを追加 Rails.application.routes.default_url_options[:host] = 'localhost' Rails.application.routes.default_url_options[:port] = 3000 endそして、該当するモデルで下記のようにしてください。
post.rbclass Post < ApplicationRecord # ここから include Rails.application.routes.url_helpers # ここまでを追加してください。 has_one_attached :image # ここから def image_url image.attached? ? url_for(image) : nil end # ここまで追加してください。 end
url_forメソッドを使うためにRails.application.routes.url_helpersをincludeしてください。image_urlメソッドでは、画像のURLを返しています。ちなみに
url_for(image)の部分について少し補足しておきます。
アクセスした時には、実際のサービスエンドポイントへのリダイレクトが返されます。なので公開されるURLと実際のURLを切り離すことができます。すごく便利ですね。
準備はこれで完了です。コントローラでは以下のように書けば、URLを出力することできます。
posts_controller.rbclass PostsController < ApplicationController # 下記のアクションを追加 def index render json: Post.all, methods: [:image_url] end def create post = Post.new(post_params) if post.save render json: post else render json: post.errors, status: 422 end end def post_params params.permit(:name, :image) end end
methods: [:image_url]の部分で、メソッドの結果をjsonで出力することができます。(実際には、こんな感じには書かずに僕だったらシリアライザーで整形します。)URLに関しては以上です。
複数のファイルをアタッチしたい
この場合はモデルで
has_many_attachedのように宣言してあげれば、複数のファイルをアタッチすることができます。実際には下記のようなイメージです。post.rbclass Post < ApplicationRecord include Rails.application.routes.url_helpers has_many_attached :images def image_url image.attached? ? url_for(image) : nil end end基本的な使い方に関しては以上です。あとはドキュメントを読み込んでいくとさらに知識がつくかなと思います。
ではでは?
- 投稿日:2021-01-09T18:50:32+09:00
remote: trueでajaxの投稿をPOSTをするよ。
何をしたか
Railsでアプリを作っています。タイトルの通りなのですが、
remote: trueでajaxの投稿ができるフォームを作りました。
初回ではないのでスルスル作れたのですが、手順や考え方がしっかり身についていないので、自分のためのノートとしてメモします。なお、実行環境は以下の通りです。
-Rails 5.2.3
-Ruby 2.6.0参考記事
実装にあたっては、以下の記事を大変参考にさせていただきました。
【Rails】remote: trueでフォーム送信をAjax実装する方法とは?
今回の手順も↑こちらとそっくりになってしまったので、丁寧な解説をみたい方は上記の記事を見ていただいた方が良いかと思います。(こちらはあくまでも、私自身のためのメモですので。。。。)
実装方法
作ったもの
今回作ろうとしたのは、こんな感じの、投稿にぬるぬるとコメントを投稿できる仕組みです。DB構造的にはpostsテーブルに紐づくcommentsがある状況です。(画像は作成中のものなので、そのうち挿げ替えるかもしれません。)remote: trueのフォームを作ってみる
まずは、通常通りコメントを投稿するフォームを作ってみました。なお、装飾のためのclassや、今回の実装に関係ない要素は省略しています。(以下、全てのコードで同じ)
= form_with model: [@post, @comment] do |f|
  = f.text_field :body
  = f.submit '投稿'
form_withはデフォルトがremote: trueなので、local: trueもついていない、非常にシンプルなフォームになっています。controller
comments_controller.rbdef create @comment = @post.comments.build(comment_params) @comment.save! endcontrollerも非常にシンプルにしました。
なお、今回はremote: trueの挙動確認が主な目的なので、1) redpond_to, formatでhtmlとjsの処理を分けること
2)@commentが保存できなかった時のエラーハンドリングは実装していません。
2)ついては別記事にしたいなとも思うのですが、実際に実装するときには上記の2点も考慮しているというのは追記しておきます。
とにかくにも、上記のcontrollerによってjsフォーマットの
create.js.erbが呼び出されるようになります。create.js.erb
ところで、
**.js.erbって、聞き慣れないファイル名ですよね。このファイルは何ができるかというと、(以下、先に紹介したこちらの記事からの引用です。)
- ファイル内に記述したJavaScriptのコードを実行する
- ERBタグを使用することができる
- インスタンス変数を使用することができる
上記のことができます。便利ですね
なので、上記に記した、create.js.erbに例えば下記の様に書くと...。comments/create.js.erb$('.comments').append("<%= @comment.text %>");それだけでこのようなビューを作ることができます。
まだ形は整っていないですが、ぬるぬると投稿が表示されていきますね
補足1:投稿をする先のビューについて
なお、順番が前後してしまいましたが...。今回投稿をする先のビューはこの様な構造になっています。
.comments
  = render @comments
.commentsクラスの下に、@commentsの中身を展開して呼びだす構造になっていて、(←こちら、すごく端折った書き方ですので、「???」という方はこちらの記事をご覧ください)先に書いたこのコードで、
comments/create.js.erb$('.comments').append("<%= @comment.text %>");
.comments内の@comment群の末尾に、投稿した新しい@commentが足されていきます。補足2:実際に書いたコードについて
実は上記のコードだけでは、投稿後、フォームの中に投稿したコメントが残り続けます。そのため、実際には下記の様なコードを書いています。
= form_with model: [@post, @comment], class: 'js-comment-form' do |f| #追記
  = f.text_field :body
  = f.submit '投稿'
フォームに
js-comment-formというクラスをつけ、comments/create.js.erb$('.comments').append("<%= @comment.text %>"); $('.js-comment-form')[0].reset();テキストの追加後、
.js-comment-formの中身をリセット(空に)しています。create.js.erbでのパーシャルの呼び出し
とにかくにも、これで非同期で投稿できる様になりましたので、あとはもう少し見た目をリッチにしていきたいと思います。
結論から言うと、書いたコードは下記の通りです。
comments/create.js.erb$('.comments').append("<%= j(render 'comment', comment: @comment) %>");まず、
render 'comment'の部分で、comments/_commentのパーシャルを呼び出しています。(先の補足1の箇所に戻りますが、今回、コメントを投稿する先のビューは下記の通りです。したがって
_commentというパーシャルが存在します。).comments = render @comments次に、
jメソッドでJavaScriptのコードをエスケープしています。この辺りは、この2記事を読んで理解を深めました。パーシャルの中身は、詳しくは省略しますが、大体こんな感じです。こちらは
hamlやslimなどを使って書いてなんら問題ありません。comments/_comment.html.slimdiv = アイコンの画像 = comment.user div = comment.body div = 削除アイコン = 編集アイコン完成!
ここまでの実装で、上記にあげた画像の実装を実現しています。
ちょっと苦手なところだったのですが、一段落したところで記事を書くことで、実装に関する理解を深め、ついでにリファクタリングもできました
これから、エラーハンドリングや編集・削除の非同期での実装も頑張っていきたいです。
- 投稿日:2021-01-09T18:50:32+09:00
remote: trueでajaxのPOSTをするよ。
何をしたか
Railsでアプリを作っています。タイトルの通りなのですが、
remote: trueでajaxの投稿ができるフォームを作りました。
初回ではないのでスルスル作れたのですが、手順や考え方がしっかり身についていないので、自分のためのノートとしてメモします。なお、実行環境は以下の通りです。
-Rails 5.2.3
-Ruby 2.6.0参考記事
実装にあたっては、以下の記事を大変参考にさせていただきました。
【Rails】remote: trueでフォーム送信をAjax実装する方法とは?
今回の手順も↑こちらとそっくりになってしまったので、丁寧な解説をみたい方は上記の記事を見ていただいた方が良いかと思います。(こちらはあくまでも、私自身のためのメモですので。。。。)
実装方法
作ったもの
今回作ろうとしたのは、こんな感じの、投稿にぬるぬるとコメントを投稿できる仕組みです。DB構造的にはpostsテーブルに紐づくcommentsがある状況です。(画像は作成中のものなので、そのうち挿げ替えるかもしれません。)remote: trueのフォームを作ってみる
まずは、通常通りコメントを投稿するフォームを作ってみました。なお、装飾のためのclassや、今回の実装に関係ない要素は省略しています。(以下、全てのコードで同じ)
= form_with model: [@post, @comment] do |f| = f.text_field :body = f.submit '投稿'
form_withでデフォルトがremote: trueなので、local: trueもついていない、非常にシンプルなフォームになっています。controller
comments_controller.rbdef create @comment = @post.comments.build(comment_params) @comment.save! endcontrollerも非常にシンプルにしました。なお、今回は
remote: trueの挙動確認が主な目的なので、1) redpond_to, formatでhtmlとjsの処理を分けること、および2)@commentが保存できなかった時のエラーハンドリングは実装していません。後者については別記事にしたいなとも思うのですが、実際に実装するときには上記の2点にもさらに配慮しています。
とにかくにも、上記のcontrollerによってjsフォーマットの
create.js.erbが呼び出されます。create.js.erb
ところで、
**.js.erbファイルは何ができるかというと、(以下、先に紹介したこちらの記事からの引用です。)
- ファイル内に記述したJavaScriptのコードを実行する
- ERBタグを使用することができる
- インスタンス変数を使用することができる
上記の様なことができます。便利ですね
なので、上記に記した、create.js.erbに例えば下記の様に書くと...。comments/create.js.erb$('.comments').append("<%= @comment.text %>");それだけでこのようなビューを作ることができます。
まだ形は整っていないですが、ぬるぬると投稿が表示されていきますね
補足1:投稿をする先のビューについて
なお、今回投稿をする先のビューはこの様になっています。
.comments
  = render @comments
.commentsクラスの下に、@commentsの中身を展開して呼びだす構造になっていて、(←こちら、すごく端折った書き方ですので、「???」という方はこちらの記事をご覧ください)先に書いたこのコードで、
comments/create.js.erb$('.comments').append("<%= @comment.text %>");これら
@commentの末尾に投稿した新しい@commentを足す形になります。補足2:実際に書いたコードについて
実は上記のコードだけでは、投稿後、フォームの中に投稿したフォームが残り続けます。そのため、実際には下記の様なコードを書いています。
= form_with model: [@post, @comment], class: 'js-comment-form' do |f|
  = f.text_field :body
  = f.submit '投稿'
フォームに
js-comment-formというクラスをつけ、comments/create.js.erb$('.comments').append("<%= @comment.text %>"); $('.js-comment-form')[0].reset();テキストの追加後、
js-comment-formの中身をリセットしています。create.js.erbでのパーシャルの呼び出し
とにかくにも、これで非同期で投稿できる様になりましたので、あとはもう少し見た目をリッチにしていきたいと思います。
結論から言うと、書いたコードは下記の通りです。
comments/create.js.erb$('.comments').append("<%= j(render 'comment', comment: @comment) %>");まず、
render 'comment'の部分で、comments/_commentのパーシャルを呼び出しています。(先の補足1の箇所で説明を端折ってしまって申し訳ないのですが、今回、コメントを投稿する先のビューは下記の通りですので、
_commentというパーシャルが存在します。).comments = render @comments次に、
jメソッドでJavaScriptのコードをエスケープしています。この辺りは、この2記事を読んで理解を深めました。パーシャルの中身は、詳しくは省略しますが、だいたいこんな感じです。こちらは
hamlやslimなどを使って書いてなんら問題ありません。comments/_comment.html.slimdiv = アイコンの画像 = comment.user div = comment.body div = 削除アイコン = 編集アイコン完成!
ここまでの実装で、上記にあげた画像の実装を実現しています。
ちょっと苦手なところだったのですが、一段落したところで記事を書くことで、実装に関する理解を深め、ついでにリファクタリングもできました
これから、エラーハンドリングや編集・削除の非同期での実装も頑張っていきたいです。
- 投稿日:2021-01-09T16:55:00+09:00
= render @collection を忘れがちなのでメモを残しておく
これは何?
すごーく初歩的なことなのですが、あるファイル(便宜的に「呼び出し元ファイル」とします)のなかで、
- @comments.each do |comment|
   = render 'comment', comment: comment
上記の様に書いて、
_commentのパーシャルの中では_comment.html.slim= comment.bodyとかで「コメント一覧」を表示するのはよくあると思います。
この時、呼び出し元ファイルの方で、= render @commentsとシンプルに1行で書いても同じ結果が得られます。
ただし、条件が2つあリます。
- パーシャルのファイル名が渡しているコレクション名の単数形である
- そのパーシャルはコレクション名と同じ名前のビューのディレクトリ内にある
つまり、この組み合わせはOKで、(それぞれ、下段は呼び出したいパーシャル名)
= render @messages
# messages/_message

= render @comments
# comments/_comment
この組み合わせはダメ。(下段同じ)
= render @messages
# messages/_messages (複数形)

= render @comments
# posts/_comment (ディレクトリがNG)
忘れがちなのでメモしました
TIPS
例えば、
=render @commentsと書くと、自動的にRailsはcomments/_commentのファイルを探しに行くので、呼び出し元ファイルがcommentsディレクトリになくても=render @commentsと書けば@commentを繰り返し呼びだすことができました。つまり例えば
posts#showアクションのページでposts/show.html.slim= render @commentsと書いても、自動的に
comments/_commentが呼び出されるという仕組み。すごいですね。
- 投稿日:2021-01-09T16:16:27+09:00
RSpecの基礎
RSpecとは
▶ Ruby on Railsで用いられる、テストフレームワークです。RSpecをうまく活用するることで、簡潔で読みやすいテストコードを書くことができ、Railsアプリケーションの保守性を高めることができます。
▶ ちなみにRuby on RailsにはMinitestというテストフレームワークが標準で組み込まれているのですが、私はまだ学習していないので、今回はRSpecについて投稿したいと思います。1. RSpecの初期設定
GemファイルにRSpecのGemを追記
# Gemfile
group :development, :test do      # 開発・テストのグループに記述してGem動作に制限をもたせる
       # 省略
  gem 'rspec-rails', '~> 4.0.0'   # ← gemの追記
end
ターミナルでbundle installを実行
アプリケーションのディレクトリに移動して以下のコマンドを実行
% bundle install
引き続きRSpecをインストール
% rails g rspec:installインストール完了後、以下のディレクトリやファイルが生成されます。
ターミナルのログ
Running via Spring
preloader in process 1087
   create .rspec
   create spec
   create spec/spec_helper.rb
   create spec/rails_helper.rb
また生成された.rspec.rbに以下を追記することでターミナルでテストコードの結果を可視化する事ができます。
# spec/.rspec.rb
--format documentation
以上で初期設定はおしまいです。次は実際にテストコードを書いていきたいと思います。
2. RSpecによる簡単なテストコードを書く
それではテストコードを書いていきたいと思います。
specファイルはspecディレクトリのサブディレクトリに分類して配置します。どのサブディレクトリにどんなspecファイルを置くかは慣習的に決まっています。たとえば、モデルクラスに関するspecファイルはspec/modelsディレクトリに、APIに関するspecファイルspec/requestsディレクトリに置くのが一般的です。今回は説明のためにサブディレクトリとしてtestsディレクトリを作成し説明していきます。
specディレクトリにtestsディレクトリのサブディレクトリを作り、その直下にstring_spec.rbのファイルを作ります。この時、ファイル名は特に気にしなくて良いのですが、ファイルの末尾は_spec.rbとする必要があります。文字の追加が正しく行われているかテスト
# spec/tests/string_spec.rb
require "spec_helper"

describe String do
  it "文字の追加" do
    str = "あいう"                 # 変数strを定義
    str << "え"                  # strに"え"を追加
    expect{str.size}.to eq(4)   # expectメソッドで変数strの状態を調べる。文字の追加後、文字数は4文字("あいうえ")
  end
end
describeメソッド
テストコードのグループ分けを行うメソッドです。「どの機能に対してのテストを行うか」をdescribeでグループ分けし、その中に各テストコードを記述します。また、describeとendで囲まれた部分をエグザンプルグループといいます。describeメソッドの引数には、クラスまたは文字列を指定します。エグザンプルグループは入れ子構造にすることが可能です。
itメソッド
describeメソッド同様に、グループ分けを行うメソッドです。itの場合はより詳細に、「describeメソッドに記述した機能において、どのような状況のテストを行うか」を明記します。
またexampleという用法もあり、itで分けたグループのことを指します。また、itに記述した内容のことを指す場合もあります。expectation(エクスペクテーション)
エクスペクテーションとは、検証で得られた挙動が想定通りなのかを確認する構文です。
expect(T).to M を雛形に、テストの内容に応じてT(引数)やM(マッチャ)を変えて記述します。matcher(マッチャ)
matcherは、「expectの引数」と「想定した挙動」が一致しているかどうかを判断します。
expectの引数には検証で得られた実際の挙動を指定し、マッチャには、どのような挙動を想定しているかを記述します。
今回はeqとういマッチャを使用しています。eqは、「expectの引数」と「eqの引数」が等しいことを確認するマッチャです。それでは、ターミナルでテストコードを実行します。
ターミナル % bundle exec rspec spec/tests/string_spec.rbログは以下のようになります。テストは成功です。
Finished in 0.01423 seconds (files took 0.15324 seconds to load)
1 example, 0 failures
失敗する場合
次に失敗の場合を見てみます。追加文字を"えお"の2文字にします。
# spec/tests/string_spec.rb require "spec_helper" describe String do it "文字の追加" do str = "あいう" # 変数strを定義 str << "えお" # strに"えお"を追加 expect{str.size}.to eq(4) # expectメソッドで変数strの状態を調べる。文字の追加後、文字数は5文字("あいうえお") end endログは以下のようになります。テストは失敗です。
String
  文字の追加 (FAILED - 1)

Failures:

  1) String 文字の追加
     Failure/Error: expect(s.size).to eq(4)

       expected: 4
            got: 5

       (compared using ==)
     # ./spec/tests/string_spec.rb:7:in `block (2 levels) in <top (required)>'

Finished in 0.03041 seconds (files took 0.13182 seconds to load)
1 example, 1 failure

Failed examples:

rspec ./spec/tests/string_spec.rb:4 # String 文字の追加
この時、 「Failure/Error: expect(s.size).to eq(4)」の後に「expected: 4 got: 5」
という記述があり、想定は4文字なのに実際は5文字であるというエラーメッセージがあります。このようにテストが失敗した場合、ログに失敗の原因のヒントがあります。3. 保留中(pendingメソッド)
基本的には、すべてのテストが成功するまでソースコードの修正とテストの実行を繰り返すことになります。しかし、原因が分からないとか時間が足りないといった理由ですぐには直せない場合もあります。その場合は、pendingメソッドを使ってエグザンプルに「保留中(pending)」の印を付けることができます。
require "spec_helper"

describe String do
  it "文字の追加" do
      pending("原因調査中")    # pendingメソッドには理由を示す引数を与える。この場合"原因調査中"
      s = "あいう"
      s << "えお"
      expect(s.size).to eq(4)
  end
end
この状態でテストを実行すると次のようになります。
String 文字の追加 (PENDING: 原因調査中) Pending: (Failures listed here are expected and do not affect your suite's status) 1) String 文字の追加 # 原因調査中 Failure/Error: expect(s.size).to eq(4) expected: 4 got: 5 (compared using ==) # ./spec/tests/string_spec.rb:8:in `block (2 levels) in <top (required)>' Finished in 0.0292 seconds (files took 0.13358 seconds to load) 1 example, 0 failures, 1 pendingまた、pendingメソッドの代わりにxexamplメソッドがあります。今回exampleを使用していないのですが、単純に対象のexampleをxexampleに書き換えるだけです。
これを使うと、ターミナルのログに「xexampleにより一時的に無効化されている」という意味である「Temporarily disabled with xexample」が出力されます。4. エグザンプルの絞り込み
複数のエグザンプルグループを持つテストコードの例
# spec/tests/test_spec.rb
require "spec_helper"

describe String do                   # 行番号3
  it "文字の追加" do
      s = "あいう"
      s << "え"
      expect(s.size).to eq(4)
  end
end

describe Integer do                  # 行番号11
  it "数字の足し算" do
      i = 1
      i += 1
      expect(i).to eq(2)
  end
end
複数のエグザンプルグループを持つテストコードを実行させる場合、処理に時間がかかることもあり、特定のエグザンプルグルームのみをテストしたい場合があります。
行番号による絞り込み
次のようにパスの後ろにコロン(:)と行番号を指定する。今回は行番号11のエグザンプルグループのみを実行します。
ターミナル
 % bundle exec rspec spec/tests/test_spec.rb:11
ターミナルのログ Run options: include {:locations=>{"./spec/tests/string_spec.rb"=>[11]}} Integer 数字の足し算 Finished in 0.0039 seconds (files took 0.13787 seconds to load) 1 example, 0 failuresタグによる絞り込み
test_spec.rbを次のように修正します。
# spec/tests/test_spec.rb
require "spec_helper"
    # 途中省略 #
describe Integer do                  # 行番号11
  it "数字の足し算" , :exception do    # [, :exception]の追記
      i = 1
      i += 1
      expect(i).to eq(2)
  end
end
exampleメソッドの第2引数に加えた:exceptionというシンボルがタグです。こうしておくと、次のコマンドで:exceptionタグの付いたエグザンプルだけをまとめて実行できます。
ターミナル
 % bundle exec rspec spec/tests/test_spec.rb --tag=exception
ターミナルのログ Run options: include {:exception=>true} Integer 数字の足し算 Finished in 0.004 seconds (files took 0.15853 seconds to load) 1 example, 0 failures2つあるエグザンプルグループのうち片方のみを実行できました。今回は2つだけですが、実際にアプリケーション開発で多数のエグザンプルグループに分けてテストコードを書くことがあります。1つのエグザンプルグループのコードを修正して、再度テストするときに、他のエグザンプルグループをテストすると非効率です。そのためエグザンプルの絞り込みは重要だと思います。
最後に
今回はRSpecの基礎について投稿させていただきました。紹介したコードは実際に実行して、間違いがないか試していますが、もし誤り等あればご指摘のほうよろしくお願いします。
- 投稿日:2021-01-09T15:37:33+09:00
Sidekiq pro を Rails にインストールする
sidekiq proをRailsで使おうとしたときに、
公式wikiのほうでは、インストール方法がどうにも見つけられず、
手こずったので、まとめてました。sidekiqの使い方ブログ記事も色々ありますが、proのほうはなかなか無かったり……
公式wiki
https://github.com/mperham/sidekiq/wiki手順
sidekiq-proをGemfileに追加します。
gem 'sidekiq-pro', source: "https://gems.contribsys.com/"bundle install時に https://gems.contribsys.com/ というサイトを確認しにいくのですが、その際に認証情報が必要です。
接続に必要なIDとパスワードは、環境変数に入れておくのが一般的なようです。
(ちなみにIDとパスワードは、proライセンスの購入時に入手できるっぽいです。)export BUNDLE_GEMS__CONTRIBSYS__COM= id : pass環境変数に設定ができたら、インストールします。
bundle installインストールが出来たら sidekiq を起動します。
bundle exec sidekiqsidekiq起動時に、アスキーアートみたいなのがsidekiq proになっていればインストール出来ています。
参考:
https://tech.medpeer.co.jp/entry/2020/04/01/090000
https://devcenter.heroku.com/ja/articles/bundler-configuration

- 投稿日:2021-01-09T14:44:31+09:00
Railsでログデータが溜まって環境が動かなくなった時
Cloud9でRilasチュートリアルをやっていたら 『容量が足りません!』 的な警告が出てきました。
これは 『rails server』 や 『raila test』 時にログが記録されてそのデータが圧迫しているがために表示されるものです。
解決策としては図で示したログフォルダ内の『development.log』 と『test.log』 の中身を空にしてあげればOKです。
ログデータを増やし続けるとターミナルすら動かなくなってしまう為ログデータの整理は定期的に行った方が良いですね。

- 投稿日:2021-01-09T14:35:59+09:00
Intellij idea で Railsプロジェクトを認識する
課題
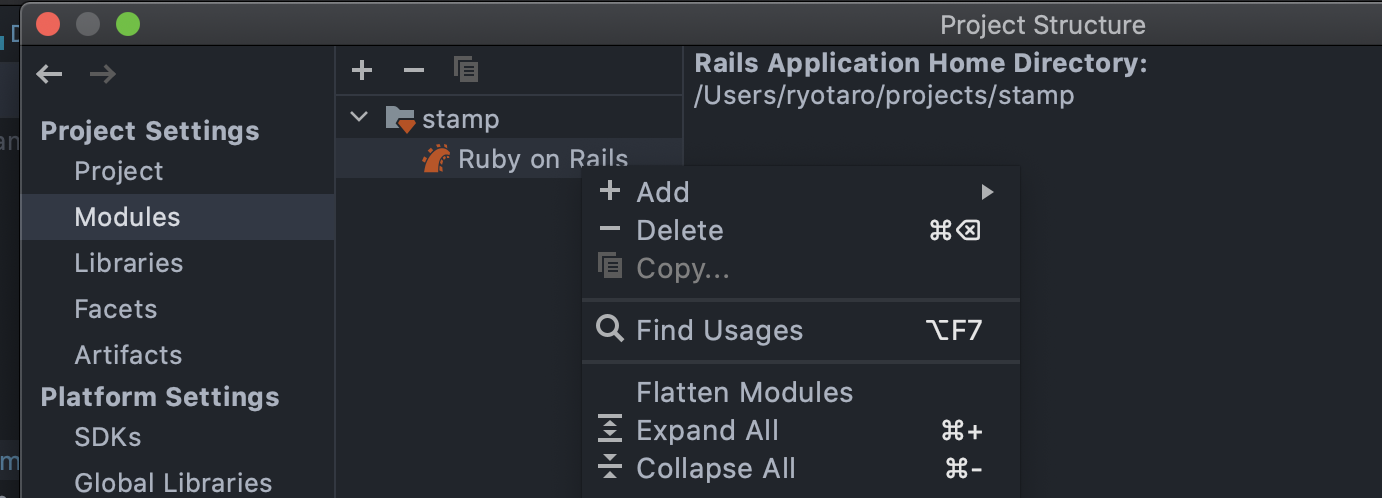
Intellij idea で Railsプロジェクトを開く際に、Railsのプロジェクトと認識されない
解決策
Project Structureを開き、moduleを消して、再度取り込む
認識しない場合は、以下を試す
- node_modulesディレクトリを削除する
- webプロジェクトと認識される場合がある
- vendorディレクトリを削除する
- Javaのプロジェクトと認識される場合がある
補足
ここでめっちゃ話してた
https://youtrack.jetbrains.com/issue/RUBY-21465
- 投稿日:2021-01-09T14:31:32+09:00
Railsを辞めたい人にこそ伝えたいRailsのビューコンポーネント化の概念
はじめに
- これはエンジニア初心者(特にRailsエンジニア)向けの記事です
- ビューコンポーネント化という昨今流行りの概念をRailsで説明します
- Railsはオワコンってあちこちで言われてて悲しいのでReact/Vue/Nextに移ろうという人向けに背中を押す
コンポーネント化って何ですか
コンポーネント化の技術に優れたエンジニアは優れています。
優れたエンジニアを目指すために、コンポーネント化とは何なのか知っておきましょう。コンポーネント化とはコードやファイルを再利用可能な部品として分割することを言います。
そして、コンポーネント化をするメリットは、コードの可読性が上がることです。なぜコードの可読性をあげる必要があるのですか
エンジニアは突然死ぬからです。
昨日「お疲れ様でした〜」と何気なく別れた開発メンバーが
明日も元気に顔を出すとは限りません。そして、大きなプロジェクトほどメンバーが欠けた際のインパクトは大きいです。
あなたが一生懸命書いたコードが残っていても、そのコードの可読性が低ければ、
極論、そのプロジェクトはやり直しや中止になるかもしれません。労働というのは実に人生の1/3を占めると言われています。
私たちエンジニアの仕事の成果は私たちが書いたコードでありますから、
それが無駄になるということは避けたいわけです。したがって、可読性の高いコードを書くことは人生の質QuallityOfLifeそのものを向上させます。
Railsのビューコンポーネントにはrenderを使おう
Railsにはrenderという大変便利なヘルパーメソッドが用意されています。renderを使うと、巷で話題のReactやVueやらが得意とするビューのコンポーネント化がお手の物です。
renderメソッドは以下の文法によって使えます。
render "ファイル名", 引数, 引数, ...他にもいくつか指定できるオプションが存在するのですが、ことコンポーネント化について語る文面のうえでその知識は必要ありません。ひとまず、第一引数にはファイル名、それ以降は引数であると覚えておきましょう。
それでは実際にrenderを使うことで何ができるのか見ていきましょう。今から作成するのは、以下の様な簡単なビュー表示です。Twitterのサイドバーを作る様なイメージとなります。
それでは、renderを使わなかった場合のアンチパターンを以下に示します。ハンズオンで学びたい方は、TailwindCSSを導入したRails6アプリケーションを作成のうえ、以下を任意のビューファイルにコピペして下さい。hoge.html.erb<div class="wrapper flex h-screen text-gray-800"> <div class="sidebar w-1/5 bg-gray-200 p-8"> <div class="sidebar-content h-12 bg-gray-300 items-center flex pl-4 mb-4"> <i class="fa fa-home"></i> <span class="pl-4">ホーム</span> </div> <div class="sidebar-content h-12 bg-gray-300 items-center flex pl-4 mb-4"> <i class="fa fa-hashtag"></i> <span class="pl-4">話題を検索</span> </div> <div class="sidebar-content h-12 bg-gray-300 items-center flex pl-4 mb-4"> <i class="fa fa-bell"></i> <span class="pl-4">通知</span> </div> <div class="sidebar-content h-12 bg-gray-300 items-center flex pl-4 mb-4"> <i class="fa fa-envelope"></i> <span class="pl-4">メッセージ</span> </div> <div class="sidebar-content h-12 bg-gray-300 items-center flex pl-4 mb-4"> <i class="fa fa-bookmark"></i> <span class="pl-4">ブックマーク</span> </div> <div class="sidebar-content h-12 bg-gray-300 items-center flex pl-4 mb-4"> <i class="fa fa-list-alt"></i> <span class="pl-4">リスト</span> </div> <div class="sidebar-content h-12 bg-gray-300 items-center flex pl-4 mb-4"> <i class="fa fa-user"></i> <span class="pl-4">プロフィール</span> </div> </div> <div class="body w-4/5 bg-gray-100"></div> </div>アンチパターンとは言いましたが、ごく普通に設計されたビューファイルです。しかしながら、
<div class="sidebar-content h-12 bg-gray-300 items-center flex pl-4 mb-4"> <i class="fa fa-home"></i> <span class="pl-4">ホーム</span> </div>といった部分が何度も繰り返されており、所謂DRY(Don't Repeat Yourself)原則というプログラミング界の通説に反しているわけです。
では、続いてrenderを使った場合のコードを確認してみましょう。
hoge.html.erb<div class="wrapper flex h-screen text-gray-800"> <div class="sidebar w-1/5 bg-gray-200 p-8"> <%= render "articles/templates/sidebarContent", icon:"home" , text:"ホーム"%> <%= render "articles/templates/sidebarContent", icon:"hashtag" , text:"話題を検索"%> <%= render "articles/templates/sidebarContent", icon:"bell" , text:"通知"%> <%= render "articles/templates/sidebarContent", icon:"envelope", text:"メッセージ"%> <%= render "articles/templates/sidebarContent", icon:"bookmark", text:"ブックマーク"%> <%= render "articles/templates/sidebarContent", icon:"list-alt", text:"リスト"%> <%= render "articles/templates/sidebarContent", icon:"user" , text:"プロフィール"%> </div> <div class="body w-4/5 bg-gray-100"></div> </div>articles/templates/_sidebarContent.html.erb<div class="sidebar-content h-12 bg-gray-300 items-center flex pl-4 mb-4"> <i class="fa fa-<%= icon %>"></i> <span class="pl-4"><%= text %></span> </div>かなりスリムなコードに生まれ変わりました。
もう一度renderの使い方を確認しておきましょう。render "ファイル名", 引数, 引数, ...引数はキーハッシュの形式で与えています。
キーハッシュというのは名前を付けることのできる変数のことです。今回、fontawesomeのアイコン名がサイドバーの子項目ごとに違っていたので、まずはこれを
iconという名前でrenderメソッドの第2引数に与えているわけです。また、表示されているテキストも子項目ごとに異なりますから、こちらはtextという名前で第3引数に与えてやったわけです。あとはこれらの引数たちをテンプレート(切り出された側のファイルのこと。今回はつまり
_sidebarContent.html.erbのことです)内でERBタグ(<%= %>みたいなタグのことです)を使って呼び出せばいいわけです。よって<i class="fa fa-<%= icon %>"></i> <span class="pl-4"><%= text %></span>となるわけです。上記をもって「Railsでビューのコンポーネント化」ができました。
こんな感じで、コンポーネント化しておくことで、コードが大変読みやすい上に、
新しい子項目を追加するのも非常に楽な良いコードを書くことができましたね。まとめ
- renderメソッドを使えばRailsでビューのコンポーネント化が可能
render "ファイル名", 引数, 引数という形式で使おうコンポーネント化の概念を習得しておけば、Railsが真にオワコンになったとしても他のJavaScript系技術を学習する際に役立つこと間違いなしです。是非習得しておきましょう!
筆者連絡先

- 投稿日:2021-01-09T14:31:32+09:00
Rails辞めたい人にこそ伝えたいRailsのビューコンポーネント化の概念
はじめに
- これはエンジニア初心者(特にRailsエンジニア)向けの記事です
- ビューコンポーネント化という昨今流行りの概念をRailsで説明します
- Railsはオワコンってあちこちで言われてて悲しいのでReact/Vue/Nextに移ろうという人向けに背中を押す
コンポーネント化って何ですか
コンポーネント化の技術に優れたエンジニアは優れています。
優れたエンジニアを目指すために、コンポーネント化とは何なのか知っておきましょう。コンポーネント化とはコードやファイルを再利用可能な部品として分割することを言います。
そして、コンポーネント化をするメリットは、コードの可読性が上がることです。なぜコードの可読性をあげる必要があるのですか
エンジニアは突然死ぬからです。
昨日「お疲れ様でした〜」と何気なく別れた開発メンバーが
明日も元気に顔を出すとは限りません。そして、大きなプロジェクトほどメンバーが欠けた際のインパクトは大きいです。
あなたが一生懸命書いたコードが残っていても、そのコードの可読性が低ければ、
極論、そのプロジェクトはやり直しや中止になるかもしれません。労働というのは実に人生の1/3を占めると言われています。
私たちエンジニアの仕事の成果は私たちが書いたコードでありますから、
それが無駄になるということは避けたいわけです。したがって、可読性の高いコードを書くことは人生の質QuallityOfLifeそのものを向上させます。
Railsのビューコンポーネントにはrenderを使おう
Railsにはrenderという大変便利なヘルパーメソッドが用意されています。renderを使うと、巷で話題のReactやVueやらが得意とするビューのコンポーネント化がお手の物です。
renderメソッドは以下の文法によって使えます。
render "ファイル名", 引数, 引数, ...他にもいくつか指定できるオプションが存在するのですが、ことコンポーネント化について語る文面のうえでその知識は必要ありません。ひとまず、第一引数にはファイル名、それ以降は引数であると覚えておきましょう。
それでは実際にrenderを使うことで何ができるのか見ていきましょう。今から作成するのは、以下の様な簡単なビュー表示です。Twitterのサイドバーを作る様なイメージとなります。
それでは、renderを使わなかった場合のアンチパターンを以下に示します。ハンズオンで学びたい方は、TailwindCSSを導入したRails6アプリケーションを作成のうえ、以下を任意のビューファイルにコピペして下さい。hoge.html.erb<div class="wrapper flex h-screen text-gray-800"> <div class="sidebar w-1/5 bg-gray-200 p-8"> <div class="sidebar-content h-12 bg-gray-300 items-center flex pl-4 mb-4"> <i class="fa fa-home"></i> <span class="pl-4">ホーム</span> </div> <div class="sidebar-content h-12 bg-gray-300 items-center flex pl-4 mb-4"> <i class="fa fa-hashtag"></i> <span class="pl-4">話題を検索</span> </div> <div class="sidebar-content h-12 bg-gray-300 items-center flex pl-4 mb-4"> <i class="fa fa-bell"></i> <span class="pl-4">通知</span> </div> <div class="sidebar-content h-12 bg-gray-300 items-center flex pl-4 mb-4"> <i class="fa fa-envelope"></i> <span class="pl-4">メッセージ</span> </div> <div class="sidebar-content h-12 bg-gray-300 items-center flex pl-4 mb-4"> <i class="fa fa-bookmark"></i> <span class="pl-4">ブックマーク</span> </div> <div class="sidebar-content h-12 bg-gray-300 items-center flex pl-4 mb-4"> <i class="fa fa-list-alt"></i> <span class="pl-4">リスト</span> </div> <div class="sidebar-content h-12 bg-gray-300 items-center flex pl-4 mb-4"> <i class="fa fa-user"></i> <span class="pl-4">プロフィール</span> </div> </div> <div class="body w-4/5 bg-gray-100"></div> </div>アンチパターンとは言いましたが、ごく普通に設計されたビューファイルです。しかしながら、
<div class="sidebar-content h-12 bg-gray-300 items-center flex pl-4 mb-4"> <i class="fa fa-home"></i> <span class="pl-4">ホーム</span> </div>といった部分が何度も繰り返されており、所謂DRY(Don't Repeat Yourself)原則というプログラミング界の通説に反しているわけです。
では、続いてrenderを使った場合のコードを確認してみましょう。
hoge.html.erb<div class="wrapper flex h-screen text-gray-800"> <div class="sidebar w-1/5 bg-gray-200 p-8"> <%= render "articles/templates/sidebarContent", icon:"home" , text:"ホーム"%> <%= render "articles/templates/sidebarContent", icon:"hashtag" , text:"話題を検索"%> <%= render "articles/templates/sidebarContent", icon:"bell" , text:"通知"%> <%= render "articles/templates/sidebarContent", icon:"envelope", text:"メッセージ"%> <%= render "articles/templates/sidebarContent", icon:"bookmark", text:"ブックマーク"%> <%= render "articles/templates/sidebarContent", icon:"list-alt", text:"リスト"%> <%= render "articles/templates/sidebarContent", icon:"user" , text:"プロフィール"%> </div> <div class="body w-4/5 bg-gray-100"></div> </div>articles/templates/_sidebarContent.html.erb<div class="sidebar-content h-12 bg-gray-300 items-center flex pl-4 mb-4"> <i class="fa fa-<%= icon %>"></i> <span class="pl-4"><%= text %></span> </div>かなりスリムなコードに生まれ変わりました。
もう一度renderの使い方を確認しておきましょう。render "ファイル名", 引数, 引数, ...引数はキーハッシュの形式で与えています。
キーハッシュというのは名前を付けることのできる変数のことです。今回、fontawesomeのアイコン名がサイドバーの子項目ごとに違っていたので、まずはこれを
iconという名前でrenderメソッドの第2引数に与えているわけです。また、表示されているテキストも子項目ごとに異なりますから、こちらはtextという名前で第3引数に与えてやったわけです。あとはこれらの引数たちをテンプレート(切り出された側のファイルのこと。今回はつまり
_sidebarContent.html.erbのことです)内でERBタグ(<%= %>みたいなタグのことです)を使って呼び出せばいいわけです。よって<i class="fa fa-<%= icon %>"></i> <span class="pl-4"><%= text %></span>となるわけです。上記をもって「Railsでビューのコンポーネント化」ができました。
こんな感じで、コンポーネント化しておくことで、コードが大変読みやすい上に、
新しい子項目を追加するのも非常に楽な良いコードを書くことができましたね。まとめ
- renderメソッドを使えばRailsでビューのコンポーネント化が可能
render "ファイル名", 引数, 引数という形式で使おうコンポーネント化の概念を習得しておけば、Railsが真にオワコンになったとしても他のJavaScript系技術を学習する際に役立つこと間違いなしです。是非習得しておきましょう!
筆者連絡先
- 投稿日:2021-01-09T14:31:32+09:00
【初心者に伝えたい】RailsでDon't Repeat Yourself【ビューコンポーネント化の概念】
はじめに
- これはエンジニア初心者(特にRailsエンジニア)向けの記事です
- ビューコンポーネント化という昨今流行りの概念をRailsで説明します
- Railsはオワコンってあちこちで言われてて悲しいのでReact/Vue/Nextに移ろうという人向けに背中を押す
コンポーネント化って何ですか
コンポーネント化の技術に優れたエンジニアは優れています。
優れたエンジニアを目指すために、コンポーネント化とは何なのか知っておきましょう。コンポーネント化とはコードやファイルを再利用可能な部品として分割することを言います。
そして、コンポーネント化をするメリットは、コードの可読性が上がることです。なぜコードの可読性をあげる必要があるのですか
エンジニアは突然死ぬからです。
昨日「お疲れ様でした〜」と何気なく別れた開発メンバーが
明日も元気に顔を出すとは限りません。そして、大きなプロジェクトほどメンバーが欠けた際のインパクトは大きいです。
あなたが一生懸命書いたコードが残っていても、そのコードの可読性が低ければ、
極論、そのプロジェクトはやり直しや中止になるかもしれません。労働というのは実に人生の1/3を占めると言われています。
私たちエンジニアの仕事の成果は私たちが書いたコードでありますから、
それが無駄になるということは避けたいわけです。したがって、可読性の高いコードを書くことは人生の質そのものを向上させます。
Railsのビューコンポーネントにはrenderを使おう
Railsにはrenderという大変便利なヘルパーメソッドが用意されています。renderを使うと、巷で話題のReactやVueやらが得意とするビューのコンポーネント化がお手の物です。
renderメソッドは以下の文法によって使えます。
render "ファイル名", 引数, 引数, ...他にもいくつか指定できるオプションが存在するのですが、ことコンポーネント化について語る文面のうえでその知識は必要ありません。ひとまず、第一引数にはファイル名、それ以降は引数であると覚えておきましょう。
それでは実際にrenderを使うことで何ができるのか見ていきましょう。今から作成するのは、以下の様な簡単なビュー表示です。Twitterのサイドバーを作る様なイメージとなります。
それでは、renderを使わなかった場合のアンチパターンを以下に示します。ハンズオンで学びたい方は、TailwindCSSを導入したRails6アプリケーションを作成のうえ、以下を任意のビューファイルにコピペして下さい。hoge.html.erb<div class="wrapper flex h-screen text-gray-800"> <div class="sidebar w-1/5 bg-gray-200 p-8"> <div class="sidebar-content h-12 bg-gray-300 items-center flex pl-4 mb-4"> <i class="fa fa-home"></i> <span class="pl-4">ホーム</span> </div> <div class="sidebar-content h-12 bg-gray-300 items-center flex pl-4 mb-4"> <i class="fa fa-hashtag"></i> <span class="pl-4">話題を検索</span> </div> <div class="sidebar-content h-12 bg-gray-300 items-center flex pl-4 mb-4"> <i class="fa fa-bell"></i> <span class="pl-4">通知</span> </div> <div class="sidebar-content h-12 bg-gray-300 items-center flex pl-4 mb-4"> <i class="fa fa-envelope"></i> <span class="pl-4">メッセージ</span> </div> <div class="sidebar-content h-12 bg-gray-300 items-center flex pl-4 mb-4"> <i class="fa fa-bookmark"></i> <span class="pl-4">ブックマーク</span> </div> <div class="sidebar-content h-12 bg-gray-300 items-center flex pl-4 mb-4"> <i class="fa fa-list-alt"></i> <span class="pl-4">リスト</span> </div> <div class="sidebar-content h-12 bg-gray-300 items-center flex pl-4 mb-4"> <i class="fa fa-user"></i> <span class="pl-4">プロフィール</span> </div> </div> <div class="body w-4/5 bg-gray-100"></div> </div>アンチパターンとは言いましたが、ごく普通に設計されたビューファイルです。しかしながら、
<div class="sidebar-content h-12 bg-gray-300 items-center flex pl-4 mb-4"> <i class="fa fa-home"></i> <span class="pl-4">ホーム</span> </div>といった部分が何度も繰り返されており、所謂DRY(Don't Repeat Yourself)原則というプログラミング界の通説に反しているわけです。
では、続いてrenderを使った場合のコードを確認してみましょう。
hoge.html.erb<div class="wrapper flex h-screen text-gray-800"> <div class="sidebar w-1/5 bg-gray-200 p-8"> <%= render "articles/templates/sidebarContent", icon:"home" , text:"ホーム"%> <%= render "articles/templates/sidebarContent", icon:"hashtag" , text:"話題を検索"%> <%= render "articles/templates/sidebarContent", icon:"bell" , text:"通知"%> <%= render "articles/templates/sidebarContent", icon:"envelope", text:"メッセージ"%> <%= render "articles/templates/sidebarContent", icon:"bookmark", text:"ブックマーク"%> <%= render "articles/templates/sidebarContent", icon:"list-alt", text:"リスト"%> <%= render "articles/templates/sidebarContent", icon:"user" , text:"プロフィール"%> </div> <div class="body w-4/5 bg-gray-100"></div> </div>articles/templates/_sidebarContent.html.erb<div class="sidebar-content h-12 bg-gray-300 items-center flex pl-4 mb-4"> <i class="fa fa-<%= icon %>"></i> <span class="pl-4"><%= text %></span> </div>かなりスリムなコードに生まれ変わりました。
もう一度renderの使い方を確認しておきましょう。render "ファイル名", 引数, 引数, ...引数はキーハッシュの形式で与えています。
キーハッシュというのは名前を付けることのできる変数のことです。今回、fontawesomeのアイコン名がサイドバーの子項目ごとに違っていたので、まずはこれを
iconという名前でrenderメソッドの第2引数に与えているわけです。また、表示されているテキストも子項目ごとに異なりますから、こちらはtextという名前で第3引数に与えてやったわけです。あとはこれらの引数たちをテンプレート(切り出された側のファイルのこと。今回はつまり
_sidebarContent.html.erbのことです)内でERBタグ(<%= %>みたいなタグのことです)を使って呼び出せばいいわけです。よって<i class="fa fa-<%= icon %>"></i> <span class="pl-4"><%= text %></span>となるわけです。上記をもって「Railsでビューのコンポーネント化」ができました。
こんな感じで、コンポーネント化しておくことで、コードが大変読みやすい上に、
新しい子項目を追加するのも非常に楽な良いコードを書くことができましたね。まとめ
- renderメソッドを使えばRailsでビューのコンポーネント化が可能
render "ファイル名", 引数, 引数という形式で使おうコンポーネント化の概念を習得しておけば、Railsが真にオワコンになったとしても他のJavaScript系技術を学習する際に役立つこと間違いなしです。是非習得しておきましょう!
筆者連絡先
- 投稿日:2021-01-09T13:02:05+09:00
【Railsトリビア】blog_path(@ blog)の代わりにblog_pathと書いても自動的にidが補完される
たとえば、RailsのViewファイルとして次のような
blogs/edit.html.erbがあったとします。<h1>Editing Blog</h1> <%= render 'form', blog: @blog %> <%= link_to 'Show', blog_path(@blog) %> | <%= link_to 'Back', blogs_path %>5行目の
blog_path(@blog)は/blogs/10のようなパスを生成するヘルパーメソッドです。(ここでは@blog.idの値が10だった場合を想定)このように
blog_pathの引数には通常、@blogのようなActiveRecordのインスタンスを渡すと思います。
ですが、blog_pathは次のように引数無しで呼びだしてもエラーにはなりません。<%= link_to 'Show', blog_path %> |生成されるパスは先ほどと同じく
/blogs/10になります。Viewだけでなく、コントローラ内でも同様です。
def update
  if @blog.update(blog_params)
    # blog_path(@blog) と書かなくても /blogs/10 にリダイレクトされる
    redirect_to blog_path, notice: '...'
  else
    render :edit
  end
end
Why?
上記のような編集画面は通常、以下のようなパス(URL)で呼び出されると思います。
/blogs/10/edit
blog_pathのように引数無しでヘルパーメソッドを呼び出した場合、リクエスト時のパスに含まれるid(ここでは10)を引き継いで/blogs/10が生成されます。引数がないとエラーになるケース
rails consoleなどで
app.blog_pathと書いた場合は引き継ぐidがないのでエラーになります。> app.blog_path Traceback (most recent call last): 1: from (irb):2 ActionController::UrlGenerationError (No route matches {:action=>"show", :controller=>"blogs"}, missing required keys: [:id]) Did you mean? blog_url blogs_url blogs_path new_blog_url引数無しの
blog_pathを使うのはアリか、ナシか?個人的にはナシだと思います。
暗黙的にidが決まってしまうより、明示的に「このメソッドで生成したいパスはこのid(このオブジェクト)」ということを示すために
blog_path(@blog)のように書く方が安全だからです。また、引数を省略するクセが付いていると、Viewのロジックによっては意図しないidでパスが生成されたりして思わぬ不具合を起こすかもしれません。
ドキュメントはどこ?
url_forメソッドのドキュメントにそれらしき記述がありました。https://edgeapi.rubyonrails.org/classes/ActionDispatch/Routing/UrlFor.html#method-i-url_for
Missing routes keys may be filled in from the current request's parameters (e.g.
:controller,:action,:idand any other parameters that are placed in the path).(筆者訳) 不足しているルーティングのキーは、リクエストパラメータ(例
:controllerや、:action、:id、その他パスに含まれる各種パラメータ)から取得されます。上のドキュメントに書いてあるとおり、たとえば
blog_pathの代わりにurl_for(controller: 'blogs', action: 'show')のように書いても同じように/blogs/10が生成されます。(もっと言えばurl_for(action: 'show')だけでもOK)確認したバージョン
- Rails 6.0.3.3
- 投稿日:2021-01-09T12:36:29+09:00
Railsの”shallow(浅い)”ルーティングを理解する
何をしたか
Railsの課題を実施しています。DB構造はこんな感じで、
userに紐づくpostと、それぞれに紐づくcommentsがあります。
その中で、
post-comment間のルーティングについてshallowを使いましょうとの指示があったのですが、実は、shallowは悪手だと聞いていたこともあって、自分では使っていませんでした。とはいえ「悪手なのでやめましょう」ではなんの発展もないので、
shallowがどんなルーティングを生んでいるのか、および
shallowを肯定する人の意見- そうではない人の意見
も比べて、今後自分の担当するプロジェクトにおいて使う・使わないを検討する材料にしたいと思います。
なお、実行環境は下記の通りです。
Rails 5.2.3Ruby 2.6.0shallowはどんなルーティングを生んでいるか
shallowは、ネストしたルーティングにおいて、下層にあるテーブルのIDが一意なら、その上にあるテーブルのIDは不要という発想に基づいています。具体的には、以下のようにネストしたルーティングを記載すると...
config/routes.rbresources :posts, shallow: true do resources :comments end以下のような
commentsのルーティングが生成されます。
ヘルパー リクエスト URI アクション post_comments GET /posts/:post_id/comments index post_comments POST /posts/:post_id/comments create new_post_comments GET /posts/:post_id/comments/new new edit_comment GET /comments/:id/edit edit comment GET /comments/:id show comment PATCH /comments/:id update comment DELETE /comments/:id destroy ちなみに、
shallowがない時はこんな感じです。
ヘルパー リクエスト URI アクション post_comments GET /posts/:post_id/comments index post_comments POST /posts/:post_id/comments create new_post_comments GET /posts/:post_id/comments/new new edit_comment GET /posts/:post_id/comments/:id/edit edit comment GET /posts/:post_id/comments/:id show comment PATCH /posts/:post_id/comments/:id update comment DELETE /posts/:post_id/comments/:id destroy
edit、show、update、destroyの4アクションで、URIパターンがスッキリし、ヘルパーメソッドも短くなっていることがわかります。画像だともう少しスッキリしている感がわかりやすいかなと思ったので、
rails routesで出力した結果も載せておきます。▼Shallowあり
▼Shallowなし
だいぶスッキリしていますね
shallow肯定派の主張
shallow(浅い)ルーティングを肯定する人の主張はまさにここで、
- ルーティングがスッキリする
- URLがカッコ悪くない
- ヘルパーもスッキリして、コードの見通しも良くなる
ということだと思います。
Qiitaでよく閲覧されている記事には、この辺がありそうです。
resources を nest するときは shallow を使うと幸せになれる
では、悪手だという人の主張はどこにあるのでしょうか。
shallow否定派の主張
1) RESTfulでない
私がよく聞く理由の一つがまずこれで、例えば、
- newとdestroyのリダイレクト先の設定に困った(どのPOSTにリダイレクトすれば良いのだ問題)
- newとeditのフォームでURLの指定が異なる(newには親のIDが含まれるけど、editには含まれない)
などがあります。
2) 他の実装者の混乱を招く
これは、弊社だけかなあと思いつつ...。URIパターンが普段よく見るルーティング異なるため、
- ネストしているのかURLからわかりづらくなる
- ヘルパーメソッドをいちいち確認しないといけない
などで地味にコストがかかっております...
3) その他の主張
そのほか、私は実際に見たことはないですが
- SQLインジェクションを招きやすい
- 渡すParamsが増える
などのデメリットもある様です。
主な主張はこちらにまとまっているかなあと思いました。Railsのroutesのshallowは安易に使わないで欲しい
考察:今回の実装画面
最後に、今回実装することになっている画面をよく見ると、コメントは非同期通信で画面のすぐ上に投稿する(リダイレクトが発生しない)作りだったり、
EditとNewフォームは分かれていたりするので(画面は実装中なので、実装出来次第画像は差し替えます)、上記の
shallowの欠点は影響しない範囲ではないかと思いました^^結論:自分はshallow使うか
いろいろ考えたのですが、自分は積極的にはshallowは使わないかなと思いました。最大の理由は「チームに混乱を招くから」で、スムーズに開発を進めるという意味では、shallowは使わない方が幸せになれそうです。
一方で、お客さんに納品するアプリなどで、お客さんから注文があった場合には、使用場面を考慮した上でshallowを使うのもありかなとは思います。
普段のコミュニケーションでリンクをシェアするときなどに、やはりスッキリしたURLの方がかっこいいですものね
以上、
shallowに関する考察と感想でした。
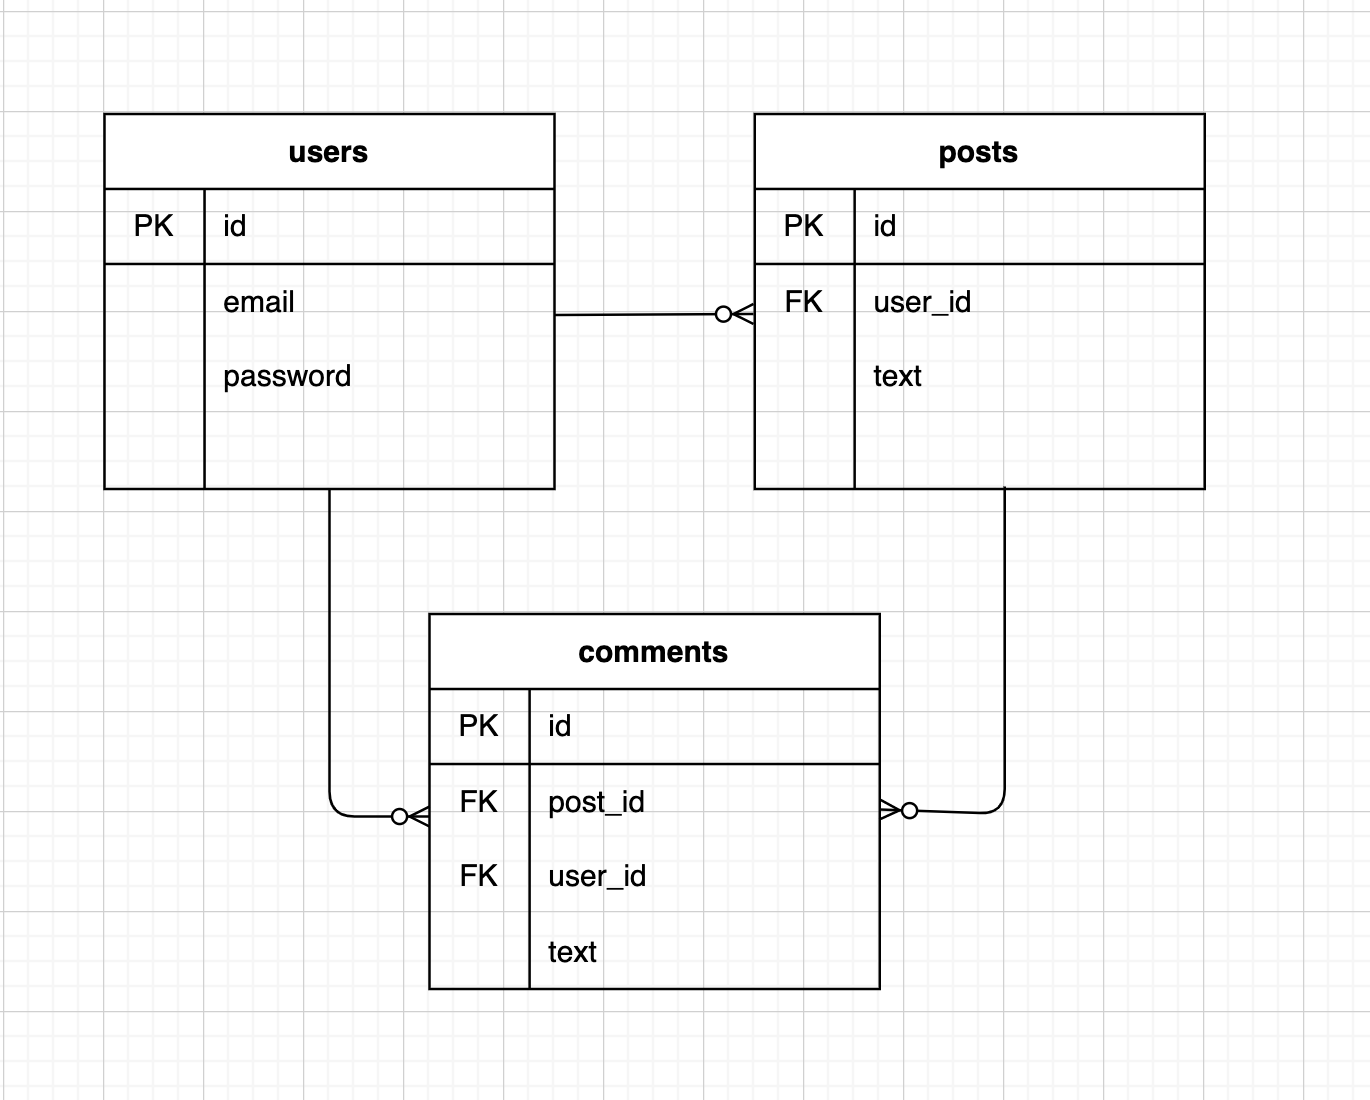


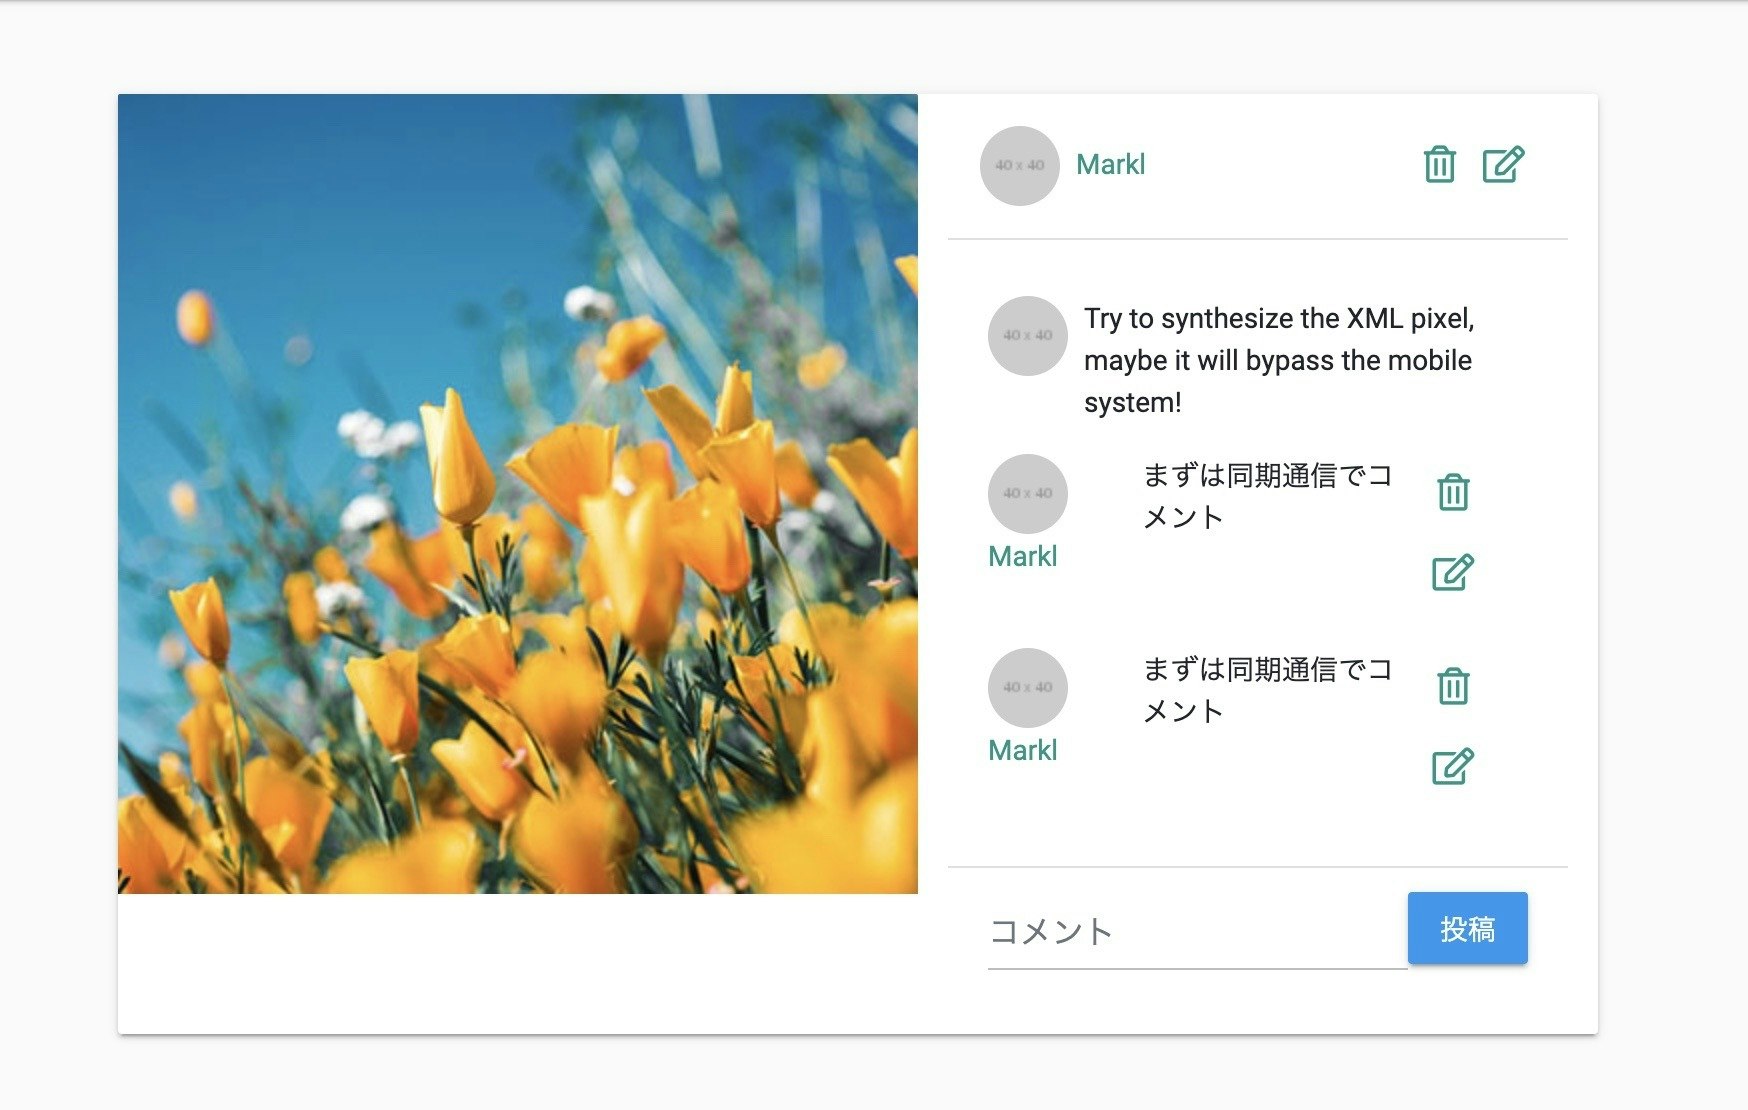
- 投稿日:2021-01-09T11:44:05+09:00
Rails EngineのRoutesを書き換える
はじめに
Rails Engineは複数のプロジェクトで、同じアプリケーションの機能を提供したい場合に使いますよね
有名なgemではdeviceとかでしょうか
そんなRails Engineですが、上位アプリケーションで独自の機能を追加したいときがあります
今回はRoutesにフォーカスします
上位アプリケーションで、Rails EngineのRoutesを上書き、追加してみましょう
Rails Routes
アプリケーションのルーティングを定義します
routes.rbRails.application.routes.draw do resources :posts endRails Engineではこんな感じです
routes.rbMyEngine::Engine.routes.draw do resources :users enddraw
この
drawメソッドが何をやっているのか見てみるrails/actionpack/lib/action_dispatch/routing/route_set.rbdef draw(&block) clear! unless @disable_clear_and_finalize eval_block(block) finalize! unless @disable_clear_and_finalize nil endなんかclear!して、blockを展開して、finalize!している
clear!
clear!が何をしているのか見てみる
rails/actionpack/lib/action_dispatch/routing/route_set.rbdef clear! @finalized = false named_routes.clear set.clear formatter.clear @polymorphic_mappings.clear @prepend.each { |blk| eval_block(blk) } endなんか
@prependを展開してますね
@prependはどこでセットされてるのか?rails/actionpack/lib/action_dispatch/routing/route_set.rbdef prepend(&block) @prepend << block endprependってメソッドのblockが展開されることがわかります
ってことは、prependで定義されたroutesは、アプリケーションのdrawで定義された手前に差し込まれるってことです
Railsのroutesは上から順番にマッチングされるので、定義済みのルーティングを上書きしたりできます
finalize!
finalize!が何をしているのかを見てみる
rails/actionpack/lib/action_dispatch/routing/route_set.rbdef finalize! return if @finalized @append.each { |blk| eval_block(blk) } @finalized = true end
@appendを展開してますね
@appendはどこでセットされているのか?rails/actionpack/lib/action_dispatch/routing/route_set.rbdef append(&block) @append << block endappendってメソッドのblockが展開されていることがわかります
ってことは、appendで定義されたroutesは、アプリケーションのdrawで定義されたあとに差し込まれるってことです
なので、単純にRoutesを追加することができますが、アプリケーションで定義されているルーティングが優先されます
Rails EngineのRoutesを上書き
では、Engineのroutesを上書きしてみる
こんなルーティングが定義されていて、ネストしたルーティングに上書きしたい!
routes.rbMyEngine::Engine.routes.draw do resources :users end上書きなので、
prependを使って定義しますこういうネストをさせたいユースケースは、Engineの名前空間を利用したいときですかね
config/initializers/my_engine_routes.rbMyEngine::Engine.routes.prepend do resources :users do resources: posts end end追加したい場合は、
appendを使って定義しますconfig/initializers/my_engine_routes.rbMyEngine::Engine.routes.append do resources: posts endまとめ
今回はRilas EngineのRoutesを上書き、追加する方法を、Railsのコードをみながら書きました
もちろん、上位アプリでも同じことができます
prepend,appendを使って、肥大化したroutesのファイルを分割したりもできますね
- 投稿日:2021-01-09T06:53:42+09:00
Railsに組み込んだvuetifyがページ遷移をすると読み込まれなくなる現象を解消した
はじめに
RailsにいよいよVuetifyを組み込み始めたが、ページ遷移をするとvuetifyのボタンが消えてしまう。ページ更新をするとボタンが表示される。そのような不具合に見舞われた。いったいなにが原因なのか。一週間ほど悩んだのちにようやくわかった。
turbolinkの問題だった。ちょっとずつ書いていく。hello_vue.jsをのぞく
vue導入時に
app/javascript/packs/hello_vue.jsが作成された。さきの記事ではこいつを編集して、いいようにしていたが、まだここには続きがあった。app/javascript/packs/hello_vue.js// If the project is using turbolinks, install 'vue-turbolinks': // // yarn add vue-turbolinks // // Then uncomment the code block below:そういうわけで、
$ yarn add vue-turbolinksを実行したのち、
hello_vue.jsを以下のように変更した。app/javascript/packs/hello_vue.jsimport TurbolinksAdapter from 'vue-turbolinks' //turbolinkをつかっていたので追加 import Vue from 'vue' import Vuetify from "vuetify"; // vuetify導入のため追加 import "vuetify/dist/vuetify.min.css"; // vuetify導入のため追加 import App from '../app.vue' Vue.use(Vuetify); // vuetify導入のため追加 const vuetify = new Vuetify(); // vuetify導入のため追加 Vue.use(TurbolinksAdapter) document.addEventListener('turbolinks:load', () => { const app = new Vue({ vuetify, // vuetify導入のため追加 el: '#hello', data: { message: "Can you say hello?" }, components: { App } }) })
なんとかなった。turbolinkとはなにか
今回私を悩ませたturbolinkだが、Railsのgemfileにはちゃんと記述があった。
Gemfile# Turbolinks makes navigating your web application faster. Read more: https://github.com/turbolinks/turbolinksページ遷移の速度が向上するらしい。もうちょっとread.meを読んでみよう。
https://github.com/turbolinks/turbolinksTurbolinks intercepts all clicks on
<a href>links to the same domain. When you click an eligible link, Turbolinks prevents the browser from following it. Instead, Turbolinks changes the browser’s URL using the History API, requests the new page using XMLHttpRequest, and then renders the HTML response.そういうことらしい。turbolinksはaタグのリンクをクリックすると、その遷移をブロックするらしい。そして、その代わりにHistory APIを利用してHTMLレスポンスを返す。History APIを使ってやるほうがはやくなるらしいね。
しかし、それがなぜvuetifyに悪影響を及ぼしているのかがわからなかった。
こんなときは答えのほうからみていくと話が早い。解決策としてvueが提示している
vue-turbolinksを覗こう。vue-turbolinksとは
https://github.com/jeffreyguenther/vue-turbolinks
vue-turbolinks is a package to allow you to easily add Vue.js components to your Turbolinks & Hotwire powered apps.
簡単に加えられるぜ!ということらしい。(Hotwireってなんだろ。まぁいいか)
index.jsをみると思いの外シンプルだった。https://github.com/jeffreyguenther/vue-turbolinks/blob/master/index.js
vue-turbolinks/index.js//略 const Mixin = { beforeMount: function() { // If this is the root component, we want to cache the original element contents to replace later // We don't care about sub-components, just the root if (this === this.$root && this.$el) { handleVueDestruction(this); // cache original element this.$cachedHTML = this.$el.outerHTML; // register root hook to restore original element on destroy this.$once('hook:destroyed', function() { this.$el.outerHTML = this.$cachedHTML }); } } }; //略vueがmountする前にこれらのfunctionを実行していた。キャッシュされたHTMLの内容を、現在のHTMLに置き換えていた。それだけだった。
なんとなくわかった。torbolinksはキャッシュからリンクをひっぱってくるが、本来のvueはそれをしていなかったのだ。だからvue-turbolinkを使って、キャッシュのところにHTMLを入れ込んでいたのだ。
おわりに
vueはたのしい。vuetifyはたのしい。
これからも、勉強しながら詰まったところを書いていこう。
- 投稿日:2021-01-09T06:03:31+09:00
何も知らない私が独学で3日間ruby on rails勉強しながらTODOを作ってみた
はじめに
どうやって私がruby on railsを勉強したのかについて詳しく説明します!
なぜrubyを勉強したのか?
日本でrubyを使うことがあると聞きました。
いつかrubyプロジェクトに出会いそうで勉強を始めました。rubyを勉強した方法
https://www.tutorialspoint.com/ruby/index.htm
上リンクにある例をすべて確認しました。
重要なポイントだけ実行しながら勉強しました!
わからないことが出てきたら後で参考にすることにしました。# variable and operate num1 = 10 num2 = 20 result = num1 + num2 # print string puts "result is #{result}" # if else condition if result > 10 puts "result > 10" else puts "else condition" end # loop # start <= n <= end for n in 1..5 puts "#{n}" end # array (list) arr = [1, 2, 3] for n in arr puts "#{n}" end # hash (dict) hash = Hash[ "a" => 100, "b" => 200 ] puts "#{hash['a']}" puts "#{hash['b']}" # block def helloworld puts "hello world" end helloworld() def add(num1, num2) puts "sum is #{num1 + num2}" end add(5,8)railsを勉強した方法
https://guides.rubyonrails.org/getting_started.html
上リンクにある例を部分的に参考にしました。
railsをインストールする
gem install railsrailsがよくインストールできたのか確認する
rails --version
Rails 6.1.0
プロジェクトを作る
rails new todooptionを見る
rails s --helpサーバーを実行する
rails smysqlを作る
docker-compose.yml
version: '3'

services:
  db:
    image: mysql:8.0
    container_name: mysql
    environment:
      MYSQL_ROOT_PASSWORD: root
      MYSQL_DATABASE: todo
      MYSQL_USER: docker
      MYSQL_PASSWORD: docker
      TZ: 'Asia/Tokyo'
    command: mysqld --character-set-server=utf8mb4 --collation-server=utf8mb4_unicode_ci
    ports:
    - 3306:3306
docker-compose up -ddockerを利用して簡単にmysqlを作りました:)
勉強しながら出会った最悪の問題
https://rubyinstaller.org/downloads/
上記のリンクからrubyをダウンロードしました。
ruby --version
ruby 3.0.0p0 (2020-12-25 revision 95aff21468) [x64-mingw32]

gem --version
3.2.3
最初は全然わからなかったです。
windows10でrubyを使うのはダメだったこと…mysqlと繋ぐとき問題に出会いました。
問題1
Puma caught this error: Error loading the 'mysql2' Active Record adapter. Missing a gem it depends on? mysql2 is not part of the bundle. Add it to your Gemfile. (LoadError)問題1解決
Gemfileにしたのコードを追加
gem 'mysql2'bundle install問題2
Gem::Ext::BuildError: ERROR: Failed to build gem native extension.
...
Cannot find include dir(s)
C:\Users\dev\mysql-connector-c-noinstall-6.0.2-win32/include/include
問題2解決
bundle config --local build.mysql2 "--with-mysql-dir=C:\Users\dev\mysql-connector-c-noinstall-6.0.2-win32"bundle install問題3
client.c:1350:38: error: 'MYSQL_DEFAULT_AUTH' undeclared (first use in this
function); did you mean 'MYSQL_SECURE_AUTH'?
 1350 |   return _mysql_client_options(self, MYSQL_DEFAULT_AUTH, value);
      |                                      ^~~~~~~~~~~~~~~~~~
      |                                      MYSQL_SECURE_AUTH
問題3解決
Gemfileにしたのコードに修正
gem 'mysql2', '~> 0.4.10'問題4
C:/Ruby30-x64/lib/ruby/gems/3.0.0/gems/bootsnap-1.5.1/lib/bootsnap/load_path_cache/core_ext/kernel_require.rb:23:in `require': cannot load such file -- Win32API (LoadError) Did you mean? win32/sspiここで諦めました…
たくさん調べて分かりましたが
皆WSLを使う事実を分かりました。
ここからはWSLでプログラミングしましたWSLとは?
https://qiita.com/Brutus/items/f26af71d3cc6f50d1640
WSLに関する詳細は上記リンクを参照してください
WSLを利用してruby on railsとmysqlを繋ぎました。
dependencyをインストール
sudo apt-get update sudo apt-get install autoconf bison build-essential libssl-dev libyaml-dev libreadline6-dev zlib1g-dev libncurses5-dev libffi-dev libgdbm6 libgdbm-dev libdb-devrbenvをインストール
git clone https://github.com/rbenv/rbenv.git ~/.rbenv git clone https://github.com/sstephenson/ruby-build.git ~/.rbenv/plugins/ruby-buildrbenvをセッティング
vi ~/.bashrcexport PATH=$PATH:$HOME/.rbenv/bin eval "$(rbenv init -)"source ~/.bashrcrubyをセッティング
rbenv --version rbenv install --list rbenv install 3.0.0 rbenv versions rbenv global 3.0.0 rbenv versionsdb dependencyをインストール
sudo apt-get install libsqlite3-dev sudo apt install libmysqlclient-devGemfileに下のコードを追加
gem 'mysql2'bundleをインストール
bundle installこれでmysqlと繋ぐことができました。
一つずつゆっくりプログラミング
htmlをレンダリングするために最初にしなければならないことはcontrollerを作ることでした。
rails generate controller Todo index --skip-routeshtmlレンダリングを確認した後、コードを一生懸命作成しました。
その後、モデルを簡単に作ってmysqlでカラムを修正しました。
rails generate model Todo content:stringrails generate model User username:stringrails db:migratecontents table
users table
rails session が保存できない問題
GET METHODでsessionを保存してGET METHODでsessionを呼び込んだら作動する。
GET METHODでsessionを保存してPOST METHODでsessionを呼び込んだら作動しない。sessionがPOST METHODを使うとき保存できない問題の原因
https://stackoverflow.com/questions/18422182/rails-sessions-not-saving
csrf tokenが一致しなければsessionが初期化されることが分かりました。
csrf token問題解決方法
https://qiita.com/naberina/items/d3b14521e78e0daccdcd
csrf tokenを正常に送る方法が胃リンクで分かりました。
結果
色んな問題を乗り越えて3日たって完成することができました!!
最初はデザインもダサいです。
機能を作ることに集中しました。
その後bootstrapのbreak pointとspaceを利用して反応型ウェブを作りました。
デザインも修正してtoastrライブラリーも追加しました。
最後にログインを勉強するためにsessionを利用した機能を作りました。
ユーザーを変更するuiはslick.jsを使いました。github
https://github.com/h4ppyy/ror-todo
まとめ
ウェブ勉強の場合TODOを作ると素早くcreate, read, update, deleteを実現することができ効果的です。
私の場合、このような方法で色んな言語やフレームワークを速く経験することができました!
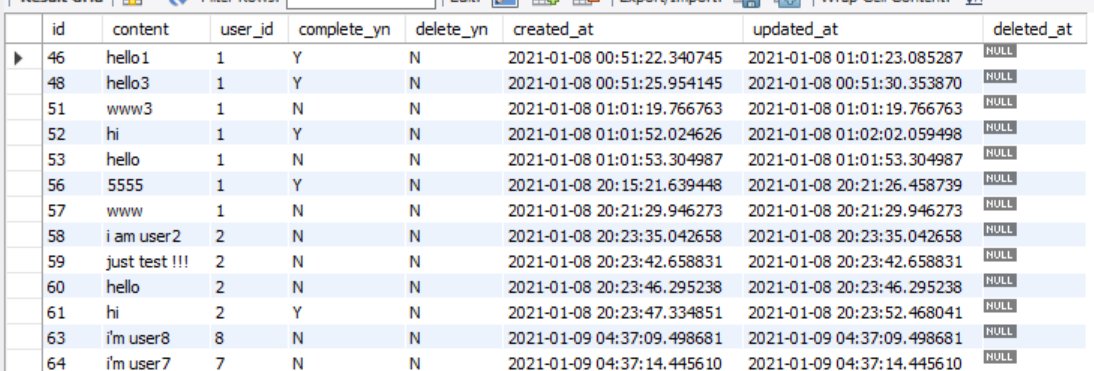
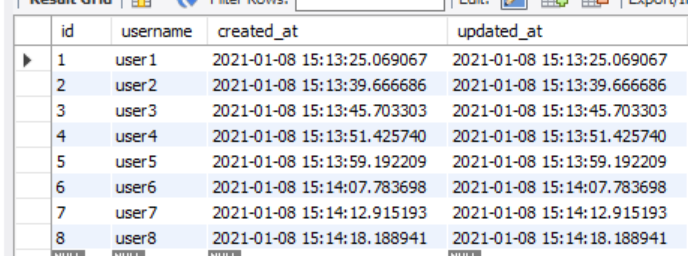
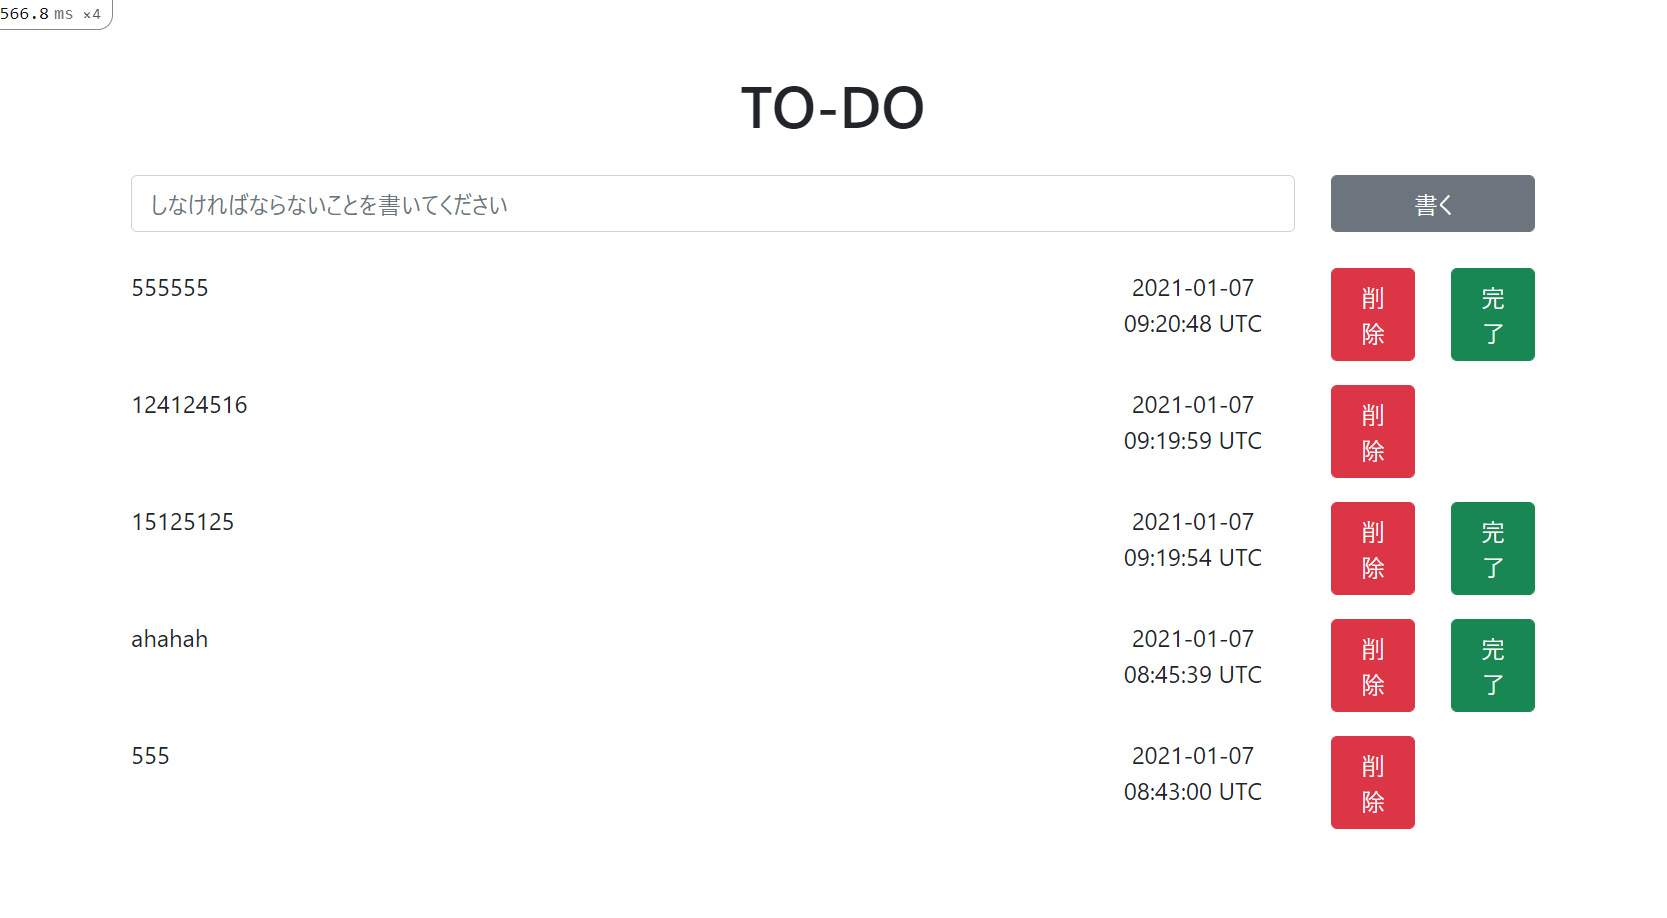

- 投稿日:2021-01-09T05:46:20+09:00
Rails link_toで表示された下線を消す方法
はじめに
検証機能を使えば分かるがlink_toはaタグ
方法1
aタグだからscssにて
a { text-decoration: none; }を指定する
方法2
link_toにクラスをつけて
<%= link_to "リンク", path名, class: "link" %>scssにて指定
.link { text-decoration: none; }それでも消えないとき
!importantを付けて優先順位を変更する方法1の場合
a { text-decoration: none !important; }方法2の場合
.link { text-decoration: none !important; }
!importantはあくまで最後の手段なので多用は厳禁
- 投稿日:2021-01-09T01:53:52+09:00
Ruby,Rails ようやくインストール完了
やはりすんなりいかないRuby,Railsインストール
前回に引き続き、
RubyとRailsのインストールを進めるもやはりすんなりいかない。
しかし今回は約1年半前に挫折した経験があるのである程度は要領を得ている。まずはRuby
$ brew install railsでインストールすると、バージョンが2.5.0であった。
2.6.0あたりでインストールしたいので下記コマンドでアップグレード。
下記コマンドは約1年半前の記録を参照。こちら$ cd ~/.rbenv $ git pull origin master $ cd ~/.rbenv/plugins/ruby-build $ git pull origin master $ rbenv install 2.6.0 $ rbenv global 2.6.0 $ rbenv rehash $ ruby -v ruby 2.6.0p0 (2018-12-25 revision 66547) [x86_64-darwin19]次はRails
$ gem install railsで処理完了後バージョン確認するといない。
$ rails -v Rails is not currently installed on this system. To get the latest version, simply type: $ sudo gem install rails You can then rerun your "rails" command. $ sudo gem install rails Password: Successfully installed rails-6.1.0 1 gem installed $ rails -v Rails is not currently installed on this system. To get the latest version, simply type: $ sudo gem install rails You can then rerun your "rails" command.すどぅーをやれと言われているようなので、すどぅー発動し、成功したかと思わせるが、
バージョン確認すると、またすどぅーをやれの繰り返し。ググる
こちらのブログを参考にさせていただき解消。
railsをインストールしたのに Rails is not currently installed on this system と出る場合の対処法$ export PATH="$HOME/.rbenv/shims:$PATH" $ rails -v Rails 6.1.0とりあえずOKでしょう。
- 投稿日:2021-01-09T01:34:45+09:00
active_hashについて
active_hashとは
gemの一種でハッシュのデータを、ActiveRecordと同じように使えるようにしてくれる。
都道府県など基本的に変更されないデータはデータベースに保存する必要性がなく、ビューファイルにデータを直接書いてしまうと、可読性に欠けてしまう。このような場面でactive_hashを使う。目標
簡単なActiveHashを使用したスポーツ記事の投稿アプリの作成(今回CSSは割愛)
ActiveHashを導入
gem 'active_hash'モデルを作成する
次にモデルを作成する。
今回モデルはsportsモデルとgenreモデルの2つ作成する。
まずはrails g modelでsportsモデルを作成。rails g model sports次にgenreモデルを作成します。
rails g model genre --skip-migration今回の--skip-migrationとは、モデルファイルを作成するときに、マイグレーションファイルの生成を行わないためのオプションです。
次にgenre.rbを編集していきます。
この時にActiveHash::Baseクラスを継承するようにします。ActiveHash::Baseを継承することで、ActiveRecordと同じようなメソッドを使用できるようになります。結果以下のようなオブジェクトを記述したとします。class Genre < ActiveHash::Base self.data = [ { id: 1, name: '--' }, { id: 2, name: '野球' }, { id: 3, name: 'サッカー' }, { id: 4, name: 'テニス' }, { id: 5, name: '卓球' }, { id: 6, name: 'バスケットボール' }, { id: 7, name: '陸上' }, { id: 8, name: 'スポーツ' } ] endジャンルのデータは、配列にハッシュ形式で格納しています。
またsportsモデルのマイグレーションファイルにgenre_idというカラムを追加することによってsportsテーブルのなかでGenreモデル(ActiveHash)のidを外部キーとして管理することで、その記事に紐付いたジャンルの取得ができるようになります。
class CreateSports < ActiveRecord::Migration[6.0] def change create_table :sports do |t| t.string :title , null: false t.text :text , null: false t.integer :genre_id , null: false t.timestamps end end end$ rails db:create $ rails db:migrateアソシエーションの設定
active_hashにはbelongs_to_active_hashメソッドが用意されているので、
sports.rbに このメソッドを記述し、アソシエーションを定義する。class Sports < ApplicationRecord extend ActiveHash::Associations::ActiveRecordExtensions belongs_to :genre endバリデーションを設定
先ほどのsports.rbにバリデーションを追記する。
class Sports < ApplicationRecord extend ActiveHash::Associations::ActiveRecordExtensions belongs_to :genre #空の投稿を保存できないようにする validates :title, :text, presence: true #ジャンルの選択が「--」の時は保存できないようにする validates :genre_id, numericality: { other_than: 1 } endルーティングの設定
Rails.application.routes.draw do root to: 'sportses#index' resources :sportses endコントローラーとビューを作成
rails g controller sportses index newコントローラーの編集
articles_controller.rbclass ArticlesController < ApplicationController def index @sportses = Sports end def new end def create @sports = Sports.new(sports_params) if @sports.save redirect_to root_path else render :new end end private def sports_params params.require(:sports).permit(:title,:text,:genre_id) end endビューの編集
app/views/articles/index.html.erb<h1>記事一覧</h1> <%= link_to "投稿する", new_sports_path, class:"post" %> <% @sportses.each do |sports| %> <div class="sports"> <div class="sports-genre"> <%= sports.genre.name %> </div> <div class="sports-title"> <%= sports.title %> </div> <div class="sports-text"> <%= sports.text %> </div> </div> <% end %>プルダウンバーの実装
記事投稿画面の実装です。
app/views/articles/new.html.erb<%= form_with model: @sports, url:sportses_path, local: true do |f| %> <div class="sports-box"> 記事を投稿する <%= f.text_field :title, class:"title", placeholder:"タイトル" %> <%= f.text_area :text, class:"text", placeholder:"テキスト" %> <%= f.collection_select(:genre_id, Genre.all, :id, :name, {}, {class:"genre-select"}) %> <%= f.submit "投稿する" ,class:"btn" %> </div> <% end %>collection_selectを使うことで先ほどのアクティブハッシュをプルダウン形式で使用することができる。
collection_selectは第一引数から第五引数まで存在し以下の順に引数を入力していく。
Genre.allによってgenre.rbのデータ(配列)を指定している。ビューでユーザーが実際に選んだスポーツ名はgenre_idとしてsportsモデルに保存されるという流れになる。<%= form.collection_select(保存されるカラム名, オブジェクトの配列, カラムに保存される項目, 選択肢に表示されるカラム名, オプション, htmlオプション) %> <%= f.collection_select(:genre_id, Genre.all, :id, :name, {}, {class:"genre-select"}) %>終わりに
初めてここまで本格的なアウトプットをしたので至らない部分は多かったと思う。編集してわかりやすいようにしていくが今回この記事を書くことによってアクティブハッシュに関する理解が自分の中でグッと整理できた。