- 投稿日:2020-11-20T19:54:42+09:00
Laravel の FormRequest を全体的に、実態に近く自動テストする
はじめに
Laravel の FormRequest のテストの話は rules() のテストだけなのが多いので、rules() 以外も含む FormRequest 全体を、より実態に近くテストする話をする
テスト
以降は次を use する前提
use App\Http\Requests\HogeRequest;
use Illuminate\Http\Request;
use Illuminate\Validation\ValidationException;
全体なので FormRequest の passedValidation() や failedValidation() の実装の影響を受ける
以降はこれらがデフォルトの実装の前提。上書くときはその処理に従う。成功することをテストする
FormRequest がサービスコンテナによる解決によって効果を得ることをテストする
public function testPass()
{
    $attributes = ['key' => 'value'];
    // FormRequest が依存する Request に入力値をセット
    $this->app->make(Request::class)->replace($attributes);
    // Controller で DI するのと同じ効果を得る
    $request = $this->app->make(HogeRequest::class);
    // risky になるので assert
    $this->assertInstanceOf(HogeRequest::class, $request);
}
失敗することをテストする
public function testFail()
{
    $attributes = ['key' => null];
    // FormRequest が依存する Request に入力値をセット
    $this->app->make(Request::class)->replace($attributes);
    // Controller で DI すると例外が投げられるのと同じ効果を得る
    $this->expectException(ValidationException::class);
    $this->app->make(HogeRequest::class);
}
おわりに
サービスコンテナによる解決によって、rules() 以外も含む FormRequest 全体を、より実態に近くテストできる
- 投稿日:2020-11-20T18:53:07+09:00
[Laravel]CRUD基礎☆レストランメニュー作成アプリのチュートリアル
(※ この記事は、Laravel8が出るより結構前に書いて、他のブログに載せていました。それを転載したものなので、Laravel7で解説しています。ご了承くださいませ。。(m´・ω・`)m ゴメン…)
環境:XAMPP
前回は、Laravelで作った初めてのアプリとして、簡単なタスク管理アプリのチュートリアル記事を投稿しました。
今回は、もうちょっと色々機能をつけて、レストランのメニュー作成アプリを作ってみようと思います!完成品は以下画像のような感じです。
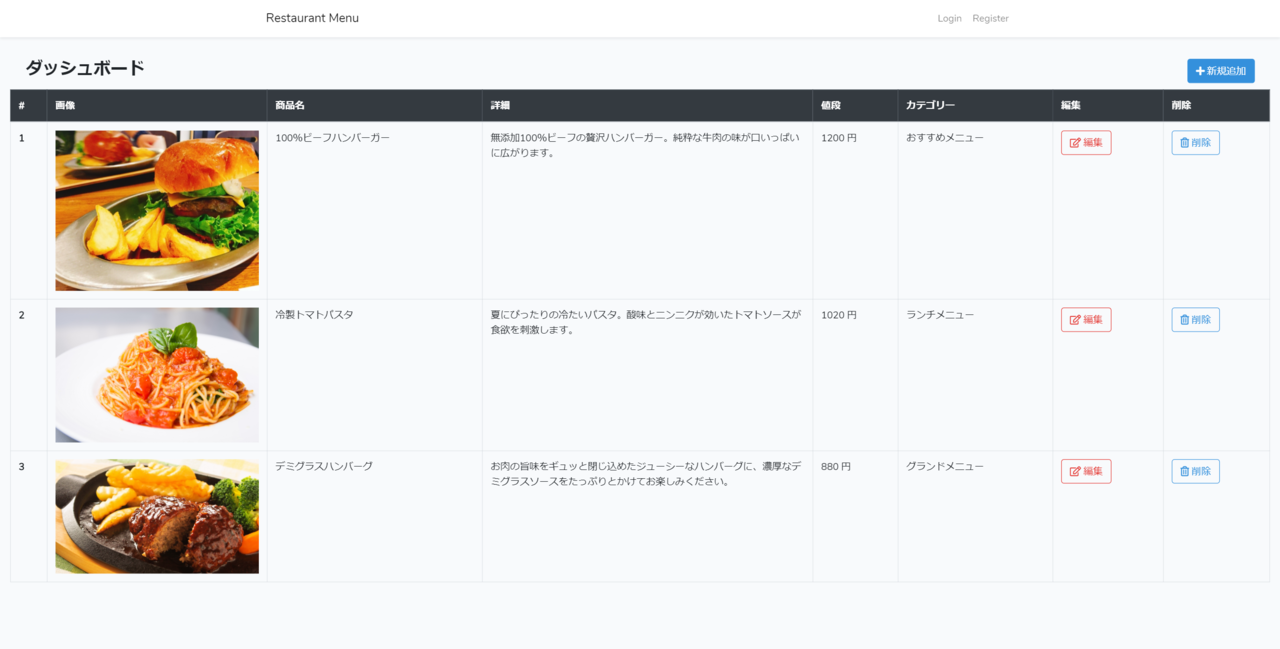
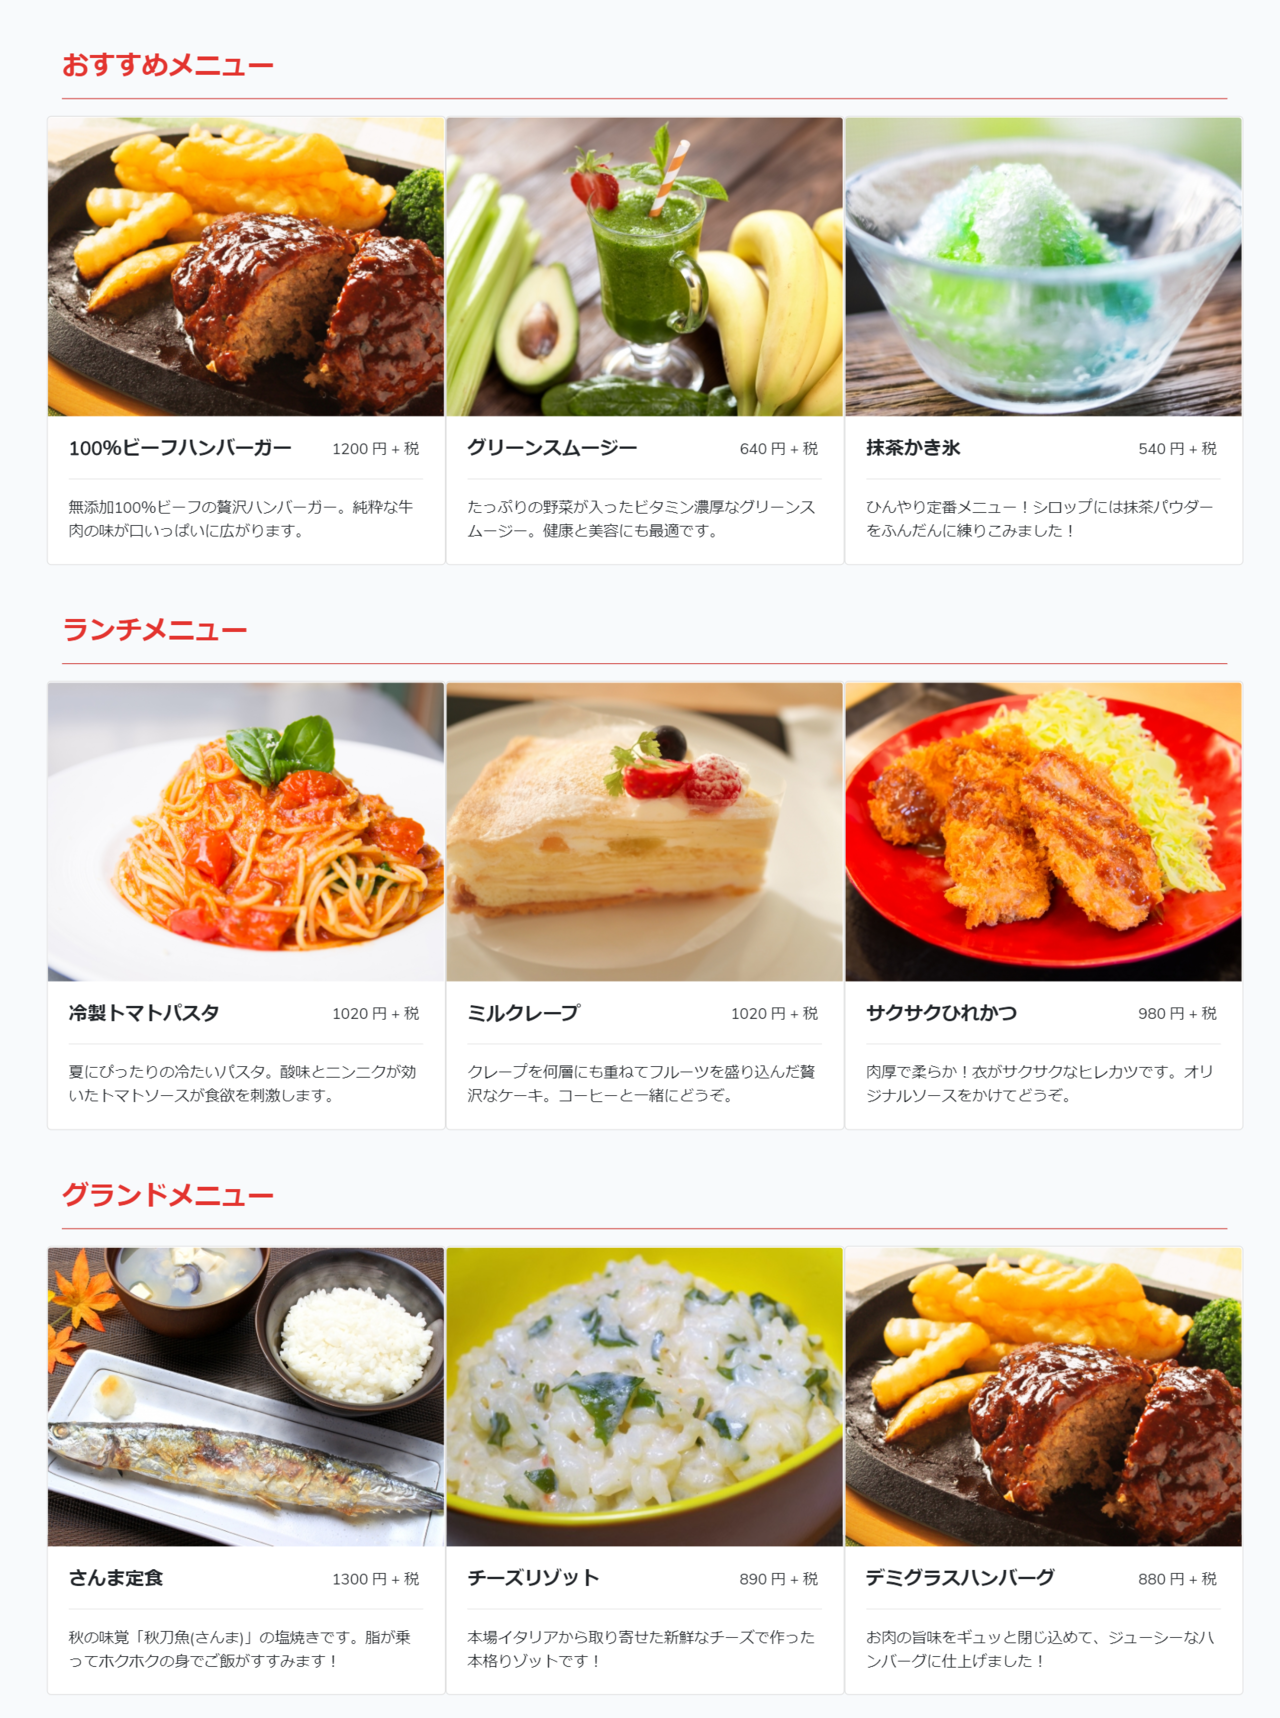
管理画面で情報を入力して画像をアップロードすると、メニューページに反映されるというものです。今回のアプリで基本的なCRUD機能の作成はマスターできるのかな~と思います。お客さん用画面はこちら。『おすすめメニュー』とか、『ランチメニュー』とかのカテゴリー別にメニューが表示されます。(カテゴリーも自由に設定できます。)
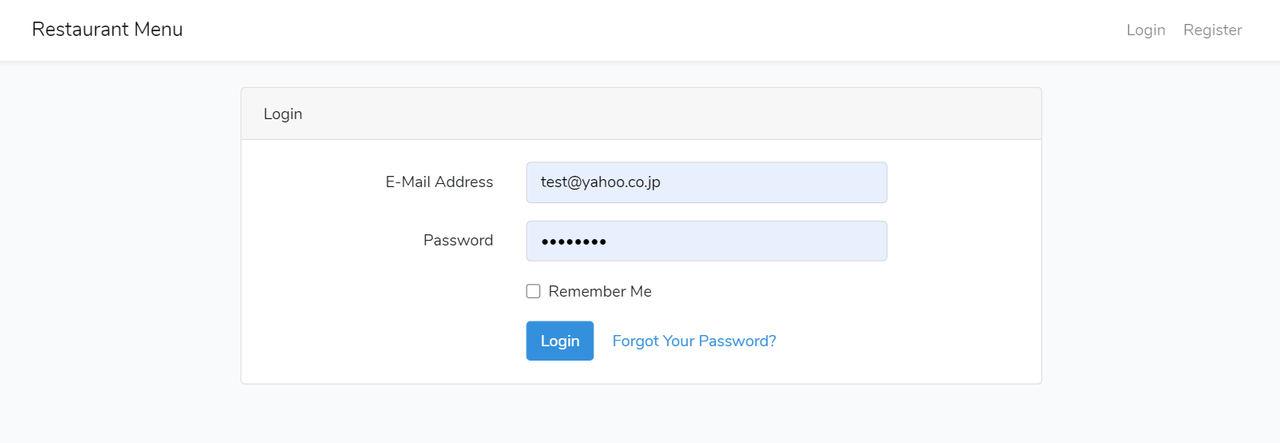
サイト管理者は管理画面のログインページからログインします。
ログインするとダッシュボードに飛びます。メニューを追加する場合は、右上ボタンから追加できます。
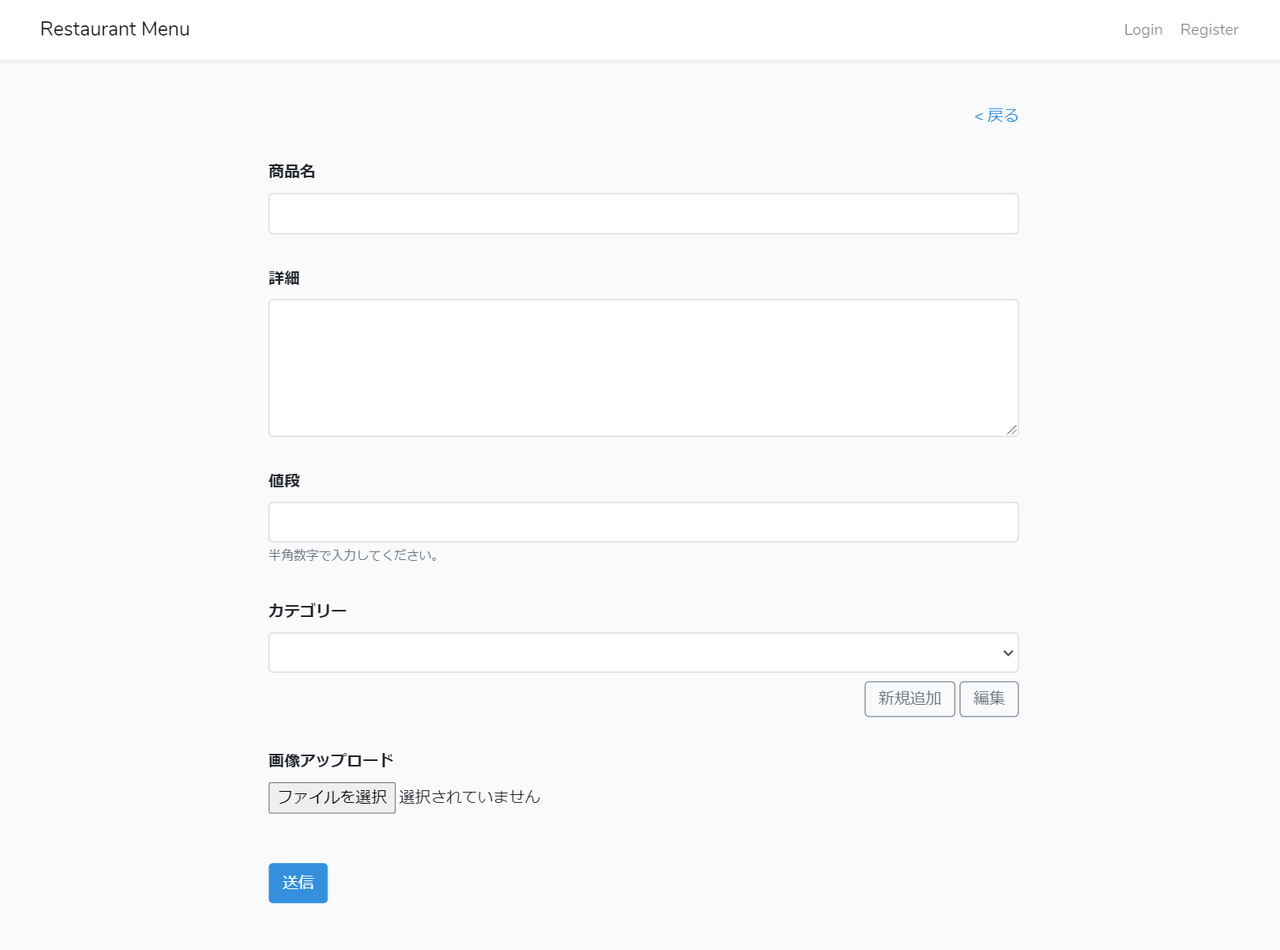
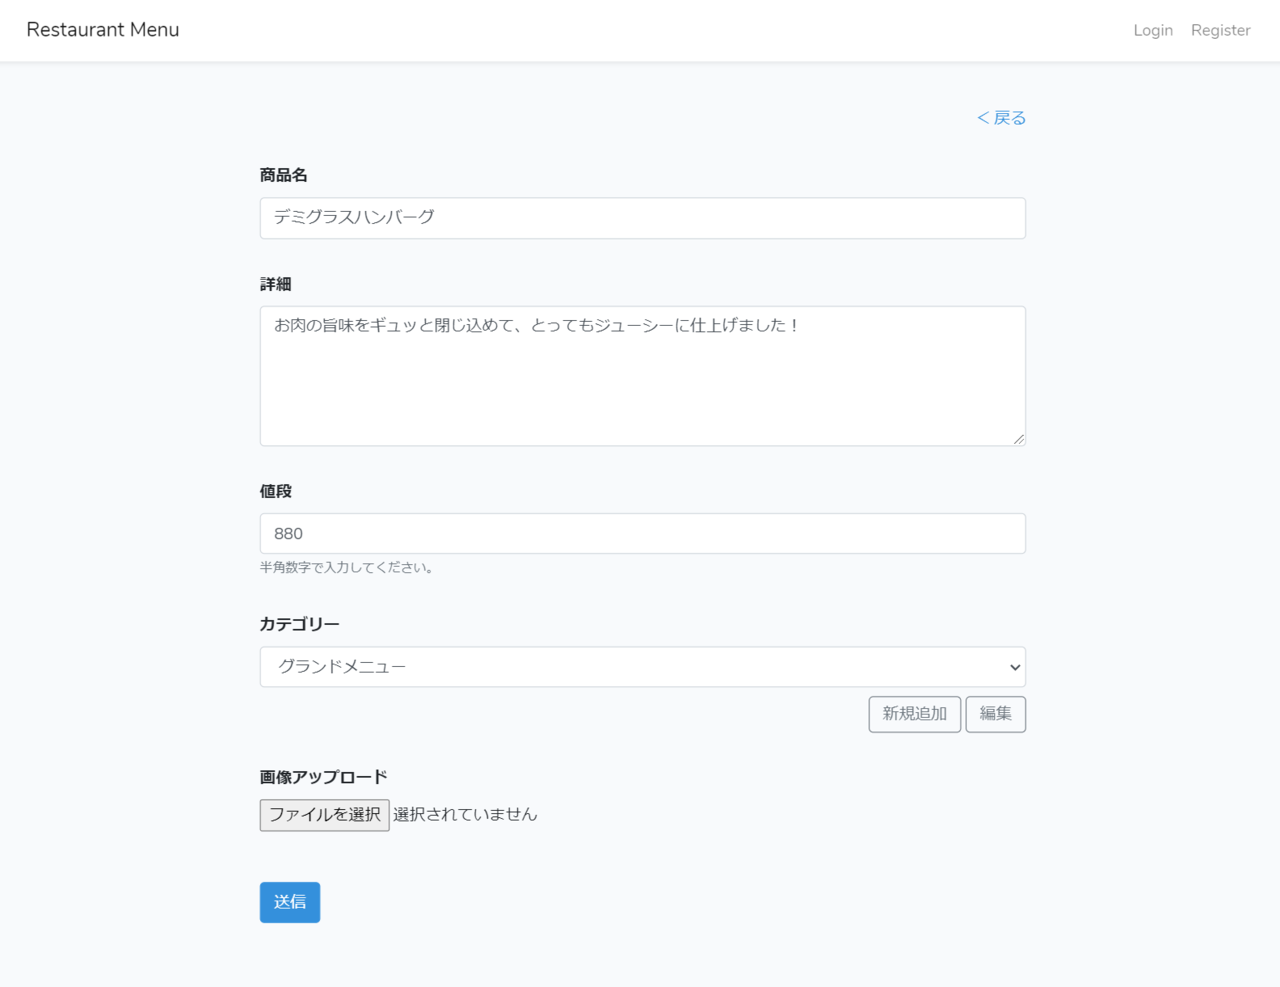
メニュー追加フォームはこちら。カテゴリーは、別ボタンを用意して別ページから追加できる仕様です。
ちなみに私、Webデザインは全然できませんので、フロント側はBootstrapで作ったデザイン性のないシンプル画面です。。。悪しからず。(;'∀') 汗
全体のソースコードはGitHubにアップしております。
必要な方は、以下のリンクからご確認ください。
https://github.com/Tomochan-taco/restaurant_menuそれでは早速スタート!
1 : プロジェクトの作成
手順1: XAMPPのインストール後、C:\xampp\htdocs に移動して、composerでプロジェクトを作成します。プロジェクト名は restaurant_menu にします。(※ 7系で解説しているので、バージョン指定してください。)
composer create-project --prefer-dist laravel/laravel restaurant_menu "7.*"手順2: プロジェクトを作成したら、cd コマンドでプロジェクト内『C:\xampp\htdocs\restaurant_menu』に移動します。因みに今回のLaravelのバージョンを確認したら下記のようになりました。
php artisan --version  //Laravelバージョン確認用コマンド
Laravel Framework 7.28.3
2 : BootstrapとFont Awesomeのインストール
今回も前回同様、BootstrapとFont Awesomeでフロント側を作成しています。ですので、BootstrapとFont Awesomeのインストールを先にやっちゃいます。
手順1: Laravelで用意されているBootstrapのscaffoldingは、laravel/uiパッケージに含まれています。その為、まずはcomposerでlaravel/uiパッケージをインストールします。
composer require laravel/ui:^2.4手順2: 今回は認証機能も使うので、--authオプションをつけてBootstrapのscaffoldingをインストールします。
php artisan ui bootstrap --authC:\xampp\htdocs\restaurant_menu\package.json(以後、package.json と略して表記します。) の "devDependencies"箇所に、以下のようにBootstrapが追加されます。
restaurant_menu\package.json"devDependencies": { "axios": "^0.19", "bootstrap": "^4.0.0", // Bootstrapが追加されています。 "cross-env": "^7.0", "jquery": "^3.2", "laravel-mix": "^5.0.1", "lodash": "^4.17.19", "popper.js": "^1.12", "resolve-url-loader": "^3.1.0", "sass": "^1.15.2", "sass-loader": "^8.0.0" }手順3: npmでインストールします。
npm install && npm run devこれで、C:\xampp\htdocs\restaurant_menu\public\css\app.css にコンパイルされてBootstrapが使えるようになります!
手順4: 次はFont Awesomeをインストールします。まずはnpmでfree versionをインストールします。
npm install --save @fortawesome/fontawesome-freepackage.json の "dependencies" の箇所に、以下のようにFont Awesomeが追加されます。
restaurant_menu\package.json"dependencies": { "@fortawesome/fontawesome-free": "^5.14.0" }手順5: C:\xampp\htdocs\restaurant_menu\resources\sass\app.scss に下記を追記してインポートします。
restaurant_menu\resources\sass\app.scss// Font Awesome @import '~@fortawesome/fontawesome-free/scss/fontawesome'; @import '~@fortawesome/fontawesome-free/scss/regular'; @import '~@fortawesome/fontawesome-free/scss/solid'; @import '~@fortawesome/fontawesome-free/scss/brands';手順6: npmで実行します。
npm run devこれでBootstrapとFont Awesomeが使えるようになります!
手順7: ブラウザ確認します。artisanコマンドでサーバを起動後、http://127.0.0.1:8000/ にアクセスしてみてください。
すると、以下画像のように表示されるはずです。LOGINとREGISTERが右上に表示されます!php artisan serve
3 : ロケールの設定
C:\xampp\htdocs\restaurant_menu\config\app.php で、
'timezone' と 'locale' を以下のように変更します。restaurant_menu\config\app.php'timezone' => 'Asia/Tokyo', 'locale' => 'ja',4 : データベースの作成と、.envファイルの設定
手順1: XAMPPでデータベースを作成します。データベース名は、restaurant_menu にします。(XAMPPでのデータベースの作り方がわからない方は、ご自身で調べてみてください。)
手順2: データベースを作ったら、C:\xampp\htdocs\restaurant_menu\.env
で、 APP_NAME を Restaurant Menu に、DB_DATABASE を restaurant_menu に変更します。(* 空白を含む値を環境変数に定義する場合は、ダブル引用符で囲む必要があります。)
DB_USERNAME と DB_PASSWORD はそのままにします。XAMPP側でデータベースユーザーを設定した人は、こちらも変更してください。restaurant_menu\.envAPP_NAME="Restaurant Menu" | |途中省略 DB_DATABASE=restaurant_menu DB_USERNAME=root DB_PASSWORD=5 : モデルとマイグレーションファイル (テーブル) の作成
データベースを作成したら、お次はテーブルを作成していきます。
データベースに入力する必要があるデータは、ダッシュボードの以下黄色枠の部分です。
但し、カテゴリーは、例えば『グランドメニュー』の場合に、デミグラスハンバーグやさんま定食など、一つのカテゴリーに対して複数のメニューがあるので、別テーブルにしていきます。
手順1: artisanコマンドで、『Category』と『Product』の二つのモデルを作成します。-mオプションをつけて同時にマイグレーションファイルも作成します。
php artisan make:model Category -mphp artisan make:model Product -m手順2:『Category』モデルのマイグレーションファイル(C:\xampp\htdocs\restaurant_menu\database\migrations\2020_09_19_235630_create_categories_table.php)(2020_09_19 の部分は、作成した日付ですので、作成日によって変わります。)へ移動します。カテゴリーテーブルに追加するカラムは、カテゴリー名だけですので、18行目辺りに1行だけ追記します。
restaurant_menu\database\migrations\2020_09_19_235630_create_categories_table.phppublic function up() { Schema::create('categories', function (Blueprint $table) { $table->id(); $table->string('name'); // 追記 $table->timestamps(); }); }手順3:『Category』モデルの複数代入設定をします。複数代入設定は、意図しないデータを書き換えさせない為に、入力できるデータベーステーブルのカラムを指定するものです。今回は、ホワイトリスト方式である『$fillable方式』を使って、入力できるカラムを指定します。
Categoryモデルファイル(C:\xampp\htdocs\restaurant_menu\app\Category.php *←以後、Category.php と略して表記します。)へ移動します。今回はnameカラム一個だけです。restaurant_menu\app\Category.phpclass Category extends Model { protected $fillable=['name']; }手順4: Productモデルのマイグレーションファイル(C:\xampp\htdocs\restaurant_menu\database\migrations\2020_09_19_235644_create_products_table.php)へ移動します。
18行目辺りから、以下のように追記します。category_id が、Categoryテーブルとの外部キーです。restaurant_menu\database\migrations\2020_09_19_235644_create_products_table.phppublic function up() { Schema::create('products', function (Blueprint $table) { $table->id(); $table->string('name'); // ここから追記 $table->text('description'); $table->integer('price'); $table->string('image'); $table->integer('category_id'); // ここまで追記 $table->timestamps(); }); }手順5: Productモデルの複数代入設定をします。モデルファイル
(C:\xampp\htdocs\restaurant_menu\app\Product.php *←以後、Product.phpと略して表記します。) へ移動して、下記の通りカラムを指定します。restaurant_menu\app\Product.phpclass Product extends Model { protected $fillable=['name', 'description', 'price', 'image', 'category_id']; }手順6:artisanコマンドでマイグレーションします。
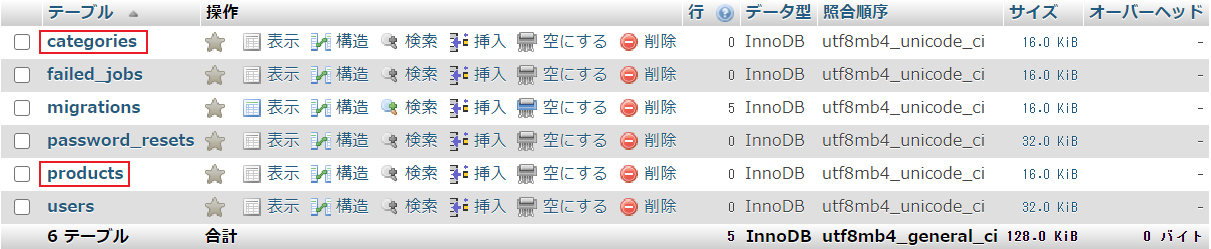
php artisan migrateデータベースに戻り、categories テーブルと、products テーブルが作成されていることをご確認ください。
6 : コントローラーの作成
普通だったらコントローラーより先にルーティングを設定すると思うのですが、ちょっとルーティングの部分でご説明申し上げたい箇所がありまして、それを説明する為に、コントローラーを先に作成します。
artisanコマンドで CategoryController と ProductController を作成します。
-r オプションをつけると、基本的なCRUDルーティングのアクションが自動で入った状態でコントローラーが作成されます!php artisan make:controller CategoryController -rphp artisan make:controller ProductController -r作成されたコントローラーファイル(C:\xampp\htdocs\restaurant_menu\app\Http\Controllers\CategoryController.php *←以後、CategoryController.php と略して表記します。また、ProductController の方も同様に略して表記します。)の中身を見てみると、-r オプションをつけたので、以下のようにindex() やらcreate() やら、7つのコントローラーアクションが自動で入力されています!
restaurant_menu\app\Http\Controllers\CategoryController.php<?php namespace App\Http\Controllers; use Illuminate\Http\Request; class CategoryController extends Controller { /** * Display a listing of the resource. * * @return \Illuminate\Http\Response */ public function index() { // } /** * Show the form for creating a new resource. * * @return \Illuminate\Http\Response */ public function create() { // } 以下省略 | |7 : ルーティングの設定
今回のルーティングは、リソースルーティングを使います。
これは、先ほど-r オプションをつけて、7つのアクションが自動で入った状態のコントローラーを作りましたが、そのそれぞれのアクションに対して、典型的なCRUDルーティングをたった一行のコードで割り当てることができるものです。
ルーティングファイル(C:\xampp\htdocs\restaurant_menu\routes\web.php *←以後、web.phpと略して表記します。)にて、以下のように、下二行を追記します。restaurant_menu\routes\web.phpRoute::get('/', function () { return view('welcome'); }); Auth::routes(); Route::get('/home', 'HomeController@index')->name('home'); Route::resource('category','CategoryController'); //追記 Route::resource('product','ProductController'); //追記追記後、artisanコマンドでルーティングを確認してみてください。
php artisan route:list以下のように表示されます。
C:\xampp\htdocs\restaurant_menu>php artisan route:list
+--------+-----------+--------------------------+------------------+------------------------------------------------------------------------+------------+
| Domain | Method    | URI                      | Name             | Action                                                                 | Middleware |
+--------+-----------+--------------------------+------------------+------------------------------------------------------------------------+------------+
|        | GET|HEAD  | /                        |                  | Closure                                                                | web        |
|        | GET|HEAD  | api/user                 |                  | Closure                                                                | api        |
|        |           |                          |                  |                                                                        | auth:api   |
|        | POST      | category                 | category.store   | App\Http\Controllers\CategoryController@store                          | web        |
|        | GET|HEAD  | category                 | category.index   | App\Http\Controllers\CategoryController@index                          | web        |
|        | GET|HEAD  | category/create          | category.create  | App\Http\Controllers\CategoryController@create                         | web        |
|        | DELETE    | category/{category}      | category.destroy | App\Http\Controllers\CategoryController@destroy                        | web        |
|        | PUT|PATCH | category/{category}      | category.update  | App\Http\Controllers\CategoryController@update                         | web        |
|        | GET|HEAD  | category/{category}      | category.show    | App\Http\Controllers\CategoryController@show                           | web        |
|        | GET|HEAD  | category/{category}/edit | category.edit    | App\Http\Controllers\CategoryController@edit                           | web        |
|        | GET|HEAD  | home                     | home             | App\Http\Controllers\HomeController@index                              | web        |

         以下省略
         |
         |
createメソッドやら、updateメソッドやらに自動でルーティングが設定されています!(これを説明する為に、コントローラーを先に作成したのです!)これで、
『 Route::get('/category/create', 'CategoryController@create'); 』
とか、
『 Route::put('/category/{category}', 'CategoryController@update'); 』
とかをいちいち書かずに済みます!便利!8:作成手順の説明
さて、土台となるものを一通り作成し終えたところで、これからの開発手順をざっくり説明します。そうじゃないと色々と混乱してくると思うので。。(;^_^A
その1: カテゴリーの追加フォーム及び一覧ページの作成
メニュー追加フォームで、予め作られたカテゴリーをプルダウンから選ぶ項目を作ります。ですので、何が何でもカテゴリーを一番先に作らなくてはいけません。その2: メニュー追加フォーム及びダッシュボードの作成
カテゴリー関連のページを作り終えたら、メニュー追加フォームと、その追加されたメニューを一覧表示するダッシュボードを作ります。その3: お客さん用画面の作成
ダッシュボードまで作り終えたら、最後にお客さん用画面に情報を反映させて完成です。9:Viewページの作成(カテゴリー)
それでは、カテゴリーの追加フォーム及び一覧ページを作っていきます。一覧では、各カテゴリーの編集と削除もできるようにします。
手順1: まずは、追加フォームのViewを作ります。C:\xampp\htdocs\restaurant_menu\resources\views にcategoryというフォルダを作って、create.blade.php という名前でファイルを作ります。コードは以下の通りです。
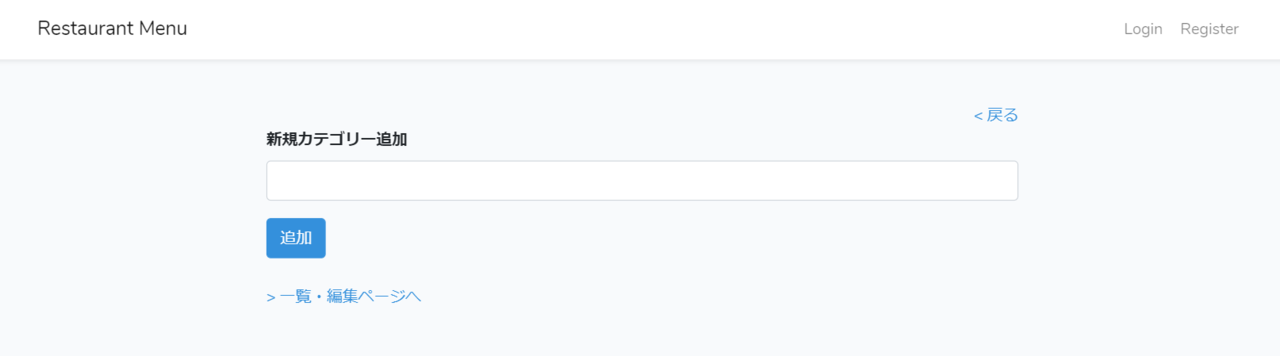
\xampp\htdocs\restaurant_menu\resources\views\category\create.blade.php@extends('layouts.app') @section('content') <div class="container mt-3" style="max-width: 720px;"> <div class="text-right"> <a href="{{ url('/product/create') }}">< 戻る</a> </div> <form> <div class="form-group"> <label for="categoryAdd" class="font-weight-bold">新規カテゴリー追加</label> <input type="text" class="form-control" id="categoryAdd" name="name" /> </div> <button type="submit" class="btn btn-primary">追加</button> </form> <div class="my-4"> <a href="{{ url('/category/') }}">> 一覧・編集ページへ</a> </div> </div> @endsection『@extends('layouts.app') 』の箇所で使われているlayouts.appのページは、特に編集せずにデフォルトのものをそのまま使っています。
@extends() や @section() の使い方等、laravelのbladeに関する基本的な説明は省きますので、ご存知でない方はご自身で調べてみてください。手順2: ブラウザで表示確認する為に、コントローラーを設定します。
CategoryController.phpで、以下のようにcreate()メソッドを設定します。restaurant_menu\app\Http\Controllers\CategoryController.phppublic function create() { return view('category.create'); }ブラウザで、『 http://127.0.0.1:8000/category/create 』へアクセスします。すると以下のように表示されるはずです。
手順3: お次は、一覧ページのViewを作ります。
categoryフォルダに index.blade.php という名前でファイルを作ります。
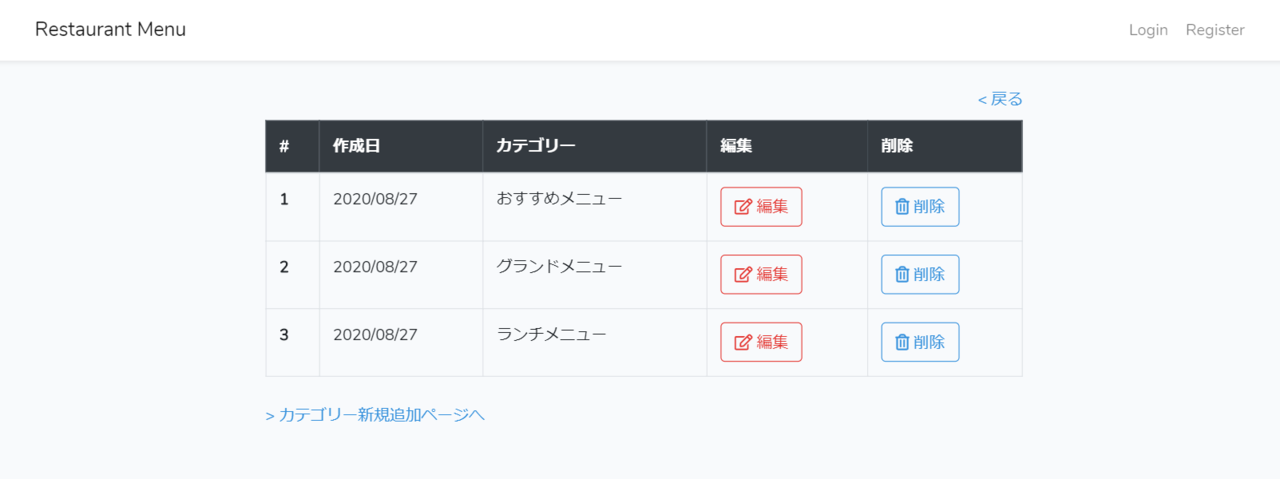
コードは以下の通りです。(*データベースからデータを引っ張ってきて表示させる箇所は、現段階ではサンプル値の手入力です。)restaurant_menu\resources\views\category\index.blade.php@extends('layouts.app') @section('content') <div class="container" style="max-width: 720px"> <div class="text-right"> <a href="{{ url('/product/create') }}">< 戻る</a> </div> <table class="table table-bordered mt-2"> <thead class="table-dark"> <tr> <th scope="col"> # </th> <th scope="col"> 作成日 </th> <th scope="col"> カテゴリー </th> <th scope="col"> 編集 </th> <th scope="col"> 削除 </th> </tr> </thead> <tbody> <tr> <th scope="row"> 1 </th> <td> 2020/2/11 </td> <td> グランドメニュー </td> <td> <button type="button" class="btn btn-outline-danger"><i class="far fa-edit"></i> 編集</button> </td> <td> <button type="button" class="btn btn-outline-primary"><i class="far fa-trash-alt"></i> 削除</button> </td> </tr> </tbody> </table> <div class="my-4"> <a href="{{ url('/category/create') }}">> カテゴリー新規追加ページへ</a> </div> </div> @endsection手順4: ブラウザで表示確認する為に、コントローラーを設定します。
CategoryController.phpで、以下のようにindex()メソッドを設定します。restaurant_menu\app\Http\Controllers\CategoryController.phppublic function index() { return view('category.index'); }ブラウザで、『 http://127.0.0.1:8000/category/ 』へアクセスします。すると以下のように表示されるはずです。
10: データベースへの挿入(カテゴリー)
カテゴリー情報をデータベースに挿入していきます。
手順1: 前回作ったcategoryのviewファイル(create.blade.php)を編集します。ソースコードは以下の通りです。
restaurant_menu\resources\views\category\create.blade.php<form action="{{ route('category.store') }}" method="POST"> //追記 @csrf //追記 <div class="form-group"> <label for="categoryAdd" class="font-weight-bold">新規カテゴリー追加</label> <input type="text" class="form-control" id="categoryAdd" name="name" /> </div> <button type="submit" class="btn btn-primary">追加</button> </form>9行目辺りの、<form>タグにaction属性とmethod属性を追記します。POSTデータを送信してデータベースに挿入するので、CategoryControllerのstoreメソッドをヒットするようにします。laravelに限らずなのかもしれませんが、フォーム入力されたデータを保存するにはstore()メソッドを使います。
リソースルーティングを設定しているので、category.storeという名前のルーティングが既についています。ですので、action属性には {{ route('category.store') }} と書くことができます。bladeのroute関数についてご存知でない方は、ご自身で調べてみてください。
また、Laravelでお約束ですが、formタグの下には『@csrf 』をつけることを忘れないようにします。CSRF対策の為です。これを書かないと、419|Page Expired エラー等が起きます。手順2: 正常にデータが送信できるかを確認します。ここではひとまずdd()関数を利用してチェックしてみます。
CategoryController.phpで、store()メソッドを以下のように設定します。
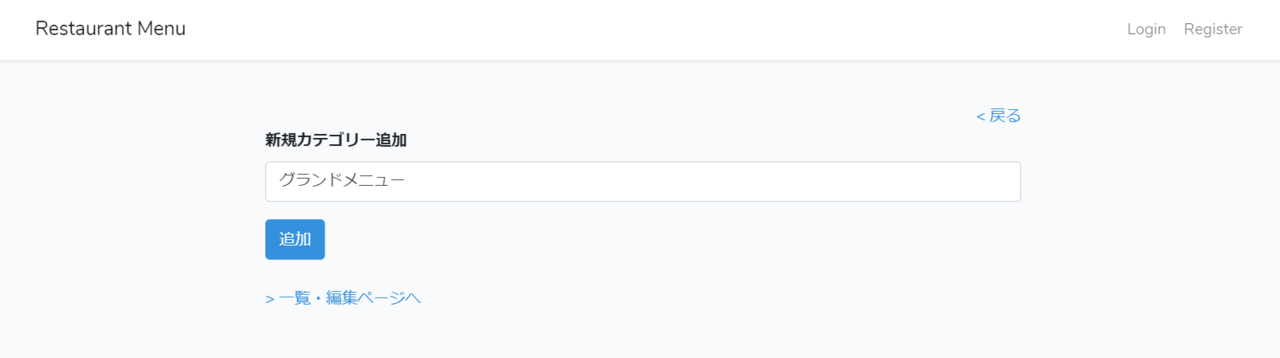
※ フォームから飛んでくるデータはRequest型で渡ってきます。その為、コールバック関数の引数には、Implicit Bindingを利用して、(Request $request) とします。この辺りがよくわからない方は、『Laravel フォーム Request Implicit Binding』等で検索してみてください。restaurant_menu\app\Http\Controllers\CategoryController.phppublic function store(Request $request) { return dd($request->all()); }手順3:『 http://127.0.0.1:8000/category/create 』にアクセスします。何でもいいのですが、とりあえず『グランドメニュー』と入力して、追加ボタンを押します。
すると、以下のように表示されて、CSRFのトークンと、カテゴリー情報(inputタグの値)が送られてきているのがわかります!
手順4: データベースに挿入していきます。dd()メソッドはコメントアウトして、Eloquentモデルのcreate()メソッドを使って挿入します。
その際、Categoryモデルを使うので、コントローラーに『 use App\Category; 』を追記しておくことを忘れないようにします。
コードは以下の通りです。restaurant_menu\app\Http\Controllers\CategoryController.php<?php namespace App\Http\Controllers; use Illuminate\Http\Request; use App\Category; //追記 以下省略 | | public function store(Request $request) { // return dd($request->all()); Category::create([ 'name'=>request('name') ]); }手順5: データがきちんと挿入されるか確認します。先程と同じようにブラウザで『 グランドメニュー』と入力して追加ボタンを押します。
categoriesテーブルを確認すると、以下の通りグランドメニューが追加されています!データベースへの挿入ができました!
11:フラッシュメッセージの表示とリダイレクト(カテゴリー)
カテゴリーを追加した際に、直前のページ(要は、カテゴリーを追加した同じページのこと。)にリダイレクトして、フラッシュメッセージを出すようにします。
手順1: まずは、View側でフラッシュメッセージを出すコードを追記します。categoryのviewファイル(create.blade.php)へ移動して、9行目辺りから追記していきます。コードは以下の通りです。
restaurant_menu\resources\views\category\create.blade.php@extends('layouts.app') @section('content') <div class="container mt-3" style="max-width: 720px;"> <div class="text-right"> <a href="{{ url('/product/create') }}">< 戻る</a> </div> @if (session('message')) //ここから追記 <div class="alert alert-success" role="alert">{{ session('message') }}</div> @endif //ここまで追記 <form action="{{ route('category.store') }}" method="POST"> @csrf 以下省略 | |グローバルなsession()ヘルパ関数を使います。引数を一つにすることで、キーに対する値を取得することができます。if文にすることで、'message'というキー名でsessionデータがあれば表示しないさい、と書いています。
手順2: 次に、コントローラーに設定していきます。
CategoryControllerのstore()メソッドに、『 return redirect() ~~ 』部分を追記します。restaurant_menu\app\Http\Controllers\CategoryController.phppublic function store(Request $request) { // return dd($request->all()); Category::create([ 'name'=>request('name') ]); return redirect()->back()->with('message', 'カテゴリーが追加されました。'); //追記 }直前のページにリダイレクトするには、back()メソッドを使います。フラッシュメッセージを出すには、セッションデータを返す必要があるので、with()メソッドを使います。with()メソッドは、リダイレクトする場合や、viewを返す時などにデータを渡せるメソッドです。view側に変数を渡す場合等によく使われます。今回は、『 with('キー', 'バリュー'); 』のように2つ引数を渡すことで、配列としてセッションデータをview側に渡します。
手順3: ブラウザで確認してみます。
再度『 http://127.0.0.1:8000/category/create 』にアクセスして、カテゴリーを入力後に追加ボタンを押すと、リダイレクトされて、以下のようにフラッシュメッセージが表示されます。
12:一覧ページへ反映させる(カテゴリー)
カテゴリーを無事データベースに追加できたので、それを一覧ページに表示させます。
手順1: まずは、コントローラーに一覧情報を表示させるためのデータ受け渡しの設定を行います。
CategoryController.phpで、元々書いてあった『return view('category.index');』はコメントアウトして、index() メソッドに下二行を追記します。restaurant_menu\app\Http\Controllers\CategoryController.phppublic function index() { // return view('category.index'); $categories = Category::latest()->get(); //追記 return view('category.index', ['categories' => $categories]); //追記 }latest()は、新しいもの順でデータを取ってくる際に使えるように、Laravelが用意してくれている便利なメソッドです。クエリビルダで言う所の、orderBy('created_at', 'desc')と同じ意味になります。その為、『Category::latest()->get();』は、『Category::orderBy('created_at', 'desc')->get();』と同じ結果になります。
手順2: 先程作った一覧ページのView(index.blade.php)へ移動して、30行目辺りの
以下に、//追記 もしくは //変更 と書かれている部分を追記・変更してください。restaurant_menu\resources\views\category\index.blade.php@extends('layouts.app') @section('content') <div class="container" style="max-width: 720px"> <div class="text-right"> <a href="{{ url('/product/create') }}">< 戻る</a> </div> <table class="table table-bordered mt-2"> <thead class="table-dark"> <tr> <th scope="col"> # </th> <th scope="col"> 作成日 </th> <th scope="col"> カテゴリー </th> <th scope="col"> 編集 </th> <th scope="col"> 削除 </th> </tr> </thead> <tbody> @if (count($categories) > 0) //追記 @foreach ($categories as $key=>$category) //追記 <tr> <th scope="row"> {{ $key+1 }} //変更 </th> <td> {{ $category->created_at->format('Y/m/d') }} //変更 </td> <td> {{ $category->name }} //変更 </td> <td> <button type="button" class="btn btn-outline-danger"><i class="far fa-edit"></i> 編集</button> </td> <td> <button type="button" class="btn btn-outline-primary"><i class="far fa-trash-alt"></i> 削除</button> </td> </tr> @endforeach //追記 @else //追記 <tr> //追記 <td colspan="5">追加されたカテゴリーはありません。</td> //追記 </tr> //追記 @endif //追記 </tbody> </table> <div class="my-4"> <a href="{{ url('/category/create') }}">> カテゴリー新規追加ページへ</a> </div> </div> @endsection31行目辺りの @if (count($categories) > 0) の部分で、カテゴリーが1つ以上あればテーブルを表示して、そうでなければ、51行目辺りの、@else 部分で『追加されたカテゴリーはありません。』という文言を表示するようにします。
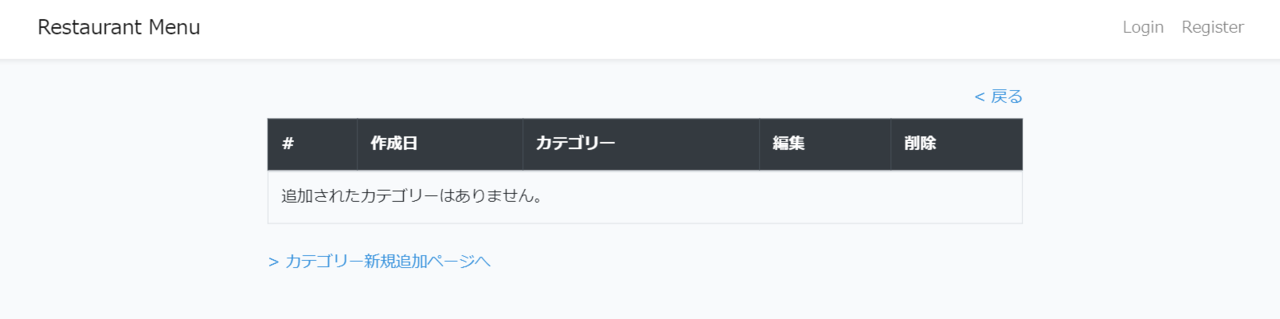
手順3: @else 部分が正常に表示されるかを確認する為に、データを全部消去します。artisanコマンドで以下の通りmigrate:freshを行います。
php artisan migrate:fresh手順4: ブラウザで確認します。『 http://127.0.0.1:8000/category 』にアクセスします。すると、以下の通り表示されるはずです。
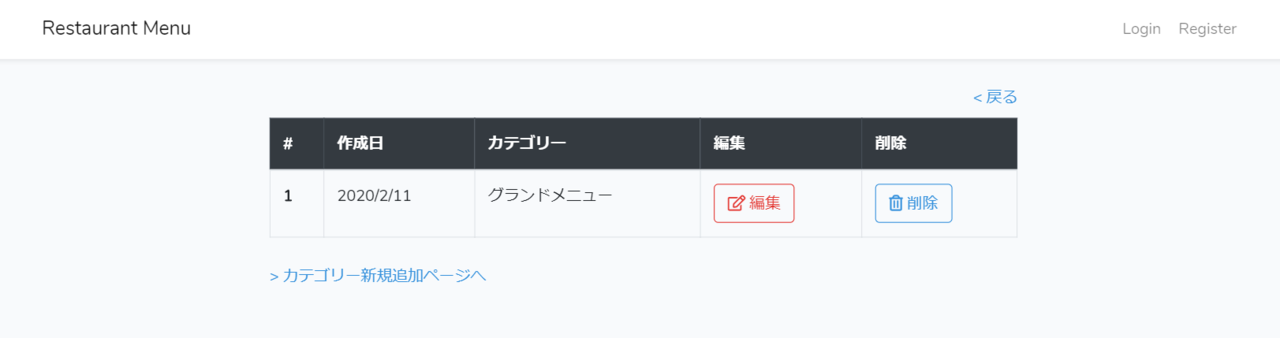
手順5:『> カテゴリー新規追加ページへ』 のリンクをクリックして、追加ページへ移動します。そこで、『ランチメニュー』『グランドメニュー』『おすすめメニュー』を追加してみます。
手順6:『> 一覧・編集ページへ のリンク』をクリックすると、以下のようにデータが表示されます!
*おまけで解説です。↓↓
index.blade.phpの、『 @foreach (\$categories as \$key=>\$category) 』の部分ですが、これは、通し番号の部分( {{ \$key+1 }} のとこ。)を表示させる為に、このように書いています。Laravelではモデルを使った場合に、データベースから返ってくる値は常にCollectionインスタンスになるので、$key変数に、連想配列の”キー”の部分を入れ込むことができます。
* LaravelのCollectionが分からない方は、結構豊富に記事が出ているので調べてみてください!また、PHPの連想配列を取り出す方法に関しては、この記事がわかりやすかったです。【やさしいPHP】foreach文の基礎を知ってかんたんな応用を試してみる
実際に確認してみます。CategoryController.phpのindex()メソッドに、以下のようにdd() ヘルパ関数を追記してみてください。
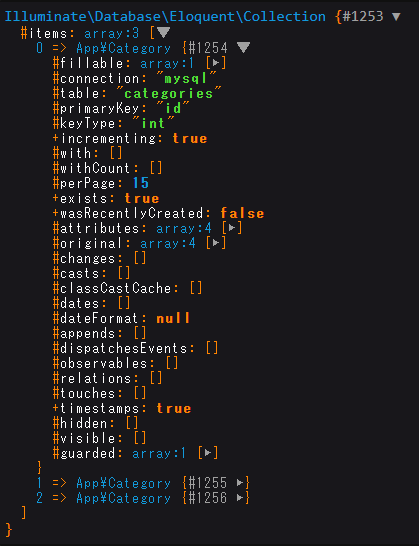
restaurant_menu\app\Http\Controllers\CategoryController.phppublic function index() { // return view('category.index'); $categories = Category::latest()->get(); dd($categories); //追記 return view('category.index', ['categories' => $categories]); }『 http://127.0.0.1:8000/category 』にアクセスすると、以下のように表示されます。Collectionインスタンスが返されて、”キー”の部分には、配列で言う所の配列番号が入っています。これを表示させることで、一覧表の通し番号を表示させています。
13:編集機能をつける(カテゴリー)
次は、カテゴリー一覧ページの編集ボタンから、カテゴリーを編集できるようにします。
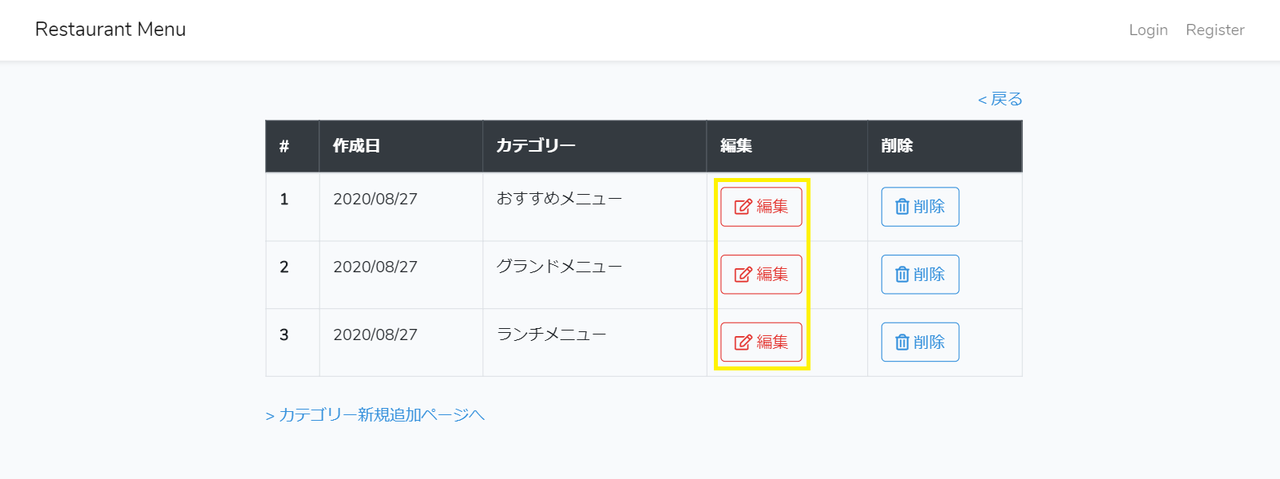
手順1: 一覧ページ(index.blade.php)へ移動して、編集ボタンの箇所を<a>タグで囲みます。
restaurant_menu\resources\views\category\index.blade.php<a href="{{ route('category.edit', [ 'category' => \$category->id ]) }}"> //追記 <button type="button" class="btn btn-outline-danger"><i class="far fa-edit"></i> 編集</button> </a> //追記『 route('category.edit', [ 'category' => $category->id ]) 』の箇所で、該当するカテゴリーのidをつけたURLへ遷移します。ブラウザで実際に編集ボタンを押してみると、URLが『 http://127.0.0.1:8000/category/1/edit 』や『 http://127.0.0.1:8000/category/2/edit 』へ飛びます。
php artisan route:list を今一度確認してみてください。
『 category.edit 』 という名前のついたルーティングは、『 category/{category}/edit 』へ遷移するように設定されています。route関数の第二引数につけたパラメーターは、自動的にURLの正しい場所へ埋め込まれます。
手順2: お次は、編集ボタンを押した先にeditページを表示させるようにコントローラーに設定していきます。(editページ自体はこの後作ります。)
CategoryController.phpで、edit() メソッドを以下のように編集します。indexページの編集ボタンを押したときに渡ってきたパラメーターが(\$id)の部分に入ります。restaurant_menu\app\Http\Controllers\CategoryController.phppublic function edit($id) { $category = Category::find($id); return view('category.edit', ['category' => $category]); }手順3: editページを作成します。C:\xampp\htdocs\restaurant_menu\resources\views\category に『 edit.blade.php 』という名前でファイルを作ります。同じフォルダのcreate.blade.phpファイルとほぼ中身は一緒なので、まずはそれを全てコピペします。そのうえで、以下『//追記 』もしくは 『//変更』と書かれている部分を追記・変更します。
restaurant_menu\resources\views\category\edit.blade.php@extends('layouts.app') @section('content') <div class="container mt-3" style="max-width: 720px;"> <div class="text-right"> <a href="{{ url('/product/create') }}">< 戻る</a> </div> <form action="{{ route('category.update', [ 'category' => $category->id ]) }}" method="POST"> // 変更 @csrf @method('PUT') //追記 <div class="form-group"> <label for="categoryAdd" class="font-weight-bold">カテゴリー編集</label> // 変更 <input type="text" class="form-control" id="categoryAdd" name="name" value="{{ $category->name }}" /> // 変更 </div> <button type="submit" class="btn btn-primary">編集</button> // 変更 </form> <div class="my-4"> <a href="{{ url('/category/') }}">> 一覧ページへ</a> // 変更 </div> </div> @endsection何点か説明します。
『 <form action="{{ route('category.update', [ 'category' => $category->id ]) }}" method="POST"> 』の箇所は、アップデートしたデータをデータベースに反映させる為に、update() メソッドをヒットするように設定します。また、update() メソッドはPUTリクエストで送信するため、『 @method('PUT') 』という記述を書く必要があります。これは、現段階ではブラウザがGETかPOSTしか理解することができないため、これはPOSTじゃなくて、PUTだよ、ということをブラウザ側に伝える為です。これは、DELETEリクエストの時も同様です。
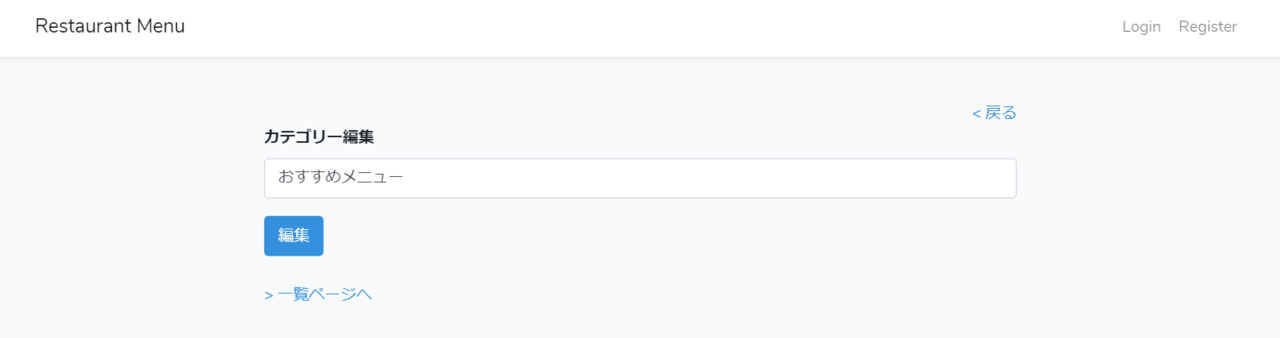
また、編集ページのため、編集する前のデータがフォームに残った状態で表示させます。その為、inputタグにvalue属性を追記します。これで、一覧ページの編集ボタンをクリックしてみてください。以下のように該当するカテゴリーが入力された状態で編集フォームが表示されます。
手順4: 編集されたデータをデータベースに保存していきます。CategoryController.php へ移動して、update()メソッドを、以下のように設定します。
restaurant_menu\app\Http\Controllers\CategoryController.phppublic function update(Request $request, $id) { $category = Category::find($id); $category->name = request('name'); $category->save(); return redirect('/category')->with('message', 'カテゴリーが編集されました。'); }コードの中身を説明します。
① 『\$category = Category::find(\$id);』で、フォームから渡ってきたデータをidで探します。
② 『\$category->name = request('name');』で、該当するidのデータのnameカラムを、フォームから渡ってきたRequest型の値に変更します。
③ ②のデータを保存します。
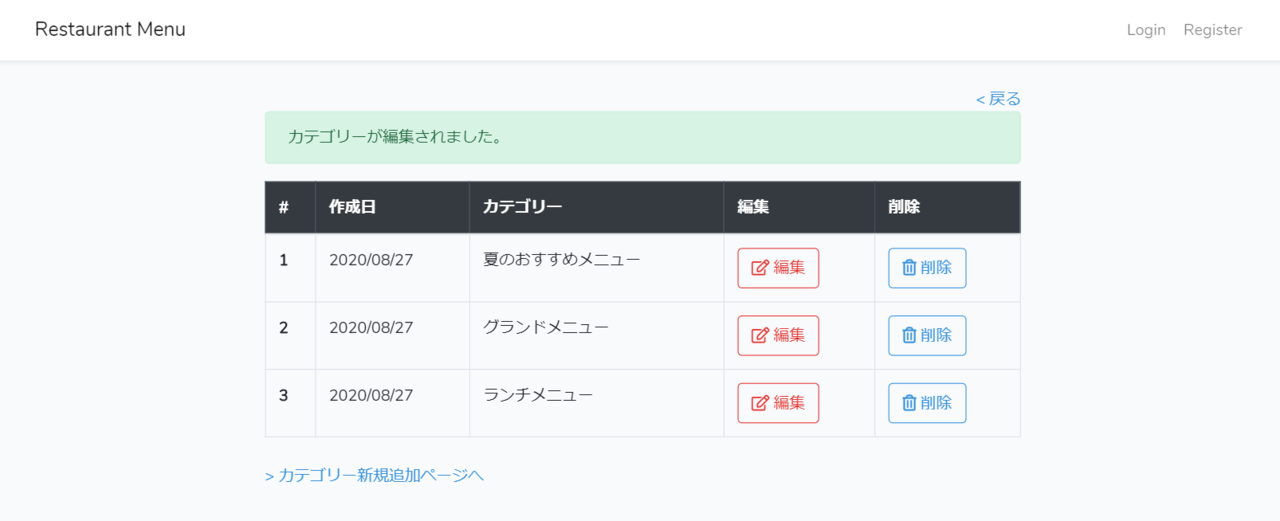
④ 一覧ページにリダイレクトして、そこで編集完了のフラッシュメッセージを出します。手順5: 一覧ページ(index.blade.php)にフラッシュメッセージを表示させるコードを書いていなかったので、追記しておきます。
restaurant_menu\resources\views\category\index.blade.php@extends('layouts.app') @section('content') <div class="container" style="max-width: 720px"> <div class="text-right"> <a href="{{ url('/product/create') }}">< 戻る</a> </div> @if (session('message')) //ここから追記 <div class="alert alert-success" role="alert">{{ session('message') }}</div> @endif //ここまで追記 <table class="table table-bordered mt-2"> <thead class="table-dark">手順6: 編集ページで、『おすすめメニュー』を『夏のおすすめメニュー』と変更して、編集ボタンを押してみます。そうすると、一覧ページにリダイレクトして、編集された旨のフラッシュメッセージが表示されます。
14:削除機能をつける(カテゴリー)
一覧ページでカテゴリーを削除できるようにします。削除する機能は、delete()メソッド一発で実現できるので簡単です!
手順1: CategoryController.php のdestroy()メソッドを以下のように設定します。
restaurant_menu\app\Http\Controllers\CategoryController.phppublic function destroy($id) { $category = Category::find($id); $category->delete(); return redirect('/category')->with('message', 'カテゴリーが削除されました。'); }コードの説明をします。
① 『 \$category = Category::find(\$id); 』で、パラメーターから渡ってきたidを元にデータを探します。
② 『 \$category->delete(); 』では、①のデータをdelete()メソッド一発でデータベースから削除しています。
③ 一覧ページにリダイレクトして、フラッシュメッセージ用のデータをwith()関数でbladeに送ります。手順2: 次は、View側の設定をしていきます。削除する際に、モーダルを使って確認画面を出してみようと思います。一覧ページ(index.blade.php)で、元々削除ボタンがあった
タグ箇所に、Bootstrapのモーダルのコードをとりえあえずコピペします。コピペするのは、以下サイトの『Live demo』のコードです。手順3: コピペしたら、以下『//変更』もしくは 『//追記 』と書かれている部分を変更・追記します。コードは以下の通りです。
restaurant_menu\resources\views\product\index.blade.php<td> <!-- <button type="button" class="btn btn-outline-primary"><i class="far fa-trash-alt"></i> 削除</button> --> //コメントアウト <!-- Button trigger modal --> <button type="button" class="btn btn-outline-primary" data-toggle="modal" data-target="#exampleModal{{$category->id}}"><i class="far fa-trash-alt"></i> 削除</button> //変更 <!-- Modal --> <div class="modal fade" id="exampleModal{{$category->id}}" tabindex="-1" role="dialog" aria-labelledby="exampleModalLabel" aria-hidden="true"> //変更 <div class="modal-dialog" role="document"> <form action="{{ route('category.destroy', [ 'category' => $category->id ]) }}" method="POST"> //追加 @csrf //追加 @method('DELETE') //追加 <div class="modal-content"> <div class="modal-header"> <h5 class="modal-title" id="exampleModalLabel">カテゴリー削除</h5> //変更 <button type="button" class="close" data-dismiss="modal" aria-label="Close"> <span aria-hidden="true">×</span> </button> </div> <div class="modal-body"> 本当に削除しますか? //変更 </div> <div class="modal-footer"> <button type="button" class="btn btn-secondary" data-dismiss="modal">キャンセル</button> //変更 <button type="submit" class="btn btn-primary">削除</button> //変更 </div> </div> </form> </div> </div> </td>53行目辺りに、元々あった削除ボタンのコード『 <button type="button" class="btn btn-outline-primary"><i class="far fa-trash-alt"></i> 削除</button> 』はコメントアウトします。
次に、<div class="modal-dialog" role="document"> の直下、60行目辺りにformタグを追加します。formタグでは、destroy()メソッドをヒットさせるようにします。@csrf と @method('DELETE') をつけるのを忘れないようにしてください。また、55行目あたりの『data-target="#exampleModal{{\$category->id}}">』と58行目辺りの『id="exampleModal{{\$category->id}}"』の箇所には『{{\$category->id}}』を追加しています。
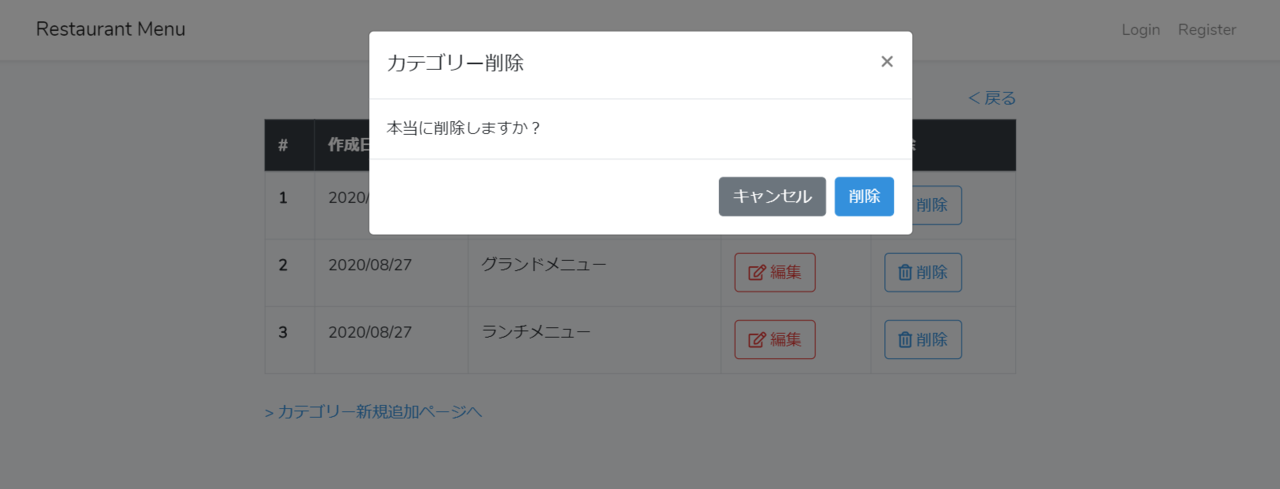
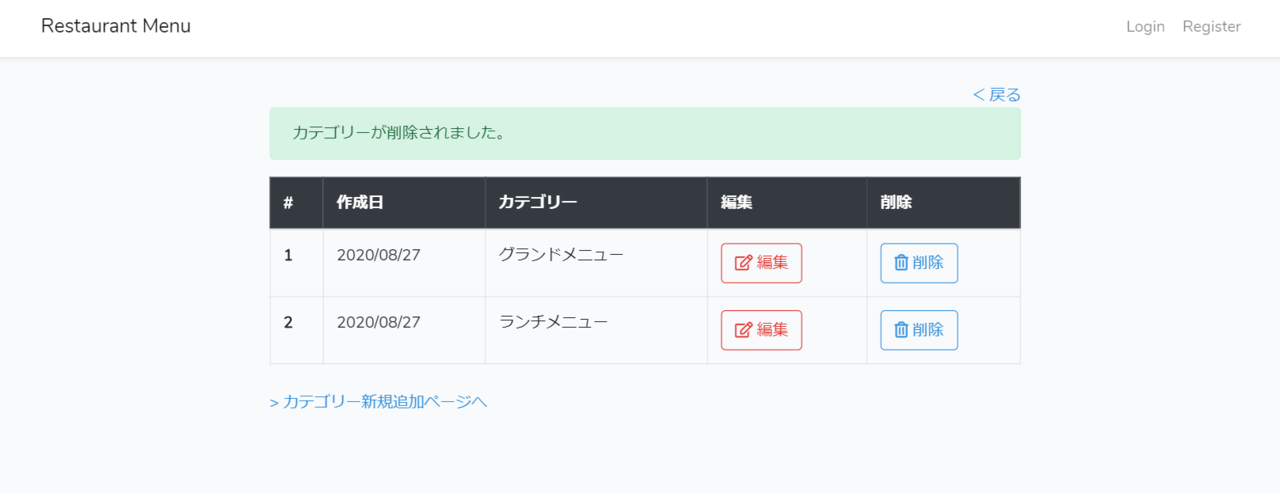
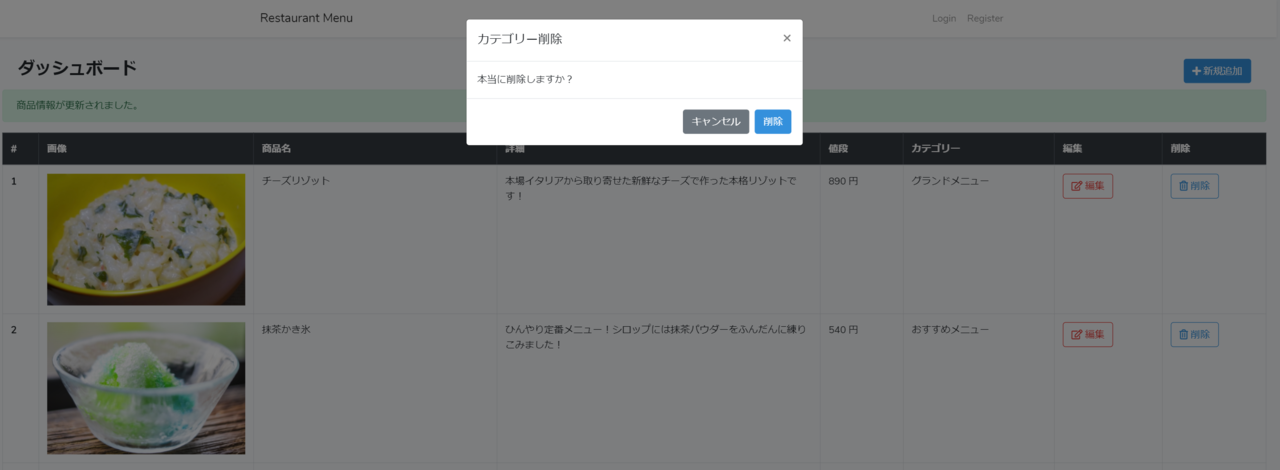
続いて、『カテゴリー削除』『本当に削除しますか?』『キャンセル』『削除』の文言を変更します。『削除』文言の<button>タグは、type="submit" に変更してください。手順4: ブラウザで確認してみます。削除ボタンを押すとモーダルで確認画面が出てきて、更に削除ボタンを押すとフラッシュメッセージと共に一覧から削除されます。また、データベースからも削除されます。
15:バリデーションをつける(カテゴリー)
フォームにバリデーションを付けていなかったので、追加ページと一覧ページにつけていきます。
手順1: まずは追加ページの方からです。コントローラの設定を先に行います。CategoryController.phpで、store()メソッドに、request()->validate 箇所を追記します。
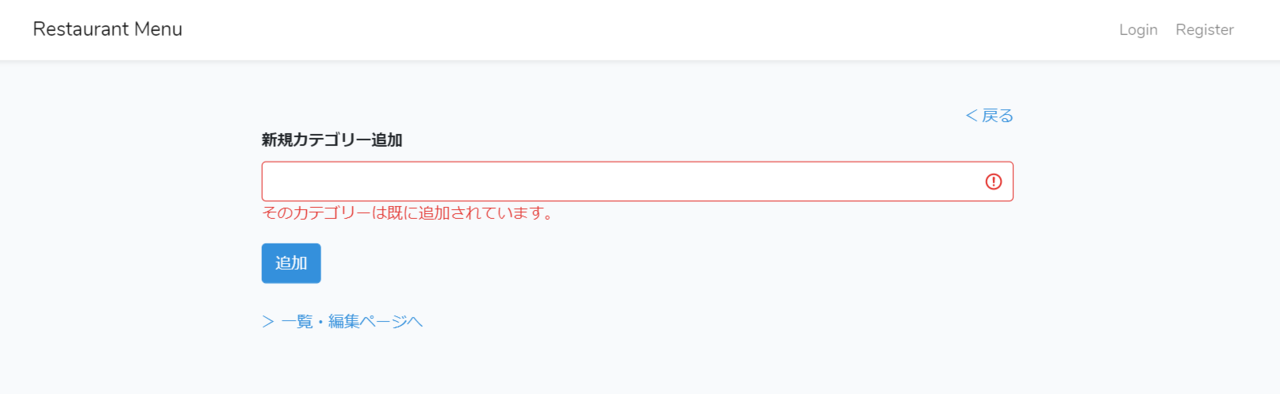
restaurant_menu\app\Http\Controllers\CategoryController.phppublic function store(Request $request) { // return dd($request->all()); request()->validate( ['name' => 'required|unique:categories'], ['name.required' => 'カテゴリーを入力してください。', 'name.unique' => 'そのカテゴリーは既に追加されています。'] ); Category::create([ 'name'=>request('name') ]); return redirect()->back()->with('message', 'カテゴリーが追加されました。'); }手順2: 追加ページ(create.blade.php)に移動して、以下『//変更』もしくは 『//追記 』と書かれている部分を変更・追記します。
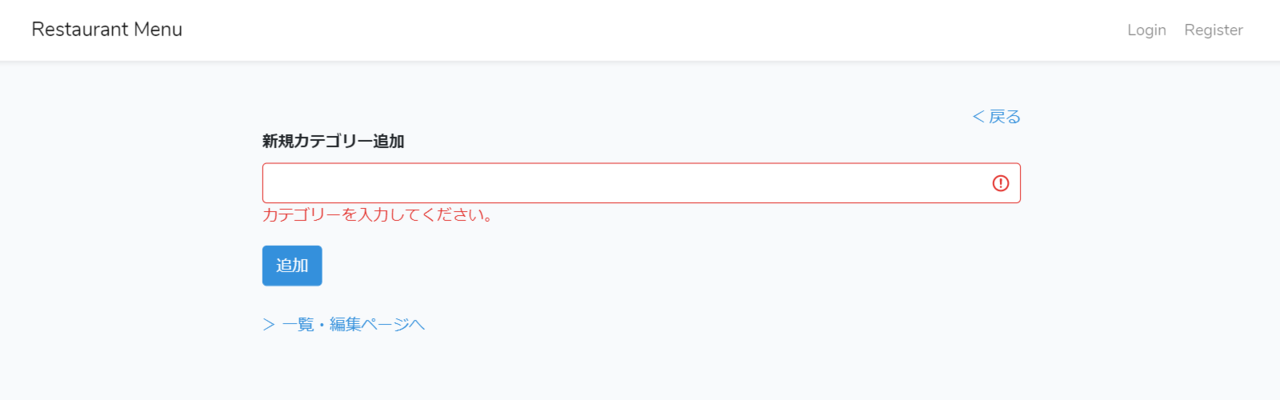
restaurant_menu\resources\views\product\create.blade.php<form action="{{ route('category.store') }}" method="POST"> @csrf <div class="form-group"> <label for="categoryAdd" class="font-weight-bold">新規カテゴリー追加</label> <input type="text" class="form-control @error('name') is-invalid @enderror" id="categoryAdd" name="name" /> //変更 @error('name') //追記 <p class="text-danger">{{ $message }}</p> //追記 @enderror //追記 </div> <button type="submit" class="btn btn-primary">追加</button> </form>17行目辺りのinputタグのclass名には、『 @error('name') is-invalid @enderror 』を追記しています。これは、@errorディレクティブを利用をして、エラーメッセージがあったらis-invalidクラスを付けてね、ということを表しています。また、その後の18行目から20行目にかけても@errorディレクティブを使って、$message変数を表示させるようにしています。
手順3: カテゴリー追加ページに行って、何も入力せずに追加ボタンを押すと、以下のようにエラーメッセージが表示されます。
重複して追加しようとすると、既に登録されている旨のエラーが出ます。
手順4: 編集ページも同様にバリデーションをかけていきます。
CategoryController.phpのupdate()メソッドにrequest()->validate()部分を追記します。restaurant_menu\app\Http\Controllers\CategoryController.phppublic function update(Request $request, $id) { request()->validate( ['name' => 'required|unique:categories'], ['name.required' => 'カテゴリーを入力してください。', 'name.unique' => 'そのカテゴリーは既に追加されています。'] ); $category = Category::find($id); $category->name = request('name'); $category->save(); return redirect('/category')->with('message', 'カテゴリーが編集されました。'); }手順5: View側でも設定していきます。追加ページと同じように追記していきます。編集ページ(edit.blade.php)にて、inputタグのclass名に、『@error('name') is-invalid @enderror』を追記します。その後の18行目から20行目にかけても@errorディレクティブを使って、$message変数を表示させます。
restaurant_menu\resources\views\product\edit.blade.php<form action="{{ route('category.update', [ 'category' => $category->id ]) }}" method="POST"> @csrf @method('PUT') <div class="form-group"> <label for="categoryAdd" class="font-weight-bold">カテゴリー編集</label> <input type="text" class="form-control @error('name') is-invalid @enderror" id="categoryAdd" name="name" value="{{ $category->name }}" /> //変更 @error('name') //追加 <p class="text-danger">{{ $message }}</p> //追加 @enderror //追加 </div> <button type="submit" class="btn btn-primary">編集</button> </form>これで、フォームを空にして編集ボタンを押すと、『カテゴリーを入力してください。』というエラーが出て、何も変更せずに編集ボタンを押すと『そのカテゴリーは既に追加されています。』というエラーが出ます。
16:Viewページの作成(メニュー)
カテゴリー関連の機能は完成したので、お次はメニュー追加フォームとダッシュボードの作成を行います!
手順1:まずはメニュー追加フォームのViewを作ります。
C:\xampp\htdocs\restaurant_menu\resources\views にproductというフォルダを作って、create.blade.php という名前でファイルを作ります。コードは以下の通りです。
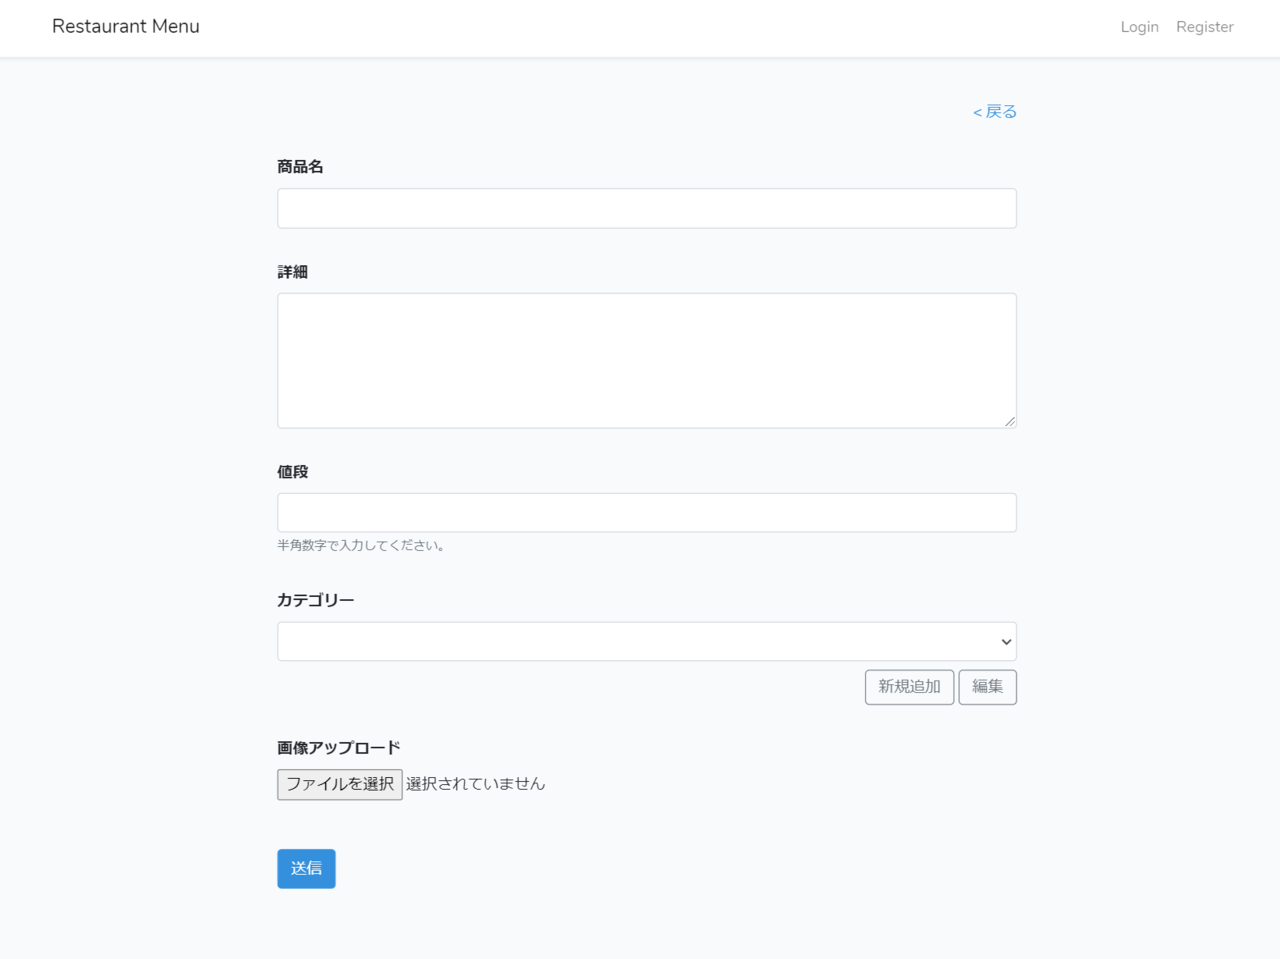
フラッシュメッセージと@errorディレクティブを使ったバリデーションの部分は、既にコード内に記載済みです。カテゴリーの時と同様なので、これに関する説明は省きます。restaurant_menu\resources\views\product\create.blade.php@extends('layouts.app') @section('content') <div class="container mt-3" style="max-width: 720px;"> <div class="text-right"> <a href="{{ url('/product/') }}">< 戻る</a> </div> @if ( session('message') ) <div class="alert alert-success" role="alert">{{ session('message') }}</div> @endif <form action="{{ route('product.store') }}" method="POST" enctype="multipart/form-data"> @csrf <div class="form-group" style="margin-top: 30px; margin-bottom: 30px"> <label for="name" class="font-weight-bold">商品名</label> <input type="text" class="form-control @error('name') is-invalid @enderror" id="name" name="name" /> @error('name') <p class="text-danger">{{ $message }}</p> @enderror </div> <div class="form-group" style="margin-bottom: 30px"> <label for="textarea" class="font-weight-bold">詳細</label> <textarea class="form-control @error('description') is-invalid @enderror" id="textarea" rows="5" name="description"></textarea> @error('description') <p class="text-danger">{{ $message }}</p> @enderror </div> <div class="form-group" style="margin-bottom: 30px"> <label for="price" class="font-weight-bold">値段</label> <input type="text" class="form-control @error('price') is-invalid @enderror" id="price" name="price" /> <small class="form-text text-muted">半角数字で入力してください。</small> @error('price') <p class="text-danger">{{ $message }}</p> @enderror </div> <div class="form-group" style="margin-bottom: 30px"> <label for="category" class="font-weight-bold">カテゴリー</label> <select class="form-control @error('category') is-invalid @enderror" id="category" name="category"> <option value="" disabled selected style="display: none;">カテゴリーを選択してください。</option> @foreach(App\Category::all() as $category) <option value="{{ $category->id }}">{{ $category->name }}</option> @endforeach </select> @error('category') <p class="text-danger">{{ $message }}</p> @enderror <div class="text-right mt-2"> <a type="button" href="{{ url('/category/create/') }}" class="btn btn-outline-secondary py-1" role="button">新規追加</a> <a type="button" href="{{ url('/category/') }}" class="btn btn-outline-secondary py-1" role="button">編集</a> </div> </div> <div class="form-group" style="margin-bottom: 30px"> <label for="image" class="font-weight-bold">画像アップロード</label> <input type="file" class="form-control-file @error('image') is-invalid @enderror" id="image" name="image" /> @error('image') <p class="text-danger">{{ $message }}</p> @enderror </div> <button type="submit" class="btn btn-primary my-3">送信</button> </form> </div> @endsection40行目辺りの<option>タグ『 <option value="" disabled selected style="display: none;">』の箇所について少し説明します。
これは、『カテゴリーを選択してください。』の文章を、下記画像のようにデフォルトで表示させる為に書いています。
属性の説明は下記4点です。
① value値を空にします。( value="")
② 選択できないようにします。(disabled)
③ デフォルトで選択表示されているようにします。(selected)
④ プルダウンの中ではなく、フォームの中に表示させるようにします。(style="display: none;)
また、『@foreach(App\Category::all() as $category)』の部分は、コントローラーから変数が渡って来ている訳ではないので、ここでCategoryモデルにアクセスしています。手順2: ブラウザで表示確認する為に、コントローラーの設定をします。(*おさらいですが、ルーティングは、リソースルーティングで既に設定しています。)
ProductController.phpで、以下のようにcreate()メソッドを設定します。restaurant_menu\app\Http\Controllers\ProductController.phppublic function create() { return view('product.create'); }手順3: ブラウザで、『 http://127.0.0.1:8000/product/create 』へアクセスします。すると以下のように表示されるはずです。
手順4: 次に、ダッシュボードのViewを作ります。
先程作ったproductフォルダに、index.blade.phpと言う名前でファイルを作ります。コードは以下の通りです。(*データベースからデータを引っ張ってきて表示させる箇所は、現段階ではサンプル値の手入力です。)restaurant_menu\resources\views\product\index.blade.php@extends('layouts.app') @section('content') <div class="container-fluid my-2"> <div class="row m-2"> <div class="col"> <h3 class="font-weight-bold">ダッシュボード</h3> </div> <div class="col text-right"> <a type="button" href="{{ url('/product/create/') }}" class="btn btn-primary text-right" role="button"><i class="fas fa-plus"></i> 新規追加</a> </div> </div> <table class="table table-bordered"> <thead class="table-dark"> <tr> <th scope="col"> id </th> <th scope="col"> 画像 </th> <th scope="col"> 商品名 </th> <th scope="col"> 詳細 </th> <th scope="col"> 値段 </th> <th scope="col"> カテゴリー </th> <th scope="col"> 編集 </th> <th scope="col"> 削除 </th> </tr> </thead> <tbody> <tr> <th scope="row"> 1 </th> <td style="max-width: 200px;"> <img src="#" class="img-fluid" /> </td> <td> デミグラスハンバーグ </td> <td style="max-width: 300px;"> お肉の旨味をギュッと閉じ込めたジューシーなハンバーグに、濃厚なデミグラスソースをたっぷりとかけてお楽しみください。 </td> <td> 880 </td> <td> グランドメニュー </td> <td> <button type="button" class="btn btn-outline-danger"><i class="far fa-edit"></i> 編集</button> </td> <td> <button type="button" class="btn btn-outline-primary"><i class="far fa-trash-alt"></i> 削除</button> </td> </tr> </tbody> </table> </div> @endsection手順5: ブラウザで表示確認する為に、コントローラーの設定をします。
ProductController.phpで、以下のようにindex()メソッドを設定します。restaurant_menu\app\Http\Controllers\ProductController.phppublic function index() { return view('product.index'); }手順6: ブラウザで、『 http://127.0.0.1:8000/product/ 』へアクセスします。すると以下画像のように表示されるはずです。画像はまだアップしていないので、リンク切れになっています。
17:データベースへの挿入(メニュー)
手順1: フォームからの送信データをデータベースに挿入していきます。ProductController.phpで、以下のようにstore()メソッドを設定します。コードは以下の通りです。バリデーションの部分は、既に含んでいます。
restaurant_menu\app\Http\Controllers\ProductController.phppublic function store(Request $request) { request()->validate( ['name' => 'required', 'description' => 'required', 'price' => 'required|integer', 'category' => 'required', 'image' => 'required|mimes:jpeg,png,jpg,gif,svg'], ['name.required' => '商品名を入力してください。', 'description.required' => '詳細を入力してください。', 'price.required' => '値段を入力してください。', 'category.required' => 'カテゴリーを入力してください。', 'image.required' => '画像を選択してください。'] ); $image = $request->file('image'); $name = time().'.'.$image->getClientOriginalExtension(); $destinationPath = public_path('/images'); $image->move($destinationPath,$name); Product::create([ 'name'=>request('name'), 'description'=>request('description'), 'price'=>request('price'), 'category_id'=>request('category'), 'image'=>$name ]); return redirect()->back()->with('message', '商品情報が追加されました。'); }上記のコードの部分で、画像アップロードに関する部分を説明します。
① まずはフォームからアップされた画像を変数に代入して、(\$image = \$request->file('image');)
② アップロードした日時と画像の拡張子をつけてユニークな画像名にします。(\$name = time().'.'.\$image->getClientOriginalExtension();)
③ C:\xampp\htdocs\restaurant_menu\public にimagesという名前でフォルダを作っておきます。そして、そこに画像を保存するようにします。
(\$destinationPath = public_path('/images'); \$image->move(\$destinationPath,\$name);)手順2: データの挿入にはProductモデルのcreate()メソッドを使っているので、ProductController.php上部に『use App\Product;』を追記することを忘れないようにします。
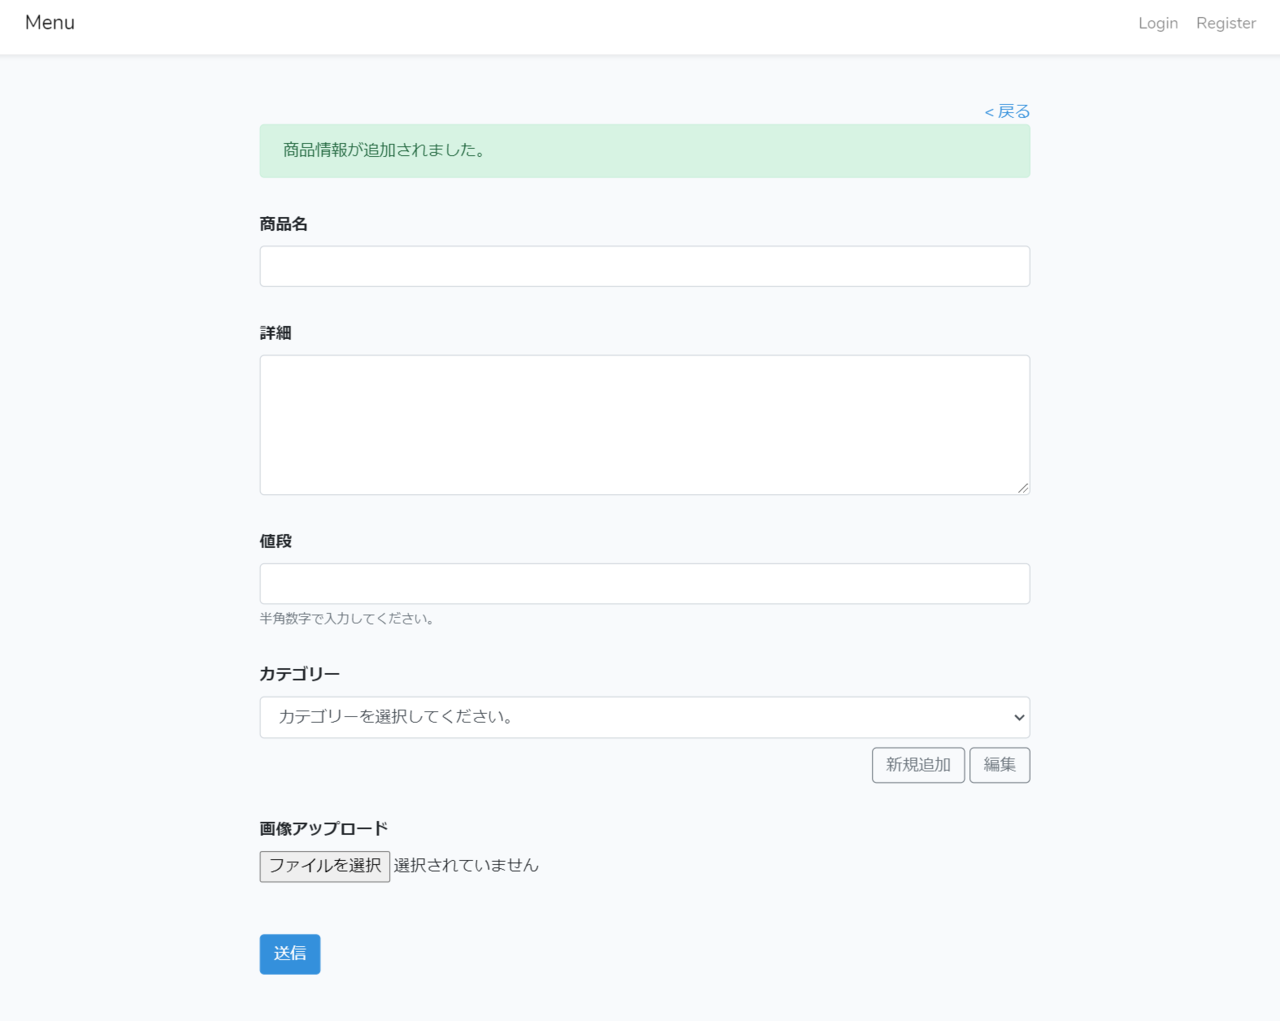
restaurant_menu\app\Http\Controllers\ProductController.php<?php namespace App\Http\Controllers; use Illuminate\Http\Request; use App\Product; //追記 以下省略 | |手順3: ブラウザに戻って、メニュー追加ページで適当に情報を入力して、送信ボタンを押してみます。正常に送信された場合は、以下画像のようにフラッシュメッセージが表示されます。
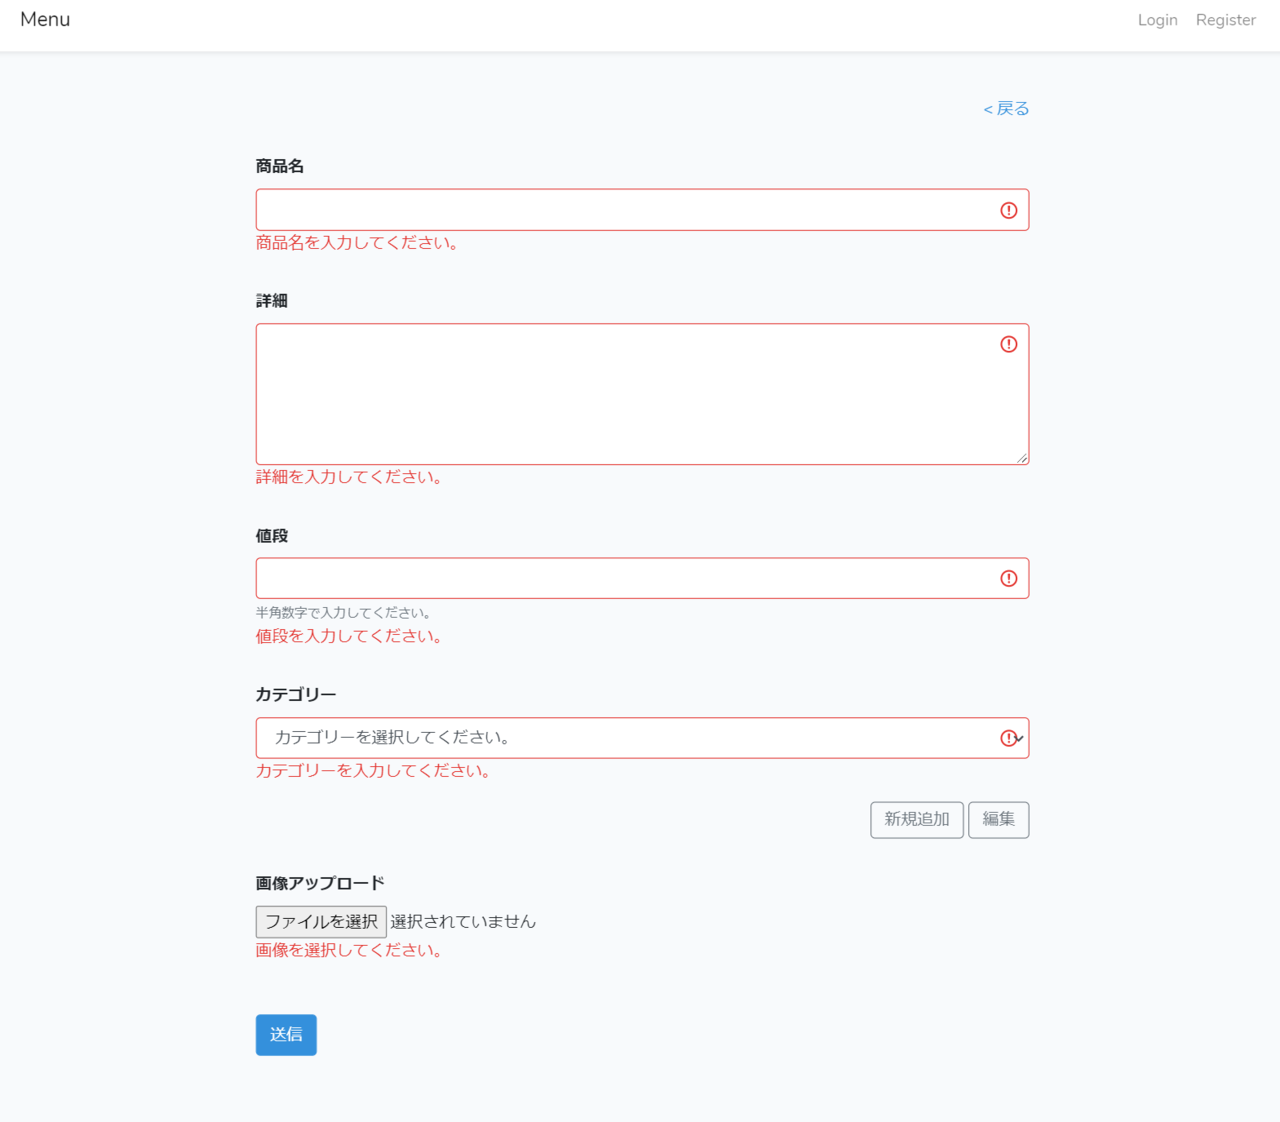
何も入力せずに送信ボタンを押すと、以下画像のようにエラーが表示されるはずです。
18:ダッシュボードへ反映させる
ダッシュボードに追加したメニュー情報を反映させます。
手順1: まずは、コントローラーに情報を表示させるためのデータ受け渡しの設定を行います。
ProductController.phpで、元々書いてあった『return view('product.index');』はコメントアウトして、index() メソッドに下二行を追記します。restaurant_menu\app\Http\Controllers\ProductController.phppublic function index() { // return view('product.index'); $products = Product::latest()->paginate(5); return view('product.index', ['products' => $products]); }特筆すべきは、paginate(5)のページネーションの箇所です。5項目追加したら次のページに行くように設定しています。
手順2: ダッシュボードのView(index.blade.php)へ移動して、43行目辺りの
以下に、//追記 もしくは //変更 と書かれている部分を追記・変更してください。@if() 文や、@foreach 、@else 文の箇所は、Categoryの時と同様なので説明は省きます。
また、115行目辺りの\$products->links()の箇所は、コントローラーで設定したpaginate(5)の部分を表示させています。restaurant_menu\resources\views\product\index.blade.php@extends('layouts.app') @section('content') <div class="container-fluid my-2"> <div class="row m-2"> <div class="col"> <h3 class="font-weight-bold">ダッシュボード</h3> </div> <div class="col text-right"> <a type="button" href="{{ url('/product/create/') }}" class="btn btn-primary text-right" role="button"><i class="fas fa-plus"></i> 新規追加</a> </div> </div> <table class="table table-bordered"> <thead class="table-dark"> <tr> <th scope="col"> # </th> <th scope="col"> 画像 </th> <th scope="col"> 商品名 </th> <th scope="col"> 詳細 </th> <th scope="col"> 値段 </th> <th scope="col"> カテゴリー </th> <th scope="col"> 編集 </th> <th scope="col"> 削除 </th> </tr> </thead> <tbody> @if(count($products) > 0 ) //追記 @foreach($products as $key=>$product) //追記 <tr> <th scope="row"> {{ $key+1 }} //変更 </th> <td style="max-width: 200px;"> <img src="{{asset('images')}}/{{$product->image}}" class="img-fluid" /> //変更 </td> <td> {{$product->name}} //変更 </td> <td style="max-width: 300px;"> {{$product->description}} //変更 </td> <td> {{$product->price}} 円 //変更 </td> <td> {{$product->category->name}} //変更 </td> <td> <button type="button" class="btn btn-outline-danger"><i class="far fa-edit"></i> 編集</button> </td> <td> <button type="button" class="btn btn-outline-primary"><i class="far fa-trash-alt"></i> 削除</button> </td> </tr> @endforeach //追記 @else //追記 <tr> //追記 <td colspan="8">追加された商品情報はありません。</td> //追記 </tr> //追記 @endif //追記 </tbody> </table> <div class="d-flex"> //追記 <div class="mx-auto"> //追記 {{$products->links("pagination::bootstrap-4")}} //追記 </div> //追記 </div> //追記 </div> @endsection手順3: 63 行目辺りの『{{\$product->category->name}}』の箇所ですが、これはProductモデルからCategoryモデルにアクセスしようとしている為、(厳密に言うと、Categoryモデルのインスタンスのnameプロパティの値にアクセス)モデルのリレーション設定が必要です。
ProductモデルのモデルファイルProduct.phpで、以下のようにcategory()メソッドを追記します。一つのメニューにつき、一つのカテゴリーがあるので、関係性はhasOneにします。
Laravelのモデルのリレーションについてご存知でない方は、ご自身で調べてみてください。restaurant_menu\app\Product.phpclass Product extends Model { protected $fillable=['name', 'description', 'price', 'image', 'category_id']; public function category(){ return $this->hasOne('App\Category','id','category_id'); } }手順4: メニュー追加ページで、適当に情報を入力した後に、『< 戻る』ボタンを押してダッシュボードを表示させてみます。すると、以下画像のように表示されるはずです。
手順5: 画面上部の『Restaurant Menu』の部分ですが、ここをクリックするとダッシュボードに飛ぶように設定しようと思います。C:\xampp\htdocs\restaurant_menu\resources\views\layouts\app.blade.phpで、26行目辺りの以下コード部分(href属性のとこ。)を、『url('/product')』に変更します。
<a class="navbar-brand" href="{{ url('/') }}">
↓変更
<a class="navbar-brand" href="{{ url('/product') }}">19:編集/削除機能をつける(メニュー)
ダッシュボードの編集/削除機能を完成させていきます。
手順1: まずはダッシュボードのview画面を作成します。コードは以下の通りです。編集ボタンと削除ボタンの箇所に、カテゴリーでやった時と同様にコードを追記しています。その為、ここでのコードに関する説明は省きます。
restaurant_menu\resources\views\product\index.blade.php@extends('layouts.app') @section('content') <div class="container-fluid my-2"> <div class="row m-2"> <div class="col"> <h3 class="font-weight-bold">ダッシュボード</h3> </div> <div class="col text-right"> <a type="button" href="{{ url('/product/create/') }}" class="btn btn-primary text-right" role="button"><i class="fas fa-plus"></i> 新規追加</a> </div> </div> @if (session('message')) //追記 <div class="alert alert-success" role="alert">{{ session('message') }}</div> //追記 @endif //追記 <table class="table table-bordered"> <thead class="table-dark"> <tr> <th scope="col"> # </th> <th scope="col"> 画像 </th> <th scope="col"> 商品名 </th> <th scope="col"> 詳細 </th> <th scope="col"> 値段 </th> <th scope="col"> カテゴリー </th> <th scope="col"> 編集 </th> <th scope="col"> 削除 </th> </tr> </thead> <tbody> @if(count($products) > 0 ) @foreach($products as $key=>$product) <tr> <th scope="row"> {{ $key+1 }} </th> <td style="max-width: 200px;"> <img src="{{asset('images')}}/{{$product->image}}" class="img-fluid" /> </td> <td> {{$product->name}} </td> <td style="max-width: 300px;"> {{$product->description}} </td> <td> {{$product->price}} 円 </td> <td> {{$product->category->name}} </td> <td> <a href="{{route('product.edit',[$product->id])}}"> //追記 <button type="button" class="btn btn-outline-danger"><i class="far fa-edit"></i> 編集</button> </a> //追記 </td> <td> <!-- <button type="button" class="btn btn-outline-primary"><i class="far fa-trash-alt"></i> 削除</button> --> //コメントアウト //ここから追記 <button type="button" class="btn btn-outline-primary" data-toggle="modal" data-target="#exampleModal{{$product->id}}"><i class="far fa-trash-alt"></i> 削除</button> <!-- Modal --> <div class="modal fade" id="exampleModal{{$product->id}}" tabindex="-1" role="dialog" aria-labelledby="exampleModalLabel" aria-hidden="true"> <div class="modal-dialog" role="document"> <form action="{{ route('product.destroy', [ 'product' => $product->id ]) }}" method="POST"> @csrf @method('DELETE') <div class="modal-content"> <div class="modal-header"> <h5 class="modal-title" id="exampleModalLabel">カテゴリー削除</h5> <button type="button" class="close" data-dismiss="modal" aria-label="Close"> <span aria-hidden="true">×</span> </button> </div> <div class="modal-body"> 本当に削除しますか? </div> <div class="modal-footer"> <button type="button" class="btn btn-secondary" data-dismiss="modal">キャンセル</button> <button type="submit" class="btn btn-primary">削除</button> </div> </div> </form> </div> </div> //ここまで追記 </td> </tr> @endforeach @else <tr> <td colspan="8">追加された商品情報はありません。</td> </tr> @endif </tbody> </table> <div class="d-flex"> <div class="mx-auto"> {{$products->links("pagination::bootstrap-4")}} </div> </div> </div> @endsection手順2:次に、編集ボタンを押したときの編集画面のViewを作成していきます。productフォルダにedit.blade.phpという名前でファイルを作ります。こちらもカテゴリーの時と同様、追加フォーム画面とほぼ一緒です。コードは以下の通りです。
restaurant_menu\resources\views\product\edit.blade.php@extends('layouts.app') @section('content') <div class="container mt-3" style="max-width: 720px;"> <div class="text-right"> <a href="{{ url('/product/') }}">< 戻る</a> </div> <form action="{{ route('product.update', [$product->id]) }}" method="POST" enctype="multipart/form-data"> @csrf @method('PUT') <div class="form-group" style="margin-top: 30px; margin-bottom: 30px"> <label for="name" class="font-weight-bold">商品名</label> <input type="text" class="form-control @error('name') is-invalid @enderror" id="name" name="name" value="{{ $product->name }}"/> @error('name') <p class="text-danger">{{ $message }}</p> @enderror </div> <div class="form-group" style="margin-bottom: 30px"> <label for="textarea" class="font-weight-bold">詳細</label> <textarea class="form-control @error('description') is-invalid @enderror" id="textarea" rows="5" name="description">{{ $product->description }}</textarea> @error('description') <p class="text-danger">{{ $message }}</p> @enderror </div> <div class="form-group" style="margin-bottom: 30px"> <label for="price" class="font-weight-bold">値段</label> <input type="text" class="form-control @error('price') is-invalid @enderror" id="price" name="price" value="{{ $product->price }}"/> <small class="form-text text-muted">半角数字で入力してください。</small> @error('price') <p class="text-danger">{{ $message }}</p> @enderror </div> <div class="form-group" style="margin-bottom: 30px"> <label for="category" class="font-weight-bold">カテゴリー</label> <select class="form-control @error('category') is-invalid @enderror" id="category" name="category"> <option value="" disabled selected style="display: none;">カテゴリーを選択してください。</option> @foreach(App\Category::all() as $category) <option value="{{ $category->id }}" @if($category->id == $product->category_id) selected @endif>{{ $category->name }}</option> @endforeach </select> @error('category') <p class="text-danger">{{ $message }}</p> @enderror <div class="text-right mt-2"> <a type="button" href="{{ url('/category/create/') }}" class="btn btn-outline-secondary py-1" role="button">新規追加</a> <a type="button" href="{{ url('/category/') }}" class="btn btn-outline-secondary py-1" role="button">編集</a> </div> </div> <div class="form-group" style="margin-bottom: 30px"> <label for="image" class="font-weight-bold">画像アップロード</label> <input type="file" class="form-control-file @error('image') is-invalid @enderror" id="image" name="image" /> @error('image') <p class="text-danger">{{ $message }}</p> @enderror </div> <button type="submit" class="btn btn-primary my-3">送信</button> </form> </div> @endsection上記のコードで特筆すべきことは、商品名等の各項目のinputタグ等にvalue値を書いていますが、textareaタグにはそもそもvalue属性はないので、タグの中にそのまま書いています。
手順3: コントローラーの設定を行います。ProductController.phpの edit()メソッド、update()メソッド、そしてdestroy()メソッドを以下のように設定します。カテゴリーでやった時とほぼ同様なので、コードの説明は省きます。
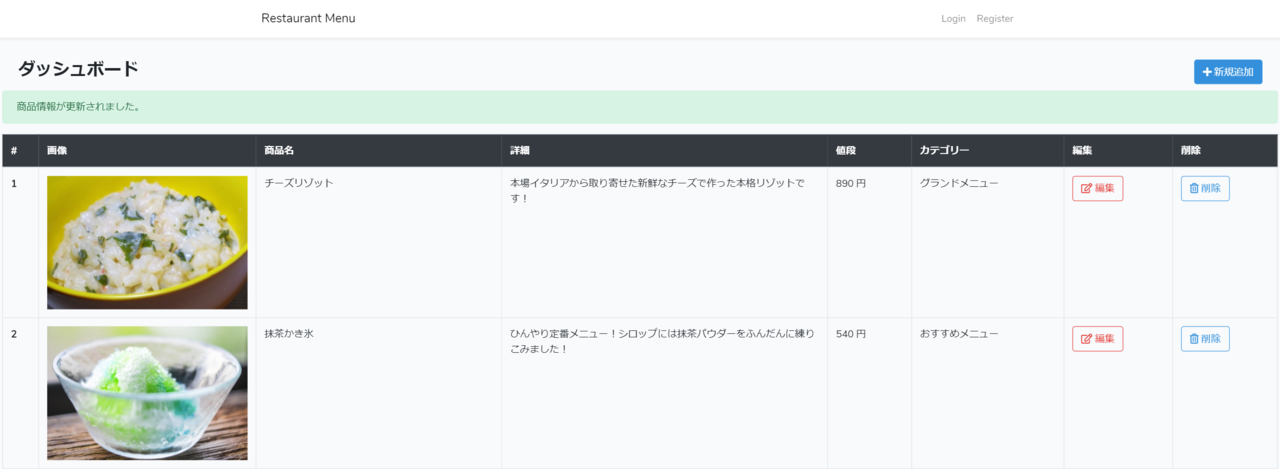
restaurant_menu\app\Http\Controllers\ProductController.phppublic function edit($id) { $product = Product::find($id); return view('product.edit', ['product' => $product]); } public function update(Request $request, $id) { request()->validate( ['name' => 'required', 'description' => 'required', 'price' => 'required|integer', 'category' => 'required', 'image' => 'mimes:jpeg,png,jpg,gif,svg'], ['name.required' => '商品名を入力してください。', 'description.required' => '詳細を入力してください。', 'price.required' => '値段を入力してください。', 'category.required' => 'カテゴリーを入力してください。'] ); $product = Product::find($id); $name = $product->image; if( $request->hasFile('image')) { $image = $request->file('image'); $name = time().'.'.$image->getClientOriginalExtension(); $destinationPath = public_path('/images'); $image->move($destinationPath,$name); } $product->update([ 'name'=>request('name'), 'description'=>request('description'), 'price'=>request('price'), 'category_id'=>request('category'), 'image'=>$name ]); return redirect()->route('product.index')->with('message','商品情報が更新されました。'); } update() メソッドに関してですが、編集ページなので、画像はアップロードしないで、元の画像を使うときもあるかと思います。なので、バリデーションのrequiredは消します。 public function destroy($id) { $product = Product::find($id); $product->delete(); return redirect('/product')->with('message', '商品情報が削除されました。'); }手順4: ブラウザで確認してみます。まずは、『 http://127.0.0.1:8000/product/ 』にアクセスして、登録したメニューのどれでもいいのですが、編集ボタンを押します。すると、以下画像のように編集前のデータが入った状態でページが表示されます。
編集して送信ボタンを押すと、ダッシュボードにリダイレクトされてフラッシュメッセージが表示されます。
削除ボタンを押すと、以下画像のようにモーダル表示されて、データを削除することができます。
20:お客さん用画面を作成する
最後にお客さん用の画面を作成します。
手順1: まずはルートの設定をします。これは、リソースルーティングでは設定されていないページになるので、手動で設定する必要があります。C:\xampp\htdocs\restaurant_menu\routes\web.phpで、以下のように追記します。
restaurant_menu\routes\web.phpRoute::get('/', 'ProductController@productTop');手順2: 次に、コントローラーに設定します。ProductController.phpに、productTop()というメソッドを以下のように追記します。
restaurant_menu\app\Http\Controllers\ProductController.phppublic function productTop() { $categories = Category::latest()->get(); return view('product.top', ['categories' => $categories]); }手順3: Categoryモデルを使うので、ProductController.phpの上部に『use App\Category;』の追記を忘れないようにします。
restaurant_menu\app\Http\Controllers\ProductController.php<?php namespace App\Http\Controllers; use Illuminate\Http\Request; use App\Product; use App\Category; //追記 以下省略 | |手順4: 次にViewの設定をします。C:\xampp\htdocs\restaurant_menu\resources\views\productに、top.blade.phpという名前でファイルを作ります。コードは以下の通りです。
restaurant_menu\resources\views\product\top.blade.php<!DOCTYPE html> <html lang="en"> <head> <meta charset="UTF-8"> <meta name="viewport" content="width=device-width, initial-scale=1.0"> <title>Document</title> <script src="{{ asset('js/app.js') }}" defer></script> <link href="{{ asset('css/app.css') }}" rel="stylesheet"> </head> <body> @foreach($categories as $category) <div class="container mt-5"> <h3 class="text-danger font-weight-bold">{{$category->name}}</h3> <hr class="bg-danger" /> <div class="row row-cols-3 mb-5"> @foreach(App\Product::where('category_id',$category->id)->get() as $product) <div class="card"> <img style="width: 100%; height: 15vw; object-fit: cover;" src="{{ asset('images') }}/{{ $product->image }}" class="card-img-top" /> <div class="card-body"> <h5 class="card-title font-weight-bold" style="display:inline;">{{ $product->name }}</h5><span class="card-title pr-1" style="float: right">{{ $product->price }} 円 + 税</span> <hr /> <p class="card-text">{{ $product->description }}</p> </div> </div> @endforeach </div> </div> @endforeach </body> </html>ここで特筆すべきは、『 @foreach(App\Product::where('category_id',\$category->id)->get() as $product) 』の部分です。
まず、コントローラーからproductモデルの値が渡ってきている訳ではないので、ここでProductモデルにアクセスしています。また、カテゴリー別に分けてメニューを表示する為に、クエリビルダのwhere節を使っています。カテゴリーをチェックして、同じカテゴリーのもののみ、その後の項目を表示させる為です。
Laravelのクエリビルダについて、わかりやすくまとめてらっしゃるサイトがあったので、ご紹介します。↓↓こちらのサイトです。手順5: メニュー追加ページで情報入力した後に、『 http://127.0.0.1:8000/ 』にアクセスすると、以下のような感じで表示されるはずです。
21:認証機能をかける
現段階では、ダッシュボード等の管理画面に、ログインしていなくてもアクセスできてしまうので、認証機能をかけます。
Bootstrapをインストールした時に、一緒にLaravelのauthentication機能もインストールしているので、今回やるべきことは簡単です!
ProductController.phpで、categoryとproductのリソースルーティング部分に、以下のように『->middleware('auth')』を追記するだけです!restaurant_menu\app\Http\Controllers\ProductController.phpRoute::resource('category','CategoryController')->middleware('auth'); Route::resource('product','ProductController')->middleware('auth');これで『 http://127.0.0.1:8000/product/create 』や、『 http://127.0.0.1:8000/category 』にアクセスしようとすると、ログインページにリダイレクトされます!
以上で完成です。お疲れさまでした!


- 投稿日:2020-11-20T17:15:56+09:00
Read DoubleのComposerでLaravelインストールで躓いたところ
Read DoubleのComposerでLaravelインストールで躓いたところ
プログラミング学習歴1年未満の初心者がLaravelをインストールするまでの道のり。
laravel公式(日本語ver)と言われるRead Doubleだけではわからなかったため途中、調べたところを追加。使用環境(動作環境)
- windows10Home(COREi7)
- xampp7.3.18
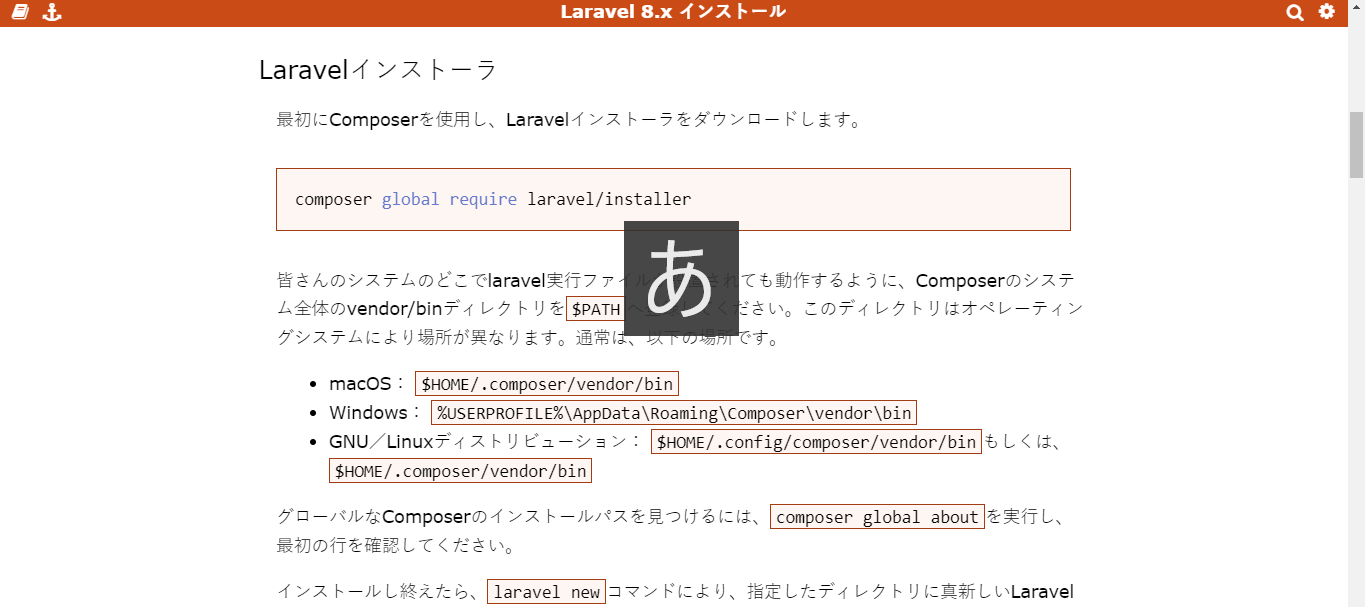
Composerシステム全体のvendor/binディレクトリを$PATHへ登録してくださいって何?
$PATHへ登録する=PATHを通す=環境変数(環境パス)に登録する
環境パスのことすらわからなかった(多分これまでも環境構築で設定してきたはず)
PATHを通すとは
特定のプログラムを「プログラム名だけで実行できるようにする」こと。
もっと言うと、プログラム名だけで実行できるようにするために、PATH という環境変数(設定の一種)に「このプログラムも名前だけで実行できるようにしてください」という値を追加すること。
「PATHを通す」の意味をできるだけわかりやすく説明する試み
もっとわかりやすく言うと、拡張子が「.exe」のファイルの実行を簡単にするための手段みたいだね。
環境パスはどこで設定するの?
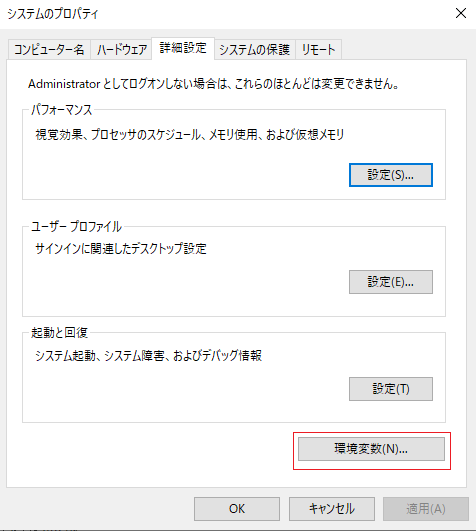
コントロールパネル → システムとセキュリティ → システム → システムの詳細設定(ちなみにコントロールパネルはwindowsシステムツールの中にあるよ!)
システム詳細設定を押した以下の画面の「環境変数」
環境変数を押すと以下の画面の「システム環境変数」の「Path」をクリック → 「編集」 → 「新規」で「%USERPROFILE%\AppData\Roaming\Composer\vendor\bin」を追加
(ここの%USERPROFIEL%は「C:\Users\ユーザーネーム」みたいな感じ)
これでComposerシステム全体のvendor/binディレクトリを$PATHへ登録が完了。
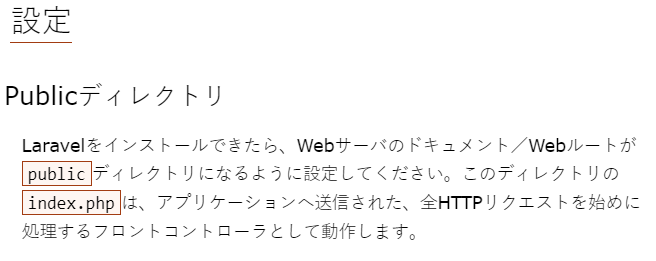
次に躓いたのはpublicディレクトリの設定
ドキュメントルートがpublicディレクトリになるように設定してくださいということなんだけどそもそもドキュメントルートって何?状態。
ドキュメントルート(DocumentRoot)とはWeb上に公開することのできるディレクトリのルートのことです。
設定方法としては,見せたいディレクトリのパスを指定をします。すると,そのディレクトリ配下のファイルへすべてアクセスができるようになります。
たとえば,DocumentRoot直下にfoo.htmlというファイルを配置をします。するとhttp://servername/foo.html
というURLで対象のファイルにアクセスをすることができます。
第8回 知っておきたいapacheの基礎知識 その4つまりたくさんディレクトリ(フォルダ)があるんだけど、ドキュメントルートとして設定したディレクトリの中身が公開されますよということ。
この設定方法にはいろいろあるんだけど私は次の方法でドキュメントルートをLaravelプロジェクトの中のpublicに変更しました。
(ちなみに今回紹介する方法ではLaravelプロジェクトごとに(イメージとしてはアプリを作るごと)ドキュメントルートの設定を変えることになります。どうやらlocalhost名?をプロジェクトごとに設定したりもできる(いちいちプロジェクトごとにドキュメントルートを変更しなくても良い)方法があるみたいなのですが私にはまだわかりません;;)Laravelプロジェクトのpublicをドキュメントルートに設定する方法~apache下で使用
今回はxampp内のhtdocs内にLaravelプロジェクトを生成しています。(推奨されていないようですが)
ファイル操作します
「XAMPP」 → 「apache」 → 「conf」の中の「httpd.conf」を設定変更
このときhttpd.confファイルはコピーしてhttpd_backup.confなどに名前変更してバックアップを保存しておいてください。httpd.confファイルを開いたら、「DocumentRoot "C:/xampp/htdocs"」という行を探す
変更前:DocumentRoot "C:/xampp/htdocs"
変更後:C:/xampp/htdocs/Laravelプロジェクト作成時の名前/public
- 次に「ブロック」を探す (2か所あるのですが2か所とも変更で良いのかどなたか教えていただけると助かります)
変更前:
\<Directory "C:/xampp/htdocs">

         ...
\</Directory>
変更後:
\<Directory "C:/xampp/htdocs/Laravelプロジェクト作成時の名前/public">

         ...
\</Directory>
(xamppのドキュメントルートは「htdocs」フォルダ)
(ちなみにxamppの中にはapacheが入っているよ)
- この2点をLaravelのプロジェクトが変わるごとに変えるという方法です。 (少し手間はかかるし同時にプロジェクトを進行しにくいのであまり良い方法ではないかもしれません。)
その次に躓いたのはディレクトリパーミッションの設定
どうやらフォルダへのアクセス権限を変更せよということらしい。
聞いたところ、Macだとエラーが出て設定が必要になることがあるのだけれど、windowsだとエラーが出ず、設定が必要ないかもしれないとのこと。
以上、躓きまくりましたがなんとかLaravelをインストールできた。
そしたらなんと、Laravel 8.11.2をインストールしていたので再インストールを検討中...おまけ
virtual hostの設定もしたのでそれについては別記事にまとめたいと思っています。


- 投稿日:2020-11-20T15:12:00+09:00
laravel/ui リダイレクト先変更方法
特に解説はありません。
app/Providers/RouteServiceProvider.phpを開き
HOMEプロパティに格納している値を変更
RouteServiceProvider.php..... class RouteServiceProvider extends ServiceProvider { /** * This namespace is applied to your controller routes. * * In addition, it is set as the URL generator's root namespace. * * @var string */ protected $namespace = 'App\Http\Controllers'; /** * The path to the "home" route for your application. * * @var string */ public const HOME = 'HOME';#<=任意のリダイレクト先に変更 /** .....例
homeからwelcame画面にしたい場合RouteServiceProvider.phppublic const HOME = '/';
- 投稿日:2020-11-20T15:12:00+09:00
laravel/ui ログイン後のリダイレクト先変更方法
特に解説はありません。
app/Providers/RouteServiceProvider.phpを開き
HOMEプロパティに格納している値を変更
RouteServiceProvider.php..... class RouteServiceProvider extends ServiceProvider { /** * This namespace is applied to your controller routes. * * In addition, it is set as the URL generator's root namespace. * * @var string */ protected $namespace = 'App\Http\Controllers'; /** * The path to the "home" route for your application. * * @var string */ public const HOME = 'HOME';#<=任意のリダイレクト先に変更 /** .....例
homeからwelcame画面にしたい場合RouteServiceProvider.phppublic const HOME = '/';
- 投稿日:2020-11-20T12:51:23+09:00
キャッチコピー自動生成のWEBアプリケーションを開発した話【MeCab】
サービスサイト
MakeLike
https://melikeke.sakura.ne.jp/malike/intro概要
PythonのMecabを使用して、様々な教師データから「っぽい文章」を生成します
・カテゴリから生成
・ファイルから生成
・直接入力から生成
の3パターンから教師データを指定できます。機能
キャッチコピー自動生成
・カテゴリから生成
・ファイルから生成
・直接入力から生成ログイン機能
会員登録
ログイン
会員登録通知
パスワード再設定お気に入り機能
実装
環境
さくらサーバー
フロントエンド
Laravel
基本部分
テンプレートの活用
LaravelのBladeテンプレートでレイアウト部分を共通にする
http://cly7796.net/wp/php/to-a-common-layout-in-blade-template-of-laravel/
ログイン認証系
Laravelでサクッとログイン機能を実装する方法
https://php-junkie.net/framework/laravel/login/「Command "make:auth" is not defined.」が出たら
https://qiita.com/daisu_yamazaki/items/a914a16ca1640334d7a5【Laravel7でユーザー認証_8】メールアドレス変更時にメール認証を行う
https://qiita.com/crosawassant/items/018b29ab770c0a373bc9Laravelの標準Authentication(Auth)の動きを調べてみる
https://qiita.com/zaburo/items/9fcf0f4c771e011a4d35
会員登録時の自動通知
下記のどちらかの方法で、メール通知やSlack通知が可能
Laravel
これを読めばLaravelのイベントとリスナーが設定できる
https://reffect.co.jp/laravel/laravel-event-listener#i-8Google Analytics
Google アナリティクスからのアラートを受信しよう
https://www.ad-market.jp/column/2020/04/20200420.html
メール機能
パスワードリセットメールを送信するため、Laravelのメール機能を設定します。
ローカル開発時には「mailTrap」
本番環境では「さくらサーバ」のSMTPを設定し、疎通確認をしました。Laravel mailTrapでメール送信テスト 備忘録
https://qiita.com/ryomaDsakamoto/items/e9d3a2c258dbfc66c524LaravelのSMTPサーバにさくらサーバのSMTPを設定
https://laraweb.net/tutorial/1265/洗練された『Laravel』のメール送信機能を使ってみる
https://liginc.co.jp/369690Laravel5.7: 日本語のパスワードリセット用のメールを送信する
https://qiita.com/sutara79/items/0ea48847f5565aacceea
日本語設定
Laravelで日本語設定をする場合は、
ja.jsonへ記述することで設定を適応することができます。/resources/lang/ja.json{ "Click link below and reset password.": "下記のURLにアクセスして、パスワードを再設定してください。", "If you did not request a password reset, no further action is required.": "このメールに心当たりがない場合は、このまま削除してください。", }blade.php<p> {{ __('Click link below and reset password.') }}<br> {{ __('If you did not request a password reset, no further action is required.') }} </p>実際の表示
生成部分
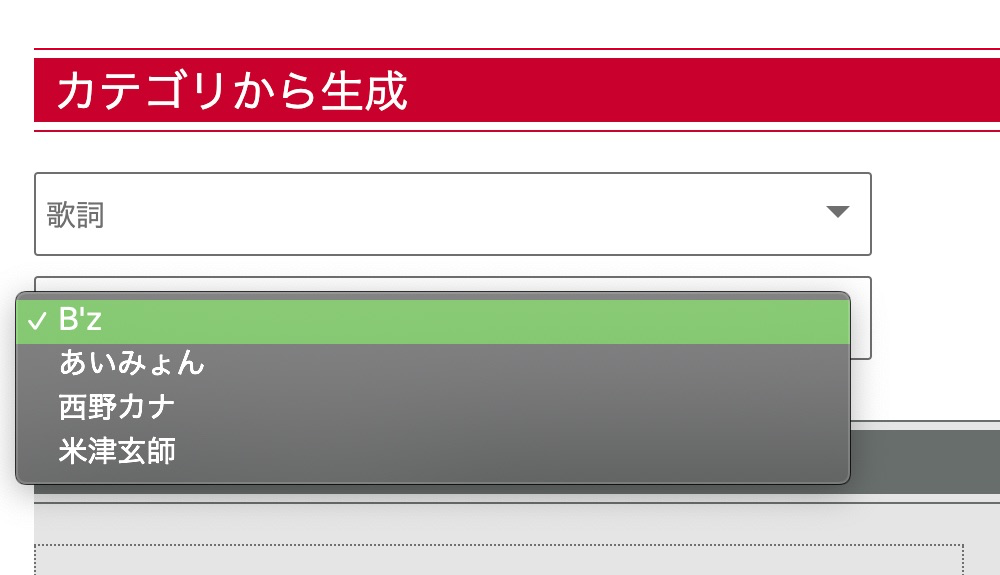
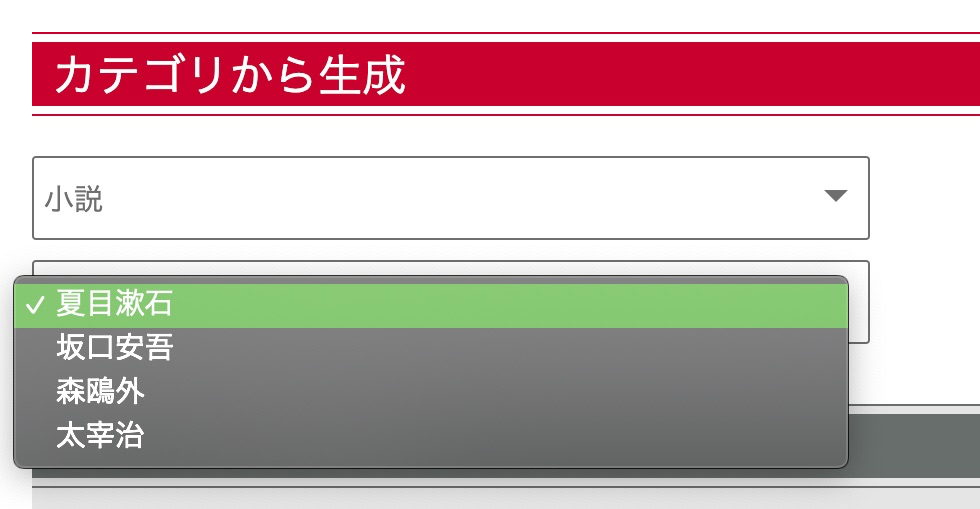
「カテゴリから生成」表示部分の実装
カテゴリプルダウンは「カテゴリ1」に紐づいて「カテゴリ2」の選択肢が変動するようにします。
・カテゴリ1が「歌詞」の場合
・カテゴリ1が「小説」の場合
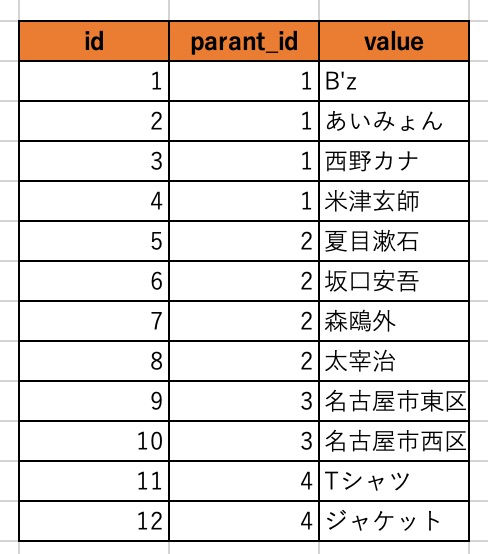
リレーション
category1.id = category2.parent_id
categori1
categori2
参考
laravel5.1で、カテゴリー・サブカテゴリーのような親子セレクトボックスを作る方法
https://www.messiahworks.com/archives/12202
「カテゴリから生成」処理部分の実装
カテゴリで指定した値を元にStorageで読み込む教師データのパスを設定します。
contoloer.php$input = $request->input(); $category1 = Arr::get($input, 'category1'); $category2 = Arr::get($input, 'category2'); $path = 'public/constText/'; $path .= $category1 . '/'; $path .= $category2 . '.txt';constTextの構成
「ファイルから生成」部分の実装
LaravelのStorage機能を使用し、アップロード処理を実装します。
今回はテキストデータのみに制限するため拡張子を以下のように設定します。
・txt
・csv
・xls
・xlsx参考
Laravelでファイルをアップロードする方法を詳細解説
https://reffect.co.jp/laravel/how_to_upload_file_in_laravelLaravelでStorageを使ったファイルおよびディレクトリの操作をまとめてみた
https://qiita.com/t1k2a/items/50081988363cf2fa1bca
「直接入力から生成」部分の実装
「ファイルから生成」は上記のようなフローで実行していますが、
「直接入力から生成」もStorage機能を活用して実行しています。直接入力から生成フロー
textareaの値をテキストファイルでStorage保存
以下、「ファイルから生成」と同様の処理サーバエンド
Python
MeCabによる自動生成部分については以下の記事にまとめています。
参考
自動生成キャッチコピー【Python】
https://qiita.com/SyogoSuganoya/items/ba542f686104811e2d6b
PHPからPython実行
Laravelで実装したinput button等の発火イベントで
Pythonを実装できるようにします。PHPのexec関数を使用し、Pythonを実行します。
参考
ゼロから作るPHPとPythonの連携 on Laravel
https://qiita.com/SwitchBlade/items/96ed4ea425ef2d758f71PHP - exec()のエラーハンドリングと標準エラー出力の関係をまとめる
https://qiita.com/smd8122/items/65b552f1d53bfb7fad9a
Ajax
基本
Laravel、Ajaxを用いて動的なコメント閲覧画面の作成
https://www.merges.co.jp/archives/1980LaravelでAjax(jQuery)を使用する
https://pointsandlines.jp/server-side/php/laravel-ajaxLaravel と Ajax で値の受け渡して非同期処理。
https://niwacan.com/1619-laravel-ajax/
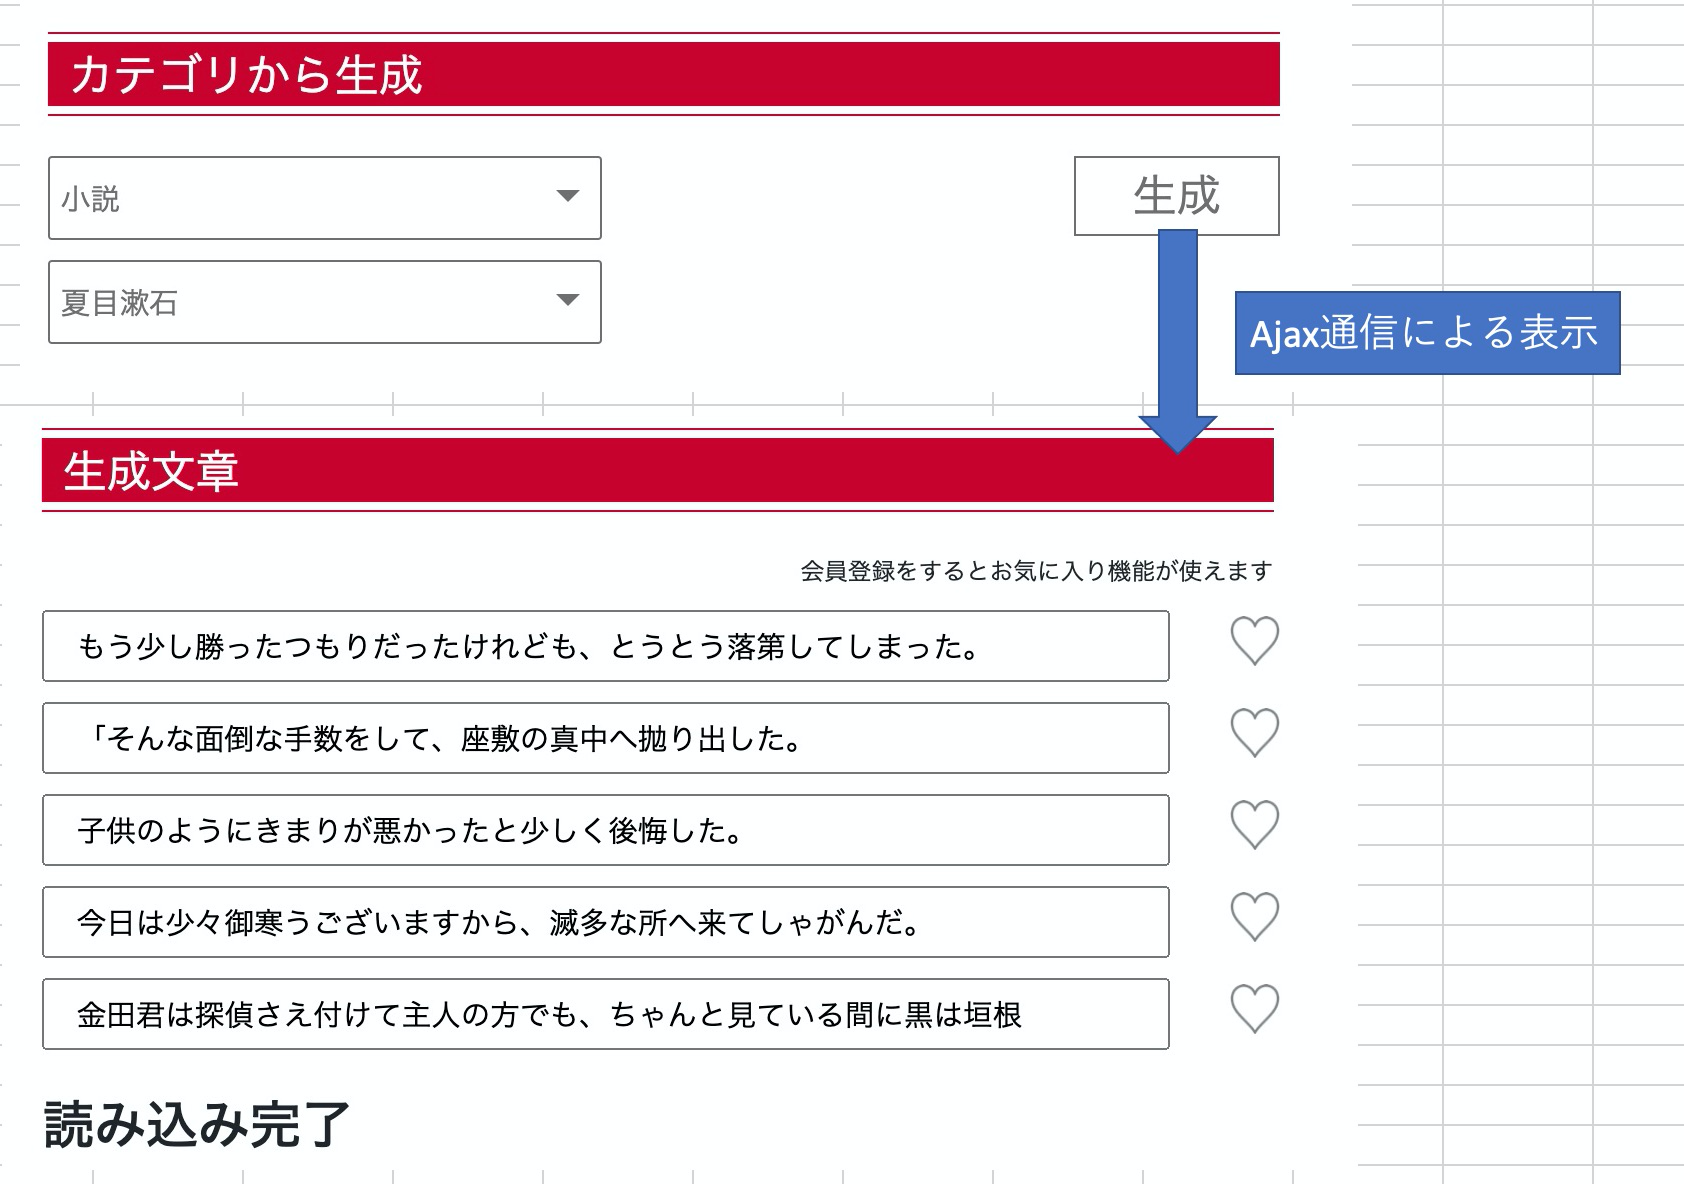
生成文章の表示
生成ボタン押下後の「生成文章」エリアの表示にはAjaxを使用します。
PHPのexec関数の「\$outputs」を生成文章に表示します。
$outputsにはPython実行中のprintした文字列が格納されていますcontroller.phpexec($command , $outputs, $return_var); $data = [ 'outputs' => $outputs, 'return_var' => $return_var, ]; return response()->json($data);pythonCall.jsvar params = { headers: { 'X-CSRF-TOKEN': $('meta[name="csrf-token"]').attr('content') }, url: url, method: 'post', dataType: 'json', data: paramData, //リクエストが完了するまで実行される beforeSend: function(){ $('h3').text('読み込み中'); $("input").attr("disabled","true"); $('.wrapper .button').addClass('pushed'); $('.heart-check').prop('checked', false); //アイテムを全部checkedはずす } }; $.ajax( params ).done(function( data ) { // 生成文章の初期化 $('input.sentence').val(''); // 生成文章の入力 for(var i = 0; i < data.outputs.length && i < 5; i++){ $('input.sentence').eq(i).val(data.outputs[i]); } }
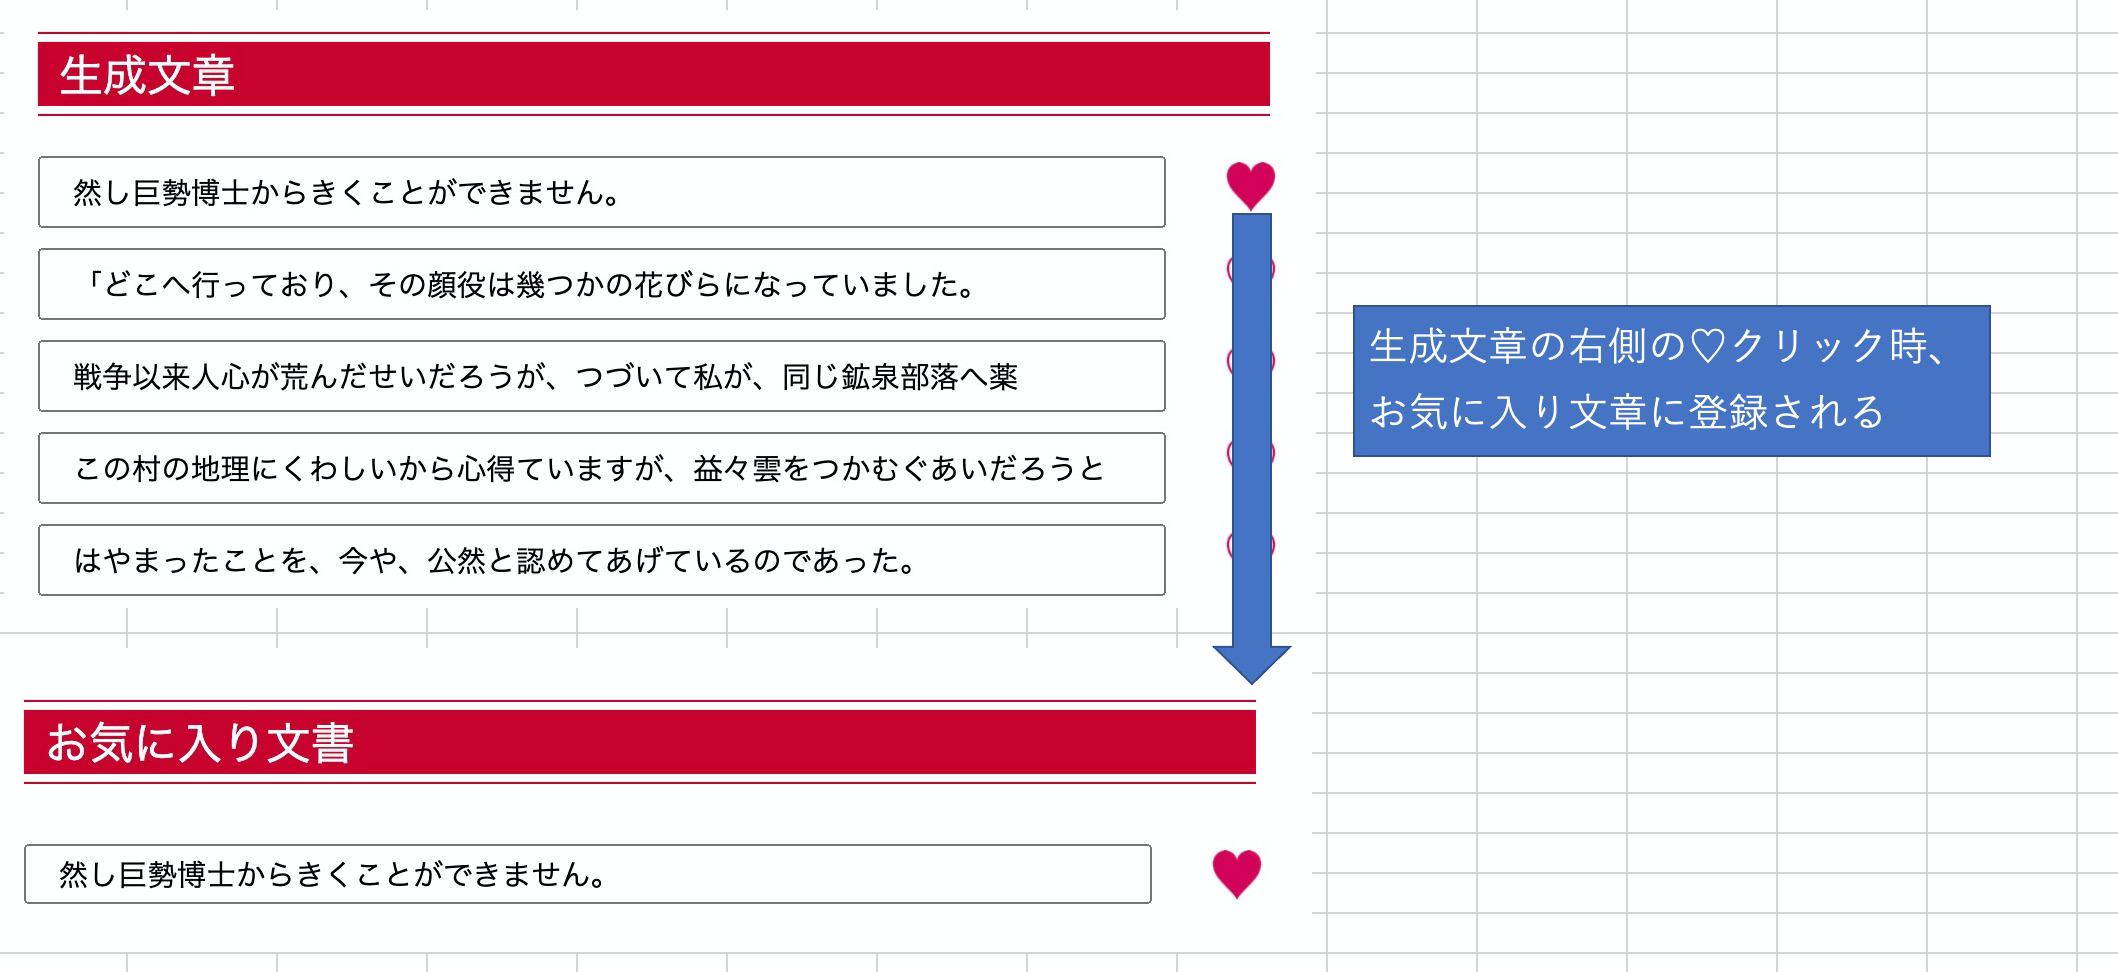
お気に入り機能
生成文章のお気に入り登録および
マイページのお気に入り文章の管理
お気に入り機能はAjaxを使用し、非同期で処理します。
controller.php// 一覧画面の表示 public function index(Request $request) { $posts = Favorite_sentence::where('user_id', $request->user()->id) //$userによる投稿を取得 ->orderBy('created_at', 'desc') // 投稿作成日が新しい順に並べる ->paginate(10); // ページネーション; return view('user.mypage', [ 'posts' => $posts, // $userの書いた記事をviewへ渡す ]); } // ハートマークのクリック(登録 or 削除) public function ajaxlike(Request $request) { // $user_id = $request->user()->id; $user_id = Auth::user()->id; $post_id = $request->post_id; $sentence = $request->sentence; $like = new Favorite_sentence; $exist = Favorite_sentence::where('id', $post_id)->get(); $isExist = $exist->isEmpty(); if ($isExist) { // 空(まだ「いいね」していない)ならlikesテーブルに新しいレコードを作成する $like = new Favorite_sentence; $like->user_id = $user_id; $like->sentence = $sentence; $like->save(); $post_id = $like->id; $command = 'insert'; } else { // お気に入りフレーズの存在確認 Favorite_sentence::findOrFail($post_id); // likesテーブルのレコードを削除 $like = Favorite_sentence::where('id', $post_id) ->delete(); $command = 'delete'; } $data = [ 'user_id' => $user_id, 'post_id' => $post_id, 'sentence' => $sentence, 'command' => $command, ]; //下記の記述でajaxに引数の値を返す return response()->json($data); }likeSentence.jsvar like = $('.heart-label'); var likePostId; var sentence; like.on('click', function () { var $this = $(this); // お気に入り文章ID likePostId = $this.parent().parent().find(".sentence").attr('data-postid'); // お気に入り文章 sentence = $this.parent().parent().find(".sentence").val(); // お気に入り文章が空白 if (!sentence) { return; } $.ajax({ headers: { 'X-CSRF-TOKEN': $('meta[name="csrf-token"]').attr('content') }, url: '/ajaxlike', type: 'POST', data: { 'post_id': likePostId , 'sentence': sentence , }, }).done(function (data) { if(data.command = 'insert') { $this.parent().parent().find(".sentence").attr('data-postid', data.post_id); } });リリース
本番環境では「さくらサーバー」を使用
Python/MeCab環境構築
さくらサーバ・UTF-8に対応したWEBブラウザにMecabで形態素解析した結果を出力する
https://qiita.com/Jshirius/items/ac3ca66a2d5262b98b58さくら共有サーバーにmecabをインストールしてpythonから呼び出してみる
https://qiita.com/Jshirius/items/3a067486e2a693544c32
MeCabがターミナルからは実行できるが、PHP呼び出しから使えない時…
まずはPythonをフルパスで呼び出してみる
エックスサーバーでphpからexec関数でpythonを呼び出そうとして苦労した話
https://hazukei.com/1259/
site-packagesを追加指定
それでもうまくいかない時は、「site-packages」をターミナル実行とPHP実行で比較
import site
site.USER_SITE
差分を追加し、インストール済みパッケージを実行可能な状態にする
import sys
sys.path.append('vendor\Lib\site-packages')
参考
さくらのレンタルサーバに Python モジュールをインストール
https://emptypage.jp/notes/sakura-python.htmlPythonモジュールのインストール先の確認方法や設定方法を現役エンジニアが解説【初心者向け】
https://techacademy.jp/magazine/46510Laravel
[0001]さくらのレンタルサーバーにSSHで入りLaravelをインストール
https://www.failibere.com/development_memo/lalavel/0001さくらサーバでstorageへのシンボリックリンクを張る
https://blog.hiroyuki90.com/articles/laravelで作成したwebアプリをレンタルサーバに公開する/


- 投稿日:2020-11-20T12:10:36+09:00
Laravel8 CRUD処理を使った投稿アプリを作成する その10 URLをリンク化する
目的
- 投稿内容の文字列中にURLがあったときにリンク化する方法をまとめる
実施環境
- 筆者の実施環境を記載する。
- ハードウェア環境
項目 情報 OS macOS Catalina(10.15.5) ハードウェア MacBook Pro (13-inch, 2020, Four Thunderbolt 3 ports) プロセッサ 2 GHz クアッドコアIntel Core i5 メモリ 32 GB 3733 MHz LPDDR4 グラフィックス Intel Iris Plus Graphics 1536 MB
- ソフトウェア環境
項目 情報 備考 PHP バージョン 7.4.8 Homebrewを用いてこちらの方法で導入→Mac HomebrewでPHPをインストールする Laravel バージョン 8.6.0 commposerを用いてこちらの方法で導入→Mac Laravelの環境構築を行う MySQLバージョン 8.0.19 for osx10.13 on x86_64 Homwbrewを用いてこちらの方法で導入→Mac HomebrewでMySQLをインストールする 前提条件
- 下記の記事の作業が完了していること。
前提情報
- 作成するアプリ名は「laravel8_crud」とする。
- 作成するMySQLのデータベース名は「laravel8_crud_DB」とする。
- 下記に今回の作業のあとのソースコードのリモートリポジトリのリンクを記載する。
- 「http」か「https」から始まるURLをリンク化する。URLと通常文字列の区切りは、全半角スペースと改行とする。
概要
- ビューファイルの編集
- 確認
詳細
ビューファイルの編集
laravel8_crudディレクトリで下記コマンドを実行してビューファイルを開く。
$ vi resources/views/contents/output.blade.php下記のように編集する。
laravel8_crud/resources/views/contents/output.blade.php@extends('layouts.app') @section('content') <h1>output</h1> @foreach ($items as $item) <hr> @if (isset($item['file_path'])) <img src="{{asset('storage/' . $item['file_path'])}}" alt="{{asset('storage/' . $item['file_path'])}}"> @endif {{-- 下記を修正する --}} <p>{!! nl2br(preg_replace('/(https?:\/\/[^\s]*)/', '<a href="$1" target="_blank" rel="noopener noreferrer">$1</a>', $item['content'])) !!}</p> <a href="{{route('detail', ['content_id' => $item['id']])}}">詳細</a> <a href="{{route('edit', ['content_id' => $item['id']])}}">編集</a> @endforeach @endsectionlaravel8_crudディレクトリで下記コマンドを実行してビューファイルを開く。
$ vi resources/views/contents/detail.blade.php下記のように編集する。
laravel8_crud/resources/views/contents/detail.blade.php@extends('layouts.app') @section('content') <h1>detail</h1> @if (isset($item['file_path'])) <img src="{{asset('storage/' . $item['file_path'])}}" alt="{{asset('storage/' . $item['file_path'])}}"> @endif <p>投稿ID: {{$item['id']}}</p> {{-- 下記を修正する --}} <p>投稿内容: {!! nl2br(preg_replace('/(https?:\/\/[^\s]*)/', '<a href="$1" target="_blank" rel="noopener noreferrer">$1</a>', $item['content'])) !!}</p> <p>投稿時間: {{$item['created_at']}}</p> <a href="{{route('edit', ['content_id' => $item['id']])}}">編集</a> <form action="{{route('delete')}}" method="post"> @csrf <input type="hidden" name="id" value="{{$item['id']}}"> <input type="submit" value="削除"> </form> @endsection確認
laravel8_crudディレクトリで下記コマンドを実行してローカルサーバを起動する。
$ php artisan serveブラウザで下記にアクセスする。
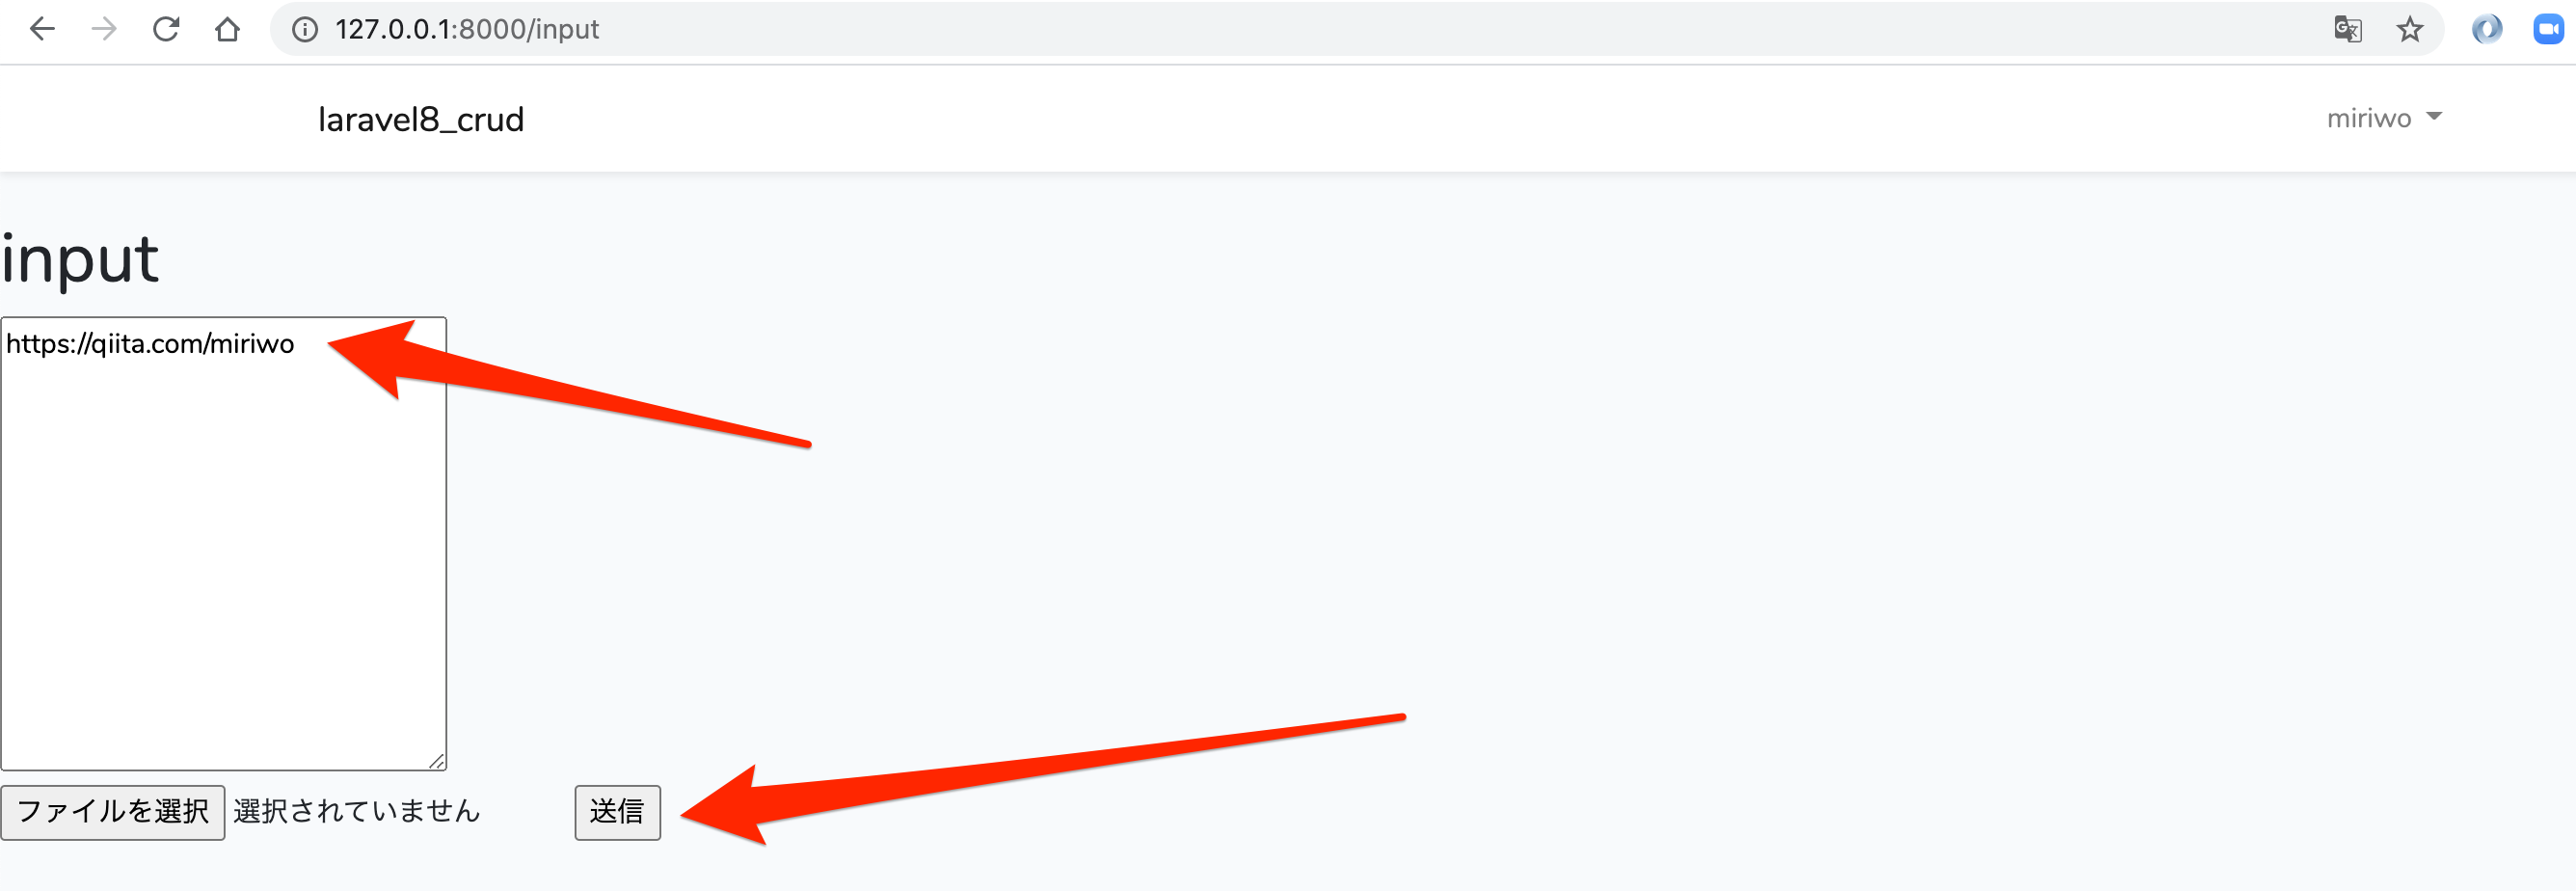
投稿内容に「https://qiita.com/miriwo」と入力し「送信」をクリックする。
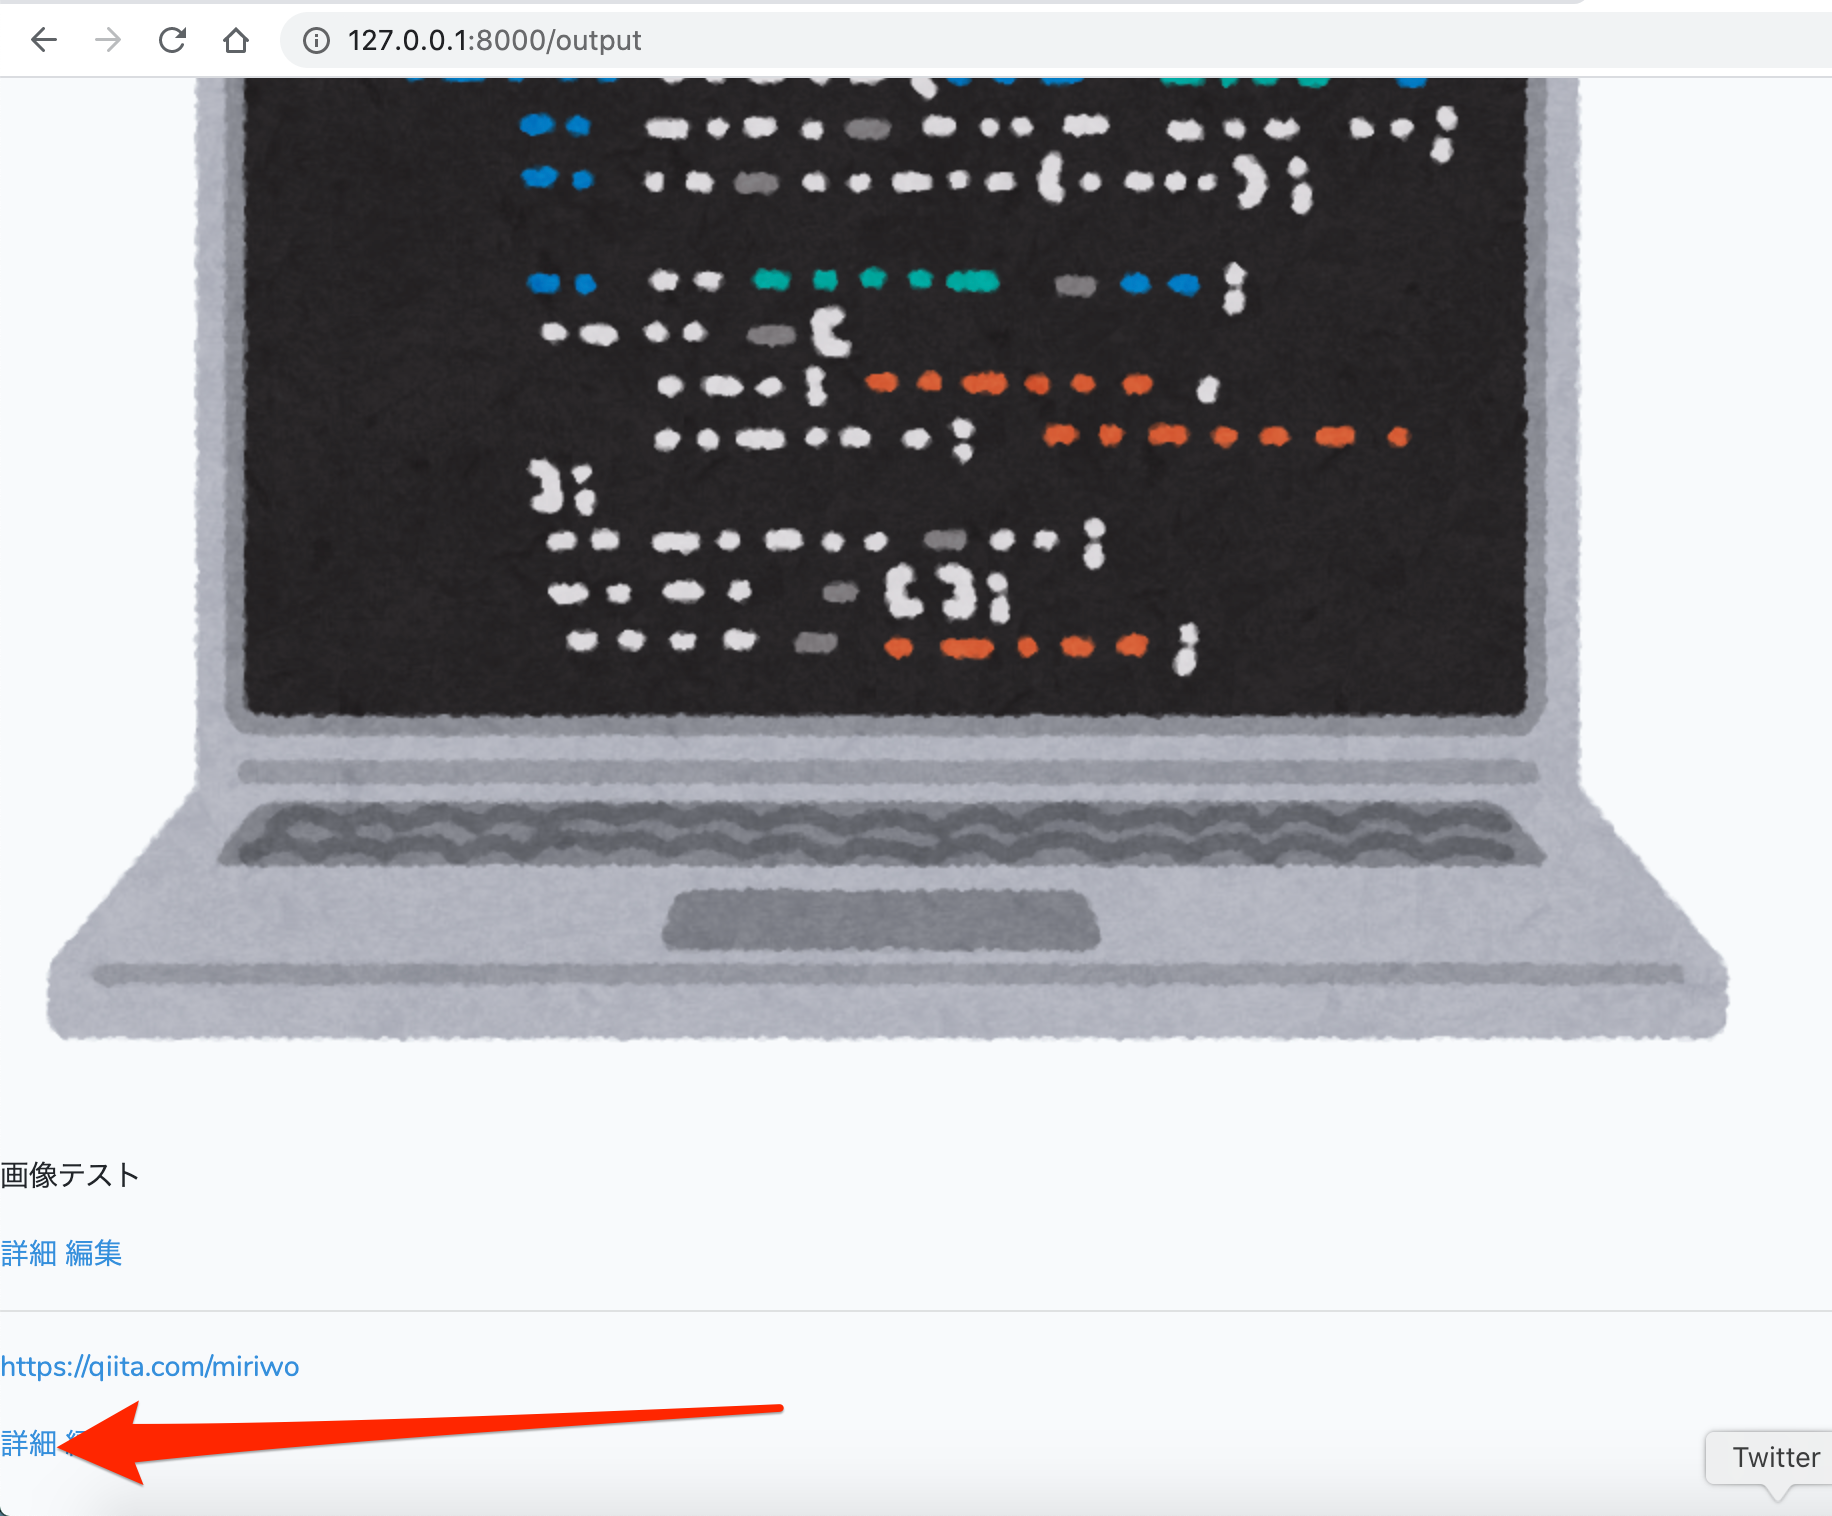
下記にアクセスする。
URLがリンク化されており、クリックすると新しいタブで筆者のQiitaの画面が表示されることを確認する。
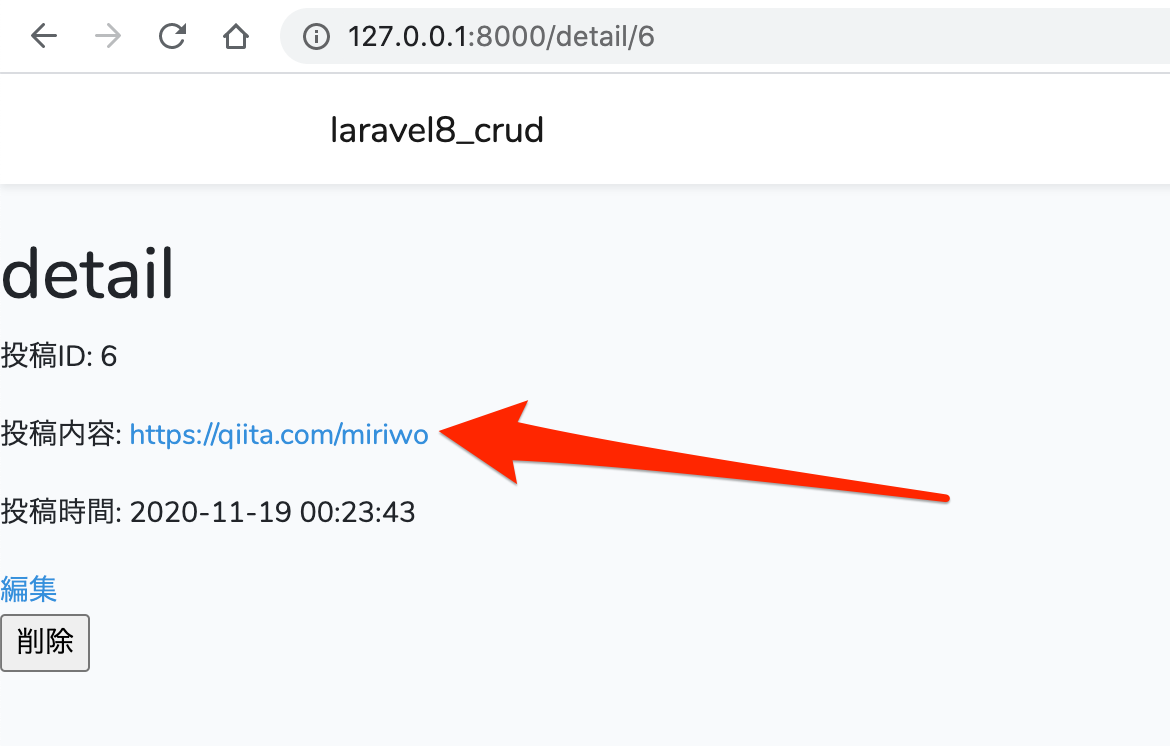
URLの投稿の「詳細」をクリックする。
URLがリンク化されており、クリックすると新しいタブで筆者のQiitaの画面が表示されることを確認する。

- 投稿日:2020-11-20T10:05:50+09:00
LaravelでDocker環境構築後にルーティング設定が効かなくなる時の対処法
1.まずはルートが存在するのか確認
php artisan route:list
2.httpd.confを確認する
sudo vim /etc/httpd/conf/httpd.confhttpd.confの内容が以下になっているか確認。
DocumentRoot "/var/www/html/laravel/public/"
Allowoverride All
3.rewrite.loadがあるか確認してみる
ls /etc/apache2/mods-enabled/
a2enmod rewrite
4.再起動をしてrewrite.fileが追加されているか確認
service apache2 restart 又は apachectl restart
ls /etc/apache2/mods-enabled/
dockfileからRUNコマンドでできる方法もあるみたいですが、今回はこちらの方法でしました。
- 投稿日:2020-11-20T00:07:20+09:00
Vue.jsで無限スクロールをライブラリなしの自前で実装してみた(Laravel + Vue.js)
業務でとある予約システムを開発する機会があり、その中で無限スクロールを実装しましたが、
取得するデータが条件付きで単純な取得データの個数を一定にして行うことができなかったのでライブラリなしで実装しました?♂️ライブラリを使った記事は割とあるけど自前の方はあんまりないなーと思ったので自分のメモも含めて残します?
僕自身、vue.jsがかなり初心者だったため、こう書いたらもっといいよとかあればコメントで教えて下さい?♂️
本当はもう少し複雑なんですが、必要最低限のみ載せます?♂️
Seats.vue<template> <div class="seat-list"> <div v-for="seat in seats"> <div class="seat"> <div>{{ seat.value }}</div> </div> </div> <!--ロード中のアニメーション--> <div class="loader-wrap" v-show="loading"> <div class="text">取得中...</div> </div> </div> </template> <script> export default { props: { //予約枠のデータ propSeatsData: { type: Array, default: [], }, eventData: { type: Object, default: () => {}, }, initialStartDay: { type: String, default: '', }, endpoint: { type: String, default: '', }, }, data() { return { //ロード中のアニメーション loading: false //予約枠のデータ seats: this.propSeatsData, //イベントデータ event: this.eventData, //取得する開始日 startDay: this.initialStartDay, //非同期で取得中 通常: false, 通信中: true itemLoading: false, //まだ取得するデータが存在する: false, もう存在しない: true initialIsLastPage: this.propIsLastPage, }, }, mounted(){ window.onscroll = () => { //一定位置以上スクロールされればtrueを返す let bottomOfWindow = document.documentElement.scrollTop + window.innerHeight >= document.documentElement.offsetHeight; //trueでデータ取得 if(bottomOfWindow) { //無限スクロールでデータ取得 this.getSeats(); } } }, methods: { //予約枠データ取得(無限スクロール) async getSeats () { if (!this.itemLoading) { //読込中は再読み込み防止 if (!this.isLastPage) { //取得データがもう存在しない場合は行わない const self = this //読込中 true this.itemLoading = true //ロード中のアニメーション表示 this.loading = true //非同期通信 axios.post(this.endpoint, { //送信するデータ date: this.startDay, event_id: this.event.id, }).then(function (responce) { //取得したデータを追加 self.seats.push(...responce.data.seats_data) //取得するスタート日を更新 self.startDay = responce.data.start_day //ローディングアニメーション非表示 self.loading = false //読込中 false self.itemLoading = false //まだ取得するデータが存在する: false, もう存在しない: true self.isLastPage = responce.data.is_last_page }) .catch(function (error) { //エラー出力 console.log(error) //ローディングアニメーション非表示 self.loading = false //読込中 false self.itemLoading = false }); } } }, },下記のコードの部分で、
通信の重複を回避するためにitemLoadingを通常はfalse、通信中はtrueにしてあげます。
データがまだ存在するかどうかはController側で工夫して真偽値を返してあげるといいですね?♂️Seats.vuedata() { return { //非同期で取得中 通常: false, 通信中: true itemLoading: false, //まだ取得するデータが存在する: false, もう存在しない: true isLastPage: this.initialIsLastPage, } },一番下までのスクロールを検知したい場合は
Seats.vuemounted() { window.onscroll = () => { //一定位置以上スクロールされればtrueを返す let bottomOfWindow = document.documentElement.scrollTop + window.innerHeight >= document.documentElement.offsetHeight; if (bottomOfWindow) { 下までスクロールした時に実行したい処理を書く } } },もし、無限スクロール + selectとかで取得するデータをユーザーが自由に選べる場合は
optionタグ内に :disabled="disabled" を入れてあげて通信中はtrueにすればその間はユーザーはselectを選択できなくなります?♂️
通信の重複防止です?♂️Seats.vue<select @change="changeDate"> <option v-for="day in days" :disabled="disabled">{{ day }}</option> </select>Seats.vuedata() { return { disabled: false, } }メソッド内で⬇
Seats.vuemethods: { async getSeats() { //selectを選択させない this.disabled = true 処理... //解除 this.disabled = false } }とかしてあげれば良い感じに通信の重複は防げるかなと?
vue.jsはpropsで渡ってきたデータに、pushしてデータを追加すれば勝手に描画してくれるので
jqueryとかを使うよりもずっと簡単にできるなと実感しました?♂️おわり?
参考記事
【ライブラリ無し】Laravel + vue で無限スクロール(infinite scroll)を1から実装
https://inokawablog.org/laravel/laravel-vue-infinite-scroll-scratch/