- 投稿日:2020-11-16T22:53:22+09:00
Laravelでデータベース(MySQL)を作成し、接続をする。
こんにちは!
今回の内容は前回の続きになります。まだ見てない方は是非こちらの方もご参照ください!
LaravelでMySQLにログインするまでそれでは本題に入っていきます。
開発環境
macOS Big Sur 11.0.1
composer 2.0.7
Laravel Framework 8.13.0
PHP 7.3.22
MySQL 8.0.22データベースを作成する
前回の続きであるMySQLにログインした状態でターミナルから
mysql> show databases;と入力すると、
+--------------------+
| Database           |
+--------------------+
| information_schema |
| mysql              |
| performance_schema |
| sys                |
+--------------------+
4 rows in set (0.01 sec)
このように表示されます。
次にデータベースを作成するコマンド
mysql> CREATE DATABASE `laravel_test`;と入力すると
Query OK, 1 row affected (0.01 sec)ちゃんとデータベースが作成できたようです。
show databases();で確認してみると、、、mysql> show databases; +--------------------+ | Database | +--------------------+ | information_schema | | laravel_test | | mysql | | performance_schema | | sys | +--------------------+ 5 rows in set (0.00 sec)
laravel_testが新たに追加されてデータベースが作成できていることがわかります。データベースに接続する
ターミナルで
php artisan tinkerと入力すると、Psy Shell v0.10.4 (PHP 7.3.22-(to be removed in future macOS) — cli) by Justin Hileman >>>と表示されました。
ここでデータベースに接続するコマンドDB::connection();を入力します。>>> DB::connection(); => Illuminate\Database\MySqlConnection {#3326}これで前回、.envファイルやdatabase.phpファイルで入力したデータベースに接続できました!
この先はマイグレーションファイルを実行すればテーブルを作成することができます。
マイグレーションやテーブル作成がわからない方は続きも読んでみてください!
- 投稿日:2020-11-16T22:11:24+09:00
order by句でcase式を利用し、任意の順でソートする
昇順、降順のソートならorder by asc descを用いれば実現できるが、任意の順でソートを行いたい場合、case式を使うことで実現できるようだ。
以下のようなデータを持つテーブルがある。
| tbl_key | x    | y    | z    |
+---------+------+------+------+
| A       |    1 |    2 |    3 |
| B       |    5 |    5 |    2 |
| C       |    4 |    7 |    1 |
| D       |    3 |    3 |    8 |
+---------+------+------+------+
結果順をtbl_keyのB-A-D-Cにしたい場合
SELECT
*
FROM Greatests
ORDER BY
CASE tbl_key
WHEN 'B' THEN 1
WHEN 'A' THEN 2
WHEN 'D' THEN 3
WHEN 'C' THEN 4
ELSE NULL END;
-- 結果 +---------+------+------+------+ | tbl_key | x | y | z | +---------+------+------+------+ | B | 5 | 5 | 2 | | A | 1 | 2 | 3 | | D | 3 | 3 | 8 | | C | 4 | 7 | 1 | +---------+------+------+------+こちらを参考にさせていただきました。
達人に学ぶSQL徹底指南書 第2版 初級者で終わりたくないあなたへ
- 投稿日:2020-11-16T18:33:53+09:00
OpenstackのコンポーネントがMySQLに接続できない
MySQLをデータベースとしてopenstackを構築したところ、各コンポーネントのログにエラーが。
ERROR oslo_db.sqlalchemy.engines [req-e8ea5ffd-f4f9-4c44-855c-c72c4eeee270 - - - - -] Database connection was found disconnected; reconnecting: oslo_db.exception.DBConnectionError: (pymysql.err.OperationalError) (2006, "MySQL server has gone away (ConnectionResetError(104, 'Connection reset by peer'))")該当ホストからmysqlコマンドでログインできるため、ネットワーク的な問題はなさそうです。
どうやらコネクションタイムアウトっぽい。
MySQL側のwait timeoutは
MariaDB [(none)]> show global variables like 'wait_timeout';
+---------------+-------+
| Variable_name | Value |
+---------------+-------+
| wait_timeout  |   120 |
+---------------+-------+
1 row in set (0.001 sec)
となっていて、特に異常はないように思えた。
ところが、openstackではDBのコネクションを継続使用しているため、mysql側でtimeoutさせてはならないようだ。
そのため、timeoutさせないようにopenstackは300秒毎にポーリングも行ったいた。openstackのポーリング秒 > MySQLのwait timeout
となってしまっていたため、最初の
Database connection was found disconnectedが出ていた。素直に
MariaDB [(none)]> set global wait_timeout=600;やって無事解決。
- 投稿日:2020-11-16T17:49:23+09:00
docker-composeで.sqlファイルが実行されない
エラー
コンソール・・・ ERROR 1396 (HY000) at line 1: Operation CREATE USER failed for 'root'@'%'原因と修正
docker-compose.yamlversion: "3" services: mysql: ・・・ volumes: - mysql-data:/var/lib/mysql - ./build/mysql/init:/docker-entrypoint-initdb.d environment: MYSQL_DATABASE: sample MYSQL_USER: test # root -> test MYSQL_PASSWORD: test MYSQL_ROOT_PASSWORD: test TZ: Asia/Tokyo
MYSQL_USERにrootを使っていたので、rootに変更
- 投稿日:2020-11-16T14:33:38+09:00
SQL Dumpからインポートしようとしたら、Cannot create a JSON value... というエラーが出たので対応した
SQL Dumpからインポートしようとしたら、Cannot create a JSON value… というエラーが出てしまいました。
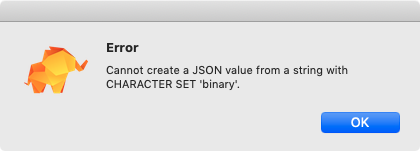
テーブルにJSONカラムを追加してから発生するようになったようなので、しばらく気づかず...厄介ですね。。発生したエラー
ErrorCannot create a JSON value from a string with CHARACTER SET 'binary'.私は、TablePlusというGUIクライアントを使用しておりましたため、以下のような画面とともにメッセージが表示されました。
もし、他のGUIクライアントやコマンドにて実行されたユーザーでも同じようなエラーが出るものと思います。
SQL Dumpに使用したコマンド
参考までに、SQL Dumpを行った際に実行していたコマンドも載せておきます。
<HOST>、<USER>、<PASSWORD>、<DATABASE>には、それぞれ適切な値を設定してあります。mysqldump --host=<HOST> --user=<USER> --password=<PASSWORD> --single-transaction <DATABASE> --default-character-set=binary > <DATABASE>.sql解決策
上記に記載した方法で取得したDumpファイルだと、文字コードの設定が
binaryとなっていることが原因のようです。
こちらを、無理やり?テキストエディタ等でutf8mb4に変更してやると、上手くいきました。- /*!40101 SET NAMES binary */; + /*!40101 SET NAMES utf8mb4 */;※ 恐らくファイルの先頭あたり(私の場合は10行目)に、一箇所のみあるようです。
まとめ
コマンドに付与したオプション(--default-character-set=binary)は、
SQL Dumpを作成する際に、絵文字を含めた状態でDumpファイルを書き出すために指定していたものでした。もっと最適な方法などあればコメント欄にて教えていただけますと幸いです。
- 投稿日:2020-11-16T10:51:24+09:00
ローカルのSQL DUMPをRDSなどへインポートした際に以下のエラーが出た時の対処法
ローカルのSQL DUMPをRDSなどへインポートした際に以下のエラーが出た時の対処法
ERROR 1227 (42000) at line 18: Access denied; you need (at least one of) the SUPER, SYSTEM_VARIABLES_ADMIN or SESSION_VARIABLES_ADMIN privilege(s) for this operationコマンドラインにて、いかを実行。
sed -i -e '/^\/\*!50013 DEFINER=/d' dump.sql
sed -i -E 's/CREATE DEFINER=.+ (FUNCTION|PROCEDURE)/CREATE \1/g' dump.sql
sed -i -E 's/\/\*\!50020 DEFINER=`.*`@`localhost`\*\/ //g' dump.sql

sed -i '/SESSION.SQL_LOG_BIN/d' dump.sql
sed -i '/GLOBAL.GTID_PURGED/d' dump.sql
- 投稿日:2020-11-16T01:39:28+09:00
LaravelでMySQLにログインするまで
今回はLaravelでMySQLにログインするまでを説明します!
開発環境
macOS Big Sur 11.0.1
composer 2.0.7
Laravel Framework 8.13.0
PHP 7.3.22
MySQL 8.0.22.envの編集
.envファイルの編集をしていきます
.env(編集前)DB_CONNECTION=mysql DB_HOST=127.0.0.1 DB_PORT=3306 DB_DATABASE=laravel DB_USERNAME=root DB_PASSWORD=
DB_DATABASE,DB_USERNAME,DB_PASSWORDをそれぞれ変更、修正します。(名前は適宜変更してください).env(編集後)DB_CONNECTION=mysql DB_HOST=127.0.0.1 DB_PORT=3306 DB_DATABASE=laravel_test DB_USERNAME=test_user DB_PASSWORD=pass今回はこのように設定しました。
config/database.phpの編集
.envファイルの編集に伴い、database.phpのファイルも修正します。
database.php(編集前)'mysql' => [ ~~~ 'database' => env('DB_DATABASE', 'forge'), 'username' => env('DB_USERNAME', 'forge'), 'password' => env('DB_PASSWORD', ''), ~~~ ],database.php(編集前)'mysql' => [ ~~~ 'database' => env('DB_DATABASE', 'laravel_test'), 'username' => env('DB_USERNAME', 'test_user'), 'password' => env('DB_PASSWORD', 'pass'), ~~~ ],それぞれ.envファイルに設定した値を入力してください。
MySQLにログインする
以上で準備が整ったので、データベースに接続します。
ターミナルを開いてプロジェクトルートディレクトリに移動して下記を入力してください。mysql -urootすると、
Welcome to the MySQL monitor.  Commands end with ; or \g.
Your MySQL connection id is 9
Server version: 8.0.22 Homebrew

Copyright (c) 2000, 2020, Oracle and/or its affiliates. All rights reserved.

Oracle is a registered trademark of Oracle Corporation and/or its
affiliates. Other names may be trademarks of their respective
owners.

Type 'help;' or '\h' for help. Type '\c' to clear the current input statement.

mysql>
と表示されました!
次はデータベースを作成し、接続するところまで説明するので是非、続きも読んでみてください。
Laravelでデータベース(MySQL)を作成し、接続をする。
- 投稿日:2020-11-16T00:37:14+09:00
OCI Compute上のLinux仮想マシンにMySQLをインストールしてみた
- Oracle MySQL Database Serviceの使い方メモ〜番外編
- Oracle Linux 8/7(CentOS7)とMySQL Community Server 8.0/5.7の組合わせで手こずったのでその忘備録
はじめに
Oracle Cloud Infrastructure (OCI) Compute ServiceでORACLE標準イメージとして提供されているOracle LinuxとCentOS上にMySQL Community Serverをインストールする手順をまとめました。Oracle Linux 8/7(CentOS7)とMySQL Community Server 8.0/5.7の組合わせで確認しています。
インストール・コマンドまとめ
詳細な手順の説明の前にそれぞれの組み合わせの際のインストール・コマンドをまとめました。リポジトリの確認等のコマンドは省略しています。
Oracle Linux 8.2
検証環境
Oracle Linux Server release 8.2
MySQL Ver 8.0.22
MySQL Ver 5.7.32MySQL 8.0のインストール
$ sudo rpm -Uvh http://dev.mysql.com/get/mysql80-community-release-el7-3.noarch.rpm
$ sudo dnf module disable mysql mariadb
$ sudo dnf install mysql-community-server
$ sudo systemctl start mysqld
$ sudo cat /var/log/mysqld.log | grep password
$ mysql_secure_installation
MySQL 5.7のインストール
$ sudo rpm -Uvh https://repo.mysql.com/yum/mysql-5.7-community/el/7/x86_64/mysql-community-release-el7-7.noarch.rpm
$ sudo dnf config-manager --disable mysql56-community
$ sudo dnf config-manager --enable mysql57-community
$ sudo dnf module disable mysql mariadb
$ sudo dnf install mysql-community-server
$ sudo systemctl start mysqld
$ sudo cat /var/log/mysqld.log | grep password
$ mysql_secure_installation
Oracle Linux 7.9 / CentOS Linux 7.8
検証環境
Oracle Linux Server release 7.9
CentOS Linux release 7.8
MySQL Ver 8.0.22
MySQL Ver 5.7.32MySQL 8.0のインストール
$ sudo rpm -Uvh http://dev.mysql.com/get/mysql80-community-release-el7-3.noarch.rpm
$ sudo yum install mysql-community-server
$ sudo systemctl start mysqld
$ sudo cat /var/log/mysqld.log | grep password
$ mysql_secure_installation
MySQL 5.7のインストール
$ sudo rpm -Uvh https://repo.mysql.com/yum/mysql-5.7-community/el/7/x86_64/mysql-community-release-el7-7.noarch.rpm
$ sudo yum-config-manager --disable mysql56-community
$ sudo yum-config-manager --enable mysql57-community
$ sudo yum install mysql-community-server
$ sudo systemctl start mysqld
$ sudo cat /var/log/mysqld.log | grep password
$ mysql_secure_installation
インストール手順詳細
Oracle Linux 8.2上にMySQL 8.0をインストールした場合の実行ログをもとに詳細な手順を確認していきます。RHEL8.0で登場したdnf(yum) コマンドを使いました1。OCI Compute Serviceで作成した仮想マシンのORACLE提供イメージのOSバージョンから確認していきます。
$ cat /etc/oracle-release
Oracle Linux Server release 8.2
次に、Oracle Linux 8に対応したMySQL 8.0のRPMファイルをインストールします。Yumのリポジトリは下記にあります。
MySQL Community Downloads - MySQL Yum Repository$ sudo rpm -Uvh http://dev.mysql.com/get/mysql80-community-release-el8-1.noarch.rpm有効になっているリポジトリを確認します。
$ sudo dnf repolist all
Failed to set locale, defaulting to C.UTF-8
repo id                            repo name                                     status
ksplice-uptrack                    Ksplice Uptrack for Oracle Linux              disabled
mysql-cluster-8.0-community        MySQL Cluster 8.0 Community                   disabled
mysql-cluster-8.0-community-source MySQL Cluster 8.0 Community - Source          disabled
mysql-connectors-community         MySQL Connectors Community                    enabled
mysql-connectors-community-source  MySQL Connectors Community - Source           disabled
mysql-tools-community              MySQL Tools Community                         enabled
mysql-tools-community-source       MySQL Tools Community - Source                disabled
mysql-tools-preview                MySQL Tools Preview                           disabled
mysql-tools-preview-source         MySQL Tools Preview - Source                  disabled
mysql80-community                  MySQL 8.0 Community Server                    enabled
mysql80-community-source           MySQL 8.0 Community Server - Source           disabled
ol8_UEKR6                          Latest Unbreakable Enterprise Kernel Release  enabled
ol8_UEKR6_RDMA                     Oracle Linux 8 UEK6 RDMA (x86_64)             disabled
ol8_addons                         Oracle Linux 8 Addons (x86_64)                enabled
ol8_appstream                      Oracle Linux 8 Application Stream (x86_64)    enabled
ol8_baseos_latest                  Oracle Linux 8 BaseOS Latest (x86_64)         enabled
ol8_codeready_builder              Oracle Linux 8 CodeReady Builder (x86_64) - U disabled
ol8_developer                      Oracle Linux 8 Development Packages (x86_64)  disabled
ol8_developer_EPEL                 Oracle Linux 8 EPEL Packages for Development  disabled
ol8_developer_UEKR6                Developer Preview of UEK Release 6 (x86_64)   disabled
ol8_ksplice                        Ksplice for Oracle Linux 8 (x86_64)           enabled
ol8_oci                            Oracle Linux 8 OCI Packages (x86_64)          enabled
ol8_oci_included                   Oracle Software for OCI users on Oracle Linux enabled
ol8_u0_baseos_base                 Oracle Linux 8 BaseOS GA (x86_64)             disabled
ol8_u1_baseos_base                 Oracle Linux 8.1 BaseOS (x86_64)              disabled
ol8_u2_baseos_base                 Oracle Linux 8.2 BaseOS (x86_64)              disabled
デフォルトで設定されているMySQLとMarinaDBのモジュールを無効化します。
$ sudo dnf module disable mysql mariadb下記のコマンドでインストールするパッケージのバージョンなどを確認します。
$ sudo dnf info mysql-community-server
Failed to set locale, defaulting to C.UTF-8
Last metadata expiration check: 0:01:02 ago on Sun Nov 15 11:00:21 2020.
Available Packages
Name         : mysql-community-server
Version      : 8.0.22
Release      : 1.el8
Architecture : x86_64
Size         : 53 M
Source       : mysql-community-8.0.22-1.el8.src.rpm
Repository   : mysql80-community
Summary      : A very fast and reliable SQL database server
URL          : http://www.mysql.com/
License      : Copyright (c) 2000, 2020, Oracle and/or its affiliates. Under GPLv2
             : license as shown in the Description field.
Description  : The MySQL(TM) software delivers a very fast, multi-threaded, multi-user,
             : and robust SQL (Structured Query Language) database server. MySQL Server
             : is intended for mission-critical, heavy-load production systems as well
             : as for embedding into mass-deployed software. MySQL is a trademark of
             : Oracle and/or its affiliates
             :
             : The MySQL software has Dual Licensing, which means you can use the MySQL
             : software free of charge under the GNU General Public License
             : (http://www.gnu.org/licenses/). You can also purchase commercial MySQL
             : licenses from Oracle and/or its affiliates if you do not wish to be bound
             : by the terms of the GPL. See the chapter "Licensing and Support" in the
             : manual for further info.
             :
             : The MySQL web site (http://www.mysql.com/) provides the latest news and
             : information about the MySQL software.  Also please see the documentation
             : and the manual for more information.
             :
             : This package includes the MySQL server binary as well as related utilities
             : to run and administer a MySQL server.
問題なければ下記コマンドでインストールを行ってください。
$ sudo dnf install mysql-community-serverインストールが完了したら下記コマンドでMySQLのバージョンを確認します。
$ mysqld --version
/usr/sbin/mysqld  Ver 8.0.22 for Linux on x86_64 (MySQL Community Server - GPL)
MySQLを起動しましょう。
$ sudo systemctl start mysqld
$ sudo systemctl status mysqld
● mysqld.service - MySQL Server
   Loaded: loaded (/usr/lib/systemd/system/mysqld.service; enabled; vendor preset: disab>
   Active: active (running) since Sun 2020-11-15 11:03:45 GMT; 9s ago
     Docs: man:mysqld(8)
           http://dev.mysql.com/doc/refman/en/using-systemd.html
  Process: 37102 ExecStartPre=/usr/bin/mysqld_pre_systemd (code=exited, status=0/SUCCESS)
 Main PID: 37178 (mysqld)
   Status: "Server is operational"
    Tasks: 38 (limit: 48672)
   Memory: 458.6M
   CGroup: /system.slice/mysqld.service
           └─37178 /usr/sbin/mysqld

Nov 15 11:03:36 iaasmysql systemd[1]: Starting MySQL Server...
Nov 15 11:03:45 iaasmysql systemd[1]: Started MySQL Server.
MySQLの初回起動時に
/var/log/mysqld.logにrootユーザーの初期パスワードが記録されます。ファイルにアクセスし、パスワードの記述箇所を検索します。$ sudo cat /var/log/mysqld.log | grep password 2020-11-15T11:03:41.974831Z 6 [Note] [MY-010454] [Server] A temporary password is generated for root@localhost: PASSWORDパスワードの再設定等、セキュリティ関連の初期設定を行うために
mysql_secure_installationを実行します。mysql_secure_installationの設定内容をStep-by-Stepで確認しています。
はじめに、mysql_secure_installationを起動した際は、rootユーザーの初期パスワードを聞かれるので入力して起動します。/var/log/mysqld.logで確認したパスワードを利用します。また、rootパスワードが期限切れになっていると言われるので新しいパスワードを設定します。確認のため2回入力が必要です。$ mysql_secure_installation Securing the MySQL server deployment. Enter password for user root: The existing password for the user account root has expired. Please set a new password. New password: Re-enter new password: The 'validate_password' component is installed on the server. The subsequent steps will run with the existing configuration of the component. Using existing password for root. Estimated strength of the password: 100さらにroot ユーザーのパスワードを変更するか聞かれます。ここでも確認のため2回入力する必要があります。
Change the password for root ? ((Press y|Y for Yes, any other key for No) : y

New password:

Re-enter new password:

Estimated strength of the password: 100
Do you wish to continue with the password provided?(Press y|Y for Yes, any other key for No) : y
匿名ユーザーを削除するか聞かれるので、
yを入力し匿名ユーザーを削除します。By default, a MySQL installation has an anonymous user, allowing anyone to log into MySQL without having to have a user account created for them. This is intended only for testing, and to make the installation go a bit smoother. You should remove them before moving into a production environment. Remove anonymous users? (Press y|Y for Yes, any other key for No) : y Success.リモートからの rootユーザーのアクセスを禁止するか聞かれるので、
yを入力しリモートアクセスを禁止します。Normally, root should only be allowed to connect from 'localhost'. This ensures that someone cannot guess at the root password from the network. Disallow root login remotely? (Press y|Y for Yes, any other key for No) : y Success.テストデータベースを削除するか聞かれるので、
yを入力し削除します。By default, MySQL comes with a database named 'test' that anyone can access. This is also intended only for testing, and should be removed before moving into a production environment. Remove test database and access to it? (Press y|Y for Yes, any other key for No) : y - Dropping test database... Success. - Removing privileges on test database... Success.最後に権限の変更を更新するか聞かれるので、
yを入力し更新しますReloading the privilege tables will ensure that all changes made so far will take effect immediately. Reload privilege tables now? (Press y|Y for Yes, any other key for No) : y Success. All done!MySQLクライアントからアクセスできることを確認します。
$ mysql -u root mysql -p
Enter password:
Reading table information for completion of table and column names
You can turn off this feature to get a quicker startup with -A

Welcome to the MySQL monitor.  Commands end with ; or \g.
Your MySQL connection id is 13
Server version: 8.0.22 MySQL Community Server - GPL

Copyright (c) 2000, 2020, Oracle and/or its affiliates. All rights reserved.

Oracle is a registered trademark of Oracle Corporation and/or its
affiliates. Other names may be trademarks of their respective
owners.

Type 'help;' or '\h' for help. Type '\c' to clear the current input statement.

mysql>
関連情報
MySQL 8.0 Reference Manual 2.5 Installing MySQL on Linux
MySQL 5.6 リファレンスマニュアル 2.5 Linux に MySQL をインストールする