- 投稿日:2020-10-14T23:41:32+09:00
LambdaでGoを動かす① -Serverless-offlineを起動するまで-
はじめに
最近Goの面白さを知ったので、簡単なWeb開発を通して文法を学んでいく。
またGoって、Lambdaと相性良さそうだなと感じたので、そこらへんでの利用を考えてみる。目的
LambdaでGoを動かすとすると、どんな感じかを確かめる。
デプロイするのは手間なので、serverless-offlineを用いて、ローカルでLambdaやAPI Gatewayを再現する。
今回は環境構築まで。環境構築
serverlessのGoテンプレートは3種類あります。aws-go-modで開発が進んでいるようなので、こちらを利用します。
$ sls create --template aws-go-mod --path gochats
Serverless: Generating boilerplate...
Serverless: Generating boilerplate in "/Users/apple/gochats"
 _______                             __
|   _   .-----.----.--.--.-----.----|  .-----.-----.-----.
|   |___|  -__|   _|  |  |  -__|   _|  |  -__|__ --|__ --|
|____   |_____|__|  \___/|_____|__| |__|_____|_____|_____|
|   |   |             The Serverless Application Framework
|       |                           serverless.com, v2.1.1
 -------'

Serverless: Successfully generated boilerplate for template: "aws-go-mod"
生成したテンプレートを確認します。
$ cd gochats; ls
Makefile    gomod.sh    hello       serverless.yml  world
すごい! Makefileがありますね。
ビルドしてみましょう!$ make build $ ls Makefile bin go.mod go.sum gomod.sh hello serverless.yml worldたくさんファイルが増えました。
先走りましたが、serverless.ymlも修正します。org: uribow app: gochatsserverlessをオフラインで動かすために、以下を追加します。
$ yarn init
$ yarn add serverless-offline -D
プラグインも追加しておきます。
serverless.ymlplugins: - serverless-offlineそれでは動作確認します。
なぜかDockerにしないと動かないので、要注意です。$ sls offline --useDocker直接ブラウザでアクセスするか、curlコマンドとかで動作確認します。
$ curl http://localhost:3000/dev/world
{"message":"Okay so your other function also executed successfully!"}
いい感じ。
[参考]
ServerlessのGoテンプレート
Serverlessのオフラインで動かす方法総括
ServerlessのGoテンプレートで動作確認までしました。
あとは、もうなんでもできそう。
近いうちに何を作るか考えて、続きを書きます。
- 投稿日:2020-10-14T22:38:29+09:00
gprc_zapで簡単シンプルにgRPCの構造化ログを実装してみる
はじめに
チーム内でgRPCを採用し開発を進めていますが、
まだまだ日本語の記事も少なく、とくにログの実装については詳細な記事が
なかなか見つからなく、情報収集に時間がかかりました。。
そのため、チームへの情報共有と自分の備忘録ついでに記事にしたいと思います。今回はGo言語によるgRPCサーバ開発を進める中で、
高速なログ出力ができ、grpc-middlewareに組み込まれている
grpc_zapを使って簡単シンプルな構造化ログを実装してみます。
なお、今回の記事ではgRPCの概要や仕組みについては触れていません。grpc_zapとは
UberがOSSで提供している
zapLoggerを利用し、gRPCに組み込めるよう
Interceptorの一つとしてgrpc-middlewareに組み込まれているパッケージです。
zapの構造化ログが簡単に実装でき、grpc_ctxtagsと組み合わせることで、
自由にフィールドを追加することができます。サンプルと動作環境
GitHubリポジトリにてサンプルを公開しています。
こちらのサンプルを元に説明していきます。動作環境は以下で確認しています。
OS: macOS Catalina 10.15.4 @ 2.7GHz 2Core, 16GB
Docker Desktop: 2.3.0.5(48029), Engine:19.03.12
要件
今回はリクエストを行うと、生徒の情報が取得できるgRPCサーバを考えます。
gRPCはサーバ・クライアント共通のIDLとしてProtocol Buffer(protobuf)を
使った実装が多いため、当記事でもprotobufを使います。proto/sample.protopackage sample; service Student { // 生徒の情報を取得する rpc Get (StudentRequest) returns (StudentResponse) {} } message StudentRequest { int32 id = 1; // 取得したい生徒ID } message StudentResponse { int32 id = 1; // 生徒ID string name = 2; // 名前 int32 age = 3; // 年齢 School school = 4; // 所属の学校 } message School { int32 id = 1; // 学校ID string name = 2; // 学校名 string grade = 3; // 学年 }生徒IDでリクエストするとレスポンスとして生徒とその所属学校・学年が取得できる、
簡単なgRPCサーバを想定しています。実装
まずはmain.goファイルです。
main.gopackage main import ( "log" "net" "google.golang.org/grpc" "google.golang.org/grpc/codes" "google.golang.org/grpc/reflection" grpc_middleware "github.com/grpc-ecosystem/go-grpc-middleware" grpc_zap "github.com/grpc-ecosystem/go-grpc-middleware/logging/zap" grpc_ctxtags "github.com/grpc-ecosystem/go-grpc-middleware/tags" "go.uber.org/zap" "go.uber.org/zap/zapcore" sv "github.com/y-harashima/grpc-sample/server" pb "github.com/y-harashima/grpc-sample/proto" ) func main() { port, err := net.Listen("tcp", ":50051") if err != nil { log.Fatal(err) } // zap loggerとオプションの設定 zap, _ := zap.NewProduction() // --- ① zap_opt := grpc_zap.WithLevels( // --- ② func(c codes.Code) zapcore.Level { var l zapcore.Level switch c { case codes.OK: l = zapcore.InfoLevel case codes.Internal: l = zapcore.ErrorLevel default: l = zapcore.DebugLevel } return l }, ) // Interceptorを設定しgRPCサーバを初期化 grpc := grpc.NewServer( // --- ③ grpc_middleware.WithUnaryServerChain( grpc_ctxtags.UnaryServerInterceptor(), grpc_zap.UnaryServerInterceptor(zap, zap_opt), ), ) server := &sv.Server{} pb.RegisterStudentServer(grpc, server) reflection.Register(grpc) log.Println("Server process starting...") if err := grpc.Serve(port); err != nil { log.Fatal(err) } }一つずつ解説していきたいと思います。
①zap, _ := zap.NewProduction()まずはzap Loggerを初期化します。
grpc_zapに組み込む際に必要となります。
ここではNewProduction()としていますが、log出力時わかりやすくするために
ログレベルなども含めて構造化ログとして出力しています。
(NewDevelopment()という初期化関数もありますが、
こちらはログレベルはJSONの中には含まれず出力されるようです)
②zap_opt := grpc_zap.WithLevels( func(c codes.Code) zapcore.Level { var l zapcore.Level switch c { case codes.OK: l = zapcore.InfoLevel case codes.Internal: l = zapcore.ErrorLevel default: l = zapcore.DebugLevel } return l }, )
grpc_zapではステータスコードに対応するログレベルを
比較的簡単にオプションとして設定できます。
実装例のようにgrpcのcodes.Codeに対して、振り分けたいログレベルを設定すると、
レスポンスを実装する際ステータスコードの指定をするだけで対応するログレベルで
出力を行ってくれます。
③grpc := grpc.NewServer( grpc_middleware.WithUnaryServerChain( grpc_ctxtags.UnaryServerInterceptor(), grpc_zap.UnaryServerInterceptor(zap, zap_opt), ), )gRPCサーバの初期化を行う際にInterceptorを統合します。
統合するInterceptorが一つの場合はWithUnaryServerChainで
まとめる必要はありませんが、今回は構造化ログに任意のフィールドも追加したいので、
WithUnaryServerChainを使ってgrpc_ctxtagsとgrpc_zapを統合します。
つづいて、レスポンス部分であるserver.goファイルをみていきます。
server/server.gopackage server import ( "context" "google.golang.org/grpc/codes" "google.golang.org/grpc/status" grpc_ctxtags "github.com/grpc-ecosystem/go-grpc-middleware/tags" pb "github.com/y-harashima/grpc-sample/proto" ) type Server struct{} func (s *Server) Get(ctx context.Context, req *pb.StudentRequest) (*pb.StudentResponse, error) { if req.Id == 1 { res := &pb.StudentResponse{ Id: 1, Name: "Taro", Age: 11, School: &pb.School{ Id: 1, Name: "ABC school", Grade: "5th", }, } // ログ出力するフィールドを定義 log := map[string]interface{}{ // --- ② "name": res.Name, "age": res.Age, "school_name": res.School.Name, "school_grade": res.School.Grade, } grpc_ctxtags.Extract(ctx).Set("data", log) return res, nil } else { grpc_ctxtags.Extract(ctx).Set("request_id", req.Id) // --- ① return nil, status.Errorf(codes.Internal, "No students found.") // --- ③ } }処理部についてはリクエストされたIDが1の時は
Taro君の情報を返す、
簡単なレスポンスになっています。
説明の順番がコードの流れ通りではありませんが、順を追って説明します。
①grpc_ctxtags.Extract(ctx).Set("request_id", req.Id)
grpc_ctxtagsを使うとcontextのlogにフィールドを追加することができます。
引数として渡したcontextに、Set(キー, 値)を追加することで
grpc_zapの出力に乗せることができます。
②log := map[string]interface{}{ "name": res.Name, "age": res.Age, "school_name": res.School.Name, "school_grade": res.School.Grade, } grpc_ctxtags.Extract(ctx).Set("data", log) return res, nilセットする値は
interface{}型で対応しているため、mapでも対応可能です。
渡す値がmap[string]interface{}の場合、キー名と値がそれぞれ構造化されるため、
ネストさせて出力することも可能です。
正常なレスポンスの場合は、通常のgRPCと同様に処理することで、
Interceptorとして統合されたgrpc_zapが構造化されたログを出力してくれます。
複雑な構成をせずに構造化ログが出せるのでとても簡単シンプルです。
③return nil, status.Errorf(codes.Internal, "No students found.")エラーで処理を返す場合も、そのままエラー処理を実装するだけで
レスポンスのログとして出力が可能ですが、gRPCのstatusパッケージを使うと
ステータスコードを指定してエラー処理を行うことが可能です。
main.goで定義したgrpc_zapのオプションと組み合わせることで
ステータスコードに合わせたログレベルで出力されます。
上記の例だとErrorLevelのログとして出力されるということになります。テスト
実装後のテストを行ってみます。
サンプルではdocker-composeでmain.goを実行するようにしています。grpc-sample/docker-compose up -d --build
gRPCの動作テストはgRPCurl、evansなどで実施します。
今回はgRPCurlを使用します。shellgrpcurl -plaintext -d '{"id": 1}' localhost:50051 sample.Student.Get { "id": 1, "name": "Taro", "age": 11, "school": { "id": 1, "name": "ABC school", "grade": "5th" } }shellgrpcurl -plaintext -d '{"id": 2}' localhost:50051 sample.Student.Get ERROR: Code: Internal Message: No students found.IDが1の場合は正常な処理、それ以外はエラーとなることが確認できました。
エラーの場合はcode.Internalで指定した通りに出力されています。
出力ログを確認してみましょう。
docker-logs(OK){ "level":"info", "ts":1602527196.8505046, "caller":"zap/options.go:203", "msg":"finished unary call with code OK", "grpc.start_time":"2020-10-12T18:26:36Z", "system":"grpc", "span.kind":"server", "grpc.service":"sample.Student", "grpc.method":"Get", "peer.address":"192.168.208.1:54062", "data":{ "age":11, "name":"Taro", "school_grade":"5th", "school_name":"ABC school" }, "grpc.code":"OK", "grpc.time_ms":0.03400000184774399 }docker-log(Error){ "level":"error", "ts":1602651069.7882483, "caller":"zap/options.go:203", "msg":"finished unary call with code Internal", "grpc.start_time":"2020-10-14T04:51:09Z", "system":"grpc", "span.kind":"server", "grpc.service":"sample.Student", "grpc.method":"Get", "peer.address":"192.168.208.1:54066", "request_id":2, "error":"rpc error: code = Internal desc = No students found.", "grpc.code":"Internal", "grpc.time_ms":1.3320000171661377, "stacktrace":"github.com/grpc-ecosystem/go-grpc-middleware/logging/zap.DefaultMessageProducer\n\t/go/pkg/mod/github.com/grpc-ecosystem/go-grpc-middleware@v1.2.2/logging/zap/options.go:203\ngithub.com/grpc-ecosystem/go-grpc-middleware/logging/zap.UnaryServerInterceptor.func1\n\t/go/pkg/mod/github.com/grpc-ecosystem/go-grpc-middleware@v1.2.2/logging/zap/server_interceptors.go:39\ngithub.com/grpc-ecosystem/go-grpc-middleware.ChainUnaryServer.func1.1.1\n\t/go/pkg/mod/github.com/grpc-ecosystem/go-grpc-middleware@v1.2.2/chain.go:25\ngithub.com/grpc-ecosystem/go-grpc-middleware/tags.UnaryServerInterceptor.func1\n\t/go/pkg/mod/github.com/grpc-ecosystem/go-grpc-middleware@v1.2.2/tags/interceptors.go:23\ngithub.com/grpc-ecosystem/go-grpc-middleware.ChainUnaryServer.func1.1.1\n\t/go/pkg/mod/github.com/grpc-ecosystem/go-grpc-middleware@v1.2.2/chain.go:25\ngithub.com/grpc-ecosystem/go-grpc-middleware.ChainUnaryServer.func1\n\t/go/pkg/mod/github.com/grpc-ecosystem/go-grpc-middleware@v1.2.2/chain.go:34\ngithub.com/y-harashima/grpc-sample/proto._Student_Get_Handler\n\t/app/proto/sample.pb.go:389\ngoogle.golang.org/grpc.(*Server).processUnaryRPC\n\t/go/pkg/mod/google.golang.org/grpc@v1.33.0/server.go:1210\ngoogle.golang.org/grpc.(*Server).handleStream\n\t/go/pkg/mod/google.golang.org/grpc@v1.33.0/server.go:1533\ngoogle.golang.org/grpc.(*Server).serveStreams.func1.2\n\t/go/pkg/mod/google.golang.org/grpc@v1.33.0/server.go:871" }(上記は可読性のため、改行とインデントで整形をしています)
JSON形式のログが出力されていることがわかります。
また、grpc_ctxtagsを使うことで、以下のようなフィールドが追加されています。docker-logs(OK、抜粋)"data":{ "age":11, "name":"Taro", "school_grade":"5th", "school_name":"ABC school" },docker-logs(Error、抜粋)"request_id":2,参考サイト
最後に、参考としたサイトです。
- grpc-middleware - GitHub
grpc-middlewareの使用例が書かれています。- grpc-go の interceptor を理解した
日本のサイトの中でもフィールドの追加など詳しく解説があり、
かなり参考になりました。- Git repositories on Chromium
ChromiumのGitリポジトリ内、
goma serverにステータスコードからログレベルの出し分けについて
参考にさせていただきました。
ここが一番苦労したところで、調査中、
参考文献がこれぐらいしかなかった記憶があります。。まとめ
grpc_zapを使うことでzapLoggerを簡単シンプルにgRPCに組み込むことができました。
また、grpc_ctxtagsによるフィールドの追加やOptionでログレベルの出しわけも
比較的簡単に実装することができ、カスタマイズも柔軟だと思います。
ログの設計も立てやすいかなと思いますので、ぜひ利用してみてください。
ご指摘・「こういう使い方もあります!」などの共有も歓迎です。
- 投稿日:2020-10-14T22:38:29+09:00
grpc_zapで簡単シンプルにgRPCの構造化ログを実装してみる
はじめに
チーム内でgRPCを採用し開発を進めていますが、
まだまだ日本語の記事も少なく、とくにログの実装については詳細な記事が
なかなか見つからなく、情報収集に時間がかかりました。。
そのため、チームへの情報共有と自分の備忘録ついでに記事にしたいと思います。今回はGo言語によるgRPCサーバ開発を進める中で、
高速なログ出力ができ、grpc-middlewareに組み込まれている
grpc_zapを使って簡単シンプルな構造化ログを実装してみます。
なお、今回の記事ではgRPCの概要や仕組みについては触れていません。grpc_zapとは
UberがOSSで提供している
zapLoggerを利用し、gRPCに組み込めるよう
Interceptorの一つとしてgrpc-middlewareに組み込まれているパッケージです。
zapの構造化ログが簡単に実装でき、grpc_ctxtagsと組み合わせることで、
自由にフィールドを追加することができます。サンプルと動作環境
GitHubリポジトリにてサンプルを公開しています。
こちらのサンプルを元に説明していきます。動作環境は以下で確認しています。
OS: macOS Catalina 10.15.4 @ 2.7GHz 2Core, 16GB
Docker Desktop: 2.3.0.5(48029), Engine:19.03.12
要件
今回はリクエストを行うと、生徒の情報が取得できるgRPCサーバを考えます。
gRPCはサーバ・クライアント共通のIDLとしてProtocol Buffer(protobuf)を
使った実装が多いため、当記事でもprotobufを使います。proto/sample.protopackage sample; service Student { // 生徒の情報を取得する rpc Get (StudentRequest) returns (StudentResponse) {} } message StudentRequest { int32 id = 1; // 取得したい生徒ID } message StudentResponse { int32 id = 1; // 生徒ID string name = 2; // 名前 int32 age = 3; // 年齢 School school = 4; // 所属の学校 } message School { int32 id = 1; // 学校ID string name = 2; // 学校名 string grade = 3; // 学年 }生徒IDでリクエストするとレスポンスとして生徒とその所属学校・学年が取得できる、
簡単なgRPCサーバを想定しています。実装
まずはmain.goファイルです。
main.gopackage main import ( "log" "net" "google.golang.org/grpc" "google.golang.org/grpc/codes" "google.golang.org/grpc/reflection" grpc_middleware "github.com/grpc-ecosystem/go-grpc-middleware" grpc_zap "github.com/grpc-ecosystem/go-grpc-middleware/logging/zap" grpc_ctxtags "github.com/grpc-ecosystem/go-grpc-middleware/tags" "go.uber.org/zap" "go.uber.org/zap/zapcore" sv "github.com/y-harashima/grpc-sample/server" pb "github.com/y-harashima/grpc-sample/proto" ) func main() { port, err := net.Listen("tcp", ":50051") if err != nil { log.Fatal(err) } // zap loggerとオプションの設定 zap, _ := zap.NewProduction() // --- ① zap_opt := grpc_zap.WithLevels( // --- ② func(c codes.Code) zapcore.Level { var l zapcore.Level switch c { case codes.OK: l = zapcore.InfoLevel case codes.Internal: l = zapcore.ErrorLevel default: l = zapcore.DebugLevel } return l }, ) // Interceptorを設定しgRPCサーバを初期化 grpc := grpc.NewServer( // --- ③ grpc_middleware.WithUnaryServerChain( grpc_ctxtags.UnaryServerInterceptor(), grpc_zap.UnaryServerInterceptor(zap, zap_opt), ), ) server := &sv.Server{} pb.RegisterStudentServer(grpc, server) reflection.Register(grpc) log.Println("Server process starting...") if err := grpc.Serve(port); err != nil { log.Fatal(err) } }一つずつ解説していきたいと思います。
①zap, _ := zap.NewProduction()まずはzap Loggerを初期化します。
grpc_zapに組み込む際に必要となります。
ここではNewProduction()としていますが、log出力時わかりやすくするために
ログレベルなども含めて構造化ログとして出力しています。
(NewDevelopment()という初期化関数もありますが、
こちらはログレベルはJSONの中には含まれず出力されるようです)
②zap_opt := grpc_zap.WithLevels( func(c codes.Code) zapcore.Level { var l zapcore.Level switch c { case codes.OK: l = zapcore.InfoLevel case codes.Internal: l = zapcore.ErrorLevel default: l = zapcore.DebugLevel } return l }, )
grpc_zapではステータスコードに対応するログレベルを
比較的簡単にオプションとして設定できます。
実装例のようにgrpcのcodes.Codeに対して、振り分けたいログレベルを設定すると、
レスポンスを実装する際ステータスコードの指定をするだけで対応するログレベルで
出力を行ってくれます。
③grpc := grpc.NewServer( grpc_middleware.WithUnaryServerChain( grpc_ctxtags.UnaryServerInterceptor(), grpc_zap.UnaryServerInterceptor(zap, zap_opt), ), )gRPCサーバの初期化を行う際にInterceptorを統合します。
統合するInterceptorが一つの場合はWithUnaryServerChainで
まとめる必要はありませんが、今回は構造化ログに任意のフィールドも追加したいので、
WithUnaryServerChainを使ってgrpc_ctxtagsとgrpc_zapを統合します。
つづいて、レスポンス部分であるserver.goファイルをみていきます。
server/server.gopackage server import ( "context" "google.golang.org/grpc/codes" "google.golang.org/grpc/status" grpc_ctxtags "github.com/grpc-ecosystem/go-grpc-middleware/tags" pb "github.com/y-harashima/grpc-sample/proto" ) type Server struct{} func (s *Server) Get(ctx context.Context, req *pb.StudentRequest) (*pb.StudentResponse, error) { if req.Id == 1 { res := &pb.StudentResponse{ Id: 1, Name: "Taro", Age: 11, School: &pb.School{ Id: 1, Name: "ABC school", Grade: "5th", }, } // ログ出力するフィールドを定義 log := map[string]interface{}{ // --- ② "name": res.Name, "age": res.Age, "school_name": res.School.Name, "school_grade": res.School.Grade, } grpc_ctxtags.Extract(ctx).Set("data", log) return res, nil } else { grpc_ctxtags.Extract(ctx).Set("request_id", req.Id) // --- ① return nil, status.Errorf(codes.Internal, "No students found.") // --- ③ } }処理部についてはリクエストされたIDが1の時は
Taro君の情報を返す、
簡単なレスポンスになっています。
説明の順番がコードの流れ通りではありませんが、順を追って説明します。
①grpc_ctxtags.Extract(ctx).Set("request_id", req.Id)
grpc_ctxtagsを使うとcontextのlogにフィールドを追加することができます。
引数として渡したcontextに、Set(キー, 値)を追加することで
grpc_zapの出力に乗せることができます。
②log := map[string]interface{}{ "name": res.Name, "age": res.Age, "school_name": res.School.Name, "school_grade": res.School.Grade, } grpc_ctxtags.Extract(ctx).Set("data", log) return res, nilセットする値は
interface{}型で対応しているため、mapでも対応可能です。
渡す値がmap[string]interface{}の場合、キー名と値がそれぞれ構造化されるため、
ネストさせて出力することも可能です。
正常なレスポンスの場合は、通常のgRPCと同様に処理することで、
Interceptorとして統合されたgrpc_zapが構造化されたログを出力してくれます。
複雑な構成をせずに構造化ログが出せるのでとても簡単シンプルです。
③return nil, status.Errorf(codes.Internal, "No students found.")エラーで処理を返す場合も、そのままエラー処理を実装するだけで
レスポンスのログとして出力が可能ですが、gRPCのstatusパッケージを使うと
ステータスコードを指定してエラー処理を行うことが可能です。
main.goで定義したgrpc_zapのオプションと組み合わせることで
ステータスコードに合わせたログレベルで出力されます。
上記の例だとErrorLevelのログとして出力されるということになります。テスト
実装後のテストを行ってみます。
サンプルではdocker-composeでmain.goを実行するようにしています。grpc-sample/docker-compose up -d --build
gRPCの動作テストはgRPCurl、evansなどで実施します。
今回はgRPCurlを使用します。shellgrpcurl -plaintext -d '{"id": 1}' localhost:50051 sample.Student.Get { "id": 1, "name": "Taro", "age": 11, "school": { "id": 1, "name": "ABC school", "grade": "5th" } }shellgrpcurl -plaintext -d '{"id": 2}' localhost:50051 sample.Student.Get ERROR: Code: Internal Message: No students found.IDが1の場合は正常な処理、それ以外はエラーとなることが確認できました。
エラーの場合はcode.Internalで指定した通りに出力されています。
出力ログを確認してみましょう。
docker-logs(OK){ "level":"info", "ts":1602527196.8505046, "caller":"zap/options.go:203", "msg":"finished unary call with code OK", "grpc.start_time":"2020-10-12T18:26:36Z", "system":"grpc", "span.kind":"server", "grpc.service":"sample.Student", "grpc.method":"Get", "peer.address":"192.168.208.1:54062", "data":{ "age":11, "name":"Taro", "school_grade":"5th", "school_name":"ABC school" }, "grpc.code":"OK", "grpc.time_ms":0.03400000184774399 }docker-log(Error){ "level":"error", "ts":1602651069.7882483, "caller":"zap/options.go:203", "msg":"finished unary call with code Internal", "grpc.start_time":"2020-10-14T04:51:09Z", "system":"grpc", "span.kind":"server", "grpc.service":"sample.Student", "grpc.method":"Get", "peer.address":"192.168.208.1:54066", "request_id":2, "error":"rpc error: code = Internal desc = No students found.", "grpc.code":"Internal", "grpc.time_ms":1.3320000171661377, "stacktrace":"github.com/grpc-ecosystem/go-grpc-middleware/logging/zap.DefaultMessageProducer\n\t/go/pkg/mod/github.com/grpc-ecosystem/go-grpc-middleware@v1.2.2/logging/zap/options.go:203\ngithub.com/grpc-ecosystem/go-grpc-middleware/logging/zap.UnaryServerInterceptor.func1\n\t/go/pkg/mod/github.com/grpc-ecosystem/go-grpc-middleware@v1.2.2/logging/zap/server_interceptors.go:39\ngithub.com/grpc-ecosystem/go-grpc-middleware.ChainUnaryServer.func1.1.1\n\t/go/pkg/mod/github.com/grpc-ecosystem/go-grpc-middleware@v1.2.2/chain.go:25\ngithub.com/grpc-ecosystem/go-grpc-middleware/tags.UnaryServerInterceptor.func1\n\t/go/pkg/mod/github.com/grpc-ecosystem/go-grpc-middleware@v1.2.2/tags/interceptors.go:23\ngithub.com/grpc-ecosystem/go-grpc-middleware.ChainUnaryServer.func1.1.1\n\t/go/pkg/mod/github.com/grpc-ecosystem/go-grpc-middleware@v1.2.2/chain.go:25\ngithub.com/grpc-ecosystem/go-grpc-middleware.ChainUnaryServer.func1\n\t/go/pkg/mod/github.com/grpc-ecosystem/go-grpc-middleware@v1.2.2/chain.go:34\ngithub.com/y-harashima/grpc-sample/proto._Student_Get_Handler\n\t/app/proto/sample.pb.go:389\ngoogle.golang.org/grpc.(*Server).processUnaryRPC\n\t/go/pkg/mod/google.golang.org/grpc@v1.33.0/server.go:1210\ngoogle.golang.org/grpc.(*Server).handleStream\n\t/go/pkg/mod/google.golang.org/grpc@v1.33.0/server.go:1533\ngoogle.golang.org/grpc.(*Server).serveStreams.func1.2\n\t/go/pkg/mod/google.golang.org/grpc@v1.33.0/server.go:871" }(上記は可読性のため、改行とインデントで整形をしています)
JSON形式のログが出力されていることがわかります。
また、grpc_ctxtagsを使うことで、以下のようなフィールドが追加されています。docker-logs(OK、抜粋)"data":{ "age":11, "name":"Taro", "school_grade":"5th", "school_name":"ABC school" },docker-logs(Error、抜粋)"request_id":2,参考サイト
最後に、参考としたサイトです。
- grpc-middleware - GitHub
grpc_zapの使用例が書かれています。- grpc-go の interceptor を理解した
日本のサイトの中でもフィールドの追加など詳しく解説があり、
かなり参考になりました。- Git repositories on Chromium
ChromiumのGitリポジトリ内、
goma serverにステータスコードからログレベルの出し分けについて
参考にさせていただきました。
ここが一番苦労したところで、調査中、
参考文献がこれぐらいしかなかった記憶があります。。まとめ
grpc_zapを使うことでzapLoggerを簡単シンプルにgRPCに組み込むことができました。
また、grpc_ctxtagsによるフィールドの追加やOptionでログレベルの出しわけも
比較的簡単に実装することができ、カスタマイズも柔軟だと思います。
ログの設計も立てやすいかなと思いますので、ぜひ利用してみてください。
ご指摘・「こういう使い方もあります!」などの共有も歓迎です。
- 投稿日:2020-10-14T13:35:25+09:00
【golang】構造体のint型のフィールドのjsonタグにomitemptyをつけて、0が入った場合に無視するようにしたい
はじめに
golangで、構造体のint型のフィールドの値が0のとき、jsonを無視させたい。
言い換えれば、int型のフィールドのjsonのタグに
omitemptyを指定したときに、そのフィールドの値に0が入ってきた場合に、無視させたい。※追記
実際には「無視」というよりも、それを「nullにする」という表現のほうが適切かと
omitempty構造体のフィールドが空のときに、jsonを無視する方法はわかった
type User struct {
  Name string `json:"name, omitempty"`
  Age  int64  `json:"age, omitempty"`
}
しかし、
omitemptyでは数値型は、0が入っても無視できない。解決策
そこで、数値型のフィールドをポインタにして、無視したい場合は、ポインタにnilをいれる方針にすれば解決した。
// User構造体
type User struct {
  Name string `json:"name, omitempty"`
  Age  *int64 `json:"age, omitempty"`
}

// 構造体にマッピングする値
testName := "Alice"
testAge := 20

var age *int64
if age > 0 {
  age = &testAge
} else {
  age = nil
}

user := User {
  Name: testName,
  Age:  age,
}
以上のようにすれば、
json.Marshal(user)とする際、
testAgeが0の場合はUser構造体のAgeフィールドは無視されて、
0より大きいときは無視されない。
testAgeが0の場合は、jsonで"age": nullとなり、
0より大きいときには、"age": 20などとなる。参考
- 投稿日:2020-10-14T00:55:22+09:00
Goで簡単Webアプリ
Goの目覚め
低レイヤーの知識を身につけて、さいつよ自給自足エンジニアになるぞ!
...と意気込みC言語を学んでみたものの面白さが見出せなかった自身へ送る。ペルソナ
Webアプリを作りたいなら、現状NodeやRailsで十分と思ってる。
デスクトップアプリなら、Electronで。
ターミナルアプリとか、OSの機能を使うぜ系でGoとか使ってみたいなぁと思ってる方 (最近流行りのDockerやGitHub CLIもGo製だし、使えれば遊べそう)。本記事の目的
Goを学ぼうかどうか判断するために、簡単なWebアプリを作ってみます (アクセスしたら、Hello Worldと表示するだけ)。
開発環境
Goを信用して良いのか分からなかったので、環境を汚さないために、Dockerでやります。
面白かったら、デバッカーとかで内部まで見たいので、ローカルで環境構築します。ディレクトリ構成は以下のようにしました。
compileFileディレクトリ内にgoファイルを置いて、ビルドしていきます。compileFile (ディレクトリ) Dockerfile docker-compose.yml# Dockerfile FROM golang:latest RUN mkdir -p /go/srcdocker-compose.ymlversion: '3' services: go: build: . ports: - "8080:8080" volumes: - ./compileFile:/go/src working_dir: /go/srcコンテナ内に入って、goのコマンドを確かめてみます。
--service-portsを指定しないと、8080ポート同士を繋げることはできないので、注意です。
docker psでちゃんとポートフォワードできていることを確認しておきます。$ docker-compose run --service-ports go /bin/bash $ docker ps CONTAINER ID IMAGE COMMAND CREATED STATUS PORTS NAMES af4f9c066ecd golean_go "/bin/bash" 7 seconds ago Up 2 seconds 0.0.0.0:8080->8080/tcp golean_go_run_a79a836040abひとまず、
goと打ってみて、使えるコマンドを確認します。Go is a tool for managing Go source code. Usage: go <command> [arguments] The commands are: bug start a bug report build compile packages and dependencies clean remove object files and cached files doc show documentation for package or symbol env print Go environment information fix update packages to use new APIs fmt gofmt (reformat) package sources generate generate Go files by processing source get add dependencies to current module and install them install compile and install packages and dependencies list list packages or modules mod module maintenance run compile and run Go program test test packages tool run specified go tool version print Go version vet report likely mistakes in packages Use "go help <command>" for more information about a command. Additional help topics: buildconstraint build constraints buildmode build modes c calling between Go and C cache build and test caching environment environment variables filetype file types go.mod the go.mod file gopath GOPATH environment variable gopath-get legacy GOPATH go get goproxy module proxy protocol importpath import path syntax modules modules, module versions, and more module-get module-aware go get module-auth module authentication using go.sum module-private module configuration for non-public modules packages package lists and patterns testflag testing flags testfunc testing functions Use "go help <topic>" for more information about that topic.
go buildgo rungo fmtは近いうちに使いそうです。プロジェクト作成
馴染みが深いWebアプリからGoを理解していこうと思いました。
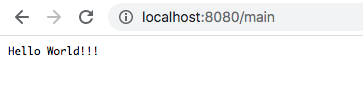
サンプルコードとか見ながら、Hello Worldをブラウザ上に表示するプログラムを書きます。server/main.gopackage main import "io" import "net/http" func mainHandler(w http.ResponseWriter, req *http.Request) { io.WriteString(w, `Hello World!!!`) } func main(){ http.HandleFunc("/main", mainHandler) http.ListenAndServe(":8080", nil) }1コマンドで整形できるので、整形後ビルドします!
ちなみに、ビルド時にリンターも働いているのか、改行の位置や使ってないパッケージがあると怒られます。ビルドすると、goファイルのあるディレクトリ名の実行ファイルが作られました。
$ go fmt
$ go build
$ ls server main.go $ ./serverhttp://localhost:8080/main にアクセスすると、Hello Worldを確認できました!
ちなみに、Macで動かしたい場合は、以下でMac用にコンパイルできます。
$ GOOS=darwin GOARCH=amd64 go buildnet/httpパッケージ
わかりやすいところから見ていきます。
これでサーバーを立てられるようです。
第一引数がポートの指定、第二引数でHandlerを選択できるようで、nilの場合デフォルトのDefaultServeMuxが使われるようです。http.ListenAndServe(":8080", nil)DefaultServeMuxって何?
ドキュメントを読み進めると、以下の記述にあたります。
HandleFunc registers the handler function for the given pattern in the DefaultServeMux.
The documentation for ServeMux explains how patterns are matched.
HandleFuncでURLのパターンに対応するハンドラーをDefaultServerMuxに登録できる...みたいなことが書いてあります。ルーティング的な何かと思っておきましょうか。
なので、以下は/mainにアクセスしたら、mainHandlerの処理を実行と読めます。
http.HandleFunc("/main", mainHandler)ioパッケージの方は何してるか分かるので、置いておきます。
総括
GoをWeb開発で使いたい!という気持ちにはなりませんが、少なくともCよりは楽しいと感じました!
ターミナルアプリとか何か作りたいですね。
当面はGoの使い方を学ぶために、フレームワークとか使って、簡単なWebアプリから作ってみようかなと思いました。
- 投稿日:2020-10-14T00:55:22+09:00
Goのnet/httpパッケージでHello WorldするだけのWebアプリ
Goの目覚め
低レイヤーの知識を身につけて、さいつよ自給自足エンジニアになるぞ!
...と意気込みC言語を学んでみたものの面白さが見出せなかった自身へ送る。ペルソナ
Webアプリを作りたいなら、現状NodeやRailsで十分と思ってる。
デスクトップアプリなら、Electronで。
ターミナルアプリとか、OSの機能を使うぜ系でGoとか使ってみたいなぁと思ってる方 (最近流行りのDockerやGitHub CLIもGo製だし、使えれば遊べそう)。本記事の目的
Goを学ぼうかどうか判断するために、簡単なWebアプリを作ってみます (アクセスしたら、Hello Worldと表示するだけ)。
開発環境
Goを信用して良いのか分からなかったので、環境を汚さないために、Dockerでやります。
面白かったら、デバッカーとかで内部まで見たいので、ローカルで環境構築します。ディレクトリ構成は以下のようにしました。
compileFileディレクトリ内にgoファイルを置いて、ビルドしていきます。compileFile (ディレクトリ) Dockerfile docker-compose.yml# Dockerfile FROM golang:latest RUN mkdir -p /go/srcdocker-compose.ymlversion: '3' services: go: build: . ports: - "8080:8080" volumes: - ./compileFile:/go/src working_dir: /go/srcコンテナ内に入って、goのコマンドを確かめてみます。
--service-portsを指定しないと、8080ポート同士を繋げることはできないので、注意です。
docker psでちゃんとポートフォワードできていることを確認しておきます。$ docker-compose run --service-ports go /bin/bash $ docker ps CONTAINER ID IMAGE COMMAND CREATED STATUS PORTS NAMES af4f9c066ecd golean_go "/bin/bash" 7 seconds ago Up 2 seconds 0.0.0.0:8080->8080/tcp golean_go_run_a79a836040abひとまず、
goと打ってみて、使えるコマンドを確認します。Go is a tool for managing Go source code. Usage: go <command> [arguments] The commands are: bug start a bug report build compile packages and dependencies clean remove object files and cached files doc show documentation for package or symbol env print Go environment information fix update packages to use new APIs fmt gofmt (reformat) package sources generate generate Go files by processing source get add dependencies to current module and install them install compile and install packages and dependencies list list packages or modules mod module maintenance run compile and run Go program test test packages tool run specified go tool version print Go version vet report likely mistakes in packages Use "go help <command>" for more information about a command. Additional help topics: buildconstraint build constraints buildmode build modes c calling between Go and C cache build and test caching environment environment variables filetype file types go.mod the go.mod file gopath GOPATH environment variable gopath-get legacy GOPATH go get goproxy module proxy protocol importpath import path syntax modules modules, module versions, and more module-get module-aware go get module-auth module authentication using go.sum module-private module configuration for non-public modules packages package lists and patterns testflag testing flags testfunc testing functions Use "go help <topic>" for more information about that topic.
go buildgo rungo fmtは近いうちに使いそうです。プロジェクト作成
馴染みが深いWebアプリからGoを理解していこうと思いました。
サンプルコードとか見ながら、Hello Worldをブラウザ上に表示するプログラムを書きます。server/main.gopackage main import "io" import "net/http" func mainHandler(w http.ResponseWriter, req *http.Request) { io.WriteString(w, `Hello World!!!`) } func main(){ http.HandleFunc("/main", mainHandler) http.ListenAndServe(":8080", nil) }1コマンドで整形できるので、整形後ビルドします!
ちなみに、ビルド時にリンターも働いているのか、改行の位置や使ってないパッケージがあると怒られます。ビルドすると、goファイルのあるディレクトリ名の実行ファイルが作られました。
$ go fmt
$ go build
$ ls server main.go $ ./serverhttp://localhost:8080/main にアクセスすると、Hello Worldを確認できました!
ちなみに、Macで動かしたい場合は、以下でMac用にコンパイルできます。
$ GOOS=darwin GOARCH=amd64 go buildnet/httpパッケージ
わかりやすいところから見ていきます。
これでサーバーを立てられるようです。
第一引数がポートの指定、第二引数でHandlerを選択できるようで、nilの場合デフォルトのDefaultServeMuxが使われるようです。http.ListenAndServe(":8080", nil)DefaultServeMuxって何?
ドキュメントを読み進めると、以下の記述にあたります。
HandleFunc registers the handler function for the given pattern in the DefaultServeMux.
The documentation for ServeMux explains how patterns are matched.
HandleFuncでURLのパターンに対応するハンドラーをDefaultServerMuxに登録できる...みたいなことが書いてあります。ルーティング的な何かと思っておきましょうか。
なので、以下は/mainにアクセスしたら、mainHandlerの処理を実行と読めます。
http.HandleFunc("/main", mainHandler)ioパッケージの方は何してるか分かるので、置いておきます。
総括
GoをWeb開発で使いたい!という気持ちにはなりませんが、少なくともCよりは楽しいと感じました!
ターミナルアプリとか何か作りたいですね。
当面はGoの使い方を学ぶために、フレームワークとか使って、簡単なWebアプリから作ってみようかなと思いました。