- 投稿日:2020-09-29T21:19:10+09:00
Nuxt.jsで認証認可入り掲示板APIのフロントエンド部分を構築する #6 記事投稿フォームの作成
←Nuxt.jsで認証認可入り掲示板APIのフロントエンド部分を構築する #5 ログイン・ログアウトの実装
はじめに
今回はNuxt編の最終回。
記事投稿フォームをindexに設置します。ログインしていないと書き込めないので、ログイン中のみフォームを表示します。
Railsのレスポンスコード修正
まず下準備として、Rails側の修正漏れ箇所を直します。
postのsave失敗時、ステータスが200(正常)で返ってきてしまっておりエラーがキャッチできないので、レスポンスコードを422で返すようにします。app/controllers/v1/posts_controller.rb... if post.save render json: post else - render json: { errors: post.errors } + render json: { errors: post.errors }, status: 422 end end ... if @post.update(post_params) render json: @post else - render json: { errors: @post.errors } + render json: { errors: @post.errors }, status: 422 end end ...postした時にNuxt側でtry catchを使っていますが、エラーが出てもレスポンスコードが200だとcatchブロックに行きません。ここは以前の設定ミスなのであらかじめ塞いでおきます。
pages/index.vueとstore/index.jsの修正
pages/index.vuesm8 md6 > + <form v-if="logged_in" @submit.prevent="newPost"> + <v-card> + <v-card-title class="headline"> + 新規投稿 + </v-card-title> + <v-card-text> + <ul v-if="errors"> + <li v-for="(message, key) in errors" :key="key"> + {{ key }} + <span v-for="(m, i) in message" :key="i"> + {{ m }} + </span> + </li> + </ul> + <v-text-field + id="subject" + v-model="subject" + label="subject" + name="subject" + prepend-icon="mdi-subtitles" + /> + <v-textarea + id="body" + v-model="body" + label="body" + name="body" + prepend-icon="mdi-comment-text" + /> + </v-card-text> + <v-card-actions> + <v-spacer /> + <v-btn color="primary" type="submit"> + 投稿 + </v-btn> + </v-card-actions> + </v-card> + </form> <v-card v-for="post in posts" :key="post.id"> <v-card-title class="headline"> <n-link :to="`/posts/${post.id}`"> ... <script> export default { + data () { + return { + subject: '', + body: '', + errors: [] + } + }, computed: { posts () { return this.$store.getters['posts/posts'] + }, + logged_in () { + return this.$store.getters.logged_in + } + }, + methods: { + async newPost () { + try { + await this.$store.dispatch('posts/newPost', { + subject: this.subject, + body: this.body + }) + this.subject = '' + this.body = '' + this.errors = [] + } catch (e) { + this.errors = e.data.errors + } + const posts = await this.$store.dispatch('posts/fetchPosts') + this.$store.commit('posts/setPosts', posts.posts) } } }エラーメッセージの表示箇所や、投稿後のposts再取得あたりがやっつけ感満載ですが。
やっていることはログインフォーム等と大差無いですね。最後にstore/posts.jsにnewPostを定義して終わりです。
store/posts.jsexport const actions = { async fetchPosts () { return await this.$axios.$get('/v1/posts') + }, + async newPost (_c, post) { + return await this.$axios.$post('/v1/posts', post) } }終わりに
今回でNuxt.js編最終回です。
Rails編からご覧いただいていた場合、18+6で24章にも及ぶ連載です。ご覧いただいたり、プログラムを書いていただいた皆様ありがとうございました。Railsで実装したCRUD処理でNuxt側未実装の点も多いため、ここからは自力で実装に挑戦してみてください。
また、RailsもNuxtも(特にNuxtは)初心者でお見苦しいコードも多々あったかと思いますが、これをきっかけにオリジナルのアプリケーション構築への挑戦をオススメします。
終わり
【連載目次へ】
- 投稿日:2020-09-29T20:44:20+09:00
Vue 映画情報をTMDb APIを使って取得
はじめに
完成イメージはこんな感じ
はじめてVueを触ってみた。。。Angular以外jsフレームワーク知らんから、これからはVueを本格的に学んでいく!
— 高卒プログラマーげんと (@gento34165638) September 29, 2020
ってことで、映画情報をVue(v2系)で取得してみた。#プログラミング #エンジニア転職 pic.twitter.com/UvEHYFiirR環境
Vue v2系です。
どうやら2020/09現在、vue v3系ではvuetifyが使えないようなので、あえてv2系にしました。。
https://github.com/vuetifyjs/vuetify-loader/issues/127使えるようになってら、コメントより教えてください
別に「vuetifyなんて使わない」と言う方は、特にバージョンを気にしなくて良いかと!
vuetifyを入れる
コマンドプロンプトかターミナルより、プロジェクトvueの階層へ移動
vue add vuetifyTMDbのAPI keyを取得
【Ionic + Angular】TMDb APIで映画の一覧を取得して表示する
上記リンクのリンクより、取得できます。映画情報を取得
axiosを入れる
npm install axiosまぁ映画上を取得するだけならaxiosを使う必要はなさそうですが、後々に検索機能とかもやってみたいので
一覧を表示してみる
Home.vue<template> <v-container> <v-row> <v-col v-for="movie in movies" :key="movie.id"> <v-card> <v-img v-bind:src="'http://image.tmdb.org/t/p/w300/' + movie.poster_path"></v-img> <v-card-title>{{ movie.title }}</v-card-title> <v-card-subtitle>{{ movie.release_date }}</v-card-subtitle> <v-card-text>{{ movie.overview }}</v-card-text> </v-card> </v-col> </v-row> </v-container> </template> <script> import axios from 'axios' export default { name: 'Home', data() { return { movies: [], // 自分のkeyに置き換える apiKey: '***', } }, methods: { getMovies() { // &language=jaで日本語に(日本語版がないものは空欄になるけど、、) axios.get(`https://api.themoviedb.org/3/movie/now_playing?api_key=${this.apiKey}`) .then(response => { this.movies = response.data.results console.log(this.movies); }) console.log(this.movies); }, }, created() { this.getMovies(); } } </script>https://developers.themoviedb.org/3/movies/get-now-playing
ドキュメントはこちら
現在上映中の映画を取得しました〜。
- 投稿日:2020-09-29T07:22:36+09:00
@nuxtjs/composition-apiと@nuxt/contentを使ってみる
@nuxtjs/composition-api / @nuxt/content とは
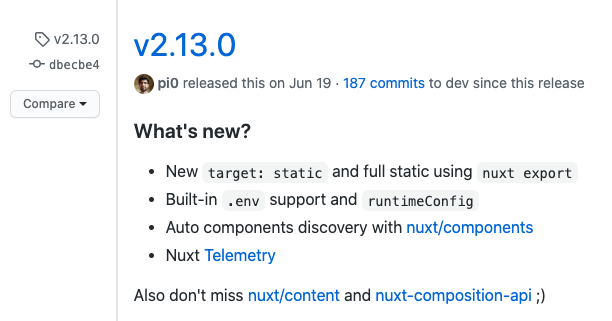
Nuxt v2.13(2020-06-19)辺りから使えるレベルになってきている様子
専用のページもある
@nuxtjs/composition-api の概要
- Vue 3 のComposition APIをNuxtの仕様に合わせたもの
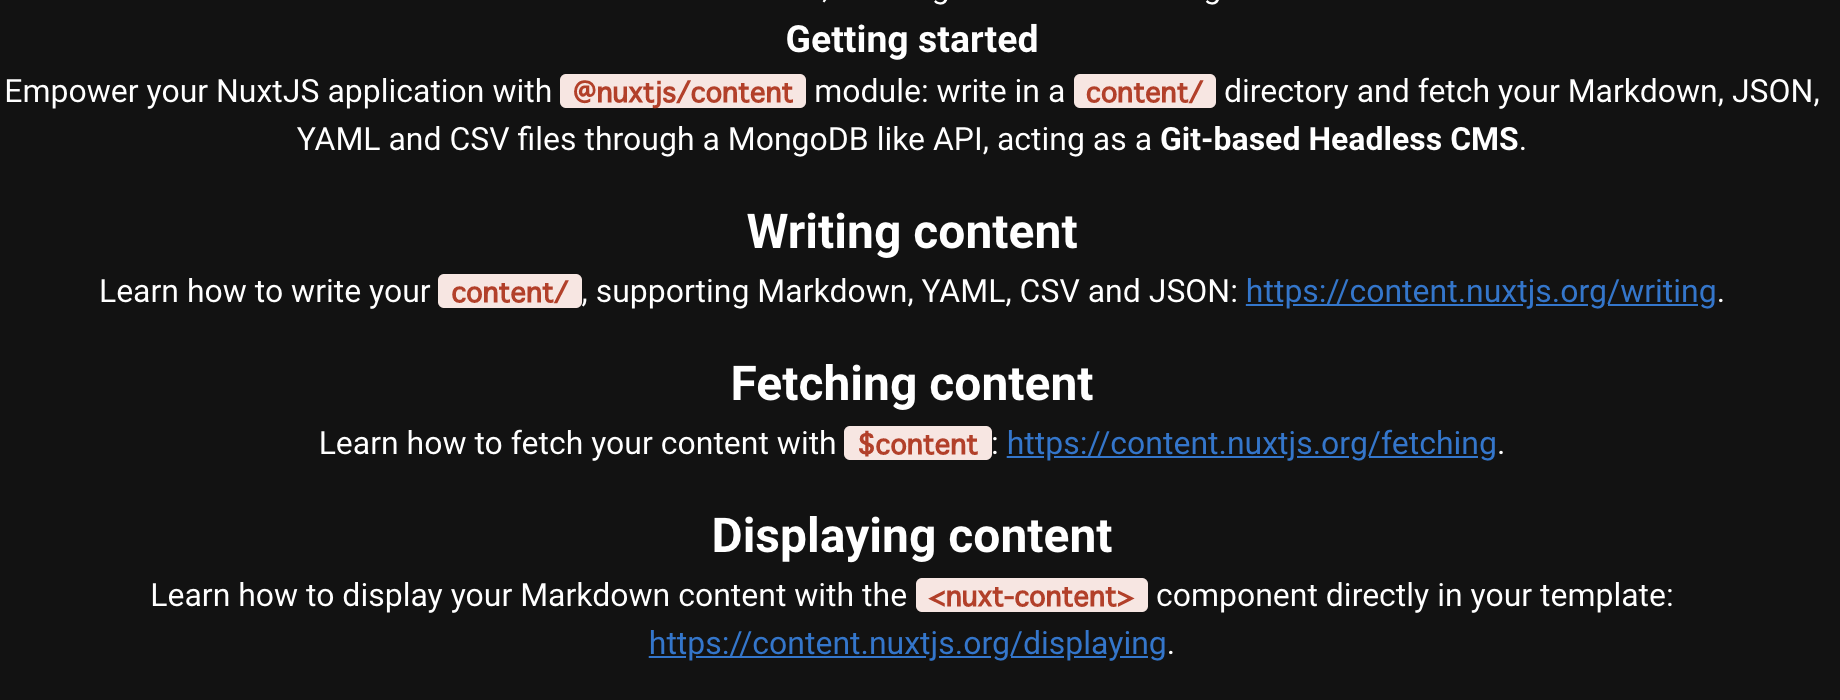
@nuxt/content の概要
- MarkdownやJSONなどのファイルからAPIのようにfetchできるようにするもの
create-nuxt-app を使用してnuxtアプリを生成
https://github.com/nuxt/create-nuxt-app
1.Package manager: Yarn
2.Programming language: TypeScript
3.UI framework: Vuetify
4.Nuxt.js modules: Axios / PWA / Content
5.Linting tools: ESLint / Prettier / Lint staged files / StyleLint
6.Testing framework: Jest
7.Rendering mode: Universal(SSR / Static)
8.Deployment target: Server
9.Deployment tools: none@nuxt/contentはmodulesへ記載される
@nuxtjs/composition-apiをインストールする
https://composition-api.nuxtjs.org/setup追記する
nuxt.config.tsbuildModules: [ // https://github.com/nuxt-community/composition-api '@nuxtjs/composition-api', ],試したリポジトリ
https://github.com/seiy4/nuxt214/tree/master/src
@nuxtjs/composition-api
https://www.npmjs.com/package/@nuxtjs/composition-api
https://github.com/nuxt-community/composition-api/blob/main/src/entrypoint.ts
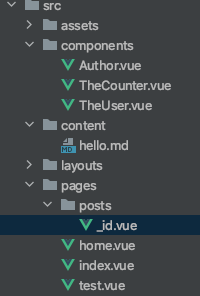
componentを定義
components/TheUser.vue<template> <div>Name: {{ fullName }}, Message: {{ message }}</div> </template> <script lang="ts"> import { defineComponent, computed, ref } from '@nuxtjs/composition-api' interface User { firstName: string lastName: string } export default defineComponent({ props: { user: { type: Object as () => User, required: true, }, }, setup({ user }) { const fullName = computed(() => `${user.firstName} ${user.lastName}`) const message = ref('This is a message') return { fullName, message, } }, }) </script>components/TheCounter.vue<template> <div> <v-btn @click="decrement">-</v-btn> <span>{{ count }}</span> <v-btn @click="increment">+</v-btn> </div> </template> <script lang="ts"> import { reactive, computed } from '@nuxtjs/composition-api' export default { setup() { const state = reactive({ count: 0, }) const count = computed(() => state.count) return { count, increment() { state.count++ }, decrement() { state.count-- }, } }, } </script>実際に使うとき
main.vue<template> <div> <the-counter /> <the-user :user="user" /> </div> </template> <script> export default { data() { return { user: { firstName: 'Taro', lastName: 'Yamada', }, } }, } </script>@nuxt/content
https://content.nuxtjs.org/ja/writing
contentディレクトリへMarkdownを追加するCode
hello.vue<template> <div> <h3>{{ page.title }}</h3> <nuxt-content :document="page" /> </div> </template> <script> export default { async asyncData({ $content }) { const page = await $content('hello').fetch() return { page, } }, </script>markdown sample
output


- 投稿日:2020-09-29T00:46:15+09:00
分かりすぎるVue.jsチートシート
自己紹介
むちゃんです。
関西を拠点に活動しているフロントエンドエンジニアです。HAL大阪の2回生です
(2020.9.29現在)
イベントなど回っているので是非大阪辺りの方は会いましょう!!
1...JSフレームワークについて
「Angular」,「React」,「Vue」この3個がJS人気フレームワークです。
今回はその中のVueについて詳しく話していきたいと思います
2...Vue.jsとは?
Vue.jsはユーザーインターフェースを構築するためのJavaScriptのフレームワークです。
最近ではReact、Angular、Vue.jsがJavaScriptの人気フレームワークとして定着してきています。
その中でもVue.jsは初心者に優しく比較的に学習しやすい事もあり現在の国内での人気は頭一つ抜けている印象があります。Vue.jsの特徴
・コンポーネントの再利用性が高い
・学習コストが低く、取っ付きやすい
・拡張性が高い3...Vue.jsで抑えとくべきポイント
①Vuex
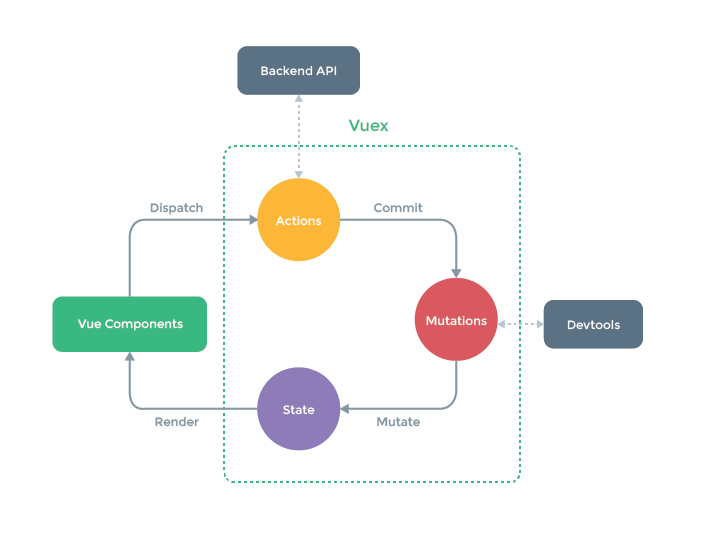
Vuex は Vue.js アプリケーションのための 状態管理パターン + ライブラリです。
※貯蔵庫的な役割と思っていいです。詳しいのは公式=>https://vuex.vuejs.org/ja/
Vuexの流れ(図解)
①componentでdispatchする
②actionsでAPIデータのやり取りする
③それをcommitしてmutationsを呼ぶ
④mutationsでデータの値変える
⑤するとstateの値が変わるざっくりした流れですが公式の補足程度で見てもらえると嬉しいです。
⭐️おすすめ
[初めてのアウトプット]
・爆速理解!超簡単Vuex入門①
②基本的に使うオブジェクト構成
構造だけまとめているので詳しいことは公式で確認してください。
sample.jsver vm = new Vue({ el: 'app', // ①使用するデータ data: { name: 'note', price: 500 }, // ② 算出プロパティ computed: { isPrice: function () { return this.price / 2; } }, // ③ 使用するメソッド methods: { isPrice: function() { return this.price / 2; } } })data(使用するデータ)
sample.jsvar vm = new Vue ({ el: '#app', data: { //data: { プロパティ名: 値 } name: 'note', price: 500 } })samole.html<div id="app"> <p>{{ name }}</p> </div>computed (算出プロパティ)
sample.jsvar vm = new Vue ({ el: '#app', data: { name: 'note', price: 500 }, computed: { // isPriceを定義 isPrice: function () { return this.price / 2; } } })sample.html<div id="app"> <!-- 250が表示される --> <p>{{ isPrice }}円</p> </div>methods(メソッド)
sample.jsvar vm = new Vue ({ el: '#app', data: { name: 'note', price: 500 }, methods: { // メソッドisPriceを定義 isPrice: function() { return this.price / 2; } } })sample.html<div> <!-- ボタンをクリックするとisPrice関数が実行 --> <button @click="isPrice()">半額</button> <!-- 250円と表示 --> <p>{{ price }}円</p> </div>computedとmethodsの違い
結論 & 資料
この辺りをある程度理解できればアウトプットに全力を注いでいいと思います。
⭕️ アウトプットやオススメの記事一覧
・Vue.jsを100時間勉強して分かったこと
・5分でわかるVue.js基礎の基礎
・2019年版Vue.jsを使ってる人には必ず知っていてほしいVue.jsの武器
・Vue-routerを使って、SPAをシンプルにはじめてみる
・vueとexpressでSPAを作るあとがき
今回は自分なりにVueについて簡潔にまとめてみした
次回はReactについてまとめてみたいと思います。
Twitter @HomgMuchan ぜひフォロー待っています❗️