- 投稿日:2020-09-25T20:02:51+09:00
ARKitのトラッキング状態を保存、ロードして再開する
1、ワールドマップを保存
sceneView.session.getCurrentWorldMap { [self] worldMap, error in
    self.sceneView.session.pause()
    self.map = worldMap
}
2、保存したワールドマップ構成でセッション再開
let configuration = ARWorldTrackingConfiguration()
configuration.initialWorldMap = map
sceneView.session.run(configuration, options: [])
Core MLを使ったアプリを作っています。
機械学習関連の情報を発信しています。お仕事のご依頼は
rockyshikoku@gmail.com
まで
- 投稿日:2020-09-25T18:16:14+09:00
iOS: Youtubeをアプリで再生する
自作のアプリでYoutubeを再生させます。
ライブラリのインストール
- アプリのプロジェクトフォルダで、CocoaPodの初期化
- → Podfileが作成される
pod init
- Podfileに、youtube-ios-player-helperを追加
# Uncomment the next line to define a global platform for your project
# platform :ios, '9.0'

target 'YoutubePlayer' do
  # Comment the next line if you don't want to use dynamic frameworks
  use_frameworks!

  # Pods for YoutubePlayer
  pod 'youtube-ios-player-helper', '~> 1.0.2' # 追加
end
- CocoaPodインストールコマンド実行
pod install
- Xcodeを「プロジェクト名.xcworkspace」ファイルをダブルクリックして起動する
ViewにYoutube Playerを追加
- StoryBoardから、画面にView(UIView)を画面に設置
- ViewのクラスをYTPlayerViewに変更
- ViewControllerに、このYTPlayerViewを紐づける
ViewController@IBOutlet weak var youtubeView: YTPlayerView!Youtubeを再生させる
- youtube_ios_player_helperをインポートする
- YTPlayerViewDelegateを実装する
- viewDidLoadでyoutubeViewの初期化
ViewControllerimport UIKit import youtube_ios_player_helper class ViewController: UIViewController, YTPlayerViewDelegate { @IBOutlet weak var youtubeView: YTPlayerView! override func viewDidLoad() { super.viewDidLoad() // Do any additional setup after loading the view. self.youtubeView.delegate = self self.youtubeView.load(withVideoId: "ec3_rjH_ymE") } func playerViewDidBecomeReady(_ playerView: YTPlayerView) { self.youtubeView.playVideo() } }
- 投稿日:2020-09-25T12:35:19+09:00
TestFlightで内部テスターにアプリをテストしてもらう
リリース前のアプリを内部ユーザーにインストールしてもらってテストしてもらう手順です。
手順
1、テストするアプリをApp Store ConnectにUploadする。
XcodeからArchiveしていつも通りアップ。
2、テストユーザーを登録。
App Store Connectの「ユーザーとアクセス」の+ボタンでテストユーザーのメールアドレスを指定して追加。
テストユーザーに招待メールリンクから承認してもらう必要があります。3、TestFlightでテスター登録
App Store ConnectのAppからテストするアプリページを開き、TestFlightタブを開く。
アプリがアップロードされていれば、ビルドに表示されているので、クリックして「輸出コンプライアンス」の設定をしておく。これしておかないとテストできません。左のメニューから内部グループのApp Store Connectユーザーを選び、+ボタンから2、で登録したテストユーザーをテスターに追加する。
2、でユーザーに承認してもらっていないと、テスター候補に表示されません。4、TestFlightアプリをダウンロードしてもらう。
テスターにはTestFlight招待メールが送信されます。App StoreからTestFlightアプリをダウンロードすると、招待されたアプリをインストールしてテストできます。
内部テスターは100人まで登録できます。
1万人までテストできる外部テストには、アップルのアプリ審査を受ける必要があります。
Core MLを使ったアプリを作っています。
機械学習関連の情報を発信しています。
- 投稿日:2020-09-25T12:05:21+09:00
【Swift】iOS14.0から追加されたWidgetKitを簡単に実装する方法
私の理解力が足りないのか
iOS14で追加された、WidgetKitを実装する際に遠回りをしてしまったので、
シンプルにWidgetKitをとりあえず実装してみたい!!という方々向けに、
最低の最低限(ノーアウト満塁からゲッツー崩れの1打点)だけまとめました。詳しく知りたい方は公式のサンプルを..
https://developer.apple.com/documentation/widgetkit/building_widgets_using_widgetkit_and_swiftui環境
- Xcode: 12.0(GM)
- Swift5
・手順
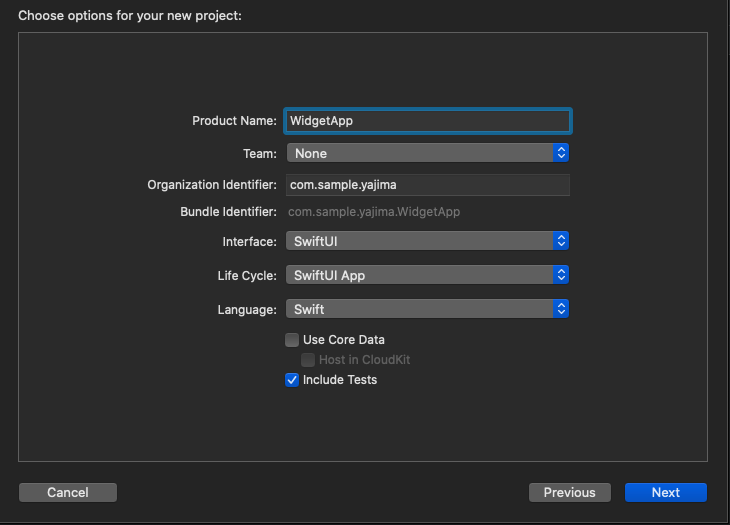
1. SwiftUIでプロジェクトを作成
WidgetはSwiftUIで作成しますので、storyboardを選択し内容注意!
2.WidgetExtensionを追加
a.File > New > Targetを選択
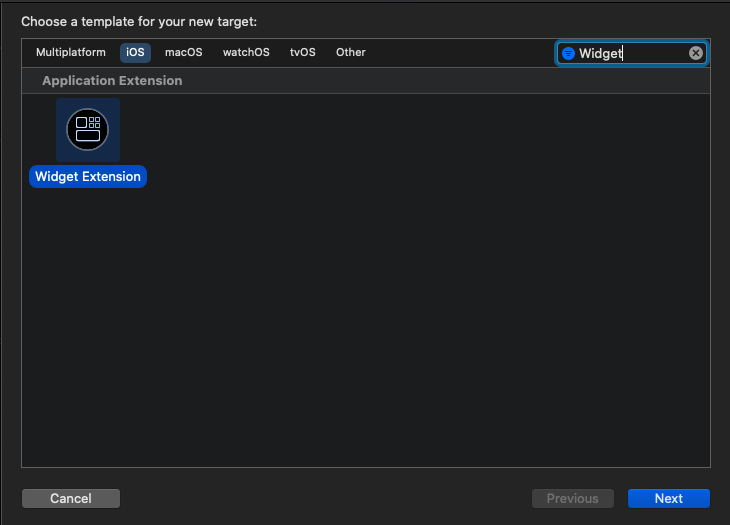
b.右上のテキストボックスに、Widgetと入力しWidgetExtensionを検索・選択し、Next!
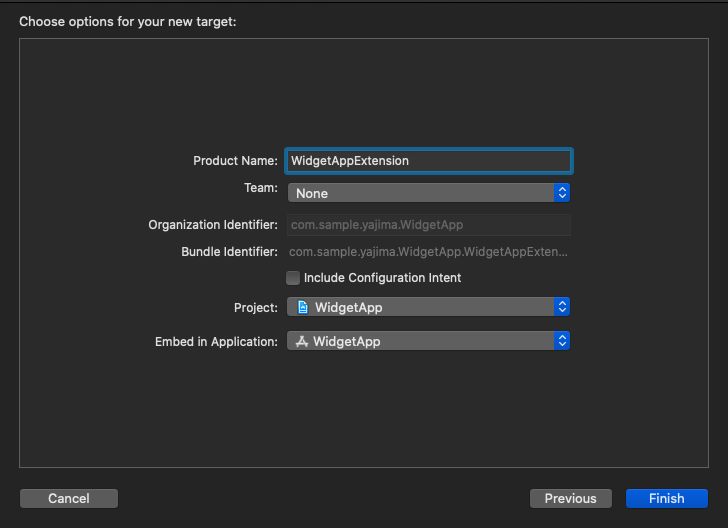
c.ProductNameを入力し、Finish!!
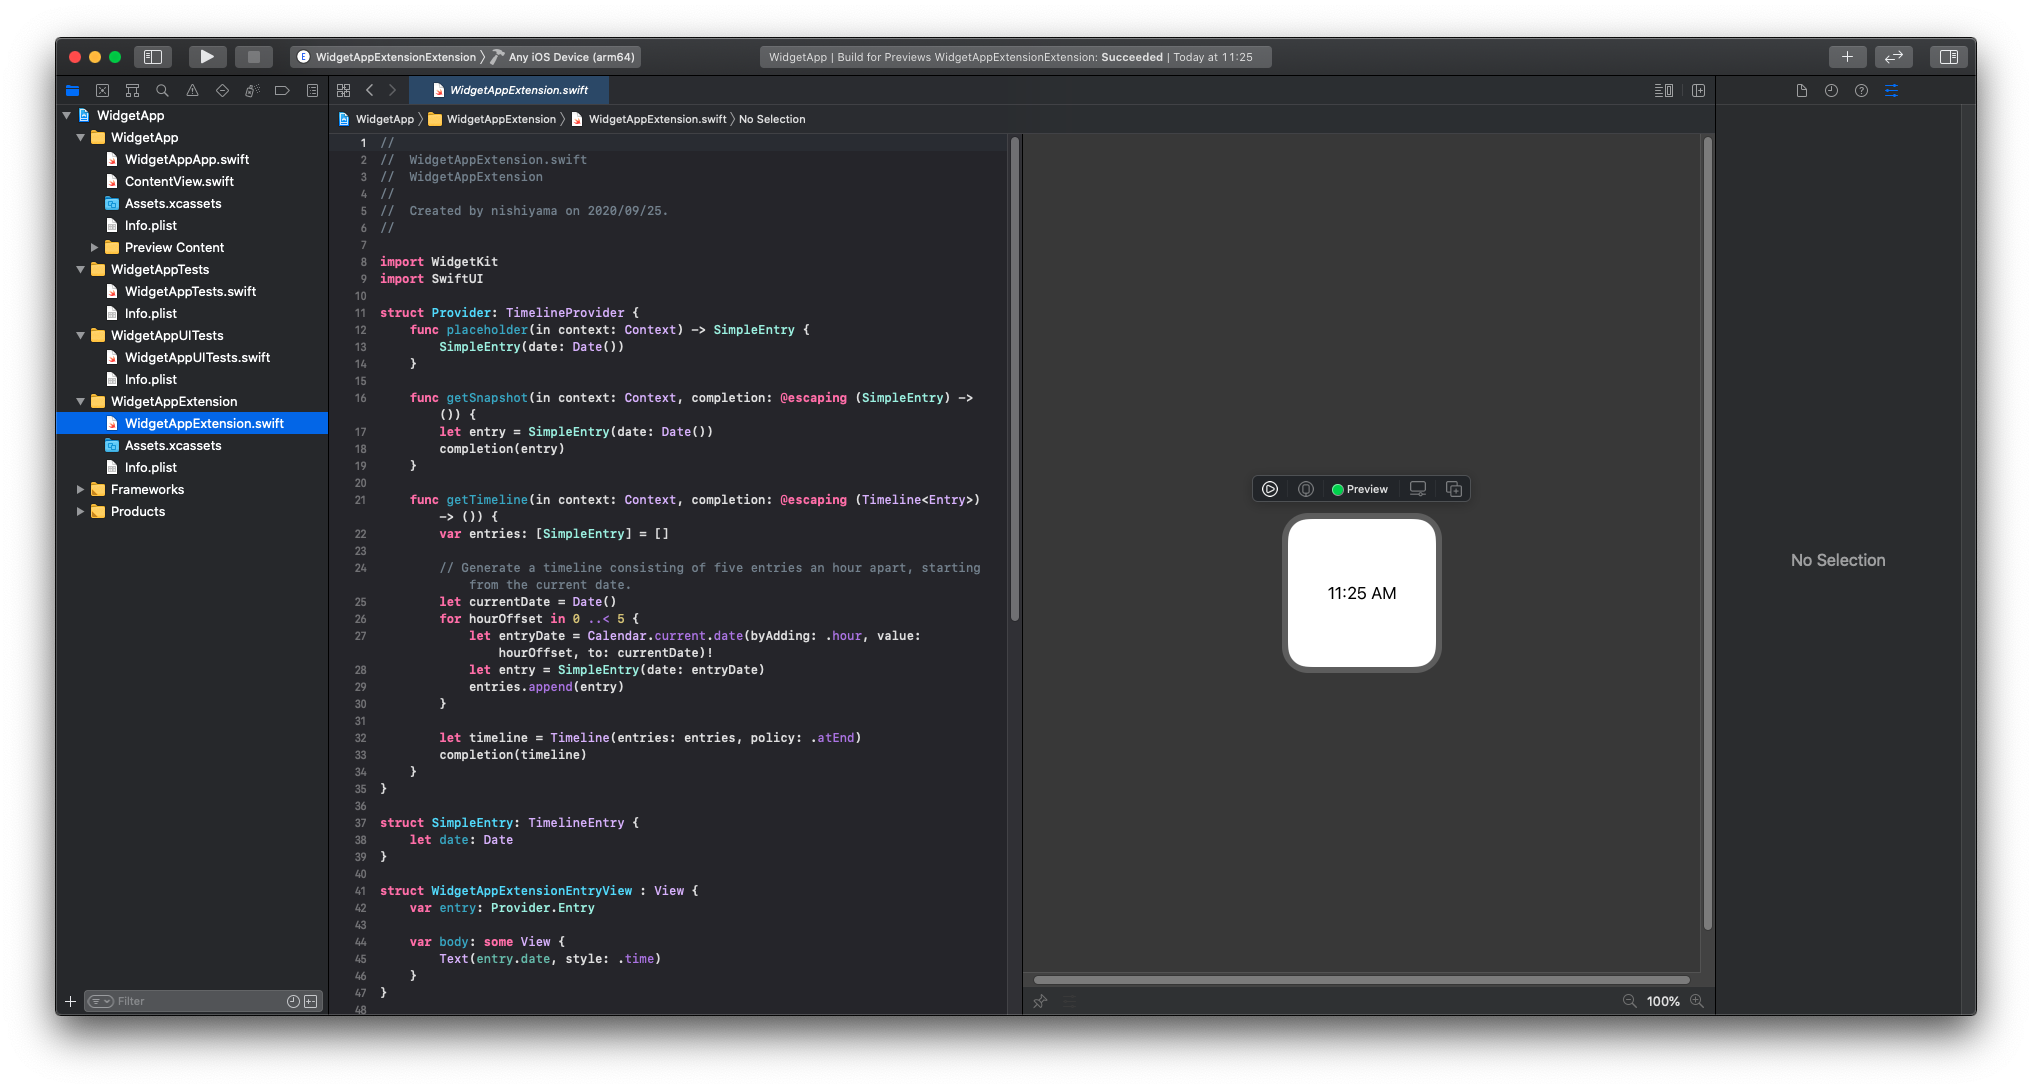
以下のようにWidgetExtensionを追加することができました!
動作
備考
userDefaultsを使用してデータの受け渡しとうする際に、
AppGroupを使用したりする必要がありますが、それらの方法は
後ほど追記するか、別途記事にしたいと思っております。アプリ公開しました!よろしければインストールお願いします。
とらんぽTwitter始めました!よろしければフォローお願いします。
@yajima_tohshu

- 投稿日:2020-09-25T09:22:15+09:00
Swiftでデザインパターン【Factory Method】
元ネタ → ochococo/Design-Patterns-In-Swift
クラス図
図の引用元:Wikipedia: Factory Method パターン
概要
The factory pattern is used to replace class constructors, abstracting the process of object generation so that the type of the object instantiated can be determined at run-time.
Factory Methodパターンは、クラスコンストラクターを置き換えるために使用され、インスタンス化されたオブジェクトのタイプを実行時に判別できるように、オブジェクト生成のプロセスを抽象化する。サンプルコード
// Product
protocol CurrencyDescribing {
    var symbol: String { get }
    var code: String { get }
}

// ConcreteProduct
final class Euro: CurrencyDescribing {
    var symbol: String {
        return "€"
    }

    var code: String {
        return "EUR"
    }
}

// ConcreteProduct
final class UnitedStatesDolar: CurrencyDescribing {
    var symbol: String {
        return "$"
    }

    var code: String {
        return "USD"
    }
}

// like ConcreteCreator
enum Country {
    case unitedStates
    case spain
    case uk
    case greece
}
// Creator
enum CurrencyFactory {
    // factoryMethod
    static func currency(for country: Country) -> CurrencyDescribing? {

        switch country {
            case .spain, .greece:
                return Euro()               // インスタンス生成
            case .unitedStates:
                return UnitedStatesDolar()  // インスタンス生成
            default:
                return nil
        }
    }
}

// usage //
let noCurrencyCode = "No Currency Code Available"

CurrencyFactory.currency(for: .greece)?.code ?? noCurrencyCode
CurrencyFactory.currency(for: .spain)?.code ?? noCurrencyCode
CurrencyFactory.currency(for: .unitedStates)?.code ?? noCurrencyCode
CurrencyFactory.currency(for: .uk)?.code ?? noCurrencyCode
クラス図との対応
サンプルコード クラス図 CurrencyDescribing Product
サンプルコード クラス図 Euro, UnitedStatesDolar ConcreteProduct
サンプルコード クラス図 CurrencyFactory Creator currency factoryMethod
サンプルコード クラス図 Country ConcreteCreator ※ConcreteCreatorではないが、具体的なProductを識別しているという意味で。
考察
ConcreteProductはCurrencyDescriptionプロトコルに準拠させている。CurrencyFactoryのcurrency()では、戻り値をCurrencyDescriptionにしておくことで(アップキャスト)、実行時にenumのcaseで、具体的なConcreteProductを判別・生成できるようになっている(ポリモーフィズム)。
Java等のサンプルでは、CreatorのanOperation()のなかで、ConcreteCreatorで実装されたfactoryMethod()が呼ばれていることが多い。

- 投稿日:2020-09-25T09:08:48+09:00
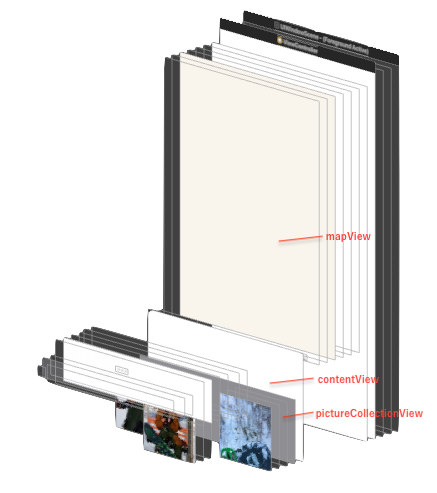
CollectionViewに複数のジェスチャーを認識させてマップアプリのような動きのUIを作った
マップアプリのようなUIで使用したい機能がありまして、今回自前で実装をしてみました。
実装の内容や使用した機能について、今後のためにこの場を借りてまとめることにしました。動作イメージ
今回作ったUIの動作イメージです。
デモ用に、地図で選択した位置で撮影した写真を表示するアプリを作成しました。・場所を未選択の状態:全ての写真を表示
・場所を選択した状態:選択した位置で撮影した写真を表示といった感じです。
モーダルのような見た目のViewを作り、その中にコレクションビューを配置して
拡大表示の場合のみスクロールできるようにしています。— 小岩井 (@WfODXAd0jmop1Ev) September 18, 2020レイアウトイメージ
今回のデモのレイアウトは、次のように組んでいます。
実装で使用した機能
- UIPanGestureRecognizer
- UIView.transform
- UIView.animate
- UIGestureRecognizerDelegate
UIPanGestureRecognizer
目的:pictureCollectionViewへのスワイプのアクションを認識したい
パンジェスチャーを認識する機能で、座標の情報の変化や速度を取得することが可能です。
今回は、translation(in: UIView?)を使って座標情報の変化を監視しました。override func viewDidLoad() { super.viewDidLoad() let collectionViewPanGesture = UIPanGestureRecognizer(target: self, action: #selector(handlePanGesture(sender:))) collectionViewPanGesture.delegate = self pictureCollectionView.addGestureRecognizer(handlePanGesture) } @objc private func handlePanGesture(sender: UIPanGestureRecognizer) { let translation = sender.translation(in: contentView) print("translationY : ", translation.y) # 省略 }これでパンジェスチャーにより座標が、どのくらい移動したいかの情報が取得できるようになりました。
UIView.transform
目的:pictureCollectionViewへのスワイプのアクションの情報をViewへ反映させたい
次に移動した座標を、実際にViewへ反映させます。
Viewへの反映にはUIView.transformを使用して反映させています。@objc private func handlePanGesture(sender: UIPanGestureRecognizer) { let translation = sender.translation(in: contentView) switch sender.state { case .changed: contentView.transform = CGAffineTransform(translationX: 0, y: translation.y) default: break } }
UIGestureRecognizer.Stateが、changedのタイミングで更新します。
これにより、ユーザーの動きに追従させるように見せる準備ができました。実際には、縮小表示から拡大表示にする際の調整に次のような対応を入れています。
override func viewDidLoad() {
    super.viewDidLoad()

    let collectionViewPanGesture = UIPanGestureRecognizer(target: self, action: #selector(handlePanGesture(sender:)))
    collectionViewPanGesture.delegate = self
    pictureCollectionView.addGestureRecognizer(handlePanGesture)

    // 最初に画面を表示した際の位置を調整(デフォルトの位置)
    contentViewTop.constant = 400
}

@objc private func handlePanGesture(sender: UIPanGestureRecognizer) {
    let translation = sender.translation(in: contentView)
    let maxVertical = -contentViewTop.constant

    switch sender.state {
    case .began:
       adjustValue = 0

       // 拡大表示の際に調整する値を設定
       if !contentView.transform.isIdentity {
          adjustValue = maxVertical
       }
    case .changed:
       let y = max(maxVertical, trans.y + adjustValue)
       contentView.transform = CGAffineTransform(translationX: 0, y: y)
    default:
       break
    }
}
UIView.animate
目的:スワイプアクションが止まった時にViewを拡大・縮小させたい
UIView.animateを使用して、ジェスチャーが終了したタイミングで
Viewを拡大・縮小させてモーダルのように見せます。@objc private func handlePanGesture(sender: UIPanGestureRecognizer) { let translation = sender.translation(in: contentView) let maxVertical = -contentViewTop.constant switch sender.state { case .changed: let y = max(maxVertical, trans.y + adjustValue) contentView.transform = CGAffineTransform(translationX: 0, y: y) case .ended, .cancelled: if translation.y < 0 { UIView.animate(withDuration: 0.2, animations: { self.contentView.transform = CGAffineTransform(translationX: 0, y: maxVertical) }) } else { UIView.animate(withDuration: 0.2, animations: { self.contentView.transform = .identity }) } default: break } }例では、パンジェスチャーの方向が上の場合には、拡大のアニメーションをさせています。
一方で下の場合では、縮小のアニメーションをさせます。
方向の判定には、translation.yの値を参照して判断しています。これで、pictureCollectionViewの
isScrollEnabledが無効の場合に
ジェスチャーに応じてViewを拡大・縮小できるようになります。UIGestureRecognizerDelegate
目的:pictureCollectionViewのスクロールを有効にしつつ、他のジェスチャーも認識させたい
pictureCollectionViewの
isScrollEnabledが有効の状態においても、
特定の条件の元でパンジェスチャーを有効にするためにUIGestureRecognizerDelegateを使用します。パンジェスチャーを有効にする条件
今回ジェスチャーを有効にする条件を次の条件を満たす場合に設定しました。
以下の2つを満たす。
- contentViewが拡大表示の状態
- pictureCollectionViewが一番上にある状態
または
- contentViewが縮小表示の状態
を対象としました。
gestureRecognizer(_:shouldRecognizeSimultaneouslyWith:)
ここでは、ジェスチャーの同時認識を許可するかどうかの制御を行います。
今回の場合ですと、pictureCollectionViewに対してのスクロールとパンジェスチャーが対象になります。戻り値にtrueを設定する事で、同時認識が許可されます。
extension ViewController: UIGestureRecognizerDelegate {
    func gestureRecognizer(_ gestureRecognizer: UIGestureRecognizer, shouldRecognizeSimultaneouslyWith otherGestureRecognizer: UIGestureRecognizer) -> Bool {
        gestureRecognizer.view == pictureCollectionView
    }
}
ここでは、引数の
gestureRecognizer.viewにて対象のView(今回はpictureCollectionView)の場合にのみ
trueを返すように設定しました。これで、pictureCollectionViewに対して、複数のジェスチャーが認識できるようになりました。
gestureRecognizerShouldBegin(_:)
ここでは、ジェスチャーの認識を開始するかどうかの制御を行います。
今回は、pictureCollectionViewのパンジェスチャーに対して①contentViewが拡大表示の状態 かつ pictureCollectionViewが一番上にある状態
②contentViewが縮小表示の状態のどちらかに該当する場合に開始するように設定します。
extension ViewController: UIGestureRecognizerDelegate {
    func gestureRecognizerShouldBegin(_ gestureRecognizer: UIGestureRecognizer) -> Bool {
        if pictureCollectionView.contentOffset.y <= 0 {
            return true
        }

        return !pictureCollectionView.isScrollEnabled
    }
}
また、
handlePanGesture内の拡大・縮小のアニメーションが完了したタイミングにisScrollEnabledを更新する処理を追加します。@objc private func handlePanGesture(sender: UIPanGestureRecognizer) { let translation = sender.translation(in: contentView) let maxVertical = -contentViewTop.constant switch sender.state { case .changed: let y = max(maxVertical, trans.y + adjustValue) contentView.transform = CGAffineTransform(translationX: 0, y: y) case .ended, .cancelled: if translation.y < 0 { UIView.animate(withDuration: 0.2, animations: { self.contentView.transform = CGAffineTransform(translationX: 0, y: maxVertical) }) { _ in self.pictureCollectionView.isScrollEnabled = true // 追加 } } else { UIView.animate(withDuration: 0.2, animations: { self.contentView.transform = .identity }) { _ in self.pictureCollectionView.isScrollEnabled = false // 追加 } } default: break } }これで、意図した条件下の場合にのみスワイプによるViewの拡大・縮小の体験ができます。
更にそれ以外の場合は、普通のpictureCollectionViewの機能が使えるようになりました。