- 投稿日:2020-09-20T22:13:59+09:00
Ruby 積演算子(&)、和演算子(|)について
仕事でコードを書いている際に&&でも&.でもない、&一つだけの演算子を見かけました。
調べてみると意外と記事が無かったのでメモしておきます。
和演算子についてはついでに・・・積演算子(&)
https://docs.ruby-lang.org/ja/latest/method/Array/i/=26.html
リファレンスに書いてある通りですが、集合の積演算を行います。
両方の配列に存在する要素からなる新しい配列を返します。
Array#intersectionと同様。
配列以外のオブジェクトを指定した場合は、暗黙的に型変換が行われるそうですが、この辺りはまた勉強します。multiple_operation.rba = [1, 2, 3, 4, 5, 6] b = [2, 4, 6, 8, 10] a & b # => [2, 4, 6] fruits = ['apple', 'banana', 'grape', 'melon', 'strawberry'] favorite_fruits = ['banana', 'cherry', 'peach', 'strawberry'] fruits & favorite_fruits # => ['banana', 'strawberry'] a = 10 b = 15 a & b # => 10 a = 0b1010 b = 0b1111 a & b # => 10積演算子(|)
https://docs.ruby-lang.org/ja/latest/method/Array/i/=7c.html
こちらもリファレンスに書いてある通りなのですが、集合の和演算を行います。
両方のいずれかの配列に含まれる要素を含む配列を返します。
重複する要素は取り除かれると書いてありますが、和集合なので、記載ミスですかね?sum_operation.rba = [1, 2, 3, 4, 5, 6] b = [2, 4, 6, 8, 10] a | b # => [1, 2, 3, 4, 5, 6, 8, 10] fruits = ['apple', 'banana', 'grape', 'melon', 'strawberry'] favorite_fruits = ['banana', 'cherry', 'peach', 'strawberry'] fruits | favorite_fruits # => ["apple", "banana", "grape", "melon", "strawberry", "cherry", "peach"] a = 10 b = 15 a | b # => 15 a = 0b1010 b = 0b1111 a | b # => 15最後に
小ネタをポツポツ投稿出来ればと思います。
自分自身医療分野から転職してエンジニアになりましたので、同じような境遇の方がいれば是非交流してみたいです!
- 投稿日:2020-09-20T20:18:53+09:00
【Ruby初歩】splitメソッドとto_sメソッド
splitメソッドは「文字列を1つずつ区切り、配列にする」メソッド。
def split_1st(string) #string(文字列)を引数として期待するメソッド
  string.split("") #to_sメソッドがない点に注意。
end
p split_1st("12345")
#=> ["1","2","3","4","5"]
p split_1st("Thank You")
#=> ["T","h","a","n","k"," ","Y","o","u"]
"Thank You"のようにスペース含んだ場合は、スペースも文字列の1つとしてみなされ出力される。
引数として与えられるのが文字列ではなく、数値の場合はどうすればよいか?
下記のように、to_sメソッドを加えれば、数値も同様に区切って配列にすることができる。def split_2nd(integer) #integer(整数)を引数として期待するメソッド integer.to_s.split("") #to_sメソッドで数値を文字列に変換し、splitメソッドで文字列を1つずつ区切る。 end p split_2nd(12345) #=> ["1","2","3","4","5"] p split_2nd("12345") #元から文字列のこの呼び出しも有効に出力される。 #=> ["1","2","3","4","5"]
- 投稿日:2020-09-20T20:03:33+09:00
【Rails 6.0】 複数レコードの一括保存について
はじめに
個人アプリで受発注管理機能を実装したので、その時に学んだ複数レコードの一括保存のやり方についてアウトプットします。
参考資料
今回の記事を作成するにあたり、以下の記事を大いに参考にさせていただきました。本当にありがとうございました。
【Rails 5】モデルを一括登録する手順
【Rails 6】form_with用いて一括登録する
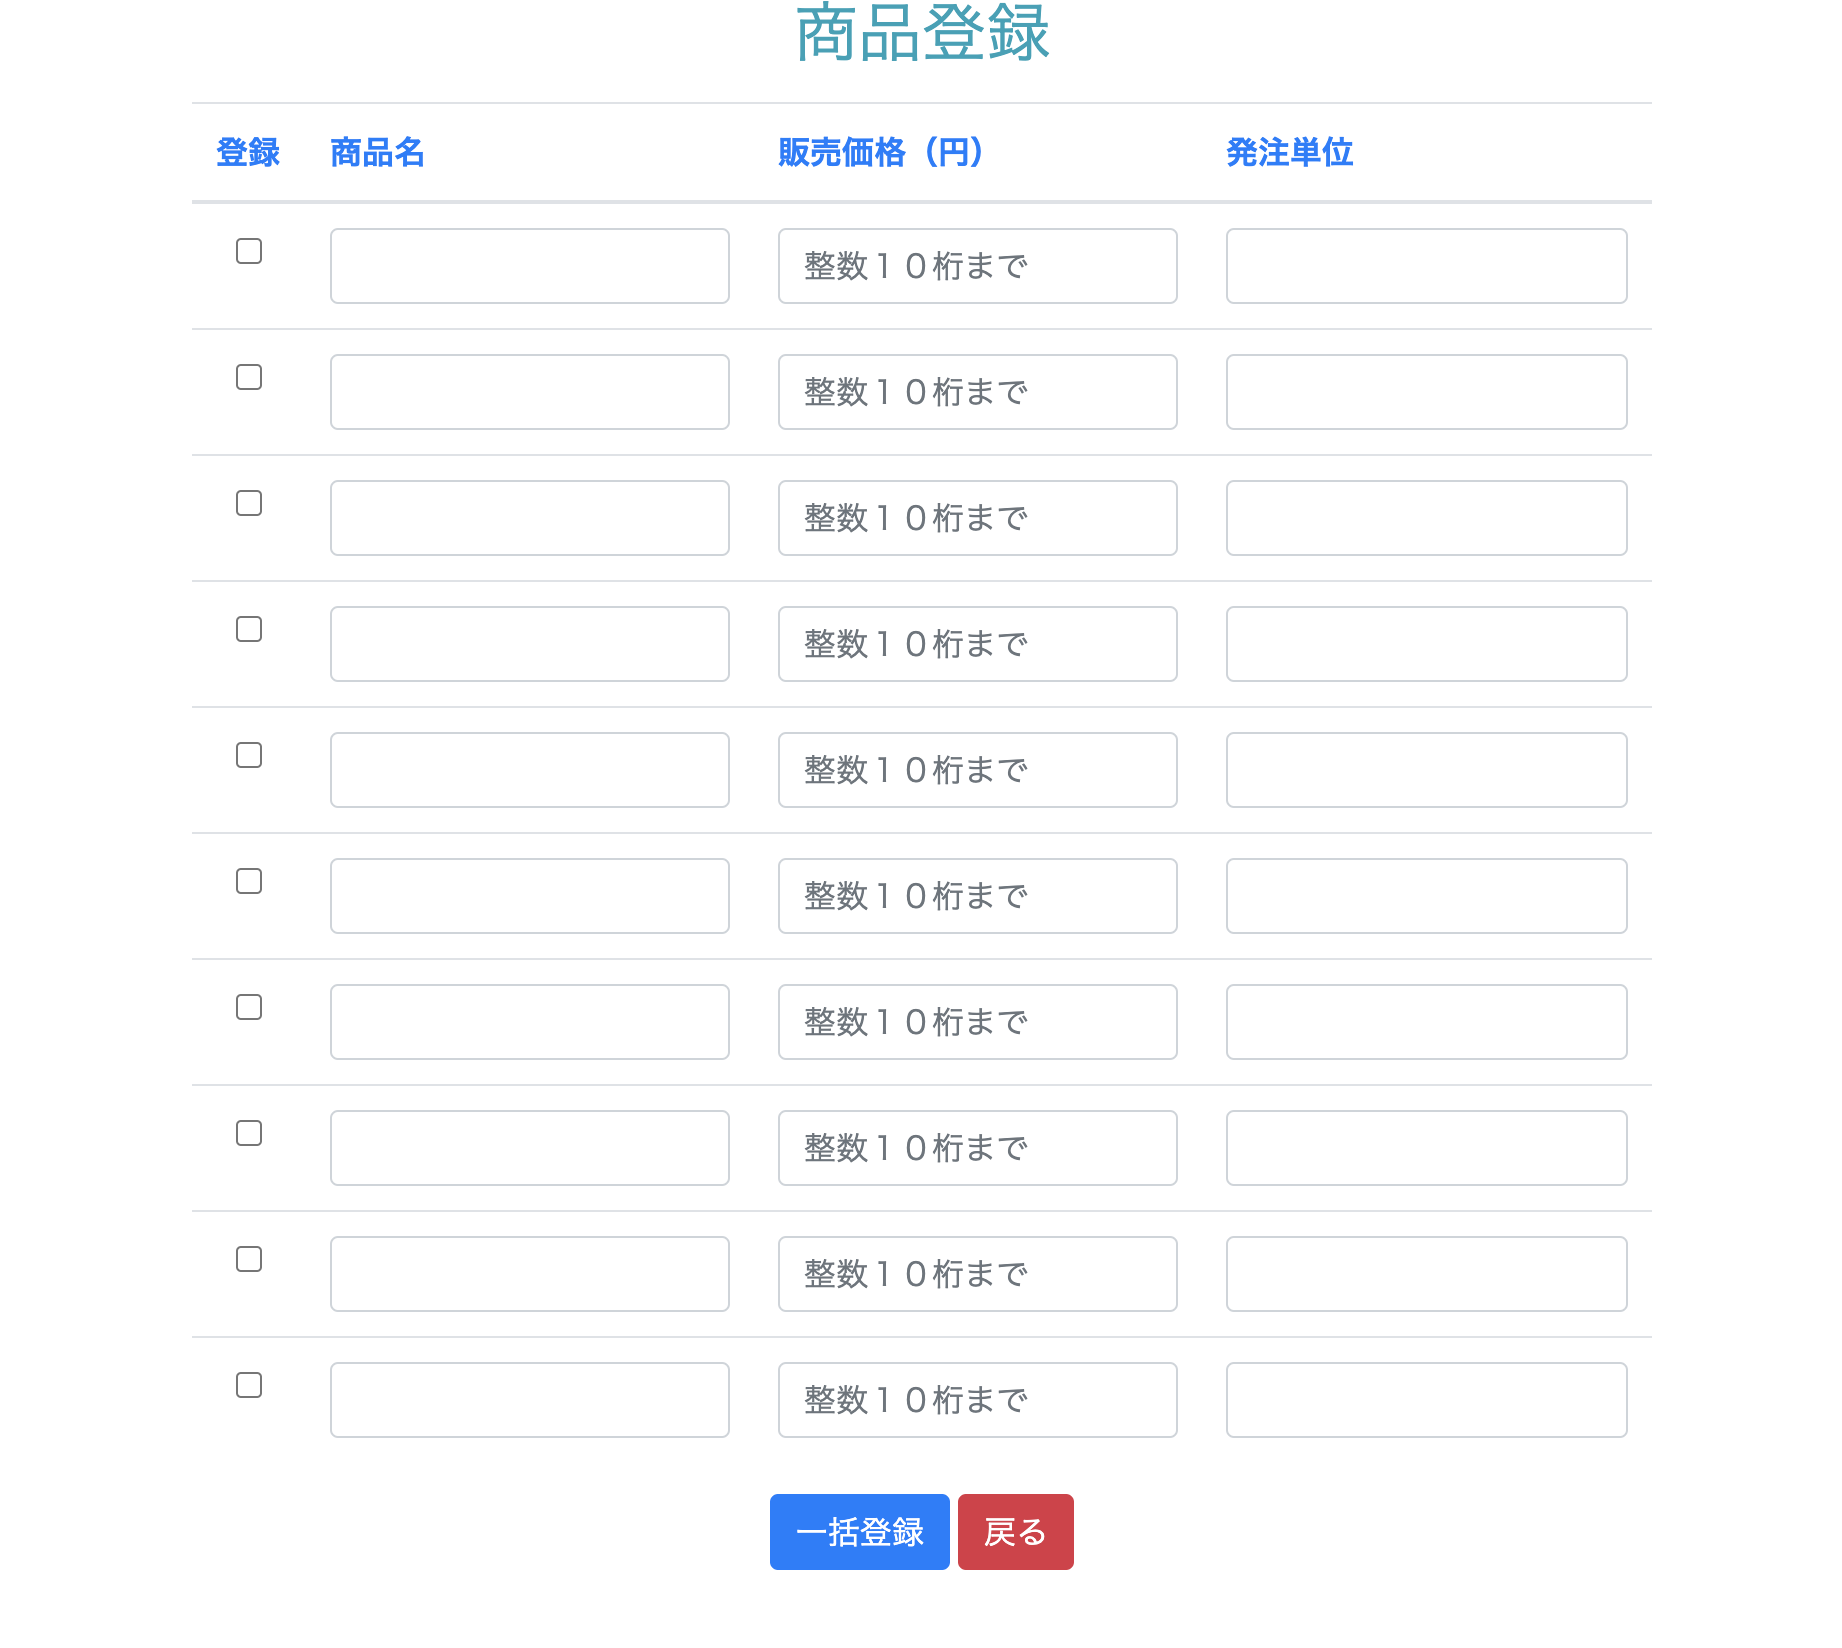
1.2. 一括登録フォームの実装制作物
チェックボックスにチェックを入れた商品のみを登録する
前提条件
Productモデル
Column Type name string price integer unit string availability boolean models/product.rbclass Product < ApplicationRecord with_options presence: true do validates :name validates :unit validates :price, numericality: {only_integer: true, greater_than_or_equal_to: 0 } validates :availability, inclusion: { in: [true, false] } end end方針
- 複数商品を一括保存するためのコレクションモデルを作成
- コントローラーで、一括登録のための処理を記述
- ビュー画面で複数の商品を一括登録できるフォームを作成
1. 複数商品を一括保存するためのコレクションモデルを作成
modelsディレクトリの中にformディレクトリを作成し、その中にProductCollectionモデルとBaseモデルを作成します。
models/form/product_collectionclass Form::ProductCollection < Form::Base FORM_COUNT = 10 #ここで、作成したい登録フォームの数を指定 attr_accessor :products def initialize(attributes = {}) super attributes self.products = FORM_COUNT.times.map { Product.new() } unless self.products.present? end def products_attributes=(attributes) self.products = attributes.map { |_, v| Product.new(v) } end def save Product.transaction do self.products.map do |product| if product.availability # ここでチェックボックスにチェックを入れている商品のみが保存される product.save end end end return true rescue => e return false end endmodels/form/base.rbclass Form::Base include ActiveModel::Model include ActiveModel::Callbacks include ActiveModel::Validations include ActiveModel::Validations::Callbacks end2. コントローラーでインスタンスの生成および、データの処理
controllers/products_controller.rbclass ProductsController < ApplicationController def new @form = Form::ProductCollection.new end def create @form = Form::ProductCollection.new(product_collection_params) if @form.save redirect_to products_path, notice: "商品を登録しました" else flash.now[:alert] = "商品登録に失敗しました" render :new end end private def product_collection_params params.require(:form_product_collection) .permit(products_attributes: [:name, :price, :unit, :availability]) end end
@form = Form::ProductCollection.newにより、先ほど作ったモデルのインスタンスが生成されます。
ストロングパラメータはproducts_attributesで受け取ります。3. ビュー画面で複数の商品を一括登録できるフォームを作成
views/products/new.html.haml= form_with model: @form, url: products_path, method: :post, local: true do |form| %table %thread %tr %th 登録 %th 商品名 %th 販売価格(円) %th 発注単位 %tbody = form.fields_for :products do |f| %tr %td.text-center = f.check_box :availability %td = f.text_field :name %td = f.text_field :price %td = f.text_field :unit = form.submit "一括登録" = link_to "戻る", :backform_withとfields_forを使って複数登録できるフォームを作成しています。
これで、一括保存ができると思います。
最後に
ご覧いただきありがとうござました。何か間違いがあれば、ご指摘をお願いします。


- 投稿日:2020-09-20T19:51:06+09:00
【初心者向け】deviseのユーザー登録をRSpecでテストする
はじめに
deviseを導入したは良いものの最初のテストが書けない…!どうやって書いたらいいの、というとこで情報がまとまってなかったので自分でまとめてみました。
自分でアプリを作り始めた初心者さん向けです。Ruby '2.6.6'
Rails '5.2.4'1.Gemfileの編集
group :development, :test do
・
・
  gem "rspec-rails"
  gem "factory_bot_rails"
end
をGemfileに加える
bundle installbundle install Fetching gem metadata from https://rubygems.org/............. Fetching gem metadata from https://rubygems.org/. ・ ・ Using duktape 2.3.0.0 Fetching factory_bot 6.1.0 Installing factory_bot 6.1.0 Fetching factory_bot_rails 6.1.0 Installing factory_bot_rails 6.1.0 Using jbuilder 2.10.0 ・ ・ Using web-console 3.7.0 Bundle complete! 22 Gemfile dependencies, 95 gems now installed. Use `bundle info [gemname]` to see where a bundled gem is installed.RSpecをダウンロードする
$ bundle exec rails generate rspec:install2. .rspecの設定
.rspecに以下の記述を行います。
/.rspec--require spec_helper --format documentation #ここを追加上の記述はあってもなくてもいいのですが、あるなしでテスト実行時の表示がこのくらい変わります。
なし
$ ...............................

あり
$ User
$ #create
$   is valid
$   is invalid without email
$   is invalid without password
引用元:rspecのテスト環境でdeviseにログインする方法【rails】
https://qiita.com/Kohei_Kishimoto0214/items/e29e509b12a6eb484a42なにも書いて無いけど試しにテストしてみる
テストするコマンドは
bundle exec rspec
または、個別に指定することもできるbundle exec rspec No examples found. Finished in 0.00101 seconds (files took 3.71 seconds to load) 0 examples, 0 failuresまだ確認することは記述してないですが、表示はされています…!!!
3.Factory_botの設定をする
spec/rails_helper.rbRSpec.configure do |config| config.includeFactoryBot::Syntax::Methods endこんな感じになると思います。
spec\rails_helper.rbRSpec.configure do |config| # Remove this line if you're not using ActiveRecord or ActiveRecord fixtures config.fixture_path = "#{::Rails.root}/spec/fixtures" config.include FactoryBot::Syntax::Methods config.use_transactional_fixtures = true config.infer_spec_type_from_file_location! config.filter_rails_from_backtrace! end4.rails_helperの設定
次に、
/spec/rails_helper.rb内で以下の一文がコメントアウトされているので、コメントアウトを外してください。
これでspec/support/のファイルを読み込むことができます。/spec/rails_helper.rbDir[Rails.root.join('spec/support/**/*.rb')].each{|f|requiref}/spec/rails_helper.rb# This file is copied to spec/ when you run 'rails generate rspec:install' require 'spec_helper' ENV['RAILS_ENV'] ||= 'test' require File.expand_path('../config/environment', __dir__) # Prevent database truncation if the environment is production abort("The Rails environment is running in production mode!") if Rails.env.production? require 'rspec/rails' # Add additional requires below this line. Rails is not loaded until this point! # Requires supporting ruby files with custom matchers and macros, etc, in # spec/support/ and its subdirectories. Files matching `spec/**/*_spec.rb` are # run as spec files by default. This means that files in spec/support that end # in _spec.rb will both be required and run as specs, causing the specs to be # run twice. It is recommended that you do not name files matching this glob to # end with _spec.rb. You can configure this pattern with the --pattern # option on the command line or in ~/.rspec, .rspec or `.rspec-local`. # # The following line is provided for convenience purposes. It has the downside # of increasing the boot-up time by auto-requiring all files in the support # directory. Alternatively, in the individual `*_spec.rb` files, manually # require only the support files necessary. # Dir[Rails.root.join('spec', 'support', '**', '*.rb')].sort.each { |f| require f } ここのコメントアウトを外した # Checks for pending migrations and applies them before tests are run. # If you are not using ActiveRecord, you can remove these lines. begin ActiveRecord::Migration.maintain_test_schema! rescue ActiveRecord::PendingMigrationError => e puts e.to_s.strip exit 1 end RSpec.configure do |config| # Remove this line if you're not using ActiveRecord or ActiveRecord fixtures config.fixture_path = "#{::Rails.root}/spec/fixtures" config.include FactoryBot::Syntax::Methods # If you're not using ActiveRecord, or you'd prefer not to run each of your # examples within a transaction, remove the following line or assign false # instead of true. config.use_transactional_fixtures = true # You can uncomment this line to turn off ActiveRecord support entirely. # config.use_active_record = false # RSpec Rails can automatically mix in different behaviours to your tests # based on their file location, for example enabling you to call `get` and # `post` in specs under `spec/controllers`. # # You can disable this behaviour by removing the line below, and instead # explicitly tag your specs with their type, e.g.: # # RSpec.describe UsersController, type: :controller do # # ... # end # # The different available types are documented in the features, such as in # https://relishapp.com/rspec/rspec-rails/docs config.infer_spec_type_from_file_location! # Filter lines from Rails gems in backtraces. config.filter_rails_from_backtrace! # arbitrary gems may also be filtered via: # config.filter_gems_from_backtrace("gem name") end5.テストデータの準備
新しいフォルダ&ファイル
spec\factories\user.rbを作成今回、Fakerは入れてないので、手動でデータ入力をします。
通し番号を振っていく付け方もありますが、今回は一番シンプルな方法ににます。devise初期設定は名前がないので以下の3要素のみ必要です。
nameカラムを追加している方はspec\factories\user.rbにもnameの項目を追加して下さい。spec\factories\user.rbFactoryBot.define do factory :user do email {"test@gmail.com"} password {"111111"} password_confirmation {"111111"} end end6.controller_macrosの作成
spec/support/controller_macros.rbを作成し、下記の公式の内容を追記してください。公式:How To: Test controllers with Rails (and RSpec)
https://github.com/heartcombo/devise/wiki/How-To:-Test-controllers-with-Rails-(and-RSpec)spec/support/controller_macros.rbmodule ControllerMacros def login_admin before(:each) do @request.env["devise.mapping"] = Devise.mappings[:admin] sign_in FactoryBot.create(:admin) # Using factory bot as an example end end def login_user before(:each) do @request.env["devise.mapping"] = Devise.mappings[:user] user = FactoryBot.create(:user) user.confirm! # or set a confirmed_at inside the factory. Only necessary if you are using the "confirmable" module sign_in user end end end7. rails_helper内でdeviseとcontroler_macrosを読み込む
rails_helperのRSpec.configure外に以下を記述し、deviseとmacrosを読み込みます。
spec/rails_helper.rbrequire'devise' requireFile.expand_path("spec/support/controller_macros.rb")RSpec.configure内に以下を記述し、deviseのtest_helperとmacrosをcontroller内で使えるようにします。
spec/rails_helper.rbRSpec.configure do |config| ・ ・ config.include Devise::Test::ControllerHelpers, type: :controller config.include Devise::Test::IntegrationHelpers, type: :request config.extend ControllerMacros, :type => :controller ・ ・加えるとこんな感じになります。
spec\rails_helper.rb# This file is copied to spec/ when you run 'rails generate rspec:install' require 'spec_helper' ENV['RAILS_ENV'] ||= 'test' require File.expand_path('../config/environment', __dir__) abort("The Rails environment is running in production mode!") if Rails.env.production? require 'rspec/rails' require 'devise' require File.expand_path("spec/support/controller_macros.rb") require_relative 'support/controller_macros' Dir[Rails.root.join('spec', 'support', '**', '*.rb')].sort.each { |f| require f } begin ActiveRecord::Migration.maintain_test_schema! rescue ActiveRecord::PendingMigrationError => e puts e.to_s.strip exit 1 end RSpec.configure do |config| # Remove this line if you're not using ActiveRecord or ActiveRecord fixtures config.fixture_path = "#{::Rails.root}/spec/fixtures" config.include FactoryBot::Syntax::Methods config.include Devise::Test::ControllerHelpers, type: :controller config.include Devise::Test::IntegrationHelpers, type: :request config.extend ControllerMacros, :type => :controller config.infer_spec_type_from_file_location! config.filter_rails_from_backtrace! end8. user_spec.rbで、userをcreateしログイン処理をする
createしたuserをletに格納しインスタンス変数のように使用できるようにしました。
さらにそのuserにlogin_userメソッドを使ってdeviseにログインさせます。modelのvalidationをテストします。
事前にvalidationは設定してください。spec\models\user_spec.rbrequire 'rails_helper' RSpec.describe User, type: :model do describe 'ユーザー登録' do it "name、email、passwordとpassword_confirmationが存在すれば登録できること" do user = build(:user) expect(user).to be_valid # user.valid? が true になればパスする end end引用元:Rspecを使用したテスト①(単体テスト:バリデーションのテスト)
引用元:Rspecを使用したテスト②(統合テスト)かいてからの
bundle exec rspecでいける
はず!!!!これで完成!!
$ bundle exec rspec

User
  name、email、passwordとpassword_confirmationが存在すれば登録できること

Finished in 0.5297 seconds (files took 9.34 seconds to load)
1 example, 0 failures
9.ハマったところ
パターン1
& rails g rspec:model user
    conflict  spec/models/user_spec.rb
Overwrite C:/Users/deeep/techpitgram/spec/models/user_spec.rb? (enter "h"
for help) [Ynaqdhm]
                                        force  spec/models/user_spec.rb   for help) [Ynaqdhm]
$ bundle


Migrations are pending. To resolve this issue, run:

        bin/rails db:migrate RAILS_ENV=test
No examples found.
こんな時は指示通り
$ rails db:migrate RAILS_ENV=testしましょう
パターン2
こんなエラーがでたらそれはgemfileの中に古いGemが混ざっています。
$ bundle exec rspec
2020-09-02 22:36:39 WARN Selenium [DEPRECATION] Selenium::WebDriver::Chrom
e#driver_path= is deprecated. Use Selenium::WebDriver::Chrome::Service#dri
ver_path= instead.

An error occurred while loading ./spec/models/user_spec.rb.
Failure/Error: require File.expand_path('../config/environment', __dir__)

Selenium::WebDriver::Error::WebDriverError:
per-2.1.1/bin/chromedriver-helper"
# ./config/application.rb:7:in `<top (required)>'

# ./config/environment.rb:2:in `<top (required)>'
# ./spec/rails_helper.rb:4:in `require'
# ./spec/rails_helper.rb:4:in `<top (required)>'
# ./spec/models/user_spec.rb:1:in `require'
# ./spec/models/user_spec.rb:1:in `<top (required)>'
No examples found.


Finished in 0.00008 seconds (files took 7.23 seconds to load)
0 examples, 0 failures, 1 error occurred outside of examples
参考:Rspecが動かない rails_helperの読み込み
https://teratail.com/questions/247938?link=qa_related_pcGemfileを書き換えます。
group :test do
  # Adds support for Capybara system testing and selenium driver
  gem 'capybara', '>= 2.15'
  gem 'selenium-webdriver'
  # Easy installation and use of chromedriver to run system tests with Chrome
  #gem 'chromedriver-helper'  #この1文を削除orコメントアウト
  gem 'webdrivers', '~> 3.0' #この1行を追加
  gem 'rspec-rails'
  gem "factory_bot_rails"
end
・
・

gem 'devise'
そして
bundle installこれでいけるはずです!
最後に
間違いなどがあればご指摘いただけると嬉しいです。
いろいろな参考
RailsアプリへのRspecとFactory_botの導入手順
rspecのテスト環境でdeviseにログインする方法【rails】
RSpecを用いた単体テストについての備忘録 @TECH CAMP #11 -note
- 投稿日:2020-09-20T17:49:02+09:00
(ギリ)20代の地方公務員がRailsチュートリアルに取り組みます【第12章】
前提
・Railsチュートリアルは第4版
・今回の学習は3周目(9章以降は2周目)
・著者はProgate一通りやったぐらいの初学者基本方針
・読んだら分かることは端折る。
・意味がわからない用語は調べてまとめる(記事最下段・用語集)。
・理解できない内容を掘り下げる。
・演習はすべて取り組む。
・コードコピペは極力しない。
認証システム開発・第6段回目、最終回の第12章です!世間は4連休ですが、学習に休みはありません。ばりばりやっていきましょう。不断の努力を。
本日の一曲はこちら。
SUPERCAR "PLANET short ver."
良い曲は何年経っても色褪せません。
【12.1.1 PasswordResetsコントローラ 演習】
1. この時点で、テストスイートが greenになっていることを確認してみましょう。
→ GREENです。
2. 表 12.1の名前付きルートでは、_pathではなく_urlを使うように記してあります。なぜでしょうか? 考えてみましょう。ヒント: アカウント有効化で行った演習 (11.1.1.1) と同じ理由です。
→ 完全なURL(絶対パス)が必要だから。
【12.1.2 新しいパスワードの設定 演習】
1. リスト 12.4のform_forメソッドでは、なぜ@password_resetではなく:password_resetを使っているのでしょうか? 考えてみてください。
→ password_resetモデルがないから。モデルがある場合はその変数(@userなど)が使えるけど、今回はそういった変数がない。
【12.1.3 createアクションでパスワード再設定 演習】
1. 試しに有効なメールアドレスをフォームから送信してみましょう (図 12.6)。どんなエラーメッセージが表示されたでしょうか?
→ ArgumentError in PasswordResetsController#create
wrong number of arguments (given 1, expected 0)
2. コンソールに移り、先ほどの演習課題で送信した結果、(エラーと表示されてはいるものの) 該当するuserオブジェクトにはreset_digestとreset_sent_atがあることを確認してみましょう。また、それぞれの値はどのようになっていますか?
→ ありました。下記。>> user = User.find_by(email: "kawa@kawa.com") User Load (0.2ms) SELECT "users".* FROM "users" WHERE "users"."email" = ? LIMIT ? [["email", "kawa@kawa.com"], ["LIMIT", 1]] => #<User id: 102, name: "kawa", email: "kawa@kawa.com", created_at: "2020-09-17 22:39:47", updated_at: "2020-09-20 04:23:52", password_digest: "$2a$10$kgv1Loz8fVDaaZvtUMtkZOUBnbCcHZNIBQBrgb18QMj...", remember_digest: nil, admin: false, activation_digest: "$2a$10$bmgQ2XztK7kgePhH8pVDiuKenXFDEl51XktqmfPUwHv...", activated: true, activated_at: "2020-09-17 22:40:33", reset_digest: "$2a$10$iuW.1GDheym2P5Nkuo7QUu7YjCs1DyooYonE0RY2lck...", reset_sent_at: "2020-09-20 04:23:52">
【12.2.1 パスワード再設定のメールとテンプレート 演習】
1. ブラウザから、送信メールのプレビューをしてみましょう。「Date」の欄にはどんな情報が表示されているでしょうか?
→ Date: Sun, 20 Sep 2020 04:49:13 +00002. パスワード再設定フォームから有効なメールアドレスを送信してみましょう。また、Railsサーバーのログを見て、生成された送信メールの内容を確認してみてください。
→ 下記----==_mimepart_5f66df073210_17841d9a2dc334fd Content-Type: text/plain; charset=UTF-8 Content-Transfer-Encoding: 7bit To reset your password click the link below: https://545f54b8b0d74dfd8bcc26b33cb0f3fe.vfs.cloud9.us-east-2.amazonaws.com/password_resets/TaQ06fMRyqZk-wHJp8fnyw/edit?email=kawa%40kawa.com This link will expire in two hours. if you did not request your password to be reset, please ignore this email and your password will stay as it is.
3. コンソールに移り、先ほどの演習課題でパスワード再設定をしたUserオブジェクトを探してください。オブジェクトを見つけたら、そのオブジェクトが持つreset_digestとreset_sent_atの値を確認してみましょう。
→ 下記reset_digest: "$2a$10$JUgxhUTG.XKFk7BnZqfLHeU8fdUIU/cnMvBGaAs.RCX...", reset_sent_at: "2020-09-20 04:48:06">
【12.2.2 送信メールのテスト 演習】
1. メイラーのテストだけを実行してみてください。このテストは greenになっているでしょうか?
→ $ rails test test/mailers/user_mailer_test.rb でGREEN
2. リスト 12.12にある2つ目のCGI.escapeを削除すると、テストが redになることを確認してみましょう。
→ REDでした。
【12.3.1 editアクションで再設定 演習】
1. 12.2.1.1で示した手順に従って、Railsサーバーのログから送信メールを探し出し、そこに記されているリンクを見つけてください。そのリンクをブラウザから表示してみて、図 12.11のように表示されるか確かめてみましょう。
→ Reset password画面が表示されました。
2. 先ほど表示したページから、実際に新しいパスワードを送信してみましょう。どのような結果になるでしょうか?
→ Unknown action
The action 'update' could not be found for PasswordResetsController
【12.3.2 パスワードを更新する 演習】
1. 12.2.1.1で得られたリンク (Railsサーバーのログから取得) をブラウザで表示し、passwordとconfirmationの文字列をわざと間違えて送信してみましょう。どんなエラーメッセージが表示されるでしょうか?
→ Password confirmation doesn't match Password
2. コンソールに移り、パスワード再設定を送信したユーザーオブジェクトを見つけてください。見つかったら、そのオブジェクトのpassword_digestの値を取得してみましょう。次に、パスワード再設定フォームから有効なパスワードを入力し、送信してみましょう (図 12.13)。パスワードの再設定は成功したら、再度password_digestの値を取得し、先ほど取得した値と異なっていることを確認してみましょう。ヒント: 新しい値はuser.reloadを通して取得する必要があります。
→ およ、パスワードを再設定しようとしたら「SQLite3::BusyException: database is locked: commit transaction」が。こちらの記事を参考に、RailsコンソールでActiveRecord::Base.connection.execute("BEGIN TRANSACTION; END;") を打ったら動作しました。結果下記。異なってますね。
変更前:\$2a$10$kgv1Loz8fVDaaZvtUMtkZOUBnbCcHZNIBQBrgb18QMjyvnK.U3vlW
変更後:\$2a$10$/lAIMLbkR84Zg0rBkVmcIeWn6u/UBEOaHGrU34rLR8ZMnmcIEomiu
【12.3.3 パスワードの再設定をテストする 演習】
1. リスト 12.6にあるcreate_reset_digestメソッドはupdate_attributeを2回呼び出していますが、これは各行で1回ずつデータベースへ問い合わせしていることになります。リスト 12.20に記したテンプレートを使って、update_attributeの呼び出しを1回のupdate_columns呼び出しにまとめてみましょう (これでデータベースへの問い合わせが1回で済むようになります)。また、変更後にテストを実行し、 greenになることも確認してください。ちなみにリスト 12.20にあるコードには、前章の演習 (リスト 11.39) の解答も含まれています。
→ 下記user.rbdef create_reset_digest self.reset_token = User.new_token update_columns(reset_digest: User.digest(reset_token), reset_sent_at: Time.zone.now) end
2. リスト 12.21のテンプレートを埋めて、期限切れのパスワード再設定で発生する分岐 (リスト 12.16) を統合テストで網羅してみましょう (12.21 のコードにあるresponse.bodyは、そのページのHTML本文をすべて返すメソッドです)。期限切れをテストする方法はいくつかありますが、リスト 12.21でオススメした手法を使えば、レスポンスの本文に「expired」という語があるかどうかでチェックできます (なお、大文字と小文字は区別されません)。
→ 下記(/~/iって何?調べてもわからん)password_resets_test.rbtest "expired token" do get new_password_reset_path post password_resets_path, params: { password_reset: { email: @user.email } } @user = assigns(:user) @user.update_attribute(:reset_sent_at, 3.hours.ago) patch password_reset_path(@user.reset_token), params: { email: @user.email, user: { password: "foobar", password_confirmation: "foobar" } } assert_response :redirect follow_redirect! assert_match /expired/i, response.body end
3. 2時間経ったらパスワードを再設定できなくする方針は、セキュリティ的に好ましいやり方でしょう。しかし、もっと良くする方法はまだあります。例えば、公共の (または共有された) コンピューターでパスワード再設定が行われた場合を考えてみてください。仮にログアウトして離席したとしても、2時間以内であれば、そのコンピューターの履歴からパスワード再設定フォームを表示させ、パスワードを更新してしまうことができてしまいます (しかもそのままログイン機構まで突破されてしまいます!)。この問題を解決するために、リスト 12.22のコードを追加し、パスワードの再設定に成功したらダイジェストをnilになるように変更してみましょう。
→ @user.update_attribute(:reset_digest, nil)を入れるだけ。
4. リスト 12.18に1行追加し、1つ前の演習課題に対するテストを書いてみましょう。ヒント: リスト 9.25のassert_nilメソッドとリスト 11.33のuser.reloadメソッドを組み合わせて、reset_digest属性を直接テストしてみましょう。
→ 該当箇所だけ下記password_resets_test.rb# 有効なパスワードとパスワード確認 patch password_reset_path(user.reset_token), params: { email: user.email, user: { password: "foobaz", password_confirmation: "foobaz" } } assert is_logged_in? assert_nil user.reload.reset_digest assert_not flash.empty? assert_redirected_to user
【12.4 本番環境でのメール送信 演習】
ここはカット!!理由は前章同様!!
第12章まとめ
・前章同様にリソースでモデル化。
・再設定リンクに有効期限を設けるため、Userモデルにreset_sent_atも追加(これを基準時にするため)
・hidden_field_tagで、一度送信後(editアクション)もメールアドレスを保持。
・@user.errors.add(:password, :blank)で空文字列を弾く。
ついに認証システム開発が終わりました。ここまでやってるといやでもトークンとかダイジェストとかの用語が身に染み付いてきますね。ちょっと分からなくても、とにかく食べて食べまくってたら消化して血肉になっていきます。がんばりましょう。
次章は投稿機能を実装していきます!
⇦ 第11章はこちら
学習にあたっての前提・著者ステータスはこちら
なんとなくイメージを掴む用語集
今回はありません。
- 投稿日:2020-09-20T17:13:28+09:00
条件によりf.radio_buttonにdisabledオプションを付与したい
Ruby 2.6.5
Rails 5.2.0
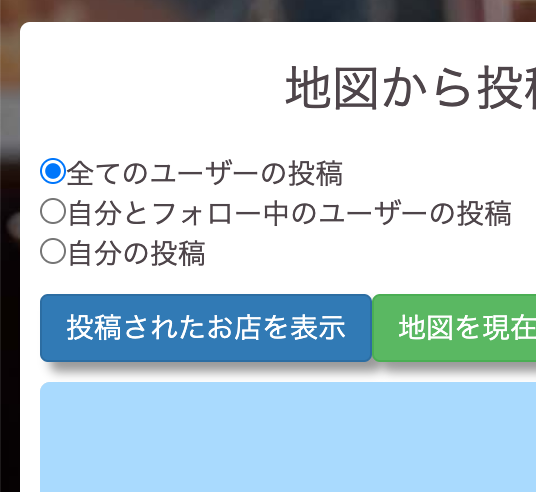
地図上からユーザーの投稿を検索できる機能を持ったアプリを開発しています。ユーザーがログインしていない時にform_with内の一部のradio_buttonを無効化したかったのですが、
当初は下記のような感じで条件式を書いていました。index.html.erb<%= form_with url: map_request_path, method: :get do |f| %> <%= f.radio_button :posts, "all_user", checked: true %>全てのユーザーの投稿 <% if logged_in? %> <%= f.radio_button :posts, "following", disabled: false %>自分とフォロー中のユーザーの投稿 <%= f.radio_button :posts, "current_user", disabled: false %>自分の投稿 <% else %> <%= f.radio_button :posts, "following", disabled: true %>自分とフォロー中のユーザーの投稿 <%= f.radio_button :posts, "current_user", disabled: true %>自分の投稿 <% end %> <%= f.submit '投稿されたお店を表示', class: "btn btn-primary" %> <% end %> <div id="map_index"></div> <script> ~ ~ ~ initMap(); </script>if logged_in? で 条件により disabled: の箇所を操作していたのですが、冗長なコードとなっていました。
一行でどうにかしたかったので調べてみた結果、下記のようにすることでスッキリしました。index.html.erb<%= form_with url: map_request_path, method: :get do |f| %> <%= f.radio_button :posts, "all_user", checked: true %>全てのユーザーの投稿 <%= f.radio_button :posts, "following", disabled: current_user.nil? %>自分とフォロー中のユーザーの投稿 <%= f.radio_button :posts, "current_user", disabled: current_user.nil? %>自分の投稿 <%= f.submit '投稿されたお店を表示', class: "btn btn-primary" %> <% end %> <div id="map_index"></div> <script> ~ ~ ~ initMap(); </script>disabled: current_user.nil? と書き、
current_user が空かどうか (ログインしているかどうか)の真偽値を disabled: の箇所に持ってくることができました。ログインしていない時
ログインしている時
参考にさせていただきました

- 投稿日:2020-09-20T16:18:12+09:00
【Rails】Rspecレスポンステストについて
はじめに
※独学で学習しているので間違いやもっといい方法がある場合があると思います。
そのような時はご教授いただけると大変嬉しいです!概要
Rspecでのテストコードの書き方をまとめてみました。(レスポンステスト編になります。)
以下の記事を参考に学習しました。
RailsでRSpecの初期設定を行う際のテンプレートを作ってみる-Qiita
Rails チュートリアル(3章、4章、5章)をRSpecでテスト-Qiita1.Rspecのセットアップ
Gemをインストール
gemfileにRspecを追記
gemfilegroup :development, :test do gem 'rspec-rails', '~> 4.0.1' end次にGemをインストールします。
$ bundle installrailsコマンドで rspecをプロジェクトにインストールします。
$ rails generate rspec:installrspecの設定編集
.rspec--require rails_helper --format documentationconfig/application.rbmodule RailsTutorial class Application < Rails::Application config.load_defaults 5.2 # ↓追加 # テストフレームワークにrspecを指定することで、rails g ~を実行した際、自動的にspecファイルも作成する設定 config.generators do |g| g.test_framework :rspec, helper_specs: false, routing_specs: false, view_specs: false, controller_specs: false end # ↑追加 end end2.Rspecでテストを書いてみる
Rspecファイルの作成する
Rspecではテストコードのことを'スペック'と呼ばれているらしいです。
(コントローラーのテストコードのことは’コントローラースペック’みたいな感じらしいです。)
※ファイルの名は「(コントローラ名,モデル名)_spec.rb」のように命名する。Railsの場合はrails generateコマンドでファイルを作成できます。
#controllerの場合
$ rails g rspec:controller ファイル名

#modelの場合
$ rails g rspec:model ファイル名
$ rails g rspec:controller StaticPagesテストコードを記述する
spec/requests/static_pages_request_spec.rbrequire 'rails_helper' RSpec.describe 'Access to static_pages', type: :request do # homeページへのリクエスト送信テスト context 'GET #home' do before { get static_pages_home_path } # リクエストに対するレスポンステスト it 'responds successfully' do expect(response).to have_http_status 200 end end enddescribeとかcontextとかよくわからない。
一つ一つみていきましょう。
・describe,type
_spec.rbRSpec.describe 'Access to static_pages', type: :request do end ↓ RSpec.describe [テスト名], type: [Specの種類] do end # Specの種類 # 今回はレスポンステストなのでrequestになります。 # 他には'system','controller','model','routing','view'などがあるみたいです。・context,before,it
_spec.rbRSpec.describe 'Access to static_pages', type: :request do context 'GET #home' do before { get static_pages_home_path } # リクエストに対するレスポンステスト it 'responds successfully' do expect(response).to have_http_status 200 end end end ↓ RSpec.describe 'Access to static_pages', type: :request do context ['~の場合'(お好きな名前で)] do before [事前準備] # リクエストに対するレスポンステスト it ['仕様の内容'(お好きな名前で)] do [期待する動作] end end end上から順番に読んでいくと
itの中でようやくテストコードが記載されています。
describe>context>...を何個もネストしていく構造でテストコードが書かれています。
※describeの中にdescribeをネストすることは可能ですが、typeの指定は一番外側のdescribeでのみ行います。spec/requests/static_pages_request_spec.rbrequire 'rails_helper' RSpec.describe 'Access to static_pages', type: :request do # homeページへのリクエスト送信テスト context 'GET #home' do before { get static_pages_home_path } # リクエストに対するレスポンステスト it 'responds successfully' do expect(response).to have_http_status 200 end end endexpect(response).to have_http_status 200これはbeforeで
{ get static_pages_home_path }つまり
homeのパスにGETメソッドで通信を行った時に、返ってくるレスポンスが200(OK)ならテスOKという意味です。以上、簡単にですがRailsでのRspecのレスポンステストの書き方についてです。
- 投稿日:2020-09-20T14:11:28+09:00
【Ruby on Rails】CSV出力機能
目標
開発環境
ruby 2.5.7
Rails 5.2.4.3
OS: macOS Catalina前提
※ ▶◯◯ を選択すると、説明等が出てきますので、
よくわからない場合の参考にしていただければと思います。postモデルにはtitle,bodyのカラムがあり、
userモデルとはN:1の関係です。まずは完成形のコードを記述し、その後補足コードを記述します
完成コード
controllerの編集
app/controllers/posts_controller.rbclass PostsController < ApplicationController require 'csv' def new @post = Post.new @posts = Post.all respond_to do |format| format.html format.csv do |csv| send_posts_csv(@posts) end end end private def send_posts_csv(posts) csv_data = CSV.generate do |csv| column_names = %w(投稿者名 タイトル 本文) csv << column_names posts.each do |post| column_values = [ post.user.name, post.title, post.body, ] csv << column_values end end send_data(csv_data, filename: "投稿一覧.csv") end endview
app/views/posts/new.html.erb<%= link_to "csvで出力する",new_post_path(format: :csv) %>補足コード
controller
app/controllers/posts_controller.rbclass PostsController < ApplicationController require 'csv' # ←忘れがちのため要注意 def new @post = Post.new @posts = Post.all # respond_to はリクエストに応じた処理を行うメソッドです。 # 通常時はhtmlをリクエストしているので、処理は記述していません。 # viewのlink_toでformatをcsvとして指定しているので、 # リンクを押すとsend_posts_csv(@posts)の処理を行います。 respond_to do |format| format.html format.csv do |csv| send_posts_csv(@posts) end end end private def send_posts_csv(posts) # CSV.generateとは、対象データを自動的にCSV形式に変換してくれるCSVライブラリの一種 csv_data = CSV.generate do |csv| # %w()は、空白で区切って配列を返します column_names = %w(投稿者名 タイトル 本文) # csv << column_namesは表の列に入る名前を定義します。 csv << column_names # column_valuesに代入するカラム値を定義します。 posts.each do |post| column_values = [ post.user.name, post.title, post.body, ] # csv << column_valueshは表の行に入る値を定義します。 csv << column_values end end # csv出力のファイル名を定義します。 send_data(csv_data, filename: "投稿一覧.csv") end endview
app/views/posts/new.html.erb<!-- formatをcsvとして指定してcontrollerのrespond_toの処理を実行する --> <%= link_to "csvで出力する",new_post_path(format: :csv) %>
- 投稿日:2020-09-20T13:20:29+09:00
render と redirect_to の使い分け基準
【概要】
1.結論
2.どのように使うか
3.なぜそのような違いが発生するのか
4.ここから学んだこと
1.結論
Controllerを挟みたくないか、一度挟みたいかです
2.どのように使うか
❶render
(i)ただViewファイルを指定して表示させたい
controller.rbdef render '***(Viewファイル名).index(アクション名) #---"a" end or def render :index(アクション名) #---"b" end"a"と"b"の違いは
a➡︎違うコントローラーのアクションを表示させたい
b➡︎renderを記載している同コントローラーのアクションを表示させたい
ということになります。(ii)複数のhtml.erbファイルで同じプログラムを使いたい
<%= render 'public/error_messages', model: f.object %> #---自分の記事から抜粋上記の場合はindex,new,showアクションで空で入力した際に”必要事項が入力されていないよ!”メッセージを出しています。(エラーバンドリングの出し方)
❷redirect_to
(i)一度Controller処理を通したアクションを行いたい
controllerdef redirect_to("/app/(Viewフォルダ名)/(アクション名.html.erb)") end or def redirect_to ****_****_path endつまりURL指定ということです。
3.なぜそのような違いが発生するのか
結論は"もう一度Controller"が間に入っているかの違いになります。
❶renderはController➡︎Viewの動きに対して
❷redirect_toはController➡︎routes.rb(URLに基づいたid)➡︎Controller➡︎View
という動きになります。
renderだけだと”ただ”ページを表示するだけなので、処理に困りエラーが起きることがありました。
redirect_toはControllerを一回挟むのでupdate/destoryアクションをエラーなしで行えます。
- 投稿日:2020-09-20T13:00:55+09:00
【Rails】PAYJPのトークン生成後のエラー解決
現在プログラミング学習中で、これはメモしたいと思ったものを、自分用に分かりやすく残しておきます。
(前回投稿した内容の続きというか別ルートみたいな感じになります。)
【Rails】PAYJPでトークン生成時のエラー解決PAYJPを導入してトークンを生成したが、決済が成功しない...
テスト用のカード情報を入力して、購入ボタンを押したら、
のように表示されました。前回の内容に記述しておりますので割愛しますが、
トークン生成のJavaScriptの記述中にconsole.log()を書いてstatusを確認したところ、200と出ており、トークン生成に成功していることは確認が取れております。
(トークンがいない?? そんなはずはない!!!)現状把握
エラーの原因を探るために、
binding.pryを使用して、paramsの中身を確認したところ、pry(#<OrdersController>)> params => <ActionController::Parameters {"authenticity_token"=>"uRxJ+Ho4c2vi4Pc8MrK/s7UhNbujnVBDt7qjJ11pFpeHWDMltGl3eu/ls94DaALSPNfIpoMtUd4aeOcs4Z8Y4w==", "item_order"=>{"postal_code"=>"555-0000", "prefecture_id"=>"9", "city"=>"市区町村", "block_number"=>"番地", "building_name"=>"建物名", "phone_number"=>"09012345678"}, "token"=>"tok_3b5890d13fb07a96a6cf2fa832e0", "controller"=>"orders", "action"=>"create", "id"=>"3"} permitted: false>後半部分を見ると分かりますが、
"token"=>"tok_3b5890d13fb07a96a6cf2fa832e0"
tokenはしっかりparamsの中に入っていました!!!トークンはしっかり生成されているのです!
では次に、コントローラーの現状を見てみましょう。
****_controller.rb(一部抜粋)def order_params params.require(:item_order).permit(:token, :postal_code, :prefecture_id, :city, :block_number, :building_name, :phone_number).merge(item_id: @item[:id], user_id: current_user.id) end def set_item @item = Item.find(params[:id]) end def pay_item Payjp.api_key = ENV["PAYJP_SECRET_KEY"] Payjp::Charge.create( amount: @item.selling_price, card: order_params[:token], currency:'jpy' ) end現状の記述としては、
paramsに入っている:item_orderの中の:tokenをorder_params[:token]として受け取っている。
ということになります。では、もう一度
binding.pryで今度はorder_paramsと入力して確認してみましょう。pry(#<OrdersController>)> order_params => <ActionController::Parameters {"postal_code"=>"555-0000", "prefecture_id"=>"9", "city"=>"市区町村", "block_number"=>"番地", "building_name"=>"建物名", "phone_number"=>"09012345678", "item_id"=>3, "user_id"=>3} permitted: true>"building_name"=>"建物名", "phone_number"=>"09012345678"} permitted: false>
tokenがいない!!!!!!!params.require(:item_order).permit(:token, ~~~~)このように、
requireとpermitで書いているのになんで???解決
bindng.pryで確認したところ、tokenが生成されているのは確認できたので、生成されたトークンの移動の仕方に問題がありました。
現在tokenが生成されている場所は、item_orderの外であり、paramsの直下なので、
そもそものtokenの場所が違ったということです。
binding.pryで、試しにparams[:token]と入力してみますと、pry(#<OrdersController>)> params[:token] => "tok_14078502197e031107d18bb7e428"と出ます。
なので、このように記述する必要があったということです。
****_controller.rbdef order_params params.require(:item_order).permit(:postal_code, :prefecture_id, :city, :block_number, :building_name, :phone_number).merge(item_id: @item[:id], user_id: current_user.id, token: params[:token]) end少し長いですが、
mergeメソッドの中にtokenを記述しています。
item_orderの中にではなく、order_paramsに引っ付けるための記述です。こうすることで、
order_paramsに引っ付けることができたので、記述を変更した後にbinding.pryで確認してみますと、pry(#<OrdersController>)> order_params => <ActionController::Parameters {"postal_code"=>"333-0000", "prefecture_id"=>"13", "city"=>"市区町村", "block_number"=>"番地", "building_name"=>"建物名", "phone_number"=>"09012345678", "item_id"=>3, "user_id"=>3, "token"=>"tok_14078502197e031107d18bb7e428"} permitted: true>これでバッチリです☆
order_params[:token]で受け取れるようになり、決済も無事成功しました!!!まとめ
tokenの居場所をしっかり理解する!
mergeメソッドを使用して、引っ付ける!
- 投稿日:2020-09-20T13:00:55+09:00
【Rails】PAYJPのトークン生成後のエラー解決(別ルート編)
現在プログラミング学習中で、これはメモしたいと思ったものを、自分用に分かりやすく残しておきます。
(前回投稿した内容の続きというか別ルートみたいな感じになります。)
【Rails】PAYJPでトークン生成時のエラー解決PAYJPを導入してトークンを生成したが、決済が成功しない...
テスト用のカード情報を入力して、購入ボタンを押したら、
のように表示されました。前回の内容に記述しておりますので割愛しますが、
トークン生成のJavaScriptの記述中にconsole.log()を書いてstatusを確認したところ、200と出ており、トークン生成に成功していることは確認が取れております。
(トークンがいない?? そんなはずはない!!!)現状把握
エラーの原因を探るために、
binding.pryを使用して、paramsの中身を確認したところ、pry(#<OrdersController>)> params => <ActionController::Parameters {"authenticity_token"=>"uRxJ+Ho4c2vi4Pc8MrK/s7UhNbujnVBDt7qjJ11pFpeHWDMltGl3eu/ls94DaALSPNfIpoMtUd4aeOcs4Z8Y4w==", "item_order"=>{"postal_code"=>"555-0000", "prefecture_id"=>"9", "city"=>"市区町村", "block_number"=>"番地", "building_name"=>"建物名", "phone_number"=>"09012345678"}, "token"=>"tok_3b5890d13fb07a96a6cf2fa832e0", "controller"=>"orders", "action"=>"create", "id"=>"3"} permitted: false>後半部分を見ると分かりますが、
"token"=>"tok_3b5890d13fb07a96a6cf2fa832e0"
tokenはしっかりparamsの中に入っていました!!!トークンはしっかり生成されているのです!
では次に、コントローラーの現状を見てみましょう。
****_controller.rb(一部抜粋)def order_params params.require(:item_order).permit(:token, :postal_code, :prefecture_id, :city, :block_number, :building_name, :phone_number).merge(item_id: @item[:id], user_id: current_user.id) end def set_item @item = Item.find(params[:id]) end def pay_item Payjp.api_key = ENV["PAYJP_SECRET_KEY"] Payjp::Charge.create( amount: @item.selling_price, card: order_params[:token], currency:'jpy' ) end現状の記述としては、
paramsに入っている:item_orderの中の:tokenをorder_params[:token]として受け取っている。
ということになります。では、もう一度
binding.pryで今度はorder_paramsと入力して確認してみましょう。pry(#<OrdersController>)> order_params => <ActionController::Parameters {"postal_code"=>"555-0000", "prefecture_id"=>"9", "city"=>"市区町村", "block_number"=>"番地", "building_name"=>"建物名", "phone_number"=>"09012345678", "item_id"=>3, "user_id"=>3} permitted: true>"building_name"=>"建物名", "phone_number"=>"09012345678"} permitted: false>
tokenがいない!!!!!!!params.require(:item_order).permit(:token, ~~~~)このように、
requireとpermitで書いているのになんで???解決
bindng.pryで確認したところ、tokenが生成されているのは確認できたので、生成されたトークンの移動の仕方に問題がありました。
現在tokenが生成されている場所は、item_orderの外であり、paramsの直下なので、
そもそものtokenの場所が違ったということです。
binding.pryで、試しにparams[:token]と入力してみますと、pry(#<OrdersController>)> params[:token] => "tok_14078502197e031107d18bb7e428"と出ます。
なので、このように記述する必要があったということです。
****_controller.rbdef order_params params.require(:item_order).permit(:postal_code, :prefecture_id, :city, :block_number, :building_name, :phone_number).merge(item_id: @item[:id], user_id: current_user.id, token: params[:token]) end少し長いですが、
mergeメソッドの中にtokenを記述しています。
item_orderの中にではなく、order_paramsに引っ付けるための記述です。こうすることで、
order_paramsに引っ付けることができたので、記述を変更した後にbinding.pryで確認してみますと、pry(#<OrdersController>)> order_params => <ActionController::Parameters {"postal_code"=>"333-0000", "prefecture_id"=>"13", "city"=>"市区町村", "block_number"=>"番地", "building_name"=>"建物名", "phone_number"=>"09012345678", "item_id"=>3, "user_id"=>3, "token"=>"tok_14078502197e031107d18bb7e428"} permitted: true>これでバッチリです☆
order_params[:token]で受け取れるようになり、決済も無事成功しました!!!まとめ
tokenの居場所をしっかり理解する!
mergeメソッドを使用して、引っ付ける!
- 投稿日:2020-09-20T12:29:51+09:00
Elastic Beanstalk ワーカー環境の定期的なタスクとFIFOキューを併用する
概要
If you configure your worker environment with an existing SQS queue and choose an Amazon SQS FIFO queue, periodic tasks aren't supported.
FIFOキューと定期的なタスクが併用できない旨が記載されています。
対策方針
オートスケールによって台数が増減しても、
ワーカー環境の定期的なタスクは重複実行されないようになっています。
その仕組みとしては、DynamoDBのAWSEBWorkerCronLeaderRegistryに書き込みできたインスタンスをリーダー(Leader)として、そのリーダーインスタンスのみで実行することでそれを実現しています。そのリーダーの選出を流用し、ワーカー環境のEC2でcron実行をさせることで表題の併用を実現してみます。
検証環境
Ruby 2.6 running on 64bit Amazon Linux 2/3.1.1

Amazon Linux 2なので注意してください。ステップ
: ダミーのcron.yamlを作成し、
AWSEBWorkerCronLeaderRegistryを書き込みさせるcron.yamlversion: 1 cron: # UTC - name: "dummy-job" # 何でもよい url: "/health" # 何でもよい schedule: "7 7 7 7 7" # 何でもよいステップ
: 自身がLeaderか判定するスクリプトを用意
bin/eb_is_worker_leader#!/usr/bin/env bash # EC2でないときはexit if [[ ! -f /var/lib/cloud/data/instance-id ]]; then exit fi instance_id=$(cat /var/lib/cloud/data/instance-id) # AWSEBWorkerCronLeaderRegistry のテーブル名を取得 table_name=$(awk -F': ' '$1=="registry_table" {printf $2}' /etc/aws-sqsd.d/default.yaml) # 定期的に更新されている、leader_idを取得する (ex: i-XXXXX.${registration-record.worker_id}) leader_id=$(aws dynamodb get-item --region ${AWS_REGION} --table-name ${table_name} --key '{"id": {"S": "leader-election-record"} }' | jq -r .Item.leader_id.S) echo ${leader_id} | grep -q ${instance_id} exit $?ステップ
: cronをセット
ステップ2で作成した
bin/eb_is_worker_leaderが成功したら、処理を実行するようにcronをセットします。
例えば、Rubyでcronをセットするwhenever を使う場合、下記のようになります。
schedule.rbjob_type :leader_runner, "cd :path && bin/eb_is_worker_leader && bin/rails runner -e :environment ':task' :output" every :hour do leader_runner "SomeModel.ladeeda" endなお、whenever で用意されている
runnerは下記のとおりです。
比べるとbin/eb_is_worker_leaderが追加されているだけなのがわかるかと思います。job_type :runner, "cd :path && bin/rails runner -e :environment ':task' :output"
おまけ: wheneverでcronを更新する
.platform/hooks/postdeploy/XX_update_cron.sh#!/usr/bin/env bash # Workerでなければ何もしない env_name=$(jq -r .Name /opt/elasticbeanstalk/config/ebenvinfo/envtier.json) if [[ ! ${env_name} = 'Worker' ]]; then exit fi /opt/elasticbeanstalk/.rbenv/shims/bundle exec whenever --user webapp --update-crontab
まとめ
これらによって、すべてのワーカーインスタンスでcronが実行されます。
cronではリーダーのみ処理が継続されるため、定期的なタスクの重複した実行が防げます。
似たような解決策
- https://github.com/awsdocs/elastic-beanstalk-samples/blob/main/configuration-files/aws-provided/instance-configuration/cron-leaderonly-linux.config
- https://github.com/dignoe/whenever-elasticbeanstalk
Amazon Linux 1が対象ですこれらはインスタンス数でLeaderを判断しています。
この記事のやり方では、AWSEBWorkerCronLeaderRegistryを流用することで、シンプルな実装になるかなと思っています。
- 投稿日:2020-09-20T11:24:17+09:00
【Rails】PAYJPでトークン生成時のエラー解決
プログラミング学習中で、これはメモしたいと思ったものを、自分ように分かりやすく残しておきます。
PAYJPを導入して、決済システムを実装したい!
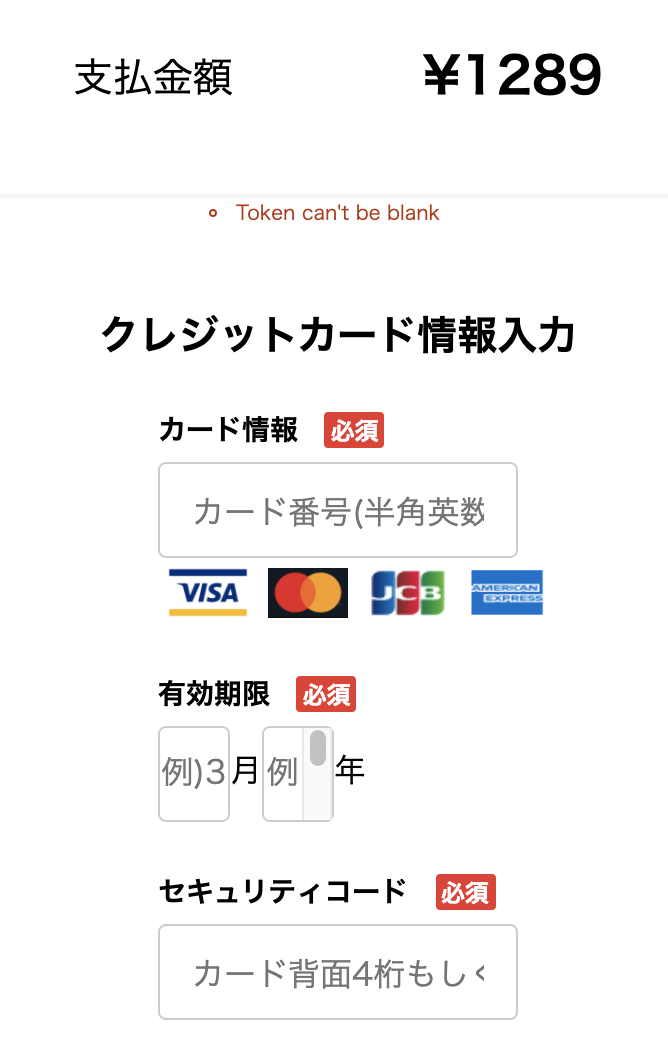
今回もっていきたいゴールはこちらです。
テスト用のカード情報を入力して、決済が完了している状態です。
決済が成功しない...
まずは、
payjpのgemを導入し、学習した通りにJavaScriptのファイルを作ったり、コントローラーやビューへ記述しました。そして、テスト用のカード情報を打ち込んで、
購入ボタンを押しますが、
元の画面に戻ってしまう...
(んん?? トークンが空っぽだと???)これはコントローラーで、決済が成功しなかったら画面が変わらないように設定しており、エラーも表示させるようにしているからですが、最初は原因が分かりませんでした...
現在のコントローラーのコードはこちらです。(読みづらいかと思いますが、長くなるのでcreateアクションの部分のみ抜粋しております。)
****_controller.rbdef create @order = ItemOrder.new(order_params) if @order.valid? pay_item @order.save return redirect_to root_path else render 'new' end endカードの情報を受け取って、トークンを生成するためのJavaScriptの記述はこちらです。
****.jsconst pay = () => { Payjp.setPublicKey(process.env.PAYJP_PUBLIC_KEY); const form = document.getElementById("charge-form"); form.addEventListener("submit", (e) => { e.preventDefault(); const formResult = document.getElementById("charge-form"); const formData = new FormData(formResult); const card = { card_number: formData.get("card-number"), card_cvc: formData.get("card-cvc"), card_exp_month: formData.get("card-exp-month"), card_exp_year: `20${formData.get("card-exp-year")}`, }; Payjp.createToken(card, (status, response) => { if (status == 200) { const token = response.id; const renderDom = document.getElementById("charge-form"); const tokenObj = `<input value=${token} type="hidden" name='token'>`; renderDom.insertAdjacentHTML("beforeend", tokenObj); } document.getElementById("card-number").removeAttribute("name"); document.getElementById("card-cvc").removeAttribute("name"); document.getElementById("card-exp-month").removeAttribute("name"); document.getElementById("card-exp-year").removeAttribute("name"); document.getElementById("charge-form").submit(); document.getElementById("charge-form").reset(); }); }); }; window.addEventListener("load", pay);現状把握
どこが間違っているのかを見るために、
pry-railsのgemを導入し、createアクションにbinding.pryを記述して、paramsの中身を確認しました。pry(#<OrdersController>)> params => <ActionController::Parameters {"authenticity_token"=>"pvPlrZPKlxtcYotX8kK4N/OjbTuWNkiq5bOCJxqNI+OYt59wXZuTClFnz7XDmAVWelWQJraGSTdIccYspnstlw==", "item_order"=>{"postal_code"=>"555-0000", "prefecture_id"=>"3", "city"=>"市区町村", "block_number"=>"番地", "building_name"=>"建物名", "phone_number"=>"09012345678"}, "controller"=>"orders", "action"=>"create", "id"=>"1"} permitted: false>たしかに、
tokenがいない....
(authenticity_tokenは全く別のものだそうです。)ということは、うまくtokenが生成されていない可能性があります。
次に、JavaScriptへの記述を調べるために,
console.log()を使用して調べました。const pay = () => { Payjp.setPublicKey(process.env.PAYJP_PUBLIC_KEY); console.log(process.env.PAYJP_PUBLIC_KEY) // 環境変数が定義できているか確認 const form = document.getElementById("charge-form"); form.addEventListener("submit", (e) => { e.preventDefault(); const formResult = document.getElementById("charge-form"); const formData = new FormData(formResult); const card = { card_number: formData.get("card-number"), card_cvc: formData.get("card-cvc"), card_exp_month: formData.get("card-exp-month"), card_exp_year: `20${formData.get("card-exp-year")}`, }; console.log(card) // カード情報が受け取れているかの確認 Payjp.createToken(card, (status, response) => { console.log(status) // ステータスの数字を確認 if (status == 200) { const token = response.id; const renderDom = document.getElementById("charge-form"); const tokenObj = `<input value=${token} type="hidden" name='token'>`; renderDom.insertAdjacentHTML("beforeend", tokenObj); } document.getElementById("card-number").removeAttribute("name"); document.getElementById("card-cvc").removeAttribute("name"); document.getElementById("card-exp-month").removeAttribute("name"); document.getElementById("card-exp-year").removeAttribute("name"); document.getElementById("charge-form").submit(); document.getElementById("charge-form").reset(); }); }); }; window.addEventListener("load", pay);そして、binding_pryで停止しているので、そこでコンソールを確認すると、
カード情報はしっかり受け取れているみたいです!
しかし、ステータスが400なのでトークンが生成できない...カード情報が受け取れているのに、なんで???
解決
そこで、知識のある方に相談させて頂き、ようやく解決しました!
取得するcard情報を格納する記述に誤りがあったみたいです。この部分の記述の、
****.jsconst card = { card_number: formData.get("card-number"), card_cvc: formData.get("card-cvc"), card_exp_month: formData.get("card-exp-month"), card_exp_year: `20${formData.get("card-exp-year")}`, };
card_number:、card_cvc:、card_exp_month:、card_exp_year:の記述をすると、正しくPayjpと通信しないみたいです。この形は決まっていると教わりまして、
number:、cvc:、exp_month:、exp_year:というように記述を直しました。const card = { number: formData.get("card-number"), cvc: formData.get("card-cvc"), exp_month: formData.get("card-exp-month"), exp_year: `20${formData.get("card-exp-year")}`, };と記述することで、
無事ステータスも、
200になり、決済も成功させることができました!
まとめ
PAYJPを導入する時は、取得したcard情報を格納する記述を、決まっている形式の記述にする必要がある。
binding_pryとconsole.log()を使うことで、どこで不具合が起きているのかを探すことができる。


- 投稿日:2020-09-20T10:16:29+09:00
Rails 6で認証認可入り掲示板APIを構築する #15 pundit導入
←Rails 6で認証認可入り掲示板APIを構築する #14 seed実行時間の表示
認証と認可の違い
まずはpunditを入れます。
punditは認可を管理するgemです。認証と認可の違いは何か?
【認証】とは、言わば運転免許証を見せるようなもの。
あなたが何者であるかを証明する処理です。【認可】はその免許証に書かれている、どんな車に乗れるかというもの。
免許によっても、原付しか乗れない免許証や、中型・大型等いろいろありますよね。
つまりシステム上でも、あなたが何者かは分かったけれど、この処理は許可されていないよ等を管理する必要があります。そしてdevise(devise_token_auth)だけで認可ができないのかというと、実はできます。
しかしpunditのような認可gemを使った方が、認可処理だけ担うファイルに分割して管理できる等のメリットが多く、アプリケーションが大きくなるにつれて利点を感じるようになります。punditのインストール
さて、punditを入れていきましょう。
punditのドキュメント通りですが、以下の通りインストールと初期設定をしていきます。Gemfile+ gem “pundit”$ bundleapp/controllers/v1/application_controller.rbclass ApplicationController < ActionController::Base + include Pundit … end$ rails g pundit:installここまでインストールしたら1回
rails sを止めて再起動しましょう。postのpolicyを作る
参照:https://github.com/varvet/pundit#generator
$ rails g pundit:policy post実行するとpolicyファイルとspecファイルができます。
ここで、一般的な掲示板アプリケーションの挙動を想像してみましょう。
- #indexは全員見れていい
- #showも全員見れていい
- #createは認証済みの場合のみ実行できる
- #updateは認証済みかつ自分の投稿だけ編集できる
- #destroyも認証済みかつ自分の投稿だけ削除できる
主に修正が必要なファイルは3つ。
- app/controllers/v1/posts_controller.rb
- app/policies/application_policy.rb
- app/policies/post_policy.rb
それに加え、初期設定として1度だけ修正が必要なファイルが
- app/controllers/application_controller.rb
これら4ファイルを修正しながら、punditの挙動を理解してきましょう。
app/controllers/v1/posts_controller.rbdef index posts = Post.includes(:user).order(created_at: :desc).limit(20) + authorize posts render json: posts end def show + authorize @post render json: @post end def create + authorize Post post = current_v1_user.posts.new(post_params) if post.save … def update + authorize @post if @post.update(post_params) … def destroy + authorize @post @post.destroy …ここで注目すべきは、どの位置に
authorizeを入れているか、です。本記事の後半で解説します。このauthorize {model}とすることで、post_policy.rbの該当するメソッドが呼ばれます。
今はまだpost_policy.rbを直していないので、スーパークラスであるapplication_policy.rbのindex?やshow?が呼ばれます。app/policy/application_policy.rbdef index? false end
index?はfalseになっていますね。
{action}?に該当するメソッドの返り値がtrueなら許可、falseなら拒否されます。そのため認証エラーとなります。{"status":500,"error":"Internal Server Error","exception":"#\u003cNameError: undefined local variable or method `current_user' for #\u003cV1::PostsController:0x00000000036a49a8\u003e\nDid you mean? current_v1_userこのエラーがなかなか曲者です。
current_userという変数やメソッドはないよ
というエラーですね。実はpundit、デフォルトだとcurrent_userというメソッドを呼び出してapplication_policy.rbやpost_policy.rbの
@userに渡す挙動をします。
しかし今回のテストアプリケーションではv1というnamespaceを切っているので、current_userではなくcurrent_v1_userを呼ばないといけません。これはapplication_controller.rbで
pundit_userというメソッドをオーバーライドしてやると対応できます。app/controllers/application_controller.rbclass ApplicationController < ActionController::API … + def pundit_user + current_v1_user + endこれで
current_userではなくcurrent_v1_userがpunditで呼ばれるようになるので、先程のundefined local variable or methodcurrent_user'`は解消されます。
再度curlを叩きます。{"status":500,"error":"Internal Server Error","exception":"#\u003cPundit::NotAuthorizedError: not allowed to index? this Post::ActiveRecord_Relation許可されなかった時、500エラーが返っているようです。
権限がない時は403エラーが適切ですので、application_controller.rbでPundit::NotAuthorizedErrorをrescueしてやれば良さそうですね。app/controllers/application_controller.rbclass ApplicationController < ActionController::API include DeviseTokenAuth::Concerns::SetUserByToken + rescue_from Pundit::NotAuthorizedError, with: :render_403 … + def render_403 + render status: 403, json: { message: "You don't have permission." } + end …再度実行してみましょう。
$ curl localhost:8080/v1/posts -i
HTTP/1.1 403 Forbidden
X-Frame-Options: SAMEORIGIN
X-XSS-Protection: 1; mode=block
X-Content-Type-Options: nosniff
X-Download-Options: noopen
X-Permitted-Cross-Domain-Policies: none
Referrer-Policy: strict-origin-when-cross-origin
Content-Type: application/json; charset=utf-8
Cache-Control: no-cache
X-Request-Id: e19d413c-89c9-4701-94c5-ece2b12560a9
X-Runtime: 0.003657
Transfer-Encoding: chunked

{"message":"You don't have permission."}
403のレスポンスコードと、メッセージもちゃんと返ってきましたね。
なお、試しにapp/policy/application_policy.rbのdef index?をfalseからtrueに変えると、正常に投稿一覧が返ってきます。
しかしapplication_policy.rbはスーパークラスであり、ここは原則変えずに全てfalseのままにしておきましょう。
継承したサブクラスであるpost_policy.rbを編集します。post_policy.rbの編集
先に最終的なコードを書いておきます。
app/policies/post_policy.rb# frozen_string_literal: true # # postのポリシークラス # class PostPolicy < ApplicationPolicy def index? true end def show? true end def create? @user.present? end def update? @record.user == @user end def destroy? @record.user == @user end # # scope # class Scope < Scope def resolve scope.all end end endこれで意図した通りに動くはずです。なお、punditの挙動を理解するのを優先するため、今回はテストは最後に書きます。
さて、controllerでauthorizeを挿入した位置を思い出してみます。app/controllers/v1/posts_controller.rbdef index posts = Post.includes(:user).order(created_at: :desc).limit(20) + authorize posts render json: posts end def show + authorize @post render json: @post end def create + authorize Post post = current_v1_user.posts.new(post_params) if post.save … def update + authorize @post if @post.update(post_params) … def destroy + authorize @post @post.destroy …どれも、そのactionが行う必要な処理が実行される前に呼び出していることに注目してください。
- #indexはpostの一覧を返すので、
render jsonより前に実行- #showはpostを返すので、
render jsonより前に実行- createは新しいレコードを生成するので、
if post.saveより前に実行- updateはレコードを更新するので、
if @post.update(post_params)より前に実行- destroyはレコードを削除するので、
@post.destroyより前に実行となります。
仮にsaveやupdateの後にauthorizeしていたらどうでしょう?
権限がない時に403のレスポンスは返りますが、保存処理が終わった後なので、DB上は書き換えができてしまっているはずです。それだと認可の意味がないですよね。
また、そもそもauthorizeを呼んでないと認可が行われないことにも注意です。結論としては、
authorizeを必ず呼ぶことと、呼ぶ位置についてしっかり確認する必要があります。最後に、
create?とupdate?の処理について解説します。app/policies/post_policy.rbdef create? @user.present? end
@userにはcurrent_v1_userが入ってきますが、未ログインだと@userはnilが入ってきます。
つまり、上記メソッドではログイン状態ならtrueで200, 非ログイン状態ならfalseで403が返ります。app/controllers/v1/post_controller.rbdef create authorize Post post = current_v1_user.posts.new(post_params)controller側も注目です。
post = current_v1_user.posts.new(post_params)の下でauthorize postをしていないことに注目です。
なぜなら前述の通りcurrent_v1_userはnilなので、post = current_v1_user.posts.new(post_params)の下でauthorize postを呼び出そうとすると、postsメソッドが存在せず500エラーになるためです。判定に必要なのは
postではなくuserなので、その上で適当にPostを渡してauthorizeを動かしてるのです。2つ目、update?とdestory?の挙動について。
app/policies/post_policy.rbdef update? @record.user == @user endこちらの場合、更新対象レコードをcontrollerで
authorize @postと渡しているので@recordには更新・削除対象レコードが渡ってきます。
そのレコードのuserと、current_v1_userが渡ってきている@userを比較し、一致するか判定。
つまり自分自身の投稿か?を判定しているわけですね。次回の記事ではpunditのテストと、処理をメソッドに切り出す方法を解説します。
続き
→
【連載目次へ】
- 投稿日:2020-09-20T07:43:29+09:00
Railsで作成したCSVをS3に出力する方法
先日Railsで作成したCSVをS3にアップロードする機能を実装しました。
思っていたよりも考慮することが多かったので、内容をまとめておこうと思います。環境
Rails 5.2.3
Ruby 2.6.3前提
CSVをExcelで確認することは想定していない
※この前提は重要です。今回まとめた方法で出力されたcsvファイルはExcelで確認すると文字化けしたりして、期待した表示ができません。Excelで確認できるようにするには別途考慮が必要です。
gemの導入
RailsからAWSへアクセスするためのgemをインストールする必要があります。
Gemfileに以下を追加します。Gemfilegem 'aws-sdk', '~> 3'共通クラスの作成
今回作成するCSV出力機能は共通ロジックとして使用したかったので、
/app/libにoutput_csv.rbというファイルを作成します。
output_csv.rbには以下のようにクラスを定義します。
このクラスのメソッドは全てクラスメソッドにします。app/lib/output_csv.rbrequire 'csv' require 'nkf' class OutputCsv class << self # ここにメソッドを追加していく end end※ requireしているcsvとnkfは後ほど使用します。
S3への出力メソッド実装
S3に出力するメソッドを作成します。
パラメータで受け取ったCSV文字列をS3に出力します。
CSV文字列作成部分は後述します。app/lib/output_csv.rb# CSV出力メソッド -- ① def save_csv(data) # ファイル名は 'ランダム文字列_タイムスタンプ.csv' とする file_name = "#{SecureRandom.urlsafe_base64(9)}_#{Time.current.strftime('%Y%m%d%H%M%S')}.csv" # バケット直下のcsvという名前のフォルダ配下に出力する file_full_path = "csv/#{file_name}" # 開発環境ではローカルに、本番環境ではS3にCSV出力する -- ② if Rails.env.development? File.open(Rails.root.join('tmp', file_name), 'w') do |f| # NKFを使用して文字コードを変換 -- ③ f.puts(NKF.nkf('-x -w', data)) end else # S3クライアントのインスタンス作成 -- ④ s3 = Aws::S3::Client.new # S3にCSVを出力 -- ⑤ s3.put_object(bucket: ENV['AWS_S3_BUCKET'], key: file_full_path, body: NKF.nkf('-x -w', data), content_type: 'text/csv') end end① CSV出力メソッドの定義です。パラメータ(data)で出力するCSV文字列を受け取ります。
def save_csv(data)② 今回は開発環境ではローカルに、本番環境ではS3に出力するようにしています。開発環境でもS3に出力したい場合、この分岐は不要です。
③ NKFを使用して文字列を変換しています。
f.puts(NKF.nkf('-x -w', data))第1引数の-xと-wは以下のような変換を指定しています。
-x: 半角カタカナを全角カタカナに変換せずに出力
-w: utf-8で出力④ S3クライアントのインスタンスを作成しています。これを使用してS3にアクセスします。
s3 = Aws::S3::Client.new注意点として、ここではコンストラクタにパラメータを渡していません。
理由はこのRailsアプリケーションが動作するEC2インスタンスのロールにS3へ書き込みをする権限が付与されているため、権限について考慮する必要がないためです。ロールではなく、IAMユーザーの権限でS3にアクセスしたい場合は、以下のようにアクセスキーとシークレットキーを指定してあげる必要があります。
s3 = Aws::S3::Client.new(
  access_key_id: 'your_access_key_id',
  secret_access_key: 'your_secret_access_key'
)
⑤ S3にCSVファイルを作成します。
s3.put_object(bucket: ENV['AWS_S3_BUCKET'],
              key: file_full_path,
              body: NKF.nkf('-x -w', data),
              content_type: 'text/csv')
put_objectというメソッドを使用しています。
各パラメータの内容は以下の通りです。・bucket: 出力するバケットの名称です。ここでは環境変数
AWS_S3_BUCKETに設定されている想定で記述しています。
・key: 出力するディレクトリ名 + ファイル名を指定します。
・body: 上記で説明したNKFで変換した文字列を出力します。
・content_type: ファイル形式を指定しています。ここで明示的にcsvファイルであることを指定しないとS3上でCSVファイルとして認識されませんでした。CSV文字列の作成
CSV文字列を作成し、その作成した文字列を上記で作成したsave_csvメソッドに渡してCSVファイルを出力するメソッドを作成します。
作成するメソッドでは、パラメータでヘッダー項目、データ項目を受け取り、それをCSV文字列に変換してファイル出力します。
app/lib/output_csv.rb# CSV文字列作成メソッド -- ① def execute(headers, values) output = CSV.generate do |csv| # ヘッダー出力 -- ② csv << headers # データ項目の出力 -- ③ values.each do |value| csv << value end end # CSVファイル出力 -- ④ save_csv(output) end① CSV文字列作成メソッドの定義です。
パラメータでヘッダーとデータ項目の配列を受け取ります。
例えば、以下のようなCSVを作成したい場合id,name,age 1,hoge,20 2,fuga,31 3,foo,43以下のような配列を作成してパラメータに渡します。
# ヘッダー
headers = ['id', 'name','age']
# データ項目
values = []
values.push([1, 'hoge', 20])
values.push([2, 'fuga', 31])
values.push([3, 'foo', 43])

OutputCsv.execute(headers, values)
② パラメータで受け取ったヘッダーの値をCSVにセットしています。
③ パラメータで受け取ったデータ項目をCSVにセットしています。配列になっているため、1行ずつ取り出してセットしています。
④ 上記で作成したsave_csvメソッドに作成したCSV文字列を渡してS3に出力します。
全コード
全てのコードは以下の通りです。
save_csvメソッドは外部から呼び出す想定はないため、privateにしています。app/lib/output_csv.rbrequire 'csv' require 'nkf' class OutputCsv class << self def execute(headers, values) output = CSV.generate do |csv| # ヘッダー出力 csv << headers # データ項目の出力 values.each do |value| csv << value end end # CSVファイル出力 save_csv(output) end private def save_csv(data) # ファイル名は 'ランダム文字列_タイムスタンプ.csv' とする file_name = "#{SecureRandom.urlsafe_base64(9)}_#{Time.current.strftime('%Y%m%d%H%M%S')}.csv" # バケット直下のcsvという名前のフォルダ配下に出力する file_full_path = "csv/#{file_name}" # 開発環境ではローカルに、本番環境ではS3にCSV出力する if Rails.env.development? File.open(Rails.root.join('tmp', file_name), 'w') do |f| # NKFを使用して文字コードを変換 f.puts(NKF.nkf('-x -w', data)) end else # S3クライアントのインスタンス作成 s3 = Aws::S3::Client.new # S3にCSVを出力 s3.put_object(bucket: ENV['AWS_S3_BUCKET'], key: file_full_path, body: NKF.nkf('-x -w', data), content_type: 'text/csv') end end end end使用方法
CSVファイル出力
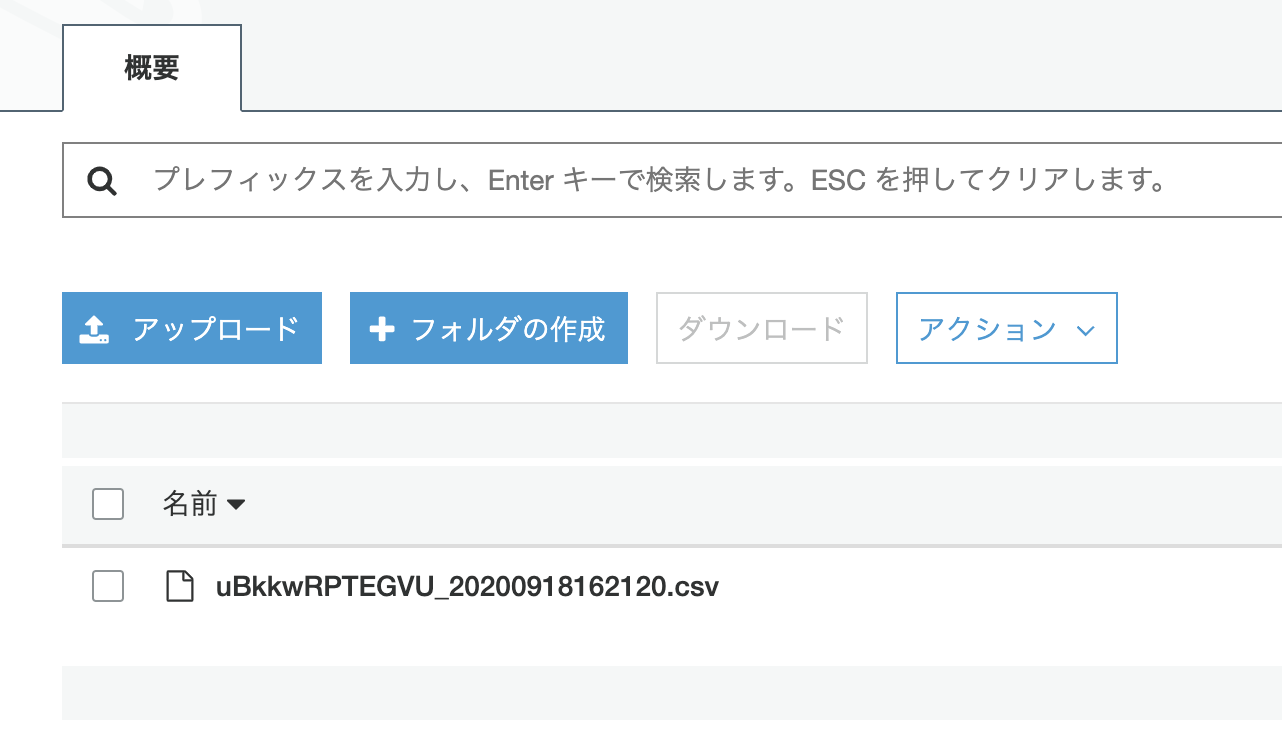
S3にファイルを出力します。
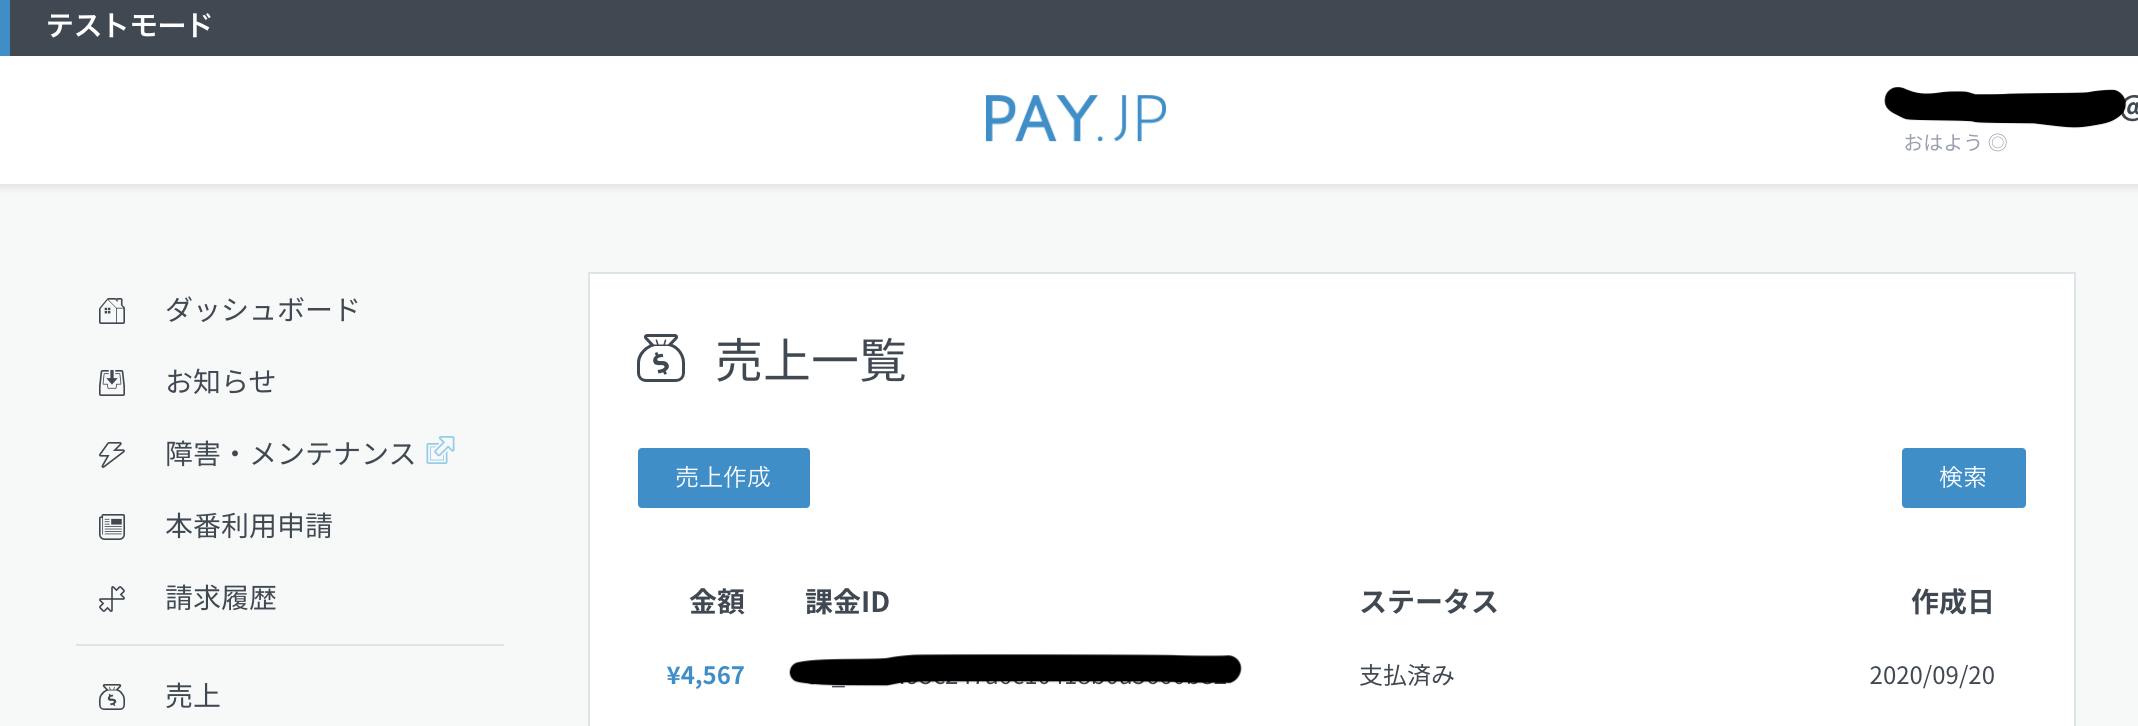
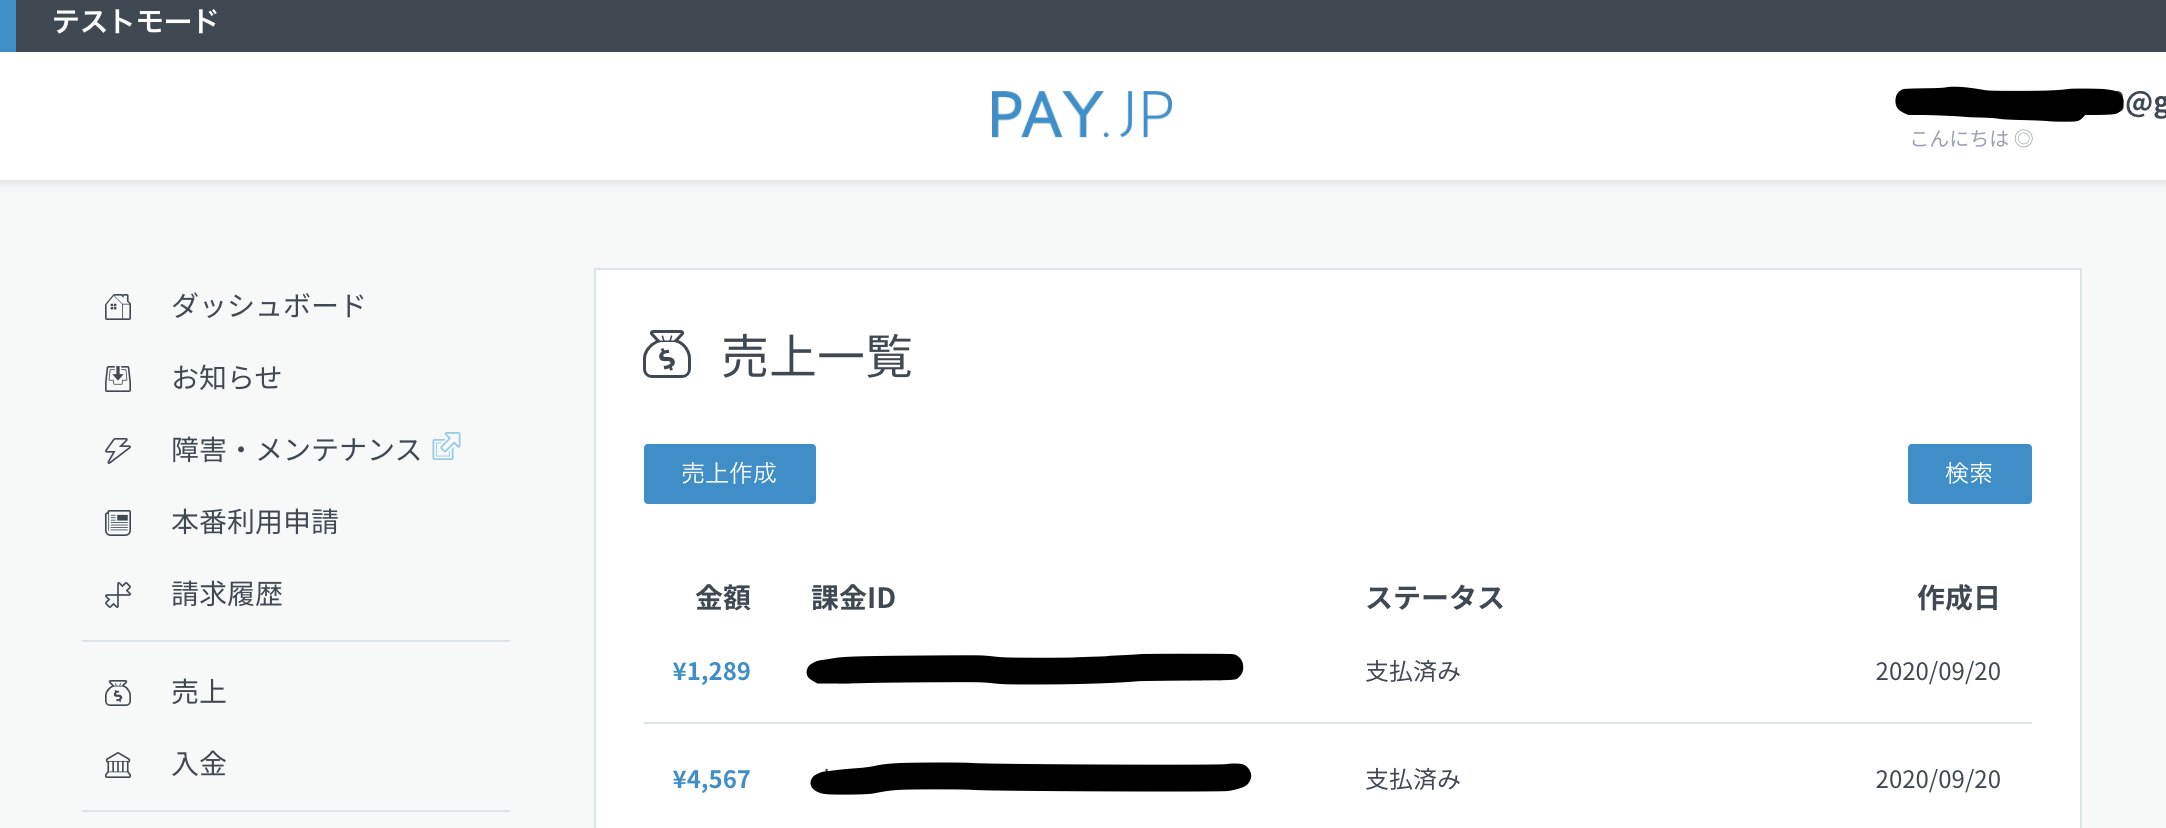
headers = ['id', 'name','age']
values = []
values.push([1, 'あいうえお', 20])
values.push([2, 'かきくけこ', 31])
values.push([3, 'さしすせそ', 43])

OutputCsv.execute(headers, values)
S3に出力されたファイルを確認
指定したバケット、ディレクトリに以下の通りCSVファイルが出力されます。
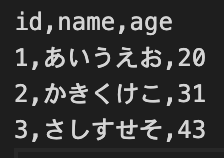
ファイルの中身を確認
S3に出力されたファイルをダウンロードして内容を確認すると以下のようになります。
- 投稿日:2020-09-20T01:34:31+09:00
超初心者がDockerでRails6 + Postgresql 環境構築を最後まで
構築開始にいたるまで
Dockerに触れておきたかったので、上記環境を構築することに。
前知識がまったくないのでトライアンドエラーを繰り返しました...
しかしなんとか構築できたので、メモを残します。
いまいちよくわかってない箇所は注釈や説明に?を付けました必要なフォルダ、ファイル
任意の名前のフォルダーを用意、ここでは
my_appとします。$ mkdir my_app
my_app内に以下のファイルを用意$ touch xxx(必要なファイル名) - my_app - .dockerignore - Dockerfile - docker-compose.yml - Gemfile - Gemfile.lock - entrypoint.shそれぞれのファイルは以下のような中身に編集していきます。
.dockerignore
ローカルモジュールとデバッグログがDockerイメージにコピーされるのを防ぎます。
Mac環境とDocker上のLinux環境とでは必要なモジュールが違うから...なのかな?
とにかく、これがないと Node.js 12.xの関係でエラーがでます。.dockerignorenode_modules npm-debug.log.Dockerfile
Postgresqlと、rails6のWebpackerに必要なyarnとNode.jsをインストールをします。
羅列されている各コマンドについてはざっくりでしか理解できてません(焦)
勉強の必要がありそうです...DockerfileFROM ruby:2.7.1 # 必要なライブラリインストール RUN apt-get update -qq && apt-get install -y nodejs postgresql-client # yarnパッケージ管理ツールをインストール RUN apt-get update && apt-get install -y curl apt-transport-https wget && \ curl -sS https://dl.yarnpkg.com/debian/pubkey.gpg | apt-key add - && \ echo "deb https://dl.yarnpkg.com/debian/ stable main" | tee /etc/apt/sources.list.d/yarn.list && \ apt-get update && apt-get install -y yarn # Node.jsをインストール RUN curl -SL https://deb.nodesource.com/setup_12.x | bash RUN apt-get install -y nodejs # コンテナ内の作業フォルダ構築 RUN mkdir /my_app WORKDIR /my_app COPY Gemfile /my_app/Gemfile COPY Gemfile.lock /my_app/Gemfile.lock RUN bundle install COPY . /my_app #entrypoint.shと接続の設定 COPY entrypoint.sh /usr/bin/ RUN chmod +x /usr/bin/entrypoint.sh ENTRYPOINT ["entrypoint.sh"] EXPOSE 3000 CMD ["rails", "server", "-b", "0.0.0.0"]docker-compose.yml
ここではPostgresqlで使うユーザー名とパスワードを
postgresとします。
サービスにwebとdbがありますね。docker-compose.ymlversion: '3' services: db: image: postgres volumes: - ./tmp/db:/var/lib/postgresql/data environment: - POSTGRES_USER=postgres - POSTGRES_PASSWORD=postgres web: build: . command: bash -c "rm -f tmp/pids/server.pid && bundle exec rails s -p 3000 -b '0.0.0.0'" volumes: - .:/my_app ports: - "3000:3000" depends_on: - dbGemfile
Gemfilesource 'https://rubygems.org' gem 'rails', '~> 6'Gemfile.lock
ファイル生成のみで、中身を編集する必要はありません。
entrypoint.sh
entrypoint.sh#!/bin/bash set -e # 前回のrailsサーバー起動時から残ったserver.pidを消す処理? rm -f /my_app/tmp/pids/server.pid # コンテナのメインプロセスを実行(Dockerfile内のCMDで指定したコマンド) exec "$@"Railsアプリの作成
runでweb単体?がbuildされ、webコンテナ内でrails newを実行$ docker-compose run web rails new . --force --no-deps --database=postgresql --skip-bundle
--nodeps:リンクしたサービスを起動しない(webにリンクしたdbを今は起動しない?)
--skip-bundle:bundleを実行しないbundle install
さきほどの
rails newで、Gemfileが書き換えられています。
イメージをbuildすることによって、bundle installも行われるため、以下のコマンドを実行します。$ docker-compose buildデータベース設定
作業用フォルダには見慣れたrailsのファイル一式がすでにあると思うので、
config/database.ymlを以下のように編集します。config/database.ymldefault: &default adapter: postgresql encoding: unicode host: db #docker-compose.yml内で書いたPostgresqlのユーザー名、パスワードと一致させること username: postgres password: postgres pool: 5 development: <<: *default database: my_app_development test: <<: *default database: my_app_testwebpackerのインストールと設定
webpackerのインストール
webコンテナ内で
bundle exec rails webpacker:installを実行。$ docker-compose run web bundle exec rails webpacker:installwebpackerの設定
自分の場合、この設定を行わないとサーバー起動時にエラーが起ってしまいます。
rails webpacker:installによって生成されたconfig/webpacker.ymlを以下のように編集します。config/webpacker.ymldevelopment: dev_server: host: webpacker hmr: trueまた
config/environments/development.rbに以下のコードを加えます。
でもひょっとしたらこの工程だけは必要ないかもしれません。config/environments/development.rbconfig.webpacker.check_yarn_integrity = falseコンテナ起動
$ docker-compose upこの時点で
http://localhost:3000/にアクセスできますが、
DBがまだ作成されてないので、エラー画面が表示されます。
実に初歩的ですが長い道のりだっただけに、自分はかなり焦りました(笑)DB作成
$ docker-compose run web rails db:create構築完了
http://localhost:3000/に「Yay! You're on Rails!」があれば成功です!
もし不要なdockerイメージやコンテナが生成されていれば各自で削除してくださいね。初めての投稿記事につき、至らない点がたくさんあると思います。
そんな記事に最後までお付き合いいただき、ありがとうございました。
記事に間違いがありましたら、ご指摘ください。参考
Docker + Rails6 + PostgreSQL 環境構築
docker-compose upの直後Yarnのエラーでコンテナが落ちる問題と解決
Node.js Web アプリケーションを Docker 化する
既存のrails6アプリをDocker,webpackerの組み合わせで使いたい
docker-compose 'up' とか 'build' とか 'start' とかの違いを理解できていなかったのでまとめてみた