- 投稿日:2020-09-18T23:35:16+09:00
(Ruby on Rails6) 投稿データを新しい順に並び替える方法(ソート順序)
まえがき
ここでは、投稿データを新しい順に並び替える方法を忘却録として記録します。
投稿順を実装できると、twitter や ブログサイトみたいですね。投稿データを新しい順に並び替える
ここでは
app/controllers/コントローラー名_controller.rbclass PostsController < ApplicationController def アクション名 @コントローラー名 = データベース名.all end ・ ・ end例
app/controllers/コントローラー名_controller.rbclass PostsController < ApplicationController def index @posts = Post.all end ・ ・ endにより、全ての投稿内容をViewで表示させたことを前提に記録しています。
アクションコントローラーの変更
先ほどのアクションを記述します。
app/controllers/コントローラー名_controller.rbclass PostsController < ApplicationController def アクション名 @コントローラー名 = データベース名.all @コントローラー名 = データベース名.all.order(created_at: :desc) ←これ (例) @posts = Post.all.order(created_at: :desc) end ・ ・ end記述項目について
app/controllers/コントローラー名_controller.rb@コントローラー名 = データベース名.all.order(created_at: :desc) @posts = Post.all.order(created_at: :desc)・orderメソッドは、投稿データの順序(ソートの順序)を変更
・created_at属性は、データの制作日時
・descは、並び替え(ソート)の降順を表しています。
また、ここで気を付けたいのは @コントローラー名 = データベース名.all を削除せずに、下にoderメソッドの内容を記述することです。ブラウザでの確認
ここまでできたら、ブラウザ確認をしましょう。
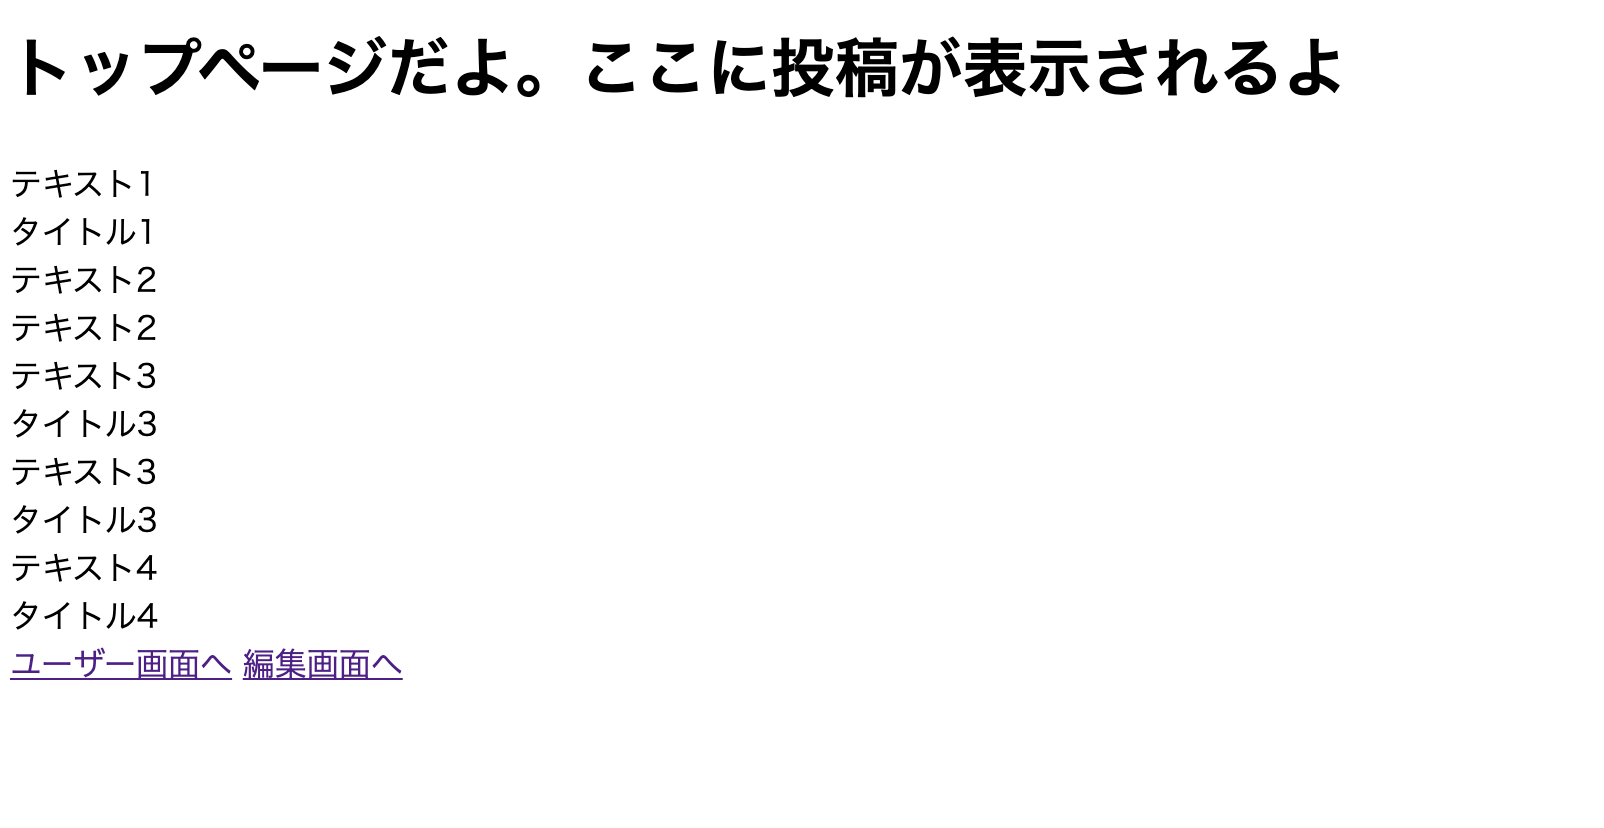
※テキスト・タイトル1(古い) → 4(新しい)コマンドrails s(oderメソッド前)
↓
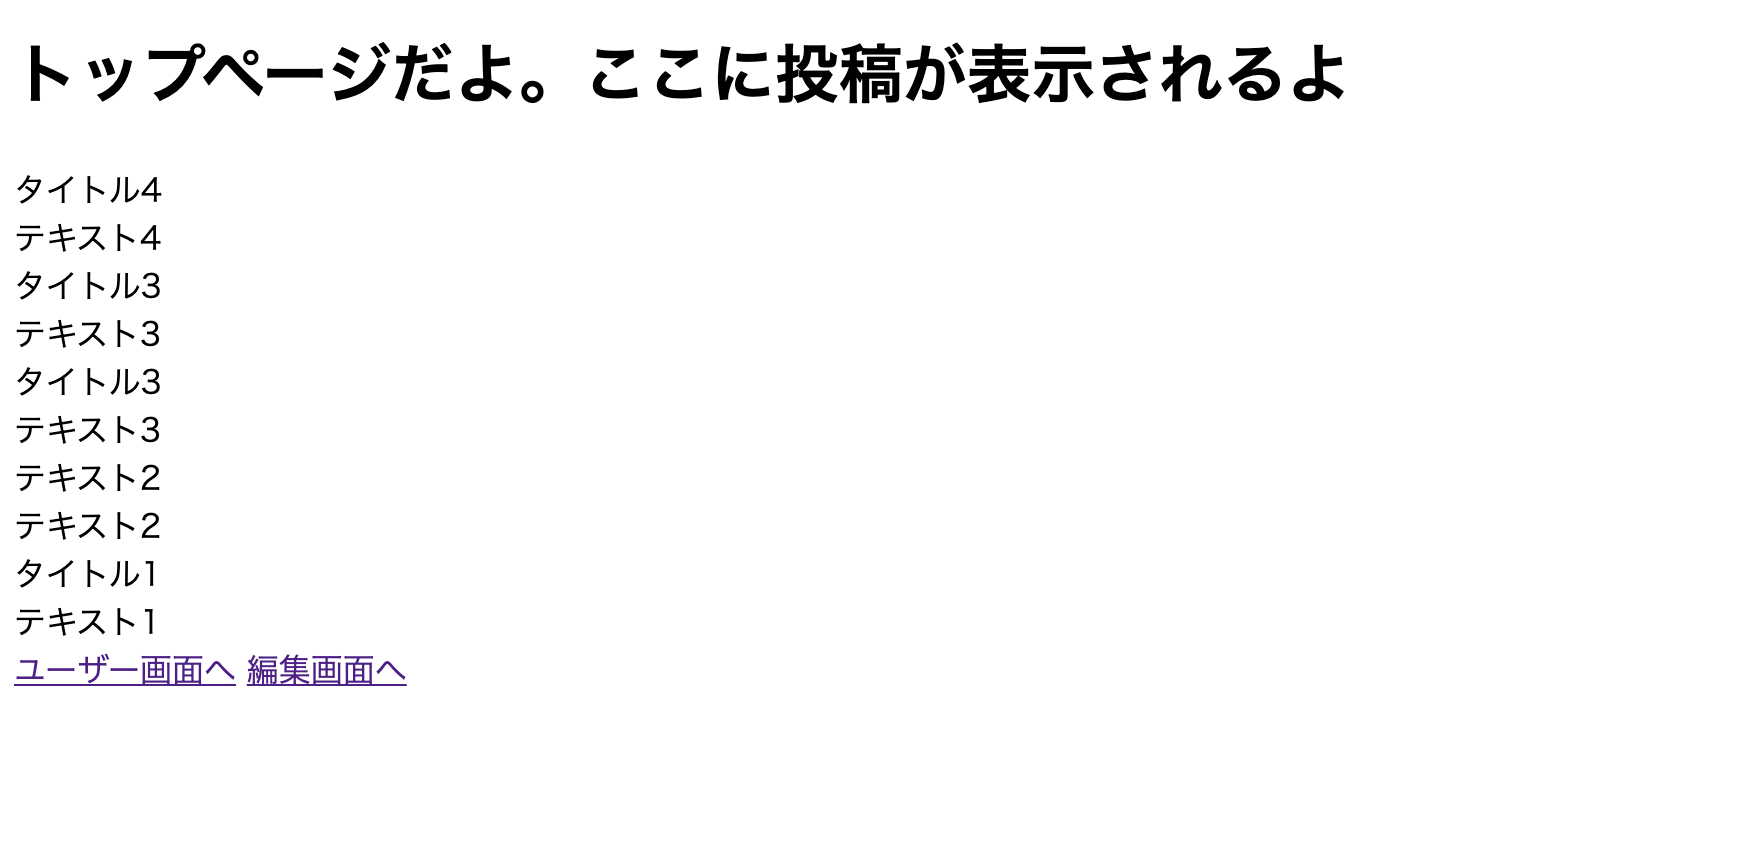
(oderメソッド後)
以上で、実装できました。
あとがき
ここまで読んでいただき、ありがとうございました。
無事に降順の設定ができてよかったです。
orderやdescなど覚える単語がありますね。参考リンク
Myリンク
また、Twitter・Portfolio のリンクがありますので、気になった方は
ぜひ繋がってください。プログラミング学習を共有できるフレンドが出来るととても嬉しいです。
- 投稿日:2020-09-18T22:48:23+09:00
コメント機能に削除機能を追加したい
【概要】
1.結論
2.どのように実装したのか
3.今後していきたいこと
1.結論
❶commentコントローラーのdestroyアクションに、投稿したidを紐づけて削除できるようにする。
❷ネスト化したpathにlink_toで削除ボタン押下できるようにする。
2.どのように実装したのか
<開発環境> Ruby: 2.6.5 Rails: 6.0.3.3controllers/comments_controller.rbdef destroy redirect_to root_path unless user_signed_in? || current_user.id == @time.user_id && current_user.id == comment.user_id #---(1) @comment = Comment.find(params[:time_id]) if @comment.destroy #---(2) redirect_to time_path #---(3) else redirect_to root_path #---(4) end end❶commentコントローラーのdestroyアクションに、投稿したidを紐づけて削除できるようにしました。
(1)ではログアウトしてる人や、自分以外の投稿者が自分の投稿のコメントを削除される(直接URLの入力して削除される)のを防ぐためです。
(2)は自分が投稿したコメントの削除を実行します。
(3)は成功すればコメント投稿画面に戻ります。
(4)はコメントの削除に失敗すればトップページに戻ります。view/time/show.html.erb<% if @comments %>#---(1) <% @comments.each do |comment| %>#---(2) <p> <%= comment.user.name %>:#---(3) <% if user_signed_in? && current_user.id == @time_report.user_id && current_user.id == comment.user_id %> <%= link_to '❌', time_report_comment_path(comment.id), method: :delete %> #---(4) <%= comment.content %> #---(5) <% end %> </p> <% end %> <% end %>❷ネスト化したpathにlink_toで削除ボタン押下できるようにしました。
(1)は"もしコメントがあれば"ということで、インスタンス変数でtimeコントローラーから持ってきています。
(2)User➡︎commentsはhas_manyなのでたくさんあるコメントを持ってきています。
(3)その中でも紐づけられたコメントしたユーザー名だけ表示しています。
(4)ルーティングでコメントをネスト化しているので自分で投稿した自分のコメントを自分で削除できるようにしています。
(5)コメントの内容を表示しています。
3.今後していきたいこと
SPAを実装したいです。吹き出しマークをクリックしたら、非同期的(ページ遷移がなく)にコメントが表示され、そこで編集や削除ができるようなアプリケーションにしたいです。そのためにはNuxt.js/Vue.jsの知識が必要になってくるのでコツコツ勉強していきます。
- 投稿日:2020-09-18T19:50:25+09:00
Git管理中のRailsプロジェクトをCloud9に環境構築
きっかけ
元々MacOS環境で作成していたRailsアプリをWindowsでも作業したいと思ったが、WindowsでやるならAWSでやってみたら簡単じゃないかということで久しぶりにCloud9で環境構築をした。
環境
AWS Cloud9
Ruby 2.7.0
Ruby on Rails 6.0.3
Chrome(ブラウザは何でもいい)Cloud9にインスタンスを作成
AWSへのIAMユーザーでサインインは済ませておく。(これがまずよくわからない問題。)
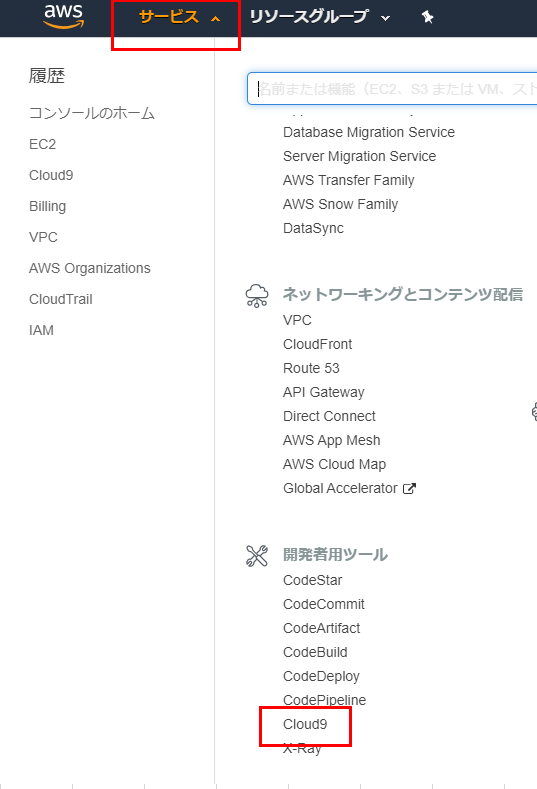
サービスの中の下の方にCloud9があるのでクリック。
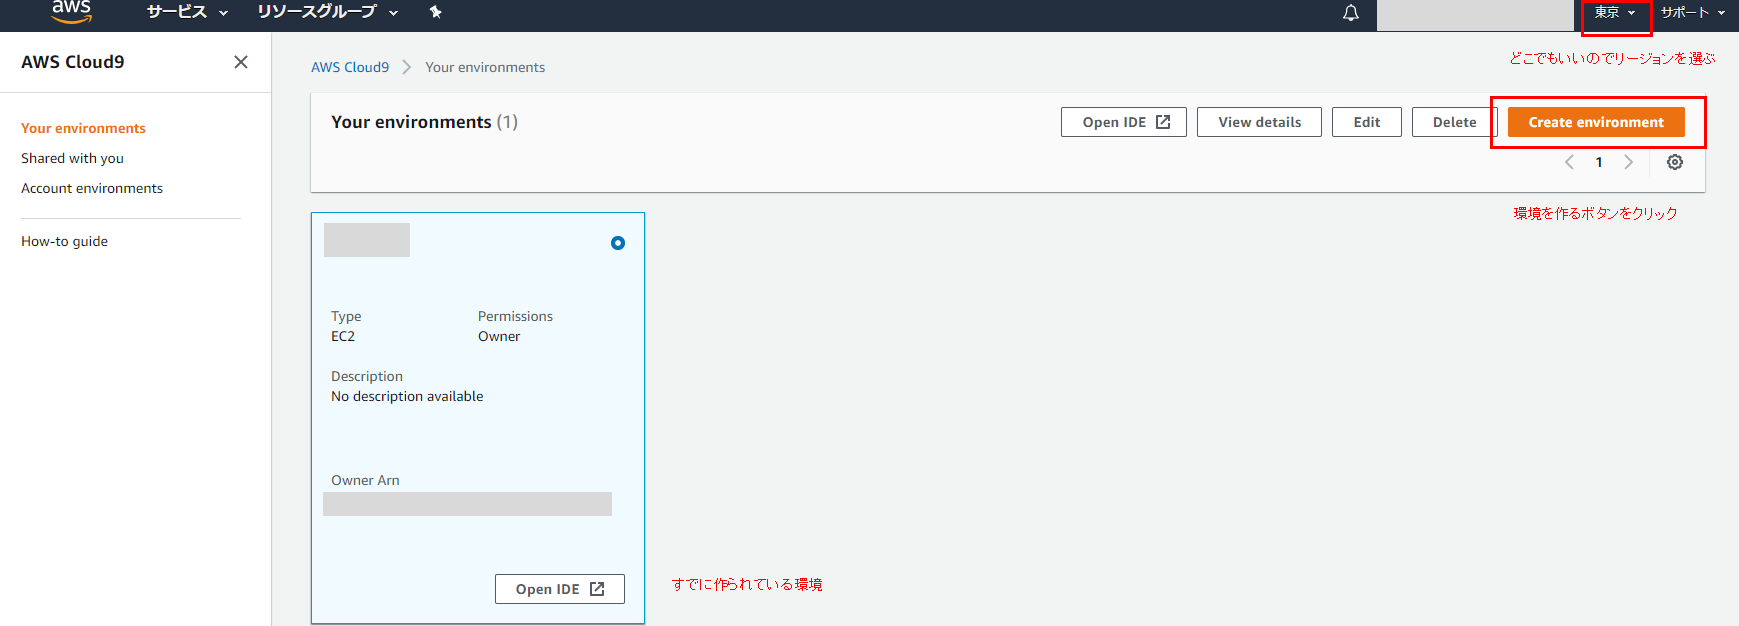
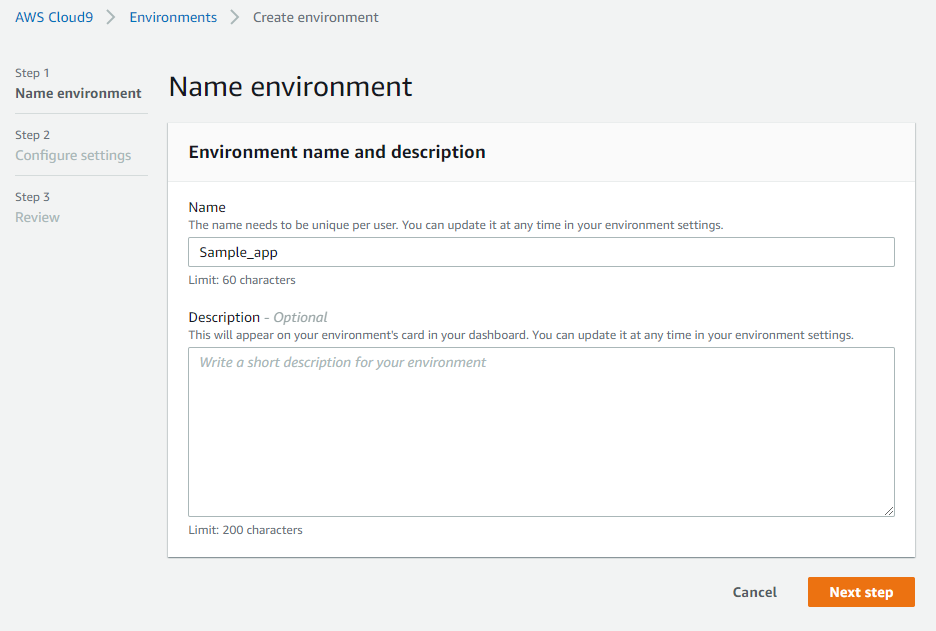
環境を作るボタンをクリック
Nameに好きなアプリ名を入れる。すでにGit管理されているプロジェクトの名前でいいでしょう。
今回はSample_appとしました。その後Next step。
セッティングの中のPlatformはUbuntu Serverを選択。その他はデフォルトでOK。
Rails6を使うときはSQLite3のバージョンの都合でAmazon Linuxでは無理なため決して選ばないように。
そしてNext step。確認画面に移動するので、Crreate environment!
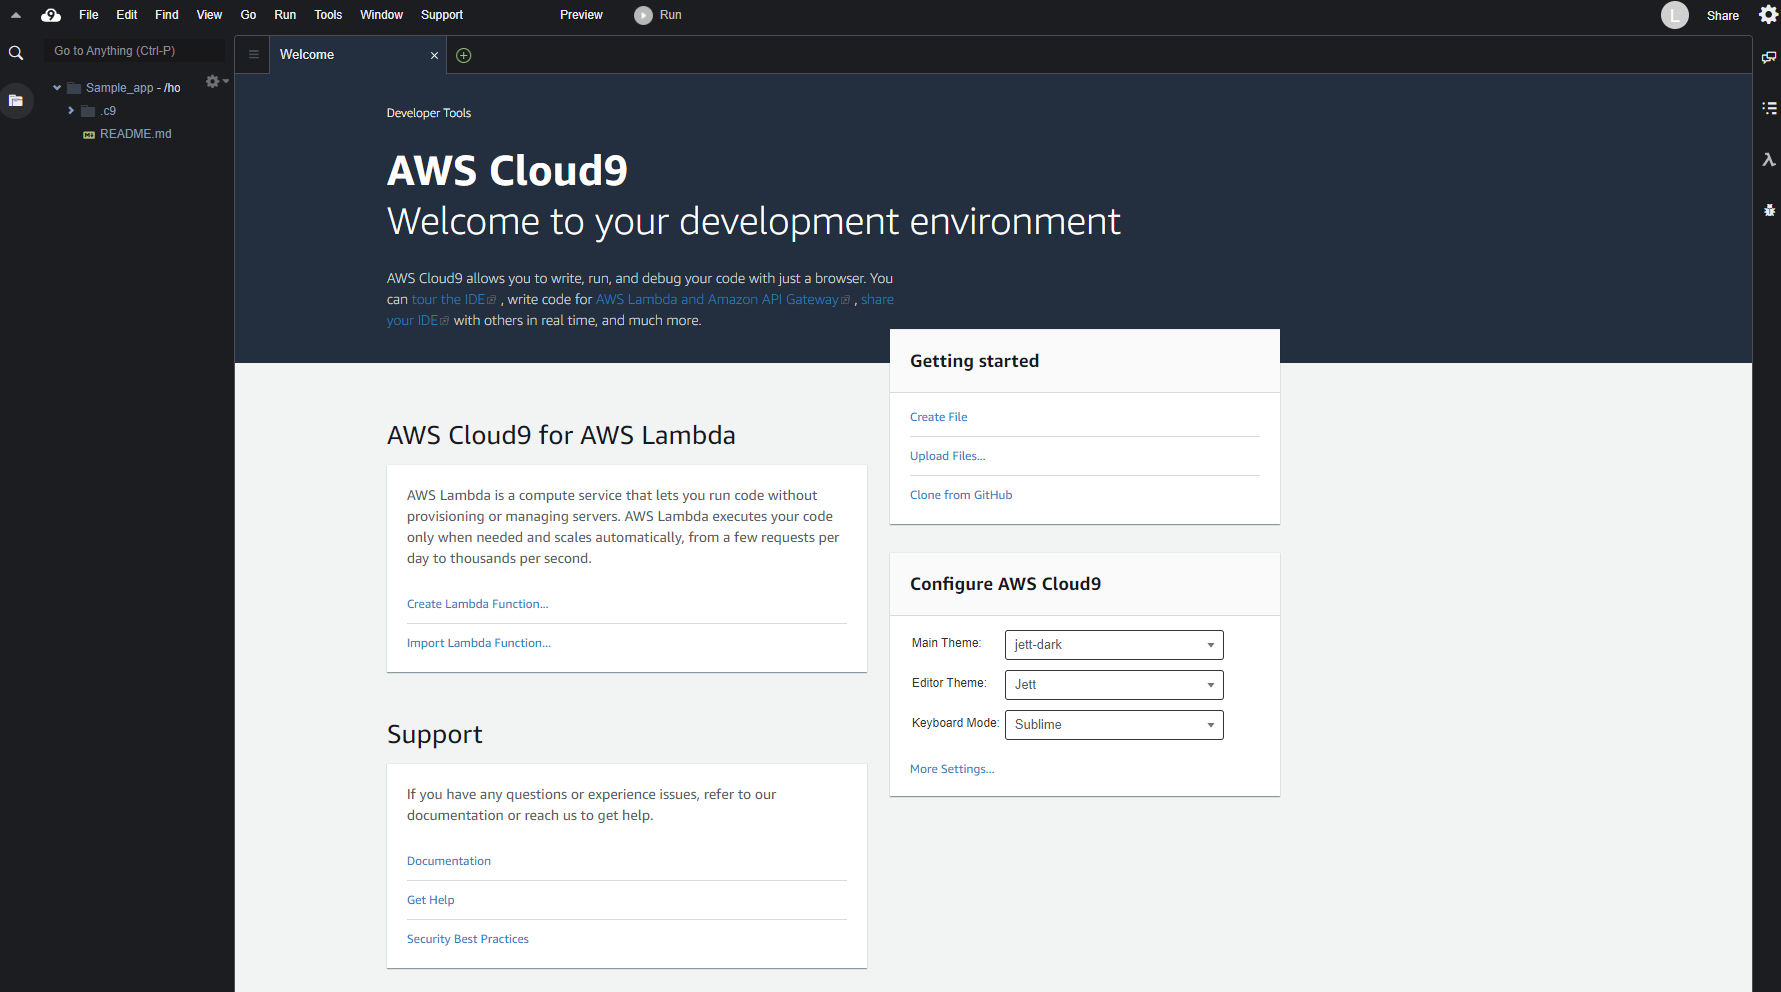
しばらくすると以下のような画面になってまずはプログラムを置く場所を作りました。このタブは不要なので消してOK。
プログラムをクローンする
+ボタンをクリックしてNew Terminalを選択。ターミナルが立ち上がります。
以下を行うことでドキュメントのダウンロードを行わないので、インストールが早まるそうです。$ echo "gem: --no-document" >> ~/.gemrcクローン!
$ git clone GitリポジトリのURLクローン出来ました。
では、クローンしたプログラムのディレクトリに移動します。$ cd プログラムのディレクトリ名そうすると、以下のように注意を促されます。
Required ruby-2.7.0 is not installed.
To install do: 'rvm install "ruby-2.7.0"'
Ruby 2.7.0が必要だよ!
Ruby 2.7.0のインストールを行う
今回使用したいRubyのバージョンは2.7.0、Railsは6.0.2。開発中のプログラムに合わせる。
デフォルトでインストールされているRubyとバージョンが違うので、この環境にインストールします。
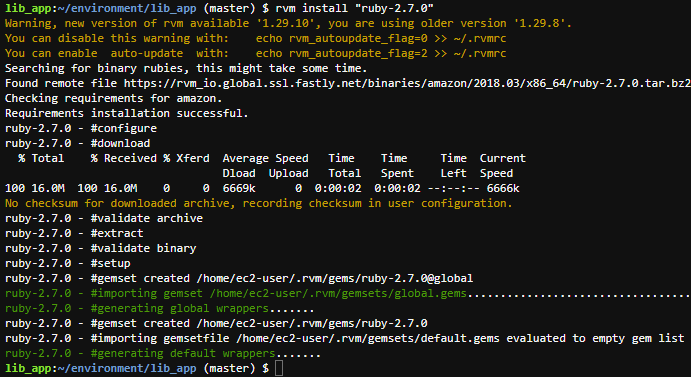
素直に行きます。$ rvm install "ruby-2.7.0"
OK。YARNのダウンロードとインストール
$ source <(curl -sL https://cdn.learnenough.com/yarn_install)
$ yarn install --check-files
上記がうまくいったら下のコマンドはスキップしてBundlerのインストールへ。
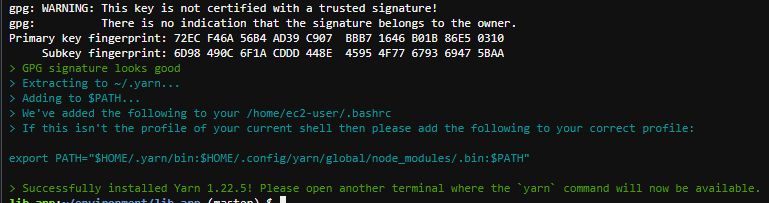
これでうまくいかないこともあるので、以下でも可能。$ curl -o- -L https://yarnpkg.com/install.sh | bash以下のような画面が出て、インストールが完了。新しいターミナルを開いたら使えるよって書いてありますね。
では、新しいターミナルを+ボタンを押して開いてみます。
$ yarn --version1.22.5と出たので、インストールOK。
Railsなどのgemをインストール
まずはBundler のインストールから。プログラムのGemfileの内容によってちょっと時間かかります。
$ bundle installRailsがインストールされているか確認します。
$ rails --version6.0.3.1と出たのでOK。
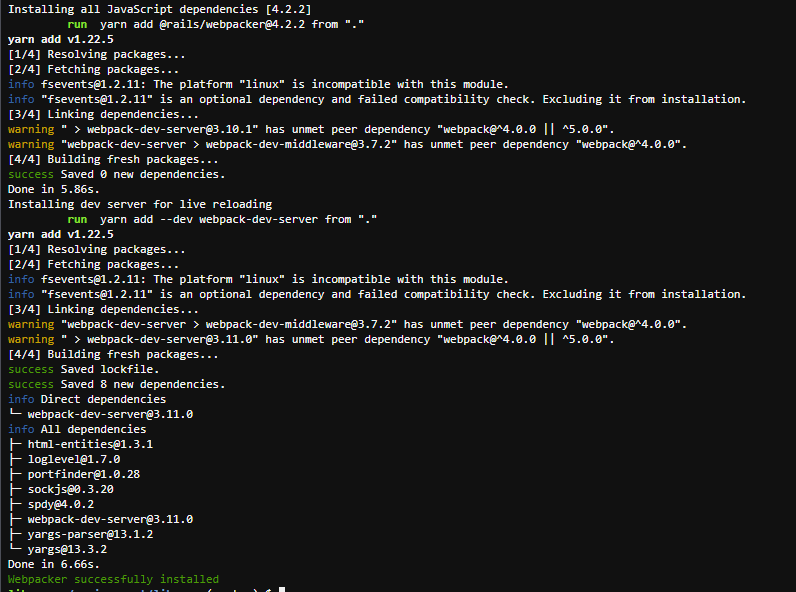
Rails6 から特有のwebpackerをインストールします。
$ rails webpacker:install何々?コンフリクトだと?YでOK。
よし。OK。Cloud9の開発環境で画面にアクセスできるようにする
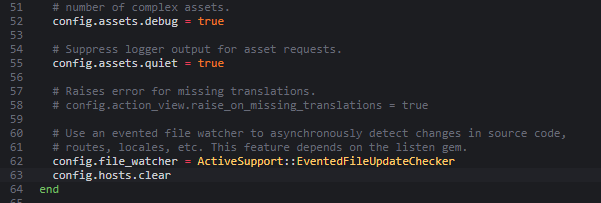
以下のファイルに追記します。画面確認のためにはブラウザでCloud9の環境にアクセスする必要があるので。
config/environments/development.rb
一番下のendの一段上。config.hosts.clear
既存のプロジェクトなので以下のコマンドを忘れずに。
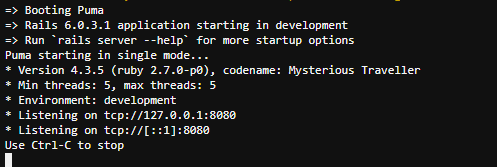
rails db:migrateついにプログラム起動!
$ rails s
画面を確認するには上の方のPreviewタブ>Preview Running Applicationをクリック。
その後赤枠部分をクリックするとブラウザが別タブで起動します。
よし!この画面が今回利用したプログラムのデフォルト画面です。これが出たので、この調子で開発が進められます!
以下のサイトを運営しています。
https://dokusyo-no-wa.com/
こちらの開発をMacとWindowsPCと両方でやれたら便利だなと思ったのがきっかけ。参考記事
https://skillhub.jp/courses/134/lessons/785 (Cloud9でRails6の準備)
https://happy-teeth.hatenablog.com/entry/2019/09/17/110208 (SQLite3を利用するにはAmazon Linuxではできない。)
https://qiita.com/8zca/items/175efb0612070530d186 (CentOS環境でRails6.0をSQLite3 (>=3.8)で動かす)


- 投稿日:2020-09-18T18:55:57+09:00
instagramのクローンアプリを作る④
はじめに
タイトルの通り、簡易版instagramのアプリを作っていきます。
下記の工程に分けて記事を執筆していきますので、順を追って読んでいただけたらなと思います。①アプリ作成〜ログイン機能の実装
②写真投稿機能の実装
③ユーザーページの実装
④フォロー機能の実装 ←イマココ
⑤投稿削除機能の実装モデル作成
※以下、アプリケーションのディレクトリで
ターミナルrails g model follow user:belongs_to target_user:belongs_toマイグレーションファイルを修正します。
target_userのforeign_keyをfalseに。db/migrate/2020**********_create_follows.rbclass CreateFollows < ActiveRecord::Migration[6.0] def change create_table :follows do |t| t.belongs_to :user, null: false, foreign_key: true t.belongs_to :target_user, null: false, foreign_key: false t.timestamps end end end修正できたら
rails db:migrateを実行します。リレーションの設定
followモデルにリレーションを設定していきます。
target_userにclass_nameとforeign_keyを指定します。app/models/follow.rbclass Follow < ApplicationRecord belongs_to :user belongs_to :target_user, class_name: 'User', foreign_key: 'target_user_id' end
userモデルにもリレーションを設定していきます。
active_relationships
passive_relationships
を記述していきます。app/models/user.rbclass User < ApplicationRecord devise :database_authenticatable, :registerable, :recoverable, :rememberable, :validatable has_many :active_relationships, class_name: 'Follow', foreign_key: 'user_id' has_many :passive_relationships, class_name: 'Follow', foreign_key: 'target_user_id' has_many :followings, through: :active_relationships, source: :target_user has_many :followers, through: :passive_relationships, source: :user has_many :photos endこれでリレーションは完成です。
followsコントローラ作成
ターミナルrails g controller followsルーティングの設定も忘れずに行います。
routes.rbRails.application.routes.draw do root 'homes#index' devise_for :users resources :photos resources :users do resource :follow # ←ここ end endこれでURLは
user/user_id/followという感じになると思います。次に、
followsコントローラを編集していきます。folows_controller.rbclass FollowsController < ApplicationController before_action :authenticate_user! def create current_user.active_relationships.create(target_user_id: params[:user_id]) redirect_to [:user, {id: params[:user_id] }] end def destroy current_user.active_relationships.find_by(target_user_id: params[:user_id]).destroy redirect_to [:user, {id: params[:user_id] }] end end
before_action :authenticate_user!とすることで、
ログインしているユーザーのみ「フォロー/フォロー解除」することができます。
createアクションでフォローの動きを設定します。
リダイレクト先は[:user, {id: params[:user_id] }]として、
userのuser_id、つまり ユーザーの詳細ページに遷移するよう設定しています。
destroyアクションでフォロー解除の動きを設定します。
createではなく、まずfind_byでフォロー中のレコードを取得します。
そして、destroyで取得してきたレコードを破壊します。
リダイレクト先は同じで大丈夫だと思います。viewファイルにフォロー/フォロー解除リンクを作成
app/views/users/show.html.erb<h3><%= @user.email %></h3> # ↓↓↓↓↓↓↓↓↓↓ ここから ↓↓↓↓↓↓↓↓↓↓ <% if current_user.active_relationships.exists?(target_user_id: @user.id) %> <%= link_to 'unfollow', [@user, :follow], method: :delete %> <% else %> <%= link_to 'follow', [@user, :follow], method: :post %> <% end %> # ↑↑↑↑↑↑↑↑↑↑ ここまで ↑↑↑↑↑↑↑↑↑↑ <div> <%= link_to 'followings', [@user, :followings] %> </div> <div> <%= link_to 'followers', [@user, :followers] %> </div> <% @user.photos.each do |photo| %> <div> <p><%= photo.caption %></p> <%= image_tag photo.image %> </div> <% end %>条件分岐で、
current_userがユーザーを既にフォローしていた場合は
フォロー解除用のリンクを表示させます。→ method: delete
まだフォローしていない場合はフォロー用のリンクを表示させます。→ method: postここまでで一度ブラウザで確認してみます。
下記のようになっていれば成功です。
ユーザー詳細ページにとび、followを押すとフォロー完了。
そして、followがunfollowに変わります。
unfollowを押すとフォロー解除となり、followに戻ります。
ただ、この状態だとログインしていないユーザーが
URLに直接アクセスするとエラーが起きてしまいます。↓
これは条件分岐で
current_userとしているためです。
ですので、更に条件分岐を追加していきます。
先ほどの条件分岐を↓で挟みます。
<% if user_signed_in? && current_user != @user %>
<% end %>app/views/users/show.html.erb<h3><%= @user.email %></h3> <% if user_signed_in? && current_user != @user %> # ←ここ <% if current_user.active_relationships.exists?(target_user_id: @user.id) %> <%= link_to 'unfollow', [@user, :follow], method: :delete %> <% else %> <%= link_to 'follow', [@user, :follow], method: :post %> <% end %> <% end %> # ←ここ <div> <%= link_to 'followings', [@user, :followings] %> </div> <div> <%= link_to 'followers', [@user, :followers] %> </div> <% @user.photos.each do |photo| %> <div> <p><%= photo.caption %></p> <%= image_tag photo.image %> </div> <% end %>
ユーザーがサインインしている
且
current_userがユーザー詳細ページのユーザーでないことという条件分岐を追記したことになります。
これで、サインインしていないと「フォロー/解除」のリンクが表示されないようになります。
また、自分の詳細ページに飛んだ時も表示されないようになります。これでフォロー機能はほとんど完成ですが、
最後に、フォローされているユーザーの一覧を表示させたいと思います。followings/followersコントローラの作成
ターミナルrails g controller followingsターミナルrails g controller followersルーティングも忘れずに設定します。
routes.rbRails.application.routes.draw do root 'homes#index' devise_for :users resources :photos resources :users do resource :follow resources :followings # ←ここ resources :followers # ←ここ end endコントローラにもそれぞれ記述していきます。
folowings_controller.rbclass FollowingsController < ApplicationController def index @followings = User.find(params[:user_id]).followings end endfolowers_controller.rbclass FollowersController < ApplicationController def index @followers = User.find(params[:user_id]).followers end endそしてviewを作成していきます。
それぞれlink_toでfollowing/followerの
ユーザー詳細ページへのリンクを作成しています。app/views/followings/index.html.erb<% @followings.each do |following| %> <div> <%= link_to following.email, [following] %> </div> <% end%>app/views/followers/index.html.erb<% @followers.each do |follower| %> <div> <%= link_to follower.email, [follower] %> </div> <% end%>pathの指定は
[following]→user_followings_path
[follower]→user_followers_path
でも良いのでわかりやすい方で。最後にユーザー詳細ページにリンクを作成します。
app/views/users/show.html.erb<h3><%= @user.email %></h3> <% if user_signed_in? && current_user != @user %> <% if current_user.active_relationships.exists?(target_user_id: @user.id) %> <%= link_to 'unfollow', [@user, :follow], method: :delete %> <% else %> <%= link_to 'follow', [@user, :follow], method: :post %> <% end %> <% end %> # ↓↓↓↓↓↓↓↓↓↓ ここから ↓↓↓↓↓↓↓↓↓↓ <div> <%= link_to 'followings', [@user, :followings] %> </div> <div> <%= link_to 'followers', [@user, :followers] %> </div> # ↑↑↑↑↑↑↑↑↑↑ ここまで ↑↑↑↑↑↑↑↑↑↑ <% @user.photos.each do |photo| %> <div> <p><%= photo.caption %></p> <%= image_tag photo.image %> </div> <% end %>表示させるページのpathは
@userのfollowings
@userのfollowers
となります。これで動作を確認してみます。
以下のようになっていれば成功です。
速くててわかりづらいんですが、sampleでログインしている状態から始まっています。
①sampleがexampleの詳細ページに飛びフォローする。
②sampleの詳細ページでfollowingsのリンクへ飛ぶと、今フォローしたexampleが確認できる。
③exampleの詳細ページでfollowersのリンクへ飛ぶと、sampleが確認できる。
以上です。お疲れ様でした。
- 投稿日:2020-09-18T18:44:14+09:00
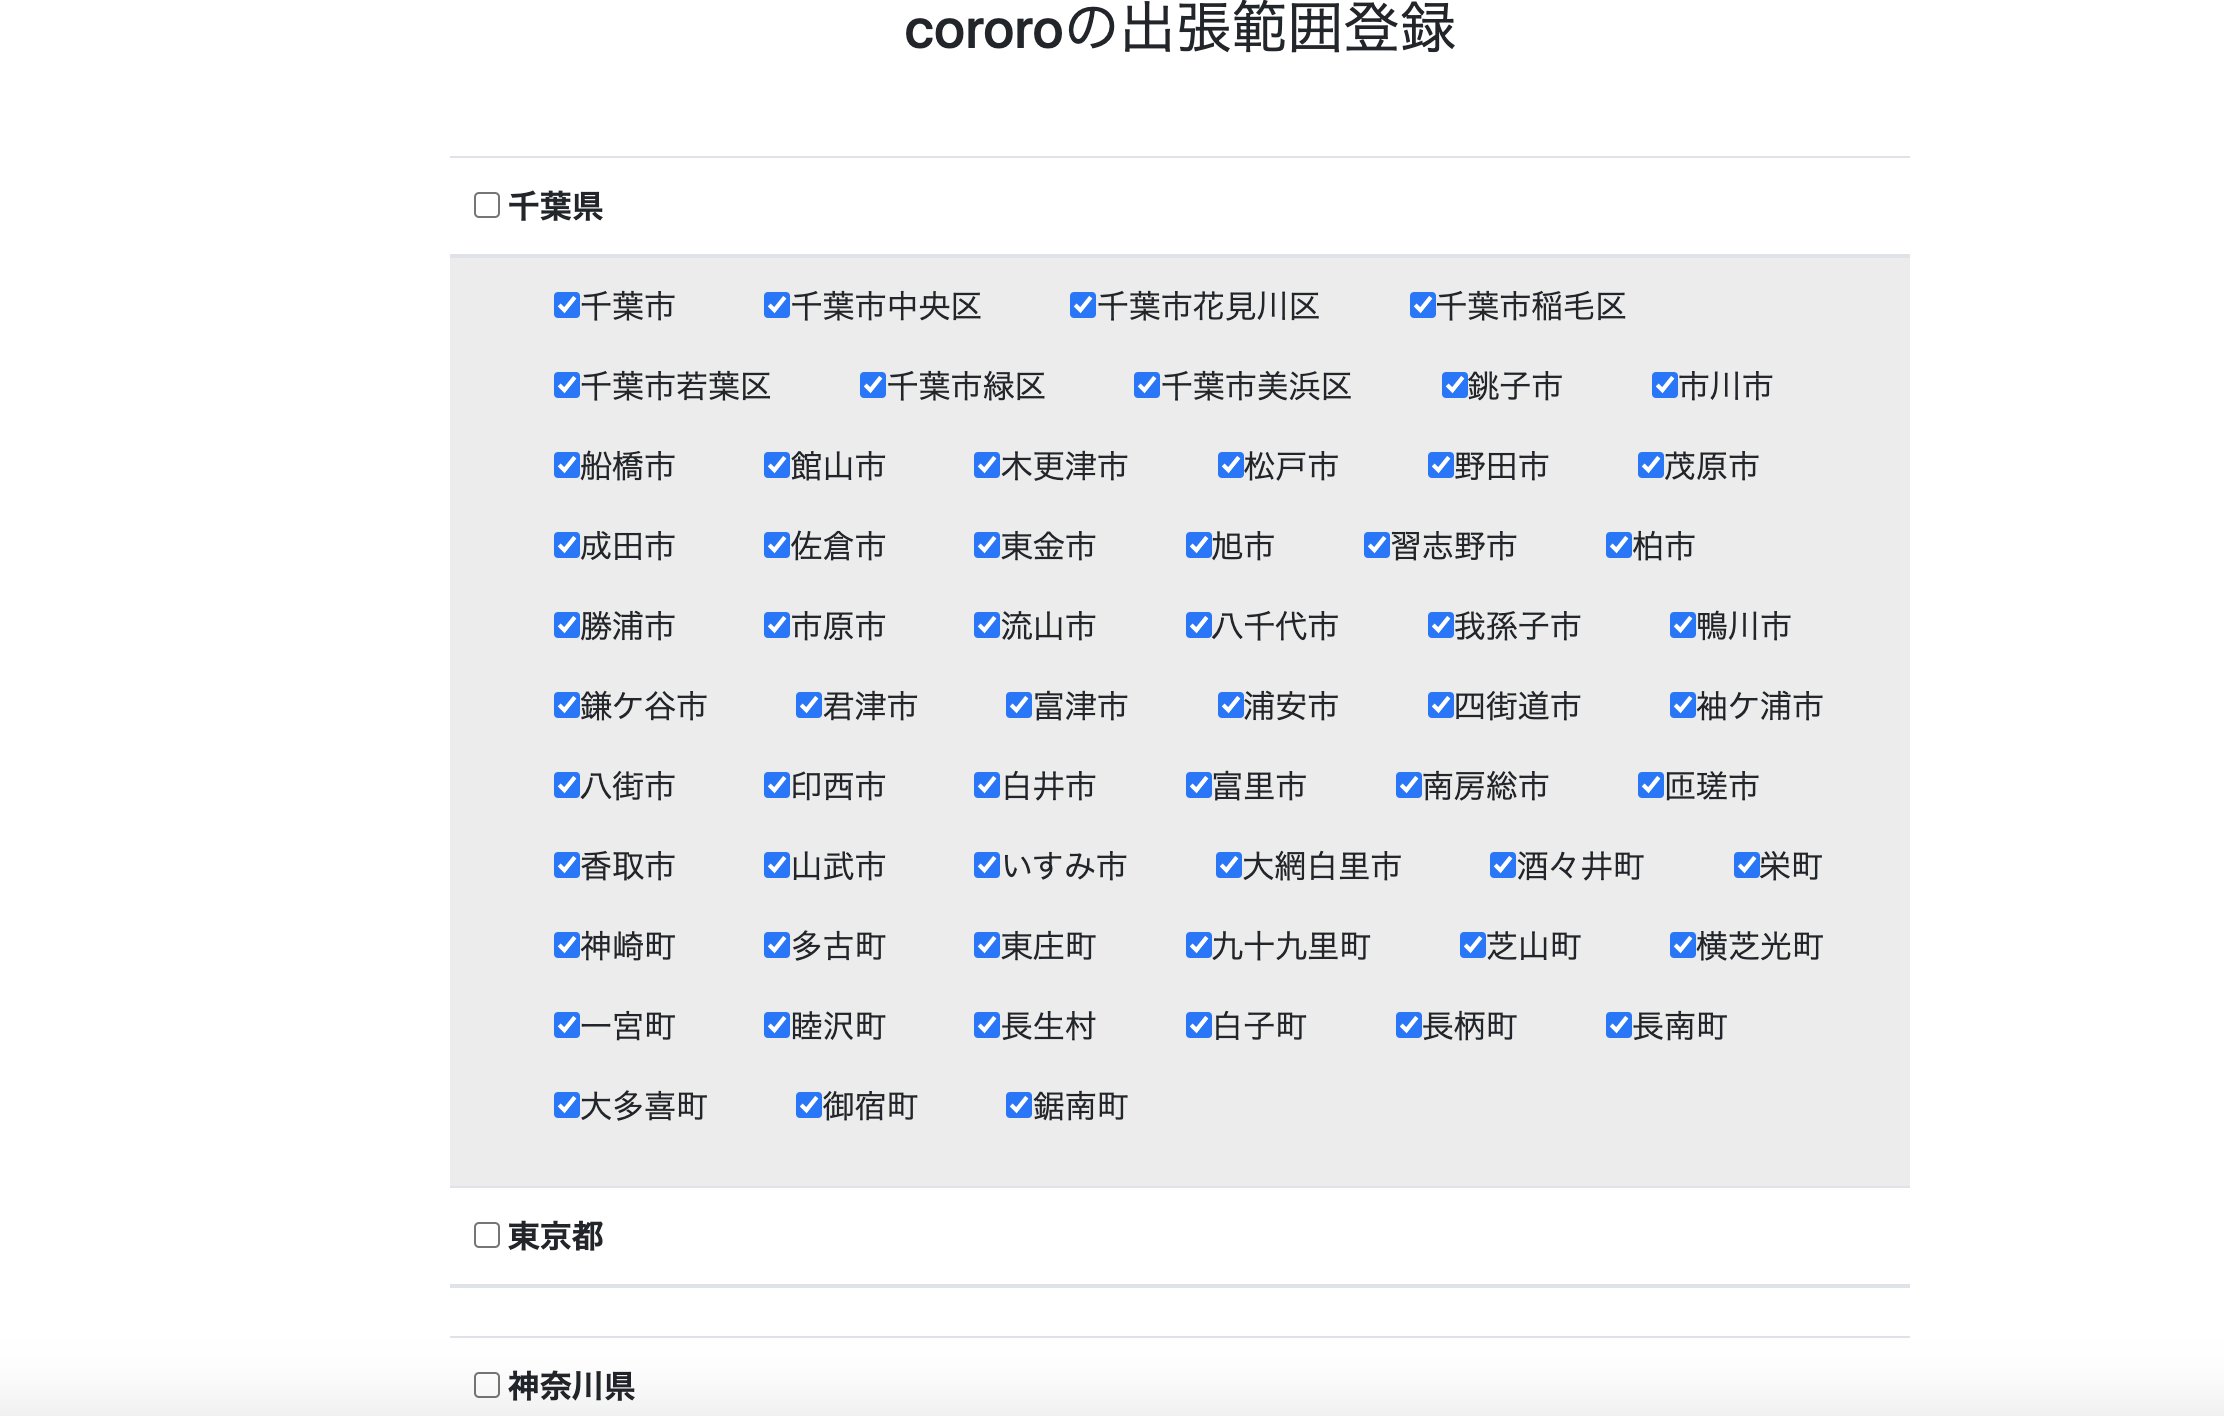
都道府県に紐づく市町村をドロップダウンで表示させる
備忘録として記録
完成形
先にコードから記載
<%= form_with(model: @current_masseur, url: store_manager_business_trip_ranges_update_path(@current_masseur), method: :patch, local: true) do |f| %>
        <table class="prefecture table table-hover">
            <thead>
              <!--今は東京のみを表示しているがDBには全都道府県が入っている-->
              <%= collection_check_boxes :prefecture, :prefecture_ids, Prefecture.all.where(id: [12, 13, 14]), :id, :name, include_hidden: false do |prefecture| %>
              <tr>
                <th>
                  <div id="menu<%= prefecture.object.id %>">
                    <span class="check_box"><%= prefecture.check_box %></span>
                    <span class="text"><%= prefecture.text %></span>
                  </div>
                </th>
              </tr>
            </thead>
            <tbody>
              <tr>
                <td class="city-check-boxes">
                  <div id="city-list<%= prefecture.object.id %>">
                    <%= f.collection_check_boxes :city_ids, City.all, :id, :name, include_hidden: false do |city| %>
                      <% if prefecture.object.id == city.object.prefecture_id %>
                        <ul class="city-check-box">
                            <li class="city-check-box-item">
                            <div id="boxes"><%= city.check_box + city.text %></div>
                            </li>
                        </ul>
                      <% end %>
                    <% end %>
                  </div>
                </td>
              </tr>
              <% end %>
            </tbody>

        </table>
        <div class="actions text-center">
          <%= f.submit "登録する", class: "btn btn-primary mt-5 w-50" %>
        </div>
      <% end %
<script type="text/javascript" src="https://ajax.googleapis.com/ajax/libs/jquery/2.0.0/jquery.min.js"></script> <script> $(function () { // メニュー領域外をクリックしたらメニューを閉じる $(function(){ $("#menu12 .text").on('click', function(){ $("#city-list12").slideToggle('fast'); }); }); $(function(){ $('#menu13 .text').on('click', function(){ $("#city-list13").slideToggle('fast'); }); }); $(function(){ $('#menu14 .text').on('click', function(){ $("#city-list14").slideToggle('fast'); }); }); }); </script>ポイントはjqueryのメソッドslideToggleが肝。これを使用するだけでslideDownとslideUpの両方が実装できます。
また$("#menu12 .text")の#menu12。
viewファイルの<div id="menu<%= prefecture.object.id %>">から取得したものだが、同じID名がviewファイルに複数あった場合、最初の要素しか取得できない事に注意。
またslideToggleを使用するとドロップダウンはデフォルトで開いた状態になっているので変えたい場合はcssで変更する必要がある。*eachで繰り返したID要素は最初の一つしか表示されません。
参考:
http://php.o0o0.jp/article/jquery-dropdown_list
http://www.hp-stylelink.com/news/2013/11/20131122.php
https://teratail.com/questions/21542
- 投稿日:2020-09-18T18:20:15+09:00
【Rails】複雑なルーティング構成まとめ
今回は、
Usersリソースを中心に、追加構成としてAPIディレクトリを追加してみたり、新たなメソッドとしてsortメソッドを追加したときのパスの状態などを設定するパターンで見ていく早見表
種類 パス クラス ファイルパス scope /api/users UsersController /users_controller.rb namespace /api/users Api::UsersController /api/users_controller.rb module /users Api::UsersController /api/users_controller.rb member /users/:id/sort collection /users/sort Controllersのディレクトリ構成と、ルーティング
scope
routes.rb# /api/users scope :api do resources :users endディレクトリ構成/controllers-- | |--application.rb | |--users_controller.rbcontroller.rbclass UsersController < ApplicationController endnamespace
routes.rb# /api/users namespace :api do resources :users endディレクトリ構成controllers/- | |--application.rb | |--api/- | |--users_controller.rbcontroller.rbclass Api::UsersController < ApplicationController endmodule
routes.rb# /users scope module: :api do resources :users endディレクトリ構成controllers/- | |--application.rb | |--api/- | |--users_controller.rbcontroller.rbclass Api::UsersController < ApplicationController endまったく新しいパスを作る
member
routes.rb# idを伴うパス /users/:id/sort resources :users do member do get :sort end end省略形
routes.rbresources :users do get :sort, on: :member endcollection
routes.rb# idを伴わないパス /users/sort resources :users do collection do get :sort end end省略形
routes.rbresources :users do get :sort, on: :collection end参考記事
- 投稿日:2020-09-18T16:23:02+09:00
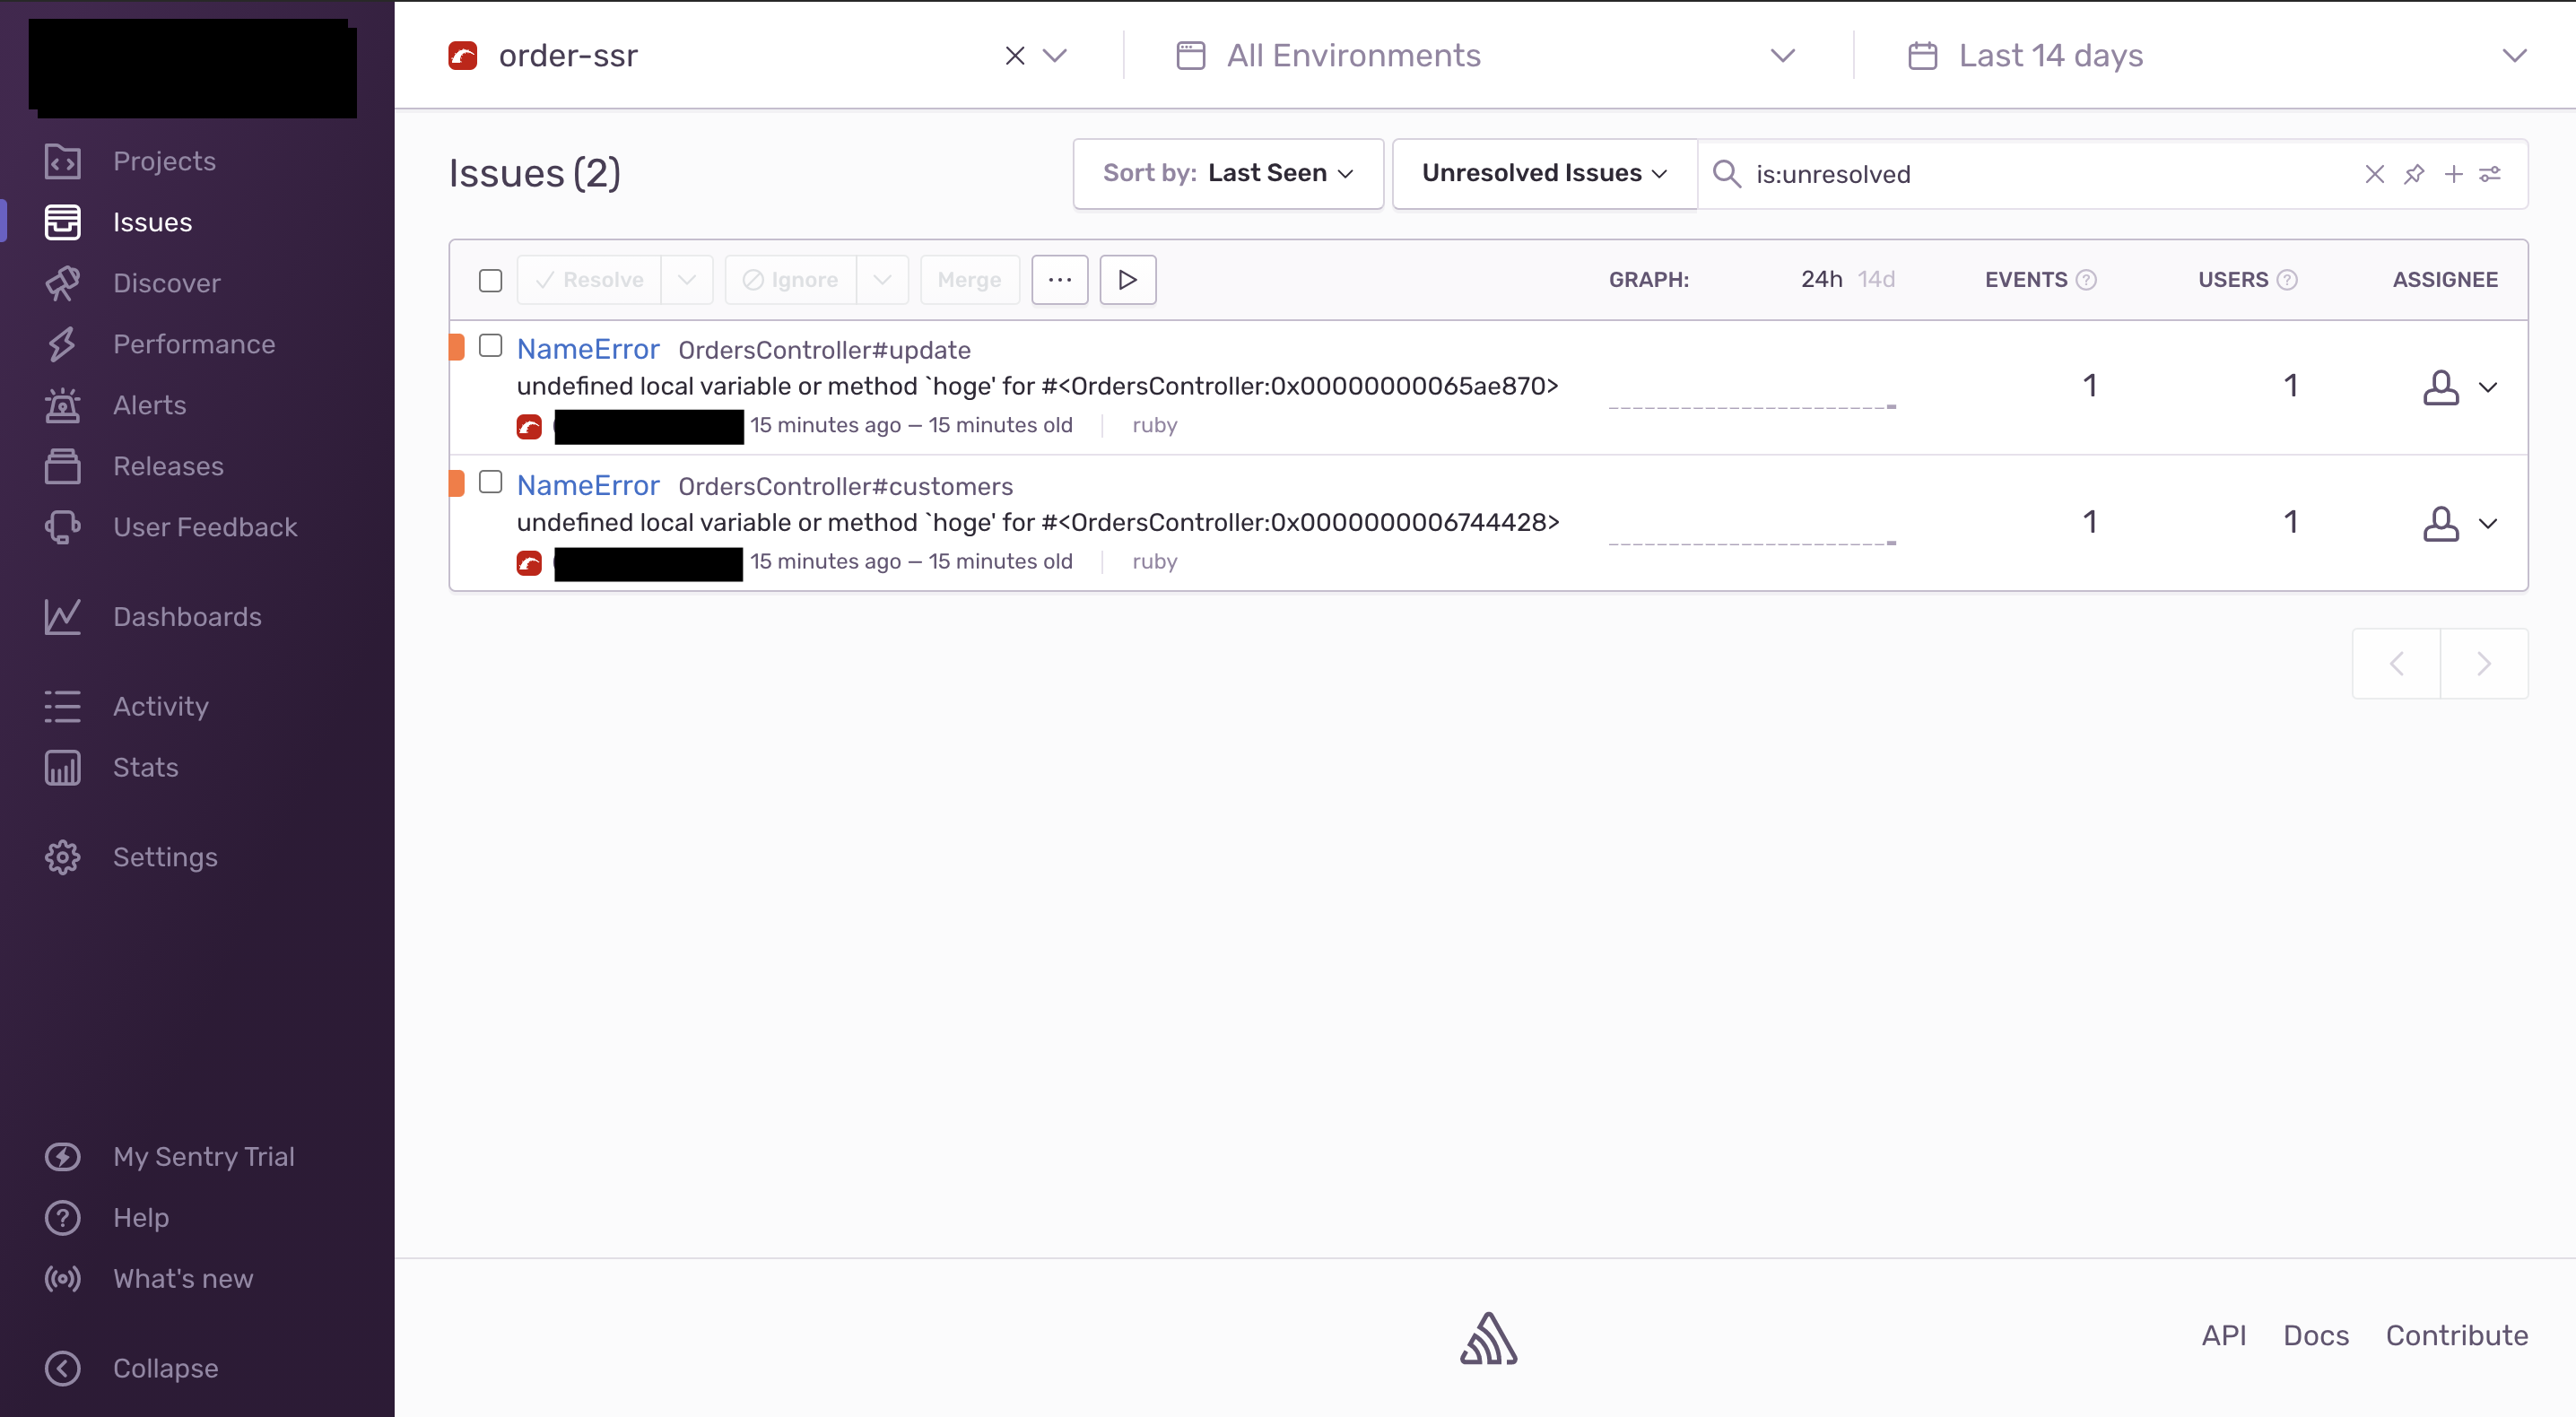
SentryでRailsアプリのエラーをトラッキング
契約
以下より契約
https://sentry.io/signup/契約時にプロジェクトを作成することになり、プロジェクト作成後の画面にセットアップ方法が書かれているので、手順通りに進めていけば問題無いはず。ただ念のため自分ようにまとめなおします。
基本的な使い方
Gemfilegem "sentry-raven"$ bundle installconfig/application.rbmodule AppName class Application < Rails::Application # 省略 Raven.configure do |config| config.dsn = "https://#{ENV['SENTRY_KEY']}@#{ENV['SENTRY_SECRET']}.sentry.io/#{ENV['SENTRY_ID']}" end end endSentryのサイトで表示されるセットアップ方法には、ID等が全て直書きされているので、環境変数にしまいました。
パラメーターやsession情報を拾えるようにする
app/controllers/application.rbclass ApplicationController < ActionController::Base before_action :set_raven_context private def set_raven_context Raven.user_context(id: session[:current_user_id]) # or anything else in session Raven.extra_context(params: params.to_unsafe_h, url: request.url) end endパスワードを平文で記録しない
$ touch config/initializers/sentry.rbconfig/initializers/sentry.rbRaven.configure do |config| config.sanitize_fields = Rails.application.config.filter_parameters.map(&:to_s) end参考
その他
UIがめっちゃSlack笑
- 投稿日:2020-09-18T10:50:08+09:00
Uglifier::Error: Unexpected character '`' デプロイ時のエラー解消方法
エラー内容
ターミナルでデプロイを実行したところ、
Uglifier::Error: Unexpected character '`'
というエラーが表示され、デプロイが完了しなかった。
解決方法
config/environments/production.rb内にある以下の記述をコメントアウトする。
production.rbconfig.assets.js_compressor = :uglifierconfig/environments/production.rbファイルとは
参考: https://railsguides.jp/configuring.htmlその後、コミット&プッシュで問題は解決しました。
参考
https://railsguides.jp/configuring.html
https://qiita.com/mikd/items/e10805343f2d7534d52c
- 投稿日:2020-09-18T09:34:47+09:00
Railsを始める時に読んでおきたい入門書
はじめに
Railsで開発を行うにあたり読んで良かった入門書をまとめましたが、一番は公式ドキュメントを読む事です。
ただ公式ドキュメントだけだとなかなか理解が進まない事も多いかと思います。
そういった方に参考になれば幸いです。Ruby
Ruby on Rails
Rspec
・Everyday Rails - RSpecによるRailsテスト入門
https://leanpub.com/everydayrailsrspec-jp・Effective Testing with RSpec 3
https://www.amazon.co.jp/Effective-Testing-RSpec-Confidence-English-ebook/dp/B076VTMTV8/ref=sr_1_6?__mk_ja_JP=%E3%82%AB%E3%82%BF%E3%82%AB%E3%83%8A&dchild=1&keywords=rspec&qid=1600388276&sr=8-6React
・速習 React
https://www.amazon.co.jp/%E9%80%9F%E7%BF%92-React-%E9%80%9F%E7%BF%92%E3%82%B7%E3%83%AA%E3%83%BC%E3%82%BA-%E5%B1%B1%E7%94%B0%E7%A5%A5%E5%AF%9B-ebook/dp/B07GWFRCR1/ref=sr_1_6?__mk_ja_JP=%E3%82%AB%E3%82%BF%E3%82%AB%E3%83%8A&dchild=1&keywords=react&qid=1600389000&sr=8-6
・りあクト! TypeScriptで始めるつらくないReact開発 第3版【Ⅰ. 言語・環境編】
https://booth.pm/ja/items/2368045
・りあクト! TypeScriptで始めるつらくないReact開発 第3版【Ⅱ. React基礎編】
https://booth.pm/ja/items/2368019
・りあクト! TypeScriptで始めるつらくないReact開発 第3版【Ⅲ. React応用編】
https://booth.pm/ja/items/2367992jQuery
BootStrap
webpack
- 投稿日:2020-09-18T00:21:33+09:00
form_withについて
そもそもform_withってなんですか?
情報を送信するためのヘルパーメソッドです!
Q.ヘルパーメソッドって何ですか?
A.railsにおける、主にビューでHTMLタグを出現させたりテキストを加工するために使用するメソッドの総称のことです。要は、railsでビューの加工をするメソッドといったもので覚えておくといいと思いました。(同じことを言ってますねこれ?)form_withが何かわかりました!じゃあ、どのように使うのですか?
ビューファイルに記載していきます!
次のように記述します。index.html.erb<%= form_with url: "パス",local:true do |form| %>上記のような記述ではデータベースには保存されません。
index.html.erb<%= form_with(model: モデルクラスのインスタンス,local:true,) do |form| %>で、保存するためのボタンを作成するには
index.html.erb<%= form.submit %>と記述をすることで、ボタンを表示させ保存等を行うことができます。(ルーティングからコントローラーの設定ができていればの話ですが!)
まとめ
form_withは、要するに、ビューで使用するデータを受け渡すメソッドといった考えでいたらいいのかなと思っております。間違っていたら、ご指摘お願いします!
- 投稿日:2020-09-18T00:01:02+09:00
Rails 6で認証認可入り掲示板APIを構築する #13 認証ヘッダの付与
←Rails 6で認証認可入り掲示板APIを構築する #12 userとpostの関連付け
factoryの修正
factoryから直していきます。
一番多く飛んでいるのが
ActiveRecord::RecordInvalid:
        Validation failed: User must exist
というエラーですね。
これはcreate(:post)した時に、user_idがnilになることで発生しています。factoryの修正で潰しましょう。
spec/factories/posts.rbfactory :post do subject { "MyString" } body { "MyText" } + + after(:build) do |obj| + obj.user = build(:user) if obj.user.nil? + end end
after(:build)は、buildやcreateをした後に実行されます。
post.userにbuildしたuserを入れることにより、User must existエラーを潰せます。なお、
if obj.user.nil?をすることでcreate(:post, user: user)のように特定ユーザーを渡して生成した際、内部処理で上書きされてしまうのを防いでいます。実はもっとシンプルな方法で、とりあえず大半潰すことができたりします。
spec/factories/posts.rbfactory :post do subject { "MyString" } body { "MyText" } + user endただしこの方法だと
create(:post)した時はいいのですが、build(:post)した時にuserがnilで返ってくるため、前者の対応をしています。request specとcontrollerの修正
spec/requests/v1/posts_request_spec.rbdescribe "POST /v1/posts#create" do + let(:authorized_headers) do + user = create(:user) + post v1_user_session_url, params: { email: user.email, password: "password" } + headers = {} + headers["access-token"] = response.header["access-token"] + headers["client"] = response.header["client"] + headers["uid"] = response.header["uid"] + headers + end let(:new_post) do attributes_for(:post, subject: "create_subjectテスト", body: "create_bodyテスト") end it "正常レスポンスコードが返ってくる" do - post v1_posts_url, params: new_post + post v1_posts_url, params: new_post, headers: authorized_headers expect(response.status).to eq 200 end it "1件増えて返ってくる" do expect do - post v1_posts_url, params: new_post + post v1_posts_url, params: new_post, headers: authorized_headers end.to change { Post.count }.by(1) end it "subject, bodyが正しく返ってくる" do - post v1_posts_url, params: new_post + post v1_posts_url, params: new_post, headers: authorized_headers json = JSON.parse(response.body) expect(json["post"]["subject"]).to eq("create_subjectテスト") expect(json["post"]["body"]).to eq("create_bodyテスト") end it "不正パラメータの時にerrorsが返ってくる" do - post v1_posts_url, params: {} + post v1_posts_url, params: {}, headers: authorized_headers json = JSON.parse(response.body) expect(json.key?("errors")).to be true end endユーザーを生成し、そのユーザー情報を元にログイン。
レスポンスヘッダにある認証用3キーをheadersに加えてpostをすることで、create(:user)したユーザーとして認証された状態でアクセスをします。
ただしcontroller側をまだ直していないのでエラーのままです。controllerの修正
app/controllers/v1/posts_controller.rbdef create - post = Post.new(post_params) + post = current_v1_user.posts.new(post_params) if post.save上記修正でテスト通過するようになるはずです。
挙動を説明すると、まずheadersで認証情報が渡ってきているため、controllerでは
current_v1_userというメソッドが使えます。これはログイン中のユーザーインスタンスが返ってくるものです。
つまりcurrent_v1_user.posts.newは、ログイン中のユーザーに紐づくpostをインスタンス化しています。
それにより、ログインしているユーザーのpostが作られます。rspecの認証済みヘッダ取得処理をhelperに移動
テストは通るようになったのですが、今後Punditを入れて認可を実装していくにあたり、認証済みヘッダを取得する処理を都度書いていては保守性が下がるので、spec用のhelperに移動します。
spec用helperは一般的にspec/supportに置いていくのでディレクトリを作ります。
$ mkdir spec/support
$ touch spec/support/authorization_spec_helper.rb
rspecにあった処理をごっそりこっちに持ってきます。
spec/support/authorization_spec_helper.rb# frozen_string_literal: true # # 認証用ヘルパ # module AuthorizationSpecHelper def authorized_user_headers user = create(:user) post v1_user_session_url, params: { email: user.email, password: "password" } headers = {} headers["access-token"] = response.header["access-token"] headers["client"] = response.header["client"] headers["uid"] = response.header["uid"] headers end endspec/support下に配置しただけでは勝手に読み込んでくれないので、spec/rails_helper.rbを修正します。
spec/rails_helper.rb-# Dir[Rails.root.join('spec', 'support', '**', '*.rb')].sort.each { |f| require f } +Dir[Rails.root.join("spec", "support", "**", "*.rb")].sort.each { |f| require f } ... RSpec.configure do |config| ... + config.include(AuthorizationSpecHelper, type: :request) endコメントアウトされていたspec/support下を読みにいく処理を有効化するのと、AuthorizationSpecHelperをincludeします。上記のように書くことで、request specのみ有効になります。
spec/requests/v1/posts_request_spec.rb... require "rails_helper" RSpec.describe "V1::Posts", type: :request do + let(:authorized_headers) do + authorized_user_headers + end ... describe "POST /v1/posts#create" do - let(:authorized_headers) do - user = create(:user) - post v1_user_session_url, params: { email: user.email, password: "password" } - headers = {} - headers["access-token"] = response.header["access-token"] - headers["client"] = response.header["client"] - headers["uid"] = response.header["uid"] - headers - end ...あとは上記対応で完了。
テスト結果が変わらずgreenであればとりあえずOKです。テストは全部通過するものの、そもそもテストコードが不十分。
認証されていない時に#createを叩くと500エラーになったり、そもそも自分以外の投稿を更新したり削除できてしまう現状の仕様は困るので、次次回でいよいよ認可を入れていきます。次回はseedの整備を行います。
本日はここまで。続き