- 投稿日:2020-09-18T19:02:00+09:00
react-native-firebase(v6↑) + react-native-push-notificationを使ったプッシュ通知実装の注意点
まえがき
私が開発しているReact Nativeアプリについて、元々react-native-firebase(v5)を使ってプッシュ通知を実装していましたが、そろそろバージョンを上げることにしました。
ところが、v6からローカル通知の機能がNotifeeという有料の別ライブラリに分離されており、ローカル通知の機能のみ他のライブラリを採用せざるを得なくなりました。
そこで使えそうなライブラリを調べてみたところ、
- Notifee: ローカル通知専用ライブラリ。react-native-firebaseのチームが作っており当然相性も良く、品質も高そうだが、有料。
- react-native-push-notification: リモート&ローカル通知ライブラリ。一番スターが多い。
- react-native-notifications: リモート&ローカル通知ライブラリ。Wix製。Androidでchannelを指定してローカル通知を送れなさそう。(今のところ)
という感じのようだったので、react-native-push-notificationを採用することにしました。
本記事では、react-native-firebase(v6↑)とreact-native-push-notificationを使ってプッシュ通知を実装するにあたっての注意点を紹介します。
実現したいこと
- FCMで受信したメッセージを、アプリの状態(Foreground/Background/Quit)にかかわらずプッシュ通知で表示したい
- プッシュ通知をタップしたとき、アプリの状態にかかわらず処理したい
本記事で触れないこと
- react-native-firebaseの導入方法
- FCMの導入方法
環境
- React Native (0.63.2)
- @react-native-firebase/app (8.4.2)
- @react-native-firebase/messaging (7.8.6)
- react-native-push-notification (5.1.1)
- @react-native-community/push-notification-ios (1.5.0)
ライブラリを導入する
※ react-native-firebaseについては導入が済んでいるものとします。
まずは、react-native-push-notificationを導入します。このライブラリは、iOS部分については@react-native-community/push-notification-iosを使用しているため、併せてインストールを行います。
npm install --save react-native-push-notification @react-native-community/push-notification
npx pod-install
続けて、iOSについて下記コードの追記を行います。
AppDelegate.h#import <UserNotifications/UNUserNotificationCenter.h> ... @interface AppDelegate : UIResponder <UIApplicationDelegate, RCTBridgeDelegate, UNUserNotificationCenterDelegate>AppDelegate.m#import <UserNotifications/UserNotifications.h> #import <RNCPushNotificationIOS.h> ... - (BOOL)application:(UIApplication *)application didFinishLaunchingWithOptions:(NSDictionary *)launchOptions { ... UNUserNotificationCenter *center = [UNUserNotificationCenter currentNotificationCenter]; center.delegate = self; return YES; } ... - (void)userNotificationCenter:(UNUserNotificationCenter *)center didReceiveNotificationResponse:(UNNotificationResponse *)response withCompletionHandler:(void (^)(void))completionHandler { [RNCPushNotificationIOS didReceiveNotificationResponse:response]; completionHandler(); } - (void)userNotificationCenter:(UNUserNotificationCenter *)center willPresentNotification:(UNNotification *)notification withCompletionHandler:(void (^)(UNNotificationPresentationOptions options))completionHandler { completionHandler(UNNotificationPresentationOptionSound | UNNotificationPresentationOptionAlert | UNNotificationPresentationOptionBadge); }push-notification-iosのREADMEの導入手順には、他にもリモート通知用のデリゲートメソッドがいくつか記載してありますが、今回はローカル通知用として使用するため、上記のデリゲートメソッドがあればOKです。
実装前に抑えておくポイント
アプリの状態
アプリには以下の3つの状態があり、状態によってプッシュ通知受信時およびタップ時の挙動が異なります。
- Foreground: アプリが前面にあり動作している状態
- Background: ホーム画面や他のアプリが前面にあり、アプリが背面で動作している状態
- Quit: タスクキルなどでアプリが死んでいる状態
Quit時にプッシュ通知をタップした場合は、アプリが起動します。その起動したタイミングでタップしたプッシュ通知を処理することになります。
リモート通知とローカル通知
アプリがBackgroundまたはQuit状態のときにFCMを受信すると、FCM側(react-native-firebase)がプッシュ通知を表示してくれます。しかし、Foreground状態の場合には表示してくれず、代わりに
onMessageコールバックが呼ばれます。そのため、onMessageの中で、react-native-push-notificationを使ってプッシュ通知を表示する処理を実施する必要があります。本記事では、前者のことをリモート通知、後者のことをローカル通知と呼んでいます。実装する
関係するコードの抜粋です。
app.jsimport PushNotification from 'react-native-push-notification'; import PushNotificationIOS from '@react-native-community/push-notification-ios'; class App extends Component { constructor(props) { ... PushNotification.configure({ onNotification: notification => { // プッシュ通知をタップしたときに呼ばれる ... // URLを開くなどの処理 notification.finish(PushNotificationIOS.FetchResult.NoData); } }); } componentDidMount() { this.unsubscribeMethods = [ firebaseMessaging().onTokenRefresh((token: string) => { // トークンリフレッシュ時に呼ばれる ... // トークンリフレッシュ時の処理 }), firebaseMessaging().onMessage(message => { // Foreground時にリモートプッシュ通知を受信した際に呼ばれる this._localNotification(message); }) ]; } componentDidUnmount() { this.unsubscribeMethods(); } // ローカル通知 _localNotification(message) { PushNotification.localNotification({ title: message.notification.title, message: message.notification.body, userInfo: message.data, ... }); } }ForegroundでFCMを受信したときには
onMessageが呼ばれるので、localNotification()でローカル通知を行っています。プッシュ通知がタップされたときはreact-native-push-notificationの
onNotificationが呼ばれます。ローカル通知だけでなく、react-native-firebaseが表示したリモート通知がタップされたときも呼ばれます。また、Quit時にタップされてアプリが起動する場合も、起動時に呼ばれます。すなわち、プッシュ通知がタップされた際の処理は、あらゆる場合にonNotificationでカバーできることになります。なお、@react-native-firebase/messagingには、リモート通知をタップした際に呼ばれる
onNotificationOpenedAppや、起動時に呼ぶことでQuit時にタップした通知を取得するgetInitialNotification()が用意されていますが、リモート通知に限って処理を行いたいケースを除いては、特に使う必要はなさそうです。タップしたときの動き(メモ)
各OS、各アプリ状態、ローカル通知/リモート通知について、プッシュ通知をタップしたときにどのコールバックが呼ばれるかを整理した際のメモを載せておきます。
onNotificationでは、Foregroundでタップされたかどうかの値foreground、ユーザーがタップしたかどうかの値userInteractionが引数で渡されますが、一部のケースで誤った値になっていそうです(該当箇所は太字で記載しています)。iOS
ローカル通知
- Foreground:
onNotification(foreground=true, userInteraction=false)が呼ばれる- Background:
onNotification(foreground=false, userInteraction=true)が呼ばれる。- Quit:
onNotification(foreground=false, userInteration=true)が呼ばれる。(getInitialNotification()では取れない。)リモート通知
- Foreground:
onNotificationOpenedAppが呼ばれる。onNotification(foreground=true, userInteraction=false)も呼ばれる。- Background:
onNotificationOpenedAppが呼ばれる。onNotification(foreground=false, userInteraction=true)も呼ばれる。- Quit:
getInitialNotification()で取れる。onNotification(foreground=false, userInteraction=true)も呼ばれる。Android
ローカル通知
- Foreground:
onNotification(foreground=true, userInteraction=true)が呼ばれる。- Background:
onNotification(foreground=true, userInteraction=true)が呼ばれる。- Quit:
onNotification(foreground=false, userInteration=true)が呼ばれる。(getInitialNotification()では取れない。)リモート通知
- Foreground:
onNotification(foreground=false, userInteraction=true)が呼ばれる。onNotificationOpenedAppも呼ばれる。- Background:
onNotification(foreground=false, userInteraction=true)が呼ばれる。onNotificationOpenedAppも呼ばれる。- Quit:
getInitialNotification()で取れる。onNotification(foreground=false, userInteraction=true)も呼ばれる。まとめ
- ForegroundでFCMを受信した際にはプッシュ通知が表示されず
onMessageが呼ばれるので、そのタイミングでreact-native-push-notificationのlocalNotification()を使ってローカル通知を表示する。- OS、アプリの状態、リモート通知/ローカル通知のにかかわらず、通知タップ時の処理は
onNotificationで行えばOK。onNotificationのforegroundやuserInteractionの値は怪しいので、場合分けには使わない方が無難。以上、react-native-push-notificationの
onNotificationが万能で助かったというお話でした。
- 投稿日:2020-09-18T17:47:17+09:00
7. 【Android/Kotlin】バリデーションチェック
はじめに
DreamHanksのMOONです。
前回は「スピナー」について説明をしていきました。
6. 【Android/Kotlin】スピナー(Spinner)今回は簡単なログイン画面を作り、バリデーションチェックをしていきます。
バリデーションチェックとは
バリデーションチェックは入力内容や記述内容が要件を満たしているか、妥当性を確認することです。みんなさんが
ヤフーやほかのポータルサイトのログインページでIDを入力しなくてログインすると、
ログインができなくて「IDを入力してください」というメッセージをみた経験があると思います。それがバリデーションチェックによるエラーメッセージです。
ログイン画面を作成
・ログイン画面のレイアウトのxmlファイルを作成
activity_main.xml<?xml version="1.0" encoding="utf-8"?> <LinearLayout xmlns:android="http://schemas.android.com/apk/res/android" xmlns:app="http://schemas.android.com/apk/res-auto" xmlns:tools="http://schemas.android.com/tools" android:layout_width="match_parent" android:layout_height="match_parent" android:orientation="vertical" tools:context=".MainActivity" android:gravity="center"> <TextView android:layout_width="wrap_content" android:layout_height="wrap_content" android:id="@+id/main_tv" android:text="ログイン" /> <EditText android:layout_width="200dp" android:layout_height="wrap_content" android:id="@+id/id_et" android:inputType="text" android:hint="ID"/> <EditText android:layout_width="200dp" android:layout_height="wrap_content" android:id="@+id/pwd_et" android:inputType="textPassword" android:hint="パスワード"/> <Button android:layout_width="wrap_content" android:layout_height="wrap_content" android:id="@+id/login_btn" android:text="ログイン"/> </LinearLayout>・Activityを作成
MainActivity.ktpackage com.example.practiceapplication import android.content.Intent import androidx.appcompat.app.AppCompatActivity import android.os.Bundle import android.widget.Button import android.widget.EditText import android.widget.TextView import android.widget.Toast import javax.xml.validation.Validator class MainActivity : AppCompatActivity() { override fun onCreate(savedInstanceState: Bundle?) { super.onCreate(savedInstanceState) setContentView(R.layout.activity_main) val id_et = findViewById<EditText>(R.id.id_et) //IDのEditText(入力エリア) val pwd_et = findViewById<EditText>(R.id.pwd_et) //PasswordのEditText(入力エリア) val login_btn = findViewById<Button>(R.id.login_btn) //ログインボタン //ログインボタンのクリックイベントを設定 login_btn.setOnClickListener { //バリデーションチェックの結果 val check = validationCheck(id_et, pwd_et) //エラーがない場合に画面を遷移 if(check){ val nextIntent = Intent(this, IntentTestActivity::class.java) nextIntent.putExtra("id_et", id_et.text.toString()) startActivity(nextIntent) } } } //バリデーションチェックするためのメソッド fun validationCheck(id_et : EditText, pwd_et : EditText) : Boolean{ //IDの入力値がない場合 if(id_et.text.toString().length == 0){ //IDの入力エリアをフォーカスさせる id_et.requestFocus() //画面の下にToastエラーメッセージを表示 Toast.makeText(applicationContext, "IDを入力してください。", Toast.LENGTH_SHORT).show() return false } //Passwordの入力値がない場合 if(pwd_et.text.toString().length == 0){ //Passwordの入力エリアをフォーカスさせる pwd_et.requestFocus() //画面の下にToastエラーメッセージを表示 Toast.makeText(applicationContext, "パスワードを入力してください。", Toast.LENGTH_SHORT).show() return false } return true } }①ログインボタンのクリックイベントを設定します。
②バリデーションチェックするためのメソッドを作成します。
③バリデーションチェックのメソッドの結果によって問題がない場合に画面を遷移させます。・遷移させる画面のxmlを作成
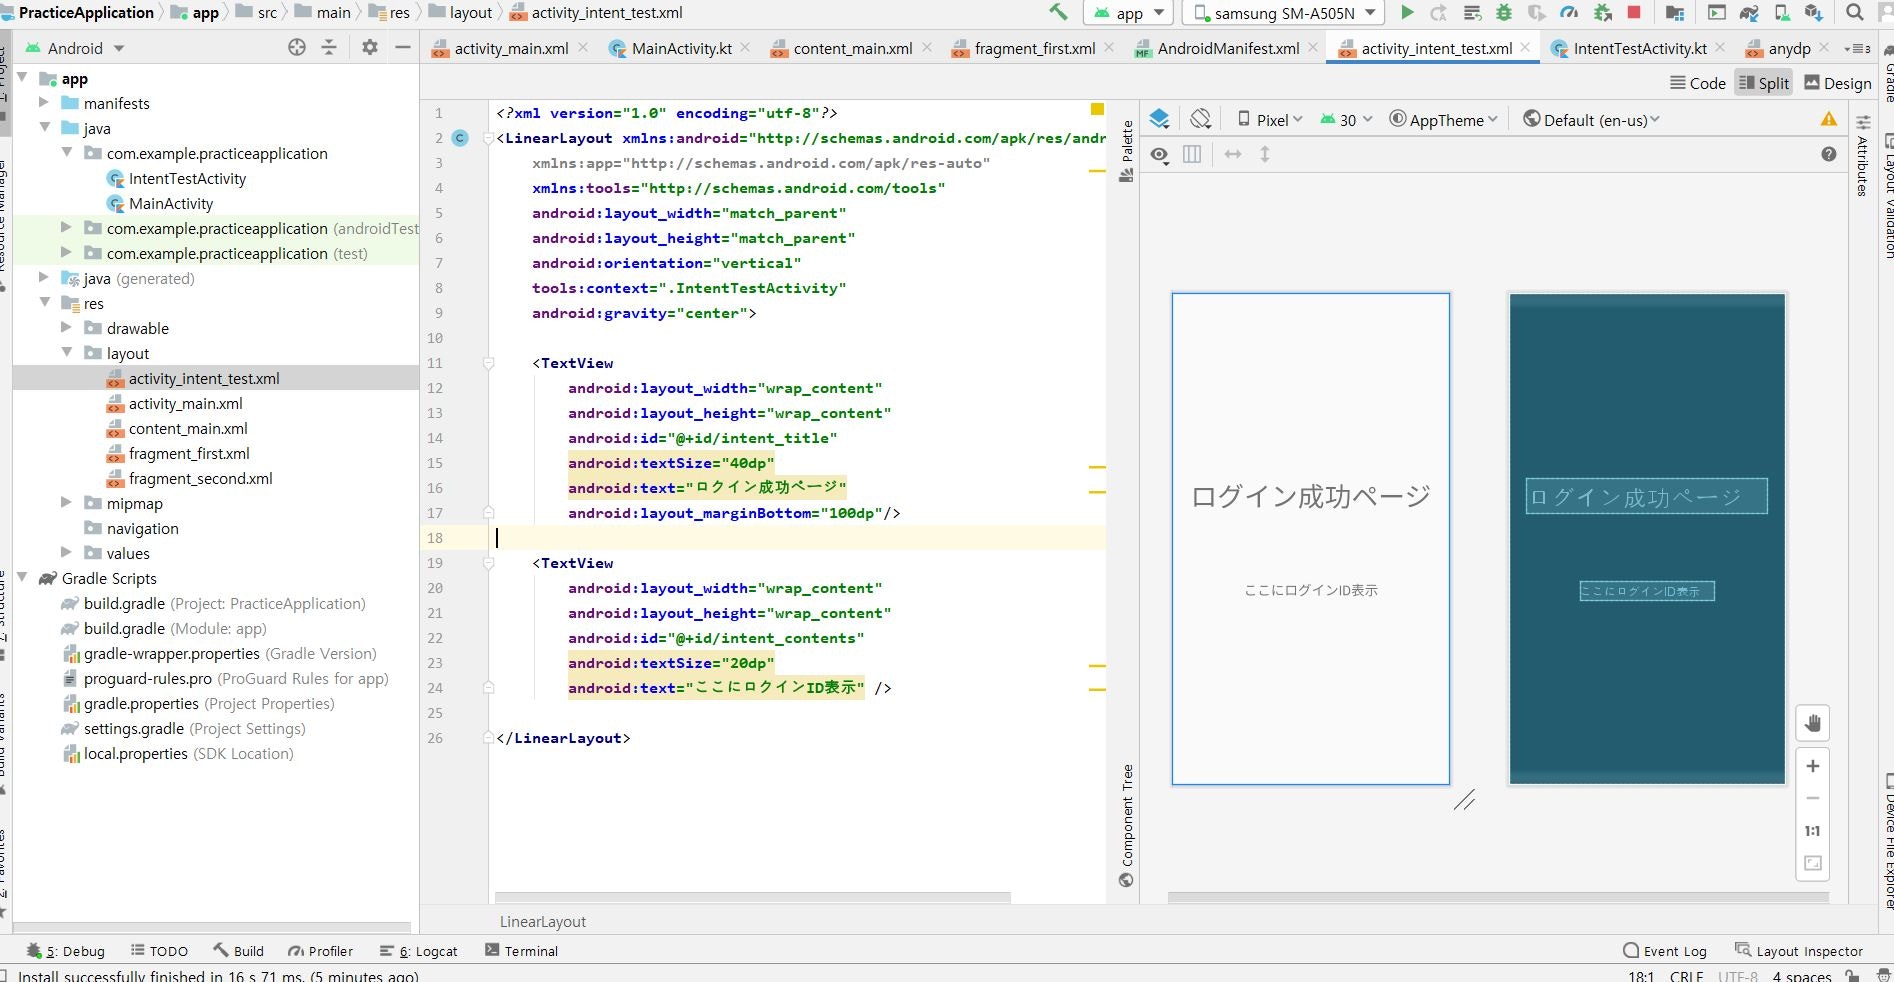
activity_intent_test.xml<?xml version="1.0" encoding="utf-8"?> <LinearLayout xmlns:android="http://schemas.android.com/apk/res/android" xmlns:app="http://schemas.android.com/apk/res-auto" xmlns:tools="http://schemas.android.com/tools" android:layout_width="match_parent" android:layout_height="match_parent" android:orientation="vertical" tools:context=".IntentTestActivity" android:gravity="center"> <TextView android:layout_width="wrap_content" android:layout_height="wrap_content" android:id="@+id/intent_title" android:textSize="40dp" android:text="ログイン成功ページ" android:layout_marginBottom="100dp"/> <TextView android:layout_width="wrap_content" android:layout_height="wrap_content" android:id="@+id/intent_contents" android:textSize="20dp" android:text="ここにログインID表示" /> </LinearLayout>・遷移させる画面のActivityを作成
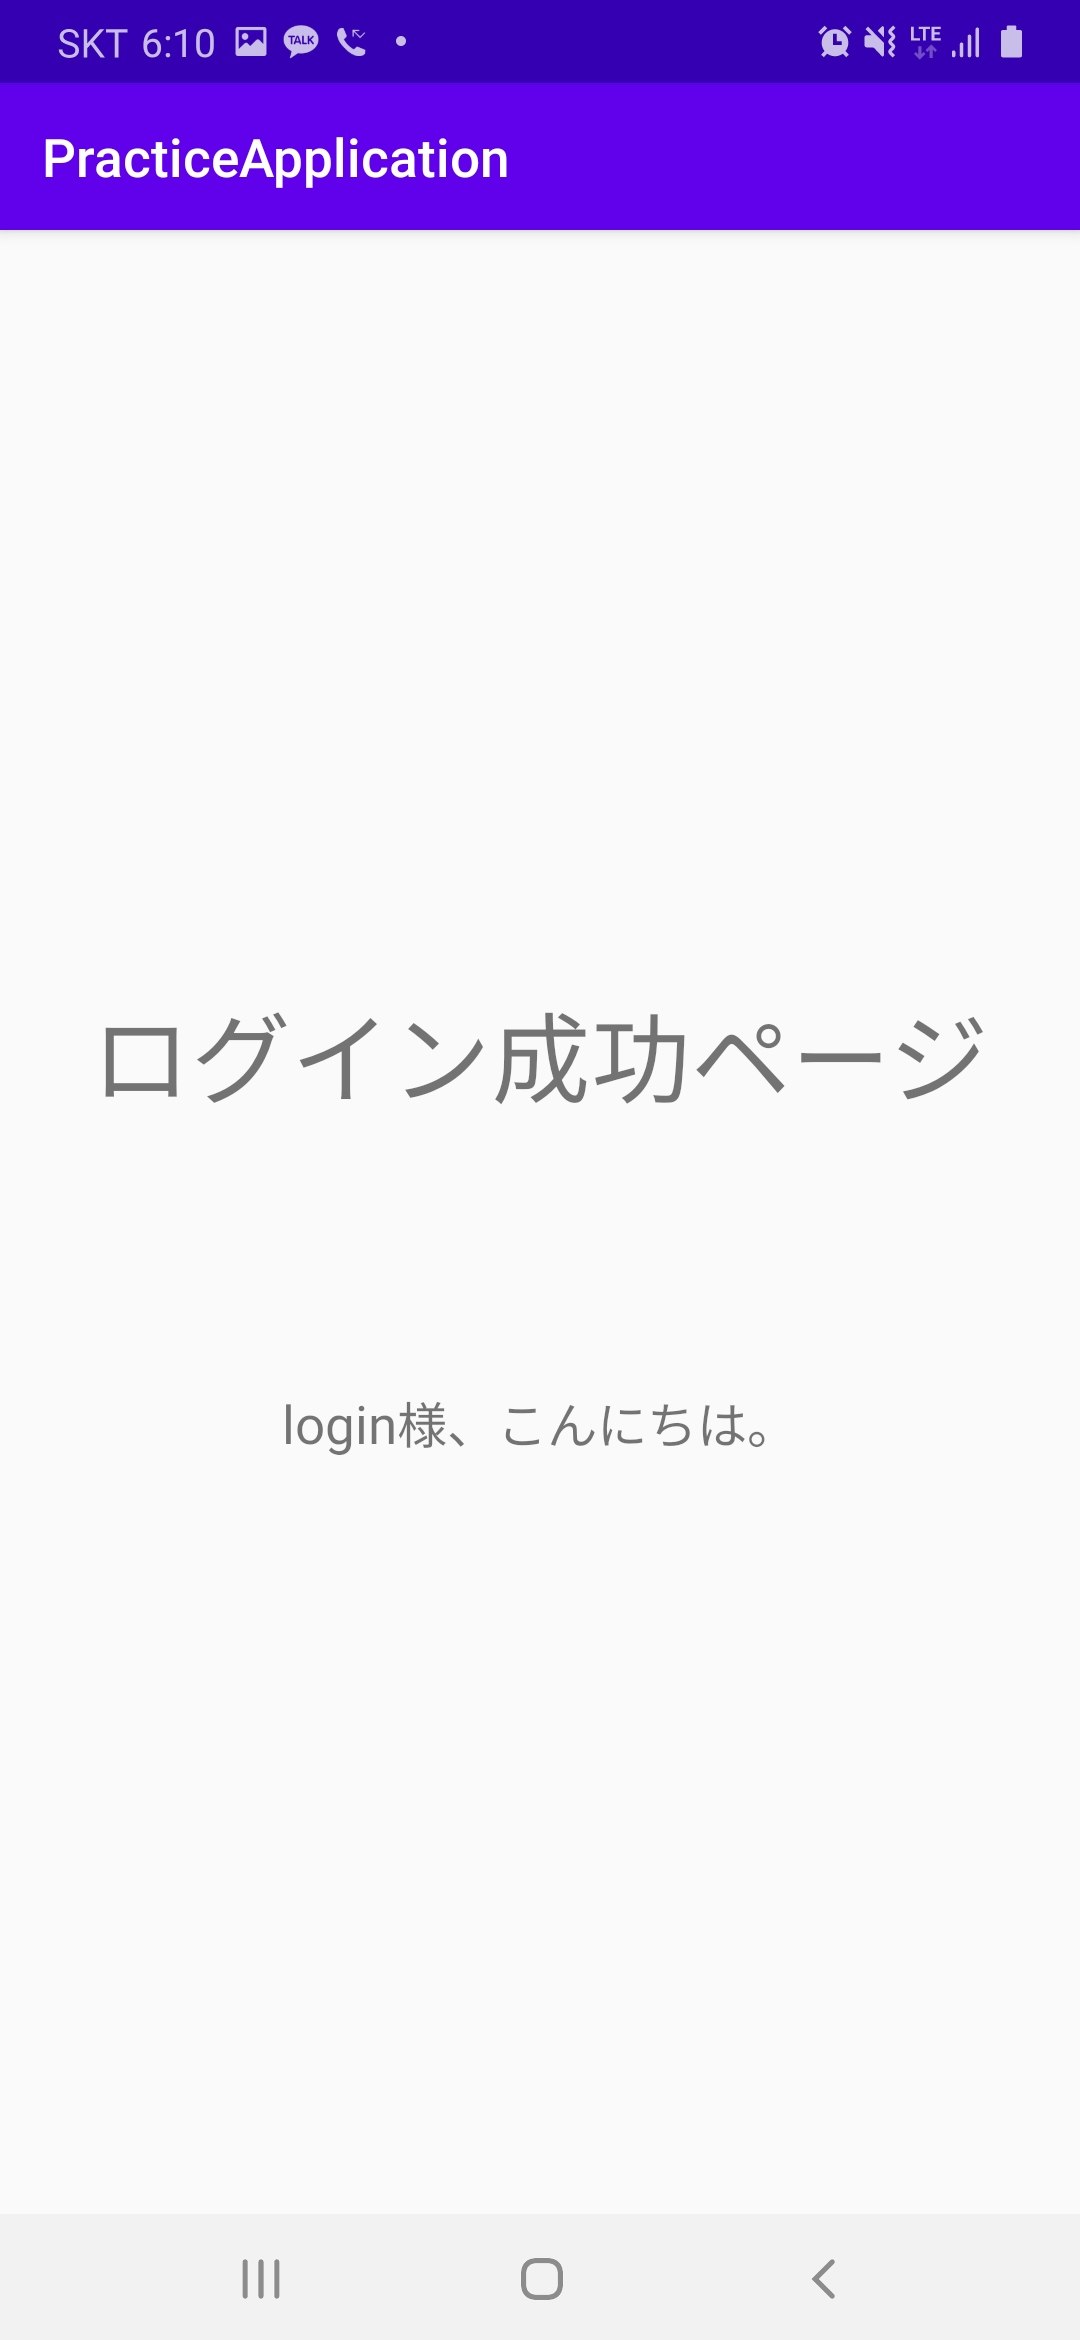
IntentTestActivity.ktpackage com.example.practiceapplication import androidx.appcompat.app.AppCompatActivity import android.os.Bundle import android.widget.TextView class IntentTestActivity : AppCompatActivity() { override fun onCreate(savedInstanceState: Bundle?) { super.onCreate(savedInstanceState) setContentView(R.layout.activity_intent_test) val intent_contents = findViewById<TextView>(R.id.intent_contents) //以前の画面のIDを取得 val intented_string = intent.getStringExtra("id_et") //以前の画面のIDをテキストに表示 intent_contents.text = intented_string + "様、こんにちは。" } }アプリ起動
・IDを入力しなくてログインボタンをクリックした場合
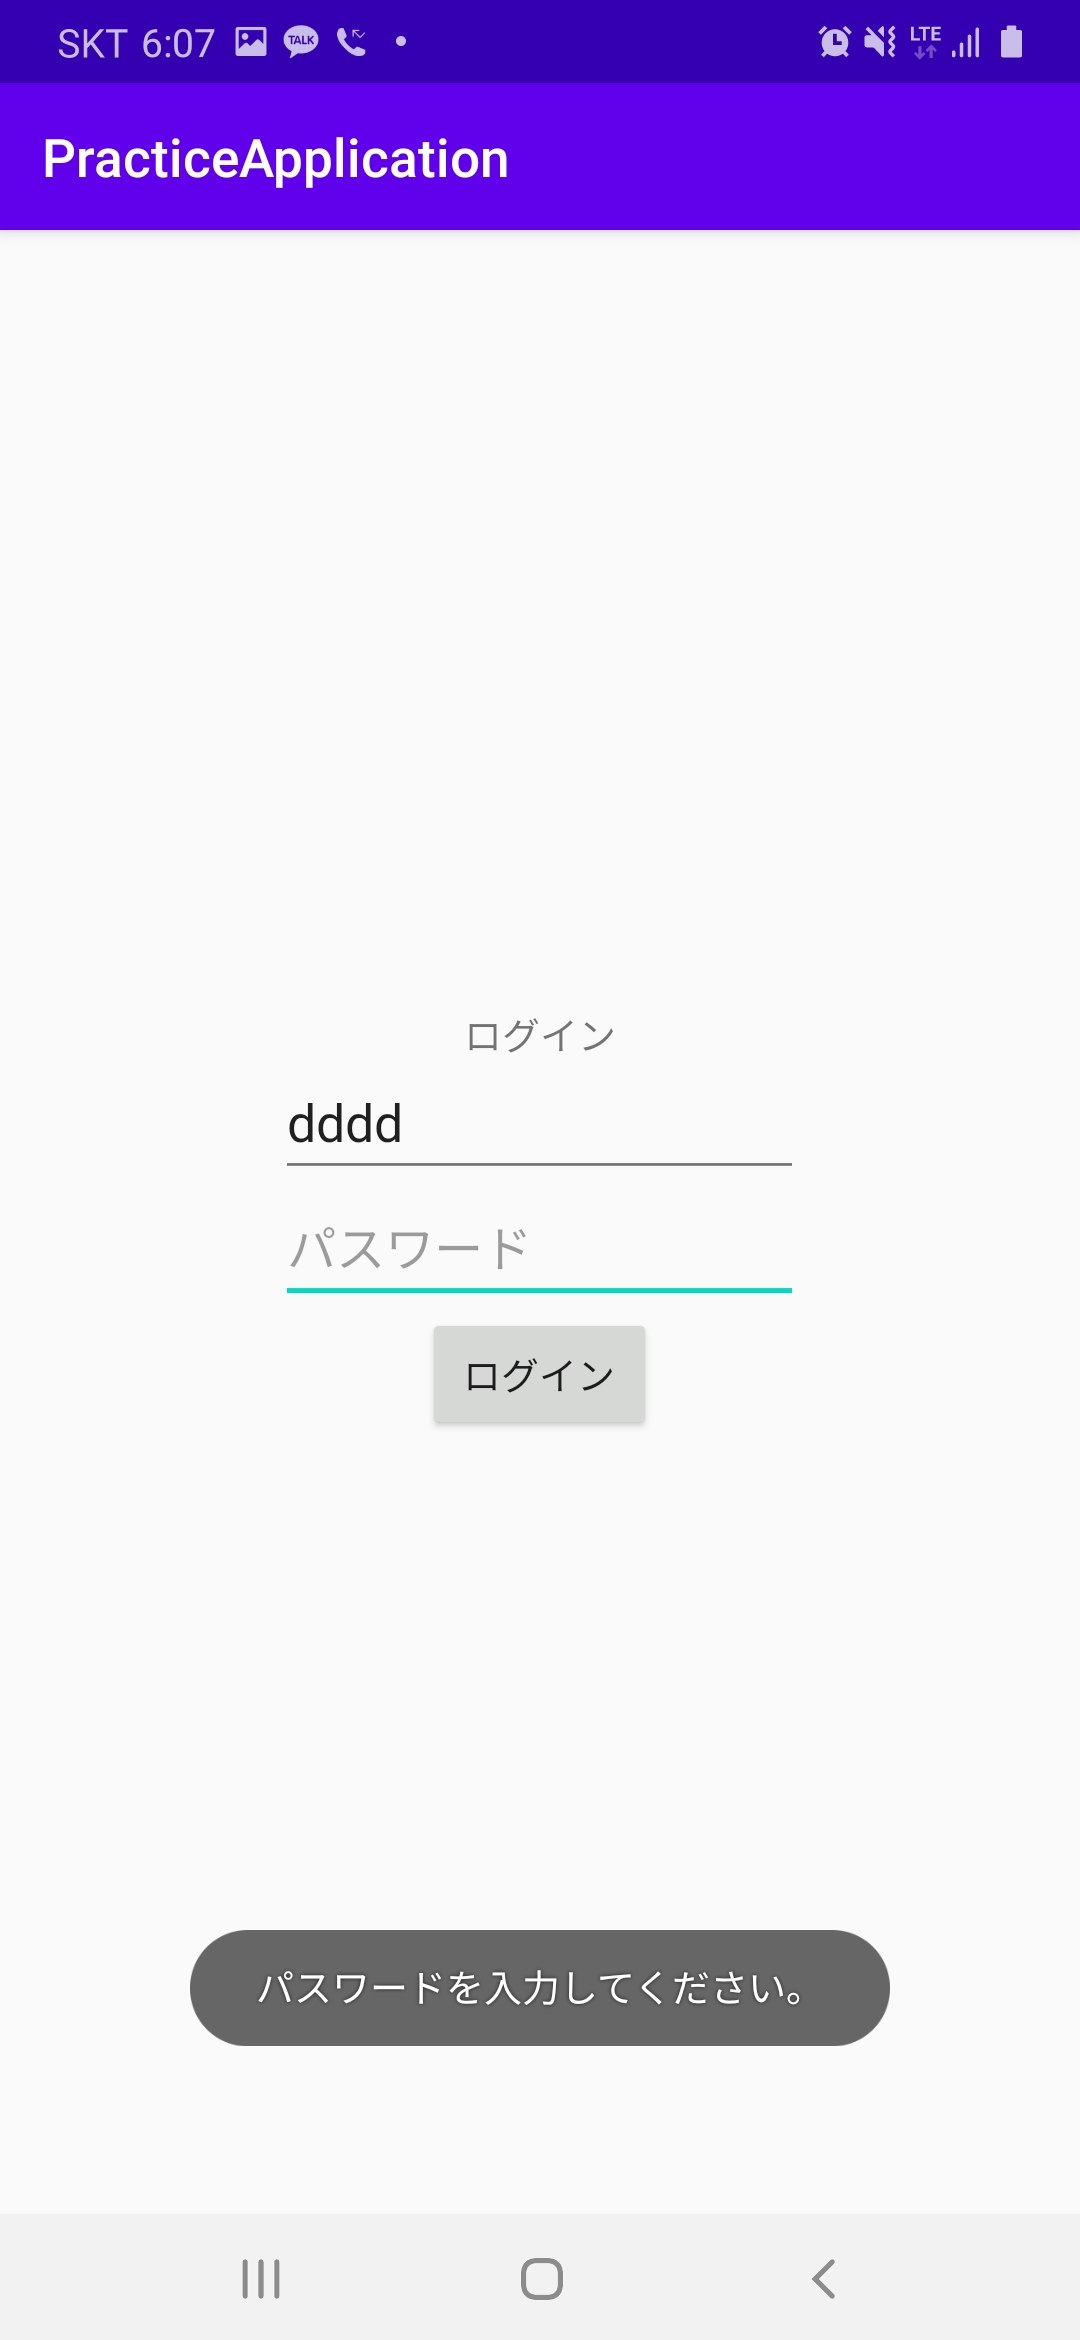
・パスワードを入力しなくてログインボタンをクリックした場合
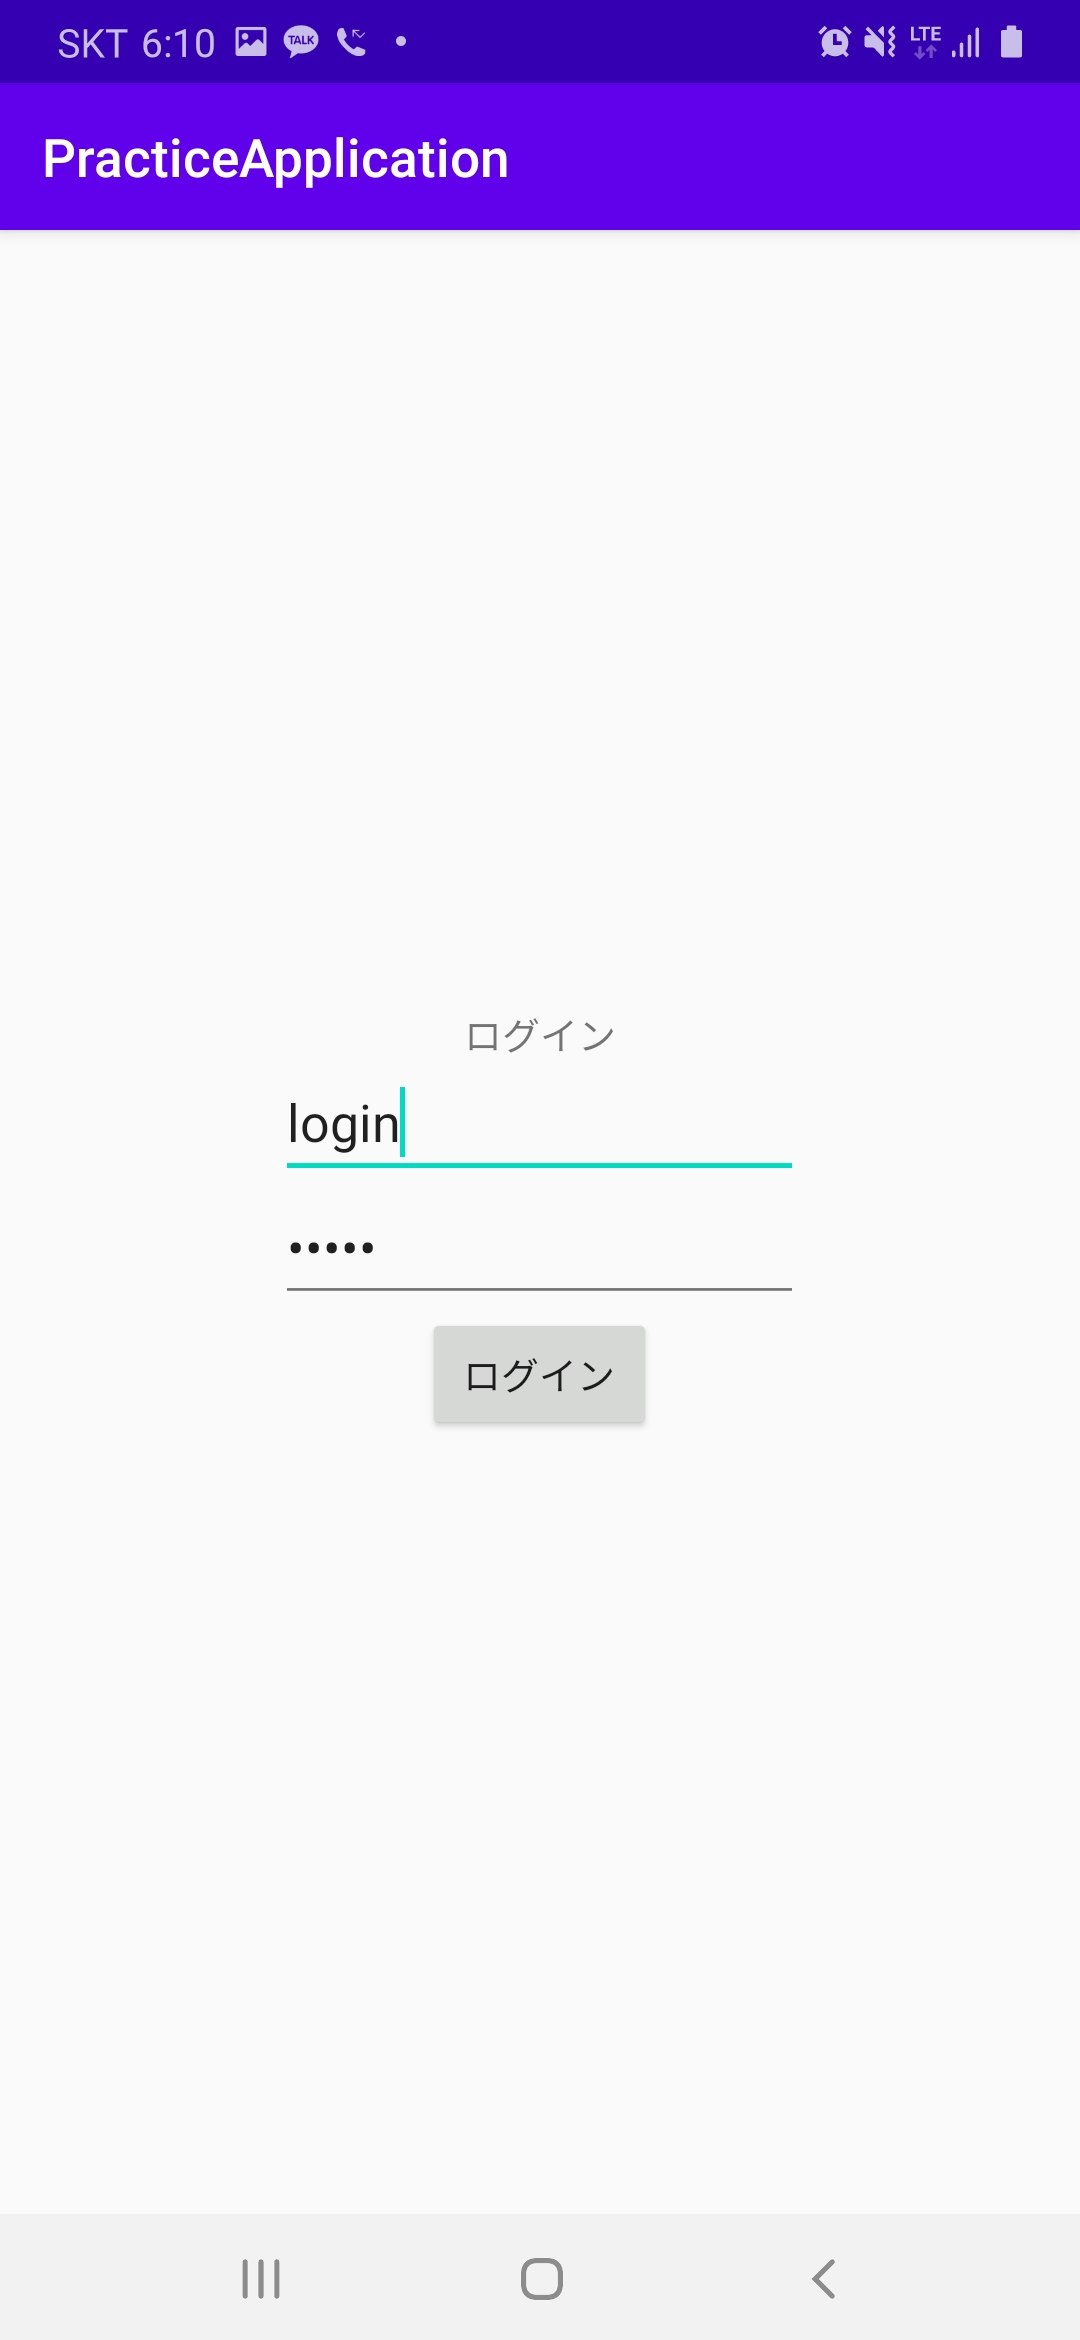
・正確に入力してログインボタンをクリックした場合
終わりに
今回はバリデーションチェックについて説明をしました。
次回は「ウェブビュー」について説明をしていきます。
8. 【Android/Kotlin】ウェブビュー(WebView)