- 投稿日:2020-05-25T23:15:03+09:00
Raspberry Pi Imager を使ったOSセットアップ
Raspberry Pi Imager を使ったOSセットアップ
- Raspberry-Pi 4 を使用
- 作業端末はWindows
全体構成
この順に構築していく予定です、今回はOS設定編となります。
- OSインストール・環境設定
- コンテナ環境構築
- アプリケーション導入
- ファイルサーバ
- VPNサーバ
- TBA
OSインストール・環境設定
利用モデル
Raspberry Piは以下のものを購入。
色々遊んでみるだけなのでもっとロースペックでもよかった。
よくわからないけど、セットを買えば問題無いよね!の精神で購入。
https://www.amazon.co.jp/gp/product/B07ZRF5BC1/SDカードの準備
ファイルシステムはFAT32でないとダメらしい。
最初はNintendo SwitchのSDカードを引っこ抜いて使おうと思っていたが、
上記セットに同封されていたため今回はこれを使用。Raspberry Pi Imager でメディア作成
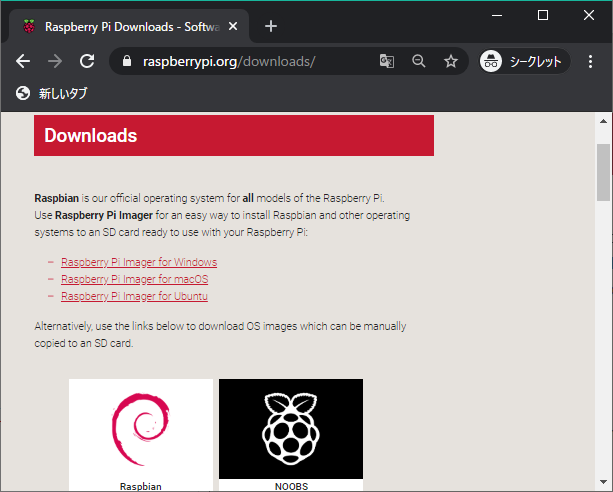
サイトからexeファイルをダウンロード
https://www.raspberrypi.org/downloads/
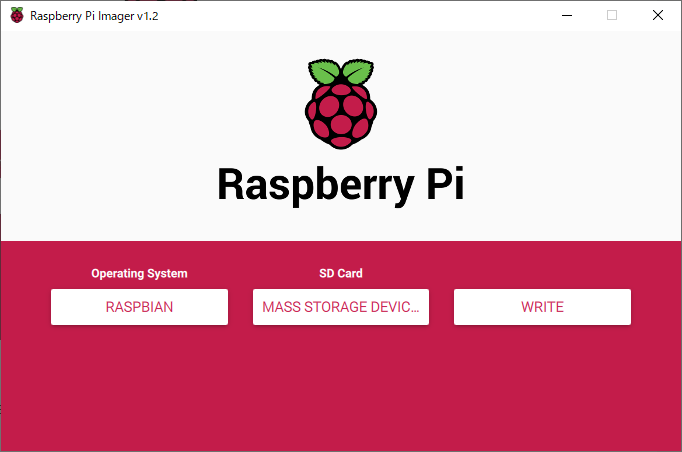
インストールし、そのまま管理者権限で起動
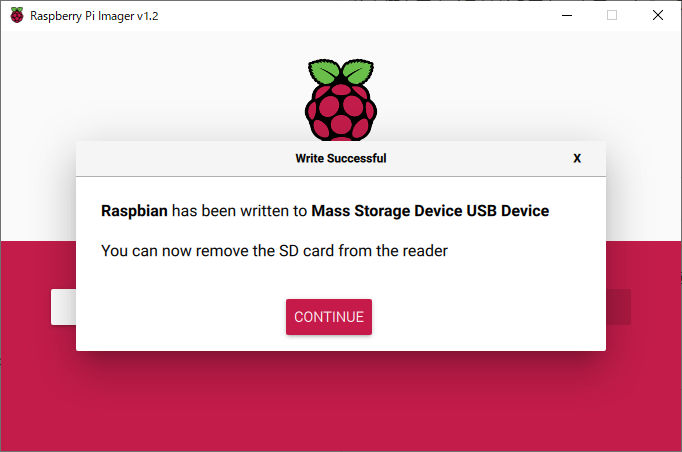
OSと書き込み先ボリュームを指定して、[WRITE]を選択。
完了まで暫くかかった。30分強かも
OS設定
SDカードをラズパイに挿し電源起動、HDMIケーブルでディスプレイを写して操作
SSH有効化
VNC有効化
有効化を確認
# netstat -ant
稼働中のインターネット接続 (サーバと確立)
Proto 受信-Q 送信-Q 内部アドレス            外部アドレス            状態
tcp        0      0 0.0.0.0:5900            0.0.0.0:*               LISTEN
tcp        0      0 0.0.0.0:22              0.0.0.0:*               LISTEN
ここでifconfigでIPアドレスを確認し、SSH接続での作業に切り替え
- vimインストール
# apt install ^vim$
- IPアドレス固定
# vi /etc/dhcpcd.conf
==追記=====
interface wlan0
static ip_address=172.22.1.253/22
static routers=172.22.0.1
static domain_name_servers=172.22.255.1

# service sshd restart
- ディストリビューション、ファームウェア最新化
# apt-get dist-upgrade
# rpi-update
# apt-get update
# apt-get upgrade
ここで一度再起動し、再度ログイン
# shutdown -r now
- ユーザ作成、sudo設定
# adduser batch
# vi /etc/sudoers
==追記=====
batch   ALL=(ALL)   NOPASSWD: ALL
- 秘密鍵・公開鍵作成
# su - batch
$ ssh-keygen -t rsa -b 4096
$ scd .ssh/
$ schmod 600 id_rsa
$ smv id_rsa authorized_keys
$ ls -l
合計 8
-rw------- 1 batch batch 3381  5月 25 22:01 authorized_keys
-rw------- 1 batch batch  743  5月 25 22:01 id_rsa.pub
id_rsa.pubはローカルへダウンロード
- sshd_config修正
ログイン確認は既存セッションを残したまま行いましょう。
# vi /etc/ssh/sshd_config
==以下を変更====
PermitRootLogin no
PubkeyAuthentication yes
PasswordAuthentication no
- エイリアス設定
.bashrc に書き込もうと思ったが、内容をみると
.bash_aliase の方が適していそうだったためそちらに記載# vi .bash_aliase ==以下を記載==== alias ll='ls -la --color=auto'
- Swap無効化
設定反映には再起動が必要
# swapoff --all
# systemctl stop dphys-swapfile
# systemctl disable dphys-swapfile

# free -h
              total        used        free      shared  buff/cache   available
Mem:          3.7Gi        88Mi       3.1Gi       8.0Mi       611Mi       3.5Gi
Swap:            0B          0B          0B
- 利用しないログ出力の無効化
# vi /etc/rsyslog.conf
==以下をコメントアウト====
#daemon.*                       -/var/log/daemon.log
#lpr.*                          -/var/log/lpr.log
#mail.*                         -/var/log/mail.log
#mail.info                      -/var/log/mail.info
#mail.warn                      -/var/log/mail.warn
#mail.err                       /var/log/mail.err
#*.=debug;\
#       auth,authpriv.none;\
#       news.none;mail.none     -/var/log/debug
- その他
パーティションも設定したかったがめんどくさいのでやめた
アプリケーション導入後にログローテート設定を入れるようにするバックアップ取得
この状態でバックアップファイルを取得しておく
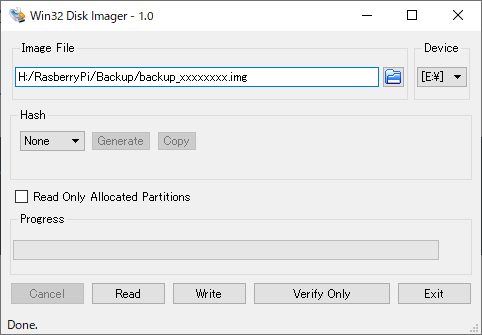
Win32 Disk Imager をインストール
https://sourceforge.net/projects/win32diskimager/Win32 Disk Imagerを起動した状態で、ラズパイのSDカードを作業PCに接続
[ImageFIle] にバックアップイメージのファイル名
[Device] にSDカードが認識されているデバイス名を指定
30分程度でバックアップ取得が完了。
参考サイト
Raspberry Pi-01〜土台環境構築編〜
Raspberry Pi 3 (Raspbian Jessie)の無線LANに固定IPアドレスを設定する
【Raspberry Pi】SDカードを丸ごとバックアップする方法について
- 投稿日:2020-05-25T20:39:22+09:00
Linux Gadget Serial Driver v2.0
https://www.kernel.org/doc/html/latest/usb/gadget_serial.html
Linux Gadget Serial Driver v2.0
11/20/2004
(updated 8-May-2008 for v2.3)
License and Disclaimer
This program is free software; you can redistribute it and/or modify it under the terms of the GNU General Public License as published by the Free Software Foundation; either version 2 of the License, or (at your option) any later version.
This program is distributed in the hope that it will be useful, but WITHOUT ANY WARRANTY; without even the implied warranty of MERCHANTABILITY or FITNESS FOR A PARTICULAR PURPOSE. See the GNU General Public License for more details.
You should have received a copy of the GNU General Public License along with this program; if not, write to the Free Software Foundation, Inc., 59 Temple Place, Suite 330, Boston, MA 02111-1307 USA.
This document and the gadget serial driver itself are Copyright (C) 2004 by Al Borchers (alborchers@steinerpoint.com).
If you have questions, problems, or suggestions for this driver please contact Al Borchers at alborchers@steinerpoint.com.
Prerequisites
Versions of the gadget serial driver are available for the 2.4 Linux kernels, but this document assumes you are using version 2.3 or later of the gadget serial driver in a 2.6 Linux kernel.
gadget serial driverは、2.4 Linux kernelから有効でした、しかしこのドキュメントでは、2.6 Linux Kernelで、version 2.3以降のgadget serial driverを使っている前提とします。
This document assumes that you are familiar with Linux and Windows and know how to configure and build Linux kernels, run standard utilities, use minicom and HyperTerminal, and work with USB and serial devices. It also assumes you configure the Linux gadget and usb drivers as modules.
このドキュメントでは、LinuxやWindowsが身近であり、Linux Kernelの設定や構築方法を知っており、標準的なユーティリティを動かせ、miniconやHyperTerminalが利用でき、更に、USB とserial deviceを扱える、という前提にも届きます。また、あなたは、Linux gadgetとusb driverをmoduleとして設定している前提です。
With version 2.3 of the driver, major and minor device nodes are no longer statically defined. Your Linux based system should mount sysfs in /sys, and use “mdev” (in Busybox) or “udev” to make the /dev nodes matching the sysfs /sys/class/tty files.
driverのバージョン2.3では、major / minor device nodeが静的に定まっていませんでした。Linux based systemにおいてsysfsを/sysでmountし、(BusyBoxであれば)mbev, そうでなければ"udev"によって、sysfs /sys/class/tty filesを/dev nodeを一致させてください。
Overview
The gadget serial driver is a Linux USB gadget driver, a USB device side driver. It runs on a Linux system that has USB device side hardware; for example, a PDA, an embedded Linux system, or a PC with a USB development card.
Gadget serial driverは、Linux USB gadget driverであり、USB dervice sid driverです。これは、hardwareの横に位置するUSB deviceを有するLinux system上で動作します:例えば、PDA, 組み込みLinux system あるいは、USB開発カード(訳注:要するに、ArduinoやmbedのようなUSB接続マイコン)を備えたPC。
The gadget serial driver talks over USB to either a CDC ACM driver or a generic USB serial driver running on a host PC:
Gadget serial driverは、USBを介して、hos PC上で動作するCDC ACM driverあるいはgeneric USB serial driverのいずれと通信をします。
 Host
 --------------------------------------
| Host-Side   CDC ACM       USB Host   |
| Operating |   or        | Controller |   USB
| System    | Generic USB | Driver     |--------
| (Linux or | Serial      | and        |        |
| Windows)    Driver        USB Stack  |        |
 --------------------------------------         |
                                                |
                                                |
                                                |
 Gadget                                         |
 --------------------------------------         |
| Gadget                   USB Periph. |        |
| Device-Side |  Gadget  | Controller  |        |
| Linux       |  Serial  | Driver      |--------
| Operating   |  Driver  | and         |
| System                   USB Stack   |
 --------------------------------------
On the device-side Linux system, the gadget serial driver looks like a serial device.
device-side linux systemから見ると、gadget serial driverは、seirla deviceのように見えます。
On the host-side system, the gadget serial device looks like a CDC ACM compliant class device or a simple vendor specific device with bulk in and bulk out endpoints, and it is treated similarly to other serial devices.
host-side systemから見ると、gadget serial device は、CDC ACM compliant class deviceあるいは、bulk in で bulk outするendpointを有する、単純なvender specific deviceに見え、他のserial deviceと同じように使われます。
The host side driver can potentially be any ACM compliant driver or any driver that can talk to a device with a simple bulk in/out interface. Gadget serial has been tested with the Linux ACM driver, the Windows usbser.sys ACM driver, and the Linux USB generic serial driver.
host side driverは、ACM compliant driverあるいはsimple bulk in/out interfaceと通信できるドライバである可能性があります。Gadget serial は、Linux ACM driver、Windows usbser.sys ACM driverあるいは、Linux USB generic serial driverによってテストされます、
With the gadget serial driver and the host side ACM or generic serial driver running, you should be able to communicate between the host and the gadget side systems as if they were connected by a serial cable.
Gadget serial driverとhost side ACM / generic serial driverを動かしているとき、serial cableで接続されているならば、hostとgadget side system間でコミュニケーションをとることができます。
The gadget serial driver only provides simple unreliable data communication. It does not yet handle flow control or many other features of normal serial devices.
Gadget serial driverは、信頼性の低いデータ通信のみを提供するものです。これは、flow制御やそのほかの一般的なserial deviceの多くのほか機能を処理しません。
Installing the Gadget Serial Driver
To use the gadget serial driver you must configure the Linux gadget side kernel for “Support for USB Gadgets”, for a “USB Peripheral Controller” (for example, net2280), and for the “Serial Gadget” driver. All this are listed under “USB Gadget Support” when configuring the kernel. Then rebuild and install the kernel or modules.
Gadget serial driverを使うには、"Support for USB Gadgets" , “USB Peripheral Controller"(例えば、net2280)、そして、"Serial Gadget" driverをLinux gadget side kernelに設定する必要があります。これらすべてはKernel設定をする時に、"USB Gadget Support"の下にリストされています。そして、kernelとmoduleの再構築とインストールをしてください。
Then you must load the gadget serial driver. To load it as an ACM device (recommended for interoperability), do this:
そして、gadget srial driverをloadしなければなりません。CM deviceとしてLoadするにはこのようにしてください(相互運用性のために推奨)。
modprobe g_serialTo load it as a vendor specific bulk in/out device, do this:
vendor specific bulk in/out deviceとしてloadする場合には、以下のようにしてください。
modprobe g_serial use_acm=0This will also automatically load the underlying gadget peripheral controller driver. This must be done each time you reboot the gadget side Linux system. You can add this to the start up scripts, if desired.
これにより、元になるgadget peripheral controller driverも自動的に読み出されます。これは、gadget side Linux systemが再起動したとき毎回行う必要があります。必要に応じて、start up scriptに追加してください。
Your system should use mdev (from busybox) or udev to make the device nodes. After this gadget driver has been set up you should then see a /dev/ttyGS0 node:
mdev(busyboxから)あるいはudevを使い、device nodeを作る必要があります。このgadget driverをセットアップされたら、/dev/ttyGS0 nodeとして参照できます:
# ls -l /dev/ttyGS0 | cat
crw-rw----    1 root     root     253,   0 May  8 14:10 /dev/ttyGS0
#
Note that the major number (253, above) is system-specific. If you need to create /dev nodes by hand, the right numbers to use will be in the /sys/class/tty/ttyGS0/dev file.
major number(上記の253)は、システム固有であることに注意してください。もし、/dev nodeを手で作る必要がある場合、/sys/class/tty/ttyGS0/dev fileにある、正しい値を使ってく下さい。
When you link this gadget driver early, perhaps even statically, you may want to set up an /etc/inittab entry to run “getty” on it. The /dev/ttyGS0 line should work like most any other serial port.
gadget driverを早期につなぎたい時には、あるいは、静的にしたい場合、/etc/inittab entryで、"getty"を実行することができます。/dev/ttyGS0行は、他のシリアルドライバと同じように動くはずです。
If gadget serial is loaded as an ACM device you will want to use either the Windows or Linux ACM driver on the host side. If gadget serial is loaded as a bulk in/out device, you will want to use the Linux generic serial driver on the host side. Follow the appropriate instructions below to install the host side driver.
Gadget serialがACM deviceとしてloadされている場合、host sideのWindowsあるいはLinux ACM driverのいずれかを使う必要があります。Gadget serialがbulk in/out deviceつsite
loadされている場合、host sideのLinux generial serial driverを使う必要ああ取ります。以下の手順に従って、host side driverをインストールしてください。Installing the Windows Host ACM Driver
To use the Windows ACM driver you must have the “linux-cdc-acm.inf” file (provided along this document) which supports all recent versions of Windows.
Windows ACM driverを使うには、全ての最新バージョンのWindowsでサポートしている、"linux-cdc-acm.inf" file(このドキュメントで提供)を有する必要があります。
When the gadget serial driver is loaded and the USB device connected to the Windows host with a USB cable, Windows should recognize the gadget serial device and ask for a driver. Tell Windows to find the driver in the folder that contains the “linux-cdc-acm.inf” file.
gadget serial driverがloadされ、USB deviceがWindows hostにUSBケーブルで接続されたとき、Windowsはdadget serial deviceを認識し、driverに質問します。 Windowsに対して"linux-cdc-acm.inf" fileを含むフォルダー内のドライバを発見するように指示ます。
For example, on Windows XP, when the gadget serial device is first plugged in, the “Found New Hardware Wizard” starts up. Select “Install from a list or specific location (Advanced)”, then on the next screen select “Include this location in the search” and enter the path or browse to the folder containing the “linux-cdc-acm.inf” file. Windows will complain that the Gadget Serial driver has not passed Windows Logo testing, but select “Continue anyway” and finish the driver installation.
例えば、Windows XPであれば、gadget serial deviceが初めて装着されたときに、 "Found New Hardware Wizard"が起動します。 "Install from a list or specific location (Adcanced)"を選択させます。spそて次の画面では、"Include this location in the search"を選択させ、pathを入力するか、"linux-cdc-acn.inf" fileを含むパスを発見させます。Windowsは、Gadget Serial driverがWindows Logo 認証を通っていないことを警告しますが、"Continue anyway"を選択し、ドライバーのインストールを完了させます。
On Windows XP, in the “Device Manager” (under “Control Panel”, “System”, “Hardware”) expand the “Ports (COM & LPT)” entry and you should see “Gadget Serial” listed as the driver for one of the COM ports.
Windows XPでは、"Device Manager" ("Control Panel" , "System", "Hardware" の下にあります)の中から、"Ports(COM & LPT) entryを開くと、"Gadget Serial"がCOM portの1つのドライバとして発見することができます。
To uninstall the Windows XP driver for “Gadget Serial”, right click on the “Gadget Serial” entry in the “Device Manager” and select “Uninstall”.
"Gadget Serial" のWindows XP drviverをアンインストールするには、"Device Manager"の中の"Gadget Serial" entryの上で右クリックをし、"Uninstall"を選択してください。
Installing the Linux Host ACM Driver
To use the Linux ACM driver you must configure the Linux host side kernel for “Support for Host-side USB” and for “USB Modem (CDC ACM) support”.
Linux ACM driverを使うためには、Linux host side kernelで、"Support for Host-side USB"と"USB Modem(CDC ACM) support"を設定してください。
Once the gadget serial driver is loaded and the USB device connected to the Linux host with a USB cable, the host system should recognize the gadget serial device. For example, the command:
Gadget serial driverがロードされ、USB deviceとLinux hostがUSBケーブルで一度接続されたら、host systemはgadget serial deviceを認識します。例えば、コマンド:
cat /sys/kernel/debug/usb/devicesshould show something like this::
その結果、以下のような結果が見えます。
T:  Bus=01 Lev=01 Prnt=01 Port=01 Cnt=02 Dev#=  5 Spd=480 MxCh= 0
D:  Ver= 2.00 Cls=02(comm.) Sub=00 Prot=00 MxPS=64 #Cfgs=  1
P:  Vendor=0525 ProdID=a4a7 Rev= 2.01
S:  Manufacturer=Linux 2.6.8.1 with net2280
S:  Product=Gadget Serial
S:  SerialNumber=0
C:* #Ifs= 2 Cfg#= 2 Atr=c0 MxPwr=  2mA
I:  If#= 0 Alt= 0 #EPs= 1 Cls=02(comm.) Sub=02 Prot=01 Driver=acm
E:  Ad=83(I) Atr=03(Int.) MxPS=   8 Ivl=32ms
I:  If#= 1 Alt= 0 #EPs= 2 Cls=0a(data ) Sub=00 Prot=00 Driver=acm
E:  Ad=81(I) Atr=02(Bulk) MxPS= 512 Ivl=0ms
E:  Ad=02(O) Atr=02(Bulk) MxPS= 512 Ivl=0ms
If the host side Linux system is configured properly, the ACM driver should be loaded automatically. The command “lsmod” should show the “acm” module is loaded.
host side Linux systemが適切に設定されているならば、ACM driverは自動的にloadされるはずです。コマンド"lsmod"は、"acm" moduleがloadされていることを示します。
Installing the Linux Host Generic USB Serial Driver
To use the Linux generic USB serial driver you must configure the Linux host side kernel for “Support for Host-side USB”, for “USB Serial Converter support”, and for the “USB Generic Serial Driver”.
Linux ACM driverを使うためには、Linux host side kernelで、"Support for Host-side USB"、"USB Serial Converter Support"と"USB Modem(CDC ACM) support"を設定してください。
Once the gadget serial driver is loaded and the USB device connected to the Linux host with a USB cable, the host system should recognize the gadget serial device. For example, the command:
Gadget serial driverがロードされ、USB deviceとLinux hostがUSBケーブルで一度接続されたら、host systemはgadget serial deviceを認識します。例えば、コマンド:
cat /sys/kernel/debug/usb/devicesshould show something like this::
その結果、以下のような結果が見えます。
T:  Bus=01 Lev=01 Prnt=01 Port=01 Cnt=02 Dev#=  6 Spd=480 MxCh= 0
D:  Ver= 2.00 Cls=ff(vend.) Sub=00 Prot=00 MxPS=64 #Cfgs=  1
P:  Vendor=0525 ProdID=a4a6 Rev= 2.01
S:  Manufacturer=Linux 2.6.8.1 with net2280
S:  Product=Gadget Serial
S:  SerialNumber=0
C:* #Ifs= 1 Cfg#= 1 Atr=c0 MxPwr=  2mA
I:  If#= 0 Alt= 0 #EPs= 2 Cls=0a(data ) Sub=00 Prot=00 Driver=serial
E:  Ad=81(I) Atr=02(Bulk) MxPS= 512 Ivl=0ms
E:  Ad=02(O) Atr=02(Bulk) MxPS= 512 Ivl=0ms
You must load the usbserial driver and explicitly set its parameters to configure it to recognize the gadget serial device, like this:
usbserial driverをロードし明示的にgadget serial deviceを認識するようにパラメータを設定してください。例えば以下のように。
echo 0x0525 0xA4A6 >/sys/bus/usb-serial/drivers/generic/new_idThe legacy way is to use module parameters:
従来の方法では、module paramterを使います。
modprobe usbserial vendor=0x0525 product=0xA4A6If everything is working, usbserial will print a message in the system log saying something like “Gadget Serial converter now attached to ttyUSB0”.
全てが動いているならば、usbserialはsystem logにおいて、“Gadget Serial converter now attached to ttyUSB0”のような何かしらのメッセージを残します。
Testing with Minicom or HyperTerminal
Once the gadget serial driver and the host driver are both installed, and a USB cable connects the gadget device to the host, you should be able to communicate over USB between the gadget and host systems. You can use minicom or HyperTerminal to try this out.
Gadget serial driverとhost driverの両方がインストールされ、USB cableによってgadget deviceとhostが一度接続されたら、gadgetとhost system間でUSBを介して通信する事が可能になります。miniconやHyperTerminalを試すことができます。
On the gadget side run “minicom -s” to configure a new minicom session. Under “Serial port setup” set “/dev/ttygserial” as the “Serial Device”. Set baud rate, data bits, parity, and stop bits, to 9600, 8, none, and 1–these settings mostly do not matter. Under “Modem and dialing” erase all the modem and dialing strings.
Gadget sizeで"minicon -s"を実行する事で、新しいminicon sessionが設定されます。"Serial port setup"の下で、"/dev/ttygserial"を"Serial Device"に設定してください。baud rate, data bits, parity そしてstop bitsをそれぞれ、9600, 8, none 1-these settingに設定してください。これらの設定はほとんど関係ありません。"Modem and dialing"では、全部のmodemとdialing stringを削除してください。
On a Linux host running the ACM driver, configure minicom similarly but use “/dev/ttyACM0” as the “Serial Device”. (If you have other ACM devices connected, change the device name appropriately.)
ACM driverを動かしているLinux host において、minicon を同様に設定してください。この時、"/dev/ttyACM0"を"Serial Device"で使ってください。(他のACM deviceを接続している場合には、デバイスの名称はおそらく変更になります)。
On a Linux host running the USB generic serial driver, configure minicom similarly, but use “/dev/ttyUSB0” as the “Serial Device”. (If you have other USB serial devices connected, change the device name appropriately.)
USB generic serial driverを動かしているLinux host では、同様にminicom の設定をしてください。ただし、"/dev/ttyUSB0"を"Serial Device"として使ってください。(他のUSB serial deviceを接続している場合には、デバイスの名称はおそらく変更になります)。
On a Windows host configure a new HyperTerminal session to use the COM port assigned to Gadget Serial. The “Port Settings” will be set automatically when HyperTerminal connects to the gadget serial device, so you can leave them set to the default values–these settings mostly do not matter.
Windows host では、新しいHyperTerminal session を設定し、Gadget Serialを割り当てたCOM portを利用してください。"Port Settings"では、HyperTerminalがgadget serial deviceするときに、自動的に設定するので、デフォルトの設定から離れられます。これらは、そこまで重要ではありません。
With minicom configured and running on the gadget side and with minicom or HyperTerminal configured and running on the host side, you should be able to send data back and forth between the gadget side and host side systems. Anything you type on the terminal window on the gadget side should appear in the terminal window on the host side and vice versa.
gadget sizeでminiconを構成して実行し、そして、ホスト側でminiconあるいはHypertTerminalを構成して実行したら、Gadget sideとHost sideのシステムの間で、データの送受信ができるようになっています。ガジェット側のターミナルウィンドウで入力したものは、ホスト側のターミナルウィンドウに表示されます。逆もまた同様です。、
もともと、Linux Kernelのソースコードの一部なので、GPLv2扱いになる(はずの認識)。
https://www.kernel.org/doc/html/latest/index.html
Licensing documentation
The following describes the license of the Linux kernel source code (GPLv2), how to properly mark the license of individual files in the source tree, as well as links to the full license text.
https://www.kernel.org/doc/html/latest/process/license-rules.html#kernel-licensing
- 投稿日:2020-05-25T14:05:40+09:00
Linux基礎8 -ファイルパーミッション・スーパーユーザ-
はじめに
Linuxは1つのマシンへ複数のユーザーが同時にログインして操作することを前提として作られています。今回は、秘密のファイルを見られないようにするなど、ファイルを保護を実現するためのアクセス権限の仕組みについて解説します。
また、合わせて管理者権限を持つスーパーユーザについても紹介します。ファイルのオーナーとグループ
Linuxで扱われるファイルは自分で作成したテキストファイルから、システムが提供するライブラリまで、全てに所有者(オーナー)が設定されています。ファイルのオーナーはファイルへのアクセス権限を自由に設定できます。
試しにファイルのオーナーを見てみましょう。
alias ll='ls -l'が設定されていることに注意してください。
このとき、出力結果にrootrootと並んでいるのが確認できると思います。
これがファイルのオーナー(左)と所属するグループ(右)を示しています。つまりこの場合は、/bin/catというファイルはrootユーザがオーナーで、rootグループに所属していると解釈できます。新しくファイルを作成すると、作成したユーザーがそのファイルのオーナーになります。
グループ
先ほど登場したグループというのは、ユーザをまとめた集まりのことです。ユーザは同時にいくつものグループに所属できます。また、どのユーザも最低1つのグループに所属していないといけません。ユーザを新規作成する際に、特に指定がなければ、ユーザ名と同一のグループに所属します。
所属するグループの確認$ groups #所属するグループの確認 nossy #所属するグループが表示パーミッション
1つ1つのファイルには、
誰に、どのような操作を許可するのかという権限を規定する情報が設定されています。この情報のことをパーミッションと呼びます。ファイルのパーミッション
ファイルのパーミッションは
ls -lコマンドで確認することができます。先ほどの/bin/catの表示をもう1度みてみましょう。
出力された行のはじめに-rwxr-xr-xという表示が確認できると思います。-rwxr-xr-xについて・先頭の1文字がファイルタイプを表しています。 -:通常ファイル、d:ディレクトリ、l:シンボリックリンク ・rwxr-xr-xの部分がファイルモードと呼ばれ、パーミッションを表しています。この9文字は3文字ずつ1つのブロックになっています。 (この場合、rwx, r-x,r-x) それぞれが、「オーナー」、「グループ」、「その他のユーザ」に対するパーミッションを意味します。表にまとめます。
オーナー グループ その他のユーザ rwx r-x r-x この中で、rやwと言った記号が、許可されるファイルへの操作を意味しています。
記号 意味 r 読み取り(read)許可 w 書き込み(write)許可 x 実行(execute)許可 - 禁止 ここで先ほどの/bin/catファイルのパーミッションをまとめると
ユーザ種別 読み取り 書き込み 実行 オーナー 許可 r 許可 w 許可 x rootグループに所属するユーザ 許可 r 禁止 - 許可 x その他のユーザ 許可 r 禁止 - 許可 x すなわち、/bin/catファイルは、オーナーにしか書き込みの権限がないためその他のユーザーは上書きすることができないが、読み取りと実行はどのユーザでも可能ということです。
試しに/bin/catへ権限のないユーザが書き込みを試みた場合の例を示します。読み込み専用ですと怒られてしまいました。
ディレクトリのパーミッション
ファイルと同様にディレクトリにもパーミッションが設定されています。
lsコマンドでディレクトリのパーミッションを確認するには、-lオプションに加えて、-dオプションを使います。
記号はファイルと同様にrやw等で表されていますが、ファイルの場合とは違った意味を持っています。
ディレクトリのパーミッション記号 意味 r 読み取り : ディレクトリに含まれるファイル一覧の取得 w 書き込み : ディレクトリの下にあるファイル・ディレクトリの作成・削除 x 実行 : ディレクトリをカレントディレクトリにする
rが設定されていない場合は、lsコマンドでディレクトリを読み込むことができませんwが設定されていない場合は、ディレクトリ下にファイルの作成や・削除が行えません。xが設定されていない場合は、cdコマンドでディレクトリにアクセスできませんここで、
wについて重要な点があります。それはファイルの削除が可能かどうかは、ディレクトリのパーミッションで決定されるということです。ファイル自身のパーミッションには関係ないことに注意してください。chmodコマンド ファイルモードを変更する
ファイルやディレクトリのパーミッションを設定するには、ファイルモードを変更する
chmodコマンドを使用します。chmodコマンドには2種類のパーミッションの指定の方法があります。シンボルモード
シンボルモードでは下記のようにchmodコマンドを実行します。
シンボルモード$ chmod [ugoa][+-=][rwx] <ファイル名> $ chmod u+w file.txt #使用の一例[ugoa]はどのユーザに対するパーミッションを変更するのかを示しています。
記号 意味 u オーナー g グループ o その他のユーザ a ugoの全て [+-=]は権限を追加するのか、禁止するのかの操作を表しています。
記号 意味 + 権限を追加する - 権限を禁止する = 指定した権限と等しくする 例えば上の例だと、
オーナー(u)に対して、書き込み(w)権限を、追加(+)しています。下の図にchmodコマンドで、権限を追加した例を示します。
このようにシンボルモードは、権限の一部を変更したいときに便利です。数値モード
2つ目のパーミッション指定方法である
数値モードについてみていきましょう。
数値モードでは下記のようにchmodコマンドを実行します。数値モード$ chmod <8進数の数値> <ファイル名> $ chmod 755 file.txt #使用の一例
7, 5, 5という数値が「オーナー」、「グループ」、「その他のユーザ」に対するパーミッションを表しています。
この数値はr,w,xに対してそれぞれ4,2,1の数値が割り当てられており、権限を追加する項目の数値を足した値となっています。
数字 意味 4 読み取り(r) 2 書き込み(w) 1 実行(x) つまり、
7であれば、4+2+1でrwxである。というパーミッションを設定していることになります。
上の例では755なので、rexr-xr-xとなるわけですね。スーパーユーザ
Linuxのユーザの中には、管理者権限を持つ特別なユーザが存在します。これを
スーパーユーザと言います。スーパユーザは、ユーザ名がrootであることから、rootユーザとも呼ばれます。
スーパーユーザはあらゆる操作が許可された強い権限を持つユーザであり、システムの設定ファイルを変更したり、新しいアプリケーションをインストールしたりすることができます。しかし、Linuxを動作させる上で重要なファイルの削除もできてしまうため、通常は一般ユーザでログインし、必要な時だけスーパーユーザとして作業するというようにスーパーユーザの使用は必要最小限にすることが大切です。一般ユーザからスーパーユーザに変更するときに
suコマンドとsudoコマンドが使用されます。個別にみていきましょう。suコマンド ユーザを変更する
suコマンドは一時的に別のユーザになるためのコマンドです。実行するとログアウトせずにユーザを切り替えることができます。suコマンドは任意のユーザになることができますが、主にスーパーユーザに変わるために使います。Linuxではセキュリティ上の理由からスーパーユーザで直接ログインすることができないように設定されていることもあるため、まずは一般ユーザでログインして、suコマンドでスーパーユーザに変わるという形で利用します。suコマンド$ su
suコマンドを実行するとパスワードの入力が求められるので、入力してユーザを切り替えます。
一般ユーザに戻るときにはexitを実行してください。
スーパーユーザになるとユーザ名がrootに、プロンプトが#に変化しているのがわかると思います。sudoコマンド コマンドを別のユーザとして実行する
sudoコマンドは別のユーザとしてコマンドを実行するのに利用されます。ユーザを特に指定しない場合にはスーパーユーザとしてコマンドを実行します。主に、一般ユーザとしてログインしているときに、スーパーユーザでないと実行できないコマンドを実行するために用います。sudoコマンド$ sudo <実行したいコマンド>
sudoコマンドはsuコマンドと似ていますが、1つのコマンドだけをスーパーユーザとして実行するところが異なります。
なおsudoコマンドを実行するときに入力するパスワードは、現在ログインしているユーザのパスワードであることに注意してください。sudoコマンドの設定
sudoコマンドは一般ユーザにスーパーユーザの権限を与えるコマンドです。この際全てのユーザがsudoコマンドを使えてしまうと、ユーザを区別している意味がなくなってしまいます。
そのためsudoコマンドはどのユーザにどのコマンドを実行する権限を与えるのかを設定することができます。これは/etc/sudoersファイルで管理されています。sudoersファイル<ユーザ> <マシン名>=(<権限>) <コマンド> #記述形式 %wheel ALL=(ALL) ALL #記述例
上の例は、wheelグループに所属するユーザは、全てのマシンで、全てのユーザとして、全てのコマンドを実行できるという意味になります。例えば、nossyユーザに、sudoを使って、全てのコマンドを実行する権限を与える場合には、sudoersに下記のように記述します。
nossyユーザに権限を与えるnossy All=(ALL) ALL学習用マシンなら、この記述で問題ありませんが、業務でLinuxマシンを使用する場合には、注意して権限を与えるようにしましょう。
/etc/sudoersファイルの編集
etc/sudoersを編集するためには、
visudoという特殊なコマンドを使用します。このコマンドの実行にはスーパーユーザの権限が必要なため、suまたはsudoコマンドを使用して実行してください。/etc/sudoersの編集# visudo編集はVimの使用方法を参考にしながら行ってください。
suとsudoのどちらを使用するか
現在ではsuよりもsudoの方がよく使われるようになりつつあります。
これは、sudoコマンドは1部のコマンドだけをを許可したりという、細かな制御も可能であるためです。参考資料


- 投稿日:2020-05-25T11:48:13+09:00
CSVファイルの行頭に行番号を入れる方法
行数が数百行あるCSVファイルの行頭に行番号を入れたかった。
何かいい方法はないかと悩んだ、ExcelでCSVファイルを加工すると思わぬことが起こるのでExcelは使いたくない。
shellでも書くか・・・面倒くさい、と思った時に見つけた方法。
- 環境
- Windows10 64bit バージョン1909
- nl (GNU coreutils) 8.31
CSVファイルの行頭に行番号を入れる方法$ nl -w1 -s, {元のCSV}.csv > {行番号付きCSV}.csv
nlコマンドは行番号付きでファイルを表示してくれる。$ nl sample.csv 1 "hoge",2020/05/31,"fuga" 2 "kuma",2020/05/30,"usagi" 3 "tako",2020/05/29,"inu" 4 "ponsuke",2020/05/02,"numa"
-W1オプションで行番号の表示幅を最小にする。# 「0」を指定したら怒られた $ nl -w0 sample.csv nl: invalid line number field width: ‘0’: Numerical result out of range $ nl -w1 sample.csv 1 "hoge",2020/05/31,"fuga" 2 "kuma",2020/05/30,"usagi" 3 "tako",2020/05/29,"inu" 4 "ponsuke",2020/05/02,"numa"
-s,オプションで行番号の後に「,」を表示してくれる。$ nl -w1 -s, sample.csv 1,"hoge",2020/05/31,"fuga" 2,"kuma",2020/05/30,"usagi" 3,"tako",2020/05/29,"inu" 4,"ponsuke",2020/05/02,"numa"参考
- 投稿日:2020-05-25T09:21:47+09:00
Linuxディレクトリ構造
Linuxディレクトリ構造とファイルの種類
Linuxのディレクトリ構造もまともに把握できないまま開発をしていたのでこの機会に勉強してみました。 Linux入門者は、まずLinuxの構造について先に習得し、Linuxに適応するのに早いです。
Linuxファイルシステム構造
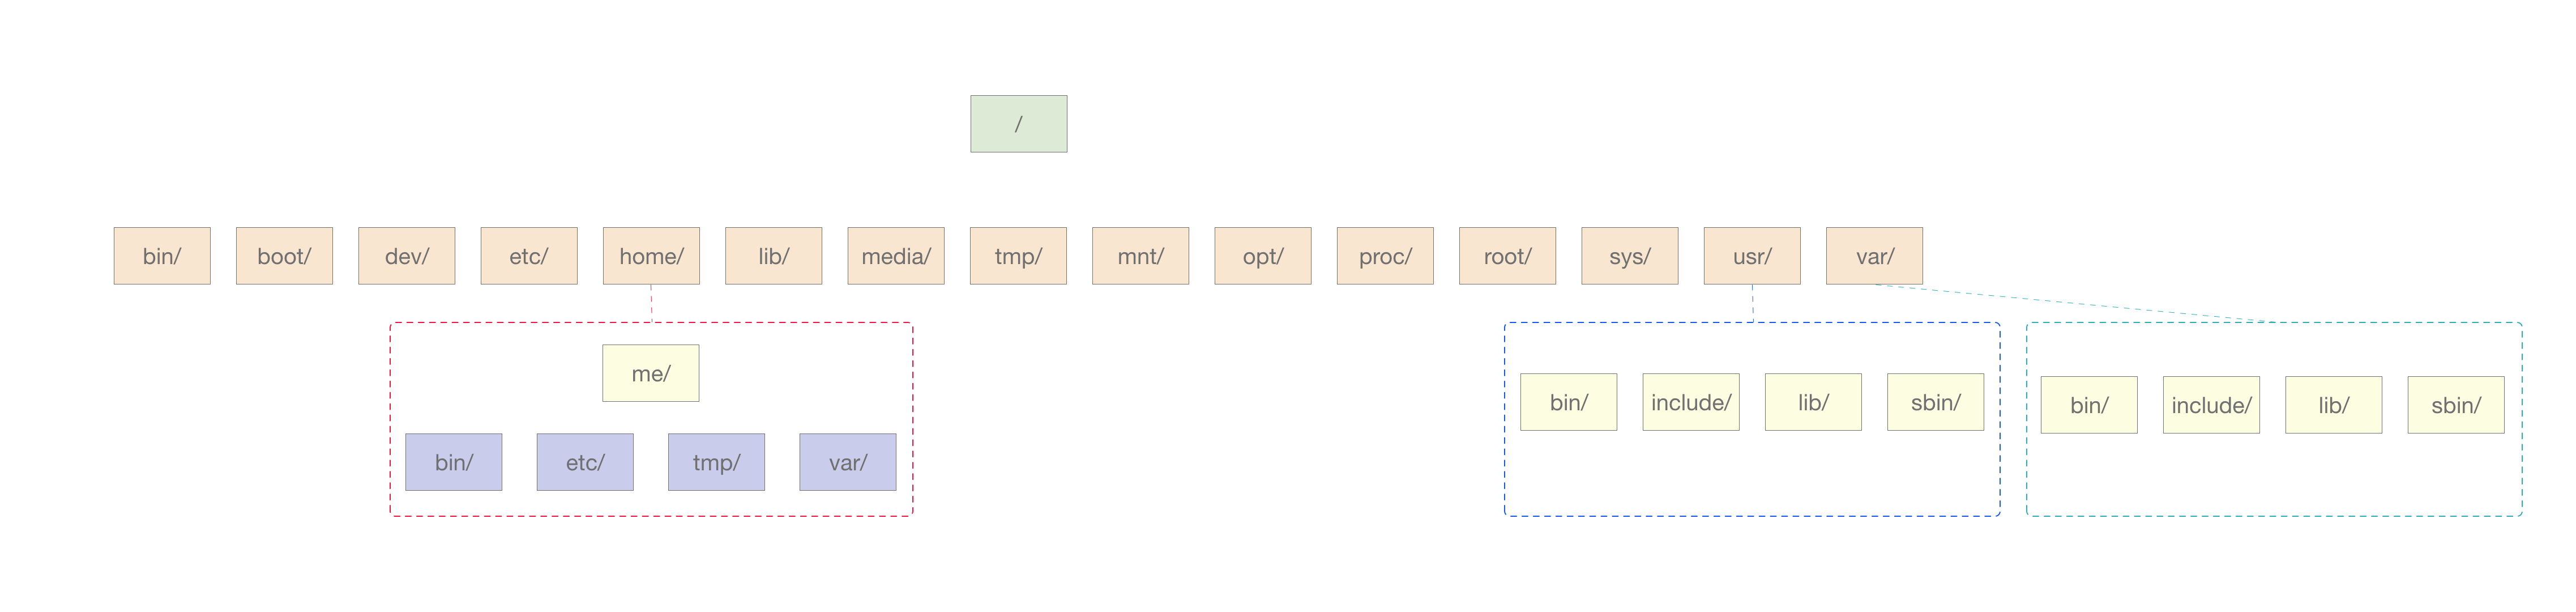
[全体構造図]
?me/はただのユーザー名の例として認識してください。/ (root)
最上のディレクトリであるルートディレクトリを意味。リナックスのすべてのディレクトリたちのスタート地点。すなわち、すべてのディレクトリを絶対経路で表記する際にこのディレクトリから始める必要がある。
/bin
binフォルダはBinary Folderの略で、OSの最小限の正常な駆動のため、すべてのユーザーが使用する実行ファイルが入っているフォルダ。 つまり、基本的なコマンドが保存されたディレクトリで、cat、chmod、chown、cp、date、echo、kill、ln、ls、mkdir、etxなどのプログラムが含まれる。 また、ルートユーザー、一般ユーザーともにアクセス可能。
/boot
システム起動に必要なファイルが位置。GRUBのようなBoot Loaderに関するファイルがこのディレクトリに存在。
/dev
deviceの略字でハードウェア機器を表すファイルが保存される場所。 キーボード、マウス、プリンターなどのデバイスをファイルまたはディレクトリの形でdevフォルダの中に存在。標準入出力により読み書きもでき、ディレクトリどこでもアクセス可能。
例)フロッピーディスクを持っている場合、/dev/fd0ディレクトリのfd0
/etc
Linux設定のための各種ファイルを持っているディレクトリ。 etc文字の意味の通り、そのシステム全体で使用する設定のようなエストラデータが保存されるフォルダ。
システムのほぼすべての設定ファイルが存在するディレクトリ。例)/etc/registry
/home
ユーザーホームディレクトリ。
useraddコマンドで新しいユーザを生成すると、ほとんどのユーザのIDと同じ名前のディレクトリが自動的に生成される。/lib
カーネルモジュールファイルとプログラム(C、C++など)に必要な各種ライブラリファイルが存在するディレクトリ。
/bin/と/sbin/にあるバイナリに必要なライブラリ。/media
mntディレクトリと区別必要。Mntはユーザーがマウントするパスとして使用される場合、MediaはOSで自動的にマウントしてくれるポイントとして主に使用。
例)DVD、CD-ROM、USBなどの着脱が可能な装置(移動式メディア)がOSに自動的にマウンティングされるとすれば、主にMediaフォルダ内にマウンティングポイントが生成。
/tmp
オペレーティングシステムが使用しようがプログラムが使用しようが、臨時にデータを解読·削除した動作が必要ならばtmpに位置付ける。 システム使用中に発生した臨時データ等が保存。
システムを使用する全てのユーザーが共同で使用するディレクトリ。例)セッション情報やワープロで作業するなら、現在まで保存されていない現在の作業内容などが保存。
/mnt
mediaディレクトリと区別必要。取り外し可能な装置に対してファイルシステムを臨時に接続するディレクトリ。
Mntはユーザーがマウントするルートとして使用。mediaに置き換わる傾向。/sbin
sbinフォルダはbinと類似しているが、ルートユーザのみ実行できるプログラムが位置。主にシステム管理者が使用するシステム管理者用のコマンドを保存しているディレクトリ。
例)ifconfig、e2fsck、ethtool、haltなどのコマンドが保存されている。
/opt
追加で選択可能なアプリケーションパッケージがインストールされるディレクトリ。
例)Chromeブラウザなどのサードパーティアプリケーションのためのインストールディレクトリ。
/proc
カーネル関連情報が保存されるディレクトリで、システム運用において非常に重要。 各プロセス名によって数多くのフォルダが存在し、現在実行されているプロセスに対する情報とデータが含まれている。 ディスク上に実際存在するのではなくメモリ上に存在するため、仮想ファイルシステムと呼ばれる。
実際の運用状態を正確に把握する重要な情報を提供し、現在実行中のカーネルのオプション値を直ちに変更可能なパラメータファイルが存在。/root
システム最高管理者であるrootアカウントのホームディレクトリ。(/ディレクトリとは別。)
/sys
Linuxカーネルに関する情報があるディレクトリ。 現在のカーネルデータの構造属性など、現在のシステム全般についての内容を提供。 毎回再起動するたびに新しく作成。
/usr
システムではなく、一般ユーザーが主に使用するディレクトリ。
基本実行ファイルとライブラリファイル、ヘッダーファイルなどのファイルが保存されている。 各ユーザ名に合ったフォルダ名が生成されており、各フォルダごとにbin、sbin、shared、libのように各ユーザが使用できるフォルダが位置。主にシステムで最も多くの領域を占め、ルートユーザと自分自身のみアクセス可能。例)Cドライブ、Program and Files。
/var
Variableの略。 システム運用中に生成されて削除されるデータを一時的に保存するためのディレクトリ。 その他すべての多用途に使用できるファイルが保存され、ファイルのサイズが後ほど拡張し続ける場合、より適合。
例)ログファイル(/var/log)、データベースキャッシングファイル、ウェブサーバーイメージファイルなどが位置。
- 投稿日:2020-05-25T07:46:02+09:00
Mac/Linuxのaliasでaws ssmによるパスワード管理を直感的にする
公私共にお世話になっているSSMですが、都度コマンドは何だっけと苦労してたのでaliasにしました。
正確には、引数を使う必要があったので、aliasではなくfunctionとして実装しました。以下のように利用できます。$ setssm TEST_KEY test_val #登録して $ getssm TEST_KEY #参照する test_val #出力 $ setssm TEST_KEY2 "test space日本語" #スペース、日本語の処理も可 $ echo HOGE$(getssm TEST_KEY2)FUGA #コマンド上で展開し変数としても扱える HOGEtest space日本語FUGA $ listssm | grep TEST #一覧の出力からgrepで検索し、TESTを含むキーと値を出力 TEST_KEY test_val TEST_KEY2 test space日本語実装は
~/.bash_profileの終わりに以下を追加し、source ~/.bash_profileで更新するだけです。~/.bash_profilefunction setssm() { command aws ssm put-parameter --name $1 --type "String" --overwrite --value "$2"; } function getssm() { command aws ssm get-parameter --name $1 --query 'Parameter.Value' --output text; } function listssm() { command aws ssm get-parameters-by-path --path "/" --query "Parameters[].[Name,Value]" --output text }個人的に最も捗るのはコマンドを会社用と自分用に分けてしまうことです。
setssm_privateとsetssm_corpなどコマンドを2パターン用意し、--profile引数をそれぞれに付与するとパーソナルな情報を会社のssmにアップしたりその逆を避けれます。最近は認証情報もSSM経由で取り扱えるフレームワークが増えてきて、レポジトリに認証情報をアップするリスクや心配が無くなってきていいですね。皆様も良いAWSライフを。
参考
https://github.com/aws/aws-cli/issues/1961
https://hacknote.jp/archives/8043/
https://dev.classmethod.jp/articles/aws-cli-all-ssm-parameter-get/
https://qiita.com/tomoya_oka/items/a3dd44879eea0d1e3ef5
- 投稿日:2020-05-25T02:37:23+09:00
apache2 入門
official page
how to install
$ sudo apt update
$ sudo apt install apache2
how to start
$ sudo service apache2 startcomand line option
Usage: apache2 [-D name] [-d directory] [-f file] [-C "directive"] [-c "directive"] [-k start|restart|graceful|graceful-stop|stop] [-v] [-V] [-h] [-l] [-L] [-t] [-T] [-S] [-X] Options: -D name : define a name for use in <IfDefine name> directives -d directory : specify an alternate initial ServerRoot -f file : specify an alternate ServerConfigFile -C "directive" : process directive before reading config files -c "directive" : process directive after reading config files -e level : show startup errors of level (see LogLevel) -E file : log startup errors to file -v : show version number -V : show compile settings -h : list available command line options (this page) -l : list compiled in modules -L : list available configuration directives -t -D DUMP_VHOSTS : show parsed vhost settings -t -D DUMP_RUN_CFG : show parsed run settings -S : a synonym for -t -D DUMP_VHOSTS -D DUMP_RUN_CFG -t -D DUMP_MODULES : show all loaded modules -M : a synonym for -t -D DUMP_MODULES -t : run syntax check for config files -T : start without DocumentRoot(s) check -X : debug mode (only one worker, do not detach)check for config files
# run syntax check for config files
$ apache2 -t
/var/www/html
apache2が動いていることを確認する。
$ curl localhost && echo success || echo failedApacheがブラウザに送ってくれているhtmlは /var/www/html/ となっている。
ここを ドキュメントルート という。
ここにファイルを配置する事でApache経由で参照する事ができるようになる。
ドキュメントルートに移動する
$ cd /var/www/html$ touch test.html$ echo "Hello World!" > ./test.htmlブラウザを起動し、下記のように入力する。
[IPアドレス]/test.htmlドキュメントルートの変更
/etc/apahce2/apache2.confを変更する。
<Directory /var/www/>
</Directory>
となっている部分を以下のように変更する。
<Directory /home/ubuntu/www>
</Directory>
その後、apache2を再起動する。
$ sudo service apache2 restart
- 投稿日:2020-05-25T01:58:28+09:00
Netflixのパフォーマンスエンジニアも使っているsarコマンドについてまとめた
https://twitter.com/go_vargo/status/1215281798948642817?s=20
上記Tweetで紹介されていた内で、
sarコマンドに馴染みがなかったので少し調査してみました。sarコマンドとは
sar(System Activity Reporter)はLinuxのモニタリングツールの1つです。
メモリ、CPU使用率、ディスクIO、ネットワーク、ロードアベレージ等の統計情報を表示するコマンドで、sysstatパッケージに含まれています。
リアルタイムの統計情報だけでなく、過去の統計情報を表示することが可能で、
過去にさかのぼって情報を見ることができるため、障害対応時の原因調査に役立ちます。表示する統計情報の種類は、オプションで指定します。
基本的な使い方
オプション
sar [...options][...options]に、どのリソースの情報を表示するか指定します。
オプションを指定しない場合、当日のリソース情報が取得されます。
情報取得間隔は、デフォルトは10分です。過去データの保存先
Amazon Linux 2だと、
/var/log/sa配下に過去データが保存されていきます。[ec2-user@xxx ~]$ ls -la /var/log/sa 合計 2652 drwxr-xr-x 2 root root 167 5月 24 05:14 . drwxr-xr-x 8 root root 4096 5月 24 05:14 .. -rw-r--r-- 1 root root 91760 10月 12 2019 sa12 -rw-r--r-- 1 root root 336992 10月 13 2019 sa13 -rw-r--r-- 1 root root 336992 10月 14 2019 sa14 -rw-r--r-- 1 root root 238880 10月 15 2019 sa15 -rw-r--r-- 1 root root 290320 10月 17 2019 sa17 -rw-r--r-- 1 root root 336992 10月 18 2019 sa18 -rw-r--r-- 1 root root 16960 10月 19 2019 sa19 -rw-r--r-- 1 root root 5328 5月 24 05:30 sa24 -rw-r--r-- 1 root root 68488 10月 12 2019 sar12 -rw-r--r-- 1 root root 249044 10月 13 2019 sar13 -rw-r--r-- 1 root root 249044 10月 14 2019 sar14 -rw-r--r-- 1 root root 214675 10月 17 2019 sar17 -rw-r--r-- 1 root root 249044 10月 18 2019 sar18
sar**のあとの数字は、直近何日分かを表しています。ファイル自体はバイナリで保存されていますが、
sar経由でファイルの中身を表示できます。[ec2-user@xxx ~]$ sar -r -f /var/log/sa/sa12 Linux 4.14.123-111.109.amzn2.x86_64 (localhost) 2019年10月12日 _x86_64_ (1 CPU) 17時23分29秒 LINUX RESTART 17時30分01秒 kbmemfree kbmemused %memused kbbuffers kbcached kbcommit %commit kbactive kbinact kbdirty 17時40分01秒 493536 513796 51.01 2088 390136 593996 58.97 166828 253464 252 17時50分01秒 493540 513792 51.01 2088 390300 593996 58.97 166892 253532 252 18時00分01秒 493004 514328 51.06 2088 390636 593988 58.97 167000 253844 216リアルタイムの情報を、特定間隔に絞って表示する場合
コマンドのあと
[取得間隔] [取得回数]でリアルタイムで表示するデータを制限できます。1秒おきに3回情報を習得する場合は、下記の通りです。
[ec2-user@xxx ~]$ sar -r 1 3
Linux 4.14.146-119.123.amzn2.x86_64 2020年05月24日   _x86_64_    (1 CPU)

05時37分41秒 kbmemfree kbmemused  %memused kbbuffers  kbcached  kbcommit   %commit  kbactive   kbinact   kbdirty
05時37分42秒    585824    421468     41.84      2088    323892    531260     52.74    154588    198628       128
05時37分43秒    584948    422344     41.93      2088    323892    531260     52.74    155608    198628       128
05時37分44秒    584568    422724     41.97      2088    323892    531260     52.74    155884    198628       128
平均値:     585113    422179     41.91      2088    323892    531260     52.74    155360    198628       128
統計情報を別ファイルに保存する
## memというファイルにメモリのリアルタイム情報を1秒間隔で3回保存する
[ec2-user@xxx ~]$ sar -r 1 3 -o mem

## memファイルに保存した統計情報を表示する
[ec2-user@xxx ~]$ sar -r -f mem
表示するリソースを指定する
オプションを変えることで、表示するリソースを指定できる
- CPU使用率
[ec2-user@xxx ~]$ sar -P ALL 1
Linux 4.14.146-119.123.amzn2.x86_64     2020年05月24日   _x86_64_    (1 CPU)

05時39分43秒     CPU     %user     %nice   %system   %iowait    %steal     %idle
05時39分44秒     all      0.00      0.00      0.00      0.00      0.00    100.00
05時39分44秒       0      0.00      0.00      0.00      0.00      0.00    100.00
- メモリ使用率
[ec2-user@xxx ~]$ sar -r 1
Linux 4.14.146-119.123.amzn2.x86_64     2020年05月24日   _x86_64_    (1 CPU)

05時41分24秒 kbmemfree kbmemused  %memused kbbuffers  kbcached  kbcommit   %commit  kbactive   kbinact   kbdirty
05時41分25秒    586180    421112     41.81      2088    323940    526944     52.31    154808    198444         0
05時41分26秒    586180    421112     41.81      2088    323940    526944     52.31    154808    198444         0
05時41分27秒    586180    421112     41.81      2088    323940    526944     52.31    154808    198444         0
- ネットワーク
受信/送信パケット数[ec2-user@xxx ~]$ sar -n DEV 1 Linux 4.14.146-119.123.amzn2.x86_64 (ip-172-31-63-105.ap-northeast-1.compute.internal) 2020年05月24日 _x86_64_ (1 CPU) 05時42分33秒 IFACE rxpck/s txpck/s rxkB/s txkB/s rxcmp/s txcmp/s rxmcst/s 05時42分34秒 eth0 2.00 0.00 0.10 0.00 0.00 0.00 0.00 05時42分34秒 lo 0.00 0.00 0.00 0.00 0.00 0.00 0.00 05時42分34秒 IFACE rxpck/s txpck/s rxkB/s txkB/s rxcmp/s txcmp/s rxmcst/s 05時42分35秒 eth0 1.01 1.01 0.05 0.39 0.00 0.00 0.00 05時42分35秒 lo 0.00 0.00 0.00 0.00 0.00 0.00 0.00