- 投稿日:2020-05-23T22:23:27+09:00
分子動力学法で一瞬文字が浮かび上がるアニメーションを作る
はじめに
分子動力学法で粒子を動かして文字が一瞬浮かび上がるアニメーションを作ります。分子動力学法といっても粒子間の相互作用は考えません。
具体的には、こんなアニメーションを作ります。
Ballistic版
Diffusion版
ソースは以下に置いておきます。
https://github.com/kaityo256/stringtext
方針
とりあえず文字を描きます。RubyならCairoを使うのが楽でしょう。やり方は「スパコンの落とし方」と同じです。もしCairoが入ってなければいれます。
sudo gem install cairoあとは適当な大きさのキャンバスに適当なフォントで文字を描画します。「スパコン」ならこんな感じでしょうか。
require 'rubygems'
require 'cairo'
format = Cairo::FORMAT_RGB24
width = 400
height = 100
surface = Cairo::ImageSurface.new(format, width, height)
context = Cairo::Context.new(surface)
context.set_source_rgb(0, 0, 0)
context.rectangle(0, 0, width, height)
context.fill
context.set_source_rgb(1, 1, 1)
context.select_font_face('Meiryo')
context.move_to(5,90)
context.font_size = 96
context.show_text('スパコン')
さて、文字をラスタライズできたので、これを粒子の座標として取り出します。
surface = Cairo::ImageSurface.newで取り出したsurfaceのsurface.dataが0かどうかを見てやれば、そこに点があるかどうか調べることができます。注意点としては、
surface.dataはStringなので、整数と比較するためにはordを読んでやる必要があります。こんな感じです。height.times do |y| width.times do |x| i = x + y * width next if surface.data[i*4].ord ==0 # 粒子の追加処理 end endこれで粒子の座標を取り出してしまえば、あとは好き放題すれば良いと思います。
分子動力学シミュレーション
Ballistic版
まずは単純に、全ての粒子に等速直線運動をさせてみましょう。アニメーションGIFにしたときに、ループさせたいので、適当なステップ後にもとの場所に戻ってきて欲しいですね。
高さ100、幅400ピクセルのイメージを考えましょう。アニメーションは200フレームとします。周期境界条件を考えると、200ステップで、x座標は400、y座標は100の整数倍進めば元の場所に戻ってくることになります。
というわけで、x方向の速度vxは、-4, -2, 2, 4の4種類からランダムに選ぶことにしましょう。また、y座標は -2, -1.5, -1.0, -0.5, 0.5, 1.0, 1.5, 2.0の8種類からランダムに選ぶことにします。いずれも200倍すると、x座標は400の、y座標は100の整数倍になるので、もとの場所に戻ってくることになります。ついでに色もランダムに変えておきましょう。
Particle構造体でも作って、その配列を作ることにしましょう。Particle = Struct.new(:x, :y, :vx, :vy, :r, :g, :b)height.times do |y| width.times do |x| i = x + y * width next if surface.data[i*4].ord ==0 vx = [-1, 1, -2, 2].sample vy = [-1, 1, -0.5, 0.5, -0.25, 0.25, 0.75, -0.75].sample r = rand g = rand b = rand atoms.push Particle.new(x, y, vx, vy, r, g, b) end end最初は「スパコン」の文字が表示されています。
これが徐々に崩れていきます。
あとは、最初から文字が見えるとつまらないので、少しインデックスをずらしてファイルを作成すれば完成です。
iter = 200
iter.times do |i|
  index = (i + 108) % iter
  filename = format("img%03d.png", index)
  puts filename
  step(atoms)
  save_png(filename, atoms)
end
さて、この方法は楽ちんですが、全ての粒子が等速直線運動をして、かつその速度ベクトルのバリエーションが少ないため、何度か変な模様が出現してしまいます。たとえばタイミングによってはこんな感じに「あ、文字が隠れてるな」ということがわかってしまいます。
これを防ぐため、違う方法も考えてみましょう。
Diffusion版
先ほどは等速直線運動をさせましたが、次はランダムウォークをさせましょう。しかし、ループさせたいので、要素の和が0となるような配列を作り、それを各ステップの速度にしましょう。
なんでも良いのですが、単純に半分-2, 半分2となる配列を作ってシャッフルしましょうか。
steps = 200
$a = Array.new(steps) do |i|
  if i < steps/2
    2
  else
    -2
  end
end
この配列をそれぞれの粒子の
vx、vy配列にシャッフルして渡します。height.times do |y| width.times do |x| i = x + y * width next if surface.data[i*4].ord ==0 vx = $a.shuffle.dup vy = $a.shuffle.dup r = rand g = rand b = rand atoms.push Particle.new(x, y, vx, vy, r, g, b) end endあとは毎ステップ、
x, yにvx[i], vy[i]を足してやるだけです。vx、vyの和はゼロなので、必ず戻ってきます。最初は「スパコン」の文字が表示され、それが徐々に崩れていくのは同じです。
これが徐々に崩れていきます。
崩れ方は等速直線運動よりゆっくりです。また、拡散で広がっていくので、もっとも広がった状態でも、まだにじんだ文字が見えてしまっています。
まとめ
分子動力学法により、一瞬文字が浮かび上がるアニメーションGIFを作ってみました。なぜこんなものを作ろうと思ったかは内緒です。
工夫すれば、次々と文字が浮かび上がってメッセージになったりとかできるのでいろいろ遊んでみてください。


- 投稿日:2020-05-23T21:44:57+09:00
100日後に1人前になる新人エンジニア(3日目)
100日後に1人前になる新人エンジニア(3日目)
どうもこんばんは。
土曜日でもめげずに学び更新していきます。今日は本屋にいって書籍を買ってきました。
「Ruby on Rails 速習実践ガイド」 です
コツコツとやっていきたいと思います。本日のお題は
・ REST
・Ruby製のテンプレートエンジンslim以上の二つです。全然違うテーマだけど自分がよく分かっていないと
思っていたところなので書いていきます。REST
Railsをやるようになってから「この設計はRESTfulだとか」,「RESTらしい」
という言葉を書籍等でよく見るようになった。
でもよく考えたらRESTについてしっかり分かっていないなと思ったので
土曜日を使って学んでみた。RESTとは
次の6つを組み合わせたWebのアーキテクチャスタイルのこと
- クライアント/サーバ
- クライアントがサーバーにリクエストを送り、サーバーはそれに対してレスポンスを返す
- ステートレスサーバ
- クライアントのアプリケーションの状態をサーバーで管理しない
- キャッシュ
- 一度取得したリソースをクライアント側で使い回す。
- 統一インターフェース -リソースに対する操作を統一したインターフェースで行う(GET POST PUT DELETE HEAD OPTIONS TRACE CONNECT の8つ)
- 階層化システム
- システムがいくつかの階層に分離すること
- コードオンデマンド
- プログラムコードをサーバからダウンロードし、クライアント側で実行するスタイル。JavaScriptとかがこれに当てはまる
これら6つを合わせたアーキテクチャスタイルをRESTって言うんだって。
ちなみにステートレスサーバに関してだけどCookieとかは
RESTの観点で言うとHTTPの間違った拡張の方法みたいです。
状態を保存しているし、ステートレスではないもんね。でもそれは必ずしも間違いではないから
あくまでRESTを意識して必要最低限の拡張でアプリケーションを作っていくことが大事なんだって。Railsの本を読んでてRESTに関して言っていたのは,
統一インターフェースの事だったのね。適切なインターフェースで処理ができているのか。と言うところ。それぞれのインターフェースには役割があるからそれをしっかり理解して、使いましょうって事でした。RESTに関しては以上!!(結構長くなっちゃった)
アプリケーションを作りながら意識するともっと分かってくると思った。slim
slimとは, Ruby製のテンプレートエンジンのこと、
htmlをより簡潔でスマートに書くことができるんだって。erbのファイル形式しか知らなかったからまとめてみます。
slimの特徴
・<>がいらない
・<%= %> → =
・<% %> → -
・コメント → /
・id指定 → #
・class指定 → .|以降にある文字は全てテキストと認識される
p
  | テキストテキストテキスト
    テキストテキストテキスト
p
  |
    テキストテキストテキスト
    テキストテキストテキスト
条件式なども省略できる
- if cuser.nil?
  li 新規登録
- else
  li ログイン
基本的な部分だけまとめてみた。
調べて分かったけど覚えることは意外と少ないみたい
はじめて見た時はなんじゃこりゃって感じだったけど、
慣れたら大丈夫になってきそうな気がしてきた。では今日はこの辺で。
1人前のエンジニアになるまであと97日
- 投稿日:2020-05-23T21:38:07+09:00
pacman で MSYS2 に Ruby をインストール
既存の MSYS2 環境に後から手動で Ruby をインストールする手順メモ
動作環境
Windows10 Home Edition

msys2-x86_64-20190524
インストール済みパッケージの更新
# パッケージデータベースの更新
$ pacman -Sy

# インストールされているパッケージを最新版に更新
$ pacman -Suu
以下の警告が出た場合、MSYS2 のシェルをクローズボタンで終了し、再起動して再度
pacman -Suuを実行する警告: シェルに戻る前に MSYS2 を終了し、更新を再度チェックしてください 警告: exit を呼ぶのではなく、例えば端末ウィンドウを閉じてくださいtoolchain (gcc) のインストール
$ pacman -S base-devel
$ pacman -S mingw-w64-x86_64-toolchain
ruby のインストール
$ pacman -S mingw-w64-x86_64-ruby動作確認
$ ruby --version
ruby 2.7.1p83 (2020-03-31 revision a0c7c23c9c) [x64-mingw32]

$ gem --version
3.1.2

$ gem list --local
benchmark (default: 0.1.0)
bigdecimal (default: 2.0.0)
bundler (default: 2.1.4)
cgi (default: 0.1.0)
csv (default: 3.1.2)
date (default: 3.0.0)
dbm (default: 1.1.0)
delegate (default: 0.1.0)
did_you_mean (default: 1.4.0)
etc (default: 1.1.0)
fcntl (default: 1.0.0)
fiddle (default: 1.0.0)
fileutils (default: 1.4.1)
forwardable (default: 1.3.1)
gdbm (default: 2.1.0)
getoptlong (default: 0.1.0)
io-console (default: 0.5.6)
ipaddr (default: 1.2.2)
irb (default: 1.2.3)
json (default: 2.3.0)
logger (default: 1.4.2)
matrix (default: 0.2.0)
minitest (5.13.0)
mutex_m (default: 0.1.0)
net-pop (default: 0.1.0)
net-smtp (default: 0.1.0)
net-telnet (0.2.0)
observer (default: 0.1.0)
open3 (default: 0.1.0)
openssl (default: 2.1.2)
ostruct (default: 0.2.0)
power_assert (1.1.7)
prime (default: 0.1.1)
pstore (default: 0.1.0)
psych (default: 3.1.0)
racc (default: 1.4.16)
rake (13.0.1)
rdoc (default: 6.2.1)
readline (default: 0.0.2)
readline-ext (default: 0.1.0)
reline (default: 0.1.3)
rexml (default: 3.2.3)
rss (default: 0.2.8)
sdbm (default: 1.0.0)
singleton (default: 0.1.0)
stringio (default: 0.1.0)
strscan (default: 1.0.3)
test-unit (3.3.4)
timeout (default: 0.1.0)
tracer (default: 0.1.0)
uri (default: 0.10.0)
webrick (default: 1.6.0)
xmlrpc (0.3.0)
yaml (default: 0.1.0)
zlib (default: 1.1.0)
参考
- 投稿日:2020-05-23T20:27:00+09:00
Railsでとにかくログイン機能を作る
とにかくログイン機能を作りましょう
Railsを用いたWEBアプリケーションでログイン機能を作るためだけの記事です。
これを体に覚え込ませて爆速で作れるようになっちゃいましょう!アプリの雛形を作る
これを作らないと何も始まりません!ターミナルから以下のコマンドを実行しましょう。
% rails _5.2.3_ new アプリ名 -d mysql上記のコマンドによりアプリの雛形ができたらアプリのディレクトリに移動しましょう。
% cd アプリ名deviseのインストール
エディタでGemfileを開き、deviseを追加します。
deviseとは、ユーザー認証に必要な機能を簡単に作れるようになるgemのことです。
また、今回は私の好みでerbではなくhamlを使うのでerbファイルをhamlに変換するgemもインストールします。gem 'devise' gem "haml-rails"Gemfileにdeviseを追記したらインストールします!
% bundle installインストールが終了したらerbファイルをhamlに変換しておきます。
% rails haml:erb2haml上記の変換作業が終わったらdeviseの設定ファイルを作成します。
% rails g devise:installで、以下の設定ファイルが出来ます。
config/initializers/devise.rb
config/locales/devise.en.ymlデータベース周りの設定
続いてユーザーモデルの作成するため以下のコマンドを実行します。
% rails g devise userこれでルーティングファイルにもdeviseのルーティングが記載されます。
Rails.application.routes.draw do
  devise_for :users
end
このアプリで使用するデータベースが未作成の状態なので作りましょう。
% rails db:createモデルを作成した時点でマイグレーションファイルが作成されていると思うので、マイグレーションしましょう
xxxxxxxxxxxxxx_devise_create_users.rb% rails db:migrateこれでデータベース周りの設定は完了です。
トップページを表示させる
続いて、トップページのビューファイルを作ります。
ここにログイン、新規登録、ログアウトへの導線を作っておきしょう。
今回は何らかの投稿をユーザーで投稿できるアプリ、と仮定しapp/views/postsにindex.html.hamlを作ります。
deviseをインストールすると、user_signed_inというヘルパーメソッドが使えるようになるので、これで未ログイン時とログイン時で表示を分けましょう。%header - if user_signed_in? %div = link_to "ログアウト", destroy_user_session_path, method: :delete - else %div = link_to "ログイン", new_user_session_path = link_to "新規登録", new_user_registration_pathトップページができたらroutes.rbにルーティングを追記します。
Rails.application.routes.draw do
  devise_for :users
  root to: 'posts#index'
end
現時点でトップページを開こうとすると下記のようなエラーになると思うので、コントローラを作ります。
% rails g controller postsこれでコントローラができました!
作成されたコントローラにindexアクションを追加すればトップページが開けるはずです。class PostsController < ApplicationController def index end end何とも味気ない画面ですが、うまくいっていれば下記のような画面になるはずです。
ログインと新規登録
続いて、ログインと新規登録画面の作成を行います。
下記のコマンドを実行すると、新規登録とログイン用のビューが作成されます。% rails g devise:views.新規登録画面
app/views/devise/registrations/new.html.erb・ログイン画面
app/views/devise/sessions/new.html.erb今回はhamlで作成するので、下記のコマンドを再度実行してerbをhamlに変換しておきましょう。
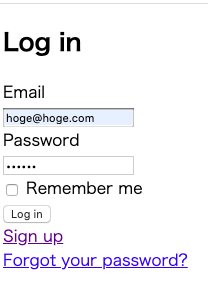
% rails haml:erb2hamlここまで出来れば新規登録、ログイン、ログアウトができるはずなので早速実践してみます。
・新規登録をクリック
・メールアドレスとパスワードを入力して"sign up"をクリック
・トップページに遷移し、ログアウトが表示されるのでログアウトをクリック
・ログアウトできたので、続いてログインをクリック
・メールアドレスとパスワードを入力してログインをクリック
・トップページに遷移してログアウトが表示される。
スタイルが当たってないので見た目はしょぼいですが、とりあえずサーバーサイドの実装は完了です!
今回の記事を参考にして、ぜひ爆速実装を目指してみてください!


- 投稿日:2020-05-23T18:32:31+09:00
【備忘録】Devise + cancancan の使い方
はじめに
deviseを使用してUserモデル(認証)を作成後して
cancancanを追加して認可をできるようにしました。その過程を備忘録としてログします。
deviseのgemを追記します。
・
・
・
gem 'devise'
バンドルインストールします。
$bundle installデバイスをインストールします。
$rails generate devise:install設定があるか確認します。
config/environments/development.rb・ ・ config.action_mailer.default_url_options = { host: 'localhost', port: 3000 }page#indexを追記します。
config/routes.rbRails.application.routes.draw do root to: "page#index" ・ ・ end以下を追記します。
app/views/layouts/application.html.erb<body> <p class="notice"><%= notice %></p> <p class="alert"><%= alert %></p> ・ ・ </body>Viewをインストールします。
$ rails g devise:views以下が作られます。
app/views/devise/unlocks/new.html.erb
app/views/devise/shared/links.html.erb
app/views/devise/shared/_error_messages.html.erb
app/views/devise/sessions/new.html.erb
app/views/devise/registrations/new.html.erb
app/views/devise/registrations/edit.html.erb
app/views/devise/passwords/new.html.erb
app/views/devise/passwords/edit.html.erb
app/views/devise/mailer/unlockinstructions.html.erb
app/views/devise/mailer/reset_password_instructions.html.erb
app/views/devise/mailer/password_change.html.erb
app/views/devise/mailer/email_changed.html.erb
app/views/devise/mailer/confirmation_instructions.html.erb
app/views/devise/confirmations/new.html.erbモデルを作成します。
今回はUserモデルを作ります。$ rails g devise user以下モデルが作られます。
app/models/user.rbclass User < ApplicationRecord # Include default devise modules. Others available are: # :confirmable, :lockable, :timeoutable, :trackable and :omniauthable devise :database_authenticatable, :registerable, :recoverable, :rememberable, :validatable end以下が同時に作られます。
config/application.rbconfig.i18n.default_locale = :ja以下も作られます。
config/routes.rbails.application.routes.draw do devise_for :users ・ ・ endモデル作成後に、DBに反映します。
rails db:migrateまだpage#indexのViewがないので作ります。
$ rails g controller Pages index余談ですが、routes.rbにスコープを作ることでPathを変更できます。
routes.rbdevise_scope :user do get 'login', to: 'devise/sessions#new' post 'login', to: 'devise/sessions/#create' delete 'logout', to: 'devise/sessions#destroy' endこれにより、
http://localhost:3000/login
にアクセスしたときに、ログインページが表示されます。もちろんデフォルトの/users/sign_inでもログインページが表示されるので必要であれば削除しておきましょう。
routes.rbdevise_for :users, skip: [:sessions]デバイスの設定は完了です。
cancancanのインストール
次にcancancanをインストールしていきます。
これは認可と言って、ユーザによって、
アクセス権を付与するという意味になります。
システム管理者と一般ユーザの違いです。gem 'cancancan'バンドルインストールします。
$bundle installAbilityクラスが作成されます。
rails g cancan:abilityAbilityクラスのデフォルトです。
class Ability
  include CanCan::Ability

  def initialize(user)
    # Define abilities for the passed in user here. For example:
    #
    #   user ||= User.new # guest user (not logged in)
    #   if user.admin?
    #     can :manage, :all
    #   else
    #     can :read, :all
    #   end
    #
    # The first argument to `can` is the action you are giving the user
    # permission to do.
    # If you pass :manage it will apply to every action. Other common actions
    # here are :read, :create, :update and :destroy.
    #
    # The second argument is the resource the user can perform the action on.
    # If you pass :all it will apply to every resource. Otherwise pass a Ruby
    # class of the resource.
    #
    # The third argument is an optional hash of conditions to further filter the
    # objects.
    # For example, here the user can only update published articles.
    #
    #   can :update, Article, :published => true
    #
    # See the wiki for details:
    # https://github.com/CanCanCommunity/cancancan/wiki/Defining-Abilities
  end
end
以下に変更します。
# frozen_string_literal: true

class Ability
  include CanCan::Ability

  def initialize(user)
    user ||= User.new
    can :read,  :all

    if user.admin?
      can :manage,  :all

    end


    # Define abilities for the passed in user here. For example:
    #
    #   user ||= User.new # guest user (not logged in)
    #   if user.admin?
    #     can :manage, :all
    #   else
    #     can :read, :all
    #   end
    #
    # The first argument to `can` is the action you are giving the user
    # permission to do.
    # If you pass :manage it will apply to every action. Other common actions
    # here are :read, :create, :update and :destroy.
    #
    # The second argument is the resource the user can perform the action on.
    # If you pass :all it will apply to every resource. Otherwise pass a Ruby
    # class of the resource.
    #
    # The third argument is an optional hash of conditions to further filter the
    # objects.
    # For example, here the user can only update published articles.
    #
    #   can :update, Article, :published => true
    #
    # See the wiki for details:
    # https://github.com/CanCanCommunity/cancancan/wiki/Defining-Abilities
  end
end
user ||= User.new
上記がないとゲストユーザで操作しているときに、エラーになりました。if user.admin? ←adminって何?と聞かれました。
def initialize(user)
user ||= User.new
can :read, :all
Abilityモデルが呼ばれたときに
初期値としてログインしていれば、そのユーザを変数に入れ、ログインしていなければゲストユーザが変数に代入されます。
そして、ユーザ変数に対して、read権限を付与するという意味となる。全てのユーザがread権限があるということです。read権限というのは、CRUDに紐づいている訳ではないので注意しましょう。
ページが読めるということであり、getができるという意味ではないし、createメソッドとかも別にプログラムすればできます。if user.admin? can :manage, :allこちらはUserモデルに作成したadminカラムにtrueが入っていれば実行するプログラムです。
つまりは管理者権限を持つユーザということになります。Page#indexのビューページに以下を追加します。
app/views/pages/index.html.erb<h1>Pages#index</h1> <p>Find me in app/views/pages/index.html.erb</p> <%= link_to "削除", login_path, method: :delete %> <% if can? :update, current_user %> <h1>update</h1> <% end %> <% if can? :read, current_user %> <h1>read</h1> <% end %><% if can? :update, current_user %>
今ログインしているユーザがupdateの権限を持っていれば中身を表示します。<% if can? :read, current_user %>
もしログインしているユーザがreadの権限を持っていれば中身を表示します。という意味になります。
db/schema.rbcreate_table "users", force: :cascade do |t| t.string "email", default: "", null: false t.string "encrypted_password", default: "", null: false t.string "reset_password_token" t.datetime "reset_password_sent_at" t.datetime "remember_created_at" t.datetime "created_at", precision: 6, null: false t.datetime "updated_at", precision: 6, null: false t.boolean "admin", default: false t.index ["email"], name: "index_users_on_email", unique: true t.index ["reset_password_token"], name: "index_users_on_reset_password_token", unique: true end上記でadminってUserモデルにないけどどうするの?ってなるかと思うが、
追加することとなります。$rails g migration AddAdminToUser admin:booleanデフォルトで以下が作成されるので
default: "false"を追加します。ビューページでは、adminを選択するビューは作成せず、デフォルトでユーザを作成したらadmin=falseがつくようにします。
ここでは、adminは管理側で意図的に作成することとします。db/migrate/20200522114428_add_admin_to_users.rbclass AddAdminToUsers < ActiveRecord::Migration[6.0] def change add_column :users, :admin, :boolean, default: "false" end endマイグレートします。
$rails g migrateDBのスキーマの確認をします。
db/schema.rbcreate_table "users", force: :cascade do |t| t.string "email", default: "", null: false t.string "encrypted_password", default: "", null: false t.string "reset_password_token" t.datetime "reset_password_sent_at" t.datetime "remember_created_at" t.datetime "created_at", precision: 6, null: false t.datetime "updated_at", precision: 6, null: false t.boolean "admin", default: false t.index ["email"], name: "index_users_on_email", unique: true t.index ["reset_password_token"], name: "index_users_on_reset_password_token", unique: true endhttp://localhost:3000/
で一般ユーザを作成しておきます。adminユーザは、
以下の通り作成します。$user =User.new(id: xx, email: "xxx@yyy", password: "xxxx", admin: true)これで手続きは完了なので、
実際に一般ユーザとAdminユーザそれぞれで、
Page#indexにアクセスします。一般ユーザはread権限のみなのでreadを表示可能です。
Adminユーザは,manage権限(全ての権限を持つ)なのでread,updateそれぞれ表示可能です。
- 投稿日:2020-05-23T18:32:31+09:00
【備忘録】Rails6 Devise + cancancan の使い方
はじめに
deviseを使用してUserモデル(認証)を作成後して
cancancanを追加して認可をできるようにしました。その過程を備忘録としてログします。
deviseのgemを追記します。
・
・
・
gem 'devise'
バンドルインストールします。
$bundle installデバイスをインストールします。
$rails generate devise:install設定があるか確認します。
config/environments/development.rb・ ・ config.action_mailer.default_url_options = { host: 'localhost', port: 3000 }page#indexを追記します。
config/routes.rbRails.application.routes.draw do root to: "page#index" ・ ・ end以下を追記します。
app/views/layouts/application.html.erb<body> <p class="notice"><%= notice %></p> <p class="alert"><%= alert %></p> ・ ・ </body>Viewをインストールします。
$ rails g devise:views以下が作られます。
app/views/devise/unlocks/new.html.erb
app/views/devise/shared/links.html.erb
app/views/devise/shared/_error_messages.html.erb
app/views/devise/sessions/new.html.erb
app/views/devise/registrations/new.html.erb
app/views/devise/registrations/edit.html.erb
app/views/devise/passwords/new.html.erb
app/views/devise/passwords/edit.html.erb
app/views/devise/mailer/unlockinstructions.html.erb
app/views/devise/mailer/reset_password_instructions.html.erb
app/views/devise/mailer/password_change.html.erb
app/views/devise/mailer/email_changed.html.erb
app/views/devise/mailer/confirmation_instructions.html.erb
app/views/devise/confirmations/new.html.erbモデルを作成します。
今回はUserモデルを作ります。$ rails g devise user以下モデルが作られます。
app/models/user.rbclass User < ApplicationRecord # Include default devise modules. Others available are: # :confirmable, :lockable, :timeoutable, :trackable and :omniauthable devise :database_authenticatable, :registerable, :recoverable, :rememberable, :validatable end以下が同時に作られます。
config/application.rbconfig.i18n.default_locale = :ja以下も作られます。
config/routes.rbails.application.routes.draw do devise_for :users ・ ・ endモデル作成後に、DBに反映します。
rails db:migrateまだpage#indexのViewがないので作ります。
$ rails g controller Pages index余談ですが、routes.rbにスコープを作ることでPathを変更できます。
routes.rbdevise_scope :user do get 'login', to: 'devise/sessions#new' post 'login', to: 'devise/sessions/#create' delete 'logout', to: 'devise/sessions#destroy' endこれにより、
http://localhost:3000/login
にアクセスしたときに、ログインページが表示されます。もちろんデフォルトの/users/sign_inでもログインページが表示されるので必要であれば削除しておきましょう。
routes.rbdevise_for :users, skip: [:sessions]デバイスの設定は完了です。
cancancanのインストール
次にcancancanをインストールしていきます。
これは認可と言って、ユーザによって、
アクセス権を付与するという意味になります。
システム管理者と一般ユーザの違いです。gem 'cancancan'バンドルインストールします。
$bundle installAbilityクラスが作成されます。
rails g cancan:abilityAbilityクラスのデフォルトです。
class Ability
  include CanCan::Ability

  def initialize(user)
    # Define abilities for the passed in user here. For example:
    #
    #   user ||= User.new # guest user (not logged in)
    #   if user.admin?
    #     can :manage, :all
    #   else
    #     can :read, :all
    #   end
    #
    # The first argument to `can` is the action you are giving the user
    # permission to do.
    # If you pass :manage it will apply to every action. Other common actions
    # here are :read, :create, :update and :destroy.
    #
    # The second argument is the resource the user can perform the action on.
    # If you pass :all it will apply to every resource. Otherwise pass a Ruby
    # class of the resource.
    #
    # The third argument is an optional hash of conditions to further filter the
    # objects.
    # For example, here the user can only update published articles.
    #
    #   can :update, Article, :published => true
    #
    # See the wiki for details:
    # https://github.com/CanCanCommunity/cancancan/wiki/Defining-Abilities
  end
end
以下に変更します。
# frozen_string_literal: true

class Ability
  include CanCan::Ability

  def initialize(user)
    user ||= User.new
    can :read,  :all

    if user.admin?
      can :manage,  :all

    end


    # Define abilities for the passed in user here. For example:
    #
    #   user ||= User.new # guest user (not logged in)
    #   if user.admin?
    #     can :manage, :all
    #   else
    #     can :read, :all
    #   end
    #
    # The first argument to `can` is the action you are giving the user
    # permission to do.
    # If you pass :manage it will apply to every action. Other common actions
    # here are :read, :create, :update and :destroy.
    #
    # The second argument is the resource the user can perform the action on.
    # If you pass :all it will apply to every resource. Otherwise pass a Ruby
    # class of the resource.
    #
    # The third argument is an optional hash of conditions to further filter the
    # objects.
    # For example, here the user can only update published articles.
    #
    #   can :update, Article, :published => true
    #
    # See the wiki for details:
    # https://github.com/CanCanCommunity/cancancan/wiki/Defining-Abilities
  end
end
user ||= User.new
上記がないとゲストユーザで操作しているときに、エラーになりました。if user.admin? ←adminって何?と聞かれました。
def initialize(user)
user ||= User.new
can :read, :all
Abilityモデルが呼ばれたときに
初期値としてログインしていれば、そのユーザを変数に入れ、ログインしていなければゲストユーザが変数に代入されます。
そして、ユーザ変数に対して、read権限を付与するという意味となる。全てのユーザがread権限があるということです。read権限というのは、CRUDに紐づいている訳ではないので注意しましょう。
ページが読めるということであり、getができるという意味ではないし、createメソッドとかも別にプログラムすればできます。if user.admin? can :manage, :allこちらはUserモデルに作成したadminカラムにtrueが入っていれば実行するプログラムです。
つまりは管理者権限を持つユーザということになります。Page#indexのビューページに以下を追加します。
app/views/pages/index.html.erb<h1>Pages#index</h1> <p>Find me in app/views/pages/index.html.erb</p> <%= link_to "削除", logout_path, method: :delete %> <% if can? :update, current_user %> <h1>update</h1> <% end %> <% if can? :read, current_user %> <h1>read</h1> <% end %><% if can? :update, current_user %>
今ログインしているユーザがupdateの権限を持っていれば中身を表示します。<% if can? :read, current_user %>
もしログインしているユーザがreadの権限を持っていれば中身を表示します。という意味になります。
db/schema.rbcreate_table "users", force: :cascade do |t| t.string "email", default: "", null: false t.string "encrypted_password", default: "", null: false t.string "reset_password_token" t.datetime "reset_password_sent_at" t.datetime "remember_created_at" t.datetime "created_at", precision: 6, null: false t.datetime "updated_at", precision: 6, null: false t.boolean "admin", default: false t.index ["email"], name: "index_users_on_email", unique: true t.index ["reset_password_token"], name: "index_users_on_reset_password_token", unique: true end上記でadminってUserモデルにないけどどうするの?ってなるかと思うが、
追加することとなります。$rails g migration AddAdminToUser admin:booleanデフォルトで以下が作成されるので
default: "false"を追加します。ビューページでは、adminを選択するビューは作成せず、デフォルトでユーザを作成したらadmin=falseがつくようにします。
ここでは、adminは管理側で意図的に作成することとします。db/migrate/20200522114428_add_admin_to_users.rbclass AddAdminToUsers < ActiveRecord::Migration[6.0] def change add_column :users, :admin, :boolean, default: "false" end endマイグレートします。
$rails g migrateDBのスキーマの確認をします。
db/schema.rbcreate_table "users", force: :cascade do |t| t.string "email", default: "", null: false t.string "encrypted_password", default: "", null: false t.string "reset_password_token" t.datetime "reset_password_sent_at" t.datetime "remember_created_at" t.datetime "created_at", precision: 6, null: false t.datetime "updated_at", precision: 6, null: false t.boolean "admin", default: false t.index ["email"], name: "index_users_on_email", unique: true t.index ["reset_password_token"], name: "index_users_on_reset_password_token", unique: true endhttp://localhost:3000/
で一般ユーザを作成しておきます。adminユーザは、
以下の通り作成します。$user =User.new(id: xx, email: "xxx@yyy", password: "xxxx", admin: true)これで手続きは完了なので、
実際に一般ユーザとAdminユーザそれぞれで、
Page#indexにアクセスします。一般ユーザはread権限のみなのでreadを表示可能です。
Adminユーザは,manage権限(全ての権限を持つ)なのでread,updateそれぞれ表示可能です。
- 投稿日:2020-05-23T17:46:32+09:00
Ruby, Nokogiri : セレクトしているノードの要素名を取得する
はじめに
Nokogiriでは、cssまたはat_cssで要素の名前を指定することでノードをセレクトできますが、逆にセレクトしているノードから要素名はどのように取得するのか気になったので、調べてみました。
nameメソッドを使う
ノードの要素名取得はとてもシンプルです。以下のようなhtmlファイルがあったとします。
hello.html<html> <head> <title>hello</title> <meta charset="UTF-8"> </head> <body> <p>こんにちは</p> </body> </html>at_cssでpタグを選択します。
sample.rbrequire 'nokogiri' html = open('hello_utf8.html').read doc = Nokogiri::HTML.parse(html) element = doc.at_css('p') p element.name #=> 'p' p element.parent.name #=> 'body'parentなどを使って他のノードをセレクトし、要素名を取得することもできます。
さいごに
普通はhtml構造を先に見てからスクレイピングするので、ノードから要素名を取得する需要はあまりないと思います^^;
- 投稿日:2020-05-23T17:28:41+09:00
Google Books APIから情報を格納するモデルを作り、直感的な扱いとテストを可能にする
対象読者
- 本に関するRailsポートフォリオを作る方
- Google Books APIを用いたRailsポートフォリオを作る方
本記事の到達物
Google Books APIのIDから情報を取得し、クラスに格納する
pry(main)> @google_book = GoogleBook.new_from_id('c1L4IzmUzicC')

pry(main)> @google_book.title
=> "Practical Rails Plugins"

pry(main)> @google_book.authors
=> ["Nick Plante", "David Berube"]

pry(main)> @google_book.image
=> "http://books.google.com/books/content?id=c1L4IzmUzicC&printsec=frontcover&img=1&zoom=5&edge=curl&imgtk=AFLRE73ENsMYFOfY27vluLqgI1cO-b80lA7enoeZzzcDGEhA5NWIj3djHvd6gvP1zlKoMoC4V0_7fKVuIjWQDYVs4FrDjHvxoqtRUcxHZ9L7isRtsHc2Cs5iS6DPAQQcTT20Oseo9gq_&source=gbs_api"
キーワードから検索し、複数のオブジェクトを返す
pry(main)> @google_books = GoogleBook.search('Rails')

pry(main)> @google_books[0].title
=> "実践Rails"

pry(main)> @google_books.last.authors
=> ["Sam Ruby", "Dave Thomas", "David Heinemeier Hansson"]

pry(main)> @google_books.map { |google_book| google_book.title }
=> ["実践Rails",
 "独習Ruby on Rails",
 "Railsレシピ",
 "Ajax on Rails",
 "Ruby on Rails 4アプリケーションプログラミング",
 "Ruby on Rails 5の上手な使い方 現場のエンジニアが教えるRailsアプリケーション開発の実践手法",
 "Ruby on Rails 5 超入門",
 "RailsによるアジャイルWebアプリケーション開発第3版",
 "JRuby on Rails 実践開発ガイド",
 "RailsによるアジャイルWebアプリケーション開発第4版"]

pry(main)> @google_books.class
=> Array
格納された情報を、複数のテーブルに保存できる
pry(main)> @google_book = GoogleBook.new_from_id('wlNHDwAAQBAJ')

pry(main)> @google_book.title
=> "Ruby on Rails 5の上手な使い方 現場のエンジニアが教えるRailsアプリケーション開発の実践手法"

pry(main)> @google_book.authors
=> ["太田 智彬", "寺下 翔太", "手塚 亮", "宗像 亜由美", "株式会社リクルートテクノロジーズ"]

pry(main)> @google_book.save
=> true


pry(main)> @book = Book.last

pry(main)> @book.title
=> "Ruby on Rails 5の上手な使い方 現場のエンジニアが教えるRailsアプリケーション開発の実践手法"

pry(main)> @book.authors[0].name
=> "太田 智彬"

pry(main)> @book.authors.size
=> 5

pry(main)> @book.authors.class
=> Author::ActiveRecord_Associations_CollectionProxy


pry(main)> @author = Author.last

pry(main)> @author.name
=> "株式会社リクルートテクノロジーズ"
本記事で書くこと
Google Books APIからの情報を格納する、GoogleBookモデルを作成します。
大きなメリットとしては、以下の2つがあります。
- Google Books APIから受け取った情報をControllerやViewで直感的に扱える。
- 情報を取得する / 情報を格納して整理する / 複数テーブルに跨いで保存をする、などのロジックを分離して書くことができ、それぞれテストを行える。
本記事ではControllerでの使用例、テストについても記載します。
DB設計
データベースには、本の以下の情報を保存します。
- 「タイトル」
- 「著者」
- 「画像URL」
- 「出版日」
- 「Google Books APIのID」
もちろん、Google Books APIにある情報であれば、これ以外も取得し保存することができます。
本記事では説明のために、取得する情報としては少なめにしてあります。ER図
BooksテーブルとAuthorsテーブルを用意します。
一つの本に対し、著者は複数人いることがあるので、book has_many authorsの関係にします。ただし、「本を一覧で表示する」ようなページで、著者全員でなく代表著者を表示したい場合があると思います。
そのため、authorsテーブルにはis_representativeカラムを用意しておきます。また、「Google Books APIから情報を取得するなら、自前のデータベースに情報を持つ必要は無いのでは?」と思われるかもしれません。
その設計を行い、失敗した話を以下に載せておきます。
GoogleBooksAPIだけで本リソースの取得をする設計を行い、失敗した話要約すると、本の情報は自前のデータベースでも情報を持っておいた方が良い、という結論になります。
マイグレーションファイル
マイグレーションファイルを作るなら、以下のようになるかと思います。
Booksテーブル
db/migrate/20202020202020_create_booksclass CreateBooks < ActiveRecord::Migration[5.2] def change create_table :books do |t| t.string :google_books_api_id, null: false t.string :title, null: false t.string :image t.date :published_at t.timestamps end add_index :books, :googlebooksapi_id, unique: true end endGoogle Books APIのIDは必ず必要なため、
null: falseを指定しておきます。
また、Google Books APIのIDが重複することは考えられないため、ユニークキーも付与します。タイトルが存在しない本は、存在しないと考えられるため、
null: falseを指定しておきます。逆に、他の情報に
null: falseを指定するのには注意が必要です。
外部APIからの情報なわけで、本によってはその情報が無いことがあり、「DBに登録できない」という事態を発生させうるからです。Authorsテーブル
db/migrate/20202020202021_create_authorsclass CreateAuthors < ActiveRecord::Migration[5.2] def change create_table :authors do |t| t.references :book, foreign_key: true t.string :name, null: false t.boolean :is_representative, null: false t.timestamps end end endGoogle Books APIを叩くメソッド
まずはAPIを叩くモジュールを
app/lib/配下に追加します。app/lib/google_books_api.rbmodule GoogleBooksApi def url_of_creating_from_id(googlebooksapi_id) "https://www.googleapis.com/books/v1/volumes/#{googlebooksapi_id}" end # Google Books APIのIDから、APIのURLを取得する def url_of_searching_from_keyword(keyword) "https://www.googleapis.com/books/v1/volumes?q=#{keyword}&country=JP" end # キーワードから、検索するAPIのURLを取得する def get_json_from_url(url) JSON.parse(Net::HTTP.get(URI.parse(Addressable::URI.encode(url)))) end # URLから、JSON文字列を取得し、JSONオブジェクトを構築する end本記事で使用するGoogle Books APIは2種類です。
- IDから一つの本の情報を返してくれる
https://www.googleapis.com/books/v1/volumes/:ID
というURLによって取得できます。
以下のURLがその例です。
https://www.googleapis.com/books/v1/volumes/aB4B13xGEv4CGoogle Books APIから取得できる情報がどんなものか知らない場合、上のURLを見て確認してみて下さい。
タイトル、出版日、購入リンク、ISBN、など色々取得できることが分かると思います。
- キーワードから検索結果群を返してくれる
https://www.googleapis.com/books/v1/volumes?q=search?:キーワード
というURLによって取得できます。
以下のURLがその例です。
https://www.googleapis.com/books/v1/volumes?q=search?RailsGoogle Books APIの他仕様について知りたい方は、公式ドキュメントをご参照ください。
Getting StartedURLをエスケープするために、
addressableというgemを使っています。
以下gemをGemfileに追記しbundle installしてください。Gemfilegem 'addressable'ちなみに、Railsでは、
app/**/**.rbを自動で読み込んでくれます。
よって使いたいクラス内でinclude GoogleBooksApiとincludeさえすれば、以上3つのメソッドをクラス内で使用できます。情報を格納するモデル
Google Books APIからの情報を、オブジェクトとして格納するモデルを以下のように作ります。
app/models/google_book.rbclass GoogleBook include ActiveModel::Model include ActiveModel::Attributes include ActiveModel::Validations attribute :googlebooksapi_id, :string attribute :authors attribute :image, :string attribute :published_at, :date attribute :title, :string validates :googlebooksapi_id, presence: true validates :title, presence: true class << self include GoogleBooksApi def new_from_item(item) @item = item @volume_info = @item['volumeInfo'] new( googlebooksapi_id: @item['id'], authors: @volume_info['authors'], image: image_url, published_at: @volume_info['publishedDate'], title: @volume_info['title'], ) end def new_from_id(googlebooksapi_id) url = url_of_creating_from_id(googlebooksapi_id) item = get_json_from_url(url) new_from_item(item) end def search(keyword) url = url_of_searching_from_keyword(keyword) json = get_json_from_url(url) items = json['items'] return [] unless items items.map do |item| GoogleBook.new_from_item(item) end end private def image_url @volume_info['imageLinks']['smallThumbnail'] if @volume_info['imageLinks'].present? end end def save return false unless valid? book = build_book return false unless book.valid? ActiveRecord::Base.transaction do book.remote_image_url = image if image.present? book.save authors.each.with_index do |author, index| author = book.authors.build(name: author) author.is_representation = index.zero? author.save end end true end def find_book_or_save if Book.find_by(googlebooksapi_id: googlebooksapi_id) || save Book.find_by(googlebooksapi_id: googlebooksapi_id) else false end end private def build_book Book.new( googlebooksapi_id: googlebooksapi_id, published_at: published_at, title: title, ) end end長くなりました笑
一つ一つ解説していきます。ActiveModel
  include ActiveModel::Model
  include ActiveModel::Attributes
  include ActiveModel::Validations
ActiveModelとは「データベースと連携しないActiveRecord」みたいなものです。
ActiveModelのattribute
  attribute :googlebooksapi_id, :string
  attribute :authors
  (以下略)
ActiveModel::Attributesをincludeしたので使えます。
authorsには配列を入れることを想定していますが、配列に対応するattributeの型は無いようなので、この書き方にしています。ActiveModel::Attributes が最高すぎるんだよな。
ActiveModelのvalidates
  validates :googlebooksapi_id, presence: true
  validates :title, presence: true
Google Books APIのIDが無い本、タイトルの存在しない本は存在しない(と思われる)ので、
validetesを入れておきます。
仮にGoogle Books APIのIDが無い本がオブジェクトとして格納された場合、valid?メソッドを使ったときにfalseを返すことができます。(後述しますが、saveメソッドにて使用します)クラスメソッドの定義方法
class << self
new_from_idはGoogleBook.new_from_id('c1L4IzmUzicC')のようにクラスメソッドとして使いたいメソッドです。クラスメソッドを定義する方法は他にもありますが、class << slefによるやり方が推奨なようです。Rubyのクラスメソッドをclass << selfで定義している理由(翻訳)
IDからインスタンスを生成する
    def new_from_id(googlebooksapi_id)
      url = url_of_creating_from_id(googlebooksapi_id)
      item = get_json_from_url(url)
      new_from_item(item)
    end
順番がちょっと前後しますが、
new_from_itemより先にnew_from_idを説明します。前述の
GoogleBooksApiモジュールのurl_of_creating_from_idおよびget_json_from_urlを使用することで、一つの本の情報(JSON)をitemとして取得します。
そのitemをnew_from_itemに渡します。
itemからインスタンスを生成するdef new_from_item(item) @item = item @volume_info = @item['volumeInfo'] new( googlebooksapi_id: @item['id'], authors: @volume_info['authors'], image: image_url, published_at: @volume_info['publishedDate'], title: @volume_info['title'], ) endGoogle Books APIの中身を観察すると分かりますが、多くの情報は
item['volumeInfo']に入っています。
取り出したい情報を上記のように適宜定義し、new()を使ってインスタンスを生成する、というロジックにします。
image_urlだけ下記のやり方で実装しています。
image_urlの実装private def image_url @volume_info['imageLinks']['smallThumbnail'] if @volume_info['imageLinks'].present? end本によっては
volume_info['imageLinks']が入っていない本が存在するため、そのままvolume_info['imageLinks']['smallThumbnail']だけで使おうとするとundefindのエラーが出てしまうことがあります。
undefindを出さないようにするため、上記のように実装します。また、この
image_urlメソッドはクラス外で使用することは考えられないので、private下で定義します。検索結果をインスタンス群として返すクラスメソッド
    def search(keyword)
      url = url_of_searching_from_keyword(keyword)
      json = get_json_from_url(url)
      items = json['items']
      return [] unless items

      items.map do |item|
        GoogleBook.new_from_item(item)
      end
    end
Google Books APIのうち、検索結果群を返してくれるAPIを使った場合、返ってくるのは複数の
itemsとなります。
itemsは配列として[item1, item2, item3, ...]という形になっています。
mapメソッド内で一つ一つnew_from_item(item)をすることで、[googlebook1, googlebook2, googlebook3, ...]という配列の形で返すことができます。不適切なキーワードだと検索結果群を返してくれるAPIで
itemsが返ってこないため、その場合もundefindのエラーが発生してしまいます。
そこでreturn [] unless itemsの一行を入れることで、itemsが無い場合は空の配列を返すようにします。まだ
saveメソッド、find_book_or_saveメソッドの説明が残っていますが、先にControllerでの使い方を見るほうが分かりやすいと思うので、Controllerの説明に移りたいと思います。Controllerでの使用例
GoogleBookクラスを使うのは、「検索画面」と「リソース登録(create)」の2つかと思います。
ルーティング
config/routes.rbresources :books, only: %i[create show], shallow: true do collection do get :search end endあらかじめ、上記のようなルーティングは設定しておきます。
本筋とズレてしまうので説明は省きます。検索画面のController
app/controllers/books_controller.rbclass BooksController < ApplicationController def search @search_form = SearchBooksForm.new(search_books_params) books = GoogleBook.search(@search_form.keyword) @books = Kaminari.paginate_array(books).page(params[:page]) end private def search_books_params params.fetch(:q, keyword: '').permit(:keyword) end end弊記事で恐縮ですが、検索フォームは以下の記事のやり方で実装します。
【Ruby on Rails】フォームオブジェクトを使って検索キーワードをcontrollerに送る受け取ることのできた検索キーワード(
@search_form.keyword)をGoogleBook.searchに渡して、検索結果をGoogleBookクラスから生成したインスタンス群の配列として受け取ります。以降は任意ですが、私は検索結果をkaminariのページネーションで表示したかったため、
Kaminari.paginate_arrayに渡して使用しました。リソース登録のController ver.1(今までのメソッドのみで書くNGな例)
やりたいこととしては以下の通りです。
GoogleBookモデルに持っていた情報をBookモデルやAuthorモデルに格納し直す- ヴァリデーションをかける
- ヴァリデーション成功時にはDBに保存する
app/models/google_book.rbclass BooksController < ApplicationController def create google_book = GoogleBook.new_from_id(create_book_params[:googlebooksapi_id]) @book = Book.build( googlebooksapi_id: google_book.googlebooksapi_id, published_at: google_book.published_at, title: google_book.title, ) if @book.valid? @book.remote_image_url = google_book.image if google_book.image.present? @book.save google_book.authors.each.with_index do |author, index| @author = @book.authors.build(name: author) @author.is_representation = index.zero? @author.save end redirect_to @book else redirect_to search_books_path, danger: 'ページの表示に失敗しました' end end private def create_book_params params.permit(:googlebooksapi_id) end endしかし、上記の実装には色々な問題が発生しています。
- Fat Controllerになってしまっている
- 重複した本を弾けていない
- 複数リソースへのデータ登録なのに、
ActiveRecord::Base.transactionを使えていない特にFat Controllerの問題はなんとかしなくてはいけないです。
そもそも、このDBへの保存に関する処理はGoogleBookモデルが責務を持つ処理かと思います。
よって、保存に関するロジックはGoogleBookのインスタンスメソッドとして定義することにします。複数テーブルへの保存を実現する、
saveメソッドapp/models/google_book.rbdef save return false unless valid? book = build_book ActiveRecord::Base.transaction do book.remote_image_url = image if image.present? book.save if authors.present? authors.each.with_index do |author, index| author = book.authors.build(name: author) author.is_representative = index.zero? author.save end end end true end private def build_book Book.new( googlebooksapi_id: googlebooksapi_id, published_at: published_at, title: title, ) end
ActiveRecordのsaveメソッド風に仕上げるため、保存に成功すればtrue、失敗すればfalseを返すようにしたいです。
そこで、return false unless valid?の一行で、valid?で失敗したときにはfalseを返すようにしました。
また、成功時の最後にtrueの一行を入れることで、成功時にはtrueを返すことができます。
ActiveRecord::Base.transactionで囲うことで、複数リソース登録時で途中で失敗したときにロールバックを走らせることができます。
この場合では、何かの不具合で後半のauthor.saveで失敗したとしても、前半のbook.saveを取り止めにすることができます。
book.remote_image_url = image if image.present?はCarrierwaveで画像のアップロードを行うロジックになります。本筋とズレるので、今回は説明は省きます。
author.is_representative = index.zero?は、authors配列のうち、最初のインデックスにある著者を「代表著者」とするための一行です。
each.with_indexを使って配列を回してるのもこれが理由です。リソース登録のController ver.2(重複の登録をしてしまう)
app/controllers/books_controller.rbclass BooksController < ApplicationController def create google_book = GoogleBook.new_from_id(create_book_params[:googlebooksapi_id]) if google_book.save @book = Book.find_by(googlebooksapi_id: google_book.googlebooksapi_id) redirect_to @book else redirect_to search_books_path, danger: 'ページの表示に失敗しました' end end private def create_book_params params.permit(:googlebooksapi_id) end endかなりスッキリしましたが、まだ問題が残っています。
Google Books APIのIDが重複した、すなわち同じ本を登録してしまう可能性があります。
find_or_create_by風味な実装実現したいのは以下のことです。
- すでにbooksテーブルにその本があるなら、そのレコードに対応したモデルを返す
- なければ、
saveメソッドを実行して、新しく作ったレコードに対応したモデルを返す- booksテーブルにその本が無く、
saveメソッドが失敗するなら、falseを返す
ActiveRecordで言えば、find_or_create_byに近い挙動を実現したいことになります。
GoogleBookのインスタンスメソッドとして、以下のようにfind_book_or_saveメソッドとして実装します。app/models/google_book.rbdef find_book_or_save if Book.find_by(googlebooksapi_id: googlebooksapi_id) || save Book.find_by(googlebooksapi_id: googlebooksapi_id) else false end endリソース登録のController ver.3(完成)
app/controllers/books_controller.rbclass BooksController < ApplicationController def create google_book = GoogleBook.new_from_id(create_book_params[:googlebooksapi_id]) if (@book = google_book.find_book_or_save) redirect_to @book else redirect_to search_books_path, danger: 'ページの表示に失敗しました' end end private def create_book_params params.permit(:googlebooksapi_id) end endRSpecでテストを書く
今回扱うテストは3種類とします。
- Google Books APIを叩くメソッドのテスト
GoogleBookのモデルテスト- 本の登録時のリクエストスペック
テストの書き方については若干自信が無いため、ご指摘お待ちしております笑
Google Books APIを叩くメソッドのテスト
spec/lib/google_books_api_spec.rbrequire 'rails_helper' describe GoogleBooksApi do let(:test_class) { Struct.new(:google_books_api) { include GoogleBooksApi } } let(:google_books_api) { test_class.new } it '検索するAPIを叩き、複数のデータを返すkindが取得できること' do url = google_books_api.url_of_searching_from_keyword('Rails') expect(google_books_api.get_json_from_url(url)['kind']).to eq 'books#volumes' end it 'IDから本の情報を取得するAPIを叩き、特定データを返すkindが取得できること' do GOOGLE_BOOKS_API_ID_SAMPLE = 'aB4B13xGEv4C'.freeze url = google_books_api.url_of_creating_from_id(GOOGLE_BOOKS_API_ID_SAMPLE) expect(google_books_api.get_json_from_url(url)['kind']).to eq 'books#volume' expect(google_books_api.get_json_from_url(url)['id']).to eq GOOGLE_BOOKS_API_ID_SAMPLE end endモジュールのテストをするやり方に関しては以下サイトを参考にさせて頂きました。
【Ruby on Rails】初心者でもメソッドの単体テストがしたい!!
GoogleBookのモデルテストまずはFactoryBotを定義しておきます。
spec/factories/google_book.rbFactoryBot.define do factory :google_book do googlebooksapi_id { 'wlNHDwAAQBAJ' } authors do [ '太田 智彬', '寺下 翔太', '手塚 亮', '宗像 亜由美', '株式会社リクルートテクノロジーズ' ] end image { 'http://books.google.com/books/content?id=wlNHDwAAQBAJ&printsec=frontcover&img=1&zoom=5&edge=curl&imgtk=AFLRE70j5lrdzOYN-iUu8w-G_JJKpEhnpUGAgqyZd7rj4jHu59NcAU48eQ75T4fkdyyZD6dMlwjjw0sAdQSKY_HiEdNBMMeyDn4DUmOcY-oLHFRAnxPXocc_T_PA7NYdSlZdwKckhCMy&source=gbs_api' } published_at { '2018-01-24' } title { 'Ruby on Rails 5の上手な使い方 現場のエンジニアが教えるRailsアプリケーション開発の実践手法' } end end現場Railsです。
次にモデルテストの本体です。app/models/google_book_spec.rbrequire 'rails_helper' RSpec.describe GoogleBook, type: :model do it '有効なファクトリを持つこと' do google_book = build(:google_book) expect(google_book).to be_valid end it 'Google Books APIのIDが存在しないときに無効なこと' do google_book = build(:google_book, googlebooksapi_id: nil) google_book.valid? expect(google_book.errors.messages[:googlebooksapi_id]).to include('を入力してください') end it 'タイトルが存在しないときに無効なこと' do google_book = build(:google_book, title: nil) google_book.valid? expect(google_book.errors.messages[:title]).to include('を入力してください') end it 'Google Books APIのIDから目的のインスタンスを生成できること' do googlebooksapi_id = 'YEfUBgAAQBAJ' google_book = GoogleBook.new_from_id(googlebooksapi_id) expect(google_book.title).to eq 'SpriteKitではじめる2Dゲームプログラミング Swift対応' expect(google_book.googlebooksapi_id).to eq googlebooksapi_id expect(google_book.authors).to eq %w[山下佳隆 村田知常 原知愛 近藤秀彦] expect(google_book.author).to eq '山下佳隆' end it '適切なキーワードから複数の検索結果を返し、そのタイトルにキーワードが含まれていること' do keyword = 'Ruby' keyword_count = 0 google_books = GoogleBook.search(keyword) expect(google_books.size).to be >= 5 # 検索結果を5個以上は返せる google_books.each do |google_book| if google_book.title.include?(keyword) keyword_count += 1 end end expect(keyword_count).to be >= 5 # キーワードのRubyを含むタイトルが5個以上は返せる end it '不適切なキーワードからは検索結果を返さないこと' do keyword = 'bbvjnaovnaov' # 適当 google_books = GoogleBook.search(keyword) expect(google_books.size).to be 0 end describe '保存時に' do context '不適切な情報しか持たないときは' do let(:google_book) { build(:google_book, googlebooksapi_id: nil) } it '保存に失敗すること' do expect { google_book.save }.to change { Book.count }.by(0).and change { Author.count }.by(0) end it 'falseを返すこと' do expect(google_book.save).not_to be_truthy end end context '適切な情報を持っているときは' do let(:google_book) { build(:google_book, authors: [ '太田 智彬', '寺下 翔太', '手塚 亮', '宗像 亜由美', '株式会社リクルートテクノロジーズ' ]) } it '保存できること' do expect { google_book.save }.to change { Book.count }.by(1).and change { Author.count }.by(5) end it 'trueを返すこと' do expect(google_book.save).to be_truthy end end context '著者の情報だけを持っていないときにも' do let(:google_book) { build(:google_book, authors: nil) } it '保存できること' do expect { google_book.save }.to change { Book.count }.by(1).and change { Author.count }.by(0) end it 'trueを返すこと' do expect(google_book.save).to be_truthy end end end endヴァリデーションと、それぞれのメソッドをテストしただけなので、あまり説明は要らないかと思います。
本の登録時のリクエストスペック
spec/requests/books_spec.rbrequire 'rails_helper' RSpec.describe 'Books', type: :request do it '適切なGoogle Books APIのIDである本が登録できること' do expect { post '/books', params: { googlebooksapi_id: 'xPbRxgEACAAJ' } }.to change { Book.count }.by(1) expect(response).to redirect_to book_path(Book.last.id) end it '既に登録されている本の登録に失敗し、その詳細画面に遷移すること' do same_google_books_api_id = 'xPbRxgEACAAJ' create(:book, googlebooksapi_id: same_google_books_api_id) expect { post '/books', params: { googlebooksapi_id: same_google_books_api_id } }.to change { Book.count }.by(0) expect(response).to redirect_to book_path(Book.find_by(googlebooksapi_id: same_google_books_api_id)) end end対応するControllerは「リソース登録のController ver.3(完成)」のものです。
テストは説明することが少なくて楽で良いですね以上になります。
改善していければと思っておりますので、間違ってる箇所や改善すべき箇所があればご指摘いただけると嬉しいです。

- 投稿日:2020-05-23T16:46:31+09:00
[Ruby]getとpostの違い
Rubyのルーティングの中にgetとpostがあります。
その違いは何なのかを説明していきます。get:
データベースを変更しないアクションpost:
データベースを変更するアクション非常にシンプルです
- 投稿日:2020-05-23T15:08:56+09:00
Ruby on rails を初心者向けに解説⑤ ~データベースの編集と削除~
はじめに
今回は以前の記事の続きになります。
よろしければ、以前の記事も御覧ください。
Ruby on rails を初心者向けに解説② ~リンクの作成~
Ruby on rails を初心者向けに解説③ ~データベースの作成~
Ruby on rails を初心者向けに解説④ ~命名規則とform_Tagの使い方について~
データベースのデータ一覧の表示
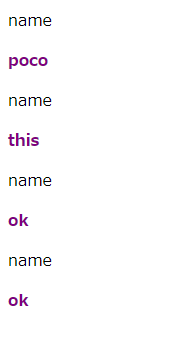
以下のコードでusersテーブルのデータを取得して表示しましょう。
index.html.erb<% @users.each do |user| %> <p>name</p> <div class="ruby-name"><%= user.name %></div> <% end %>インスタンス変数@usersを使用するために、コントローラ内で渡しています。
users_controller.rbdef index @users = User.all end以下のような画面が表示されます。
また、以下のようにcssを指定しています。
users.scss.ruby-name { color: purple; display: inline-block; font-weight: bold; }データベースの削除
それではデータベースの削除を実装してみましょう。
以下のようにコードを書き換えてください。
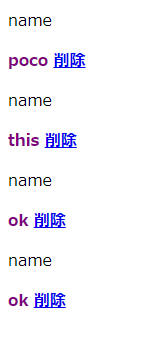
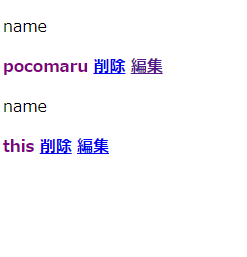
index.html.erb<% @users.each do |user| %> <p>name</p> <div class="ruby-name"> <%= user.name %> <%= link_to("削除", "/users/#{user.id}/destroy", {method: "post"})%> </div> <% end %>
削除ボタンをクリックすると、要素を削除することができました。
具体的な処理を見ていきましょう。index.html.erbに、以下のコードが追記されています。
<%= link_to("削除", "/users/#{user.id}/destroy", {method: "post"})%>これにより、削除をクリックすると、第二引数の処理が実行されます。
第二引数の"/users/#{user.id}/destroy"は、usersコントローラーのdestroyアクションへのルーティングに、データベースのidを含めたものになっています。このようにURLを指定することで、コントローラーは削除したいデータベースのidを受け取ることができます。
第三引数は、これがgetリクエストではなく、postリクエストであることを指定しています。
以下のようにルーティングしてください。
routes.rbpost "users/:id/destroy" => "users#destroy":id の部分は、任意の数字を受け取ることができます。受け取った数字は、usersコントローラーにおいて、
params[:id]の中に格納されます。以下のようにコントローラーをコーディングしてください。
users_controller.rbdef destroy user = User.find_by(id: params[:id]) user.destroy redirect_to("/users/index") end
user = User.find_by(id: params[:id])の部分で、データベースからモデルを使ってデータを抜き出します。index.html.erbから送られてきたidと同じidのデータをデータベースから抜き出し、userに格納します。
user.destroyの部分でそのデータを削除しています。
redirect_to("/users/index")の部分で、index.html.erbにリダイレクトしています。今回は、index.html.erbから削除リンクをクリックしたときの動作であるので、リロードになります。ここまでで、データベースからデータを削除することができました。
データベースの編集
次はデータベースの編集を行っていきましょう。
次のように
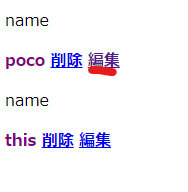
index.html.erbを編集してください。index.html.erb<% @users.each do |user| %> <p>name</p> <div class="ruby-name"> <%= user.name %> <%= link_to("削除", "/users/#{user.id}/destroy", {method: "post"})%> <%= link_to("編集", "/users/#{user.id}/edit") %> </div> <% end %>今回新たに追加されたのは
<%= link_to("編集", "/users/#{user.id}/edit") %>の部分です。これにより、新たに
users/editというviewファイルへ移動します。そのときに、そのviewファイルに編集したいデータベースのidを渡すことになります。
次のようにルーティングしてください。
routes.rbget "users/:id/edit" => "users#edit"次のパスに以下のviewファイルを準備してください。
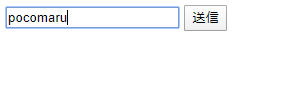
edit.html.erb<%= form_tag("/users/#{@user.id}/update") do %> <input type="text" value="<%=@user.name%>" name="new_name"> <input type="submit" value="送信"> <% end %>試しに以下のindex.html.erbファイルの編集と書いてある部分をクリックしましょう。
以下のようになります。
ここで、edit.html.erbファイルについての解説です。
form_tag("/users/#{@user.id}/update")の部分で、どのコントローラーのどのアクションを使うかを指定しています。今回は、usersコントローラーのupdateアクションを使用します。また、データベースの編集を行うため、編集したいデータベースのidも送ります。form_tagはpostリクエストになるのでしたね。
<input type="text" value="<%=@user.name%>" name="new_name">の部分で、inputタグの初期値と名前を設定しています。@userはusersコントローラーのeditアクションから送られてきたものです。users_controller.rbdef edit @user = User.find_by(id: params[:id]) end
@userには、データベースからidに応じて探してきた値が格納されています。それでは、下のように値を変更して送信してみましょう。
そうすると、以下のルーティングにより、usersコントローラーのupdateアクションが実行されます。
routes.rbpost "users/:id/update" => "users#update"users_controller.rbdef update user = User.find_by(id: params[:id]) user.name = params[:new_name] user.save redirect_to("/users/index") endupdateアクション内では、送られてきたidに応じてデータベースからデータを探索し、ローカル変数userに格納した後、nameカラムのデータを送られてきた新しい名前に書き換えて、
user.saveでセーブした後に、/users/indexにリダイレクトしています。そのため、以下のように変化します。
終わりに
ここまでで今回の記事は終了です。
お付き合い頂きありがとうございました。


- 投稿日:2020-05-23T14:29:36+09:00
Ruby: CSV::Tableの使い方備忘録
CSVライブラリ使いにくいですね〜。少なくとも私は使いにくいです。
備忘録として書き留めます。参考になれば幸いです。newする
CSV::Rowインスタンスを渡す。それ以外の方法あるのかよくわからない。なんか直感的じゃないと感じる
row1 = CSV::Row.new(["header1", "header2"], ["row1_1", "row1_2"])
table = CSV::Table.new([row1])
pp table
#<CSV::Table mode:col_or_row row_count:2>headersを取得する
row1 = CSV::Row.new(["header1", "header2"], ["row1_1", "row1_2"]) table = CSV::Table.new([row1]) pp table.headers["header1", "header2"]row(行)を指定して取得する
[0]はheaderが取れるかもと思っていましたが、ヘッダーを除いた1行目(rowというのかな?)が取れました。
添字?を指定するとheaderではなくrowが取れるということのようです。row1 = CSV::Row.new(["header1", "header2"], ["row1_1", "row1_2"]) table = CSV::Table.new([row1]) pp table[0] pp table[1] pp table["header1"]#<CSV::Row "header1":"row1_1" "header2":"row1_2"> nilheaderを指定して取得する
これは直感的な挙動でした。
row1 = CSV::Row.new(["header1", "header2"], ["row1_1", "row1_2"]) table = CSV::Table.new([row1]) pp table["header1"]["row1_1"]CSVファイルの生成
- ここで紹介するのは読み込んでから保存する方法ではなく、ゼロからCSVファイルを生成する方法
- 結局CSV.openを使う事になる
- force_quotesを指定するとダブルクォートで囲ってくれる
- headersの書き込みは引数で行い、rowの書き込みは1行ずつcsv << xxxで行う
    headers = ["header1", "header2"]

    row1 = CSV::Row.new(headers, ["row1_1", "row1_2"])
    row2 = CSV::Row.new(headers, ["row2_1", "row2_2"])
    table = CSV::Table.new([row1, row2])

    CSV.open("test.csv", "w", headers: headers, write_headers: true, force_quotes: true) do |csv|
      table.each { |row| csv << row }
    end
$ cat test.csv "header1","header2" "row1_1","row1_2" "row2_1","row2_2"メソッド化しておく
  def save_csv_table(csv_table)
    headers = csv_table.headers
    CSV.open("test.csv", "w", { headers: headers, write_headers: true, force_quotes: true }) do |csv|
      csv_table.each{ |row| csv << row }
    end
  end
- 投稿日:2020-05-23T01:19:01+09:00
Ruby to_sメソッド
puts("10000" + 0)
これができない。
そこで「to_s」メソッドを用いる。
puts("10000" + 0.to_s)
これで、文字列の数値をくっつけて表示することができる。