- 投稿日:2020-05-16T16:59:25+09:00
【Golang】if文
【Golang】if文
Golangの基礎学習〜Webアプリケーション作成までの学習を終えたので、復習を兼ねてまとめていく。 基礎〜応用まで。
package main
//if


import "fmt"

func main(){

    a := 1
    //if else if else
    if a == 2{
        fmt.Println("2だ")
    }else if a == 1{
        fmt.Println("1だ")
    }else{
        fmt.Println("それ以外")
    }

    //内包表記
    //1行で書く
    //if 条件の; 結果がTrueなら{
        //これを表示
    //}
    if b := 100; b == 100{
        fmt.Println("100だ")
    }
}
- 投稿日:2020-05-16T16:58:13+09:00
GolangアプリをKubernetesにDeployしてIngressで公開までしてみる【minikube&docker hubを利用】
以前に、DockerでサクッとGolangの環境作ってみたという記事を書いたGoのアプリをkubernetesで動かして、webブラウザで確認するところまでやってみる。
必要なもの
minikube v1.9.0
docker 19.03.8
dockerhubのアカウント成果物
https://github.com/atsugitakuya/golang_kubernetes
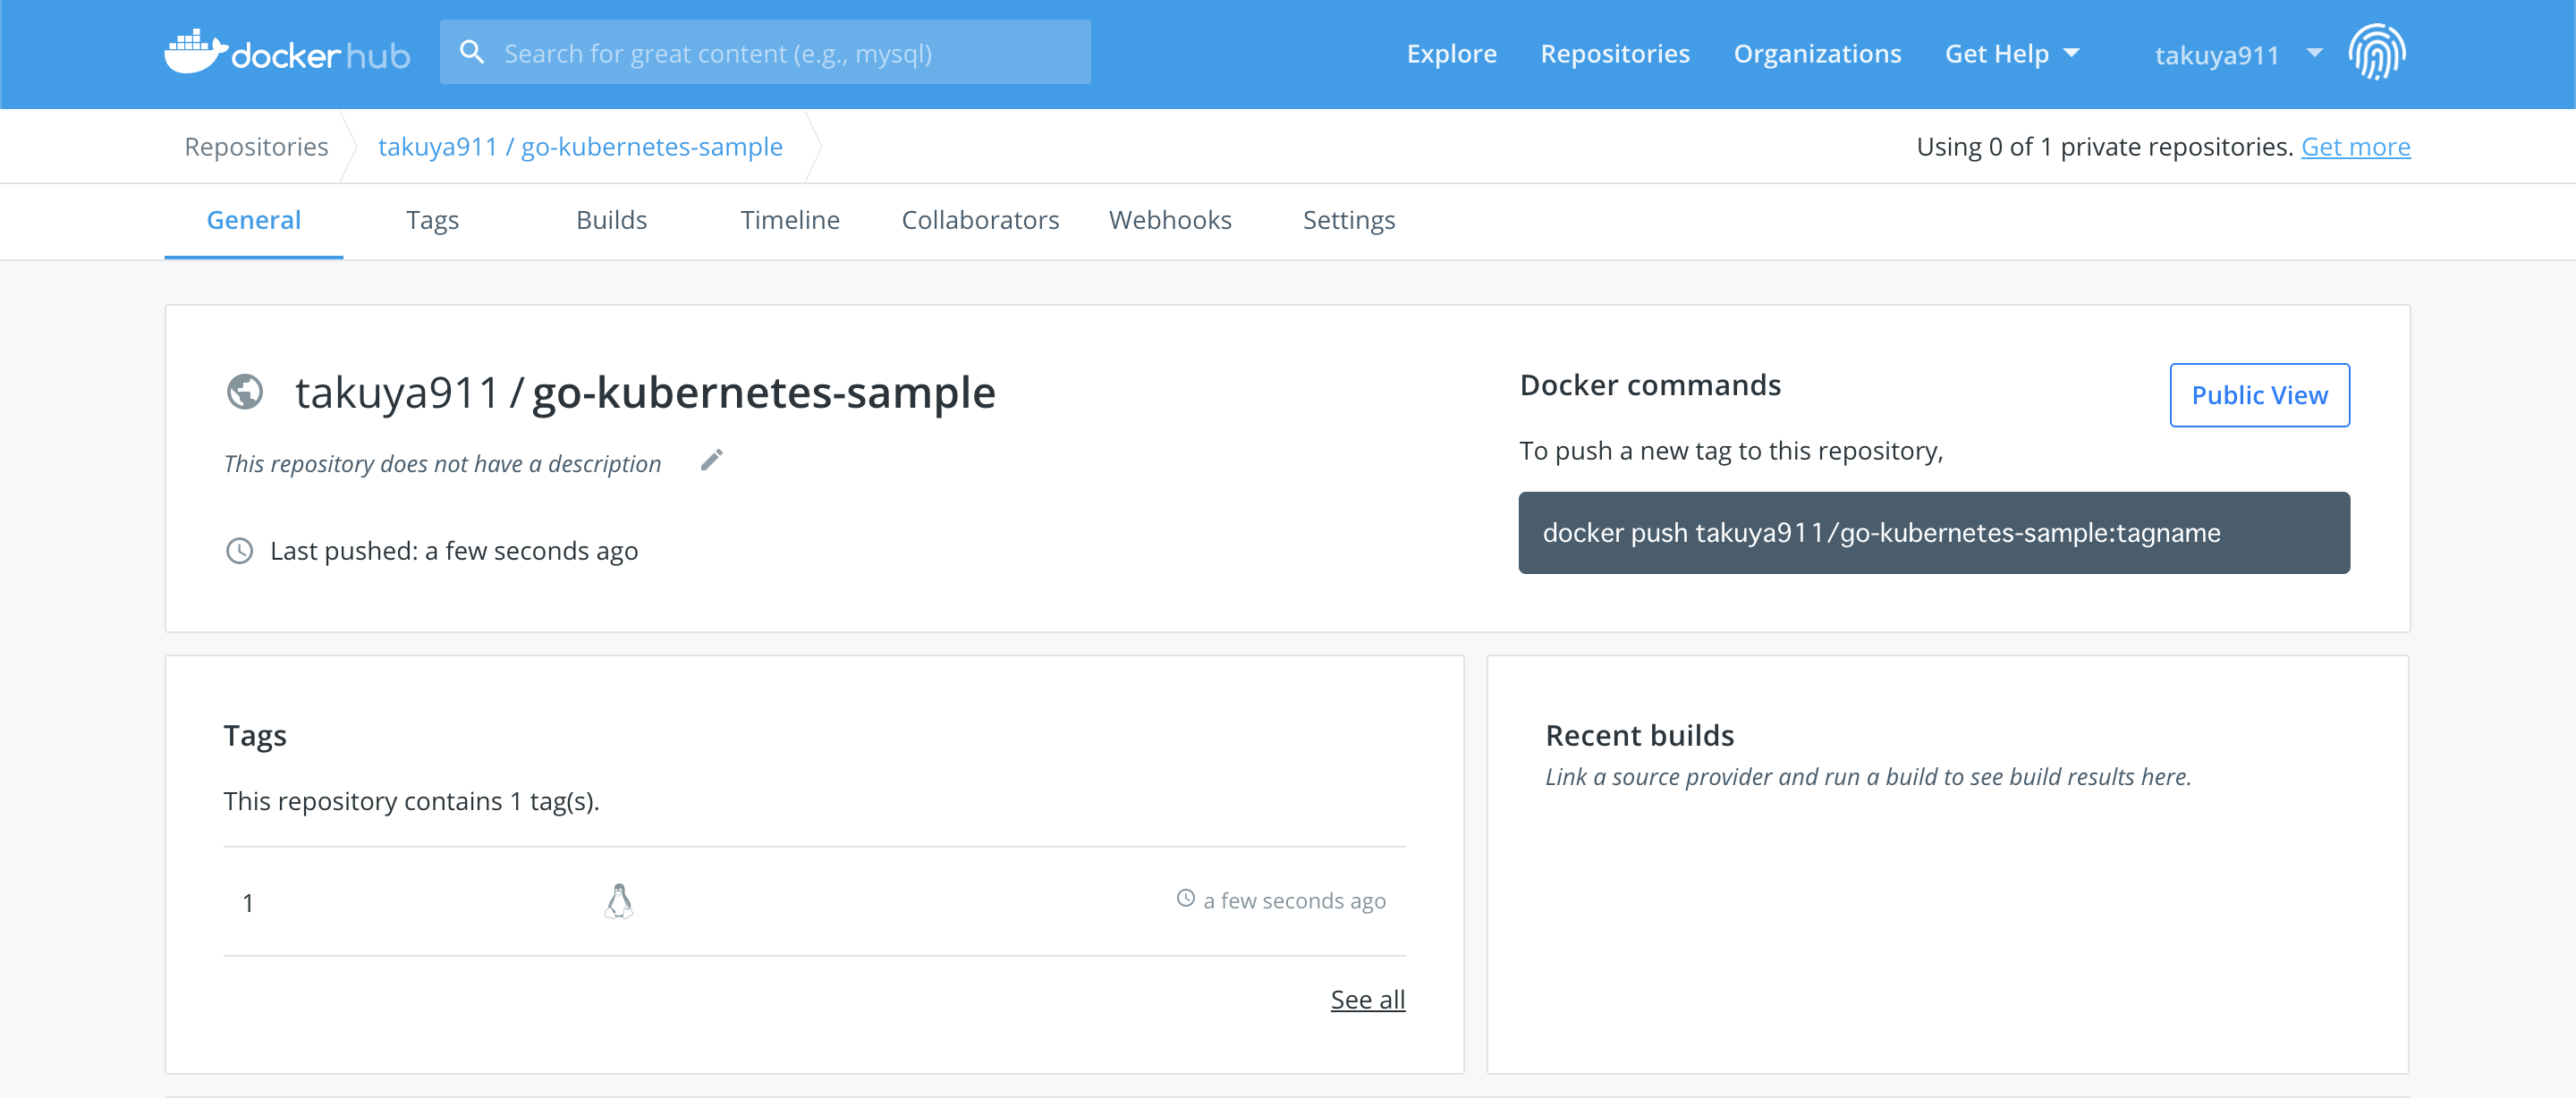
Docker Hubにリポジトリを作成する
docker hubのアカウントを作成し、リポジトリを作成する。
今回は以下のものがリポジトリの情報です。(publicなので、誰でも利用可です)
・アカウント名:takuya911
・リポジトリ名:go-kubernetes-sample
Dockerfileをビルドし、ImageをDocker Hubに登録する
前回の記事と同じ内容だが、念のためmain,goとDockerfileを載せておく
/DockerfileFROM golang:alpine # フォルダ作成 RUN mkdir /app/ # 作成したフォルダ内にmain.goを配置 COPY . /app/ # 作業場所を/appに設定(main.goがある場所) WORKDIR /app/ # main.goをbuild RUN go build -o main . CMD ["/app/main"]/main.gopackage main import ( "fmt" "net/http" ) func index(w http.ResponseWriter, r *http.Request) { fmt.Fprintf(w, "golang api access") } func main() { http.HandleFunc("/", index) http.ListenAndServe(":80", nil) }Dockerfileをビルドして、imageを作成する。
docker hubのリポジトリ名と同じ名前のimage名になるようにする。zsh$docker build -t takuya911/go-kubernetes-sample:1 . .... Successfully built 74ed57aa2c28 Successfully tagged takuya911/go-kubernetes-sample:1ビルドに成功したら、次はImageをDocker Hubにpushする。
Docker HubはDocker Imageを管理するためのモノ。zsh$docker push takuya911/go-kubernetes-sample:1 .... 1: digest: sha256:76487a1e6dc32faf94cb845ee9894c024340885e22432090304c870ce29b1d79 size: 1992今回はbuild時にtagとして1を設定しているので、Docker Hubのtagが1になっていることを確認する。
Kunernetesでアプリを動かす
Docker Hubに登録したImageを取得し、Kubernetesにdeployする。
まずはminikubeを起動する。zsh$minikube start .... Done! kubectl is now configured to use "minikube"インフラをコードで管理するのが今時(カッコいい)ので、deployしたい内容が記載されたyamlファイルを生成する。
zsh$cd manifest $kubectl create deploy go-sample --image takuya911/go-kubernetes-sample:1 -o yaml --dry-run=client > deployment.yamlすると、deployment.yamlが生成されている。
/manifest/deployment.yamlapiVersion: apps/v1 kind: Deployment metadata: creationTimestamp: null labels: app: go-sample name: go-sample spec: replicas: 1 selector: matchLabels: app: go-sample strategy: {} template: metadata: creationTimestamp: null labels: app: go-sample spec: containers: - image: takuya911/go-kubernetes-sample:1 name: go-kubernetes-sample resources: {} status: {}yamlファイルをapplyする
zsh$kubectl apply -f deployment.yaml deployment.apps/go-sample createdちゃんと動いていることを確認する。
zsh$kubectl get deploy,rs,po NAME READY UP-TO-DATE AVAILABLE AGE deployment.apps/go-sample 1/1 1 1 25s NAME DESIRED CURRENT READY AGE replicaset.apps/go-sample-66b5fb64f6 1 1 1 25s NAME READY STATUS RESTARTS AGE pod/go-sample-66b5fb64f6-p6sn8 1/1 Running 0 25sIngressを使って、Goアプリを公開する
Kubernetes上で動かすことはできたけれど、やっぱりwebブラウザからgoが動いていることを確認したい。クラスタ外からクラスタ内のアプリにアクセスするための方法としては、以下の3つがある。
- Node Portを使う
- 外部ロードバランサーを使う
- Ingressを使う
Ingressがよく使われている&yamlで管理できるので、今回はIngressを使う。
ingressでサービスを公開する際にはserviceも必要になる。以下参考記事。
https://qiita.com/Esfahan/items/f7d13d7e80848e9b6963なのでserviceとingressを作成していく。
まず、minikubeのIngressのaddonを有効にする。
zsh$minikube addons enable ingress ? The 'ingress' addon is enabled次にserviceを作成していく。
/manifest/service.yamlapiVersion: v1 kind: Service metadata: creationTimestamp: null labels: app: go-sample name: go-sample spec: type: NodePort ports: - protocol: TCP port: 7000 targetPort: 80 selector: app: go-sample status: loadBalancer: {}/manifest/ingress.yamlapiVersion: extensions/v1beta1 kind: Ingress metadata: name: go-sample spec: rules: - host: http: paths: - path: backend: serviceName: go-sample servicePort: 7000service.yamlとingress.yamlをdeployする。
zsh$kubectl apply -f . deployment.apps/go-sample configured ingress.extensions/go-sample created service/go-sample createdしばらく待ってからingressの情報を表示するコマンドを実行すると、ipが振られているのでそのipを確認する。
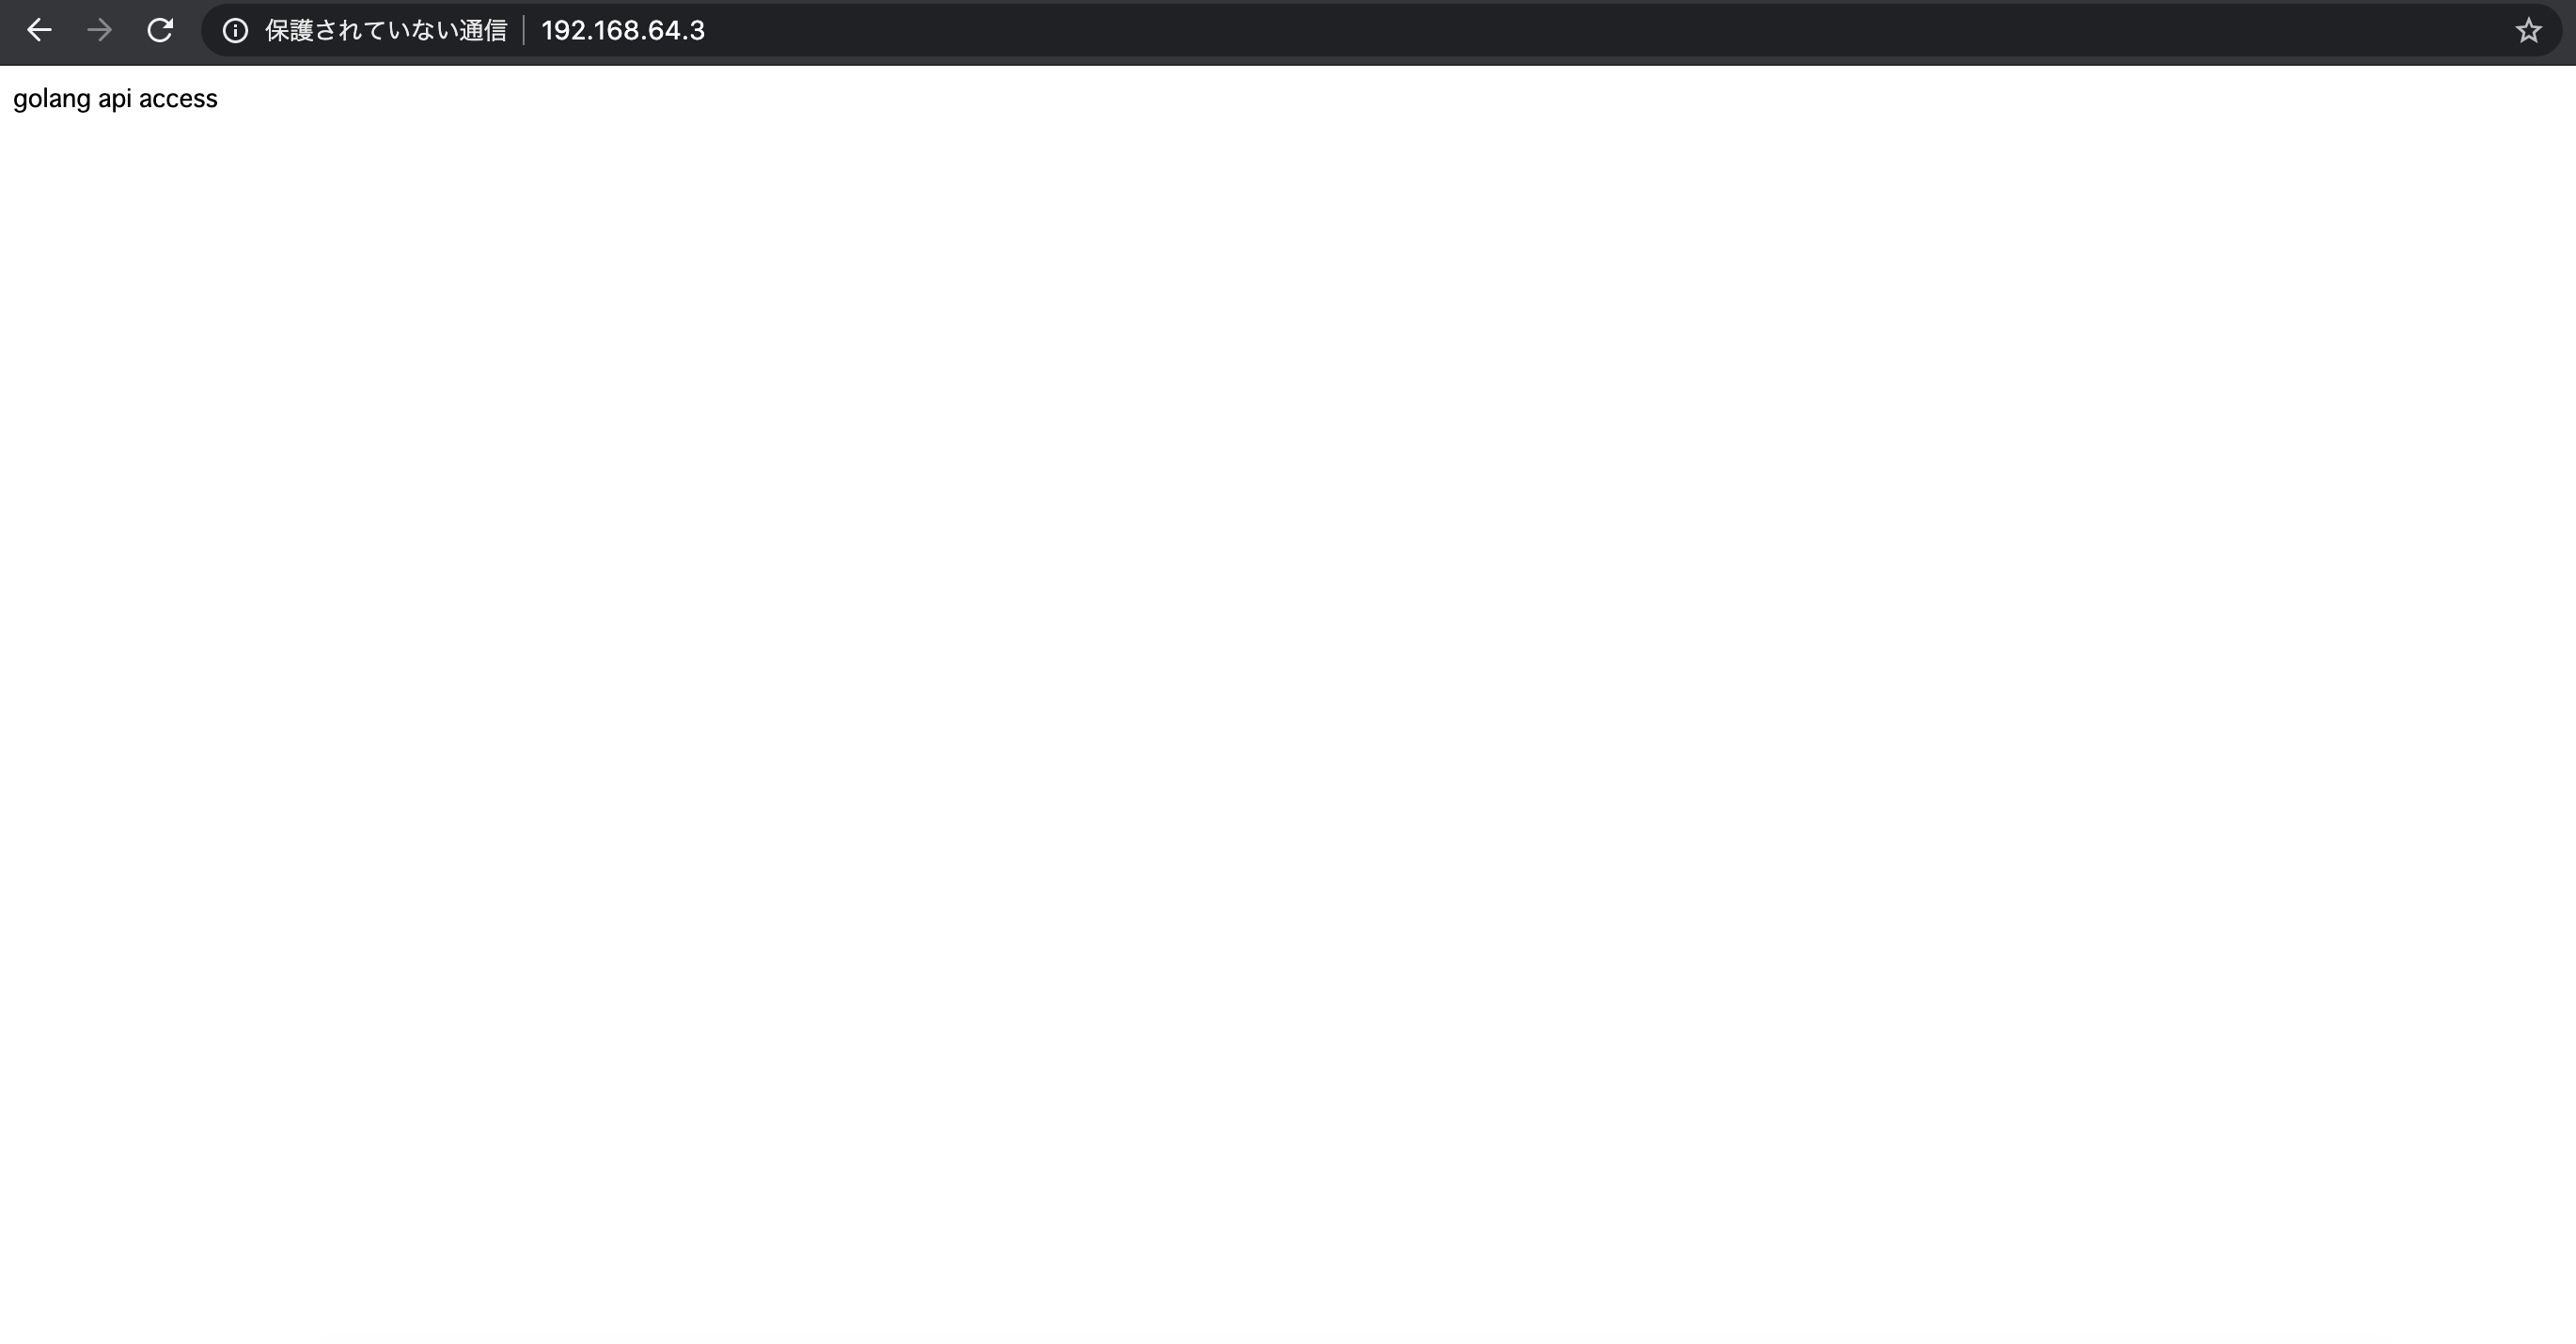
zsh$kubectl get ing NAME CLASS HOSTS ADDRESS PORTS AGE go-sample <none> * 192.168.64.3 80 4m39s実際にingressで割り振られたipアドレスにアクセスすると、main.goのindexメソッドの実行結果が帰ってくる
ここまでで、GolangのアプリのImageをDocker Hubに登録し、そのImageを使ってアプリをkubernetesにデプロイ&外部公開までが完了です。

- 投稿日:2020-05-16T16:13:58+09:00
脱Go初心者のためにGoとNuxt.jsでWebアプリ開発してみた
はじめに
【電子版】NuxtとGoではじめるWebアプリ開発
を購入してお勉強しました。
その中でわからないこと、あいまいだったことを以下にメモとして残します。
Goのチュートリアルを終えた人でWebアプリを作りたい人の参考になると思います。Go
Go全般
blank import
Go言語のperiod(.) importとblank(_) importについて
インポート宣言は、インポート「する側」と「される側」の依存関係を宣言します。自分自身のパッケージをインポートすること、またはインポートしたパッケージ内でエクスポートされている識別子を一切参照しないことは誤った使い方です。インポートによる副作用(初期化)のためだけにパッケージをインポートするときは、パッケージ名としてブランク識別子を使ってください。
ホットリロード
oxequa/realizeパッケージを使うとできるロギング
sirupsen/logrusパッケージを使うとできるORM
jinzhu/gormパッケージを使うとできる
一部不評もある↓
Gormが本番テーブルの数億件のデータを消そうとした話外部ファイルからAPIキーを読み取る
joho/godotenvパッケージを使うとできる↓APIキー読み込み方
【Go】.envファイルをGolangでも使用するためのライブラリ「godotenv」Echo
ログ出力
https://echo.labstack.com/middleware/logger
e := echo.New() e.Use(middleware.Logger())ログのイメージ$ go run . ____ __ / __/___/ / ___ / _// __/ _ \/ _ \ /___/\__/_//_/\___/ v3.3.10-dev High performance, minimalist Go web framework https://echo.labstack.com ____________________________________O/_______ O\ ⇨ http server started on [::]:8080 {"time":"2020-05-16T10:26:01.4460558+09:00","id":"","remote_ip":"::1","host":"localhost:8080","method":"GET","uri":"/","user_agent":"Mozilla/5.0 (Windows NT 10.0; Win64; x64) AppleWebKit/537.36 (KHTML, like Gecko) Chrome/81.0.4044.138 Safari/537.36","status":404,"error":"code=404, message=Not Found","latency":0,"latency_human":"0s","bytes_in":0,"bytes_out":24}Context
https://echo.labstack.com/guide/context
echo.Context represents the context of the current HTTP request. It holds request and response reference, path, path parameters, data, registered handler and APIs to read request and write response. As Context is an interface, it is easy to extend it with custom APIs.
CORS
https://echo.labstack.com/middleware/cors
e := echo.New()
e.Use(middleware.CORS())
【参考】CORSとは?
なんとなく CORS がわかる...はもう終わりにする。echo.MiddlewareFunc型
頻繁に使うAPIはecho.MiddlewareFunc型のメソッドとして切り出す
hoge_middleware.gopackage middlewares func HogeService() echo.MiddlewareFunc { return func(next echo.HandlerFunc) echo.HandlerFunc { return func(c echo.Context) error { service, err := *xxx.Service型のメソッド c.Set("hs", service) if err := next(c); err != nil { return err } return nil } } }呼び出し元.gofunc Yobidashimoto() echo.HandlerFunc { return func(c echo.Context) error { hs := c.Get("hss").(*xxx.Service) ~~~~ } }main.gofunc main() { e := echo.New() e.Use(middlewares.HogeService()) ~~~~JavaScript
JS全般
モジュール
export
use strict
encodeURIComponent()
MDN Web Docs
URLをエンコードしてくれる関数Vue
スタイルガイド
スコープ付きCSS
Vuex
Nuxt.js
axios
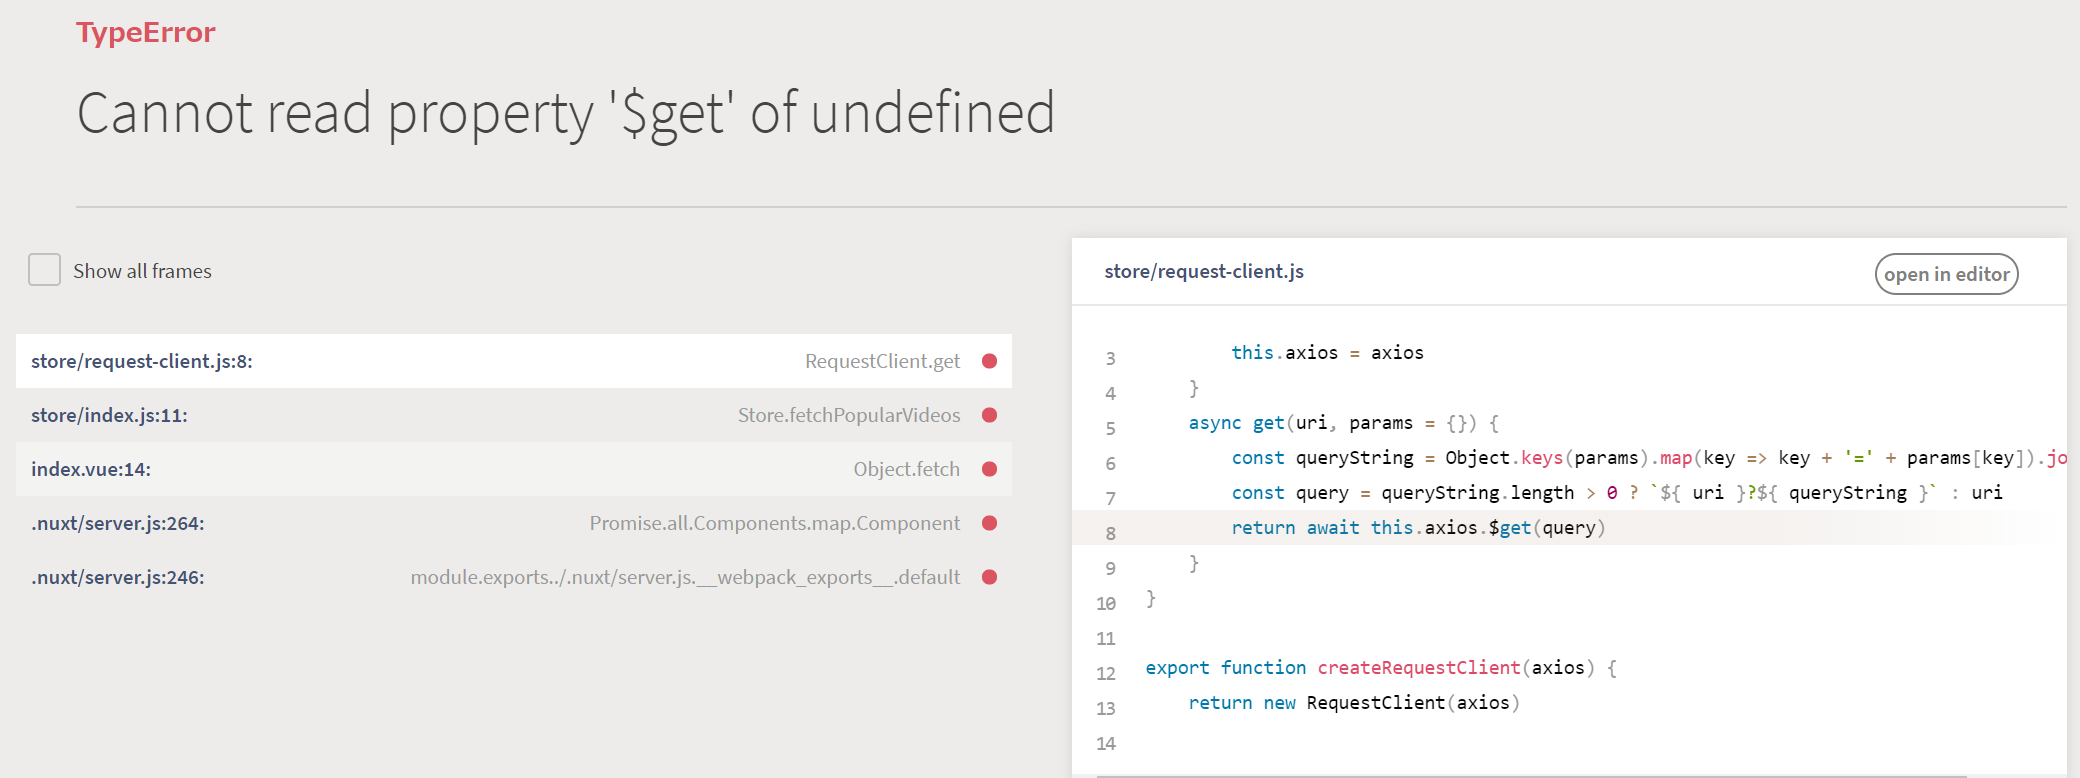
詰まった点
axiosの動作確認をしたところ、以下のようなエラーが発生した。
対処
Nuxt.jsのプロジェクト作成時にaxiosをインストールしたつもりができていなかった。
以下のコマンドでインストール&nuxt.config.jsのmodulesに追記$ npm add '@nuxtjs/axios'nuxt.config.jsmodules: [ // Doc: https://axios.nuxtjs.org/usage '@nuxtjs/axios', ],プラグイン
Nuxt.js では JavaScript プラグインを定義することができ、それはルートの Vue.js アプリケーションがインスタンス化される前に実行されます。この機能は、自前のライブラリや外部のモジュールを使用する際にとりわけ有用です。
cookie-universal-nuxt
Nuxt.jsでCookieを使って閲覧したデータを取得する方法
Nuxt.js用のCookieを扱うためのモジュール
Firebase
Firebaseとは?Google社の強みを活かしたメリットや機能をご紹介
認証
フロントエンドから送られてきたjwt_tokenを使っても、バックエンドで認証ができなかった。
firebaseの管理画面から作成した秘密鍵を使えばできたので、間違えて他プロジェクトの秘密鍵を使っていたかも。。その他
JWT(JSON Web Token)
JSON Web Token(JWT)の紹介とYahoo! JAPANにおけるJWTの活用
JWTとはJSON Web Tokenの略称であり、属性情報(Claim)をJSONデータ構造で表現したトークンの仕様です。
特徴として、署名、暗号化ができ、URL-safeであることなどが挙げられます。発音は"ジョット"です。
- 投稿日:2020-05-16T12:29:10+09:00
Goで対話式SSHクライアントパッケージを作成した
はじめに
のっぴきならない事情でWindowsからLinuxホストに対話式にSSH接続するプログラムが必要になり、Goで対話式SSHするためのクライアントパッケージを作成しました。
go-interactive-ssh
https://github.com/jlandowner/go-interactive-sshGoogle と Netflix の go-expect
「Go Expect」などで検索するとGoogleとNetflixのリポジトリが見つかります。
google/goexpect
https://github.com/google/goexpectNetflix/go-expect
https://github.com/Netflix/go-expectが、共にWindowsには対応していないとのことでした。
今回作成したものは必要最低限の機能しかないので、これらには及ばないと思いますが、シンプルなものになっていると思っています。インストール
go get -u "github.com/jlandowner/go-interactive-ssh"実装サンプル
Exampleに記載しているものです。
main.gopackage main import ( "context" "log" "golang.org/x/crypto/ssh" issh "github.com/jlandowner/go-interactive-ssh" ) func main() { ctx := context.Background() config := &ssh.ClientConfig{ User: "pi", HostKeyCallback: ssh.InsecureIgnoreHostKey(), Auth: []ssh.AuthMethod{ ssh.Password("raspberry"), }, } // create client client := issh.NewClient(config, "raspberrypi.local", "22", []issh.Prompt{issh.DefaultPrompt}) // give Commands to client and Run err := client.Run(ctx, commands()) if err != nil { log.Fatal(err) } log.Println("OK") } // make Command structs executed sequentially in remote host. func commands() []*issh.Command { return []*issh.Command{ issh.CheckUser("pi"), issh.NewCommand("pwd", issh.WithOutputLevelOption(issh.Output)), issh.ChangeDirectory("/tmp"), issh.NewCommand("ls -l", issh.WithOutputLevelOption(issh.Output)), } }サンプル・仕様説明
セットアップ
SSHクライアントの設定は、標準のSSHと同じにしたく、
ssh.ClientConfigを渡す様にしました。func NewClient(sshconfig *ssh.ClientConfig, host string, port string, prompts []Prompt) *Client最後の引数で、Prompt構造体なるものを渡す様にしました。
これは、SSHログインしたシェルの中で、コマンド実行が完了したか確認するために利用します。prompt.gotype Prompt struct { SufixPattern byte SufixPosition int }通常は
pi@raspberrypi:~ $の様なプロンプトだと思うので、$と#のプロンプトは事前定義しておきました。prompt.govar ( // DefaultPrompt is prompt pettern like "pi@raspberrypi:~ $ " DefaultPrompt = Prompt{ SufixPattern: '$', SufixPosition: 2, } // DefaultRootPrompt is prompt pettern like "pi@raspberrypi:~ $ " DefaultRootPrompt = Prompt{ SufixPattern: '#', SufixPosition: 2, } )このPromptに一致するまで待機します。
実行とCommand構造体
あとはこのclientのRun関数に実行したいコマンドのリストを渡すだけです。
func (c *Client) Run(ctx context.Context, cmds []*Command) errorコマンドは、期待する結果、コールバック関数などを含むCommand構造体として渡します。
command.go// Command has Input config and Output in remote host. // Input is line of command execute in remote host. // Callback is called after input command is finished. You can check whether Output is exepected in this function. // NextCommand is called after Callback and called only Callback returns "true". NextCommand cannot has another NextCommand. // ReturnCodeCheck is "true", Input is added ";echo $?" and check after Output is 0. Also you can manage retrun code in Callback. // OutputLevel is logging level of command. Secret command should be set Silent // Result is Command Output. You can use this in Callback, NextCommand, DefaultNextCommand functions. type Command struct { Input string Callback func(c *Command) (bool, error) NextCommand func(c *Command) *Command ReturnCodeCheck bool OutputLevel OutputLevel Timeout time.Duration Result *CommandResult }Command構造体は
NewCommand()で取得します。command.gofunc NewCommand(input string, options ...Option) *CommandInput以外は
With...から始まるOptionインターフェースを実装した関数で設定してください。option.gofunc WithNoCheckReturnCodeOption() *withNoCheckReturnCode func WithOutputLevelOption(v OutputLevel) *withOutputLevel func WithTimeoutOption(v time.Duration) *withTimeout func WithCallbackOption(v func(c *Command) (bool, error)) *withCallback func WithNextCommandOption(v func(c *Command) *Command) *withNextCommand通常は全てのInputに渡されたコマンドに
;echo $?を付与して実行し、リターンコードチェックをおこないます。
標準入力がある場合など、リターンコードチェックをしたくない場合は、WithNoCheckReturnCodeOption()を付与してください。Expect
Expect相当の機能については、はじめは正規表現で受け取る方式にしようかと思いましたが、
自由度を持たせるために、コールバック関数を受け取る様にしました。option.go// WithCallbackOption is option function called after command is finished func WithCallbackOption(v func(c *Command) (bool, error)) *withCallbackコールバック関数内では、コマンド実行の標準出力結果を持ったCommand構造体を引数として受け取るので、コマンド実行結果から自分で好きな処理を記載することができます。
コマンド実行結果は
c.Resultで参照できます。command.gotype Command struct { ... Result *CommandResult } type CommandResult struct { Output []string Lines int ReturnCode int }コールバック関数の実装例はREADME.mdにも記載していますが、いくつかコマンドのプリセットを
commands.goに作成していて、それ自体がコールバックを利用しています。例えば
CheckUser()はこの様な形です。commands.go// CheckUser check current login user is expected in remote host func CheckUser(expectUser string) *Command { whoami := "whoami" callback := func(c *Command) (bool, error) { if c.Result.Lines-3 < 0 { return false, errors.New("user is not expected") } user := c.Result.Output[c.Result.Lines-3] if user != expectUser { return false, fmt.Errorf("user is invalid expected %v got %v", expectUser, user) } return true, nil } return NewCommand(whoami, WithCallbackOption(callback), WithOutputLevelOption(Output)) }またコールバック関数で
trueを返した場合のみ実行できるコマンドを仕込める様にしました。option.go// WithNextCommandOption is option function called after Callback func return true func WithNextCommandOption(v func(c *Command) *Command) *withNextCommandこれは、「のっぴきならない事情の件」で、
suを行う必要があり、追加した機能です。
sudoでもパスワード入力が必要な場合も、同じ様にできると思います。commands.go// SwitchUser run "su - xxx" command in remote host func SwitchUser(user, password string, newUserPrompt Prompt) *Command { su := "su - " + user ... nextCommand := func(c *Command) *Command { nextcallback := func(c *Command) (bool, error) { ... return true, nil } return NewCommand(password, WithCallbackOption(nextcallback), // passwordを入力するCommand構造体を返す WithNoCheckReturnCodeOption(), WithOutputLevelOption(Silent)) } return NewCommand(su, WithCallbackOption(callback), WithNextCommandOption(nextCommand), WithNoCheckReturnCodeOption()) }最後に
これを実装したタスクなどをgoroutineで実行すれば、同時に複数ホストに対する操作を自動化できます。
Runはcontextを受け取る様にしているので、キャンセル動作なども簡単に実現できます。よろしければお使いください。IssueやPullRequestも大歓迎です。
- 投稿日:2020-05-16T11:43:52+09:00
Go言語での集合(Set)の扱い方とテスト
はじめに
Go言語には標準で集合(Set)は用意されていません。
実現方法
1. Slice
strSet1 := []string{"element1", "element2", "element3"}シンプルな方法。
重複は許されるし、ただのスライス。
簡易的な場合はこれで十分。2. map[interface{}]struct{}
strSet2 := map[string]struct{}{
    "element1": struct{}{},
    "element2": struct{}{},
    "element3": struct{}{},
}
mapを利用する方法。
struct{}はメモリを圧迫することはない。3. github.com/deckarep/golang-set/mapset
strSet3 := mapset.NewSet()
requiredClasses.Add("element1")
requiredClasses.Add("element2")
requiredClasses.Add("element3")
パッケージを利用する方法。
Setを操作する便利メソッドが多く実装されている。
内部実装ではmap[interface{}]struct{}が用いられている。
https://github.com/deckarep/golang-set にソースコードがある。用途
個人開発しているときに、RedisのSMembersのテストをする必要があった。
RedisではSetでデータを保持することができ、SMembersで取得することができる。
goにはSet型はないため、go-redisのSMembersでは[]stringが返る。
集合どうしを比較する場合に[]stringでは要素間の順序が担保されず、テストが失敗するためSet型を利用した。
3のgithub.com/deckarep/golang-set/mapsetを利用するのは大袈裟と思い、2のmap[interface{}]struct{}を利用した。
[]stringを集合として扱い比較したい場合には、それぞれの要素が過不足なく含まれていることを確認するためにforループをたくさん回すことになるだろう。sample.gopackage sample import ( "testing" "github.com/go-redis/redis/v7" ) type RepositoryImpl struct { Client *redis.Client } func New(addr string) (*redis.Client, error) { client := redis.NewClient(&redis.Options{ Addr: addr, }) if err := client.Ping().Err(); err != nil { return nil, errors.Wrapf(err, "failed to ping redis server") } return client, nil } func (r RepositoryImpl) GetStringSet(key string) ([]string, error) { result, err := r.Client.SMembers(key).Result() if err != nil { return nil, err } return result, nil }sample_test.gopackage sample import ( "testing" "github.com/go-redis/redis/v7" ) func NewMockRedis(t *testing.T) *redis.Client { t.Helper() s, err := miniredis.Run() if err != nil { t.Fatalf("unexpected error while createing test redis server '%#v'", err) } client := redis.NewClient(&redis.Options{ Addr: s.Addr(), }) return client } func TestGetStringSet(t *testing.T) { client := NewMockRedis(t) r := RepositoryImpl{ Client: client, } client.SAdd("testKey", "hoge", "fuga", "piyo") actual, err := r.GetStringSet("testKey") if err != nil { t.Fatalf("unexpected error while GetStringSet '%#v'", err) } expected, err := []string{"hoge", "fuga", "piyo"} // 順番が担保されないため、テストが失敗する if diff := cmp.Diff(actual, expected); diff != "" { t.Errorf("Diff: (-got +want)\n%s", diff) } // sliceではcmp.Diffで順序が考慮されてしまうのでSetに変換して比較する expectedSet := make(map[string]struct{}) for _, v := range expected { expectedSet[v] = struct{}{} } actualSet := make(map[string]struct{}) for _, v := range actual { actualSet[v] = struct{}{} } // 順番が担保されるため、テストが成功する if diff := cmp.Diff(actualSet, expectedSet); diff != "" { t.Errorf("Diff: (-got +want)\n%s", diff) } }参考
- 投稿日:2020-05-16T10:27:53+09:00
A Tour of Goのリンク集
1. はじめに
1.1 背景と目的
1.1.1 背景
- A Tour of Goで調べ事をしたいとき、自分の知りたいことがどこに書かれているかをすぐに見つけられない。
1.1.2 目的
- Go言語の勉強、理解を効率化させるために本記事を作成した。
1.2 本記事でやっていること
- A Tour of Goのコンテンツをピックアップし、リンクを貼っている。
1.3 読者の対象
- あくまでも自分自身
- 他に、A Tour of Goを用いたGo言語の学習をしている方にも役立つかもしれません。
1.4 前提
- 自分自身が気になったページ、よく参照するページのみ、リンクを貼っています。A Tour of Goで紹介しているすべてのページに対応しているわけではありません。
- そのため、随時修正、変更が入ります。
1.5 参照リンク
2. 本編
2.1 基本
2.1.1 Goプログラムの基本的なコンポーネントについて
2.1.1.1 Packageについて
- https://go-tour-jp.appspot.com/basics/1
- https://go-tour-jp.appspot.com/basics/2
- https://go-tour-jp.appspot.com/basics/3
- 大文字表記で始まる名前は、外部のパッケージから参照できる
2.1.1.2 関数について
- https://go-tour-jp.appspot.com/basics/4
- 関数の表記:基本形
- https://go-tour-jp.appspot.com/basics/5
- 関数の表記:発展形①
- https://go-tour-jp.appspot.com/basics/6
- 関数の表記:発展形②
- https://go-tour-jp.appspot.com/basics/7
- 関数の表記:発展形③
2.1.1.3 変数について
- https://go-tour-jp.appspot.com/basics/8
- https://go-tour-jp.appspot.com/basics/9
- https://go-tour-jp.appspot.com/basics/10
2.1.1.4 型について
- https://go-tour-jp.appspot.com/basics/11
- https://go-tour-jp.appspot.com/basics/12
- https://go-tour-jp.appspot.com/basics/13
- https://go-tour-jp.appspot.com/basics/14
2.1.1.5 定数について
2.1.1.6 この章を終わります。
2.1.2 コードの流れをコントロールする技術について
2.1.2.1 For文について
- https://go-tour-jp.appspot.com/flowcontrol/1
- https://go-tour-jp.appspot.com/flowcontrol/2
- https://go-tour-jp.appspot.com/flowcontrol/3
- https://go-tour-jp.appspot.com/flowcontrol/4
2.1.2.2 If文について
- https://go-tour-jp.appspot.com/flowcontrol/5
- https://go-tour-jp.appspot.com/flowcontrol/6
- https://go-tour-jp.appspot.com/flowcontrol/7
2.1.2.3 Exercise:For文とIf文を使ったプログラムの演習
2.1.2.4 Switch文について
- https://go-tour-jp.appspot.com/flowcontrol/9
- https://go-tour-jp.appspot.com/flowcontrol/10
- https://go-tour-jp.appspot.com/flowcontrol/11
2.1.2.5 Deferについて
2.1.2.6 この章を終わります。
2.1.3 新しい型の定義について
2.1.3.1 ポインタについて
- https://go-tour-jp.appspot.com/moretypes/1
- ポインタは参照渡しである
2.1.3.2 構造体について
- https://go-tour-jp.appspot.com/moretypes/2
- https://go-tour-jp.appspot.com/moretypes/3
- https://go-tour-jp.appspot.com/moretypes/4
- https://go-tour-jp.appspot.com/moretypes/5
2.1.3.3 配列について
2.1.3.4 スライスについて
- https://go-tour-jp.appspot.com/moretypes/7
- https://go-tour-jp.appspot.com/moretypes/8
- https://go-tour-jp.appspot.com/moretypes/9
- https://go-tour-jp.appspot.com/moretypes/10
- https://go-tour-jp.appspot.com/moretypes/11
- https://go-tour-jp.appspot.com/moretypes/12
- https://go-tour-jp.appspot.com/moretypes/13
- make関数でスライスを作成する
- https://go-tour-jp.appspot.com/moretypes/14
- https://go-tour-jp.appspot.com/moretypes/15
- https://go-tour-jp.appspot.com/moretypes/16
- rangeを使うと、indexとvalueを抽出できる
- https://go-tour-jp.appspot.com/moretypes/17
- rangeでは、
_を用いることで不要な値を捨てることができる。2.1.3.5 Exercise:スライスを使ったプログラムの演習
2.1.3.6 Mapについて
- https://go-tour-jp.appspot.com/moretypes/19
- Map:
keyとvalueの組み合わせ。
keyは、nameID等好きなものを指定できる。- 配列やスライスは、
indexとvalueの組み合わせ。
indexは、0,1,2,...の数字で決まっている。- Mapは、python等他の言語で「辞書」と呼ばれる
- https://go-tour-jp.appspot.com/moretypes/20
- Mapは、構造体とは違い
keyが必要である。- https://go-tour-jp.appspot.com/moretypes/21
- https://go-tour-jp.appspot.com/moretypes/22
- Mapの操作
2.1.3.7 Exercise:Mapを使ったプログラムの演習
2.1.3.8 関数の応用
- https://go-tour-jp.appspot.com/moretypes/24
- 関数を変数として扱う
- https://go-tour-jp.appspot.com/moretypes/25
- 関数のClosure(外部から変数を参照する関数値)
2.1.3.9 Exercise:Closureに関するプログラムの演習
2.1.3.10 この章を終わります。
2.2 メソッド、Interface、オブジェクトとその動作を定義する構造体について
2.2.1 メソッドについて
- https://go-tour-jp.appspot.com/methods/1
- https://go-tour-jp.appspot.com/methods/2
- https://go-tour-jp.appspot.com/methods/3
- https://go-tour-jp.appspot.com/methods/4
- https://go-tour-jp.appspot.com/methods/5
- https://go-tour-jp.appspot.com/methods/6
- https://go-tour-jp.appspot.com/methods/7
- https://go-tour-jp.appspot.com/methods/8
2.2.2 Interfaceについて
- https://go-tour-jp.appspot.com/methods/9
- https://go-tour-jp.appspot.com/methods/10
- https://go-tour-jp.appspot.com/methods/11
- https://go-tour-jp.appspot.com/methods/12
- https://go-tour-jp.appspot.com/methods/13
- https://go-tour-jp.appspot.com/methods/14
- https://go-tour-jp.appspot.com/methods/15
- https://go-tour-jp.appspot.com/methods/16
- https://go-tour-jp.appspot.com/methods/17
2.2.3 Exercise:Stringer Interfaceを使ったプログラムの演習
2.2.4 Errorについて
2.2.5 Exercise:Errorに関するプログラムの演習
2.2.6 Readers Interfaceについて
2.2.7 Exercise:Readers Interfaceに関するプログラムの演習
- https://go-tour-jp.appspot.com/methods/22
- Reader型の実装
- https://go-tour-jp.appspot.com/methods/23
- io.Reader Interfaceの実装
2.2.8 imageパッケージについて
2.2.9 Exercise:imaegeパッケージに関するプログラムの演習
2.2.10 この章を終わります。
2.3 並行処理機能について(執筆者はまだ学習していない)
- https://go-tour-jp.appspot.com/concurrency/1
- https://go-tour-jp.appspot.com/concurrency/2
- https://go-tour-jp.appspot.com/concurrency/3
- https://go-tour-jp.appspot.com/concurrency/4
- https://go-tour-jp.appspot.com/concurrency/5
- https://go-tour-jp.appspot.com/concurrency/6
- https://go-tour-jp.appspot.com/concurrency/7
- https://go-tour-jp.appspot.com/concurrency/8
- https://go-tour-jp.appspot.com/concurrency/9
- https://go-tour-jp.appspot.com/concurrency/10
- https://go-tour-jp.appspot.com/concurrency/11
3. おまけ
- A Tour of Goのページ遷移が面倒な場合、
Fn+↑/↓キーで簡単に遷移ができます。
- 投稿日:2020-05-16T09:50:21+09:00
【Golang】可変長引数
【Golang】可変長引数
Golangの基礎学習〜Webアプリケーション作成までの学習を終えたので、復習を兼ねてまとめていく。 基礎〜応用まで。
package main
//可変長引数
//複数の引数を渡す際、決まった個数でない場合。

import "fmt"

//可変長引数   ...int
func foo(params ...int) {
    //引数の長さ表示
    fmt.Println(len(params), params)
    //引数の長さ分繰り返す
    //_にはインデックスが入る。
    for _, param := range params {
        fmt.Println(param)
    }
}

func main() {
    foo()
    //>>0 []
    foo(10, 20)
    //>>2 [10 20]
    //>>10
    //>>20
    foo(10, 20, 30)
    //>>3 [10 20 30]
    //>>10
    //>>20
    //>>30

    //スライス作成
    s := []int{1, 2, 3}

    //表示
    fmt.Println(s)
    //>>[1 2 3]

    //スライスを引数に展開して渡す
    //foo(s)ではエラーになる
    foo(s...)
    //>>3 [1 2 3]
    //1
    //2
    //3
}
- 投稿日:2020-05-16T07:25:57+09:00
golangのrestのググりまとめ
golangでrestを試してみたくて、まずは記事を調べてみた。
golangでシンプルなRESTful APIを作ってみよう!
mux packageを使って、Readを試してみている。RESTAPI WITH Go言語!
mux packageを使って、CRUDを作り、ElephantSQL(postgresのPaaS)でdb接続もやっている。【Go×WAF】うほうほ!!gorillaを分かりやすくまとめてみた【mux/context/schema】
mux packageのrouterを丁寧に網羅してかいて、testも書き、gorilla packageでのformへのDecode&Encodeを解説してくれている。【第4回】Go言語(Golang)入門~REST API環境構築編~
right code様のgolangの記事。echo frameworkを使って、
簡単なPOST、JSONでの受け渡しなどをやっている。
続きの第5回実装編にて、firebaseを使って試しているgolangでREST APIをやってみた①
go-json-restやgormを使って、実装している。