- 投稿日:2020-03-22T22:04:46+09:00
Electronでカレンダーを作る⑤
前回まで
前回はカレンダーの表示月を切り替えたら画面も切り替わるようにした。
ただ、切り替える度に画面更新で数秒真っ白になるのでダサかった。レスポンシブルな感じのUIにしたい。
HTMLを最小限にする
HTML内にカレンダーの構造をそのまま書いているのでこれをごっそり削って最小限の記述にする。
カレンダーの構造自体はJavaScriptで作っていく。before
index.html<!DOCTYPE html> <html> <head> <meta charset="UTF-8"> <title>ElectronCalendar</title> <script text="text/javascript" src="./js/index.js"></script> <link rel="stylesheet" href="./css/index.css"> </head> <body> <div class="calendar-wrapper"> <div class="preMonthButton"> <button type="button" id="preMonth"><先月</button> </div> <div class="nextMonthButton"> <button type="button" id="nextMonth">来月></button> </div> <table id="table" class="calendar"> <caption id="caption"></caption> <thead> <tr> <th>日</th> <th>月</th> <th>火</th> <th>水</th> <th>木</th> <th>金</th> <th>土</th> </tr> </thead> <tbody> <tr id="row1"> <td id="cell1"></td> <td id="cell2"></td> <td id="cell3"></td> <td id="cell4"></td> <td id="cell5"></td> <td id="cell6"></td> <td id="cell7"></td> </tr> <tr id="row2"> <td id="cell8"></td> <td id="cell9"></td> ...略 <td id="cell34"></td> <td id="cell35"></td> </tr> <tr id="row6"> <td id="cell36"></td> <td id="cell37"></td> <td id="cell38"></td> <td id="cell39"></td> <td id="cell40"></td> <td id="cell41"></td> <td id="cell42"></td> </tr> </tbody> </table> </div> </body> </html>after
index.html<!DOCTYPE html> <html> <head> <meta charset="UTF-8"> <title>ElectronCalendar</title> <script text="text/javascript" src="./js/index.js"></script> <link rel="stylesheet" href="./css/index.css"> </head> <body> <div class="calendar-wrapper"> <div class="preMonthButton"> <button type="button" id="preMonth"><先月</button> </div> <div class="nextMonthButton"> <button type="button" id="nextMonth">来月></button> </div> <div id="calendars"> </div> </div> </body> </html><div id="calendars">ってなんでこのIDにしたか謎。
index.jsを改修する
index.js'use strict'; //momentモジュール const moment = require("moment"); // カレンダーをキャッシュしておくMap let calendarMap = new Map(); // 画面に表示されている月 let currentDispMonth; window.onload = function() { //URL文字列から初期表示の月を取得 const month = parseURLParam(location.search).month; //直近3か月のカレンダー作成 createLatestCalendar(month); //カレンダーの親要素取得 const root = document.getElementById('calendars'); //子要素としてパネルを追加 const callendar = calendarMap.get(month); root.appendChild(callendar.getPanel()); //カレンダー表示 display(callendar.createContents); //先月ボタン押下時 document.getElementById('preMonth').onclick = function() { const localMoment = moment(currentDispMonth); const preMonth = localMoment.add(-1,'month').format("YYYY-MM"); const beforPanel = calendarMap.get(currentDispMonth).getPanel(); const afterCallendar = calendarMap.get(preMonth); const afterPanel = afterCallendar.getPanel(); changePanel(beforPanel, afterPanel, afterCallendar.createContents); createLatestCalendar(preMonth); }; //来月ボタン押下時 document.getElementById('nextMonth').onclick = function() { const localMoment = moment(currentDispMonth); const nextMonth = localMoment.add(1,'month').format("YYYY-MM"); const beforPanel = calendarMap.get(currentDispMonth).getPanel(); const afterCallendar = calendarMap.get(nextMonth); const afterPanel = afterCallendar.getPanel(); changePanel(beforPanel, afterPanel, afterCallendar.createContents); createLatestCalendar(nextMonth); }; }; /** * URLパラメータを分解してkey:valueの形式で返す。 * @param URL */ function parseURLParam(URL) { // URLパラメータを"&"で分離する const params = URL.substr(1).split('&'); var paramsArray = []; var keyAndValue = null; for(var i = 0 ; i < params.length ; i++) { // "&"で分離したパラメータを"="で再分離 keyAndValue = params[i].split("="); // パラメータを連想配列でセット paramsArray[keyAndValue[0]] = keyAndValue[1]; } // 連想配列パラメータを返す return paramsArray; } /** * パネルを切り替える * @param beforPanel * @param afterPanel * @param callback パネル切り替え後に実行される関数 */ function changePanel(beforPanel, afterPanel, callback) { //カレンダーの親要素取得 const root = document.getElementById('calendars'); //afterPanelでbeforPanelを置き換え root.replaceChild(afterPanel, beforPanel); display(callback); } /** * カレンダーを表示する。 * @param callback 実行される関数 */ function display(callback) { callback(); } /** * 指定した月の直近(当月、先月、来月)のCallendarオブジェクトを作成する。 */ function createLatestCalendar(month) { //当月分 if(!calendarMap.get(month)) { const callendar = new Callendar(month); callendar.createPanel(); calendarMap.set(month, callendar); } const localMoment = moment(month); //先月分 const preMonth = localMoment.add(-1,'month').format("YYYY-MM"); if(!calendarMap.get(preMonth)) { const preCallendar = new Callendar(preMonth); preCallendar.createPanel(); calendarMap.set(preMonth, preCallendar); } //今月分 const nextMonth = localMoment.add(2,'month').format("YYYY-MM"); if(!calendarMap.get(nextMonth)) { const nextCallendar = new Callendar(nextMonth); nextCallendar.createPanel(); calendarMap.set(nextMonth, nextCallendar); } } /** * カレンダークラス * @param month(YYYY-MM) */ const Callendar = function(month) { //コンストラクタ this._month = month; this._moment = moment(this._month); this._panel = {}; //コールバック関数で利用するのでthisを固定しておく const _this = this; /** * カレンダーのパネルを作成する。 */ this.createPanel = function() { // カレンダーのパネルを作成 const panel = document.createElement('div'); panel.id = 'panel'; // 子要素にテーブルを追加 const table = panel.appendChild(document.createElement('table')); table.id = 'table'; table.classList.add('calendar'); // テーブルにキャプション追加 const caption = table.appendChild(document.createElement('caption')); caption.id = 'caption'; // ヘッダー追加 const header = table.appendChild(document.createElement('thead')); // ヘッダーのカラムを作成する。 const headerRow = header.appendChild(document.createElement('tr')); headerRow.appendChild(document.createElement('th')).innerText = '日'; headerRow.appendChild(document.createElement('th')).innerText = '月'; headerRow.appendChild(document.createElement('th')).innerText = '火'; headerRow.appendChild(document.createElement('th')).innerText = '水'; headerRow.appendChild(document.createElement('th')).innerText = '木'; headerRow.appendChild(document.createElement('th')).innerText = '金'; headerRow.appendChild(document.createElement('th')).innerText = '土'; // body作成 let cellNum = 1; for (let i = 1; i < 7; i++) { const row = table.appendChild(document.createElement('tr')); row.id = 'row' + i; for(let j = 1; j < 8; j++) { const cell = row.appendChild(document.createElement('td')); cell.id = 'cell' + cellNum; cellNum++; } } this._panel = panel; }; /** * カレンダーの内容を作成する。 */ this.createContents = function() { const __moment = _this._moment; //captionを表示 document.getElementById('caption').innerText = __moment.format("YYYY年MM月"); //当月の日数を取得 const daysOfMonth = __moment.daysInMonth(); //月初の曜日を取得(index.htmlと合わせるために+1する) const firstDayOfManth = __moment.startOf('month').day() + 1; //カレンダーの各セルに日付を表示させる let cellIndex = 0; for(let i = 1; i < daysOfMonth + 1; i++) { if(i === 1) { cellIndex += firstDayOfManth; } else { cellIndex++; } document.getElementById("cell" + cellIndex).innerText = i; } //6行目の第1セルが空白なら6行目自体を非表示にする。 if(document.getElementById("cell36").innerText === "") { document.getElementById('row6').style.display = "none"; } currentDispMonth = _this._month; }; /** * パネルを取得する。 */ this.getPanel = function() { return this._panel; }; /** * 月を取得する。 */ this.getMonth = function() { return this._month; }; };修正・追加点
①カレンダーの構造を動的に作るようにする。
Calendarオブジェクトでカレンダーの構造(HTML要素)を作成して持っておくようにする。
Calendarオブジェクトは月ごとに一つ作られる。display関数にCalendarクラスのcreateContentsメソッドをコールバック関数として渡すことで画面にカレンダーの内容が表示される。
index.js/** * カレンダーを表示する。 * @param callback 実行される関数 */ function display(callback) { callback(); }※コールバック関数をそのまま実行しているだけなのでコールバックという名前は不適なので修正したい。
②ボタンを押したら画面の更新無しでカレンダーを切り替えるようにする。
カレンダーの表示の切り替えは、changePanel関数でHTML要素を置き換える。
index.js/** * パネルを切り替える * @param beforPanel * @param afterPanel * @param callback パネル切り替え後に実行される関数 */ function changePanel(beforPanel, afterPanel, callback) { //カレンダーの親要素取得 const root = document.getElementById('calendars'); //afterPanelでbeforPanelを置き換え root.replaceChild(afterPanel, beforPanel); ※ display(callback); }※replaceChildメソッドの引数はreplaceChild(置き換えたいHTML要素(Node), 置き換え対象のHTML要素)となるので注意。
③カレンダーの切り替え毎に前後一ヶ月のCalendarオブジェクトを作っておくようにする。
初期表示では今月・先月・来月分のCalendarオブジェクトを作成しておき、今月分のカレンダーの表示させる。
以後、ボタン押下毎にCalendarオブジェクトが作られていく。index.js/** * 指定した月の直近(当月、先月、来月)のCallendarオブジェクトを作成する。 * 対象月のCalendarオブジェクトがキャッシュされているならそれを使い回す。 */ function createLatestCalendar(month) { //当月分 if(!calendarMap.get(month)) { const callendar = new Callendar(month); callendar.createPanel(); calendarMap.set(month, callendar); } const localMoment = moment(month); //先月分 const preMonth = localMoment.add(-1,'month').format("YYYY-MM"); if(!calendarMap.get(preMonth)) { const preCallendar = new Callendar(preMonth); preCallendar.createPanel(); calendarMap.set(preMonth, preCallendar); } //今月分 const nextMonth = localMoment.add(2,'month').format("YYYY-MM"); if(!calendarMap.get(nextMonth)) { const nextCallendar = new Callendar(nextMonth); nextCallendar.createPanel(); calendarMap.set(nextMonth, nextCallendar); } }なんかごちゃっとしてる。
index.js//先月ボタン押下時 document.getElementById('preMonth').onclick = function() { const localMoment = moment(currentDispMonth); const preMonth = localMoment.add(-1,'month').format("YYYY-MM"); const beforPanel = calendarMap.get(currentDispMonth).getPanel(); const afterCallendar = calendarMap.get(preMonth); const afterPanel = afterCallendar.getPanel(); changePanel(beforPanel, afterPanel, afterCallendar.createContents); createLatestCalendar(preMonth); }; //来月ボタン押下時 document.getElementById('nextMonth').onclick = function() { const localMoment = moment(currentDispMonth); const nextMonth = localMoment.add(1,'month').format("YYYY-MM"); const beforPanel = calendarMap.get(currentDispMonth).getPanel(); const afterCallendar = calendarMap.get(nextMonth); const afterPanel = afterCallendar.getPanel(); changePanel(beforPanel, afterPanel, afterCallendar.createContents); createLatestCalendar(nextMonth); };こっちもごちゃっとしてる。
・キャッシュしたCalendarオブジェクトの取得方法
Calendarオブジェクトはグローバル変数のMapに保存されているので月をキーにして取り出せる。
index.js// カレンダーをキャッシュしておくMap let calendarMap = new Map();動かす
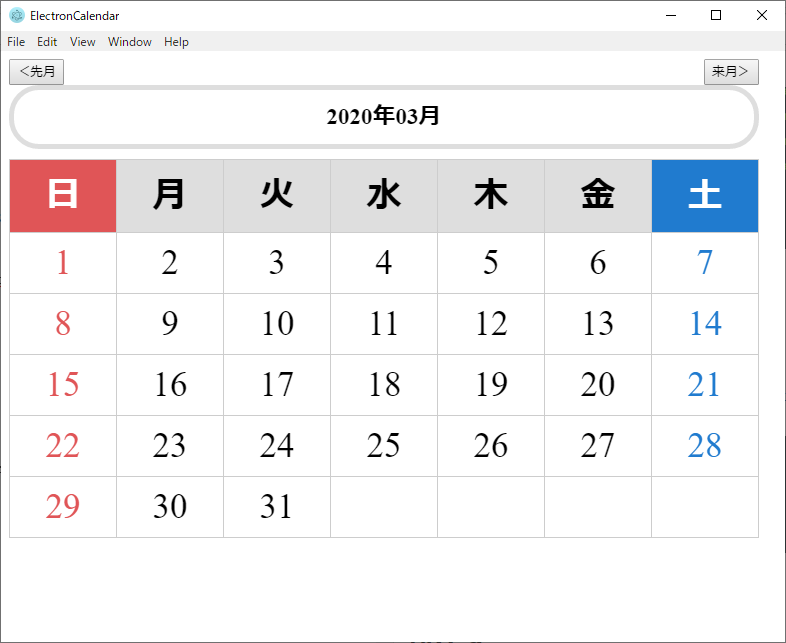
$ electron .初期表示
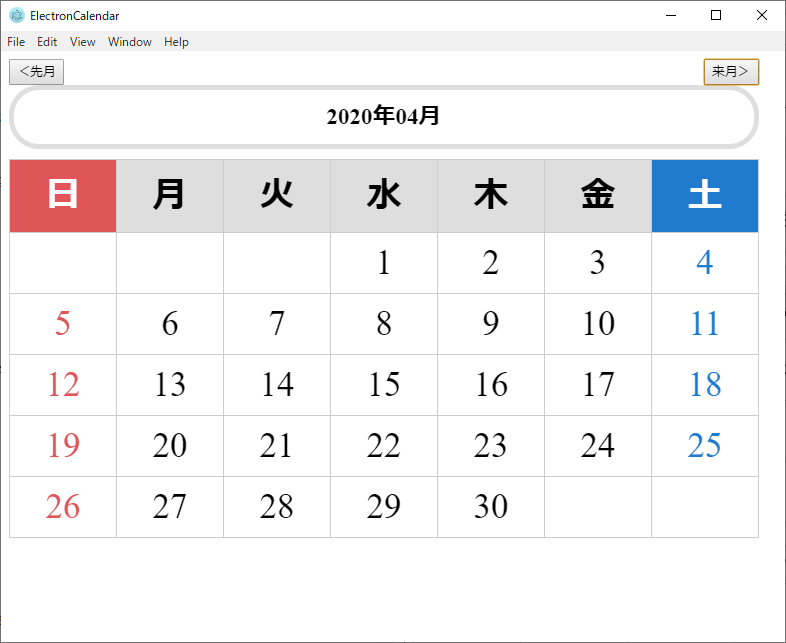
来月ボタン押下時
画面更新で真っ白になることが無くなった!!!(画像じゃ分からない)
TODO
・コードをもっとスッキリさせたい。
・Electronの機能をもっと使いたい。あとがき
・Javaの型で縛るプログラミングに慣れているので動的型付け言語は自由だけど不自由。
・ロジックを書くのはやっぱり楽しい。プログラミングの醍醐味だと思う。
・Electronの記事なのにほぼHTML・JSの記事になってる・・・。今回に関してはipc通信の箇所すら削っちゃってる!!!
- 投稿日:2020-03-22T16:31:13+09:00
謎の余白の正体 CSS編
- 投稿日:2020-03-22T15:47:16+09:00
要素の配置するためにかなり便利なCSS機能、、position
初めに、、
日本語に翻訳すると
position = 場所
absolute = 絶対
relative = 相対的です
使い方
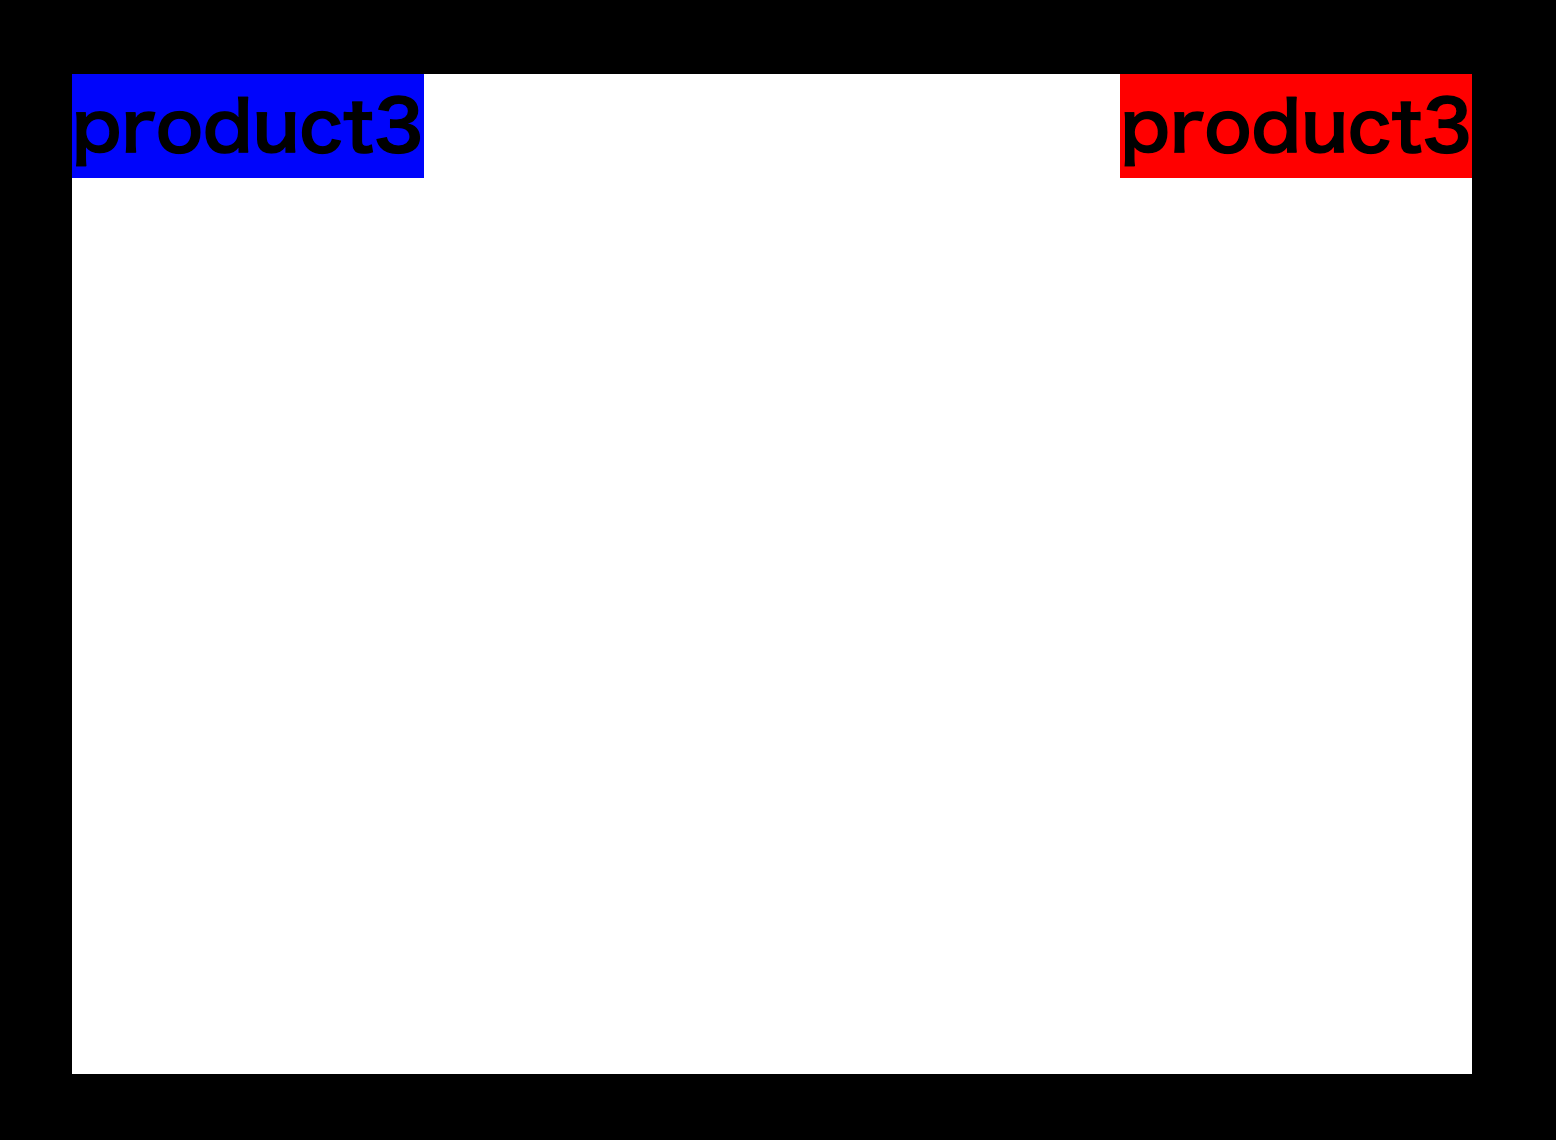
今回は、白い箱を基準に動かしていきます
デフォルトでは、top:0px;・left:0px;のところに配置されている
指定なしの場合
position:relative;
赤いprodactをrightに200px動かすと、、
position:relative;
right:0px;
赤いprodactをtopに0px動かすと、、
position:relative;
top:0px;
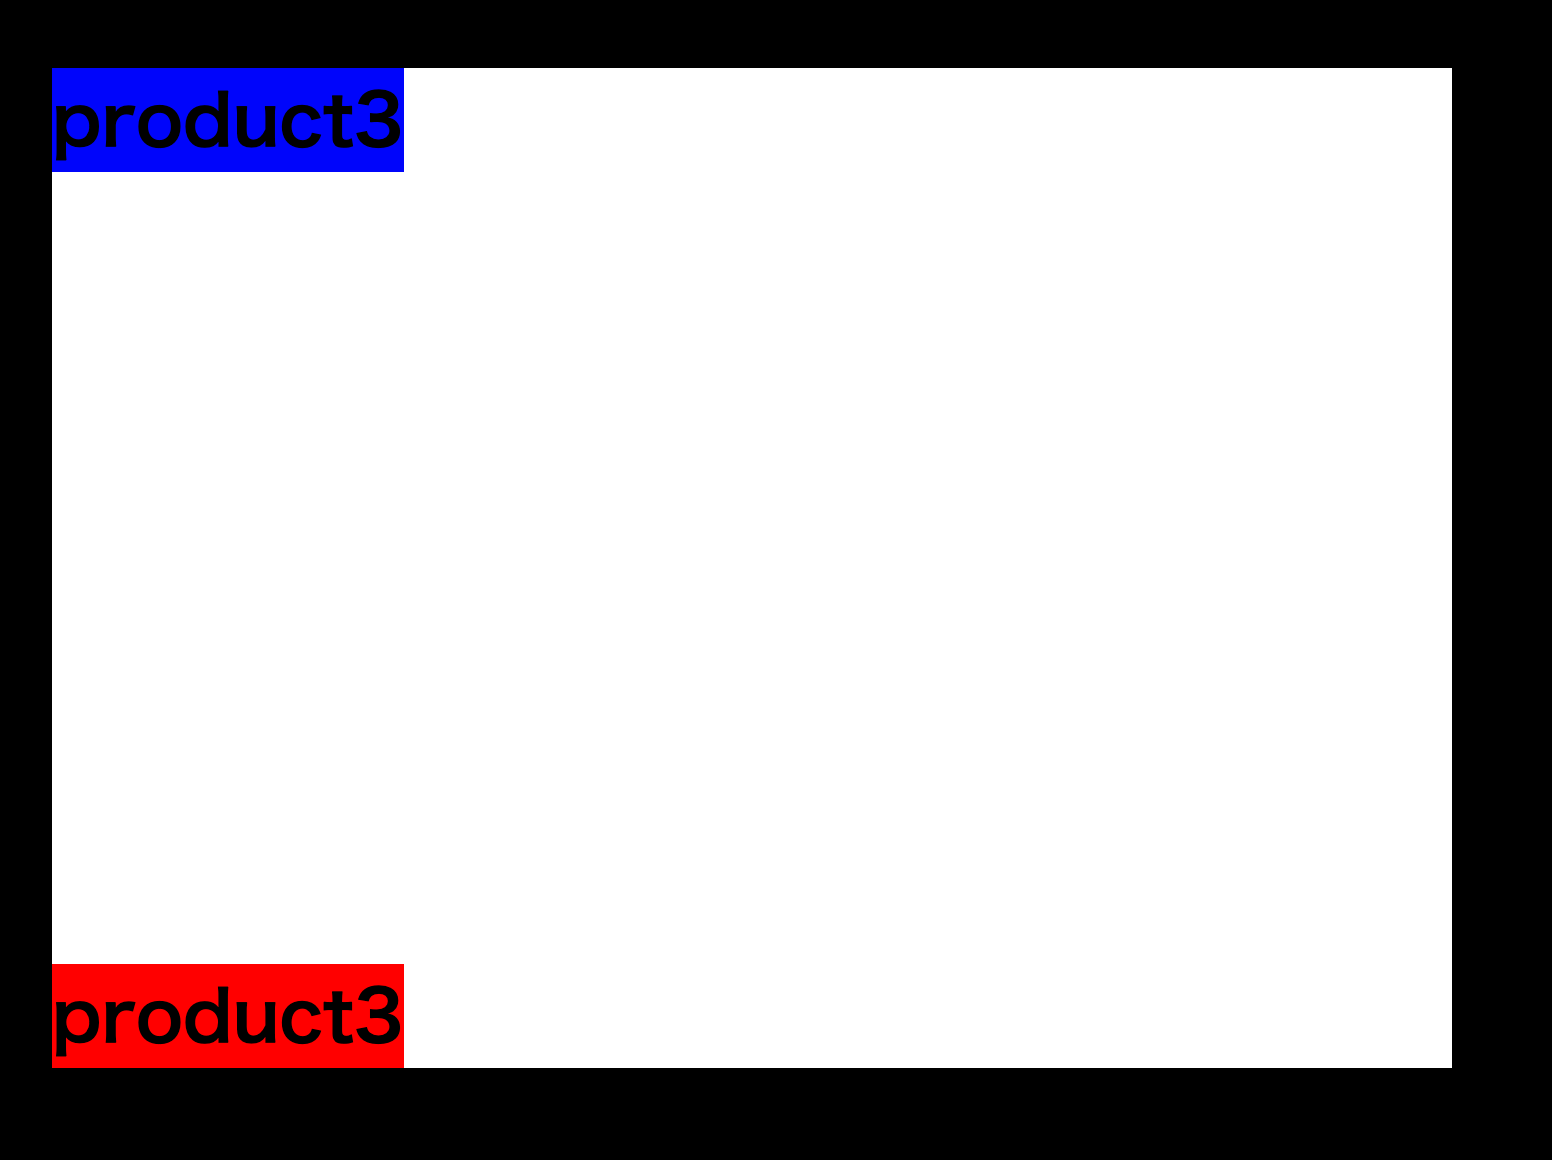
赤いprodactをbottomに0px動かすと、、
position:relative;
bootm:0px;
赤いprodactをleftに200px動かすと、、
position:relative;
left:0px;
最後に
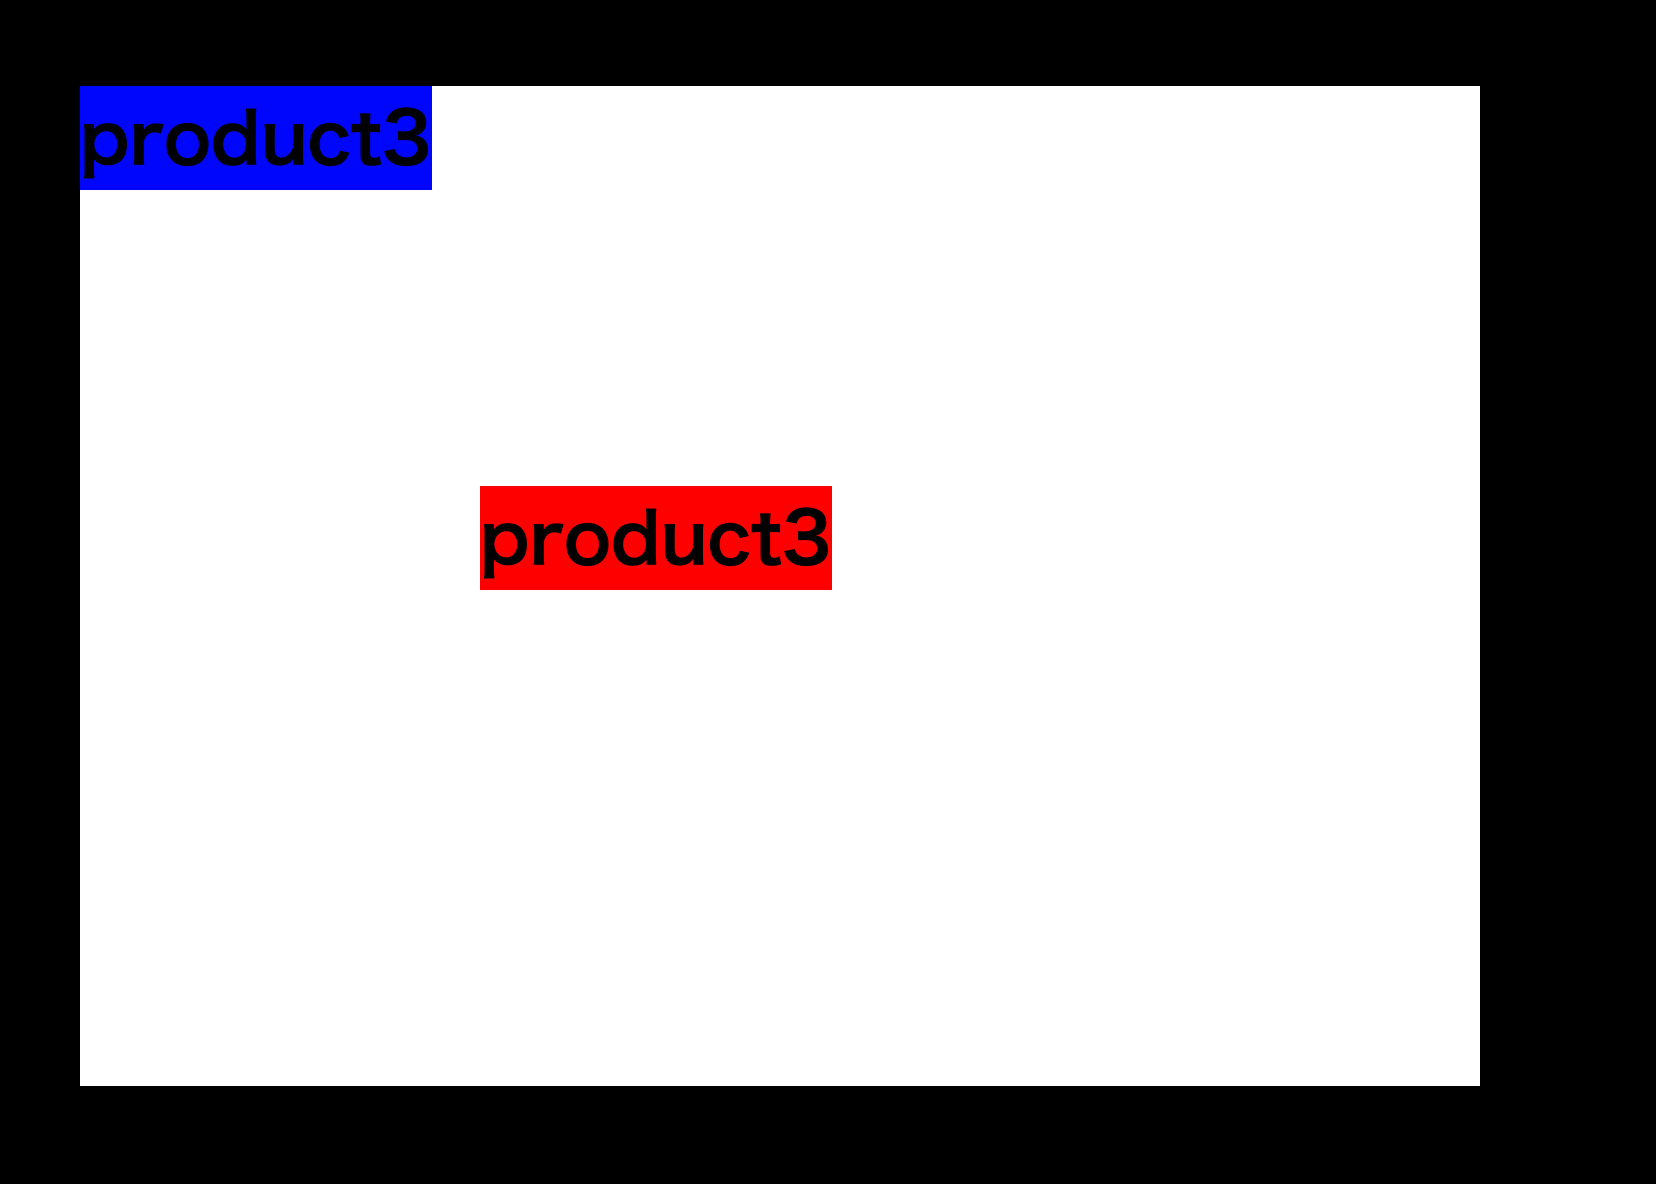
ポジションの指定は、複数合わせる事ができて、例えば、、、
top 200px
left 200px
指定すると、、、position:relative; top:200px; left:200px;
上記のように配置されます
- 投稿日:2020-03-22T13:13:05+09:00
初めてのレスポンシブ
初めまして
初めての投稿でして、先輩方よろしゅーおねがいします。
昨今の様々なニュースと機械学習組み合わせるときっと楽しんだろうって思ってsakura vpsでサイト立ち上げて 勉強開始してます。サイト立ち上げの苦労はまた今度。
今回はhtmlにつきものなレスポンシブってやつを勉強しました。
いろんなサイトをみてパクってきて再利用しようと思ったんですが、どうも複雑で。一部削除してもなぜか動いたり、期待した動きしなかったり。やっぱり基礎理解しないとダメだなって思って書きました。
実行例
下記にあります。
色々と色付けてわかりやすくしてみました。PCブラウザで枠幅を600以下にすると変わります。
https://dirtycode7.com/sample_css_responseive.html悩んでるところ
なぜかすべてを半角文字にするとダメになる。
別に支障ないんだけど、とっても気になる。今後
PCとスマホ、どうやって切り替えるか。先人の情報を見て考えます。
html部分
sample_css_responseive.html<!DOCTYPE html> <html> <head> <link rel="stylesheet" type="text/css" href="responseive.css" > <meta charset="utf-8"> <title>かなりシンプルなレスポンシブのサンプル</title> </head> <body> <div class="header"> かなーりシンプルなレスポンシブのサンプル (テーブルと枠の組み合わせ) </div> <div class="main"> <table class="main_table"> <tr> <th>1234567890123 </th> <td>ああああああああああああああああああああああああああああああああああああああ</td> </tr> <tr> <th>1234567890123 </th> <td>ああああああああああああ</td> </tr> <tr> <th>いいいいいいいいいいいいいいいいいいい </th> <td>うううううううううううううううううううううううううううううう</td> </tr> </table> </div> </body> </html>css部分
responseive.css/*********************************************/ /* フォント */ @import url('https://fonts.googleapis.com/css?family=Sawarabi+Gothic&display=swap'); /*********************************************/ /* 基本 */ html { position: relative; font-size: 1em; font-family: 'Sawarabi Gothic', sans-serif; color: #aaa; background-color: #000; } /*********************************************/ /* ヘッダー */ .header { font-size: 2em; font-weight: bolder; text-align: center; padding: 1em; margin: 1em 1em 1em 1em; background-color: #222; } /*********************************************/ /* メイン */ .main { padding: 1em; margin: 1em 1em 1em 1em; background-color: #222; } /*********************************************/ /* テーブル */ .main_table { padding: 1em; background-color: #444; } /* 左 */ .main_table th { width: 10em; text-align: left; background-color: #666; } /* 右 */ .main_table td { position: relative; padding: 0.5em; margin-bottom: 1em; border-radius: 16px; display: inline-block; font-size: 2em; color: #eee; background: #555; } /* 狭いとき */ @media only screen and (max-width:600px){ .header { color: #e00; } .main_table { } .main_table th { display: block; color: #0e0; } .main_table td { display: block; color: #00e; } .main_table tr:first-child th { } } /* EOF */github
下記にあります。
https://github.com/dirtycode7/sample_css_Responsive
- 投稿日:2020-03-22T08:50:38+09:00
jQueryでFlash, error_messageを閉じる方法(Bootstrap xボタンが反応しない場合)。
はじめに
Bootstrapの
flash,error_messagesなどに使われる
<div class= "alert alert-○○">
が閉じない場合の対処法です。
私の環境が悪く閉じるアクションができないのか定かではありませんが
jQueryを使って閉じるアクションを可能にする方法を書いておきます。私の場合、xマークのボタンは表示できましたがクリックをしても一切反応しませんでした。
開発環境
- bootstrap-sass (3.3.7)
- devise (4.7.1)
- jquery-rails (4.3.1)
- rails (5.2.4.1)
Flashやerror_messagesにxボタンをつける
こちら Bootstrap4版
こちら Bootstrap3版
上記のサイトのサンプルを確認すると<div class="alert alert-success alert-dismissible"> <button type="button" class="close" data-dismiss="alert">×</button> <strong>Success!</strong> Indicates a successful or positive action. </div>サイトでは、↓
To close the alert message, add a .alert-dismissible class to the alert container. Then add class="close" and data-dismiss="alert" to a link or a button element (when you click on this the alert box will disappear).
簡単に要約するとalertなどを閉じる時は
class=alert-dismissibleをalertコンテナに
<button>タグにclass="close",data-dismiss="alert"
を記入すればxボタンクリック時に消えますよと。(私の環境で何か導入し忘れのものがある、もしくは、Javascript,jQueryで閉じるアクションする前提なのかもしれません。わかる方宜しければコメントなどで教えてください。)
jQueryで閉じるイベント
applivation.js$(function() { $(".close").click(function() { $(".alert").hide(); }); });参考サイト
w3schools.com
(https://www.w3schools.com/bootstrap/bootstrap_alerts.asp)
(https://www.w3schools.com/bootstrap4/bootstrap_alerts.asp)終わりに
xボタンを押した際にBootstrapを適用したクラスのFlashやエラーメッセージを閉じることができると思います。
jQuery、Javascriptの重要性を再確認できました。
- 投稿日:2020-03-22T07:58:02+09:00
JqueryでFlash, Alertsを閉じる(Bootstrap xボタンが反応しない場合)。
はじめに
Bootstrapの
flash,error_messagesなどに使われる
<div class= "alert alert-○○">
が閉じない場合の対処法です。
私の環境が悪く閉じるアクションができないのか定かではありませんが
JQueryを使って閉じるアクションを可能にする方法を書いておきます。私の場合、xマークのボタンは表示できましたがクリックをしても一切反応しませんでした。
開発環境
- bootstrap-sass (3.3.7)
- devise (4.7.1)
- jquery-rails (4.3.1)
- rails (5.2.4.1)
Alertやerror_messagesにxボタンをつける
こちら Bootstrap4版
こちら Bootstrap3版
上記のサイトのサンプルを確認すると<div class="alert alert-success alert-dismissible"> <button type="button" class="close" data-dismiss="alert">×</button> <strong>Success!</strong> Indicates a successful or positive action. </div>サイトにでは、↓
To close the alert message, add a .alert-dismissible class to the alert container. Then add class="close" and data-dismiss="alert" to a link or a button element (when you click on this the alert box will disappear).
簡単に要約するとalertなどを閉じる時は
class=alert-dismissibleをalertコンテナに
<button>タグにclass="close",data-dismiss="alert"
を記入すればxボタンクリック時に消えますよと。(私が何か導入し忘れのものがある、もしくは、Javascript,JQueryで閉じるアクションする前提なのかもしれません。わかる方よければコメントなどで教えてください。)
JQueryで閉じるイベント
applivation.js$(function() { $(".close").click(function() { $(".alert").hide(); }); });参考サイト
w3schools.com
(https://www.w3schools.com/bootstrap/bootstrap_alerts.asp)
(https://www.w3schools.com/bootstrap4/bootstrap_alerts.asp)終わりに
xボタンを押した際にBootstrapを適用したクラスのFlashやエラーメッセージを閉じることができると思います。
jquery、javascriptの重要性を再確認できました。
- 投稿日:2020-03-22T07:58:02+09:00
jQueryでFlash, Alertsを閉じる方法(Bootstrap xボタンが反応しない場合)。
はじめに
Bootstrapの
flash,error_messagesなどに使われる
<div class= "alert alert-○○">
が閉じない場合の対処法です。
私の環境が悪く閉じるアクションができないのか定かではありませんが
jQueryを使って閉じるアクションを可能にする方法を書いておきます。私の場合、xマークのボタンは表示できましたがクリックをしても一切反応しませんでした。
開発環境
- bootstrap-sass (3.3.7)
- devise (4.7.1)
- jquery-rails (4.3.1)
- rails (5.2.4.1)
Alertやerror_messagesにxボタンをつける
こちら Bootstrap4版
こちら Bootstrap3版
上記のサイトのサンプルを確認すると<div class="alert alert-success alert-dismissible"> <button type="button" class="close" data-dismiss="alert">×</button> <strong>Success!</strong> Indicates a successful or positive action. </div>サイトにでは、↓
To close the alert message, add a .alert-dismissible class to the alert container. Then add class="close" and data-dismiss="alert" to a link or a button element (when you click on this the alert box will disappear).
簡単に要約するとalertなどを閉じる時は
class=alert-dismissibleをalertコンテナに
<button>タグにclass="close",data-dismiss="alert"
を記入すればxボタンクリック時に消えますよと。(私の環境で何か導入し忘れのものがある、もしくは、Javascript,jQueryで閉じるアクションする前提なのかもしれません。わかる方宜しければコメントなどで教えてください。)
JQueryで閉じるイベント
applivation.js$(function() { $(".close").click(function() { $(".alert").hide(); }); });参考サイト
w3schools.com
(https://www.w3schools.com/bootstrap/bootstrap_alerts.asp)
(https://www.w3schools.com/bootstrap4/bootstrap_alerts.asp)終わりに
xボタンを押した際にBootstrapを適用したクラスのFlashやエラーメッセージを閉じることができると思います。
jQuery、Javascriptの重要性を再確認できました。
- 投稿日:2020-03-22T07:58:02+09:00
jQueryでFlash, error_messageを閉じる方法(Bootstrap xボタンが反応しない場合)。
はじめに
Bootstrapの
flash,error_messagesなどに使われる
<div class= "alert alert-○○">
が閉じない場合の対処法です。
私の環境が悪く閉じるアクションができないのか定かではありませんが
jQueryを使って閉じるアクションを可能にする方法を書いておきます。私の場合、xマークのボタンは表示できましたがクリックをしても一切反応しませんでした。
開発環境
- bootstrap-sass (3.3.7)
- devise (4.7.1)
- jquery-rails (4.3.1)
- rails (5.2.4.1)
Alertやerror_messagesにxボタンをつける
こちら Bootstrap4版
こちら Bootstrap3版
上記のサイトのサンプルを確認すると<div class="alert alert-success alert-dismissible"> <button type="button" class="close" data-dismiss="alert">×</button> <strong>Success!</strong> Indicates a successful or positive action. </div>サイトでは、↓
To close the alert message, add a .alert-dismissible class to the alert container. Then add class="close" and data-dismiss="alert" to a link or a button element (when you click on this the alert box will disappear).
簡単に要約するとalertなどを閉じる時は
class=alert-dismissibleをalertコンテナに
<button>タグにclass="close",data-dismiss="alert"
を記入すればxボタンクリック時に消えますよと。(私の環境で何か導入し忘れのものがある、もしくは、Javascript,jQueryで閉じるアクションする前提なのかもしれません。わかる方宜しければコメントなどで教えてください。)
JQueryで閉じるイベント
applivation.js$(function() { $(".close").click(function() { $(".alert").hide(); }); });参考サイト
w3schools.com
(https://www.w3schools.com/bootstrap/bootstrap_alerts.asp)
(https://www.w3schools.com/bootstrap4/bootstrap_alerts.asp)終わりに
xボタンを押した際にBootstrapを適用したクラスのFlashやエラーメッセージを閉じることができると思います。
jQuery、Javascriptの重要性を再確認できました。
- 投稿日:2020-03-22T05:40:55+09:00
初心者によるプログラミング学習ログ 269日目
100日チャレンジの269日目
twitterの100日チャレンジ#タグ、#100DaysOfCode実施中です。
すでに100日超えましたが、継続。
100日チャレンジは、ぱぺまぺの中ではプログラミングに限らず継続学習のために使っています。
269日目は、おはようございます
— ぱぺまぺ@webエンジニアを目指したい社畜 (@yudapinokio) March 21, 2020
269日目
・webサイト模写
・下層ページ 4ページ目作成
CSSの設計手法ってなにがいいんだろ?#早起きチャレンジ#駆け出しエンジニアと繋がりたい#100DaysOfCode