- 投稿日:2020-02-08T22:56:30+09:00
Macでnodeのバージョンを切り替える〜少しめんどい〜
nodeのバージョンを切り替えるための処理です!
homebrewがインストールされている前提で話をすすめます。homebrewがインストールされてない方はインストールして下さい。nodebrewがインストールされているか確認
$ nodebrew -v$ node -vでnodeのバージョンも確認できる
nodebrewをインストール(インストール済みであれば不要)
$ brew install nodebrew$ nodebrew -vでバージョン確認
nodebrewでインストール可能なnodeのバージョンを確認
$ nodebrew ls-remoteローカルの状況確認(nodebrewを通さずにインストールされているnodeがあれば一旦、アンインストールが必要)
$ brew ls→nodeが入っていれば一度アンイストールしなければいけない
今まで使っていたnodeをアンインストール
$ brew uninstall --force node→無理なら
$ brew uninstall --ignore-dependencies nodepathを設定
$ vi ~/.bash_profilevimでファイルを開き、以下を追加する。(iでインサートモード)
export PATH=$HOME/.nodebrew/current/bin:$PATH

bash_profile
→esc、:wqで保存する
$ source ~/.bash_profile→更新して設定を反映させる。
セットアップ
$ nodebrew setup→セットアップのためのコマンドで、これやらないとインストールできない。
インストール可能なバージョンを確認
$ nodebrew ls-remotenodebrewを通して、使いたいバージョンを指定してnodeをインストール
$ nodebrew install-binary 8.11.1使用するnodeのバージョンを選択
$ nodebrew use v10.15.0nodeが正しく設定されているか確認
$ nodebrew ls
v8.11.1
v12.14.0

current: v12.14.0
こんな感じになれば正解。
- 投稿日:2020-02-08T22:24:04+09:00
【解決】nuxtでyarnをすると「gyp: No Xcode or CLT version detected!」エラーが発生
環境
- macOS Catalina 10.15.3 (zsh)
- node.js v10.15.2
- yarn 1.21.1
- vue/cli 4.1.1
事象
nuxt + typescript + vuetify環境を作成するために、以下のテンプレートを使用しました。
https://github.com/nuxt-community/typescript-templateそこでyarnコマンドを実行すると以下のエラーが発生し正常に起動できませんでした。
gyp: No Xcode or CLT version detected!
gyp ERR! configure error
gyp ERR! stack Error: `gyp` failed with exit code: 1
gyp ERR! stack     at ChildProcess.onCpExit (/Users/dmorita/.nodebrew/node/v10.15.2/lib/node_modules/npm/node_modules/node-gyp/lib/configure.js:345:16)
gyp ERR! stack     at ChildProcess.emit (events.js:189:13)
gyp ERR! stack     at Process.ChildProcess._handle.onexit (internal/child_process.js:248:12)
gyp ERR! System Darwin 19.3.0
gyp ERR! command \"/Users/dmorita/.nodebrew/node/v10.15.2/bin/node\" \"/Users/dmorita/.nodebrew/node/v10.15.2/lib/node_modules/npm/node_modules/node-gyp/bin/node-gyp.js\" \"rebuild\"
gyp ERR! cwd /Users/projects/XXXX/client/node_modules/watchpack/node_modules/fsevents
gyp ERR! node -v v10.15.2
success Saved lockfile.
✨  Done in 156.15s.
yarnとしては、Xcodeが見つからないだけなのでsuccessとなってしまうのですが、yarnやnpm辺りに色々と不具合が起こるので解消したいと思います。
私の場合は以下の2stepで解消しました。Step1
まずは、エラー内容「No Xcode or CLT version detected!」の通りにXcodeとCLTを確認
% xcode-select --install
xcode-select: error: command line tools are already installed, use "Software Update" to install updates
もちろんインストール済みですと。
私の場合、Catalinaにアップデートしてから多々不具合がありました。
こちらを参考に再インストールしました。
https://github.com/nodejs/node-gyp/blob/master/macOS_Catalina.md#i-did-all-that-and-the-acid-test-still-does-not-pass--Step2
それから再度上記のテンプレートで
yarnコマンドを叩くと以下のエラーが発生しました。xcrun: error: active developer path (\"/Applications/Xcode.app/Contents/Developer\") does not exist Use `sudo xcode-select --switch path/to/Xcode.app` to specify the Xcode that you wish to use for command line developer tools, or use `xcode-select --install` to install the standalone command line developer tools. See `man xcode-select` for more details. gyp ERR! build error gyp ERR! stack Error: `make` failed with exit code: 1 gyp ERR! stack at ChildProcess.onExit (/Users/dmorita/.nodebrew/node/v10.15.2/lib/node_modules/npm/node_modules/node-gyp/lib/build.js:262:23) gyp ERR! stack at ChildProcess.emit (events.js:189:13) gyp ERR! stack at Process.ChildProcess._handle.onexit (internal/child_process.js:248:12) gyp ERR! System Darwin 19.3.0 gyp ERR! command \"/Users/dmorita/.nodebrew/node/v10.15.2/bin/node\" \"/Users/dmorita/.nodebrew/node/v10.15.2/lib/node_modules/npm/node_modules/node-gyp/bin/node-gyp.js\" \"rebuild\" gyp ERR! cwd /Users/projects/XXXX/client/node_modules/watchpack/node_modules/fsevents gyp ERR! node -v v10.15.2 success Saved lockfile. ✨ Done in 150.93s.え?パスが存在しないだと?
え?CLTのパスじゃなくてXcodeのパスだと?
となり、確認したところ% xcode-select -print-path /Applications/Xcode.app/Contents/DeveloperCLTが参照しているのがXcode.appのDeveloperでした。
この原因の推測としては、過去に Xcode.app→CLT の順にインストールを行ったためXcode.appが先に決定されていたのだと思います。こちらを参考に参照先のパスをCLTに変更しました。
https://stackoverflow.com/questions/17980759/xcode-select-active-developer-directory-error% sudo xcode-select -switch /Library/Developer/CommandLineTools以上
この状態で再度
yarnコマンドを叩くと% yarn yarn install v1.21.1 info No lockfile found. [1/4] ? Resolving packages... warning nuxt > @nuxt/webpack > @nuxt/babel-preset-app > core-js@2.6.11: core-js@<3 is no longer maintained and not recommended for usage due to the number of issues. Please, upgrade your dependencies to the actual version of core-js@3. [2/4] ? Fetching packages... [3/4] ? Linking dependencies... warning " > vuex-class@0.3.2" has unmet peer dependency "vue@^2.5.0". warning " > vuex-class@0.3.2" has unmet peer dependency "vuex@^3.0.0". warning " > vuex-class@0.3.2" has unmet peer dependency "vue-class-component@^6.0.0 || ^7.0.0". [4/4] ? Building fresh packages... success Saved lockfile. ✨ Done in 150.13s.と正常に完了しました。
CatalinaになりNode.js周りで苦しんでる方の悩みが解消できたら幸いです?
- 投稿日:2020-02-08T19:38:12+09:00
【AWS】IAM-APIGetway-Lambda-DynamoDB-S3でシンプルなアプリケーション制作
はじめに
サーバーレス勉強する際に、いろいろ試したメモ、
つまずいた点や、解決法など、主に自分用のメモになります。
他の方の参考にもなれば嬉しいです。やること
- DynamoDBでテーブル作成
- IAMでDynamoDB用のロール作成
- Lambda上でDynamoDBに値を挿入
- Lambda上でDynamoDBから値を取得
- API Gatewayの設定
- S3にウェブアプリケーションをアップし、公開する
- 公開されたアプリケーションでDynamoDBを操作する
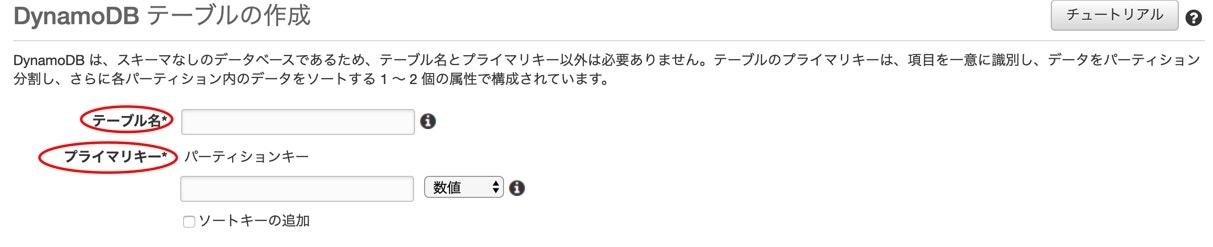
DynamoDBでテーブル作成
テーブルの作成をクリックしてください。
テーブル名とプライマリキーを入力します、プライマリキーのタイプは数値を選んでください。
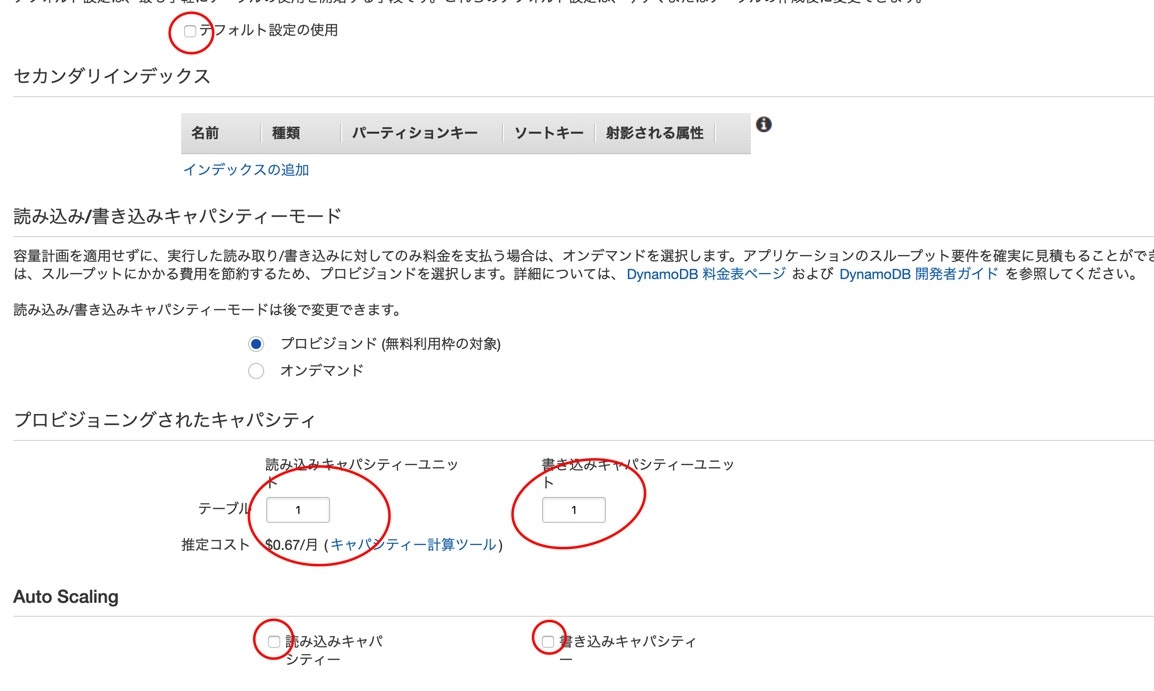
デフォルト設定の使用のチェックを外します、今回はテストのため、性能は最低限のもので良いです。
設定が終わったら
作成をクリックします、しばらくしたらテーブルが作成されるはずです。
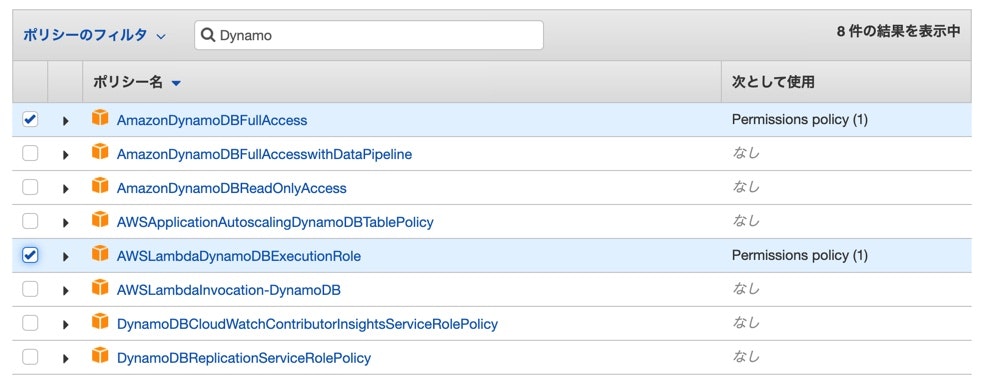
IAMでDynamoDB用のロール作成
権限なしではLambdaがDynamoDB操作できません、Lambda作成する前にまずロールを作ります。
AWSサービスのLambdaを選び、次のステップを押してください。
Dynamoを検索して、AmazonDynamoDBFullAccessとAWSLambdaDynamoDBExecutionRoleにチェック入れてください。
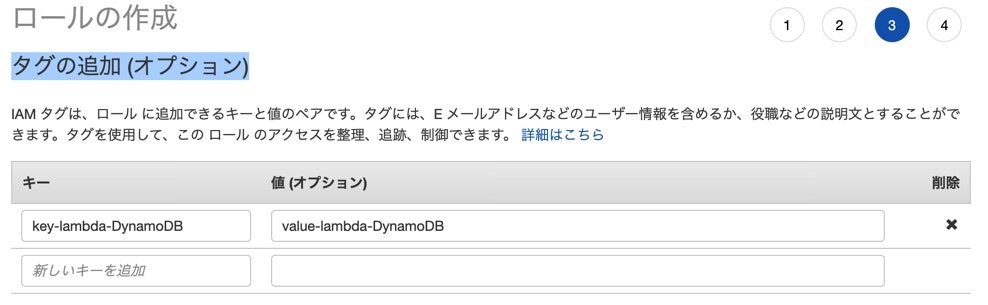
タグの追加に関しては、わかりやすいkeyとvalueでいいと思います。
ロール名も用途が分かりやすいもので良いです、作成完了したら、Lambdaの方に入ります。
Lambda上でDynamoDBに値を挿入
関数を作ります。
関数の作成をクリック。
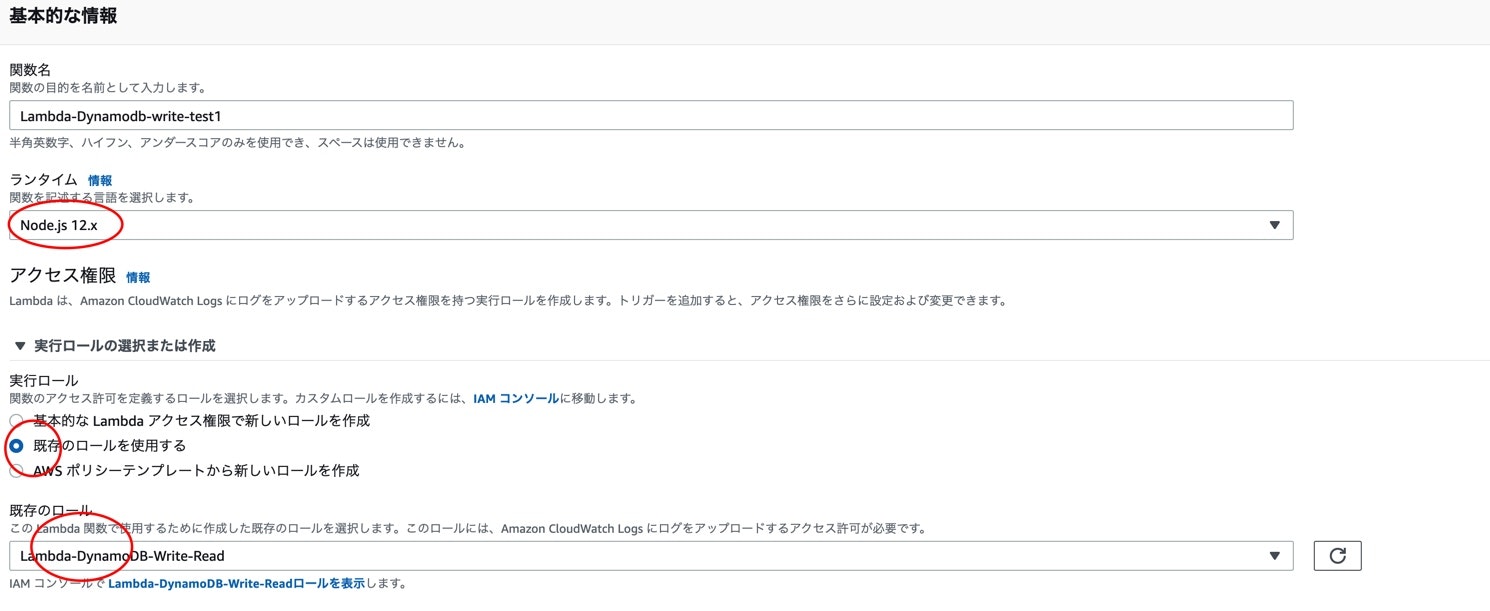
一から作成を選択、関数名は用途が分かりやすいものにします。
言語は今回Node.jsにします。
アクセス権限は先ほど作って置いたロールを使用します。
設定が終わったら、関数を作成します。
関数の内容はリクエストから
messageを受け取って、DynamonDBに保存するというシンプルな内容でした。index.js"use strict" console.log("loading function"); var AWS = require("aws-sdk"); AWS.config.region = "ap-northeast-1"; var docClient = new AWS.DynamoDB.DocumentClient(); exports.handler = function(event, context, callback) { var params = { Item:{ data: Date.now(), message: event.message }, TableName: "Lambda-DynamoDB-Write-Read", }; docClient.scan(params, function(err, data){ if(err){ console.log("Fail to write into DynamoDB"); callback(err, null); }else{ console.log("Successfully write into AWS DynamoDB"); callback(null, data); } }); };Lambda上でDynamoDBから値を取得
設定は値挿入時と同じです。
今回はデータの読み取りなので、関数名はLambda-DynamoDB-read-testにします。index.js"use strict" console.log("loading function"); const AWS = require("aws-sdk"); AWS.config.region = "ap-northeast-1" var docClient = new AWS.DynamoDB.DocumentClient(); exports.handler = function(event, context, callback){ var params = { TableName: "Lambda-DynamoDB-Write-Read", Limit: 100 }; docClient.scan(params, function(err, data){ if(err){ console.log("Fail to read from AWS DynamoDB"); callback(err, null); }else{ console.log("Successfully Read from AWS DynamoDB table"); Reflect.set(data, "headers", { "Access-Control-Allow-Origin" : "*", "Access-Control-Allow-Credentials": "true"} ); Reflect.set(data, "responseCode", 200); context.succeed(data); } }); }API Gatewayの設定
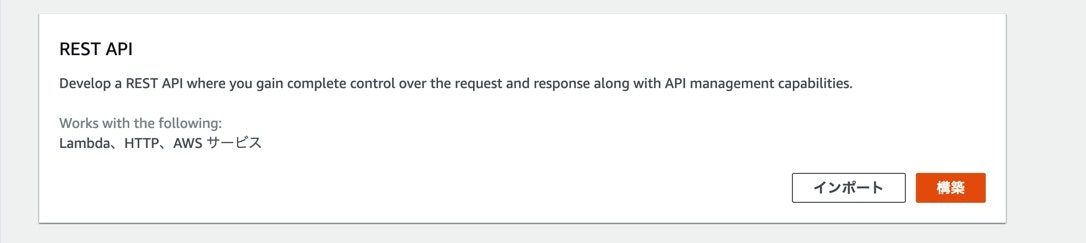
APIを作成します。
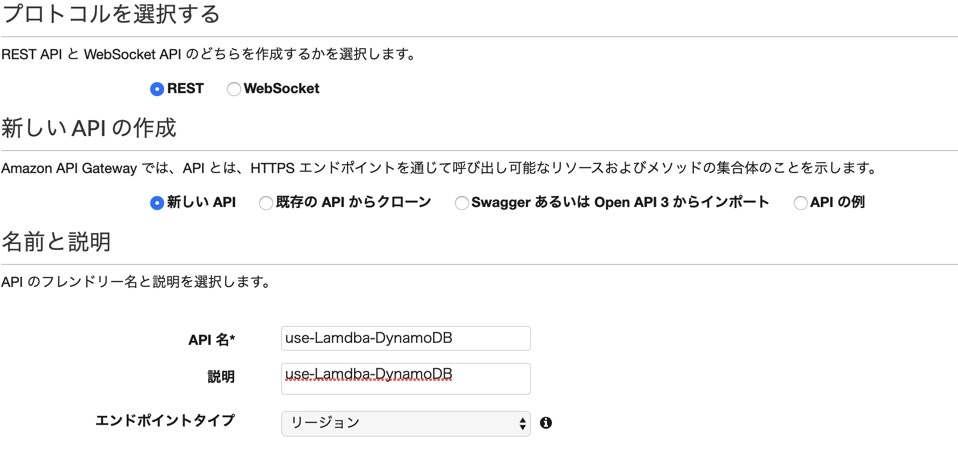
REST APIを選択します。
API名と説明を入力して、作成します。
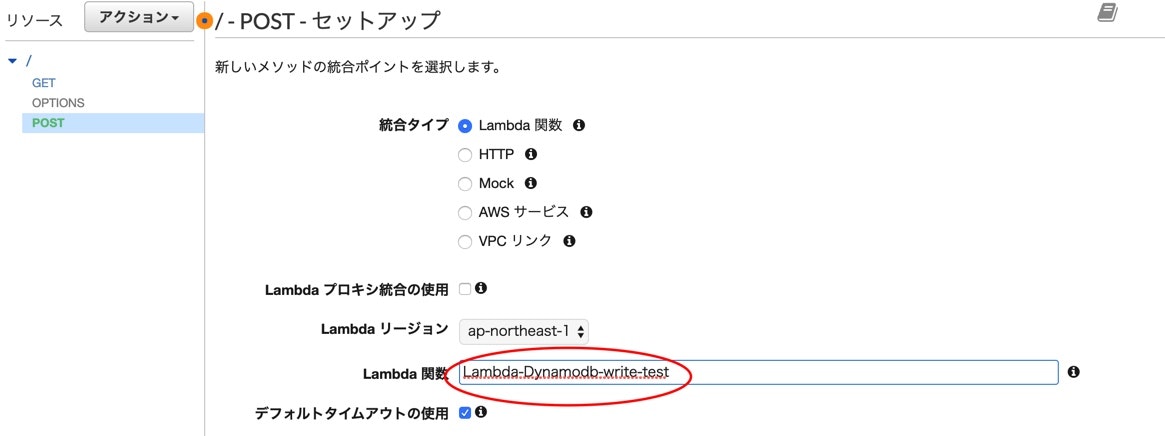
作成完了後、メニューのアクションから、メソッドの作成を選択して、GETとPOSTを作ります。
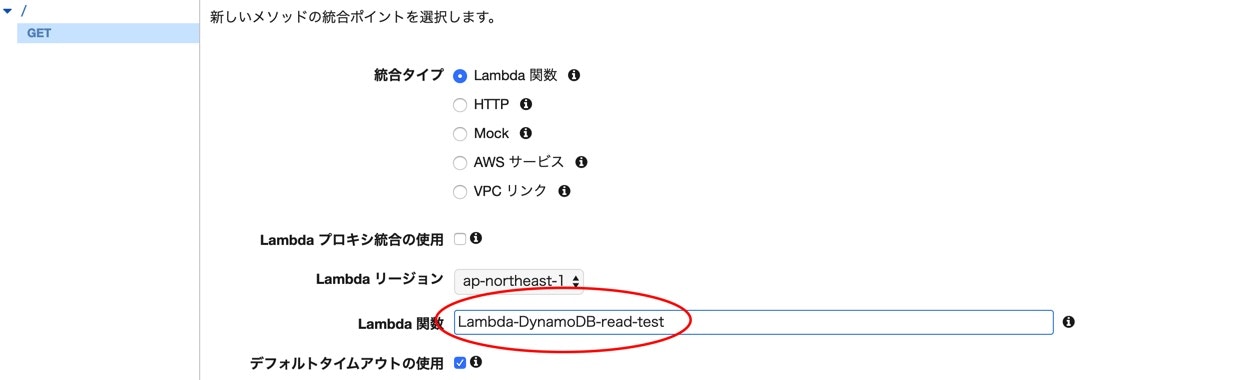
GET
Lambda関数にチェックを入れて、
Lambda関数の所に先程作った、DynamoDBから値を取得用のLambda関数名を入れます。
Lambda 関数に権限を追加するのダイアログが出てきますが、okを選択します。
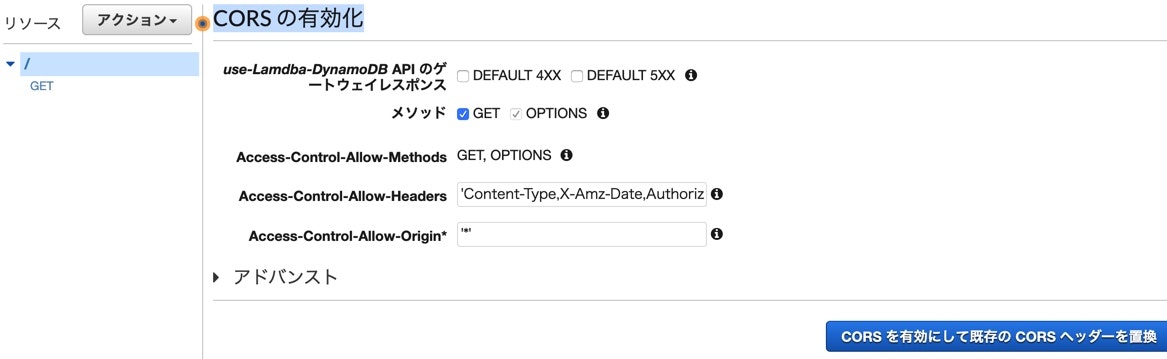
CORSを有効化します、アクションからCORS の有効化にしてください。
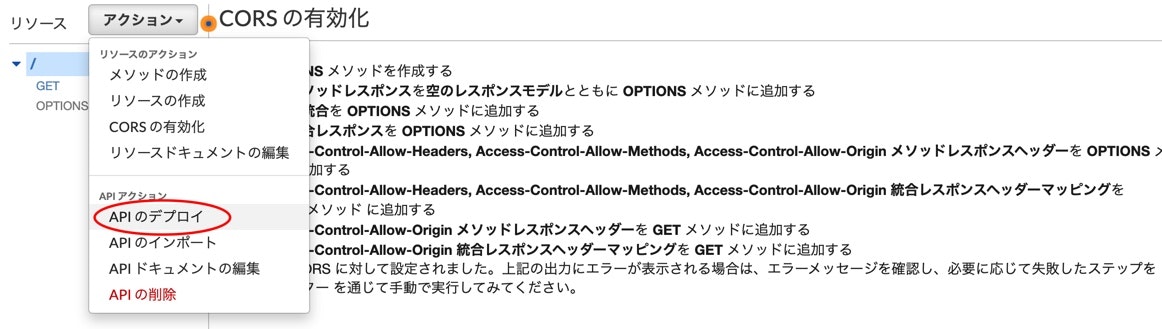
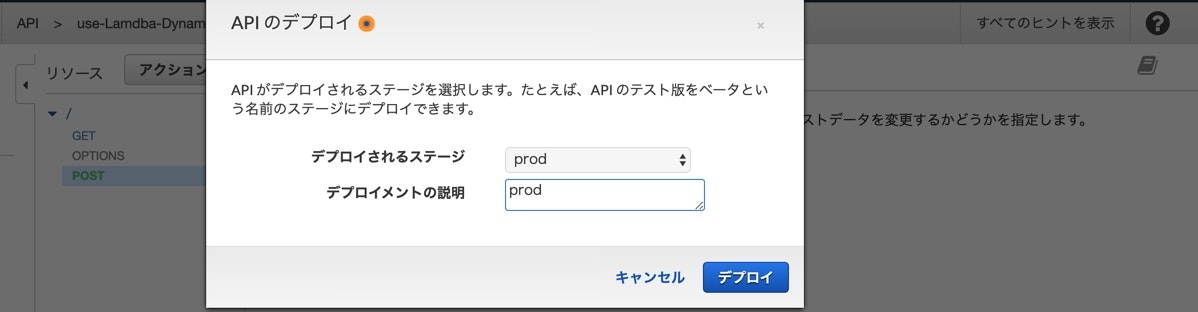
アクションから、APIのデプロイを行ないます。
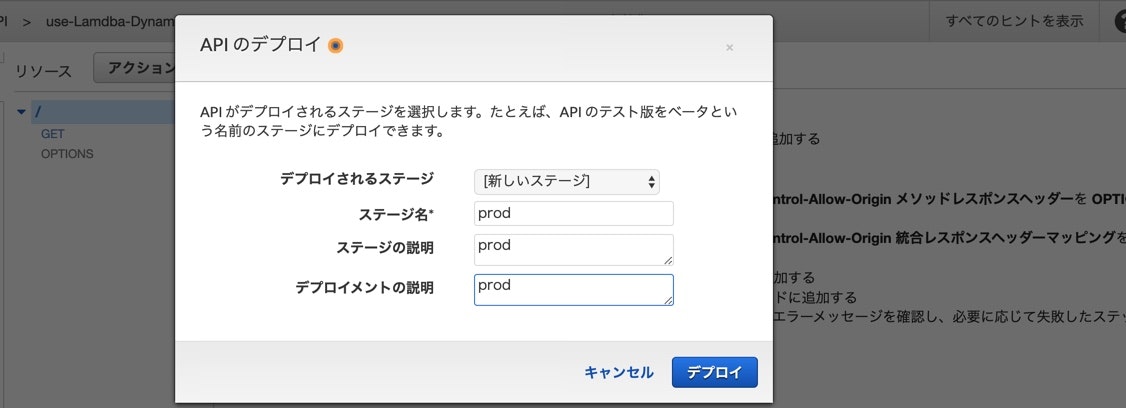
新しいステージを選択して、
ステージ名*、ステージの説明、デプロイメントの説明を入力します。
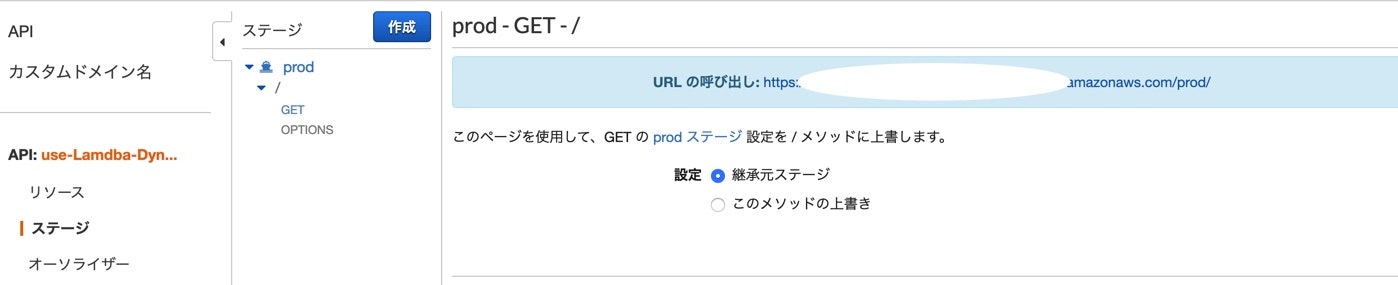
デプロイ完成したら、スタージでメソッド確認できます。
POST
手順はGET時と基本同じです。
先程作った値を挿入用のLambda関数を使用します。
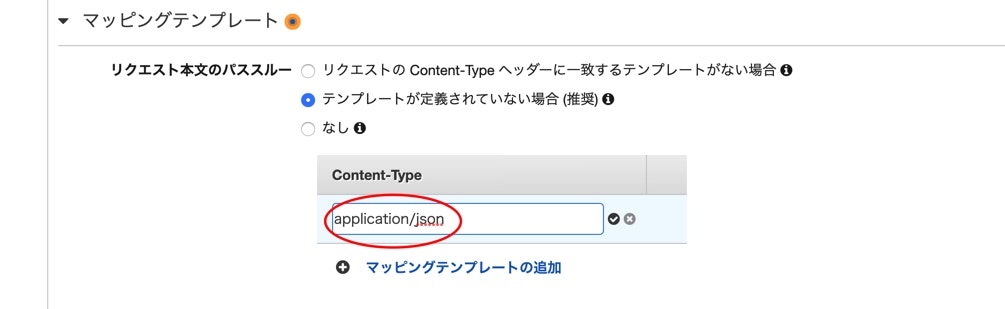
作った後、統合リクエストを選択します。
マッピングテンプレートにapplication/jsonをContent-Typeに追加します。
デプロイする際に、先程作ったステージを選択します。
完了後のステージはこんな感じになります。
S3にウェブアプリケーションをアップし、公開する
使用するウェブアプリのソースは以下になります。
Jqueryのmin.jsを同じディレクトリに置いてあります。
機能はajax使用して、ApiGatewayにGETとPOSTのリクエストを送り、
DynamoDBにデータ挿入、また取得します。LamdbaAPIGetwanyDynamoDB.html<html lang="en"> <head> <meta charset="UTF-8"> <title>Title1</title> <script type="text/javascript" src="./jquery-2.1.4.min.js"></script> </head> <body> <div id="entries"> </div> <h1>Write new comment</h1> <form> <label for="message">Message</label> <textarea id="message"></textarea> <button id="submitbutton">submit</button> </form> <script type="text/javascript"> var API_Gateway_URL = "APIのURL"; $(document).ready(()=>{ $.ajax({ type: "GET", url: API_Gateway_URL, success: (data)=>{ $("#entries").html(""); data.Items.forEach((getcomments)=>{ $("#entries").append("<p>" + getcomments.message+ "</p>"); }) } }); }); $(function () { $("#submitbutton").click(() => { console.log($("#message").val()); $.ajax({ url: API_Gateway_URL, type: "POST", data: JSON.stringify({"message": $("#message").val()}), contentType:'application/json', success: function (data) { location.reload(); } }); return false; }) }) </script> </body> </html>S3のパケット作ります
パケット名を入力し、リージョンは東京を使用します。
作成でパケットを作ります。
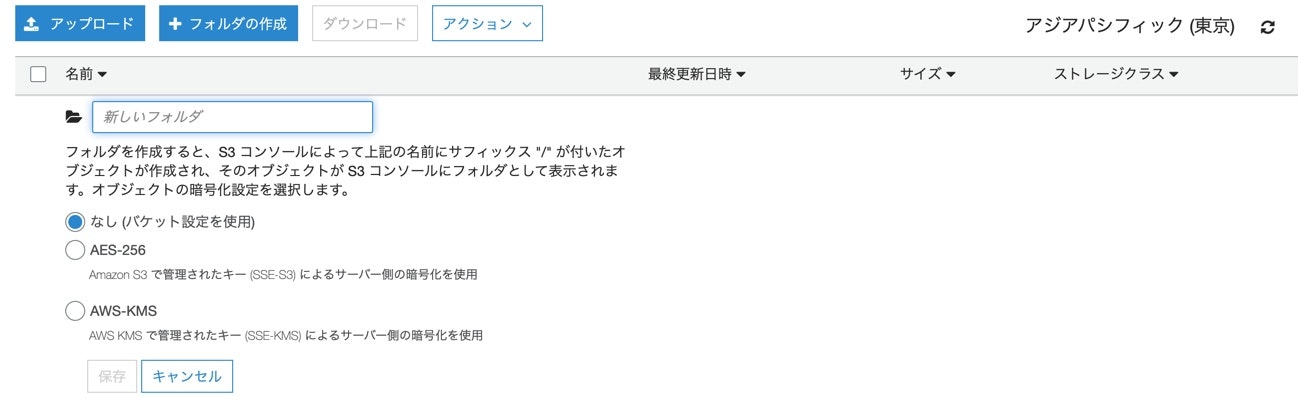
フォルダを作ります。
ウェブアプリのファイルとjqueryのmin.jsを同じフォルダーにアップロードします。
アップロードされたファイル(HtmlをJqueryのmin.js)にチェック入れて、
アクションから公開します。
公開されたアプリケーションでDynamoDBを操作する
公開されたHtmlファイルのurlを開いて、実際操作します。
以上で終わりです。


- 投稿日:2020-02-08T16:55:43+09:00
Node.jsでGoogle Slidesの新規スライド作成
Google Slides APIをNode.jsから触ってみてます。
の記事の続きです。
Google Slideのcreateを試す
スライドの新規作成が出来そうな雰囲気です。
presentations.createのドキュメントを覗くとスライド作成できそうな雰囲気がありました。
準備
Node.jsでGoogle Slides APIを触ってみるでAPIへのアクセスなどを出来るようにしましょう。
ソースコード
前回記事のapp.jsの中身を書き換えます。
- SCOPESを変更
app.jsconst SCOPES = ['https://www.googleapis.com/auth/presentations'];元々は'https://www.googleapis.com/auth/presentations.readonly'と書いてあって読み込みのみ許可になってました。
listSlides(auth)の中身を以下に書き換えapp.js省略 function listSlides(auth) { const slides = google.slides({version: 'v1', auth}); slides.presentations.create({ presentationId: '', }, (err, res) => { if (err) return console.log('The API returned an error: ' + err); console.log(res.data); }); }tokenを再発行
token.jsonは読み込みのみ許可のトークンで作成されていたので、一度token.jsonのファイルを削除します。再度
node app.jsで実行すると、URLが発行されて、ブラウザでアクセスするとこのようにアクセス許可を求められます。
許可をして、発行されるコードをターミナル側に貼り付けて実行するとtoken.jsonが再発行されて実行できます。
新規スライドが出来た!
実行してみます。
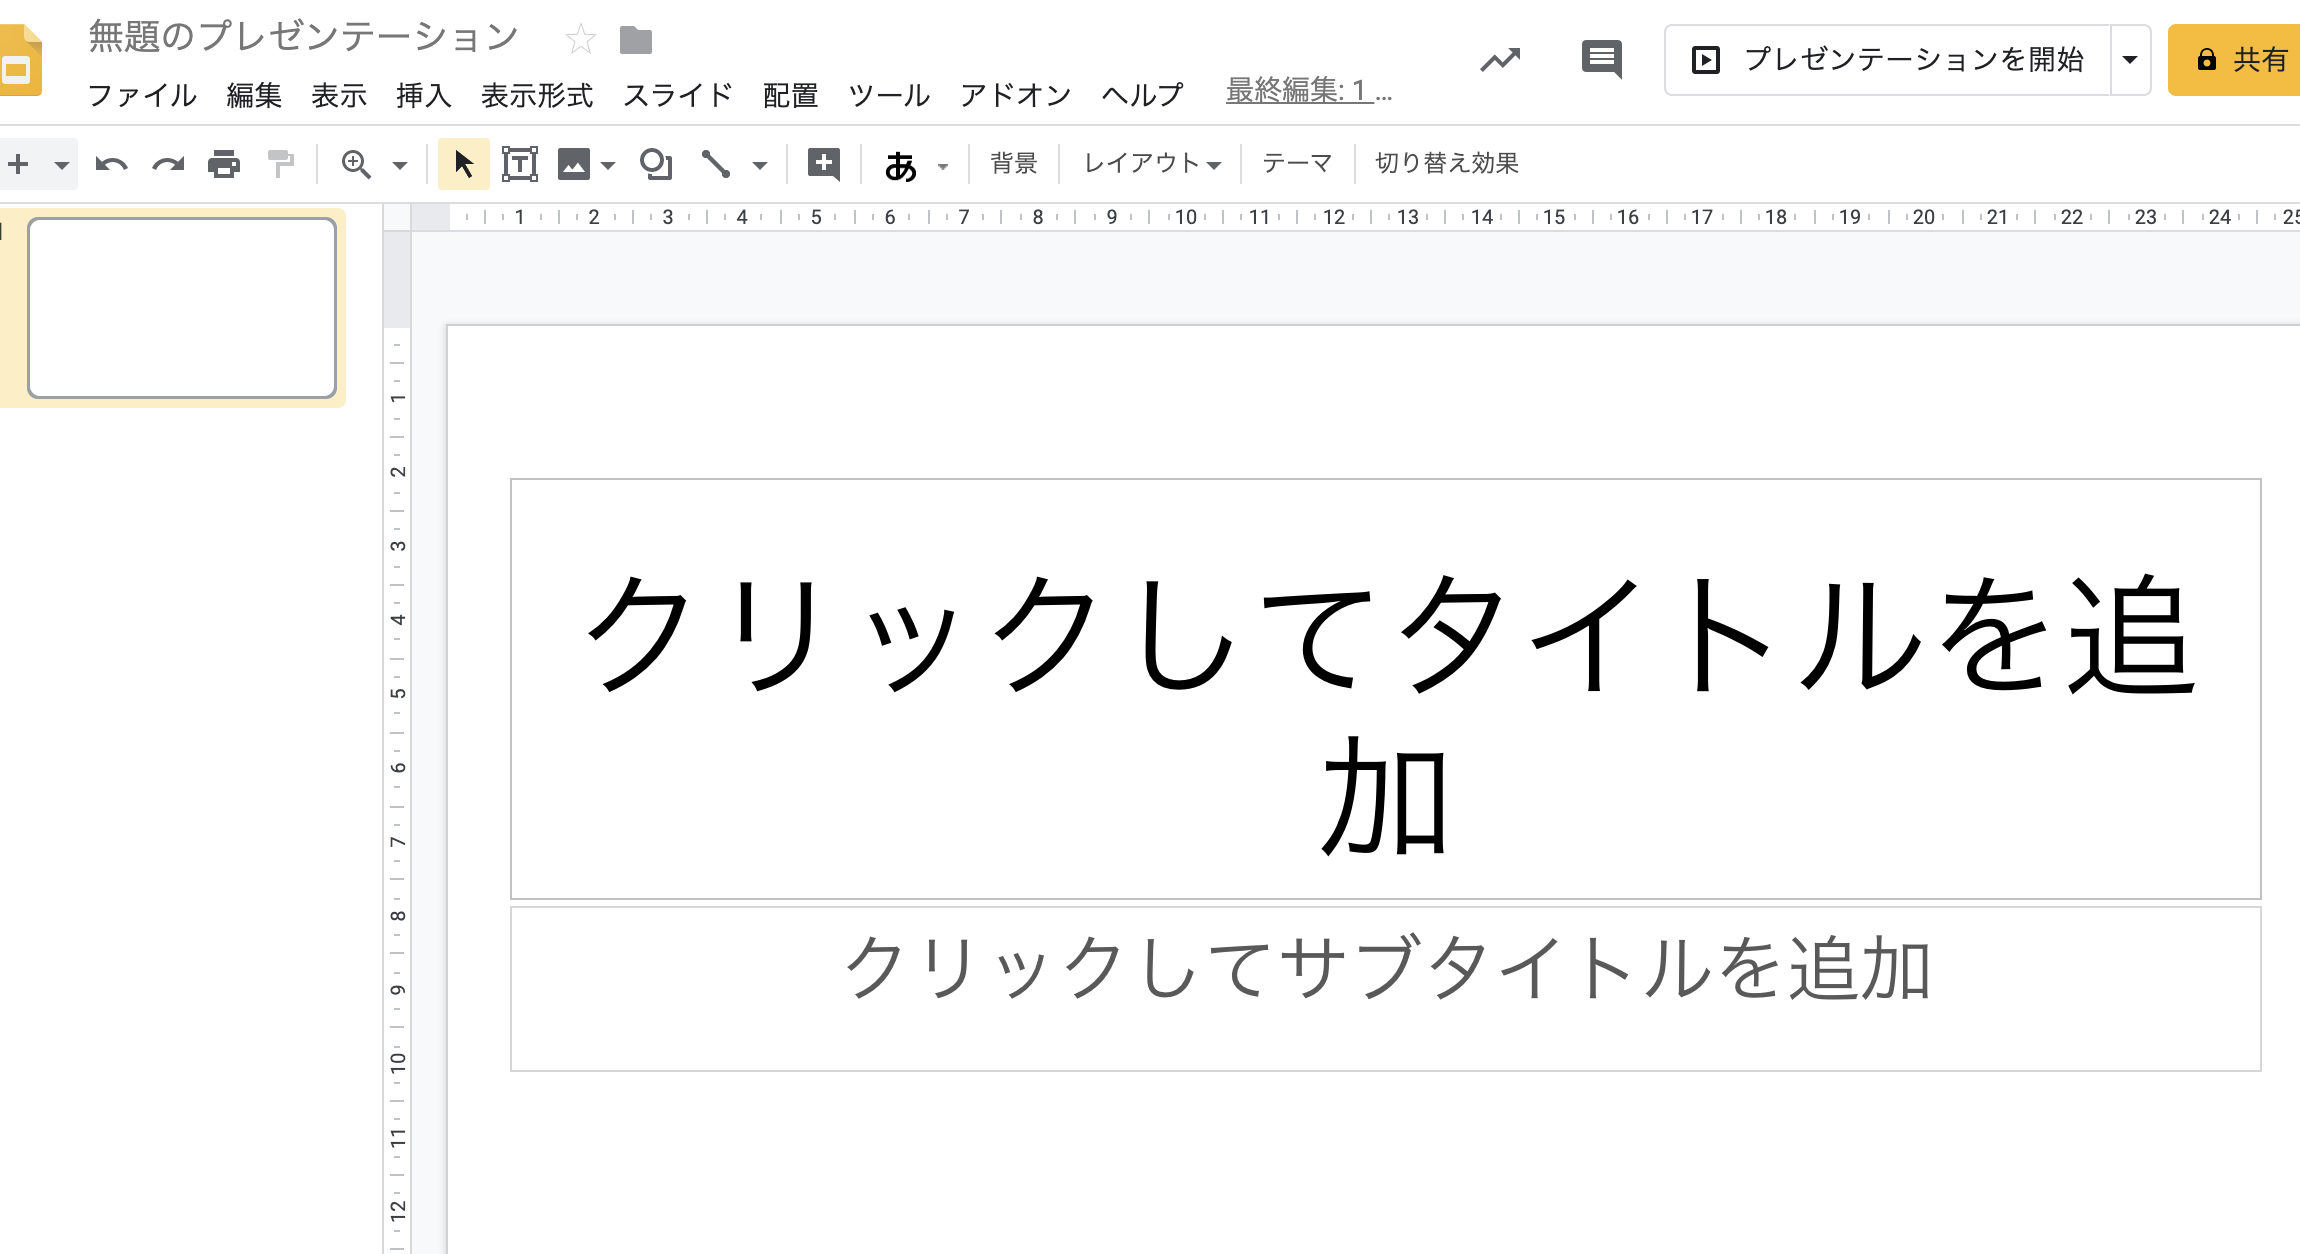
$ node app.js
{
  presentationId: 'xxxxxxxxxxxxxxxxxxxxxxxxxxxxxxxxxx',
  pageSize: {
    width: { magnitude: 9144000, unit: 'EMU' },
    height: { magnitude: 5143500, unit: 'EMU' }
  },
  slides: [
    {
      objectId: 'p',
      pageElements: [Array],
      slideProperties: [Object],
      pageProperties: [Object]
    }
  ],
  title: '無題のプレゼンテーション',
  masters: [
    {
      objectId: 'simple-light-2',
      pageType: 'MASTER',
      pageElements: [Array],
      pageProperties: [Object],
      masterProperties: [Object]
    }
  ],

省略
Google Drive上で確認してみると
無題のプレゼンテーションが作成されてました。
所感
とりあえず、Node.jsからスライドの新規作成ができました。
タイトル指定などをして作ることも出来そうなので引き続き探っていきます。


- 投稿日:2020-02-08T16:28:13+09:00
Node.jsでGoogle Slides内のテキストを取得してみる
Node.jsでGoogle Slides APIを触ってみるの続きです。
準備
前回の記事を参照して、スライド情報にNode.jsからアクセス出来るようにしましょう。
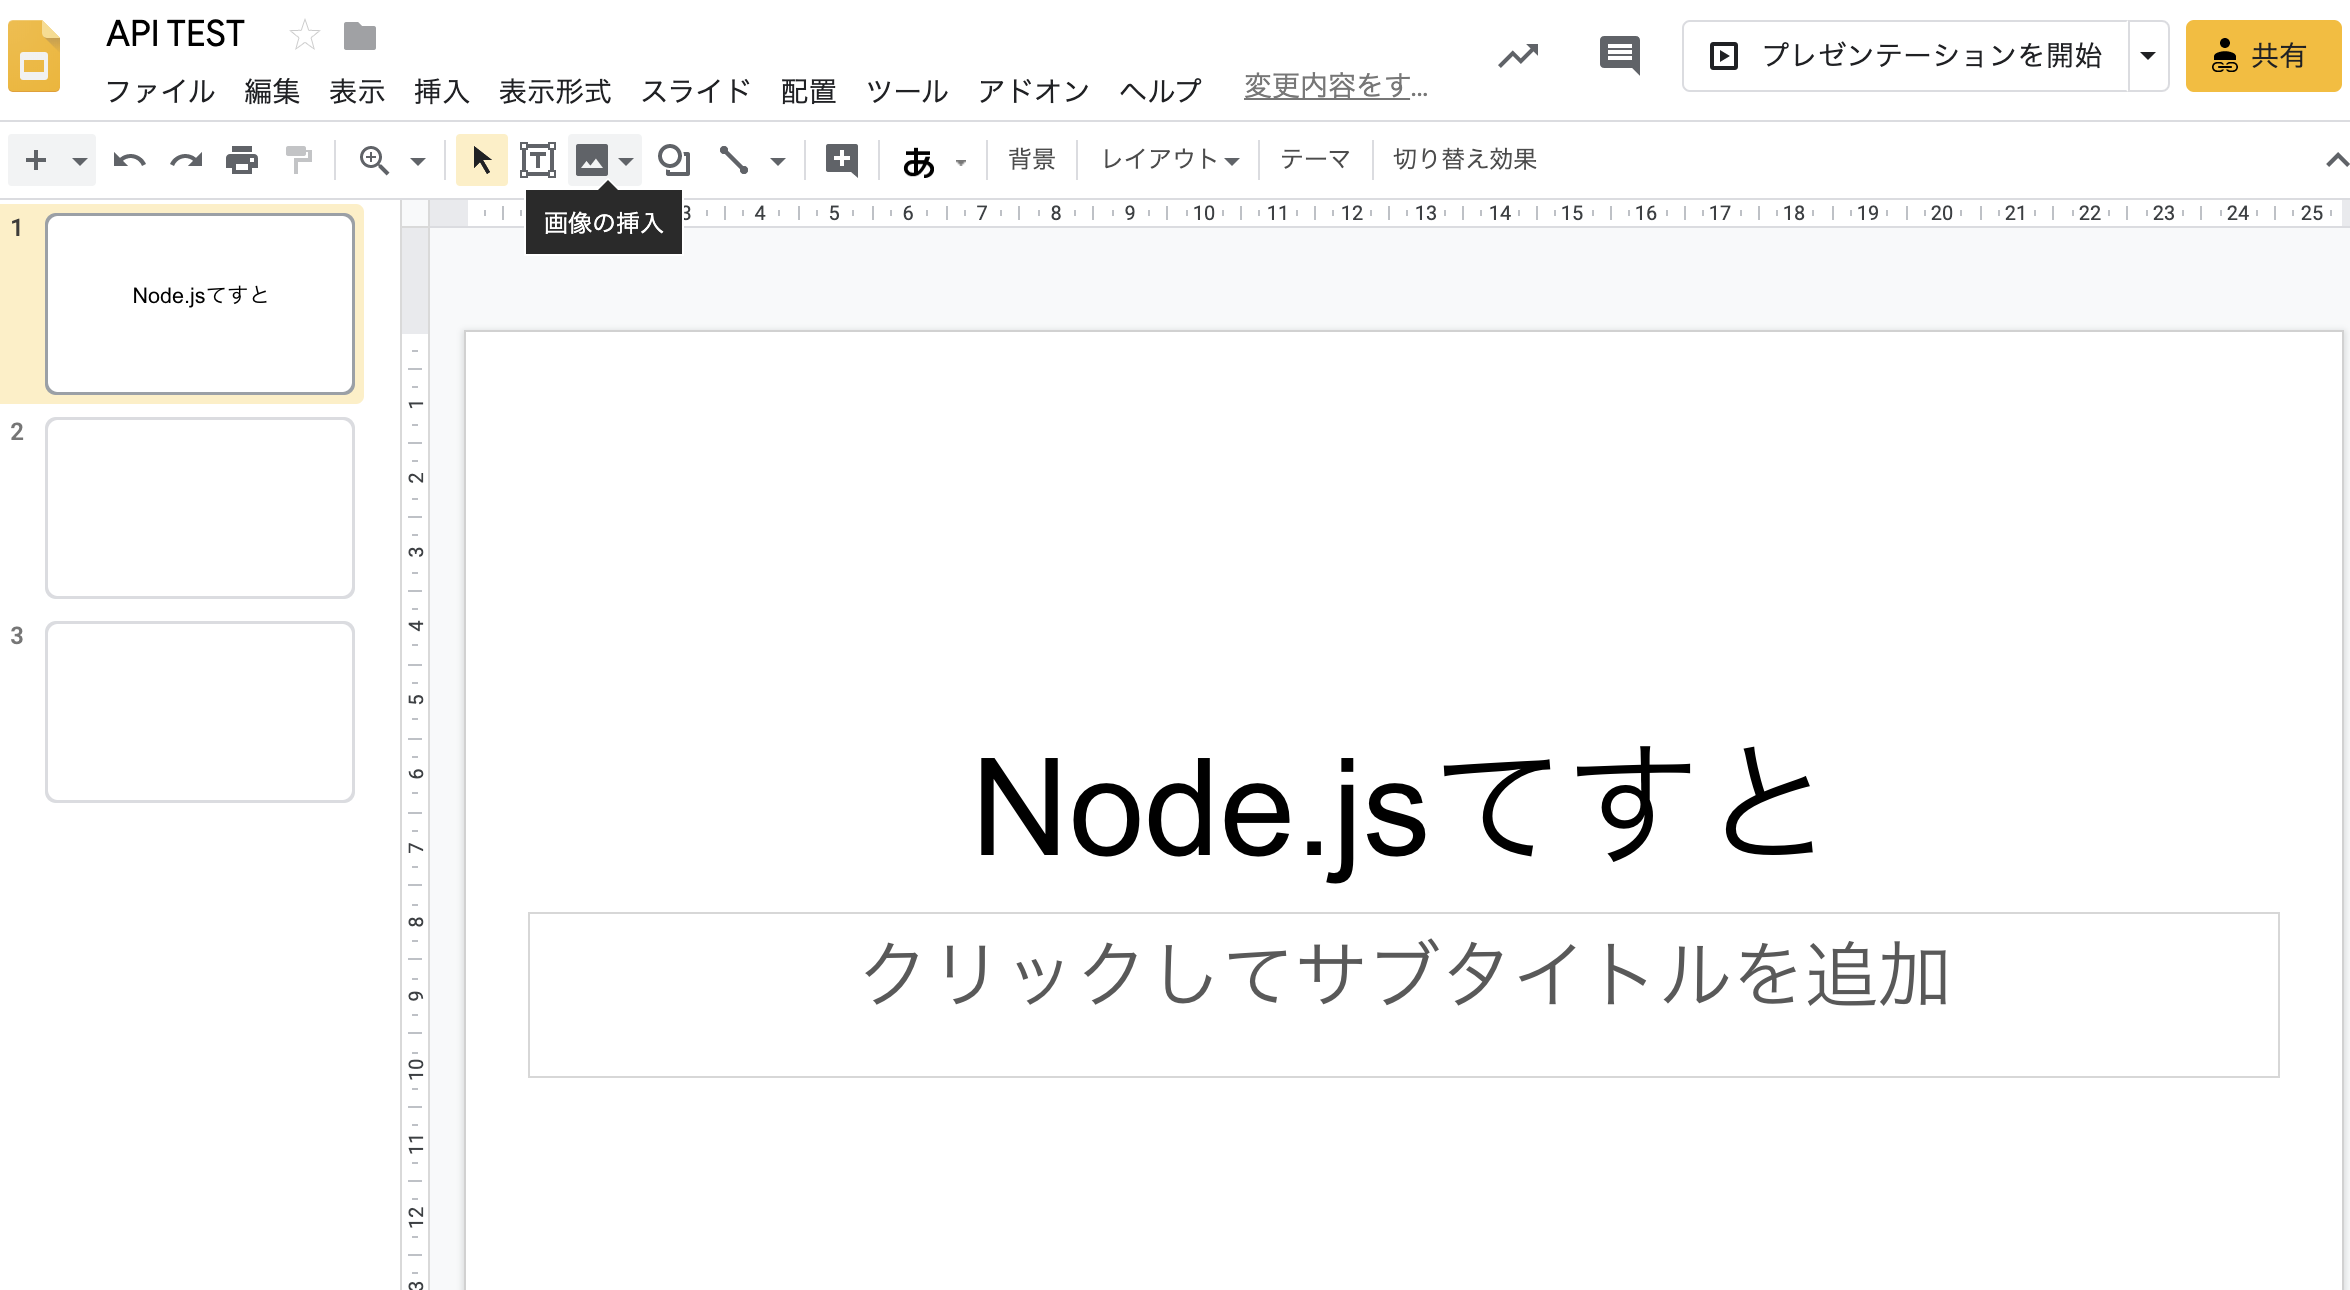
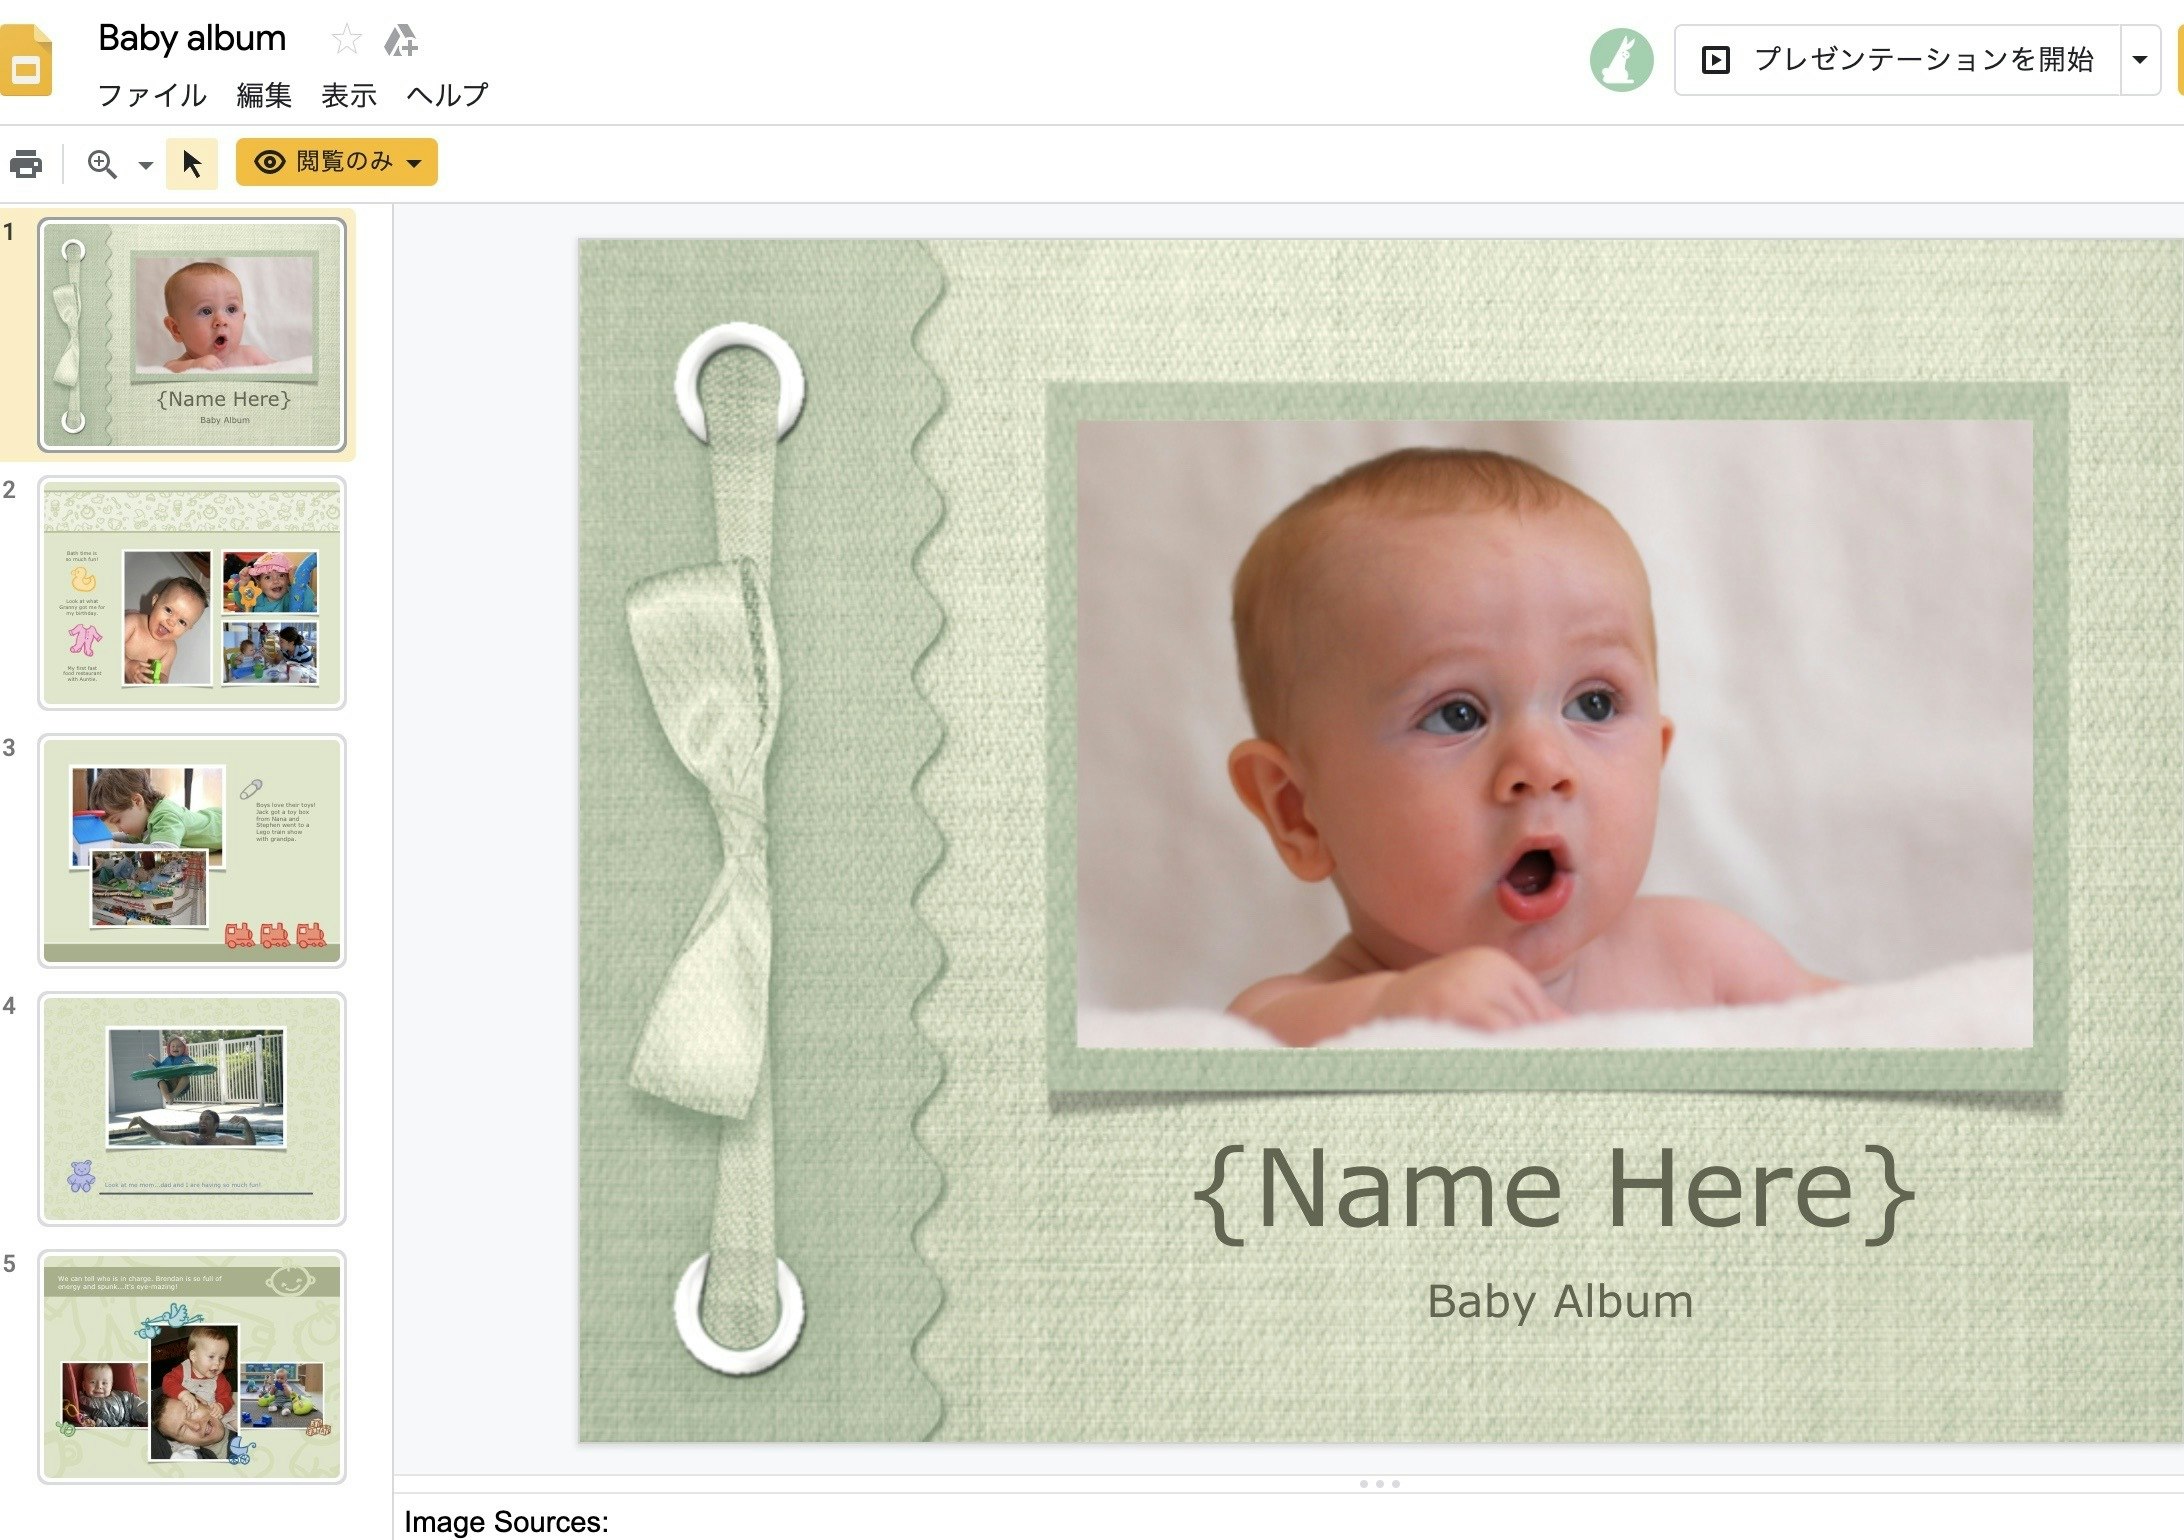
適当なスライドを用意する
こちらを用意してみました。
https://docs.google.com/presentation/d/1ziVnaFocZ_YF_cuXyXF5PUKGoE62eX-XlnOEslPkKUc/edit#slide=id.p
https://docs.google.com/presentation/d/<ここがプレゼンテーションID>/edit#slide=id.pになるのでこのスライドのプレゼンテーションIDは1ziVnaFocZ_YF_cuXyXF5PUKGoE62eX-XlnOEslPkKUcになります。Node.jsでGoogle Slidesのテキストを抽出
前回のコードからプレゼンテーションIDの箇所と
function listSlides(auth)の中身を書き換えてます。app.jsconst fs = require('fs'); const readline = require('readline'); const {google} = require('googleapis'); //変更箇所: プレゼンテーションID - 試すときは自分のスライドでもやってみましょう const presentationId = `1ziVnaFocZ_YF_cuXyXF5PUKGoE62eX-XlnOEslPkKUc`; // If modifying these scopes, delete token.json. const SCOPES = ['https://www.googleapis.com/auth/presentations.readonly']; // The file token.json stores the user's access and refresh tokens, and is // created automatically when the authorization flow completes for the first // time. const TOKEN_PATH = 'token.json'; // Load client secrets from a local file. fs.readFile('credentials.json', (err, content) => { if (err) return console.log('Error loading client secret file:', err); // Authorize a client with credentials, then call the Google Slides API. authorize(JSON.parse(content), listSlides); }); /** * Create an OAuth2 client with the given credentials, and then execute the * given callback function. * @param {Object} credentials The authorization client credentials. * @param {function} callback The callback to call with the authorized client. */ function authorize(credentials, callback) { const {client_secret, client_id, redirect_uris} = credentials.installed; const oAuth2Client = new google.auth.OAuth2( client_id, client_secret, redirect_uris[0]); // Check if we have previously stored a token. fs.readFile(TOKEN_PATH, (err, token) => { if (err) return getNewToken(oAuth2Client, callback); oAuth2Client.setCredentials(JSON.parse(token)); callback(oAuth2Client); }); } /** * Get and store new token after prompting for user authorization, and then * execute the given callback with the authorized OAuth2 client. * @param {google.auth.OAuth2} oAuth2Client The OAuth2 client to get token for. * @param {getEventsCallback} callback The callback for the authorized client. */ function getNewToken(oAuth2Client, callback) { const authUrl = oAuth2Client.generateAuthUrl({ access_type: 'offline', scope: SCOPES, }); console.log('Authorize this app by visiting this url:', authUrl); const rl = readline.createInterface({ input: process.stdin, output: process.stdout, }); rl.question('Enter the code from that page here: ', (code) => { rl.close(); oAuth2Client.getToken(code, (err, token) => { if (err) return console.error('Error retrieving access token', err); oAuth2Client.setCredentials(token); // Store the token to disk for later program executions fs.writeFile(TOKEN_PATH, JSON.stringify(token), (err) => { if (err) return console.error(err); console.log('Token stored to', TOKEN_PATH); }); callback(oAuth2Client); }); }); } /** * Prints the number of slides and elements in a sample presentation: * https://docs.google.com/presentation/d/1EAYk18WDjIG-zp_0vLm3CsfQh_i8eXc67Jo2O9C6Vuc/edit * @param {google.auth.OAuth2} auth The authenticated Google OAuth client. * */ function listSlides(auth) { const slides = google.slides({version: 'v1', auth}); slides.presentations.get({ presentationId: presentationId, }, (err, res) => { if (err) return console.log('The API returned an error: ' + err); /* 変更箇所: スライド中のテキストを抽出するテスト */ const firstPage = res.data.slides[0]; //1スライド目 const firstBox = firstPage.pageElements[0]; //最初の要素 console.log(firstBox.shape.text.textElements[1].textRun.content); //中身のテキスト確認 }); }素でアクセすると
res.data.slides[0].pageElements[0].shape.text.textElements[1].textRun.contentみたいな感じで超深い階層になるみたいです。
res.data.slides: スライドXXページごとの配列 今回はタイトルスライドから抜き出すので0指定firstPage.pageElements: 対象ページのオブジェクト(テキストボックスなど)の配列 今回はページの最初の部ジェクトなので0指定実行
$ node app.js
Node.jsてすと
ちゃんとテキストがとれましたね。
所感
返ってくるオブジェクトが結構複雑な印象です。
詳細はslides周りのSDKを覗くのが良さそうだけどどんなオブジェクトが返ってくるかはまだ見つけられてないのでconsole.logで探していったほうが早いかも
追記: 今回使ってる
presentations.getのAPIリファレンスはここっぽいhttps://developers.google.com/slides/reference/rest/v1/presentations/get
- 投稿日:2020-02-08T16:10:33+09:00
Node.jsでGoogle Slides APIを触ってみる
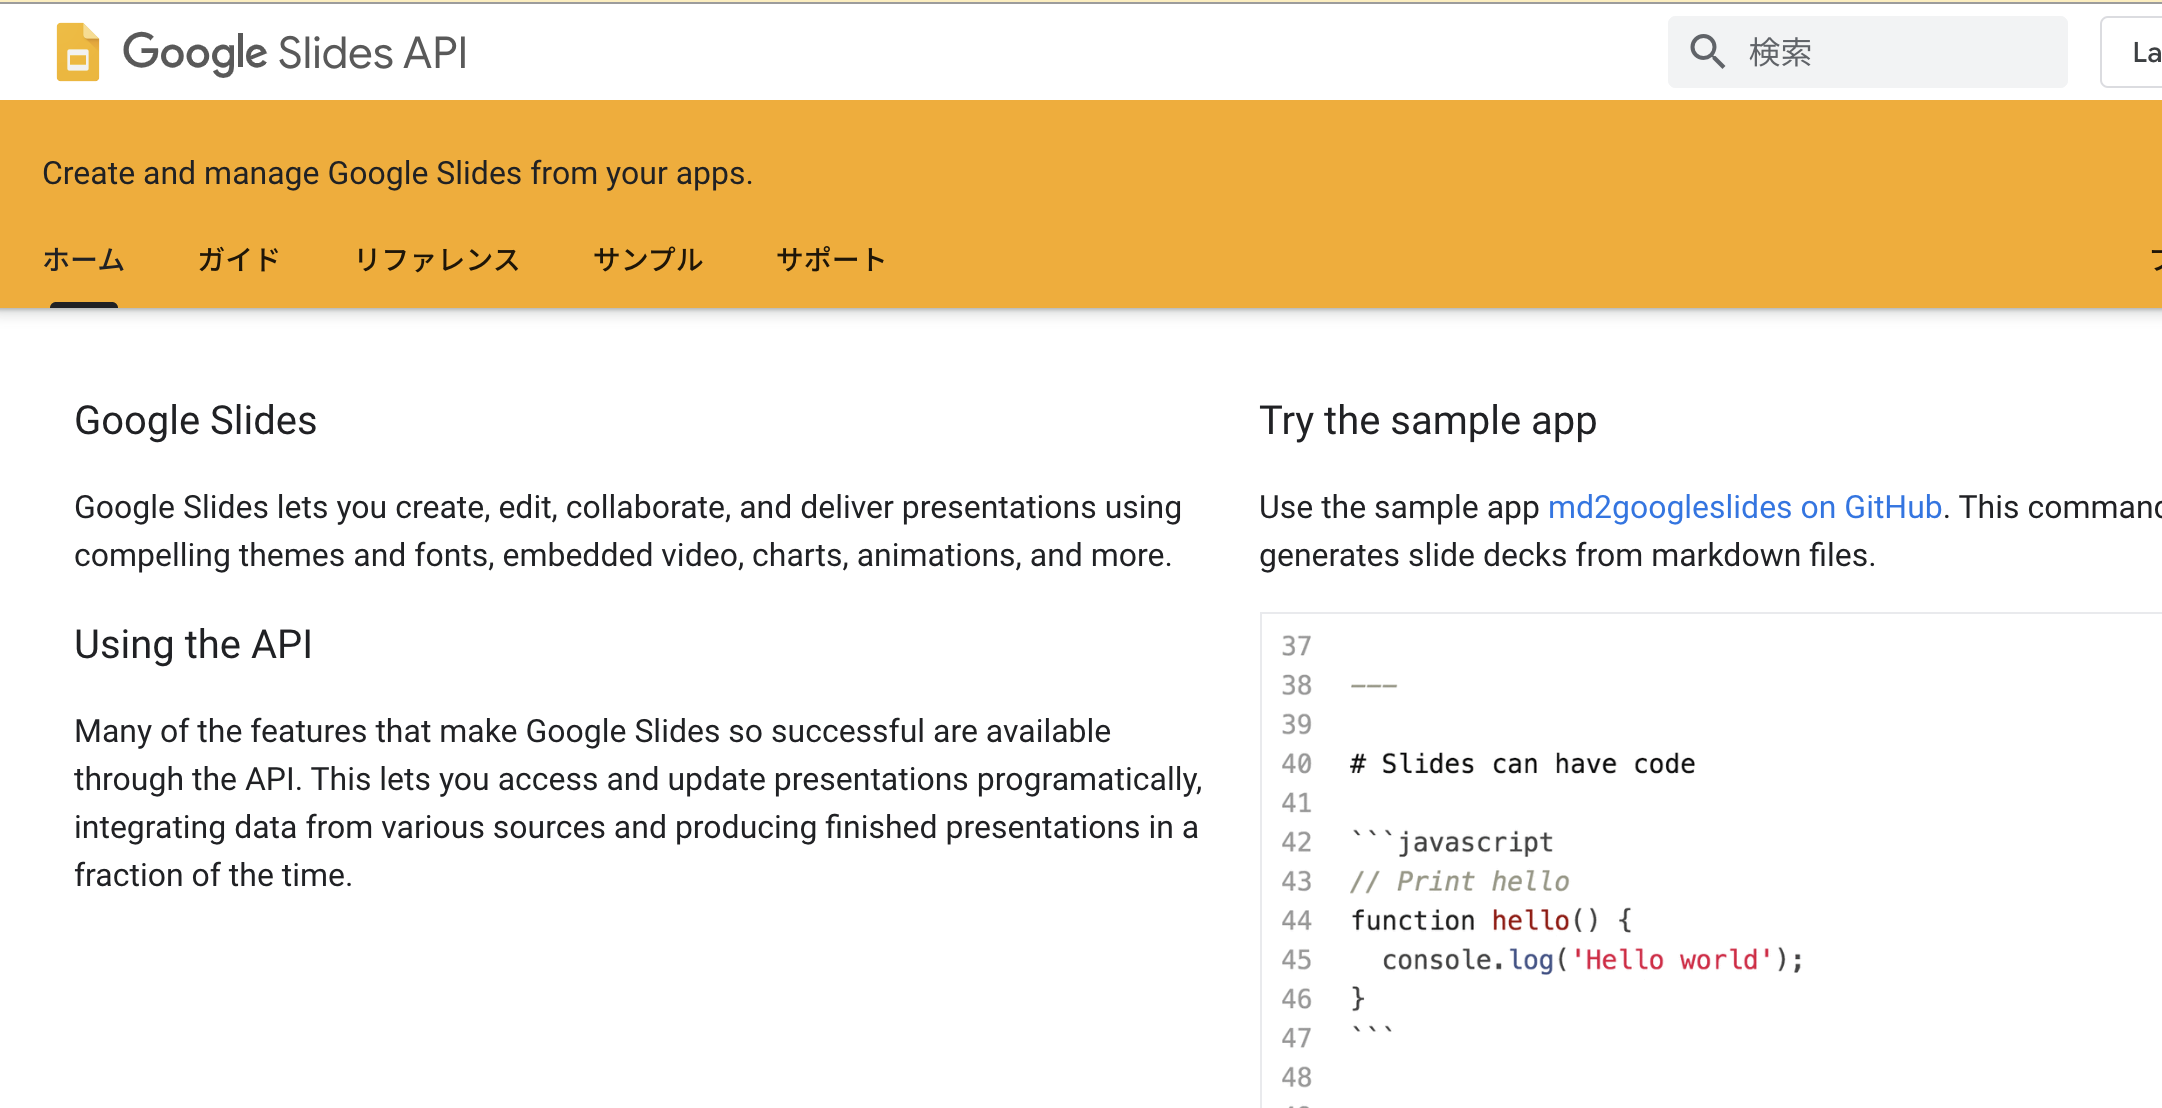
Google SlidesのAPIをNode.jsで触ってみます。
公式チュートリアルになぞりつつ試したメモ
です。準備
Node.jsのバージョンは13.7.0です。
- 作業フォルダ作成
$ mkdir slidesapitest
$ cd slidesapitest
- 利用モジュールをインストール
$ npm init -y
$ npm i googleapis@39
app.jsファイルを作成$ touch app.jsAPIをオンにして、
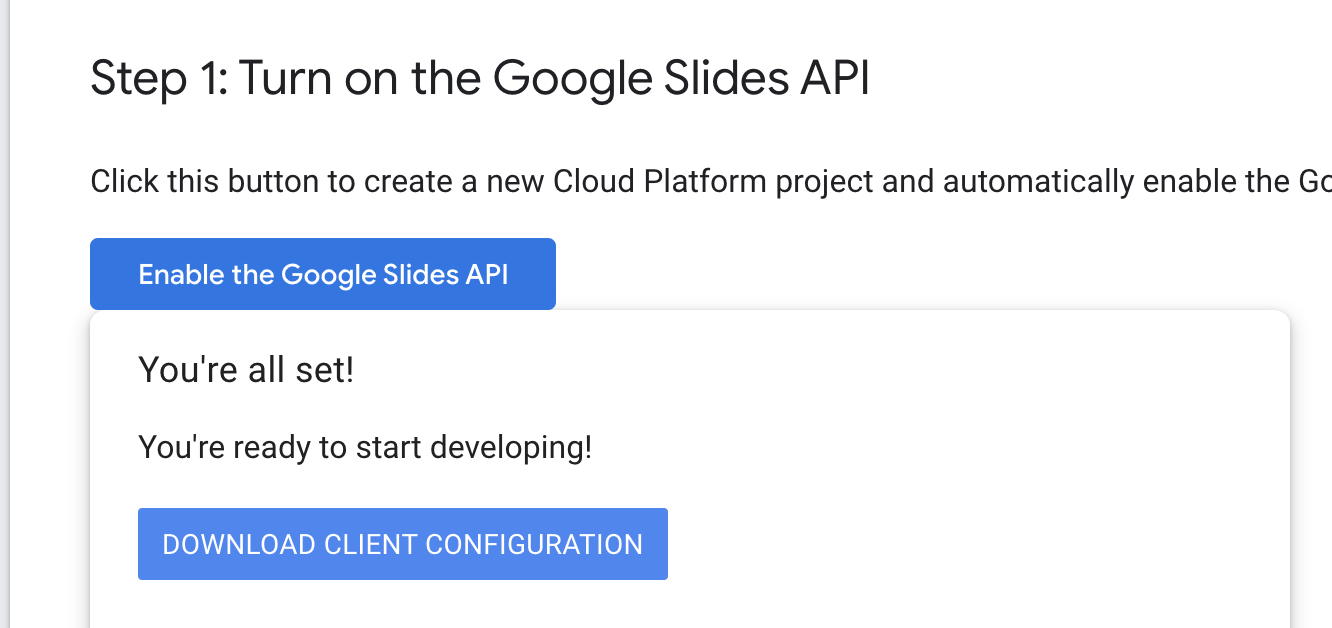
credentials.jsonを作成公式チュートリアルの
Enable the Google Slides APIボタンを押して、APIを有効にし、credentials.jsonを作業フォルダのapp.jsと同じ階層に保存します。
ソースコード
app.jsの中身に以下をコピペ。 公式のままです。
app.jsconst fs = require('fs'); const readline = require('readline'); const {google} = require('googleapis'); // If modifying these scopes, delete token.json. const SCOPES = ['https://www.googleapis.com/auth/presentations.readonly']; // The file token.json stores the user's access and refresh tokens, and is // created automatically when the authorization flow completes for the first // time. const TOKEN_PATH = 'token.json'; // Load client secrets from a local file. fs.readFile('credentials.json', (err, content) => { if (err) return console.log('Error loading client secret file:', err); // Authorize a client with credentials, then call the Google Slides API. authorize(JSON.parse(content), listSlides); }); /** * Create an OAuth2 client with the given credentials, and then execute the * given callback function. * @param {Object} credentials The authorization client credentials. * @param {function} callback The callback to call with the authorized client. */ function authorize(credentials, callback) { const {client_secret, client_id, redirect_uris} = credentials.installed; const oAuth2Client = new google.auth.OAuth2( client_id, client_secret, redirect_uris[0]); // Check if we have previously stored a token. fs.readFile(TOKEN_PATH, (err, token) => { if (err) return getNewToken(oAuth2Client, callback); oAuth2Client.setCredentials(JSON.parse(token)); callback(oAuth2Client); }); } /** * Get and store new token after prompting for user authorization, and then * execute the given callback with the authorized OAuth2 client. * @param {google.auth.OAuth2} oAuth2Client The OAuth2 client to get token for. * @param {getEventsCallback} callback The callback for the authorized client. */ function getNewToken(oAuth2Client, callback) { const authUrl = oAuth2Client.generateAuthUrl({ access_type: 'offline', scope: SCOPES, }); console.log('Authorize this app by visiting this url:', authUrl); const rl = readline.createInterface({ input: process.stdin, output: process.stdout, }); rl.question('Enter the code from that page here: ', (code) => { rl.close(); oAuth2Client.getToken(code, (err, token) => { if (err) return console.error('Error retrieving access token', err); oAuth2Client.setCredentials(token); // Store the token to disk for later program executions fs.writeFile(TOKEN_PATH, JSON.stringify(token), (err) => { if (err) return console.error(err); console.log('Token stored to', TOKEN_PATH); }); callback(oAuth2Client); }); }); } /** * Prints the number of slides and elements in a sample presentation: * https://docs.google.com/presentation/d/1EAYk18WDjIG-zp_0vLm3CsfQh_i8eXc67Jo2O9C6Vuc/edit * @param {google.auth.OAuth2} auth The authenticated Google OAuth client. */ function listSlides(auth) { const slides = google.slides({version: 'v1', auth}); slides.presentations.get({ presentationId: '1EAYk18WDjIG-zp_0vLm3CsfQh_i8eXc67Jo2O9C6Vuc', }, (err, res) => { if (err) return console.log('The API returned an error: ' + err); const length = res.data.slides.length; console.log('The presentation contains %s slides:', length); res.data.slides.map((slide, i) => { console.log(`- Slide #${i + 1} contains ${slide.pageElements.length} elements.`); }); }); }アクセストークンの発行
app.jsを実行します。
$ node app.js実行すると、こんな感じのURLが表示されます。
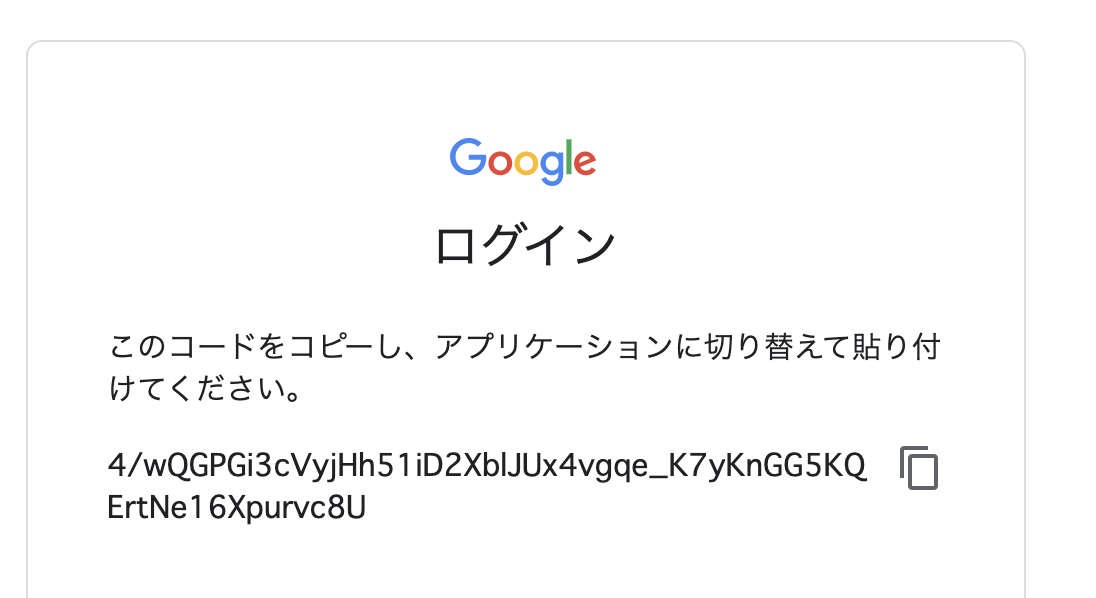
Authorize this app by visiting this url: https://accounts.google.com/o/oauth2/v2/auth?access_type=offline&scope=https%3A%2F%2Fwww.googleapis.com%2Fauth%2Fpresentations.readonly&response_type=code&client_id=xxxxxxxxxxxx.apps.googleusercontent.com&redirect_uri=urn%3Aietf%3Awg%3Aoauth%3A2.0%3Aoob
Enter the code from that page here: <ここにコードをペースト>
クリックするとブラウザ上で以下のようなコードが表示されるのでコピーします。
Enter the code from that page here: <ここにコードをペースト>の箇所にペーストします。成功すると
token.jsonというファイルが保存されて、以下のように元になってるスライドの情報が表示されます。Token stored to token.json The presentation contains 5 slides: - Slide #1 contains 4 elements. - Slide #2 contains 11 elements. - Slide #3 contains 9 elements. - Slide #4 contains 5 elements. - Slide #5 contains 12 elements.ソースコードの挙動など
ソースコード上で以下のような箇所がありますが、このプレゼンテーションIDでGoogle Slidesのプレゼンを指定します。
app.js//省略 slides.presentations.get({ presentationId: '1EAYk18WDjIG-zp_0vLm3CsfQh_i8eXc67Jo2O9C6Vuc', } //省略
先ほど、app.jsを実行した時の表示はスライドの枚数と要素数を表示しています。
The presentation contains 5 slides:
- Slide #1 contains 4 elements.
- Slide #2 contains 11 elements.
- Slide #3 contains 9 elements.
- Slide #4 contains 5 elements.
- Slide #5 contains 12 elements.
所感
取り急ぎ、触ることが出来ました。
思ったより簡単です。
JSONをもっと深ぼっていくとテキスト情報も取れそうですね。
次回やってみます。
- 投稿日:2020-02-08T15:49:26+09:00
Node.js - MySQL「Error: Cannot enqueue Query after invoking quit.」の対処(Connection pool)
はじめに
本記事はデータベースにおける
コネクションプール(Connection pool)について触れていくものです。実際にハマったシチュエーションをもとに説明していきたいと思います。
- 事象の詳細
- 原因
- 状況を再現してみる
- 適切な対処方法
- コネクションプールの実装
事象の詳細
Node.jsにて、MySQLからデータを取得しようとしたとき、以下のエラーが発生した。
Error: Cannot enqueue Query after invoking quit.どうやら2回目の
GET:/api/todoを呼び出した時に必ず発生するようです。
その時のソースコードは以下です。const express = require("express"); const mysql = require("mysql"); const app = express(); // データベースへのコネクションを生成 const connection = mysql.createConnection({ // DB接続に関するオプション設定 }); connection.connect(); app.get("/api/todo", (req, res) => { const query = "SELECT * FROM todo;"; connection.query(query, (err, rows) => { if (err) console.log("err: ", err); res.json(rows); }); connection.end(); }); // サーバー起動 app.listen(8081, () => console.log("Example app listening on port 8081!"));原因
コネクションは再利用できない。
変数
connectionに対して、end()を呼び出し、丁寧に接続を切っています。
そこで再度connection()を呼び出せばまた接続できるのでは?という発想でした。状況を再現してみる
実装した処理
同一のコネクションに対して、複数回接続を行う処理を作成してみました。
const mysql = require("mysql");

const connection = mysql.createConnection({
  // DB接続に関するオプション設定
});

for (let index = 0; index < 2; index++) {
  connection.connect();

  const query = connection.query("SELECT * FROM todo;");
  query.on("result", (row, index) => {
    console.log("--- result ---");
    console.log(row);
    console.log(index);
  });

  connection.end();
}
処理結果
nodeコマンドを使って、この処理を実行すると、以下のようなエラーになります。
Error: Cannot enqueue Handshake after invoking quit.一度使ったんだから、ちゃんと破棄してくれってことですね。
適切な対処方法
何度もアクセス要求ができる接続窓口を作ってあげる。
実際のWebアプリケーションでは、同一のデータベースに対して何度も接続する処理が行われます。
規模にもよりますが、多人数で利用することを考えると、その数は膨大なものになります。よって、以下の観点からコネクション確立処理は極力減らしたほうが良いです。
- 本処理自体が
オーバーヘッド(overhead)である- コネクション確立には時間がかかるため、ユーザーを都度待たせてしまう
- コネクションの数だけDB側でメモリを確保する必要があるため、高負荷状態になりやすい
それらを実現するのが
コネクションプール(Connection pool)です。
- コネクションの状態を保持し、そのコネクションを使いまわすことができる
- コネクション数に上限を設けることができる
コネクションプールの実装
MySQL - Pooling connections を参考に、コネクションプールを作成し、複数回のデータベース接続処理を行ってみます。
使用する関数は
createPool()です。
実行するクエリが一つの場合、以下のような書き方でOKです。const mysql = require("mysql"); const pool = mysql.createPool({ // DB接続に関するオプション設定 }); pool.query("SELECT * FROM todo;", (error, results) => { if (error) throw error; console.log(results[0]); });プールが持つ
query関数はpool.getConnection()、connection.query()、connection.release()を省略してくれます。複数回のクエリ実行を行いたい場合などは以下です。
pool.getConnection((err, connection) => {
  if (err) throw err;

  connection.query("SELECT something FROM sometable", (error, results) => {
    connection.release();

    if (error) throw error;

    console.log(results[0])
  });
});
おわり
データベースに関する基礎的な知識が不足していたせいで、こんなところでハマってしまいました。
基礎的な部分を固めることができたと思うので、次の課題に取り組んでいきたいと思います。あと、ライブラリのドキュメントに書いてあるとおりに実装していくと、コールバック地獄に陥りそうですね。
async/awaitなどを使ってもっとスマートに実装していきたいです。
- 投稿日:2020-02-08T15:49:26+09:00
Node.js - Mysql「Error: Cannot enqueue Query after invoking quit.」の対処(Connection pool)
はじめに
本記事はデータベースにおける
コネクションプール(connection pool)について触れていくものです。実際にハマったシチュエーションをもとに説明していきたいと思います。
- 事象の詳細
- 原因
- 状況を再現してみる
- 適切な対処方法
- コネクションプールの実装
事象の詳細
Node.jsにて、Mysqlからデータを取得しようとしたとき、以下のエラーが発生した。
Error: Cannot enqueue Query after invoking quit.どうやら2回目の
GET:/api/todoを呼び出した時に必ず発生するようです。
その時のソースコードは以下です。const express = require("express"); const mysql = require("mysql"); const app = express(); // データベースへのコネクションを生成 const connection = mysql.createConnection({ // DB接続に関するオプション設定 }); connection.connect(); app.get("/api/todo", (req, res) => { const query = "SELECT * FROM todo;"; connection.query(query, (err, rows) => { if (err) console.log("err: ", err); res.json(rows); }); connection.end(); }); // サーバー起動 app.listen(8081, () => console.log("Example app listening on port 8081!"));原因
コネクションは再利用できない。
変数
connectionに対して、end()を呼び出し、丁寧に接続を切っています。
そこで再度connection()を呼び出せばまた接続できるのでは?という発想でした。状況を再現してみる
実装した処理
同一のコネクションに対して、複数回接続を行う処理を作成してみました。
const mysql = require("mysql");

const connection = mysql.createConnection({
  // DB接続に関するオプション設定
});

for (let index = 0; index < 2; index++) {
  connection.connect();

  const query = connection.query("SELECT * FROM todo;");
  query.on("result", (row, index) => {
    console.log("--- result ---");
    console.log(row);
    console.log(index);
  });

  connection.end();
}
処理結果
nodeコマンドを使って、この処理を実行すると、以下のようなエラーになります。
Error: Cannot enqueue Handshake after invoking quit.一度使ったんだから、ちゃんと破棄してくれってことですね。
適切な対処方法
何度もアクセス要求ができる接続窓口を作ってあげる。
実際のWebアプリケーションでは、同一のデータベースに対して何度も接続する処理が行われます。
規模にもよりますが、多人数で利用することを考えると、その数は膨大なものになります。よって、以下の観点からコネクション確立処理は極力減らしたほうが良いです。
- 本処理自体が
オーバーヘッド(overhead)である- コネクション確立には時間がかかるため、ユーザーを都度待たせてしまう
- コネクションの数だけDB側でメモリを確保する必要があるため、高負荷状態になりやすい
それらを実現するのが
コネクションプール(connection pool)です。
- コネクションの状態を保持し、そのコネクションを使いまわすことができる
- コネクション数に上限を設けることができる
コネクションプールの実装
mysql - Pooling connections を参考に、コネクションプールを作成し、複数回のデータベース接続処理を行ってみます。
使用する関数は
createPool()です。
実行するクエリが一つの場合、以下のような書き方でOKです。const mysql = require("mysql"); const pool = mysql.createPool({ // DB接続に関するオプション設定 }); pool.query("SELECT * FROM todo;", (error, results) => { if (error) throw error; console.log(results[0]); });プールが持つ
query関数はpool.getConnection()、connection.query()、connection.release()を省略してくれます。複数回のクエリ実行を行いたい場合などは以下です。
pool.getConnection((err, connection) => {
  if (err) throw err;

  connection.query("SELECT something FROM sometable", (error, results) => {
    connection.release();

    if (error) throw error;

    console.log(results[0])
  });
});
おわり
データベースに関する基礎的な知識が不足していたせいで、こんなところでハマってしまいました。
基礎的な部分を固めることができたと思うので、次の課題に取り組んでいきたいと思います。あと、
mysqlライブラリのドキュメントに書いてあるとおりに実装していくと、コールバック地獄に陥りそうですね。
async/awaitなどを使ってもっとスマートに実装していきたいです。
- 投稿日:2020-02-08T15:45:02+09:00
nodeコマンド(non-blockngとblockingについてメモ)
コマンドライン上で操作
node.jsではブラウザなどを使用せずにコマンドライン上で操作ができる
# コマンドライン上での操作開始を宣言
$ node

# この状態で処理を書くと実行される
> console.log('hello world')  # 出力結果: hello world

# 終了する
> .exit
jsファイルから実行
jsファイル
sample.jsを作成し、処理を実行させる# コマンドライン上でjsファイルの処理開始を宣言 $ node sample.jsnon-blockngとblockingな書き方
- nodeはメインのスレッドが1つであるため、処理がブロックされるような書き方はnodeの処理の速さの特徴を殺してしまうためやめるべきである
- setTimeoutなどのタイマー処理やデータベースへのアクセス、ファイルの書き込みといった命令は処理に時間を要するため、次の命令をブロックしないように書く必要がある
そこで、non-blockingな書き方を採用し、時間がかかりそうな関数はcallback関数で実装することが望ましい
non-blockingな書き方
次の処理をブロックしない書き方のこと
setTimeout(function() {
  console.log('hello');
}, 1000);
conosole.log('world')
setTimeout内の関数をcallback関数という
setTimeoutの内の処理を待たずに次の処理が実行されるblockingな書き方
var start = new Data().getTime();
while (new Data().getTime() < start + 1000);
console.log('world');
- 投稿日:2020-02-08T03:49:59+09:00
gitignoreで指定したディレクトリが読み込まれない
現象
node_modulesディレクトリはリモートリポジトリへpushしなくてよいので、プロジェクトの最上層ディレクトリに.gitignoreを作成し、
.gitignorenode_modules/を記載。しかし、
git add *するとあらゆるnode_modules/内のファイルがステージされてしまう。ポイント
.gitignoreは、
「ファイル名」で指定すると配下のフォルダすべてから同名のファイルをすべて該当させるが、
「ディレクトリ名」の場合は現在位置からの相対パスの記載が必要になる。原因と対処
.gitignore設置ディレクトリからみたnode_modulesディレクトリの位置が
./project/app1/node_modules/となっていたため、
.gitignore/project/app1/node_modules/のように記載。