- 投稿日:2020-01-23T22:50:38+09:00
Unity3D/C#で簡単なリバーシ(オセロ)を作る!!~Part1~
Unity学習歴1ヶ月、そろそろ教本を手放して簡単なゲームを作ろうと思い、いろいろなものを参考にしながら挑戦してみました。
盤と石を作成し、ゲーム開始時に所定の位置に石を置くところまでが本Part内容です。初投稿ですが、極力わかりやすい文になるよう努めます。
環境
・Macbook air
・Unity2019.2.17盤と石を生成
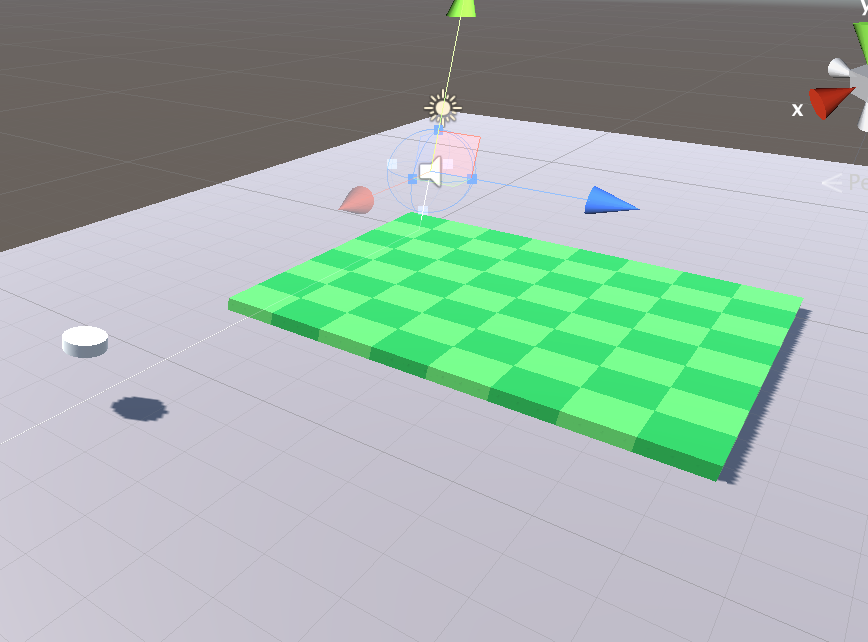
・盤はCubeを座標(0,0.5,0)を起点に置き、xとzを1ずつ足して合計8×8個置きます。
・石はcylinderを2つ引っ付けたオブジェクトを1つ作り、盤に乗るようにCupsule Colliderを調節、座標をGame画面外に設定します。(PrefabにしてHiererchyから消すとなぜか後の処理で詰まりました)
石の色をスクリプトで管理
    [SerializeField] Material material = null;

    Material topMaterial = null;
    Material backMaterial = null;

    [SerializeField] MeshRenderer topCylinder = null;
    [SerializeField] MeshRenderer backCylinder = null;
    public void SetState(StageManager.eStoneState state){
        bool isActive = (state != StageManager.eStoneState.EMPTY);
        {
            topCylinder.gameObject.SetActive(isActive);
            backCylinder.gameObject.SetActive(isActive);
        }
        SetColor(state == StageManager.eStoneState.WHITE);

    }
    public void SetColor(bool isWHITE)
    {
        if (topMaterial == null)
        {
            topMaterial = GameObject.Instantiate<Material>(material);
            backMaterial = GameObject.Instantiate<Material>(material);
            topCylinder.material = topMaterial;
            backCylinder.material = backMaterial;
        }
        topMaterial.color = isWHITE ? Color.white : Color.black;
        backMaterial.color = isWHITE ? Color.black : Color.white;
    }
スクリプトに適当な名前を付け(今回は"StoneManager")、上記のコードで石の色を管理します。
UnityのInspectorから"material","topCylinder","backCylinder"に先ほど作成した石のmaterialと、引っ付けてあった2つのcylinderを別々に貼り付けます。
7行目の"StageManager"は後述するスクリプトのクラス名なのでスルーしてください。
topMaterial.color = isWHITE ? Color.white : Color.black;

    backMaterial.color = isWHITE ? Color.black : Color.white;
上の2行で、石の上が黒(白)のときに下が白(黒)になるように設定しています。最初の石を生成
    public enum eStoneState//石の状態
    {
        EMPTY,//石が空
        WHITE,//石の上が白
        BLACK//石の上が黒
    };
    public GameObject firstStone;//置いた石
    private GameObject[,] firstStoneState = new GameObject[squareZ, squareX];//置いた石の座標
    private StoneManager[,] stoneManagers = new StoneManager[squareZ, squareX];//石のシリンダーとマテリアルの状態
    private eStoneState[,] stoneState = new eStoneState[squareZ, squareX];//石が空か白か黒か

    public Camera mainCamera;//カメラ取得用変数
    const int squareX = 8;//盤上のx(横)座標
    const int squareZ = 8;//盤上のz(縦)座標
    public int whiteScore;//白の枚数
    public int blackScore;//黒の枚数

    void Start()
    {
        mainCamera = GameObject.Find("Main Camera").GetComponent<Camera>();
        for (int i = 0; i < squareZ; i++)
        {
            for (int j = 0; j < squareX; j++)
            {
                // 石を64枚EMPTYで生成
                GameObject stone = GameObject.Instantiate<GameObject>(firstStone);
                StoneManager stoneManager = stone.GetComponent<StoneManager>();

                stone.transform.position = new Vector3(j, 1, i);
                firstStoneState[i, j] = stone;
                stoneManagers[i, j] = stoneManager;
                stoneState[i, j] = eStoneState.EMPTY;
            }
                stoneState[3, 3] = eStoneState.WHITE;
                stoneState[3, 4] = eStoneState.BLACK;
                stoneState[4, 3] = eStoneState.BLACK;
                stoneState[4, 4] = eStoneState.WHITE;
        }
        whiteScore = 2;
        blackScore = 2;
    }
新しくスクリプトを作成し(今回は"StageManager")、上記のコードを記述します。
startで繰り返し文を使い、各マスに石を置き、"StoneManager"の"SetState"で"SetActive()"をコントロールし、最初に置いておきたい石には予め"eStoneState"を"BLACK"か"WHITE"にしておくよう記述しておけば、ゲーム開始時に下記の画像のように石が配置されます。
Part2ではタップして石を置く処理とひっくり返す処理について記述します。

- 投稿日:2020-01-23T18:16:39+09:00
OpenCV plus Unityで画像とwebカメラの映像の二値化まで
概要
windows formアプリケーションから画像処理の環境をUnityへお引っ越し作業をした時に,ところどころ苦労したのでその手順を共有
画像処理といっても様々な方法がありますが,私は今回OpenCvSharpを使っていたのでその方向で
調べたところ先人の知恵を利用した簡単な方法として,UnityでNugetの拡張パッケージを使用してOpenCvSharp3や4をインポートする方法と,OpenCv plus Unity(for Unityはコスト面から今回は除外)というアセットをストアからダウンロードする方法が挙げられます今回は後者のやり方を紹介します
環境
windows10
Visual Studio 2019
Unity 2019.2.8f1(64-bit)実装
3D空間でプロジェクトを作成
OpenCV plus Unityのインポート
1.UnityのAsset Store内のSearch for assetsにopencv plus unityと入力してパッケージをインポートしてください
2.ライブラリ使用の許可をする
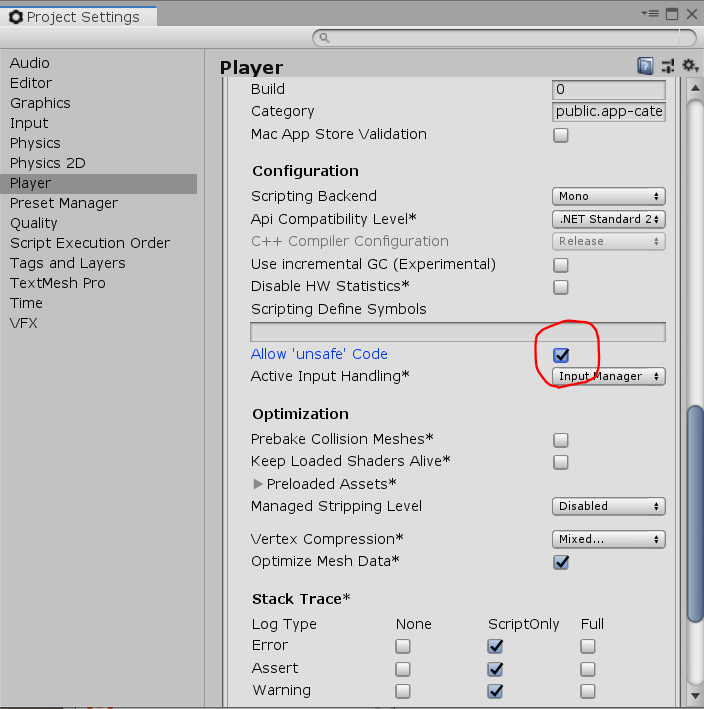
インポートをするとこれでもかとunsafe,unsafeと言ってくるので直します
「Edit」→「Project Settings」の中のOther Settings内の「Arrow 'unsafe' Code」チェックボックスにチェックを入れます
エラーがなくなるはずです
Webカメラの映像を出力する
1.Hierarchyタブから「Create」→「UI」→「rawimage」と選択しSceneに追加
2.スクリプトを追加
以下のスクリプトを作成し,rawimageにアタッチWebCamController.csnamespace OpenCvSharp { using System.Collections; using System.Collections.Generic; using UnityEngine; using UnityEngine.UI; public class WebCamController : MonoBehaviour { int width = 1920; int height = 1080; int fps = 30; Texture2D cap_tex; Texture2D out_tex; WebCamTexture webcamTexture; Color32[] colors = null; IEnumerator Init() { while (true) { if (webcamTexture.width > 16 && webcamTexture.height > 16) { colors = new Color32[webcamTexture.width * webcamTexture.height]; cap_tex = new Texture2D(webcamTexture.width, webcamTexture.height, TextureFormat.RGBA32, false); //GetComponent<Renderer>().material.mainTexture = texture; break; } yield return null; } } void Start() { WebCamDevice[] devices = WebCamTexture.devices; webcamTexture = new WebCamTexture(devices[0].name, this.width, this.height, this.fps); webcamTexture.Play(); StartCoroutine(Init()); } void Update() { if (colors != null) { webcamTexture.GetPixels32(colors); int width = webcamTexture.width; int height = webcamTexture.height; Color32 rc = new Color32(0, 0, 0, byte.MaxValue); for (int x = 0; x < width; x++) { for (int y = 0; y < height; y++) { Color32 c = colors[x + y * width]; byte gray = (byte)(0.1f * c.r + 0.7f * c.g + 0.2f * c.b); rc.r = rc.g = rc.b = gray; colors[x + y * width] = rc; } } cap_tex.SetPixels32(this.colors); cap_tex.Apply(); } GetComponent<RawImage>().texture = cap_tex; } } }3.rawimageのInspectorからWidthとHeightを1920と1080にして実行
ここで,画像がひっくり返ってるのであればxのスケールを-1にしたりして調整してください二値化
ここからやっとopencv
webカメラの映像を二値化する
1.さっき作ったスクリプトに二値化する関数を追加します
WebCamController.csTexture2D To_Mono(Texture2D tex) { //matの定義 Mat mat; //textureをmatに変換 mat = Unity.TextureToMat(tex); //画像をグレスケに変換 Mat matGray = mat.CvtColor(ColorConversionCodes.BGR2GRAY); //画像を2値化 Mat matMono = matGray.Threshold(100, 255, ThresholdTypes.Otsu); //2値化画像を白黒反転 Cv2.BitwiseNot(matMono, matMono); //matMonoをtexture2Dに変換 tex = Unity.MatToTexture(matMono); return tex; }3.Update内のrawimageにレンダリングするところのコードを以下に変更
WebCamController.csout_tex = To_Mono(cap_tex); GetComponent<RawImage>().texture = out_tex;うまくいっていればモノクロの世界にいざなわれます
画像を二値化する
1.publicでtexture2Dを定義する
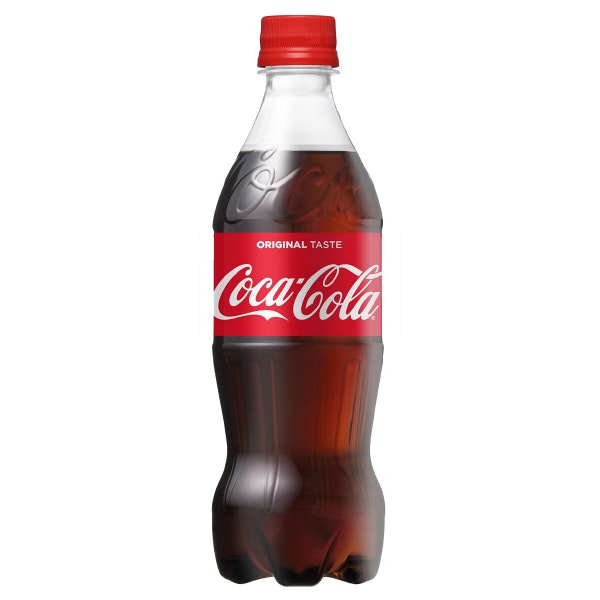
public Texture2D imj_tex;//入力画像2.今回使用する画像↓
これをProjectタブのAssetsにD&Dして追加する
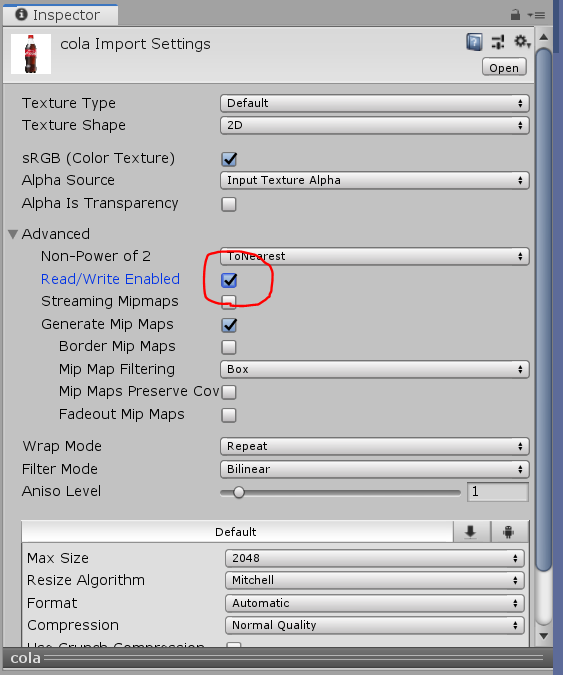
ここで,写真をスクリプト内で編集するためにRead/Write Enabledにチェックする
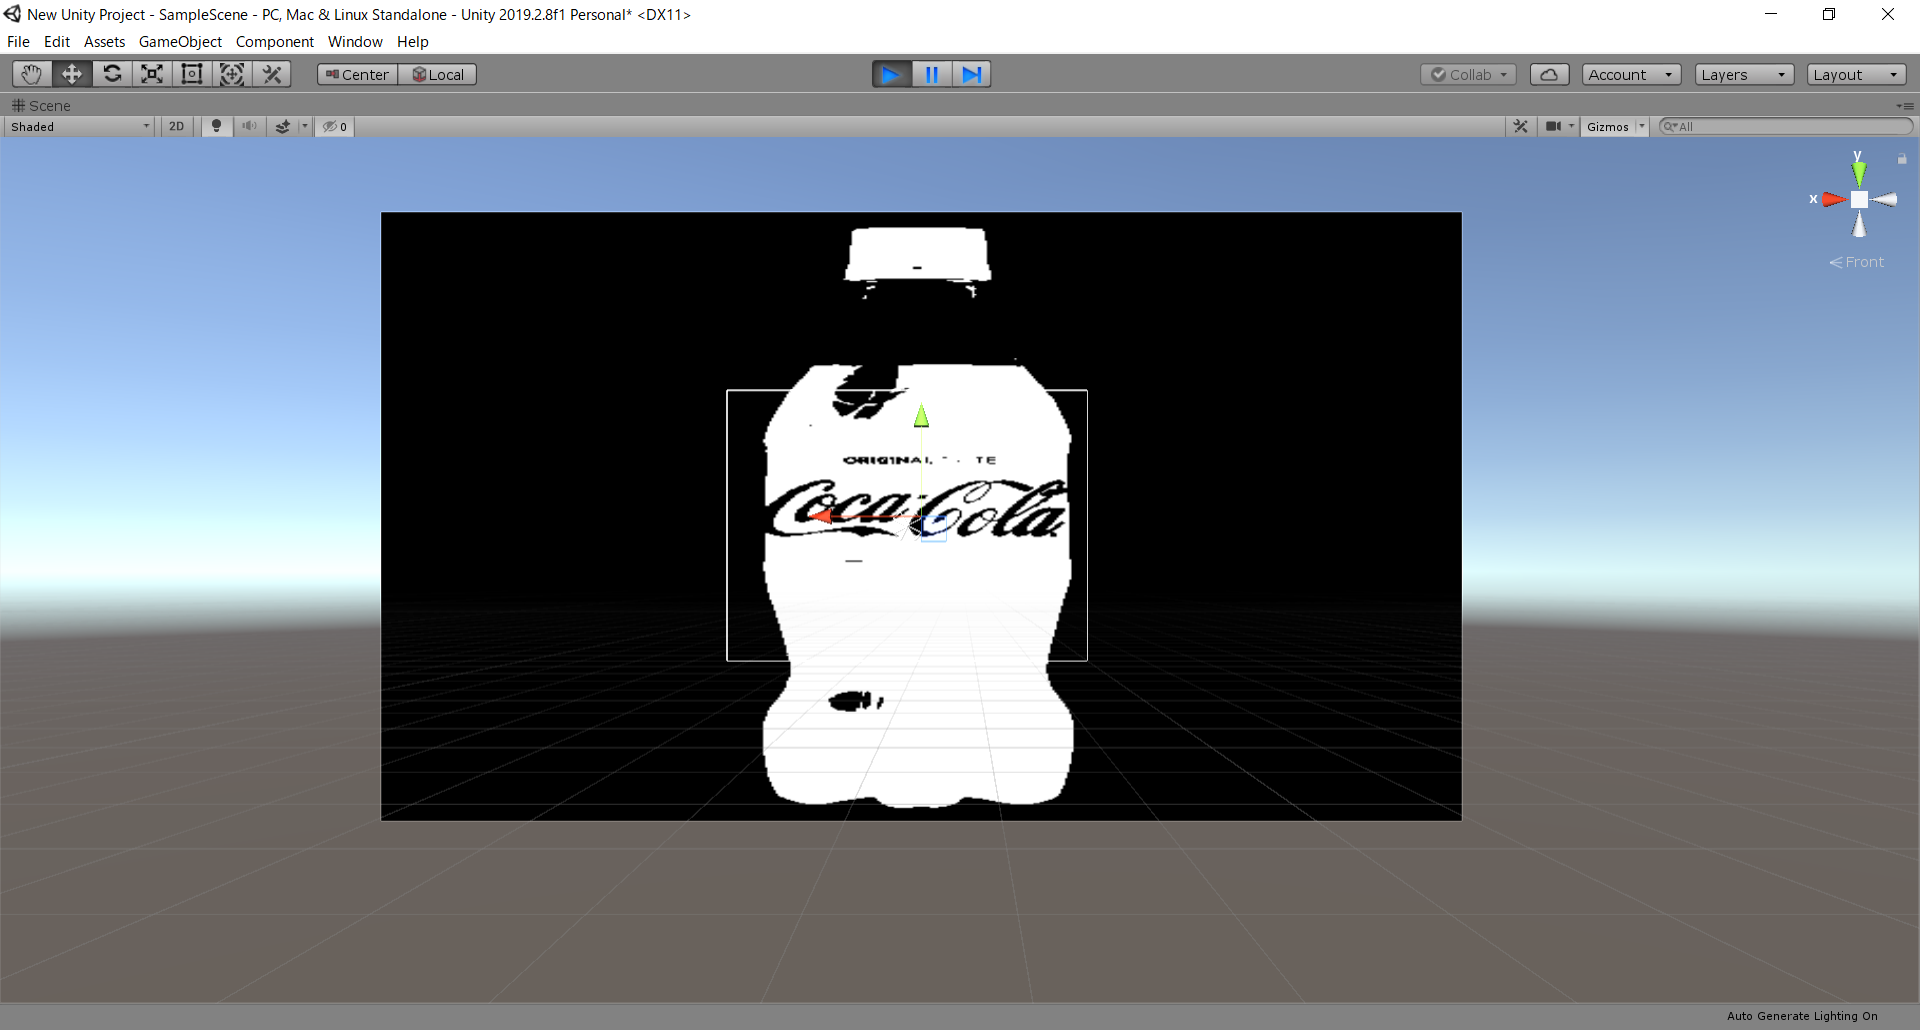
3.WebCamControllerのimj_texにcola.jpgをアタッチして,To_Monoの引数をcap_texからimj_texにすると白黒のコーラができます実行結果
太っちょコーラ
参考URL
webカメラの映像出力
http://nn-hokuson.hatenablog.com/entry/2017/08/09/192813
画像処理参考コード
https://github.com/yoyoyo-yo/Gasyori100knock
- 投稿日:2020-01-23T16:11:47+09:00
unityでシーン間のフェードインフェードアウトを行う
初めに
このプログラムはTama-Labさんの記事を参考にして作りました、
>Unityでフェードイン/フェードアウトを実装する方法
完成した物のイメージ画像がこちらになります
以下gifあり
完成したスクリプトがこちらになりますプログラム文
SceneFadeManager.csusing System.Collections; using System.Collections.Generic; using UnityEngine; using UnityEngine.UI; using UnityEngine.SceneManagement; public class SceneFadeManager : MonoBehaviour { //フェードアウト処理の開始、完了を管理するフラグ private bool isFadeOut = false; //フェードイン処理の開始、完了を管理するフラグ private bool isFadeIn = true; //透明度が変わるスピード float fadeSpeed = 0.75f; //画面をフェードさせるための画像をパブリックで取得 public Image fadeImage; float red, green, blue, alfa; //シーン遷移のための型 string afterScene; // Start is called before the first frame update void Start() { DontDestroyOnLoad(this); SetRGBA(0, 0, 0, 1); //シーン遷移が完了した際にフェードインを開始するように設定 SceneManager.sceneLoaded += fadeInStart; } //シーン遷移が完了した際にフェードインを開始するように設定 void fadeInStart(Scene scene,LoadSceneMode mode) { isFadeIn = true; } /// <summary> /// フェードアウト開始時の画像のRGBA値と次のシーン名を指定 /// </summary> /// <param name="red">画像の赤成分</param> /// <param name="green">画像の緑成分</param> /// <param name="blue">画像の青成分</param> /// <param name="alfa">画像の透明度</param> /// <param name="nextScene">遷移先のシーン名</param> public void fadeOutStart(int red,int green,int blue,int alfa,string nextScene) { SetRGBA(red, green, blue, alfa); SetColor(); isFadeOut = true; afterScene = nextScene; } // Update is called once per frame void Update() { if (isFadeIn == true) { //不透明度を徐々に下げる alfa -= fadeSpeed * Time.deltaTime; //変更した透明度を画像に反映させる関数を呼ぶ SetColor(); if (alfa <= 0) isFadeIn = false; } if (isFadeOut == true) { //不透明度を徐々に上げる alfa += fadeSpeed * Time.deltaTime; //変更した透明度を画像に反映させる関数を呼ぶ SetColor(); if (alfa >= 1) { isFadeOut = false; SceneManager.LoadScene(afterScene); } } } //画像に色を代入する関数 void SetColor() { fadeImage.color = new Color(red, green, blue, alfa); } //色の値を設定するための関数 public void SetRGBA(int r, int g, int b, int a) { red = r; green = g; blue = b; alfa = a; } }注意
作成したイメージをSceneFadeManagerをアタッチしたオブジェクトの子要素に設定しないと、ロード先のシーンで画像が見つからないので、エラーが発生してしまいます。
ただこのプログラム単体ではシーン遷移することが出来ないので、別プログラムから呼び出す必要があります。
呼び出し例
SceneChange.csusing System.Collections; using System.Collections.Generic; using UnityEngine; public class SceneChange : MonoBehaviour { GameObject ManageObject; SceneFadeManager fadeManager; // Start is called before the first frame update void Start() { //SceneFadeManagerがアタッチされているオブジェクトを取得 ManageObject = GameObject.Find("ManageObject"); //オブジェクトの中のSceneFadeManagerを取得 fadeManager = ManageObject.GetComponent<SceneFadeManager>(); } // Update is called once per frame void Update() { if(Input.GetMouseButtonDown(0)) { //SceneFadeManagerの中のフェードアウト開始関数を呼び出し fadeManager.fadeOutStart(0, 0, 0, 0, "Scene2"); } } }この↑のプログラムを別のオブジェクトにアタッチして使用すれば
トップにあるgif画像のようにフェードイン、フェードアウトができると思います。最後に
こうした方が分かりやすい等のアドバイス頂けると嬉しいです!

- 投稿日:2020-01-23T14:14:48+09:00
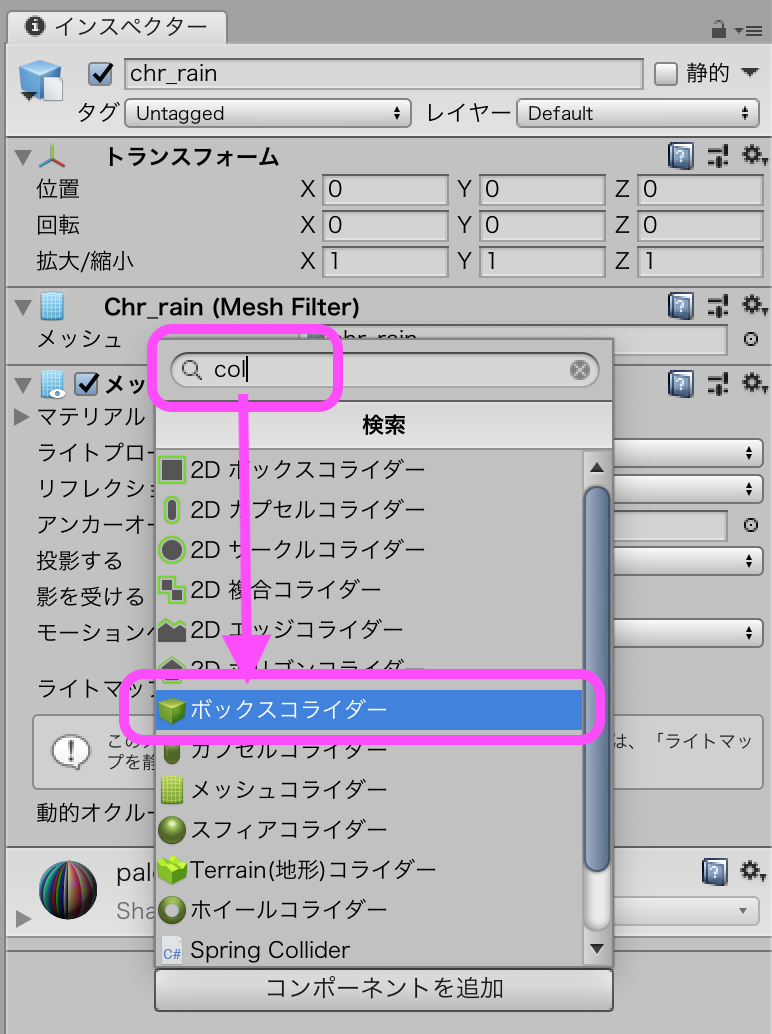
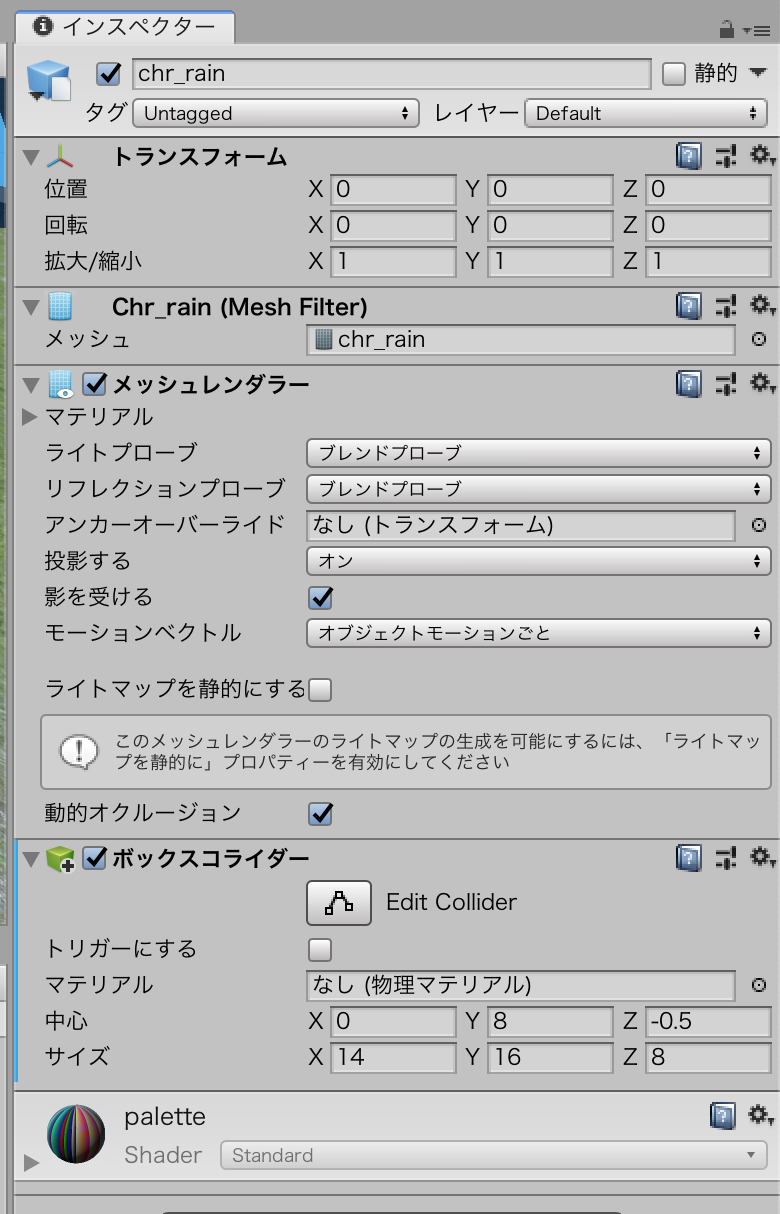
MagicaVoxelからインポートしたオブジェクトに当たり判定をつける(コライダー)
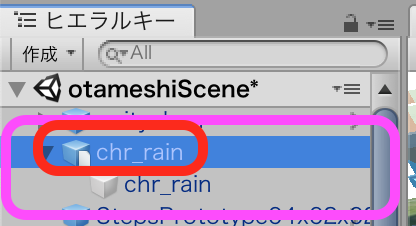
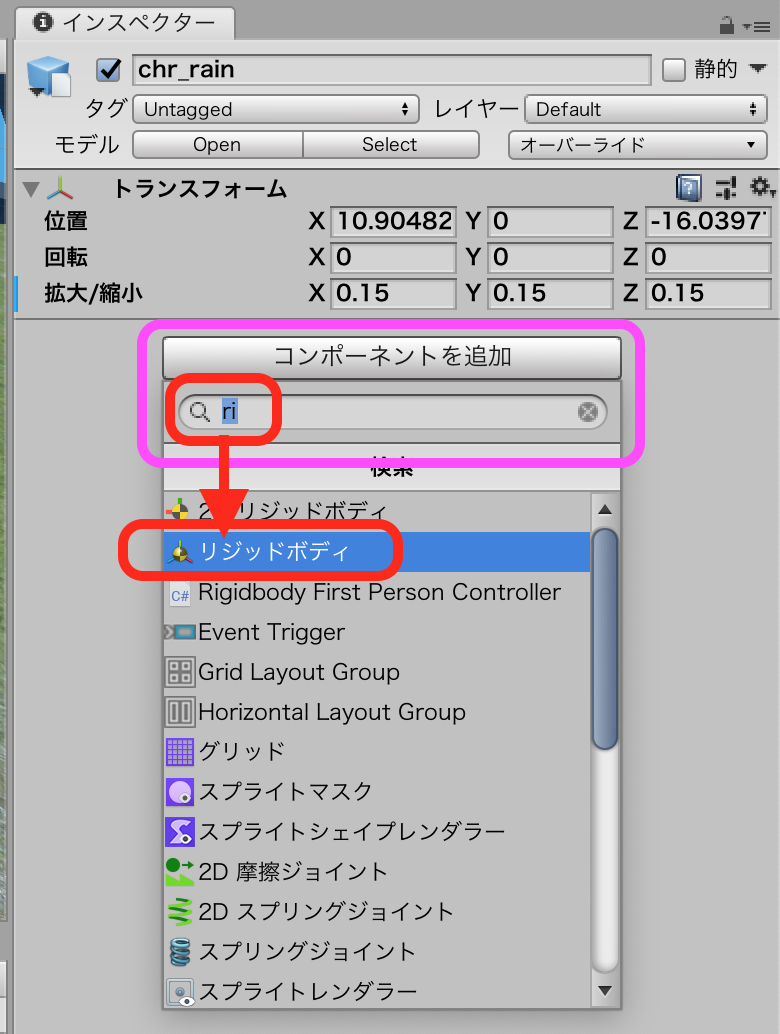
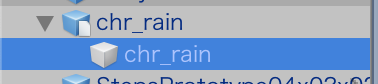
MagicaVoxelからインポートしたオブジェクトは、親子になっているので、親にはRigidbody
子にはコライダーを設定する

- 投稿日:2020-01-23T14:00:16+09:00
MagicaVoxelのデータをunityで使う(エクスポートとインポート)
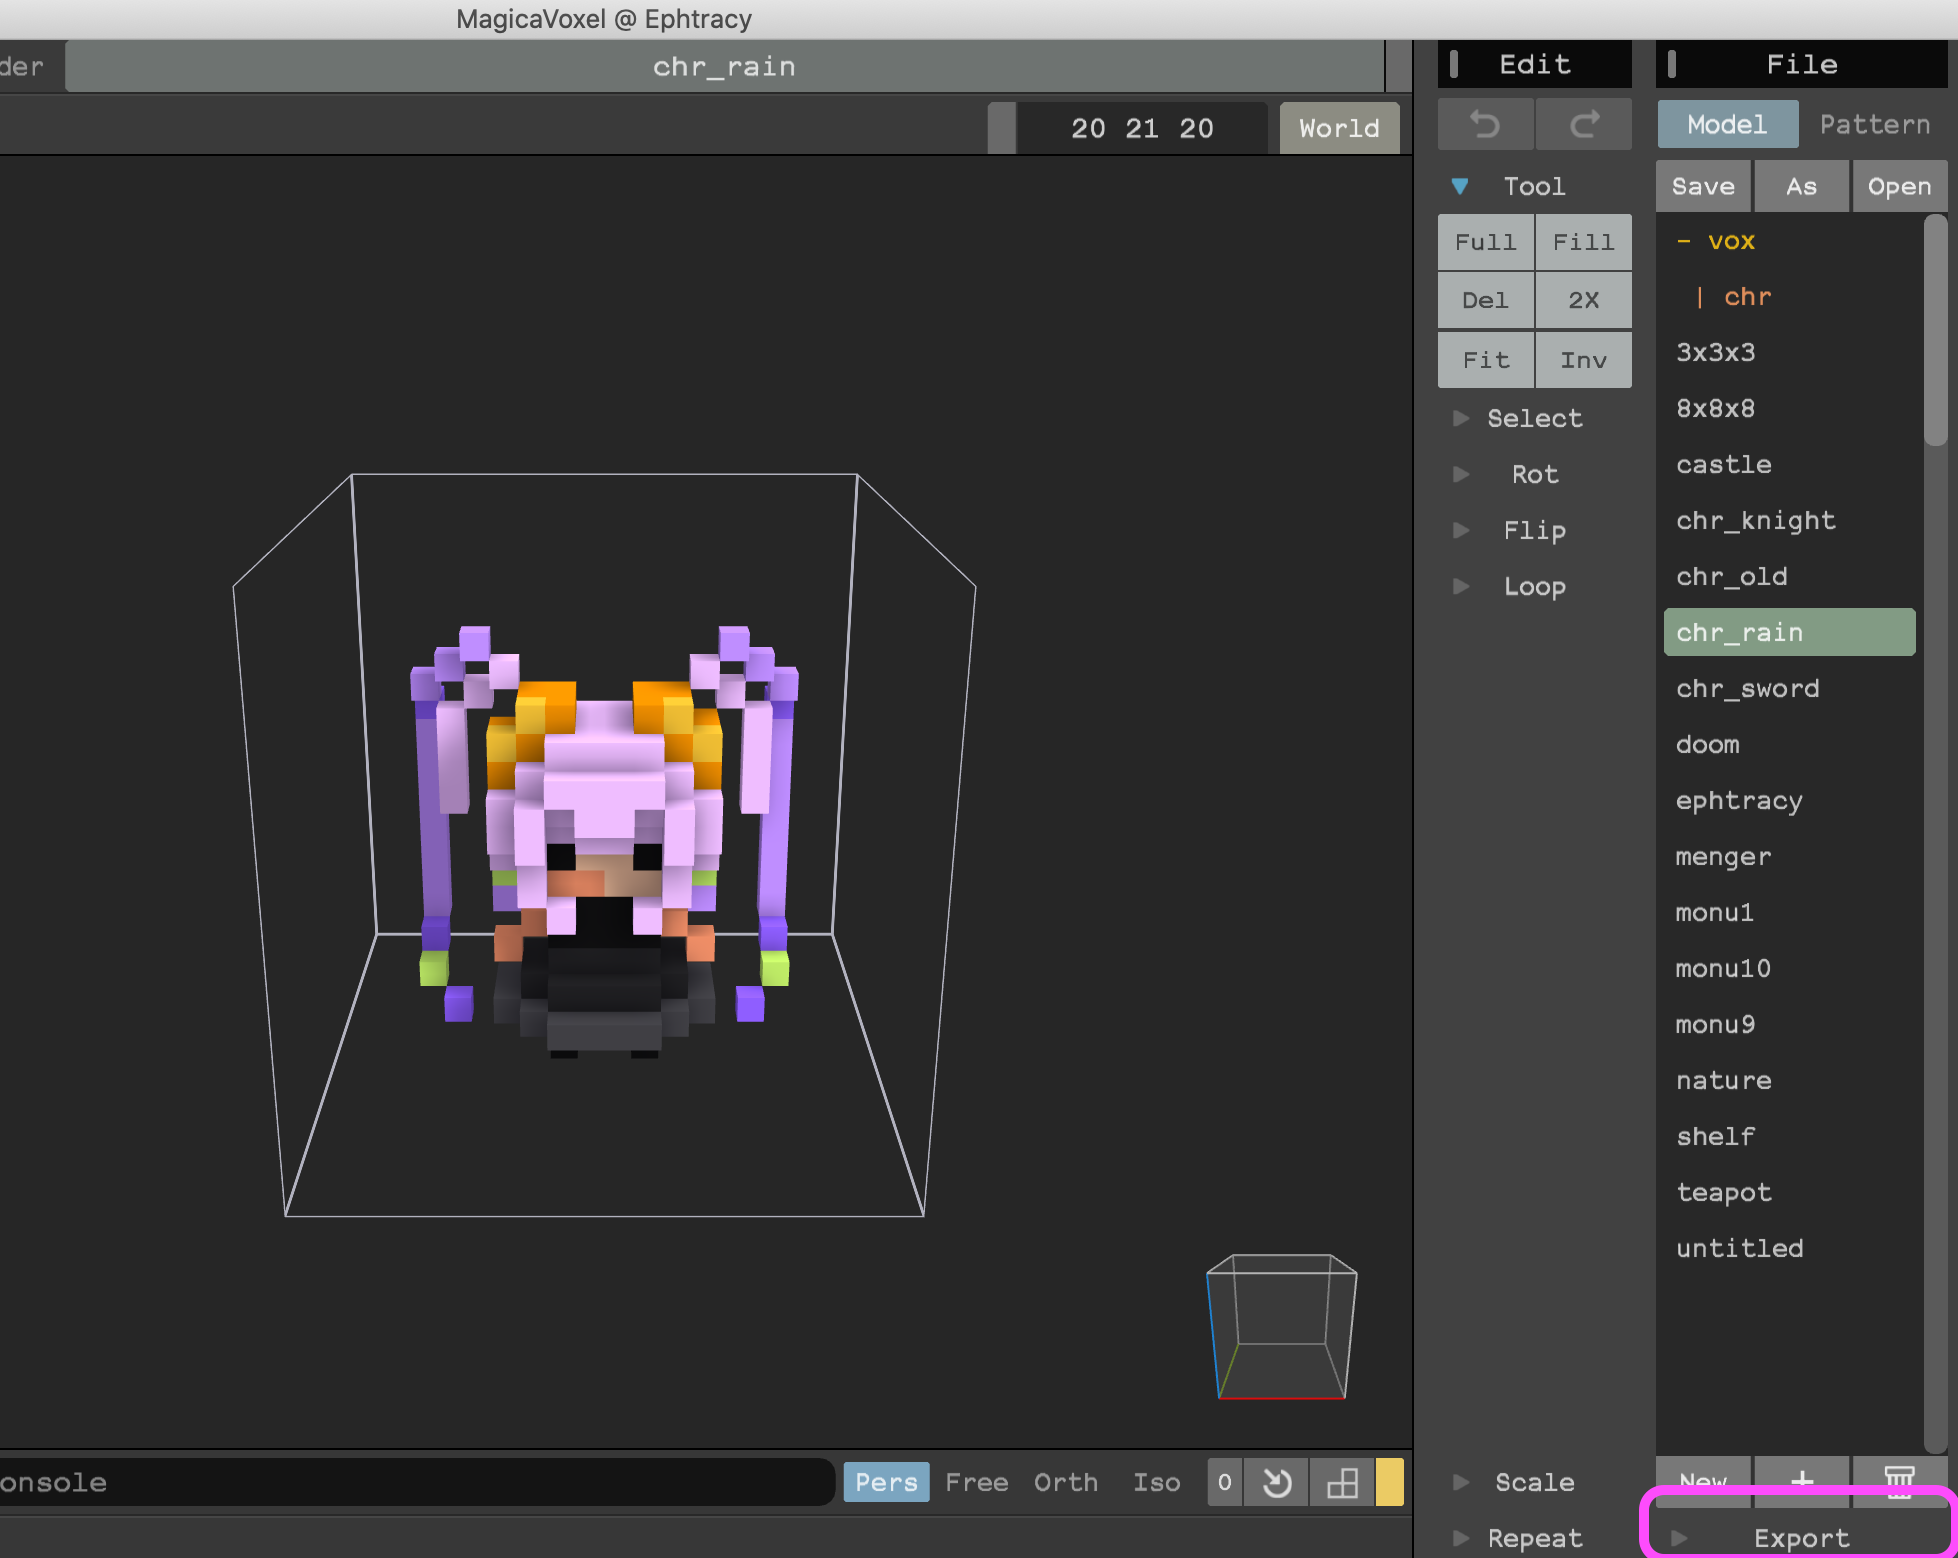
MagicaVoxelでの作業
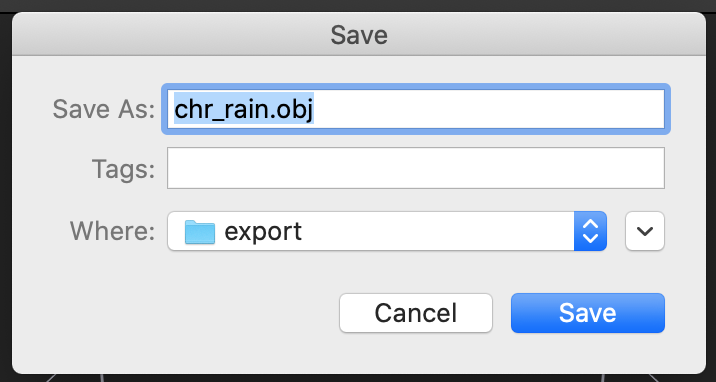
MagicaVoxelの画面右下にある、Exportをクリックする
obj をクリックする
データの名前や、保存先を決める
名前は自由
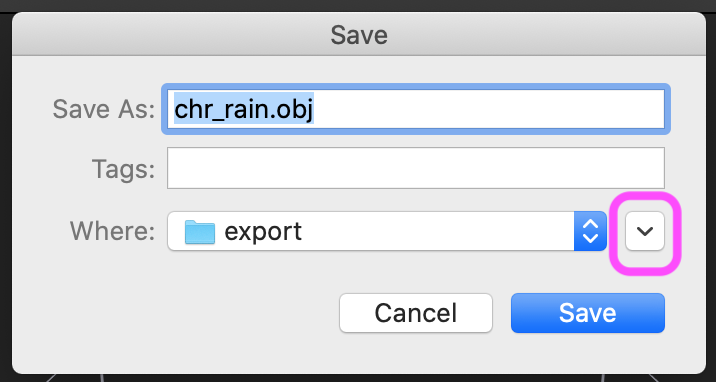
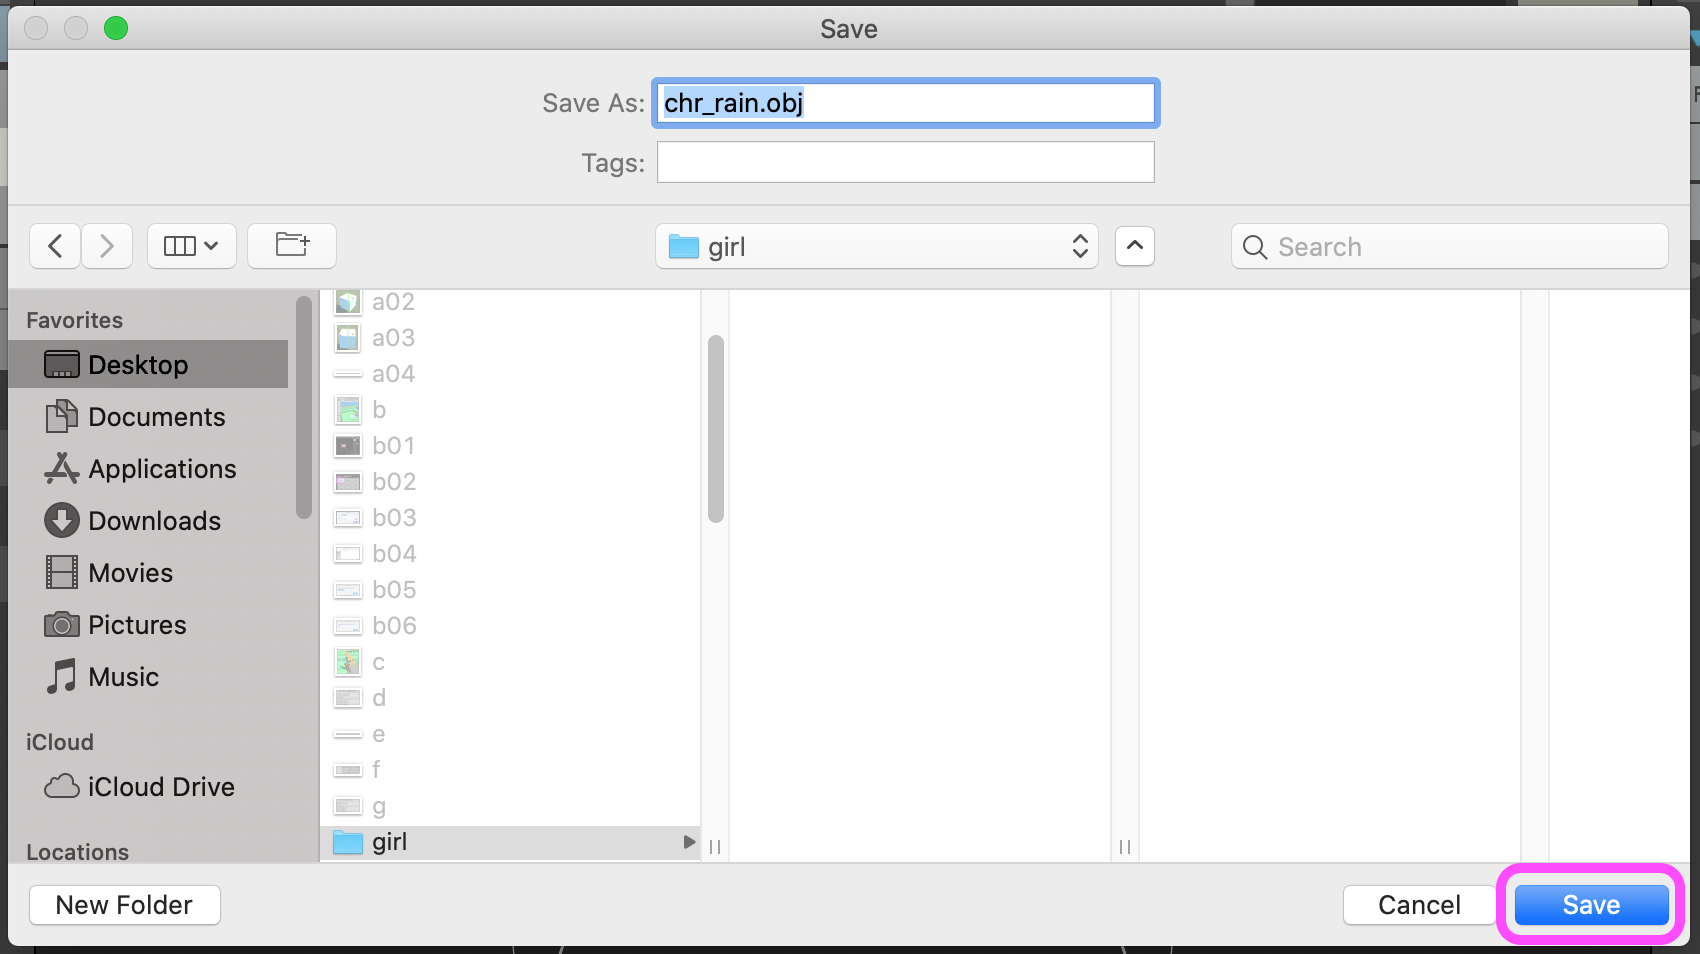
データが三つ作られるので、保存先を作ってあげる
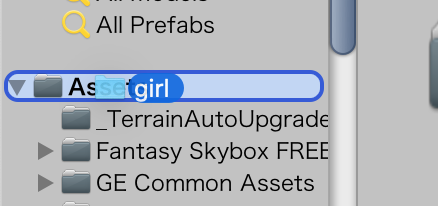
下図のように下向きの三角をクリックする
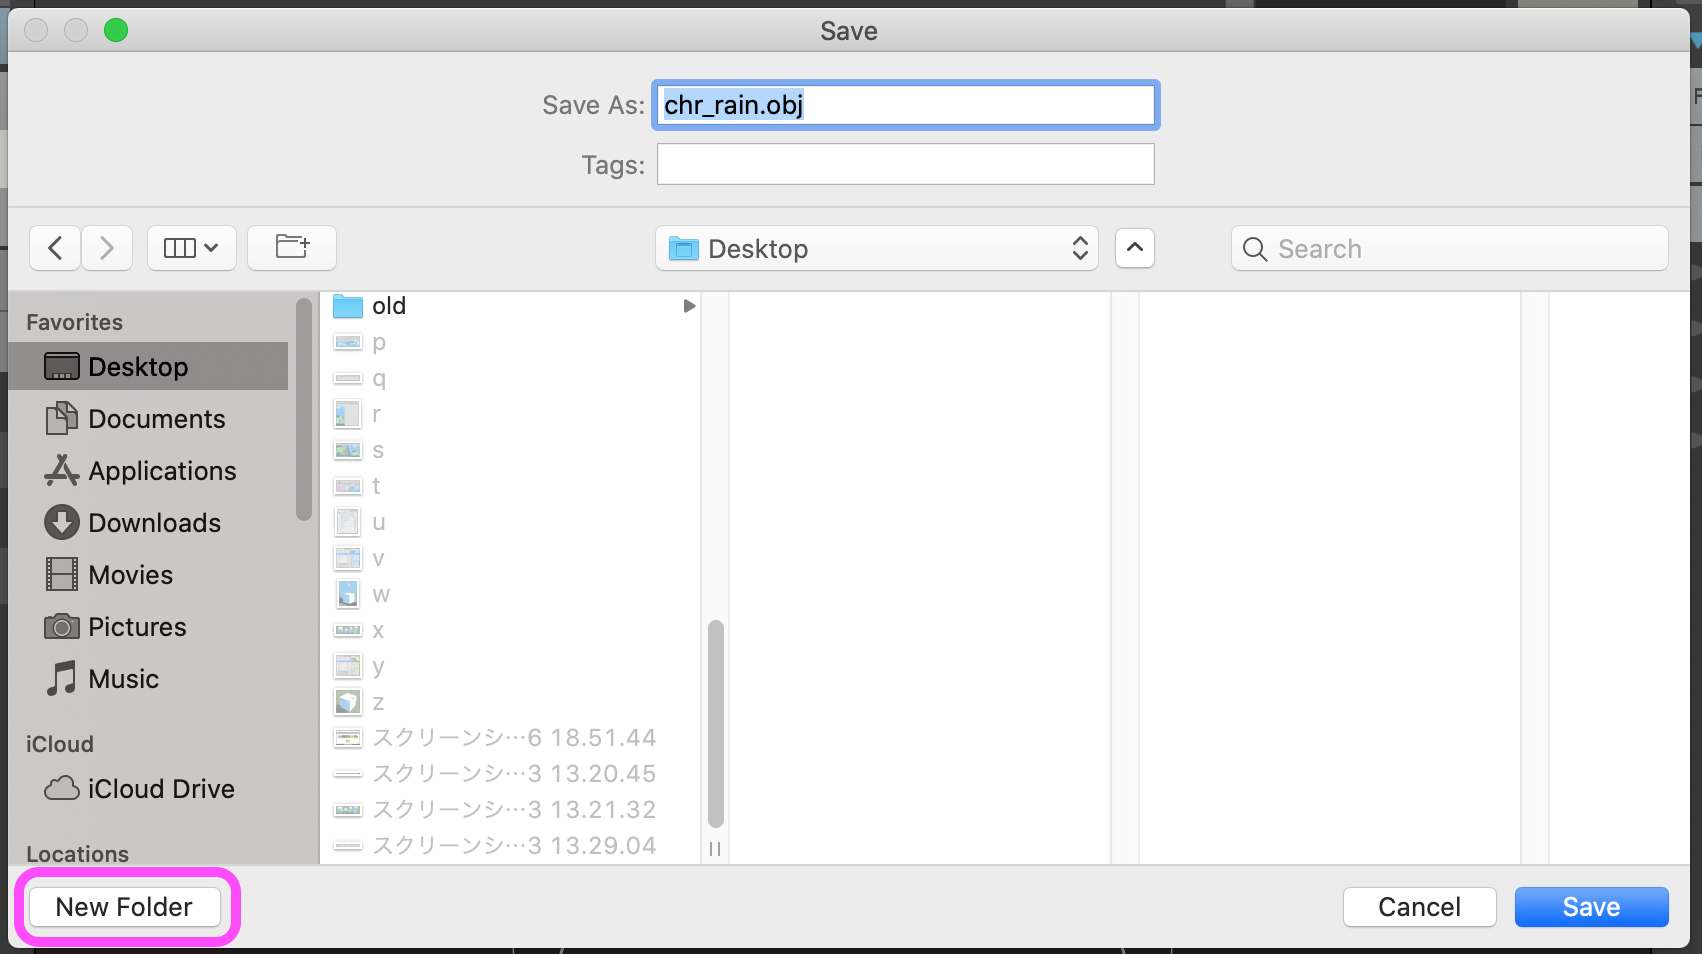
ウィンドウが大きくなる
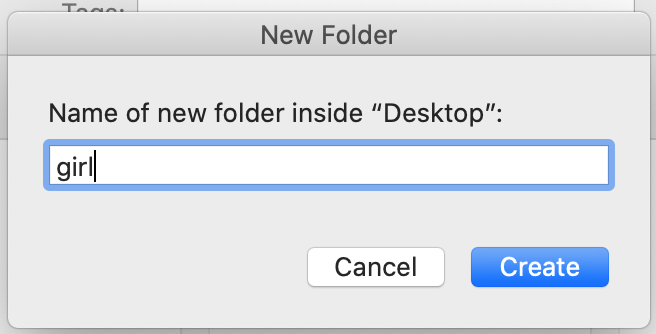
フォルダーを作りたいので、 New Folder をクリックする
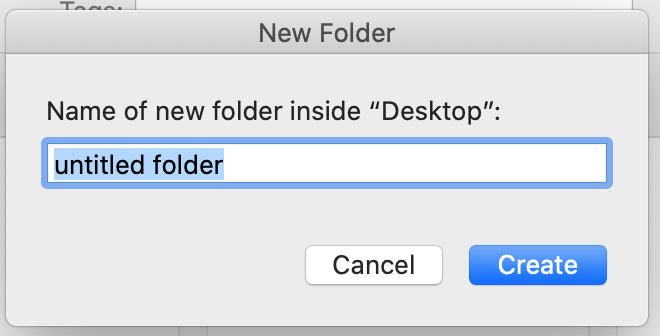
このようなウィンドウが出てくる
適当な名前をつけて、 Create をクリックする
ここで右下の Save をクリックする
MagicaVoxelのエクスポートはこれで完了
続いてunityへのインポート
以下、unityでの作業
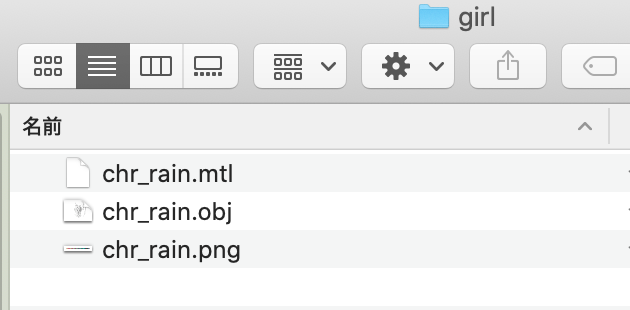
さっき作ったフォルダーに、データが三つあること
(形のデータや、色のデータが入っている)
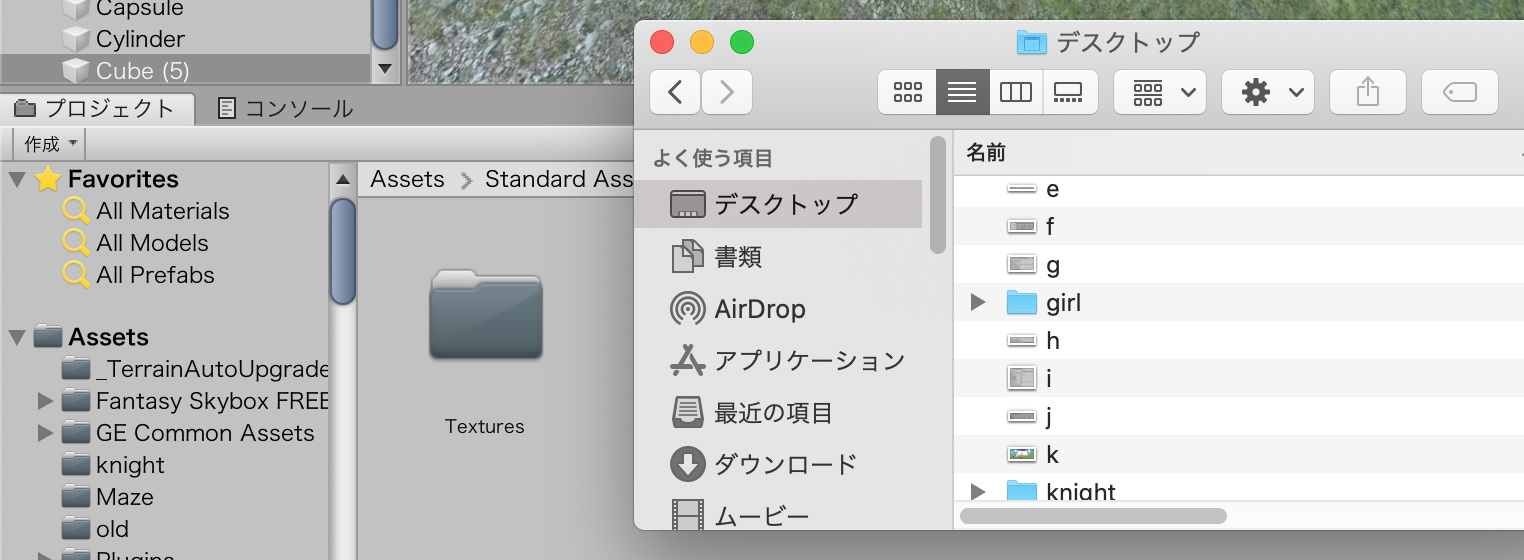
Finderとunityの画面をいい感じに並べる
(ちなみにFinderとはこいつで開くことができる)
()
下図のように、フォルダーをunityのAssetsとかにドラッグ&ドロップする
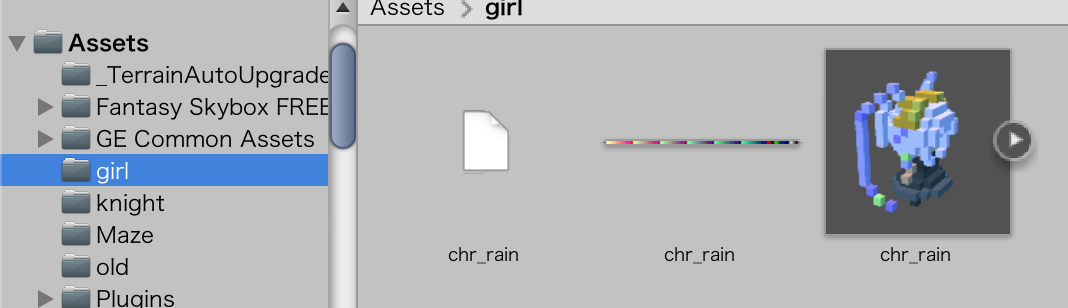
うまくいけばこうなる
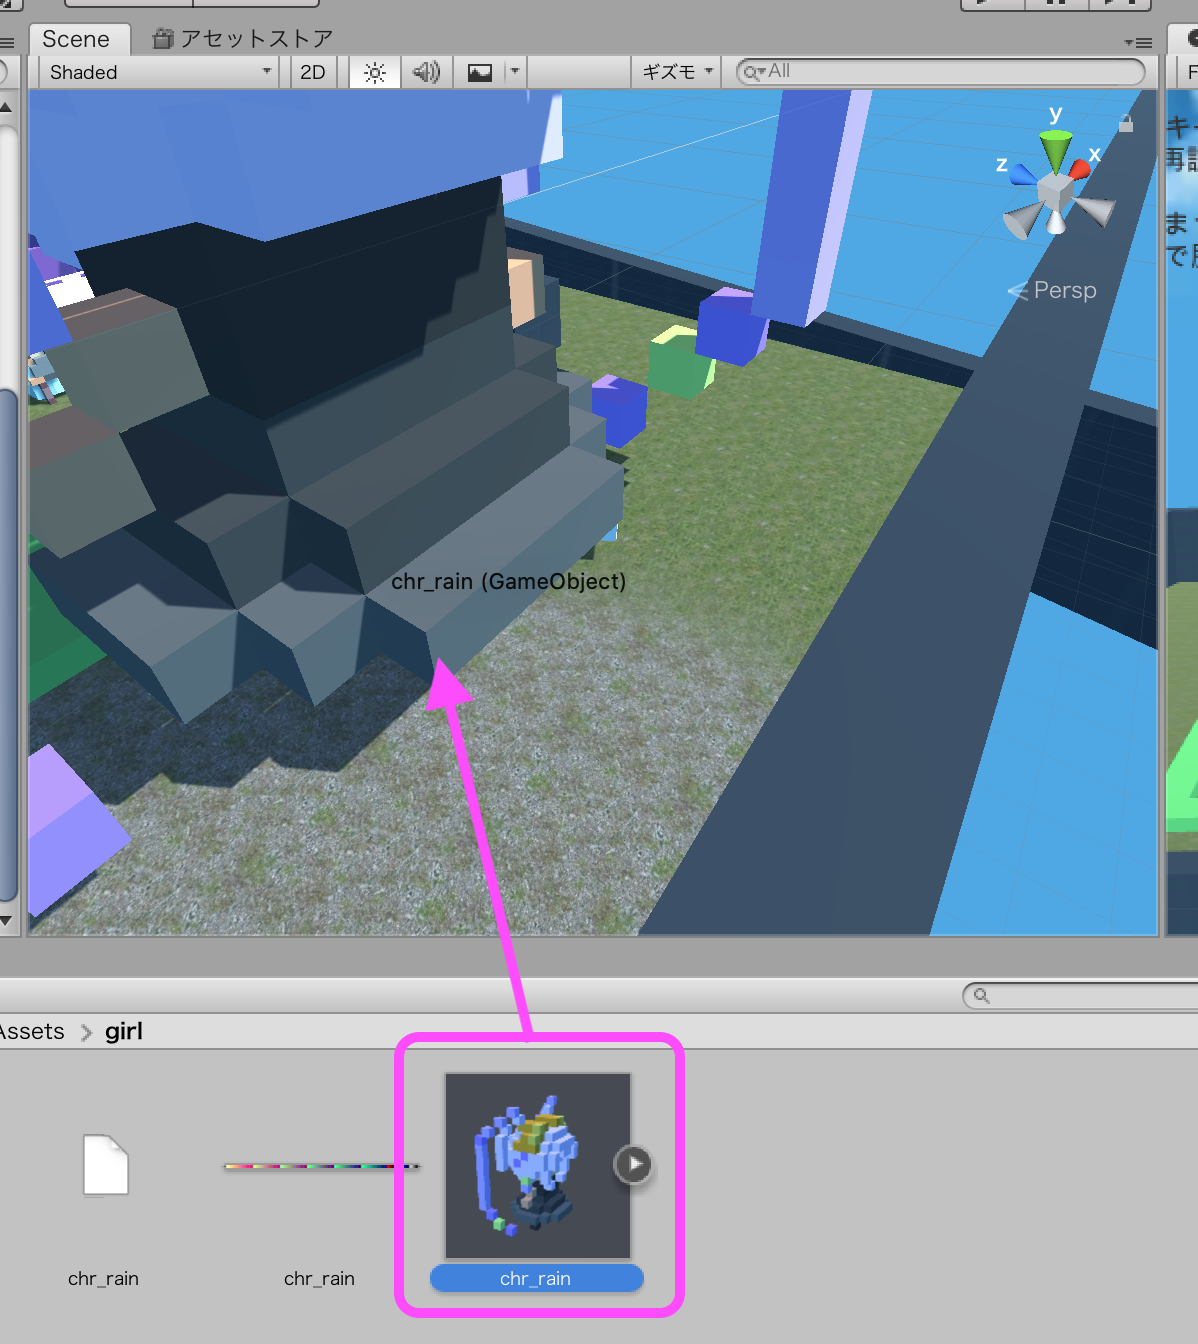
フォルダーの中にある、デザインされたデータを編集画面へドラッグ&ドロップする
(ちなみに、ウィンドウ右下のスライダーで、リスト化とアイコン化を変えられる)
()
()
MagicaVoxelのデータは大きいので、サイズを適当に変える
当たり判定(コライダー)の設定は別記事で。


- 投稿日:2020-01-23T13:30:25+09:00
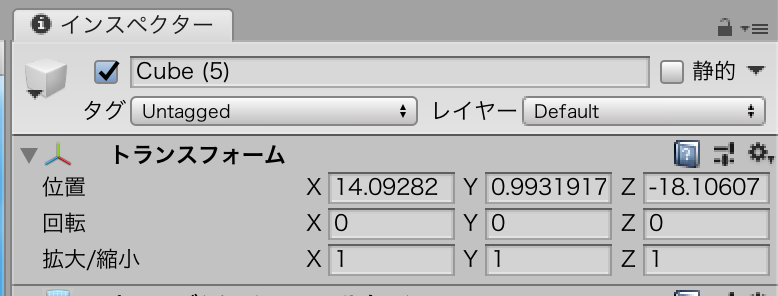
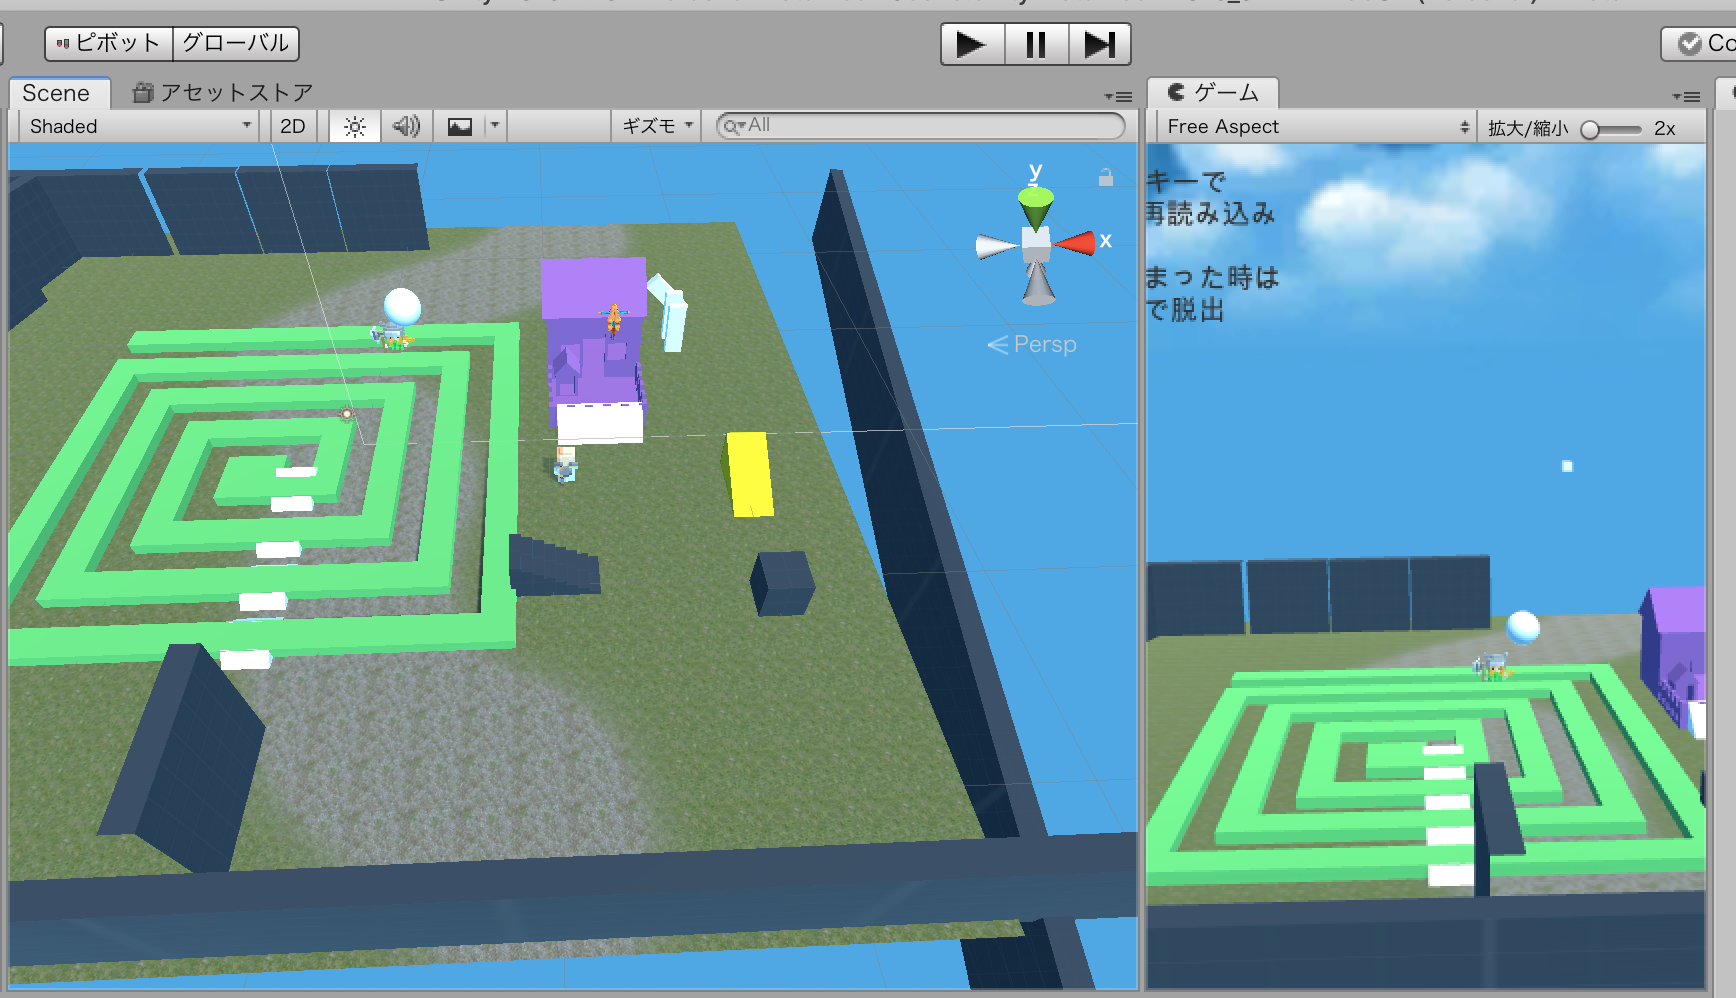
オブジェクトを出して、サイズを変えたりする
位置...置いてある場所
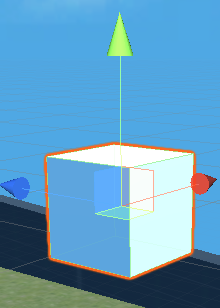
回転...xyz軸を中心に回転
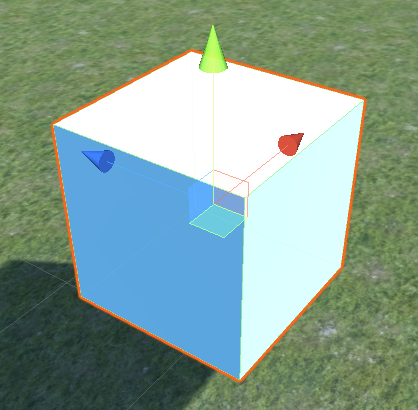
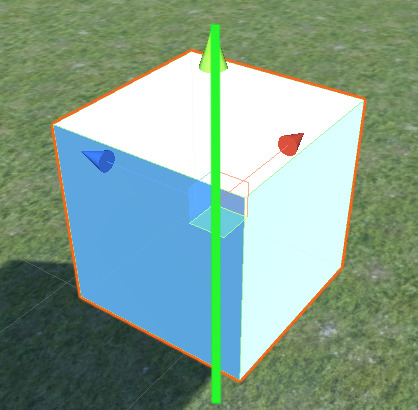
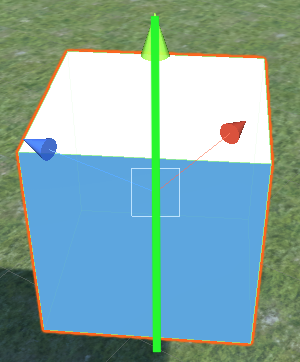
拡大/縮小...xyz軸で大きくなったり小さくなったり回転は、各軸を見立てた竹串を、オブジェクトに差して回転と考えればわかりやすい
下図では、y軸である緑の竹串がキューブの真ん中に刺さっている様子


- 投稿日:2020-01-23T13:22:03+09:00
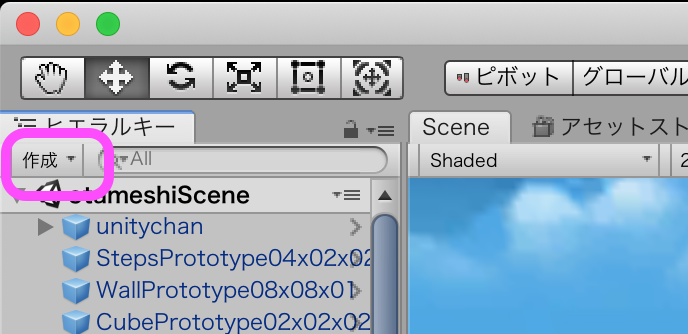
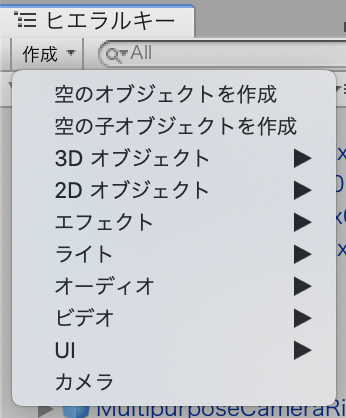
オブジェクトの出し方
ヒエラルキーウィンドウの 作成 をクリックする
キューブを出したいときは、
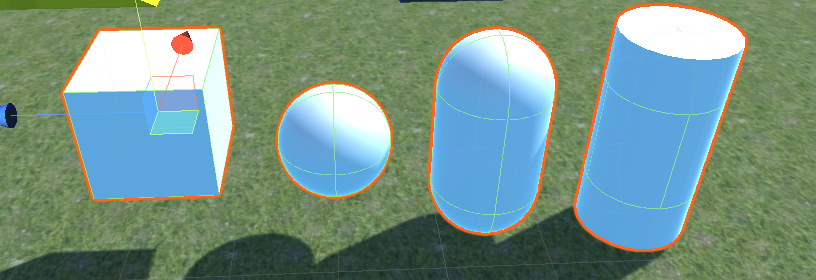
3Dオブジェクト → キューブ をクリックする
このように出てくる
キューブ...立方体
スフィア...球体
カプセル...鼻炎カプセルみたいなやつ
シリンダー...円柱

- 投稿日:2020-01-23T13:14:35+09:00
ウィンドウタブの動かし方
動かしたいタブをドラッグする
マウスのボタンは押しっぱなし
マウスのボタンはまだまだ押しっぱなし
自分にとってokなところで指を離す


- 投稿日:2020-01-23T13:08:31+09:00
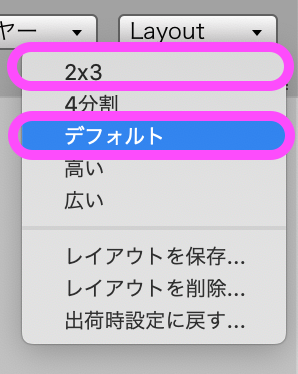
レイアウトの変え方
Layout を押下
自分にとってちょうど良いレイアウトを選択する
よく使われるのが
2x3
デフォルト

- 投稿日:2020-01-23T04:23:57+09:00
【UnityEditor拡張】AudioClipを司る内部ユーティリティ "UnityEditor.AudioUtil" のラッパーを作る
UnityEditor.AudioUtilとは
エディタ上でAudioClipを扱うための内部APIです。
リファレンスは存在しませんが、その全貌はここで見ることができます。
全貌と言ってもほぼexternなのでメソッド名や型しか分かりませんが。使うと何ができるの?
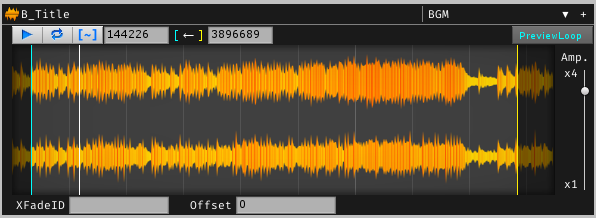
AudioSourceを使わずに、Editor上でAudioClipを再生できます。
AudioClipを選択したときにInspector下部にプレビューとしてサウンドプレイヤーが表示されますが、あんな感じのGUIを自前定義のカスタムInspectorやEditorWindow上に構築できるわけです。私の場合、AudioClip(のラッパークラス)にこんなカスタムPropertyDrawerを定義するのに使いました。
準備
内部APIなので、当然普通に呼ぶことはできません。Reflectionを使って無理やり呼び出します。
メソッド名列挙
ここを見てpublicメソッドの名前を全部列挙します。
列挙型管理なのは、コード補完が効いて扱いやすいため。タイポ怖い。ついでに使うnamespaceも全て書いておきます。
using System;
using UnityEditor;
using UnityEngine;
using System.Reflection;
using System.Collections.Concurrent;
using System.Linq;
using System.Linq.Expressions;

public static class InternalAudioUtil
{
    enum Method
    {
        PlayClip,
        StopClip,
        PauseClip,
        ResumeClip,
        LoopClip,
        IsClipPlaying,
        StopAllClips,
        GetClipPosition,
        GetClipSamplePosition,
        SetClipSamplePosition,
        GetSampleCount,
        GetChannelCount,
        GetBitRate,
        GetBitsPerSample,
        GetFrequency,
        GetSoundSize,
        GetSoundCompressionFormat,
        GetTargetPlatformSoundCompressionFormat,
        GetAmbisonicDecoderPluginNames,
        HasPreview,
        GetImporterFromClip,
        GetMinMaxData,
        GetDuration,
        GetFMODMemoryAllocated,
        GetFMODCPUUsage,
        IsTrackerFile,
        GetMusicChannelCount,
        GetLowpassCurve,
        GetListenerPos,
        UpdateAudio,
        SetListenerTransform,
        HasAudioCallback,
        GetCustomFilterChannelCount,
        GetCustomFilterProcessTime,
        GetCustomFilterMaxIn,
        GetCustomFilterMaxOut,
    }
}
以降のコードは全てこの
InternalAudioUtilクラス内に記述します。メソッド取得・コンパイル・キャッシュ
ReflectionとExpressionをこねくり回します。
全部public staticだし、オーバーロードの曖昧性がないので楽でいいですね。
Expression構築については、neuecc先生の手法を参考にしています。//AudioUtil型 static readonly Type tAudioUtil = typeof(Editor).Assembly.GetType("UnityEditor.AudioUtil"); //コンパイル済みメソッドのキャッシュ static readonly ConcurrentDictionary<Method, Func<object[], object>> compiled = new ConcurrentDictionary<Method, Func<object[], object>>(); //キャッシュからメソッドを取得する。コンパイル済みでなければコンパイルしてキャッシュし、それを返す。 static Func<object[], object> GetOrCompile(Method method) { return compiled.GetOrAdd(method, _m => { //キャッシュが存在しなければここに来る //MethodInfo取得 var m = tAudioUtil.GetMethod(_m.ToString(), BindingFlags.Static | BindingFlags.Public); //voidメソッドのためのreturn先ラベルを定義 var voidTarget = Expression.Label(typeof(object)); //引数はobject[] var args = Expression.Parameter(typeof(object[]), "args"); //MethodInfoのパラメータの型に引数をキャストするExpressionの束 var parameters = m.GetParameters() .Select((x, index) => Expression.Convert( Expression.ArrayIndex(args, Expression.Constant(index)), x.ParameterType)) .ToArray(); //式木構築 var lambda = Expression.Lambda<Func<object[], object>>( m.ReturnType == typeof(void) //voidメソッドの場合、ブロックにしてreturn default(object)する必要がある ? (Expression)Expression.Block( Expression.Call(null, m, parameters), Expression.Return(voidTarget, Expression.Default(typeof(object))), Expression.Label(voidTarget, Expression.Constant(null)) ) //返り値がある場合はCallして結果をobjectにキャストするだけ : Expression.Convert( Expression.Call(null, m, parameters), typeof(object)), args); //コンパイルしてキャッシュしつつ返す return lambda.Compile(); }); }呼ぶ
new object[]{...}やらキャストやらを毎回書くのは嫌なので、適当に中間メソッドを作っておいて、static TRet Call<TRet>(Method method) => (TRet)GetOrCompile(method).Invoke(null); static TRet Call<T0, TRet>(Method method, T0 arg0) => (TRet)GetOrCompile(method).Invoke(new object[] { arg0 }); static TRet Call<T0, T1, TRet>(Method method, T0 arg0, T1 arg1) => (TRet)GetOrCompile(method).Invoke(new object[] { arg0, arg1 }); static TRet Call<T0, T1, T2, TRet>(Method method, T0 arg0, T1 arg1, T2 arg2) => (TRet)GetOrCompile(method).Invoke(new object[] { arg0, arg1, arg2 }); static TRet Call<T0, T1, T2, T3, TRet>(Method method, T0 arg0, T1 arg1, T2 arg2, T3 arg3) => (TRet)GetOrCompile(method).Invoke(new object[] { arg0, arg1, arg2, arg3 }); static void Call(Method method) => GetOrCompile(method).Invoke(null); static void Call<T0>(Method method, T0 arg0) => GetOrCompile(method).Invoke(new object[] { arg0 }); static void Call<T0, T1>(Method method, T0 arg0, T1 arg1) => GetOrCompile(method).Invoke(new object[] { arg0, arg1 }); static void Call<T0, T1, T2>(Method method, T0 arg0, T1 arg1, T2 arg2) => GetOrCompile(method).Invoke(new object[] { arg0, arg1, arg2 }); static void Call<T0, T1, T2, T3>(Method method, T0 arg0, T1 arg1, T2 arg2, T3 arg3) => GetOrCompile(method).Invoke(new object[] { arg0, arg1, arg2, arg3 });以下のようにそれぞれのメソッドに対応する公開APIを定義します(これが一番疲れました)。
[Obsolete]を付けているPlayClipについては後述します。public static void PlayClip(AudioClip clip) => Call(Method.PlayClip, clip, 0, false); [Obsolete("The parameters <startSample> and <loop> are not working")] public static void PlayClip(AudioClip clip, int startSample, bool loop) => Call(Method.PlayClip, clip, startSample, loop); public static void StopClip(AudioClip clip) => Call(Method.StopClip, clip); public static void PauseClip(AudioClip clip) => Call(Method.PauseClip, clip); public static void ResumeClip(AudioClip clip) => Call(Method.ResumeClip, clip); public static void LoopClip(AudioClip clip) => Call(Method.LoopClip, clip); public static bool IsClipPlaying(AudioClip clip) => Call<AudioClip, bool>(Method.IsClipPlaying, clip); public static void StopAllClips() => Call(Method.StopAllClips); public static float GetClipPosition(AudioClip clip) => Call<AudioClip,float>(Method.GetClipPosition, clip); public static int GetClipSamplePosition(AudioClip clip) => Call<AudioClip, int>(Method.GetClipSamplePosition, clip); public static void SetClipSamplePosition(AudioClip clip, int iSamplePosition) => Call(Method.SetClipSamplePosition, clip, iSamplePosition); public static int GetSampleCount(AudioClip clip) => Call<AudioClip, int>(Method.GetSampleCount, clip); public static int GetChannelCount(AudioClip clip) => Call<AudioClip, int>(Method.GetChannelCount, clip); public static int GetBitRate(AudioClip clip) => Call<AudioClip, int>(Method.GetBitRate, clip); public static int GetBitsPerSample(AudioClip clip) => Call<AudioClip, int>(Method.GetBitsPerSample, clip); public static int GetFrequency(AudioClip clip) => Call<AudioClip, int>(Method.GetFrequency, clip); public static int GetSoundSize(AudioClip clip) => Call<AudioClip, int>(Method.GetSoundSize, clip); public static AudioCompressionFormat GetSoundCompressionFormat(AudioClip clip) => Call<AudioClip, AudioCompressionFormat>(Method.GetSoundCompressionFormat, clip); public static AudioCompressionFormat GetTargetPlatformSoundCompressionFormat(AudioClip clip) => Call<AudioClip, AudioCompressionFormat>(Method.GetTargetPlatformSoundCompressionFormat, clip); public static string[] GetAmbisonicDecoderPluginNames() => Call<string[]>(Method.GetAmbisonicDecoderPluginNames); public static bool HasPreview(AudioClip clip) => Call<AudioClip, bool>(Method.HasPreview, clip); public static AudioImporter GetImporterFromClip(AudioClip clip) => Call<AudioClip, AudioImporter>(Method.GetImporterFromClip, clip); public static float[] GetMinMaxData(AudioImporter importer) => Call<AudioImporter, float[]>(Method.GetMinMaxData, importer); public static double GetDuration(AudioClip clip) => Call<AudioClip, double>(Method.GetDuration, clip); public static int GetFMODMemoryAllocated() => Call<int>(Method.GetFMODMemoryAllocated); public static float GetFMODCPUUsage() => Call<float>(Method.GetFMODCPUUsage); public static bool IsTrackerFile(AudioClip clip) => Call<AudioClip, bool>(Method.IsTrackerFile, clip); public static int GetMusicChannelCount(AudioClip clip) => Call<AudioClip, int>(Method.GetMusicChannelCount, clip); public static AnimationCurve GetLowpassCurve(AudioLowPassFilter lowPassFilter) => Call<AudioLowPassFilter, AnimationCurve>(Method.GetLowpassCurve, lowPassFilter); public static Vector3 GetListenerPos() => Call<Vector3>(Method.GetListenerPos); public static void UpdateAudio() => Call(Method.UpdateAudio); public static void SetListenerTransform(Transform t) => Call(Method.SetListenerTransform, t); public static bool HasAudioCallback(MonoBehaviour behaviour) => Call<MonoBehaviour, bool>(Method.HasAudioCallback, behaviour); public static int GetCustomFilterChannelCount(MonoBehaviour behaviour) => Call<MonoBehaviour, int>(Method.GetCustomFilterChannelCount, behaviour); public static int GetCustomFilterProcessTime(MonoBehaviour behaviour) => Call<MonoBehaviour, int>(Method.GetCustomFilterProcessTime, behaviour); public static float GetCustomFilterMaxIn(MonoBehaviour behaviour, int channel) => Call<MonoBehaviour, int, float>(Method.GetCustomFilterMaxIn, behaviour, channel); public static float GetCustomFilterMaxOut(MonoBehaviour behaviour, int channel) => Call<MonoBehaviour, int, float>(Method.GetCustomFilterMaxOut, behaviour, channel);これで準備OKです。
使用上の注意
大体メソッド名と引数名から予測できる通りの挙動をしますが、いくつかかなりヤバめの注意点があります。
PlayClip()の第2引数以降は指定しても何も起きない
PlayClip(AudioClip clip, int startSample, bool loop)
見るからに再生開始位置とループ有無を指定できそうですが、できません。
一応全て引数に取れるメソッドも定義していますが、この理由により[Obsolete]を付けています。なお、代わりに
SetClipSamplePosition()やLoopClip()を同時に使うことで所望の挙動が得られます。複数のAudioClipを再生すると、最後に再生したもの以外停止不能になる
そんなバカな、
StopAllClips()があるじゃないか。私もそう思いました。
StopAllClips()は、最後に再生したclipを停止します。clipを明示的に指定しなくてもいいのでとても便利ですね!!!!!
この状態になると、再生が終了するか、Unityを再起動するまで他のAudioClipは停止できません。
そのため、クロスフェードのプレビューとかは無理です。残念。全てのメソッドの動作確認はしていない
きっとまだ罠があるので、ぜひ踏み抜いて教えてください。
参考リンク
AudioUtilクラス
https://github.com/Unity-Technologies/UnityCsReference/blob/master/Editor/Mono/Audio/Bindings/AudioUtil.bindings.csneuecc先生によるReflectionの高速化手法紹介
http://neue.cc/2014/01/27_446.htmlRtyper氏が作った旧AudioUtilのラッパー(とその問題点(上述したものと同じ))
https://forum.unity.com/threads/reflected-audioutil-class-for-making-audio-based-editor-extensions.308133/