- 投稿日:2020-01-20T23:01:37+09:00
devise ユーザーのプロフィール画面作成と編集(デフォルトをカスタマイズ)
はじめに
deviseを導入の仕方を学び、デフォルトのままだとユーザーフレンドではないと思い、deviseのカスタマイズをしようと思います。
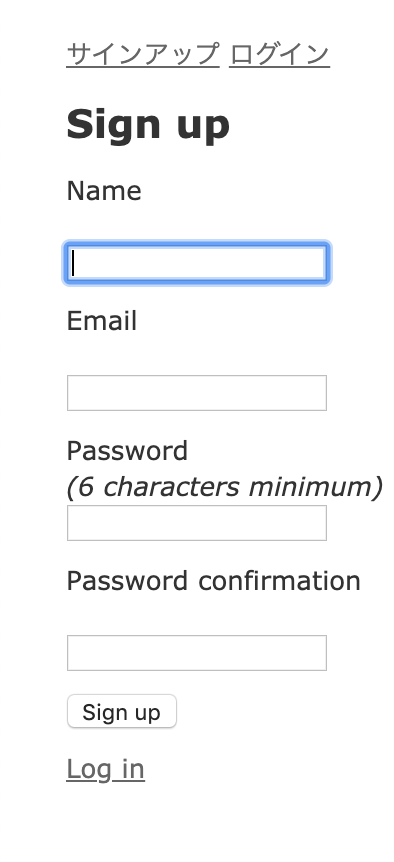
・sign up(アカウント登録)時にユーザーの名前も一緒に登録!
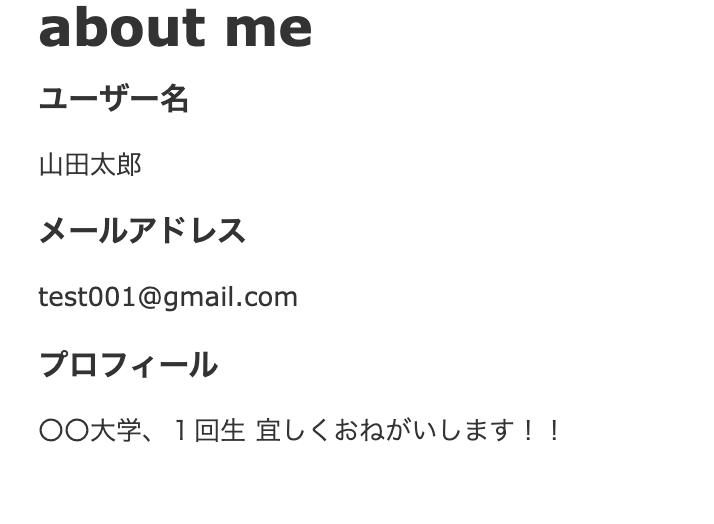
・users/showで「名前」「メールアドレス」「プロフィール」の表示!
・users/editで簡単編集!上記の3つについて、rails初心者目線で書いていきたいと思います。
完成イメージ
Qiita初めての記事で緊張しますが、分かりやすく書いていきます!
環境
ruby 2.5.6
rails 5.2.3
devise 4.7.1前提
今回、deviseは導入済みでその後どうやってカスタマイズしていくか進めます。
deviseの導入がまだの方用に参考URL貼っておきます。
devise導入方法URL
(1)公式ドキュメント
(2)[Rails] deviseの使い方(rails4版)
※(2)だと「1.deviseの導入」まで進めてください。MVC(model/ view/ controller )設定
modelの生成
ターミナル.$ rails g devise userテキストエディターのapp/models見てみると一番下にuser.rbがあります。
これでuser modelで出来ました。viewの生成
ターミナル.$ rails g devise:viewsテキストエディターのapp/views/devise見てみるとこんな感じになります。
確認ができたらdeviseのviewsが生成されました。controllerの生成
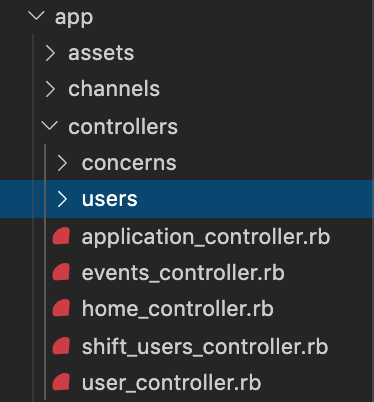
ターミナル.$ rails g devise:controllers usersテキストエディターのapp/controllers/users見てみるとこんな感じになります。
確認できたら、deviseのcontroller生成されました!各種ファイルの設定
この章の目的:
(1)sign upでメールアドレスとパスワードの他に名前もを登録
(2)ユーザーのプロフィール画像の作成
そのために各種の設定していきます。userテーブルにカラムを追加しよう
ターミナル.$ rails g migration add_name_profile_to_usersテキストエディターでdb/migrateの中を確認すると
その時作った「日時add_name_profile_users」と表示されたファイルが出来ます。例えばこんな感じ「20200120053617_add_name_profile_to_users.rb」です。
〇〇_add_name_profile_to_users.rbclass AddNameProfileUsers < ActiveRecord::Migration[5.2] def change add_column :users, :name, :string #追記 add_column :users, :profile, :text #追記 end endターミナル.$ rails db:migrate解説(なぜ、 userテーブルに「name」「profile」カラムを?)
※なぜ、 userテーブルに「name」「profile」カラムを追加したか解説します。
結論、deviseの初期状態でのカラムに「name」「profile」カラムがないからです。userテーブルが持っているカラムをどこで確認するのか?
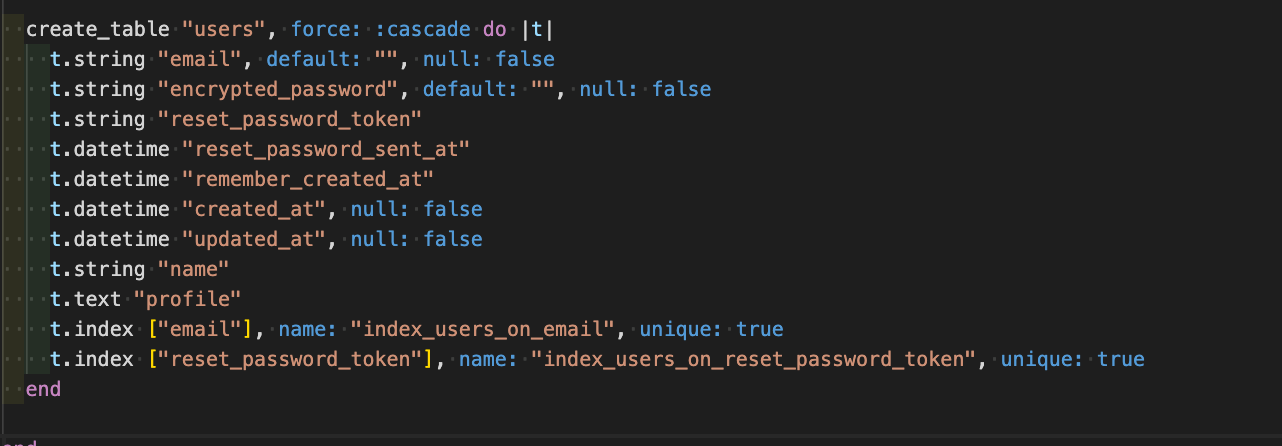
①db/schema.rbで確認
これはカラム追加した後ですが、本来は「name」「profile」カラムがない状態です。②rails cで確認
ターミナルでrails cをして
User.column_namesをすると確認できます。モデル
app/models/user.rbclass User < ApplicationRecord # Include default devise modules. Others available are: # :confirmable, :lockable, :timeoutable, :trackable and :omniauthable devise :database_authenticatable, :registerable, :recoverable, :rememberable, :validatable validates :name, presence: true #追記 validates :profile, length: { maximum: 200 } #追記 endnameに空欄は許しませんよ!
profileは200文字に抑えてくさだいね!って制限をかけます。コントローラー
app/controllers/application_controller.rbclass ApplicationController < ActionController::Base protect_from_forgery with: :exception # ログイン済ユーザーのみにアクセスを許可する before_action :authenticate_user! # deviseコントローラーにストロングパラメータを追加する before_action :configure_permitted_parameters, if: :devise_controller? protected def configure_permitted_parameters # サインアップ時にnameのストロングパラメータを追加 devise_parameter_sanitizer.permit(:sign_up, keys: [:name]) # アカウント編集の時にnameとprofileのストロングパラメータを追加 devise_parameter_sanitizer.permit(:account_update, keys: [:name, :profile]) end end後はviewで「sign up時にユーザーの名前も一緒に登録」「users/showで「名前」「メールアドレス」「プロフィール」の表示」を表示していきます。
ユーザー情報を記入
app/views/devise/registrations/new.html.erb<h2>Sign up</h2> <%= form_for(resource, as: resource_name, url: registration_path(resource_name)) do |f| %> <%= render "devise/shared/error_messages", resource: resource %> <!--サインアップ時に名前を入力できるようにフォームを追加--> <div class="field"> <%= f.label :name %><br /> <%= f.text_field :name, autofocus: true %> </div> <div class="field"> <%= f.label :email %><br /> <%= f.email_field :email, autofocus: true, autocomplete: "email" %> </div> <div class="field"> <%= f.label :password %> <% if @minimum_password_length %> <em>(<%= @minimum_password_length %> characters minimum)</em> <% end %><br /> <%= f.password_field :password, autocomplete: "new-password" %> </div> <div class="field"> <%= f.label :password_confirmation %><br /> <%= f.password_field :password_confirmation, autocomplete: "new-password" %> </div> <div class="actions"> <%= f.submit "Sign up" %> </div> <% end %> <%= render "devise/shared/links" %>ユーザー情報を編集
app/views/devise/registrations/edit.html.erb<h2>Edit <%= resource_name.to_s.humanize %></h2> <%= form_for(resource, as: resource_name, url: registration_path(resource_name), html: { method: :put }) do |f| %> <%= devise_error_messages! %> <!--アカウント編集時に名前を入力できるようにフォームを追加--> <div class="field"> <%= f.label :name %><br /> <%= f.text_field :name, autofocus: true %> </div> <div class="field"> <%= f.label :email %><br /> <%= f.email_field :email, autofocus: true, autocomplete: "email" %> </div> <!--アカウント編集時にプロフィールを入力できるようにフォームを追加--> <div class="field"> <%= f.label :profile %><br /> <%= f.text_area :profile, autofocus: true %> </div> <div class="actions"> <%= f.submit "Update" %> </div> <% end %> <%= link_to "Back", :back %>プロフィール画面の作成
ここでの目的
・プロフィール画面の作成手順
①コントローラーとviewファイルの生成と設定
②ルーティング設定
の手順で進めていきます。コントローラーとviewファイルの生成
ターミナル.$ rails g controller Users showdeviseとまた別にコントローラーとshow.html.erbを作成します。
app/controllers/users_controller.rbclass UsersController < ApplicationController def show @user = current_user end endcurrent_userは現在ログインしているユーザーのことを指します。
app/views/users/show.html.erb<h1>about me</h1> <h3>ユーザー名</h3> <%= @user.name %> <h3>メールアドレス</h3> <%= @user.email %> <h3>プロフィール</h3> <%= @user.profile%>ルーティング設定
route.rbdevise_for :users, controllers: { registrations: 'users/registrations' } get "users/show" => "users#show"パスワードを入力せずにユーザー情報を編集
編集画面で入力した情報をsubmitすると
Current password can't be blankが出てくると思います。これはパスワードを入れて情報を更新してください。ってことなので、
パスワードを入れずにユーザー情報を編集できるようにします。registrations_controller.rbの追記
registrations_controller.rbclass RegistrationsController < Devise::RegistrationsController protected def update_resource(resource, params) resource.update_without_password(params) end endユーザー情報を編集する際にパスワード無しで編集可能になりました!
参考URL
[Devise] パスワードを入力せずにユーザー情報を編集する
devise導入からユーザ-のプロフィール画面を作成するまで


- 投稿日:2020-01-20T22:48:25+09:00
【Rails】Strong Parametersの書き方について
概要
Strong Parametersについて、セキュリティに強い値の取り方というくらいの認識で
あまり意識せずに書いていたため、改めて必要性と書き方について纏めてみました。Strong Parametersについて
Web上から入力された値をセキュリティ面で安全に受け取るための仕組みであり、値の正当性をチェックしてくれます。
そうして指定した値以外を受け取らないようにすることで、攻撃を防ぐというセキュリティ対策です。
1つのモデルに対して属性をまとめて取得するというRailsに元々搭載されているマスアサイメント機能の脆弱性を防ぐためにできた機能です。例えば、UserコントローラーでCreateアクションを起こすとき、
渡すカラムが増えた場合、都度paramsを追加していくのは手間がかかります。def create User.create(name: params[:user][:name], email: params[:user][:emails], password: params[:user][:password]) end上記のコードはこのように書き換えられ、値を纏めて渡すことができます。
def create User.create(params[:user]) endこれがマスアサイメント機能です。
しかし、これはuserに紐付いた値であれば全ての値をcreateメソッドに渡すことになるため、セキュリティ面で問題があります。
例えば、悪意のあるユーザーがChromeの検証ツールからtrueの値を渡してadmin権限を変更したり、外部からシステムを自由に操作できてしまいます。そこで登場したのが「Strong Parameters」です。
rails4以降に登場した機能です。StrongParametersを使用すれば、渡す値を指定することができるので外部からの悪意のある攻撃を防ぐことができます。
書き方
def create
  User.create(params.require(:user).permit(:name))
end
この場合、userキーのnameだけ受け取り許可するということになります。
Email,passwordも受け取る場合は
def create
  User.create(params.require(:user).permit(:name, :email, :password))
end
最後に、Strong Parametersはupdate,destroyアクションなどでも利用でき、コードが重複するのでメソッドとして記述するのが一般的です。
 private

 def user_params
   params.require(:user).permit(:name, :email, :password)
 end
end
尚、そのクラス内でしか呼び出すことができなくするためにprivateメソッドとして記述します。
外部からuser_paramsを呼び出したい場面はありませんので。下記参考の通りですが、privateメソッドはレシーバをつけて呼び出すことができないので
例えばUserクラスで指定したprivateメソッドは、Userクラス以外のレシーバから呼び出すことができません。参考:Ruby の private メソッドとは
http://secret-garden.hatenablog.com/entry/2015/07/02/000000
- 投稿日:2020-01-20T22:30:18+09:00
Dockerを使ってRuby2.7&Rails6を構築
はじめに
2020/01/20時点での最新安定版のrails開発環境の構築の記事がなかったので。
【Imagemagick対応】Dockerを利用して、Rails環境を作成
基本上記の記事のままです。
ただ、上記の記事はRuby2.6&Rails5.2.2で、そのままバージョンを書き換えるだけではうまく動作しなかったので、動作できるようにしたインストール資材を記載しておきます。
参考までに上記記事からの変更点も記載しておきます。コンテナ立ち上げ以降は参考記事の手順のまま実施できます。
インストール資材
Dockerfile
DockerfileFROM ruby:2.7 ENV RUNTIME_PACKAGES="linux-headers libxml2-dev libxslt-dev make gcc libc-dev nodejs tzdata postgresql-dev postgresql" \ DEV_PACKAGES="build-base curl-dev" \ HOME="/myapp" WORKDIR $HOME # Counter Measure to Error:"Autoprefixer doesn’t support Node v4.8.2. Update it" RUN curl -sL https://deb.nodesource.com/setup_10.x | bash - \ && apt-get install -y nodejs # yarnパッケージ管理ツールインストール RUN apt-get update && apt-get install -y curl apt-transport-https wget && \ curl -sS https://dl.yarnpkg.com/debian/pubkey.gpg | apt-key add - && \ echo "deb https://dl.yarnpkg.com/debian/ stable main" | tee /etc/apt/sources.list.d/yarn.list && \ apt-get update && apt-get install -y yarn RUN apt-get update && \ apt-get install -y default-mysql-client \ postgresql-client \ sqlite3 \ --no-install-recommends && \ rm -rf /var/lib/apt/lists/* ADD Gemfile $HOME/Gemfile ADD Gemfile.lock $HOME/Gemfile.lock RUN bundle install ADD ./ $HOME COPY ./ $HOME CMD ["rails", "server", "-b", "0.0.0.0"]変更点①:ruby2.6⇒2.7
変更点②:mysql-client⇒default-mysql-client
mysql-clientはインストールできなくなっていたので、代わりにdefault-mysql-clientをインストールします。
mysql-clientがインストールできない理由は以下の記事が参考になります。Circle CI で mysql-client が apt-get install できなくなってCI環境が壊れた話
変更点③:yarnを追加でインストール
エラーメッセージは控えていませんでしたが、参考記事のままインストールしようとしたら
yarnがないと怒られました。そのため、# yarnパッケージ管理ツールインストールのところでインストールしています。docker-compose.yml
docker-compose.ymlversion: '3' services: db: container_name: db image: postgres:latest environment: POSTGRES_USER: root POSTGRES_PASSWORD: password POSTGRES_INITDB_ARGS: "--encoding=UTF-8" web: container_name: app build: . command: bundle exec rails s -p 3000 -b '0.0.0.0' volumes: - .:/myapp ports: - "3000:3000" depends_on: - db変更点①:passwordありユーザーの設定
セキュリティ的にpasswordありユーザーがほしかったので、
environmentのところでrootユーザにpasswordを付与しています。Gemfile
Gemfilesource 'https://rubygems.org' gem 'rails', '~> 6.0.2', '>= 6.0.2.1'Imagemagickは使用しないのでGemfileから削除しています。
Gemfile.lock
Gemfile.lockこちらは空のまま。
- 投稿日:2020-01-20T21:21:45+09:00
railsにおける get と post の違い
getはデータベースを変更しないアクション
postはデータベースを変更するアクション
- 投稿日:2020-01-20T20:14:49+09:00
Rails5.2.3でjQuery導入
jQuery導入手順
gemfileに記述
Gemfilegem 'jquery-rails' gem 'jquery-ui-rails'bundleapplication.jsに記述
application.js//= require jquery //= require jquery_ujsリロードしないと機能しない場合
Gemfile の gem 'turbolinks' をコメントアウト
application.js の//require turbolinks を削除
"data-turbolinks-track" => "reload"(application.html.erb)
とする。個別ファイルの読み込み
application.jsに記述
//= require_tree .
- 投稿日:2020-01-20T20:12:09+09:00
【第10章】Railsチュートリアル 5.1(第4版) ユーザーの更新・表示・削除
はじめに
個人的な理解・備忘録を目的としてます。
筆者自身は動画版Railsチュートリアルで進めているため、アプリ作成中コード・ブランチ名などの若干の違いがありますので参考程度に流し見して頂けたら嬉しいです。
理解不足のため、何かありましたらコメント等ご指摘してくださると幸いです(^_^;)10.0 目標
未実装だったedit、update、index、destroyアクションを加え、RESTアクションを完成させる。
その他 個人的進行
単数形と複数形
モデル(概念的)→単
それ以外→複数(ほぼ全部)10.1 ユーザーを更新する
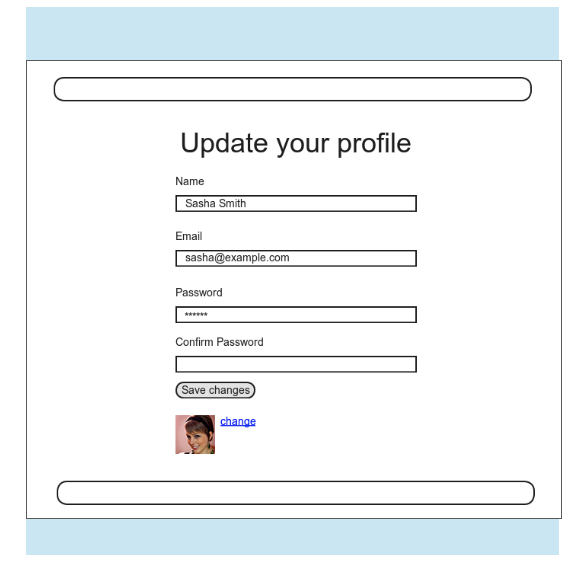
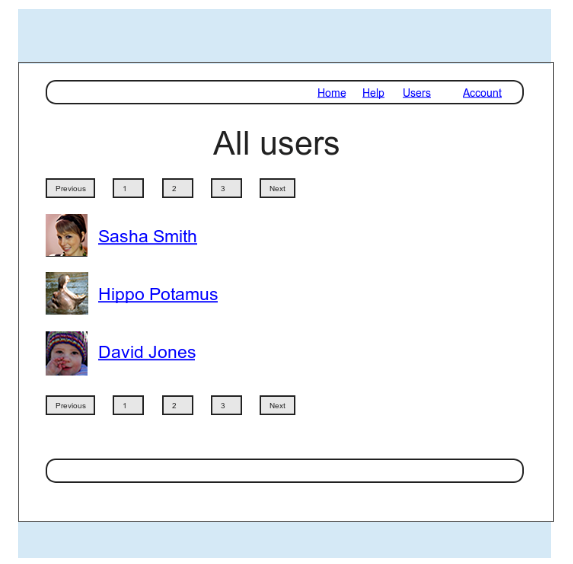
10.1.1 編集フォーム
編集フォームのモックアップ
(公式より参考)
まずはフィーチャーブランチを作成。
$ git checkout -b updating-users最初はeditアクションを実装する。
app/controllers/users_controller.rb# GET /users/:id/edit def edit @user = User.find(params[:id]) #=> app/views/users/edit.html.erb end endapp/views/users/edit.html.erb
<% provide(:title, "Edit user") %>
<h1>Update your profile</h1>

<div class="row">
  <div class="col-md-6 col-md-offset-3">
    <!--入力formの送信先を指定-->
    <%= form_for(@user) do |f| %>
    <!--エラーメッセージ-->
      <%= render 'shared/error_messages' %>

       <!--入力formを作成-->
      <%= f.label :name %>
      <%= f.text_field :name, class: 'form-control' %>

      <%= f.label :email %>
      <%= f.email_field :email, class: 'form-control' %>

      <%= f.label :password %>
      <%= f.password_field :password, class: 'form-control' %>

      <%= f.label :password_confirmation, "Confirmation" %>
      <%= f.password_field :password_confirmation, class: 'form-control' %>

      <%= f.submit "Save changes", class: "btn btn-primary" %>
    <% end %>

    <!--編集完了ボタンとユーザー画像を表示-->
    <div class="gravatar_edit">
      <%= gravatar_for @user %>
      <a href="http://gravatar.com/emails" target="_blank">change</a>
    </div>
  </div>
</div>
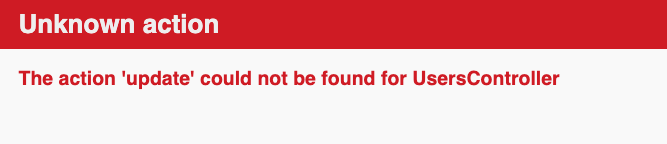
ユーザーのeditビュー画面の表示と、saveを押すとupdateアクションに移行しているか(エラー画面)を確認する。
Webブラウザは通常GETリクエストとPOSTの2つのリクエストのみのため、PATCHリクエストを送信できないので、RailsはPOSTリクエストと隠しinputフィールドを利用してPATCHリクエストを「偽造」している。
edit.heml.erbとnew.html.erbはform_for(@user)...と構造は同じだが、
editにはDBに入っている値、newはDBにない新しいインスタンスが入り、これをRailsのActive Recordにあるnew_record?メソッドが判断する。Ruby on Rails チュートリアル 第10章 ユーザー更新 beforeフィルター フレンドリーフォワーディング adminまで
最後に、サイト内移動用のヘッダーSettingsにユーザー一覧表示用のリンクを追加する。
app/views/layouts/_header.html.erb<li><%= link_to "Users", users_path %></li> <li><%= link_to "Settings", edit_user_path(current_user) %></li>10.1.2 編集の失敗
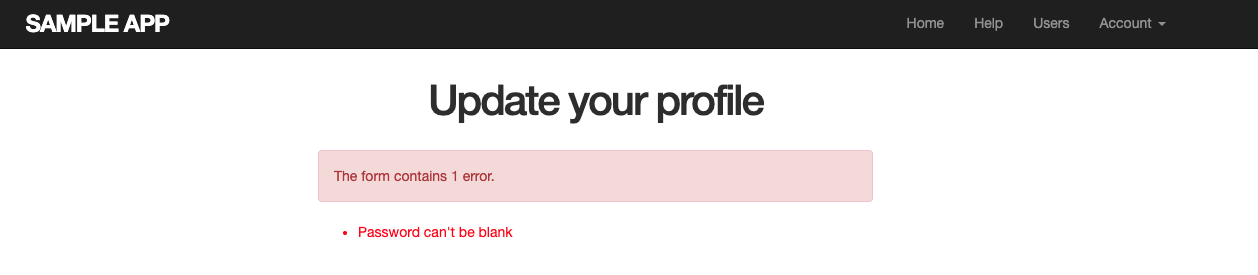
ユーザー登録に失敗したときと似た方法で、編集に失敗した場合について扱う。updateアクションを追加して失敗時の処理表示を実装する。
app/controllers/users_controller.rb# PATCH /users/:id def update @user = User.find(params[:id]) if @user.update_attributes(user_params) # Success else # Failure #=> @user.errors.full_messages() render 'edit' end endパスワードなしで更新すると、エラーメッセージが出る。
10.1.3 編集失敗時のテスト
統合テストを生成
$ rails generate integration_test users_editテスト内容を記載する。流れは下記の通り。
- まず編集ページにアクセス
- editビュー(テンプレート)が描画されるかどうかをチェック
- その後、無効な情報を送信
- editビューが再描画されるかどうかをチェック
この特徴として、
PATCHリクエストを送るためにpatchメソッドを使っているというものがある。patchメソッドはとは、getやpost、deleteメソッドと同じように、HTTPリクエストを送信するためのメソッド。test/integration/users_edit_test.rbrequire 'test_helper' class UsersEditTest < ActionDispatch::IntegrationTest def setup @user = users(:michael) end test "unsuccessful edit" do get edit_user_path(@user) assert_template 'users/edit' patch user_path(@user), params: { user: { name: "", email: "foo@invalid", password: "foo", password_confirmation: "bar" } } assert_template 'users/edit' end endテストが通過すればok!
10.1.4 TDDで編集を成功させる
TDD
TDDとはテスト駆動開発(Test-Driven Development: TDD)の名称で、プログラム実装前にテストコードを書き(テストファーストと呼ばれる)、動作する必要最低限な実装をとりあえず行った後にコードを改善していく手法である。
基本スタイルは
1. (RED:失敗する)テストコードを書く
2. テストに通る(GREEN:成功する)最低限のコードを書く
3. コードの重複を除去する(リファクタリング)
を繰り返すもので、アジャイル開発等でよく用いられる。
(※本記事では(公式)
の理解を目的とするため、REDは一部省略してリファクタリングに移る場合もあります)この節では編集フォームが動作するようにする。
今回はアプリケーション用のコードを実装する前に統合テストとして受け入れテスト (Acceptance Tests)を行う。
受け入れテストとは、ある機能の実装が完了し、受け入れ可能な状態になったかどうかを決める(成功したらどうなるか?の)テストとされている。
先ほどのテストをベースとして、
- 今回はユーザー情報を更新する有効な情報を送信する
- 次に、flashメッセージが空でないかどうか
- プロフィールページにリダイレクトされるかどうか
- DBのユーザー情報をインスタンスに上書きする(リロード)
- データベース内のユーザー情報が正しく変更されたかどうか
test/integration/users_edit_test.rbtest "successful edit" do get edit_user_path(@user) assert_template 'users/edit' name = "Foo Bar" email = "foo@bar.com" patch user_path(@user), params: { user: { name: name, email: email, password: "", password_confirmation: "" } } assert_not flash.empty? assert_redirected_to @user @user.reload assert_equal name, @user.name assert_equal email, @user.email endもちろん成功部を実装していないためテストしてもRED。
updateアクションif文に成功パターンとして、flashと@userでリダイレクト動作を追加する。
app/controllers/users_controller.rbdef update @user = User.find(params[:id]) if @user.update_attributes(user_params) # Success flash[:success] = "Profile updated" redirect_to @user else先ほどのテストでパスワードが空で渡しているためバリデーションで弾かれるが、例外処理として
allow_nil: trueというオプションをvalidatesに追加してテストを通過 & 更新flashの表示を確認。app/models/user.rbvalidates :password, presence: true, length: { minimum: 6 }, allow_nil: true
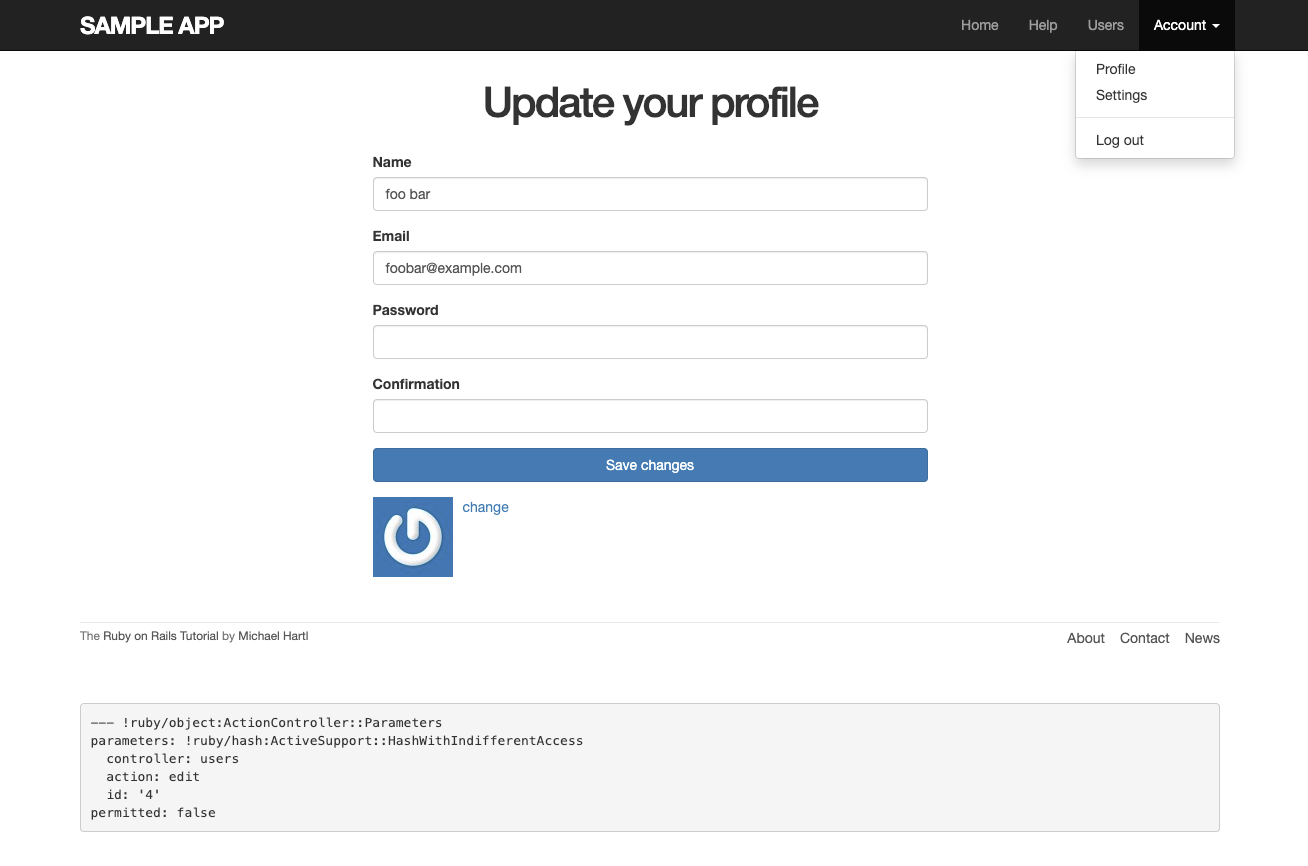
10.2 認可
editアクションとupdateアクションの動作導入はできたが、今のままでは誰でも (ログインしていないユーザーでも) ユーザー情報を編集できてしまうので、ユーザーにログインを要求し、かつ自分以外のユーザー情報を勝手に変更できないように制御する。こういったセキュリティ上の制御機構を
セキュリティモデルと呼ぶ。
(公式より参考)
(実際のところ、本人でもセッションが切れてしまった場合も含む)
この節では、ログインしていないユーザーが保護された(自分の権限のない)ページにアクセスしようとしたらログインを促すよう対処する。認証と認可
日本語だと似たような印象になるが、
認証(英:Authentication, AuthN)
→ 何者であるかを特定すること。
ex.「〇〇ですか?」と尋ねられる、職務質問で身分証の提示を求められるなど
Railsでは、*** authenticateメソッド***認可(英:Authorization, AuthZ)
→ 行動やリソースの使用を許可すること。
ex.「△△の資格がありますね。あのカウンターへどうぞ」と権限を認められる。
Railsでは、beforeメソッド`<参考>
認証と認可10.2.1 ユーザーにログインを要求する
beforeフィルター
beforeフィルターとは、before_actionメソッドを使って何らかの処理が実行される直前に特定のメソッドを実行する仕組みのこと。
今回はユーザーにログインを要求するためコントローラーに追加する。
before_actionの後にメソッド名をシンボルでlogged_in_userメソッドを定義、その後に:onlyオプション (ハッシュ) で渡されたeditアクション、updateアクションを入れることで、「only以下のアクション(edit、updateアクション)が実行される前に、最初に定義したメソッド(logged_in_user)を実行してね」という内容になる。
app/controllers/users_controller.rbclass UsersController < ApplicationController before_action :logged_in_user, only: [:edit, :update] 省略 # beforeアクション # ログイン済みユーザーかどうか確認 def logged_in_user unless logged_in? flash[:danger] = "Please log in." redirect_to login_url end end end
この段階ではテストしててもRED。原因としては、editアクションやupdateアクションでログインを要求するようになったため、ログインしていないユーザーだとこれらのテストが失敗するようになったため。対処としては、editアクションやupdateアクションをテストする前にログインしておくよう、
log_in_asヘルパーを実装する。test/integration/users_edit_test.rbtest "unsuccessful edit" do log_in_as(@user) #=> Michaelとしてログイン 省略 test "successful edit" do log_in_as(@user) #=> MichaelとしてログインテストはGREEN。
しかし、実はまだbeforeフィルターの実装はまだ終わっていない。セキュリティモデルに関する実装を取り外してもテストが通ってしまうか、beforeフィルターをコメントアウトしてテスト確認。app/controllers/users_controller.rbclass UsersController < ApplicationController # before_action :logged_in_user, only: [:edit, :update]0 failures, 0 errors, 0 skips通過してしまった。
beforeフィルターは基本的にアクションごとに適用していくので、Usersコントローラのテストもアクションごとに書いていく。手順としては、
1.routesからedit、updateの正しい種類のHTTPリクエスト確認
2. そのリクエストを使ってeditアクションとupdateアクションをそれぞれ実行
3. flashにメッセージが代入されたかどうか
4. ログイン画面にリダイレクトされたかどうか$ rails routes Prefix Verb URI Pattern Controller#Action sessions_new GET /sessions/new(.:format) sessions#new root GET / static_pages#home static_pages_home GET /static_pages/home(.:format) static_pages#home help GET /help(.:format) static_pages#help about GET /about(.:format) static_pages#about contact GET /contact(.:format) static_pages#contact signup GET /signup(.:format) users#new POST /signup(.:format) users#create login GET /login(.:format) sessions#new POST /login(.:format) sessions#create logout DELETE /logout(.:format) sessions#destroy users GET /users(.:format) users#index POST /users(.:format) users#create new_user GET /users/new(.:format) users#new edit_user GET /users/:id/edit(.:format) users#edit user GET /users/:id(.:format) users#show PATCH /users/:id(.:format) users#update PUT /users/:id(.:format) users#update DELETE /users/:id(.:format) users#destroyeditとupdateアクションの保護に対するテスト追加。
beforeフィルターが入っているかの確認(ユーザー:Michael追加)。具体的には、
1. ログインしてない状況でgetリクエスト→ユーザーの編集ページに
2. flashが出て
3. ログインにリダイレクトされるかもう一つはpatchリクエスト(ブラウザ以外からもある)にもneforeの確認を行うもの。
test/controllers/users_controller_test.rbrequire 'test_helper' class UsersControllerTest < ActionDispatch::IntegrationTest def setup @user = users(:michael) end . . . test "should redirect edit when not logged in" do get edit_user_path(@user) assert_not flash.empty? assert_redirected_to login_url end test "should redirect update when not logged in" do patch user_path(@user), params: { user: { name: @user.name, email: @user.email } } assert_not flash.empty? assert_redirected_to login_url end endテストして
2 failures, 0 errors, 0 skipsエラーでなく失敗したのok(コメントアウト解除)
10.2.2 正しいユーザーを要求する
ユーザーが自分の情報だけを編集できるようにしたい。まずはユーザーの情報が互いに編集できないことを確認するために、ユーザー用のfixtureファイル(YAML)に2人目のユーザー(Archer)を追加する。
test/fixtures/users.ymlarcher: name: Sterling Archer email: duchess@example.gov password_digest: <%= User.digest('password') %>次に、
log_in_asメソッドを使ってeditアクションとupdateアクションをテスト。このとき、既にログイン済みのユーザーを対象として(①ArcherさんでログインしてMichaelさん入ろうとする、②Archerさんでログインしてpatchを送ろうとする)、ログインページではなくルートURLにリダイレクトしている点に注意。test/controllers/users_controller_test.rbdef setup @user = users(:michael) @other_user = users(:archer) #=> 他ユーザー追加 endテストではエラーになるので、beforeアクションに書き足す。
app/controllers/users_controller.rbclass UsersController < ApplicationController before_action :logged_in_user, only: [:edit, :update] before_action :correct_user, only: [:edit, :update] #順番に注意! 上から順番に「ログインしたユーザー」且つ正しいユーザー # beforeアクション # ログイン済みユーザーかどうか確認 def logged_in_user unless logged_in? flash[:danger] = "Please log in." redirect_to login_url end end # 正しいユーザーかどうか確認 def correct_user # GET /users/:id/edit # PATCH /users/:id @user = User.find(params[:id]) redirect_to(root_url) unless @user == current_user endテストは通過。
リファクタリングとして、一般的な慣習に倣ってcurrent_user?という論理値を返すメソッドを実装。correct_userの中で使えるようにしたいので、Sessionsヘルパーの中にこのメソッドを追加する。
(旧)unless @user == current_user (新)unless current_user?(@user)app/controllers/users_controller.rbredirect_to(root_url) unless current_user?(@user) #=> @user == current_userapp/helpers/sessions_helper.rb# 渡されたユーザーがログイン済みユーザーであればtrueを返す def current_user?(user) user == current_user endテスト通過。
10.2.3 フレンドリーフォワーディング
フレンドリーフォワーディング
フレンドリーフォワーディングとは、ユーザーがログインした後、ログイン直前に閲覧していたページヘとリダイレクトさせる(あると便利な)機能のこと。
フレンドリーフォワーディングのテストは、ログイン手前でログインページへ(ユーザさんにログインしてもらう)
ログインした後に編集ページへアクセスするという順序を逆にするもの。test/integration/users_edit_test.rbtest "successful edit with friendly forwarding" do get edit_user_path(@user) log_in_as(@user) assert_redirected_to edit_user_url(@user) name = "Foo Bar" email = "foo@bar.com" patch user_path(@user), params: { user: { name: name, email: email, password: "", password_confirmation: "" } } assert_not flash.empty? assert_redirected_to @user @user.reload assert_equal name, @user.name assert_equal email, @user.email end実装してないのでテストして失敗(failure)。
ユーザーを希望のページに転送するには、リクエスト時点のページをどこかに保存しておき、その場所にリダイレクトさせる必要があり、
store_locationとredirect_back_orの2つのメソッドを使って対応する。app/helpers/sessions_helper.rb# 記憶したURL (もしくはデフォルト値) にリダイレクト def redirect_back_or(default) redirect_to(session[:forwarding_url] || default) session.delete(:forwarding_url) end # アクセスしようとしたURLを覚えておく def store_location session[:forwarding_url] = request.original_url if request.get? end
redirect_back_orメソッド
転送先のURLを保存する場所は(今回は一時的なものなので)DBでなくsessionを使い、もともとユーザーが行きたかった場所を保存しておいてURLがある場合はリダイレクトし、ない場合(sessionが切れたり分からなくなったら)デフォルト値にユーザーのページを表示する。終わったらsessionを消す。
デフォルトのURLは、sessionコントローラのcreateアクションに追加し、サインイン成功後にリダイレクトします
store_locationメソッド
リクエストが送られたURLをsession変数のforwarding_urlキーに格納。ただし、GETリクエストが送られたときのみ(後置if)。ログインユーザー用beforeフィルターにstore_locationメソッドを追加する。
app/controllers/users_controller.rb# ログイン済みユーザーかどうか確認 def logged_in_user unless logged_in? store_location #=> アクセスしようとしたURLを覚えておく flash[:danger] = "Please log in." redirect_to login_url end endapp/controllers/sessions_controller.rbdef create user = User.find_by(email: params[:session][:email].downcase) if user && user.authenticate(params[:session][:password]) log_in user params[:session][:remember_me] == '1' ? remember(user) : forget(user) redirect_back_or user #=> フレンドリーフォワーディングを備えるこれでテストは通過する。
Settingsの確認もok.
10.3 すべてのユーザーを表示する
この節ではすべての(大量の)ユーザーをページごとに一覧表示、
かつsignupしたユーザーのみが閲覧できるindexアクションを実装する。
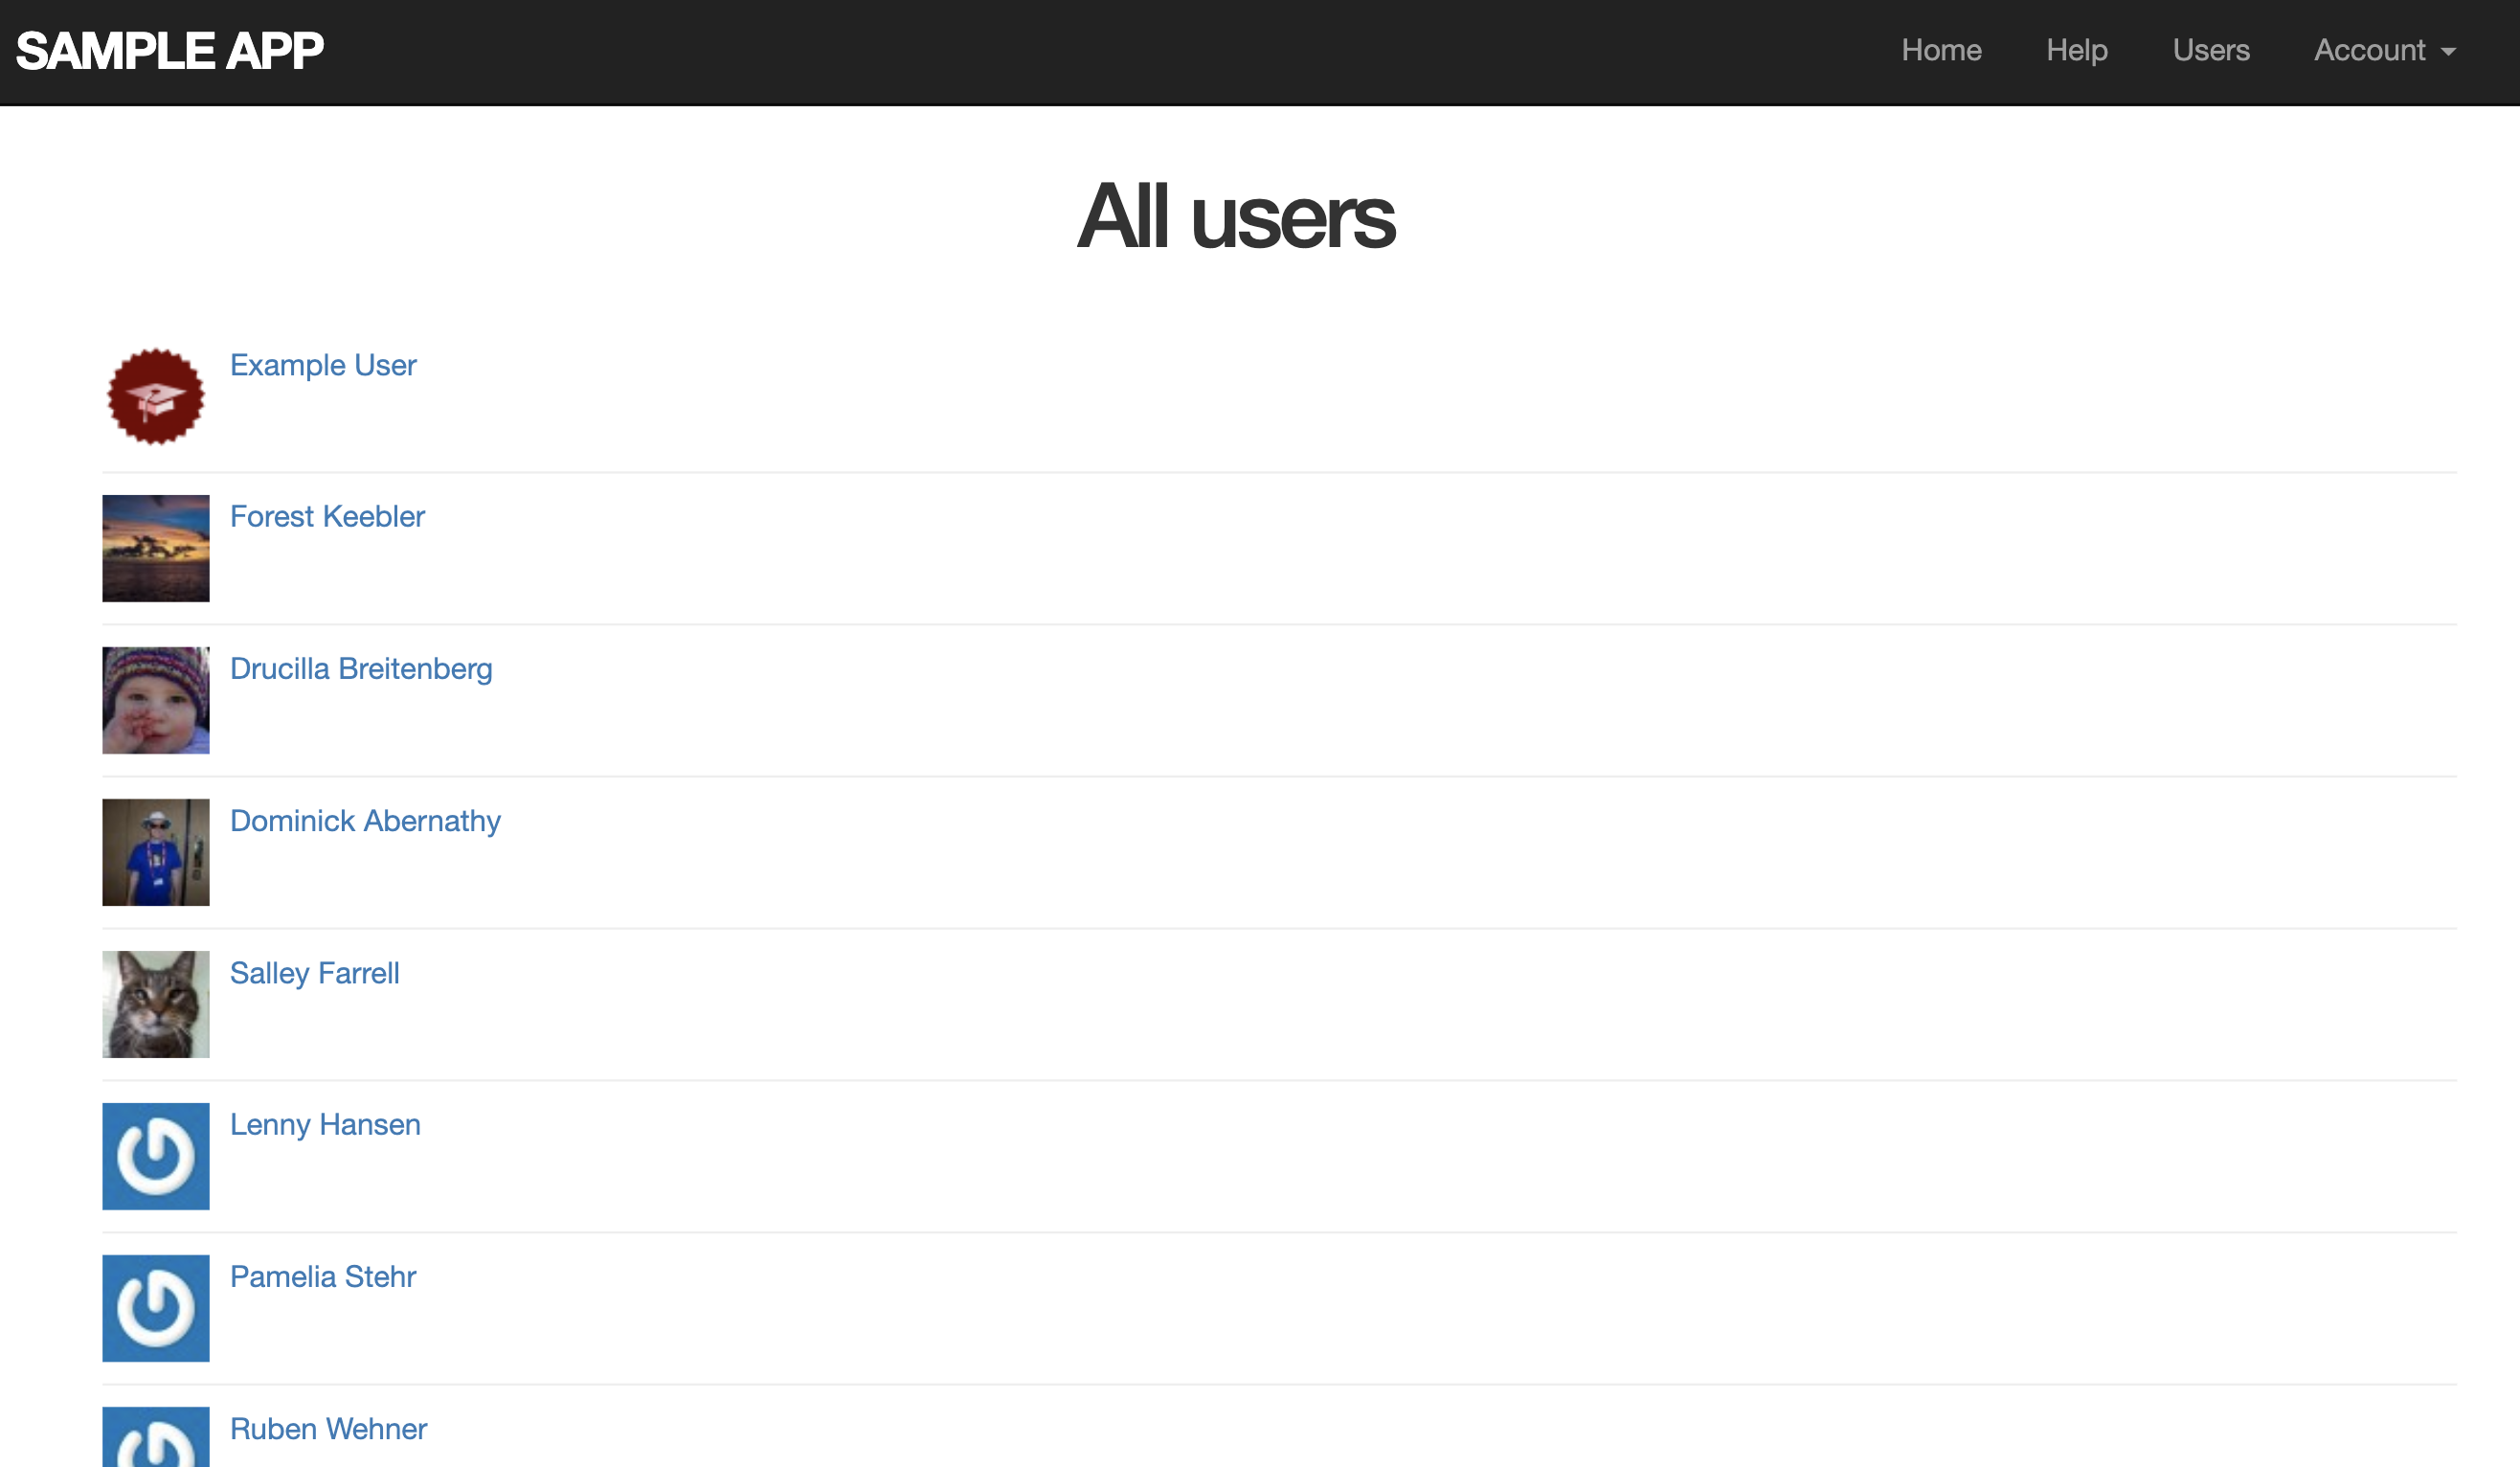
それに伴い、①DBにサンプルデータを追加する方法、②将来ユーザー数が膨大になってもindexページを問題なく表示できるようにするためのユーザー出力のページネーション (pagination=ページ分割) の方法、を学ぶ。モックアップ
(公式より参考)
10.3.1 ユーザーの一覧ページ
indexページを不正なアクセスから守るために、まずはindexアクションが正しくリダイレクトするか検証するテスト。
test/controllers/users_controller_test.rb#=> 習慣として、indexに関するテストは一番上に書く test "should redirect index when not logged in" do get users_path #=> user(s)_pathでindexのurl(/users)へgetリクエスト assert_redirected_to login_url endbeforeフィルターに何もないため失敗するので、beforeフィルターの
logged_in_userにindexアクションを追加して、このアクションを保護する。すべてのユーザーを表示するために、User.allを使ってデータベース上の全ユーザーを取得し、ビューで使えるインスタンス変数@usersに代入。app/controllers/users_controller.rbbefore_action :logged_in_user, only: [:index, :edit, :update] #=> 「:index」追加 def index @users = User.all endユーザーのindexビュー(app/views/users/index.html.erb)を新規に作成。
userはハッシュを受け取らないので、引数に2つ(gravatar_for userとsize: 50)を与えるとエラーが起こる。<% provide(:title, 'All users') %> <h1>All users</h1> <ul class="users"> <% @users.each do |user| %> <li> <%= gravatar_for user, size: 50 %> <%= link_to user.name, user %> </li> <% end %> </ul>
app/helpers/users_helper.rbmodule UsersHelper # 引数で与えられたユーザーのGravatar画像を返す def gravatar_for(user, options = { size: 80 }) #=> デフォでsize80追加 gravatar_id = Digest::MD5::hexdigest(user.email.downcase) size = options[:size] #=>変数size ,下記で「?s=#{size}」追加 gravatar_url = "https://secure.gravatar.com/avatar/#{gravatar_id}?s=#{size}" image_tag(gravatar_url, alt: user.name, class: "gravatar") end endSCSSの追記
app/assets/stylesheets/custom.scss/* Users index */ .users { list-style: none; margin: 0; li { overflow: auto; padding: 10px 0; border-bottom: 1px solid $gray-lighter; } }ビュー画面ができたので、ヘッダー(app/views/layouts/_header.html.erb)にユーザー一覧ページへのリンクを更新する。
<% if logged_in? %>
  <li><%= link_to "Users", users_path %></li>
テストして通過。
10.3.2 サンプルのユーザー
indexページに複数のユーザーを表示させてみる。
まずはGemfileにFaker gemを追加する。Gemfilegem 'bcrypt', '3.1.12' gem 'faker', '1.7.3' #=> 追加データベース上にサンプルユーザーを生成するRailsタスク(サンプルユーザーを生成するRubyスクリプト)を追加。
Railsではdb/seeds.rbというファイルを標準とする。
中身としては、
1. まずユーザー(Example User)を作る
2. Fakerの「.name」メソッドからそれっぽいユーザーを99人増やすdb/seeds.rbUser.create!(name: "Example User", email: "example@railstutorial.org", password: "foobar", password_confirmation: "foobar") 99.times do |n| name = Faker::Name.name email = "example-#{n+1}@railstutorial.org" password = "password" User.create!(name: name, email: email, password: password, password_confirmation: password) endそしてbundle install。だが、筆者の場合失敗。
エラー対応:GemfileにFaker gemを追加できない
bundle installしようとするとエラー。
サーバを止めてもダメ。環境
Rails v5.1.6
faker v1.7.3$ bundle install The dependency tzinfo-data (>= 0) will be unused by any of the platforms Bundler is installing for. Bundler is installing for ruby but the dependency is only for x86-mingw32, x86-mswin32, x64-mingw32, java. To add those platforms to the bundle, run `bundle lock --add-platform x86-mingw32 x86-mswin32 x64-mingw32 java`. Fetching gem metadata from https://rubygems.org/............ Fetching gem metadata from https://rubygems.org/. Resolving dependencies... Bundler could not find compatible versions for gem "i18n": In snapshot (Gemfile.lock): i18n (= 1.7.0) In Gemfile: rails (= 5.1.6) was resolved to 5.1.6, which depends on activesupport (= 5.1.6) was resolved to 5.1.6, which depends on i18n (>= 0.7, < 2) faker (= 1.7.3) was resolved to 1.7.3, which depends on i18n (~> 0.5) Running `bundle update` will rebuild your snapshot from scratch, using only the gems in your Gemfile, which may resolve the conflict.対応策
fakerのバージョンを指定しないGemfile#旧 gem 'faker', '1.7.3' gem 'faker' #=> バージョン指定なし再度bundle install実行。
$ bundle install
The dependency tzinfo-data (>= 0) will be unused by any of the platforms Bundler is installing for. Bundler is installing for ruby but the dependency is only for x86-mingw32, x86-mswin32, x64-mingw32, java. To add those platforms to the bundle, run `bundle lock --add-platform x86-mingw32 x86-mswin32 x64-mingw32 java`.
Fetching gem metadata from https://rubygems.org/............
Fetching gem metadata from https://rubygems.org/.
Resolving dependencies...
Using rake 13.0.1
Using concurrent-ruby 1.1.5
Using i18n 1.7.0
Using minitest 5.10.3
Using thread_safe 0.3.6
Using tzinfo 1.2.5
Using activesupport 5.1.6
Using builder 3.2.3
Using erubi 1.9.0
Using mini_portile2 2.4.0
Using nokogiri 1.10.5
Using rails-dom-testing 2.0.3
Using crass 1.0.5
Using loofah 2.3.1
Using rails-html-sanitizer 1.3.0
Using actionview 5.1.6
Using rack 2.0.7
Using rack-test 1.1.0
Using actionpack 5.1.6
Using nio4r 2.5.2
Using websocket-extensions 0.1.4
Using websocket-driver 0.6.5
Using actioncable 5.1.6
Using globalid 0.4.2
Using activejob 5.1.6
Using mini_mime 1.0.2
Using mail 2.7.1
Using actionmailer 5.1.6
Using activemodel 5.1.6
Using arel 8.0.0
Using activerecord 5.1.6
Using ansi 1.5.0
Using execjs 2.7.0
Using autoprefixer-rails 9.7.2
Using bcrypt 3.1.12
Using bindex 0.8.1
Using rb-fsevent 0.10.3
Using ffi 1.11.2
Using rb-inotify 0.10.0
Using sass-listen 4.0.0
Using sass 3.7.4
Using bootstrap-sass 3.3.7
Using bundler 1.17.3
Using byebug 9.0.6
Using coderay 1.1.2
Using coffee-script-source 1.12.2
Using coffee-script 2.4.1
Using method_source 0.9.2
Using thor 0.20.3
Using railties 5.1.6
Using coffee-rails 4.2.2
Fetching faker 2.10.1
Installing faker 2.10.1
Using formatador 0.2.5
Using ruby_dep 1.5.0
Using listen 3.1.5
Using lumberjack 1.0.13
Using nenv 0.3.0
Using shellany 0.0.1
Using notiffany 0.1.3
Using pry 0.12.2
Using guard 2.13.0
Using guard-compat 1.2.1
Using guard-minitest 2.4.4
Using multi_json 1.14.1
Using jbuilder 2.7.0
Using jquery-rails 4.3.1
Using ruby-progressbar 1.10.1
Using minitest-reporters 1.1.14
Using puma 3.9.1
Using sprockets 3.7.2
Using sprockets-rails 3.2.1
Using rails 5.1.6
Using rails-controller-testing 1.0.2
Using tilt 2.0.10
Using sass-rails 5.0.6
Using spring 2.0.2
Using spring-watcher-listen 2.0.1
Using sqlite3 1.3.13
Using turbolinks-source 5.2.0
Using turbolinks 5.0.1
Using uglifier 3.2.0
Using web-console 3.5.1
Bundle complete! 24 Gemfile dependencies, 82 gems now installed.
Gems in the group production were not installed.
Use `bundle info [gemname]` to see where a bundled gem is installed.
無事終了
(とてもありがたかった)ご参考先
Railsチュートリアルでfakerがインストールできない場合の対処法本編へ戻ります
DBリセット(これまでの登録ユーザー初期化)、Railsタスクを実行 (db:seed) 。$ rails db:migrate:reset $ rails db:seedサンプルですが、たくさんのユーザーさん登場。
10.3.3 ページネーション
ユーザーが増えたのはいいが、今度は逆に1つのページに大量のユーザーが表示されて(仮に1万人とかになったときに)重くなってしまう。
そこで解決するのが、ページネーション (pagination) **というもの。
ページネーションとは、検索などに使われてるような「1つのページに一度に〇〇個だけ表示する」**というもの。
今回は1つのページに一度に30人だけ表示するのに、シンプルとされるwill_paginateメソッドを使う。そのためには、Gemfileにwill_paginate gem とbootstrap-will_paginate gemを両方含め、Bootstrapのページネーションスタイルを使ってwill_paginateを構成する。Gemfilegem 'faker' gem 'will_paginate', '3.1.6' gem 'bootstrap-will_paginate', '1.0.0'$ bundle install新たにpaginateメソッドを追加したため、念のためここでサーバーの再起動を行っておく。
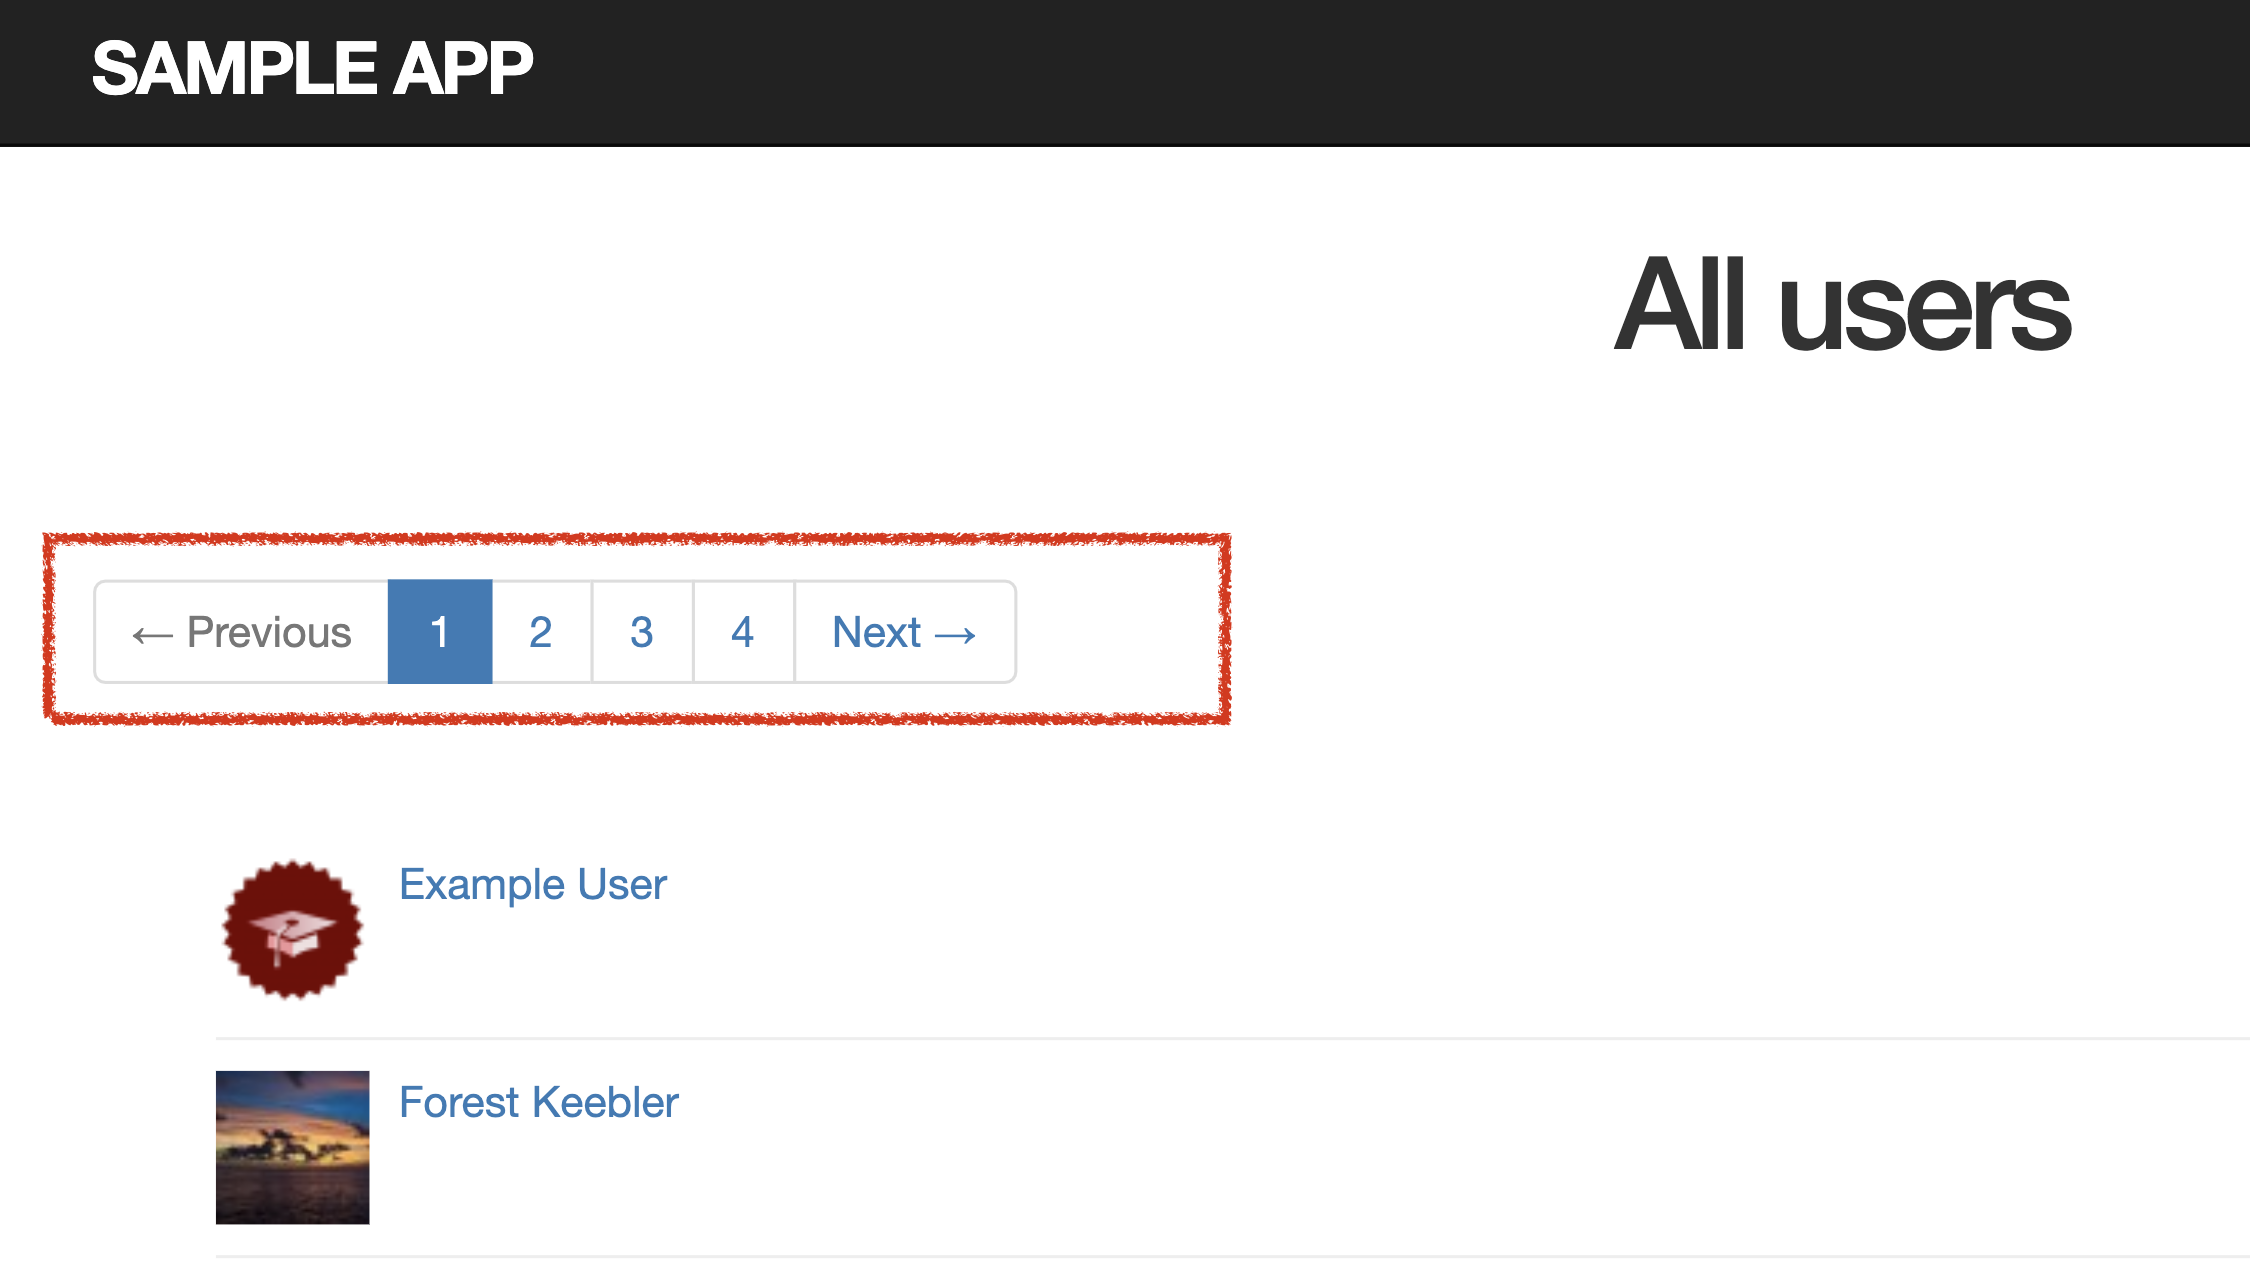
indexページ(app/views/users/index.html.erb)でpaginationを使う<% provide(:title, 'All users') %> <h1>All users</h1> <%= will_paginate %> <ul class="users"> <% @users.each do |user| %> <li> <%= gravatar_for user, size: 50 %> <%= link_to user.name, user %> </li> <% end %> </ul> <%= will_paginate %>
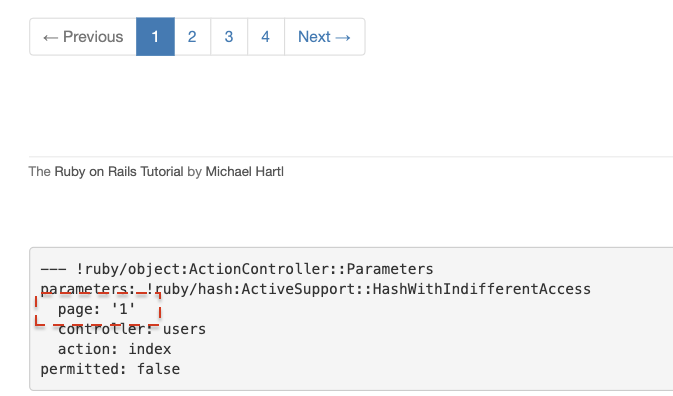
will_paginateメソッドは、usersビューのコードの中から@usersオブジェクトを自動的に見つけ出し、それから他のページにアクセスするためのページネーションリンクを作成してくれる。ただし、現在の@users変数にはUser.allの結果が含まれているが 、will_paginateではpaginateメソッドを使った結果が必要となる。必要となるデータの例は次のとおり
paginateでは、キーが:pageで値がページ番号のハッシュを引数に1を渡すと1~30までのユーザーまで出る
ちなみにpageがnilの場合、 paginateは単に最初のページを返す。$ rails console > User.paginate(page: 1) User Load (1.0ms) SELECT "users".* FROM "users" LIMIT ? OFFSET ? [["LIMIT", 11], ["OFFSET", 0]] (0.1ms) SELECT COUNT(*) FROM "users" => #<ActiveRecord::Relation [#<User id: 1, name: "Example User", email: "example@railstutorial.org", created_at: "2020-01-19 06:42:48", updated_at: "2020-01-19 06:42:48", password_digest: "$2a$10$xDXvcjV4nyrflH.nVpxu2uWGCeBYR5quXeo1ERVKIUE...", remember_digest: nil>, #<User id: 2,... 省略paginateを使うことで、このアプリでユーザーのページネーションを行えるようになる。
具体的には、indexアクション内のallをpaginateメソッドに置き換えて、indexアクションでUsersをページネートするapp/controllers/users_controller.rbdef index #旧 @users = User.all @users = User.paginate(page: params[:page]) end
現在の位置(ページネーションの番号)と下のデータが一致。
10.3.4 ユーザー一覧のテスト
ユーザーの一覧ページが動くようになったので、ページネーションに対するテストを行う。
今回のテストでは、
1. ログイン
2. indexページにアクセス
3. 最初のページにユーザーがいることを確認
4. ページネーションのリンクがあることを確認
の順でテストを行う。まずはfixtureにさらに30人のユーザーを追加する。
今後必要になるので、2人の名前付きユーザーも一緒に追加。test/fixtures/users.ymlmichael: name: Michael Example email: michael@example.com password_digest: <%= User.digest('password') %> archer: name: Sterling Archer email: duchess@example.gov password_digest: <%= User.digest('password') %> lana: name: Lana Kane email: hands@example.gov password_digest: <%= User.digest('password') %> malory: name: Malory Archer email: boss@example.gov password_digest: <%= User.digest('password') %> <% 30.times do |n| %> user_<%= n %>: name: <%= "User #{n}" %> email: <%= "user-#{n}@example.com" %> password_digest: <%= User.digest('password') %> <% end %>統合テストを生成。
$ rails generate integration_test users_index Running via Spring preloader in process 12447 invoke test_unit create test/integration/users_index_test.rb test/integration/users_index_test.rbページネーションを含めたUsersIndexのテスト内容を記述。
具体的には、
1. Michael(何かのユーザー)でログイン
2. ユーザーのindexページへ移動(テンプレート)
3. ページネーションクラスがあるか
4. ユーザーの名前(変数user)をクリックするとそのprofileページに行くかtest/integration/users_index_test.rbrequire 'test_helper' class UsersIndexTest < ActionDispatch::IntegrationTest def setup @user = users(:michael) end test "index including pagination" do log_in_as(@user) get users_path assert_template 'users/index' assert_select 'div.pagination' User.paginate(page: 1).each do |user| assert_select 'a[href=?]', user_path(user), text: user.name end end endテストは通過。
10.3.5 パーシャルのリファクタリング
いくつかリファクタリングを行う。
リファクタリングの第一歩は、ユーザーのliをrender呼び出しに置き換える。(app/views/users/index.html.erb)
renderをパーシャル (ファイル名の文字列) に対してではなく、Userクラスのuser変数に対して実行している。これは、renderにモデルのインスタンスオブジェクトを渡したときのデフォルトの挙動。この場合、Railsは自動的に_user.html.erbという名前のパーシャルを探しにいくので、各ユーザーを表示するパーシャルを作成する。<ul class="users"> <% @users.each do |user| %> <%= render user %> <!-- => app/views/リソース名/_モデル名.html.erb--> <!-- => app/views/users/_user.html.erb--> <% end %> </ul>各ユーザーを表示するパーシャル
app/views/users/_user.html.erb<li> <%= gravatar_for user, size: 50 %> <%= link_to user.name, user %> </li>今度はrenderを@users変数にして、最終的に下記に。
<ul class="users"> <%= render @users %> </ul>Railsは@usersをUserオブジェクトのリストであると推測する。さらに、ユーザーのコレクションを与えて呼び出すと、Railsは自動的にユーザーのコレクションを列挙し、それぞれのユーザーを_user.html.erbパーシャルで出力するので、each文がなくなりコードは短くなった。
一応テストして通過。
10.4 ユーザーを削除する
destroyの実装。この節では、ユーザーを削除するためのリンクを追加する。もちろん、ユーザーを削除(delete)できるのは管理権限を持ったユーザーのみ。モックアップは以下の形式。(公式より参考)
ただしその前に、削除を実行できる権限を持つ管理 (admin) ユーザーのクラスを作成する。
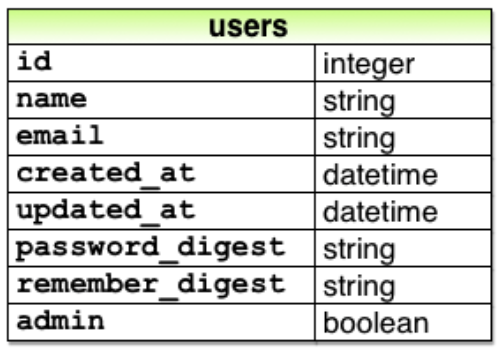
10.4.1 管理ユーザー
特権を持つ管理ユーザーを識別するために、論理値をとるadmin属性をUserモデルに追加する。
こうすると自動的にadmin?メソッド (論理値booleanを返す) も使えるようになるため、これを使って管理ユーザーの状態をテストする。
変更後のデータモデルは以下(公式より参考)
まずはマイグレーションを実行してadmin属性を追加(属性の型をbooleanに指定)
$ rails generate migration add_admin_to_users admin:boolean Running via Spring preloader in process 6078 invoke active_record create db/migrate/20200120090448_add_admin_to_users.rbマイグレーションを実行するとadminカラムがusersテーブルに追加される。デフォルトでは管理者になれないことを示す+nilが入るケースを防ぐため、
default: false引数を与える。db/migrate/[timestamp]_add_admin_to_users.rbclass AddAdminToUsers < ActiveRecord::Migration[5.1] def change add_column :users, :admin, :boolean, default: false end endマイグレーションを実行。
$ rails db:migrateコンソール(sandbox)で動作を確認すると、期待どおりadmin属性が追加されて論理値をとり、さらに疑問符の付いたadmin?メソッドも利用できるようになっている。
$ rails console --sandbox > user = User.first > user.admin? => false > user.toggle!(:admin) => true > user.admin? => trueここではtoggle!メソッドを使って admin属性の状態をfalseからtrueに反転している。
toggle!メソッドの「!」は破壊的メソッドで、「書き換えたらもう元には戻らない」ことを示している。演習用として、最初のユーザーだけをデフォルトで管理者にするよう(admin→true)、サンプルデータを更新しておく。
db/seeds.rbUser.create!(name: "Example User", email: "example@railstutorial.org", password: "foobar", password_confirmation: "foobar", admin: true) 99.times do |n| name = Faker::Name.name email = "example-#{n+1}@railstutorial.org" password = "password" User.create!(name: name, email: email, password: password, password_confirmation: password) endデータベースをリセットして、サンプルデータを再度生成。
$ rails db:migrate:reset $ rails db:seed10.4.2 destroyアクション
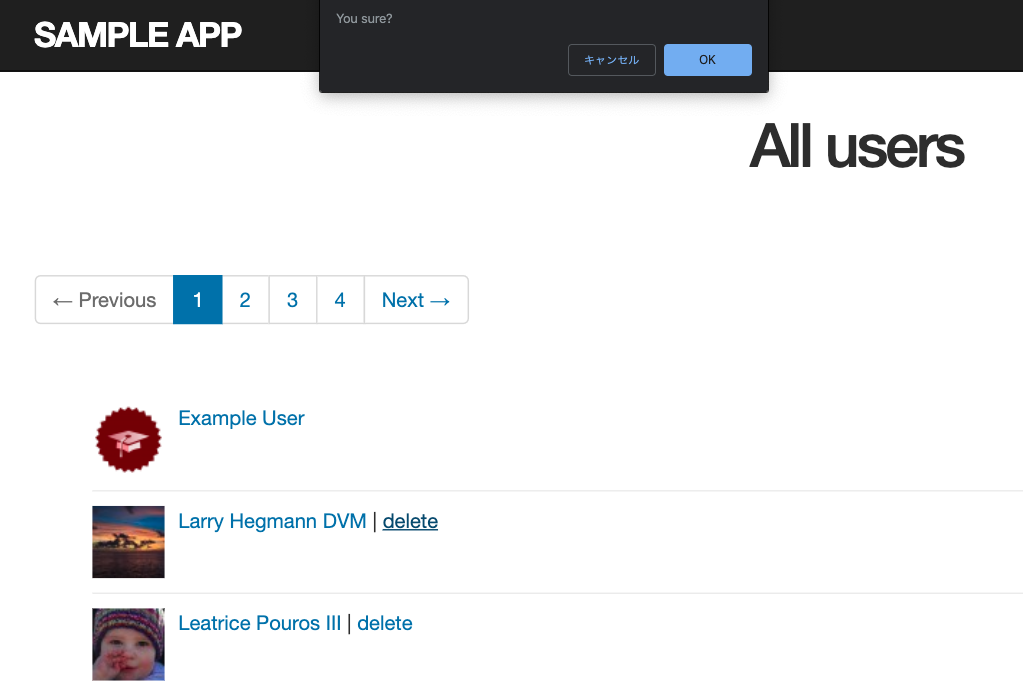
まず、destroyアクションへのリンクを追加する。ユーザーindexページの各ユーザーに削除用のリンクを追加+管理ユーザーへのアクセスを制限が目標。
ユーザー削除用リンクの実装 (管理者にのみ表示される)
(app/views/users/user.html.erb)
※admin権限を持っていても、自分自身は消せないように && !currentuser? で確認を取っている。<li> <%= gravatar_for user, size: 50 %> <%= link_to user.name, user %> <% if current_user.admin? && !current_user?(user) %> | <%= link_to "delete", user, method: :delete, data: { confirm: "You sure?" } %> <% end %> </li>実際にユーザExample Userでログインしてみると、アクションまで(エラー画面で)確認できる。
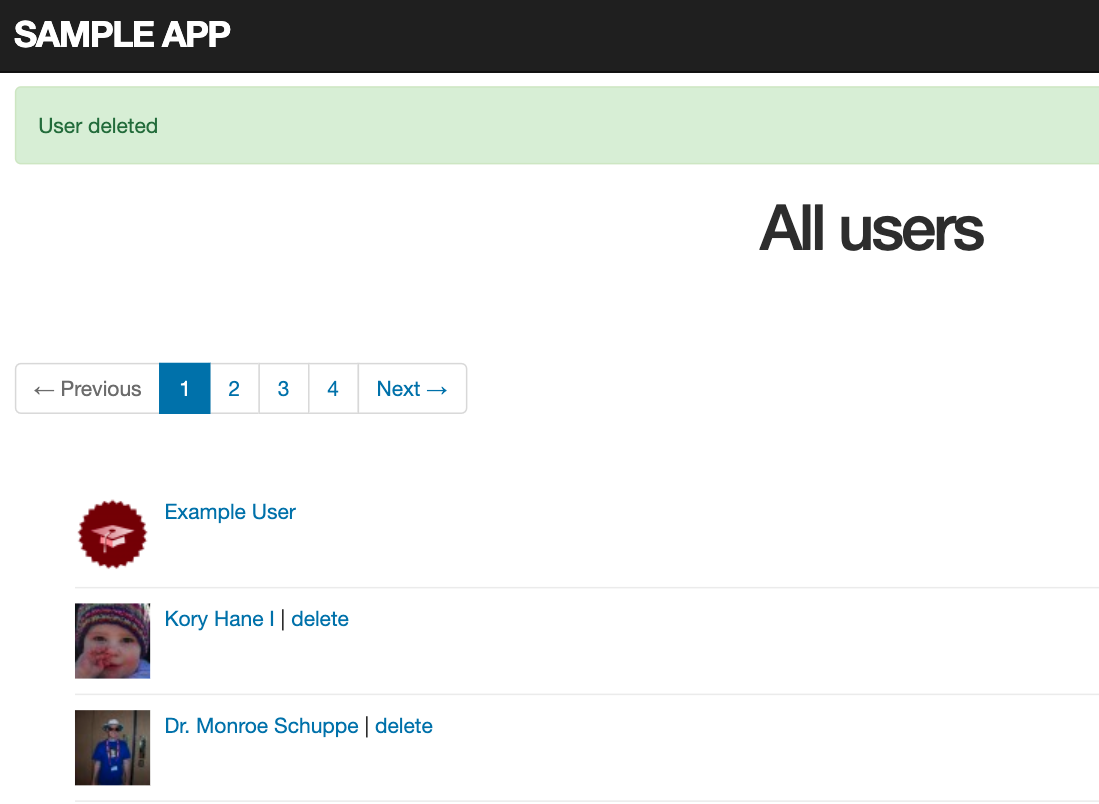
実際に動作するdestroyアクションを追加する。このアクションでは、該当するユーザーを見つけてActive Recordのdestroyメソッドを使って削除し、最後にユーザーのindexページにリダイレクトさせる。ユーザーを削除するためにはログインしていなくてはならないため、destroyアクションもlogged_in_userフィルター(before_action)に追加している。
ただしこれでは、コマンドラインでDELETEリクエストを直接発行するという方法でサイトの全ユーザーを削除される可能性があるため、destroyアクションにもadmin_userフィルターを入れてアクセス制御を実装する。
app/controllers/users_controller.rbclass UsersController < ApplicationController before_action :logged_in_user, only: [:index, :edit, :update, :destroy] before_action :correct_user, only: [:edit, :update] before_action :admin_user, only: [:destroy] 省略 # DELETE /users/:id def destroy User.find(params[:id]).destroy flash[:success] = "User deleted" redirect_to users_url end private # 管理者かどうか確認 def admin_user redirect_to(root_url) unless current_user.admin? end end10.4.3 ユーザー削除のテスト
fixtureファイルの一番上(Michael)を管理者にする。
test/fixtures/users.ymlmichael: name: Michael Example email: michael@example.com password_digest: <%= User.digest('password') %> admin: true管理者権限の制御をアクションレベルでテストする。
「ユーザーがログインしてないときにDELETEリクエスト送ったらだめ」
「ログインしていたとしても、adminじゃなかったらやはりだめ」
という内容。test/controllers/users_controller_test.rbtest "should redirect destroy when not logged in" do assert_no_difference 'User.count' do delete user_path(@user) end assert_redirected_to login_url end test "should redirect destroy when logged in as a non-admin" do log_in_as(@other_user) assert_no_difference 'User.count' do delete user_path(@user) end assert_redirected_to root_url endテストは通過。
最後に、削除リンクとユーザー削除に対する統合テストとして「ユーザーを削除したらユーザーの総数が1つ消えてるよ?」というテストを付け加える(先のテストを大幅に改造)。
上のテストは、
1. サンプルとしてMichaelさん(admin)、Archerさん(non_admin)のユーザーデータを持ってくる
2. ログイン(ユーザーパスが見えるはず)
3. ページネーション見える
4. ユーザーがadminかどうかチェック(adminならdeleteが見えるはず)
5. 選択すればArcherさん(non_admin)は消えるはず下のテストは,
1. non_adminとしてログイン
2. deleteリンクは見えないはずなのでcountは0か?test/integration/users_index_test.rbrequire 'test_helper' class UsersIndexTest < ActionDispatch::IntegrationTest def setup @admin = users(:michael) @non_admin = users(:archer) end test "index as admin including pagination and delete links" do log_in_as(@admin) get users_path assert_template 'users/index' assert_select 'div.pagination' first_page_of_users = User.paginate(page: 1) first_page_of_users.each do |user| assert_select 'a[href=?]', user_path(user), text: user.name unless user == @admin assert_select 'a[href=?]', user_path(user), text: 'delete' end end assert_difference 'User.count', -1 do delete user_path(@non_admin) end end test "index as non-admin" do log_in_as(@non_admin) get users_path assert_select 'a', text: 'delete', count: 0 end endテストは通過。
最後にherokuへデプロイ。
$ git add -A
$ git commit -m "Finish ch10"
$ git checkout master
$ git merge updating-users
$ git push heroku master
本番環境として
・ DBリセットは危険なので本来あまりやらない
・ 本番環境にrun rails db:seedで擬似データを送る。これもあまりやらない
・ リモートのリンクのfetchをクリック$ heroku pg:reset DATABASE ▸ WARNING: Destructive action ▸ To proceed, type sample-app or re-run this command with --confirm sample-app > sample-app $ heroku run rails db:migrate $ heroku run rails db:seed $ git remote -v ※リンク確認
本番環境でログインしてユーザー削除の確認ができたので終了!


- 投稿日:2020-01-20T19:33:57+09:00
[Rails] chartkick の Tips 2つ
bar_chart で棒の幅を一定にしつつ、グラフのheightを棒数に応じた可変長にする方法
私の場合は、以下のように
heightを設定すると、上手くいきました。
@items.size * 2で棒数に応じるようにし、
+ 2は、グラフのx軸メモリなどの高さに関するもののはずです。〇〇.html.haml= bar_chart @items, height: "#{@items.size * 2 + 2}rem"ちなみに、単純に
height: "#{@items.size * 2}rem"にすると、棒数が増えるにつれて段々棒の幅が太くなってしまいます。
bar_chart で、なぜか勝手に項目順がソートされてしまう場合
項目名がint型だと勝手にソートされてしまいました。
事前にto_sでstring型に変えておけば問題無いようです。
- 投稿日:2020-01-20T17:59:23+09:00
JavaScriptの差分ライブラリを使ってERBに入れてみた
<!DOCTYPE html>
<html>
<head>
  <meta charset="UTF-8">
  <title>vue_pager</title>
  <link rel="stylesheet" type="text/css" href="https://cdnjs.cloudflare.com/ajax/libs/diff2html/2.3.3/diff2html.min.css">
  <script type="text/javascript" src="https://cdnjs.cloudflare.com/ajax/libs/jsdiff/3.4.0/diff.min.js"></script>
  <script src="https://cdnjs.cloudflare.com/ajax/libs/jquery/3.2.1/jquery.js"></script>
  <script type="text/javascript" src="https://cdnjs.cloudflare.com/ajax/libs/diff2html/2.3.3/diff2html.min.js"></script>
  <script type="text/javascript" src="https://cdnjs.cloudflare.com/ajax/libs/diff2html/2.3.3/diff2html-ui.min.js"></script>
</head>
<body>
<div id="user" userJson="<%= @user.to_json %>"></div>
<div id="app">
</div>
</body>

<script>
    document.addEventListener('DOMContentLoaded', function() {
        var diff = document.getElementById('user');
        var diffJson = JSON.parse(diff.getAttribute('userJson'));
        const unifiedDiff = JsDiff.createPatch("user", diffJson[0], diffJson[1], "変更前", "変更後");
        const diff2htmlUi = new Diff2HtmlUI({diff: unifiedDiff});
        diff2htmlUi.draw('#app', {inputFormat: 'json', showFiles: true, matching: 'lines'});
    });
</script>
</html>
- 投稿日:2020-01-20T17:59:23+09:00
備忘録 JavaScriptの差分ライブラリを使ってERBに入れてみただけ
<!DOCTYPE html>
<html>
<head>
  <meta charset="UTF-8">
  <title>vue_pager</title>
  <link rel="stylesheet" type="text/css" href="https://cdnjs.cloudflare.com/ajax/libs/diff2html/2.3.3/diff2html.min.css">
  <script type="text/javascript" src="https://cdnjs.cloudflare.com/ajax/libs/jsdiff/3.4.0/diff.min.js"></script>
  <script src="https://cdnjs.cloudflare.com/ajax/libs/jquery/3.2.1/jquery.js"></script>
  <script type="text/javascript" src="https://cdnjs.cloudflare.com/ajax/libs/diff2html/2.3.3/diff2html.min.js"></script>
  <script type="text/javascript" src="https://cdnjs.cloudflare.com/ajax/libs/diff2html/2.3.3/diff2html-ui.min.js"></script>
</head>
<body>
<div id="user" userJson="<%= @user.to_json %>"></div>
<div id="app">
</div>
</body>

<script>
    document.addEventListener('DOMContentLoaded', function() {
        var diff = document.getElementById('user');
        var diffJson = JSON.parse(diff.getAttribute('userJson'));
        const unifiedDiff = JsDiff.createPatch("user", diffJson[0], diffJson[1], "変更前", "変更後");
        const diff2htmlUi = new Diff2HtmlUI({diff: unifiedDiff});
        diff2htmlUi.draw('#app', {inputFormat: 'json', showFiles: true, matching: 'lines'});
    });
</script>
</html>
- 投稿日:2020-01-20T17:07:08+09:00
画像投稿ボタンのCSS
なんとなく納得いかなかったけど忘れない為にメモ。
form_for
<label>
 <span class="btn btn-primary">
  <input type="file" style="display:none" name="product[product_image]" include_hidden="false" >
     編集してください
 </span>
</label>
end
こうなる。
name部分はProductモデルのproduct_image_idカラム。使用gemはrefile。
f.attachment_fieldだとうまいこといかなかったのでinputタグを使用。labelタグで囲わないと画像を選択できない。なんでや。

- 投稿日:2020-01-20T16:55:49+09:00
WEBエンジニアへの転職を目指す外資系新卒が、8週間の学習過程を晒してみる
何をやっているのか
- 2019年3月に東京の大学(ド文系)を卒業し、続く4月に新卒として米系のITサービスプロバイダに就職
- 3ヶ月のC言語研修を経て、IBMのメインフレームやオフィスコンピュータといった汎用システムの運用・保守を行うプロジェクトに配属
なぜ転職するのか
- 就活時、IT業界を目指しており、テクノロジー、ビジネスサイド両方に興味があった
- 技術のわからないPMになりたくなかったので、最初はITエンジニアとして開発の仕事を行い、徐々にマネジメントのキャリアを歩める会社を探していた
- 日本のSIerのほとんどが最初から上流工程でほとんどプログラミングをできない、もしくは下流工程でずっとコーダーという、極端なパターンが多いことを就活の業界研究の過程で学んでいった
- 最初に開発、徐々にマネジメントというキャリアを歩める会社に絞って就活を行い、理想的な会社に就職できた(と思っていた)
- 入社後、3ヶ月の研修が終わると、汎用システムの運用保守を行うプロジェクトに配属される
- 仕事内容はマニュアル通りにコマンドを実行し、システムに問題がないか確認したり、定期監視のレポートをチェックして、問題があれば該当部門に連絡するという技術的なスキルが何も身につかないものだった
- 自分のキャリアが腐っていく音が聞こえたので、2019年11月から転職を決意して独学でWEB界隈の勉強を開始する
なぜこの記事を書くのか
- 自分が勉強を始めたとき、どういったロードマップを設定して進めていけばいいのかわからなかったので、同じような境遇の人の参考程度になればと思った
- 勉強してきたことを整理して、今後の学習方針の見直し、参考にするため
- 識者の方々から学習方針に関するアドバイスが得られればいいなあという希望的観測
どう勉強してきたか
早速本題。
基本的な自分のスタンスとして、まずは未経験の門戸が広いフロントエンドエンジニアとしての就職を目指している。実際のところはフロントもバックエンドも興味がありやりたいことが多すぎるので、とにかくまずは転職を成功させてスキルを伸ばしていった上で自分の進む分野を決めたいと思っている。
また、スクールに通うつもりはなくこれまでもすべて独学で勉強を進めてきた。スクールに行かないのはお金の理由もあるけれど、どこも胡散臭い印象が拭えないというのが一つと、大学受験のときから一人で黙々と勉強を進めるのが得意だし好きだったというのが主な理由。
勉強開始して1週間ほど経ったころからTwitterを始め、勉強した日は日報を残すようにしているので、それをベースにしながらどんなことをやってきたのか思い出しながら下記に1週間単位でまとめていく。
ちなみに現時点(2020年1月20日)で学習開始から59日目、学習総時間は272時間となっている。
1週目
HTML・CSS
HTML5+CSS3 手を動かしてマスターする WEBデザイン/プログラミング動画講座
最初に手を付けたのがUdemyの上記講座。10時間程度の講座で、1.5倍速で再生して進めていった。このコースでは、タイトルにもあるように動画に沿って実際に手を動かしながら進めたので、実質15時間ぐらいかかったと思う。
これでHTML・CSSの基礎の基礎は理解できたと思ったのでJavaScriptに移った。JavaScript
The Complete JavaScript Course 2020: Build Real Projects!
Udemy for Businnessという法人向けのサービスを会社が契約していることを知り、それを利用して見始めたのが上記のコース。会社のアカウントでは英語のコースしか利用できないものの、全て無料で登録、視聴できるのがかなり嬉しかった。このコースではJavaScriptの基本から始まり、検索結果を元にAPIを叩くようなある程度本格的なWEBアプリの開発まで体験できる。JavaScriptの基本パートではES5をまず教わり、その後ES5との違いを比較しながらES6をわかりやすく説明してくれる。
このコースのいいところは以下の点。
- Q&A機能が開放されていて、複数のスタッフによるサポート体制が整っている
- 講義→実践という流れで、学んだことを実際に使う機会が豊富に用意されているのでしっかり理解できる
- 本当に知識がゼロでも、Whyがわかる構成になっている
特に3は自分の中で大きくて、本質的な理解ができないと気がすまない自分にはありがたかった。先生のJonasはこのコース以外にも、HTML・CSS基礎、CSS上級コースなどをやっていて、自分はこの人がすごく気に入ったので後にこの2つも受講した。
これが初めての英語のコースだったが、英語の講座の充実度とコンテンツの質の高さに驚いた。英語のリスニングに問題がない人は絶対に英語の講座がオススメ。JonasのHTML・CSS講座を後に受けることになるが、最初に見たUdemyの日本語講座に比べて量も質も圧倒的に勝っていて、もう日本語の講座は受けなくていいやとなった。有料だし。
2週目
LP模写
動画を見続けることに疲れたのと、1週目にやったHTML・CSSの復習がしたくなったので、「LP模写 初心者 オススメ」とかで適当に検索して出てきた以下のサイトを模写することにした。
flower | かわいいが届く、ずっと無料のお花便目的はHTML・CSSの基本的な書き方やよく使うプロパティを覚えることだったので、完璧に模写するつもりはなかった。Google Developer Toolもガンガン使ってずるしまくったのに結局完成させるのに20時間ぐらいかかった。でも1週目の講座の学びも思い出せたのでやってよかったと思う。アウトプット本当に大切。
3週目
CSS上級
Advanced CSS and Sass: Flexbox, Grid, Animations and More!
上記のコースを開始する。JavaScriptの講座でお世話になったJonas先生のCSS上級講座。CSSの仕組みを始めとして、複雑なアニメーション、NPM、Sass、BEM設計、Flexbox、CSS Gridなどなど、幅広いながらも実際の業務では必須とも言える(実務未経験のため予想w)内容を網羅してくれている。Jonas先生の良さは言うまでもなく、実際の演習で作るWebサイトがとてもおしゃれで作っていて楽しかった。28時間のボリュームのため骨が折れるかもしれないが、つまみ食いしていく進め方でも良いと思う。自分は1.5倍速で進めたものの、さすがのボリュームに途中で疲れたので一旦視聴をやめて、いままで習ったことの総復習としてToDoアプリを作り始めた。その作成過程でやっぱりFlexboxあったほうが便利だろうなあと思い、Jonasのコースに戻ってそのパートだけ視聴したりした。実際CSS Gridのパートは見ないまま終わっている。
必要になったら学習するスタイルのメリットは3つほどあると思っていて、
- 学んだことをすぐにアウトプットする場があるので「わかる」→「できる」の転換が早い
- なぜその技術が重要なのか、必要なのか理解しやすい
- 「時間をかけて学んだのに、その知識・技術は結局使うことがなかった」という事態を避けられる
これに関してはどの3つもすごく大きなメリットだと思っている。3に関しては、とにかく一刻も早く今の会社を抜け出したい自分にとって、時間効率という観点からも非常に重要な要素だ。
一方で、網羅的な知識を身に着けることの重要さも感じているので、そのあたりは転職活動を終えて時間に余裕ができたら進めていきたいと思っている。
ともかく、フロントエンドの基礎を学びたいに人にはJonas先生おすすめです。セールのときにでもぜひ買ってみてください。
4週目
Git
Git Complete: The definitive, step-by-step guide to Git
次に模写をするときにセーブ機能が欲しくなったので、Gitの勉強を始めようと受講したのが上記のコース。ただ、これは途中で視聴をやめてしまった。というのも、Git自体は複雑なものではないので、動画で学習するより公式のドキュメントなどの文章形式のほうが時間効率的にもよろしいと思ったから。実際、Gitに関する資料は充実していて、
- サルでもわかるGit入門
- gittutorial Documentationこのへんを読んで、あとはわからないことを都度調べていくぐらいでいいのかなと思った。
LP模写
JonasのCSS上級コースで作成したWebサイトを、Google Dev Toolを最低限使用して自分でゼロから作り直す作業を始めた。
目的としては、
- CSS上級の内容を復習したかった
- Gitを使ったバージョン管理を試してみたかった
という2つだったので、こちらも詰まったらすぐDev Toolでズルしつつサクサクと進めていった。
ToDoアプリ作り
先に少し話した、ToDoアプリの作成を開始した。 この目的は3つで、
- CSS上級コースの視聴(インプット)に疲れて、逃げ場としてアウトプットしたくなった
- JavaScriptの内容を忘れている気がしたので復習したかった
- そろそろ一つぐらいまともな成果物を作りたかった
このToDoアプリ作りは割と正解だったと思っている。必要なことを必要なタイミングで学ぶことの有用さや、Gitの便利さ、HTML・CSS・JavaScriptの理解の深化といったことはもちろん、ゼロから自分の手を動かしてモノを一つ作ったという達成感と自信を得られたのは良かった。その後の学習の大きなモチベーションにもなったと思う。
挙動はめちゃくちゃおかしいけど作って満足して放置しているw
5週目
Chingu事前課題作成
Chinguというサービスを発見する。これは、世界中の人とリモートでチームを組んで、チームで設定した成果物を一緒に進めていくことができるサービスだ。本開発への参加の前に事前課題の提出が必要なため、こちらに取り組んでいた。事前課題をもとに、運営が適切なレベルのチームに振り分けてくれるらしい。
自分は一番下のコースであるHTML・CSS・JavaScriptのチーム開発をしたかったので、それに対応する事前課題を選択してLP模写を行った。LP自体は完成したものの、結局Chinguの本開発には参加しなかった。というのも、本開発に参加するとその作業に時間をかなりとられることになり、他の作業に時間を割けなくなりそうだと途中で思ってしまったから(登録する前に気付けw)。これに割かなければいけない時間に対して、オンラインでチーム開発をしたという経験は、果たして転職活動においてどれほど有利になるだろうかと考えた結果、そこまで優先順位は高くないと考えた。
この事前課題に使ってしまった時間は今思うともったいなかったなと。Chinguというサービスを見つけて「このサービスおもしれー!」みたいな勢いで始めてしまったので、何事も作業に取り掛かる前に時間対効果を熟慮することが大切だと感じた。当たり前の話だけど、時間がないなら作業の優先順位を厳格につけなければならない…。
React
次にJSフレームワークを学習しようと思い調べてみると、Angular, React, Vueの3つが現在の主流であることを知った。悩みに悩んだ結果、大学時代の友人がReactでサービスをなにか作ろうと思っているという話を聞いて、自分も勉強ついでに手伝えればと思いReactを選択した。結局その話はなくなったので意味はなかったのだけどw
使用した教材はこれ。
React - The Complete Guide (incl Hooks, React Router, Redux)先生のMaxがこれまたいい。表情が豊か、ジェスチャーも豊か。テンションがポジティブで聞いているこちらも上向きな気持ちで勉強を進められる。動画の総時間は驚異の45.5時間。かなりのボリュームなので全て一度でマスターするのは不可能。自分は例にも漏れず必要になったタイミングで必要なパートを視聴するスタイルで進めた。
自分の場合、ReactとRailsで転職活動に使うポートフォリオを作るつもりだったので、まずはReactの基礎は知らないとアプリを作り始められないのでReduxの前のパートまでは一気に進めていった。
6週目
神経衰弱ゲーム作成
引き続きMaxの動画を見てReactの学習を進める。結局Reduxのパートまで動画を見進めて、アウトプットがしたくなったので神経衰弱ゲームを作成することにした。が、これは途中でやめることになる。
このころ、2020年の4月中に転職活動を終えるため、いつまでに何を終わらせればいいのか逆算をしていた。その結果、このままのペースではスケジュールに的に間に合わないことがわかってしまったのだ。1月中にポートフォリオのフロント部分(View)完成とRails基礎、2月にはRails TutorialとAWS、Dockerの勉強、3月にはポートフォリオのバック部分(Model, Controller)完成、4月に転職活動という流れだ。
そのため、神経衰弱ゲーム作成は早々に切り上げて、Reactのインプットと並行して転職活動で使うポートフォリオ作りに入ることにした。
7週目
ポートフォリオ作成
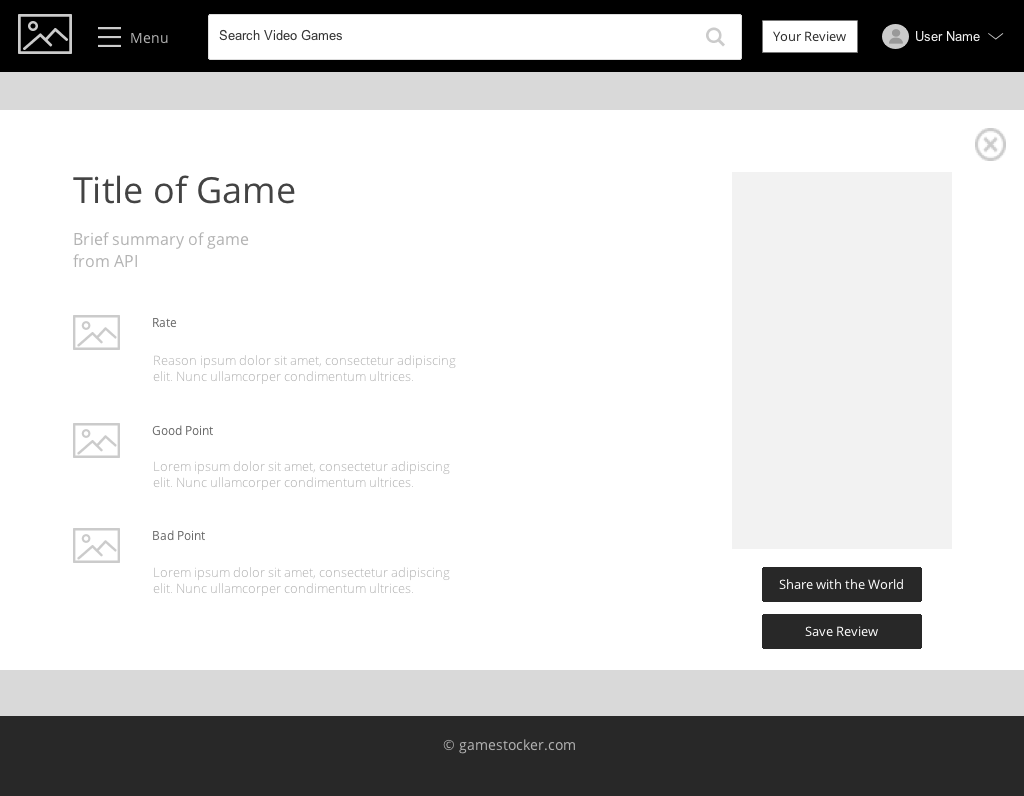
どうせ作るなら自分が使いたいと思えるものを作りたかったので何を作るか丸1日考えた。自分は小さい頃からゲームが大好きだったので、ゲームをテーマとして、ゲームプレイの感想を記録できるサービスを作ることにした。ただ、長々とした感想を書かなければいけないとなると大仰だし億劫になってあまり使わなそうだったので記録できる項目を絞ることにし、
- 星5点満点での評価
- 良い点を3行で書く
- 悪い点を3行で書く
という3つに限定して、ユーザー(自分)が使用するハードルを下げてみた。
アイデアが固まったらプロトタイプ作成もしてみたかったので、Justinmindというプロトタイプ作成アプリ(無料)で画面のレイアウトをざっくりと作ってみたりした。
こういう作業を年末年始にしていた。年明けからは本格的な実装に入ってみたものの、やっぱりReactの書き方がわからんすぎてMaxの講座で作ったサービスのコードを真似しながら少しずつ進めていった、というか現在進行系で進めている。
8週目 〜 現在
Ruby + Rails
ポートフォリオ作成は変わらず進めていたが、並行してバックエンドの技術として使うRailsの勉強を始めた。最初はUdemyの動画で学習を進めようと思っていたが、一番レビューが多い講座の内容が冗長な気がしたのでやめた。
結局Progateに登録して、基礎を固めることにした。Progateは評判の通り本当に素晴らしくて、楽しくサクサクと進めることができた。最初見ていたUdemyの講座内容に比べると、内容が端折られている気はしたが、プログラミング学習のきっかけを提供するというProgateの理念を考えると仕方がないと思った。網羅的な学習はポートフォリオ完成後に余裕ができてから行うつもり。
今はRubyとRailsのコースが全て終わったところで、次はRails Tutorialに着手する予定。もし難しすぎたらUdemyの動画を挟んでからリベンジしようと思っている。
Jest + Enzyme
ポートフォリオの成果物だけでなく、設計やテストなどの思想・周辺技術をどれほど考慮できているかということが重要という情報をツイッターで見かけた。なるほど確かにテストは実際の業務で必ず必要になってくるなと思い、ポートフォリオ作りの際にもテストを行っていこうと考えた。現在はUdemyで2019 Update! React Testing with Jest and Enzymeというコースを受講している。
そのため、一旦ポートフォリオ作成の作業は止めている。このコースでテストが何たるかというのを理解したら、ポートフォリオ作成を再開して、TDDを試してみようと思っている。
さいごに
今後の目標
1月の目標は、ポートフォリオのフロント側を完成させること、ProgateのRuby + Railsコースを終わらせることだったので後者は達成している。正直あと10日程度で前者を達成する自信はないが、引き続きストイックに作業を進めていってできるだけ2月に作業がずれ込まないようにしたい。
2月はRails Tutorialの終了とAWS、DockerのUdemy講座各1つずつ見る。
あと全体目標として、Qiita投稿を月に4回を設定してあるので今月はあと2記事書かなければwアウトプットが何かしら自分の糧になると信じて頑張っていこう。
問い合わせ
この記事に関してでもそれ以外のことでも、もし何かお聞きしたいことなどありましたらTwitter(@Ryo_Code)でもこちらでもお気軽にコメントください。自分の分かる範囲でお答えさせていただきます。

- 投稿日:2020-01-20T16:12:05+09:00
Railsのテストについて知ってること
railsのテストについて、現状知っていることを書いていきます。
railsチュートリアル以来テストを書いていなかったので、railsチュートリアルに取り組んだ直後の方、取り組んでいる最中の方の役に立つかもしれません。minitestを使うことを前提に書いていきます。
テストの目的
機能を追加する度に、その機能が動作していることを保証するテストを書くようにすることで、
何か修正を加えた時に「これまで動いていた機能が動かなくなる」リスクを最小限に抑えることができます。バグが減り、大規模な変更への怖さが減り、いちいちブラウザで手動で確認する手間が減ります。
テストを書く手間が発生しますが、テストを書くことに慣れてしまえば、その手間もあまり気にならなくなるかもしれません。
何ができるのか、何ができないのかを定義するので「仕様書」のような側面もあるみたいです。
テストの種類
大きく分けて、単体テストと統合テストに分類されます。
単体テストは、各コントローラーやモデルの動作を検証します。
統合テストは「ログインして、投稿して、ログアウトして」のような、実際のユーザーの動きを再現するような形のテストで、複数のコントローラーやモデルを横断する動作を検証します。
テストファイルの生成方法
テスト用ファイルは、コントローラー作成時等に自動生成されるものと、専用のコマンドを使って生成するものがあります。代表的なファイルの生成方法は以下の通りです。
controller用テストファイル:コントローラー作成時に自動生成
model用テストファイル、fixture:モデル作成時に自動生成
mailer用テストファイル:メイラー作成時に自動生成
統合テスト用ファイル:$ g integration_test hogehogeで生成テストの流れ
テストは、機能を追加する前に書いたり、機能を追加した直後に書いたりします。
テストを書かずに進めてしまうと、あとあとリファクタリングや機能の追加が怖くなります。テストで利用するサンプルデータを
fixtureに書き、必要に応じて各テストファイル内で呼び出して使います。テストファイルの冒頭にset upという名前のメソッドを書いて、インスタンスを生成しておく方法がよく用いられます。テスト内で使いたいメソッドは、
test_helper.rbに定義します。あとは各テストファイルにゴリゴリ書いていくのみです。
どこにどんなテストを書くか
実際に、どのファイルにどんなテストを書いていくのかを探るべく、railsチュートリアルで書いたコードを全て読んで、ピックアップしてみました。
fixture
各モデルに紐づいたサンプルデータを定義
test_helper.rb
ログイン用メソッド×2、ログアウト用メソッド
→統合テストではsessionコントローラーにpostを投げてログインし、controllerやmodelの単体テストではsessionにidを直接保存するcontroller
・ログインしてないユーザーが投稿、削除した時のDBの変化とリダイレクトを確認
・他人のmicropostを削除した時のDBの変化とリダイレクトを確認
・ログインせずにフォロー、解除しようとした時の...
・ログイン画面が表示されるか確認
・固定ページが表示されるか確認
・ログインしてない時にユーザー情報変更画面に行けないことを確認
・ログインせずにユーザー情報を更新しようとした時、DBの値、flashメッセージの表示、リダイレクトを確認
・ログインしてユーザー情報を更新しようとした時、flashが空でリダイレクトされてることを確認
・Adminの値は書き換えられないことを確認
・未ログイン、管理者以外のログインではユーザーの削除ができないことを確認
・未ログインではフォロー、フォロワーの一覧ページにアクセスできないことを確認model
いろんな値を入れて
valid?メソッドの戻り値を確認
レコードを削除した後の、DBのレコード数が減ったことを確認
フォロー後のフォローリストやフォロワーリストを確認
フォローしているユーザーの投稿が表示されているか確認mailer
メールのタイトル、宛先、本文内の記述などをチェック
integration
(ログインした後の挙動)
フォロー一覧ページに、フォロー数分のユーザーページへのリンクがある
フォローしたらDBのレコード数が1つ増える
フォロー解除したらDBのレコード数が1つ減る
トップページにフィードに1ページ目の内容が表示されているログイン→ページ内の要素を確認→無効な投稿→有効な投稿→投稿を削除→違うユーザーのプロフィールにアクセスし、削除ボタンがないことを確認
投稿数が表示されていることを確認無効なパスワードでログインし、flashとテンプレートを確認
パスワードリセットの流れを、いろんなエラーを発生させながら確認指定のリンクが存在するか確認
いろんなページに移動して、ページタイトルを確認ユーザー編集画面でエラーを発生させて、エラーメッセージの内容を確認
ユーザー編集を成功させて、登録した名前等が表示されているか確認管理者としてログインして、ページネーションやリンクの数、deleteを押した時のDBのレコード数を確認
非管理者としてログインして、deleteボタンが無いことを確認ログイン失敗時のレイアウトやflashの数等を確認
ログインしてログアウトする流れを確認
remember meの有無での挙動の違いを確認
プロフィールページに表示される内容を確認サインアップ時にメールが1通送られたことを確認
有効化されてないユーザーなどでログインを試みた時の挙動を確認基本文法
test 'the truth' do
  assert hogehoge
end
test 'テスト名' doの下に、テストしたい内容を書いていきます。$ rails tで作成した全てのテストを実行することができます。
Assertionの内容
railsに標準で組み込まれているminitestでは、
assert◯◯ ××という形で、変数の値やDBのレコード数を確認していきます。Railsチュートリアルに登場したassertionの一覧を以下にまとめました。[]内の数字は登場回数です。
assert(assert_not) [17 + 35]
testが真(nil、false以外)の場合にアサーションが成功します。
assert @user.valid?
assert_not flash.empty?
assert_nil [3]
obj.nil?が真の場合にアサーションに成功します。
assert_nil current_userassert_empty(assert_not_empty) [1 + 1]
obj.empty?が真の場合にアサーションが成功します。
assert_empty cookies['remember_token']
assert_not_empty cookies['remember_token']
assert_equal(assert_not_equal) [16 + 1]
exp == actが真の場合にアサーションが成功します。
assert_equal @user, current_user
assert_not_equal @user.reset_digest, @user.reload.reset_digest
assert_redirected_to [25]
適切にリダイレクトされている場合にアサーションが成功します。
post ...
assert_redirected_to login_url
assert_response [8]
レスポンスが指定したステータスコードになっている場合にアサーションが成功します。
get root_path
assert_response :success
assert_select [38]
指定した種類、個数のHTMLの要素が存在する場合にアサーションが成功します。
assert_select 'div#error_explanation'assert_match [19]
指定した正規表現に一致する場合、アサーションが成立します。特定の文字列が含まれているかどうか、の検証等でもよく利用されます。
assert_match @user.followers.count.to_s, response.bodyassert_template [14]
指定されたテンプレート、レイアウトファイルが選択されている場合にアサーションが成功します。
assert_template 'users/edit'assert_difference(assert_no_difference) [9 + 9]
create/update/deleteの実行前後のレコード数が指定通りに変化している場合にアサーションが成功します。ブロックで使います。
assert_difference '@user.following.count', 1 do
  post relationships_path, params:{
    followed_id: @other.id
  }
end
Fixture
fixtureの使い方を簡単にまとめます。
定義と取り出し
# test/fixtures/hoges.ymlの内容
one:
  name: Hoge san
  email: hoge@hoge.com

# テストファイル内でレコードを取り出す方法
@one = hoges(:one)
@one.name #=> "Hoge san"
erb記法やyamlのエイリアスも使える
base: &minimal
  email: test_user@example.com
  name: テストユーザー
  payment_type: credit_card
  created_at: <%= Time.zone.now - 1.day %>
  updated_at: <%= Time.zone.now - 1.day %>

tarou:
  <<: *minimal
  email: test_tatou@example.com
  name: テスト太郎
・fixtureには、最小限のデータ、ありそうなデータ1,2個、エッジデータ(在庫0の商品を購入する、すでに完了したタスクを再度完了させるなど)を登録すると良い
・サンプルデータはfixtureを使わずにUser.newなどで新しいインスタンスを作成する方法もあるその他
・
user.reloadで、DB登録後のレコードの内容をインスタンスに反映させることができる参考
Rails チュートリアル 【初心者向け】 テストを10分でおさらいしよう!
Minitest でテスト、Rails のテスト (その1)
Railsのテストの仕方(Minitest編)
- 投稿日:2020-01-20T14:02:04+09:00
深くネストしたルーティングにはshallowを使う
目的
- Qiitaの記事に大まかな流れをテンプレート化しておき、作業効率を上げる。
- 今後、railsを学ぶ方に向けての参考に役立てる。
前提条件
- 実行環境
- Ruby 2.5.1
- Rails 5.2.4.1
- MySQL 5.7.7
(変更前)_config/routes.rbRails.application.routes.draw do resources :projects do resources :queries, only: %i[new create] do resources :issue_categories end end end? shallowを適用したコード
(変更後)_config/routes.rbRails.application.routes.draw do resources :projects do resources :queries, only: %i[new create], shallow: true do resources :issue_categories end end end ------------------ # ↓ 上と同じ Rails.application.routes.draw do resources :projects do shallow do resources :queries, only: %i[new create], shallow: true do resources :issue_categories end end end end?※赤文字部分が省略される
Helper HTTP Verb Path Controller#Action 1 変更前 project_query_issue_categories_path GET /projects/:project_id/queries/:query_id/issue_categories(.:format) issue_categories#index 変更後 query_issue_categories_path /queries/:query_id/issue_categories(.:format) 2 変更前 project_query_issue_categories_path POST /projects/:project_id/queries/:query_id/issue_categories(.:format) issue_categories#create 変更後 query_issue_categories_path /queries/:query_id/issue_categories(.:format) 3 変更前 new_project_query_issue_category_path GET /projects/:project_id/queries/:query_id/issue_categories/new(.:format) issue_categories#new 変更後 new_query_issue_category_path /queries/:query_id/issue_categories/new(.:format) 4 変更前 edit_project_query_issue_category_path GET /projects/:project_id/queries/:query_id/issue_categories/:id/edit(.:format) issue_categories#edit 変更後 edit_issue_category_path /issue_categories/:id/edit(.:format) 5 変更前 project_query_issue_category_path GET /projects/:project_id/queries/:query_id/issue_categories/:id(.:format) issue_categories#show 変更後 issue_category_path /issue_categories/:id(.:format) 6 変更前 project_query_issue_category_path PATCH /projects/:project_id/queries/:query_id/issue_categories/:id(.:format) issue_categories#update 変更後 issue_category_path /issue_categories/:id(.:format) 7 変更前 project_query_issue_category_path PUT /projects/:project_id/queries/:query_id/issue_categories/:id(.:format) issue_categories#update 変更後 issue_category_path /issue_categories/:id(.:format) 8 変更前 project_query_issue_category_path DELETE /projects/:project_id/queries/:query_id/issue_categories/:id(.:format) issue_categories#destroy 変更後 issue_category_path /issue_categories/:id(.:format) 関連URL
- 投稿日:2020-01-20T12:03:29+09:00
【Rails×Ajax】いいね機能の実装で上手く出来ないあなたへの2つの注意喚起 #学習者向け
目的
はじめまして。
今回、Railsでいいね機能をQiita等の記事通りに行っても上手く行かない!という方へ向けた、ちょっとした実装の際のチェック項目を列挙させていただきます。前提条件
対象となる読者
- 「いいね機能」の実装において、railsの同期処理では問題なく処理されるが、Ajax通信が上手く行かない
開発環境
- ruby 2.5.1
- Rails 5.2.4.1
- mysql Ver 14.14
実装済み機能
- 同期処理で「いいね機能」が正しく処理されていること
筆者が参考にした記事
- 「いいね機能」同期処理編 【初心者向け】丁寧すぎるRails『アソシエーション』チュートリアル【幾ら何でも】【完璧にわかる】?
- 「いいね機能」非同期処理編 【Rails×Ajax】いいね機能ハンズオン #学習者向け#Ajax
Ajax処理のいいね機能の実装方法のチェック項目
ずばり、先に結論をここで提示させていただきます
1. 部分テンプレートの呼び出しが正しく相対パスで指定されているか
2. インスタンス変数の指定が
favorites_controller.rbで指定されているかの2点です。では、詳しく見ていきましょう。
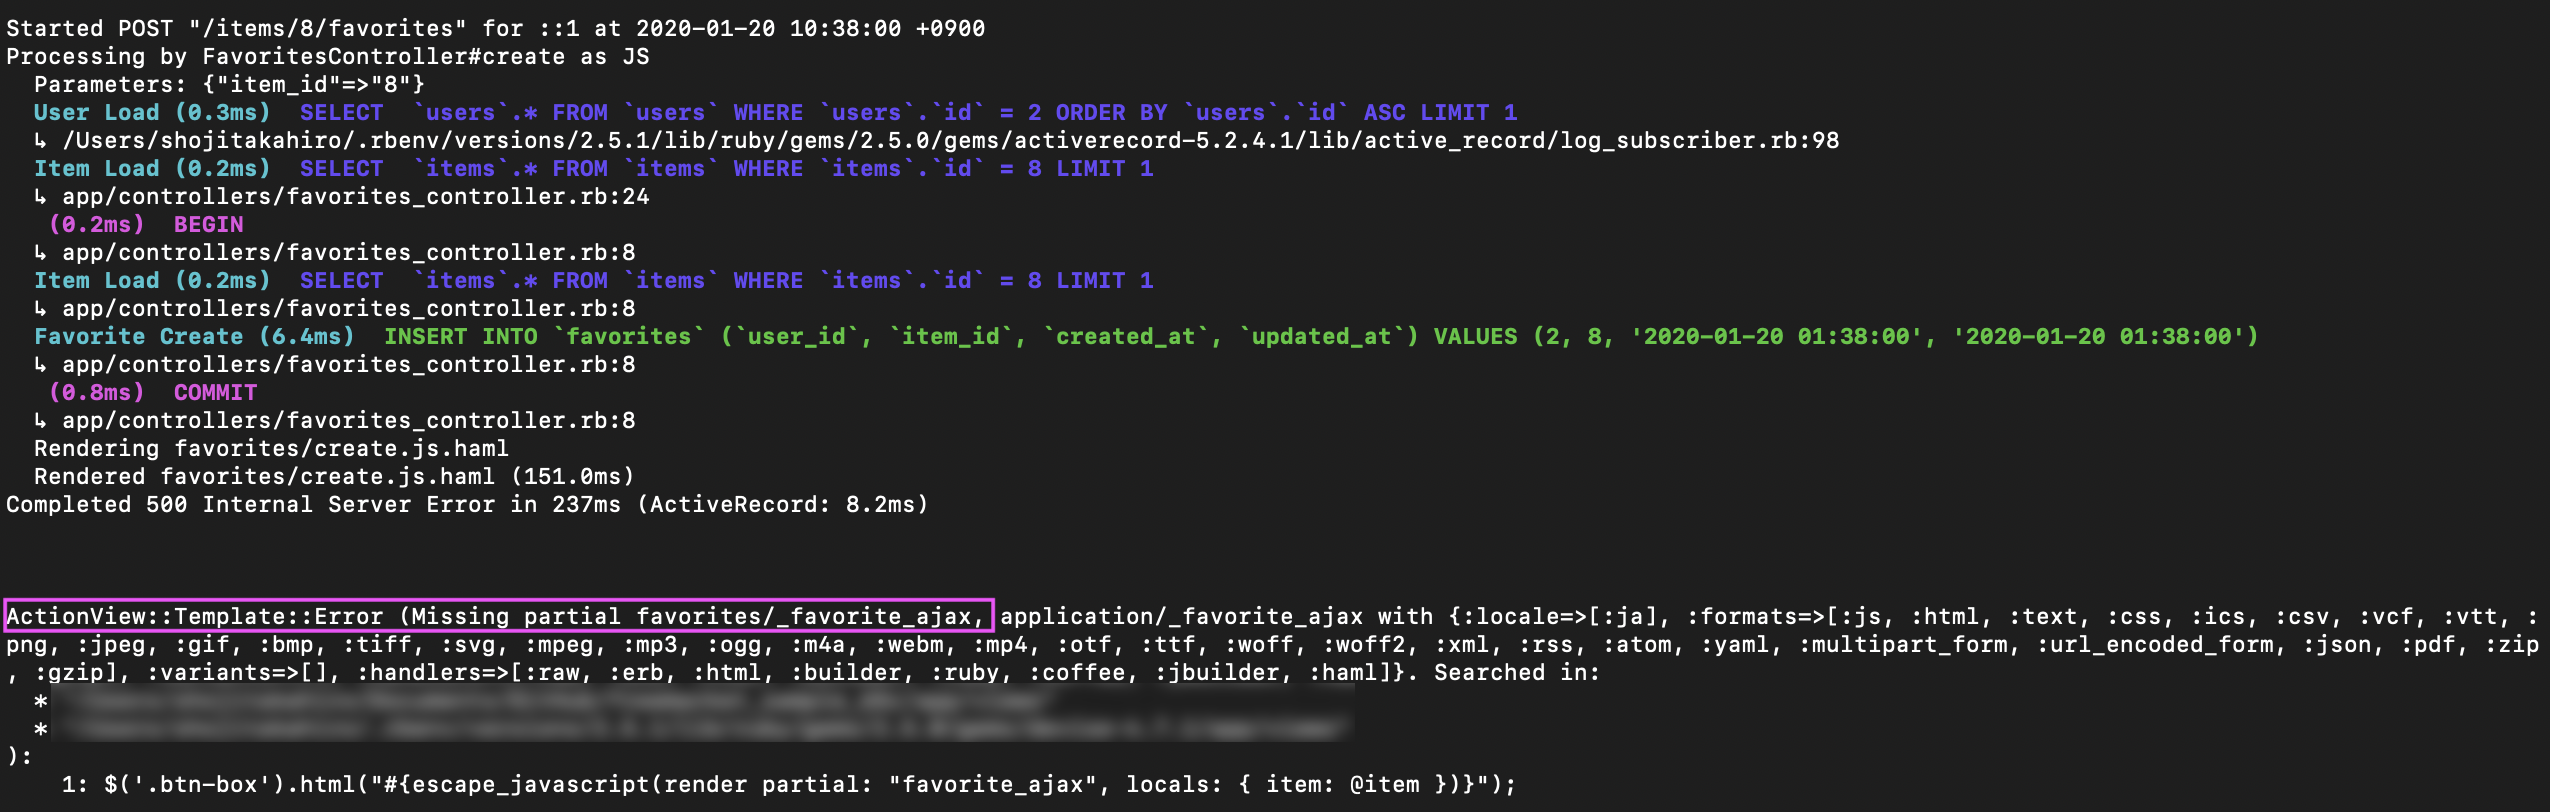
1. 部分テンプレートの呼び出しが正しく相対パスで指定されているか
よく陥りがちなミスの一つですね。実際にどのように間違えて実装しどの様なエラー文が出たのでしょうか?
view/items/show.html.haml.btn-bar .btn-box = render partial: "favorite_ajax", locals: { item: @item } -# view/items/_favorite_ajax.html.hamlでいいねボタンを部分テンプレートを作成したview/items/_favorite_ajax.html.haml- if user_signed_in? -# ユーザーがログインしているか判断 - if item.favorited_by?(current_user) -# ログイン中のユーザーがいいねしているかしていないかを判断 = link_to item_favorites_path(item.id), method: :delete, class: "favorite red", remote: true do -# リクエストをjs形式で送信 = icon('fas', 'heart') いいね! = item.favorites.count - else = link_to item_favorites_path(item.id), method: :post, class: "favorite", remote: true do -# リクエストをjs形式で送信 = icon('far', 'heart') いいね! = item.favorites.count - else = link_to new_user_session_path, class: "favorite", remote: false do -# リクエストをjs形式で送信 = icon('far', 'heart') いいね! = item.favorites.countview/favorites/destroy.js.haml(失敗例)$('.btn-box').html("#{escape_javascript(render partial: "favorite_ajax", locals: { item: @item })}"); -# この記述ではview/favorites/_favorite_ajax.html.hamlを呼び出していることとなる。従って、対応するファイルが無いことからTemplate::Error(Missing partial)が発生view/favorites/destroy.js.haml(失敗例)$('.btn-box').html("#{escape_javascript(render partial: "favorite_ajax", locals: { item: @item })}"); -# この記述ではview/favorites/_favorite_ajax.html.hamlを呼び出していることとなる。従って、対応するファイルが無いことからTemplate::Error(Missing partial)が発生エラー文
items_controller.rbのshowアクションのビューでいいね機能の実装をしています。また、いいね機能のDBへの保存・削除はfavorites_controller.rbのcreateアクション・destroyアクションで実装をしています。今回、いいねボタンを押した際にビューが切り替わる部分を
view/items/_favorite_ajax.html.hamlで切り出し部分テンプレートを作成しました。ajaxではview/favorites/destroy.js.hamlview/favorites/destroy.js.hamlをそれぞれ用意し、view/items/_favorite_ajax.html.hamlを呼び出したかったのですが、相対パスの指定が誤っていました。以下のように修正するとTemplate::Error(Missing partial)は解消されます。view/favorites/destroy.js.haml$('.btn-box').html("#{escape_javascript(render partial: "items/favorite_ajax", locals: { item: @item })}"); -# partial: にitems/ を追加view/favorites/destroy.js.haml$('.btn-box').html("#{escape_javascript(render partial: "items/favorite_ajax", locals: { item: @item })}"); -# partial: にitems/ を追加2. インスタンス変数の指定がfavorites_controller.rbで指定されているか
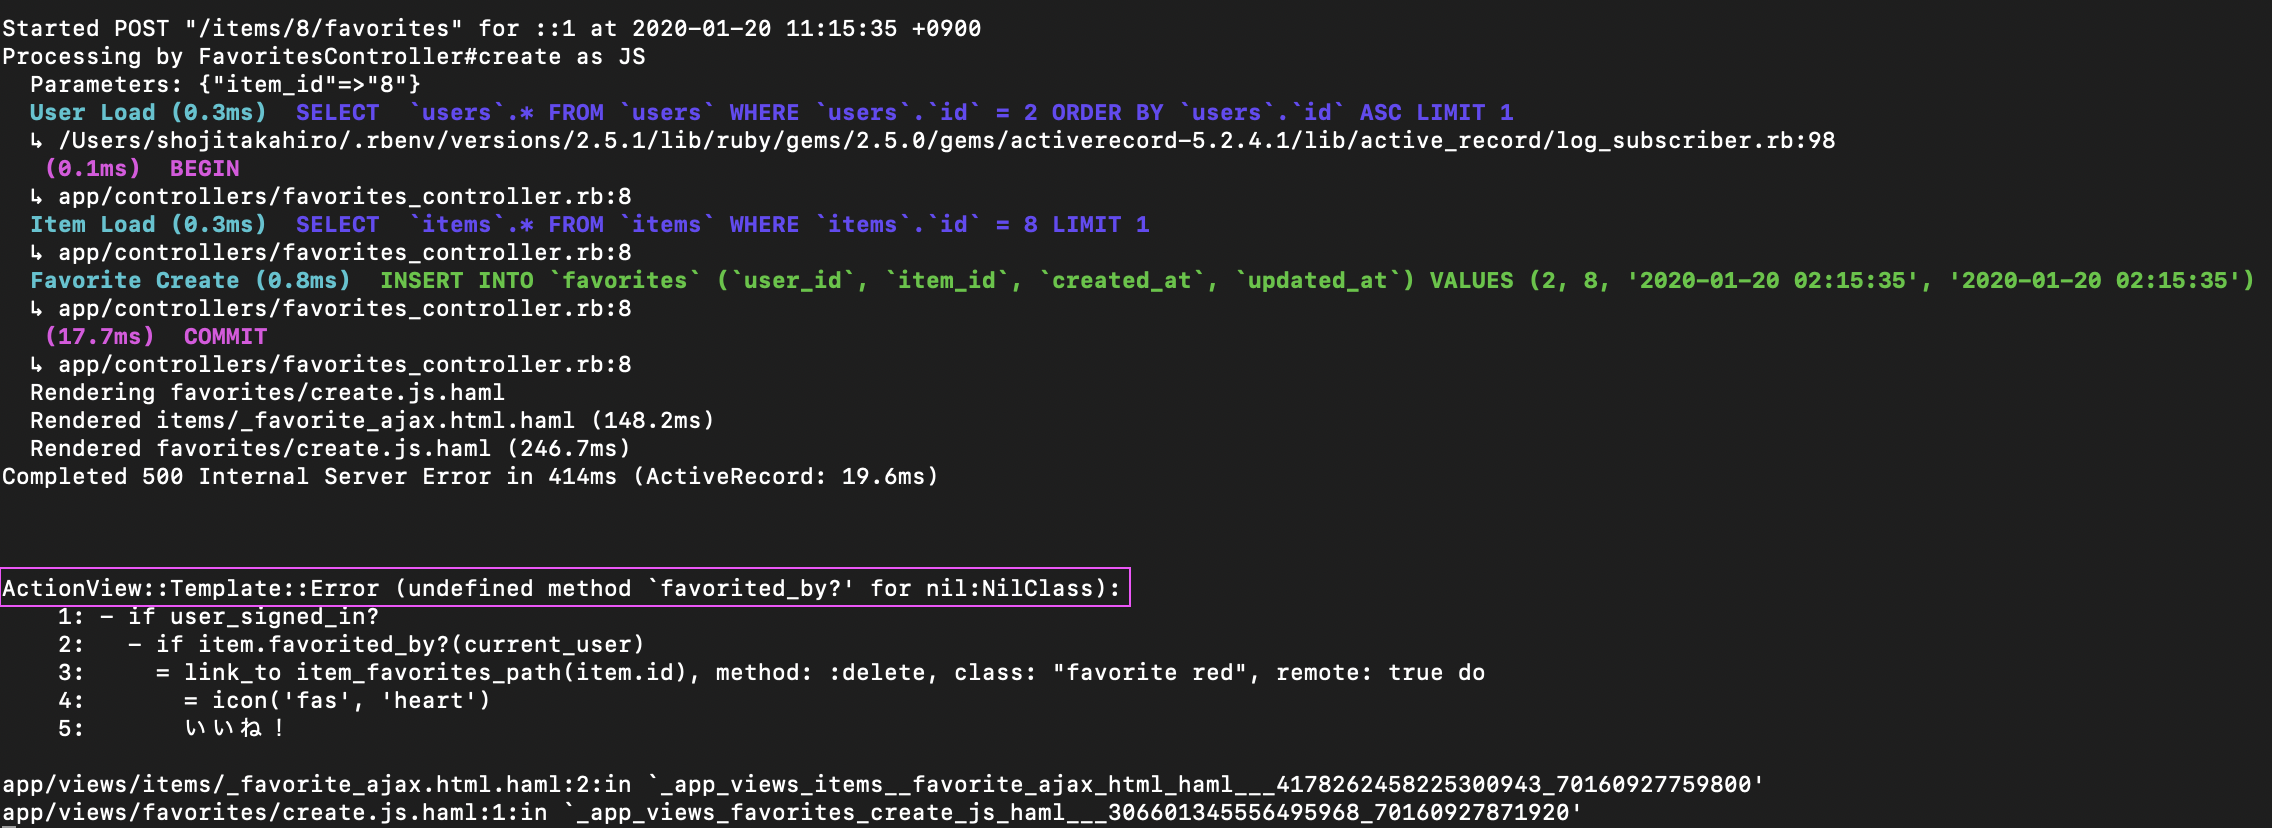
こちらはまず、どんなエラー文が出たか確認して見ましょう
renderの中身のitem.favorited_by?に対してundefined method `favorited_by?' for nil:NilClassとエラーが出ています。ここでいうitemとは
items_controller.rbのshowアクションで定義されているインスタンス変数@itemをrenderの中身ではitemとして記述している、という意味です。favorited_by?については、item.rbで事前に定義した「ログイン中のユーザーがいいねしているかしていないかを判断」するメソッドです。models/item.rbclass Item < ApplicationRecord # (中略) def favorited_by?(user) favorites.where(user_id: user.id).exists? end endこのことから、
render内ではitem.favorited_by?が定義されていない
→ render内ではitemそのものが定義されていない
→view/favorites/destroy.js.hamlでは、@itemが定義されていない
→favorites_controller.rbでは、@itemが定義されていない!!ということが判明しました。確認してみると確かに
favorites_controller.rbでは、@itemが定義されていなかったので、以下のように記述を加えたところ、正しくAjax処理が実行されました。
(items_controller.rbでも同様のset_itemメソッドを定義済みです)favorites_controller.rbclass FavoritesController < ApplicationController before_action :authenticate_user! # 追記========================================================================== before_action :set_item # ============================================================================== def create favorite = current_user.favorites.build(item_id: params[:item_id]) if favorite.save else flash.now[:alert] = favorite.errors.full_messages end end def destroy favorite = Favorite.find_by(item_id: params[:item_id], user_id: current_user.id) if favorite.destroy else flash.now[:alert] = '削除できませんでした。' end end private # 追記========================================================================== def set_item @item = Item.find(params[:item_id]) end # ============================================================================== endまとめ
いかがだったでしょうか。
いいね機能のAjaxは、実装の手順そのものはすごくシンプルです。しかし、いいね機能専用のビューを用意していなかったり、部分テンプレートの保存場所の違いによって記述内容が異なるケースがあります。当たり前のことではあるのですが、記事通り実装してみて上手く出来なかった時、解決の一助となれば幸いです。※私自身初めてのQiitaの投稿です!
ご指摘等ございましたらコメントにてお待ちしております。
- 投稿日:2020-01-20T10:54:29+09:00
windowsでRuby on Railsインストールからプロジェクト作成までの流れ
windowsでRuby on Railsインストールからプロジェクト作成までの流れ
Railsは下記のコマンドでインストールできます。
gem install railsインストールが完了したら、下記コマンドでバージョン確認ができます。
rails -v
gem list rails
rails (6.0.2.1) rails-dom-testing (2.0.3) rails-html-sanitizer (1.3.0) sprockets-rails (3.2.1)特定のバージョンを追加したい場合は、下記のコマンドで追加できます。
gem i -v 5.2.4.1 railsバージョンを確認すると、増えていることが分かります。
gem list railsrails (6.0.2.1, 5.2.4.1) rails-dom-testing (2.0.3) rails-html-sanitizer (1.3.0) sprockets-rails (3.2.1)これでrailsのインストールが完了です。
次にrailsのプロジェクトを作成します。
rails new プロジェクト名上記のコマンドで作成できますが、オプションを指定することもできます。
rails new hello -d mysql  #データベースの指定
rails _5.2.4.1_ new プロジェクト名  #railsのバージョン指定
rails _5.2.4.1_ new プロジェクト名 -d postgresql
これでrailsのプロジェクトが作成できます。
rails s上記のコマンドで起動することができます。
途中でSQLiteのエラーが出たときは下記の記事が参考になるかと思います。
Could not find gem 'sqlite3 (~> 1.4) x64-mingw32' in any of the gem sources listed in your Gemfile.https://prog-8.com/docs/rails-env-win
webpackerをインストールしたい時は下記コマンド
rails webpacker:install
- 投稿日:2020-01-20T09:10:47+09:00
[自動更新が止まらない]RailsでJavascriptファイル(html機能)を用いて自動更新機能実装をした時に、ブラウザ上の繰り返し表示が止まらないエラーの解決例
1.エラーの様子と間違っていたファイル
まず筆者が起こしたエラーは下のものです
<エラーの様子(gifなので動かない場合は画像をクリックしてご確認ください)>
言葉で表現すると、仕様としてはsendボタンを押したら、1回だけ「家に帰ってお母さんに報告だ!」が出て(ブラウザ上の)更新が止まる予定でした。(裏では1秒に1度更新する設定にはしていますが、見た目に反映させない仕様を目指していました。)
しかしご覧の通り表面上ループを抜けられずコメントがずっと繰り返されてしまいます。
(これでは永遠にお母さんに報告し続けることとなってしまいます。)困ったなと思いながら、この表記をするファイルにlinkを組んである「qiitaに聞いた」をクリックするとコメントは1度のみ投稿されたこととなっています(データベースへの取得は一回だけと設定ができている状態でした。)
<間違いがあったファイル(下記は間違っている状態です)>
app/assets/javascripts/message.js$(function(){ function buildHTML(message){ if ( message.image ) { var html = `<div class="chat-main__message-list" data-message-id=${message.id}> <div class="chat-main__message-list__name"> ${message.user_name} <div class="chat-main__message-list__name__date"> ${message.created_at} </div> </div> <div class="chat-main__message-list__comment"> <p class="chat-main__message-list__comment__content"> ${message.content} </p> </div> <img src=${message.image} > </div>` return html; } else { var html = `<div class="chat-main__message-list" data-message-id=${message.id}> <div class="chat-main__message-list__name"> ${message.user_name} <div class="chat-main__message-list__name__date"> ${message.created_at} </div> </div> <div class="chat-main__message-list__comment"> <p class="chat-main__message-list__comment__content"> ${message.content} </p> </div> </div>` return html; }; } $('#new_message').on('submit', function(e){ e.preventDefault(); var formData = new FormData(this); var url = $(this).attr('action') $.ajax({ url: url, type: "POST", data: formData, dataType: 'json', processData: false, contentType: false }) }) var reloadMessages = function() { //カスタムデータ属性を利用し、ブラウザに表示されている最新メッセージのidを取得 last_message_id = $('.message:last').data("message-id"); $.ajax({ //ルーティングで設定した通りのURLを指定 url: "api/messages", //ルーティングで設定した通りhttpメソッドをgetに指定 type: 'get', dataType: 'json', //dataオプションでリクエストに値を含める data: {id: last_message_id} }) .done(function(messages) { if (messages.length !== 0) { //追加するHTMLの入れ物を作る var insertHTML = ''; //配列messagesの中身一つ一つを取り出し、HTMLに変換したものを入れ物に足し合わせる $.each(messages, function(i, message) { insertHTML += buildHTML(message) }); //メッセージが入ったHTMLに、入れ物ごと追加 $('.messages').append(insertHTML); $('.messages').animate({ scrollTop: $('.messages')[0].scrollHeight}); $("#new_message")[0].reset(); // $('form')[0].reset(); $('.chat-main__message-form__new_message__send__btn').attr('disabled', false); } }) .fail(function() { console.log('error'); }); }; // }); if (document.location.href.match(/\/groups\/\d+\/messages/)) { setInterval(reloadMessages, 7000); } });app/views/messages/_message.html.haml.message{data: {message: {id: message.id}}} .chat-main__message-list .chat-main__message-list__name =message.user.name .chat-main__message-list__name__date =message.created_at.strftime("%y年%m月%d日%H時%M分") .chat-main__message-list__comment - if message.content.present? %p.chat-main__message-list__comment__content = message.content = image_tag message.image.url, class: 'chat-main__message-list__comment__content__image' if message.image.present?2.エラー元発見までの過程
解決までの道のりから記載した方がおそらく類似のエラーでも発見がしやすくなり皆さんのエラーへのお力になれると思うので過程から書かせていただきます。お急ぎの方は3.原因と解決方法をご覧ください。(エラーの元がわかれば原因と解決がやりやすくなると考え先に記載しています。原因究明だけ読まれると筆者のエラーと全く同じの場合しか解決できなく、せっかく時間をかけて調べられた内容で応用を効かせること(他のエラーの対処に役立たせること)ができず勿体無いと思っています。ですので、ぜひこの章もご覧ください)
<エラー元発見への過程>
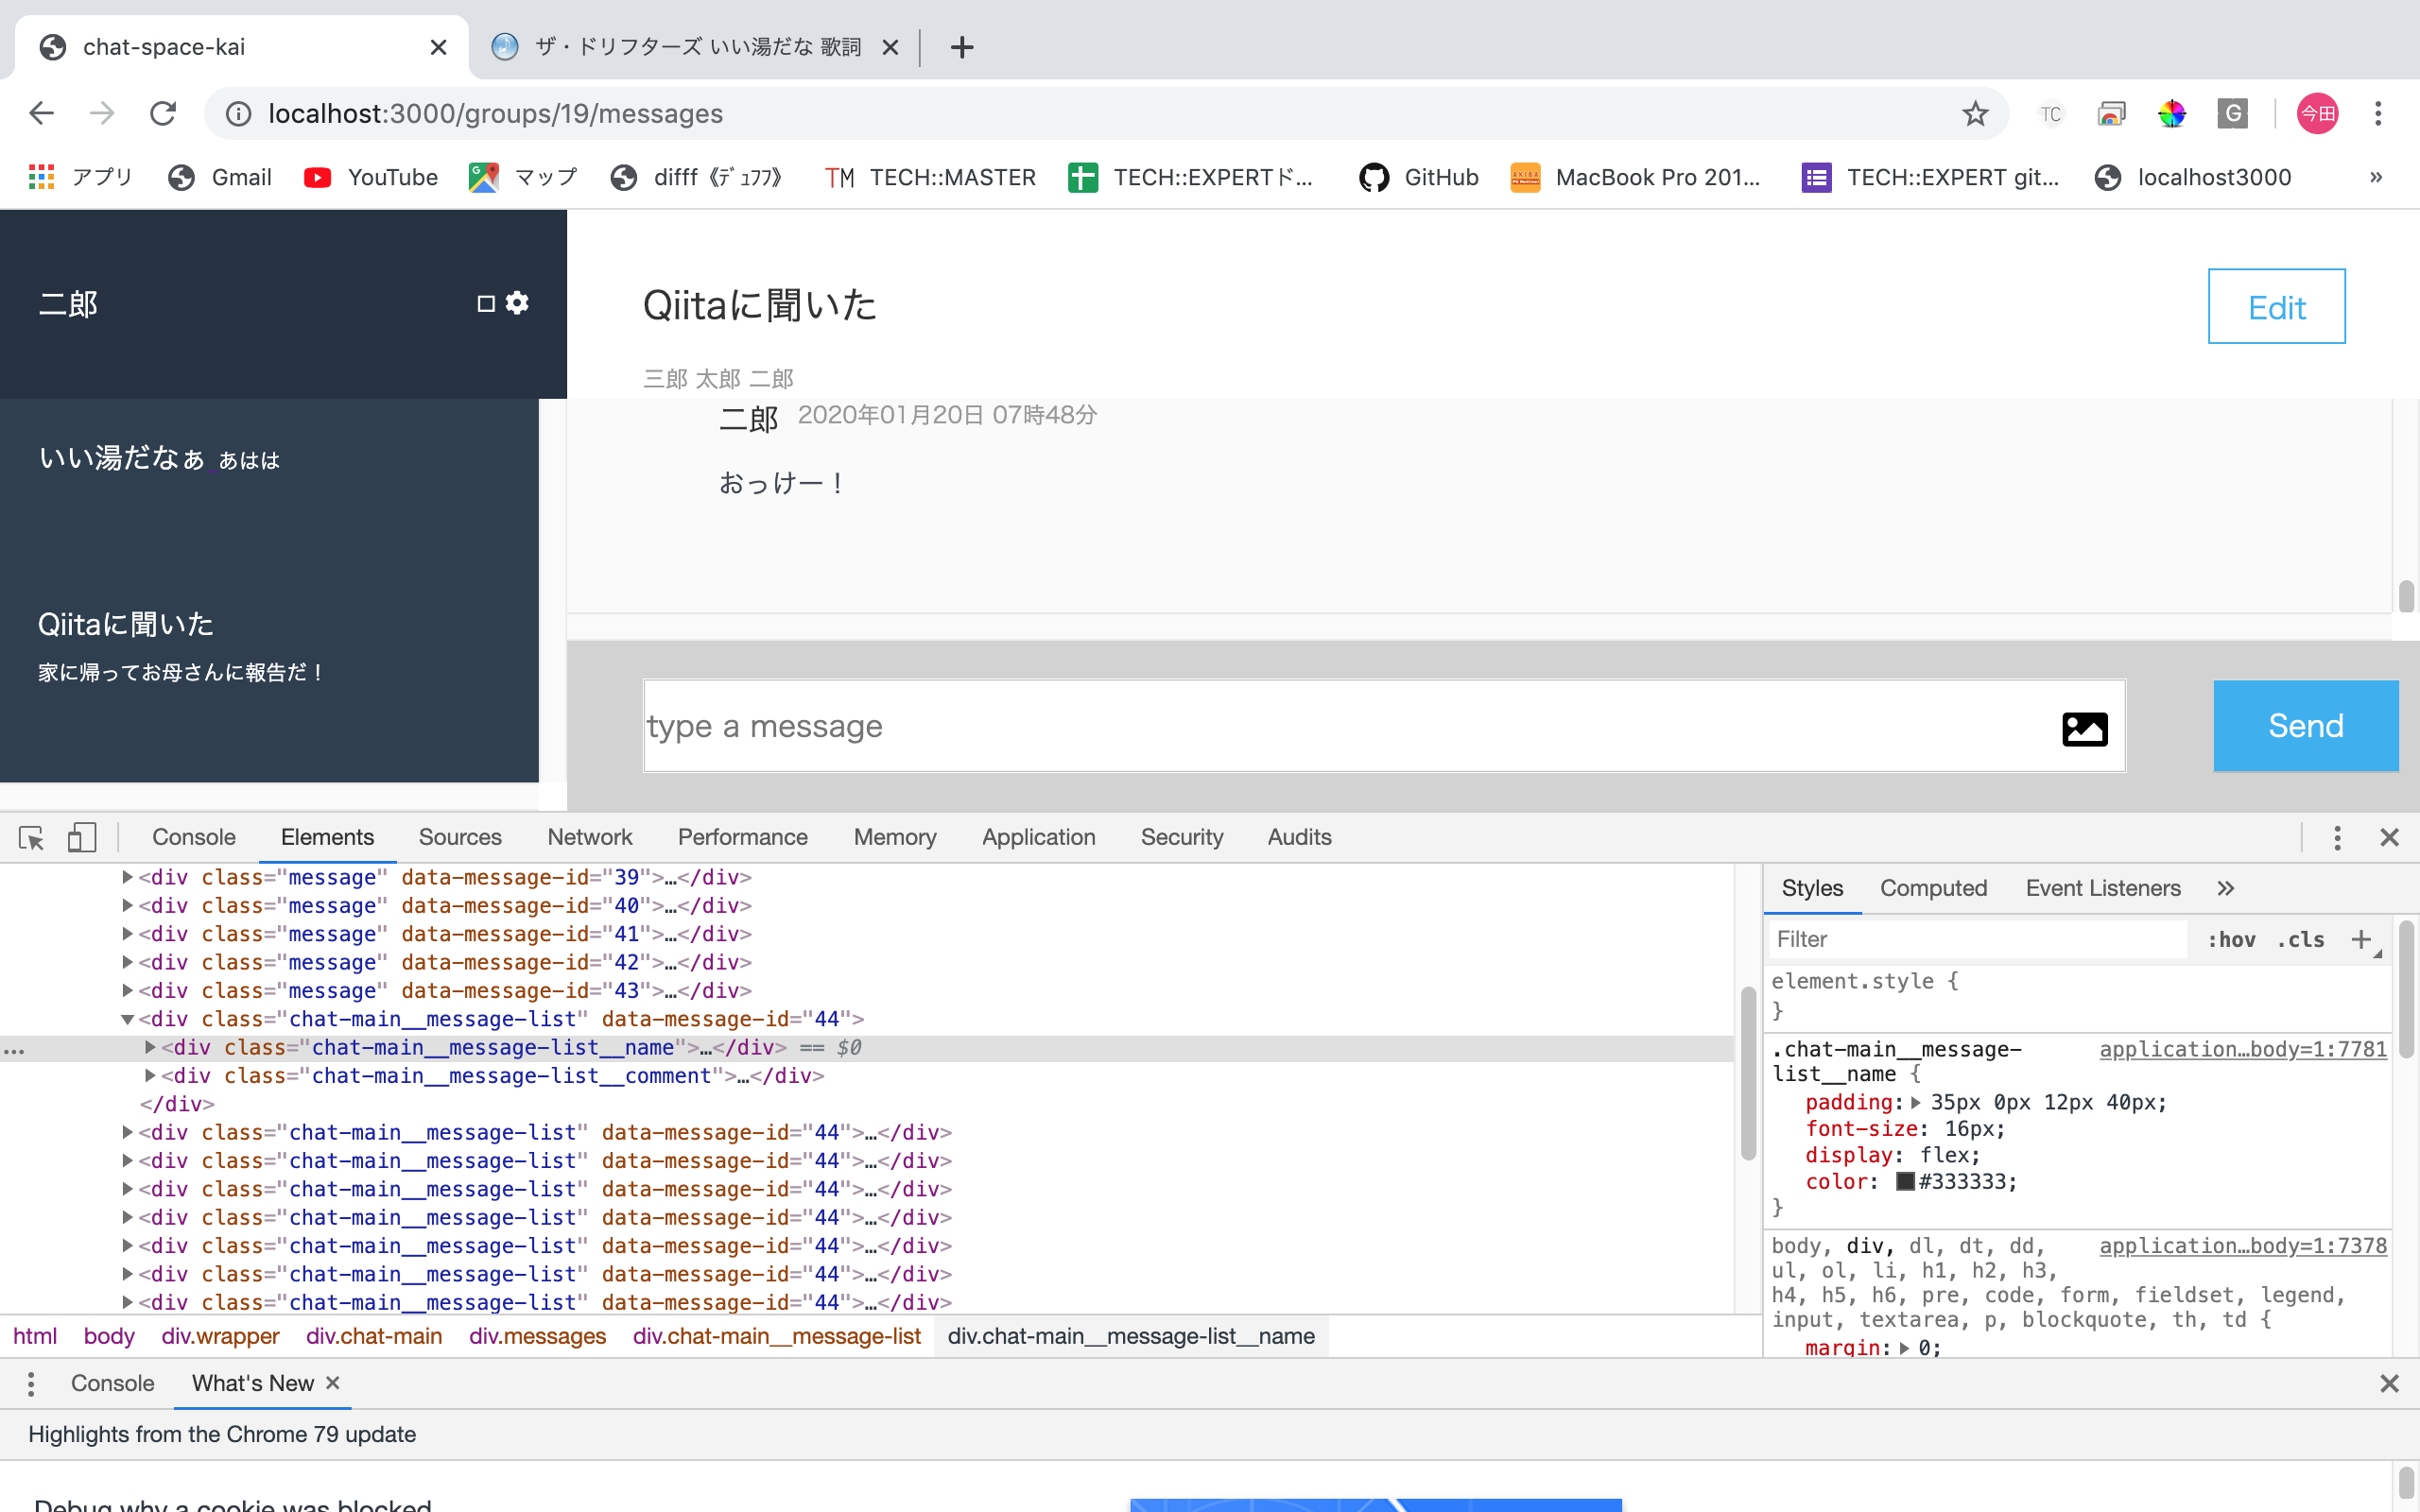
①エラーの挙動から見てフロントに関する記述(HTMLのコード)がおかしいんだろうな②フロント(HTMLのコード)ならGoogleChromeの検証機能だ!ということで下の画像のように検証を開いてみました
③繰り返し表示されてるコメントの"data-message-id=44"はclass名が"chat-main__message-list"で、正しく表記されている上のコメントの"data-message-id=42"や"data-message-id=43"のクラス名は"massage"になってる!と気づきます
④③のタイミングで正しく表記された部分とエラーの部分の差異がエラーの元となっていると予想し、自動更新(JavaScriptファイル)のchat-main__message-listの部分がおかしいんだなと気づくことができ探しに行けたという流れでした
このように、挙動を見ながら正しい部分と間違った部分を比べて差異を見つけることがエラー発見の基本となり、これ以外のエラーでも役立つ作業なのです。
3.原因と解決方法
<原因>
まず結論から言いますとこのように繰り返されてしまった原因は、id振り分け機能の不全でした。詳しく説明しますと、当初の予定ではまずapp/controllers/api/messages_controller(更新機能を取り付けるためのコントローラ)の部分で「idが以前のものより大きいものを全て受け取る」ようにする。
次に更新(api)でidを得た後、大元の"app/controllers/messages_controller"で現在振り分け済みのidと更新(api)で得たidを同期する。
すると、apiで入れ込もうとするidが振り分け済みのidとイコールの関係になるので一回しか表示されないとなるはずでした
ところが、"app/controllers/api/messages_controller"で手に入れてくるidのクラス名が間違っているので"app/controllers/messages_controller"で同期できずに繰り返し表示されるという始末でした。(じゃあなんでlinkボタンで更新すると直るのかと言われると想像の話となってしまうのですが、検証のid振り分けの挙動から推測するに、railsのgemのどれかで、他からのアクセス時に描画に関するidとclass名が大元のコントローラと一致しないものを大元に合わせた修正を行ってくれるものがあるんじゃないかと思っています。浅学で申し訳ない。)<解決方法>
親クラスが合っていればidで整合を取れるので、
①JavaScriptファイル(app/asset/javascripts/massage.js)のHTML記載の親クラスのみmessageに変えるapp/assets/javascripts/message.js$(function(){ function buildHTML(message){ if ( message.image ) { var html = `<div class="message" data-message-id=${message.id}> #クラス名を変えました <div class="chat-main__message-list__name"> ${message.user_name} <div class="chat-main__message-list__name__date"> ${message.created_at} </div> </div> <div class="chat-main__message-list__comment"> <p class="chat-main__message-list__comment__content"> ${message.content} </p> </div> <img src=${message.image} > </div>` return html; } else { var html = `<div class="message" data-message-id=${message.id}> #クラス名を変えました <div class="chat-main__message-list__name"> ${message.user_name} <div class="chat-main__message-list__name__date"> ${message.created_at} </div> </div> <div class="chat-main__message-list__comment"> <p class="chat-main__message-list__comment__content"> ${message.content} </p> </div> </div>` return html; }; } #以下は同じです②app/views/messages/_massages.html.haml(大元のコントローラと繋がっているview)で.messageを1番目の親とするネスト形態とする
app/views/messages/_message.html.haml.message{data: {message: {id: message.id}}} #以下のインデントを全て一つ下げました .chat-main__message-list .chat-main__message-list__name =message.user.name .chat-main__message-list__name__date =message.created_at.strftime("%y年%m月%d日%H時%M分") .chat-main__message-list__comment - if message.content.present? %p.chat-main__message-list__comment__content = message.content = image_tag message.image.url, class: 'chat-main__message- list__comment__content__image' if message.image.present?この①と②でこのバグは解消されます
<解決した画面(gifなので動かない場合は画像をクリックしてご確認ください)>
ご参考になればと思います。
4.参考(gif作成に参考にさせてもらった記事のリンク、関連ファイルの内容の提示)
参考までに、gif作成の参考サイトへのリンクと、修正はしなかったけど、ここまでに名前がでてきたファイルを下に貼付しておきます
<gif作成の参考にさせてもらった記事へのリンク>
<api用コントローラ>
app/controllers/api/messages_controller.rbclass Api::MessagesController < ApplicationController def index # ルーティングでの設定によりparamsの中にgroup_idというキーでグループのidが入るので、これを元にDBからグループを取得する group = Group.find(params[:group_id]) # ajaxで送られてくる最後のメッセージのid番号を変数に代入 last_message_id = params[:id].to_i # 取得したグループでのメッセージ達から、idがlast_message_idよりも新しい(大きい)メッセージ達のみを取得 @messages = group.messages.includes(:user).where("id > #{last_message_id}") end end<大元のコントローラ>
app/controllers/messages_controller.rbclass MessagesController < ApplicationController before_action :set_group def index @message = Message.new @messages = @group.messages.includes(:user) end def create @message = @group.messages.new(message_params) if @message.save respond_to do |format| format.json end else @messages = @group.messages.includes(:user) flash.now[:alert] = 'メッセージを入力してください。' render :index end end private def message_params params.require(:message).permit(:content, :image).merge(user_id: current_user.id) end def set_group @group = Group.find(params[:group_id]) end end


- 投稿日:2020-01-20T08:38:25+09:00
【Rails】 DataTables 実装方法
はじめに
RailsアプリケーションでDataTablesを使っている記事を見かけなかったので、まとめることにしました。
やり方がわかっていないと細かい仕様を変更するのに時間がかかってしまいますが、やり方さえ覚えてしまえばとても使いやすい強力なツールです。
Bootstrap や jQuery UI を使うことによって、時間をかけずに多機能&良いレイアウトを提供してくれるため、爆速で開発できるRailsととても相性がいいと個人的には思っています。DataTables
DataTables は、HTMLのテーブルに、ページ切り替え、ページ当たりの件数設定、ソート、フィルタなどの機能を簡単に追加できるjQuery プラグインのライブラリ。
使い方
設定
GemFile# ページネーションにはkaminariを使用するため gem 'kaminari' gem 'jquery-datatables-rails'$ bundle install$ rails g jquery:datatables:install $ rails g jquery:datatables:install bootstrap3app/assets/javascripts/application.js//= require dataTables/jquery.dataTables //= require dataTables/bootstrap/3/jquery.dataTables.bootstrapapp/assets/stylesheets/application.css*= require dataTables/jquery.dataTables *= require dataTables/bootstrap/3/jquery.dataTables.bootstrap
- Bootstrap
※ version3系をダウンロードする。(GitHubにBootstrap4の記載がないため念のため。。)
4系でも使えると知っている方がいればコメントください。。# 下記のようにファイルを配置する app/assets/javascripts/bootstrap.min.js app/assets/stylesheets/bootstrap.min.cssアプリケーション実装
前提条件
Userモデルを scaffold で作成していること。
全体像
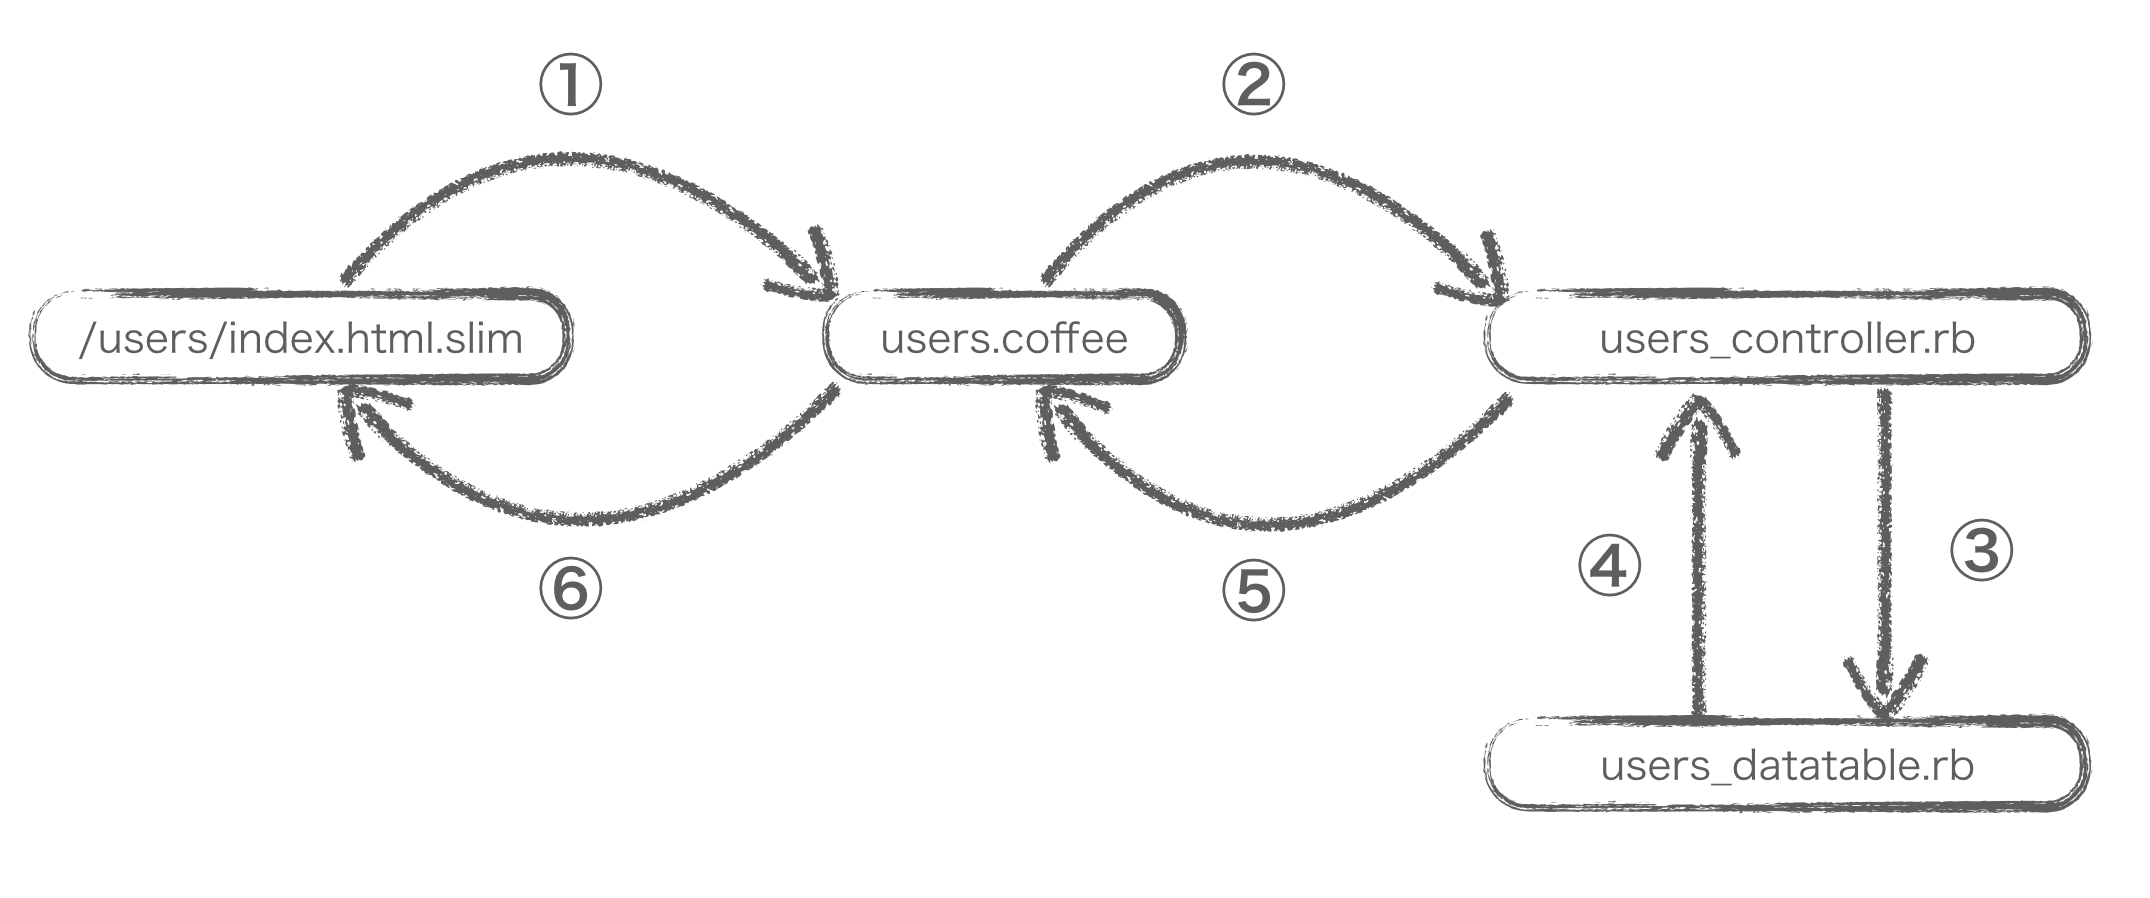
厳密には異なるところもありますが、ざっくりと全体像を示すとこんな感じになります。
① id が users の要素を持った table を作成(table#users)し、CoffeeScript にて読み込み
② ajax で CoffeeScript から Rails 側へ、データの算出を要求する
③ コントローラーにて ajax を受け取り、 UserDatatable モデルへデータの算出を要求する
④ 要求を満たすデータを返す
⑤ ④のデータを json ファイルにして返す
⑥ CoffeeScript にて実装したテーブルを HTML にて表示する
ビュー
slim だと本当にシンプルに書くことができます。
app/views/users/index.html.slim// 検索項目 button#search_btn type="button" |詳細検索 button#search_exec_btn type="button" |検索 button#search_clear_btn type="button" |クリア table tr td = label :user, :id td = text_field_tag :id, '', id: "search_id" td = label :user, :username td = text_field_tag :username, '', id: "search_username" td = label :user, :name td = text_field_tag :name, '', id: "search_name" // DataTables のテーブル表示 table#incidentsルーティング
jsonファイルを dataTables 側に渡すときに使用するルーティング。
のちほど、Javascriptにて使用する。config/routes.rbresources :users do collection do post 'ajax_data' end endコントローラー
UserDatatableのインスタンスをjsonファイルとして返す。
app/controllers/users_controller.rbdef ajax_data respond_to do |format| format.html format.json {render json: UsersDatatable.new(params) } end endUserDatatableはパラメーターを受け取って、SQL を実行し JSON 形式に変換するクラス。
テーブルに表示させたい項目や検索結果などをこちらのファイルにて割り出している。app/datatables/users_datatable.rbclass UsersDatatable attr_accessor :params def initialize(params) @params = params end # jQuery DataTables へ渡すためのハッシュを作る # 補足:コントローラーの render json: で指定したオブジェクトに対して as_json が呼び出される def as_json(options = {}) { recordsTotal: User.count, # 取得件数 recordsFiltered: users.total_count, # フィルター前の全件数 data: users, # 表データ } end def users @users ||= fetch_users end # 検索条件や件数を指定してデータを取得 def fetch_users User.where(search_sql).page(page).per(per) end # カラム情報を配列にする def columns return [] if params["columns"].blank? params["columns"].to_unsafe_h.map{|_,v| v["data"]} end # 検索ワードが指定されたとき def search_sql search_sql = [] for column, search_params in params["columns"] do search_sql.push("#{search_params["data"]} like '%#{search_params["search"]["value"]}%'") if search_params["search"]["value"].present? end search_sql.join(" and ") end # ソート順 def order_sql return "" if params["order"]["0"].blank? order_data = params["order"]["0"] order_column = columns[order_data["column"].to_i] # "id desc" のようにSQLの一部を作る "#{order_column} #{order_data["dir"]}" end # kaminari 向け、ページ数 def page params["start"].to_i / per + 1 end # kaminari 向け、1ページで取得する件数 def per params["length"].to_i > 0 ? params["length"].to_i : 10 end endJavascript
app/assets/javascripts/users.coffee$ -> # DataTables オブジェクト作成(ここではhtmlのid=users) user_table = new DataTables($('#users')) # ajax にて、 json ファイルを読み込み。作成したルーティングを引数に入れる。 user_table.setAjax("/users/ajax_data") # user_table へカラムを追加する user_table.setColumns([ { data: 'id', title: 'ユーザID', width: '5%' }, { data: 'username', title: 'ユーザ名', width: '25%' }, { data: 'name', title: '名前', width: '30%' }, { data: 'created_at', title: '登録日時', width: '20%' }, { data: 'updated_at', title: '更新日時', width: '20%' }, ]) user_table.setOption(false, true, true) # 表示順番を0番目のカラムを昇順で表示(ここではidを昇順で表示) user_table.setOrders([[0,'asc']]) # #users へ user_table を描写する。 user_table.drawTable() # 各行をクリックすると詳細画面へ遷移するように設定 $('#users tbody').on 'click', 'tr', -> data = $('#users').dataTable().fnGetData(this); document.location = "/users/#{data.id}" # 詳細検索ボタンを押すと、検索ボタンおよびカラムが表示されるように設定 $('#search_btn').on 'click', -> $('.search-body').slideToggle(200) $('#search_exec_btn').slideToggle(200) $('#search_clear_btn').slideToggle(200) # 検索ボタンを押すと、表示されているテーブルのカラムが検索条件に合致したものだけを表示するように設定。 $('#search_exec_btn').on 'click', -> # dataTable の API を利用する。 user_table_api = $('#users').dataTable().api() # 各検索カラムの値を読み込み search_id = $('#search_id').val() search_username = $('#search_username').val() search_name = $('#search_name').val() # 検索結果をテーブルに描画する user_table_api.columns(0).search(search_id).draw() user_table_api.columns(1).search(search_username).draw() user_table_api.columns(2).search(search_name).draw() $('#search_clear_btn').on 'click', -> # 検索欄 入力内容 初期化 tmp_array = ["id", "username", "name"] tmp_array.forEach (key) -> $("#search_#{key}").val('').trigger('change')まとめ
少し複雑な実装でしたので、Keynoteで作った全体像を用いての説明でした。
いかがでしたでしょうか。少しでも理解の助けになれればなと思います。また、DataTables は高機能なライブラリですので、他にもできることを紹介していきたいと思います。
参考
- DataTables(公式ページ)
- GitHub(rweng/jquery-datatables-rails)
- Rails | Ajax で動的な検索・ソート機能付きページネーションを実装する(jQuery DataTablesプラグイン連動)
- DataTablesの使い方
- DataTablesでページが切り替わっても、ソートやページャや検索結果を保持しておくようにしたい。
- javascript でテキストをクリップボードにコピーする2つの方法
- 投稿日:2020-01-20T08:13:13+09:00
Rails6 アプリからGmailのメールサーバからメールを送信する
目的
- Rails6で作成したアプリからGmailのメールサーバを利用してメールを送信する方法をまとめる。
前提条件
- Googleのアカウントを持っていること。
- Googleの二段階認証の設定がなされていること。
- Googleのアプリケーション用パスワードを取得していること。
- 正常に動作しているRails6のアプリがあること。
- テストメールを送信できるアドレス(メールを送信しても迷惑にならないメールアドレス)を知っていること。
- 二段階認証、アプリケーション用パスワードを取得しているアカウントのメールアドレスでもOK(自分にテストメールを送信して確認する)
作業期待値
- とりあえず難しい処理は無しにしてRails6アプリケーションからのメールが送信できるようにする。
- Rails6のアプリケーションから何かのトリガーを用いてGmailのメールサーバからテストメールを送信する。
- 継承やその他詳しい話はせずとにかくメールを送信できるようにする。
- メーラーの詳しい話や処理方法は下記の本のメールについての記載を確認することをオススメする。(アフィリエイトリンクでは無いので安心してください。)
作業の前にちょっと聞いてほしいこと
- 筆者はこのメールの実装に非常に時間がかかった。
- データベースの内容をメールに添付しようとしたり、宛先を複数指定したりしたためミスが多くあった。
- 余計なことは考えずとにかくテストメールを送信できることを最優先に作業をした方が良い気がする。
作業概要
- メーラーの作成
- 送信アドレス設定
- メールサーバの設定
- 送信トリガーの設定
- テスト送信
作業詳細
メーラーの作成
下記コマンドを実行してメーラーを作成する。(notice greetingはクラス名とメソット名であるため任意のものでも構わない)
$ cd アプリ名フォルダ
$ rails g mailer notice greeting
先のコマンドを実行するとメーラーが作成される。メール送信に必要なファイル群が作成されると思っていただきたい。
送信アドレス設定
- 下記に存在する送信先を指定するファイル
notice_mailer.rbをエディタで開く
- アプリ名フォルダ/app/mailers
- notice_mailer.rb
ファイル
notice_mailer.rbの下記の部分を下記のように修正してテストメールを送信する先のアドレスを設定する。class NoticeMailer < ApplicationMailer # Subject can be set in your I18n file at config/locales/en.yml # with the following lookup: # # en.notice_mailer.greeting.subject # def greeting @greeting = "Hi" mail to: "to@example.org" end end↓修正
class NoticeMailer < ApplicationMailer

  # Subject can be set in your I18n file at config/locales/en.yml
  # with the following lookup:
  #
  #   en.notice_mailer.greeting.subject
  #
  def greeting
    @greeting = "Hi"

    mail to: "テストメール送信先アドレス"
  end
end
メールサーバの設定
- 下記に存在する送信先を指定するファイル
development.rbをエディタで開く
- アプリ名フォルダ/config/environments
- development.rb
ファイル
development.rbの下記の部分を下記のように修正してテストメールを送信するメールサーバを設定する。Rails.application.configure do # Settings specified here will take precedence over those in config/application.rb. # In the development environment your application's code is reloaded on # every request. This slows down response time but is perfect for development # since you don't have to restart the web server when you make code changes. config.cache_classes = false # Do not eager load code on boot. config.eager_load = false # Show full error reports. config.consider_all_requests_local = true # Enable/disable caching. By default caching is disabled. # Run rails dev:cache to toggle caching. if Rails.root.join('tmp', 'caching-dev.txt').exist? config.action_controller.perform_caching = true config.action_controller.enable_fragment_cache_logging = true config.cache_store = :memory_store config.public_file_server.headers = { 'Cache-Control' => "public, max-age=#{2.days.to_i}" } else config.action_controller.perform_caching = false config.cache_store = :null_store end # Store uploaded files on the local file system (see config/storage.yml for options). config.active_storage.service = :local # Don't care if the mailer can't send. config.action_mailer.raise_delivery_errors = false config.action_mailer.perform_caching = false # Print deprecation notices to the Rails logger. config.active_support.deprecation = :log # Raise an error on page load if there are pending migrations. config.active_record.migration_error = :page_load # Highlight code that triggered database queries in logs. config.active_record.verbose_query_logs = true # Debug mode disables concatenation and preprocessing of assets. # This option may cause significant delays in view rendering with a large # number of complex assets. config.assets.debug = true # Suppress logger output for asset requests. config.assets.quiet = true # Raises error for missing translations. # config.action_view.raise_on_missing_translations = true # Use an evented file watcher to asynchronously detect changes in source code, # routes, locales, etc. This feature depends on the listen gem. config.file_watcher = ActiveSupport::EventedFileUpdateChecker end↓修正
Rails.application.configure do
  # Settings specified here will take precedence over those in config/application.rb.

  # In the development environment your application's code is reloaded on
  # every request. This slows down response time but is perfect for development
  # since you don't have to restart the web server when you make code changes.
  config.cache_classes = false

  # Do not eager load code on boot.
  config.eager_load = false

  # Show full error reports.
  config.consider_all_requests_local = true

  # Enable/disable caching. By default caching is disabled.
  # Run rails dev:cache to toggle caching.
  if Rails.root.join('tmp', 'caching-dev.txt').exist?
    config.action_controller.perform_caching = true
    config.action_controller.enable_fragment_cache_logging = true

    config.cache_store = :memory_store
    config.public_file_server.headers = {
      'Cache-Control' => "public, max-age=#{2.days.to_i}"
    }
  else
    config.action_controller.perform_caching = false

    config.cache_store = :null_store
  end

  # Store uploaded files on the local file system (see config/storage.yml for options).
  config.active_storage.service = :local

  # Don't care if the mailer can't send.
  # config.action_mailer.perform_caching = false
  config.action_mailer.raise_delivery_errors = true
  config.action_mailer.delivery_method = :smtp
  config.action_mailer.smtp_settings = {
    :enable_starttls_auto => true,
    :address => 'smtp.gmail.com',
    :port => '587',
    :domain => 'smtp.gmail.com',
    :authentication => 'plain',
    :user_name => '二段階認証設定、アプリケーションパスワードを取得したアカウントのメールアドレス',
    :password => 'アプリケーションパスワード(表示された時は4文字で区切られていたがスペース入れず連続して記載)'
  }

  # Print deprecation notices to the Rails logger.
  config.active_support.deprecation = :log

  # Raise an error on page load if there are pending migrations.
  config.active_record.migration_error = :page_load

  # Highlight code that triggered database queries in logs.
  config.active_record.verbose_query_logs = true

  # Debug mode disables concatenation and preprocessing of assets.
  # This option may cause significant delays in view rendering with a large
  # number of complex assets.
  config.assets.debug = true

  # Suppress logger output for asset requests.
  config.assets.quiet = true

  # Raises error for missing translations.
  # config.action_view.raise_on_missing_translations = true

  # Use an evented file watcher to asynchronously detect changes in source code,
  # routes, locales, etc. This feature depends on the listen gem.
  config.file_watcher = ActiveSupport::EventedFileUpdateChecker
end
送信トリガーの設定(ここからは各個人のプロダクトにより若干方法が異なるが、単純に送信のきっかけを作っているだけなので難しく考えないでほしい)
- 送信のトリガーとなる処理(以降、メールトリガーコードと呼ぶ)を任意のコントローラファイルに記載する。
任意のコントローラのアクション内に下記メールトリガーコードを記載する。
- ※メーラーの作成時にクラス名、メソット名を独自の物にした人は若干異なるので注意
- ※難しく考えず、下記の処理を記載してコントローラ内で実行してあげればメールが送信されると考えると記載箇所の応用が効きやすいかもしれない
# メーラークラス名.メール送信メソット名.送信メソット名
NoticeMailer.greeting.deliver_now
前述の記載を任意のアクション内に記載するが、オススメは任意ページを表示するアクションに記載することである。
筆者は
http://localhost:3000/posts/index/:idにアクセスした時にテストメールが送られるように設定した。筆者のメールトリガーコードの記載例を下記に記載する。
post_controller.rbファイルのindexアクション内に下記を記載class PostsController < ApplicationController def index @posts = Post.where(user_id: @current_user.id) end↓メールトリガーコードを記載
class PostsController < ApplicationController
  def index
    NoticeMailer.greeting.deliver_now
    @posts = Post.where(user_id: @current_user.id)
  end
テスト送信
下記コマンドを実行してアプリケーションを起動する。
$ cd アプリ名フォルダ
$ rails s
アプリケーション内でメールトリガーコードを記載したコントローラのアクションが実行されるようにページ遷移する。
筆者の場合
http://localhost:3000/posts/index/:idにアクセスするとメールトリガーコードが実行されるため上記画面を表示した。メール確認
- 下記のようなメールが送信先アドレスに届いていれば実装完了である。
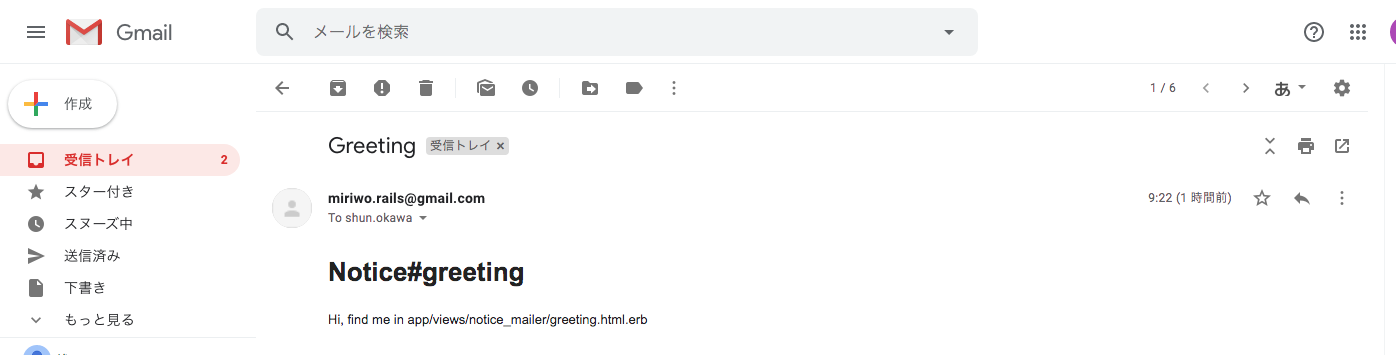
Net::SMTPAuthenticationErrorのエラー
- メールトリガーコードを記載したコントローラのアクションを実行したところエラー
Net::SMTPAuthenticationErrorが発生した。- これは二段階認証を使用してGmailのをメールサーバを使用した場合にアプリケーションパスワードが一致していない時に出るエラーらしい。
- 筆者のエラーメッセージ: 534-5.7.9 Application-specific password required. Learn more at
- ファイル
development.rbの二段階認証を行なったアカウントのメールアドレス、パスワードが間違えていないかもう一度確認しよう。- 正常に設定されているなら、railsアプリを終了し10分~20分ほど放置してから再トライしてみよう。
- サーバとのやりとりに時間がかかっており、ファイル
development.rbでパスワード設定直後だと接続がうまくいかない恐れがある。(筆者談、真意は不明)エラーは出てないがメールが来ない
- ファイル
notice_mailer.rbで指定している送信先のメールアドレスを入力していないかを確認してみよう。付録
- 筆者の環境でメール作成の実績がある各ファイルの内容を下記に記載する。
- パスワードはダミーを入力する。
今回説明に出てきていないメーラー作成コマンドで作成されたそのほかのファイルの記載状況もまとめる。
notice_mailer.rb
class NoticeMailer < ApplicationMailer

  # Subject can be set in your I18n file at config/locales/en.yml
  # with the following lookup:
  #
  #   en.notice_mailer.greeting.subject
  #
  def greeting
    @greeting = "Hi"

    mail to: "shun.okawa@gmail.com",
         cc: "miriwo.rails@gmail.com"
  end
end
- development.rb
Rails.application.configure do
  # Settings specified here will take precedence over those in config/application.rb.

  # In the development environment your application's code is reloaded on
  # every request. This slows down response time but is perfect for development
  # since you don't have to restart the web server when you make code changes.
  config.cache_classes = false

  # Do not eager load code on boot.
  config.eager_load = false

  # Show full error reports.
  config.consider_all_requests_local = true

  # Enable/disable caching. By default caching is disabled.
  # Run rails dev:cache to toggle caching.
  if Rails.root.join('tmp', 'caching-dev.txt').exist?
    config.action_controller.perform_caching = true
    config.action_controller.enable_fragment_cache_logging = true

    config.cache_store = :memory_store
    config.public_file_server.headers = {
      'Cache-Control' => "public, max-age=#{2.days.to_i}"
    }
  else
    config.action_controller.perform_caching = false

    config.cache_store = :null_store
  end

  # Store uploaded files on the local file system (see config/storage.yml for options).
  config.active_storage.service = :local

  # Don't care if the mailer can't send.
  # config.action_mailer.perform_caching = false
  config.action_mailer.raise_delivery_errors = true
  config.action_mailer.delivery_method = :smtp
  config.action_mailer.smtp_settings = {
    :enable_starttls_auto => true,
    :address => 'smtp.gmail.com',
    :port => '587',
    :domain => 'smtp.gmail.com',
    :authentication => 'plain',
    :user_name => 'miriwo.rails@gmail.com',
    :password => 'smppyvjbfzhweyxx'
  }

  # Print deprecation notices to the Rails logger.
  config.active_support.deprecation = :log

  # Raise an error on page load if there are pending migrations.
  config.active_record.migration_error = :page_load

  # Highlight code that triggered database queries in logs.
  config.active_record.verbose_query_logs = true

  # Debug mode disables concatenation and preprocessing of assets.
  # This option may cause significant delays in view rendering with a large
  # number of complex assets.
  config.assets.debug = true

  # Suppress logger output for asset requests.
  config.assets.quiet = true

  # Raises error for missing translations.
  # config.action_view.raise_on_missing_translations = true

  # Use an evented file watcher to asynchronously detect changes in source code,
  # routes, locales, etc. This feature depends on the listen gem.
  config.file_watcher = ActiveSupport::EventedFileUpdateChecker
end
- posts_controller.rb
class PostsController < ApplicationController
  def index
    NoticeMailer.greeting.deliver_now
    @posts = Post.where(user_id: @current_user.id)
  end

  def show
    @post = Post.find_by(id: params[:id])
  end

  def new
    @post = Post.new
  end

  def create
    @post = Post.new(content: params[:content], study_time: params[:'study_time'], today_study_time: params[:'study_time'], hash_tag: params[:hash_tag], user_id: @current_user.id)
    if @post.save
      # flash[:notice] = "保存完了"
      redirect_to("/posts/#{@post.id}")
    else
      # flash[:notice] = "保存失敗"
      render ("posts/new")
    end
  end

  def edit_form
    @post = Post.find_by(id: params[:id])
  end

  def edit
    @post = Post.find_by(id: params[:id])
    @post.content = params[:content]
    @post.hash_tag = params[:hash_tag]
    @post.save
    redirect_to("/posts/#{@post.id}")
  end

  def achievement
    @post = Post.find_by(id: params[:id])

  end

  def destroy
    @post = Post.find_by(id: params[:id])
    @post.destroy
    redirect_to("/posts/index/#{@post.user_id}")
  end

  def update
    @post = Post.find_by(id: params[:id])
    # 本当は下記見たいにしたいけどエラー出る。
    # 原因は@post.study_timeが数値でparams[:study_time]が文字列になってしまっているから
    @post.today_study_time = params[:study_time].to_f
    @post.save
    @post.study_time += @post.today_study_time
    @post.save
    redirect_to("/posts/#{@post.id}")
  end

  def tweet_content
    @post = Post.find_by(id: params[:id])
  end
end
アプリ名/app/mailersのapplication_mailer.rbclass ApplicationMailer < ActionMailer::Base default from: 'from@example.com' layout 'mailer' end
アプリ名/app/views/notice_mailerのgreeting.html.erb<h1>Notice#greeting</h1> <p> <%= @greeting %>, find me in app/views/notice_mailer/greeting.html.erb </p>
アプリ名/app/views/notice_mailerのgreeting.text.erbNotice#greeting <%= @greeting %>, find me in app/views/notice_mailer/greeting.text.erb
アプリ名/test/mailersのnotice_mailer_test.rbrequire 'test_helper' class NoticeMailerTest < ActionMailer::TestCase test "greeting" do mail = NoticeMailer.greeting assert_equal "Greeting", mail.subject assert_equal ["to@example.org"], mail.to assert_equal ["from@example.com"], mail.from assert_match "Hi", mail.body.encoded end end
アプリ名/test/mailers/previewsのnotice_mailer_preview.rb# Preview all emails at http://localhost:3000/rails/mailers/notice_mailer class NoticeMailerPreview < ActionMailer::Preview # Preview this email at http://localhost:3000/rails/mailers/notice_mailer/greeting def greeting NoticeMailer.greeting end end
- Gemfile
準備中
- 投稿日:2020-01-20T08:13:13+09:00
Rails6 アプリからGmailのメールサーバからメールを送信する ローカル環境編
目的
- Rails6で作成したアプリからGmailのメールサーバを利用してメールを送信する方法をまとめる。
前提条件
- Googleのアカウントを持っていること。
- Googleの二段階認証の設定がなされていること。
- Googleのアプリケーション用パスワードを取得していること。
- 正常に動作しているRails6のアプリがあること。
- テストメールを送信できるアドレス(メールを送信しても迷惑にならないメールアドレス)を知っていること。
- 二段階認証、アプリケーション用パスワードを取得しているアカウントのメールアドレスでもOK(自分にテストメールを送信して確認する)
作業期待値
- とりあえず難しい処理は無しにしてRails6アプリケーションからのメールが送信できるようにする。
- Rails6のアプリケーションから何かのトリガーを用いてGmailのメールサーバからテストメールを送信する。
- 継承やその他詳しい話はせずとにかくメールを送信できるようにする。
- メーラーの詳しい話や処理方法は下記の本のメールについての記載を確認することをオススメする。(アフィリエイトリンクでは無いので安心してください。)
作業の前にちょっと聞いてほしいこと
- 筆者はこのメールの実装に非常に時間がかかった。
- データベースの内容をメールに添付しようとしたり、宛先を複数指定したりしたためミスが多くあった。
- 余計なことは考えずとにかくテストメールを送信できることを最優先に作業をした方が良い気がする。
作業概要
- メーラーの作成
- 送信アドレス設定
- メールサーバの設定
- 送信トリガーの設定
- テスト送信
作業詳細
メーラーの作成
下記コマンドを実行してメーラーを作成する。(notice greetingはクラス名とメソット名であるため任意のものでも構わない)
$ cd アプリ名フォルダ
$ rails g mailer notice greeting
先のコマンドを実行するとメーラーが作成される。メール送信に必要なファイル群が作成されると思っていただきたい。
送信アドレス設定
- 下記に存在する送信先を指定するファイル
notice_mailer.rbをエディタで開く
- アプリ名フォルダ/app/mailers
- notice_mailer.rb
ファイル
notice_mailer.rbの下記の部分を下記のように修正してテストメールを送信する先のアドレスを設定する。class NoticeMailer < ApplicationMailer # Subject can be set in your I18n file at config/locales/en.yml # with the following lookup: # # en.notice_mailer.greeting.subject # def greeting @greeting = "Hi" mail to: "to@example.org" end end↓修正
class NoticeMailer < ApplicationMailer

  # Subject can be set in your I18n file at config/locales/en.yml
  # with the following lookup:
  #
  #   en.notice_mailer.greeting.subject
  #
  def greeting
    @greeting = "Hi"

    mail to: "テストメール送信先アドレス"
  end
end
メールサーバの設定
- 下記に存在する送信先を指定するファイル
development.rbをエディタで開く
- アプリ名フォルダ/config/environments
- development.rb
ファイル
development.rbを下記のように修正してテストメールを送信するメールサーバを設定する。Rails.application.configure do # Settings specified here will take precedence over those in config/application.rb. # In the development environment your application's code is reloaded on # every request. This slows down response time but is perfect for development # since you don't have to restart the web server when you make code changes. config.cache_classes = false # Do not eager load code on boot. config.eager_load = false # Show full error reports. config.consider_all_requests_local = true # Enable/disable caching. By default caching is disabled. # Run rails dev:cache to toggle caching. if Rails.root.join('tmp', 'caching-dev.txt').exist? config.action_controller.perform_caching = true config.action_controller.enable_fragment_cache_logging = true config.cache_store = :memory_store config.public_file_server.headers = { 'Cache-Control' => "public, max-age=#{2.days.to_i}" } else config.action_controller.perform_caching = false config.cache_store = :null_store end # Store uploaded files on the local file system (see config/storage.yml for options). config.active_storage.service = :local # Don't care if the mailer can't send. config.action_mailer.raise_delivery_errors = false config.action_mailer.perform_caching = false # Print deprecation notices to the Rails logger. config.active_support.deprecation = :log # Raise an error on page load if there are pending migrations. config.active_record.migration_error = :page_load # Highlight code that triggered database queries in logs. config.active_record.verbose_query_logs = true # Debug mode disables concatenation and preprocessing of assets. # This option may cause significant delays in view rendering with a large # number of complex assets. config.assets.debug = true # Suppress logger output for asset requests. config.assets.quiet = true # Raises error for missing translations. # config.action_view.raise_on_missing_translations = true # Use an evented file watcher to asynchronously detect changes in source code, # routes, locales, etc. This feature depends on the listen gem. config.file_watcher = ActiveSupport::EventedFileUpdateChecker end↓修正
Rails.application.configure do
  # Settings specified here will take precedence over those in config/application.rb.

  # In the development environment your application's code is reloaded on
  # every request. This slows down response time but is perfect for development
  # since you don't have to restart the web server when you make code changes.
  config.cache_classes = false

  # Do not eager load code on boot.
  config.eager_load = false

  # Show full error reports.
  config.consider_all_requests_local = true

  # Enable/disable caching. By default caching is disabled.
  # Run rails dev:cache to toggle caching.
  if Rails.root.join('tmp', 'caching-dev.txt').exist?
    config.action_controller.perform_caching = true
    config.action_controller.enable_fragment_cache_logging = true

    config.cache_store = :memory_store
    config.public_file_server.headers = {
      'Cache-Control' => "public, max-age=#{2.days.to_i}"
    }
  else
    config.action_controller.perform_caching = false

    config.cache_store = :null_store
  end

  # Store uploaded files on the local file system (see config/storage.yml for options).
  config.active_storage.service = :local

  # Don't care if the mailer can't send.
  # config.action_mailer.perform_caching = false
  config.action_mailer.raise_delivery_errors = true
  config.action_mailer.delivery_method = :smtp
  config.action_mailer.smtp_settings = {
    :enable_starttls_auto => true,
    :address => 'smtp.gmail.com',
    :port => '587',
    :domain => 'smtp.gmail.com',
    :authentication => 'plain',
    :user_name => '二段階認証設定、アプリケーションパスワードを取得したアカウントのメールアドレス',
    :password => 'アプリケーションパスワード(表示された時は4文字で区切られていたがスペース入れず連続して記載)'
  }

  # Print deprecation notices to the Rails logger.
  config.active_support.deprecation = :log

  # Raise an error on page load if there are pending migrations.
  config.active_record.migration_error = :page_load

  # Highlight code that triggered database queries in logs.
  config.active_record.verbose_query_logs = true

  # Debug mode disables concatenation and preprocessing of assets.
  # This option may cause significant delays in view rendering with a large
  # number of complex assets.
  config.assets.debug = true

  # Suppress logger output for asset requests.
  config.assets.quiet = true

  # Raises error for missing translations.
  # config.action_view.raise_on_missing_translations = true

  # Use an evented file watcher to asynchronously detect changes in source code,
  # routes, locales, etc. This feature depends on the listen gem.
  config.file_watcher = ActiveSupport::EventedFileUpdateChecker
end
送信トリガーの設定(ここからは各個人のプロダクトにより若干方法が異なるが、単純に送信のきっかけを作っているだけなので難しく考えないでほしい)
- 送信のトリガーとなる処理(以降、メールトリガーコードと呼ぶ)を任意のコントローラファイルに記載する。
任意のコントローラのアクション内に下記メールトリガーコードを記載する。
- ※メーラーの作成時にクラス名、メソット名を独自の物にした人は若干異なるので注意
- ※難しく考えず、下記の処理を記載してコントローラ内で実行してあげればメールが送信されると考えると記載箇所の応用が効きやすいかもしれない
# メーラークラス名.メール送信メソット名.送信メソット名
NoticeMailer.greeting.deliver_now
前述の記載を任意のアクション内に記載するが、オススメは任意ページを表示するアクションに記載することである。
筆者は
http://localhost:3000/posts/index/:idにアクセスした時にテストメールが送られるように設定した。筆者のメールトリガーコードの記載例を下記に記載する。
post_controller.rbファイルのindexアクション内に下記を記載class PostsController < ApplicationController def index @posts = Post.where(user_id: @current_user.id) end↓メールトリガーコードを記載
class PostsController < ApplicationController
  def index
    NoticeMailer.greeting.deliver_now
    @posts = Post.where(user_id: @current_user.id)
  end
テスト送信
下記コマンドを実行してアプリケーションを起動する。
$ cd アプリ名フォルダ
$ rails s
アプリケーション内でメールトリガーコードを記載したコントローラのアクションが実行されるようにページ遷移する。
筆者の場合
http://localhost:3000/posts/index/:idにアクセスするとメールトリガーコードが実行されるため上記画面を表示した。メール確認
- 下記のようなメールが送信先アドレスに届いていれば実装完了である。
Net::SMTPAuthenticationErrorのエラー
- メールトリガーコードを記載したコントローラのアクションを実行したところエラー
Net::SMTPAuthenticationErrorが発生した。- これは二段階認証を使用してGmailのをメールサーバを使用した場合にアプリケーションパスワードが一致していない時に出るエラーらしい。
- 筆者のエラーメッセージ: 534-5.7.9 Application-specific password required. Learn more at
- ファイル
development.rbの二段階認証を行なったアカウントのメールアドレス、パスワードが間違えていないかもう一度確認しよう。- 正常に設定されているなら、railsアプリを終了し10分~20分ほど放置してから再トライしてみよう。
- サーバとのやりとりに時間がかかっており、ファイル
development.rbでパスワード設定直後だと接続がうまくいかない恐れがある。(筆者談、真意は不明)エラーは出てないがメールが来ない
- ファイル
notice_mailer.rbで指定している送信先のメールアドレスを入力していないかを確認してみよう。付録
- 筆者の環境でメール作成の実績がある各ファイルの内容を下記に記載する。
- パスワードはダミーを入力する。
今回説明に出てきていないメーラー作成コマンドで作成されたそのほかのファイルの記載状況もまとめる。
notice_mailer.rb
class NoticeMailer < ApplicationMailer

  # Subject can be set in your I18n file at config/locales/en.yml
  # with the following lookup:
  #
  #   en.notice_mailer.greeting.subject
  #
  def greeting
    @greeting = "Hi"

    mail to: "shun.okawa@gmail.com",
         cc: "miriwo.rails@gmail.com"
  end
end
- development.rb
Rails.application.configure do
  # Settings specified here will take precedence over those in config/application.rb.

  # In the development environment your application's code is reloaded on
  # every request. This slows down response time but is perfect for development
  # since you don't have to restart the web server when you make code changes.
  config.cache_classes = false

  # Do not eager load code on boot.
  config.eager_load = false

  # Show full error reports.
  config.consider_all_requests_local = true

  # Enable/disable caching. By default caching is disabled.
  # Run rails dev:cache to toggle caching.
  if Rails.root.join('tmp', 'caching-dev.txt').exist?
    config.action_controller.perform_caching = true
    config.action_controller.enable_fragment_cache_logging = true

    config.cache_store = :memory_store
    config.public_file_server.headers = {
      'Cache-Control' => "public, max-age=#{2.days.to_i}"
    }
  else
    config.action_controller.perform_caching = false

    config.cache_store = :null_store
  end

  # Store uploaded files on the local file system (see config/storage.yml for options).
  config.active_storage.service = :local

  # Don't care if the mailer can't send.
  # config.action_mailer.perform_caching = false
  config.action_mailer.raise_delivery_errors = true
  config.action_mailer.delivery_method = :smtp
  config.action_mailer.smtp_settings = {
    :enable_starttls_auto => true,
    :address => 'smtp.gmail.com',
    :port => '587',
    :domain => 'smtp.gmail.com',
    :authentication => 'plain',
    :user_name => 'miriwo.rails@gmail.com',
    :password => 'smppyvjbfzhweyxx'
  }

  # Print deprecation notices to the Rails logger.
  config.active_support.deprecation = :log

  # Raise an error on page load if there are pending migrations.
  config.active_record.migration_error = :page_load

  # Highlight code that triggered database queries in logs.
  config.active_record.verbose_query_logs = true

  # Debug mode disables concatenation and preprocessing of assets.
  # This option may cause significant delays in view rendering with a large
  # number of complex assets.
  config.assets.debug = true

  # Suppress logger output for asset requests.
  config.assets.quiet = true

  # Raises error for missing translations.
  # config.action_view.raise_on_missing_translations = true

  # Use an evented file watcher to asynchronously detect changes in source code,
  # routes, locales, etc. This feature depends on the listen gem.
  config.file_watcher = ActiveSupport::EventedFileUpdateChecker
end
- posts_controller.rb
class PostsController < ApplicationController
  def index
    NoticeMailer.greeting.deliver_now
    @posts = Post.where(user_id: @current_user.id)
  end

  def show
    @post = Post.find_by(id: params[:id])
  end

  def new
    @post = Post.new
  end

  def create
    @post = Post.new(content: params[:content], study_time: params[:'study_time'], today_study_time: params[:'study_time'], hash_tag: params[:hash_tag], user_id: @current_user.id)
    if @post.save
      # flash[:notice] = "保存完了"
      redirect_to("/posts/#{@post.id}")
    else
      # flash[:notice] = "保存失敗"
      render ("posts/new")
    end
  end

  def edit_form
    @post = Post.find_by(id: params[:id])
  end

  def edit
    @post = Post.find_by(id: params[:id])
    @post.content = params[:content]
    @post.hash_tag = params[:hash_tag]
    @post.save
    redirect_to("/posts/#{@post.id}")
  end

  def achievement
    @post = Post.find_by(id: params[:id])

  end

  def destroy
    @post = Post.find_by(id: params[:id])
    @post.destroy
    redirect_to("/posts/index/#{@post.user_id}")
  end

  def update
    @post = Post.find_by(id: params[:id])
    # 本当は下記見たいにしたいけどエラー出る。
    # 原因は@post.study_timeが数値でparams[:study_time]が文字列になってしまっているから
    @post.today_study_time = params[:study_time].to_f
    @post.save
    @post.study_time += @post.today_study_time
    @post.save
    redirect_to("/posts/#{@post.id}")
  end

  def tweet_content
    @post = Post.find_by(id: params[:id])
  end
end
アプリ名/app/mailersのapplication_mailer.rbclass ApplicationMailer < ActionMailer::Base default from: 'from@example.com' layout 'mailer' end
アプリ名/app/views/notice_mailerのgreeting.html.erb<h1>Notice#greeting</h1> <p> <%= @greeting %>, find me in app/views/notice_mailer/greeting.html.erb </p>
アプリ名/app/views/notice_mailerのgreeting.text.erbNotice#greeting <%= @greeting %>, find me in app/views/notice_mailer/greeting.text.erb
アプリ名/test/mailersのnotice_mailer_test.rbrequire 'test_helper' class NoticeMailerTest < ActionMailer::TestCase test "greeting" do mail = NoticeMailer.greeting assert_equal "Greeting", mail.subject assert_equal ["to@example.org"], mail.to assert_equal ["from@example.com"], mail.from assert_match "Hi", mail.body.encoded end end
アプリ名/test/mailers/previewsのnotice_mailer_preview.rb# Preview all emails at http://localhost:3000/rails/mailers/notice_mailer class NoticeMailerPreview < ActionMailer::Preview # Preview this email at http://localhost:3000/rails/mailers/notice_mailer/greeting def greeting NoticeMailer.greeting end end
- Gemfile
準備中