- 投稿日:2020-01-18T22:16:36+09:00
性能検証用 負荷をかけるコマンドメモ
- 投稿日:2020-01-18T20:11:00+09:00
jupyternotebookでvimを使えるようにする。
jupyternotebookでvimが使えればいいなあと思っていたときが僕にもありました(過去形)
やり方
1. jupyter_contrib_nbextensionsを入れる
pip install jupyter_contrib_nbextensions2. nbextensionsを有効にする
jupyter nbextensions_configurator enable --user3. jupyterのdataディレクトリにnbextensionsフォルダをつくる
mkdir -p $(jupyter --data-dir)/nbextensions4. 作ったnbextensionsフォルダにvim_bindingをcloneする
gitがなければインストールする。
cd $(jupyter --data-dir)/nbextensions
git clone https://github.com/lambdalisue/jupyter-vim-binding vim_binding
5. vim_bindingに権限を付与する
chmod -R go-w vim_binding6. vimを有効にする
jupyter nbextension enable vim_binding/vim_bindingOKになれば導入成功Enabling notebook extension vim_binding/vim_binding... - Validating: OK7. themeがダーク系であれば背景色を変える
monokaiの場合
#272822とかにするといい感じになる。~/.local/share/jupyter/nbextensions/vim_binding/vim_binding.css... ... ... /* Jupyter cell is in normal mode when code mirror */ .edit_mode .cell.selected .CodeMirror-focused.cm-fat-cursor { background-color: #272822; } /* Jupyter cell is in insert mode when code mirror */ .edit_mode .cell.selected .CodeMirror-focused:not(.cm-fat-cursor) { background-color: #272822; }
- 投稿日:2020-01-18T20:09:35+09:00
Kotlin/Nativeコンパイラのインストール手順
はじめに
Kotlin/NativeのmacOS/Linux向けビルド環境(※ビルドツールのGradleなし)のインストール手順をまとめています。ただし、2020/1月時点でKotlin/Native自体がまだベータ版という状況です。
前提
KotlinソースコードのコンパイルにJDK (Java環境) が必要なため、事前にインストールしておいてください。
Kotlin/Nativeのインストール
https://github.com/JetBrains/kotlin/releases/latest
にある正式リリース最新版を利用します。ここではダウンロードにwgetコマンドを利用するため、未インストールの方は必要に応じてインストールして下さい。
macOSの場合
$ brew install wgetLinux(Ubuntu)の場合
$ sudo apt install wgetコンパイラをダウンロードします。
$ wget https://github.com/JetBrains/kotlin/releases/download/v1.3.61/kotlin-native-macos-1.3.61.tar.gz適切な場所に解凍し、環境変数のパスを通しておきます。ここでは/usr/local/kotlin-nativeに配置することにします。
$ tar xzvf kotlin-native-macos-1.3.61.tar.gz
$ sudo mkdir -p /usr/local/kotlin-native
$ sudo mv kotlin-native-macos-1.3.61/* /usr/local/kotlin-native
コンパイラバイナリへのパスを通すために~/.bash_profileにパスを追記します。
~/.bash_profileexport PATH=$PATH:/usr/local/kotlin-native/bin/動作確認用ソースコード
hello.ktfun main(args: Array<String>) { println("Hello, World!") }コンパイル
初回実行時、LLVMなどの依存パッケージをダウンロード&インストールするために時間がかかります。
$ kotlinc-native hello.kt -o helloなお、-DオプションでJavaのオプションが渡せるため、ネットワーク環境でプロキシ設定が必要な方は以下のように実行してください。
情報参照元はここです。$ kotlinc-native hello.kt -o hello ¥ -Dhttp.proxyHost=hoge.host.co.jp -Dhttp.proxyPort=12345 ¥ -Dhttps.proxyHost=hoge.host.co.jp -Dhttps.proxyPort=12345実行
$ ./hello.kexe
Hello, World!
macOS/Linuxのネイティブ環境でKotlinプログラムが実行できました!
ライブラリ生成
-pオプションを利用することでいくつかの形式のライブラリ化が可能で、ヘッダファイルも自動生成してくれます。
iOS/macOSのframeworkにも対応していて結構よくできていますが、dynamic指定時のC/C++用のヘッダファイルは結構出来が悪い気がします…。もう少しまともなマクロにして欲しい…$ kotlinc-native hello.kt -p dynamic
オプション引数 内容 program 通常の実行バイナリ static .aファイル dynamic Linux環境であれば.so, macOSであれば.dylib framework iOS/macOS向けのframework形式 library klib(Kotlinライブラリ形式) bitcode bc(オブジェクトコード) 使い方が分からない場合は、-hオプションでヘルプメッセージが確認出来ます。
$ kotlinc-native -h
Usage: kotlinc-native <options> <source files>
where possible options include:
  -g                         Enable emitting debug information
  -enable-assertions (-ea)   Enable runtime assertions in generated code
  -friend-modules <path>     Paths to friend modules
  -generate-no-exit-test-runner (-trn)
                             Produce a runner for unit tests not forcing exit
  -generate-test-runner (-tr) Produce a runner for unit tests
  -generate-worker-test-runner (-trw)
                             Produce a worker runner for unit tests
  -include-binary (-ib) <path> Pack external binary within the klib
  -library (-l) <path>       Link with the library
  -library-version (-lv) <version>
                             Set library version
  -linker-options <arg>      Pass arguments to linker
  -list-targets              List available hardware targets
  -entry (-e) <name>         Qualified entry point name
  -manifest <path>           Provide a maniferst addend file
  -memory-model <model>      Memory model to use, 'strict' and 'relaxed' are currently supported
  -module-name <name>        Specify a name for the compilation module
  -native-library (-nl) <path> Include the native bitcode library
  -no-default-libs           Don't link the libraries from dist/klib automatically
  -no-endorsed-libs          Don't link the endorsed libraries from dist automatically
  -nomain                    Assume 'main' entry point to be provided by external libraries
  -nopack                    Don't pack the library into a klib file
  -nostdlib                  Don't link with stdlib
  -opt                       Enable optimizations during compilation
  -output (-o) <name>        Output name
  -produce (-p) {program|static|dynamic|framework|library|bitcode}
                             Specify output file kind
  -repo (-r) <path>          Library search path
  -linker-option <arg>       Pass argument to linker
  -target <target>           Set hardware target
  -Werror                    Report an error if there are any warnings
  -api-version <version>     Allow to use declarations only from the specified version of bundled libraries
  -X                         Print a synopsis of advanced options
  -help (-h)                 Print a synopsis of standard options
  -kotlin-home <path>        Path to Kotlin compiler home directory, used for runtime libraries discovery
  -language-version <version> Provide source compatibility with specified language version
  -P plugin:<pluginId>:<optionName>=<value>
                             Pass an option to a plugin
  -progressive               Enable progressive compiler mode.
                             In this mode, deprecations and bug fixes for unstable code take effect immediately,
                             instead of going through a graceful migration cycle.
                             Code written in the progressive mode is backward compatible; however, code written in
                             non-progressive mode may cause compilation errors in the progressive mode.
  -nowarn                    Generate no warnings
  -verbose                   Enable verbose logging output
  -version                   Display compiler version
  @<argfile>                 Read compiler arguments and file paths from the given file
使ってみた感想
使ってみた感想としては、普通に動くもののとにかくビルドが遅いですね…。Kotlin 1.4でコンパイラが新しくなるらしいので、それに期待です。
- 投稿日:2020-01-18T17:55:17+09:00
MySQLのバイナリログが原因でディスクが枯渇した場合の対処方法
はじめに
本記事はMySQLを使用していて、バイナリログが原因でディスクが枯渇した場合の対処方法について記載しています。
MySQLで使用しているデータ領域が枯渇し、ディスク使用率が100%になりMySQLが起動できない事象が発生しました。
原因を調査したところ、データ領域として使用している
/data/mysql/配下のディレクトリに、1.1Gのバイナリログが大量に出力されていることを確認。バイナリログを
pugeして削除したいがMySQLも起動できないため、mysqlにもログインできません。
このようなケースの暫定対応と恒久対応について記載します。暫定対応
まずは、rmコマンドで一番古いバイナリログを削除し、
dfコマンドを実行して空き容量が確保されたことを確認します。
# rm /data/mysql/binlog.000169/dev/sdb1 50G 49G 1.1G 98% /data次にmysqlを起動。正常に起動できたことを確認し、mysqlにログインする。
# systemctl start mysql
# systemctl status mysql
# mysql -u root -p以下のコマンドを実行し、バイナリログの状況を確認する。
- 最新のバイナリログ
mysql> SHOW MASTER STATUS\g;
+---------------+----------+--------------+------------------+-------------------+
| File          | Position | Binlog_Do_DB | Binlog_Ignore_DB | Executed_Gtid_Set |
+---------------+----------+--------------+------------------+-------------------+
| binlog.000215 |      155 |              |                  |                   |
+---------------+----------+--------------+------------------+-------------------+
1 row in set (0.00 sec)
- バイナログの一覧
mysql> SHOW MASTER LOGS;
+---------------+------------+-----------+
| Log_name      | File_size  | Encrypted |
+---------------+------------+-----------+
| binlog.000170 | 1073742751 | No        |
| binlog.000171 | 1073751257 | No        |
| binlog.000172 | 1073757631 | No        |
| binlog.000173 | 1073755121 | No        |
| binlog.000174 | 1073752838 | No        |
| binlog.000175 | 1073743951 | No        |
| binlog.000176 | 1073748347 | No        |
| binlog.000177 | 1073751179 | No        |
| binlog.000178 | 1073763386 | No        |
| binlog.000179 | 1073765359 | No        |
| binlog.000180 | 1073745938 | No        |
| binlog.000181 | 1073763697 | No        |
| binlog.000182 | 1073744490 | No        |
| binlog.000183 | 1073761859 | No        |
| binlog.000184 | 1073775954 | No        |
| binlog.000185 | 1073757908 | No        |
| binlog.000186 | 1073773373 | No        |
| binlog.000187 | 1073755666 | No        |
| binlog.000188 | 1073743518 | No        |
| binlog.000189 | 1073782889 | No        |
| binlog.000190 | 1073756995 | No        |
| binlog.000191 | 1073770640 | No        |
| binlog.000192 | 1073743582 | No        |
| binlog.000193 | 1073757032 | No        |
| binlog.000194 | 1073754014 | No        |
| binlog.000195 | 1073757718 | No        |
| binlog.000196 | 1073746065 | No        |
| binlog.000197 | 1073745350 | No        |
| binlog.000198 | 1073751875 | No        |
| binlog.000199 | 1073745702 | No        |
| binlog.000200 | 1073754484 | No        |
| binlog.000201 | 1073762857 | No        |
| binlog.000202 | 1073761196 | No        |
| binlog.000203 | 1073755084 | No        |
| binlog.000204 | 1073836164 | No        |
| binlog.000205 | 1073745617 | No        |
| binlog.000206 | 1073753921 | No        |
| binlog.000207 | 1073771413 | No        |
| binlog.000208 | 1073764906 | No        |
| binlog.000209 | 1073767754 | No        |
| binlog.000210 | 1073781899 | No        |
| binlog.000211 | 1073744615 | No        |
| binlog.000212 | 1073744221 | No        |
| binlog.000213 | 1073770872 | No        |
| binlog.000214 |  323286661 | No        |
| binlog.000215 |     398814 | No        |
| binlog.000216 |     896660 | No        |
+---------------+------------+-----------+
47 rows in set (0.03 sec)
暫定対応として蓄積された不要なバイナリログを削除する。
toは、指定したbinlog以前のファイルを削除する。
- バイナリログ削除
mysql> PURGE MASTER LOGS TO 'binlog.000212';
Query OK, 0 rows affected, 1 warning (0.00 sec)
再度、
dfコマンドを実行してディスク使用率が低下したことを確認。/dev/sdb1 50G 4.0G 46G 8% /data恒久対応
事象の直接原因はMySQLの仕様により、デフォルトの設定でバイナリログの出力が有効なため、バイナリログが蓄積され続けていたこと。
以前のMySQLバージョンでは、バイナリロギングはデフォルトで無効になっており、--log-binオプションを指定した場合は有効になり ました。MySQL 8.0以降では、--log-binオプションを指定するかどうかにかかわらず、デフォルトでバイナリロギングが有効になっています。
恒久対応としてログローテーションの設定を行い、バイナリログが蓄積されないように設定変更を行う。
設定変更後は、MySQLを再起動する。
# vi /etc/mysql/mysql.conf.d/mysqld.cnf# binlog rotation expire_logs_days = 7上記の場合は7日でログローテーションが行われる。
おわりに
根本原因は設計時の考慮不足です。
- 投稿日:2020-01-18T17:00:51+09:00
Linuxのお勉強メモ
この記事 is 何?
- エンジニア歴13年で何故か避けて通れて来てしまったLinuxの知識が必要な時が来てしまった。
- 現場だけだとキャッチアップしきれない(というか、知らずにコマンドミスってインシデント発生が怖すぎる)ので、自主学習する。
- やったことをメモに残しておく。アウトプット大事。
- 記事を分けるのが面倒くさいので、何も気にせず追記や修正をします。
(いちおう)編集履歴
- 2020/01/18:新規作成
- 2020/01/19:ディレクトリ操作とファイル操作を追記
- 2020/01/20:権限変更について追記
1. 事前準備
特に理由もなくCentOSを使うことにした。
コマンドが気軽に試せればいいし。
また、いつぶっ壊してもいいようにDockerを利用することにした。
Dockerのお勉強にもなるので一石二鳥。やったぜ。(1) やったこと
以下のサイトを参考にして環境構築。
https://www.orangeitems.com/entry/2018/06/18/153510自分のPCはwindows10HomeだったのでHyper-Vが使えなかった。
さらに以下のサイトも参考にして環境構築した。
https://qiita.com/idani/items/fb7681d79eeb48c05144
Windowsのコンソールに戻りたい時もあるかもしれないので、バックグラウンドで動かしとく。
$ docker run -i -d -t centos bin/bash
5e2e721950e466cfd1583d8db34e72908a848209ff7f0aef71357b3884a257d6
起動でけた。
$ docker ps
CONTAINER ID        IMAGE               COMMAND             CREATED             STATUS              PORTS               NAMES
5e2e721950e4        centos              "bin/bash"          7 seconds ago       Up 6 seconds                            fervent_jones
centOSちゃんコンニチハ。
$ docker attach 5e2e721950e4
[root@5e2e721950e4 /]#
2. お勉強メモ
(1) とりあえず、どんなディレクトリがあるのか見てみよう。
[root@5e2e721950e4 /]# pwd
/
[root@5e2e721950e4 /]# ls -la
total 56
drwxr-xr-x   1 root root 4096 Jan 18 07:46 .
drwxr-xr-x   1 root root 4096 Jan 18 07:46 ..
-rwxr-xr-x   1 root root    0 Jan 18 07:46 .dockerenv
lrwxrwxrwx   1 root root    7 May 11  2019 bin -> usr/bin
drwxr-xr-x   5 root root  360 Jan 18 07:46 dev
drwxr-xr-x   1 root root 4096 Jan 18 07:46 etc
drwxr-xr-x   2 root root 4096 May 11  2019 home
lrwxrwxrwx   1 root root    7 May 11  2019 lib -> usr/lib
lrwxrwxrwx   1 root root    9 May 11  2019 lib64 -> usr/lib64
drwx------   2 root root 4096 Jan 13 21:48 lost+found
drwxr-xr-x   2 root root 4096 May 11  2019 media
drwxr-xr-x   2 root root 4096 May 11  2019 mnt
drwxr-xr-x   2 root root 4096 May 11  2019 opt
dr-xr-xr-x 131 root root    0 Jan 18 07:46 proc
dr-xr-x---   2 root root 4096 Jan 13 21:49 root
drwxr-xr-x  11 root root 4096 Jan 13 21:49 run
lrwxrwxrwx   1 root root    8 May 11  2019 sbin -> usr/sbin
drwxr-xr-x   2 root root 4096 May 11  2019 srv
dr-xr-xr-x  13 root root    0 Jan 18 07:46 sys
drwxrwxrwt   7 root root 4096 Jan 13 21:49 tmp
drwxr-xr-x  12 root root 4096 Jan 13 21:49 usr
drwxr-xr-x  20 root root 4096 Jan 13 21:49 var
内容はこんな感じらしい。先人に超感謝。
https://qiita.com/twipg/items/d8d7a0797a392bc4b75eここまでの疑問
#is 何?
- コマンドの先頭についてる#は
今はrootユーザーだとという印。- 一般ユーザーの場合は
$になる。
->is 何?
- シンボリックリンクが張られている状態。
- ハードリンクと言うものもあるようだ。
ファイル操作のお勉強するときに実際に試そう。- ググったら分かったので割愛。
(2) ディレクトリやファイル操作をしてみよう。
ディレクトリやファイルを作ったり消したりしてみる。
ディレクトリの操作
試したコマンド
# ディレクトリの新規作成
mkdir 作りたいディレクトリ名

# 親子階層のディレクトリを新規作成
mkdir -p 作りたいディレクトリ名/作りたいディレクトリ名

# ディレクトリのコピー
cp -r コピー元ディレクトリ コピー先ディレクトリ

# 中身が空のディレクトリの削除
rmdir 削除したいディレクトリ

# 中身があるディレクトリの削除
rm -rf 削除したいディレクトリ
カレントディレクトリに新しいディレクトリを作ってみる。
[root@6b65b4917285 tmp]# pwd
/tmp
[root@6b65b4917285 tmp]# mkdir directory1
directory1が出来てた。
[root@6b65b4917285 tmp]# ls -l
total 12
drwxr-xr-x 2 root root 4096 Jan 19 05:47 directory1
親子階層のディレクトリを作ってみようとしたら怒られた。
親ディレクトリが無いと作れないらしい。[root@b12193fa42d0 tmp]# mkdir dir1/subdir1 mkdir: cannot create directory 'dir1/subdir1': No such file or directory
-pオプションを指定すると、親子ディレクトリを同時に作れる。[root@b12193fa42d0 tmp]# mkdir -p dir1/subdir1 [root@b12193fa42d0 tmp]# ls -l dir1/ total 4 drwxr-xr-x 2 root root 4096 Jan 19 07:25 subdir1ディレクトリをコピーしてみようとしたら、
-rオプションつけろって怒られた。[root@b12193fa42d0 tmp]# cp directory1 directory_copy cp: -r not specified; omitting directory 'directory1'
-rオプションをつけたらコピーできた。[root@b12193fa42d0 tmp]# cp -r directory1 directory_copy [root@b12193fa42d0 tmp]# ls -l total 24 drwxr-xr-x 3 root root 4096 Jan 19 07:25 dir1 drwxr-xr-x 2 root root 4096 Jan 19 07:35 directory1 drwxr-xr-x 2 root root 4096 Jan 19 07:42 directory_copy # ディレクトリがコピーされた。ディレクトリを削除してみる。
[root@b12193fa42d0 tmp]# ls -l
total 24
drwxr-xr-x 3 root root 4096 Jan 19 07:25  dir1
drwxr-xr-x 2 root root 4096 Jan 19 07:35  directory1    # こいつを消してみる。
drwxr-xr-x 2 root root 4096 Jan 19 07:42  directory_copy
[root@b12193fa42d0 tmp]# rmdir directory1
# 消えた。
[root@b12193fa42d0 tmp]# ls -l
total 20
drwxr-xr-x 3 root root 4096 Jan 19 07:25  dir1
drwxr-xr-x 2 root root 4096 Jan 19 07:42  directory_copy
中身があるディレクトリを消そうとしたら怒られた。
[root@b12193fa42d0 tmp]# rmdir dir1
rmdir: failed to remove 'dir1': Directory not empty
rm -rで消せた。(ただし、いろいろ確認される。)[root@b12193fa42d0 tmp]# rm -r dir1 rm: descend into directory 'dir1'? y rm: remove directory 'dir1/subdir1'? y rm: remove directory 'dir1'? y [root@b12193fa42d0 tmp]# ls -l total 16 drwxr-xr-x 2 root root 4096 Jan 19 07:42 directory_copy
rm -rfだと確認無しで消える。[root@b12193fa42d0 tmp]# rm -rf dir1 [root@b12193fa42d0 tmp]# ls -l total 16 drwxr-xr-x 2 root root 4096 Jan 19 07:42 directory_copyファイル操作
試したコマンド
# ファイルの新規作成
touch 作りたいファイル名

# ファイル作ってそのまま編集(viで開く)
vi 作りたいファイル名

# ファイルのコピー
cp コピー元ファイル コピー先ファイル

# ファイルの削除
rm -rf 削除したいディレクトリ
カレントディレクトリに新しいファイルを作ってみる。
[root@b12193fa42d0 tmp]# touch file.txt
[root@b12193fa42d0 tmp]# ls -l file.txt
-rw-r--r-- 1 root root 0 Jan 19 08:04 file.txt
viでも作れる。
[root@b12193fa42d0 tmp]# vi file2.txt
# viが開くので、適当に編集して保存。
# 保存しないとファイルは作られない。
[root@b12193fa42d0 tmp]# ls -l file2.txt
-rw-r--r-- 1 root root 5 Jan 19 08:09 file2.txt
同じディレクトリ内でファイルをコピーしてみる
[root@b12193fa42d0 tmp]# ls -l
total 16
drwxr-xr-x 2 root root 4096 Jan 19 07:42 directory_copy
-rw-r--r-- 1 root root    0 Jan 19 08:04 file.txt    # こいつをコピーする。
-rw-r--r-- 1 root root    5 Jan 19 08:09 file2.txt
-rwx------ 1 root root  671 Jan 13 21:49 ks-script-_srt3u3c
-rwx------ 1 root root 1379 Jan 13 21:49 ks-script-gpqu_kuo
[root@b12193fa42d0 tmp]# cp file.txt file_copy.txt
[root@b12193fa42d0 tmp]# ls -l
total 16
drwxr-xr-x 2 root root 4096 Jan 19 07:42 directory_copy
-rw-r--r-- 1 root root    0 Jan 19 08:04 file.txt
-rw-r--r-- 1 root root    5 Jan 19 08:09 file2.txt
-rw-r--r-- 1 root root    0 Jan 19 08:14 file_copy.txt    # コピーできてる。
別のディレクトリにコピーしてみる。
[root@b12193fa42d0 tmp]# ls -l
total 20
drwxr-xr-x 2 root root 4096 Jan 19 08:17 dir
drwxr-xr-x 2 root root 4096 Jan 19 07:42 directory_copy
-rw-r--r-- 1 root root    0 Jan 19 08:04 file.txt    # こいつをdir/配下にコピーする。
-rw-r--r-- 1 root root    5 Jan 19 08:09 file2.txt
-rw-r--r-- 1 root root    0 Jan 19 08:14 file_copy.txt
[root@b12193fa42d0 tmp]# cp file.txt  dir/copy.txt
[root@b12193fa42d0 tmp]# ls -l dir/copy.txt
-rw-r--r-- 1 root root 0 Jan 19 08:17 dir/copy.txt    # コピーできてる。
ファイルを削除してみる
[root@b12193fa42d0 tmp]# ls -l
total 20
drwxr-xr-x 2 root root 4096 Jan 19 08:17 dir
drwxr-xr-x 2 root root 4096 Jan 19 07:42 directory_copy
-rw-r--r-- 1 root root    0 Jan 19 08:04 file.txt
-rw-r--r-- 1 root root    5 Jan 19 08:09 file2.txt
-rw-r--r-- 1 root root    0 Jan 19 08:14 file_copy.txt
[root@b12193fa42d0 tmp]# rm file2.txt
rm: remove regular file 'file2.txt'? y    # 消していいか確認される。
# 消えた。
[root@b12193fa42d0 tmp]# ls -l
total 16
drwxr-xr-x 2 root root 4096 Jan 19 08:17 dir
drwxr-xr-x 2 root root 4096 Jan 19 07:42 directory_copy
-rw-r--r-- 1 root root    0 Jan 19 08:04 file.txt
-rw-r--r-- 1 root root    0 Jan 19 08:14 file_copy.txt
-rfオプションを付けると確認無しで消せる。[root@b12193fa42d0 tmp]# rm -rf file_copy.txt [root@b12193fa42d0 tmp]# ls -l total 16 drwxr-xr-x 2 root root 4096 Jan 19 08:17 dir drwxr-xr-x 2 root root 4096 Jan 19 07:42 directory_copy -rw-r--r-- 1 root root 0 Jan 19 08:04 file.txt(3) ファイルの権限をいじってみよう。
ls -lしたときの謎の英文字羅列ってなんぞ?
-rw-r--r--ってなによ?-rw-r--r-- 1 root root 5 Jan 20 05:59 file.txtこういう意味。
文字数 意味 値 1文字目 ファイル種別 - : ファイル
d:ディレクトリ
l:シンボリックリンク2~4文字目 所有者の権限 r:読み取り
w:書き込み
x:実行5~7文字目 所有グループの権限 r:読み取り
w:書き込み
x:実行8~10文字目 その他の人の権限 r:読み取り
w:書き込み
x:実行なので
-rw-r--r--であれば、
- ファイル
- 所有者は「読み込みと書き込み」の権限を所有
- 所有グループは「読み込み」の権限を所有
- その他の人は「読み込み」の権限を所有権限の付け外しをしてみる。
やり方は以下の2種類。
- 数字で指定する。
- アルファベットで指定する。
chmod 付けたい権限 ファイルパス

# 付けたい権限で指定する数値は以下の通り。
#   4:r
#   2:w
#   1:x
# rとwを付けたければ、「4+2」で6を指定する。

# アルファベットの場合は
# 1文字目:変更対象(u:ユーザー g:グループ o:その他 a:全て)
# 2文字目:変更方法(=:指定した権限に置き換える +:指定した権限を付与する -:指定した権限を消す)
# 3文字目:変更内容(r:読み込み w:書き込み x:実行)
ユーザーに全ての権限を権限を付けてみる。
# 数字で指定。
[root@2e524500bb5e tmp]# ls -l file.txt
-rw-r--r-- 1 root root 5 Jan 20 05:59 file.txt
[root@2e524500bb5e tmp]# chmod 744 file.txt
[root@2e524500bb5e tmp]# ls -l file.txt
-rwxr--r-- 1 root root 5 Jan 20 05:59 file.txt

# アルファベットで指定。
[root@2e524500bb5e tmp]# ls -l file.txt
-rw-r--r-- 1 root root 5 Jan 20 05:59 file.txt
[root@2e524500bb5e tmp]# chmod u+x file.txt
[root@2e524500bb5e tmp]# ls -l file.txt
-rwxr--r-- 1 root root 5 Jan 20 05:59 file.txt
ユーザーから実行権限を外してみる。
# 数字で指定。
[root@2e524500bb5e tmp]# ls -l file.txt
-rwxr--r-- 1 root root 5 Jan 20 05:59 file.txt
[root@2e524500bb5e tmp]# chmod 644 file.txt
[root@2e524500bb5e tmp]# ls -l file.txt
-rw-r--r-- 1 root root 5 Jan 20 05:59 file.txt

# アルファベットで指定。
[root@2e524500bb5e tmp]# ls -l file.txt
-rwxr--r-- 1 root root 5 Jan 20 05:59 file.txt
[root@2e524500bb5e tmp]# chmod u-x file.txt
[root@2e524500bb5e tmp]# ls -l file.txt
-rw-r--r-- 1 root root 5 Jan 20 05:59 file.txt
複数の権限を同時につけてみる。
その他の人に最強の権限(読み書き実行)を付けてみる。# 数字で指定。 [root@2e524500bb5e tmp]# ls -l file.txt -rw-r--r-- 1 root root 5 Jan 20 05:59 file.txt [root@2e524500bb5e tmp]# chmod 647 file.txt [root@2e524500bb5e tmp]# ls -l file.txt -rw-r--rwx 1 root root 5 Jan 20 05:59 file.txt # アルファベットで指定。 [root@2e524500bb5e tmp]# ls -l file.txt -rw-r--r-- 1 root root 5 Jan 20 05:59 file.txt [root@2e524500bb5e tmp]# chmod o+wx file.txt [root@2e524500bb5e tmp]# ls -l file.txt -rw-r--rwx 1 root root 5 Jan 20 05:59 file.txt # これでもいける。(=指定して置き換え) [root@2e524500bb5e tmp]# ls -l file.txt -rw-r--r-- 1 root root 5 Jan 20 05:59 file.txt [root@2e524500bb5e tmp]# chmod o=rwx file.txt [root@2e524500bb5e tmp]# ls -l file.txt -rw-r--rwx 1 root root 5 Jan 20 05:59 file.txt
個人的にはアルファベット指定の方が解りやすいかなー
- 投稿日:2020-01-18T15:51:09+09:00
ChromebookでWEBサーバーをたてよう
何の記事?
Chromebookでwebサーバーを立てて、ブラウザからアクセスします。
使うもの
Chromebook
VS Code
Spring Boot普通に立てる
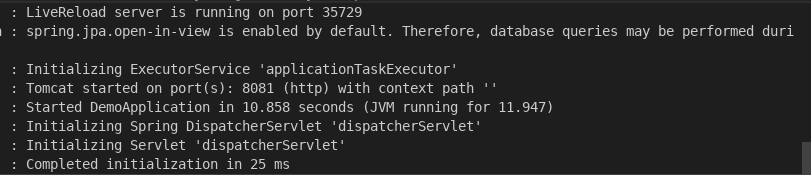
まずはVS CodeからSpring Bootで普通に立ててみます。
VS CodeにSpring Bootを入れるところは省略します。
立ち上がりました。
今回は訳があってポート'8081'を使用しています。
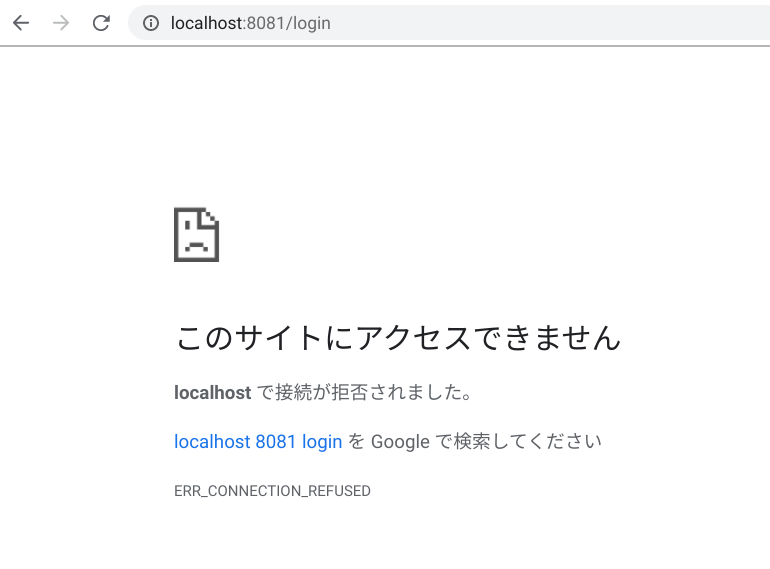
それではブラウザからアクセスしてみましょう。
だめでした。
なんで?
ChromeOSでlinuxを使うということは、仮想環境を立てるということです。
なので、ChromeOS側のブラウザからアクセスするときに、localhostではアクセスできません。なので、ホスト名を変えてアクセスしてみます。
これでChromebookで立てたWEBサーバーにアクセスすることができました。

- 投稿日:2020-01-18T14:34:18+09:00
awkについてメモ
たまーにawkを使うことがあります。
ただ、数ヶ月にすこしというペースなので使うたびに「あれ?どうやって使うんだっけ」となって
ネットで調べる、ということをやってしまっているので自分がよく使うものを記載。これだけ知っとくだけでも結構使える
- 変数\$1~\$...
- 変数NR
- 変数NF
- 変数FS
- 変数FPAT
- STAR, END
各項目の詳細は以下
超基本
以下のようなファイルがあるとします。
sample.txtNo data1 data2 data3 1 101 102 103 2 201 202 203 3 301 302 303 4 401 402 403以下のようにawkスクリプトを用意
sample.awk{ print $1 " " $3 }ターミナルから -f オプションでスクリプトを指定したあとにsample.txtを指定。
$ awk -f sample.awk sample.txt以下のように出力される。
No data2
1  102
2  202
3  302
4  402
解説
出力
変数 $1~$...
一行の各要素が入る。
sample.txtNo data1 data2 data3 <----- $1 = "No", $2 = "data1", $3 = "data2", $4 = "data3" 1 101 102 103 2 201 202 203 3 301 302 303 4 401 402 403各列の合計を出す
以下のようなファイルがあるとします。
sample.txtNo data1 data2 data3 1 101 102 103 2 201 202 203 3 301 302 303 4 401 402 403以下のようにawkスクリプトを用意
sample.awk{ if(NR > 1){ sum1 += $2; sum2 += $3; sum3 += $4; } } END { print sum1 " " sum2 " " sum3; }ターミナルから -f オプションでスクリプトを指定したあとにsample.txtを指定。
$ awk -f sample.awk sample.txt以下のように出力される。
1004 1008 1012解説
変数NR
現在の行数。この例では一行目はタイトルなので無視している。
END
終了処理。ここでは合計値を出力。
行ごとに合計を出したい。
以下のようなファイルがあるとします。
sample.txtNo data1 data2 data3 1 101 102 103 <----- 101 + 102 + 103 を求めたい。 2 201 202 203 3 301 302 303 4 401 402 403以下のようにawkスクリプトを用意
sample.awk{ sum = 0; for(i=2; i<=NF; i++) { sum += $i; } print sum; }ターミナルから -f オプションでスクリプトを指定したあとにsample.txtを指定。
$ awk -f sample.awk sample.txt以下のように出力される。
0
306
606
906
1206
解説
変数NF
各行の要素数が入る。
ファイルの区切りがスペースじゃなくてカンマ
以下のようなファイルがあるとします。
sample.txtNo,data1,data2,data3 1,101,102,103 2,201,202,203 3,301,302,303 4,401,402,403以下のようにawkスクリプトを用意
sample.awkBEGIN { FS = ","; } { print $1 " " $3 }ターミナルから -f オプションでスクリプトを指定したあとにsample.txtを指定。
$ awk -f sample.awk sample.txt以下のように出力される。
No data2
1 102
2 202
3 302
4 402
解説
変数FS
各要素の区切り位置。デフォルトは空白。
START
開始処理を書ける。
ファイルの区切りがスペースじゃなくてカンマ。あと、各要素にカンマが含まれている。
sample.txtNo,data1,data2,data3 1,101,"102,101",103 2,201,202,203 3,301,"302,101",303 4,401,402,403以下のようにawkスクリプトを用意
sample.awkBEGIN { FPAT = "([^,]+)|(\"[^\"]+\")" } { print $1 " " $3 }ターミナルから -f オプションでスクリプトを指定したあとにsample.txtを指定。
$ awk -f sample.awk sample.txt以下のように出力される。
No data2
1 "102,101"
2 202
3 "302,101"
4 402
解説
変数FPAT
各要素を正規表現で記載できる。
- 投稿日:2020-01-18T11:32:11+09:00
Ubuntu 19.04 で、起動時にロゴで止まって永遠にログイン画面が表示されない問題の解消法
多分19.04に限らず他のバージョンでも発生し得る問題かも。
現象
Ubuntu起動時に、ロゴを表示しながら何かを読み込みしているっぽい画面で永遠に読み込み続ける
↓こんなの
調査時のログは覚えてないのですが、何かでタイムアウトしているんだなと思いググったら、先人が既に解決していたので、メモがてら解決方法を書いていきます。
本来ならば、参考にした記事を参照として貼るべきだと思うのですが、この問題を解決したのが結構前なので、先人の記事もどこだったか忘れてしまいました…原因
マウントの設定ファイルに、原因は不明だけど不要な行が存在していて、その行を参照してマウントを実行しようとしていてタイムアウトになっていた模様
解決方法
/etc/fstab を確認し、思い当たりのない不要な行を削除する。
僕の場合は作った覚えのない/swapfileの記述が存在していたので、その行を削除した。これを
# /etc/fstab: static file system information.
#
# Use 'blkid' to print the universally unique identifier for a
# device; this may be used with UUID= as a more robust way to name devices
# that works even if disks are added and removed. See fstab(5).
#
# <file system> <mount point>   <type>  <options>       <dump>  <pass>
# / was on /dev/sda1 during installation
UUID=xxxxxxxxxxxxxxxxxxxxxxxxxxxxxxxxxxx /               ext4    errors=remount-ro 0       1
// swapfile の記述
こう
# /etc/fstab: static file system information.
#
# Use 'blkid' to print the universally unique identifier for a
# device; this may be used with UUID= as a more robust way to name devices
# that works even if disks are added and removed. See fstab(5).
#
# <file system> <mount point>   <type>  <options>       <dump>  <pass>
# / was on /dev/sda1 during installation
UUID=xxxxxxxxxxxxxxxxxxxxxxxxxxxxxxxxxxx /               ext4    errors=remount-ro 0       1
修正以降、ロゴ画面で止まる問題は解消されました。
