- 投稿日:2019-07-24T20:20:02+09:00
MaterialShowcaseViewの使い方メモ
概要
AndroidアプリでMaterialShowcaseViewを使ってチュートリアルを作成したときのメモ
以下に示す参考記事に記載されていることは書かない。随時更新予定
このライブラリを選んだ理由
競合ライブラリと比較して、以下の理由からこのライブラリを選んだ。
- GitHubスター数が多い
- 継続的にメンテナンスされている
- 検証段階でもスムーズに実装できたGitHub
参考記事
- MaterialShowcaseViewでAndroidアプリのチュートリアルを実装する - Qiita
- 【Android】こういうのが欲しかったMaterialShowcaseViewを使ってみた! – 読書大好きプログラマーの記録
.setShape()
ハイライトの形状を指定する。こちらのメソッドはオプショナルとなっており、デフォルトでは円形となっている。
円形
.setShape(CircleShape())
※デフォルト値
楕円形
.setShape(OvalShape())
四角形
.setShape(RectangleShape(Rect()))
ハイライトなし
.setShape(NoShape())
.setDismissStyle()
オーバーレイのスタイルを指定する。
Typefaceクラスのインスタンスを引数として受け取る。
Typefaceクラスをインスタンス生成する際、以下のように.createでインスタンス生成する。
Typeface.create("sans-serif-condensed", Typeface.NORMAL)
第一引数にフォントファミリーネームをString型で渡し、第二引数にスタイルを定数で渡す。フォント指定(第一引数)
.setDismissStyle(Typeface.create("sans-serif-condensed", Typeface.NORMAL))
※sans-serif-condensed を指定した例
スタイル指定(第二引数)
.setDismissStyle(Typeface.create("sans-serif-condensed", Typeface.NORMAL))
.setDismissStyle(Typeface.create("sans-serif-condensed", Typeface.BOLD))
.setDismissStyle(Typeface.create("sans-serif-condensed", Typeface.ITALIC))
.setDismissStyle(Typeface.create("sans-serif-condensed", Typeface.BOLD_ITALIC))
.setDismissStyle(Typeface.create("sans-serif-condensed", Typeface.STYLE_MASK))BOLDなど指定できる。
所感
簡単なチュートリアルであれば、こちらのライブラリでサクッと1日とかで実装できて楽ちん。
今回は拡張はしてないので、拡張する難易度は不明。
ライブラリの依存関係もシンプル&実装もシンプルなので、導入してからのリバートも容易。
- 投稿日:2019-07-24T19:52:49+09:00
Android アプリで、Amplify経由でPinpointを使う
セットアップ
以下、特に変わったことはしてません。
CLI のインストール
https://aws-amplify.github.io/docs/
Android のTerminalなどで以下を叩くnpm install -g @aws-amplify/cli amplify configure設定例
38f9d34ee7b1:amplify user$ ls
amplify.iml             app                     build.gradle            gradle                  gradle.properties       gradlew                 gradlew.bat             local.properties        settings.gradle
38f9d34ee7b1:amplify user$ amplify configure
Follow these steps to set up access to your AWS account:

Sign in to your AWS administrator account:
https://console.aws.amazon.com/
Press Enter to continue

Specify the AWS Region
? region:  ap-northeast-1
Specify the username of the new IAM user:
? user name:  test-amplify
Complete the user creation using the AWS console
...
Press Enter to continue

Enter the access key of the newly created user:
? accessKeyId: **********
? secretAccessKey:  ********************
This would update/create the AWS Profile in your local machine
? Profile Name:  amplify
Android Studioセットアップ
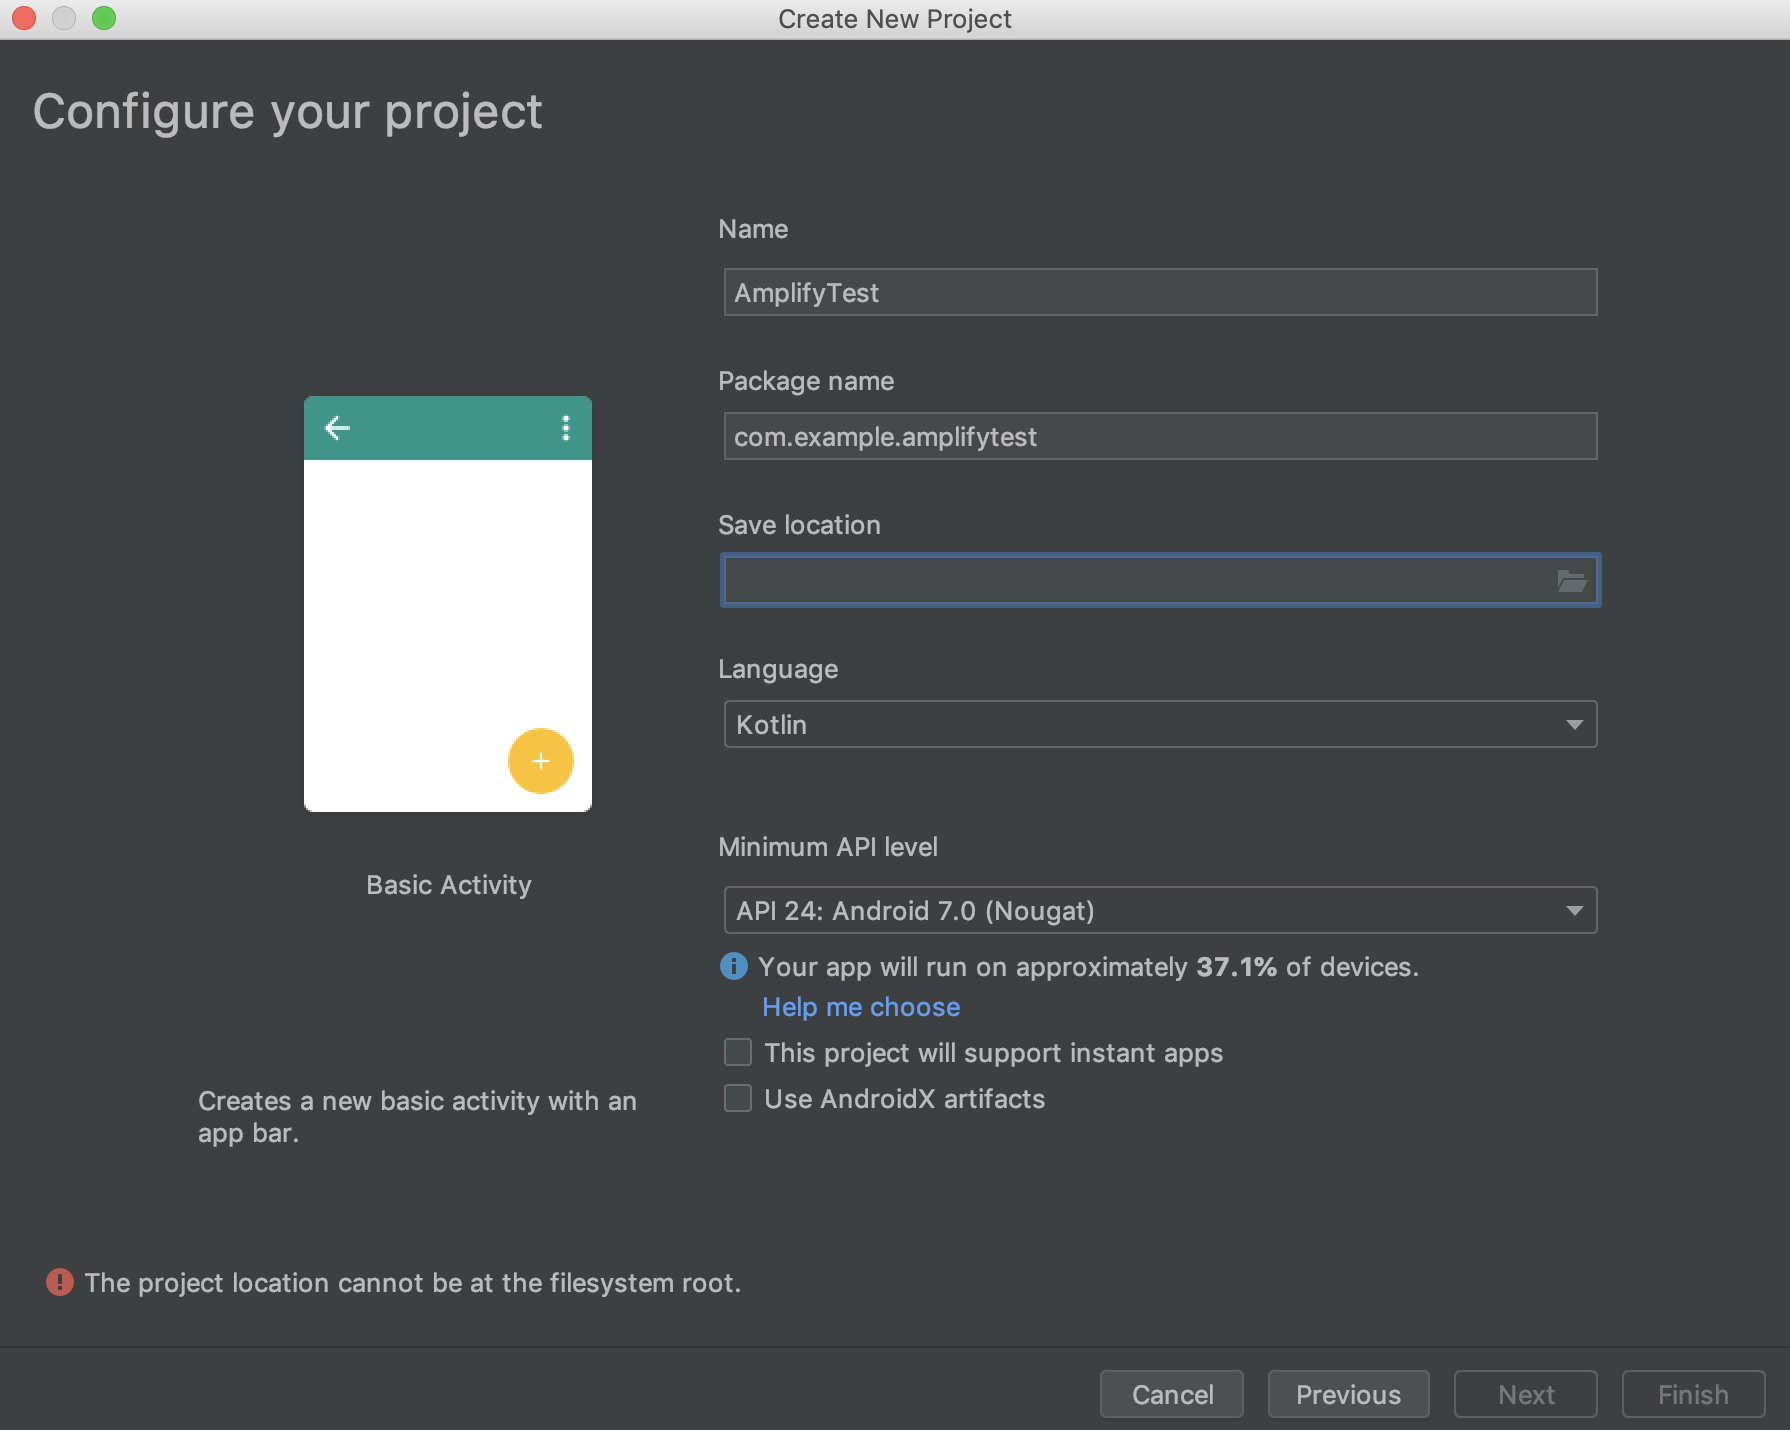
BasicActivityを作ります。
Kotlinで書きます。amplifyセットアップ
プロジェクトを作成したら、Android StudioのTerminalなどで以下を実行します。
38f9d34ee7b1:amplify user$ amplify init
Note: It is recommended to run this command from the root of your app directory
? Enter a name for the project amplify
? Enter a name for the environment dev
? Choose your default editor: IDEA 14 CE
? Choose the type of app that you're building android
Please tell us about your project
? Where is your Res directory:  app/src/main/res
Using default provider  awscloudformation

For more information on AWS Profiles, see:
https://docs.aws.amazon.com/cli/latest/userguide/cli-multiple-profiles.html

? Do you want to use an AWS profile? Yes
? Please choose the profile you want to use amplify
⠦ Initializing project in the cloud...
その後、
amplify pushすると、./app/src/main/res/rawに、awsconfiguration.jsonができます。analytics を追加
基本的な流れはこちら
https://aws-amplify.github.io/docs/android/analyticsamplify add analytics amplify pushAndroidのコード
サンプルでは、Javaで書かれているので、Kotlinになおします。
MainActivity.ktに以下を追加private val TAG = MainActivity::class.java.simpleName var pinpointManager: PinpointManager? = null fun getPinpointManager(applicationContext: Context) { if (pinpointManager == null) { // Initialize the AWS Mobile Client val awsConfig = AWSConfiguration(applicationContext) AWSMobileClient.getInstance() .initialize(applicationContext, awsConfig, object : Callback<UserStateDetails> { override fun onResult(userStateDetails: UserStateDetails) { Log.i("INIT", userStateDetails.userState.name) } override fun onError(e: Exception) { Log.e("INIT", "Initialization error.", e) } }) val pinpointConfig = PinpointConfiguration( applicationContext, AWSMobileClient.getInstance(), awsConfig ) pinpointManager = PinpointManager(pinpointConfig) } }onCreateに以下を追加。
        getPinpointManager(applicationContext)
        pinpointManager?.sessionClient?.startSession()
onDestroy を追加。
    override fun onDestroy() {
        pinpointManager?.sessionClient?.stopSession()
        pinpointManager?.analyticsClient?.submitEvents()
        super.onDestroy()
    }
以上で実装は完了。アプリをビルドし、実行します。
Pinpointを確認
Pinpointの挙動確認。以下のコマンドで起動します。
amplify console analytics
- 投稿日:2019-07-24T07:15:56+09:00
【Programming News】Qiitaまとめ記事 July 23, 2019 Vol.9
筆者が昨日2019/7/23(火)に気になったQiitaの記事をまとめました。昨日のまとめ記事はこちら。
2019/7/15(月)~2019/7/20(土)のWeeklyのまとめのまとめ記事もこちらで公開しております。
Python
- Tips
- Apps
Java
Swift
Kotlin
Rails
JavaScript
- Tips
- Turn.js
jQuery
- Beginner
Vue.js
Angular
Laravel
CakePHP
- Tips
TypeScript
- Beginner
- Tips
Google Apps Script
- Tips
Go言語
- Beginner
- Tips
R言語
- Tips
VBA
Nim
MySQL
PostgreSQL
Oracle
Azure
- Azure DevOps
- Tips
AWS
- Beginner
- AWS CDK
Docker
IoC
Git
UML
- PlantUML
Raspberry
Develop
- Tips
- Apps
更新情報
Kotlin
- Kotlin入門
Android
- Library
Java
IDE