20210308のSwiftに関する記事は25件です。

UIButtonに紗をかける

layerでなんとかしようと思ったけど、これでいいや。

let view = UIView(frame: button.bounds)
view.backgroundColor = #colorLiteral(red: 0, green: 0, blue: 0, alpha: 0.2030837874)
button.addSubview(filterView)

?


フリーランスエンジニアです。
お仕事のご相談こちらまで
rockyshikoku@gmail.com

Core MLを使ったアプリを作っています。
機械学習関連の情報を発信しています。

Twitter
Medium

  • このエントリーをはてなブックマークに追加
  • Qiitaで続きを読む

SCNNodeに最初だけカメラの方を向いているようにする

オブジェクトのむきをカメラに追従させるには

let billboardConstraint = SCNBillboardConstraint()
node.constraints = [billboardConstraint]

とすればいいが、これだとオブジェクトの方向がずっとカメラに追従してしまうため、オブジェクトの側面が見られない。
最初だけカメラの方向に向けるには、角度を計算してオブジェクトを回転させる。

let cameraPosition = sceneView.pointOfView!.position
let radian = atan2(camera.x-node.position.x,(camera.z-node.position.z)) // この場合Y軸の回転を求めている。
node.eulerAngles.y = node.eulerAngles.y + radian

?


フリーランスエンジニアです。
お仕事のご相談こちらまで
rockyshikoku@gmail.com

Core MLを使ったアプリを作っています。
機械学習関連の情報を発信しています。

Twitter
Medium

  • このエントリーをはてなブックマークに追加
  • Qiitaで続きを読む

ARKit SceneKit でタップした場所のSCNVector3ポジションを取得する

タップした先にSCNNodeがある場合は、タップ先とnodeの接点が取れます。

// sceneViewにtapRecognizerを与えておいてください。

func tap(_ sender: UITapGestureRecognizer) {
    let sceneView = sender.view as! ARSCNView
    let touchLocation = sender.location(in: sceneView)
    let hitResults = sceneView.hitTest(touchLocation, options: [:])
    if !hitResults.isEmpty {
        if let hitPosition = hitResults.first?.worldCoordinates {
            print(hitPosition)
    }

タップした先がARKitのカメラ背景など何もない場合、適当なPlaneを指定することでその平面とタップとの接点が取れます。

func tap(_ sender: UITapGestureRecognizer) {
    let sceneView = sender.view as! ARSCNView
    let touchLocation = sender.location(in: sceneView)
    if let unProjectPoint = sceneView.unprojectPoint(touchLocation, ontoPlane: simd_float4x4 (columns: (simd_float4(0,0,-5, 0), simd_float4(0,0,-5, 0), simd_float4(0,0,-5, 0), simd_float4(0,0,-5, 0)))) { 
    // 適当に5m先の平面との接点をとってみる。平面検出したアンカーなどでもいいですね。
       print(unProjectPoint)
    }

あとはタップポイントにノードおくなりビームを飛ばすなりなんなり。

?


フリーランスエンジニアです。
お仕事のご相談こちらまで
rockyshikoku@gmail.com

Core MLを使ったアプリを作っています。
機械学習関連の情報を発信しています。

Twitter
Medium

  • このエントリーをはてなブックマークに追加
  • Qiitaで続きを読む

ARKitのFeaturePointsを消す

ワールドトラッキングの結果を点群で表示してくれる機能ですが、消し方があんまり見当たらなかったので。

手順

sceneView.debugOptions = []
self.featurePoints.forEach { $0.removeFromParentNode() }

?


フリーランスエンジニアです。
お仕事のご相談こちらまで
rockyshikoku@gmail.com

Core MLを使ったアプリを作っています。
機械学習関連の情報を発信しています。

Twitter
Medium

  • このエントリーをはてなブックマークに追加
  • Qiitaで続きを読む

KingFisher で UIButtonに画像を設定する

KingFisherでUIButtonにリモート画像を設定するには、buttonTypeをカスタムに設定します。

let button = UIButton(type: .custom)
button.kf.setImage(with: url, for: .normal)

これでオッケー。

?


フリーランスエンジニアです。
お仕事のご相談こちらまで
rockyshikoku@gmail.com

Core MLを使ったアプリを作っています。
機械学習関連の情報を発信しています。

Twitter
Medium

  • このエントリーをはてなブックマークに追加
  • Qiitaで続きを読む

頭文字で分類するリストを作ってTableViewをの基本操作確認

TableViewの基本操作を確認。(cellの追加・削除・移動・Sectionの作成・SectionのTitle毎に分類)
二次元配列を使いこなすことが重要。Sectionとrow毎に配列でデータを管理する。

import UIKit
class ViewController: UIViewController, UITableViewDataSource {

    @IBOutlet weak var tableView: UITableView!
    @IBOutlet weak var textField: UITextField!

    var header = [String]()
    var row = [[String]]()

    override func viewDidLoad() {
        super.viewDidLoad()
        tableView.dataSource = self
        tableView.isEditing = true

        //A-Zを返す
        header = (65...90).map{ String(Character(UnicodeScalar($0)!)) }
        //A-Z以外はothersに分類
        header.append("others")

        for n in 0..<header.count {
            row.append([""])
        }
    }

    //Section数
    func numberOfSections(in tableView: UITableView) -> Int {
        return header.count
    }

    //    Header Title
    func tableView(_ tableView: UITableView, titleForHeaderInSection section: Int) -> String? {
        return header[section]
    }
    //    Footer Title
    //    func tableView(_ tableView: UITableView, titleForFooterInSection section: Int) -> String? {
    //        return "Footter"
    //    }

    //Section中のrowの数
    func tableView(_ tableView: UITableView, numberOfRowsInSection section: Int) -> Int {
        return row[section].count
    }

    //cellの中身を規定
    func tableView(_ tableView: UITableView, cellForRowAt indexPath: IndexPath) -> UITableViewCell {
        let cell = UITableViewCell(style: .default, reuseIdentifier: "Cell")
        cell.textLabel?.text = row[indexPath.section][indexPath.row]
        return cell
    }

    //cellの削除
    func tableView(_ tableView: UITableView, commit editingStyle: UITableViewCell.EditingStyle, forRowAt indexPath: IndexPath) {
        row.remove(at: indexPath.row)
        tableView.deleteRows(at: [indexPath], with: UITableView.RowAnimation.automatic)

    }

    //cellの移動
    func tableView(_ tableView: UITableView, moveRowAt sourceIndexPath: IndexPath, to destinationIndexPath: IndexPath) {
        let num = row[sourceIndexPath.section][sourceIndexPath.row]
        row[sourceIndexPath.section].remove(at: sourceIndexPath.row)
        row[destinationIndexPath.section].insert(num, at: destinationIndexPath.row)

    }

    //cellの追加
    @IBAction func insert(_ sender: Any) {
        let text = textField.text ?? ""
        let letter = text.prefix(1).uppercased()
        print(letter)

        if let firstIndex = header.firstIndex(of: letter){
            row[firstIndex].insert(text, at: row[firstIndex].endIndex)
            tableView.insertRows(at: [IndexPath(row: row[firstIndex].endIndex - 1, section: firstIndex)], with: .automatic)
        }else {
            row[row.endIndex - 1].insert(text, at: row[row.endIndex - 1].endIndex)
            tableView.insertRows(at: [IndexPath(row: row[row.endIndex - 1].endIndex - 1, section: row.endIndex - 1)], with: .automatic)
        }
        textField.text = ""
    }
}

Videotogif.gif

  • このエントリーをはてなブックマークに追加
  • Qiitaで続きを読む

WatchKitのObjectsまとめ

Xcode-12.4 Swift-5.3 watch0S-7.0

はじめに

watchOS のアプリを作ってみようかな?と思って調べているとほぼ記事がなかったので watchOS のアプリで使う Storyboard の Objects についてまとめました。

UIKit ではなく WatchKit を使います(もしかしたら SwiftUI 使えるかも??)。基本的にはコードでインスタンス生成(init'())ができない模様。ほぼ Storyboard で設定するみたいです。

だいたい WKInterfaceObject を継承しており、func setHidden(_ hidden: Bool) のようにセッターは用意されているがゲッターがないものが多い。Storyboard での初期設定のみでコードで値を設定できないものも多い。現在値が知りたい場合は別で変数を用意するしかない模様。

基本的にサブクラスをつくることもできない(たぶんそんな複雑なことすることもない)。

(今からなら SwiftUI 使うべきかもしれないけど気にしない:innocent:

ソースはこちら:point_right: GitHub

WKInterfaceController

ほぼ UIViewController(これはいつか別記事にまとめたい)。ScrollView のようなものはなくこの中にパーツいっぱい置いていったら勝手にスクロールする模様。

class WKInterfaceController : NSObject

ドキュメント:WKInterfaceController

画面表示とかのときに下記メソッドが呼ばれる。

The super implementation of this method does nothing.

とあるのでとくに super.willActivate() とかを中で呼ぶ必要はない模様(デフォで記述がないですし。。。)。

func awake(withContext: Any?)

func willActivate() 
func didDeactivate()

func didAppear()
func willDisappear()

画面遷移には push, modal, next page の3つがある(Storyboard で設定する場合 push と modal は Button か Table からしか接続できない)。

Push Modal Next Page
push modal page

first -> second に push 遷移して戻ると下記のように呼ばれました。

first awake
first willActivate
first didAppear
second awake
first willDisappear
second willActivate
first didDeactivate
second didAppear
second willDisappear
first willActivate
second didDeactivate
first didAppear

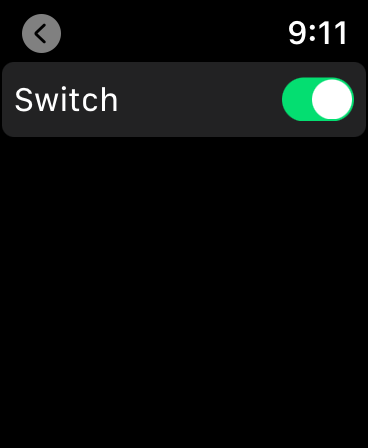
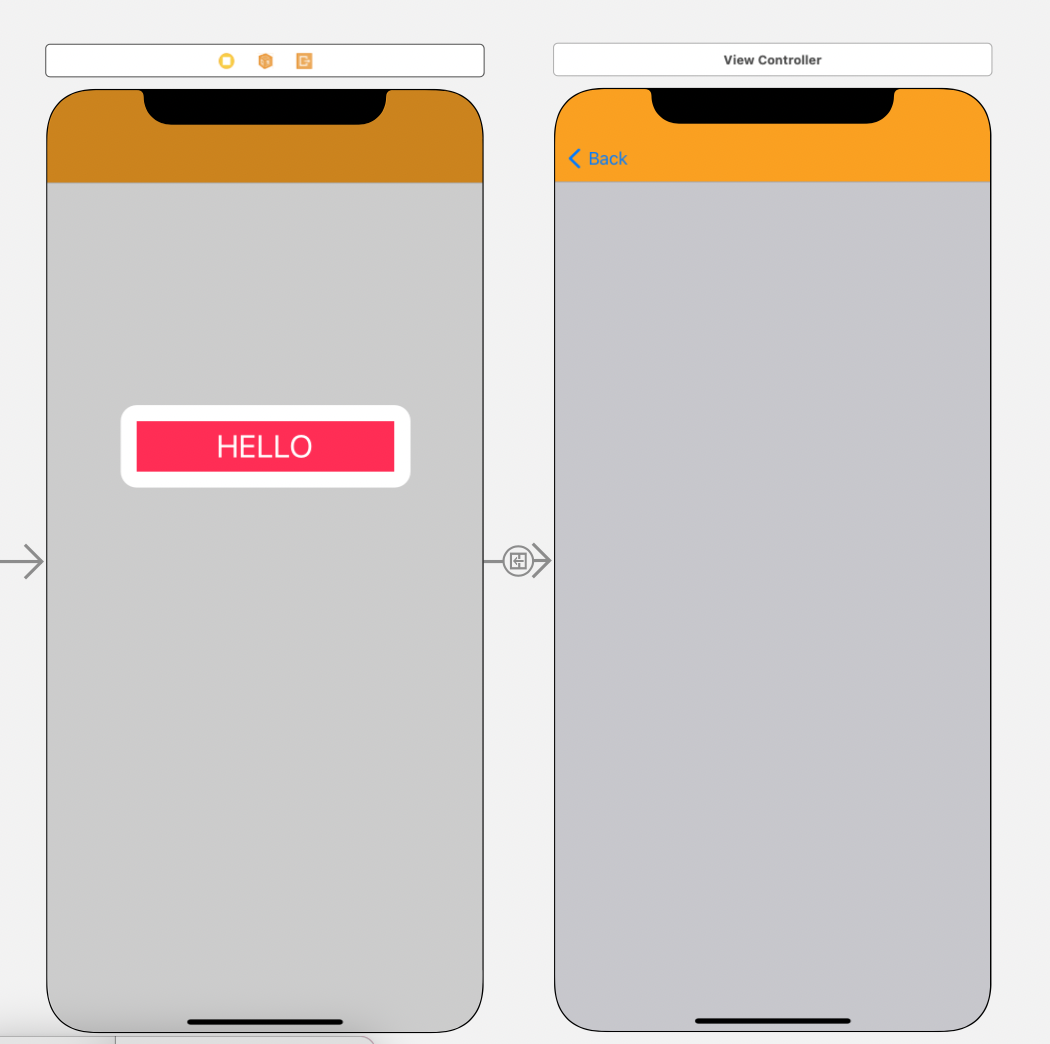
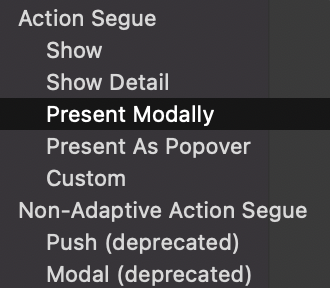
first -> second に modal 遷移して戻ると下記のように呼ばれました。

first awake
first willActivate
first didAppear
second awake
first willDisappear
second willActivate
second didAppear
first didDeactivate
second willDisappear
first willActivate
first didAppear
second didDeactivate

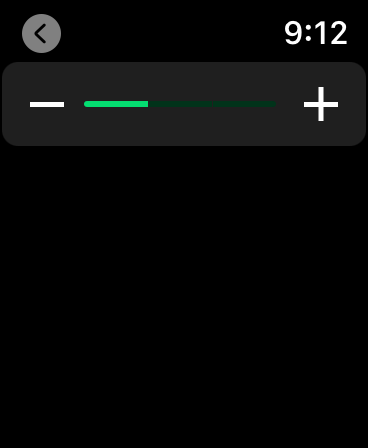
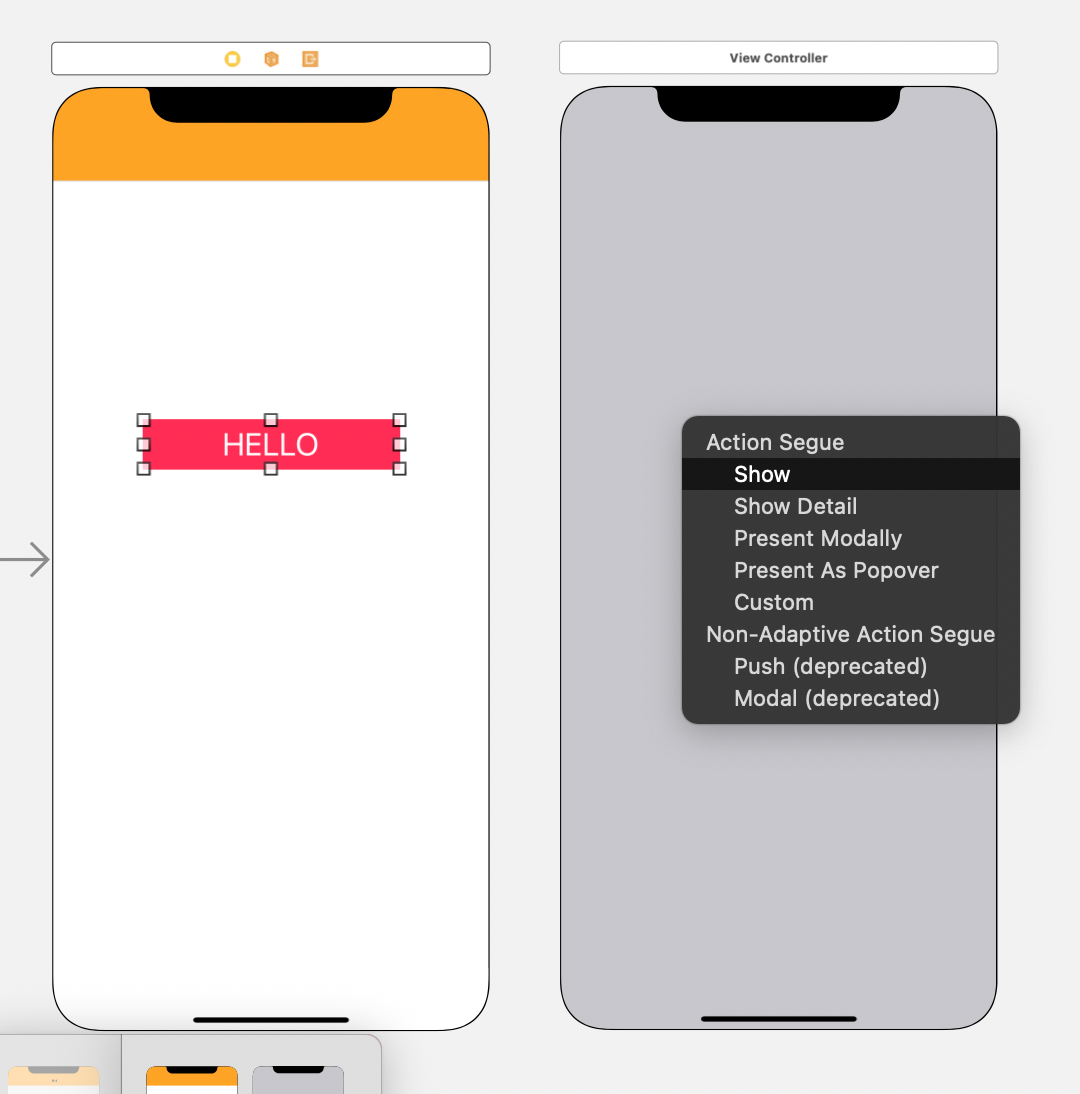
next page を設定して first -> second -> first と遷移すると下記のように呼ばれました。

first awake
first willActivate
first didAppear
second awake
second willActivate
first willDisappear
first didDeactivate
second didAppear
first willActivate
second willDisappear
second didDeactivate
first didAppear

WKUserNotificationInterfaceController

通知用のやつ。ちょっとまだよくわかってない。。。(こちらをみるといいかも:point_right: Apple Watchのアプリを開発してみた

class WKUserNotificationInterfaceController : WKInterfaceController

ドキュメント:WKUserNotificationInterfaceController

WKHostingController

SwiftUI 用。今回は割愛。。。

class WKHostingController<Body> where Body : View

ドキュメント:WKHostingController

StoryboardReference

複数の Storyboard をつなぐやつ。iOS のやつと同じ。

WKInterfaceGroup

UIStackView のようなやつ。

group

class WKInterfaceGroup : WKInterfaceObject

ドキュメント:WKInterfaceGroup

Attribute Description
Layout horizontally, vertically, overlap の3つ
Insets パディング
Spacing 子 View 同士の余白
Background 背景画像
Mode 背景画像のコンテンツモード
Animate 背景画像がアニメーションするかどうか
Color 背景色
Radius 角丸(デフォルトは 6 pt)

WKInterfaceLabel

だいたい UILabel と同じ。

label

class WKInterfaceLabel : WKInterfaceObject

ドキュメント:WKInterfaceLabel

WKInterfaceDate

現在日付を表示するラベル。

date

class WKInterfaceDate : WKInterfaceObject

ドキュメント:WKInterfaceDate

Attribute Description
Format 日付のフォーマット
Date 日付の DateFormatter.Style
Time 時刻の DateFormatter.Style
Preview プレビュー用の日付

コードで設定できるのは下記。

func setTextColor(_ color: UIColor?)
func setTimeZone(_ timeZone: TimeZone?)
func setCalendar(_ calendar: Calendar?)

WKInterfaceTimer

カウントダウン(アップ)用のラベル(秒数を表示する)。

timer

class WKInterfaceTimer : WKInterfaceObject

ドキュメント:WKInterfaceTimer

Attribute Description
Format 表示のフォーマット
Enabled 表示後すぐに開始するかどうか
Units 表示する単位(秒、分、時間、日、週、月、年)
Preview Secs プレビュー用の秒数

コードで設定できるのは下記。

func setTextColor(_ color: UIColor?)
func setDate(_ date: Date)

func start()
func stop()

WKInterfaceButton

ほぼ UIButton

button

class WKInterfaceButton : WKInterfaceObject

ドキュメント:WKInterfaceButton

下記のように IBActionsender はない。

@IBAction func buttonAction() {}

selected などの state はない。image もないが ContentGroup に変更すると中に色々置けるようになる。

WKInterfaceTextField

ほぼ UITextField

textfield

class WKInterfaceTextField : WKInterfaceObject

ドキュメント:WKInterfaceTextField

IBAction で入力イベントをとれる。

@IBAction func textFieldAction(_ value: NSString?) {}

入力画面を閉じたときに呼ばれ、キャンセル時は valuenil になる。

WKInterfaceSwitch

ほぼ UISwitch(ラベル付き)。

switch

class WKInterfaceSwitch : WKInterfaceObject

ドキュメント:WKInterfaceSwitch

IBAction で入力イベントをとれる。

@IBAction func switchAction(value: Bool) {}

WKInterfaceSlider

ほぼ UISlider

slider

class WKInterfaceSlider : WKInterfaceObject

ドキュメント:WKInterfaceSlider

IBAction で入力イベントをとれる。

@IBAction func sliderAction(_ value: Float) {}

WKInterfaceMap

地図表示するやつ。MKMapView 簡易版(とくにイベントは取得できなさそう??)。

map

class WKInterfaceMap : WKInterfaceObject

ドキュメント:WKInterfaceMap

一度に5つまでアノテーション表示ができる。

メソッド一覧。

func setShowsUserLocation(_ showsUserLocation: Bool)
func setShowsUserHeading(_ showsUserHeading: Bool)
func setUserTrackingMode(_ mode: WKInterfaceMap.UserTrackingMode, animated: Bool)
func setVisibleMapRect(_ mapRect: MKMapRect)
func setRegion(_ coordinateRegion: MKCoordinateRegion)

func addAnnotation(_ location: CLLocationCoordinate2D, with image: UIImage?, centerOffset offset: CGPoint)
func addAnnotation(_ location: CLLocationCoordinate2D, withImageNamed name: String?, centerOffset offset: CGPoint)
func addAnnotation(_ location: CLLocationCoordinate2D, with pinColor: WKInterfaceMapPinColor)
func removeAllAnnotations()

WKInterfaceSeparator

境界線。色の設定だけできる。

separator

class WKInterfaceSeparator : WKInterfaceObject

ドキュメント:WKInterfaceSeparator

WKInterfaceTable

テーブル。

table

class WKInterfaceTable : WKInterfaceObject

ドキュメント:WKInterfaceTable

メソッドとプロパティ一覧。

func setRowTypes(_ rowTypes: [String])
func setNumberOfRows(_ numberOfRows: Int, withRowType rowType: String)
var numberOfRows: Int { get }
func rowController(at index: Int) -> Any?

func insertRows(at rows: IndexSet, withRowType rowType: String)
func removeRows(at rows: IndexSet)

func scrollToRow(at index: Int)

func performSegue(forRow row: Int)

var curvesAtTop: Bool
var curvesAtBottom: Bool

選択時は WKInterfaceController の下記が呼ばれる。

override func table(_ table: WKInterfaceTable, didSelectRowAt rowIndex: Int) {}

簡易実装。

final class TableInterfaceController: WKInterfaceController {

    @IBOutlet private weak var table: WKInterfaceTable!
    private var tableDataList = ["Test1", "Test2", "Test3", "Test4", "Test5"]

    override func awake(withContext context: Any?) {
        // RowTypeがたぶんRowのID(Storyboardで設定)
        table.setNumberOfRows(tableDataList.count, withRowType: "Row")
        tableDataList.enumerated().forEach { index, value in
            let row = table.rowController(at: index) as! TableRowController
            row.setText(value)
        }
    }

    override func table(_ table: WKInterfaceTable, didSelectRowAt rowIndex: Int) {
        print("didSelect")
    }
}

// UITableViewCellのようなやつ
final class TableRowController: NSObject {

    @IBOutlet private weak var label: WKInterfaceLabel!

    func setText(_ text: String) {
        label.setText(text)
    }
}

WKInterfacePicker

ピッカー(画像と文字列が表示できる)。

picker

class WKInterfacePicker : WKInterfaceObject

ドキュメント:WKInterfacePicker

IBAction で選択イベントを取得できる。

@IBAction func pickerAction(_ index: Int) {}

メソッド一覧。

func focus()
func resignFocus()

func setSelectedItemIndex(_ itemIndex: Int)
func setItems(_ items: [WKPickerItem]?)
func setCoordinatedAnimations(_ coordinatedAnimations: [WKInterfaceObject & WKImageAnimatable]?)
func setEnabled(_ enabled: Bool)

setItemsWKPickerItem を設定する。
WKPickerItem には下記が設定できる。

var title: String?
var caption: String?
var accessoryImage: WKImage?
var contentImage: WKImage?

WKInterfaceImage

ほぼ UIImageView。複数画像用意するとパラパラ漫画みたいにアニメーションできる。

image

class WKInterfaceImage : WKInterfaceObject

ドキュメント:WKInterfaceImage

WKInterfaceActivityRing

HealthKit のアクティビティ表示のやつ。

ring

class WKInterfaceActivityRing : WKInterfaceObject

ドキュメント:WKInterfaceActivityRing

簡易実装。

import WatchKit
import Foundation
import HealthKit

final class ActivityRingInterfaceController: WKInterfaceController {

    @IBOutlet private weak var activityRing: WKInterfaceActivityRing!

    override func awake(withContext context: Any?) {
        let activitySummary = HKActivitySummary()
        activitySummary.activeEnergyBurned = HKQuantity(unit: .kilocalorie(), doubleValue: 1500)
        activitySummary.activeEnergyBurnedGoal = HKQuantity(unit: .kilocalorie(), doubleValue: 3000)
        activitySummary.appleExerciseTime = HKQuantity(unit: .minute(), doubleValue: 30)
        activitySummary.appleExerciseTimeGoal = HKQuantity(unit: .minute(), doubleValue: 30)
        activitySummary.appleStandHours = HKQuantity(unit: .count(), doubleValue: 9)
        activitySummary.appleStandHoursGoal = HKQuantity(unit: .count(), doubleValue: 10)

        activityRing.setActivitySummary(activitySummary, animated: true)
    }
}

WKInterfaceMovie

動画表示するやつ(とくにイベントは取得できなさそう??)。再生ボタン押下で動画再生用のモーダルが表示される。

movie

class WKInterfaceMovie : WKInterfaceObject

ドキュメント:WKInterfaceMovie

メソッド一覧。

func setMovieURL(_ URL: URL)
func setVideoGravity(_ videoGravity: WKVideoGravity)
func setLoops(_ loops: Bool)
func setPosterImage(_ posterImage: WKImage?)

簡易実装。

@IBOutlet private weak var movie: WKInterfaceMovie!

override func awake(withContext context: Any?) {
    let url = Bundle.main.url(forResource: "sample", withExtension: "mov")
    movie.setMovieURL(url!)
}

WKInterfaceInlineMovie

動画表示するやつ(とくにイベントは取得できなさそう??)。WKInterfaceMovie と違い再生用のモーダルは表示せずそのままの画面で動画を再生する。

inline_movie

class WKInterfaceInlineMovie : WKInterfaceObject

ドキュメント:WKInterfaceInlineMovie

メソッド一覧。

func setMovieURL(_ URL: URL)
func setVideoGravity(_ videoGravity: WKVideoGravity)
func setLoops(_ loops: Bool)
func setAutoplays(_ autoplays: Bool)
func setPosterImage(_ posterImage: WKImage?)

func play()
func playFromBeginning()
func pause()

簡易実装(再生ボタンがないので自分で用意して play を呼ぶ)。

@IBOutlet private weak var inlineMovie: WKInterfaceInlineMovie!

override func awake(withContext context: Any?) {
    let url = Bundle.main.url(forResource: "sample", withExtension: "mov")
    inlineMovie.setMovieURL(url!)
    inlineMovie.play()
}

WKInterfaceNowPlayingView

再生中のオーディオを操作する View。

now_playing

インターフェースは存在しない模様。Storyboard に置くだけでとくに制御はできない。

ドキュメント:Adding a Now Playing View

WKInterfaceVolumeControl

音量操作するやつ??ちょっと使い方わからない。。。

volume

class WKInterfaceVolumeControl : WKInterfaceObject

ドキュメント:WKInterfaceVolumeControl

WKInterfaceMenu

watchOS 7 で deprecated。Force touch 時に表示されるメニュー。
watchOS 7 で Force touch が廃止された。

WKInterfaceMenuItem

watchOS 7 で deprecated。Force touch 時に表示されるメニューのアイテム。
watchOS 7 で Force touch が廃止された。

WKInterfaceHMCamera

なにかわかってないので割愛。。。

class WKInterfaceHMCamera : WKInterfaceObject

ドキュメント:WKInterfaceHMCamera

WKInterfaceSKScene

SpriteKit 用のやつ。割愛。。。

class WKInterfaceSKScene : WKInterfaceObject

ドキュメント:WKInterfaceSKScene

WKInterfaceSCNScene

SceneKit 用のやつ。割愛。。。

class WKInterfaceSCNScene : WKInterfaceObject

ドキュメント:WKInterfaceSCNScene

WKInterfaceAuthorizationAppleIDButton

「Sign in with Apple」用のボタン。これは割愛。。。

class WKInterfaceAuthorizationAppleIDButton : WKInterfaceObject

ドキュメント:WKInterfaceAuthorizationAppleIDButton

WKInterfacePaymentButton

「Buy with Apple Pay」用のボタン。これは割愛。。。

class WKInterfacePaymentButton : WKInterfaceObject

ドキュメント:WKInterfacePaymentButton

ジェスチャ

ジェスチャは4つ。

gestures

WKLongPressGestureRecognizer

ほぼ UILongPressGestureRecognizer

class WKLongPressGestureRecognizer : WKGestureRecognizer

ドキュメント:WKLongPressGestureRecognizer

IBAction でイベントを取得する。

@IBAction func handleLongPress(_ gesture: WKLongPressGestureRecognizer) {}

WKPanGestureRecognizer

ほぼ UIPanGestureRecognizer

class WKPanGestureRecognizer : WKGestureRecognizer

ドキュメント:WKPanGestureRecognizer

IBAction でイベントを取得する。

@IBAction func handlePan(_ gesture: WKPanGestureRecognizer) {}

WKSwipeGestureRecognizer

ほぼ UISwipeGestureRecognizer

class WKSwipeGestureRecognizer : WKGestureRecognizer

ドキュメント:WKSwipeGestureRecognizer

IBAction でイベントを取得する。

@IBAction func handleSwipe(_ gesture: WKSwipeGestureRecognizer) {}

WKTapGestureRecognizer

ほぼ UIPanGestureRecognizer

class WKTapGestureRecognizer : WKGestureRecognizer

ドキュメント:WKTapGestureRecognizer

IBAction でイベントを取得する。

@IBAction func handleTap(_ gesture: WKTapGestureRecognizer) {}

おわりに

これで watchOS 用アプリのレイアウトはだいたいできるはず!

SwiftUI 使えるなら使うべきな気もするけど気にしない:innocent:

ソースみてね:blush: GitHub

  • このエントリーをはてなブックマークに追加
  • Qiitaで続きを読む

【初心者】Swift UIを勉強する その③ ーーーSlidebarとNavigationLink

はじめに

iPadの画面サイズを最大限に利用するために、1つの画面に複数の階層を作成するのが理想です。
今回のはiPhoneだけじゃなく、iPadでもスライダーバーとラベルも作成していきます。


目次

  1. SlidebarとLabel
  2. NavigationLink
  3. iPad
  4. まとめ
  5. 参考文献

SlidebarとLabel

cmd Nで新しいファイルSlidebarを作成します。
・前回の記事と同じくListを使い、LabelをGroup化します。
・前回のlistStyleInsetGroupedListStyle()を使いましたが、今回はSidebarListStyle()を使います。


ListごとをNavigationViewに取り込んで、navigationTitleでタイトルを追加します。navBarにタイトルは自動生成されます。

Slidebar.swift
NavigationView {
   Label("Tutorials", systemImage: "list.bullet.rectangle")
   Label("Livestreams", systemImage: "tv")
   Label("Certificates", systemImage: "mail.stack")
   Label("Search", systemImage: "magnifyingglass")
}
   .listStyle(SidebarListStyle())
   .navigationTitle("Learn")

NavigationLink

・UIKitではボタンなどaddTargetを使って画面遷移しますが、SwiftUIではNavigationLinkを使います。
・とてもシンプルで、引数に遷移先のViewを指定し、クロージャー内でトリガーを定義します。
 遷移先はCoursesView()を指定します。

Slidebar.swift
NavigationView {
    List {
        NavigationLink(destination: CoursesView()) {
              Label("Courses", systemImage: "book.closed")
     }
}


iPad

・iPadで実行する際に、デフォルトの画面はCouresesView()が表示されません。暫定的な解決方法は一番最初に一回CouresesView()を実行してもらいます。
截屏2021-02-28 22.15.43.png

まとめ

・SnapKitとAutoLayoutに全然負けない気がしました。
・styleまわりは馴染みがなくて、覚えていくしかありません。

ソースコードGithub

参考文献

  • このエントリーをはてなブックマークに追加
  • Qiitaで続きを読む

初心者向け:item 数により自動レイアウトするUICollectionViewを作る

import UIKit

let kCellWidth1 = CGFloat(130)
let kCellWidth2 = CGFloat(110)
let kCellHeight = CGFloat(104)

let kMiniumSpacing = CGFloat(10)

class ViewController: UIViewController {
    var myCollectionView:UICollectionView?
    var scrWidth = CGFloat(0);
    var itemCount = 2

    override func viewDidLoad() {
        super.viewDidLoad()

        scrWidth = self.view.bounds.width
        setupCollection()
        setupTextInput()
    }

    func getRowItemCount() -> Int {
        let viewWidth = self.scrWidth
        let itemWidth = getItemSize().width
        let minPadding = getSectionInset().left
        let minItemSpacing = getMinItemSpacing()
        let rowCount = Int((viewWidth - minPadding * 2 + minItemSpacing) / (itemWidth + minItemSpacing))
        return rowCount
    }

    func getColumnItemCount() -> Int {
        let rowCount = getRowItemCount()
        guard rowCount > 0 else {
            return 0
        }
        let columnCount = Int(ceil(Double(itemCount) / Double(rowCount)))
        return columnCount
    }

    func getCollectionHeight() -> CGFloat {
        let itemHeight = getItemSize().height
        let columnCount = getColumnItemCount()
        let inset = getSectionInset()
        let lineSpacing = getMinLineSpacing()

        let height = itemHeight * CGFloat(columnCount)
                                + (inset.top + inset.bottom)
                                + lineSpacing * CGFloat(columnCount - 1)
        return height
    }

    func getSectionInset() -> UIEdgeInsets {
        var insets = UIEdgeInsets.zero
        let itemWidth = getItemSize().width
        let itemsWidth = CGFloat(itemCount) * itemWidth + CGFloat(itemCount - 1) * getMinItemSpacing()
        let totalWidth = itemsWidth + 2 * kMiniumSpacing
        if totalWidth < self.scrWidth {
            let newPadding = (self.scrWidth - itemsWidth) / 2.0 - 5
            insets = UIEdgeInsets(top: kMiniumSpacing, left: newPadding, bottom: kMiniumSpacing, right: newPadding)
        } else {
            insets = UIEdgeInsets(top: kMiniumSpacing, left: kMiniumSpacing, bottom: kMiniumSpacing, right: kMiniumSpacing)
        }
        return insets
    }

    func getItemSize() -> CGSize {
        let size = self.scrWidth > 375 ? CGSize(width: kCellWidth1, height: kCellHeight) :CGSize(width: kCellWidth2, height: kCellHeight)
        return size
    }

    func getMinItemSpacing() -> CGFloat {
        return 1
    }

    func getMinLineSpacing() -> CGFloat {
        return kMiniumSpacing
    }

    func setupCollection() {
        let layout: UICollectionViewFlowLayout = UICollectionViewFlowLayout()
        layout.sectionInset = getSectionInset()
        layout.itemSize = getItemSize()
        layout.minimumInteritemSpacing = getMinItemSpacing()
        layout.minimumLineSpacing = getMinLineSpacing()
        layout.scrollDirection = .vertical

        let collectHeight = getCollectionHeight()
        let collectionRect =
            CGRect(origin: CGPoint(x: 0, y: 50),
                   size:CGSize(width: scrWidth, height: collectHeight))
        myCollectionView = UICollectionView(frame: collectionRect, collectionViewLayout: layout)
        myCollectionView?.register(UICollectionViewCell.self, forCellWithReuseIdentifier: CollectionCell.cellIdentifier)
        myCollectionView?.backgroundColor = UIColor.link

        myCollectionView?.dataSource = self
        myCollectionView?.delegate = self
        self.view.addSubview(myCollectionView ?? UICollectionView())
    }

    func setupTextInput() {
        let myTextField = UITextField(frame: CGRect(x: 50, y: (view.bounds.height - 80),
                                               width: 300.00, height: 30.00));
        myTextField.placeholder = "pleae enter item count"
        myTextField.backgroundColor = .link
        myTextField.keyboardType = .numbersAndPunctuation
        myTextField.delegate = self
        self.view.addSubview(myTextField)
    }

    func updateCollection() {
        myCollectionView?.frame.size.height = getCollectionHeight()
        if let layout = myCollectionView?.collectionViewLayout as? UICollectionViewFlowLayout {
            layout.sectionInset = getSectionInset()
            layout.itemSize = getItemSize()
            layout.minimumInteritemSpacing = getMinItemSpacing()
            layout.minimumLineSpacing = getMinLineSpacing()
            layout.scrollDirection = .vertical
        }
        myCollectionView?.reloadData()
    }
}

  • このエントリーをはてなブックマークに追加
  • Qiitaで続きを読む

item 数により自動レイアウトするUICollectionViewを作ってみる

import UIKit

let kCellWidth1 = CGFloat(130)
let kCellWidth2 = CGFloat(110)
let kCellHeight = CGFloat(104)

let kMiniumSpacing = CGFloat(10)

class ViewController: UIViewController {
    var myCollectionView:UICollectionView?
    var scrWidth = CGFloat(0);
    var itemCount = 2

    override func viewDidLoad() {
        super.viewDidLoad()

        scrWidth = self.view.bounds.width
        setupCollection()
        setupTextInput()
    }

    func getRowItemCount() -> Int {
        let viewWidth = self.scrWidth
        let itemWidth = getItemSize().width
        let minPadding = getSectionInset().left
        let minItemSpacing = getMinItemSpacing()
        let rowCount = Int((viewWidth - minPadding * 2 + minItemSpacing) / (itemWidth + minItemSpacing))
        return rowCount
    }

    func getColumnItemCount() -> Int {
        let rowCount = getRowItemCount()
        guard rowCount > 0 else {
            return 0
        }
        let columnCount = Int(ceil(Double(itemCount) / Double(rowCount)))
        return columnCount
    }

    func getCollectionHeight() -> CGFloat {
        let itemHeight = getItemSize().height
        let columnCount = getColumnItemCount()
        let inset = getSectionInset()
        let lineSpacing = getMinLineSpacing()

        let height = itemHeight * CGFloat(columnCount)
                                + (inset.top + inset.bottom)
                                + lineSpacing * CGFloat(columnCount - 1)
        return height
    }

    func getSectionInset() -> UIEdgeInsets {
        var insets = UIEdgeInsets.zero
        let itemWidth = getItemSize().width
        let itemsWidth = CGFloat(itemCount) * itemWidth + CGFloat(itemCount - 1) * getMinItemSpacing()
        let totalWidth = itemsWidth + 2 * kMiniumSpacing
        if totalWidth < self.scrWidth {
            let newPadding = (self.scrWidth - itemsWidth) / 2.0 - 5
            insets = UIEdgeInsets(top: kMiniumSpacing, left: newPadding, bottom: kMiniumSpacing, right: newPadding)
        } else {
            insets = UIEdgeInsets(top: kMiniumSpacing, left: kMiniumSpacing, bottom: kMiniumSpacing, right: kMiniumSpacing)
        }
        return insets
    }

    func getItemSize() -> CGSize {
        let size = self.scrWidth > 375 ? CGSize(width: kCellWidth1, height: kCellHeight) :CGSize(width: kCellWidth2, height: kCellHeight)
        return size
    }

    func getMinItemSpacing() -> CGFloat {
        return 1
    }

    func getMinLineSpacing() -> CGFloat {
        return kMiniumSpacing
    }

    func setupCollection() {
        let layout: UICollectionViewFlowLayout = UICollectionViewFlowLayout()
        layout.sectionInset = getSectionInset()
        layout.itemSize = getItemSize()
        layout.minimumInteritemSpacing = getMinItemSpacing()
        layout.minimumLineSpacing = getMinLineSpacing()
        layout.scrollDirection = .vertical

        let collectHeight = getCollectionHeight()
        let collectionRect =
            CGRect(origin: CGPoint(x: 0, y: 50),
                   size:CGSize(width: scrWidth, height: collectHeight))
        myCollectionView = UICollectionView(frame: collectionRect, collectionViewLayout: layout)
        myCollectionView?.register(UICollectionViewCell.self, forCellWithReuseIdentifier: CollectionCell.cellIdentifier)
        myCollectionView?.backgroundColor = UIColor.link

        myCollectionView?.dataSource = self
        myCollectionView?.delegate = self
        self.view.addSubview(myCollectionView ?? UICollectionView())
    }

    func setupTextInput() {
        let myTextField = UITextField(frame: CGRect(x: 50, y: (view.bounds.height - 80),
                                               width: 300.00, height: 30.00));
        myTextField.placeholder = "pleae enter item count"
        myTextField.backgroundColor = .link
        myTextField.keyboardType = .numbersAndPunctuation
        myTextField.delegate = self
        self.view.addSubview(myTextField)
    }

    func updateCollection() {
        myCollectionView?.frame.size.height = getCollectionHeight()
        if let layout = myCollectionView?.collectionViewLayout as? UICollectionViewFlowLayout {
            layout.sectionInset = getSectionInset()
            layout.itemSize = getItemSize()
            layout.minimumInteritemSpacing = getMinItemSpacing()
            layout.minimumLineSpacing = getMinLineSpacing()
            layout.scrollDirection = .vertical
        }
        myCollectionView?.reloadData()
    }
}

extension ViewController: UICollectionViewDataSource {
    func collectionView(_ collectionView: UICollectionView, numberOfItemsInSection section: Int) -> Int {
        return itemCount
    }

    func collectionView(_ collectionView: UICollectionView, cellForItemAt indexPath: IndexPath) -> UICollectionViewCell {
        let myCell = collectionView.dequeueReusableCell(withReuseIdentifier: CollectionCell.cellIdentifier, for: indexPath)
        myCell.backgroundColor = UIColor.blue
        return myCell
    }
}

extension ViewController: UICollectionViewDelegate {

    func collectionView(_ collectionView: UICollectionView, didSelectItemAt indexPath: IndexPath) {
       print("User tapped on item \(indexPath.row)")
    }
}
extension ViewController: UITextFieldDelegate {

//    func textField(_ textField: UITextField, shouldChangeCharactersIn range: NSRange, replacementString string: String) -> Bool {
//        guard let newValue = Int(string) else {
//            print("変換できません")
//            return true
//         }
//        itemCount = newValue
//        updateCollection()
//        return true
//    }

    func textFieldShouldReturn(_ textField: UITextField) -> Bool {
        guard let newValue = Int(textField.text ?? "") else {
            print("変換できません")
            return false
         }
        self.view.endEditing(true)
        itemCount = newValue
        updateCollection()
        return true
    }

}

  • このエントリーをはてなブックマークに追加
  • Qiitaで続きを読む

テスとー!

テストーーーー!

  • このエントリーをはてなブックマークに追加
  • Qiitaで続きを読む

【Swift】UILabel 幅 設定 できない

状況

  • 対象のUILabelのtextを処理によって変えたい
    • textによって幅の長さを変えたい
  • 対象のUILabelになんらかの制約がかかっている

なにがあったのか

UILabelの幅をtextの長さではなく自由に設定したいが、制約がかかっている場合だとどうも label.frame や、textを基準にしたPadding的なことをコードを書いて設定することができない(できなかった)。
単純にStoryboardで設定すればうまくいくが、例えばなんらかの処理でtextの文字列が変わるとその都度変えることができなくなる。

なんとかする

コードで制約を書いて変更したらなんとかなった。

label.text = "なんとかしてください"
label.widthAnchor.constraint(equalToConstant: 100).isActive = true

これを if とかで分岐した処理によって数値を変えたらいいと思う。

  • このエントリーをはてなブックマークに追加
  • Qiitaで続きを読む

【iOS】アプリに Widget を追加するまでに引っかかった点まとめ

作成中のアプリに Widget を追加するにあたり、ありとあらゆるつまづきポイントに引っかかったためメモ

環境

  • Xcode Version 12.3 (12C33)
  • iOS 13 以上

行いたいこと

  • 出勤・退勤を打刻するアプリの作成
  • ウィジェットから出勤・退勤打刻を行えるようにしたい
    • その前段階としてまずウィジェットを表示するところから

引っかかった点

  1. BundleId の設定
  2. クラス名
  3. ウィジェットの追加ができない
  4. Podfile の設定
  5. iOS 13 でもビルドが通るようにしたい
  6. 実機でビルドできない

1. BundleId の設定

  • 元のアプリの bundle Id は「com.test-inc.MyApp.develop」および「com.test-inc.MyApp」とする
  • 「com.test-inc.MyApp.Widget.develop」として生成した

問題点1(Bundle Id が不正)

以下のようなエラーが発生

error: Embedded binary's bundle identifier is not prefixed with the parent app's bundle identifier.

解決法1

bundle Id を com.test-inc.MyApp.develop.Widget とした

問題点2(Scheme ごとの Bundle Id 設定忘れ)

develop 環境ではビルドが通るが product 環境ではビルドが通らない

解決法2

WidgetExtension ターゲット > Build Settings > Packaging > Product Bundle Identifier から Scheme ごとの Bundle Id を設定

2.クラス名

問題点

ウィジェット名を「Widget」として作成したところ、自動生成された以下のコード部分でエラー

Widget.swift
@main
struct Widget: Widget {
    let kind: String = "Widget"

    var body: some WidgetConfiguration {
        IntentConfiguration(kind: kind, intent: ConfigurationIntent.self, provider: Provider()) { entry in
            WidgetEntryView(entry: entry)
        }
        .configurationDisplayName("My Widget")
        .description("This is an example widget.")
    }
}
'Widget' is annotated with @main and must provide a main static function of type () -> Void or () throws -> Void.

解決法

Widget は既に使われているため、構造体の名前を変更

Widget.swift
@main
struct TimeCardWidget: Widget {
    let kind: String = "Widget"

    var body: some WidgetConfiguration {
        IntentConfiguration(kind: kind, intent: ConfigurationIntent.self, provider: Provider()) { entry in
            WidgetEntryView(entry: entry)
        }
        .configurationDisplayName("My Widget")
        .description("This is an example widget.")
    }
}

3. Podfile の設定

問題点

  • シミュレータでビルド後ホーム画面に遷移しウィジェットの追加を試みても対象アプリのウィジェットが表示されない

解決法

  • Podfile に以下を追加する
Podfile
target 'WidgetExtension' do
end

4. ウィジェットが Swift UI のUI確認画面に表示されない

問題点1. Scheme の選択

  • Scheme として WidgetExtension を選択しているとウィジェットのUIのプレビューを表示しようとするとエラーが表示される

解決法1

  • Scheme として MyAppDevelop を選択

問題点2. Architectures の設定

ビルド時に以下のようなエラーが発生

(省略) building for iOS Simulator, but linking in object file (省略)

解決法2

  • TARGETS から SampleApp と WidgetExtension の Build Settings を変更
    • Architectures > Build Active Architecture Only > DevelopYes
    • Excluded Architectures > DevelopAny iOS Simulator SDK を追加し arm64 に変更
  • WidgetExtension のみ変更してもビルドエラーが消えなかった

5. iOS 13 でもビルドが通るようにしたい

問題点

Widget 機能自体は iOS 14 以降のものだがアプリの対象は iOS 13以上

解決法

  • MyApp の Development Info から 対象を iOS 13.0 以上に設定
  • WidgetExtension の Development Info から対象を iOS 14.0 以上に設定

6. 実機でビルドできない

問題点

  • 実機をつなげてビルドしようとすると以下のエラー
"WidgetExtension" requires a provisioning profile. Select a provisioning profile in the Signing & Capabilities editor.

解決法

参考

  • このエントリーをはてなブックマークに追加
  • Qiitaで続きを読む

わあ!

アイウエオ!

  • このエントリーをはてなブックマークに追加
  • Qiitaで続きを読む

ビューがそれぞれ分かれていて間の一つだけ空間を開けずにビューを表示したい場合

そのビュー自体を消す。

その中に例えば名前とか商品名とか入っているみたいな漢字の場合それぞれをisHiddenとかで消すと空白が生まれてしまう。

なのでビュー本体を消せばそのビューがないことにできる。

ビューの中の要素をそれぞれ消したら空白ができてしまいなぜだろうと思っていました。

でもよくよく考えたら中の要素は消しても本体は残っている訳なのでそりゃ間に空間を表示しちゃうよね

って話

  • このエントリーをはてなブックマークに追加
  • Qiitaで続きを読む

[Swift5]'Firebase MLKit'を使った言語判別機能を紹介

Firebase MLKitとは

ML Kit を使用すると、テキストの文字列の言語を識別できます。文字列の言語として特に可能性の高いものを取得することも、文字列の言語として可能性のあるものすべての信頼スコアを取得することもできます。

ML Kit では、103 種類の言語がネイティブ スクリプトのテキストで認識されます。また、アラビア語、ブルガリア語、中国語、ギリシャ語、ヒンディー語、日本語、ロシア語の場合はローマ字化されたテキストが認識されます。(引用)

ML Kit を使用してテキストの言語を識別する(iOS)

今回は、MLKitを使って現在開発中の翻訳アプリの読み上げ機能の読み上げる言語を取得したいと思います。

実装方法

必要なPod

  pod 'Firebase/MLNaturalLanguage', '6.25.0'
  pod 'Firebase/MLNLLanguageID', '6.25.0'

必要なライブラリ

  import Firebase

その他必要なこと

① Firebaseへの登録とGoogleService-Info.plistの追加
② AppDelegateへFirebaseApp.configure()記述

インスタンスの作成

let languageId = NaturalLanguage.naturalLanguage().languageIdentification()

言語判別をおこなう

// 言語判別を行う
languageId.identifyLanguage(for: "ここに判別したいテキストを") {
  (languageCode, error) in

   // エラー処理
   if let error = error {
     print("Failed with error: \(error)")
     return
   }

   // 言語判別結果の値が存在し、undでない場合呼ばれる(und == 判別不価値)
   if let languageCode = languageCode, languageCode != "und" {
     print("言語コード: \(languageCode)")
   } else {
     print("No language was identified")
   }
}

このように取得した言語コードを読み上げ機能を扱うクラスへ渡してあげることでさまざまな言語に対応した読み上げをおこなうことができます。参考にしてください!

  • このエントリーをはてなブックマークに追加
  • Qiitaで続きを読む

「this class is not key value coding-compliant for the key 〇〇."」が出たあなたへ。

「this class is not key value coding-compliant for the key 〇〇."」が出たあなたへ。

もしかして、StoryBoardに追加したオブジェクトが、ViewControllerとOutlet接続されていませんか???

だとすると今回のエラーが発生する可能性が高いので、オブジェクトを右クリックして❌ボタンで解除してみてください。

以上!!

  • このエントリーをはてなブックマークに追加
  • Qiitaで続きを読む

swiftの基礎の基礎〜画面遷移の種類〜、ナビゲーションバーの作成〜

備忘録

プッシュ遷移
横にスライドする遷移のこと。

モーダル遷移
下から上へ覆い被さるように画面が出てくる遷移のこと。
閉じる際は上から下に画面が消えていく

ナビゲーションバーの作成
①バーの選択
スクリーンショット 2021-03-08 12.36.53.png

②NavigationController選択
スクリーンショット 2021-03-08 12.37.34.png

③画面二つ出てくる。
titleを選択した状態で、Bar Tintの色を変更するとナビゲーションバーの色も変更される。
スクリーンショット 2021-03-08 12.40.59.png

  • このエントリーをはてなブックマークに追加
  • Qiitaで続きを読む

swiftの基礎の基礎④〜画面遷移の種類〜、ナビゲーションバーの作成〜

備忘録

プッシュ遷移
横にスライドする遷移のこと。

viewcontrollerをライブラリより選択。
スクリーンショット 2021-03-08 12.53.17.png

こんな感じに真横に配置し、(viewcontrollerは背景色グレーの方)遷移先の画面の作成をする。

1.HELLOを選択し、controlを押しながら、グレーの方へドラックアンドドロップすると画像のような黒い選択が出現。

2.Showを選択

スクリーンショット 2021-03-08 12.51.06.png

・プッシュ遷移完了すると、画像のように真ん中に矢印が出てくる(セグエsegueと呼ぶ)
スクリーンショット 2021-03-08 12.57.33.png

モーダル遷移
下から上へ覆い被さるように画面が出てくる遷移のこと。
閉じる際は上から下に画面が消えていく

1.プッシュ遷移の1までは同じように進める。

2.プッシュ遷移の時はshowを選択したが、モーダル遷移の時はPresent Modallyを選択。
スクリーンショット 2021-03-08 13.02.28.png

3.モーダル遷移完了!

4.戻るボタンを実装したい時は・・・
紐付けてこのコードを書くと・・・

スクリーンショット 2021-03-08 13.09.34.png
Something went wrong

戻れるようになった!

ナビゲーションバーの作成
①バーの選択
スクリーンショット 2021-03-08 12.36.53.png

②NavigationController選択
スクリーンショット 2021-03-08 12.37.34.png

③画面二つ出てくる。
titleを選択した状態で、Bar Tintの色を変更するとナビゲーションバーの色も変更される。
スクリーンショット 2021-03-08 12.40.59.png

  • このエントリーをはてなブックマークに追加
  • Qiitaで続きを読む

swift基礎の基礎③〜オブジェクトの制約〜

備忘録

<lavelとbuttonを使ってアプリを作るときの注意点>

①オブジェクトにはx軸とy軸の両方に制約をかけること。
(画面のどこの位置に配置するか)

ここを押し・・・
スクリーンショット 2021-03-08 12.18.29.png

Horizontally in ContainerにチェックしてAdd 1 Constraintをするとオブジェクトが真ん中に配置される制約。
どの種類の端末にしても真ん中に配置される。

スクリーンショット 2021-03-08 12.17.41.png

ここを押すと・・・
スクリーンショット 2021-03-08 12.23.27.png

画面の上下左右からどのくらいの位置に配置させるかの制約をつけることができる。
任意で数字をきめ、Add 1 Constraintをすると反映される。

スクリーンショット 2021-03-08 12.21.55.png

その他

便利なショートカットキー

・画面の二分割するショートカットキー
option + command + control + enter 

  • このエントリーをはてなブックマークに追加
  • Qiitaで続きを読む

文字列から数値に変えてフォーマットする

数値を文字列にするパターンはあったのに、文字列から数値に変えてフォーマットするパターンがなかったので作成します。

let a = Int(文字列の変数名etc)
String(format: "%05d", _a))

やることは2つ

文字列をInt型に変換
Intでフォーマット

できないって場合

型を調べてください。
オプショナル型ならif letのなかでやるとうまくいくと思います。

let a = Int(文字列の変数名etc)
if let _a = a{
String(format: "%05d", _a))
}

  • このエントリーをはてなブックマークに追加
  • Qiitaで続きを読む

9日目 インタラクティブ的なストーリー分岐

9日目のアプリ

インタラクティブ的なストーリー分岐

画面キャプチャ

MVCの形で作成。

以下の流れで作りました。

  1. オブジェクトを配置して、Viewcontrolerに紐付け
  2. MVCに分割して作ることを目的に作成

できたこと

  • 配列作成
  • label、ボタンの文字要素を差し替え表示
  • 答えによる分岐
  • ##書いたコードを共有します!

▼▼▼Model(Story.swift)
```
import Foundation

struct Story {
let title: String
let choice1: String
let choice1Destination: Int //choice1 を選択したときの次のストーリー番号

let choice2: String
let choice2Destination: Int //choice2 を選択したときの次のストーリー番号

}

▼▼▼Model(Story.swift)

import Foundation

struct StoryBrain {

var storyNumber = 0


let stories = [
    Story(
        title: "Your car has blown a tire on a winding road in the middle of nowhere with no cell phone reception. You decide to hitchhike. A rusty pickup truck rumbles to a stop next to you. A man with a wide brimmed hat with soulless eyes opens the passenger door for you and asks: 'Need a ride, boy?'.",
        choice1: "I'll hop in. Thanks for the help!", choice1Destination: 2,
        choice2: "Better ask him if he's a murderer first.", choice2Destination: 1
    ),
    Story(
        title: "He nods slowly, unfazed by the question.",
        choice1: "At least he's honest. I'll climb in.", choice1Destination: 2,
        choice2: "Wait, I know how to change a tire.", choice2Destination: 3
    ),
    Story(
        title: "As you begin to drive, the stranger starts talking about his relationship with his mother. He gets angrier and angrier by the minute. He asks you to open the glovebox. Inside you find a bloody knife, two severed fingers, and a cassette tape of Elton John. He reaches for the glove box.",
        choice1: "I love Elton John! Hand him the cassette tape.", choice1Destination: 5,
        choice2: "It's him or me! You take the knife and stab him.", choice2Destination: 4
    ),
    Story(
        title: "What? Such a cop out! Did you know traffic accidents are the second leading cause of accidental death for most adult age groups?",
        choice1: "The", choice1Destination: 0,
        choice2: "End", choice2Destination: 0
    ),
    Story(
        title: "As you smash through the guardrail and careen towards the jagged rocks below you reflect on the dubious wisdom of stabbing someone while they are driving a car you are in.",
        choice1: "The", choice1Destination: 0,
        choice2: "End", choice2Destination: 0
    ),
    Story(
        title: "You bond with the murderer while crooning verses of 'Can you feel the love tonight'. He drops you off at the next town. Before you go he asks you if you know any good places to dump bodies. You reply: 'Try the pier.'",
        choice1: "The", choice1Destination: 0,
        choice2: "End", choice2Destination: 0
    )
]
//ストーリーを表示するメソッド
func getQuestionText() -> String {     //型はstringを返す
    return stories[storyNumber].title
}

//ボタン内に選択肢1を表示する
func getAnswer1() -> String {
    return stories[storyNumber].choice1
}
//ボタン内に選択肢2を表示する
func getAnswer2() -> String {
    return stories[storyNumber].choice2
}

//ボタンの文字と選択肢を比較して、同じなら(⇦同じになる)設定したシナリオ番号を返す
mutating func nextStory(userChoice: String) {
    //今のシナリオ番号を取得する
    let currentStory = stories[storyNumber]
    if userChoice == currentStory.choice1 {
        storyNumber = currentStory.choice1Destination
    } else if userChoice == currentStory.choice2 {
        storyNumber = currentStory.choice2Destination
    }
}

}
```
▼View(Main.Storyboard)
ストーリーボード

▼Controller(ViewController.swift)
```
import UIKit

class ViewController: UIViewController {

//ボタンの紐付け
@IBOutlet weak var storyLabel: UILabel!
@IBOutlet weak var choice1Button: UIButton!
@IBOutlet weak var choice2Button: UIButton!

//Modelを読み込む。使うため。swiftのファイル名と同じ名称をつける。変数も文字列同じだが、最初は小文字。
var storyBrain = StoryBrain()


override func viewDidLoad() {
    super.viewDidLoad()

    //初期画面を表示する
    updateUI()

}

@IBAction func choiceMade(_ sender: UIButton) {
    //Modelに書かれているメソッド nextStory(次のストーリー)を呼び出す。
    //引数にボタンのcurrentTitleを持たせる

// let userChoice = sender.currentTitle!
// storyBrain.nextStory(userChoice: userChoice)
//
storyBrain.nextStory(userChoice: sender.currentTitle!)

    //画面に表示する
    updateUI()
}

func updateUI() {
    //はじめの文言表示と更新時の表示項目設定

    storyLabel.text = storyBrain.getQuestionText() //ラベルの文字
    //ボタンの文字を表示。Modelのメソッドを読み込んで使う。Modelにメソッドを作成する。
    choice1Button.setTitle("\(storyBrain.getAnswer1())", for: .normal)
    choice2Button.setTitle("\(storyBrain.getAnswer2())", for: .normal)

}

}
```

感想

MVCのパターンをまた少し覚えました!
繰り返しやると地味に覚えてきますね。

  • このエントリーをはてなブックマークに追加
  • Qiitaで続きを読む

【Swift】Podsをプロジェクトから削除する方法 (unable to load contents of file listのエラーが出た時の対処法)

1. プロジェクトのディレクトリから、該当のファイルとフォルダを全て削除します。

・Podfile
・Podfile.lock
・/Pods
・xcworkspace

2.下記項目を削除します。右側の「×」ボタンをクリックすることで削除できます。(自分はこれで治りました)

・[CP] Check Pods Manifest.lock
・[CP] Embed Pods Frameworks
・[CP] Copy Pods Resources

wp_ios_dev_firebase_build_configuration_pods_remove.jpg

この方のサイトを参考にさせていただきました。(https://blog.guttyo.jp/apple/ios-app/ios-app-dev/3990/#Pod)

  • このエントリーをはてなブックマークに追加
  • Qiitaで続きを読む

音を鳴らす Swift

■音や音楽を流す方法

使うもの

import AVFoundation

■使うクラス
このクラスのメソッドで音を鳴らしたり止めたりする
インスタンス化する

var player = AVAudioPlayer()

♪Bundleクラスを使って音源を指定する。

let Path = Bundle.main.bundleURL.appendingPathComponent("音源の名前")

♪指定した(Path)の音をAVAudioPlayerに入れ込む。

player = AVAudioPlayer(contentsOf:Path)

♪play()メソッドで鳴らす

player.play()

//ちなみに止めるはこれ
player.stop()

■しかしこのままではエラーになる。
do-catch文でエラーの場合を記述するとなおる。

do{

 player = try AVAudioPlayer(contentsOf:Path)
 player.play()

 }catch{

 print("エラー")
 }

これで大丈夫です簡単にまとめました。

  • このエントリーをはてなブックマークに追加
  • Qiitaで続きを読む

UserDefaultsの使い方

■主にデータを保存する機能
アプリを落としてもデータは保存されている。
軽量のデータを保存する機能

使い方
■データを保存する方法

UserDefaults.standard.set(保存したい値,forKey:"キーの名前")

■データを取り出す方法

//int型
UserDefaults.standard.integer(forKey:"キーの名前")

// Float型
userDefaults.standard.float(forKey: "キーの名前") 

// Double型               
userDefaults.standard.double(forKey: "キーの名前") 

// Bool型             
userDefaults.standard.bool(forKey: "キーの名前") 

 // URL型                 
userDefaults.standard.url(forKey: "キー")

 // 文字列型                   
userDefaults.standard.string(forKey: "キー")   

 // 文字型配列          
userDefaults.standard.stringArray(forKey: "キー")

■消去する方法

特定のデータの消去

UserDefaults.standard.removeObject(forKey:"キーの名前")

全部のキーを消す

let Domain = Bundle.main.bundoleIdentifier
UserDefaults.standard.removePersistentDomain(forName:Domain!)
  • このエントリーをはてなブックマークに追加
  • Qiitaで続きを読む