- 投稿日:2021-02-20T23:48:47+09:00
[Unity3D] CinemaChineを使用したフォローカメラ設定
1, CinemeChineをインストールする
2, ヒエラルキーにCameraを作成し、TagをMainCameraに設定する
3, CinemachineのCreateVirtualCameraを選択
4, FollowCameraに名前を変更、Followにplayerを設定しBobyがDonothingの状態でカメラを移動して合わせる
5, BodyをFramingTransposerに変更する
6, 各種調整する


- 投稿日:2021-02-20T21:56:40+09:00
[Unity3D] 敵の移動スピードを調整する
1, 下記スクリプトを記述する
Moverusing System.Collections; using System.Collections.Generic; using RPG.Core; using UnityEngine; using UnityEngine.AI; namespace RPG.Movement { public class Mover : MonoBehaviour, IAction { [SerializeField] Transform target; [SerializeField] float maxSpeed = 6f; //追加 NavMeshAgent navMeshAgent; Health health; private void Start() { navMeshAgent = GetComponent<NavMeshAgent>(); health = GetComponent<Health>(); } void Update() { navMeshAgent.enabled = !health.IsDead(); UpdateAnimator(); } public void StartMoveAction(Vector3 destination, float speedFraction) //speedFractionを追加 { GetComponent<ActionScheduler>().StartAction(this); MoveTo(destination, speedFraction); //speedFractionを追加 } public void MoveTo(Vector3 destination, float speedFraction) //speedFractionを追加 { navMeshAgent.destination = destination; navMeshAgent.speed = maxSpeed * Mathf.Clamp01(speedFraction); //追加 navMeshAgent.isStopped = false; } public void Cancel() { navMeshAgent.isStopped = true; } private void UpdateAnimator() { Vector3 velocity = navMeshAgent.velocity; Vector3 localVelocity = transform.InverseTransformDirection(velocity); float speed = localVelocity.z; GetComponent<Animator>().SetFloat("fowardSpeed", speed); } } }AIControllerusing System.Collections; using System.Collections.Generic; using UnityEngine; using RPG.Combat; using RPG.Core; using RPG.Movement; using System; namespace RPG.Control { public class AIController : MonoBehaviour { [SerializeField] float chaseDistance = 5f; [SerializeField] float suspicionTime = 3f; [SerializeField] PatrolPath patrolPath; [SerializeField] float waypointTolerance = 1f; [SerializeField] float waypointDwellTime = 3f; [Range(0,1)] //追加 [SerializeField] float patrolSpeedFraction = 0.2f; //追加 Fighter fighter; Health health; Mover mover; GameObject player; Vector3 guardPosition; float timeSinceLastSawPlayer = Mathf.Infinity; float timeSinceArrivedAtWaypoint = Mathf.Infinity; int currentWeypointIndex = 0; private void Start() { fighter = GetComponent<Fighter>(); health = GetComponent<Health>(); mover = GetComponent<Mover>(); player = GameObject.FindWithTag("Player"); guardPosition = transform.position; } private void Update() { if (health.IsDead()) return; if (InAttackRangeOfPlayer() && fighter.CanAttack(player)) { AttackBehaviour(); } else if (timeSinceLastSawPlayer < suspicionTime) { SuspicionBehaviour(); } else { PatrolBehaviour(); } UpdateTimers(); } private void UpdateTimers() { timeSinceLastSawPlayer += Time.deltaTime; timeSinceArrivedAtWaypoint += Time.deltaTime; } private void PatrolBehaviour() { Vector3 nextPosition = guardPosition; if (patrolPath != null) { if (AtWaypoint()) { timeSinceArrivedAtWaypoint = 0; CycleWaypoint(); } nextPosition = GetCurrentWaypoint(); } if (timeSinceArrivedAtWaypoint > waypointDwellTime) { mover.StartMoveAction(nextPosition, patrolSpeedFraction); //patrolSpeedFractionを追加 } } private bool AtWaypoint() { float distanceToWaypoint = Vector3.Distance(transform.position, GetCurrentWaypoint()); return distanceToWaypoint < waypointTolerance; } private void CycleWaypoint() { currentWeypointIndex = patrolPath.GetNextIndex(currentWeypointIndex); } private Vector3 GetCurrentWaypoint() { return patrolPath.GetWaypoint(currentWeypointIndex); } private void SuspicionBehaviour() { GetComponent<ActionScheduler>().CancelCurrentAction(); } private void AttackBehaviour() { timeSinceLastSawPlayer = 0; fighter.Attack(player); } private bool InAttackRangeOfPlayer() { float distanceToPlayer = Vector3.Distance(player.transform.position, transform.position); return distanceToPlayer < chaseDistance; } private void OnDrawGizmosSelected() { Gizmos.color = Color.blue; Gizmos.DrawWireSphere(transform.position, chaseDistance); } } }PlayerControllerusing UnityEngine; using System.Collections; using RPG.Movement; using System; using RPG.Combat; using RPG.Core; namespace RPG.control { public class PlayerController : MonoBehaviour { Health health; private void Start() { health = GetComponent<Health>(); } private void Update() { if (health.IsDead()) return; if (InteractWithCombat()) return; if (InteractWithMovement()) return; Debug.Log("Nothing to do"); } private bool InteractWithCombat() { RaycastHit[] hits = Physics.RaycastAll(GetMouseRay()); foreach (RaycastHit hit in hits) { CombatTarget target = hit.transform.GetComponent<CombatTarget>(); if (target == null) continue; GameObject targetGameObject = target.gameObject; if (!GetComponent<Fighter>().CanAttack(target.gameObject)) { continue; } if (Input.GetMouseButtonDown(0)) { GetComponent<Fighter>().Attack(target.gameObject); } return true; } return false; } private bool InteractWithMovement() { RaycastHit hit; bool hasHit = Physics.Raycast(GetMouseRay(), out hit); if (hasHit) { if (Input.GetMouseButtonDown(0)) { GetComponent<Mover>().StartMoveAction(hit.point, 1f); //1fを追加 } return true; } return false; } private static Ray GetMouseRay() { return Camera.main.ScreenPointToRay(Input.mousePosition); } } }Fighterusing UnityEngine; using RPG.Movement; using RPG.Core; namespace RPG.Combat { public class Fighter : MonoBehaviour, IAction { [SerializeField] float weaponRange = 2f; [SerializeField] float timeBetweenAttacks = 1f; [SerializeField] float weaponDamage = 5f; Health target; float timeSinceLastAttack = Mathf.Infinity; private void Update() { timeSinceLastAttack += Time.deltaTime; if (target == null) return; if (target.IsDead()) return; if (!GetIsInRange()) { GetComponent<Mover>().MoveTo(target.transform.position, 1f); //1fを追加 } else { GetComponent<Mover>().Cancel(); AttackBehaviour(); } } private void AttackBehaviour() { transform.LookAt(target.transform); if (timeSinceLastAttack > timeBetweenAttacks) { TriggerAttack(); timeSinceLastAttack = 0; } } private void TriggerAttack() { GetComponent<Animator>().ResetTrigger("stopAttack"); GetComponent<Animator>().SetTrigger("attack"); } void Hit() { if(target == null) { return; } target.TakeDamage(weaponDamage); } private bool GetIsInRange() { return Vector3.Distance(transform.position, target.transform.position) < weaponRange; } public bool CanAttack(GameObject combatTarget) { if (combatTarget == null) { return false; } Health targetToTest = combatTarget.GetComponent<Health>(); return targetToTest != null && !targetToTest.IsDead(); } public void Attack(GameObject combatTarget) { GetComponent<ActionScheduler>().StartAction(this); target = combatTarget.GetComponent<Health>(); } public void Cancel() { StopAttack(); target = null; } private void StopAttack() { GetComponent<Animator>().ResetTrigger("attack"); GetComponent<Animator>().SetTrigger("stopAttack"); } } }
- 投稿日:2021-02-20T20:13:32+09:00
[Unity3D] Terrain オブジェクトの配置
1, TerrainのPaintTreeを選択し、EditTreesを選びオブジェクトを選ぶ

- 投稿日:2021-02-20T20:07:30+09:00
[Unity]扉のヒンジを試しに作ってみる
概要
HingeJointを使ってヒンジの動きを作ってみました。(ちなみにサンプル動画にある扉の左右の壁は無くても動かせます)
#Unity #Qiita pic.twitter.com/70NrFcVAPB
— kazuma (@kazuma_f) February 20, 2021本文
扉の形に変形させたCubeに「HingeJoint」をAddComponentします。自動でRigidbodyも付加されます。
設定をいじらなくてもこれだけで扉の動きになってくれます。設定をいじれば横開きの扉や回転扉も作ることができます。おまけ
扉が重くて動かない > RigidbodyのMassを減らすと動いてくれます
扉がパタパタ動き続ける > RigidbodyのDragを適度に増やすと自然にパタパタが止まってくれるようになります
おまけ2
横開きの扉の設定例です。
Axisが扉の動く方向、Anchorがヒンジの位置と考えるとわかりやすいと思います。
EditAngularLimitsの右にあるボタンを押すとSceneビューにヒンジを表すマークが出てくるので各数値を変えながらマークがどう動くか見てみるとイメージが湧いてくると思います。


- 投稿日:2021-02-20T19:42:03+09:00
特殊効果のレンダリングエラーを回避する方法は?
今回の主な話題:特殊効果のレンダリングエラー、Monoメモリリーク、ネットゲーム通信暗号化スキームの設計、ゲームで描画されたマップグリッド線の実現方法など。
レンダリング
Q1: 私たちのプロジェクトでは、黒の特殊効果がテクスチャにレンダリングされる方法が濾過されました。その理由は何ですか? または、この問題を解決できるマテリアルはありますか?
①
レンダリングカメラに背景色の問題があります。RenderTextureを使用してUIを背景として加法マテリアルを正しく描画するには、特別な方法が必要です。
一般的な考え方は、RenderTextureのユーザーが一つのBlendをOne OneMinusSrcAlphaのマテリアルとして使用します。
カメラの背景色はRGB黒で、Alphaは0です。
Additiveと不透明なものは直接描くことができます(Additive Alphaが0の場合には直接添付しますが、不透明が1の場合には直接カバーします)。元のAlphaBlendマテリアルであるブレンドカラーもOneOneMinusSrcAlphaに変更され、RGBにAlphaが乗算されます(Alphaは独自のAlphaであるため、RenderTexture側はDstの色を正しく減衰します)。②
パーティクルエフェクトで使用されるシェーダーでColorMaskRGBが使用されているかどうかを確認します。これにより、Alphaチャネルの情報が書き込まれなくなります。
補足:
前のプロジェクトでも同じ問題が発生し、問題主は返信を続けませんでした。Additiveマテリアルの問題であると思われます。同様の問題が発生した人が参照できるために、プロジェクトで発生した問題と解決策を記録しました。
1)Additiveマテリアルを使用しました。効果は問題主と同じで、濾過されました。
2)特殊効果制作の一部では、パーティクルテクスチャと不透明テクスチャを使用しています。表示したい部分は黒を採用し、背景と重ね合わせて半透明効果を示しています。これをRenderTextureにレンダリングの結果は、正方形になり、テクスチャが黒い部分は背景の色で示しています。実際、この2つの状況では、RenderTextureの透明度チャネル情報に問題があります。1番目の状況では、組み込みのAdditiveでColorMask RGBを使用してAlphaチャネル情報を濾過することです。通常、背景はRGBブラックで、Alphaは0なので、RenderTextureのAlphaチャネル情報は0であり、背景と混合されると濾過されます。2番目の状況では、透明度情報はありません。
RenderTexture効果にレンダリングされた情報は正しくない状況に遭った場合は、EditorのAlphaチャネルモードでRenderTextureのAlphaチャネル情報をチェックして、Alpha情報の書き込みエラーが原因であるかどうかを確認できます。
Alpha情報が間違って書かれていることを知っている場合、それを変更する方法は?
1)特殊効果がカスタマイズしたShaderを使用してAlphaチャネル情報を書き込みます。特殊効果が1層だけ、背景はPGB黒Alpha0の場合には問題ありません。しかし、複数層の特殊効果がある場合は、RenderTextureの最後記録は最後のレンダリングの特殊効果が混合されたAlpha値であり、この値をUIと混合した結果は間違っています。
2)上にある月松さんが言った通りに、RenderTextureをUIと混合する場合、Blend One OneMinusSrcAlpha、こうすればRenderTextureがレンダリングするものが実際にUIの背景に重ねられるように、背景もある程度混合することができます。この方法にも、計算上の違いがあります。特殊効果をレンダリングする通常のブレンド方法とは異なるため、テクスチャの色を調整して正しく表示する必要があります。
3)レンダリングする特殊効果の後にパッチを追加し、UI背景を貼り付けて、特殊効果が背景と正しく混合され、レンダリングされたRenderTextureがUIの背景をカバーできるようにします。これも、私が前のプロジェクトで最後に採用したソリューションであります。
ロジックコード
Q2: フレームワークはC#+ Luaです。私たちのUnityゲームはAndroid端末でますますジャム状況になります。いくつ問題を聞きたいです。
1)Textureオブジェクトを作成しましたが、引用はしません。Destroy関数をコールしていませんが、GCはコールを取り戻すことができますか?
2)AssetBundleで生成されたテクスチャオブジェクトは、Resources.unLoadを使用して正常にクリーンアップできますか?
3)エディタモード。コード内に1000個の新しいテクスチャオブジェクトを周期的に生成し、listも存在しますのに、Profilerに何も変更されていませんのはなぜですか?(エディターのMonoは常に増加していますが、生成した時にも激しく増加したことはありません、ゆっくりと増加しています)
4)ジャムの原因は、メモリが高いではありません。たくさんのオブジェクトが廃棄されておらず、まだUnityに存在して実行されているようです。①
回答は以下になります。
1)テクスチャはGCに行わず、必ず手動で破棄する必要があります。
2)AssetBundle.Unloadを使用してください。
https://docs.unity3d.com/Manual/AssetBundles-Native.html
3)感じだけでは信用できないので、廃棄されていないものが占用しているのもメモリです。②
答えは次のようです。
1)リソース類はGCに行いません。
2)AssetBundle.Unload
3)Profilerが記録したデータはMonoにあるため、Monoが増加し続けるのは正常です。
4)ジャムの場合には、Profilerで実行に時間がかかりすぎる関数を確認できます。
レンダリング
Q3: T4MのShaderに基づいてあるプロジェクトのバージョンを作成しましたが、元のShaderは問題ありませんでしたのに、自分で作成したShaderには、Lightmapが正しくないという問題がありました。
XCodeの実機Profilerで、新作成したShaderのtexcoord0はtexcoord1がbind VBOにあるoffsetと同じであることが見つけられました。つまり、入力されたUVとLightmapUVのデータソースが同じであります。これに影響を与えるのはappdataのみと感じていますが、自分が作成したappdataも簡単です。
struct appdata_t4m
{
float4 vertex : POSITION;
float3 normal : NORMAL;
float2 texcoord : TEXCOORD0;
float2 lightmapUV : TEXCOORD1;
};
そして、strideも正しくないでした。私のappdataによると、データstrideは40(pos + normal + uv0 + uv1 = 4×3 + 4×3 + 4×2 + 4×2 = 40)であるはずですが、見ましたstrideは32だけです。
元のSurfaceバージョンのT4Mに戻す限り、問題はないので、動的ローディングやMeshの問題ではないと感じています。理由はわかりません。
①
T4MのShaderはSurface Shaderであるはずです。自分でSurface Shaderを作成する場合、LightmapはUnityによって自動的に処理されます。VF Shaderを作成したい場合、T4MのShaderでVF Shaderを生成することをお勧めします。生成されたコードを見れば原因がわかるはずです。Unityのデフォルトの静的LightmapにTEXCOORD1が存在し、動的LightmapにTEXCOORD2が存在します。
②
UnityのネイティブShaderから直接コピーすれば、
#ifndef LIGHTMAP_OFF
o.lmap.xy = v.texcoord1.xy * unity_LightmapST.xy + unity_LightmapST.zw;
#ifndef DYNAMICLIGHTMAP_OFF
o.lmap.zw = v.texcoord2.xy * unity_DynamicLightmapST.xy + unity_DynamicLightmapST.zw;
#endif
#endif
③
unity_LightmapSTやunity_DynamicLightmapSTなどのパラメーターの未使用が原因である可能性があります。
レンダリング
Q4:逆水寒庭園のグリッド線を下図のように実現したい。LineRendererで線とGameObjectを一対一描画すると、コストが非常に大きくかかるように感じます。代わりに、自己作成のMeshを使用し、Shaderを使用してグリッド線を描画します。しかし、これら2つのソリューションには、非常に深刻な効果の問題があります。つまり、視野内遠所の線ははっきりしなくなります。カメラの画角が回転するとより厳重です。Unityで次のグリッド効果を実現するには、どのような方法を使用して良好な結果と低コストを実現できますか?
MeshRendererで2番目のマテリアルを追加してみることができます。 マテリアルは、Repeatサンプリングされた正方形Outlineテクスチャを使用し、UV拡大縮小率を調整してそれを解決します。
ロジックコード
Q5: 以前のプロジェクトは簡単なXOR暗号化でしたが、次の新しいプロジェクトではこの部分を統合したいです。インターネットで見つけたほとんどのやり方は一般的なネットワーク通信暗号化スキームの設計であり、特にネットゲーム向けのカスタマイズはありません。みなさんはどうやって実現しますか?ここでの暗号化には、ネットワークメッセージング層のみが含まれ、クライアントとサーバー自体のセキュリティは含まれません(つまり、それらは安全であると仮定します)。
私の疑問は以下になります。
1)皆さんは暗号化を行いましたか? どうして?
私たちは暗号化を行いましたが、「少なくとも暗号化を行います、平文はまだ適切ではありません。probufferなどのバイナリシリアル化スキームでもvalueを解析できます」という考え方があります。暗号化以外には、「クライアントは信頼できない」の原則に守られます。具体的なビジネス通信プロトコルの設計では、クライアントがどのような情報を送信しても、サーバーがだまされないことを保証します(自分に損失はなく、相手にメリットもありません)。2)機密性について、「自己開発の暗号化アルゴリズム」が使用されていますか、それとも標準アルゴリズムですか? どうして?
3)完全性について、保証はありますか? どの方法を使用しましたか?ーー私たちはそれをしませんでした。
4)アンチリプレイについて、保証はありますか? どの方法を使用しましたか?ーー私たちはそれをしませんでした。
現在の暗号化システムで一般的に使用されている方法は、次の図に示すとおりです。この方法に従いましたか? どのコンポーネントを選択しましたか? どのようなカスタマイズをしましたか? どうして?
①
問題主は関する内容をもう十分に了解したと思います〜私たちのプロジェクトについて少しお話しましょうが、私は主にクライアントに関する仕事を働いているので、プロトコル暗号化については特に詳しくないので、参考用情報のみを提供します。
1)暗号化はもちろん必要です…「クライアントは信頼できない」という原則はビジネス層が準拠するものでありますが、この層は最初に人の原因でいくつかの極端な状況の不適切な考慮がつながります。あとは設計上に不具合な場合もあります。
そして私は個人的に、プロトコルの暗号化は不正プラグインの制作の難しさを増すことだと思います。暗号化なしでは、プロトコルは人々にまる見られ、抜け穴が見やすくなります。ロジック的な抜け穴がなくても、直接利益を生まない補助プラグインを作りやすいです。 したがって、プロトコル暗号化を行うことは基本的な専門的な品質だと思います。そうしないと、仲間に笑われ、人前に顔が青くなりやすいです(冗談)。2)標準アルゴリズムをお勧めします。 自社開発アルゴリズムは業界で証明された標準アルゴリズムより優れていないでしょう。
3)完全性とアンチリプレイについては、プロジェクトの時間と余力次第で決めます。余裕があればやる方がいいです。
プロトコル暗号化は、クライアントのチート防止機能に似ており、チーターたちに要求を引き上げます。パッケージをキャプチャできるので、チーターに対して、プロトコルデータはクライアントリソースと同じように簡単に手に入られます。ですから、ある程度の暗号化が必要だと思います。
どの程度に行うについては、コストを考慮次第です。たとえば、基本的なAES暗号化は、実際に70〜80%のチーターを除外できます。ただし、貴方のゲームをチートする商業的な利益は十分に大きい場合、当然により強い上級チーターは参加します。この場合、一般的な暗号化では不十分です。誰でもチーターに直面したくありませんが、誰かが貴方のゲームをチートしたとき、それは貴方のゲームがお金を稼いでいることを意味するかもしれません。
②
ロジックはゲームサーバー上で実行され、BUGはなく、暗号化も必要ありません。 また、他の人がゲームのために補助ツールを開発することは、推奨または許可できることです。または、自有の補助ツールを持参したりします。
たとえば、当社のMMOでは、戦闘部分がサーバー上で実行されています、他の機能も議論する必要はありません。基本的に問題はなく、もうリリースされています。 大事なのはサーバーを検証することです!
UWA Technologyは、モバイル/VRなど様々なゲーム開発者向け、パフォーマンス分析と最適化ソリューション及びコンサルティングサービスを提供している会社でございます。
UWA公式サイト:https://jp.uwa4d.com
UWA公式ブログ:https://blog.jp.uwa4d.com


- 投稿日:2021-02-20T17:29:39+09:00
[Unity初心者向け]画像を使ってシーン移動の演出をつくろう(トランジション)
今回やること
- UnityのuGUI(UI)の機能を使って、フェードイン・フェードアウトの演出を作る。
- そのためにシェーダーを自作する。
トランジションって調べるとよく出てくるuGUIとは? → UnityのUI機能のこと(Canvasなど)。
この機能を応用することで、トランジション(シーン遷移のときの画面演出)が実装できる1。
全体として以下2の記事を参考にした。1. ルール画像の作成
Unityでは、画像素材に対して設定を行うことで黒部分の透明化を行うことができる。α値を操作すれば、グラデーションのように画面が動いて切り替わる効果のトランジション(画面遷移)を作成できる。
今回は以下のような画像(透過なしPNGファイル)をPhotoshopで作成し、Rule01として使用した。以下の画像(Rule01.png)は自作のため使用自由とする。
2. Spriteとしての調整
Assetに入れた状態から、素材をダブルクリックしてInspectorを開く。設定は以下の通り行った。
-Texture TypeをSprite(2D and UI)
-sRGBのチェックボックスをオフ
-Alpha SourceをFrom Gray Scaleに設定
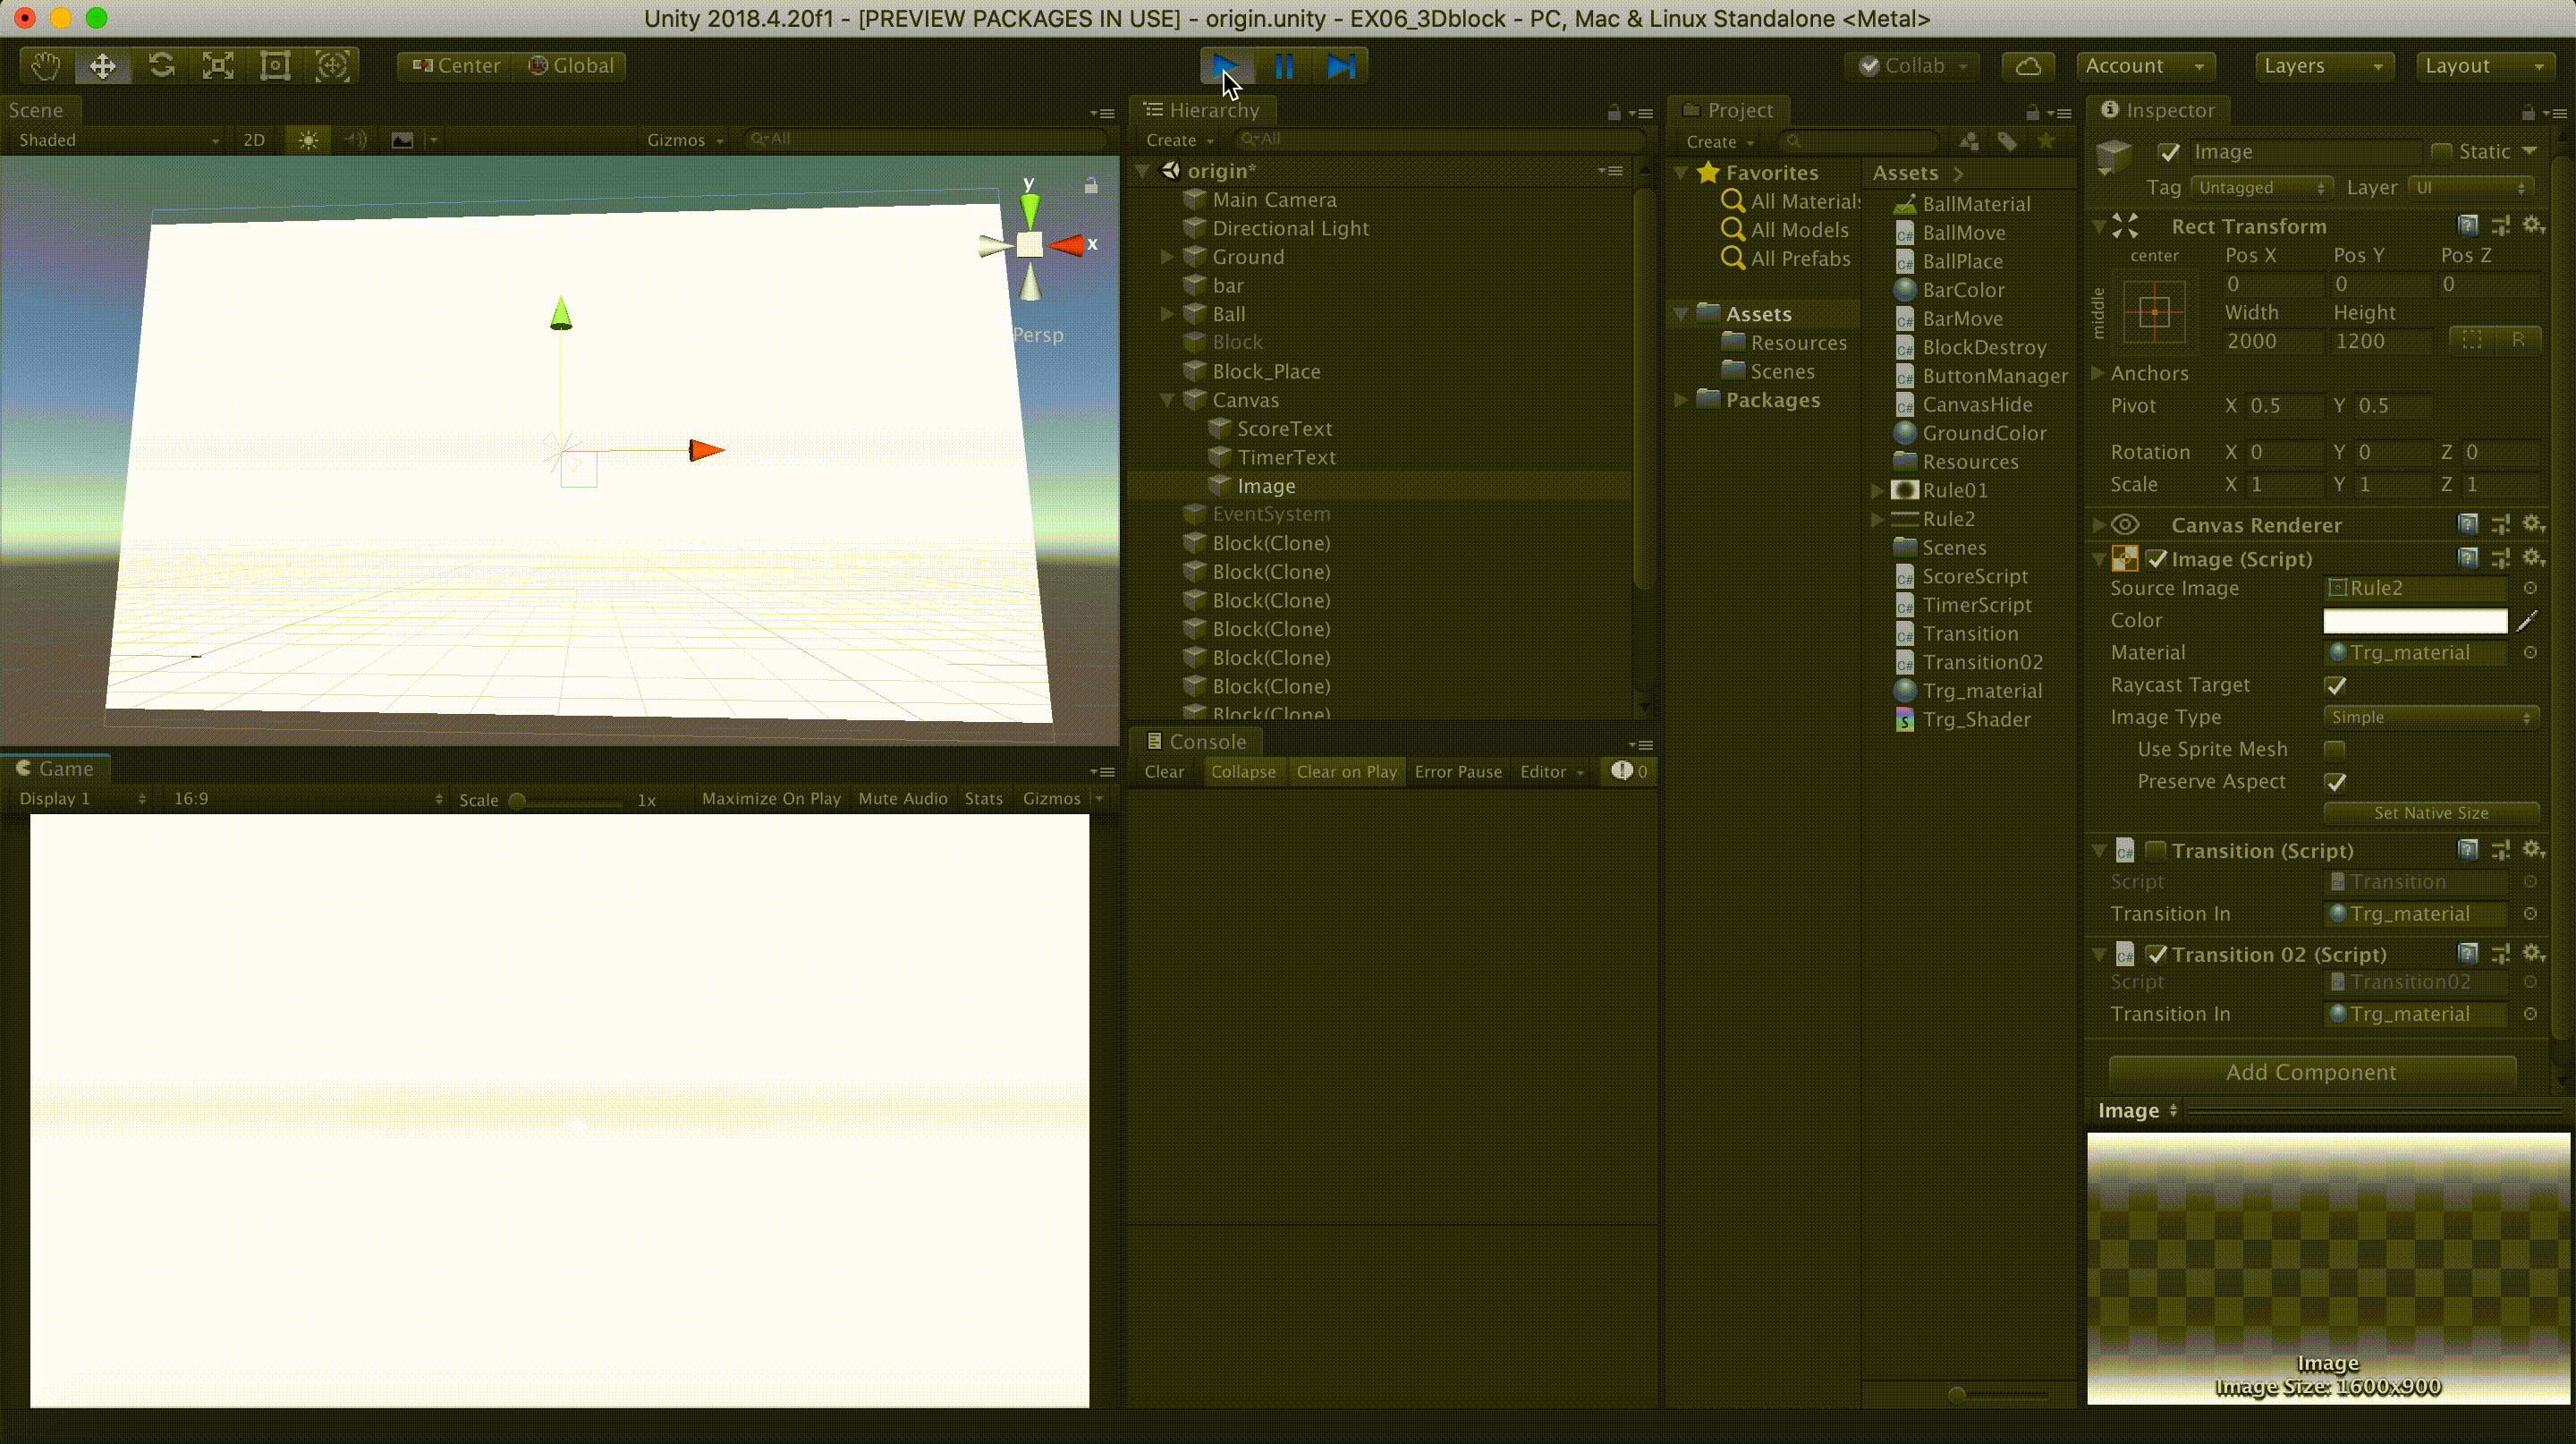
3. Imageの設定
HierarchyからCreate > UI > Imageを選んでオブジェクトを作る- ポジションを(0,0,0)に変更(カメラの中心位置に置かれる)
- Source Imageの中にSprite設定を行った画像をいれる
- Preserve Aspectにチェックを入れ(縦横比を固定できる)、画面におさまるサイズにWidthを変更
参考:Unity Imageに表示する方法: https://www.sejuku.net/blog/56133
4. シェーダーの作成
参考: 【Unity入門】Shaderってなんだ?誰でもわかるシェーダー解説!, 2018, https://www.sejuku.net/blog/66319
シェーダーとは? → テクスチャをどのように表示するかをきめるプログラム
Unityでは、シェーダーはHLSL言語で記述され、UnityのScriptの書き方(C#)とは異なる言語である3。表示させたルール画像をつかってテクスチャの表示方法を決めたいので、シェーダーのプログラム(スクリプト)を書いてImageに反映させます。
4.1 マテリアルの作成
シェーダースクリプトをアタッチするためにはマテリアルが必要なので、トランジション用マテリアルを作成してからImageにアタッチする。
4.2 シェーダースクリプトを作成する
Create>Shader>UnlitShaderでShaderを作成する。※名前注意!
▼注意! shaderの名前を後から変更すると…(間違い探し)
右側に注目。名前がUnlit/NewUnlitShaderになってしまうので、アタッチしようとするときに名前がわかりづらい。作成直後に名前が変更できるときがあるので、ここで変更しておくとよい。
なお、Shaderのスクリプトを変更する際にスクリプト内で名前を変更すれば、こちらのInspector表示上の名前も変わる。名前の不一致に注意。4.3 シェーダースクリプトをアタッチする
マテリアルをInspector画面に表示する。
Shader>Unlit>"Shaderの名前"からアタッチできる。
▼アタッチしたところ。シェーダースクリプトの中身がまだ空なのでただの画像が表示されている。
4.4 シェーダースクリプトの中身(HLSL)の作成
エディタでShaderを表示し、コードを変更して保存する。
UnityのScriptを作ったときと同様に、あらかじめ書き込まれている文章があるが、特にこだわりがなければ以下のコードのコピペで構わない。スクリプトはUnityでトランジション演出を実装する の記事から、
時間によって画像のα値を増減するの項目より引用。※Unityのスクリプト同様、名前に注意すること!"Shaderの名前"Shader "Unlit/Shaderの名前" //ここの名前を変えるのを忘れずに! { Properties { [PerRendererData] _MainTex("Sprite Texture", 2D) = "white" {} _Color("Tint", Color) = (1,1,1,1) _Alpha ("Time", Range(0, 1)) = 0 } SubShader { Tags { "Queue" = "Transparent" "IgnoreProjector" = "True" "RenderType" = "Transparent" "PreviewType" = "Plane" "CanUseSpriteAtlas" = "True" } Cull Off Lighting Off ZWrite Off ZTest[unity_GUIZTestMode] Fog{ Mode Off } Blend SrcAlpha OneMinusSrcAlpha Pass { CGPROGRAM #pragma vertex vert #pragma fragment frag #include "UnityCG.cginc" struct appdata_t { float4 vertex : POSITION; float2 texcoord : TEXCOORD0; }; struct v2f { float4 vertex : SV_POSITION; half2 texcoord : TEXCOORD0; }; fixed4 _Color; fixed _Alpha; sampler2D _MainTex; // 頂点シェーダーの基本 v2f vert(appdata_t IN) { v2f OUT; OUT.vertex = UnityObjectToClipPos(IN.vertex); OUT.texcoord = IN.texcoord; #ifdef UNITY_HALF_TEXEL_OFFSET OUT.vertex.xy += (_ScreenParams.zw - 1.0) * float2(-1,1); #endif return OUT; } // 通常のフラグメントシェーダー fixed4 frag(v2f IN) : SV_Target { half alpha = tex2D(_MainTex, IN.texcoord).a; alpha = saturate(alpha + (_Alpha * 2 - 1)); return fixed4(_Color.r, _Color.g, _Color.b, alpha); } ENDCG } } FallBack "UI/Default" }▼スクリプトを入力したところ。
5. Shaderを動かすスクリプト(C#)の作成
C#スクリプトを作成。
スクリプトはUnityでトランジション演出を実装する の記事から、
時間を制御するスクリプトの項目より引用。▼暗転用C#スクリプト
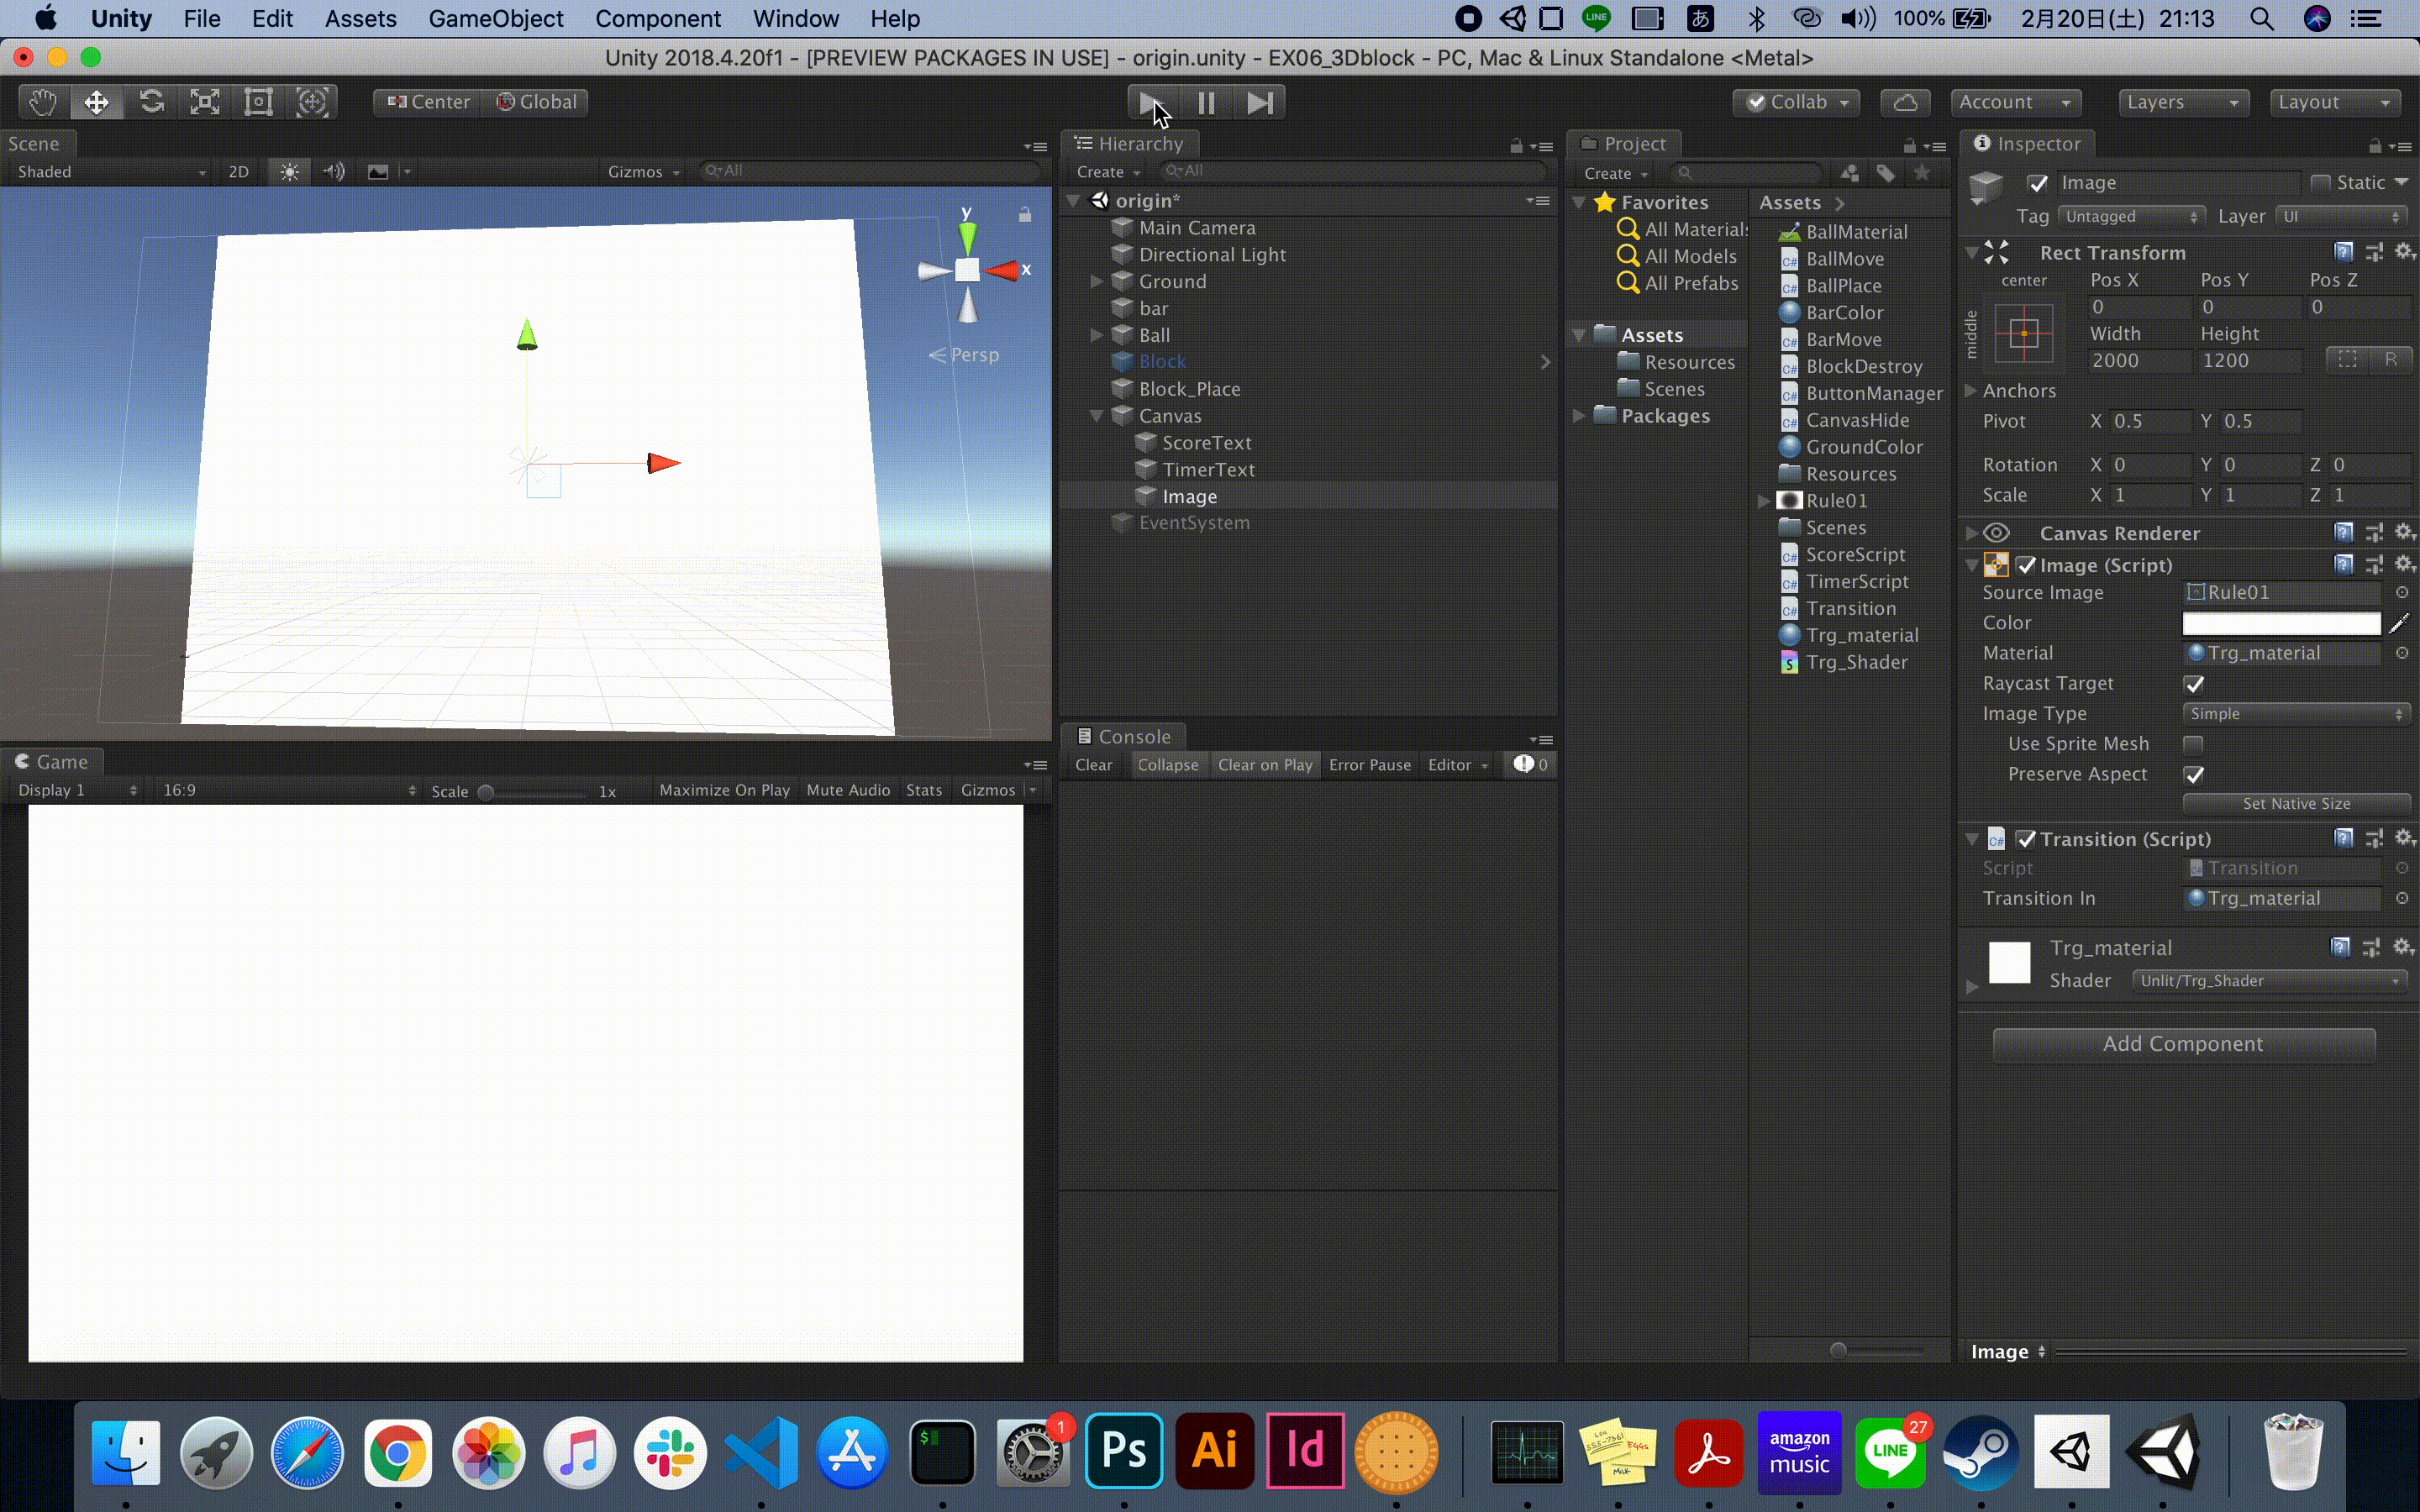
Transition.csusing System.Collections; using UnityEngine; using UnityEngine.Events; using UnityEngine.UI; public class Transition : MonoBehaviour { [SerializeField] private Material _transitionIn; void Start() { StartCoroutine( BeginTransition() ); } IEnumerator BeginTransition() { yield return Animate( _transitionIn, 1 ); } /// <summary> /// time秒かけてトランジションを行う /// </summary> /// <param name="time"></param> /// <returns></returns> IEnumerator Animate(Material material, float time) { GetComponent<Image>().material = material; float current = 0; while (current < time) { material.SetFloat( "_Alpha", current / time ); yield return new WaitForEndOfFrame(); current += Time.deltaTime; } material.SetFloat( "_Alpha", 1 ); } }コピペそのままでは
エラーが出るので、まずオブジェクト(Image)にアタッチしてから、Noneになっている
Transition In変数に、マテリアルをアタッチする。▼スクリプトを入力し、
Transition Inにマテリアルをアタッチしたところ。
動かしてみると→
マテリアルの色で暗転するようになりました。▼明転用C#スクリプト(暗転用と同様に設定)
スクリプトはUnityでトランジション演出を実装する の記事から、
時間を制御するスクリプトの項目を一部改変。Transition02.csusing System.Collections; using UnityEngine; using UnityEngine.Events; using UnityEngine.UI; public class Transition02 : MonoBehaviour { [SerializeField] private Material _transitionIn; void Start() { StartCoroutine( BeginTransition() ); } IEnumerator BeginTransition() { yield return Animate( _transitionIn, 1 ); } /// <summary> /// time秒かけてトランジションを行う /// </summary> /// <param name="time"></param> /// <returns></returns> IEnumerator Animate(Material material, float time) { GetComponent<Image>().material = material; float current = 0; while (current < time) { material.SetFloat( "_Alpha", 1 - current / time ); yield return new WaitForEndOfFrame(); current += Time.deltaTime; } material.SetFloat( "_Alpha", 0 ); } }動かしてみると→
6. 完成・アレンジ
★
マテリアルの色(Tint)を変更すると、明転・暗転の色が変わる。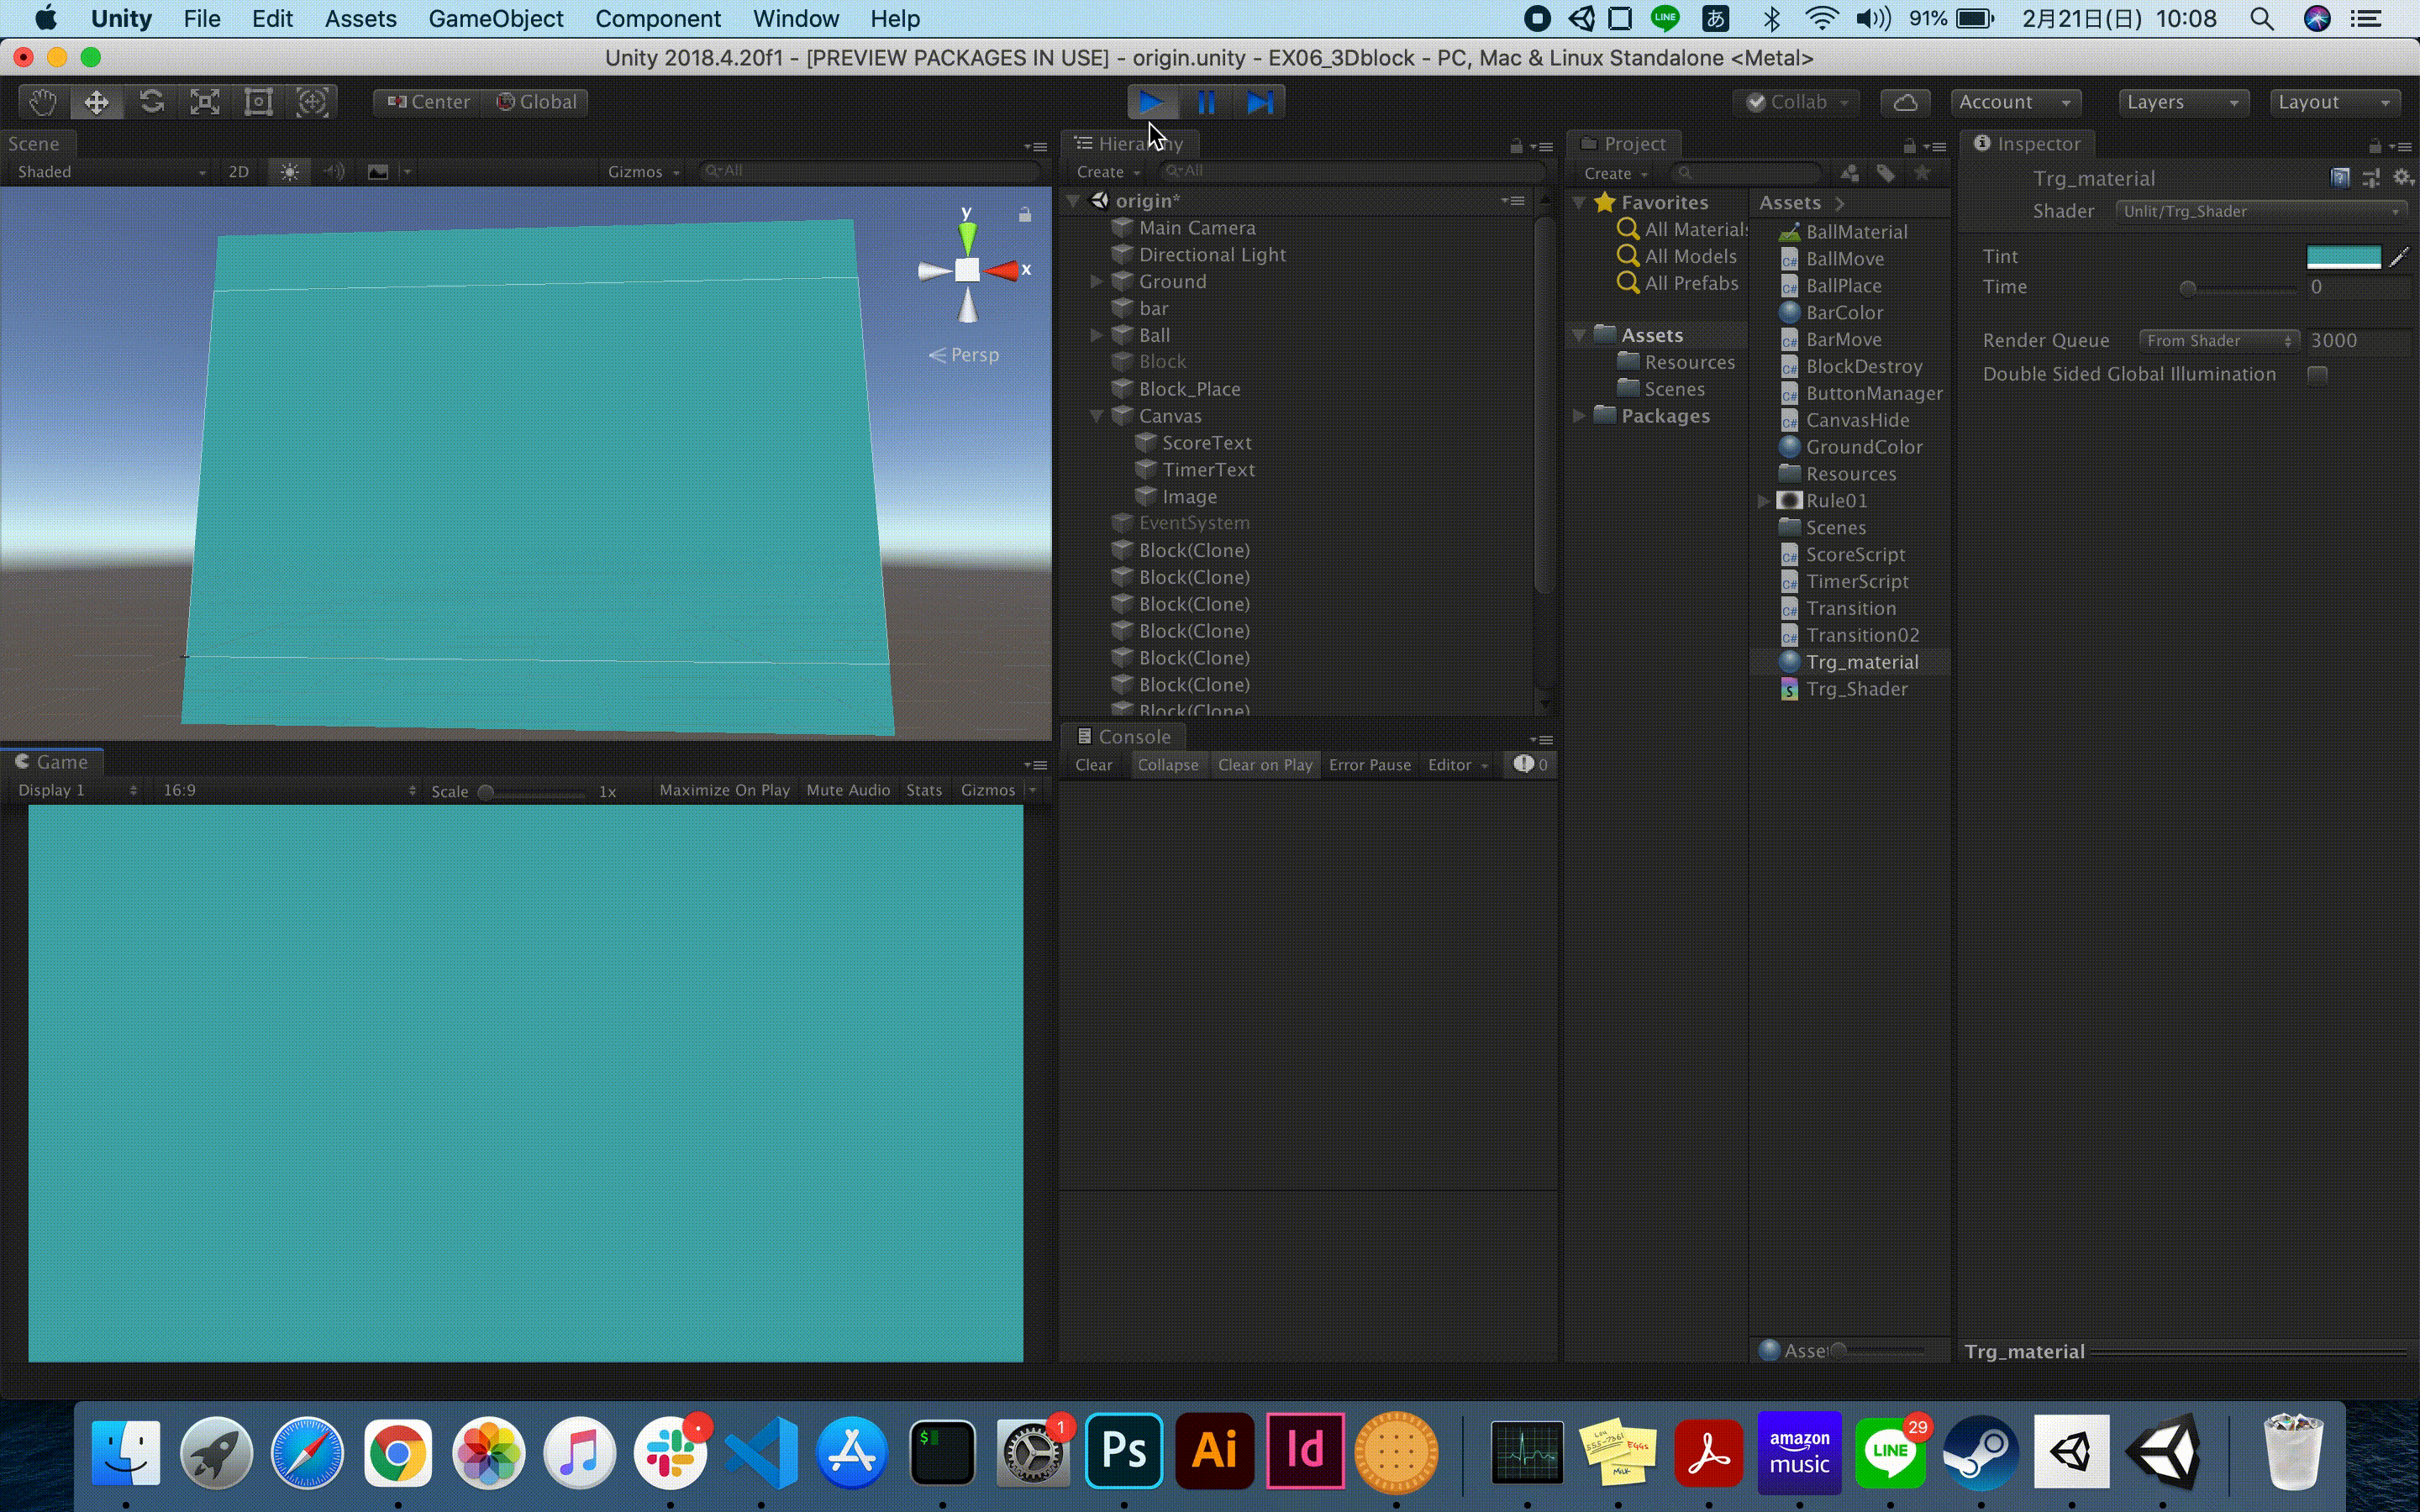
★ルール画像を変更4すれば、いろいろな模様で暗転・明転させることができる。
★このスクリプトのままではStart時にCoroutineが始まってしまうので、Coroutineの開始を適宜調整する。
補記
途中でトランジションのスペル(綴り)がTransitionであることを知りました。やっちまった…
uGUI (UnityのUI機能) の使い方まとめ, 2016, http://mikan-daisuki.hatenablog.com/entry/2016/01/11/175010 ↩
Unityでトランジション演出を実装する,2019, https://blog.cfm-art.net/archives/963 ↩
Unityリファレンス(Unityで使用するシェーダー言語), https://docs.unity3d.com/ja/2018.4/Manual/SL-ShadingLanguage.html ↩
このルール画像を使っています(自作のため使用自由)
↩


- 投稿日:2021-02-20T13:14:11+09:00
[Unity3D] ゲームデザインの作成
1, PCのペイント機能を使いゲームデザインを考えて書き出す
2, aseet内にドラッグする
3, Materialを作成し、Albedoを選択し、ペイント画像を選択する
4, ヒエラルキーにQuadを作成し、sizeを50、50、50に変更する
5, MaterialをQuadにドラッグし、ShaderをUnit→Textureにする


- 投稿日:2021-02-20T12:45:03+09:00
[Unity3D] A Iで敵を動作させる
敵を動かす
1, PlayerにTagを設定する
2, AIControllerを作成し、Enemyにアタッチする
3, 下記スクリプトを書くAIControllerusing System.Collections; using System.Collections.Generic; using UnityEngine; using RPG.Combat; namespace RPG.Control { public class AIController : MonoBehaviour { [SerializeField] float chaseDistance = 5f; Fighter fighter; GameObject player; private void Start() { fighter = GetComponent<Fighter>(); player = GameObject.FindWithTag("Player"); } private void Update() { if (InAttackRangeOfPlayer() && fighter.CanAttack(player)) { fighter.Attack(player); } else { fighter.Cancel(); } } private bool InAttackRangeOfPlayer() { float distanceToPlayer = Vector3.Distance(player.transform.position, transform.position); return distanceToPlayer < chaseDistance; } } }PlayerControllerusing UnityEngine; using System.Collections; using RPG.Movement; using System; using RPG.Combat; namespace RPG.control { public class PlayerController : MonoBehaviour { private void Update() { if (InteractWithCombat()) return; if (InteractWithMovement()) return; Debug.Log("Nothing to do"); } private bool InteractWithCombat() { RaycastHit[] hits = Physics.RaycastAll(GetMouseRay()); foreach (RaycastHit hit in hits) { CombatTarget target = hit.transform.GetComponent<CombatTarget>(); if (target == null) continue; //追加 GameObject targetGameObject = target.gameObject; //追加 if (!GetComponent<Fighter>().CanAttack(target.gameObject)) //target.gameObjectにする { continue; } if (Input.GetMouseButtonDown(0)) { GetComponent<Fighter>().Attack(target.gameObject); //target.gameObjectにする } return true; } return false; } private bool InteractWithMovement() { RaycastHit hit; bool hasHit = Physics.Raycast(GetMouseRay(), out hit); if (hasHit) { if (Input.GetMouseButtonDown(0)) { GetComponent<Mover>().StartMoveAction(hit.point); } return true; } return false; } private static Ray GetMouseRay() { return Camera.main.ScreenPointToRay(Input.mousePosition); } } }Fighterusing UnityEngine; using RPG.Movement; using RPG.Core; namespace RPG.Combat { public class Fighter : MonoBehaviour, IAction { [SerializeField] float weaponRange = 2f; [SerializeField] float timeBetweenAttacks = 1f; [SerializeField] float weaponDamage = 5f; Health target; float timeSinceLastAttack = 0; private void Update() { timeSinceLastAttack += Time.deltaTime; if (target == null) return; if (target.IsDead()) return; if (!GetIsInRange()) { GetComponent<Mover>().MoveTo(target.transform.position); } else { GetComponent<Mover>().Cancel(); AttackBehaviour(); } } private void AttackBehaviour() { transform.LookAt(target.transform); if (timeSinceLastAttack > timeBetweenAttacks) { TriggerAttack(); timeSinceLastAttack = 0; } } private void TriggerAttack() { GetComponent<Animator>().ResetTrigger("stopAttack"); GetComponent<Animator>().SetTrigger("attack"); } void Hit() { if(target == null) { return; } target.TakeDamage(weaponDamage); } private bool GetIsInRange() { return Vector3.Distance(transform.position, target.transform.position) < weaponRange; //追加 } public bool CanAttack(GameObject combatTarget) //gameObjectに変更 { if (combatTarget == null) { return false; } Health targetToTest = combatTarget.GetComponent<Health>(); return targetToTest != null && !targetToTest.IsDead(); } public void Attack(GameObject combatTarget) //gameObjectに変更 { GetComponent<ActionScheduler>().StartAction(this); target = combatTarget.GetComponent<Health>(); } public void Cancel() { StopAttack(); target = null; } private void StopAttack() { GetComponent<Animator>().ResetTrigger("attack"); GetComponent<Animator>().SetTrigger("stopAttack"); } } }Playerが死亡した後に動けるバグ修正
1, Health.csをフォルダCoreに移動
2, 各スクリプトにコードを追加
PlayerControllerusing UnityEngine; using System.Collections; using RPG.Movement; using System; using RPG.Combat; using RPG.Core; //追加 namespace RPG.control { public class PlayerController : MonoBehaviour { Health health; //追加 //追加 private void Start() { health = GetComponent<Health>(); } private void Update() { if (health.IsDead()) return; //追加 if (InteractWithCombat()) return; if (InteractWithMovement()) return; Debug.Log("Nothing to do"); } private bool InteractWithCombat() { RaycastHit[] hits = Physics.RaycastAll(GetMouseRay()); foreach (RaycastHit hit in hits) { CombatTarget target = hit.transform.GetComponent<CombatTarget>(); if (target == null) continue; GameObject targetGameObject = target.gameObject; if (!GetComponent<Fighter>().CanAttack(target.gameObject)) { continue; } if (Input.GetMouseButtonDown(0)) { GetComponent<Fighter>().Attack(target.gameObject); } return true; } return false; } private bool InteractWithMovement() { RaycastHit hit; bool hasHit = Physics.Raycast(GetMouseRay(), out hit); if (hasHit) { if (Input.GetMouseButtonDown(0)) { GetComponent<Mover>().StartMoveAction(hit.point); } return true; } return false; } private static Ray GetMouseRay() { return Camera.main.ScreenPointToRay(Input.mousePosition); } } }Fighterusing UnityEngine; using RPG.Movement; using RPG.Core; namespace RPG.Combat { public class Fighter : MonoBehaviour, IAction { [SerializeField] float weaponRange = 2f; [SerializeField] float timeBetweenAttacks = 1f; [SerializeField] float weaponDamage = 5f; Health target; float timeSinceLastAttack = Mathf.Infinity; //変更 private void Update() { timeSinceLastAttack += Time.deltaTime; if (target == null) return; if (target.IsDead()) return; if (!GetIsInRange()) { GetComponent<Mover>().MoveTo(target.transform.position); } else { GetComponent<Mover>().Cancel(); AttackBehaviour(); } }AIControllerusing System.Collections; using System.Collections.Generic; using UnityEngine; using RPG.Combat; using RPG.Core; //追加 namespace RPG.Control { public class AIController : MonoBehaviour { [SerializeField] float chaseDistance = 5f; Fighter fighter; Health health; //追加 GameObject player; private void Start() { fighter = GetComponent<Fighter>(); health = GetComponent<Health>(); //追加 player = GameObject.FindWithTag("Player"); } private void Update() { if (health.IsDead()) return; //追加 if (InAttackRangeOfPlayer() && fighter.CanAttack(player)) { fighter.Attack(player); } else { fighter.Cancel(); } } private bool InAttackRangeOfPlayer() { float distanceToPlayer = Vector3.Distance(player.transform.position, transform.position); return distanceToPlayer < chaseDistance; } } }Healthusing System.Collections; using System.Collections.Generic; using UnityEngine; namespace RPG.Core { public class Health : MonoBehaviour { [SerializeField] float healthPoints = 100f; bool isDead = false; public bool IsDead() //追加 { return isDead; } public void TakeDamage(float damage) { healthPoints = Mathf.Max(healthPoints - damage, 0); if (healthPoints == 0) { Die(); } } private void Die() { if (isDead) return; isDead = true; GetComponent<Animator>().SetTrigger("die"); GetComponent<ActionScheduler>().CancelCurrentAction(); //追加 } } }Combatusing UnityEngine; using System.Collections; using RPG.Core; //追加 namespace RPG.Combat { [RequireComponent(typeof(Health))] public class CombatTarget : MonoBehaviour { } }ActionSchedulerusing UnityEngine; using System.Collections; namespace RPG.Core { public class ActionScheduler : MonoBehaviour { IAction currentAction; public void StartAction(IAction action) { if (currentAction == action) return; if (currentAction != null) { currentAction.Cancel(); } currentAction = action; } //追加 public void CancelCurrentAction() { StartAction(null); } } }Moverusing System.Collections; using System.Collections.Generic; using RPG.Core; using UnityEngine; using UnityEngine.AI; namespace RPG.Movement { public class Mover : MonoBehaviour, IAction { [SerializeField] Transform target; NavMeshAgent navMeshAgent; Health health; //追加 private void Start() { navMeshAgent = GetComponent<NavMeshAgent>(); health = GetComponent<Health>(); //追加 } void Update() { navMeshAgent.enabled = !health.IsDead(); //追加 UpdateAnimator(); } public void StartMoveAction(Vector3 destination) { GetComponent<ActionScheduler>().StartAction(this); MoveTo(destination); } public void MoveTo(Vector3 destination) { navMeshAgent.destination = destination; navMeshAgent.isStopped = false; } public void Cancel() { navMeshAgent.isStopped = true; } private void UpdateAnimator() { Vector3 velocity = navMeshAgent.velocity; Vector3 localVelocity = transform.InverseTransformDirection(velocity); float speed = localVelocity.z; GetComponent<Animator>().SetFloat("fowardSpeed", speed); } } }敵の動き出す範囲をGizmoで視覚化する
1, AIControllerに下記コードを追加
AIController//Calld by Unity private void OnDrawGizmosSelected() { Gizmos.color = Color.blue; Gizmos.DrawWireSphere(transform.position, chaseDistance); }Gizmosの範囲を外れたら元の位置まで戻らせる
1, 下記のコードを追加
AIControllerusing System.Collections; using System.Collections.Generic; using UnityEngine; using RPG.Combat; using RPG.Core; using RPG.Movement; //追加 namespace RPG.Control { public class AIController : MonoBehaviour { [SerializeField] float chaseDistance = 5f; Fighter fighter; Health health; Mover mover; //追加 GameObject player; Vector3 guardPosition; //追加 private void Start() { fighter = GetComponent<Fighter>(); health = GetComponent<Health>(); mover = GetComponent<Mover>(); //追加 player = GameObject.FindWithTag("Player"); guardPosition = transform.position; //追加 } private void Update() { if (health.IsDead()) return; if (InAttackRangeOfPlayer() && fighter.CanAttack(player)) { fighter.Attack(player); } else { mover.StartMoveAction(guardPosition); //追加 } } private bool InAttackRangeOfPlayer() { float distanceToPlayer = Vector3.Distance(player.transform.position, transform.position); return distanceToPlayer < chaseDistance; } private void OnDrawGizmosSelected() { Gizmos.color = Color.blue; Gizmos.DrawWireSphere(transform.position, chaseDistance); } } }Gizmo範囲を超えると数秒間立ち止まらせる
1, 下記コードを追加する
AIControllerusing System.Collections; using System.Collections.Generic; using UnityEngine; using RPG.Combat; using RPG.Core; using RPG.Movement; namespace RPG.Control { public class AIController : MonoBehaviour { [SerializeField] float chaseDistance = 5f; [SerializeField] float suspicionTime = 3f; // 追加 Fighter fighter; Health health; Mover mover; GameObject player; Vector3 guardPosition; float timeSinceLastSawPlayer = Mathf.Infinity; //追加 private void Start() { fighter = GetComponent<Fighter>(); health = GetComponent<Health>(); mover = GetComponent<Mover>(); player = GameObject.FindWithTag("Player"); guardPosition = transform.position; } private void Update() { if (health.IsDead()) return; if (InAttackRangeOfPlayer() && fighter.CanAttack(player)) { timeSinceLastSawPlayer = 0; //追加 AttackBehaviour(); } // 追加 else if (timeSinceLastSawPlayer < suspicionTime) { //Suspicion state SuspicionBehaviour(); } else { GuardBehaviour(); } timeSinceLastSawPlayer += Time.deltaTime; //追加 } //追加 private void GuardBehaviour() { mover.StartMoveAction(guardPosition); } //追加 private void SuspicionBehaviour() { GetComponent<ActionScheduler>().CancelCurrentAction(); } //追加 private void AttackBehaviour() { fighter.Attack(player); } private bool InAttackRangeOfPlayer() { float distanceToPlayer = Vector3.Distance(player.transform.position, transform.position); return distanceToPlayer < chaseDistance; } private void OnDrawGizmosSelected() { Gizmos.color = Color.blue; Gizmos.DrawWireSphere(transform.position, chaseDistance); } } }敵の歩く道を視覚化する
1, ヒエラルキーでPatrolPathを作成し、WayPort4つ作成して配置する
2, ControlフォルダにPatrolPathスクリプトを作成し、アタッチする
3, 下記コードを記述する
PatrolPathusing System.Collections; using System.Collections.Generic; using UnityEngine; namespace RPG.Control { public class PatrolPath : MonoBehaviour { const float waypointGizmoRadius = 0.3f; private void OnDrawGizmos() { for (int i = 0; i < transform.childCount; i++) { int j = GetNextIndex(i); Gizmos.DrawSphere(GetWaypoint(i), waypointGizmoRadius); Gizmos.DrawLine(GetWaypoint(i), GetWaypoint(j)); } } private int GetNextIndex(int i) { if (i + 1 == transform.childCount) { return 0; } return i + 1; } private Vector3 GetWaypoint(int i) { return transform.GetChild(i).position; } } }このように道を作る
道を歩かせる
1, 下記コードを追加する
AIControllerusing System.Collections; using System.Collections.Generic; using UnityEngine; using RPG.Combat; using RPG.Core; using RPG.Movement; using System; namespace RPG.Control { public class AIController : MonoBehaviour { [SerializeField] float chaseDistance = 5f; [SerializeField] float suspicionTime = 3f; [SerializeField] PatrolPath patrolPath; //追加 [SerializeField] float waypointTolerance = 1f; //追加 Fighter fighter; Health health; Mover mover; GameObject player; Vector3 guardPosition; float timeSinceLastSawPlayer = Mathf.Infinity; int currentWeypointIndex = 0; //追加 private void Start() { fighter = GetComponent<Fighter>(); health = GetComponent<Health>(); mover = GetComponent<Mover>(); player = GameObject.FindWithTag("Player"); guardPosition = transform.position; } private void Update() { if (health.IsDead()) return; if (InAttackRangeOfPlayer() && fighter.CanAttack(player)) { timeSinceLastSawPlayer = 0; AttackBehaviour(); } else if (timeSinceLastSawPlayer < suspicionTime) { SuspicionBehaviour(); } else { PatrolBehaviour(); //変更 } timeSinceLastSawPlayer += Time.deltaTime; } //変更・追加 private void PatrolBehaviour() { Vector3 nextPosition = guardPosition; if (patrolPath != null) { if (AtWaypoint()) { CycleWaypoint(); } nextPosition = GetCurrentWaypoint(); } mover.StartMoveAction(nextPosition); } //追加 private bool AtWaypoint() { float distanceToWaypoint = Vector3.Distance(transform.position, GetCurrentWaypoint()); return distanceToWaypoint < waypointTolerance; } //追加 private void CycleWaypoint() { currentWeypointIndex = patrolPath.GetNextIndex(currentWeypointIndex); } //追加 private Vector3 GetCurrentWaypoint() { return patrolPath.GetWaypoint(currentWeypointIndex); } private void SuspicionBehaviour() { GetComponent<ActionScheduler>().CancelCurrentAction(); } private void AttackBehaviour() { fighter.Attack(player); } private bool InAttackRangeOfPlayer() { float distanceToPlayer = Vector3.Distance(player.transform.position, transform.position); return distanceToPlayer < chaseDistance; } private void OnDrawGizmosSelected() { Gizmos.color = Color.blue; Gizmos.DrawWireSphere(transform.position, chaseDistance); } } }PatrolPathusing System.Collections; using System.Collections.Generic; using UnityEngine; namespace RPG.Control { public class PatrolPath : MonoBehaviour { const float waypointGizmoRadius = 0.3f; private void OnDrawGizmos() { for (int i = 0; i < transform.childCount; i++) { int j = GetNextIndex(i); Gizmos.DrawSphere(GetWaypoint(i), waypointGizmoRadius); Gizmos.DrawLine(GetWaypoint(i), GetWaypoint(j)); } } public int GetNextIndex(int i) //publicに変更 { if (i + 1 == transform.childCount) { return 0; } return i + 1; } public Vector3 GetWaypoint(int i) //publicに変更 { return transform.GetChild(i).position; } } }2, EnemyのAIController→PatrolPathにPatrolPathを設定する
ポイントで数秒待たせる
1, 下記コードを追加する
AIControllerusing System.Collections; using System.Collections.Generic; using UnityEngine; using RPG.Combat; using RPG.Core; using RPG.Movement; using System; namespace RPG.Control { public class AIController : MonoBehaviour { [SerializeField] float chaseDistance = 5f; [SerializeField] float suspicionTime = 3f; [SerializeField] PatrolPath patrolPath; [SerializeField] float waypointTolerance = 1f; [SerializeField] float waypointDwellTime = 3f; //追加 Fighter fighter; Health health; Mover mover; GameObject player; Vector3 guardPosition; float timeSinceLastSawPlayer = Mathf.Infinity; float timeSinceArrivedAtWaypoint = Mathf.Infinity; //追加 int currentWeypointIndex = 0; private void Start() { fighter = GetComponent<Fighter>(); health = GetComponent<Health>(); mover = GetComponent<Mover>(); player = GameObject.FindWithTag("Player"); guardPosition = transform.position; } private void Update() { if (health.IsDead()) return; if (InAttackRangeOfPlayer() && fighter.CanAttack(player)) { AttackBehaviour(); } else if (timeSinceLastSawPlayer < suspicionTime) { SuspicionBehaviour(); } else { PatrolBehaviour(); } UpdateTimers(); //追加 } //追加 private void UpdateTimers() { timeSinceLastSawPlayer += Time.deltaTime; timeSinceArrivedAtWaypoint += Time.deltaTime; } private void PatrolBehaviour() { Vector3 nextPosition = guardPosition; if (patrolPath != null) { if (AtWaypoint()) { timeSinceArrivedAtWaypoint = 0; //追加 CycleWaypoint(); } nextPosition = GetCurrentWaypoint(); } //追加 if (timeSinceArrivedAtWaypoint > waypointDwellTime) { mover.StartMoveAction(nextPosition); } } private bool AtWaypoint() { float distanceToWaypoint = Vector3.Distance(transform.position, GetCurrentWaypoint()); return distanceToWaypoint < waypointTolerance; } private void CycleWaypoint() { currentWeypointIndex = patrolPath.GetNextIndex(currentWeypointIndex); } private Vector3 GetCurrentWaypoint() { return patrolPath.GetWaypoint(currentWeypointIndex); } private void SuspicionBehaviour() { GetComponent<ActionScheduler>().CancelCurrentAction(); } private void AttackBehaviour() { timeSinceLastSawPlayer = 0; //移動 fighter.Attack(player); } private bool InAttackRangeOfPlayer() { float distanceToPlayer = Vector3.Distance(player.transform.position, transform.position); return distanceToPlayer < chaseDistance; } private void OnDrawGizmosSelected() { Gizmos.color = Color.blue; Gizmos.DrawWireSphere(transform.position, chaseDistance); } } }


- 投稿日:2021-02-20T09:02:09+09:00
Unityで行動分析 ~その1:時隔スケジュール編~
1. はじめに
準備編 で作成した Operandum1 の Script を編集して、時隔スケジュールを作成します。基本的なことは準備編で一通り解説しているので、本記事では Operandum1 の Script の解説のみとなります。また、今回も「オペランダムへの反応」→「得点上昇」と「強化オペランダムへの反応」→「得点上昇」の2つの場合を考慮して解説したいと思います。
2. 時隔スケジュールとは
時隔スケジュール(Interval schedule)とは、「1つ前の強化子の提示から一定時間経過後の最初の反応に強化子が随伴する(坂上・井上, 2018, pp.172)」強化スケジュールです。一定時間 ( スケジュール値 ) が固定である場合は固定時隔スケジュール ( Fixed Interval schedule; FI ) 、平均するとスケジュール値になる場合は変動時隔スケジュール ( Variable Interval schedule; VI ) と呼びます。
Unityで作成する場合は、弁別刺激点灯時に限り反応はいつでも受けつけるけれど、スケジュール値 ( x sec ) 経過後でなければ強化子を得られない ( あるいは Ramp が点灯しない ) ようにすれば良いです。時隔スケジュールのイメージ図を下に示します。下図の左は「オペランダムへの反応」→「得点上昇」を、下図の右は「強化オペランダムへの反応」→「得点上昇」を示しています。FIであれば x sec が常に一定となり、VIであれば x sec が毎回変動します。
3. FI
3.1. 「オペランダムへの反応」→「得点上昇」
Script の内容は下記のとおりです。ちなみに、「// New」の下に書かれてあるコードは、準備編の Operandum1 の Script にはなかったコードです。
Operandum1using System.Collections; using System.Collections.Generic; using UnityEngine; using UnityEngine.UI; public class Operandum1_Script : MonoBehaviour { int Point = 1; public GameObject Sd1_off; public GameObject Sd1_on; public Text CountText; public AudioClip PointSE; AudioSource audioSource; //New float time; public float FITime; public AudioClip Operandum1SE; void Start() { audioSource = GetComponent<AudioSource>(); } // New void Update() { if (Sd1_on.activeSelf) { time += Time.deltaTime; if (Input.GetKeyDown(KeyCode.F)) { audioSource.PlayOneShot(Operandum1SE); if (time >= FITime) { audioSource.PlayOneShot(PointSE); CountText.text = "Point : " + Point.ToString(); Point += 1; time = 0 } } } if (Sd1_off.activeSelf) { time = 0; } } }このScriptの流れをざっくり書くと、変数の宣言 → Start() → Update()となります。解説は「// New」と書かれている箇所のみ行います。
変数の宣言
- float time; ... float型の変数 time を宣言
- public float FITime; ... public な float型の変数 FITime を宣言
→ Editor上ではFIのスケジュール値を入れてください- public AudioClip Operandum1SE; ... public な AudioClip として Operandum1SE を宣言
→ Editor上では Operandum1 に反応したときに鳴るSEを入れてくださいUpdate()
- 「if (Sd1_on.activeSelf)」の処理 ... Sd1_on がアクティブな時(弁別刺激点灯時)の処理
- 弁別刺激が点灯したら制限時間をカウントアップ形式で作成
- 「if (Input.GetKeyDown(KeyCode.F))」の処理 ... キーボードのFキーが押されたときの処理
- 効果音( Operandum1SE )が鳴る
- 「if (time >= FITime)」の処理 ... timeがFIのスケジュール値以上になったときの処理
- 効果音( PointSE )が鳴る
- 得点が1点上昇( Point += 1; )
- time を0にリセット
→ 得点が上昇すると時間がリセットされ、もう一度時間を計測しはじめる
→ 弁別刺激が点灯している間、FIが走り続ける3.2. 「強化オペランダムへの反応」→「得点上昇」
Script の内容は下記のとおりです。ちなみに、「// New」の下に書かれてあるコードは、準備編の Operandum1 の Script にはなかったコードです。
Operandum1using System.Collections; using System.Collections.Generic; using UnityEngine; public class Operandum1_Script : MonoBehaviour { public GameObject Sd1_off; public GameObject Sd1_on; public GameObject Ramp_off; public GameObject Ramp_on; public AudioClip Operandum1SE; AudioSource audioSource; GameObject Ramp; Ramp_Script Ramp_Script; //New float time; public float FITime; void ResetTime() { time = 0; } void Start() { audioSource = GetComponent<AudioSource>(); Ramp = GameObject.Find("Ramp"); Ramp_Script = Ramp.GetComponent<Ramp_Script>(); } void Update() { // New_1 if (Sd1_on.activeSelf) { time += Time.deltaTime; if (Input.GetKeyDown(KeyCode.F)) { audioSource.PlayOneShot(Operandum1SE); // New_2 if (time >= FITime) { Ramp_off.SetActive(false); Ramp_on.SetActive(true); Invoke("ResetTime", Ramp_Script.ReinforceableTime); } } } if (Sd1_off.activeSelf) { time = 0; Ramp_off.SetActive(true); Ramp_on.SetActive(false); } } }このScriptの流れをざっくり書くと、変数の宣言 → Start() → Update()となります。解説は「// New」と書かれている箇所のみ行います。
変数の宣言
- float time; ... float型の変数 time を宣言
- public float FITime; ... public な float型の変数 FITime を宣言
→ Editor上ではFIのスケジュール値を入れてくださいUpdate()
- New_1
- 「if (Sd1_on.activeSelf)」の処理 ... Sd1_on がアクティブな時(弁別刺激点灯時)の処理
- 弁別刺激が点灯したら制限時間をカウントアップ形式で作成
- 「if (Input.GetKeyDown(KeyCode.F))」の処理 ... キーボードのFキーが押されたときの処理
- 効果音( Operandum1SE )が鳴る
- New_2
- 「if (time >= FITime)」の処理 ... timeがFIのスケジュール値以上になったときの処理
- Ramp_off を非アクティブ化、Ramp_on をアクティブ化
→ 疑似的に強化可能ランプの点灯を表現- Invoke("ResetTime", Ramp_Script.ReinforceableTime)
→ 強化可能ランプ点灯時から強化可能時間が経過すると、time を0にリセット3. VI
3.1. Pythonで x sec のリストを作成する
VIでは、FIとは異なり、x sec が一定ではなく変動します。この変動した値をUnity上で作成しても良いのですが、先にPythonで x sec のリストを作成してCsv形式で出力しておきます。その後、作成したCsv形式の x sec のリストをUnityで読み込みます。
3.1.1. x sec のリストを作成する関数
x sec のリストを作成する関数は下記のとおりです。環境について、Pythonのバージョンは「Python 3.7.1」で、Jupyter Notebookを使用しています。
Pythonimport numpy as np def variable(value, value_min, value_max, reinforcement): for i in range(100**100): random_ = np.random.randint(value_min, value_max, reinforcement) if random_.mean()==value: variable = random_ break return variable
- forの中の処理
- スケジュール値の範囲 ( value_min から value_max まで ) の乱数(一様分布)を reinforcement 分作成して1次元の行列にする
- 乱数生成については こちら を参照してください
- ifの中の処理
- random_ の平均値がスケジュール値と同じになった場合、variable に random_ を格納
- variable に random_ を格納したらforループを中断
→ スケジュール値の範囲がよほど無茶なものでない限り、100の100乗回のforループは行われない3.1.2. x sec のリストをCsvファイルに出力
Python# 「_」には、value, range_min, range_max, reinforcementの値を入れてください value, range_min, range_max, reinforcement = _, _, _, _ variable = variable(value, range_min, range_max, reinforcement) # 「/」の前にデータの出力先を入れてください np.savetxt('/Variable.csv', variable, delimiter=',')作成したCsvファイルは、Assetの中のResourcesというファイルを作成して、その中に入れます。
3.2. 「オペランダムへの反応」→「得点上昇」
Script の内容は下記のとおりです。ちなみに、「// New」の下に書かれてあるコードは、準備編の Operandum1 の Script にはなかったコードです。
Operandum1using System.Collections; using System.Collections.Generic; using UnityEngine; using UnityEngine.UI; using System.IO; public class Operandum1_Script : MonoBehaviour { int Point = 1; public GameObject Sd1_off; public GameObject Sd1_on; public Text CountText; public AudioClip PointSE; AudioSource audioSource; //New bool first = true; float time; int i; int CsvCounter = 0; private List<string> CsvVariable = new List<string>(); public AudioClip Operandum1SE; void Start() { audioSource = GetComponent<AudioSource>(); //New_1 TextAsset Csv = Resources.Load("Variable") as TextAsset; StringReader reader = new StringReader(Csv.text); while (reader.Peek() != -1) { string line = reader.ReadLine(); string[] values = line.Split(','); // New_2 for (i = 0; i < values.Length; i++) { CsvVariable.Add(values[i]); } } } void Update() { // New_3 if (Sd1_on.activeSelf) { time += Time.deltaTime; if (Input.GetKeyDown(KeyCode.F)) { audioSource.PlayOneShot(Operandum1SE); // New_4 if (first) { if (time >= int.Parse(CsvVariable[CsvCounter])) { audioSource.PlayOneShot(PointSE); CountText.text = "Point : " + Point.ToString(); Point += 1; CsvCounter += 1; time = 0; } } } } if (Sd1_off.activeSelf) { time = 0; } } }このScriptの流れをざっくり書くと、変数の宣言 → Start() → Update()となります。5行目に「using System.IO;」が追加されているので注意してください。解説は「// New」と書かれている箇所のみ行います。
変数の宣言
- bool first = true; ... bool型の変数 first が true であることを宣言
- float time; ... float型の変数 time を宣言
- int i; ... int型の変数 i を宣言
- int CsvCounter = 0; ... int型の変数 CsvCounter が 0 であることを宣言
- private List CsvVariable = new List(); ... string型の List として CsvVariable を宣言
- public AudioClip Operandum1SE; ... public な AudioClip として Operandum1SE を宣言
→ Editor上では Operandum1 に反応したときに鳴るSEを入れてくださいStart()
- New_1
- CsvファイルをUnityに読み込ませる
- こちらの記事 とやっていることは全く同じで、詳しい解説も載っているのでここでは割愛します
- New_2
- 「for (i = 0; i < values.Length; i++)」の処理 ... 取得したCsvファイルの値を List の中に格納する処理
- C# のforループの書き方については こちら を参照してください
Update()
- New_3
- 「if (Sd1_on.activeSelf)」の処理 ... Sd1_on がアクティブな時(弁別刺激点灯時)の処理
- 弁別刺激が点灯したら制限時間をカウントアップ形式で作成
- 「if (Input.GetKeyDown(KeyCode.F))」の処理 ... キーボードのFキーが押されたときの処理
- 効果音( Operandum1SE )が鳴る
- New_4
- 「if (first)」の処理 ... 取得するList内の要素の順番についての処理
- 「if (time >= int.Parse(CsvVariable[CsvCounter]))」の処理 ... timeがVIのスケジュール値以上になったときの処理
- 効果音( PointSE )が鳴る
- 得点が1点上昇( Point += 1; )
- CsvCounterが1つ増加
→ 取得するList内の要素の順番を1つずらす- time を0にリセット
→ 得点が上昇すると時間がリセットされ、もう一度時間を計測しはじめる
→ 弁別刺激が点灯している間、VIが走り続ける3.3. 「強化オペランダムへの反応」→「得点上昇」
Script の内容は下記のとおりです。ちなみに、「// New」の下に書かれてあるコードは、準備編の Operandum1 の Script にはなかったコードです。
Operandum1using System.Collections; using System.Collections.Generic; using UnityEngine; using System.IO; public class Operandum1_Script : MonoBehaviour { public GameObject Sd1_off; public GameObject Sd1_on; public GameObject Ramp_off; public GameObject Ramp_on; public AudioClip Operandum1SE; AudioSource audioSource; GameObject Ramp; Ramp_Script Ramp_Script; //New bool first = true; float time; int i; int CsvCounter = 0; private List<string> CsvVariable = new List<string>(); void ResetTime() { time = 0; first = true; } void Start() { audioSource = GetComponent<AudioSource>(); Ramp = GameObject.Find("Ramp"); Ramp_Script = Ramp.GetComponent<Ramp_Script>(); //New_1 TextAsset Csv = Resources.Load("Variable") as TextAsset; StringReader reader = new StringReader(Csv.text); while (reader.Peek() != -1) { string line = reader.ReadLine(); string[] values = line.Split(','); // New_2 for (i = 0; i < values.Length; i++) { CsvVariable.Add(values[i]); } } } void Update() { // New_3 if (Sd1_on.activeSelf) { time += Time.deltaTime; if (Input.GetKeyDown(KeyCode.F)) { audioSource.PlayOneShot(Operandum1SE); // New_4 if (first) { if (time >= int.Parse(CsvVariable[CsvCounter])) { Ramp_off.SetActive(false); Ramp_on.SetActive(true); CsvCounter += 1; first = false; Invoke("ResetTime", Ramp_Script.ReinforceableTime); } } } if (Sd1_off.activeSelf) { time = 0; Ramp_off.SetActive(true); Ramp_on.SetActive(false); } } } }このScriptの流れをざっくり書くと、変数の宣言 → Start() → Update() → ResetTime()となります。5行目に「using System.IO;」が追加されているので注意してください。また、ResetTime()では「time = 0;」だけではなく「first = true;」も書かれてあるので注意してください。解説は「// New」と書かれている箇所のみ行います。
変数の宣言
- bool first = true; ... bool型の変数 first が true であることを宣言
- float time; ... float型の変数 time を宣言
- int i; ... int型の変数 i を宣言
- int CsvCounter = 0; ... int型の変数 CsvCounter が 0 であることを宣言
- private List CsvVariable = new List(); ... string型の List として CsvVariable を宣言
Start()
- New_1
- CsvファイルをUnityに読み込ませる
- こちらの記事 とやっていることは全く同じで、詳しい解説も載っているのでここでは割愛します
- New_2
- 「for (i = 0; i < values.Length; i++)」の処理 ... 取得したCsvファイルの値を List の中に格納する処理
- C# のforループの書き方については こちら を参照してください
Update()
- New_3
- 「if (Sd1_on.activeSelf)」の処理 ... Sd1_on がアクティブな時(弁別刺激点灯時)の処理
- 弁別刺激が点灯したら制限時間をカウントアップ形式で作成
- 「if (Input.GetKeyDown(KeyCode.F))」の処理 ... キーボードのFキーが押されたときの処理
- 効果音( Operandum1SE )が鳴る
- New_4
- 「if (first)」の処理 ... 取得するList内の要素の順番についての処理
- 「if (time >= int.Parse(CsvVariable[CsvCounter]))」の処理 ... timeがVIのスケジュール値以上になったときの処理
- Ramp_off を非アクティブ化、Ramp_on をアクティブ化
→ 疑似的に強化可能ランプの点灯を表現- CsvCounterが1つ増加
→ 取得するList内の要素の順番を1つずらす- first を false にする → 取得するList内の要素の順番が2つ以上ずれないようにする
- Invoke("ResetTime", Ramp_Script.ReinforceableTime)
→ 強化可能ランプ点灯時から強化可能時間が経過すると、time を0にリセットして、first を true に戻す4. 最後に
「時隔スケジュール(interval schedule)」の中の、「固定時隔スケジュール(Fixed Interval schedule)」と「変動時隔スケジュール(Variable Interval schedule)」をUnityで作る方法の解説を行いました。コードや用語等で間違っている点があれば、ご指摘いただけると幸いです。
参考URL
・NumPy, randomで様々な種類の乱数の配列を生成
https://note.nkmk.me/python-numpy-random/・Unity で CSV ファイルを読み込む方法
https://note.com/macgyverthink/n/n83943f3bad60・【Unity】C#の基本構文『for』
http://kimama-up.net/unity-for/引用文献
坂上 貴之・井上 雅彦 (2018). 行動分析学──行動の科学的理解をめざして── 有斐閣

- 投稿日:2021-02-20T07:40:12+09:00
[Unity]キャラクターへスムーズにカメラを向ける
概要
Quaternion.LookRotationでプレイヤーが対象物を向く角度を得て、Quaternion.Lerpで回転運動の補間をしています。
Qiita用 : キャラクターへスムーズにカメラを向ける#Unity #Qiita pic.twitter.com/BSTBPagYNZ
— kazuma (@kazuma_f) February 19, 2021コードの内容
using UnityEngine;

public class LookAtGameObject : MonoBehaviour
{
    public Transform[] position;
    int targetNumber = 0;
    float rotatePosition = 0f;
    float rotateSpeed = 0.1f;
    Vector3 direction;

    private void Update() {
        if (Input.GetMouseButtonDown(0)) {
            targetNumber++;
            if (targetNumber >= position.Length) targetNumber = 0;
            direction = position[targetNumber].position - transform.position;
            rotatePosition = 0f;
        }

        if (rotatePosition < 1f) {
            rotatePosition += rotateSpeed * Time.deltaTime;
            transform.rotation = Quaternion.Lerp(transform.rotation, Quaternion.LookRotation(direction), rotatePosition);
        }
    }
}
設定
MainCameraをPlayerに持たせます。(MainCameraのTransform各種を0にしてください)LookAtGameObjectをPlayerに貼り付けてInspector内のpositionにカメラを向けたいオブジェクトをドラッグアンドドロップします。
実行
画面をクリックするたびにカメラが対象を次々映し続けます
