- 投稿日:2021-02-20T20:52:17+09:00
C#のみでXAudio2を扱う
ネイティブDLLとか出回ってるラッパーライブラリとかに頼らず、C#だけでかつ自力で何とかサクッとXAudio2を扱えないものかと思ってたが、頑張ったら出来たのでご紹介。
頑張ったところ
大きなポイントは下記。
IXAudio2はCOMインターフェースなので、比較的扱いやすかった。ただXAudio2Createで得られるのがポインタなので、GetTypedObjectForIUnknownで実体に変換して使った。- 一方、
IXAudio2以外のインターフェースがほぼCOMではないので、ポインタから関数テーブルをほじくり出して、使うメソッドだけGetDelegateForFunctionPointerでデリゲートに変換して無理矢理動かした。ちなみにこのやり方だとクラス(インターフェース)のメソッドは、引数の先頭にクラスのインスタンスのポインタを追加する必要がある。静的メソッドだと無くなるのかな。IXAudio2VoiceCallbackはCreateSourceVoiceに継承クラスを丸ごと渡す仕様なので、クラスどうやってネイティブに渡すんだ…詰んだ…と思ったけど、さっきとは逆の発想で、実装側のコールバック関数を職人が1個1個丁寧にデリゲートにしてGetFunctionPointerForDelegateでポインタ化、関数テーブルにまとめてまたポインタ作ってCreateSourceVoiceに恐る恐る渡してみたら何と動いたので勝てば官軍。サンプルコード
- XAudio2.cs … ややこしい処理をラップしてまとめたやつ
- Program.cs … 1秒間音を鳴らすサンプル。コンソールアプリ
※XAudio2.9を使用しているので、Windows 10専用。
※今回使わなかったメソッドはちゃんと定義してない。
※「XAudio2.cs」の中、コメントで大きく囲ってある部分は、Voice系Interfaceの本来の定義の概略。関数テーブルの順番と併記してる数字が対応してる(入れ替わると動かない)ので、今回のサンプルで使ってないメソッドを使いたい場合の参考にしていただければ。
※パッションの赴くまま組んだので、例外処理等一切無かったり、アンマネージ対応が中途半端だったりする。流石にこれはヤバいよってのがあればこっそり教えてください。
※手探りで組んだので、もっと良い方法があったり、そもそも正しいコードかどうかも分からないのでご了承を。XAudio2.csusing System; using System.Runtime.InteropServices; //Guid, InterfaceType, Marshal, DllImport using System.Runtime.Versioning; //SupportedOSPlatform [assembly:SupportedOSPlatform("windows")] namespace XAudio2CS { [StructLayout(LayoutKind.Sequential, Pack = 4)] internal struct WAVEFORMATEX { internal ushort wFormatTag; internal ushort nChannels; internal uint nSamplesPerSec; internal uint nAvgBytesPerSec; internal ushort nBlockAlign; internal ushort wBitsPerSample; internal ushort cbSize; } [StructLayout(LayoutKind.Sequential, Pack = 4)] internal struct XAUDIO2_BUFFER { internal uint Flags; internal uint AudioBytes; internal IntPtr pAudioData; internal uint PlayBegin; internal uint PlayLength; internal uint LoopBegin; internal uint LoopLength; internal uint LoopCount; internal IntPtr pContext; } [Guid("2B02E3CF-2E0B-4ec3-BE45-1B2A3FE7210D"), InterfaceType(ComInterfaceType.InterfaceIsIUnknown)] internal interface IXAudio2 { int RegisterForCallbacks(); //dummy void UnregisterForCallbacks(); //dummy int CreateSourceVoice(out IntPtr ppSourceVoice, WAVEFORMATEX wfex, uint Flags, float MaxFrequencyRatio, IntPtr pCallback, IntPtr pSendList, IntPtr pEffectChain); int CreateSubmixVoice(); //dummy int CreateMasteringVoice(out IntPtr ppMasteringVoice, uint InputChannels, uint InputSampleRate, uint Flags, string szDeviceId, IntPtr pEffectChain, uint StreamCategory); int StartEngine(); //dummy void StopEngine(); //dummy int CommitChanges(); //dummy void GetPerformanceData(); //dummy void SetDebugConfiguration(); //dummy } /* internal interface IXAudio2Voice { void GetVoiceDetails(); //dummy0 int SetOutputVoices(); //dummy1 int SetEffectChain(); //dummy2 int EnableEffect(); //dummy3 int DisableEffect(); //dummy4 void GetEffectState(); //dummy5 int SetEffectParameters(); //dummy6 int GetEffectParameters(); //dummy7 int SetFilterParameters(); //dummy8 void GetFilterParameters(); //dummy9 int SetOutputFilterParameters(); //dummy10 void GetOutputFilterParameters(); //dummy11 int SetVolume(); //dummy12 void GetVolume(); //dummy13 int SetChannelVolumes(); //dummy14 void GetChannelVolumes(); //dummy15 int SetOutputMatrix(); //dummy16 void GetOutputMatrix(); //dummy17 void DestroyVoice(); //dummy18 } internal interface IXAudio2SourceVoice : IXAudio2Voice { int Start(); //dummy19 int Stop(); //dummy20 int SubmitSourceBuffer(); //dummy21 int FlushSourceBuffers(); //dummy22 int Discontinuity(); //dummy23 int ExitLoop(); //dummy24 void GetState(); //dummy25 int SetFrequencyRatio(); //dummy26 void GetFrequencyRatio(); //dummy27 int SetSourceSampleRate(); //dummy28 } internal interface IXAudio2MasteringVoice : IXAudio2Voice { int GetChannelMask(); //dummy19 } */ internal class XAudio2 { internal const uint XAUDIO2_DEFAULT_PROCESSOR = 0x1; internal const ushort WAVE_FORMAT_PCM = 1; private static IXAudio2 xaudio2 = null; internal static int Create(uint Flags = 0, uint XAudio2Processor = XAUDIO2_DEFAULT_PROCESSOR) { if (xaudio2 != null) return -1; var hr = NativeMethods.XAudio2Create(out var pXAudio2, Flags, XAudio2Processor); xaudio2 = (IXAudio2)Marshal.GetTypedObjectForIUnknown(pXAudio2, typeof(IXAudio2)); return hr; } internal static int Release() { if (xaudio2 == null) return -1; var pobj = Marshal.GetIUnknownForObject(xaudio2); var ret = Marshal.Release(pobj); xaudio2 = null; return ret; } internal static int CreateMasteringVoice(out XAudio2MasteringVoice masteringvoice, uint InputChannels = 0, uint InputSampleRate = 0, uint Flags = 0, string szDeviceId = null, IntPtr pEffectChain = default(IntPtr), uint StreamCategory = 6) { var hr = xaudio2.CreateMasteringVoice(out var pmasteringvoice, InputChannels, InputSampleRate, Flags, szDeviceId, pEffectChain, StreamCategory); masteringvoice = new XAudio2MasteringVoice(pmasteringvoice); return hr; } internal static int CreateSourceVoice(out XAudio2SourceVoice sourcevoice, WAVEFORMATEX wfex, uint Flags = 0, float MaxFrequencyRatio = 2.0f, IntPtr pCallback = default(IntPtr), IntPtr pSendList = default(IntPtr), IntPtr pEffectChain = default(IntPtr)) { var hr = xaudio2.CreateSourceVoice(out var psourcevoice, wfex, Flags, MaxFrequencyRatio, pCallback, pSendList, pEffectChain); sourcevoice = new XAudio2SourceVoice(psourcevoice); return hr; } } internal class XAudio2MasteringVoice { private NativeMethods.DestroyVoice _DestroyVoice; private IntPtr m_pmasteringvoice; private IntPtr[] pfuncs = new IntPtr[20]; internal XAudio2MasteringVoice(IntPtr pmasteringvoice) { m_pmasteringvoice = pmasteringvoice; Marshal.Copy(Marshal.ReadIntPtr(pmasteringvoice, 0), pfuncs, 0, pfuncs.Length); _DestroyVoice = Marshal.GetDelegateForFunctionPointer<NativeMethods.DestroyVoice>(pfuncs[18]); } internal void DestroyVoice() { _DestroyVoice(m_pmasteringvoice); } } internal class XAudio2SourceVoice { private NativeMethods.SetVolume _SetVolume; private NativeMethods.DestroyVoice _DestroyVoice; private NativeMethods.Start _Start; private NativeMethods.Stop _Stop; private NativeMethods.SubmitSourceBuffer _SubmitSourceBuffer; private NativeMethods.FlushSourceBuffers _FlushSourceBuffers; private IntPtr m_psourcevoice; private IntPtr[] pfuncs = new IntPtr[29]; internal XAudio2SourceVoice(IntPtr psourcevoice) { m_psourcevoice = psourcevoice; Marshal.Copy(Marshal.ReadIntPtr(psourcevoice, 0), pfuncs, 0, pfuncs.Length); _SetVolume = Marshal.GetDelegateForFunctionPointer<NativeMethods.SetVolume>(pfuncs[12]); _DestroyVoice = Marshal.GetDelegateForFunctionPointer<NativeMethods.DestroyVoice>(pfuncs[18]); _Start = Marshal.GetDelegateForFunctionPointer<NativeMethods.Start>(pfuncs[19]); _Stop = Marshal.GetDelegateForFunctionPointer<NativeMethods.Stop>(pfuncs[20]); _SubmitSourceBuffer = Marshal.GetDelegateForFunctionPointer<NativeMethods.SubmitSourceBuffer>(pfuncs[21]); _FlushSourceBuffers = Marshal.GetDelegateForFunctionPointer<NativeMethods.FlushSourceBuffers>(pfuncs[22]); } internal int SetVolume(float Volume, uint OperationSet = 0) { return (_SetVolume(m_psourcevoice, Volume, OperationSet)); } internal void DestroyVoice() { _DestroyVoice(m_psourcevoice); } internal int Start(uint Flags = 0, uint OperationSet = 0) { return (_Start(m_psourcevoice, Flags, OperationSet)); } internal int Stop(uint Flags = 0, uint OperationSet = 0) { return (_Stop(m_psourcevoice, Flags, OperationSet)); } internal int SubmitSourceBuffer(IntPtr pBuffer, IntPtr pBufferWMA = default(IntPtr)) { return (_SubmitSourceBuffer(m_psourcevoice, pBuffer, pBufferWMA)); } internal int FlushSourceBuffers() { return (_FlushSourceBuffers(m_psourcevoice)); } } internal abstract class XAudio2VoiceCallback { internal IntPtr funcentry { get; } private delegate void dlg_OnVoiceProcessingPassStart(IntPtr self, uint BytesRequired); private delegate void dlg_OnVoiceProcessingPassEnd(IntPtr self); private delegate void dlg_OnStreamEnd(IntPtr self); private delegate void dlg_OnBufferStart(IntPtr self, IntPtr pBufferContext); private delegate void dlg_OnBufferEnd(IntPtr self, IntPtr pBufferContext); private delegate void dlg_OnLoopEnd(IntPtr self, IntPtr pBufferContext); private delegate void dlg_OnVoiceError(IntPtr self, IntPtr pBufferContext, int Error); private IntPtr[] callbackfuncs = new IntPtr[7]; private IntPtr functable; internal XAudio2VoiceCallback() { callbackfuncs[0] = Marshal.GetFunctionPointerForDelegate<dlg_OnVoiceProcessingPassStart>(_OnVoiceProcessingPassStart); callbackfuncs[1] = Marshal.GetFunctionPointerForDelegate<dlg_OnVoiceProcessingPassEnd>(_OnVoiceProcessingPassEnd); callbackfuncs[2] = Marshal.GetFunctionPointerForDelegate<dlg_OnStreamEnd>(_OnStreamEnd); callbackfuncs[3] = Marshal.GetFunctionPointerForDelegate<dlg_OnBufferStart>(_OnBufferStart); callbackfuncs[4] = Marshal.GetFunctionPointerForDelegate<dlg_OnBufferEnd>(_OnBufferEnd); callbackfuncs[5] = Marshal.GetFunctionPointerForDelegate<dlg_OnLoopEnd>(_OnLoopEnd); callbackfuncs[6] = Marshal.GetFunctionPointerForDelegate<dlg_OnVoiceError>(_OnVoiceError); functable = Marshal.AllocCoTaskMem(Marshal.SizeOf<IntPtr>() * callbackfuncs.Length); Marshal.Copy(callbackfuncs, 0, functable, callbackfuncs.Length); funcentry = Marshal.AllocCoTaskMem(Marshal.SizeOf<IntPtr>()); Marshal.WriteIntPtr(funcentry, 0, functable); } internal void Release() { Marshal.FreeCoTaskMem(funcentry); Marshal.FreeCoTaskMem(functable); } private void _OnVoiceProcessingPassStart(IntPtr self, uint BytesRequired) { OnVoiceProcessingPassStart(BytesRequired); } private void _OnVoiceProcessingPassEnd(IntPtr self) { OnVoiceProcessingPassEnd(); } private void _OnStreamEnd(IntPtr self) { OnStreamEnd(); } private void _OnBufferStart(IntPtr self, IntPtr pBufferContext) { OnBufferStart(pBufferContext); } private void _OnBufferEnd(IntPtr self, IntPtr pBufferContext) { OnBufferEnd(pBufferContext); } private void _OnLoopEnd(IntPtr self, IntPtr pBufferContext) { OnLoopEnd(pBufferContext); } private void _OnVoiceError(IntPtr self, IntPtr pBufferContext, int Error) { OnVoiceError(pBufferContext, Error); } internal abstract void OnVoiceProcessingPassStart(uint BytesRequired); internal abstract void OnVoiceProcessingPassEnd(); internal abstract void OnStreamEnd(); internal abstract void OnBufferStart(IntPtr pBufferContext); internal abstract void OnBufferEnd(IntPtr pBufferContext); internal abstract void OnLoopEnd(IntPtr pBufferContext); internal abstract void OnVoiceError(IntPtr pBufferContext, int Error); } internal static class NativeMethods { [DllImport("xaudio2_9.dll")] internal static extern int XAudio2Create(out IntPtr ppXAudio2, uint Flags, uint XAudio2Processor); [UnmanagedFunctionPointer(CallingConvention.ThisCall)] internal delegate int SetVolume(IntPtr self, float Volume, uint OperationSet); [UnmanagedFunctionPointer(CallingConvention.ThisCall)] internal delegate void DestroyVoice(IntPtr self); [UnmanagedFunctionPointer(CallingConvention.ThisCall)] internal delegate int Start(IntPtr self, uint Flags, uint OperationSet); [UnmanagedFunctionPointer(CallingConvention.ThisCall)] internal delegate int Stop(IntPtr self, uint Flags, uint OperationSet); [UnmanagedFunctionPointer(CallingConvention.ThisCall)] internal delegate int SubmitSourceBuffer(IntPtr self, IntPtr pBuffer, IntPtr pBufferWMA); [UnmanagedFunctionPointer(CallingConvention.ThisCall)] internal delegate int FlushSourceBuffers(IntPtr self); } }Program.csusing System; using System.Runtime.InteropServices; //GCHandle using System.Threading; //EventWaitHandle using XAudio2CS; namespace xaudio2test { class Program { private static XAudio2MasteringVoice m_masteringvoice; private static XAudio2SourceVoice m_sourcevoice; private static byte[] wavedata; private static GCHandle gch_wavedata; private static XAUDIO2_BUFFER buf; private static GCHandle gch_buf; private static VoiceCallback m_callback; static void Main(string[] args) { XAudio2.Create(); XAudio2.CreateMasteringVoice(out m_masteringvoice); var wfex = new WAVEFORMATEX(); ushort channels = 2; uint samplerate = 48000; wfex.wFormatTag = XAudio2.WAVE_FORMAT_PCM; wfex.nChannels = channels; wfex.nSamplesPerSec = samplerate; wfex.nBlockAlign = (ushort)((16 / 8) * channels); wfex.nAvgBytesPerSec = samplerate * (uint)((16 / 8) * channels); wfex.wBitsPerSample = 16; m_callback = new VoiceCallback(); XAudio2.CreateSourceVoice(out m_sourcevoice, wfex, 0, 2.0f, m_callback.funcentry); m_sourcevoice.SetVolume(0.2f); m_sourcevoice.Start(); wavedata = new byte[48000 * 2 * 2]; uint uintval; for (var i = 0; i < 48000; ++i) { uintval = (uint)(i % 110) * 595; wavedata[i * 4] = (byte)(uintval & 0xff); wavedata[i * 4 + 1] = (byte)(uintval >> 8); uintval = (uint)(i % 73) * 892; wavedata[i * 4 + 2] = (byte)(uintval & 0xff); wavedata[i * 4 + 3] = (byte)(uintval >> 8); } gch_wavedata = GCHandle.Alloc(wavedata, GCHandleType.Pinned); buf = new XAUDIO2_BUFFER(); buf.pAudioData = gch_wavedata.AddrOfPinnedObject(); buf.AudioBytes = (uint)(wavedata.Length); gch_buf = GCHandle.Alloc(buf, GCHandleType.Pinned); m_sourcevoice.SubmitSourceBuffer(gch_buf.AddrOfPinnedObject()); m_callback.m_event_BufferEnd.WaitOne(); Console.WriteLine("バッファ終了。"); m_sourcevoice.Stop(); m_sourcevoice.FlushSourceBuffers(); gch_buf.Free(); gch_wavedata.Free(); m_sourcevoice.DestroyVoice(); m_callback.Release(); m_masteringvoice.DestroyVoice(); XAudio2.Release(); } } class VoiceCallback : XAudio2VoiceCallback { internal EventWaitHandle m_event_BufferEnd { get; } internal VoiceCallback() { m_event_BufferEnd = new EventWaitHandle(false, EventResetMode.AutoReset); } internal override void OnVoiceProcessingPassStart(uint BytesRequired) {} internal override void OnVoiceProcessingPassEnd() {} internal override void OnStreamEnd() {} internal override void OnBufferStart(IntPtr pBufferContext) {} internal override void OnBufferEnd(IntPtr pBufferContext) { m_event_BufferEnd.Set(); } internal override void OnLoopEnd(IntPtr pBufferContext) {} internal override void OnVoiceError(IntPtr pBufferContext, int Error) {} } }追記
- 実行した途端に左と右から高さの違う音(ノコギリ波)が鳴り始めます。1秒後鳴り止みます。
- いきなり大きな音が出るとビックリすると思ったので、SetVolumeで音量を0.2に絞ってあります。お好みで調整してください。(0:無音 ~ 1:最大)
- WinAPIのWaveOut系関数だとC#でもDllImportするだけで簡単に音鳴らせるけど、それでもXAudio2を使いたい理由としては、複数サウンドを重ねて再生出来る(試してないけど)のと、音量調整がWindowsの音量ミキサーとは独立してること。(
waveOutSetVolumeで音量いじると音量ミキサーのつまみが動いちゃう。)- VSCode上でデバッグで実行すると左スピーカーからしか音が出ないのはオレ環?XAudio2もだし、WaveOut系いじってた時もそうだった。
- 投稿日:2021-02-20T12:25:38+09:00
C# Word フィールドを更新
フィールドはフィールドコードと呼ばれるWordへの命令を文書内に記述するための入れ物です。Wordのフィールドを自由自在に使える方はWord上級者と呼んでも過言ではないと思います。今回はSpire.Docを使ってWord フィールドを更新する方法を紹介します。
下準備
1.E-iceblueの公式サイトからFree Spire.Doc for .NET無料版をダウンロードしてください。
2.Visual Studioを起動して新規プロジェクトを作成してから、インストールされたファイルにあった相応しいSpire.Doc.dllを参照に追加してください。(Net 4.0を例としたら、デフォルトパスは“Bin→NET4.0→Spire.Doc.dll”というようです。)
using Spire.Doc;

namespace ConsoleApplication31
{
    class Program
    {
        static void Main(string[] args)
        {

            Document doc = new Document();

            //ファイルテンプレートをロードします。
            doc.LoadFromFile("リスト.docx");

            //リストのデータに更新します。
            doc.Replace("a.price", "5.5", true, true);
            doc.Replace("b.price", "11.9", true, true);
            doc.Replace("c.price", "5", true, true);
            doc.Replace("a.quantity", "1", true, true);
            doc.Replace("b.quantity", "2", true, true);
            doc.Replace("c.quantity", "4", true, true);

            //フィールドを更新します。
            doc.IsUpdateFields = true;

            //保存します。
            doc.SaveToFile("output.docx", FileFormat.Docx2013);
        }
    }
}
実行結果


- 投稿日:2021-02-20T12:19:19+09:00
C# Wordでフィールドを作成
Spire.Docは下図のように様々なフィールド操作を行うことができます。
今回はSpire.Docを使ってFieldDate(日付),FieldIf及びTOC(目次)といったフィールドの作成する方法を紹介します。
下準備
1.E-iceblueの公式サイトからFree Spire.Doc for .NET無料版をダウンロードしてください。
2.Visual Studioを起動して新規プロジェクトを作成してから、インストールされたファイルにあった相応しいDoc.dllを参照に追加してください。(Net 4.0を例としたら、デフォルトパスは“Bin→NET4.0→Spire.Doc.dll”というようです。)
FieldDate
using Spire.Doc;
using Spire.Doc.Documents;
using Spire.Doc.Fields;

namespace ConsoleApplication31
{
    class Program
    {
        static void Main(string[] args)
        {

            //word objectを作成します。
            Document document = new Document();

            //sectionとparagraphを追加します。
            Section section = document.AddSection();
            Paragraph paragraph = section.AddParagraph();

            //paragraphにテキストを追加します。
            paragraph.AppendText("今日の日付: ");

            //日付フィールドを設定します。
            Field field = paragraph.AppendField("Date", FieldType.FieldData) as Field;
            field.Code = @"DATE  \@" + "\"yyyy年MM月dd日 \"";

            //保存します。
            document.SaveToFile("Sample.docx", FileFormat.Docx2013);


        }
    }
}
FieldIf
IFフィールドを使うと、条件に応じて結果を分けることができます。 (IFフィールドの演算子の後はスペース必要)
{IF 条件 真の場合 偽の場合}
using Spire.Doc;
using Spire.Doc.Documents;
using Spire.Doc.Fields;
using Spire.Doc.Interface;

namespace ConsoleApplication31
{
    class Program
    {
        static void Main(string[] args)
        {


            Document document = new Document();
            Section section = document.AddSection();
            Paragraph paragraph = section.AddParagraph();

            //CreateFieldメソッドを使用して値を指定します。
            CreateIfField(document, paragraph);
            string[] fieldName = { "Count" };
            string[] fieldValue = { "100" };

            //Ifフィールドに値をマージします。
            document.MailMerge.Execute(fieldName, fieldValue);

            //フィールドを更新します。
            document.IsUpdateFields = true;

            //保存します
            document.SaveToFile("sample.docx", FileFormat.Docx);
        }

        static void CreateIfField(Document document, Paragraph paragraph)
        {

            //Ifフィールドを追加して条件を設定します。
            IfField ifField = new IfField(document);
            ifField.Type = FieldType.FieldIf;

            ifField.Code = "IF ";
            paragraph.Items.Add(ifField);
            paragraph.AppendField("Count", FieldType.FieldMergeField);
            paragraph.AppendText(" > ");
            paragraph.AppendText("\"60\" ");
            paragraph.AppendText("\"合格\" ");
            paragraph.AppendText("\"不合格\"");
            IParagraphBase end = document.CreateParagraphItem(ParagraphItemType.FieldMark);
            (end as FieldMark).Type = FieldMarkType.FieldEnd;
            paragraph.Items.Add(end);
            ifField.End = end as FieldMark;
        }
    }
}
TOC
AppendTOC()メソッドで直接にTOCを追加できます。
using Spire.Doc;
using Spire.Doc.Documents;

namespace ConsoleApplication31
{
    class Program
    {
        static void Main(string[] args)
        {
            Document document = new Document();
            Section section = document.AddSection();
            Paragraph paragraph = section.AddParagraph();

            //TOCを追加します
            paragraph.AppendTOC(1, 3);

            //段落にテキストを追加します。
            Paragraph para1 = section.AddParagraph();
            para1.AppendText("Head1");
            para1.ApplyStyle(BuiltinStyle.Heading1);

            Paragraph para2 = section.AddParagraph();
            para2.AppendText("Head2");
            para2.ApplyStyle(BuiltinStyle.Heading2);

            //TOCを更新します
            document.UpdateTableOfContents();

            //保存します
            document.SaveToFile("TOC.docx", FileFormat.Docx);

        }
    }
}


- 投稿日:2021-02-20T09:02:09+09:00
Unityで行動分析 ~その1:時隔スケジュール編~
1. はじめに
準備編 で作成した Operandum1 の Script を編集して、時隔スケジュールを作成します。基本的なことは準備編で一通り解説しているので、本記事では Operandum1 の Script の解説のみとなります。また、今回も「オペランダムへの反応」→「得点上昇」と「強化オペランダムへの反応」→「得点上昇」の2つの場合を考慮して解説したいと思います。
2. 時隔スケジュールとは
時隔スケジュール(Interval schedule)とは、「1つ前の強化子の提示から一定時間経過後の最初の反応に強化子が随伴する(坂上・井上, 2018, pp.172)」強化スケジュールです。一定時間 ( スケジュール値 ) が固定である場合は固定時隔スケジュール ( Fixed Interval schedule; FI ) 、平均するとスケジュール値になる場合は変動時隔スケジュール ( Variable Interval schedule; VI ) と呼びます。
Unityで作成する場合は、弁別刺激点灯時に限り反応はいつでも受けつけるけれど、スケジュール値 ( x sec ) 経過後でなければ強化子を得られない ( あるいは Ramp が点灯しない ) ようにすれば良いです。時隔スケジュールのイメージ図を下に示します。下図の左は「オペランダムへの反応」→「得点上昇」を、下図の右は「強化オペランダムへの反応」→「得点上昇」を示しています。FIであれば x sec が常に一定となり、VIであれば x sec が毎回変動します。
3. FI
3.1. 「オペランダムへの反応」→「得点上昇」
Script の内容は下記のとおりです。ちなみに、「// New」の下に書かれてあるコードは、準備編の Operandum1 の Script にはなかったコードです。
Operandum1using System.Collections; using System.Collections.Generic; using UnityEngine; using UnityEngine.UI; public class Operandum1_Script : MonoBehaviour { int Point = 1; public GameObject Sd1_off; public GameObject Sd1_on; public Text CountText; public AudioClip PointSE; AudioSource audioSource; //New float time; public float FITime; public AudioClip Operandum1SE; void Start() { audioSource = GetComponent<AudioSource>(); } // New void Update() { if (Sd1_on.activeSelf) { time += Time.deltaTime; if (Input.GetKeyDown(KeyCode.F)) { audioSource.PlayOneShot(Operandum1SE); if (time >= FITime) { audioSource.PlayOneShot(PointSE); CountText.text = "Point : " + Point.ToString(); Point += 1; time = 0 } } } if (Sd1_off.activeSelf) { time = 0; } } }このScriptの流れをざっくり書くと、変数の宣言 → Start() → Update()となります。解説は「// New」と書かれている箇所のみ行います。
変数の宣言
- float time; ... float型の変数 time を宣言
- public float FITime; ... public な float型の変数 FITime を宣言
→ Editor上ではFIのスケジュール値を入れてください- public AudioClip Operandum1SE; ... public な AudioClip として Operandum1SE を宣言
→ Editor上では Operandum1 に反応したときに鳴るSEを入れてくださいUpdate()
- 「if (Sd1_on.activeSelf)」の処理 ... Sd1_on がアクティブな時(弁別刺激点灯時)の処理
- 弁別刺激が点灯したら制限時間をカウントアップ形式で作成
- 「if (Input.GetKeyDown(KeyCode.F))」の処理 ... キーボードのFキーが押されたときの処理
- 効果音( Operandum1SE )が鳴る
- 「if (time >= FITime)」の処理 ... timeがFIのスケジュール値以上になったときの処理
- 効果音( PointSE )が鳴る
- 得点が1点上昇( Point += 1; )
- time を0にリセット
→ 得点が上昇すると時間がリセットされ、もう一度時間を計測しはじめる
→ 弁別刺激が点灯している間、FIが走り続ける3.2. 「強化オペランダムへの反応」→「得点上昇」
Script の内容は下記のとおりです。ちなみに、「// New」の下に書かれてあるコードは、準備編の Operandum1 の Script にはなかったコードです。
Operandum1using System.Collections; using System.Collections.Generic; using UnityEngine; public class Operandum1_Script : MonoBehaviour { public GameObject Sd1_off; public GameObject Sd1_on; public GameObject Ramp_off; public GameObject Ramp_on; public AudioClip Operandum1SE; AudioSource audioSource; GameObject Ramp; Ramp_Script Ramp_Script; //New float time; public float FITime; void ResetTime() { time = 0; } void Start() { audioSource = GetComponent<AudioSource>(); Ramp = GameObject.Find("Ramp"); Ramp_Script = Ramp.GetComponent<Ramp_Script>(); } void Update() { // New_1 if (Sd1_on.activeSelf) { time += Time.deltaTime; if (Input.GetKeyDown(KeyCode.F)) { audioSource.PlayOneShot(Operandum1SE); // New_2 if (time >= FITime) { Ramp_off.SetActive(false); Ramp_on.SetActive(true); Invoke("ResetTime", Ramp_Script.ReinforceableTime); } } } if (Sd1_off.activeSelf) { time = 0; Ramp_off.SetActive(true); Ramp_on.SetActive(false); } } }このScriptの流れをざっくり書くと、変数の宣言 → Start() → Update()となります。解説は「// New」と書かれている箇所のみ行います。
変数の宣言
- float time; ... float型の変数 time を宣言
- public float FITime; ... public な float型の変数 FITime を宣言
→ Editor上ではFIのスケジュール値を入れてくださいUpdate()
- New_1
- 「if (Sd1_on.activeSelf)」の処理 ... Sd1_on がアクティブな時(弁別刺激点灯時)の処理
- 弁別刺激が点灯したら制限時間をカウントアップ形式で作成
- 「if (Input.GetKeyDown(KeyCode.F))」の処理 ... キーボードのFキーが押されたときの処理
- 効果音( Operandum1SE )が鳴る
- New_2
- 「if (time >= FITime)」の処理 ... timeがFIのスケジュール値以上になったときの処理
- Ramp_off を非アクティブ化、Ramp_on をアクティブ化
→ 疑似的に強化可能ランプの点灯を表現- Invoke("ResetTime", Ramp_Script.ReinforceableTime)
→ 強化可能ランプ点灯時から強化可能時間が経過すると、time を0にリセット3. VI
3.1. Pythonで x sec のリストを作成する
VIでは、FIとは異なり、x sec が一定ではなく変動します。この変動した値をUnity上で作成しても良いのですが、先にPythonで x sec のリストを作成してCsv形式で出力しておきます。その後、作成したCsv形式の x sec のリストをUnityで読み込みます。
3.1.1. x sec のリストを作成する関数
x sec のリストを作成する関数は下記のとおりです。環境について、Pythonのバージョンは「Python 3.7.1」で、Jupyter Notebookを使用しています。
Pythonimport numpy as np def variable(value, value_min, value_max, reinforcement): for i in range(100**100): random_ = np.random.randint(value_min, value_max, reinforcement) if random_.mean()==value: variable = random_ break return variable
- forの中の処理
- スケジュール値の範囲 ( value_min から value_max まで ) の乱数(一様分布)を reinforcement 分作成して1次元の行列にする
- 乱数生成については こちら を参照してください
- ifの中の処理
- random_ の平均値がスケジュール値と同じになった場合、variable に random_ を格納
- variable に random_ を格納したらforループを中断
→ スケジュール値の範囲がよほど無茶なものでない限り、100の100乗回のforループは行われない3.1.2. x sec のリストをCsvファイルに出力
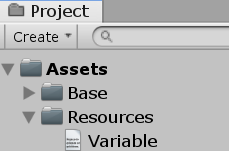
Python# 「_」には、value, range_min, range_max, reinforcementの値を入れてください value, range_min, range_max, reinforcement = _, _, _, _ variable = variable(value, range_min, range_max, reinforcement) # 「/」の前にデータの出力先を入れてください np.savetxt('/Variable.csv', variable, delimiter=',')作成したCsvファイルは、Assetの中のResourcesというファイルを作成して、その中に入れます。
3.2. 「オペランダムへの反応」→「得点上昇」
Script の内容は下記のとおりです。ちなみに、「// New」の下に書かれてあるコードは、準備編の Operandum1 の Script にはなかったコードです。
Operandum1using System.Collections; using System.Collections.Generic; using UnityEngine; using UnityEngine.UI; using System.IO; public class Operandum1_Script : MonoBehaviour { int Point = 1; public GameObject Sd1_off; public GameObject Sd1_on; public Text CountText; public AudioClip PointSE; AudioSource audioSource; //New bool first = true; float time; int i; int CsvCounter = 0; private List<string> CsvVariable = new List<string>(); public AudioClip Operandum1SE; void Start() { audioSource = GetComponent<AudioSource>(); //New_1 TextAsset Csv = Resources.Load("Variable") as TextAsset; StringReader reader = new StringReader(Csv.text); while (reader.Peek() != -1) { string line = reader.ReadLine(); string[] values = line.Split(','); // New_2 for (i = 0; i < values.Length; i++) { CsvVariable.Add(values[i]); } } } void Update() { // New_3 if (Sd1_on.activeSelf) { time += Time.deltaTime; if (Input.GetKeyDown(KeyCode.F)) { audioSource.PlayOneShot(Operandum1SE); // New_4 if (first) { if (time >= int.Parse(CsvVariable[CsvCounter])) { audioSource.PlayOneShot(PointSE); CountText.text = "Point : " + Point.ToString(); Point += 1; CsvCounter += 1; time = 0; } } } } if (Sd1_off.activeSelf) { time = 0; } } }このScriptの流れをざっくり書くと、変数の宣言 → Start() → Update()となります。5行目に「using System.IO;」が追加されているので注意してください。解説は「// New」と書かれている箇所のみ行います。
変数の宣言
- bool first = true; ... bool型の変数 first が true であることを宣言
- float time; ... float型の変数 time を宣言
- int i; ... int型の変数 i を宣言
- int CsvCounter = 0; ... int型の変数 CsvCounter が 0 であることを宣言
- private List CsvVariable = new List(); ... string型の List として CsvVariable を宣言
- public AudioClip Operandum1SE; ... public な AudioClip として Operandum1SE を宣言
→ Editor上では Operandum1 に反応したときに鳴るSEを入れてくださいStart()
- New_1
- CsvファイルをUnityに読み込ませる
- こちらの記事 とやっていることは全く同じで、詳しい解説も載っているのでここでは割愛します
- New_2
- 「for (i = 0; i < values.Length; i++)」の処理 ... 取得したCsvファイルの値を List の中に格納する処理
- C# のforループの書き方については こちら を参照してください
Update()
- New_3
- 「if (Sd1_on.activeSelf)」の処理 ... Sd1_on がアクティブな時(弁別刺激点灯時)の処理
- 弁別刺激が点灯したら制限時間をカウントアップ形式で作成
- 「if (Input.GetKeyDown(KeyCode.F))」の処理 ... キーボードのFキーが押されたときの処理
- 効果音( Operandum1SE )が鳴る
- New_4
- 「if (first)」の処理 ... 取得するList内の要素の順番についての処理
- 「if (time >= int.Parse(CsvVariable[CsvCounter]))」の処理 ... timeがVIのスケジュール値以上になったときの処理
- 効果音( PointSE )が鳴る
- 得点が1点上昇( Point += 1; )
- CsvCounterが1つ増加
→ 取得するList内の要素の順番を1つずらす- time を0にリセット
→ 得点が上昇すると時間がリセットされ、もう一度時間を計測しはじめる
→ 弁別刺激が点灯している間、VIが走り続ける3.3. 「強化オペランダムへの反応」→「得点上昇」
Script の内容は下記のとおりです。ちなみに、「// New」の下に書かれてあるコードは、準備編の Operandum1 の Script にはなかったコードです。
Operandum1using System.Collections; using System.Collections.Generic; using UnityEngine; using System.IO; public class Operandum1_Script : MonoBehaviour { public GameObject Sd1_off; public GameObject Sd1_on; public GameObject Ramp_off; public GameObject Ramp_on; public AudioClip Operandum1SE; AudioSource audioSource; GameObject Ramp; Ramp_Script Ramp_Script; //New bool first = true; float time; int i; int CsvCounter = 0; private List<string> CsvVariable = new List<string>(); void ResetTime() { time = 0; first = true; } void Start() { audioSource = GetComponent<AudioSource>(); Ramp = GameObject.Find("Ramp"); Ramp_Script = Ramp.GetComponent<Ramp_Script>(); //New_1 TextAsset Csv = Resources.Load("Variable") as TextAsset; StringReader reader = new StringReader(Csv.text); while (reader.Peek() != -1) { string line = reader.ReadLine(); string[] values = line.Split(','); // New_2 for (i = 0; i < values.Length; i++) { CsvVariable.Add(values[i]); } } } void Update() { // New_3 if (Sd1_on.activeSelf) { time += Time.deltaTime; if (Input.GetKeyDown(KeyCode.F)) { audioSource.PlayOneShot(Operandum1SE); // New_4 if (first) { if (time >= int.Parse(CsvVariable[CsvCounter])) { Ramp_off.SetActive(false); Ramp_on.SetActive(true); CsvCounter += 1; first = false; Invoke("ResetTime", Ramp_Script.ReinforceableTime); } } } if (Sd1_off.activeSelf) { time = 0; Ramp_off.SetActive(true); Ramp_on.SetActive(false); } } } }このScriptの流れをざっくり書くと、変数の宣言 → Start() → Update() → ResetTime()となります。5行目に「using System.IO;」が追加されているので注意してください。また、ResetTime()では「time = 0;」だけではなく「first = true;」も書かれてあるので注意してください。解説は「// New」と書かれている箇所のみ行います。
変数の宣言
- bool first = true; ... bool型の変数 first が true であることを宣言
- float time; ... float型の変数 time を宣言
- int i; ... int型の変数 i を宣言
- int CsvCounter = 0; ... int型の変数 CsvCounter が 0 であることを宣言
- private List CsvVariable = new List(); ... string型の List として CsvVariable を宣言
Start()
- New_1
- CsvファイルをUnityに読み込ませる
- こちらの記事 とやっていることは全く同じで、詳しい解説も載っているのでここでは割愛します
- New_2
- 「for (i = 0; i < values.Length; i++)」の処理 ... 取得したCsvファイルの値を List の中に格納する処理
- C# のforループの書き方については こちら を参照してください
Update()
- New_3
- 「if (Sd1_on.activeSelf)」の処理 ... Sd1_on がアクティブな時(弁別刺激点灯時)の処理
- 弁別刺激が点灯したら制限時間をカウントアップ形式で作成
- 「if (Input.GetKeyDown(KeyCode.F))」の処理 ... キーボードのFキーが押されたときの処理
- 効果音( Operandum1SE )が鳴る
- New_4
- 「if (first)」の処理 ... 取得するList内の要素の順番についての処理
- 「if (time >= int.Parse(CsvVariable[CsvCounter]))」の処理 ... timeがVIのスケジュール値以上になったときの処理
- Ramp_off を非アクティブ化、Ramp_on をアクティブ化
→ 疑似的に強化可能ランプの点灯を表現- CsvCounterが1つ増加
→ 取得するList内の要素の順番を1つずらす- first を false にする → 取得するList内の要素の順番が2つ以上ずれないようにする
- Invoke("ResetTime", Ramp_Script.ReinforceableTime)
→ 強化可能ランプ点灯時から強化可能時間が経過すると、time を0にリセットして、first を true に戻す4. 最後に
「時隔スケジュール(interval schedule)」の中の、「固定時隔スケジュール(Fixed Interval schedule)」と「変動時隔スケジュール(Variable Interval schedule)」をUnityで作る方法の解説を行いました。コードや用語等で間違っている点があれば、ご指摘いただけると幸いです。
参考URL
・NumPy, randomで様々な種類の乱数の配列を生成
https://note.nkmk.me/python-numpy-random/・Unity で CSV ファイルを読み込む方法
https://note.com/macgyverthink/n/n83943f3bad60・【Unity】C#の基本構文『for』
http://kimama-up.net/unity-for/引用文献
坂上 貴之・井上 雅彦 (2018). 行動分析学──行動の科学的理解をめざして── 有斐閣

- 投稿日:2021-02-20T00:25:43+09:00
[C#] event/delegateを使って、他のclassに、自分のメソッドに欲しい値を載せて良いタイミングで実行してもらう
もくじ
https://qiita.com/tera1707/items/4fda73d86eded283ec4fやりたいこと
画面(View/ViewModel)側に、例えば何かのセンサの値を取ってきてくれる奴ら(Model)が値を渡すときに、そのModelのプロパティを定期的に見るようなやり方ではなく、ViewModelが用意したメソッドを、Model側が、値が変化したタイミングで呼んでくれるようなそういうカッコイイ(?)のをやってみたい。
やったこと
C#のデリゲート(delegate)/イベント(event)を使う。
下記のページを参考にさせて頂き、いろいろと試した。参考ページ(++C++)
- イベント
- デリゲート
- イベントの注意点など
実験コード
画面は、ボタンが一個だけ配置されたものを作って、押したときに
Button_Clickを通るようにした。上に挙げた参考ページの方でも書かれているが、イベントが発生するほうを「発生側」、そのイベントのデータをもらうほうを「受取側」と呼ぶようにする。
下のサンプルでいうと、
- TestClass:イベントの「発生側」
- MainWindow:イベントの「受取側」
という位置づけになる。
using System;
using System.Diagnostics;
using System.Windows;

namespace WpfApp62
{
    public partial class MainWindow : Window
    {
        public MainWindow() => InitializeComponent();

        // 「呼出側」クラスの中の、実際に呼び出すヤツ
        private void Button_Click(object sender, RoutedEventArgs e)
        {
            var c = new TestClass();

            c.myDelegate += func1;  // デリゲートの登録
            c.myAction += func1;    // アクション(デリゲート)
            c.myEvent += func1;     // イベントの登録

            c.doFunc(null);
        }

        // 呼出側が、発生側のクラスに登録するメソッド
        private void func1(string txt) => Debug.WriteLine(txt);
    }

    // 「発生側」のクラス
    public class TestClass
    {
        // デリゲートを登録
        public delegate void TestDelegate(string txt);
        public TestDelegate myDelegate;

        // イベントを登録
        public event TestDelegate myEvent;

        // Actionもデリゲートなので、eventにできる
        public event Action<string> myAction;

        // 登録したイベント/デリゲートを読んでみるメソッド
        public void doFunc(TestDelegate func)
        {
            myDelegate?.Invoke("デリゲートです");
            myAction?.Invoke("アクションです");
            myEvent?.Invoke("イベントです");
        }
    }
}
今回は簡単に実験するために、発生側のデリゲートやイベントを呼ぶメソッドを、画面側で直接呼んでしまっているが、本当は、発生側のクラスで、例えばセンサの値が取れた!というタイミングでデリゲートやイベントを呼ぶはず。
概要
デリゲートやイベントは、受取側(ViewとかViewModel)側が、発生側クラス(Model)でイベントが起きたときに、そのイベントの値を使って、自分のメソッドを実行できるようにするもの、と理解した。
例えば、センサの値が変化したときに、Viewが画面上のテキストボックスに出した数字を更新したい、という場合は、
- View/ViewModelは、引数で受けた値を使ってテキストボックスの値を更新する、というメソッドを作っておく
- View/ViewModelは、Modelのイベントorデリゲートに、そのメソッドを登録する
- Modelは、所望の事象が発生したときに、所望の値を引数に渡して、View/ViewModelのメソッドを呼ぶ
ということをする。
例えば、温度センサの値を取ってくれるModelに、温度の値を表示するView/ViewModelのメソッドを登録する場合だと、
// View/ViewModelが用意するメソッド
private void OnSensorDataReceived(int temperature)
{
    textbox1.Text = temperature.ToString();
}
というメソッドをView/ViewModelが用意したら、そいつを
// 温度更新時に読んでほしいメソッドをModelに登録
sensorModel.OnSensorDataReceived += OnSensorDataReceived;
みたいな感じで登録しておくと、データが更新されたら
OnSensorDataReceivedを呼んでもらえるイメージ。メモ
いろいろやってみて、自分でこうなんだなと理解した内容をメモ。
〇 イベント(event)は・・・
- 「=」で登録(代入)はできない。
- 「+=」を使って、登録ができる。
- 「-=」を使って、登録した処理を解除できる。
- 登録した数だけ解除すると、イベントはnullに戻る。
- ただし、解除には、登録したときと同じもの(メソッド)を渡さないといけないので、ラムダ式が使えない。
- 解除しないまま受け取り側の方が破棄などされた場合、発生側が受取側への参照をもったままになり、メモリリークになってしまう。
- ただ、そうなる可能性がある、という話で、それ自体が悪い、イベントの仕組みが悪い、と言っているわけではない。ちゃんと解除できるのであればOK。
- 「+=」をした回数以上に「-=」をしても、例外になったりはしない。
- むしろ、登録の際、まず一旦「-=」をしてから「+=」する、というコードをよく見る。これは、間違って2回登録されたら困るときにそのようにしてる様子。
ただそんなことするならeventを使わずdelegateにすれば良いのではと思う。(発生側を作った人は別に何個登録されてもいいが、使う側(受取側)の都合でそうしているのだろうと思う)- 受取側の方で「-=」と「+=」以外の操作はできない。例えば、イベントにすでに+=で登録済みかどうかをチェックしたくなっても、
if (c.myEvent != null)とかはできない。(コンパイルエラーになる)〇 デリゲート(delegate)は・・・
- 「=」で登録(代入)ができる。
- 「+=」を使って、登録ができる。
- 「-=」を使って、登録した処理を解除できる。
- 「=」で代入したら、それまでに「+=」したものは全部消えて代入したものだけになる。
- 登録した数だけ解除すると、デリゲートはnullに戻る。
- 「-=」しすぎても別にいい、「-=」には同じものを渡す必要あり、などはイベントと同じ。
- イベントと異なり、受取側の方で「-=」と「+=」以外の操作もできる。
if (c.myEvent != null)とかもできる。- 個人的によく使う「Action」とか「Func」とかは、実はdelegateのジェネリクス版。
「namespace System」の中で、public delegate void Action(T1 arg1, T2 arg2); で定義されてる。
- だから、Actionにも「+=」「-=」で登録/解除することができる。