- 投稿日:2019-05-21T22:08:31+09:00
GAN, DCGAN, ConditionalGANを実装してみたった
GAN, DCGAN, ConditionalGANを Pytorch, Chainer, Kerasで実装してみました!(今更だけど)
実装の仕方は我流かもしれないです?
cifar10、MNISTで試してだいたい成功?してます
https://github.com/yoyoyo-yo/DeepLearningMugenKnock
の「画像生成編」に入れてます。
試してみてください!!
ConditionalGANはDCGANで生成したい画像のラベルをこちら側が指定できるようにしたものです!(それぞれの詳しい説明は「画像生成編」のREADMEに書いてます)
これから他のGANとTensorFlow実装をやります(やるとは言ってない
- 投稿日:2019-05-21T01:03:21+09:00
ロジスティック回帰 [TensorFlow2.0でDeep Learning 1]
(目次はこちら)
はじめに
ロジスティック回帰 [TensorFlowでDeep Learning 1]をtensorflow2.0で実現するためにはどうしたらいいのかを書く。
方法
tf_upgrade_v2
- 1系からの暫定的な移行用としか思えない
tf.keras
- 間違いない
コード
ロジスティック回帰 [TensorFlowでDeep Learning 1] (mnist_logistic.py)を書き換えると、
v2/mnist_logistic.pyfrom helper import * IMAGE_SIZE = 28 * 28 CATEGORY_NUM = 1 LEARNING_RATE = 0.1 EPOCHS = 20 BATCH_SIZE = 100 LOG_DIR = 'log_logistic' EPS = 1e-10 def loss_fn(y_true, y): y = tf.clip_by_value(y, EPS, 1.0 + EPS) return -tf.reduce_mean(y_true * tf.math.log(y) + (1 - y_true) * tf.math.log(1 - y)) class LR(tf.keras.layers.Layer): def __init__(self, units, *args, **kwargs): super().__init__(*args, **kwargs) self.units = units def build(self, input_shape): input_dim = int(input_shape[-1]) self.W = self.add_weight( name='weight', shape=(input_dim, self.units), initializer=tf.keras.initializers.TruncatedNormal(stddev=0.1), ) self.b = self.add_weight( name='bias', shape=(self.units,), initializer=tf.keras.initializers.Constant(0.1), ) self.built = True def call(self, x): return tf.nn.sigmoid(tf.matmul(x, self.W) + self.b) if __name__ == '__main__': (X_train, y_train), (X_test, y_test) = mnist_samples(flatten_image=True, binalize_label=True) model = tf.keras.models.Sequential() model.add(LR(CATEGORY_NUM, input_shape=(IMAGE_SIZE,))) model.compile(loss=loss_fn, optimizer=tf.keras.optimizers.SGD(LEARNING_RATE), metrics=['accuracy']) cb = [tf.keras.callbacks.TensorBoard(log_dir=LOG_DIR)] model.fit(X_train, y_train, batch_size=BATCH_SIZE, epochs=EPOCHS, callbacks=cb, validation_data=(X_test, y_test)) print(model.evaluate(X_test, y_test))v2/helper.pyimport numpy as np import tensorflow as tf def mnist_samples(flatten_image=False, binalize_label=False): (X_train, y_train), (X_test, y_test) = tf.keras.datasets.mnist.load_data() def flatten(images): d, w, h = images.shape return images.reshape(d, w * h).astype(np.float32) / 255.0 def binalize(labels): return list(map(lambda x: 1 if x == 1 else 0, labels)) def one_hot_label(labels): return tf.keras.utils.to_categorical(labels, 10) if flatten_image: X_train, X_test = flatten(X_train), flatten(X_test) if binalize_label: y_train, y_test = binalize(y_train), binalize(y_test) else: y_train, y_test = one_hot_label(y_train), one_hot_label(y_test) return (X_train, y_train), (X_test, y_test)と書け、ちゃんと動く。
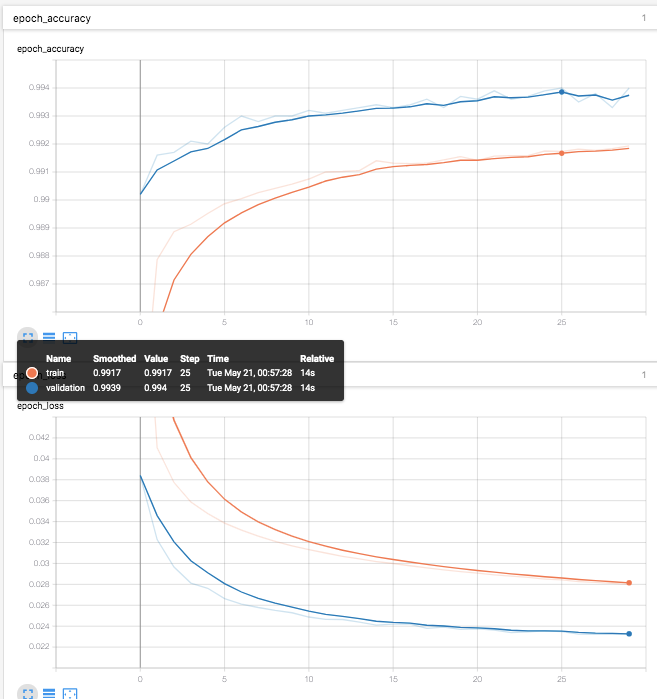
$ python mnist_logistic.py
Train on 60000 samples, validate on 10000 samples
Epoch 1/20
2019-05-20 15:50:09.369914: I tensorflow/core/profiler/lib/profiler_session.cc:164] Profile Session started.
60000/60000 [==============================] - 1s 11us/sample - loss: 0.0633 - accuracy: 0.9820 - val_loss: 0.0387 - val_accuracy: 0.9899
Epoch 2/20
60000/60000 [==============================] - 1s 9us/sample - loss: 0.0413 - accuracy: 0.9879 - val_loss: 0.0329 - val_accuracy: 0.9915
...
Epoch 19/20
60000/60000 [==============================] - 1s 9us/sample - loss: 0.0294 - accuracy: 0.9915 - val_loss: 0.0240 - val_accuracy: 0.9936
Epoch 20/20
60000/60000 [==============================] - 1s 9us/sample - loss: 0.0292 - accuracy: 0.9916 - val_loss: 0.0239 - val_accuracy: 0.9937
10000/10000 [==============================] - 0s 10us/sample - loss: 0.0239 - accuracy: 0.9937
[0.023882714230008425, 0.9937]
実際は、こんなに長ったらしく書く必要はなく、
v2/mnist_logistic_simple.py でOK
v2/mnist_logistic_simple.pyfrom helper import * IMAGE_SIZE = 28 * 28 CATEGORY_NUM = 1 LEARNING_RATE = 0.1 EPOCHS = 20 BATCH_SIZE = 100 LOG_DIR = 'log_logistic' if __name__ == '__main__': (X_train, y_train), (X_test, y_test) = mnist_samples(flatten_image=True, binalize_label=True) model = tf.keras.models.Sequential() model.add(tf.keras.layers.Dense(CATEGORY_NUM, input_shape=(IMAGE_SIZE,), activation='sigmoid')) model.compile(loss='binary_crossentropy', optimizer=tf.keras.optimizers.SGD(LEARNING_RATE), metrics=['accuracy']) cb = [tf.keras.callbacks.TensorBoard(log_dir=LOG_DIR)] model.fit(X_train, y_train, batch_size=BATCH_SIZE, epochs=EPOCHS, callbacks=cb, validation_data=(X_test, y_test)) print(model.evaluate(X_test, y_test))もはや、tensorflowの原形がない。
TensorBoardも引き続き利用できる。(なぜか、validationがtrainを常に上回っている。。。)
- 投稿日:2019-05-21T00:59:11+09:00
OpenCVのツール"CVAT"による動画ファイルからのオートアノテーション実行とTFRecord形式データセットの生成
1.Introduction
みなさん、アノテーション祭り、楽しんでますか? 私は吐き気がするほど嫌いです。
今回はオートアノテーションにチャレンジします。 動画を静止画に変換する手間は必要ですが、大量の画像を一気に投入することで、自動的にアノテーションが完了する、という夢のようなツールの検証です。 どうも、 前回記事 のVATICというツールが、OpenCVの公式ツールとして取り込まれたうえに、大幅な機能強化と改善が行われているようです。
2.Environment
- Ubuntu 16.04 (公式の推奨環境は Ubuntu 18.04)
- CUDA 9.0
- cuDNN 7.2
- Docker
- Client:
- Version: 18.09.6
- API version: 1.39
- Go version: go1.10.8
- Git commit: 481bc77
- Built: Sat May 4 02:35:27 2019
- OS/Arch: linux/amd64
- Experimental: false
- Server: Docker Engine - Community
- Engine:
- Version: 18.09.6
- API version: 1.39 (minimum version 1.12)
- Go version: go1.10.8
- Git commit: 481bc77
- Built: Sat May 4 01:59:36 2019
- OS/Arch: linux/amd64
- Experimental: false
- NVIDIA Docker 2.0.3
- Google Chrome
3.Procedure
3−1.Convert video file to still image
まず、動画ファイルをffmpegというツールを使用して静止画に変換します。 CVATへは動画を直接投入することもできますが、最終的にアノテーションデータをTFRecord形式へ変換することが目的の場合は、現時点では静止画へあらかじめ変換しておく必要があります。 以降の作業はホームディレクトリを基点として作業を進めていく前提とします。
ホームディレクトリの直下に
Videosというフォルダが有り、その中にFreestyleFootball.mp4という動画ファイルがある想定でコマンドを記載します。 おちゃカメラ。 - ffmpegの使い方やコマンド一覧をまとめました。動画リサイズ・静止画変換・フレーム補間について を参考にさせていただきました。 ありがとうございます。.mp4_convert_to_.jpegcd ~ sudo apt install -y ffmpeg mkdir -p Videos/img ffmpeg \ -i Videos/FreestyleFootball.mp4 \ -ss 0 \ -t 30 \ -f image2 \ -vcodec mjpeg \ -qscale 1 -qmin 1 -qmax 1 \ -r 20 \ Videos/img/%06d.jpg
オプション 概要 -i 入力ファイルの指定 -ss 静止画に変換したい動画の再生開始位置(秒) -t 静止画に変換したい動画の長さ(秒) -f 変換フォーマットの指定 -vcodec コーデックの指定 Motion JPEG=mjpeg, PNG=png -qscale JPEG画像の品質 -r 切り出したい画像の1秒あたりの枚数(フレームレート) %06d.jpg 書き出すファイル名の指定。%06d.jpgと指定すると6桁の連番画像ファイルが生成される Execution_logffmpeg version 2.8.15-0ubuntu0.16.04.1 Copyright (c) 2000-2018 the FFmpeg developers built with gcc 5.4.0 (Ubuntu 5.4.0-6ubuntu1~16.04.10) 20160609 configuration: --prefix=/usr --extra-version=0ubuntu0.16.04.1 --build-suffix=-ffmpeg --toolchain=hardened --libdir=/usr/lib/x86_64-linux-gnu --incdir=/usr/include/x86_64-linux-gnu --cc=cc --cxx=g++ --enable-gpl --enable-shared --disable-stripping --disable-decoder=libopenjpeg --disable-decoder=libschroedinger --enable-avresample --enable-avisynth --enable-gnutls --enable-ladspa --enable-libass --enable-libbluray --enable-libbs2b --enable-libcaca --enable-libcdio --enable-libflite --enable-libfontconfig --enable-libfreetype --enable-libfribidi --enable-libgme --enable-libgsm --enable-libmodplug --enable-libmp3lame --enable-libopenjpeg --enable-libopus --enable-libpulse --enable-librtmp --enable-libschroedinger --enable-libshine --enable-libsnappy --enable-libsoxr --enable-libspeex --enable-libssh --enable-libtheora --enable-libtwolame --enable-libvorbis --enable-libvpx --enable-libwavpack --enable-libwebp --enable-libx265 --enable-libxvid --enable-libzvbi --enable-openal --enable-opengl --enable-x11grab --enable-libdc1394 --enable-libiec61883 --enable-libzmq --enable-frei0r --enable-libx264 --enable-libopencv libavutil 54. 31.100 / 54. 31.100 libavcodec 56. 60.100 / 56. 60.100 libavformat 56. 40.101 / 56. 40.101 libavdevice 56. 4.100 / 56. 4.100 libavfilter 5. 40.101 / 5. 40.101 libavresample 2. 1. 0 / 2. 1. 0 libswscale 3. 1.101 / 3. 1.101 libswresample 1. 2.101 / 1. 2.101 libpostproc 53. 3.100 / 53. 3.100 Input #0, mov,mp4,m4a,3gp,3g2,mj2, from 'git/Videos/FreestyleFootball.mp4': Metadata: major_brand : mp42 minor_version : 0 compatible_brands: isommp42 creation_time : 2016-08-14 07:51:03 Duration: 00:03:49.41, start: 0.000000, bitrate: 2179 kb/s Stream #0:0(und): Video: h264 (Main) (avc1 / 0x31637661), yuv420p, 1280x720 [SAR 1:1 DAR 16:9], 2050 kb/s, 25 fps, 25 tbr, 90k tbn, 50 tbc (default) Metadata: creation_time : 2016-08-14 07:51:03 handler_name : ISO Media file produced by Google Inc. Stream #0:1(und): Audio: aac (LC) (mp4a / 0x6134706D), 44100 Hz, stereo, fltp, 125 kb/s (default) Metadata: creation_time : 2016-08-14 07:51:03 handler_name : ISO Media file produced by Google Inc. Please use -q:a or -q:v, -qscale is ambiguous [swscaler @ 0x126f0e0] deprecated pixel format used, make sure you did set range correctly Output #0, image2, to 'git/Videos/img/%06d.jpg': Metadata: major_brand : mp42 minor_version : 0 compatible_brands: isommp42 encoder : Lavf56.40.101 Stream #0:0(und): Video: mjpeg, yuvj420p(pc), 1280x720 [SAR 1:1 DAR 16:9], q=1-1, 200 kb/s, 20 fps, 20 tbn, 20 tbc (default) Metadata: creation_time : 2016-08-14 07:51:03 handler_name : ISO Media file produced by Google Inc. encoder : Lavc56.60.100 mjpeg Stream mapping: Stream #0:0 -> #0:0 (h264 (native) -> mjpeg (native)) Press [q] to stop, [?] for help Past duration 0.799995 too large Past duration 0.999992 too large frame= 600 fps=325 q=1.0 Lsize=N/A time=00:00:30.00 bitrate=N/A dup=0 drop=148 video:122679kB audio:0kB subtitle:0kB other streams:0kB global headers:0kB muxing overhead: unknown
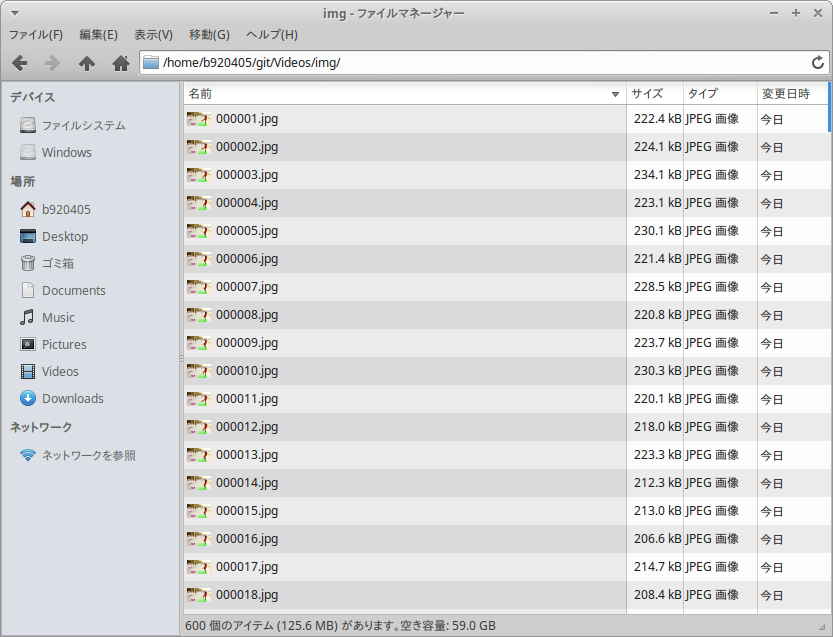
imgフォルダ配下に 600枚 の jpeg画像が生成されました。 30秒 x 20フレーム = 600画像
3−2.Constructing a CVAT execution environment
公式リポジトリの今後のアップデートにより手順が動作しなくなることを避けるため、私自身のリポジトリへForkしたものを使用します。 私のTwitterをフォローいただいている方は、下記のコマンドを実行した後の顛末をご存知かと思いますが、私のラップトップPCとの相性が良くなかったのか、一時的に、シャットダウンも、再起動も、ハードリセットも、全てが操作不能になりました。 ただ、ラップトップPCのバッテリ残量をゼロにして再度電源をONにしたところ正常に復帰しました。
公式の推奨環境は、Ubuntu 18.04 (x86_64/amd64)ですが、私のラップトップPCはUbuntu 16.04 (x86_64)でしたので、もしかしたらOSとの相性の問題もあるかもしれません。 いずれにせよ特別な処置はしていませんが、現在は異常をきたすことなく正常に利用できています。Clone_CVAT_repositorygit clone https://github.com/PINTO0309/cvat.git cd cvat sudo apt-get update sudo apt-get install -y \ apt-transport-https ca-certificates curl gnupg-agent software-properties-common curl -fsSL https://download.docker.com/linux/ubuntu/gpg | sudo apt-key add - sudo add-apt-repository \ "deb [arch=amd64] https://download.docker.com/linux/ubuntu \ $(lsb_release -cs) stable" sudo apt-get update sudo apt-get install -y docker-ce docker-ce-cli containerd.io sudo groupadd docker sudo usermod -aG docker $USER sudo apt-get install -y python3-pip sudo -H pip3 install docker-compose docker-compose \ -f docker-compose.yml \ -f components/cuda/docker-compose.cuda.yml \ -f components/openvino/docker-compose.openvino.yml \ -f components/tf_annotation/docker-compose.tf_annotation.yml up -d --build docker exec -it cvat bash -ic 'python3 ~/manage.py createsuperuser'3−3.Execution of automatic annotation
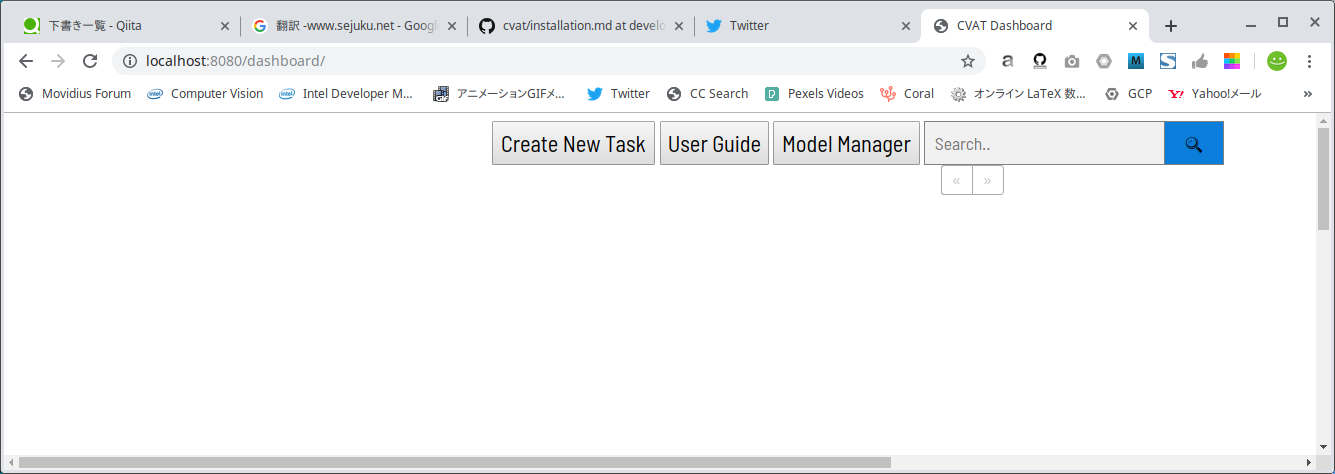
ブラウザを起動し、アドレスバーに
http://localhost:8080を入力してアクセスします。
そうすると、下図のようにアッサリ塩味なポータルが起動します。
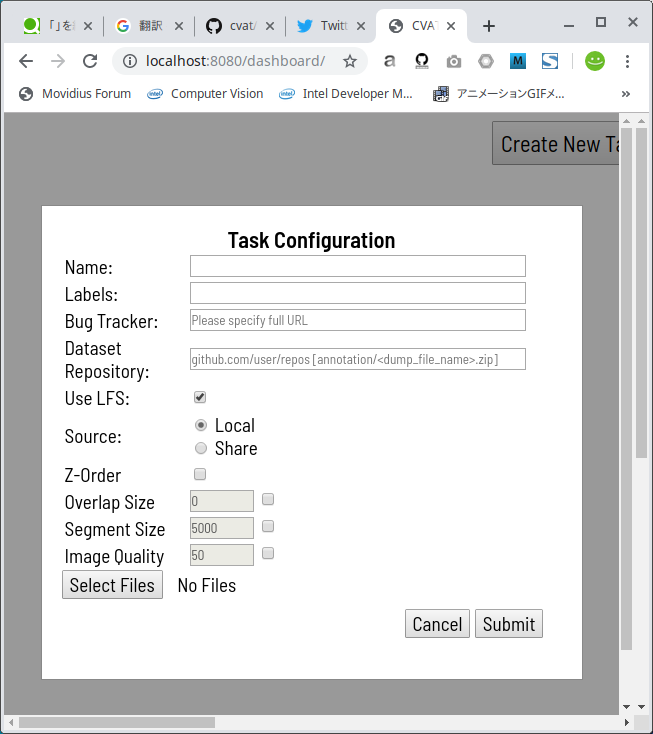
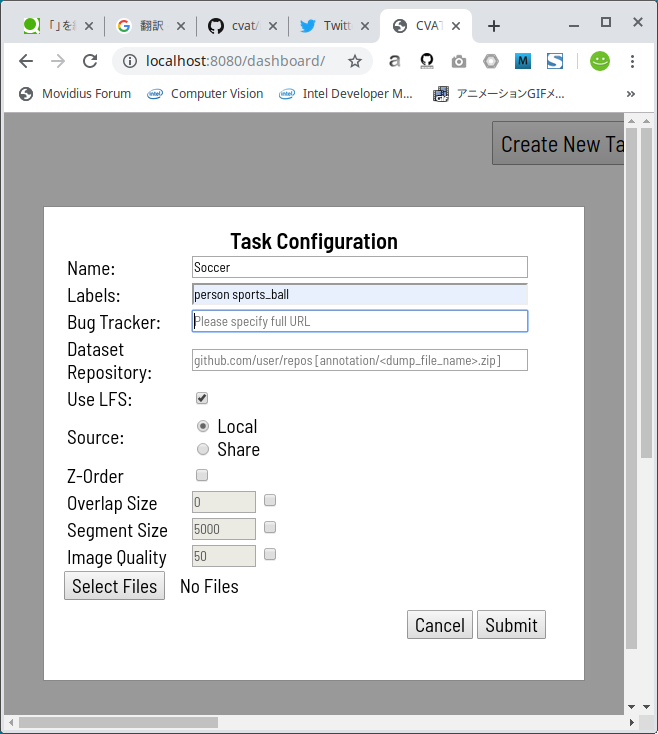
Create New Taskボタンをクリックすると、下図のようにダイアログが表示されますので、最低限必要な情報を入力します。
私がアノテーションしたいのは、人とボールですので、personとsports_ballを半角空白区切りで Labels欄 に入力します。 なお、Tensorflow によるオートアノテーションを行う場合に Labels欄 へ入力可能なラベル名は下記のいずれかです。 Tensorflow によるオートアノテーションを行わない場合は下記に限らず、自由入力で複数のラベルを指定可能です。Label_name_that_can_be_specified_when_performing_auto_annotation'surfboard', 'car', 'skateboard', 'boat', 'clock', 'cat', 'cow', 'knife', 'apple', 'cup', 'tv', 'baseball_bat', 'book', 'suitcase', 'tennis_racket', 'stop_sign', 'couch', 'cell_phone', 'keyboard', 'cake', 'tie', 'frisbee', 'truck', 'fire_hydrant', 'snowboard', 'bed', 'vase', 'teddy_bear', 'toaster', 'wine_glass', 'traffic_light', 'broccoli', 'backpack', 'carrot', 'potted_plant', 'donut', 'umbrella', 'parking_meter', 'bottle', 'sandwich', 'motorcycle', 'bear', 'banana', 'person', 'scissors', 'elephant', 'dining_table', 'toothbrush', 'toilet', 'skis', 'bowl', 'sheep', 'refrigerator', 'oven', 'microwave', 'train', 'orange', 'mouse', 'laptop', 'bench', 'bicycle', 'fork', 'kite', 'zebra', 'baseball_glove', 'bus', 'spoon', 'horse', 'handbag', 'pizza', 'sports_ball', 'airplane', 'hair_drier', 'hot_dog', 'remote', 'sink', 'dog', 'bird', 'giraffe', 'chair'.
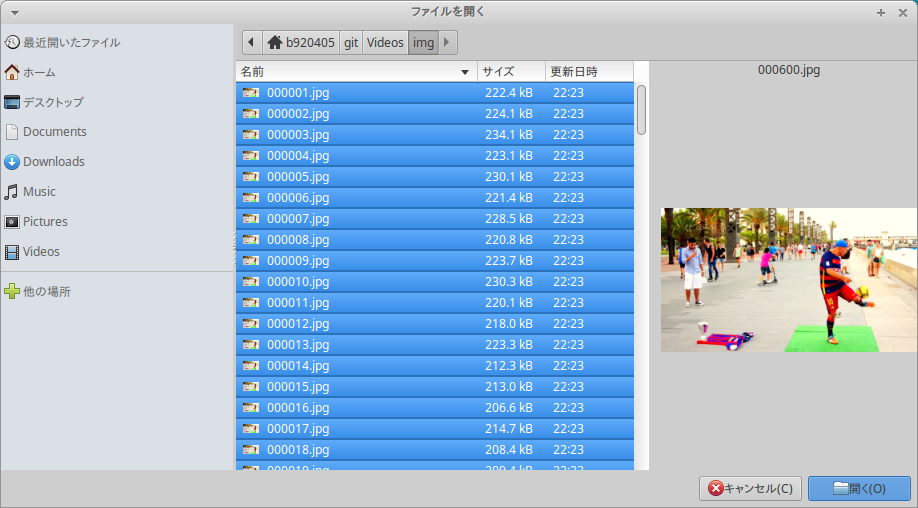
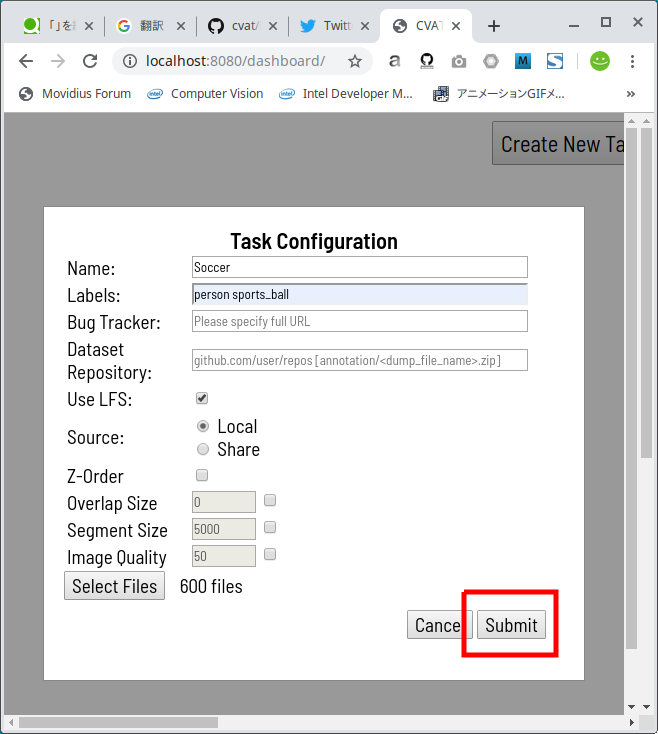
Select Filesボタンをクリックして、3−1.Convert video file to still imageで作成した静止画を全て指定します。 私の場合は、 600枚 のJPEG静止画を生成しましたので、600枚全てを選択して開きました。
Submitボタンをクリックします。
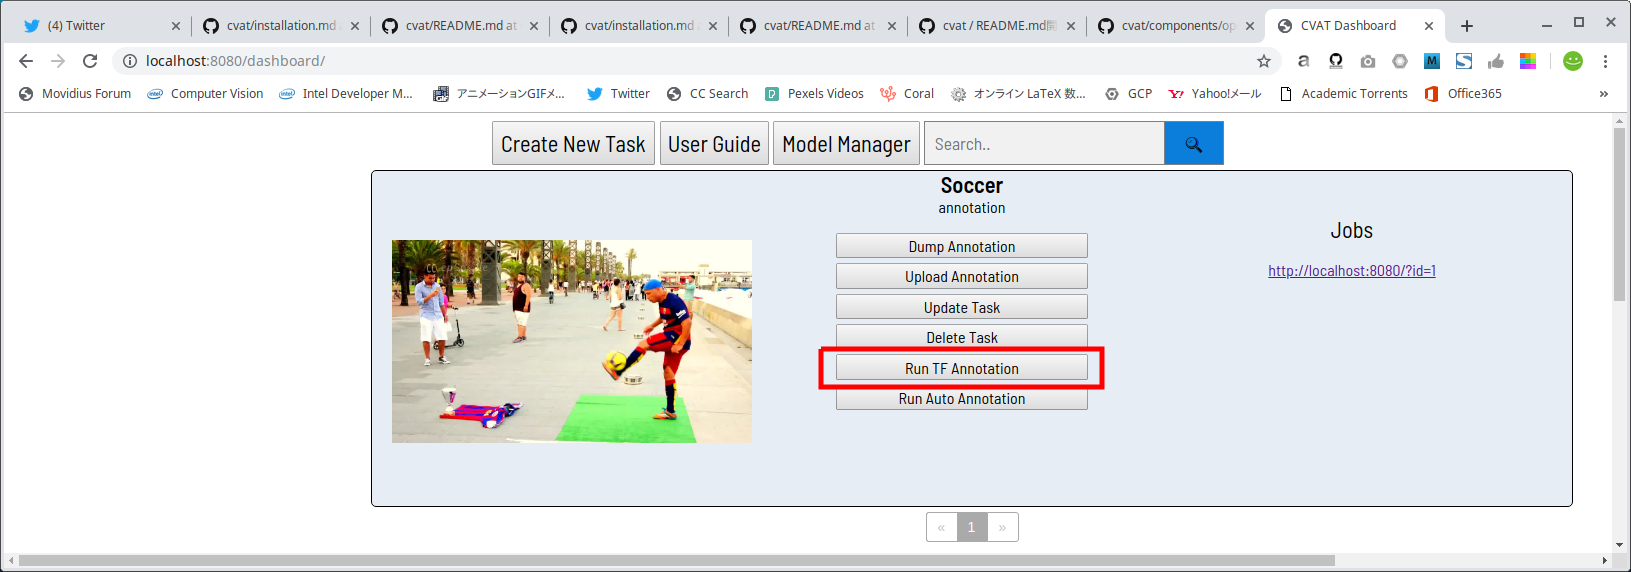
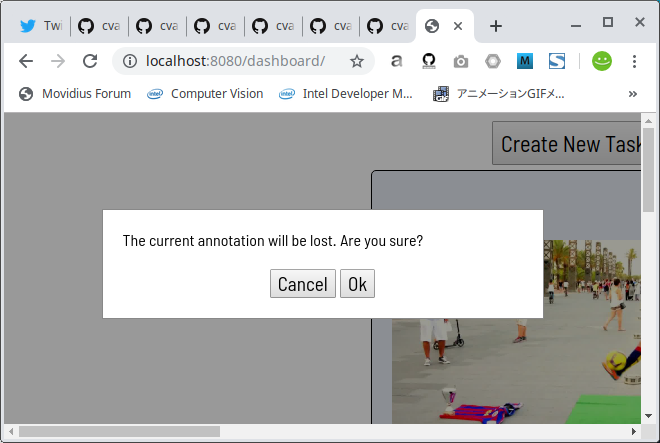
下図のRun TF Annotationボタンをクリックすると、
警告メッセージが表示されますので、Okをクリックします。
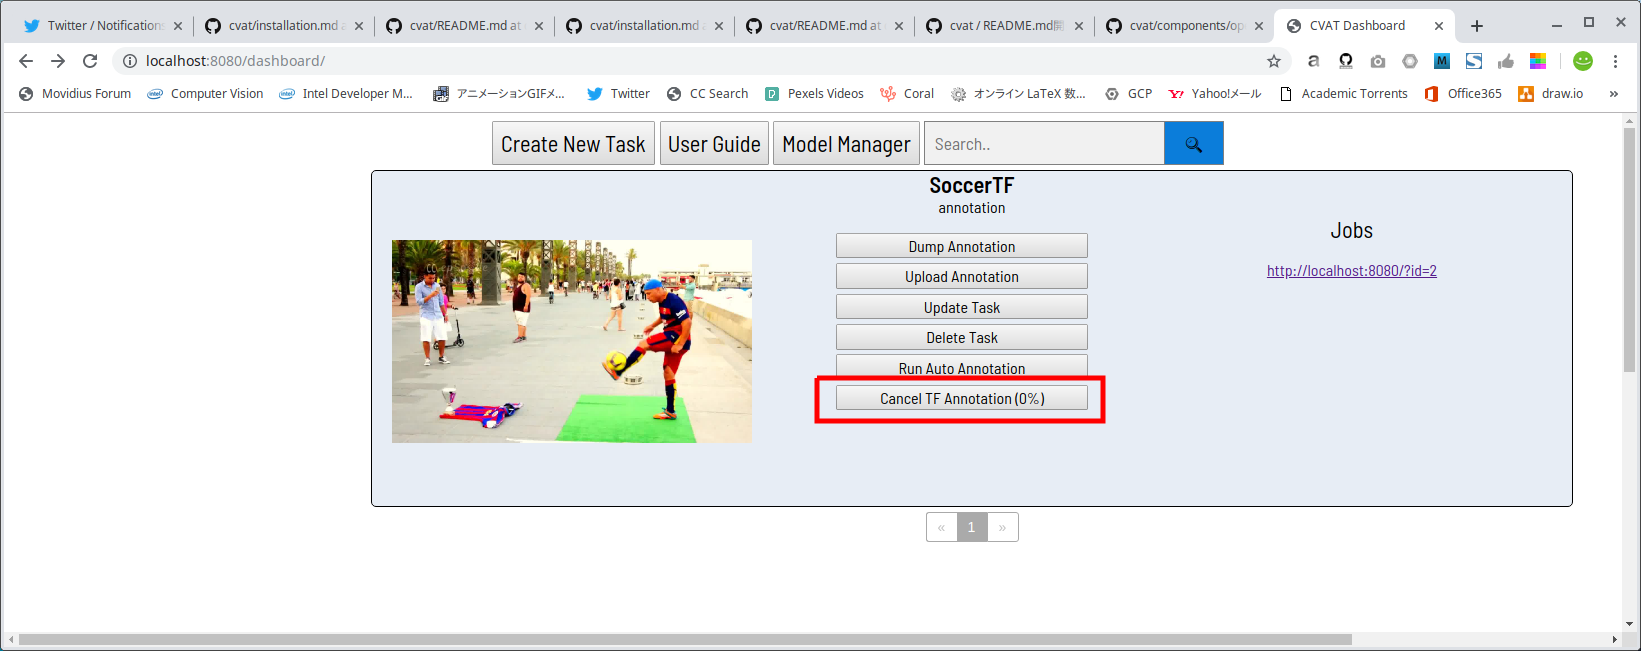
しばらく待つとボタンの表示がCancel TF Annotation [0%]という表示に変わり、リアルタイムに進捗率が更新されていきます。 精度の高いモデルを使用しているためか、かなり時間が掛かりますので気長に待ちましょう。
ちなみに、4分間5734フレームの動画をアノテーションするのに、私の環境では2時間掛かりました。
さて、変換が終わったらhttp://localhost:8080/?id=xのリンクをクリックすると、アノテーション結果を確認することができます。 さて、どうなっているでしょうか。。。
機械任せの自動アノテーションにもかかわらず、精度が高すぎますねw
衝撃的です。では、ブラウザの戻る矢印をクリックしてポータルに戻ります。
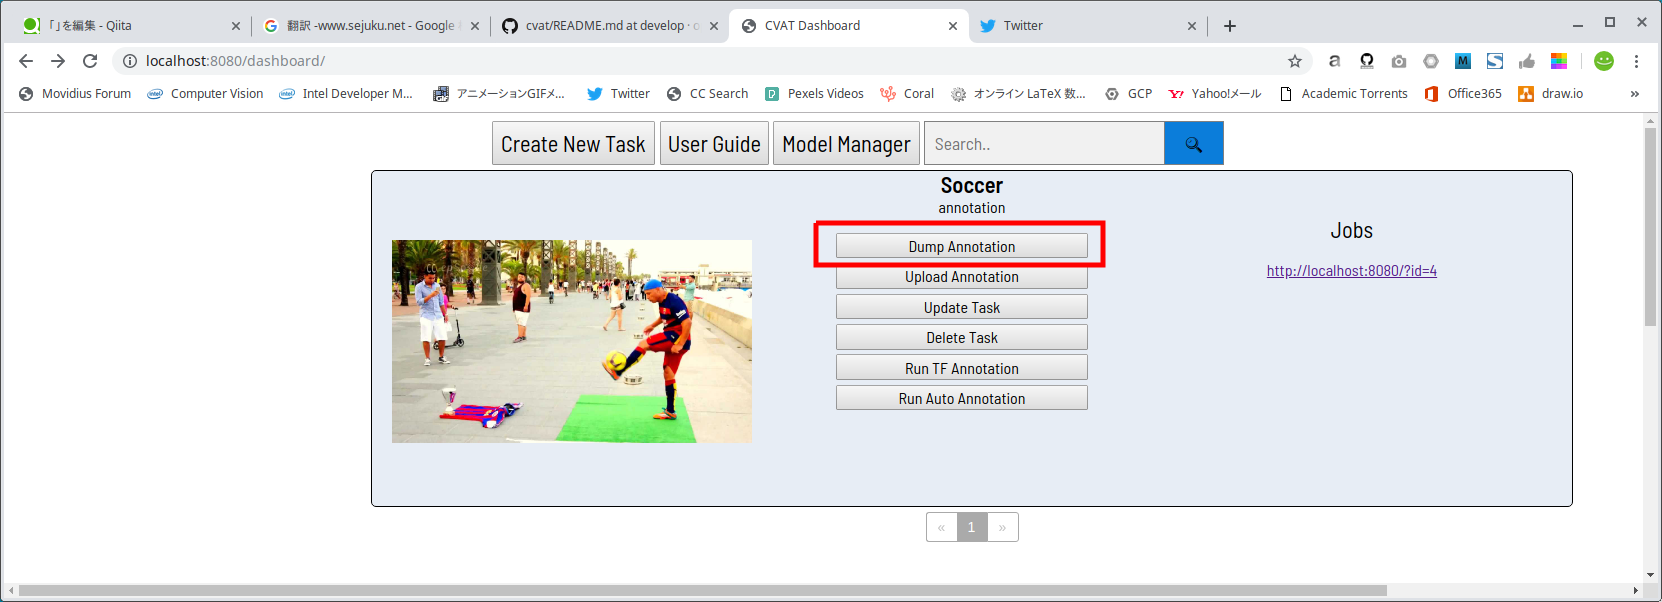
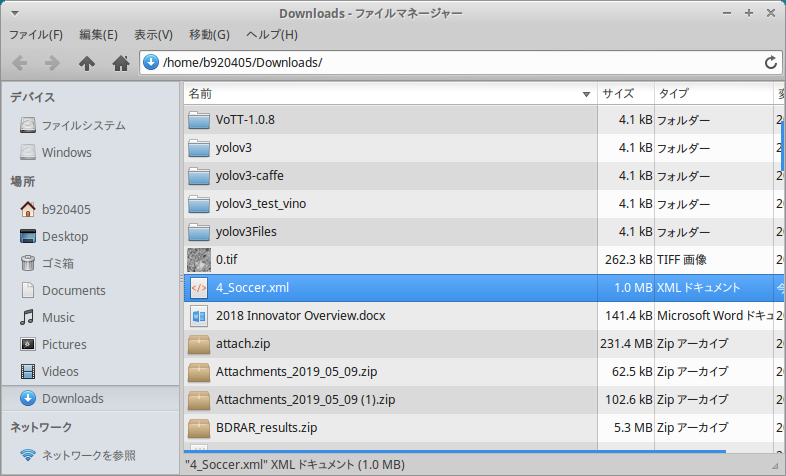
アノテーション済みの CVAT形式XMLファイル を出力するため、Dump Annotationボタンをクリックします。n_xxxx.xmlという名前のXMLファイルがダウンロードされてくるはずです。nの部分はタスクID、xxxxの部分はTask Nameです。
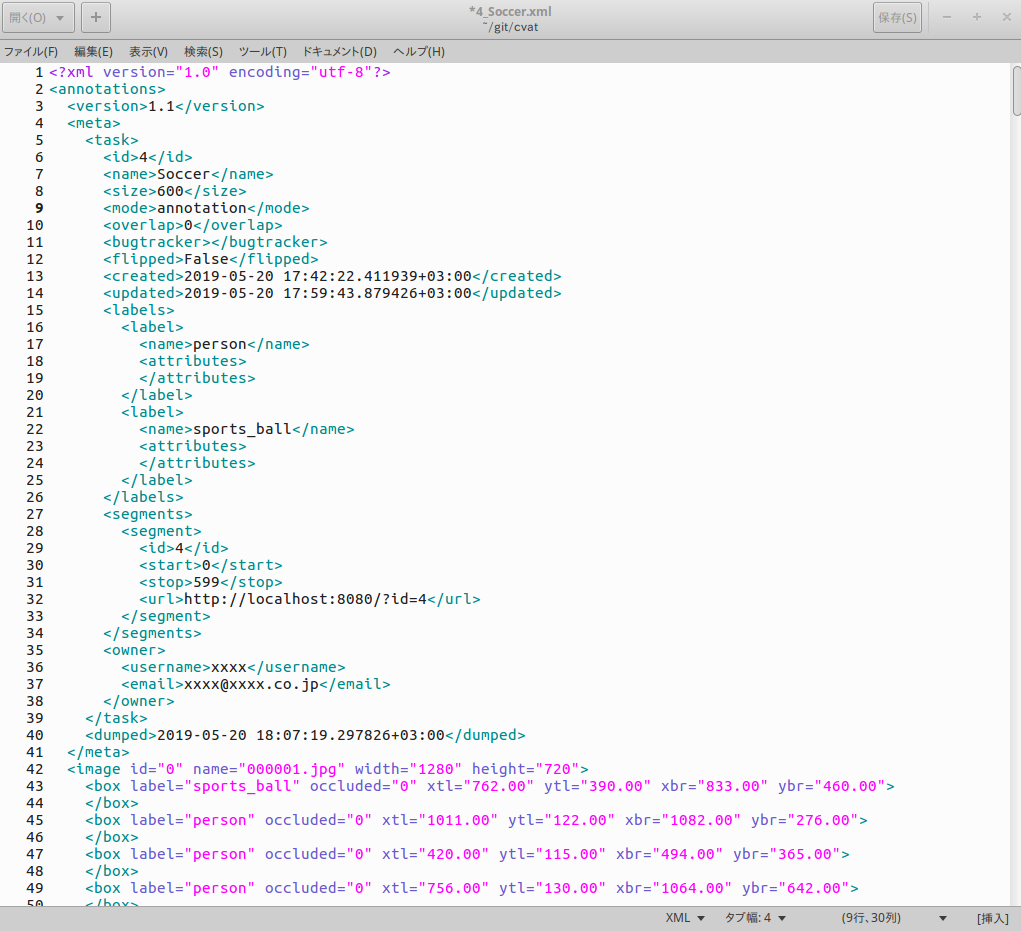
アノテーション済みCVAT形式XMLファイルの中身は下図のイメージです。<mode>がannotationとなっていることがポイントです。 もしannotationとなっていない場合は動画ファイルを変換してしまっています。 その場合、TFRecord形式への変換はできませんので、オートアノテーションの最初の手順からやり直してください。
このあとの TFRecord形式 への変換作業に使用するため、n_xxxx.xmlファイルをcvatフォルダの直下にコピーしておきます。Copy_XML_file_to_working_foldercp ~/Downloads/n_xxxx.xml ~/cvat3−4.Annotation data conversion from CVAT format to TFRecord format
さて、ここまでできたら Tensorflow Object Detection API の力を借りて、 CVAT形式 から TFRecord形式 へコンバージョンします。 やってみると分かりますが、ココから先はCVAT Dockerコンテナ内で実施するととても面倒なことになります。(sudoコマンドが通らなかったり、Permissionが通っていなかったり、その他モロモロと、本質的ではない部分でつまづきます)
好き嫌いの問題ではありますが、HostPC上での作業をオススメします。まずは、 Tensorflow Object Detection API を導入します。 私は 前回記事 - 今更ですが、VATICによる動画の自動追尾アノテーションを使用してTFRecord形式への変換まで実施してみました[Docker編] あるいは 過去の記事 - Edge TPU Accelaratorの動作を少しでも高速化したかったのでMobileNetv2-SSD/MobileNetv1-SSD+MS-COCOをPascal VOCで転移学習して.tfliteを生成した_Docker編_その2 あるいは 過去の記事 - Edge TPU Accelaratorの動作を少しでも高速化したかったのでMS-COCOをPascal VOCで転移学習して.tfliteを生成した_GoogleColaboratory[GPU]編_その3 で3種類の環境を構築済みですので改めての作業は不要ですが、念の為 公式に記載されている手順 に少しだけ味付けをして下記に転記しておきます。 一応、実環境で動作は確認済みです。
Installation_procedure_of_"Tensorflow_Object_Detection_API"sudo apt-get update sudo apt-get install -y --no-install-recommends python3-pip python3-dev sudo -H pip3 install -r requirements.txt git clone https://github.com/tensorflow/models.git cd models sudo -H pip3 install --user Cython contextlib2 pillow lxml jupyter matplotlib git clone https://github.com/cocodataset/cocoapi.git cd cocoapi/PythonAPI make cd ../../research cp -r ../cocoapi/PythonAPI/pycocotools . protoc object_detection/protos/*.proto --python_out=. export PYTHONPATH=$PYTHONPATH:`pwd`:`pwd`/slimでは、ようやくCVATフォーマットからTFRecordフォーマット(.tfrecord)へ変換してみます。
下記のコマンドを実行します。 (cd ../..でcvatフォルダへ戻ってから実行します。)
</path/to/cvat/xml>と</path/to/images>と</path/to/output/directory>を自身の環境に合わせて変更してから実行します。Convert_CVAT_format_to_TFRecord_formatcd ../.. mkdir outputs sed -i "s%os.path.join(output_dir.absolute(),%os.path.join(str(output_dir.absolute()),%g" "utils/tfrecords/converter.py" sed -i "s%os.path.join(output_dir,%os.path.join(str(output_dir),%g" "utils/tfrecords/converter.py" python3 utils/tfrecords/converter.py \ --cvat-xml </path/to/cvat/xml> \ --image-dir </path/to/images> \ --output-dir </path/to/output/directory>Convert_CVAT_format_to_TFRecord_format_samplecd ../.. mkdir outputs sed -i "s%os.path.join(output_dir.absolute(),%os.path.join(str(output_dir.absolute()),%g" "utils/tfrecords/converter.py" sed -i "s%os.path.join(output_dir,%os.path.join(str(output_dir),%g" "utils/tfrecords/converter.py" python3 utils/tfrecords/converter.py \ --cvat-xml n_xxxx.xml \ --image-dir ${HOME}/Videos/img \ --output-dir ./outputsHow_to_use_converter.pyusage: converter.py [-h] --cvat-xml FILE --image-dir DIRECTORY --output-dir DIRECTORY [--train-percentage PERCENTAGE] [--min-train NUM] [--attribute NAME] Convert CVAT XML annotations to tfrecords format optional arguments: -h, --help show this help message and exit --cvat-xml FILE input file with CVAT annotation in xml format --image-dir DIRECTORY directory which contains original images --output-dir DIRECTORY directory for output annotations in tfrecords format --train-percentage PERCENTAGE the percentage of training data to total data (default: 90) --min-train NUM The minimum number of images above which the label is considered (default: 10) --attribute NAME The attribute name based on which the object can identified無事にトレーニングデータの
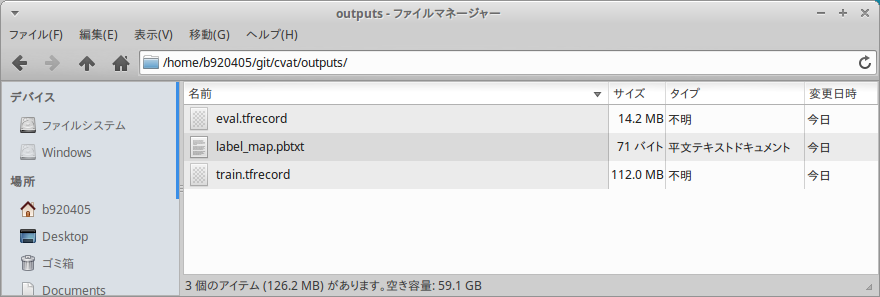
train.tfrecordファイルと、 検証用データのeval.tfrecordファイルが生成されました。 これで Tensorflow Lite のpipelineなどを使用して独自の超大量なデータセットで学習が簡単にできるようになりましたね。
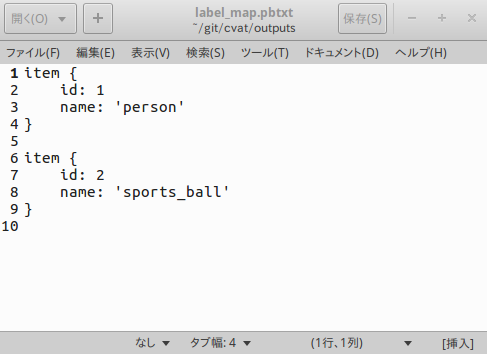
label_map.pbtxtの中身は下図のようにちゃんと生成されています。
4.Finally
オートアノテーションを使用して TFRecord形式 のデータ・セット作成まで成功しました。
これで大量の動画データから超大量のデータ・セットを独自生成することがあまり手間ではなくなりました。
オートアノテーション最高!!単に高精度のFaster R-CNNでオブジェクトディテクションをしているだけですので、ふ〜ん、という感じの方々が多いとは思います。
まぁ、いいんですよ。 楽しければ。5.Reference articles
https://github.com/opencv/cvat/blob/develop/cvat/apps/documentation/installation.md
https://github.com/opencv/cvat/blob/develop/utils/tfrecords/converter.md
https://photo-tea.com/p/17/ffmpeg-command-list/