- 投稿日:2020-09-17T23:36:59+09:00
Ionic Native Pluginを自作する
Ionic Cordova Pluginの開発
携わっているプロジェクトで使用することになったのでメモがてら
Cordova Pluginの作成
ディレクトリ作成
プラグイン開発は以下のフォルダ構成で行います。
フォルダ構成./custom_plugins └── cordova-plugin-helloworld ・・・プラグイン名 ├── package.json ├── plugin.xml ├── src │ ├── android │ │ └── HelloWorld.java ・・・ AndroidのNativeコード │ └── ios │ └── HelloWorld.swift ・・・ iOSのNativeコード └── www └── helloworld.js ・・・ Web側実行コードpackage.jsonの作成
package.jsonの内容は以下の通りです。
package.json{ "name": "cordova-plugin-helloworld", "version": "1.0.0", "cordova": { "id": "cordova-plugin-helloworld", "platforms": [ "android", "ios" ] } }plugin.xmlの作成
plguin.xml<?xml version="1.0" encoding="UTF-8"?> <!-- id: プラグインの識別子、version: プラグインのバージョン --> <plugin xmlns="http://apache.org/cordova/ns/plugins/1.0" xmlns:android="http://schemas.android.com/apk/res/android" id="cordova-plugin-helloworld" version="1.0.0"> <!-- プラグイン名 --> <name>HelloWorld</name> <!-- プラグインの説明 --> <description>HelloWorld!!!</description> <!-- ライセンス --> <license>HogeLicense</license> <!-- プラグインがサポートするCordovaのバージョン --> <engines> <engine name="cordova-android" version=">5.0.0"/> </engines> <!-- JSの場所指定。name: モジュール名 --> <js-module src="www/helloworld.js" name="HelloWorld"> <clobbers target="HelloWorld"/> </js-module> <!-- iOS用の設定 --> <platform name="ios"> <config-file target="config.xml" parent="/*"> <!-- Swift Class名 --> <feature name="HelloWorld"> <!-- Valueが@objc(HelloWorld) --> <param name="ios-package" value="HelloWorld" onload="true" /> </feature> </config-file> <!-- Swiftを使用する --> <source-file src="src/ios/HelloWorld.swift" /> </platform> <!-- Android用の設定 --> <platform name="android"> <!-- Androidのconfig.xmlはここ→project/platform/android/res/xml/config.xmlにあるのでそこに反映するように --> <config-file target="res/xml/config.xml" parent="/*"> <!-- Cordovaはfeatureタグをみて、どのプラグインが有効か見る。以下の情報が上記のファイルに追加される。 --> <feature name="helloworld"> <param name="android-package" value="plugin.helloworld.HelloWorld"/> </feature> </config-file> <!-- Javaのソースファイル。 target-dir: ファイルがコンパイルされるべき場所 --> <!-- 以下だとproject/platform/android/src/plugin/helloworld/以下になる --> <source-file src="src/android/HelloWorld.java" target-dir="src/plugin/helloworld/"/> </platform> </plugin>helloworld.jsの作成
helloworld.jsvar exec = require("cordova/exec"); module.exports = { echo: function (name, successCallback, errorCallback) { // 第1引数: 成功時に呼び出す関数 // 第2引数: エラー時に呼び出す関数 // 第3引数: プラグインの名前(plugin.xmlのfeatureのnameに設定したもの) // 第4引数: HelloWorld.javaの第1引数に渡る名前 // 第5引数: HelloWorld.javaの第2引数に渡る値 exec(successCallback, errorCallback, "helloworld", "echo", [name]); }, };HelloWorld.javaの作成(Android Native)
HelloWorld.java// plguin.xml -> feature -> param -> value で指定した物 package plugin.helloworld; import org.apache.cordova.*; import org.json.JSONArray; import org.json.JSONException; public class HelloWorld extends CordovaPlugin { @Override public boolean execute(String action, JSONArray data, CallbackContext callbackContext) throws JSONException { if (action.equals("echo")) { String name = data.getString(0); String message = "Hello, World !!! " + "Hello, " + name; callbackContext.success(message); return true; } else { return false; } } }HelloWorld.swiftの作成(iOS Native)
HelloWorld.swiftimport Foundation import UIKit @objc(HelloWorld) class HelloWorld: CDVPlugin { // JavaScriptに公開する関数名を記述 @objc(echo:) func echo(command: CDVInvokedUrlCommand) { let name = command.arguments.first as! String let message = "Hello, World !!! " + "Hello, " + name; // 返却するレスポンスを作成 let result = CDVPluginResult(status: CDVCommandStatus_OK, messageAs: message) // コールバック形式でレスポンスを返却 self.commandDelegate!.send(result, callbackId: command.callbackId) } }一旦作成したPluginを使ってみる
空のIonicプロジェクトを作成し、上記で作成たプラグインをaddする。
$ ionic start plugin-test blank
$ cd plugin-test
今回は以下のようにプロジェクト内にカスタムプラグインのファイルを配置する。
prugin-test
└── custom_plugins
│    └── cordova-plugin-helloworld ・・・今回作成したプラグイン
└── node_modules
└── src
・
・
・
プラグインの追加
$ ionic cordova plugin add ./custom_plugins/cordova-plugin-helloworldアプリ側にプラグインの実行処理を実装
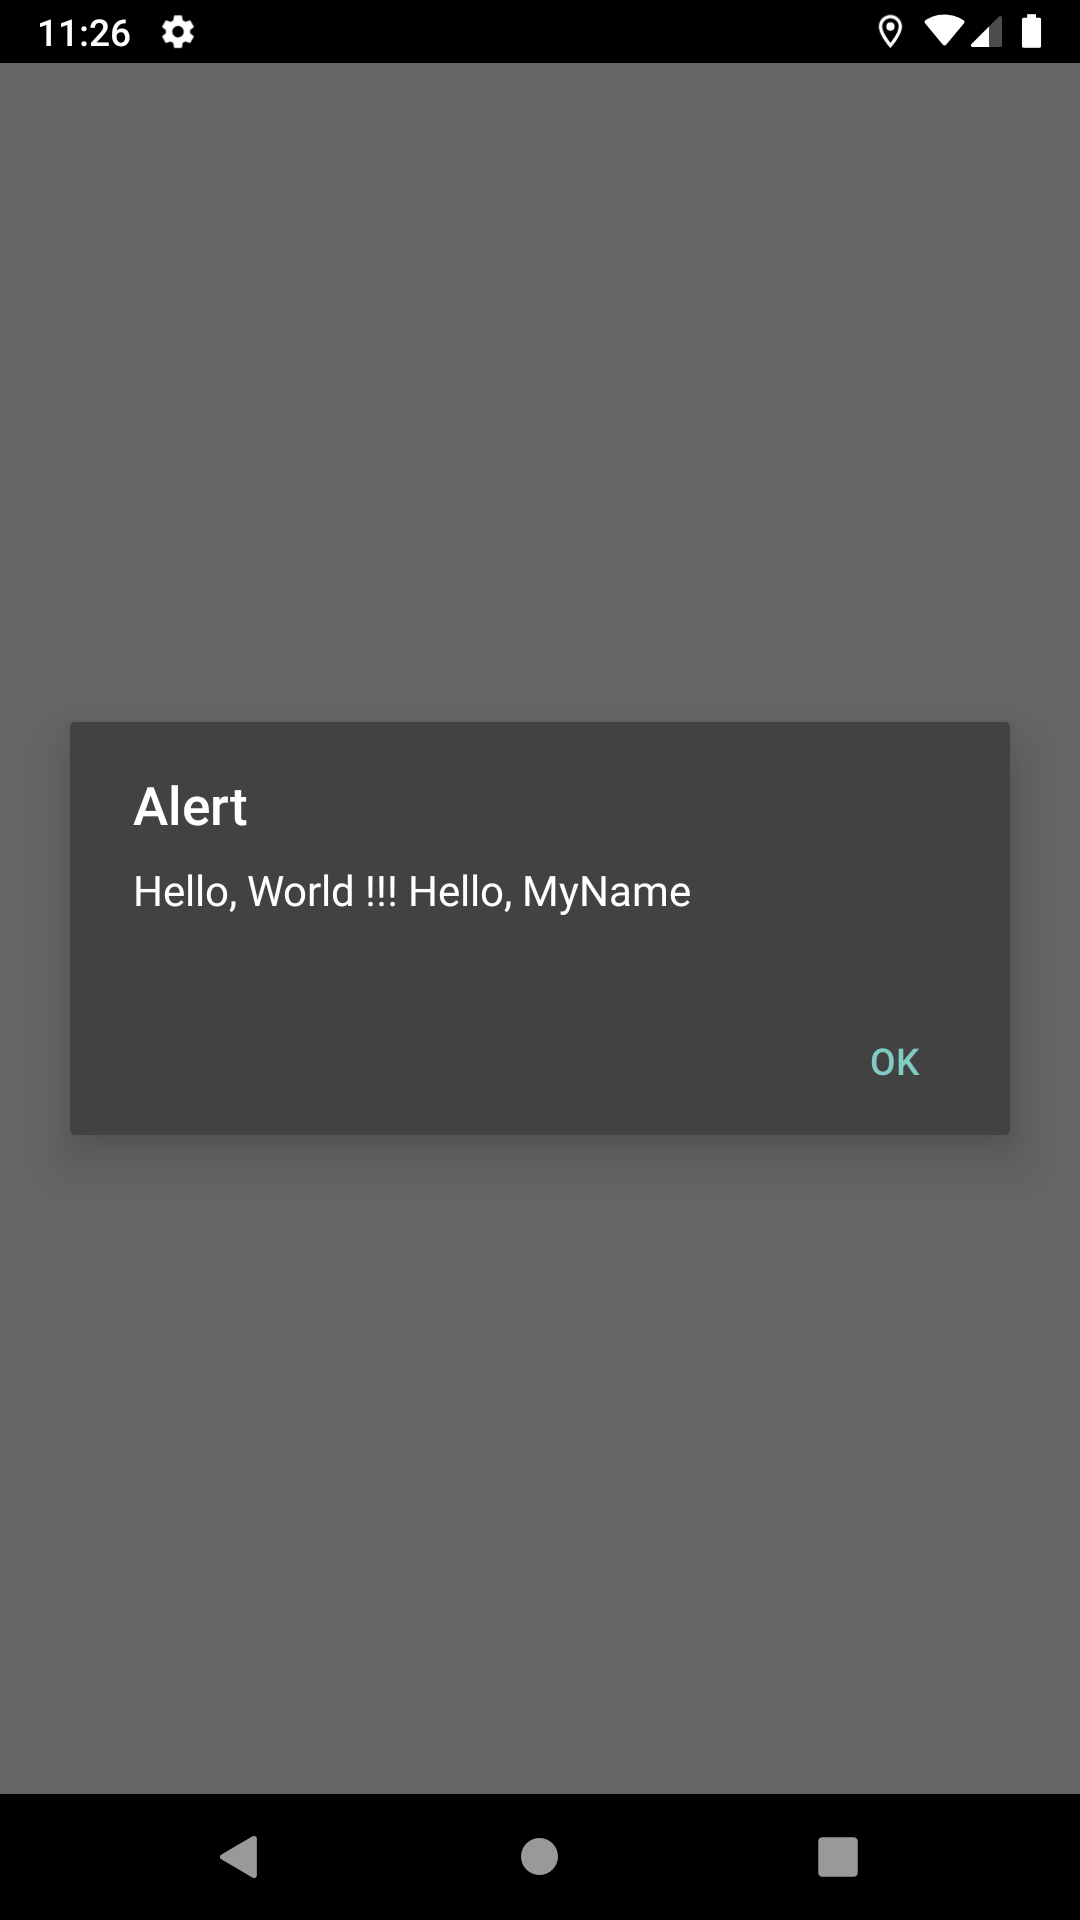
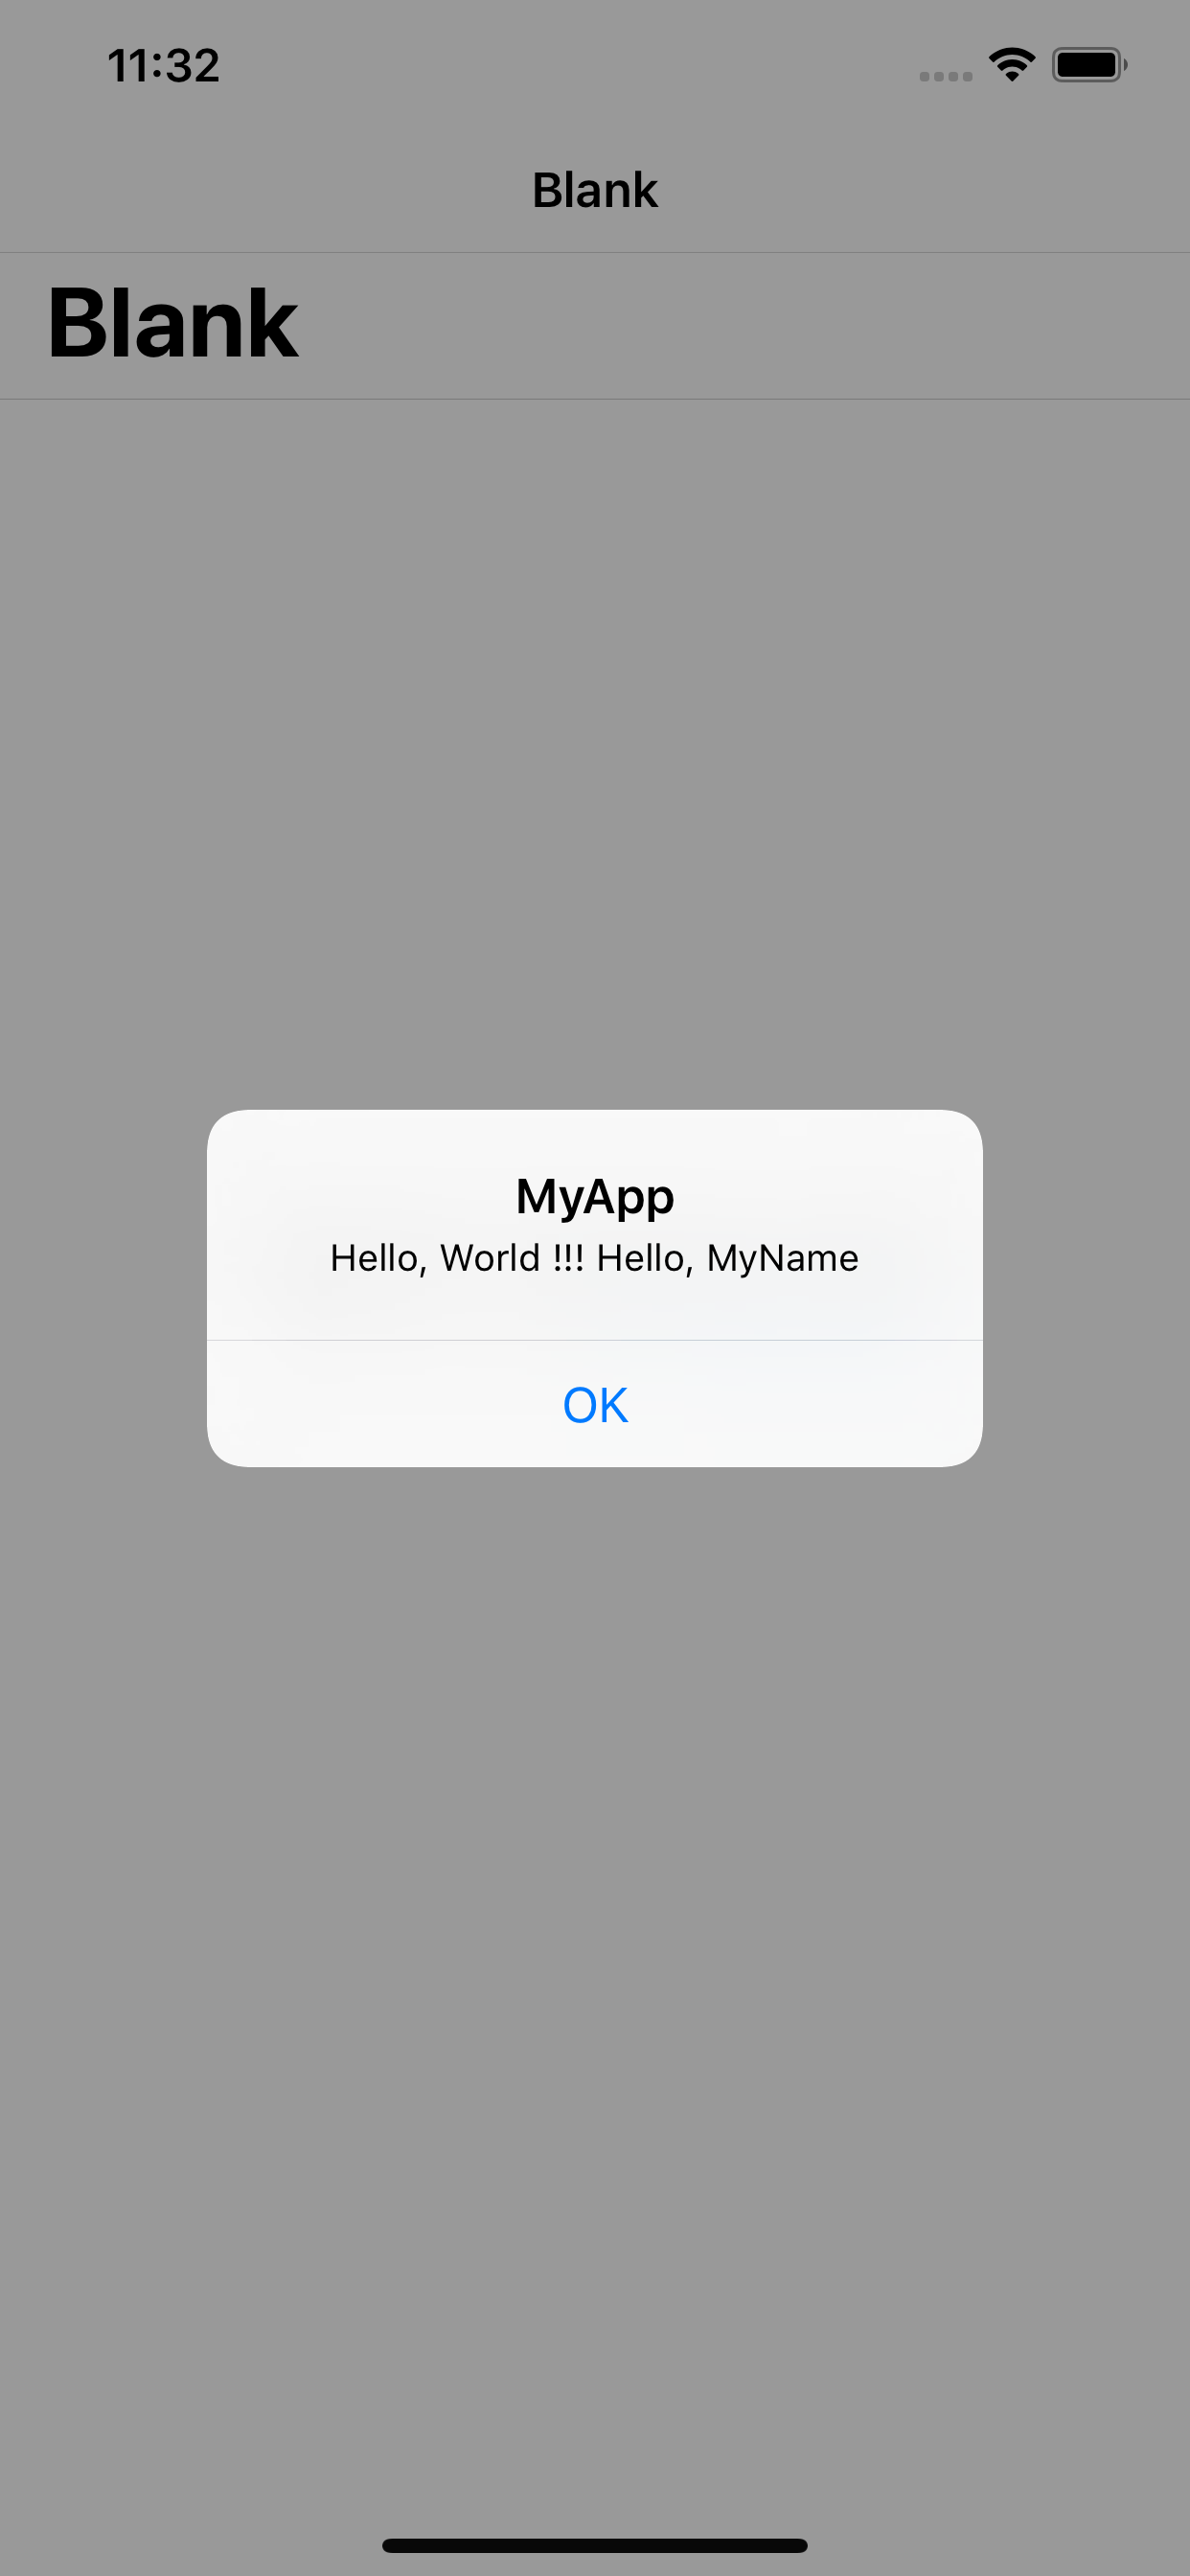
home.page.tsimport { Component } from "@angular/core"; import { Platform } from "@ionic/angular"; ・・・ 追加 declare var HelloWorld: any; ・・・ 追加 Ionic Nativeに対応していない場合はこの定義が必要 @Component({ selector: "app-home", templateUrl: "home.page.html", styleUrls: ["home.page.scss"], }) export class HomePage { ・・・以下全て追加 constructor(public platform: Platform) { this.platform.ready().then(() => { HelloWorld.echo("MyName", this.successCallback, this.errorCallback); }); } // 成功時の処理 successCallback(message) { alert(message); } // エラー時の処理 errorCallback() { alert("hello error"); } }Platformの追加と実装
Platformの追加
$ ionic cordova platform add android
$ ionic cordova platform add ios
実行
$ ionic cordova run android
$ ionic cordova run ios
結果
Android
iOS
Ionic native pluginの作成
準備
先ほど作成したCordova pluginをIonic native pluginとして使えるようにします。まず、最初にnative pluginに必要なコードをhttps://github.com/ionic-team/ionic-nativeからクローンします。ディレクトリはどこでも良いのすが、
$ cd todo
$ git clone https://github.com/ionic-team/ionic-native.git
ionic-native/src/@ionic-native/pluginsの下には既存のIonic native pluginのソースコードが置いてあります。ビルドするときに邪魔になるので一旦pluginsの下を全て削除します。
$ rm -rf ionic-native/src/@ionic-native/plugins/*Native Plugin用のファイルの生成
$ cd ionic-native
$ npm install
$ gulp plugin:create -n HelloWorldPlugin
gulpが未インストールの場合はインストール
npm install -g gulp正常に終了すると以下のファイルが生成されます。
src/@ionic-native/plugins/hello-world-plugin/index.tsプラグインの定義部分を以下のように変更します。
src/@ionic-native/plugins/hello-world-plugin/index.ts@Plugin({ pluginName: 'HelloWorldPlugin', plugin: 'cordova-plugin-helloworld', // npm package name, example: cordova-plugin-camera pluginRef: 'HelloWorldPlugin', // the variable reference to call the plugin, example: navigator.geolocation repo: '', // the github repository URL for the plugin install: '', // OPTIONAL install command, in case the plugin requires variables installVariables: [], // OPTIONAL the plugin requires variables platforms: ['Android', 'iOS'], // Array of platforms supported, example: ['Android', 'iOS'] }) /** ・pluginName:コマンド実行時に自動で追加されます。今回作成するパッケージ名になります。実際には、wewi-cordova-pluginで読み出します。 ・plugin:前回作成したcordova pluginのidです。 ・pluginRef:cordova pluginの呼び出し名です。 ・platforms:利用するplatformを配列で指定。 */次にクラス内にメソッドを追加します。今回作成したメソッドは、helloだけなので下記の様になります。複数ある場合は、同じ様に追加して行きます。
src/@ionic-native/plugins/hello-world-plugin/index.ts@Injectable() export class HelloWorldPlugin extends IonicNativePlugin { /** * This function does something * @param arg1 {string} Some param to configure something * @param arg2 {number} Another param to configure something * @return {Promise<any>} Returns a promise that resolves when something happens */ @Cordova() echo(arg1: string): Promise<any> { return; // We add return; here to avoid any IDE / Compiler errors } }最後にlintでエラーが発生するので、不要なimportは削除する。今回のimport文は、下記の通りとになります。
import { Injectable } from '@angular/core';
import { Plugin, Cordova, IonicNativePlugin } from '@ionic-native/core';
Native Pluginのビルド
index.tsの編集が完了したら、次にbuildしてnpmでインストール出来る形にします。
$ npm run buildコマンドが正常終了すると、下記のディレクトリが出来ているはずです。
dist/@ionic-native/wewi-cordova-plugin

├── index.d.ts

├── index.js

├── index.js.map

├── index.metadata.json

└── package.json
Native Pluginのインストール
作成したNative Pluginをインストールします。単純にプロジェクトのnode_modules/@ionic-nativeの下にコピーしても使えますが、アプリのビルドなどをしていると消えることがあるので、インストールした方が良いようです。インストールはプロジェクトのトップで以下のコマンドを実行します。
※私の環境では、上記でpackage.jsonが作成されなかったので、コピーして使用しました。$ npm install --save 任意のフォルダ/ionic-native/dist/\@ionic-native/hello-world-plugin呼び出しコードを修正
home.module.tsimport { NgModule } from "@angular/core"; import { CommonModule } from "@angular/common"; import { IonicModule } from "@ionic/angular"; import { FormsModule } from "@angular/forms"; import { HomePage } from "./home.page"; import { HelloWorldPlugin } from "@ionic-native/hello-world-plugin/ngx"; ・・・追加 import { HomePageRoutingModule } from "./home-routing.module"; @NgModule({ imports: [CommonModule, FormsModule, IonicModule, HomePageRoutingModule], declarations: [HomePage], providers: [HelloWorldPlugin], ・・・追加 }) export class HomePageModule {}home.page.tsimport { Component } from "@angular/core"; import { Platform } from "@ionic/angular"; import { HelloWorldPlugin } from "@ionic-native/hello-world-plugin/ngx"; ・・・追加 // declare var HelloWorld: any; ・・・削除 @Component({ selector: "app-home", templateUrl: "home.page.html", styleUrls: ["home.page.scss"], }) export class HomePage { 変更・・・ constructor(public platform: Platform, public helloworld: HelloWorldPlugin) { this.platform.ready().then(() => { this.helloworld.echo("ACN").then((message) => { this.successCallback(message); }); }); } ・・・ //成功時の処理 successCallback(message) { alert(message); } //エラー時の処理 errorCallback() { alert("hello error"); } }Git
参考
- 投稿日:2020-09-17T21:14:06+09:00
ArcGIS Runtime SDK:AR (拡張現実) ツールキットと Xamarin によるビルドとデプロイ手順のご紹介
AR アプリについて書きました。
Xamarin による iOS と Android のビルドとデプロイ手順も紹介しています。ArcGIS Runtime SDK:AR (拡張現実) ツールキットと Xamarin によるビルドとデプロイ手順のご紹介
https://community.esri.com/docs/DOC-15422
- 投稿日:2020-09-17T21:10:57+09:00
AndroidのViewを回転させ続ける方法
SampleFragment.ktprivate fun rotateLoadingImage() { // 画像の中心を軸に回転させる val rotate = RotateAnimation( 0f, 360f, Animation.RELATIVE_TO_SELF, 0.5f, Animation.RELATIVE_TO_SELF, 0.5f ) // 一回転にかかる時間(ms) rotate.duration = 3000 // 回転速度を一定にする rotate.interpolator = LinearInterpolator() // 無限リピート rotate.repeatCount = Animation.INFINITE // ImageViewのstartAnimationメソッドを呼び出す image_loading.startAnimation(rotate) }
- 投稿日:2020-09-17T18:18:36+09:00
OkHttp Authenticatorでのtokenの更新処理とUnitTest
概要
OkHttpのAuthenticatorを利用することでステータスコードが
401 Unauthorized(認証の失敗)であった場合に任意の処理を実行できます。Authenticatorの実装例
次のコードはAuthenticatorの実装例です。リクエストにAuthorization Headerでtokenを付与する必要があるAPIを想定しています。
class MyAuthenticator(private val repository: AuthenticationRepository) : Authenticator {

    private val Response.retryCount: Int
        get() {
            var currentResponse = priorResponse()
            var result = 1
            while (currentResponse != null) {
                result++
                currentResponse = currentResponse.priorResponse()
            }
            return result
        }

    override fun authenticate(route: Route?, response: Response): Request? = when {
        response.retryCount >= 3 -> null
        else -> {
            val token = runBlocking { repository.refreshToken() }
            response.request()
                .newBuilder()
                .addHeader("Authorization", "Bearer ${token}")
                .build()
        }
    }
}
response.retryCountが3未満の場合にtokenの更新と再リクエストを行います。この実装ではリトライ回数は3回です。override fun authenticate(route: Route?, response: Response): Request? = when { response.retryCount >= 3 -> null else -> { // tokenの更新と再リクエスト } }
retryCountはResponseクラスの拡張関数として実装していますが、これはこちらの記事の実装を参考にしています(綺麗な実装で好きです)。tokenを更新する処理は次のinterfaceで定義していて、
repository.refreshToken()のようにしてtokenの更新処理を行います。interface AuthenticationRepository { suspend fun refreshToken(): String }suspend functionなのでAuthenticatorでは
runBlockingで実行します。val token = runBlocking { repository.refreshToken() }使用方法
OkHttp Clientを作成する際に
authenticatorに実装したAuthenticatorをセットすることで使用できます。val client: OkHttpClient = OkHttpClient().newBuilder() .authenticator(MyAuthenticator(authenticationRepository)) .build()AuthenticatorのUnitTest
Authenticatorのテストもinterceptorと同様に書けます。次のテストコードは1度目のリトライで認証が成功した場合を想定します。モックライブラリにはMockk、アサーションライブラリにはTruthを使用しています。
@RunWith(AndroidJUnit4::class)
class AuthenticatorTest {

    @get:Rule
    val server: MockWebServer = MockWebServer()

    @Test
    fun authenticatorTest() {

        // MockResponseの用意
        server.enqueue(MockResponse().apply {
            status = "HTTP/1.1 401 Unauthorized"
        })
        server.enqueue(MockResponse().apply {
            status = "HTTP/1.1 200 OK"
        })

        // refreshTokenが成功し新しいtokenが返るよう指定
        val repository = mockk<AuthenticationRepository>()
        coEvery { repository.refreshToken() } returns "NEW_TOKEN"

        val client: OkHttpClient = OkHttpClient().newBuilder()
            .authenticator(MyAuthenticator(repository))
            .build()
        val response = client.newCall(Request.Builder().url(server.url("/")).build()).execute()

        // refreshToken関数が実行されていることを検証
        coVerify { repository.refreshToken() }

        // 想定通りHeaderにtokenが指定されていることを検証
        Truth.assertThat(response.request().header("Authorization")).isEqualTo("Bearer NEW_TOKEN")
    }
}
このテストコードでは、ステータスコード
HTTP/1.1 401 Unauthorizedと、HTTP/1.1 200 OKをセットした2つのMockResponseのそれぞれMockWebServerにenqueueします。そして、AuthenticationRepositoryをモックし、新しいtokenを返すよう指定します。その後テスト対象のAuthenticatorをセットしたclientを作成しリクエストを実行、最後にrequestを検証します。また、3回以上リトライを行った場合のテストは次のように書けます。
@RunWith(AndroidJUnit4::class)
class AuthenticatorTest {

    @get:Rule
    val server: MockWebServer = MockWebServer()

    @Test
    fun authenticatorTest() {

        repeat(4) {
            server.enqueue(MockResponse().apply {
                status = "HTTP/1.1 401 Unauthorized"
            })
        }

        val repository = mockk<AuthenticationRepository>()
        coEvery { repository.refreshToken() } returns ""

        val client: OkHttpClient = OkHttpClient().newBuilder()
            .authenticator(MyAuthenticator(repository))
            .build()
        val response = client.newCall(Request.Builder().url(server.url("/")).build()).execute()

        coVerify { repository.refreshToken() }

        Truth.assertThat(responseCount(response)).isEqualTo(3)
        Truth.assertThat(response.isSuccessful).isFalse()
    }

    private fun responseCount(response: Response): Int {
        var currentResponse = response.priorResponse()
        var result = 1
        while (currentResponse != null) {
            result++
            currentResponse = currentResponse.priorResponse()
        }
        return result
    }
}
参考
- https://square.github.io/okhttp/recipes/#handling-authentication-kt-java
- https://github.com/yschimke/okhttp/blob/f9171936cac4cfc607b622951e7e65a085781a6a/okhttp/src/main/kotlin/okhttp3/Authenticator.kt
- コメントにリトライ回数をカウントするサンプルコードが書かれています。
- https://www.lordcodes.com/articles/authorization-of-web-requests-for-okhttp-and-retrofit
- 投稿日:2020-09-17T18:09:13+09:00
6. 【Android/Kotlin】スピナー(Spinner)
はじめに
DreamHanksのMOONです。
前回は「ダイアログ」について説明をしていきました。
5. 【Android/Kotlin】ダイアログ(Dialog)今回はスピナーというViewについて説明していきます。
スピナーとは
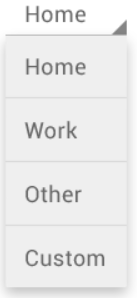
スピナーは
HTMLのタグのselectと同じ機能のViewです。
Viewをクリックしするとアイテムが表示されるし、アイテム中に一つをクリックするとそのアイテムがスピナーに配置されます。
スピナーにアイテム追加
アイテムを追加する方法は二つがあります。
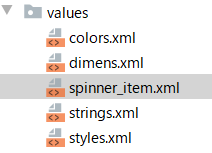
1.xmlファイルにアイテムを追加
・アイテムのリソースxmlファイルを作成
<?xml version="1.0" encoding="utf-8"?>
<resources>
    <string-array name="user_items">
        <item>佐藤</item>
        <item>鈴木</item>
        <item>高橋</item>
        <item>伊藤</item>
        <item>渡辺</item>
        <item>山本</item>
        <item>中村</item>
        <item>小林</item>
        <item>加藤</item>
    </string-array>
</resources>
・レイアウトのxmlファイルを作成
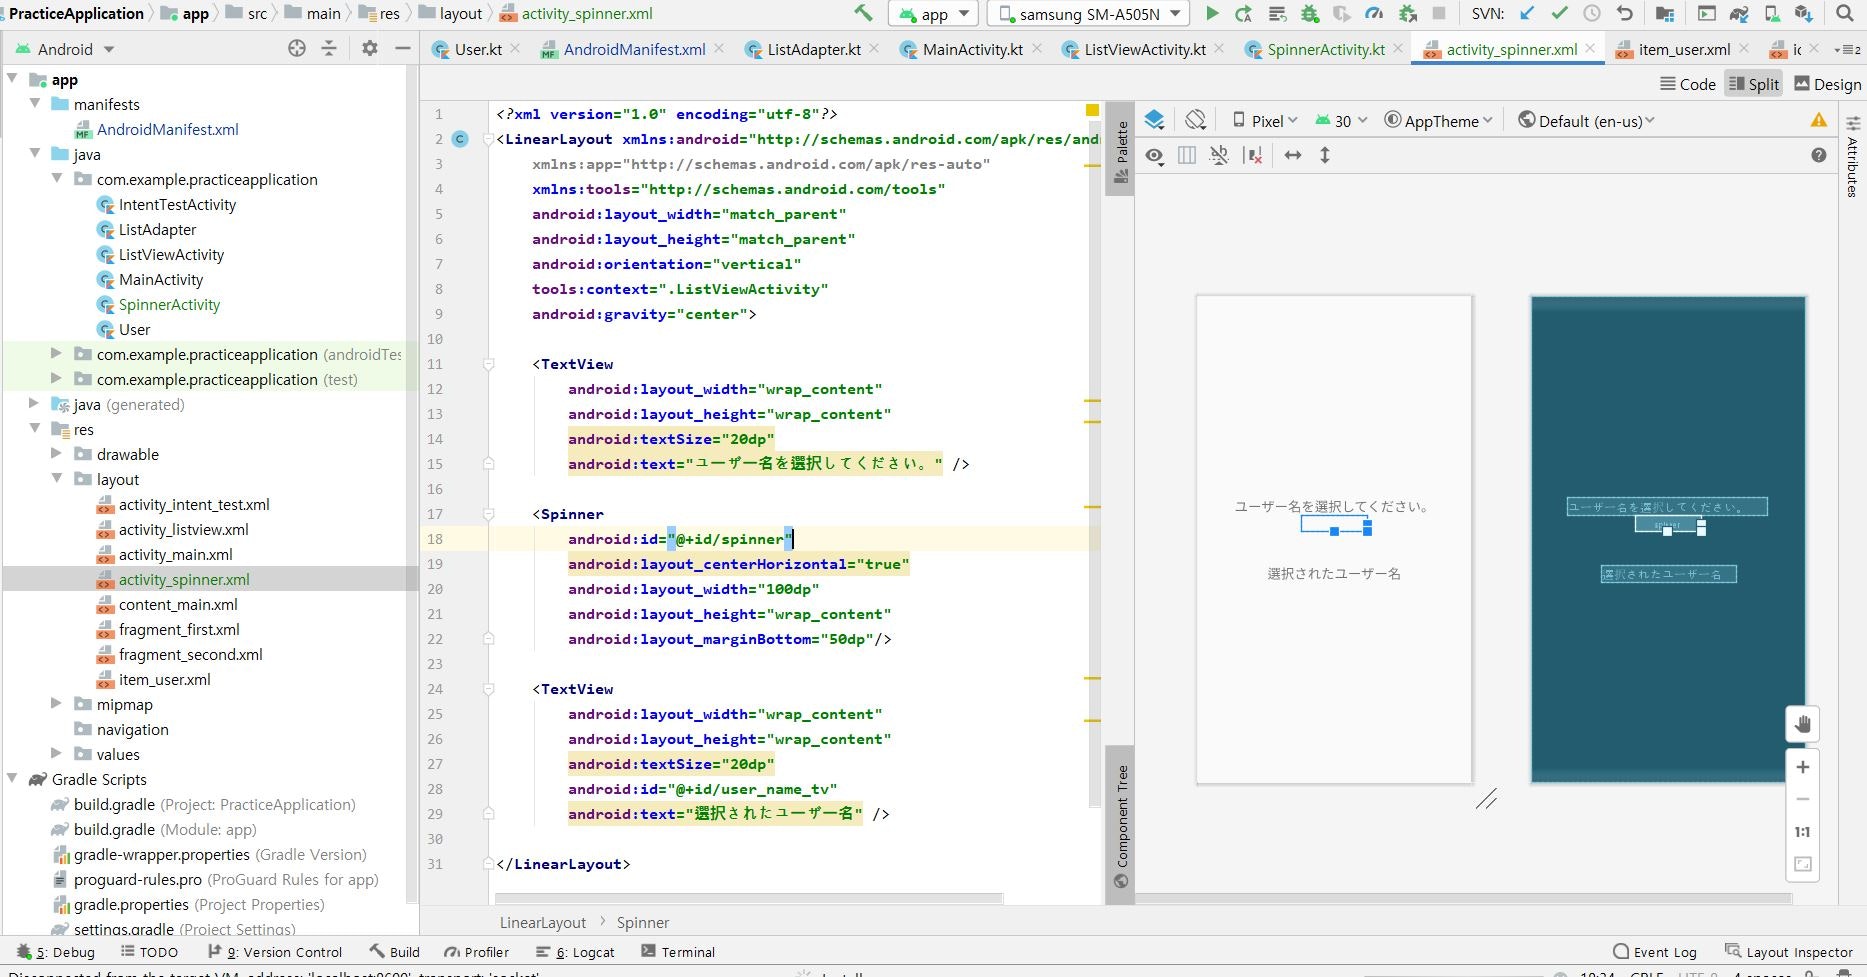
activity_spinner.xml<?xml version="1.0" encoding="utf-8"?> <LinearLayout xmlns:android="http://schemas.android.com/apk/res/android" xmlns:app="http://schemas.android.com/apk/res-auto" xmlns:tools="http://schemas.android.com/tools" android:layout_width="match_parent" android:layout_height="match_parent" android:orientation="vertical" tools:context=".ListViewActivity" android:gravity="center"> <TextView android:layout_width="wrap_content" android:layout_height="wrap_content" android:textSize="20dp" android:text="ユーザー名を選択してください。" /> <Spinner android:id="@+id/spinner" android:layout_centerHorizontal="true" android:layout_width="100dp" android:layout_height="wrap_content" android:layout_marginBottom="50dp"/> <TextView android:layout_width="wrap_content" android:layout_height="wrap_content" android:textSize="20dp" android:id="@+id/user_name_tv" android:text="選択されたユーザー名" /> </LinearLayout>・Activityファイルを作成
SpinnerActivity.ktpackage com.example.practiceapplication import androidx.appcompat.app.AppCompatActivity import android.os.Bundle import android.view.View import android.widget.* class SpinnerActivity : AppCompatActivity() { override fun onCreate(savedInstanceState: Bundle?) { super.onCreate(savedInstanceState) setContentView(R.layout.activity_spinner) var user_name_tv = findViewById<TextView>(R.id.user_name_tv) var spinner = findViewById<Spinner>(R.id.spinner) //xmlファイルからアイテムの配列を取得 val items = resources.getStringArray(R.array.user_items) //アダプターにアイテム配列を設定 val Adapter = ArrayAdapter(this, android.R.layout.simple_spinner_dropdown_item, items) //スピナーにアダプターを設定 spinner.adapter = Adapter //スピナーのセレクトイベント設定 spinner.onItemSelectedListener = object : AdapterView.OnItemSelectedListener { override fun onItemSelected( parent: AdapterView<*>, view: View, position: Int, id: Long ) { //選択されたアイテムをテキストビューに設定 val userName = parent.getItemAtPosition(position); user_name_tv.text = userName.toString() } override fun onNothingSelected(p0: AdapterView<*>?) { } } } }2.配列やリストにアイテムを追加
・レイアウトのxmlファイルを作成
レイアウトのxmlは上記と同じxmlです。・Activityファイルを作成
SpinnerActivity.ktpackage com.example.practiceapplication import androidx.appcompat.app.AppCompatActivity import android.os.Bundle import android.view.View import android.widget.* class SpinnerActivity : AppCompatActivity() { override fun onCreate(savedInstanceState: Bundle?) { super.onCreate(savedInstanceState) setContentView(R.layout.activity_spinner) var user_name_tv = findViewById<TextView>(R.id.user_name_tv) var spinner = findViewById<Spinner>(R.id.spinner) //ユーザー名のリストを生成 var userList = arrayListOf<String>("佐藤", "鈴木", "高橋", "伊藤", "渡辺", "山本", "中村", "小林", "加藤") //アダプターにユーザー名のリストを設定 val Adapter = ArrayAdapter(this, android.R.layout.simple_spinner_dropdown_item, userList) //スピナーにアダプターを設定 spinner.adapter = Adapter //スピナーのセレクトイベント設定 spinner.onItemSelectedListener = object : AdapterView.OnItemSelectedListener { override fun onItemSelected( parent: AdapterView<*>, view: View, position: Int, id: Long ) { //選択されたアイテムをテキストビューに設定 val userName = parent.getItemAtPosition(position); user_name_tv.text = userName.toString() } override fun onNothingSelected(p0: AdapterView<*>?) { } } } }アプリ起動
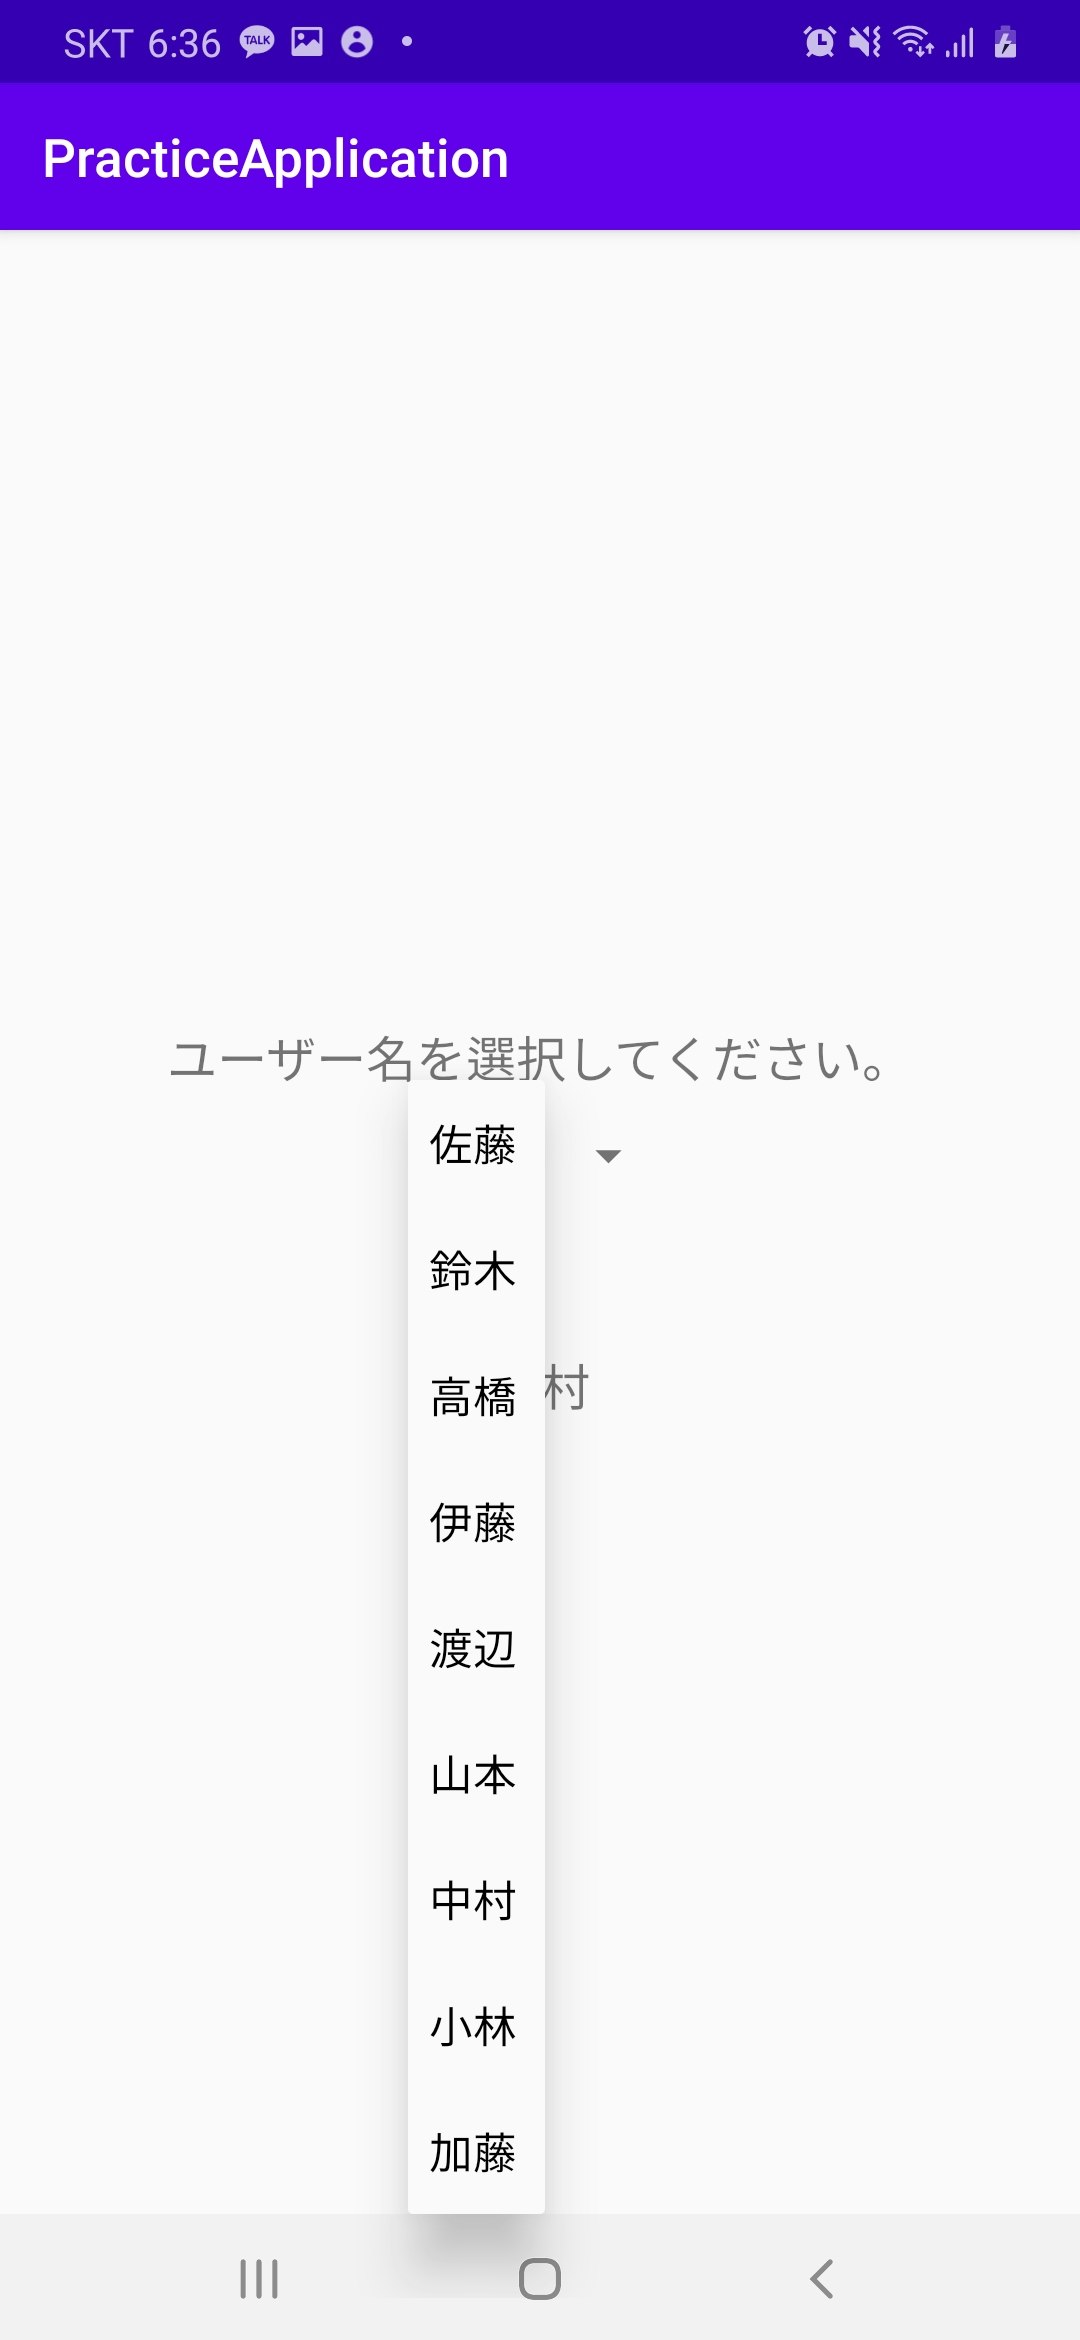
・スピナーをクリックした場合
・スピナーのアイテム中に「山本」をクリックした場合
終わりに
今回は「スピナー」について説明をしていきました。
次回はバリデーションチェックについて説明をしていきます。
7. 【Android/Kotlin】バリデーションチェック

- 投稿日:2020-09-17T17:17:19+09:00
GithubActionsでAndroidアプリのDeploygate配布、PlayStoreアップロードを自動化する
Androidアプリは規模が大きくなるとビルドにも時間がかかる。特にビルド待ち時間はbranchを切り替えて作業するわけにもいかず、とても効率が悪いため自動化をして楽をしよう。
CI/CDの実現方法
やり方はいくつか考えられ、それぞれメリットやデメリットがあるので要件や費用、運用の手間を考えて選択したいところ。
- 自前サーバーで運用
- サーバー立ててJenkinsなどのApplicationをインストールして運用する
- Macなどにインストールして社内ネットワーク上で使う
- 物理サーバーだと電源とかマシン自体のメンテナンスもやる必要があって非効率
- CI/CD専用のサービスを利用する
- CircleCIやBitriseなどのサービスを契約する
- お金がかかるが、コンテナ上でビルドできる
- 無料プランもあるが、制限はある
- VCSサービスに付属の機能を利用する
- お金がかかる場合があるが、コンテナ上でビルドできる
- 無料枠あり
- Gitlab CI/CD Pipeline(使ったことない)
- GithubActions(今回使う)
物理サーバーへの依存は極力さけたいのと、昨今盛り上がってきているGithubActionsですべて対応することにしてみた。
GithubActions
https://github.co.jp/features/actions
2019年に正式に発表された、Githubで使えるCI/CDツール。
Github上から直接コードをビルド、テスト、デプロイできる。CircleCIなどを使ったことがあるのであれば、比較的簡単に入門できると思われる。
git管理されているプロジェクトルートに.github/workflows/hogehoge.yamlを追加し、YAML形式で内容を記載して行く流れになる。
※「workflows」でないと正しく認識されないため注意(最後のsを忘れがち)workflowのトリガーイベント
workflowのトリガーにはいくつか種類があるので、最適なものを選択してYAMLに記載すると、適切なタイミングでworkflowを実行することができる。
詳しくは本家ドキュメントにて。hogehoge.yamlon: push: branches: # 指定branchへのpush / mergeをトリガーとしてworkflowを起動。マージ後に自動デプロイしたい場合など - master - feature/hoge pull_request: # 指定branchへのpull request作成をトリガーとしてworkflowを起動。レビュー前にテスト実行や自動レビューを行いたい場合など branches: - master jobs: buid: name: hoge...新たなトリガー: workflow_dispatch
https://github.blog/changelog/2020-07-06-github-actions-manual-triggers-with-workflow_dispatch/
2020年7月、workflow_dispatchという新たなトリガーがアナウンスされ、workflowの手動実行が可能になった。
これにより、githubイベントによるトリガーだけではなく、必要なときにworkflowを起動することができる。inputパラメーターも受け付けるため、外部から値を受け取り動的に挙動を変えることも可能。
hogehoge.yamlon: workflow_dispatch: # 手動トリガーとする場合 inputs: some_param_1: required: true description: 必須パラメーター some_param: required: false description: オプショナルパラメーター jobs: buid: name: hoge...そうすると、このようにgithubのActionsタブに行くと、workflowをマニュアル実行できるボタンが出現する。
今回やること
今回やることは大きく分けて3つ。
1. githubのイベントトリガーによるDeploygate自動配布
2. workflow_dispatchトリガーによるDeploygateマニュアル配布
3. workflow_dispatchトリガーによるPlayストアアップロード1. githubのイベントトリガーによるDeploygate自動配布
用途としては、QAをクリアしリリース待機状態になっているビルドを常に最新に保つ。
確認したければ固定のDeploygate配布ページから確認すればいつでも最新のビルドを確認することが可能になる。
以下のようなYAMLを.github/workflows/直下に作成。.github/workflows/hoge.yamlname: Deploygate Auto Distribution on: push: branches: - master # master branchへのpush / mergeをトリガーとしてworkflow開始 jobs: build: runs-on: ubuntu-latest # skip ciの場合は実行しない if: "!contains(github.event.head_commit.message, '[skip ci]')" steps: - uses: actions/checkout@v2 # branchチェックアウト - uses: actions/cache@v1 # gradle依存関係をキャッシュする(次回以降高速化のため) with: path: ~/.gradle/caches key: ${{ runner.os }}-gradle-${{ hashFiles('**/*.gradle') }} restore-keys: | ${{ runner.os }}-gradle- - name: setup JDK # JDKをセットアップする uses: actions/setup-java@v1 with: java-version: 1.8 - name: sensitive shell: bash env: DECRYPT_PASS: ${{ secrets.DECRYPT_PASS }} // github secretsから復号化キーを取得 run: | # opensslが1.1.1gのためMacでLibreSSL使っている場合はコマンドを変える必要があるかもしれない # 復号化コマンド - name: Build Debug // デバッグビルドの実行 shell: bash run: | ./gradlew assembleDebug - name: Distribute Debug env: DEP_API_KEY: ${{ secrets.DEP_API_KEY }} # 以下のcurlで利用するAPIキーやdistributionキーなどをsecretsからgithub 取得 run: | # DeploygateのAPIリファレンスに従って、curl処理 - name: Notification on Success # workflow処理成功時の処理 if: success() run: | # slackなどのチャットツールに通知するcurl - name: Notification on Failure # workflow処理失敗時の処理 if: failure() run: | # slackなどのチャットツールに通知するcurlここでのポイントは
if: "!contains(github.event.head_commit.message, '[skip ci]')"によりCIスキップを実現
- CI処理が不要な場合にコミットメッセージに [skip ci] を入れるとworkflowがスキップされるようになる
actions/cache@v1によりgradle依存関係をキャッシュ
- 次回以降はキャッシュから読み出すため、場合によっては数分程度処理が短縮される
- ただし、workflow_dispatchの場合はキャッシュサポートされていないため注意が必要
- センシティブなキーは直書きせずに、github secretsに登録
{{ secrets.HOGE }}により環境変数に読み出すようにするif: success()if: failure()により成功・失敗をSlack等に通知する2. workflow_dispatchトリガーによるDeploygateマニュアル配布
用途としては、開発中branchでエンジニア以外のメンバーに一旦確認をしてもらいたいときなど、branchを指定してworkflowを手動実行する。
配布終了するとチャットツールに通知されるため、誰でもそのビルドを確認できるようになる。
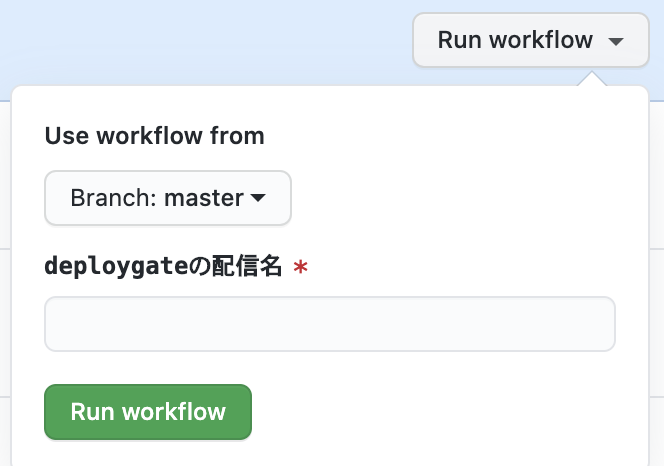
workflow_dispatchを使う上での変更点は以下のみname: Deploygate Manual Distribution on: workflow_dispatch: inputs: distribution_name: required: true description: deploygateの配信名 jobs: # 中略 - name: Distribute Debug run: | # Deploygate APIのパラメーターで distribution_name=${{github.event.inputs.distribution_name}} のようにinputからの文字列を指定ここでのポイントは
- inputs を受け付けることで、動的にDeploygateの配布ページを作成するようにする
- このように、workflow実行時に配信名を入力できるようになる
3. workflow_dispatchトリガーによるPlayストアアップロード
Play Publishing APIを使ってPlayストアにアップロードを行う。
なお、Github Actionsマーケットプレイスにすでに対応されたActionsが公開されているため、一番早いのはこの方法。
https://github.com/marketplace/actions/upload-android-release-to-play-store今回は、将来的にいろいろと拡張しやすいのと、そこまで大変な作業ではないため自前で準備することにした。
Play Publishing APIはpythonのサンプルがあるため、こちらを参考に。最新版のv3を利用。
しかし、サンプルのコード自体が古く、今ではremoveされているメソッドや、サービスアカウント認証が推奨ではないp12キーファイルによる認証となっているため、新しい環境でも動くように改変。まずは以下のファイルを
.github/workflows/scriptsなどのディレクトリに配置requirements.txt# pipで依存関係を一括インストール用 google-api-python-client ~= 1.11.0 oauth2client ~= 4.1.3upload_aab.py"""Uploads an aab to the internal track.""" import argparse import sys from googleapiclient.discovery import build from googleapiclient.http import MediaFileUpload import httplib2 from oauth2client import client from oauth2client.service_account import ServiceAccountCredentials TRACK = 'internal' # or can be 'alpha', beta', 'production' or 'rollout' # workflow.yamlからの入力受付用 argparser = argparse.ArgumentParser(add_help=False) argparser.add_argument('package_name', default='com.examole.app', help='The package name. Example: com.android.sample') argparser.add_argument('aab_file', nargs='?', default='app-release.aab', help='The path to the AAB file') argparser.add_argument('service_account_json', nargs='?', help='The path to the key file of service account.') def main(argv): scopes = ['https://www.googleapis.com/auth/androidpublisher'] flags = argparser.parse_args() service_account_json = flags.service_account_json # サンプルではここがp12ファイルを利用していたため、サービスアカウントのjsonキーファイルで認証するように変更 credentials = ServiceAccountCredentials.from_json_keyfile_name(service_account_json, scopes=scopes) http = httplib2.Http() http = credentials.authorize(http) service = build('androidpublisher', 'v3', http=http) package_name = flags.package_name aab_file = flags.aab_file try: edit_request = service.edits().insert(body={}, packageName=package_name) result = edit_request.execute() edit_id = result['id'] print('Edit ID : "%s"' % edit_id) # aabのアップロード(apkとはアップロード方法が異なるため注意) media = MediaFileUpload(aab_file, mimetype='application/octet-stream', resumable=True) aab_response = service.edits().bundles().upload( editId=edit_id, packageName=package_name, media_body=media).execute() print('Version code %d has been uploaded' % aab_response['versionCode']) # Trackの更新(internal track) track_response = service.edits().tracks().update( editId=edit_id, track=TRACK, packageName=package_name, body={u'releases': [{ u'name': u'アップロード時の文言を指定', u'versionCodes': [str(aab_response['versionCode'])], u'status': u'completed', }]}).execute() print('Track %s is set with releases: %s' % ( track_response['track'], str(track_response['releases']))) # Transactionのcommit commit_request = service.edits().commit( editId=edit_id, packageName=package_name).execute() print('Edit "%s" has been committed' % (commit_request['id'])) except client.AccessTokenRefreshError: print ('The credentials have been revoked or expired, please re-run the ' 'application to re-authorize') if __name__ == '__main__': main(sys.argv)続いてworkflow。Deploygateと同様な部分は記載割愛。
store_upload.yamlname: Upload To Play Store on: workflow_dispatch: jobs: build-and-upload-store: runs-on: ubuntu-latest steps: - uses: actions/checkout@v2 with: ref: ${{ github.event.inputs.branch_name }} # 中略 uses: actions/setup-java@v1 with: java-version: 1.8 - name: Build Release # リリース用ビルド shell: bash run: | ./gradlew bundleRelease - name: Install python dependencies # requirements.txtから依存一括インストール run: | python -m pip install --upgrade pip pip install -r ./.github/workflows/scripts/requirements.txt - name: Upload to play store # ストアの内部テストトラックへアップロード run: | python './.github/workflows/scripts/upload_aab.py' \ 'com.example.your.package' \ 'app/build/outputs/bundle/release/app-release.aab' \ # ここは環境によって変更 './.github/workflows/account.json' # 必要に応じて暗号化したjsonを事前に復号化する # 成功失敗の通知ここでのポイントは
- サービスアカウントの認証をjsonキーファイルを利用するように変更
- ただし、github secretsはjsonなどの構造化ファイルを置けないため、暗号化してpushし、使う前に復号化する等の対策が必要
- apkではなくaabアップロードできるように少し変更
- 自前の実行ファイル(python)を準備して、workflowから直接呼び出し
最後に
今回はAndroidビルドによるサンプルだったが、それ以外でもCI/CDとしてかなり使えそうなため、どんどん使って行きたい。
毎回ローカルPCでの手動ビルドによる待ち時間やビルドミスの削減にもつながるため、効率化はかなりされたと思う。
python2でしか動作しないので早いとこpython3に移行しないと・・・

- 投稿日:2020-09-17T14:10:46+09:00
Android Hilt Componentsを紹介する
アジェンダ
- Hiltとは
- 導入手順
- Hilt Application
- Components
- Moduleの作り方
- Activity, Fragmentでinject方法
Hiltとは
背景
- Dagger - Square社が開発したもの
- Dagger2 - GoogleがDaggerをforkして通称Dagger2を作っている
- Dagger2 + Android
- Dagger Android Supportの複雑性
- components and scopesが標準ではない
- マルチモジュールの流れと相性が悪く
- Android Hilt
最新バージョン
- https://search.maven.org/search?q=g:com.google.dagger%20hilt
- 2.28.3-alpha(2020.09.07時点)
- まだalpha版ですが、ドキュメントがある
メリット
- 使い方が簡単になる
- 標準化になる
導入手順
build dependencies
dependencies {
  implementation 'com.google.dagger:hilt-android:<VERSION>'
  kapt 'com.google.dagger:hilt-android-compiler:<VERSION>'

  // For instrumentation tests
  androidTestImplementation  'com.google.dagger:hilt-android-testing:<VERSION>'
  kaptAndroidTest 'com.google.dagger:hilt-android-compiler:<VERSION>'

  // For local unit tests
  testImplementation 'com.google.dagger:hilt-android-testing:<VERSION>'
  kaptTest 'com.google.dagger:hilt-android-compiler:<VERSION>'
}

kapt {
 correctErrorTypes true
}
Plugin設定
buildscript {
  repositories {
    // other repositories...
    mavenCentral()
  }
  dependencies {
    // other plugins...
    classpath 'com.google.dagger:hilt-android-gradle-plugin:<version>'
  }
}
apply plugin: 'com.android.application' apply plugin: 'dagger.hilt.android.plugin' android { // ... }
プラグインを使う理由
- プラグインを使わないと、親クラスをアノテーションで指定しないといけない
@HiltAndroidApp(MultiDexApplication.class)
public final class MyApplication extends Hilt_MyApplication {}
- プラグインを使う
@HiltAndroidApp
public final class MyApplication extends MultiDexApplication {}
Hilt Application
before
方法1
public final class MyApplication extends MyBaseApplication {
  @Inject Bar bar;

  @Override public void onCreate() {
    super.onCreate();

    MyComponent myComponent =
        DaggerMyComponent
            .builder()
            ...
            .build();

    myComponent.inject(this);
  }
}
方法2
- DaggerApplication導入
after
@HiltAndroidApp
class App : Application() {
}
Components
Component lifetimes
Hiltでは
* Application
* Activity
* Fragment
* Service
* View
のライフサイクルがあらかじめ定義されている
Component default bindings
Component Default Bindings SingletonComponent Application ActivityComponent Application, Activity FragmentComponent Application, Activity, Fragment ViewComponent Application, Activity, View ServiceComponent Application, Service
Module
- Moduleにこのライフサイクルを定義するには、@InstallIn annotationを使います。
@Module
@InstallIn(SingletonComponent::class)
object class FooModule {
  @Provides
  @Singleton
  fun provideBar(): Bar {...}
}
Activity, Fragmentでinject方法
@AndroidEntryPoint
class MyActivity : MyBaseActivity() {
  // Bindings in SingletonComponent or ActivityComponent
  @Inject lateinit var bar: Bar

  override fun onCreate(savedInstanceState: Bundle?) {
    // Injection happens in super.onCreate().
    super.onCreate()

    // Do something with bar ...
  }
}
感想
- 新機能の追加がなし
- 使いやすくなる
- injectのやり方はほぼ変わっていないので、実装済み場合はHiltへ変更がいらないはず
- 投稿日:2020-09-17T13:49:49+09:00
Custom View 探求記(DataBindingを使うべきか使わぬべきかそれが問題だ編 その1)
今回の課題
今回は、内部に data binding を用いた custom view について考えてみようと思います。
ソース
※ ライブラリ的コードなどはシグニチャで動作が理解できると思うので割愛。
◆ MainActivity.kt
main_activity.xml の内容を表示するだけの Activity です。
class MainActivity : AppCompatActivity() {
    override fun onCreate(savedInstanceState: Bundle?) {
        super.onCreate(savedInstanceState)
        setContentView(R.layout.main_activity)
    }
}
◆ main_activity.xml
NameView を表示するだけのレイアウトです。
name 要素に John Smith が入っています。<?xml version="1.0" encoding="utf-8"?> <com.example.myapplication.NameView xmlns:android="http://schemas.android.com/apk/res/android" xmlns:app="http://schemas.android.com/apk/res-auto" xmlns:tools="http://schemas.android.com/tools" android:layout_width="wrap_content" android:layout_height="wrap_content" android:layout_gravity="center" app:name="John Smith" tools:context=".MainActivity" />◆ NameView
name 文字列を表示するだけの custom view です。
内部で data dinging を用いて、動的に name_view.xml を inflate しています。class NameView : FrameLayout { constructor(context: Context) : super(context) { init() } constructor(context: Context, attrs: AttributeSet?) : super(context, attrs) { init(attrs) } constructor(context: Context, attrs: AttributeSet?, defStyleAttr: Int) : super(context, attrs, defStyleAttr) { init(attrs) } constructor(context: Context, attrs: AttributeSet?, defStyleAttr: Int, defStyleRes: Int) : super(context, attrs, defStyleAttr, defStyleRes) { init(attrs) } // View として単一のライフサイクルなので普通に POJO を直接使う。 private val layoutModel: NameViewLayoutModelImpl = NameViewLayoutModelImpl() var name: String by StringMutableLiveDataDelegate(layoutModel.name) private fun init(attrs: AttributeSet? = null) { // name という attribute を受け付ける。 attrs?.let { name = getStringAttr(attrs, R.styleable.NameView, R.styleable.NameView_name, "") } // data binding を用いる NameViewBinding.inflate(LayoutInflater.from(context), this, true).let {binding -> binding.layoutModel = layoutModel // View として単一のライフサイクルなので常に resume 扱いにする。 binding.lifecycleOwner = AlwaysResumedLifecycleOwner() } } } private class NameViewLayoutModelImpl : NameViewLayoutModel { override val name: MutableLiveData<String> = MutableLiveData("") }◆ name_view.xml
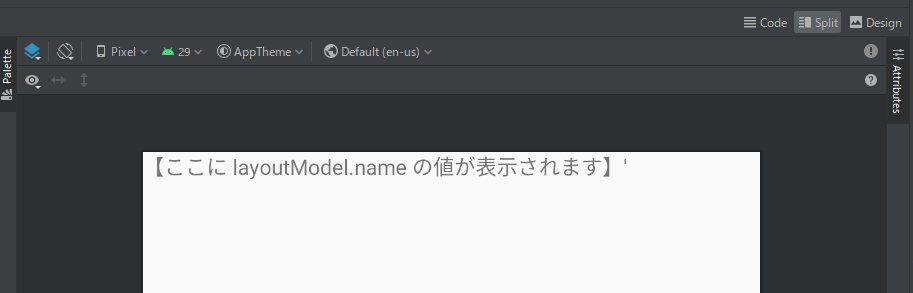
<?xml version="1.0" encoding="utf-8"?>
<layout xmlns:android="http://schemas.android.com/apk/res/android"
    xmlns:app="http://schemas.android.com/apk/res-auto"
    xmlns:tools="http://schemas.android.com/tools">
    <data>
        <variable
            name="layoutModel"
            type="com.example.myapplication.NameViewLayoutModel" />
    </data>
    <TextView
        android:layout_width="wrap_content"
        android:layout_height="wrap_content"
        android:text="@{layoutModel.name}"
        app:layout_constraintBottom_toBottomOf="parent"
        app:layout_constraintLeft_toLeftOf="parent"
        app:layout_constraintRight_toRightOf="parent"
        app:layout_constraintTop_toTopOf="parent"
        tools:text="【ここに layoutModel.name の値が表示されます】'" />
</layout>
結果
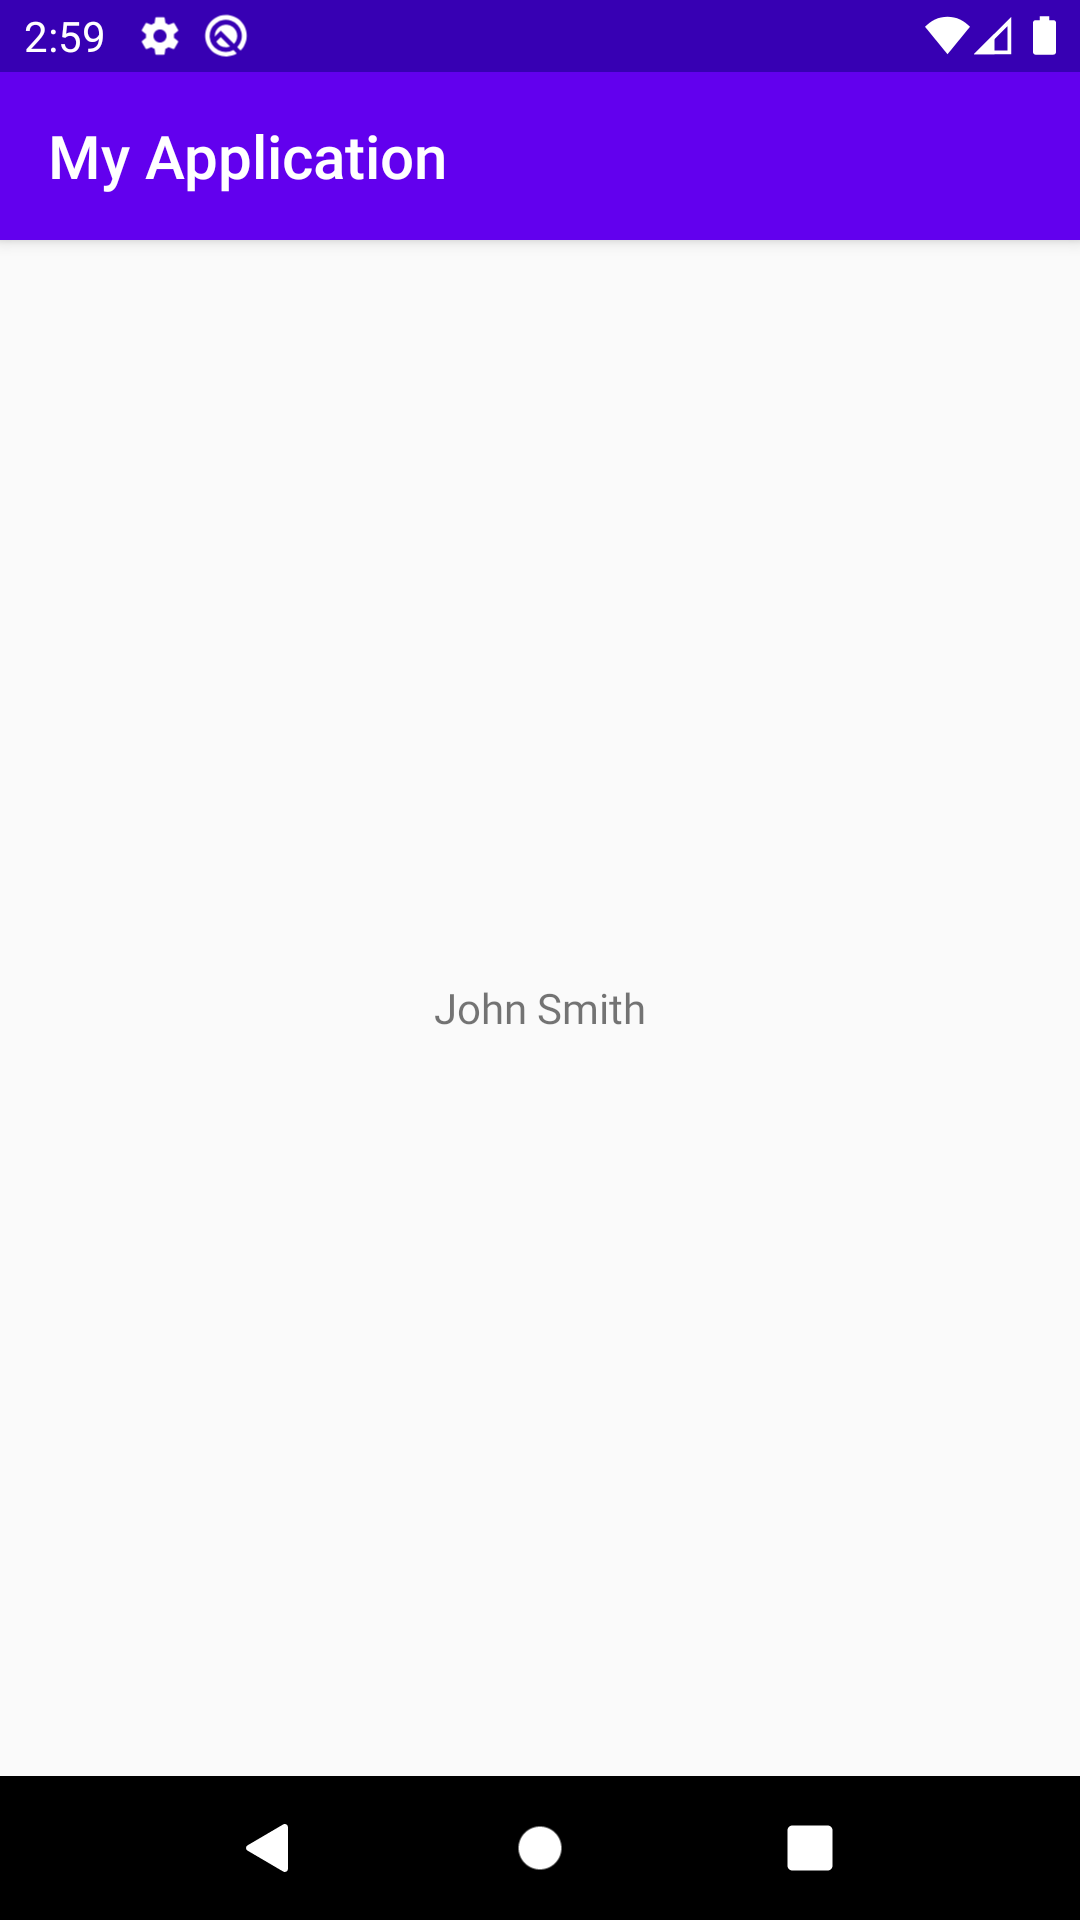
◆ 実機での表示
意図通りの画面が表示されています。
◆ レイアウトエディタ上での表示
☆ name_view.xml
tools:text の値が表示されています。
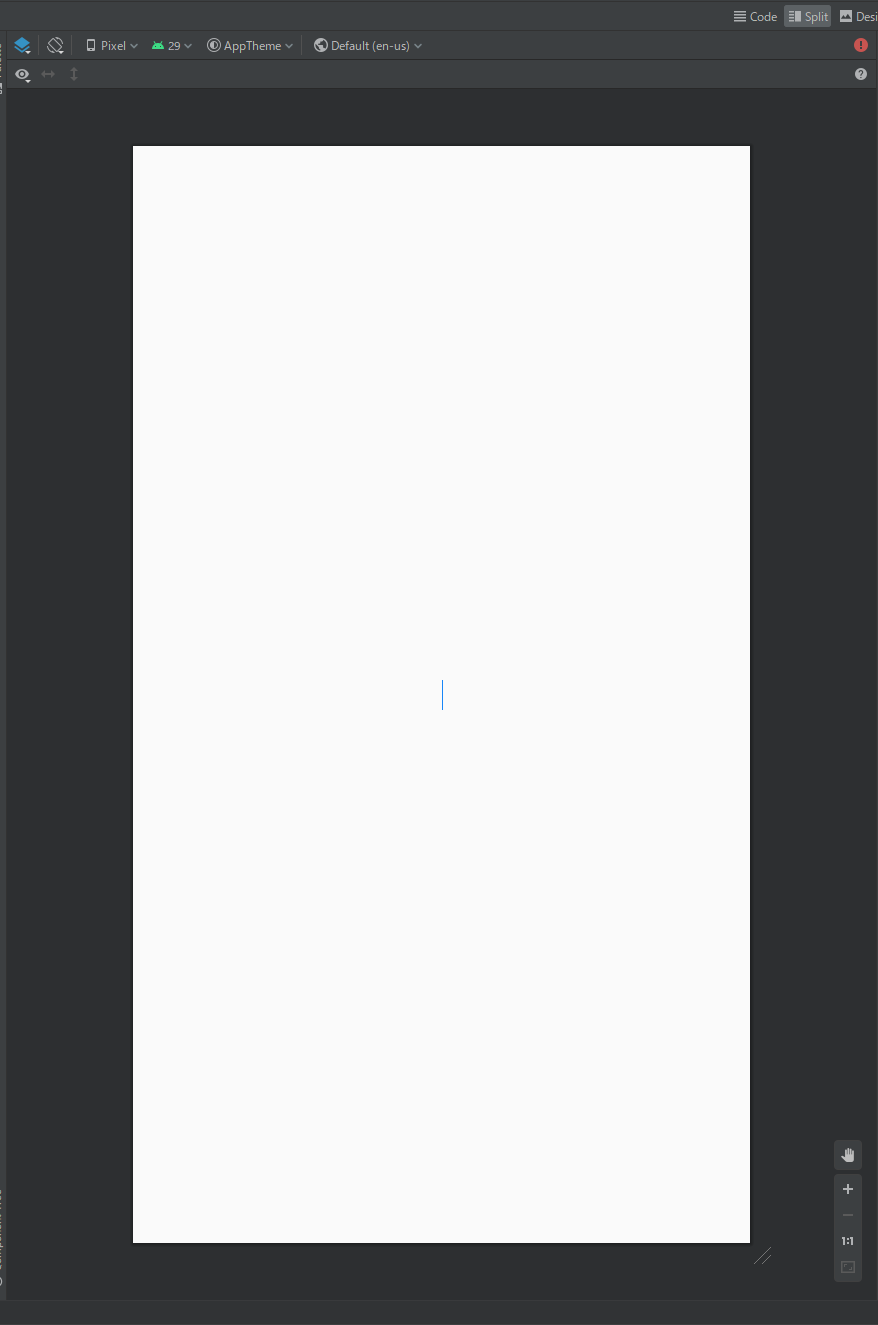
☆ name_view.xml
何も表示されていません。(´・ω・`)
ワークアラウンド
custom view で data binding を用いた場合、アプリでは動作しても、レイアウトエディタ上では data binding による振る舞いが反映しないようです。
◆ ソース
とりあえず、そういうものだと割り切って、ワークアラウンドしてみたものが以下のソース。
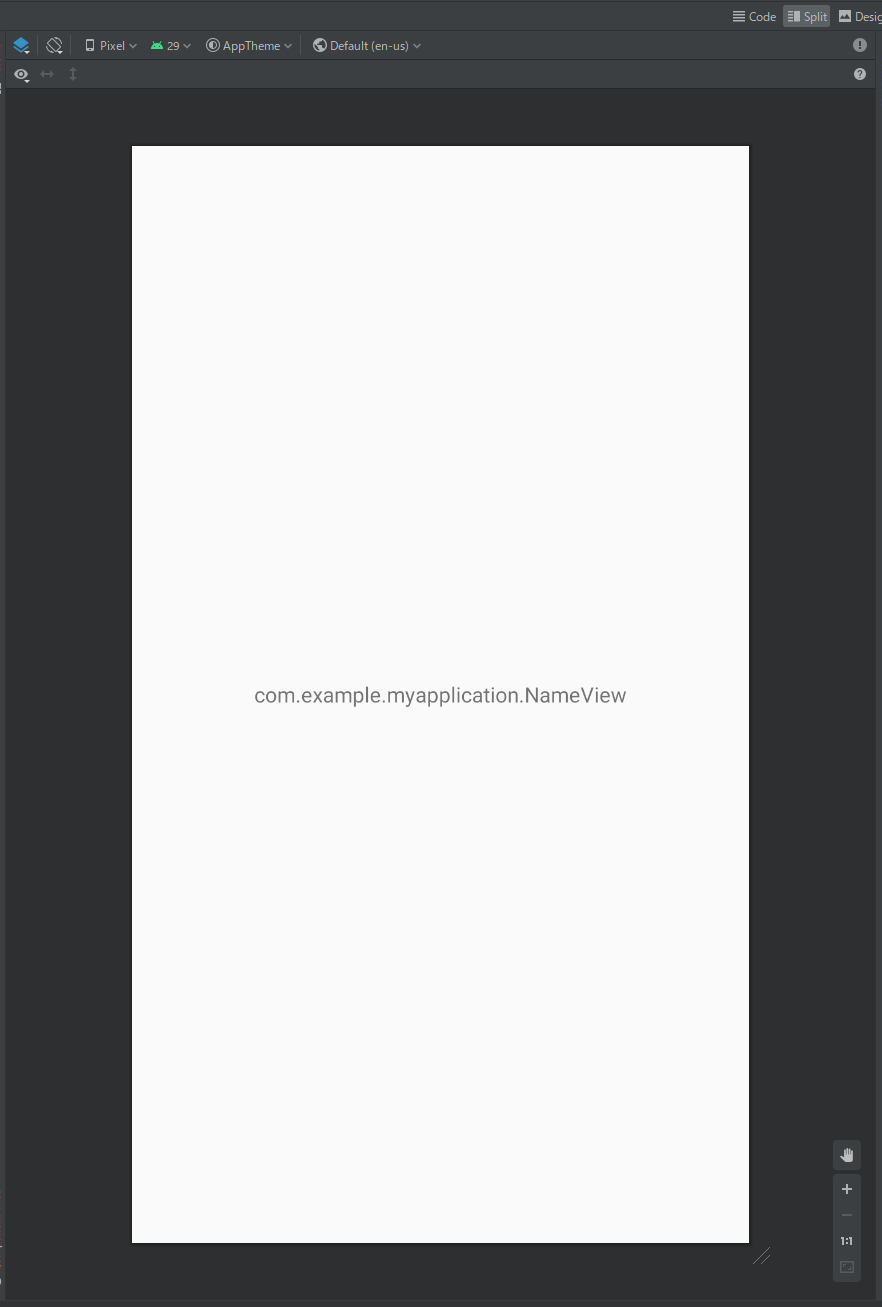
class NameView : FrameLayout {
    constructor(context: Context) : super(context) { init() }
    constructor(context: Context, attrs: AttributeSet?) : super(context, attrs) { init(attrs) }
    constructor(context: Context, attrs: AttributeSet?, defStyleAttr: Int) : super(context, attrs, defStyleAttr) { init(attrs) }
    constructor(context: Context, attrs: AttributeSet?, defStyleAttr: Int, defStyleRes: Int) : super(context, attrs, defStyleAttr, defStyleRes) { init(attrs) }

    private val layoutModel: NameViewLayoutModelImpl = NameViewLayoutModelImpl()

    var name: String by StringMutableLiveDataDelegate(layoutModel.name)

    private fun init(attrs: AttributeSet? = null) =
        when {
            isInEditMode -> initInEditMode()
            else -> initInNormalMode(attrs)
        }

    // 通常時
    private fun initInNormalMode(attrs: AttributeSet?) {
        attrs?.let {
            name = getStringAttr(attrs, R.styleable.NameView, R.styleable.NameView_name, "")
        }
        NameViewBinding.inflate(LayoutInflater.from(context), this, true).let { binding ->
            binding.layoutModel = layoutModel
            binding.lifecycleOwner = AlwaysResumedLifecycleOwner()
        }
    }

    // edit mode の場合には、AppCompatTextView を差し込んで、NameView の FQCN を表示する。
    private fun initInEditMode() {
        val textView = AppCompatTextView(context)
        textView.text = this::class.java.name
        addView(textView)
    }
}

private class NameViewLayoutModelImpl : NameViewLayoutModel {
    override val name: MutableLiveData<String> = MutableLiveData("")
}
以下は、レイアウトエディタ上で main_activity.xml を表示したもの:
何も表示されないよりはマシといったところでしょうか、、、。◆ 考察
レイアウトエディタ上で見た目が確認できないとどの程度困るのかなのですが、元々 RecyclerView や Fragment を差し込むようなケースではレイアウトエディタ上で目視確認できないことが多いので、あまり困らないような気もします。とは言っても TextView のような汎用的なものであればレイアウトエディタ上で確認できないのは致命的な気もします。
しかし、レイアウトエディタ上で確認できないことが致命的となるような custom view は、data binding を利用しなくても開発に支障の出ない規模に収まりそうな気もします。
そこら辺は、追って検証していきたいところです。
まとめ
- custom view 内部で data binding を用いた場合、アプリとしては動作する。しかし、Android Studio のレイアウトエディタ上では確認できないっぽい。
- Android Studio のレイアウトエディタ上で確認できないと割り切る場合、edit mode の場合のみ FQCN や edit mode 専用のレイアウトを表示させるというワークアラウンドで多少はマシになるかも。
- 現状でも RecyclerView や Fragment を差し込むような複雑な View はレイアウトエディタ上で目視確認できないことが多いので、レイアウトエディタ上で見れなくても実はあまり困らないかもw
- いい方法があれば教えてくださいmm
- 投稿日:2020-09-17T13:31:07+09:00
Kotlin DSL ビルド スクリプト ファイルについて
Android Studio 4.0 から、kts(Kotlin DSL ビルド スクリプト ファイル)がサポートされる様になりました。
ktsを導入するメリットは、記述が統一できることと、kotlinで実装が可能になります。では、実際に導入していきたいと思います。
buildSrc を作成
プロジェクトルート(appと同じ階層)に
buildSrcフォルダーを作成します。
作成したら、そのフォルダーにbuild.gradle.ktsファイルを作成して、下記の内容を記載します。
記載したら、Gradleを同期させます。
同期するとbuildSrc配下にGradle関連のフォルダーが作成されます。
- build.gradle.kts
plugins {
    `kotlin-dsl`
}

repositories {
    jcenter()
}
Dependenciesを作成
buildSrcに下記のフォルダーを作成します。
/buildSrc/src/main/java/
作成したら、Dependencies.ktを作成します。(ファイル名は、任意です)
- Dependencies.kt
object Dependencies {
    object Versions {
        const val gradle = "4.0.0"
        const val kotlin = "1.4.0"
        const val appcompat = "1.3.0-alpha02"
        const val core = "1.5.0-alpha02"
        const val material = "1.3.0-alpha02"
        const val junit = "1.1.2"
        const val runner = "1.3.0"
        const val espresso = "3.3.0"
    }

    object Android {
        const val compileSdk = 29
        const val targetSdk = 29
        const val minSdk = 26
        const val buildTools = "30.0.2"
        const val versionCode = 1
        const val versionName = "1.0.0"
    }

    object Plugin {
        const val gradle = "com.android.tools.build:gradle:${Versions.gradle}"
    }

    object AndroidX {
        const val core = "androidx.core:core-ktx:${Versions.core}"
        const val appcompat = "androidx.appcompat:appcompat:${Versions.appcompat}"
        const val material = "com.google.android.material:material:${Versions.material}"

        object Test {
            const val junit = "androidx.test.ext:junit:${Versions.junit}"
            const val espresso = "androidx.test.espresso:espresso-core:${Versions.espresso}"
        }
    }

    object Test {
        const val jUnit = "junit:junit:4.12"
    }
}
ktsに変換
ここから既存のgradleファイルをkts化していきます。
- settings.gradle
include ':app'
rootProject.name = "My Application"
- settings.gradle.kts
include(":app")
rootProject.name = "My Application"
- build.gradle(プロジェクト)
// Top-level build file where you can add configuration options common to all sub-projects/modules.
buildscript {
    ext.kotlin_version = "1.4.10"
    repositories {
        google()
        jcenter()
    }
    dependencies {
        classpath "com.android.tools.build:gradle:4.0.0"
        classpath "org.jetbrains.kotlin:kotlin-gradle-plugin:$kotlin_version"

        // NOTE: Do not place your application dependencies here; they belong
        // in the individual module build.gradle files
    }
}

allprojects {
    repositories {
        google()
        jcenter()
    }
}

task clean(type: Delete) {
    delete rootProject.buildDir
}
- build.gradle.kts(プロジェクト)
// Top-level build file where you can add configuration options common to all sub-projects/modules.
buildscript {
    repositories {
        google()
        jcenter()
    }
    dependencies {
        classpath(Dependencies.Plugin.gradle)
        classpath(kotlin("gradle-plugin", version = Dependencies.Versions.kotlin))

        // NOTE: Do not place your application dependencies here; they belong
        // in the individual module build.gradle files
    }
}

allprojects {
    repositories {
        google()
        jcenter()
    }
}

tasks.register<Delete>("clean").configure {
    delete(rootProject.buildDir)
}
- build.gradle(アプリ)
plugins {
    id 'com.android.application'
    id 'kotlin-android'
}

android {
    compileSdkVersion 30
    buildToolsVersion "30.0.2"

    defaultConfig {
        applicationId "com.example.myapplication"
        minSdkVersion 23
        targetSdkVersion 30
        versionCode 1
        versionName "1.0"

        testInstrumentationRunner "androidx.test.runner.AndroidJUnitRunner"
    }

    buildTypes {
        release {
            minifyEnabled false
            proguardFiles getDefaultProguardFile('proguard-android-optimize.txt'), 'proguard-rules.pro'
        }
    }
    compileOptions {
        sourceCompatibility JavaVersion.VERSION_1_8
        targetCompatibility JavaVersion.VERSION_1_8
    }
    kotlinOptions {
        jvmTarget = '1.8'
    }
}

dependencies {
    implementation "org.jetbrains.kotlin:kotlin-stdlib:$kotlin_version"
    implementation 'androidx.core:core-ktx:1.3.1'
    implementation 'androidx.appcompat:appcompat:1.2.0'
    implementation 'com.google.android.material:material:1.2.1'
    testImplementation 'junit:junit:4.+'
    androidTestImplementation 'androidx.test.ext:junit:1.1.2'
    androidTestImplementation 'androidx.test.espresso:espresso-core:3.3.0'
}
- build.gradle.kts(アプリ)
import org.jetbrains.kotlin.config.KotlinCompilerVersion

plugins {
    id("com.android.application")
    kotlin("android")
}

android {
    compileSdkVersion(Dependencies.Android.compileSdk)
    buildToolsVersion = Dependencies.Android.buildTools

    defaultConfig {
        applicationId = "com.example.myapplication"
        minSdkVersion(Dependencies.Android.minSdk)
        targetSdkVersion(Dependencies.Android.targetSdk)
        versionCode = Dependencies.Android.versionCode
        versionName = Dependencies.Android.versionName

        testInstrumentationRunner = "androidx.test.runner.AndroidJUnitRunner"
    }

    buildTypes {
        getByName("release") {
            isMinifyEnabled = false
            proguardFiles(
                    getDefaultProguardFile("proguard-android-optimize.txt"),
                    "proguard-rules.pro"
            )
        }
    }
    compileOptions {
        sourceCompatibility = JavaVersion.VERSION_1_8
        targetCompatibility = JavaVersion.VERSION_1_8
    }
    kotlinOptions {
        jvmTarget = "1.8"
    }
}

dependencies {
    implementation(kotlin("stdlib", KotlinCompilerVersion.VERSION))
    implementation(Dependencies.AndroidX.core)
    implementation(Dependencies.AndroidX.appcompat)
    implementation(Dependencies.AndroidX.material)
    testImplementation(Dependencies.Test.jUnit)
    androidTestImplementation(Dependencies.AndroidX.Test.junit)
    androidTestImplementation(Dependencies.AndroidX.Test.espresso)
}
これで、対応は完了になります。
メリットにも記載しましたが、gradleの場合、シングルコーテーションやダブルコーテーションが混在してますが、ktsではダブルコーテーションしか記述出来ないので、統一性が担保されます。
他にもkotlinで記載しているので、宣言箇所へのジャンプや補完など、通常のソースコードとして扱うことが出来るので、便利になります。
- 投稿日:2020-09-17T13:30:44+09:00
ADBで消した(無効化)アプリを戻す
- 投稿日:2020-09-17T13:24:50+09:00
【Unity】Android API29でビルドできないときの解決法
はじめに
最近Androidアプリをビルドするときにエラーが出てしまうことがありました。
なので今回はその修正方法をご紹介したいと思います。ブログ本文はこちらです。

- 投稿日:2020-09-17T12:47:25+09:00
部分角丸カスタムView
自分用のメモなので解説はないです。
RoundedCornersView.ktimport android.content.Context import android.content.res.Resources import android.graphics.Canvas import android.graphics.Path import android.graphics.RectF import android.util.AttributeSet import android.widget.FrameLayout /** * 角丸View. */ class RoundedCornersView(context: Context, attrs: AttributeSet?) : FrameLayout(context, attrs) { private val round = 5.toPx.toFloat() private val path = Path() init { setWillNotDraw(false) } override fun onDraw(canvas: Canvas) { path.addRoundRect(getRectF(canvas), round, round, Path.Direction.CW) // StartTop, EndTopだけ角丸にする. path.addRoundRect(getRectF(canvas), floatArrayOf(10f, 10f, 10f, 10f, 0f, 0f, 0f, 0f), Path.Direction.CW) canvas.clipPath(path) super.onDraw(canvas) } private fun getRectF(canvas: Canvas): RectF = RectF(canvas.clipBounds) private val Int.toPx: Int get() = (this * Resources.getSystem().displayMetrics.density).toInt() }
- 投稿日:2020-09-17T01:14:35+09:00
Firebase Authentication、 Firebase Realtime Database、 Cloud Storage for Firebase 入門
タイトルの 各Firebaseプロダクトの概要とチュートリアルを通しての実際の実装利用方法
Firebase Authentication とは
Firebase Authentication では、パスワード、電話番号、一般的なフェデレーション ID プロバイダ(Google、Facebook、Twitter)などを使用した認証を行うことができます。また、OAuth 2.0 や OpenID Connect などの業界標準を使用しているため、カスタム バックエンドと簡単に統合できます。
ユーザープロパティ
ユーザーが初めてアプリに登録するときに、利用可能な情報を使用してユーザーのプロフィール データ(一意の ID、メインのメールアドレス、名前、写真の URL から構成される基本プロパティ)が設定されます。
注: 認証されたユーザーは Firebase Realtime Database と Cloud Storage に対して、デフォルトでデータの読み取り、書き込みができます。
Firebase Realtime Database とは
Firebase Realtime Database は NoSQL クラウドホスト型データベースです。データはすべてのクライアントにわたってリアルタイムで同期され、アプリがオフラインになっても引き続き使用できます。
注: 新しくプロジェクトを開始する場合、ほとんどのケースで Cloud Firestore のご利用をおすすめします。
Firebase Realtime Database ルール
Firebase Realtime Database ルールでは、データベースへの読み取り / 書き込みアクセス権を持つユーザー、データが構造化される仕組み、存在するインデックスを決定します。
Cloud Storage for Firebase とは
Cloud Storage for Firebase は、Google 規模で構築された、強力かつシンプルでコスト効果の高いオブジェクト ストレージ サービスです。写真や動画など、ユーザーが作成したコンテンツを保管、提供する必要のあるアプリ デベロッパー向けに構築されています。
デベロッパーは Cloud Storage 用の Firebase SDK を使用して、クライアントから直接ファイルのアップロードとダウンロードを行います。ネットワーク接続がよくない場合、クライアントは動作が停止したところから再試行できるため、ユーザーは時間と帯域幅を節約できます。
Cloud Storage 用の Firebase Storage セキュリティ ルール
Cloud Storage 用の Firebase セキュリティ ルールは、Firebase Realtime Database ルール同様、わずか数行のコードで、Cloud Storage リクエストを特定のユーザーに限定する承認ルールや、アップロード サイズを制限する承認ルールを作成できます。加えて、ファイル名とパスの検証、
contentTypeやsizeなどのファイル メタデータのプロパティの検証といったデータ検証にも使用できます。注: Cloud Storage はデフォルトの Google App Engine アプリと同じ Google Cloud Storage バケットを使用します。
Cloud Functions で拡張する
これまで紹介した Firebase Authentication、Firebase Realtime Database、Cloud Storage for Firebase は、それぞれ Cloud Functions を利用することで機能を拡張することができます。一般的なユースケースは以下です。
- アプリでアカウントを作成したばかりのユーザーに登録完了の通知メールを送信
- 画像ファイルが Cloud Storage にアップロードされたときにサムネイルを生成する
重要: Cloud Storage バケットのロケーションと関数のロケーションとの距離によっては、ネットワーク レイテンシが大幅に増加する可能性があります。パフォーマンスを最適化するために、関数のロケーションは適切な場所に指定してください。
Android アプリでFirebase Authentication、 Firebase Realtime Database、 Cloud Storage for Firebase を利用する
Codelabとこちらのサンプルコードを参考にして、Firebase Authentication、Firebase Realtime Database、Cloud Storage for Firebase を試してみましょう。
FirebaseプロジェクトとAndroidアプリの準備
サンプルコードを入手する
GitHubからソースコードをローカル環境にクローンします。
$ git clone https://github.com/firebase/codelab-friendlychat-androidFirebaseプロジェクトを作成する
次にサンプルアプリケーションをデプロイするために Firebase プロジェクトを作成します。
Android プロジェクトに Firebase を追加する
作成したFirebaseプロジェクトにクローンしたAndroidアプリを追加します。
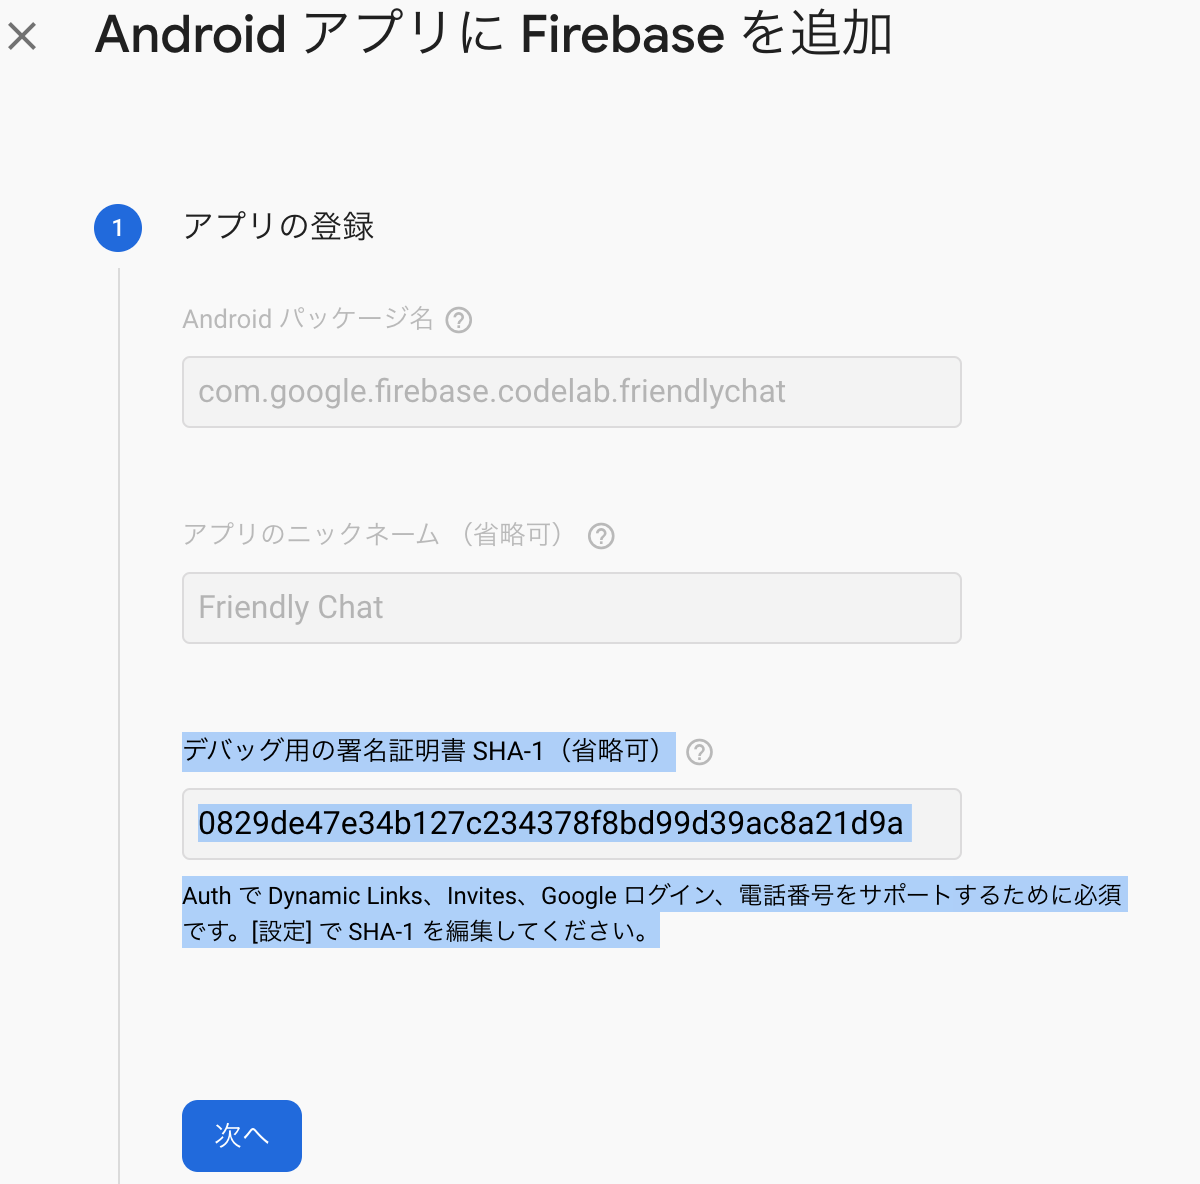
デバッグ用の署名証明書 SHA-1 を追加する
Firebase Authentication を利用するために SHA-1 を追加します。SHA-1は以下のコマンドで発行。
$ keytool -alias androiddebugkey -keystore ~/.android/debug.keystore -list -v -storepass android
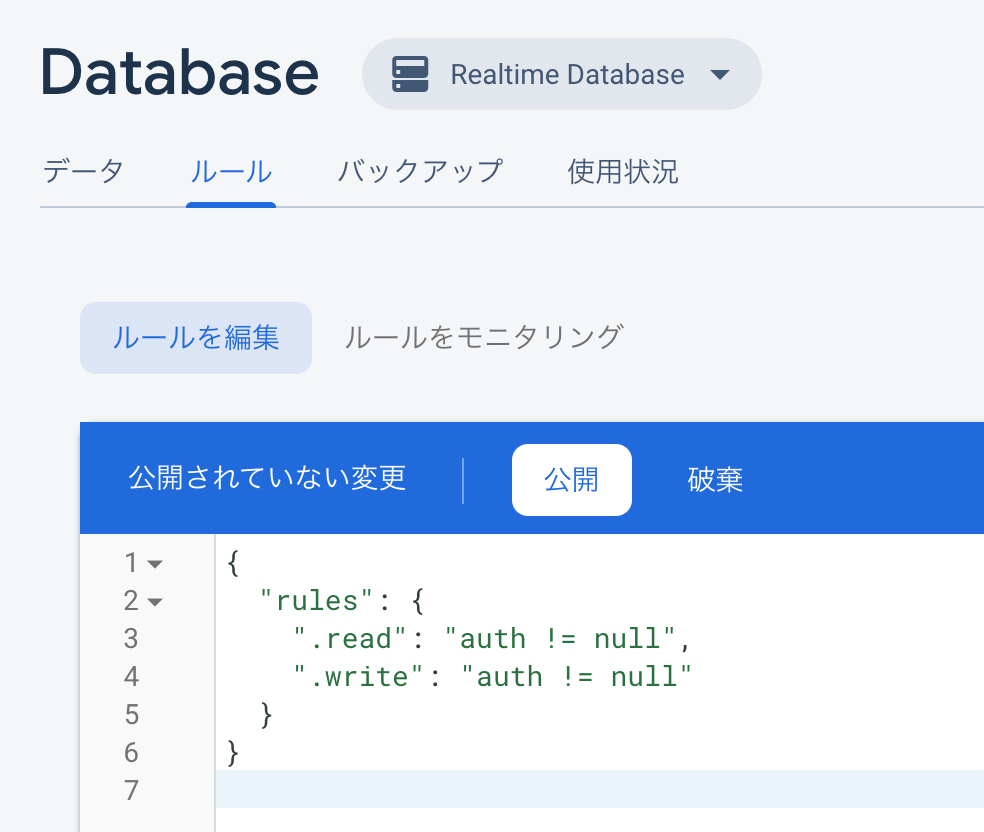
Firebase Realtime Database ルールの設定
認証ユーザー に読み取りと書き込み権限を付与する
コンソールのエディターからルールを編集し、
公開をクリックします。
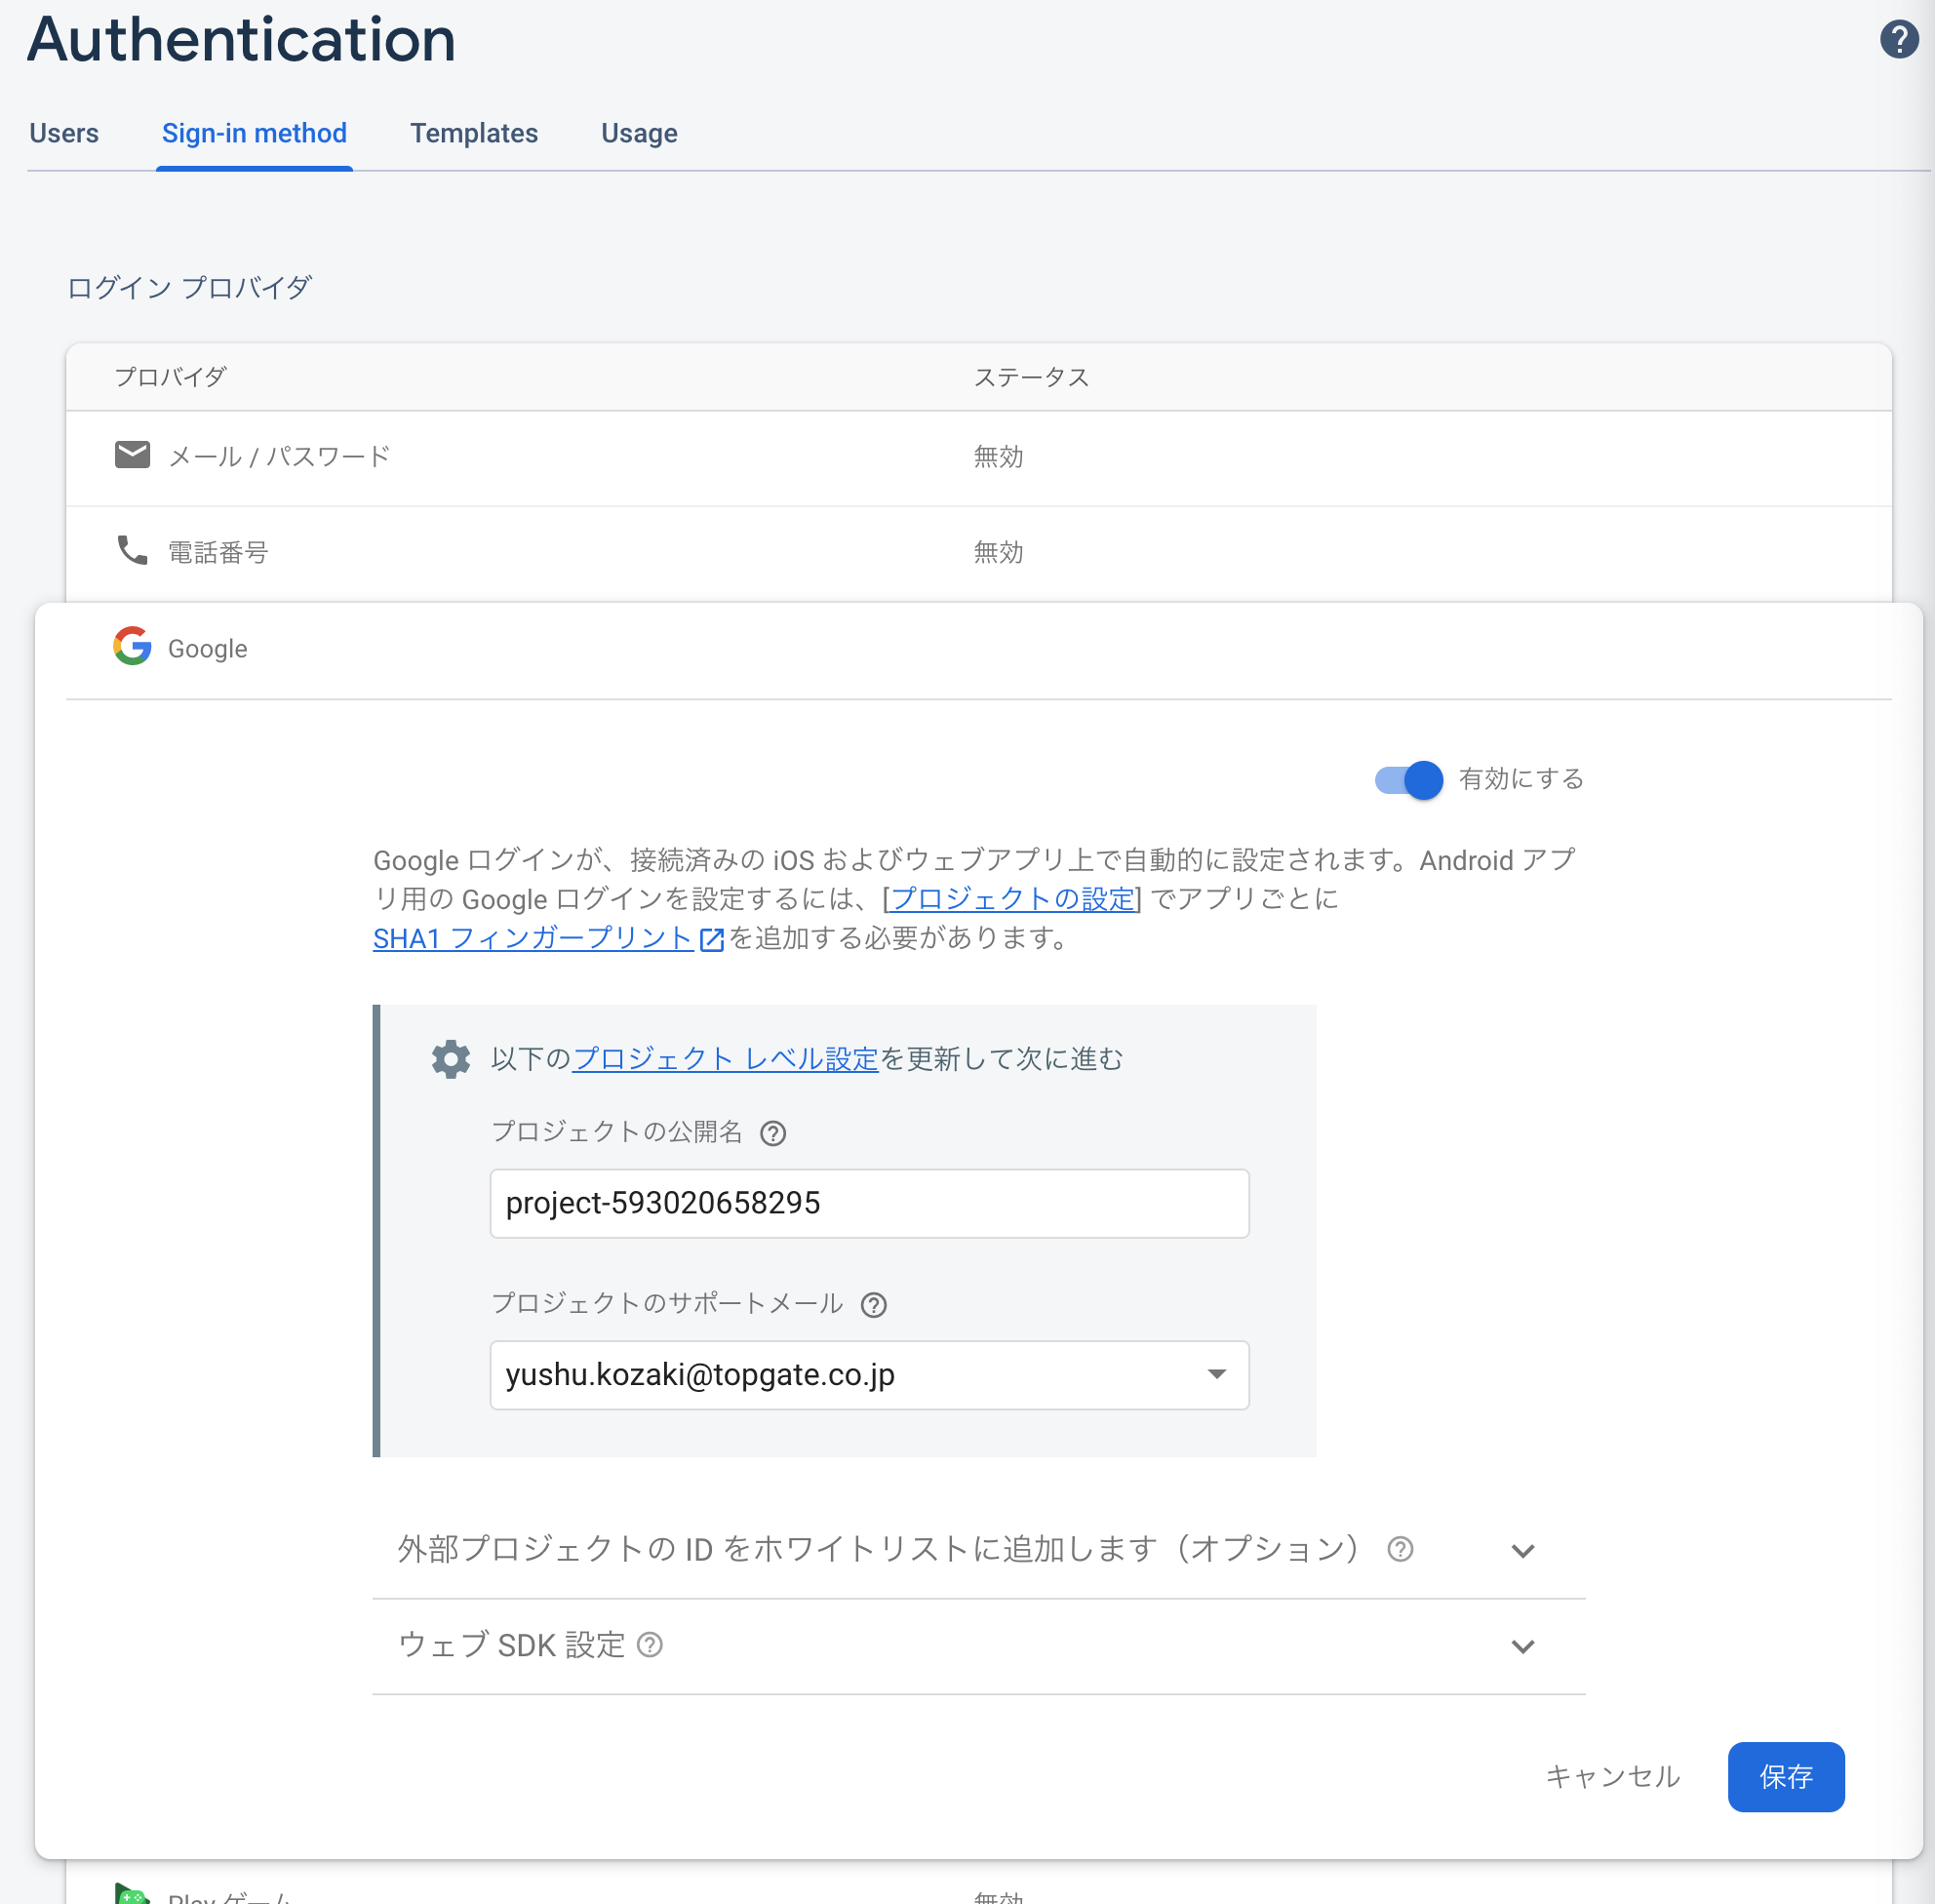
Authentication APIs の設定
Google アカウントで認証できるように設定する
Sign-in method からログイン プロバイダとして Google を有効化し、
保存をクリックします。
Dependency の追加とソースコードの編集
クローンしたプロジェクトをAndroid Studio で開き、Enable Authentication の Add Firebase Auth dependency 以降を参考に、
- app/build.gradle への dependency の追加
- 未承認ユーザーのサインイン画面への誘導
- サインイン画面での Sign-In with Google の実装
を行います。
適宜コンパイルエラーとなるので import class をすること。
Android emulator を起動します。Sign-In with Google の画面が確認できました。
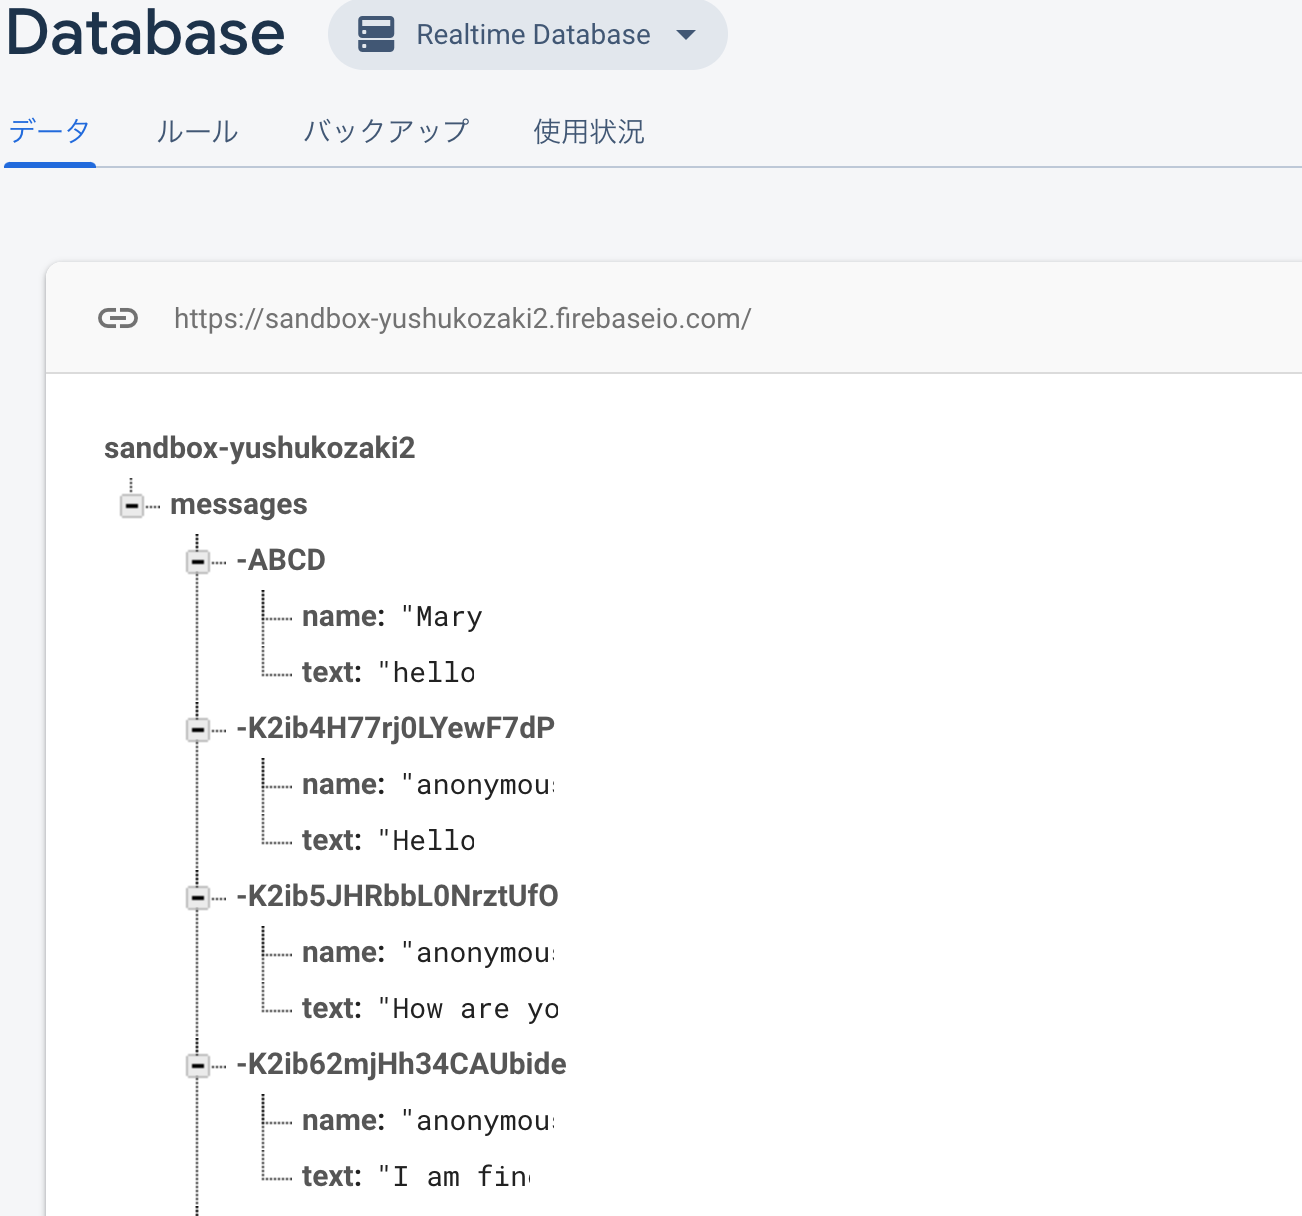
Realtime Database にデータを追加
Read Messages の Import Messages を参考にチャットで予め表示するメッセージを追加します。
Dependency の追加とソースコードの編集
Read Messages の Import Messages 以降を参考に、
- app/build.gradle への dependency の追加
- メッセージの同期の実装
- Firebaseリアルタイムデータベースを初期化し、データへの変更を処理するためのリスナーを追加
- RecyclerView アダプタを更新して、新しいメッセージを表示
- データベースのインスタンス変数を MainActivity クラスの他の Firebase インスタンス変数に追加
を行います。
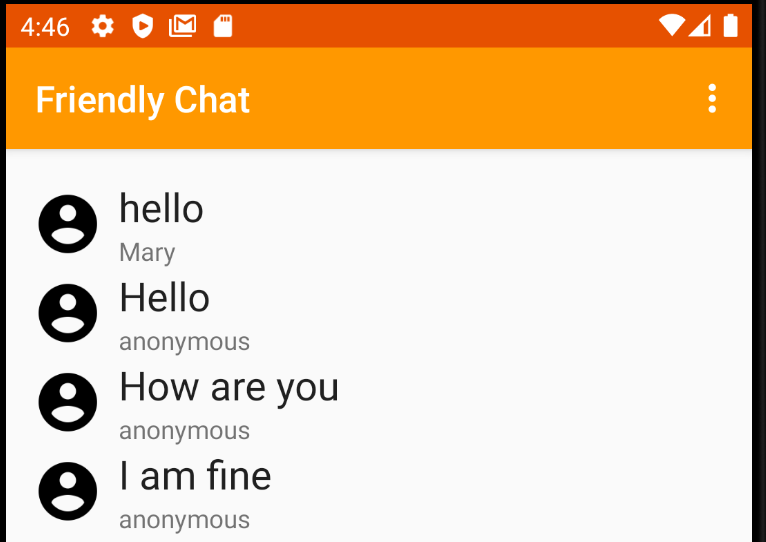
Google アカウントで Sign-In に成功すると、先ほど Realtime Database に追加したメッセージが表示されました。
テキストメッセージ送信を実装
Send Messages の Implement text message sending を参考にテキストメッセージ送信機能を実装します。ここで生成されるメッセージIDはリストの最後に追加されるようにシークエンシャルです。
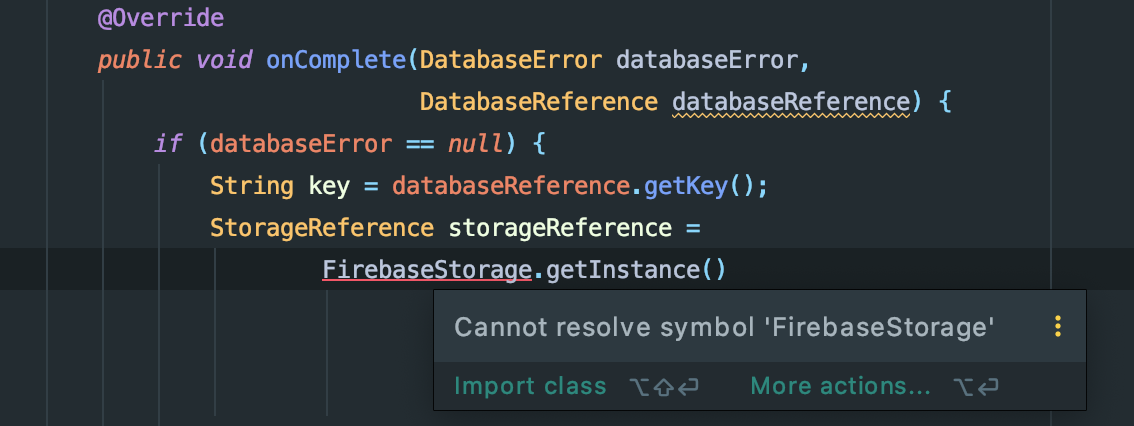
画像メッセージ送信を実装
Send Messages の Implement image message sending を参考にテキストメッセージ送信機能を実装します。
- 画像を選択
- ハンドル画像選択
- RTDB(リアルタイムデータベース)に一時的な画像メッセージを書き込む
- 選択した画像のアップロードを開始
- アップロードが完了したら、画像メッセージのURLをアップロードされた画像のものに更新
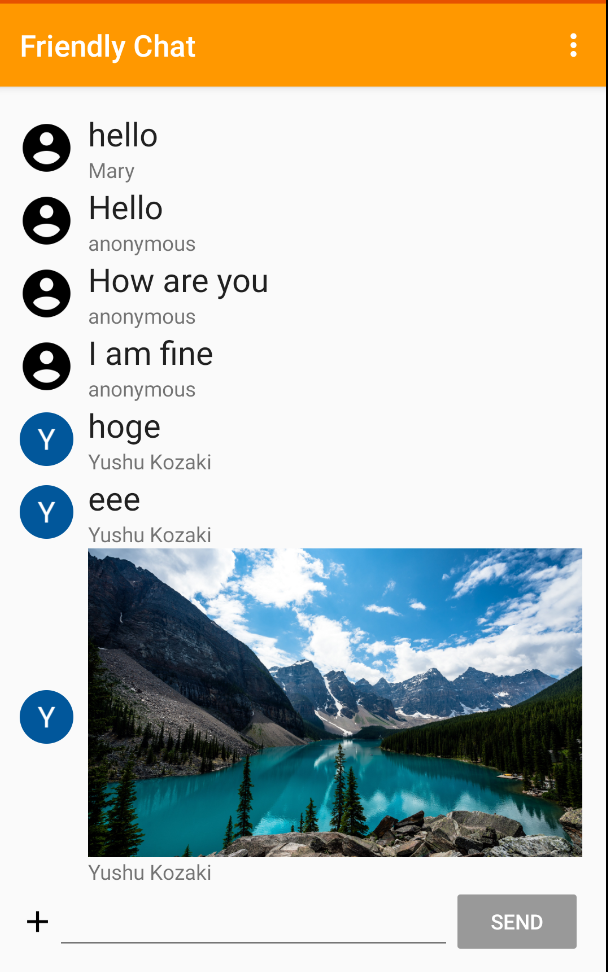
“ + “ ボタンをクリックすることで、テキスト / 画像を送信できるようになりました。
- 投稿日:2020-09-17T01:14:35+09:00
【Firebase 入門】Authentication、Realtime Database、 Cloud Storage とは
タイトルの 各Firebaseプロダクトの概要とチュートリアルを通しての実際の実装利用方法
Firebase Authentication とは
Firebase Authentication では、パスワード、電話番号、一般的なフェデレーション ID プロバイダ(Google、Facebook、Twitter)などを使用した認証を行うことができます。また、OAuth 2.0 や OpenID Connect などの業界標準を使用しているため、カスタム バックエンドと簡単に統合できます。
ユーザープロパティ
ユーザーが初めてアプリに登録するときに、利用可能な情報を使用してユーザーのプロフィール データ(一意の ID、メインのメールアドレス、名前、写真の URL から構成される基本プロパティ)が設定されます。
注: 認証されたユーザーは Firebase Realtime Database と Cloud Storage に対して、デフォルトでデータの読み取り、書き込みができます。
Firebase Realtime Database とは
Firebase Realtime Database は NoSQL クラウドホスト型データベースです。データはすべてのクライアントにわたってリアルタイムで同期され、アプリがオフラインになっても引き続き使用できます。
注: 新しくプロジェクトを開始する場合、ほとんどのケースで Cloud Firestore のご利用をおすすめします。
Firebase Realtime Database ルール
Firebase Realtime Database ルールでは、データベースへの読み取り / 書き込みアクセス権を持つユーザー、データが構造化される仕組み、存在するインデックスを決定します。
Cloud Storage for Firebase とは
Cloud Storage for Firebase は、Google 規模で構築された、強力かつシンプルでコスト効果の高いオブジェクト ストレージ サービスです。写真や動画など、ユーザーが作成したコンテンツを保管、提供する必要のあるアプリ デベロッパー向けに構築されています。
デベロッパーは Cloud Storage 用の Firebase SDK を使用して、クライアントから直接ファイルのアップロードとダウンロードを行います。ネットワーク接続がよくない場合、クライアントは動作が停止したところから再試行できるため、ユーザーは時間と帯域幅を節約できます。
Cloud Storage 用の Firebase Storage セキュリティ ルール
Cloud Storage 用の Firebase セキュリティ ルールは、Firebase Realtime Database ルール同様、わずか数行のコードで、Cloud Storage リクエストを特定のユーザーに限定する承認ルールや、アップロード サイズを制限する承認ルールを作成できます。加えて、ファイル名とパスの検証、
contentTypeやsizeなどのファイル メタデータのプロパティの検証といったデータ検証にも使用できます。注: Cloud Storage はデフォルトの Google App Engine アプリと同じ Google Cloud Storage バケットを使用します。
Cloud Functions で拡張する
これまで紹介した Firebase Authentication、Firebase Realtime Database、Cloud Storage for Firebase は、それぞれ Cloud Functions を利用することで機能を拡張することができます。一般的なユースケースは以下です。
- アプリでアカウントを作成したばかりのユーザーに登録完了の通知メールを送信
- 画像ファイルが Cloud Storage にアップロードされたときにサムネイルを生成する
重要: Cloud Storage バケットのロケーションと関数のロケーションとの距離によっては、ネットワーク レイテンシが大幅に増加する可能性があります。パフォーマンスを最適化するために、関数のロケーションは適切な場所に指定してください。
Android アプリでFirebase Authentication、 Firebase Realtime Database、 Cloud Storage for Firebase を利用する
Codelabとこちらのサンプルコードを参考にして、Firebase Authentication、Firebase Realtime Database、Cloud Storage for Firebase を試してみましょう。
FirebaseプロジェクトとAndroidアプリの準備
サンプルコードを入手する
GitHubからソースコードをローカル環境にクローンします。
$ git clone https://github.com/firebase/codelab-friendlychat-androidFirebaseプロジェクトを作成する
次にサンプルアプリケーションをデプロイするために Firebase プロジェクトを作成します。
Android プロジェクトに Firebase を追加する
作成したFirebaseプロジェクトにクローンしたAndroidアプリを追加します。
デバッグ用の署名証明書 SHA-1 を追加する
Firebase Authentication を利用するために SHA-1 を追加します。SHA-1は以下のコマンドで発行。
$ keytool -alias androiddebugkey -keystore ~/.android/debug.keystore -list -v -storepass android
Firebase Realtime Database ルールの設定
認証ユーザー に読み取りと書き込み権限を付与する
コンソールのエディターからルールを編集し、
公開をクリックします。
Authentication APIs の設定
Google アカウントで認証できるように設定する
Sign-in method からログイン プロバイダとして Google を有効化し、
保存をクリックします。
Dependency の追加とソースコードの編集
クローンしたプロジェクトをAndroid Studio で開き、Enable Authentication の Add Firebase Auth dependency 以降を参考に、
- app/build.gradle への dependency の追加
- 未承認ユーザーのサインイン画面への誘導
- サインイン画面での Sign-In with Google の実装
を行います。
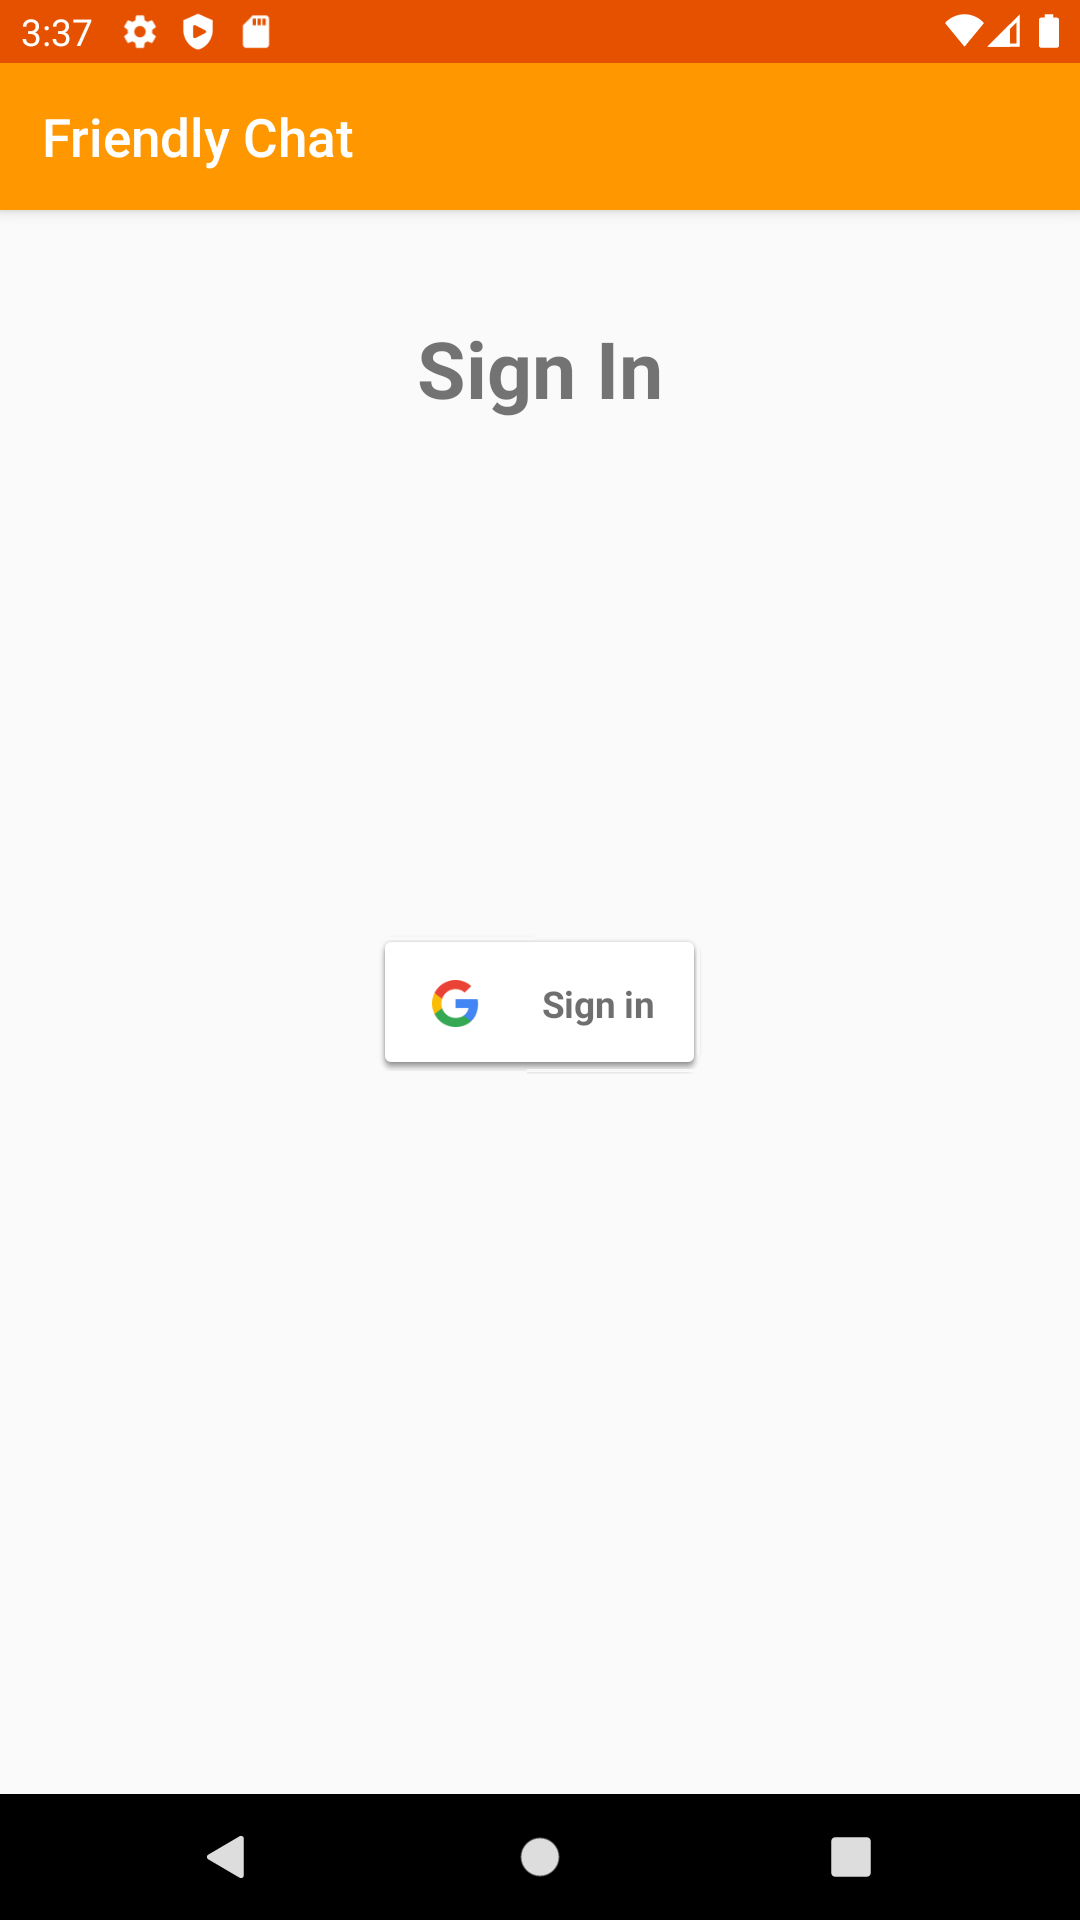
適宜コンパイルエラーとなるので import class をすること。
Android emulator を起動します。Sign-In with Google の画面が確認できました。
Realtime Database にデータを追加
Read Messages の Import Messages を参考にチャットで予め表示するメッセージを追加します。
Dependency の追加とソースコードの編集
Read Messages の Import Messages 以降を参考に、
- app/build.gradle への dependency の追加
- メッセージの同期の実装
- Firebaseリアルタイムデータベースを初期化し、データへの変更を処理するためのリスナーを追加
- RecyclerView アダプタを更新して、新しいメッセージを表示
- データベースのインスタンス変数を MainActivity クラスの他の Firebase インスタンス変数に追加
を行います。
Google アカウントで Sign-In に成功すると、先ほど Realtime Database に追加したメッセージが表示されました。
テキストメッセージ送信を実装
Send Messages の Implement text message sending を参考にテキストメッセージ送信機能を実装します。ここで生成されるメッセージIDはリストの最後に追加されるようにシークエンシャルです。
画像メッセージ送信を実装
Send Messages の Implement image message sending を参考にテキストメッセージ送信機能を実装します。
- 画像を選択
- ハンドル画像選択
- RTDB(リアルタイムデータベース)に一時的な画像メッセージを書き込む
- 選択した画像のアップロードを開始
- アップロードが完了したら、画像メッセージのURLをアップロードされた画像のものに更新
“ + “ ボタンをクリックすることで、テキスト / 画像を送信できるようになりました。