- 投稿日:2020-07-02T23:44:13+09:00
FcitxとZoomを共存 ~日本語化を添えて~
この記事はFcitxとZoomを共存させようと初心者が奮起し、成功した覚え書きです。
ご存じのようにFcitxを使用中の環境にZoomをインストールすると、Zoomがibusを連れてきて、Fcitxが使えなくなりますが、
ZoomとFcitxの共存に成功しました。 (一部機能は使えませんが)
使用中の環境はDebianとArchですが、ここではDebianのみ書いておきます。(Archでも同じようにすることは可能)$ uname -a Linux kali 5.6.0-kali2-amd64 #1 SMP Debian 5.6.14-2kali1 (2020-06-10) x86_64 GNU/LinuxFcitxのインストール
一応書いておきます。
Debian(系)でのFcitxインストール方法
$ apt install fcitx fcitx-mozc (fcitx-qt5)あとは、
input-methodでfcitxを選択して、fcitx-configtoolで設定するだけ。Zoomのインストール
Fcitx関係なしに、通常のZoomインストールを書いておきます。
Debian(系)でのzoomインストール方法
$ dpkg -i zoom_amd64.deb
$ apt -f install
共存化するためには
同じ環境にインストールされてしまうという現象を回避するには、仮想化すればいいと
いうことで使うのはdockerです。
ということでインストールしていきます。Debian(系)でのdockerインストール方法
$ apt install docker.io (docker-ce)
$ gpasswd -a {user} docker
$ systemctl start docker.service
使用頻度が高ければ
systemctl enable docker.serviceも入れておくと便利docker hub にmdouchement/zoom-usがあるのでこれを使います。
DockerにZoomをインストールする
まずはドキュメント mdouchement/zoom-us を参考にして
pull
$ docker pull mdouchement/zoom-usドキュメントをこのまま進めても起動には何の問題もないのですが、このままでは日本語フォントが入っていないので
日本語がすべて豆腐になります。
なのでGithubからファイルを落としてきます。~/Download$ git clone https://github.com/mdouchement/docker-zoom-us日本語フォントをインストールするように
Duckerfileを書き換え
pulseaudiのあとに使いたいフォントを入れます。
今回はfonts-noto-cjk-extraを入れてますが、一部反応しないフォント有? cjk-extraは使えるので困ったらこれで。docker-zoom-us/Dockerfile$ vim docker-zoom-us/Dockerfile # References: # https://hub.docker.com/r/solarce/zoom-us # https://github.com/sameersbn/docker-skype ---省略--- libxcb-keysyms1 libxcb-xtest0 ibus ibus-gtk \ libnss3 libxss1 xcompmgr pulseaudio `fonts-noto-cjk-extra` ARG ZOOM_URL=https://zoom.us/client/latest/zoom_amd64.deb # Grab the client .deb ---省略---書き換えたファイルを元に
build
~/Download$ docker build -t mdouchement/zoom-us docker-zoom-us
mdouchement/zoom-usのところは自分で名前を設定することが可あとは
run
$ docker run -it --rm --volume /usr/local/bin:/target mdouchement/zoom-us:latest installこれで終わり...ですが、
ZoomとFcitxの共存に成功しました。 (一部機能は使えませんが)
と書きましたができないのは日本語入力です。入力メゾットを入れて動くのか、どうしたらいいのか全くわかりません(泣)
小ネタ(?)
Zoomをインストールして、いざ使おうとすると
「ん? なんかUIでかくね??」なんてことがありました。
それも修正できたので書いておきます。 まあ、Zoomのconfigいじるだけなんですが元のconfigがこれ↓ですが、
~/.config/zoomus.conf[General] GeoLocale=system SensitiveInfoMaskOn=true asBarTopMargin=30 autoPlayGif=false autoScale=true bForceMaximizeWM=false blockUntrustedSSLCert=false captureHDCamera=true chatListPanelLastWidth=230 conf.webserver=https://zoom.us currentMeetingId= deviceID= enable.host.auto.grab=true enableAlphaBuffer=true enableCloudSwitch=false enableLog=true enableMiniWindow=true enableQmlCache=true enableScreenSaveGuard=false enableStartMeetingWithRoomSystem=false enableTestMode=false enableWaylandShare=false fake.version= flashChatTime=0 forceEnableTrayIcon=true forceSSOURL= host.auto.grab.interval=10 isTransCoding=false logLevel=info newMeetingWithVideo=true playSoundForNewMessage=false scaleFactor=1 sso_domain=.zoom.us sso_gov_domain=.zoomgov.com system.audio.type=default upcoming_meeting_header_image= useSystemTheme=false userEmailAddress= [AS] showframewindow=true [CodeSnippet] lastCodeType=0 wrapMode=0 [chat.recent] recentlast.session= [zoom_new_im] is_landscape_mode=false main_frame_pixel_pos_narrow="376,680" main_frame_pixel_pos_wide="810,680"大きいと感じたら6行目の
autoScaleをfalseにするだけで小さくなります。
いらないとは思いますが使ってみたかったのでDockerfileとzoomus.confをGit hubにあげておきます。~/Download$ git clone https://github.com/fzmyshion/zoom_jp_confDockerは初めてだったので、なにか良い方法か、別の方法があるよ!って時はそっと教えてくださるとありがたいです。
- 投稿日:2020-07-02T22:47:18+09:00
転職1日目
はじめに
某プログラミングスクールに通い、SES企業に転職しました。
ここでは主にスクールで学んできた事と、実際に業務を初めた際のギャップや、備忘録などを記載し、自身の知識定着を目的に書いて行こうと思います。プログラミングスクールで学んだ事
Ruby on Rails、Javascriptを用いたフルスクラッチのアプリケーション開発及びAWSを用いたデプロイ
主な開発実績
- Haml
- SCSS
- Ruby
- Ruby on Rails
- JavaScript
- jQuery
- GitHub
- AWS上記技術を用いた複合的機能の企画・実装を行いました。
つまずいた事
- Git Hubでの管理は、Git Hub Desktopの使用はしない事
- Git Hub Desktopを使用した場合、意図しないマージが発生する可能性があるため、SESとして働く場合、ターミナル上から直接コマンドを実行する必要があり、GUIに頼りきりだったため、コマンドの理解度が低かった。
- Dockerを利用して開発環境下で確認する事
- Ruby on Railsを利用している場合は、rails sでローカル環境のサーバーを立ち上げていたが、Dockerの利用方法を調べるのに時間がかかった。
備忘録
備忘録を兼ね、以下のgitコマンドを復習しておきます。
gitコマンドgit init #新たにGitで管理したいディレクトリで実行すると、Gitで管理できるようになる git branch -a #今いるブランチを確認 git add #対象ファイルをインデックスに追加 git status #状態を確認 git diff --cached #git add した後に変更点を確認 git commit #インデックスに追加されている変更修正をコミット、別途コメントを入力 git push origin ブランチ名 #commitしたファイルをリモートブランチにpush git checkout ブランチ名 #ブランチへ切り替えるさいごに
スクールを卒業しても、まだスタート地点にさえ立っていない印象が強かったです。
実施する事に必要な事は積極的に情報を仕入れる必要があると再認識しました。
- 投稿日:2020-07-02T22:23:52+09:00
自前ビデオチャットサーバーを立てる
はじめに
外部につながらないネットワークの中でビデオチャットをしたい
参考にしたところ
nginxを立てる
準備
- macにVirtualBoxをインストール
- CentOS7をインストール(minimal)
- ネットワークはブリッジにしておく
- dockerをいれる(https://docs.docker.com/engine/install/centos/) ## テスト
# docker run -d 80:80 nginx
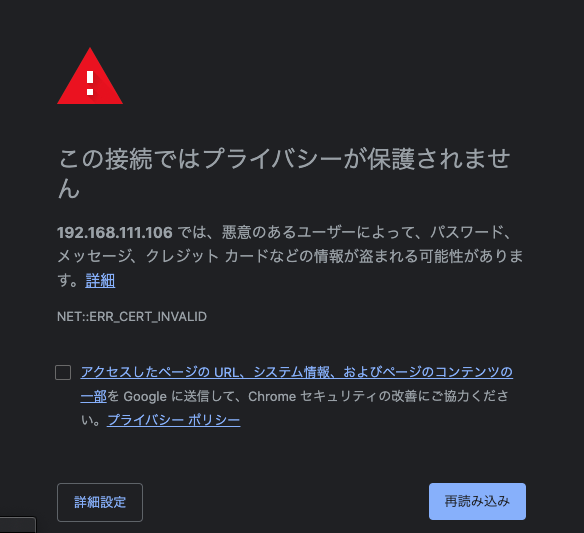
HTTPSのための証明書を準備する
[root@localhost nginx]# mkdir ssl
[root@localhost nginx]# openssl genrsa 2048 > ssl/key.pem
Generating RSA private key, 2048 bit long modulus
.........+++
..........................+++
e is 65537 (0x10001)
[root@localhost nginx]# openssl req -new -key ssl/key.pem > ssl/cacert.pem
You are about to be asked to enter information that will be incorporated
into your certificate request.
What you are about to enter is what is called a Distinguished Name or a DN.
There are quite a few fields but you can leave some blank
For some fields there will be a default value,
If you enter '.', the field will be left blank.
-----
Country Name (2 letter code) [XX]:JP
State or Province Name (full name) []:
Locality Name (eg, city) [Default City]:
Organization Name (eg, company) [Default Company Ltd]:
Organizational Unit Name (eg, section) []:
Common Name (eg, your name or your server's hostname) []:
Email Address []:

Please enter the following 'extra' attributes
to be sent with your certificate request
A challenge password []:
An optional company name []:
[root@localhost nginx]# openssl x509 -days 3650 -req -signkey ssl/key.pem < ssl/cacert.pem > ssl/cert.pem
Signature ok
subject=/C=JP/L=Default City/O=Default Company Ltd
Getting Private key
- confの変更
conf.d/default.confserver { listen 443 ssl; ssl_certificate /etc/nginx/ssl/cert.pem; ssl_certificate_key /etc/nginx/ssl/key.pem; location / { index index.html index.htm; root /usr/share/nginx/html; } }
- 動作確認
# docker run -p 443:443 -p 80:80 -v $(pwd)/ssl:/etc/nginx/ssl -v $(pwd)/conf.d:/etc/nginx/conf.d nginx
https://qiita.com/colomney/items/887f9ea7b68a3b427060
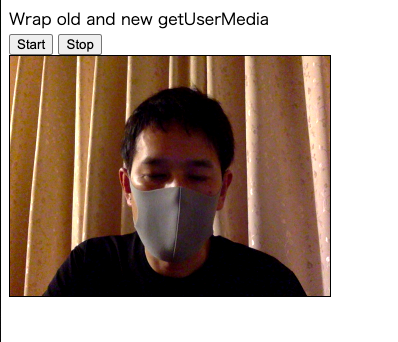
を参考にしてchromeで表示できるようにするカメラをブラウザから使う
- 参考:https://html5experts.jp/mganeko/19728/
index.html<!doctype html> <html> <head> <meta http-equiv="Content-Type" content="text/html; charset=UTF-8"> <title>Wrap old and new getUserMedia</title> </head> <body> Wrap old and new getUserMedia<br /> <button type="button" onclick="startVideo();">Start</button> <button type="button" onclick="stopVideo();">Stop</button> <br /> <video id="local_video" autoplay style="width: 320px; height: 240px; border: 1px solid black;"></video> </body> <script type="text/javascript"> var localVideo = document.getElementById('local_video'); var localStream = null; // --- prefix ----- navigator.getUserMedia = navigator.getUserMedia || navigator.webkitGetUserMedia || navigator.mozGetUserMedia || navigator.msGetUserMedia; // ---------------------- video handling ----------------------- // start local video function startVideo() { getDeviceStream({video: true, audio: false}) .then(function (stream) { // success localStream = stream; playVideo(localVideo, stream); }).catch(function (error) { // error console.error('getUserMedia error:', error); return; }); } // stop local video function stopVideo() { pauseVideo(localVideo); stopLocalStream(localStream); } function stopLocalStream(stream) { let tracks = stream.getTracks(); if (! tracks) { console.warn('NO tracks'); return; } for (let track of tracks) { track.stop(); } } function getDeviceStream(option) { if ('getUserMedia' in navigator.mediaDevices) { console.log('navigator.mediaDevices.getUserMadia'); return navigator.mediaDevices.getUserMedia(option); } else { console.log('wrap navigator.getUserMadia with Promise'); return new Promise(function(resolve, reject){ navigator.getUserMedia(option, resolve, reject ); }); } } function playVideo(element, stream) { if ('srcObject' in element) { element.srcObject = stream; } else { element.src = window.URL.createObjectURL(stream); } element.play(); element.volume = 0; } function pauseVideo(element) { element.pause(); if ('srcObject' in element) { element.srcObject = null; } else { if (element.src && (element.src !== '') ) { window.URL.revokeObjectURL(element.src); } element.src = ''; } } </script> </html># docker run -p 443:443 -v $(pwd)/ssl:/etc/nginx/ssl -v $(pwd)/conf.d:/etc/nginx/conf.d -v $(pwd)/html:/usr/share/nginx/html nginx
シグナリングサーバーを立てる
https://nodejs.org/ja/docs/guides/nodejs-docker-webappを参考にdockerでnode.jsを動かす
Dockerfile
FROM node:12 # アプリケーションディレクトリを作成する WORKDIR /usr/src/app # アプリケーションの依存関係をインストールする # ワイルドカードを使用して、package.json と package-lock.json の両方が確実にコピーされるようにします。 # 可能であれば (npm@5+) COPY package*.json ./ RUN npm install # 本番用にコードを作成している場合 # RUN npm install --only=production # アプリケーションのソースをバンドルする COPY signaling.js ./ # サーバー証明書 COPY ssl /etc/ssl CMD [ "node", "signaling.js" ]package.json{ "name": "node-signaling-server", "version": "1.0.0", "description": "Sigaling Server by Node.js on Docker", "author": "First Last <first.last@example.com>", "main": "signaling.js", "scripts": { "start": "node signaling.js" }, "dependencies": { "ws": "^7.3.0" } }httpsを使っていので、WebSocketもSecure WebSocketにする必要があります。
(証明書はnginxと同じもをとりあえず使用)signaling.js"use strict"; let fs = require('fs'); let https = require('https'); let webSocketServer = require('ws').Server; let port = 3001; let httpsServer = https.createServer({ cert: fs.readFileSync('/etc/ssl/cert.pem'), ca: fs.readFileSync('/etc/ssl/cacert.pem'), key: fs.readFileSync('/etc/ssl/key.pem') }).listen(port); let wssServer = new webSocketServer({ server: httpsServer }); console.log('secure websocket server start. port=' + port); wssServer.on('connection', function(wss) { console.log('-- secure websocket connected --'); wss.on('message', function(message) { wssServer.clients.forEach(function each(client) { if (isSame(wss, client)) { console.log('- skip sender -'); } else { client.send(message); } }); }); }); function isSame(ws1, ws2) { // -- compare object -- return (ws1 === ws2); }".dockerignore"node_modules npm-debug.logビルドと実行
# docker build . -t node-signaling-server
# docker run -d -p 3001:3001 node-signaling-server
1対1でつなげる
- 基本的にhttps://html5experts.jp/mganeko/20013/をなぞっている
- https://github.com/mganeko/webrtcexpjp/blob/master/basic2016/ws_signaling_1to1_trickle.htmlこちらを元にwssにして、サーバーアドレスを固定にした。
wc_1to1.html<!doctype html> <html> <head> <meta http-equiv="Content-Type" content="text/html; charset=UTF-8"> <title>WebSocket Signaling 1to1</title> </head> <body> WebSocket Signaling 1to1 (trickle ICE)<br /> <button type="button" onclick="startVideo();">Start Video</button> <button type="button" onclick="stopVideo();">Stop Video</button> <button type="button" onclick="connect();">Connect</button> <button type="button" onclick="hangUp();">Hang Up</button> <div> <video id="local_video" autoplay style="width: 160px; height: 120px; border: 1px solid black;"></video> <video id="remote_video" autoplay style="width: 160px; height: 120px; border: 1px solid black;"></video> </div> <p>SDP to send:<br /> <textarea id="text_for_send_sdp" rows="5" cols="60" readonly="readonly">SDP to send</textarea> </p> <p>SDP received: <!-- <button type="button" onclick="onSdpText();">Receive remote SDP</button> --> <br /> <textarea id="text_for_receive_sdp" rows="5" cols="60"></textarea> </p> </body> <script type="text/javascript"> let localVideo = document.getElementById('local_video'); let remoteVideo = document.getElementById('remote_video'); let localStream = null; let peerConnection = null; let textForSendSdp = document.getElementById('text_for_send_sdp'); let textToReceiveSdp = document.getElementById('text_for_receive_sdp'); // --- prefix ----- navigator.getUserMedia = navigator.getUserMedia || navigator.webkitGetUserMedia || navigator.mozGetUserMedia || navigator.msGetUserMedia; RTCPeerConnection = window.RTCPeerConnection || window.webkitRTCPeerConnection || window.mozRTCPeerConnection; RTCSessionDescription = window.RTCSessionDescription || window.webkitRTCSessionDescription || window.mozRTCSessionDescription; // -------- websocket ---- // please use node.js app // // or you can use chrome app (only work with Chrome) // https://chrome.google.com/webstore/detail/simple-message-server/bihajhgkmpfnmbmdnobjcdhagncbkmmp // let wsUrl = 'wss://192.168.111.106:3001/'; let ws = new WebSocket(wsUrl); ws.onopen = function(evt) { console.log('ws open()'); }; ws.onerror = function(err) { console.error('ws onerror() ERR:', err); }; ws.onmessage = function(evt) { console.log('ws onmessage() data:', evt.data); let message = JSON.parse(evt.data); if (message.type === 'offer') { // -- got offer --- console.log('Received offer ...'); textToReceiveSdp.value = message.sdp; let offer = new RTCSessionDescription(message); setOffer(offer); } else if (message.type === 'answer') { // --- got answer --- console.log('Received answer ...'); textToReceiveSdp.value = message.sdp; let answer = new RTCSessionDescription(message); setAnswer(answer); } else if (message.type === 'candidate') { // --- got ICE candidate --- console.log('Received ICE candidate ...'); let candidate = new RTCIceCandidate(message.ice); console.log(candidate); addIceCandidate(candidate); } }; // ---------------------- media handling ----------------------- // start local video function startVideo() { getDeviceStream({video: true, audio: false}) .then(function (stream) { // success localStream = stream; playVideo(localVideo, stream); }).catch(function (error) { // error console.error('getUserMedia error:', error); return; }); } // stop local video function stopVideo() { pauseVideo(localVideo); stopLocalStream(localStream); } function stopLocalStream(stream) { let tracks = stream.getTracks(); if (! tracks) { console.warn('NO tracks'); return; } for (let track of tracks) { track.stop(); } } function getDeviceStream(option) { if ('getUserMedia' in navigator.mediaDevices) { console.log('navigator.mediaDevices.getUserMadia'); return navigator.mediaDevices.getUserMedia(option); } else { console.log('wrap navigator.getUserMadia with Promise'); return new Promise(function(resolve, reject){ navigator.getUserMedia(option, resolve, reject ); }); } } function playVideo(element, stream) { if ('srcObject' in element) { element.srcObject = stream; } else { element.src = window.URL.createObjectURL(stream); } element.play(); element.volume = 0; } function pauseVideo(element) { element.pause(); if ('srcObject' in element) { element.srcObject = null; } else { if (element.src && (element.src !== '') ) { window.URL.revokeObjectURL(element.src); } element.src = ''; } } // ----- hand signaling ---- function onSdpText() { let text = textToReceiveSdp.value; if (peerConnection) { console.log('Received answer text...'); let answer = new RTCSessionDescription({ type : 'answer', sdp : text, }); setAnswer(answer); } else { console.log('Received offer text...'); let offer = new RTCSessionDescription({ type : 'offer', sdp : text, }); setOffer(offer); } textToReceiveSdp.value =''; } function sendSdp(sessionDescription) { console.log('---sending sdp ---'); textForSendSdp.value = sessionDescription.sdp; /*--- textForSendSdp.focus(); textForSendSdp.select(); ----*/ let message = JSON.stringify(sessionDescription); console.log('sending SDP=' + message); ws.send(message); } function sendIceCandidate(candidate) { console.log('---sending ICE candidate ---'); let obj = { type: 'candidate', ice: candidate }; let message = JSON.stringify(obj); console.log('sending candidate=' + message); ws.send(message); } // ---------------------- connection handling ----------------------- function prepareNewConnection() { let pc_config = {"iceServers":[]}; let peer = new RTCPeerConnection(pc_config); // --- on get remote stream --- if ('ontrack' in peer) { peer.ontrack = function(event) { console.log('-- peer.ontrack()'); let stream = event.streams[0]; playVideo(remoteVideo, stream); }; } else { peer.onaddstream = function(event) { console.log('-- peer.onaddstream()'); let stream = event.stream; playVideo(remoteVideo, stream); }; } // --- on get local ICE candidate peer.onicecandidate = function (evt) { if (evt.candidate) { console.log(evt.candidate); // Trickle ICE の場合は、ICE candidateを相手に送る sendIceCandidate(evt.candidate); // Vanilla ICE の場合には、何もしない } else { console.log('empty ice event'); // Trickle ICE の場合は、何もしない // Vanilla ICE の場合には、ICE candidateを含んだSDPを相手に送る //sendSdp(peer.localDescription); } }; // --- when need to exchange SDP --- peer.onnegotiationneeded = function(evt) { console.log('-- onnegotiationneeded() ---'); }; // --- other events ---- peer.onicecandidateerror = function (evt) { console.error('ICE candidate ERROR:', evt); }; peer.onsignalingstatechange = function() { console.log('== signaling status=' + peer.signalingState); }; peer.oniceconnectionstatechange = function() { console.log('== ice connection status=' + peer.iceConnectionState); if (peer.iceConnectionState === 'disconnected') { console.log('-- disconnected --'); hangUp(); } }; peer.onicegatheringstatechange = function() { console.log('==***== ice gathering state=' + peer.iceGatheringState); }; peer.onconnectionstatechange = function() { console.log('==***== connection state=' + peer.connectionState); }; peer.onremovestream = function(event) { console.log('-- peer.onremovestream()'); pauseVideo(remoteVideo); }; // -- add local stream -- if (localStream) { console.log('Adding local stream...'); peer.addStream(localStream); } else { console.warn('no local stream, but continue.'); } return peer; } function makeOffer() { peerConnection = prepareNewConnection(); peerConnection.createOffer() .then(function (sessionDescription) { console.log('createOffer() succsess in promise'); return peerConnection.setLocalDescription(sessionDescription); }).then(function() { console.log('setLocalDescription() succsess in promise'); // -- Trickle ICE の場合は、初期SDPを相手に送る -- sendSdp(peerConnection.localDescription); // -- Vanilla ICE の場合には、まだSDPは送らない -- }).catch(function(err) { console.error(err); }); } function setOffer(sessionDescription) { if (peerConnection) { console.error('peerConnection alreay exist!'); } peerConnection = prepareNewConnection(); peerConnection.setRemoteDescription(sessionDescription) .then(function() { console.log('setRemoteDescription(offer) succsess in promise'); makeAnswer(); }).catch(function(err) { console.error('setRemoteDescription(offer) ERROR: ', err); }); } function makeAnswer() { console.log('sending Answer. Creating remote session description...' ); if (! peerConnection) { console.error('peerConnection NOT exist!'); return; } peerConnection.createAnswer() .then(function (sessionDescription) { console.log('createAnswer() succsess in promise'); return peerConnection.setLocalDescription(sessionDescription); }).then(function() { console.log('setLocalDescription() succsess in promise'); // -- Trickle ICE の場合は、初期SDPを相手に送る -- sendSdp(peerConnection.localDescription); // -- Vanilla ICE の場合には、まだSDPは送らない -- }).catch(function(err) { console.error(err); }); } function setAnswer(sessionDescription) { if (! peerConnection) { console.error('peerConnection NOT exist!'); return; } peerConnection.setRemoteDescription(sessionDescription) .then(function() { console.log('setRemoteDescription(answer) succsess in promise'); }).catch(function(err) { console.error('setRemoteDescription(answer) ERROR: ', err); }); } // --- tricke ICE --- function addIceCandidate(candidate) { if (peerConnection) { peerConnection.addIceCandidate(candidate); } else { console.error('PeerConnection not exist!'); return; } } // start PeerConnection function connect() { if (! peerConnection) { console.log('make Offer'); makeOffer(); } else { console.warn('peer already exist.'); } } // close PeerConnection function hangUp() { if (peerConnection) { console.log('Hang up.'); peerConnection.close(); peerConnection = null; pauseVideo(remoteVideo); } else { console.warn('peer NOT exist.'); } } </script> </html>複数接続
package.json{ "name": "node-signaling-server", "version": "1.0.0", "description": "Sigaling Server by Node.js on Docker", "author": "First Last <first.last@example.com>", "main": "signaling.js", "scripts": { "start": "node signaling.js" }, "dependencies": { "socket.io": "^2.3.0" } }signaling.js"use strict"; const fs = require('fs'); const https = require('https'); const httpsServer = https.createServer({ cert: fs.readFileSync('/etc/ssl/cert.pem'), ca: fs.readFileSync('/etc/ssl/cacert.pem'), key: fs.readFileSync('/etc/ssl/key.pem') }); const io = require('socket.io')(httpsServer); const port = 3002; httpsServer.listen(port); console.log('secure signaling server started on port:' + port); // This callback function is called every time a socket // tries to connect to the server io.on('connection', function(socket) { // ---- multi room ---- socket.on('enter', function(roomname) { socket.join(roomname); console.log('id=' + socket.id + ' enter room=' + roomname); setRoomname(roomname); }); function setRoomname(room) { socket.roomname = room; } function getRoomname() { var room = socket.roomname; return room; } function emitMessage(type, message) { // ----- multi room ---- var roomname = getRoomname(); if (roomname) { console.log('===== message broadcast to room -->' + roomname); socket.broadcast.to(roomname).emit(type, message); } else { console.log('===== message broadcast all'); socket.broadcast.emit(type, message); } } // When a user send a SDP message // broadcast to all users in the room socket.on('message', function(message) { var date = new Date(); message.from = socket.id; console.log(date + 'id=' + socket.id + ' Received Message: ' + JSON.stringify(message)); // get send target var target = message.sendto; if (target) { console.log('===== message emit to -->' + target); socket.to(target).emit('message', message); return; } // broadcast in room emitMessage('message', message); }); // When the user hangs up // broadcast bye signal to all users in the room socket.on('disconnect', function() { // close user connection console.log((new Date()) + ' Peer disconnected. id=' + socket.id); // --- emit ---- emitMessage('user disconnected', {id: socket.id}); // --- leave room -- var roomname = getRoomname(); if (roomname) { socket.leave(roomname); } }); });wc_multi.htmlこちらは参照先のソースのhttp->httpsにしてアドレス指定しただけなので割愛します
- 投稿日:2020-07-02T20:57:33+09:00
postgreslのコンテナに外から複数のコマンドを一回で
sh -cでヒアドキュメントを使用したコマンドを実行して実現できる。docker-compose exec service_name sh -c "psql -U user_name -d db_name <<EOF UPDATE table_name_1 SET hoge = 1 WHERE id = 1; UPDATE table_name_2 SET fuga = 1 WHERE id = 2; UPDATE table_name_3 SET piyo = 1 WHERE id = 3; EOF"
- 投稿日:2020-07-02T20:31:01+09:00
ちょっと前のAMIで久々にGPUでDocker動かそうとしたらDockerが動かなくなった件
tl;dr
docker.serviceのExecStartPre=/usr/libexec/docker/docker-setup-runtimes.shをコメントアウトして、/run/docker/runtimes.envを削除して、サービス再起動したら治ったよ
経緯
GPU付きでDockerを動かしたかったから、半年前くらいに、DeepLearning AMI(amzn2ベース)をベースイメージにサーバを構築した。
最近、上記サーバから作ったAMIでEC2を立てたら、nvidia-smiが動かなかった。
yum updateしたらnvidia-smiは使えるようになったが、docker.serviceが死んだ。nvidia-smiが動かない
nvidia-smiを実行すると以下のエラーが発生
$ nvidia-smi
NVIDIA-SMI has failed because it couldn't communicate with the NVIDIA driver.
Make sure that the latest NVIDIA driver is installed and running.
たぶんnvidia driverが古いせいと考え、パッケージ全体のアップデートをした
sudo yum update -y
sudo reboot
$ nvidia-smi -l Thu Jul xxxxxxx +-----------------------------------------------------------------------------+ | NVIDIA-SMI xxx.xx.xx Driver Version: xxx.xx.xx CUDA Version: xx.x | |-------------------------------+----------------------+----------------------+ (以下略)問題なし。
Dockerが動かない
その後、Dockerコマンドを使おうとするとエラー
初期セットアップ時にDockerサービス起動し忘れていたかな?と思ってサービス起動するがエラー$ docker ps docker: Cannot connect to the Docker daemon at unix:///var/run/docker.sock. Is the docker daemon running?. See 'docker run --help'. $ sudo systemctl start docker Job for docker.service failed because start of the service was attempted too often. See "systemctl status docker.service" and "journalctl -xe" for details. To force a start use "systemctl reset-failed docker.service" followed by "systemctl start docker.service" again.なんでや!と思い、とりあえずjournalctlで確認
$ journalctl -xeu 'docker'
xxx xx xx:xx:xx xxxxxxx dockerd[xxxx]: unable to configure the Docker daemon with file /etc/docker/daemon.json:
the following directives are specified both as a flag and in the configuration file: runtimes:
(from flag: [neuron], from file: map[nvidia:map[path:nvidia-container-runtime runtimeArgs:[]]])

(長いので改行してるが実際はめっちゃ横に長い)
どうもflagで指定しているRuntimeと、/etc/docker/daemon.jsonで指定しているRuntimeが違うみたい。
flagではneuronってのを指定している模様。そんなの指定したっけ……?
daemon.jsonで指定しているのは以下。(GPU使うため、nvvidia-container-runtimeを指定している.DeepLearning AMIのデフォルト。)$ cat /etc/docker/daemon.json { "runtimes": { "nvidia": { "path": "nvidia-container-runtime", "runtimeArgs": [] } } }じゃあflagって何?そんなの指定してないよぉ~って思い、エラーについて調べてたら、以下を発見。
The conflict between the system docker startup file and the docker daemon.json file.
It is strongly recommended that the installed ExecStart=/usr/bin/dockerd -H fd://, -H fd:// be moved to the daemon.json file.
(https://github.com/docker/for-linux/issues/165)どうもdocker.serviceの中のExecStartが悪いみたい。
ただ、systemctl statusで見てみると、ExecStartコマンドがちょっと違う。$ sudo systemctl status docker ● docker.service - Docker Application Container Engine Loaded: loaded (/usr/lib/systemd/system/docker.service; enabled; vendor preset: disabled) Active: failed (Result: start-limit) since Thu xxxx-xx-xx xx:xx:xx xxx; xxs ago Docs: https://docs.docker.com Process: yyyy ExecStart=/usr/bin/dockerd $OPTIONS $DOCKER_STORAGE_OPTIONS $DOCKER_ADD_RUNTIMES (code=exited, status=1/FAILURE) Process: yyyy ExecStartPre=/usr/libexec/docker/docker-setup-runtimes.sh (code=exited, status=0/SUCCESS) Process: yyyy ExecStartPre=/bin/mkdir -p /run/docker (code=exited, status=0/SUCCESS) Main PID: yyyy (code=exited, status=1/FAILURE) xxx xx xx:xx:xx yyyyyyy systemd[1]: Failed to start Docker Application Container Engine. xxx xx xx:xx:xx yyyyyyy systemd[1]: Unit docker.service entered failed state. xxx xx xx:xx:xx yyyyyyy systemd[1]: docker.service failed. xxx xx xx:xx:xx yyyyyyy systemd[1]: docker.service holdoff time over, scheduling restart. xxx xx xx:xx:xx yyyyyyy systemd[1]: start request repeated too quickly for docker.service xxx xx xx:xx:xx yyyyyyy systemd[1]: Failed to start Docker Application Container Engine. xxx xx xx:xx:xx yyyyyyy systemd[1]: Unit docker.service entered failed state. xxx xx xx:xx:xx yyyyyyy systemd[1]: docker.service failed.OPTIONSとかDOCKER_STORAGE_OPTIONSとかDOCKER_ADD_RUNTIMESとか、わかんないよぉと思ったけど
どうもExecStartPreがくさいんじゃないかと思って、docker-setup-runtimes.shを見てみる$ cat /usr/libexec/docker/docker-setup-runtimes.sh #!/bin/sh { echo -n "DOCKER_ADD_RUNTIMES=\"" for file in /etc/docker-runtimes.d/*; do [ -f "$file" ] && [ -x "$file" ] && echo -n "--add-runtime $(basename "$file")=$file " done echo "\"" } > /run/docker/runtimes.env/etc/docker-runtimes.d/のファイルの数だけループし、runtimes.envに突っ込んでるっぽい
$ ls /etc/docker-runtimes.d/
neuron

$ cat /run/docker/runtimes.env
DOCKER_ADD_RUNTIMES="--add-runtime neuron=/etc/docker-runtimes.d/neuron "
悪い子見つけた!
ということで、runtimes.envを退避させ、docker-setup-runtimes.shを実行しているExecStartPreをコメントアウトし
serviceを書き換えたので、systemctlのデーモンリロード ← これ大事!$ sudo mv /run/docker/runtimes.env /run/docker/runtimes.env.old $ vi /usr/lib/systemd/system/docker.service (該当のExecStartPreをコメントアウト) $ sudo systemctl daemon-reload $ sudo systemctl restart docker以上で動いた!良かった。
- 投稿日:2020-07-02T20:31:01+09:00
パッケージアップデートしたらDockerが起動しなくなった
tl;dr
docker.serviceのExecStartPre=/usr/libexec/docker/docker-setup-runtimes.shをコメントアウトして、/run/docker/runtimes.envを削除して、サービス再起動したら治ったよ
経緯
GPU付きでDockerを動かしたかったから、半年前くらいに、DeepLearning AMI(amzn2ベース)をベースイメージにサーバを構築した。
最近、上記サーバから作ったAMIでEC2を立てたら、nvidia-smiが動かなかった。
yum updateしたらnvidia-smiは使えるようになったが、docker.serviceが死んだ。nvidia-smiが動かない
nvidia-smiを実行すると以下のエラーが発生
$ nvidia-smi
NVIDIA-SMI has failed because it couldn't communicate with the NVIDIA driver.
Make sure that the latest NVIDIA driver is installed and running.
たぶんnvidia driverが古いせいと考え、パッケージ全体のアップデートをした
sudo yum update -y
sudo reboot
$ nvidia-smi -l Thu Jul xxxxxxx +-----------------------------------------------------------------------------+ | NVIDIA-SMI xxx.xx.xx Driver Version: xxx.xx.xx CUDA Version: xx.x | |-------------------------------+----------------------+----------------------+ (以下略)問題なし。
Dockerが動かない
その後、Dockerコマンドを使おうとするとエラー
初期セットアップ時にDockerサービス起動し忘れていたかな?と思ってサービス起動するがエラー$ docker ps docker: Cannot connect to the Docker daemon at unix:///var/run/docker.sock. Is the docker daemon running?. See 'docker run --help'. $ sudo systemctl start docker Job for docker.service failed because start of the service was attempted too often. See "systemctl status docker.service" and "journalctl -xe" for details. To force a start use "systemctl reset-failed docker.service" followed by "systemctl start docker.service" again.なんでや!と思い、とりあえずjournalctlで確認
$ journalctl -xeu 'docker'
xxx xx xx:xx:xx xxxxxxx dockerd[xxxx]: unable to configure the Docker daemon with file /etc/docker/daemon.json:
the following directives are specified both as a flag and in the configuration file: runtimes:
(from flag: [neuron], from file: map[nvidia:map[path:nvidia-container-runtime runtimeArgs:[]]])

(長いので改行してるが実際はめっちゃ横に長い)
どうもflagで指定しているRuntimeと、/etc/docker/daemon.jsonで指定しているRuntimeが違うみたい。
flagではneuronってのを指定している模様。そんなの指定したっけ……?
daemon.jsonで指定しているのは以下。(GPU使うため、nvvidia-container-runtimeを指定している.DeepLearning AMIのデフォルト。)$ cat /etc/docker/daemon.json { "runtimes": { "nvidia": { "path": "nvidia-container-runtime", "runtimeArgs": [] } } }じゃあflagって何?そんなの指定してないよぉ~って思い、エラーについて調べてたら、以下を発見。
The conflict between the system docker startup file and the docker daemon.json file.
It is strongly recommended that the installed ExecStart=/usr/bin/dockerd -H fd://, -H fd:// be moved to the daemon.json file.
(https://github.com/docker/for-linux/issues/165)どうもdocker.serviceの中のExecStartが悪いみたい。
ただ、systemctl statusで見てみると、ExecStartコマンドがちょっと違う。$ sudo systemctl status docker ● docker.service - Docker Application Container Engine Loaded: loaded (/usr/lib/systemd/system/docker.service; enabled; vendor preset: disabled) Active: failed (Result: start-limit) since Thu xxxx-xx-xx xx:xx:xx xxx; xxs ago Docs: https://docs.docker.com Process: yyyy ExecStart=/usr/bin/dockerd $OPTIONS $DOCKER_STORAGE_OPTIONS $DOCKER_ADD_RUNTIMES (code=exited, status=1/FAILURE) Process: yyyy ExecStartPre=/usr/libexec/docker/docker-setup-runtimes.sh (code=exited, status=0/SUCCESS) Process: yyyy ExecStartPre=/bin/mkdir -p /run/docker (code=exited, status=0/SUCCESS) Main PID: yyyy (code=exited, status=1/FAILURE) xxx xx xx:xx:xx yyyyyyy systemd[1]: Failed to start Docker Application Container Engine. xxx xx xx:xx:xx yyyyyyy systemd[1]: Unit docker.service entered failed state. xxx xx xx:xx:xx yyyyyyy systemd[1]: docker.service failed. xxx xx xx:xx:xx yyyyyyy systemd[1]: docker.service holdoff time over, scheduling restart. xxx xx xx:xx:xx yyyyyyy systemd[1]: start request repeated too quickly for docker.service xxx xx xx:xx:xx yyyyyyy systemd[1]: Failed to start Docker Application Container Engine. xxx xx xx:xx:xx yyyyyyy systemd[1]: Unit docker.service entered failed state. xxx xx xx:xx:xx yyyyyyy systemd[1]: docker.service failed.OPTIONSとかDOCKER_STORAGE_OPTIONSとかDOCKER_ADD_RUNTIMESとか、わかんないよぉと思ったけど
どうもExecStartPreがくさいんじゃないかと思って、docker-setup-runtimes.shを見てみる$ cat /usr/libexec/docker/docker-setup-runtimes.sh #!/bin/sh { echo -n "DOCKER_ADD_RUNTIMES=\"" for file in /etc/docker-runtimes.d/*; do [ -f "$file" ] && [ -x "$file" ] && echo -n "--add-runtime $(basename "$file")=$file " done echo "\"" } > /run/docker/runtimes.env/etc/docker-runtimes.d/のファイルの数だけループし、runtimes.envに突っ込んでるっぽい
$ ls /etc/docker-runtimes.d/
neuron

$ cat /run/docker/runtimes.env
DOCKER_ADD_RUNTIMES="--add-runtime neuron=/etc/docker-runtimes.d/neuron "
悪い子見つけた!
ということで、runtimes.envを退避させ、docker-setup-runtimes.shを実行しているExecStartPreをコメントアウトし
serviceを書き換えたので、systemctlのデーモンリロード ← これ大事!$ sudo mv /run/docker/runtimes.env /run/docker/runtimes.env.old $ vi /usr/lib/systemd/system/docker.service (該当のExecStartPreをコメントアウト) $ sudo systemctl daemon-reload $ sudo systemctl restart docker以上で動いた!良かった。
- 投稿日:2020-07-02T18:07:45+09:00
DockerでLaravelの開発環境を構築する方法
本記事ではLaradockを使わずにできるだけシンプルにLaravelの環境構築を行っていきます。
任意の場所にディレクトリを作成
$ mkdir myproject
$ cd myproject
docker-compose.ymlファイルの作成
docker-compose.ymlversion: '3.7' services: php: build: context: . dockerfile: Dockerfile container_name: php volumes: - ./src:/var/www/html ports: - "9000:9000" mysql: image: mysql:5.7 container_name: mysql ports: - "3306:3306" volumes: - ./db:/var/lib/mysql - ./my_conf:/etc/mysql/conf.d environment: MYSQL_ROOT_PASSWORD: password MYSQL_DATABASE: laravel nginx: image: nginx:stable-alpine container_name: nginx ports: - "8080:80" volumes: - ./src:/var/www/html - ./nginx/default.conf:/etc/nginx/conf.d/default.conf depends_on: - php - mysqlDockerfileの作成
DockerfileFROM php:7.4-fpm-alpine RUN docker-php-ext-install pdo pdo_mysqlVolumesの作成
$ mkdir db
$ mkdir my_conf
my_confディレクトリにmysql5.7.cnfを作成し、日本語対応できるように文字コードの設定を行います。
mysql5.7.cnf[mysqld] character-set-server=utf8mb4 [client] default-character-set=utf8mb4Nginxの設定ファイルを作成
$ mkdir nginxnginxディレクトリにdefault.confを作成します。
default.confserver { listen 80; index index.php index.html; server_name localhost; error_log /var/log/nginx/error.log; access_log /var/log/nginx/access.log; root /var/www/html/public; location / { try_files $uri $uri/ /index.php?$query_string; } location ~ \.php$ { try_files $uri = 404; fastcgi_split_path_info ^(.+\.php)(/.+)$; fastcgi_pass php:9000; fastcgi_index index.php; include fastcgi_params; fastcgi_param SCRIPT_FILENAME $document_root$fastcgi_script_name; fastcgi_param PATH_INFO $fastcgi_path_info; } }コンテナの作成
$ docker-compose up -dコンテナのステータスを確認
$ docker-compose ps -aLaravelのインストール
$ docker run --rm -v /src:/app composer create-project --prefer-dist laravel/laravel .データベースへの接続
srcディレクトリ内にある.envファイルを下記の通り編集してください。
.envDB_CONNECTION=mysql DB_HOST=mysql DB_PORT=3306 DB_DATABASE=laravel DB_USERNAME=root DB_PASSWORD=password.envファイルの設定が終わったら、下記のコマンドを実行してデータベースにテーブルが作成されるか確認します。
$ docker-compose exec php php artisan migrate開発サーバの起動
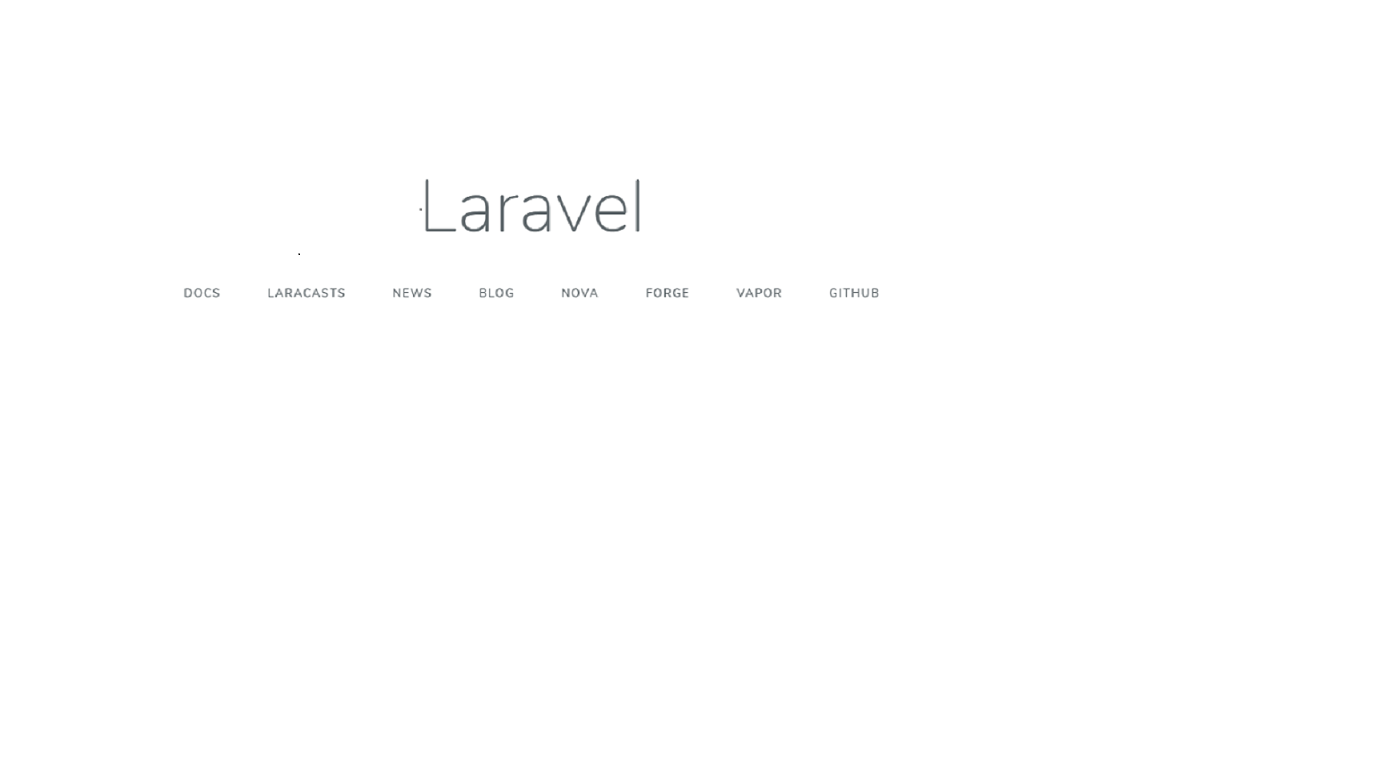
$ docker exec -it php php artisan serve --host=0.0.0.0 --port=8000上記のコマンドを実行後、ブラウザで127.0.0.1:8080にアクセスするとLaravelのスタートページが表示されます。
これでLaravelにNginx経由でアクセスし、MySQLデータベースへのデータの登録まで行えることを確認しました。

- 投稿日:2020-07-02T17:11:00+09:00
SharePoint Framework の開発環境を Docker を使って構築する際の npm install のエラーの対処
SharePoint Framework を使った開発は、そのバージョンアップの頻度から Docker など使った環境構築がおすすめされています。しかしながら、Docker Desktop for Windows を使った環境構築において、npm install でうまくいかない部分があり、あくまで場当たり的対応ですが解消するまで苦労しましたので備忘録として残します。
遭遇したこと
Dockerコンテナ起動後、npm install gulp、yo @microsoft/sharepoint でいろんなエラーがでて作業が進まない。ページ下部の③のリンクのエラーがでたり、コンテナがハングアップしたかのように動作が遅くなり、先に進むことができない。
ありがとうございます。https://t.co/m1CslvAZRE
— nan_oka (@nanoka7o8) June 16, 2020
この及川さんの記事みながらやっていたのですが、以下のようなエラーで躓いてました。npmのキャッシュ消したりいじくりながらまたやってみます。
Error: EEXIST: file already exists, copyfile '/home/spfx/.cache/yarn/v6/npm-ms-0.7.1-.... pic.twitter.com/SpFzSsX7MD対応したこと
④のリンクを参考にして、マウントしているディレクトリでないディレクトリで npm install した後、一式をマウントしているディレクトリに移動します。
1.コンテナの起動
powershelldocker run -it --rm --name [コンテナ名] -v [プロジェクトディレクトリ]:/usr/app/spfx -p 5432:5432 -p 4321:4321 -p 35729:35729 waldekm/spfx:1.10.02.一時作業ディレクトリへの変更と、gulp インストール
dockercd /tmp npm install gulp --no-bin-linksyarn add でも可(ただし--no-bin-linksが有効かは不明)
3.yo の実行
dockeryo @microsoft/sharepoint --package-manager npm --skip-installpackage-manager yarn でも可
4.spfx に必要な npm のインストール
dockernpm install --no-bin-linksyarn install でも可(ただし--no-bin-linksが有効かは不明)
5.マウントしたプロジェクトディレクトリへのファイルコピー
dockermv * .[^\.]* /usr/app/spfx6.プロジェクトディレクトリで開発を続ける!
まとめ
原因はわかっていませんが、何度か試してもこれならエラーにならないので、とりあえずはいけそうな気がします。
環境さえできてしまえば、JavaScriptが少し触れる方ならどんどんアプリを作っていけるSpfx。環境構築で躓いてやめてしまうのはもったいないので、(SPS2013のクラシックサイトのカスタマイズなんかやめて)是非みんなでやりましょう!!!
なお、小さめのモジュールなら、npm install してもエラーになりにくいので、この後の追加に関しては直接やっても問題ないです。環境構築作業の参考にさせていただいたブログ
①SharePoint Developer SharePoint Framework 開発入門 まとめ
https://sharepoint.orivers.jp/sharepoint-framework-dev対応方法の参考にさせていただいたブログなど
②Rencore Try SharePoint Framework without installing it
https://rencore.com/blog/try-sharepoint-framework-without-installing/
③[Windows][Docker] nodeコンテナでnpm installが動かず地獄を見た
https://qiita.com/yagrush/items/5fb64f878e4b9940a4ee
④WindowsのDocker環境でnpm install実行時にエラーが出た場合の対処法メモ
https://qiita.com/Y-Kanoh/items/58815aafb7346930f370感想
Twitterでつぶやいてみたら、大変ありがたいことにいろいろな方々が確認してくださり、特に工夫しなくてもうまくいっているようでした。大感謝です!
レアな事象なのかわかりませんが、同じ事象に遭遇した場合の助けになれば幸いです。
コンテナもWindowsにしてしまえばうまくいくのでしょうか。。。
- 投稿日:2020-07-02T13:49:32+09:00
DockerでGoを試す環境を作った話
はじめに
A Tour of Goをやろうと思ったんだけど、手元で試したいということがあったので、Dockerで開発環境を構築
完成図
.
├── Dockerfile
├── docker-compose.yml
└── src
    └── hello.go
作成
準備するものは以下の通り。
.
├── Dockerfile
└── docker-compose.yml
ファイルの中身
DockerfileFROM golang:latest WORKDIR /go/src/docker-compose.ymlversion: "3" services: go: build: . tty: true volumes: - ./src:/go/srcdocker-composeを利用した理由は、マウントしたかったから。
うごかす
コマンドは以下の通り。
# コンテナの作成と起動
$ docker-compose up -d --build

# コンテナ内に入る
$ docker-compose exec go bash
Hello world
コンテナの中に入っている状態でファイル作成
$ touch hello.gohello.gopackage main import "fmt" func main() { fmt.Println("Hello, World") }コンパイルは以下のようになる。
$ go run hello.goとめる
# コンテナから出る
$ exit

# コンテナを止める
$ docker-compose stop

# コンテナを削除
$ docker-compose down
おわりに
A Tour of Goを試していって、つまったところがあれば修正していきます。
参考
- 投稿日:2020-07-02T12:26:36+09:00
error creating aufs mount: invalid argument
I ran into this error while preparing docker-in-docker.
WARN Couldn't run auplink before unmount /var/lib/docker/aufs/mnt/*: exit status 22
ERRO Handler for POST /v1.30/containers/create returned error: error creating aufs mount to /var/lib/docker/aufs/mnt/*: invalid argument
In my case, I just needed to add
VOLUME /var/lib/dockerto the Dockerfile for outer docker image. In this way we can setBacking Filesystem: extfs(indocker info).
- 投稿日:2020-07-02T11:58:13+09:00
AWS EC2 AmazonLinux 2でGitHubからクローンしたdocker-compose.ymlを動かす
お気軽検証環境を作る必要があったのでその時のメモ。
プルするときに毎回パスワード聞いてくるようにしたかったのでcloneは意図的にhttpsを使っています。EC2
前準備
$ sudo yum updateGitのインストール
$ sudo yum install git
...
$ git version
git version 2.23.3
GitHubからクローン
$ git clone https://github.com/xxxx/xxxx.git
Cloning into 'xxxx'...
Username for 'https://github.com': // ユーザー名の入力
Password for 'https://xxxx@github.com': // パスワードの入力
Dockerのインストール
$ sudo amazon-linux-extras install docker
...
$ sudo service docker start
docker-compose のインストール
$ sudo curl -L "https://github.com/docker/compose/releases/download/1.23.2/docker-compose-$(uname -s)-$(uname -m)" -o /usr/local/bin/docker-compose
...
$ sudo chmod +x /usr/local/bin/docker-compose
...
$ docker-compose --version
起動
$ docker-compose up -d「ERROR: Couldn't connect to Docker daemon」が発生する場合
DockerでCouldn’t connect to Docker daemonが出る場合の原因と解決方法
ユーザをdockerグループに入れる$ sudo usermod -aG docker $USER起動時に「no space left on device」が発生する場合