- 投稿日:2020-07-02T23:51:14+09:00
【JavaScript】本日未明、[ if - else ]さんが死体で発見され...
if( c <4 ) {
    if( c < 2 ) {
        if( c == 0 ) {
            // 処理
        } else {
            // 処理
        }
    } else {
        if( c == 3 ) {
            // 処理
        } else {
            // 処理
        }
    }
} else {
    // 処理
}
「な、なんじゃこりゃあああぁあっtっt!!!!」
・・・
・・・
・・・
読みやすいコードを書きたい
複雑な条件分岐は、書いている本人も、後からそれを読む他人も非常に疲れるものです。
令和プログラマー*1である私自身、なるべく気を付けようと思っていますが、ついつい条件反射でif-elseを書いてしまいそうになります。(*1: 令和になってからプログラミングを知った人。初心者のこと。)
if - elseを使わない条件分岐のレパートリーを増やす
if - else文が絶対ダメということでは決してありません。
たくさんのレパートリー、つまり引き出しを持っておけば、適切な読みやすいコードをかける可能性が上がるかなと思うのです。文と式
JavaScriptには「文」と「式」があります。
この2つの違いを意識することが重要ではないかと思います。
- 「文」は、マシンへの命令です。
- 「式」は数学的な値です。
プログラミングにおいて、私たちが「文」を読む時は「フロー」を意識しなければなりません
フロー
フローとはつまり「流れ」のことで、以下のような図をみたことがあるならすぐに分かるかと思います。
if - elseは文
if - elseは文です。 例えるならトロッコに乗るように、線路に沿って進んだ先に分岐があります。
では何が辛いかというと、トロッコにずっと乗ってないといけないのが辛いです。
条件を確認して、あっちへ行ったりこっちへ行ったり、時には線路を戻って(アレ? なんの条件にしたがってたんだっけ???)となったり。
常に頭の中でフローを意識しなければならないのは、かなり体力を使います。
if - elseの書き換え複雑な条件も、少しの工夫で読みやすく、また書き換えやすくできます。
1. とっととReturnする
コレは好き好きあるかもしれませんが、条件反射で
elseを書かずに、
returnすることで、見通しがよくなることがあります。beforeconst checkAge = age => { if (age > 18) { // 大人です } else { // 子供です } }afterconst checkAge = age => { if (age > 18) { // 大人です return; } // 子供です }2. 三項演算子を使う
三項演算子は「値の場合分け」です。
式の中で値の場合分けをしているだけで、if文によるフローの分岐はありません。beforeconst checkAge = age => { if (age > 20) { console.log('大人です'); } else { console.log('子供です'); } }afterconst message = age > 18 ? '大人です' : '子供です'; console.log(message);ifに比べて読みづらい場合は、改行すれば良いかと思います。
afterconst message = age > 18 ? '大人です' : '子供です'; console.log(message);3. ショートサーキット
以下の基本を応用します。
キホン中のキホンtrue || true; // true true || false; // true false || false; // false
&&や||をうまく使うことで、複雑な分岐を簡潔にすることができる場合があります。beforeconst isOnline = true; if (isOnline){ makeReservation(); }afterconst isOnline = true; isOnline && makeReservation();もっとつなげることもできます。?
afterisOnline && isAdult && makeReservation();4. 関数にまとめる
大きな処理のかたまりは、関数に分割します。
beforefunction drinkAlchole(isAdult, drink) { if (!isAdult) { return; } if (drink === 'beer') { eatSomething(); adult.enjoyDrink(drink); utils.goToBathroom(2); } else { adult.goShopping(); utils.buyDrink('beer'); startCooking(); } }afterfunction drinkAlchole(isAdult, drink) { const enjoyBeer = () => { eatSomething(); adult.enjoyDrink(drink); utils.goToBathroom(2); } const getBeer = () => { adult.goShopping(); utils.buyDrink('beer'); startCooking(); } isAdult && (drink === 'beer' ? enjoyBeer() : getBeer()); }5. オブジェクト型を使う
オブジェクトとして、必要な条件としてのキーと、処理内容をあらかじめ宣言しておき、
必要に応じて取り出して使います。beforeconst calc = { run: function(op, n1, n2) { const result; if (op == "add") { result = n1 + n2; } else if (op == "sub" ) { result = n1 - n2; } else if (op == "mul" ) { result = n1 * n2; } else if (op == "div" ) { result = n1 / n2; } return result; } } calc.run("sub", 5, 3); //2afterconst calc = { add: (a, b) => a + b, sub: (a, b) => a - b, div: (a, b) => a / b, mul: (a, b) => a * b, run: (fn, a, b) => fn(a, b), }; calc.run(calc.mul, 7, 4); //28コレは、
swich - caseの書き換えにも使えます。
(ただし、パフォーマンスに劣るという意見もあるようです。個人的には、brake;を何度も書かなくていいので好きです)まとめ
文ではなく、式で表現することで、簡潔にできることが多々あるようです。
- フローに乗る前に、必要な処理やデータをあらかじめ用意する
- フローの中で、あまりゴチャゴチャやらない
という意識が必要な気がしています。
いろいろなバリエーションを使いこなして、見通しの良い記述をしたいですね。
参考
http://ichitcltk.hustle.ne.jp/gudon2/index.php?pageType=file&id=word_short_circuit.md
https://medium.com/swlh/5-ways-to-replace-if-else-statements-857c0ff19357
https://dev.to/damxipo/avoid-use-if-on-our-js-scripts-1b95]https://jp.quora.com/JavaScript-no-shiki-to-bun-no-chigai-ha-nande-shou-ka/answers/172891992?ch=10&share=5c48a6c6&srid=NGuuH
https://dev.to/mortoray/why-switch-is-better-than-if-else-9cj


- 投稿日:2020-07-02T18:47:42+09:00
[Javascript]まちがえながらも感覚的に実装できるまで昇華していく[前編]
目的
- 関数の実装を繰り返し実施し、実装までの思考法を身につける。
- 関数の概念を頭で理解するだけでなく、感覚的に操作できるまで昇華する。
- 英語でテクニカルな内容を理解する。
今回やること
lodashのライブラリを実装しながら学んだことをアウトプットしていきます。
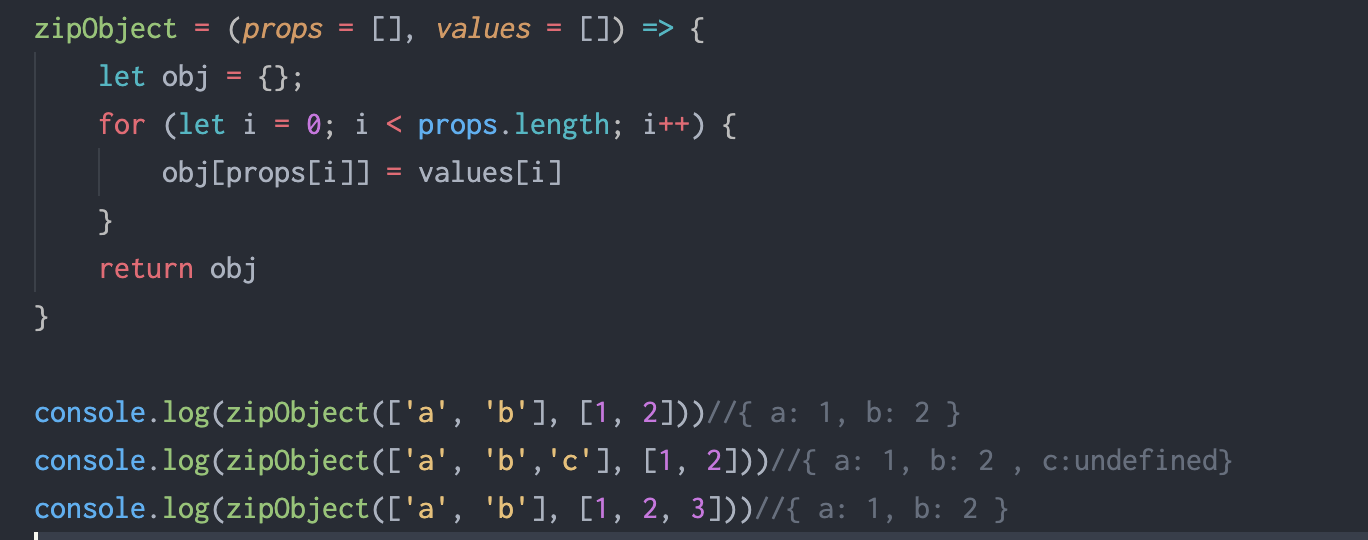
_.zipObject([props=[]], [values=[]])
配列を2つ受け取り、オブジェクトにして返す。
_.zipObject(['a', 'b'], [1, 2]);
// => { 'a': 1, 'b': 2 }
実装
でけた。特に問題なし
zipObject = (props = [], values = []) => {
    let obj = {};
    for (let i = 0; i < props.length; i++) {
        obj[props[i]] = values[i]
    }
    return obj
}
_.without(array, [values])
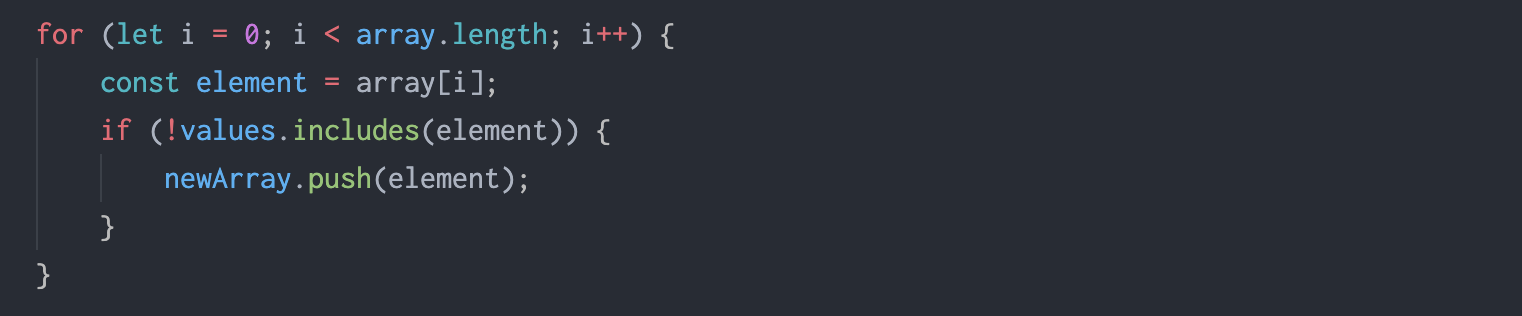
配列と値を受け取り、値を配列から取り除く。
_.without([2, 1, 2, 3], 1, 2);
// => [3]
詰まった。
配列と値を比較し取り除いた配列を抽出するため、forとfilterネストして使おうとした。
しかし、今回のようにvalueが複数あると、filterは「1を除く配列」と「2を除く配列」を別々に作る。filterのコールバック関数のreturn部分を工夫する方法(&&)を考えた。
ただ、複数引数をとるときの実装ができなかった。(もし、わかる人はそっと教えてください。)->引数の数によらず処理ができるようにしたい。が実装方法を思いつかなかった
学び
配列中の”複数の”の値を削除したいとき、配列に対してではなく、複数の値に対して有無を考える。
配列に対し、除きたい要素と比較しひとつずつ除いていく考え方ではなく、
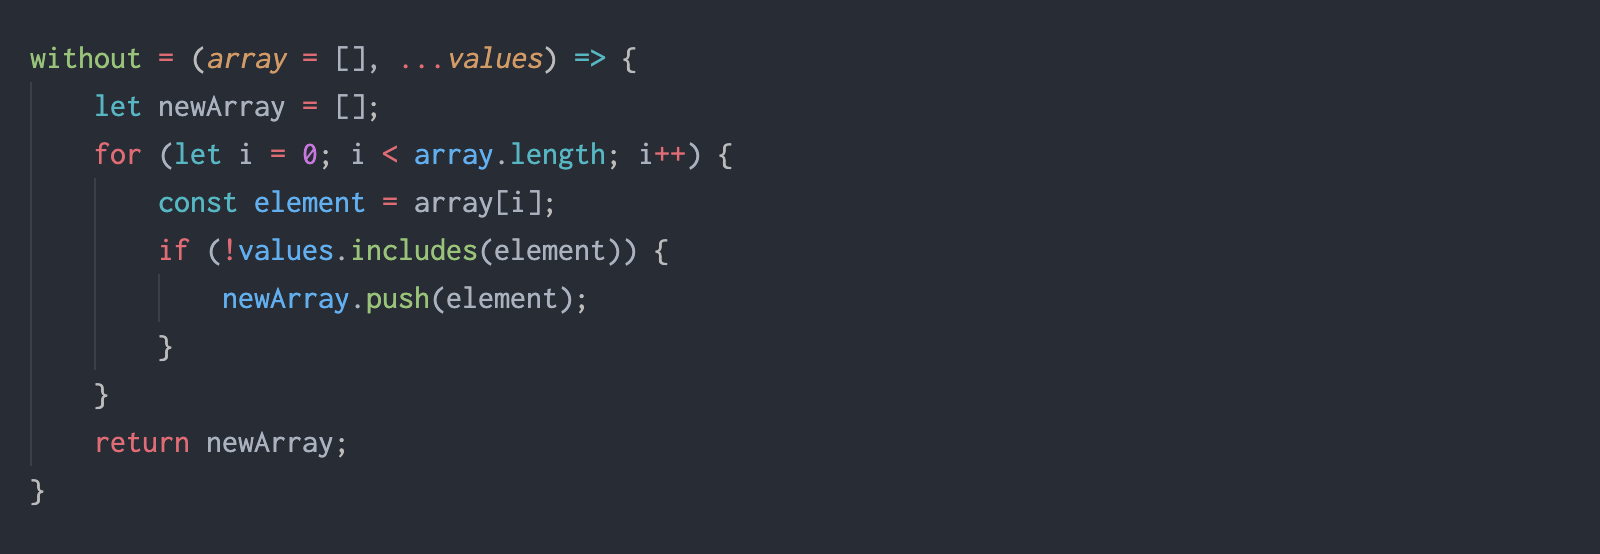
除きたい要素群に対し、配列の要素と比較しひとつずつ加えていく考え方。実装
without = (array = [], ...values) => {
    let newArray = [];
    for (let i = 0; i < array.length; i++) {
        const element = array[i];
        if (!values.includes(element)) {
            newArray.push(element);
        }
    }
    return newArray;
}
_.uniq(array)
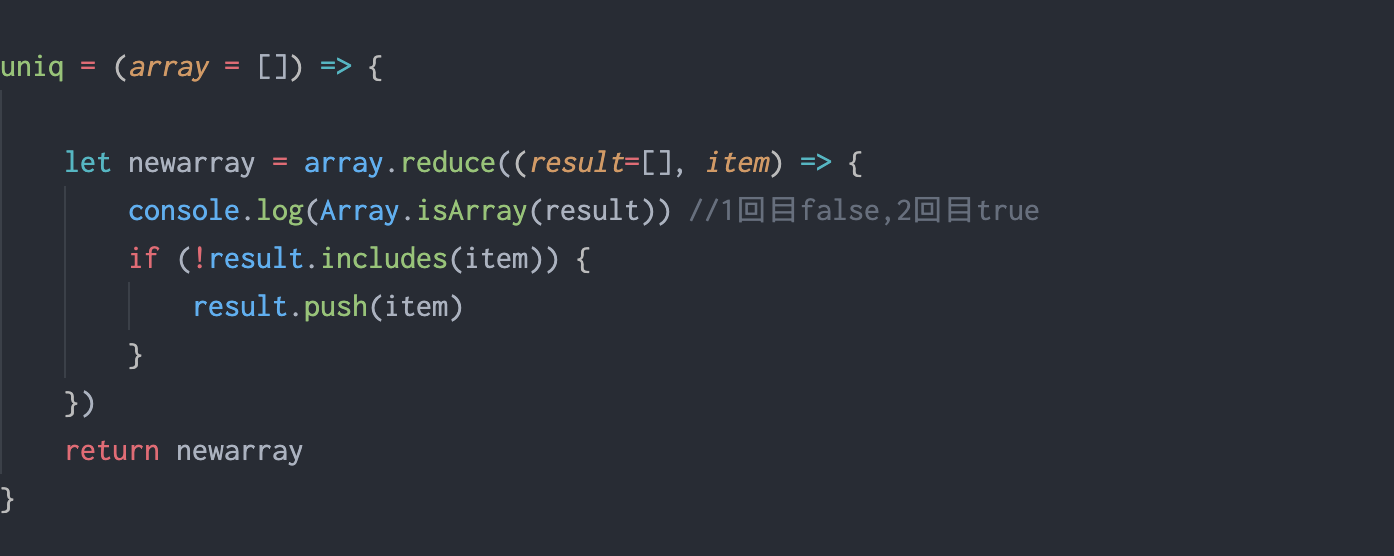
配列内の重複した要素を取り除いて配列を返す。
_.uniq([2,1,2]);
// => [2,1]
また詰まった。
uniq = (array = []) => {

    let newarray = array.reduce((result = [], item) => {
        console.log(Array.isArray(result)) //1回目false,2回目true
         if (!result.includes(item)) {
             result.push(item)
         }
    })
    return newarray
}
is not function
恐らくreduce1回目でArray.isArray(result)=falseのため。
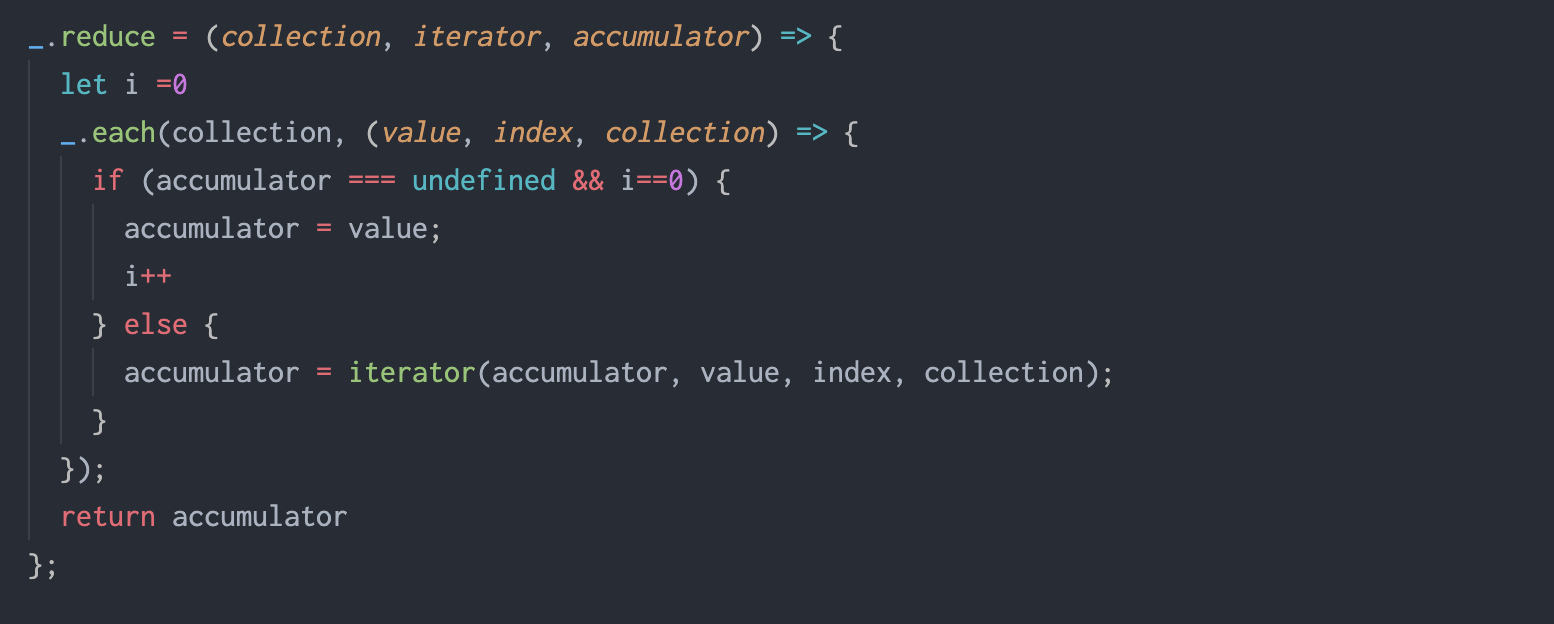
->reduceで第3引数がないときの理解があまかった。学び
reduceの第3引数がなければ、reduceに渡した最初の値はコールバック関数で処理されない。
reduceで、第3引数がない場合、array[0]は、第3引数に格納、
array[1]以降、reduceのコールバック関数が実行され、第3引数に格納。_.reduce = (collection, iterator, accumulator) => { let i =0 _.each(collection, (value, index, collection) => { if (accumulator === undefined && i==0) { accumulator = value; i++ } else { accumulator = iterator(accumulator, value, index, collection); } }); return accumulator };つまり、[2,1,2]の最初の2は、if (accumulator === undefined && i==0)に入っている。
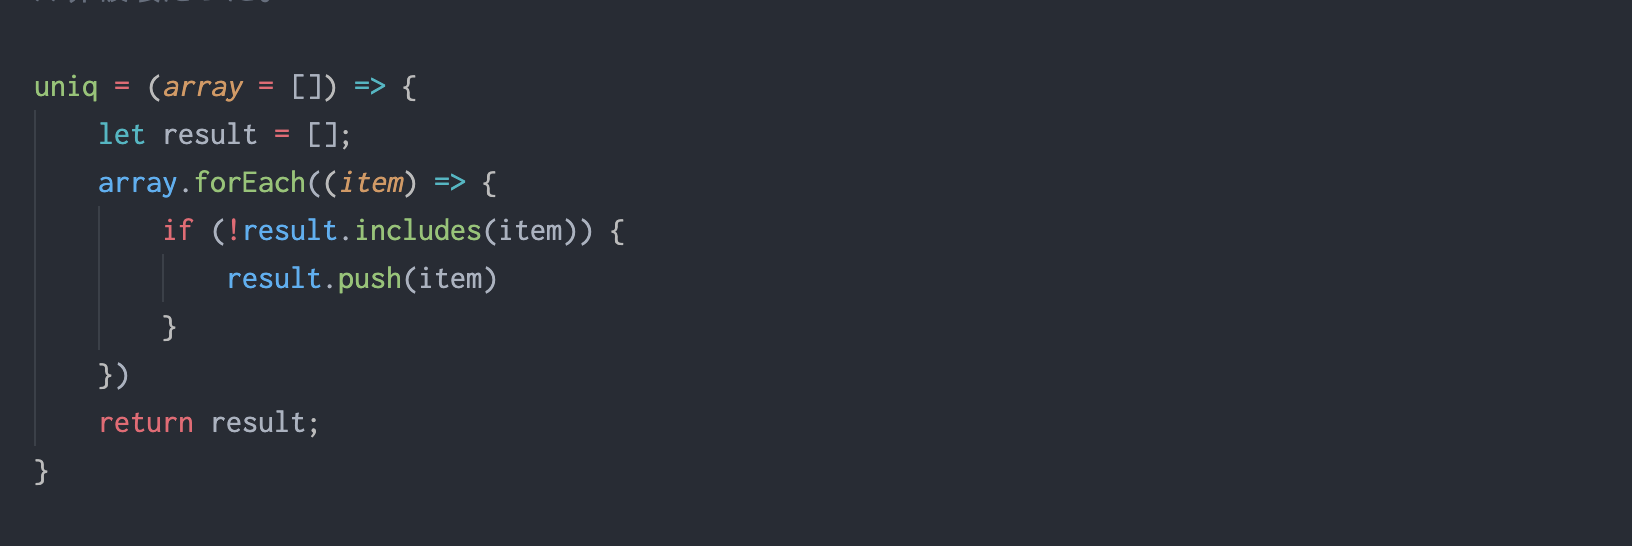
実装vol.1
reduceは仕様的に厳しいのでforeachで実装した。
uniq = (array = []) => { let result = []; array.forEach((item) => { if (!result.includes(item)) { result.push(item) } }) return result; }@ttatsfさんにそっとご指導いただきました!ありがとうございます!(2020/7/3)
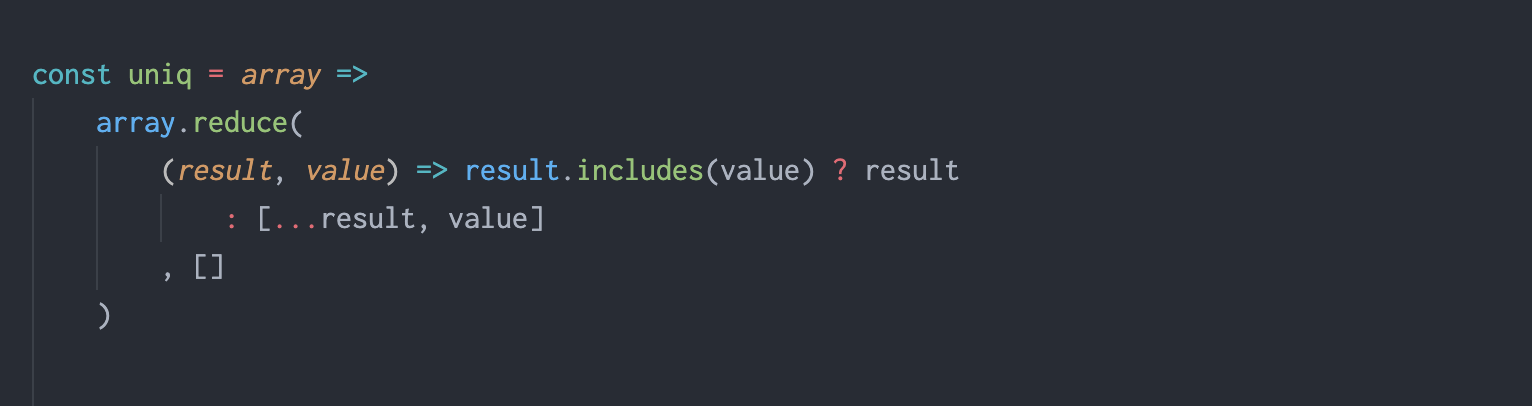
reduceは仕様的に厳しいと発言してしまいましたが前言撤回です。reduceでもできました。
const uniq = array =>
    array.reduce(
        (result, value) => result.includes(value) ? result
            : [...result, value]
        , []
    )
学びvol.2
問題は、reduceだと、最初の要素が格納されたresultは配列ではないため、配列操作ができず、is not functionと表示されていたことでした。
理解したことは、以下2点です。
reduceの最初の要素を取り出して、2回目以降配列として操作したいときは、reduce第3引数に[]を入れる。
->自分が作った関数で、resultのデフォルト引数が効いていない理由は解明中。
pushは、スプレッド演算子でも対応可能。なお、今風の書き方も教えていただきました。(ありがとうございます)
これはまだ理解できていないため、残課題です。_.takeRight(array, [n=1])
第1引数の配列を、第2引数のn番目から最後までにして取り出す。
console.log(takeRight([1, 2, 3]));
// // => [3]

console.log(takeRight([1, 2, 3], 2));
// // => [2, 3]

console.log(takeRight([1, 2, 3], 5));
// // => [1, 2, 3]

console.log(takeRight([1, 2, 3], 0));
// => []
ちょっと忘れた。
sliceの仕様忘れた。
let num = [1,2,3] console.log(num.slice(2,3)) => [3] console.log(num.slice(,3)) => Error console.log(num.slice()) => [1,2,3]参考)https://developer.mozilla.org/en-US/docs/Web/JavaScript/Reference/Global_Objects/Array/slice
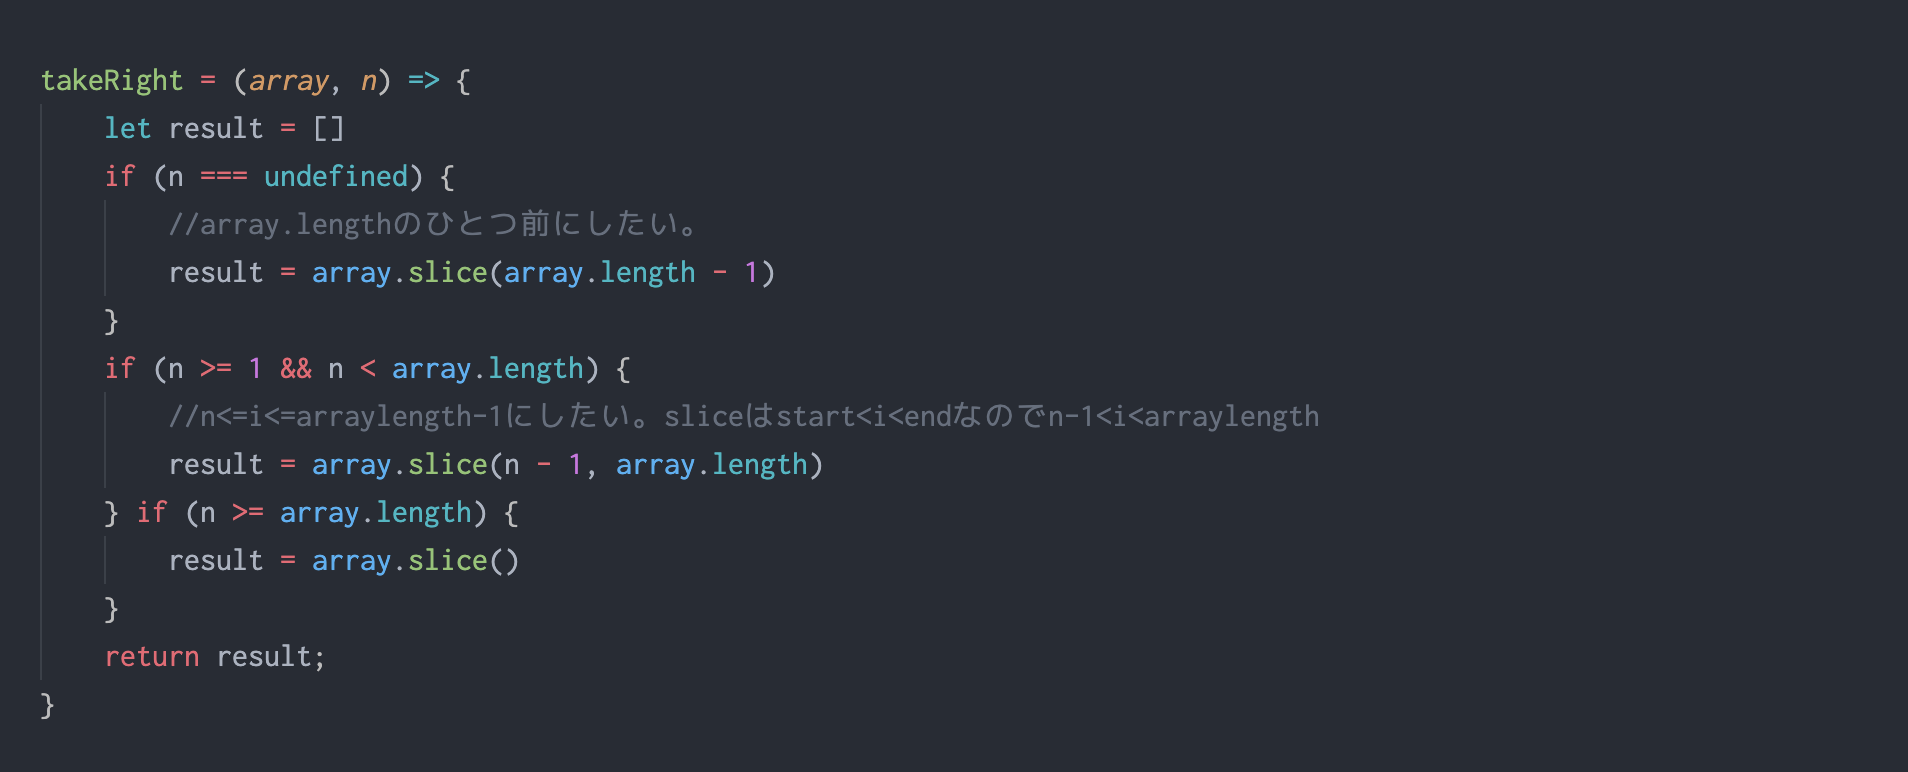
[1,2,3].slice(start,end)の場合、start < i <
end のイメージ
引数がない場合は、すべて返す。実装
takeRight = (array, n) => {
    let result = []
    if (n === undefined) {
        //array.lengthのひとつ前にしたい。
        result = array.slice(array.length - 1)
    }
    if (n >= 1 && n < array.length) {
        //n<=i<=arraylength-1にしたい。sliceはstart<i<endなのでn-1<i<arraylength
        result = array.slice(n - 1, array.length)
    } if (n >= array.length) {
        result = array.slice()
    }
    return result;
}
_.tail(array)
第1引数の配列の最初の要素を取り除き、新しい配列を
返す。_.tail([1, 2, 3]); => [2, 3]実装
特に問題なし。
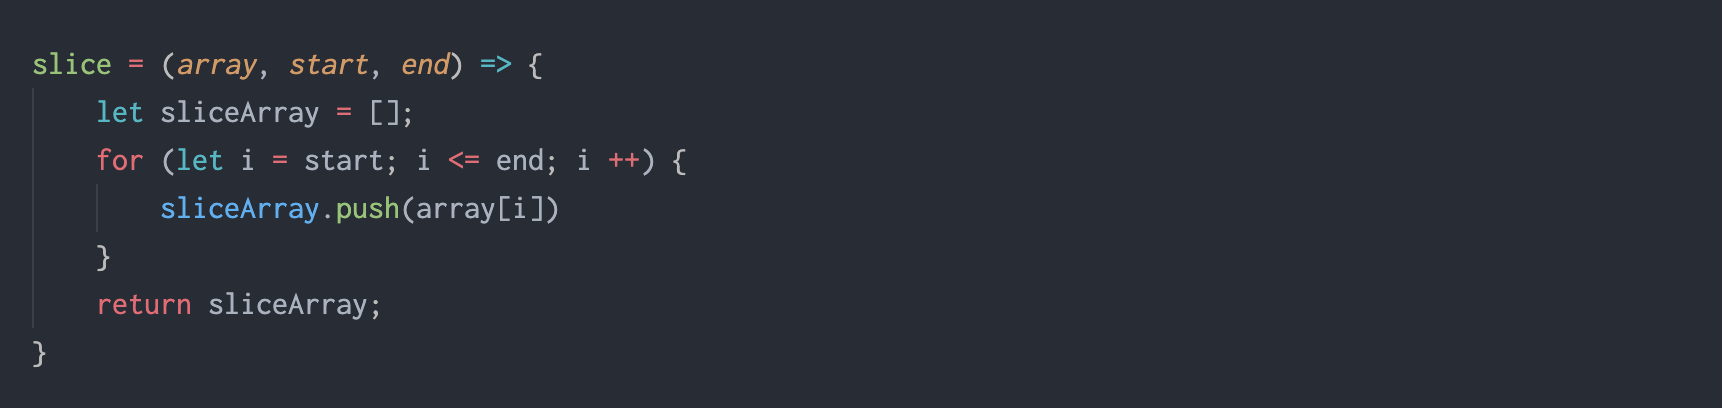
tail = (array = []) => {
    let tailarray = array.filter((value, index) => index !== 0)
    return tailarray;
}
_.slice(array, [start=0], [end=array.length])
さっきつかっちゃったけどw
let num = [1,2,3]
console.log(num.slice(2,3))
=> [3]
console.log(num.slice(,3))
=> Error
console.log(num.slice())
=> [1,2,3]
実装
特に問題なし
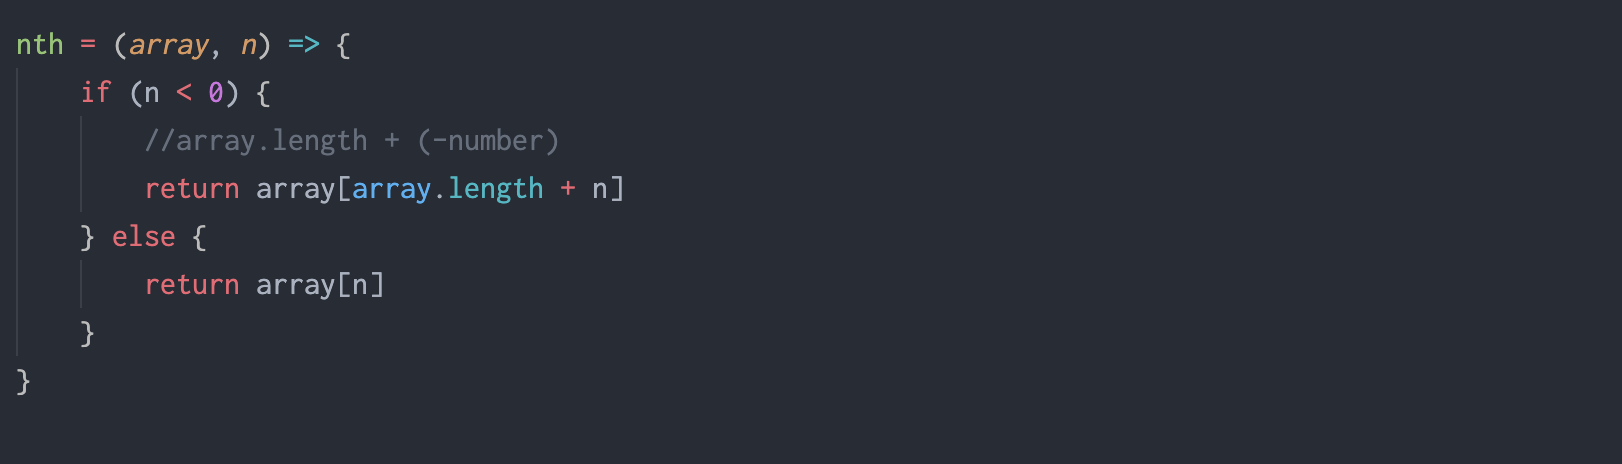
slice = (array, start, end) => {
    let sliceArray = [];
    for (let i = start; i <= end; i++) {
        sliceArray.push(array[i])
    }
    return sliceArray;
}
_.nth(array, [n=0])
array[n]の要素を取り出す。
var array = ['a', 'b', 'c', 'd'];
console.log(nth(array, 1));
// => 'b'
console.log(nth(array, -2));
// => 'c';
学び
インデックスにマイナスは使えない。
※ただし、計算式の中では可。実装
特に問題なし
nth = (array, n) => {
    if (n < 0) {
        //array.length + (-number)
        return array[array.length + n]
    } else {
        return array[n]
    }
}
何かお気づきの点がございましたらぜひコメントください・・!
- 投稿日:2020-07-02T18:47:42+09:00
[Javascript]まちがえながらも感覚的に実装できるまで昇華していく。[前編]
目的
-関数の実装を繰り返し実施し、実装までの思考法を身につける。
-関数の概念を頭で理解するだけでなく、感覚的に操作できるまで昇華する。
-英語でテクニカルな内容を理解する。今回やること
lodashのライブラリを実装しながら学んだことをアウトプットしていきます。
_.zipObject([props=[]], [values=[]])
配列を2つ受け取り、オブジェクトにして返す。
実装
でけた。特に問題なし
_.without(array, [values])
配列と値を受け取り、値を配列から取り除く。
詰まった。
配列と値を比較し取り除いた配列を抽出するため、forとfilterネストして使おうとした。
しかし、今回のようにvalueが複数あると、filterは「1を除く配列」と「2を除く配列」を別々に作る。filterのコールバック関数のreturn部分を工夫する方法(&&)を考えた。
ただ、複数引数をとるときの実装ができなかった。(もし、わかる人はそっと教えてください。)->引数の数によらず処理ができるようにしたい。が実装方法を思いつかなかった
学び
配列中の”複数の”の値を削除したいとき、配列に対してではなく、複数の値に対して有無を考える。
配列に対し、除きたい要素と比較しひとつずつ除いていく考え方ではなく、
除きたい要素群に対し、配列の要素と比較しひとつずつ加えていく考え方。実装
_.uniq(array)
配列内の重複した要素を取り除いて配列を返す。
また詰まった。
is not function
恐らくreduce1回目でArray.isArray(result)=falseのため。
->reduceで第3引数がないときの理解があまかった。学び
reduceの第3引数がなければ、reduceに渡した最初の値はコールバック関数で処理されない。
reduceで、第3引数がない場合、array[0]は、第3引数に格納、
array[1]以降、reduceのコールバック関数が実行され、第3引数に格納。
つまり、[2,1,2]の最初の2は、if (accumulator === undefined && i==0)に入っている。
実装vol.1
reduceは仕様的に厳しいのでforeachで実装した。
@ttatsfさんにそっとご指導いただきました!ありがとうございます!(2020/7/3)
reduceは仕様的に厳しいと発言してしまいましたが前言撤回です。reduceでもできました。
学びvol.2
問題は、reduceだと、最初の要素が格納されたresultは配列ではないため、配列操作ができず、is not functionと表示されていたことでした。
理解したことは、以下2点です。
reduceの最初の要素を取り出して、2回目以降配列として操作したいときは、reduce第3引数に[]を入れる。
->自分が作った関数で、resultのデフォルト引数が効いていない理由は解明中。
pushは、スプレッド演算子でも対応可能。なお、今風の書き方も教えていただきました。(ありがとうございます)
これはまだ理解できていないため、残課題です。_.takeRight(array, [n=1])
第1引数の配列を、第2引数のn番目から最後までにして取り出す。
ちょっと忘れた。
sliceの仕様忘れた。
参考)https://developer.mozilla.org/en-US/docs/Web/JavaScript/Reference/Global_Objects/Array/slice[1,2,3].slice(start,end)の場合、start < i <
end のイメージ
引数がない場合は、すべて返す。実装
関数使わない方が分かりやすそうだったので、ちょっとリファクタリング
_.tail(array)
第1引数の配列の最初の要素を取り除き、新しい配列を
返す。
実装
特に問題なし。
_.slice(array, [start=0], [end=array.length])
さっきつかっちゃったけどw
実装
特に問題なし
_.nth(array, [n=0])
array[n]の要素を取り出す。
学び
インデックスにマイナスは使えない。
※ただし、計算式の中では可。実装
特に問題なし
何かお気づきの点がございましたらぜひコメントください・・!


- 投稿日:2020-07-02T17:38:04+09:00
スクロール率表示とおしゃれなスクロールバーを実装 9日目【WEBサイトを作る30日チャレンジ】
スクロール率をJavaScriptで、なるべくレスポンシブに実装
■ポイント
・通常スクロールバーの装飾に使用する::-webkit-scrollbarのwidthを0にし、非表示にする
・スクロールバーを非表示にしたところに、position: fixedさせた要素をおいて、そこにスクロールバーを表示させる
・keyframeを使用し、10秒で色のグラデーションを変化させます
・スクロール率については、JavaScriptで要素を取得後、heightを計算しています
・レスポンシブにみえるよう、JavaScriptでスクロール率が100%になったら、ナビゲーションバーを非表示にして、フッターをそのまま表示させてます。
・シャーロックホームズの小説は著作権が切れたものをコピペしています(何かカッコよさげですよね)
・PCのみ、メニューバーを固定表示(常時表示)
・スマホ・タブレットサイズの場合、少し文字とpaddingの値を小さく設定
・(ハンバーガーメニューにしようかと思ったのですが、途中で変えました・・・記述残ってスミマセン)難しかった
①今回レスポンシブにすごく意識していましたが、何に着目して書けばいいのか?すごく悩みました。
②レスポンシブ化する際、mediaクエリを使用しましたが、スマホ仕様のサイズになった際、文字が消えて迷走していました。解決
①色々な方法がある中で、responsively を導入しました。
→これ導入して正解でした。PC、スマホ、タブレットそれぞれのの大きさごとにほぼ一度で状態確認ができます。メチャメチャ便利です。しかも無料とかありがたすぎです。まだ使いこなせていないですが、一度に複数端末の仕様を確認できますし、逆に言うと最低限どれくらいの対応で違和感がない状態までもっていけるのかがわかるので、これから重宝して使いたいなと思います。
②背景色が邪魔してたとは知らず・・・迷走してましたが、background-colorをtransparentにすることで解決しました。完成したWEBサイト
PC版
スマホ・タブレットサイズ版(iphoneは時間足りず最後までスクロールできず。。。)
HTML
<html lang="ja">
<head>
    <meta charset="UTF-8">
    <title>シャーロック・ホームズ小説サイト</title>
    <meta name="viewport" content="width=device-width, initial-scale=1.0">
    <link rel="stylesheet" href="30_9.css">
  </head>
  <body>
    <div id="progressbar"></div>
    <div id="scrollPath"></div>
    <div id="percent"></div>
    <nav id="nav-drawer">
      <input type="checkbox" id="check" id="nav-input">
      <label for="check" class="checkbtn open"></label>
      <label for="check" class="checkbtn close"></label>
      <label class="logo"><a href="#" class="logo">Sherlock</a></label>
      <ul>
        <li><a class="active" href="#">ホーム</a></li>
        <li><a href="#">会社概要</a></li>
        <li><a href="#">事業内容</a></li>
        <li><a href="#">お問い合わせ</a></li>
        <li><a href="#">採用情報</a></li>
      </ul>
    </nav>
    <section>
      <h1>The Adventures of Sherlock Holmes</h1>
      <h2>A SCANDAL IN BOHEMIA</h2>
      <p>
        To Sherlock Holmes she is always the woman. I have seldom heard him mention her under any other name. In his eyes she eclipses and predominates the whole of her sex. It was not that he felt any emotion akin to love for Irene Adler. All emotions, and that one particularly, were abhorrent to his cold, precise but admirably balanced mind. He was, I take it, the most perfect reasoning and observing machine that the world has seen, but as a lover he would have placed himself in a false position. He never spoke of the softer passions, save with a gibe and a sneer. They were admirable things for the observer—excellent for drawing the veil from men’s motives and actions. But for the trained reasoner to admit such intrusions into his own delicate and finely adjusted temperament was to introduce a distracting factor which might throw a doubt upon all his mental results. Grit in a sensitive instrument, or a crack in one of his own high-power lenses, would not be more disturbing than a strong emotion in a nature such as his. And yet there was but one woman to him, and that woman was the late Irene Adler, of dubious and questionable memory.

        I had seen little of Holmes lately. My marriage had drifted us away from each other. My own complete happiness, and the home-centred interests which rise up around the man who first finds himself master of his own establishment, were sufficient to absorb all my attention, while Holmes, who loathed every form of society with his whole Bohemian soul, remained in our lodgings in Baker Street, buried among his old books, and alternating from week to week between cocaine and ambition, the drowsiness of the drug, and the fierce energy of his own keen nature. He was still, as ever, deeply attracted by the study of crime, and occupied his immense faculties and extraordinary powers of observation in following out those clues, and clearing up those mysteries which had been abandoned as hopeless by the official police. From time to time I heard some vague account of his doings: of his summons to Odessa in the case of the Trepoff murder, of his clearing up of the singular tragedy of the Atkinson brothers at Trincomalee, and finally of the mission which he had accomplished so delicately and successfully for the reigning family of Holland. Beyond these signs of his activity, however, which I merely shared with all the readers of the daily press, I knew little of my former friend and companion.

        One night—it was on the twentieth of March, 1888—I was returning from a journey to a patient (for I had now returned to civil practice), when my way led me through Baker Street. As I passed the well-remembered door, which must always be associated in my mind with my wooing, and with the dark incidents of the Study in Scarlet, I was seized with a keen desire to see Holmes again, and to know how he was employing his extraordinary powers. His rooms were brilliantly lit, and, even as I looked up, I saw his tall, spare figure pass twice in a dark silhouette against the blind. He was pacing the room swiftly, eagerly, with his head sunk upon his chest and his hands clasped behind him. To me, who knew his every mood and habit, his attitude and manner told their own story. He was at work again. He had risen out of his drug-created dreams and was hot upon the scent of some new problem. I rang the bell and was shown up to the chamber which had formerly been in part my own.

        His manner was not effusive. It seldom was; but he was glad, I think, to see me. With hardly a word spoken, but with a kindly eye, he waved me to an armchair, threw across his case of cigars, and indicated a spirit case and a gasogene in the corner. Then he stood before the fire and looked me over in his singular introspective fashion.

        “Wedlock suits you,” he remarked. “I think, Watson, that you have put on seven and a half pounds since I saw you.”

        “Seven!” I answered.

        “Indeed, I should have thought a little more. Just a trifle more, I fancy, Watson. And in practice again, I observe. You did not tell me that you intended to go into harness.”

        “Then, how do you know?”

        “I see it, I deduce it. How do I know that you have been getting yourself very wet lately, and that you have a most clumsy and careless servant girl?”

        “My dear Holmes,” said I, “this is too much. You would certainly have been burned, had you lived a few centuries ago. It is true that I had a country walk on Thursday and came home in a dreadful mess, but as I have changed my clothes I can’t imagine how you deduce it. As to Mary Jane, she is incorrigible, and my wife has given her notice, but there, again, I fail to see how you work it out.”

        He chuckled to himself and rubbed his long, nervous hands together.

        “It is simplicity itself,” said he; “my eyes tell me that on the inside of your left shoe, just where the firelight strikes it, the leather is scored by six almost parallel cuts. Obviously they have been caused by someone who has very carelessly scraped round the edges of the sole in order to remove crusted mud from it. Hence, you see, my double deduction that you had been out in vile weather, and that you had a particularly malignant boot-slitting specimen of the London slavey. As to your practice, if a gentleman walks into my rooms smelling of iodoform, with a black mark of nitrate of silver upon his right forefinger, and a bulge on the right side of his top-hat to show where he has secreted his stethoscope, I must be dull, indeed, if I do not pronounce him to be an active member of the medical profession.”

        I could not help laughing at the ease with which he explained his process of deduction. “When I hear you give your reasons,” I remarked, “the thing always appears to me to be so ridiculously simple that I could easily do it myself, though at each successive instance of your reasoning I am baffled until you explain your process. And yet I believe that my eyes are as good as yours.”

        “Quite so,” he answered, lighting a cigarette, and throwing himself down into an armchair. “You see, but you do not observe. The distinction is clear. For example, you have frequently seen the steps which lead up from the hall to this room.”

        “Frequently.”

        “How often?”

        “Well, some hundreds of times.”

        “Then how many are there?”

        “How many? I don’t know.”

        “Quite so! You have not observed. And yet you have seen. That is just my point. Now, I know that there are seventeen steps, because I have both seen and observed. By the way, since you are interested in these little problems, and since you are good enough to chronicle one or two of my trifling experiences, you may be interested in this.” He threw over a sheet of thick, pink-tinted notepaper which had been lying open upon the table. “It came by the last post,” said he. “Read it aloud.”

        The note was undated, and without either signature or address.

        “There will call upon you to-night, at a quarter to eight o’clock,” it said, “a gentleman who desires to consult you upon a matter of the very deepest moment. Your recent services to one of the royal houses of Europe have shown that you are one who may safely be trusted with matters which are of an importance which can hardly be exaggerated. This account of you we have from all quarters received. Be in your chamber then at that hour, and do not take it amiss if your visitor wear a mask.”

        “This is indeed a mystery,” I remarked. “What do you imagine that it means?”

        “I have no data yet. It is a capital mistake to theorise before one has data. Insensibly one begins to twist facts to suit theories, instead of theories to suit facts. But the note itself. What do you deduce from it?”

        I carefully examined the writing, and the paper upon which it was written.

        “The man who wrote it was presumably well to do,” I remarked, endeavouring to imitate my companion’s processes. “Such paper could not be bought under half a crown a packet. It is peculiarly strong and stiff.”

        “Peculiar—that is the very word,” said Holmes. “It is not an English paper at all. Hold it up to the light.”

        I did so, and saw a large “E” with a small “g,” a “P,” and a large “G” with a small “t” woven into the texture of the paper.

        “What do you make of that?” asked Holmes.

        “The name of the maker, no doubt; or his monogram, rather.”

        “Not at all. The ‘G’ with the small ‘t’ stands for ‘Gesellschaft,’ which is the German for ‘Company.’ It is a customary contraction like our ‘Co.’ ‘P,’ of course, stands for ‘Papier.’ Now for the ‘Eg.’ Let us glance at our Continental Gazetteer.” He took down a heavy brown volume from his shelves. “Eglow, Eglonitz—here we are, Egria. It is in a German-speaking country—in Bohemia, not far from Carlsbad. ‘Remarkable as being the scene of the death of Wallenstein, and for its numerous glass-factories and paper-mills.’ Ha, ha, my boy, what do you make of that?” His eyes sparkled, and he sent up a great blue triumphant cloud from his cigarette.

        “The paper was made in Bohemia,” I said.

        “Precisely. And the man who wrote the note is a German. Do you note the peculiar construction of the sentence—‘This account of you we have from all quarters received.’ A Frenchman or Russian could not have written that. It is the German who is so uncourteous to his verbs. It only remains, therefore, to discover what is wanted by this German who writes upon Bohemian paper and prefers wearing a mask to showing his face. And here he comes, if I am not mistaken, to resolve all our doubts.”

        As he spoke there was the sharp sound of horses’ hoofs and grating wheels against the curb, followed by a sharp pull at the bell. Holmes whistled.

        “A pair, by the sound,” said he. “Yes,” he continued, glancing out of the window. “A nice little brougham and a pair of beauties. A hundred and fifty guineas apiece. There’s money in this case, Watson, if there is nothing else.”

        “I think that I had better go, Holmes.”

        “Not a bit, Doctor. Stay where you are. I am lost without my Boswell. And this promises to be interesting. It would be a pity to miss it.”

        “But your client—”

        “Never mind him. I may want your help, and so may he. Here he comes. Sit down in that armchair, Doctor, and give us your best attention.”

        A slow and heavy step, which had been heard upon the stairs and in the passage, paused immediately outside the door. Then there was a loud and authoritative tap.

        “Come in!” said Holmes.

        A man entered who could hardly have been less than six feet six inches in height, with the chest and limbs of a Hercules. His dress was rich with a richness which would, in England, be looked upon as akin to bad taste. Heavy bands of astrakhan were slashed across the sleeves and fronts of his double-breasted coat, while the deep blue cloak which was thrown over his shoulders was lined with flame-coloured silk and secured at the neck with a brooch which consisted of a single flaming beryl. Boots which extended halfway up his calves, and which were trimmed at the tops with rich brown fur, completed the impression of barbaric opulence which was suggested by his whole appearance. He carried a broad-brimmed hat in his hand, while he wore across the upper part of his face, extending down past the cheekbones, a black vizard mask, which he had apparently adjusted that very moment, for his hand was still raised to it as he entered. From the lower part of the face he appeared to be a man of strong character, with a thick, hanging lip, and a long, straight chin suggestive of resolution pushed to the length of obstinacy.

        “You had my note?” he asked with a deep harsh voice and a strongly marked German accent. “I told you that I would call.” He looked from one to the other of us, as if uncertain which to address.

        “Pray take a seat,” said Holmes. “This is my friend and colleague, Dr. Watson, who is occasionally good enough to help me in my cases. Whom have I the honour to address?”

        “You may address me as the Count Von Kramm, a Bohemian nobleman. I understand that this gentleman, your friend, is a man of honour and discretion, whom I may trust with a matter of the most extreme importance. If not, I should much prefer to communicate with you alone.”

        I rose to go, but Holmes caught me by the wrist and pushed me back into my chair. “It is both, or none,” said he. “You may say before this gentleman anything which you may say to me.”

        The Count shrugged his broad shoulders. “Then I must begin,” said he, “by binding you both to absolute secrecy for two years; at the end of that time the matter will be of no importance. At present it is not too much to say that it is of such weight it may have an influence upon European history.”

        “I promise,” said Holmes.

        “And I.”

        “You will excuse this mask,” continued our strange visitor. “The august person who employs me wishes his agent to be unknown to you, and I may confess at once that the title by which I have just called myself is not exactly my own.”

        “I was aware of it,” said Holmes dryly.

        “The circumstances are of great delicacy, and every precaution has to be taken to quench what might grow to be an immense scandal and seriously compromise one of the reigning families of Europe. To speak plainly, the matter implicates the great House of Ormstein, hereditary kings of Bohemia.”

        “I was also aware of that,” murmured Holmes, settling himself down in his armchair and closing his eyes.

        Our visitor glanced with some apparent surprise at the languid, lounging figure of the man who had been no doubt depicted to him as the most incisive reasoner and most energetic agent in Europe. Holmes slowly reopened his eyes and looked impatiently at his gigantic client.

        “If your Majesty would condescend to state your case,” he remarked, “I should be better able to advise you.”

        The man sprang from his chair and paced up and down the room in uncontrollable agitation. Then, with a gesture of desperation, he tore the mask from his face and hurled it upon the ground. “You are right,” he cried; “I am the King. Why should I attempt to conceal it?”

        “Why, indeed?” murmured Holmes. “Your Majesty had not spoken before I was aware that I was addressing Wilhelm Gottsreich Sigismond von Ormstein, Grand Duke of Cassel-Felstein, and hereditary King of Bohemia.”

        “But you can understand,” said our strange visitor, sitting down once more and passing his hand over his high white forehead, “you can understand that I am not accustomed to doing such business in my own person. Yet the matter was so delicate that I could not confide it to an agent without putting myself in his power. I have come incognito from Prague for the purpose of consulting you.”

        “Then, pray consult,” said Holmes, shutting his eyes once more.

        “The facts are briefly these: Some five years ago, during a lengthy visit to Warsaw, I made the acquaintance of the well-known adventuress, Irene Adler. The name is no doubt familiar to you.”

        “Kindly look her up in my index, Doctor,” murmured Holmes without opening his eyes. For many years he had adopted a system of docketing all paragraphs concerning men and things, so that it was difficult to name a subject or a person on which he could not at once furnish information. In this case I found her biography sandwiched in between that of a Hebrew rabbi and that of a staff-commander who had written a monograph upon the deep-sea fishes.

        “Let me see!” said Holmes. “Hum! Born in New Jersey in the year 1858. Contralto—hum! La Scala, hum! Prima donna Imperial Opera of Warsaw—yes! Retired from operatic stage—ha! Living in London—quite so! Your Majesty, as I understand, became entangled with this young person, wrote her some compromising letters, and is now desirous of getting those letters back.”

        “Precisely so. But how—”

        “Was there a secret marriage?”

        “None.”

        “No legal papers or certificates?”

        “None.”

        “Then I fail to follow your Majesty. If this young person should produce her letters for blackmailing or other purposes, how is she to prove their authenticity?”

        “There is the writing.”

        “Pooh, pooh! Forgery.”

        “My private note-paper.”

        “Stolen.”

        “My own seal.”

        “Imitated.”

        “My photograph.”

        “Bought.”

        “We were both in the photograph.”

        “Oh, dear! That is very bad! Your Majesty has indeed committed an indiscretion.”

        “I was mad—insane.”

        “You have compromised yourself seriously.”

        “I was only Crown Prince then. I was young. I am but thirty now.”

        “It must be recovered.”

        “We have tried and failed.”

        “Your Majesty must pay. It must be bought.”

        “She will not sell.”

        “Stolen, then.”

        “Five attempts have been made. Twice burglars in my pay ransacked her house. Once we diverted her luggage when she travelled. Twice she has been waylaid. There has been no result.”

        “No sign of it?”

        “Absolutely none.”

        Holmes laughed. “It is quite a pretty little problem,” said he.

        “But a very serious one to me,” returned the King reproachfully.

        “Very, indeed. And what does she propose to do with the photograph?”

        “To ruin me.”

        “But how?”

        “I am about to be married.”

        “So I have heard.”

        “To Clotilde Lothman von Saxe-Meningen, second daughter of the King of Scandinavia. You may know the strict principles of her family. She is herself the very soul of delicacy. A shadow of a doubt as to my conduct would bring the matter to an end.”

        “And Irene Adler?”

        “Threatens to send them the photograph. And she will do it. I know that she will do it. You do not know her, but she has a soul of steel. She has the face of the most beautiful of women, and the mind of the most resolute of men. Rather than I should marry another woman, there are no lengths to which she would not go—none.”

        “You are sure that she has not sent it yet?”

        “I am sure.”

        “And why?”

        “Because she has said that she would send it on the day when the betrothal was publicly proclaimed. That will be next Monday.”

        “Oh, then we have three days yet,” said Holmes with a yawn. “That is very fortunate, as I have one or two matters of importance to look into just at present. Your Majesty will, of course, stay in London for the present?”

        “Certainly. You will find me at the Langham under the name of the Count Von Kramm.”

        “Then I shall drop you a line to let you know how we progress.”

        “Pray do so. I shall be all anxiety.”

        “Then, as to money?”

        “You have carte blanche.”

        “Absolutely?”

        “I tell you that I would give one of the provinces of my kingdom to have that photograph.”

        “And for present expenses?”

        The King took a heavy chamois leather bag from under his cloak and laid it on the table.

        “There are three hundred pounds in gold and seven hundred in notes,” he said.

        Holmes scribbled a receipt upon a sheet of his note-book and handed it to him.

        “And Mademoiselle’s address?” he asked.

        “Is Briony Lodge, Serpentine Avenue, St. John’s Wood.”

        Holmes took a note of it. “One other question,” said he. “Was the photograph a cabinet?”

        “It was.”

        “Then, good-night, your Majesty, and I trust that we shall soon have some good news for you. And good-night, Watson,” he added, as the wheels of the royal brougham rolled down the street. “If you will be good enough to call to-morrow afternoon at three o’clock I should like to chat this little matter over with you.”</p>
    </section>

    <footer>
      <div class ="footer">
        <ul>
          <li><a href="#">ホーム</a></li>
          <li><a href="#">会社概要</a></li>
          <li><a href="#">事業内容</a></li>
          <li><a href="#">お問い合わせ</a></li>
          <li><a href="#">採用情報</a></li>
        </ul>
      </div>
    </footer>

    <script type="text/javascript">
      const percent = document.getElementById('percent');
      const progressbar = document.getElementById("progressbar");
      const totalHeight = document.body.scrollHeight - window.innerHeight;
      window.onscroll = function() {
        const progress = (window.pageYOffset / totalHeight) * 100;
        progressbar.style.height= progress + "%";
        percent.innerHTML = "Reading Rate....  " + Math.round(progress) + "%";
        // 一番下にきたらナビゲーションバーを消す
        const navbar = document.getElementById('nav-drawer');
        if (progress === 100){
          navbar.style.display ='none';
        };
        if (progress !== 100) {
          navbar.style.display ='block';
        }
      }
    </script>
  </body>
  </html>
CSS
*
{
    margin: 0;
    padding: 0;
}
body
{
    width: 100%;
    background: #000;
    font-family: 'Noto Sans JP', sans-serif;
}
nav{
    background-color: black;
    width: 100%;
    top:0;
}
#check,
#nav-input{
    display: none;
}
.checkbtn{
    font-size: 30px;
    color: white;
    float: right;
    line-height: 80px;
    margin-right: 40px;
    cursor: pointer;
    display: none;
  }
label.logo a{
    color: white;
    font-size: 40px;
    line-height: 80px;
    font-weight: 600;
    text-decoration: none;
    margin-left:30px;
  }
nav ul{
    float: right;
    margin-right: 60px;
}
nav ul li{
    display: inline-block;
    line-height: 80px;
    margin: 0 2px;
}
nav ul li a{
    color: #f2f2f2;
    text-decoration: none;
    font-weight: 600;
    font-size: 20px;
    padding: 7px 15px;
    text-transform: uppercase;
    text-decoration: none;
}
a.active,a:hover{
    background: rgb(46, 42, 42);
    transition: .5s;
  }


section
{
    margin: 0 10%;
}
section h1
{
    margin-top: 100px;
    font-size: 3em;
    color: rgb(206, 200, 200);
}
section h2
{
    margin-top: 50px;
    font-size: 2em;
    color: #555;
}
section p
{
    font-size: 1.2em;
    color: #555;
    padding: 10%;
}


::-webkit-scrollbar
{
    width: 0;
}
#scrollPath
{
    position: fixed;
    top: 0;
    right: 0;
    width: 10px;
    height: 100%;
    background: rgba(255,255,255,0.05);
}
#progressbar{
    position: fixed;
    top: 0;
    right: 0;
    width: 10px;
    background: linear-gradient(to top, #008aff,#00ffe7);
    animation: animate 10s linear infinite;
}

@keyframes animate
{
    0%
    {
        filter: hue-rotate(0deg);
        top: 0; right: 0;
    }
    50%
    {
        filter: hue-rotate(360deg);
        background: linear-gradient(to top, pink,yellow);
    }
    100%
    {
        filter: hue-rotate(0deg);
        top: 0; right: 0;
    }
}
#progressbar:before
{
    content: '';
    position: absolute;
    top: 0;
    left: 0;
    width: 100%;
    height: 100%;
    background: linear-gradient(to top, #008aff,#00ffe7);
    filter: blur(10px);
}
#progressbar:after
{
    content: '';
    position: absolute;
    top: 0;
    left: 0;
    width: 100%;
    height: 100%;
    background: linear-gradient(to top, #008aff,#00ffe7);
    filter: blur(30px);
}

#percent
{
    position: fixed;
    top: 50%;
    right: 15px;
    transform: translateY(-50%) rotateX(180deg) rotateY(180deg);
    color: #fff;
    font-size: 2em;
    writing-mode: vertical-rl;
    text-orientation: sideways-right;
}
/*フッターエリア */
.footer{
    width: 980px;
    text-align: center;
}

.footer ul{
    float: right;
    margin-right: 60px;
}
.footer ul li{
    display: inline-block;
    line-height: 80px;
    margin: 0 2px;
}
.footer ul li a{
    color: #f2f2f2;
    text-decoration: none;
    font-weight: 600;
    font-size: 20px;
    padding: 7px 15px;
    text-transform: uppercase;
    text-decoration: none;
}

@media screen and (max-width:1024px) {

    nav{
        position: static;
        }
    .footer{
        width: 100%;
        text-align: center;
    }
    li{
        line-height: 20px;
        font-size: 10px;
    }
    nav ul li a{
        font-size: 18px;
        padding: 2px 3px;
    }
    #percent{
        font-size: 1em;
    }
}

@media screen and (min-width:800px) {

    nav{
        position: fixed;
        background-color: transparent;
    }
}
本当はpタグ内の小説の文章を折り畳めればよかったのですが、どうやればいいのかわからず、、、
時間切れでそのままにしています。ながーくなってしまい見にくいかもしれません。今回は以上となります。
ここは間違っている、ここはこうしたほうが良いかも?等々ございましたらご指摘いただけますと幸いです。最後までみていただきありがとうございます。


- 投稿日:2020-07-02T17:36:26+09:00
ラズパイで温湿度とCPU温度の取得とグラフの表示
エアコンをラズパイから操作できるようになったので、室温と湿度をから自動的にエアコンをつけたいと思った。
温湿度は前の記事を参考にBME280で取得する。
ついでにラズパイのCPU温度も取得してグラフにする。まずは完成したグラフがこちら
コード
window.onload = function() {
  view();
  let sl = document.querySelector("select.date")
  sl.value = today();
}

function view(date) {
  if (!date) date = today();
  let room_temp = [];
  let room_hum = [];
  let cpu = [];
  let labels = []

  fetch('http://192.168.3.2/temperature/getData.php?date=' + date)
    .then(function(response) {
      return response.text();
    })
    .then(function(myJson) {
      // console.log(myJson)
      myJson = JSON.parse(myJson);
      // console.log(myJson)
      myJson.forEach((e) => {
        room_temp.push(parseFloat(e.room_temp));
        room_hum.push(parseFloat(e.room_hum));
        cpu.push(parseFloat(e.cpu));
        labels.push(getDatetime(new Date(Number(e.time * 1000))))
      })
      graf(labels, room_temp, room_hum, cpu, date)
    });
}

function change() {
  let sl = document.querySelector("select.date")
  view(sl.value);
}

function getDatetime(now) {
  let Hour = ("0" + now.getHours()).slice(-2);
  let Min = ("0" + now.getMinutes()).slice(-2);
  let Sec = ("0" + now.getSeconds()).slice(-2);
  return Hour + ":" + Min;
}

function today(date) {
  let now = new Date();
  let Y = now.getFullYear();
  let M = ("0" + (Number(now.getMonth()) + 1)).slice(-2);
  let D = ("0" + now.getDate()).slice(-2);
  return date = Y + '_' + M + '_' + D;
}

function graf(labels, room_temp, room_hum, cpu, date) {

  let ctx = document.getElementById('myChart').getContext('2d');

  let myChart = new Chart(ctx, {
    type: "line",
    data: {
      labels: labels,
      datasets: [{
        label: "室温",
        data: room_temp,
        borderColor: "rgb(255, 99, 132)",
        backgroundColor: "rgba(255, 99, 132, 0)"
      }, {
        label: "湿度",
        data: room_hum,
        borderColor: "rgb(54, 162, 235)",
        backgroundColor: "rgba(54, 162, 235, 0)"
      }, {
        label: "CPU",
        data: cpu,
        borderColor: "rgb(120, 120, 120)",
        backgroundColor: "rgba(54, 162, 235, 0)"
      }]
    },
    options: {
      tooltips: {
        callbacks: {}
      },
      title: {
        display: true,
        text: '温湿度とラズパイ温度 ' + date
      },
      elements: {
        line: {
          tension: 0
        }
      },
      scales: {
        xAxes: [{
          type: 'time',
          time: {
            parser: "mm:ss",
            unit: 'minute',
            unitStepSize: 1,
            displayFormats: {
              'minute': 'mm',
            },

          }
        }],
        yAxes: [{
          ticks: {
            beginAtZero: true
          },

        }]
      }
    }
  });
}
解説
DB
+-----------+---------+------+-----+---------+----------------+
| Field     | Type    | Null | Key | Default | Extra          |
+-----------+---------+------+-----+---------+----------------+
| id        | int(11) | NO   | PRI | NULL    | auto_increment |
| room_temp | float   | YES  |     | NULL    |                |
| room_hum  | float   | YES  |     | NULL    |                |
| cpu       | float   | YES  |     | NULL    |                |
| time      | int(11) | YES  |     | NULL    |                |
+-----------+---------+------+-----+---------+----------------+
timeはUnixタイムスタンプ(秒)
javascriptについて
DBからデータを取ってくる関数がこちら。
function view(date) {
  if (!date) date = today();
  let room_temp = [];
  let room_hum = [];
  let cpu = [];
  let labels = []

  fetch('http://192.168.3.2/temperature/getData.php?date=' + date)
    .then(function(response) {
      return response.text();
    })
    .then(function(myJson) {
      // console.log(myJson)
      myJson = JSON.parse(myJson);
      // console.log(myJson)
      myJson.forEach((e) => {
        room_temp.push(parseFloat(e.room_temp));
        room_hum.push(parseFloat(e.room_hum));
        cpu.push(parseFloat(e.cpu));
        labels.push(getDatetime(new Date(Number(e.time * 1000))))
      })
      graf(labels, room_temp, room_hum, cpu, date)
    });
}
撮ってきたデータをオブジェクトに格納するのだが、chart.jsが処理できるデータにする必要があるのでここでは以下のような操作をしている。
- 温度、湿度それぞれの配列へデータを入れていくがその際、DBからの値を文字列から数字に変換して格納している。
- X軸として配列labelsへ自覚情報を渡しているが、DBに登録しているUnixタイムスタンプは秒なのでミリ秒に直している。
そうしてできたデータをグラフを表示する関数grafへ渡している。

- 投稿日:2020-07-02T17:34:27+09:00
Express事始め
expressをやってみる
expressはnode.jsをいい感じに使えるようにしてくれるフレームワークです。
https://expressjs.com/ja/hello world
expressはnodeのコアモジュールを拡張しているので、httpモジュールのように書ける。
app.jsconst express = require('express') const app = express() app.get('/', (req, res) => { res.writeHead(200) res.write('Hello,World') res.end() }) app.listen(3001)express独自のメソッドを使用して実装するならば、下記。
app.jsconst express = require('express') const app = express() app.get('/', (req, res) => { res.status(200).send('Hello, world') }) app.listen(3001)上記でlocalhost:3001にアクセスできる。
完結!ちなみにhttpモジュールではGET/POSTどちらも受け付けていたが、
上記の実装だとGETのみ受け付ける。(後ほど詳しく触れます)ミドルウェアを利用する
Expressは最低限の機能しか持たないため、ミドルウェアを組み込む事になる。
ミドルウェアを作成するには、下記のようなfunctionを作成する。・通常の処理
function(req, res, next) {
   // 何かしらの処理
   next()
}
・エラー処理
function(err, req, res, next) {
   // 何かしらの処理
  next()
}
next()を呼び出すことで、次の制御に移行する。
上記のミドルウェアを利用する場合はuseメソッドを使用する。
const express = require('express')
const app = expresss()

app.use((req, res, next) => {
})

app.listen(3001)
実際に使ってみた例が下記。アクセスしたユーザーエージェントをconsole.log(ターミナル上)で表示してくれる。
app.jsconst middlewear = require('./module') const express = require('express') const app = express() app.use(middlewear) app.get('/', (req, res) => { res.status(200).send('Hello, World') }) app.listen(3001)module.jsmodule.exports = function(req, res, next) { const ua = req.headers['user-agent'] console.log(ua) next() }ルーティング
app.メソッド(パス, コールバック)で実装する。メソッド ・・・
GET,POSTなどを小文字で指定する。
パス ・・・URLのパス。正規表現での指定可
コールバック ・・・メソッドやパスが一致した場合に発動するfunctionを指定名前付きパラメータも利用できる。コロン付きで指定すればOK!
app.get('/post/:id', (req, res) => {
  console.log(req.params.id)
})
下記実装後、 localhost:3001/post/31にアクセスすると、 ターミナル上に31と表示される。
const express = require('express')
const app = express()

app.get('/post/:id', (req, res) => {
  console.log(req.params.id)
  res.status(200).send('ok,hello')
})

app.listen(3001)
/post/:id?というように正規表現を使う事で、
- /post/31
- /post/
- /post
などにも該当させることができる。
/post/:id*であれば
- /post/31
- post/31/plusなどがヒットする。
Custom Matching Parameterというものもある。
/post/:id(\\d+)であれば、数値のみのマッチングのため
/user/123はマッチするが、
/user/abcはヒットしない。expressは内部で
path-to-regexpというパッケージを使用している為、
そのドキュメントを見れば詳しいことがわかる。
https://www.npmjs.com/package/path-to-regexpルーティングのモジュール化
ある程度のアプリの規模になるとルーティングが肥大化するため、モジュール化する。
const router = express.Router()実際の使用例
const router = require('express').Router()

// ミドルウェア どのルートでも走る
router.use((req, res, next) => {
  console.log('ミドルウェアです')
  next()
})

router.get('/', (req, res) => {
   res.send('/')
   console.log('第一ルーティング')
})

router.get('/about', (req, res) => {
   res.send('/about')
   console.log('第二ルーティング')
})

module.exports = router
routerはミドルウェアなので、
app.useで使用する。app.jsconst express = require('express') const app = exppress() app.use('/user', require('./router/user.js')) app.listen(3001)
/user/にアクセスすると 「第一ルーティング」がconsole.logに出力され、
/user/aboutにアクセスすると「第二ルーティング」がconsole.logに出力される。【参考サイト】
https://expressjs.com/ja/
https://dev.classmethod.jp/articles/express_router_param_get/
https://qiita.com/kibinag0/items/8936476e99ed50279b83
- 投稿日:2020-07-02T17:33:05+09:00
Axios で Node.js で発行した S3 の署名付き URL へアップロードすると 403 エラーになる
Nuxt.js から Node.js に S3 の署名付き URL をリクエストするような状況でつまったところの忘備録です。
s3 の Bucket の CORS 設定をする
s3 のドメインとサイトのドメインが異なるなら設定しておきましょう。
アップロードのみできれば良いなら許可は PUT だけで良いと思います。<?xml version="1.0" encoding="UTF-8"?> <CORSConfiguration xmlns="http://s3.amazonaws.com/doc/2006-03-01/"> <CORSRule> <AllowedOrigin>*</AllowedOrigin> <AllowedMethod>PUT</AllowedMethod> <AllowedHeader>*</AllowedHeader> </CORSRule> </CORSConfiguration>リージョンを指定する
署名バージョンを 4 に指定する
無いと失敗するようです…?
AWS_DEFAULT_REGION などは内部で勝手に使ってくれると思っていたのですが指定したほうが良さそうです。
// on server
const sts = new STS({
  accessKeyId: process.env.ACCESS_KEY_ID,
  secretAccessKey: process.env.SECRET_ACCESS_KEY,
  region: process.env.AWS_DEFAULT_REGION, // ★
})
app.get('/get-signed-url', async (req, res) => {
  const { Credentials } = await sts
    .assumeRole({
      RoleArn: process.env.STS_ROLE_ARN,
      RoleSessionName: process.env.STS_ROLE_SESSION_NAME,
    })
    .promise()
  if (!Credentials) return Promise.reject(new Error('failed to get credencials'))
  const s3 = new S3({
    accessKeyId: Credentials.AccessKeyId,
    secretAccessKey: Credentials.SecretAccessKey,
    sessionToken: Credentials.SessionToken,
    region: process.env.AWS_DEFAULT_REGION, // ★
    signatureVersion: 'v4', // ★
  })
  const Key = randomString(128)
  const putUrl = await s3.getSignedUrlPromise('putObject', {
    Bucket,
    Key,
    ContentType: req.query.mimetype,
    Metadata: { 'user-name': 'hogehoge' },
    Expires: 60,
  })
  res.json({ putUrl, Key })
})
余計なヘッダーを送らないようにする
put するときに余計なヘッダーをつけて送ると 403 SignatureDoesNotMatch が返ってきます。
Axios のデフォルトの headers に Authorization を入れている場合などは注意が必要だと思います。// front export default Vue.extend({ methods: { async upload(rawFile: File) { const prepareUrl = new URL(process.env.API_URL + '/get-signed-url') prepareUrl.searchParams.append('filename', rawFile.name) prepareUrl.searchParams.append('mimetype', rawFile.type) this.$axios.setToken(this.$store.getters['auth/accessToken'], 'Bearer') const { putUrl } = await this.$axios.$get(prepareUrl.toString()) this.$axios.setToken(false) // ★ Authorization ヘッダーが送られないように await this.$axios.$put(putUrl, rawFile, { headers: { 'Content-Type': rawFile.type, // 'X-Amz-Acl': 'private', // ★ 間違えてつけてると 403 になります } }) } } })参考
https://qiita.com/kochizufan/items/444b7e1dfcf568945410
https://docs.aws.amazon.com/ja_jp/AmazonS3/latest/dev/cors.html
https://qiita.com/kyasbal_1994/items/774be5624e4d90c5cf38
https://qiita.com/segur/items/7746ac352afb5152cf46
- 投稿日:2020-07-02T17:02:21+09:00
Firebase初心者がFirebaseで詰まったところまとめ
はじめに
こにゃにゃちは!ganariyaです!
本記事では、「Firebaseを初めて触った人間が、初めて触るときに躓きそうな点について」まとめようと思います。
そのため、Firebase全体に関する説明ではないのでご容赦ください><Q&A形式でまとめていきます!
Firebaseってまず何よ?
Firebaseは、Googleが作っている「Webアプリやスマホアプリを作るときに便利であるようなツールを全部まとめたもの」です。
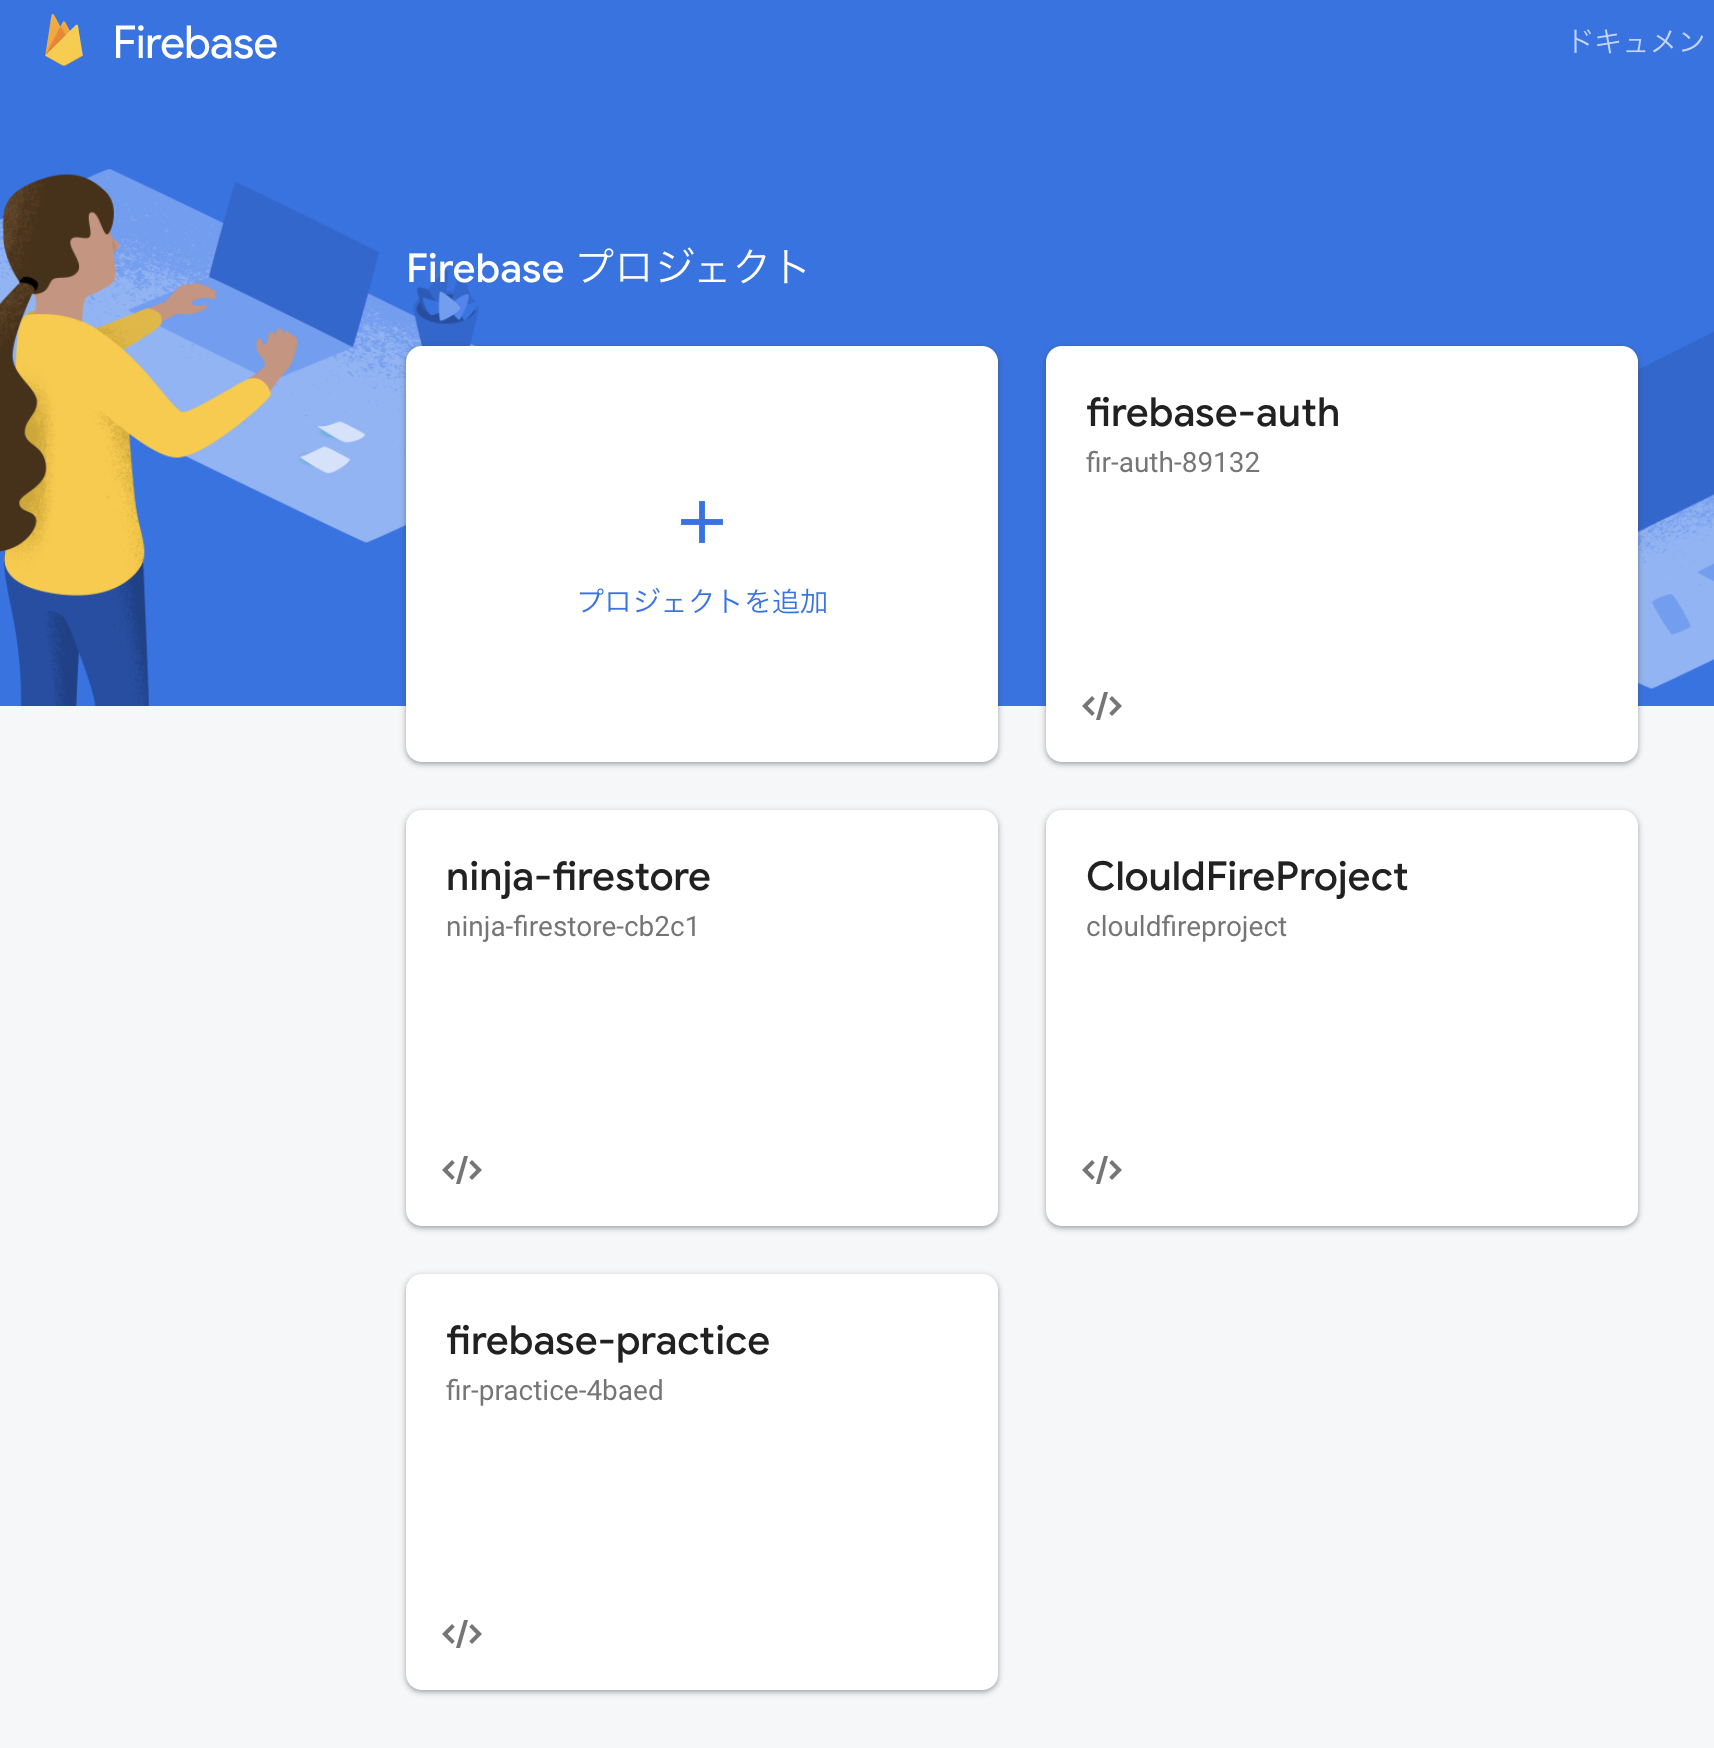
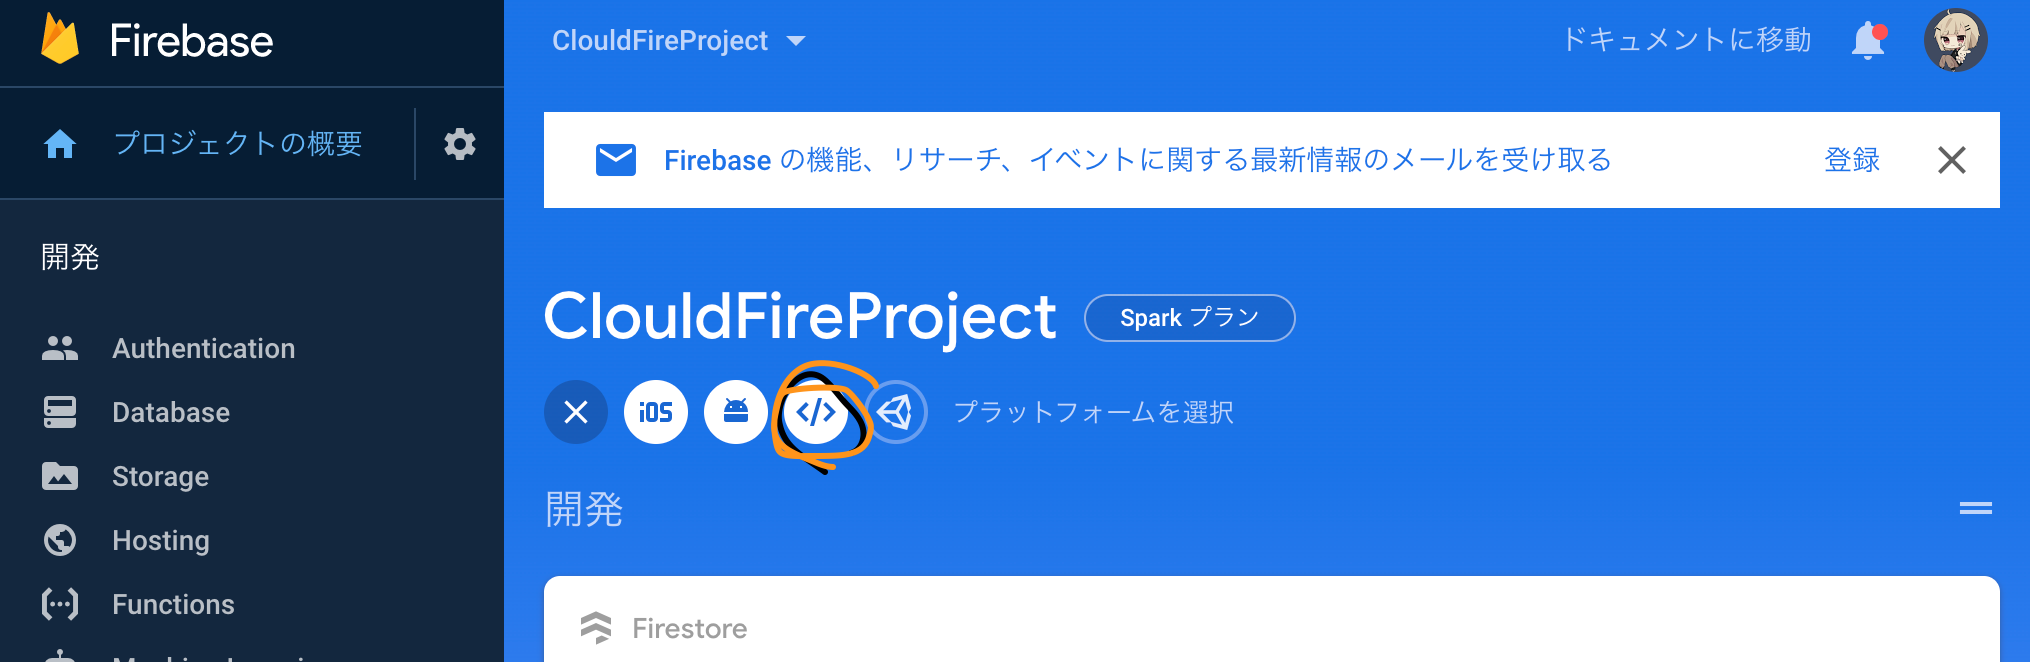
Firebaseの初期画面は
のようになっており、プロジェクトごとの画面は
になっています。
Firebaseでは、プロジェクトごとに作成していきます。
各プロジェクトには
- Authentication(認証)
- データベース(データを格納)
- Storage(使ってないけど多分静的コンテンツを入れれる)
- Hosting(作ったサイトをデプロイできる)
- Functions(セキュリティ周りなど、フロントから直接触らせるのいやなときにかますための関数)
- Machine Learning(たぶん機械学習、それはそう)
の機能があります。
また、各プロジェクトにはさらに「アプリ」の概念があります。
例えば、仮にQiitaだとすると「Qiita」「Qiita Jobs」「Qiita Teams」という感じでしょうか・・・。アプリがあるメリットとして、データベースや認証を共通したいけれど、アプリとしては分けたい・・・ という意味で存在しているのだと思います。とりあえず、Firebaseは認証からデータベース・ホスティングまでサーバーサイドをすべて肩代わりしてくれるサービスと思うと良さそうです。
データベースって?
まずは、データベースから見ていきます。
データベースは現在「Cloud Firestore」が標準のようです。昔はRealtime Databaseでしたが、こちらのCloud Firestoreがより高機能で最新っぽいです(機能が違うので、Realtime Databaseのほうが良いこともあります)
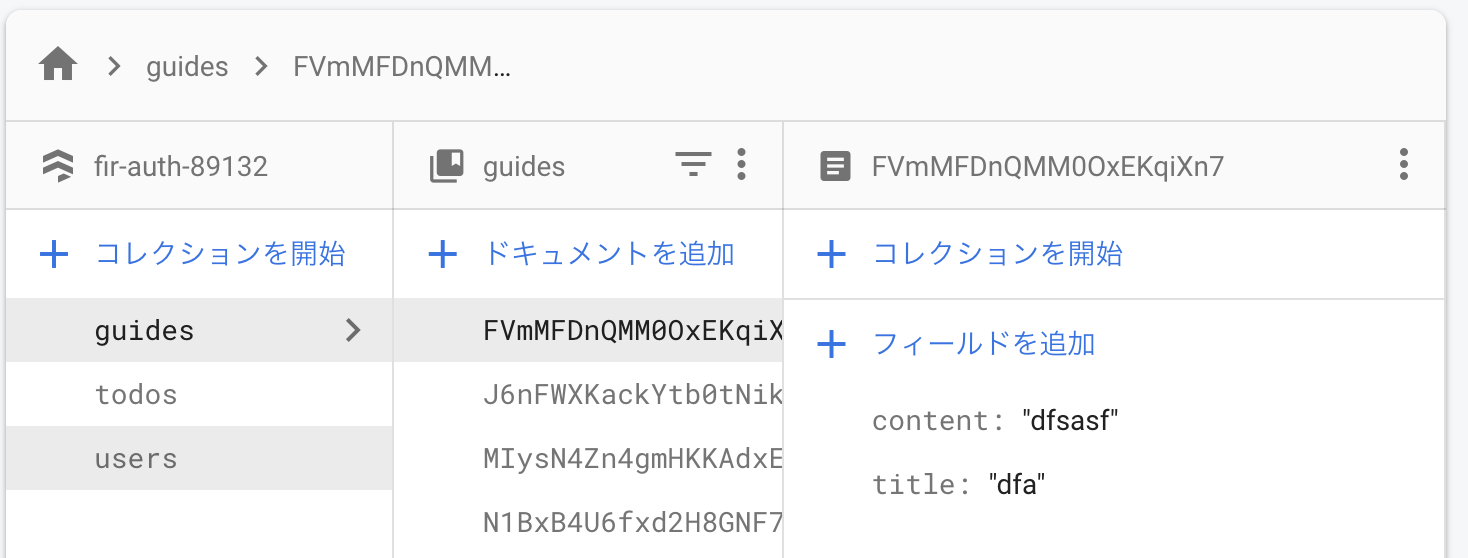
Firestoreは、NoSQL型のデータベースです。
上記のように、コレクションの中にドキュメントを入れる形になります。コレクションがSQLデータベースのテーブル名、ドキュメントが各行、ドキュメントの属性が各列に値します。
上記だとguidesというコレクション(フォルダ)があり、ドキュメントが4つ存在します。
そのうち、1つ目のドキュメントにはcontent, titleが格納されています。ドキュメント自体にも名前があることに注意してください。
イメージ的にはdocument.jsonというdocument名がついており、それをエディタで開くとcontent,titleのような実際の中身が入っているイメージです。そもそも、なぜ「データベース」をGoogleのサーバーでやるのでしょうか?
これは、サーバー側のデータベース作成をしなくてよいためです。これまでは、VPSサーバなどを借りてApacheやNginxを入れて、さらにMySQLのソフトウェアをインストール、設定などをいちいち行う必要がありました。また、クエリが多く飛んで落ちる可能性もあります。そこで、Googleが代わりにデータベースを作ってくれれば、僕たちはそれに「アクセス」するだけで良くなります。
ここで、「アクセス」は「クライアントサイド」からされることに注意が必要です。
これまでのデータベースでは、サーバー側のPHPプログラムといった、サーバー側のプログラムがデータベースサーバにアクセスするという形をとっていました。クライアント側のJavaScriptやHTMLのPOST通信が、サーバーにアクセスして、サーバーがプログラムを実行し、データベースまで取りに行っていたのです。
しかし、これではサーバー側のPHPプログラムなどの実行がボトルネックになってしまいます。一方、CloudFireStoreは、「クライアントサイド」から直接データベースにアクセスします。そのため、サーバーサイド側のプログラムが必要なくなり、フロントエンド側でJavaScriptやTypeScriptで完結することになります。手間が省けますね><
ただし、その分セキュリティには注意する必要があります。
Webアプリでの「初期コード」ってどこにあるん?
QiitaなどでFirebaseチュートリアルなどをやると、
        var firebaseConfig = {
            apiKey: "",
            authDomain: "",
            databaseURL: "",
            projectId: "",
            storageBucket: "",
            messagingSenderId: "",
            appId: "",
            measurementId: ""
        };
    firebase.initializeApp(firebaseConfig);
のfirebaseを使用するために必要な初期コードが求められます。
これ、どこにあるか探すのに時間がかかりました。
このコードは
初期画面のこのコードのところにあります。
ここで、Webアプリを作りますか?というのが出たら作る!を選んであげてください。
認証ってどうやるの?
ユーザ認証をするときはどうすればいいのでしょうか?
Webアプリなので、多くの人間が使うことを想定すると、「ある人間のデータは他の人間に見れないようにログイン機能を作る」必要があります。これは
AuthenticationのSign−in methodからログインで使いたいものを選択すればいいです。
僕はとりあえずメール・パスワードを選択しました。ログインをユーザがすると
Usersに認証データが追加されます。
ここで、Authenticationの下のDatabase(Firestore)には、ユーザの認証データは入っていません。
Authenticationで一括管理されているようです。Googleが全部認証をやってくれるので、パスワードの暗号化し忘れみたいなやばいことを避けられますね><
実際にどう登録・ログイン・ログアウトするねや?
実際に登録やログアウトを実装するときは、Firebaseが提供しているライブラリを用います。
今回は、javascriptでやりますが、PythonやPHPなど他のライブラリでも基本は同じだと思います。今回はnpm, yarnなどは使わずhtmlで直接cdnにアクセスする形にします。
    <script src="https://www.gstatic.com/firebasejs/7.15.5/firebase-app.js"></script>
    <script src="https://www.gstatic.com/firebasejs/7.15.5/firebase-auth.js"></script>
    <script src="https://www.gstatic.com/firebasejs/7.15.5/firebase-firestore.js"></script>
    <script src="https://www.gstatic.com/firebasejs/7.15.5/firebase-functions.js"></script>
    <script src="https://www.gstatic.com/firebasejs/7.15.5/firebase-analytics.js"></script>
ここらへんをとりあえずインポートしてあげます。
その後、先程の初期化をします。var firebaseConfig = { apiKey: "", authDomain: "", databaseURL: "", projectId: "", storageBucket: "", messagingSenderId: "", appId: "", measurementId: "" }; firebase.initializeApp(firebaseConfig); const auth = firebase.auth(); const db = firebase.firestore();authは、認証のライブラリ、firestoreはfirestoreのライブラリです。
登録をするときは
signupForm.addEventListener('submit', (e) => {
    e.preventDefault();

    const email = HTMLから取り出す
    const password = HTMLから取り出す

    // Userを作成する
    auth.createUserWithEmailAndPassword(email, password)
        .then(cred => {
            // 登録成功
            console.log(cred);
        })
})
などとすればいいです。今回はEmailAndPasswordでメールとパスワードを使用していますが、Googleアカウントなどの他の登録メソッドもあります。
認証が成功すると、次からは自動でログイン状態になっています。
一回登録・ログインすれば、特にクライアント側でコードを書かなくてもライブラリが自動でログイン状態をcookieなどで安全に保ってくれるのでうれしいですね><ログインをするときは
loginForm.addEventListener('submit', (e) => {
    e.preventDefault();

    const email = HTMLから取り出す
    const password = HTMLから取り出す

    auth.signInWithEmailAndPassword(email, password)
        .then(() => {
            console.log('success')
        })
}
のようにすればいいです。ログインができ、ページ遷移することなく自動でログイン状態になります。
ログアウトでは、
auth.signOut();をすればいいです。このとき、ログイン状態が変わったらコードを実行したいんだよね(UIを変えたり)などがしたいと思います。
このようなときはauth.onAuthStateChanged(user => { if (user) { // login state } else { // ログインしてない } })のように、ログイン状態が変わったら自動発火するイベントが用意されているため、コールバックを登録してあげればいいです。
ログインしているユーザのID知りたいんだけど
ログインしているとき、ユーザ認証では各ユーザにIDが割り振られています。
ユーザIDは
の最も右欄で確認できます。
ユーザIDは
let uid = auth.currentUser.uid;で取得できるため、ユーザのログイン状態は間接的にこれがnullかどうかでもチェックできそうですね><
このuidを使えば、データベースもうまく設計できそうです。
ユーザごとにデータベース作りたいんだけど
この設計が正しいかわからないため、ご意見をいただければと思います。
通常のMySQLなどのリレーショナルデータベースでは、
- Usersテーブル
- ユーザーID
- パスワード
- Todosテーブル
- todo ID
- name
- ユーザーID
みたいになっています。
こうすることで、今ログインしているユーザのIDを用いて、Todosテーブルと関連付けてユーザーIDが一致している行だけを引っ張ってきます。ただ、これはNoSQL(Firestore)だと適切か分かってないです(アドバイスいただければと思います)。
SQLと異なり、Firestoreはjsonに近い設計であるため
- ここにこのデータしか入れれない!
- テーブルごとの設計にしろ!
というのがありません。
これらはクライアントサイドで注意して行う必要があります。
良く言えばリレーショナルデータベースよりも柔軟で変化させやすいというのがありますが、ミスすると変な設計になる という裏返しみたいな状況になります。
リレーショナルデータベースは、これを設計手法でガチガチに固めています。そのため、今回は以下のようにTodosを設計しました。
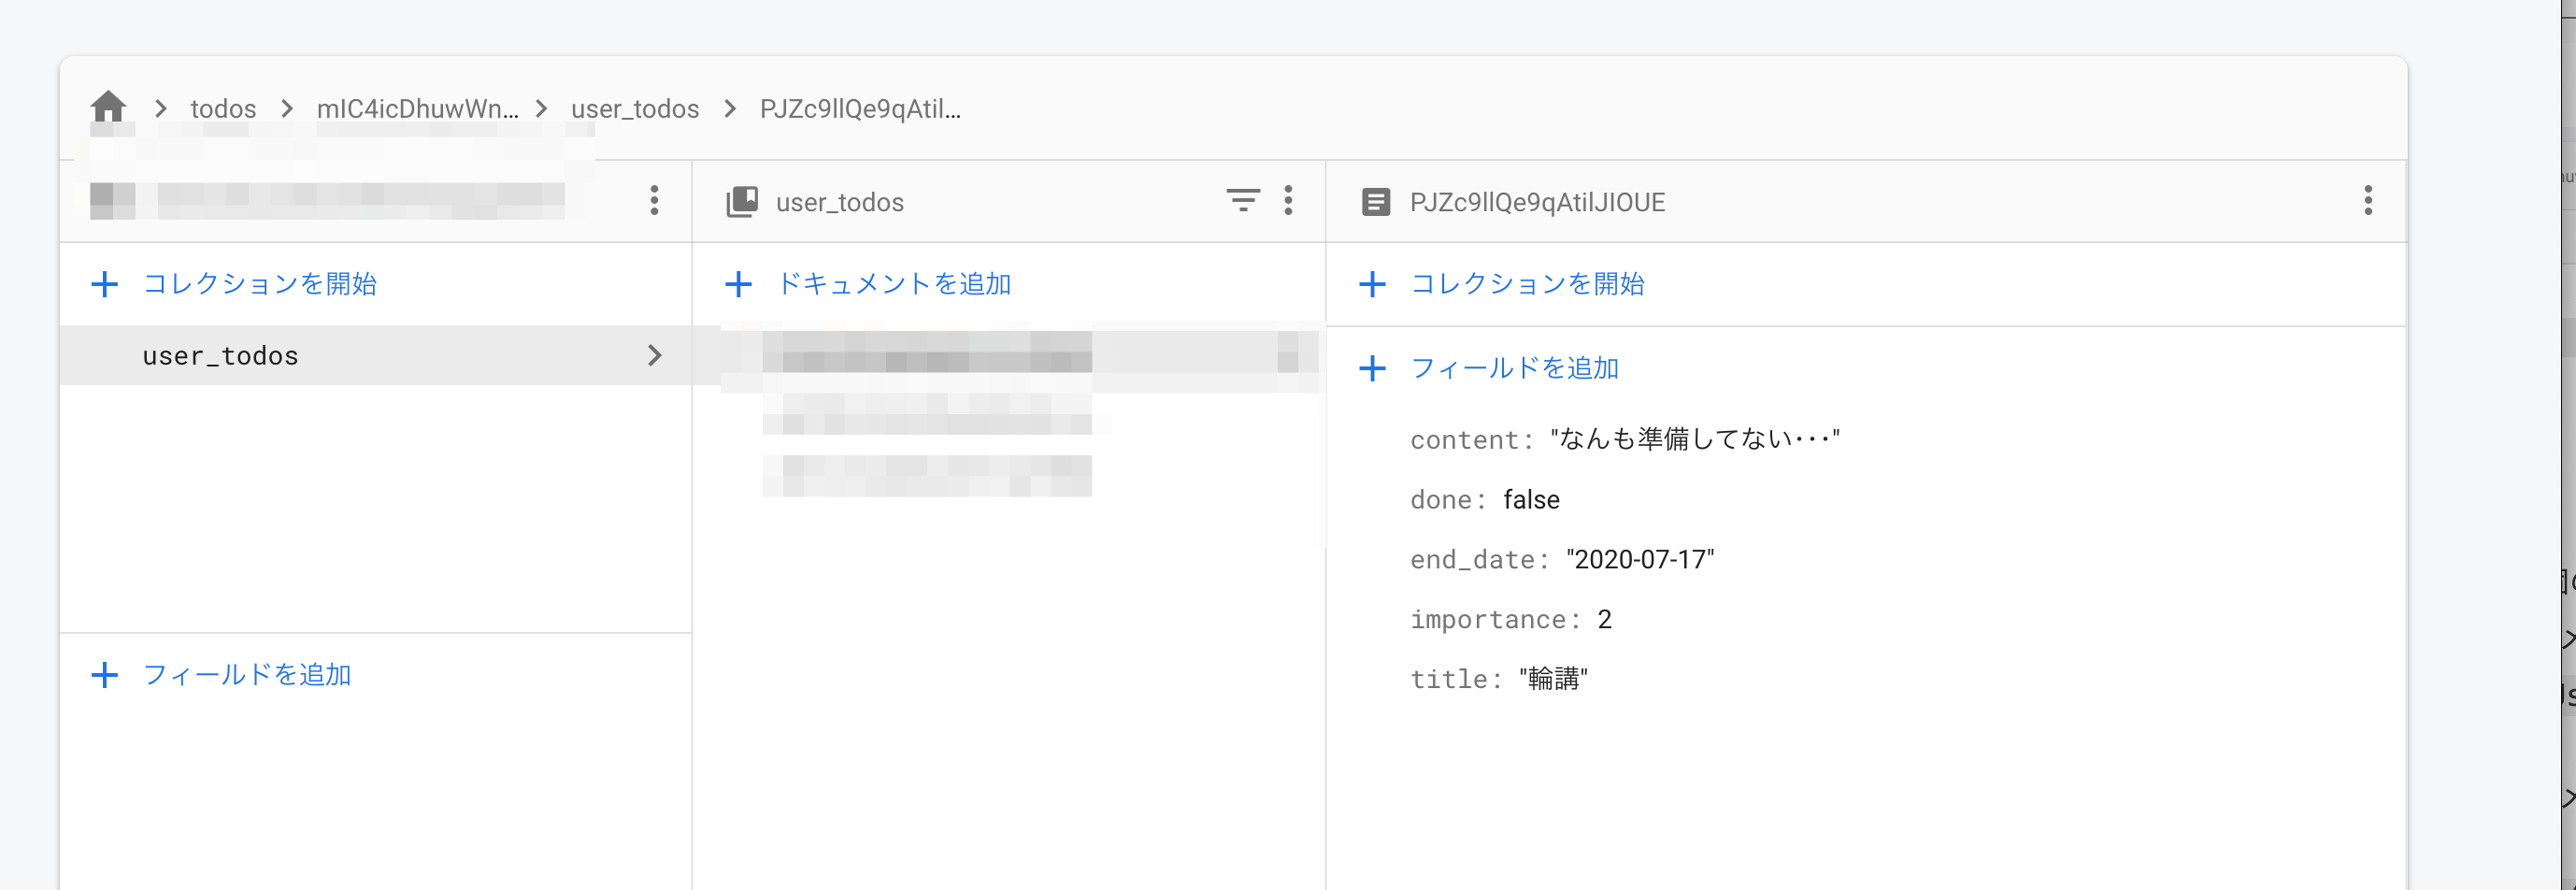
Todosには現在2個のドキュメントが入っています。
この2個のドキュメントの名前はユーザIDになっています。auth.currentUser.uidで取り出せるものですね。この名前でドキュメント名をつけることで
db.collection('users').doc(auth.currentUser.uid)で
ユーザIDに関するTodosを取れるようにしています。つまり、今回はユーザごとにTodoのデータベースを作っているイメージです(これが正しい設計なのかは分かりません・・・)
この
uid.documentにはuser_todosというコレクションを入れています。これはサブコレクションであり、
コレクションのドキュメントにコレクションを入れています。
上記のように、
todosコレクション > ユーザIDドキュメント > user_todosドキュメント > ランダム生成ドキュメントID > {content, title...}
のようになっています。
こうすることで、ユーザIDに関係するデータのみ持ってこれるようにはなります。
データベースが変化したときにメソッド実行したいんだけど
データベースにデータが登録・削除など、データベースに変更があったときに、なにかUIを変化させたい・表示内容などを変えたいなどがあります。
これも認証と同じように、イベントが設定できます。db.collection('todos').doc(user.uid).collection('user_todos').onSnapshot(snapshot => { let docs = snapshot.docs; })上記は、todosコレクションのuserIDのドキュメントのuser_todosコレクションに変更が会ったときに実行されるイベントです。
snapshotには、変更されたときのuser_todosコレクション全体のデータが入っています。https://firebase.google.com/docs/firestore/data-model?hl=ja
Firestoreには、「reference」と「実体」があるようです。
感覚が全然つかめていないのですが、let todosRef = db.collection('todos')などは、todosコレクションへの参照状態を変数としており、まだデータを取ってきていない?ようです。
実際に撮ってくるときは.get()などをつけるようです。もっと勉強しようと思います(アドバイスいただければと幸いです)
セキュリティってどう担保するの?
データベースには、フロントエンド(ユーザ)から直接アクセスされます。
そのため、かなり念入りに「他のユーザからデータを好き勝手触られないように設定する」必要があります。これはデータベースのルールから設定できます。
上記のように、アクセスするドキュメントごとに誰がアクセスしていいのか?などの設定をします。(コレクションではないです)
/users/{userId}ですが、{userId}はドキュメント名{userId}を変数として持っています。
そのため、request.auth.uid != nullなどをチェックすることで、ドキュメントへのアクセスを制限できます。理解が非常にあやしいのでルールを参考にしてみてください。
ホスティングってどうやるの?
ホスティングを参考にしました。
Firebase CLIを入れた後、ステップにしたがってdeployしたら、簡単にpublicフォルダ以下をデプロイできました。すごいですね(すごい)
今回、public以下で作業をしていなかったので、カレントディレクトリから小ディレクトリのpublicフォルダにhtmlやjsを移しました。
Nuxtなどで作業すれば、ビルドしたものをpublicとしてフォルダに出力すれば簡単にホストまで行けそうです!
良いチュートリアルない?
- https://www.youtube.com/playlist?list=PL4cUxeGkcC9itfjle0ji1xOZ2cjRGY_WB
- https://www.youtube.com/watch?v=-OKrloDzGpU
- https://www.youtube.com/playlist?list=PL4cUxeGkcC9jUPIes_B8vRjn1_GaplOPQ
- https://www.youtube.com/playlist?list=PLl-K7zZEsYLluG5MCVEzXAQ7ACZBCuZgZ (今度見る)
最後に
だいぶ簡潔にまとめました。
分かりづらい・間違っている・伝わりづらい点がありましたら、ご指摘いただければ嬉しいです!
ありがとうございました!!


- 投稿日:2020-07-02T16:08:22+09:00
「JavaScript」変数・スコープ・吊り上げ
このチュートリアルでは、var, let, const の違いや、それらを宣言する方法、名前を付けて定義する方法を調べていきます。
本ブログは英語版からの翻訳です。オリジナルはこちらからご確認いただけます。一部機械翻訳を使用しております。翻訳の間違いがありましたら、ご指摘いただけると幸いです。
変数とは何か?
簡単に言えば、変数とは値を格納する容器のことです。例えば、何度か参照する情報を変数に保存して、後でアクセスしたり、変更したりすることができます。数字、文字列、オブジェクト、またはその他のデータ型を JavaScript の変数コンテナに格納することができます。現代のJavaScriptはECMAScript 2015(ES6)の言語仕様に基づいており、当初は唯一利用可能だったvarキーワードから変数宣言が拡張されました。そのため、古い学習リソースではvarしか見当たらないでしょう。このチュートリアルでは、以下のvar、let、constキーワードの違いを探るためにセクション全体に注力しています。ここでは、変数の概念を宣言し、それに値を代入することで、変数の概念を定義するために、1つの型だけを使用します。
// Assign the string value Sam to the username identifier
var username = "sam_shark";
当社のステートメントは、いくつかの条件で構成されています。
1、var キーワードは変数の宣言に使用されています。
2、ユーザ名は、変数の識別子または変数名です。
3、構文は、ステートメントの代入操作を表します。
4、この場合の値は "sam_shark "です。これで、JavaScriptのコードにユーザー名を実装することができるようになりました。
// Check if variable is equal to value
if (username === "sam_shark") {
  console.log(true);
}
Output
true
すでに述べたように、変数を使ってすべてのJavaScriptのデータ型を表現することができます。次の変数宣言では、文字列、数値、オブジェクト、ブール値、ヌル値を使って実験してみましょう。
// Assignment of various variables
var name = "Sam";
var warriors = 300;
var kingdoms = [ "mammals", "birds", "amphibian" ];
var poem = { roses: "red", bananas: "green" };
var success = true;
var nothing = null;
console.log.logを使用して、各変数にどのような値が含まれているかを調べることができます。
// Send warriors variable to the console
console.log(warriors);
Output
300
変数に含まれるデータはメモリに保存されているので、後でアクセスして修正することができます。また、変数に新しい値を代入することもできます。以下の新しい例では、変数にパスワードが格納されています。パスワードを変更する方法を見てみましょう。
// Assign value to password variable
var password = "pass1";

// Reassign variable value with a new value
password = "pass2";

console.log(password);
Output
'pass2'
パスワードはむしろ安全なデータベースに保存されるので、上記の方法で保存することは考えにくいでしょう。しかし、この例では変数に含まれる値を更新する方法を示しています。最初、パスワードに割り当てられた値は pass1 でしたが、後に pass2 に更新しました。その後、JavaScript は更新後の新しい値を認識するようになりました。
変数の名前の付け方
JavaScriptでは、変数名は識別子とも呼ばれます。しかし、変数名を付ける際には、以下のルールを頭に入れておく必要があります。
1、変数名の構成は、文字 (a-z)、数字 (0-9)、ドル記号 ($)、アンダースコア (_) のみとすることができます。
2、変数名には、空白文字(タブやスペース)を含めることができます。
3、変数名を数字で始めることはできません。
4、予約されたキーワードを変数名として使用することはできません。
5、変数名は大文字と小文字を区別します。JavaScript の変数や関数が var や let で宣言されている場合、それらの名前はキャメルケースで付けるのが一般的です (時々 camelCase として様式化されています)。説明すると、この慣習は最初の単語を小文字にして、その後に続くすべての単語の最初の文字をスペーシングせずに大文字にすることを含みます。実際には、これはほとんどすべての非定数変数で、わずかな例外を除いて守られている慣習です。定数は const キーワードで宣言され、その名前は通常大文字で書かれます。もしあなたが始めたばかりであれば、これらの規則は学ぶことが非常に多いと感じるかもしれませんが、心配しないでください、すぐに第二の自然になるでしょう。
var、let、const の区別
前述したように、この3つのキーワードはJavaScriptの変数を定義する唯一の方法です。それらのユースケースは、以下のrableで説明したように、スコープ、ホイスト、再割り当ての3つです。
自分でプログラムを書くときに、これらの定数のうちどれを使うべきか悩んでいるならば、これを知っておくべきです: 一般的には、できる限りconstを使うのが一般的です。ループや再割り当ての場合には、ほとんどの場合 let が好まれます。ほとんどの場合、レガシーなコードを扱うときだけ var を使うことになります。
スコープを理解する
コードの現在のコンテキストを定義する際には、スコープを指標として使用します。これはJavaScriptにおける変数のアクセシビリティの指標です。スコープにはローカルとグローバルの2つのタイプがあります。
1、ブロックの外にある変数がGlobalである場合、スコープをGlobalと定義します。
2、変数がブロック内にある場合、スコープはLocalになります。
まず、以下の例でグローバル変数を作成してみましょう。// Initialize a global variable var creature = "fox";変数の再割り当てが可能であることは先に見てきました。ローカルスコープを使って外部スコープに変数という名前の新しい変数を作成することも可能で、初期値を変更したり、再設定したりする必要はありません。
したがって、下の例ではグローバルな種の変数を作成しています。これをコンソールに送信してみると、変数の値がスコープに依存していることがわかります。元の値は変わりません。
// Initialize a global variable var species = "man"; function transform() { // Initialize a local, function-scoped variable var species = "cat"; console.log(species); } // Log the global and local variable console.log(species); transform(); console.log(species); Output man cat manこの例では、ローカル変数として関数スコープ付きの変数を見てきました。var キーワードで変数を宣言すると、関数スコープ付きの変数になる傾向があります。言い換えれば、認識する関数のスコープが異なるということです。しかし、let や const で宣言された変数はブロックスコープになる傾向があります。したがって、if 文や for ループ、while ループを使用するたびに、すべてのブロックタイプの新しいローカルスコープが作成されますが、これには関数ブロックも含まれます。
let を使用して if ブロックで関数型変数とブロックスコープ付き変数を区別してみましょう。
var fullMoon = true;

// Initialize a global variable
let species = "man";

if (fullMoon) {
  // Initialize a block-scoped variable
  let species = "cat";
  console.log(`It is a full moon. Presley is currently a ${species}.`);
}

console.log(`It is not a full moon. Presley is currently a ${species}.`);
Output
It is a full moon. Presley is currently a cat.
It is not a full moon. Presley is currently a man.
上の例では、species 変数がグローバル値 (man) とローカル値 (cat) の 2 つの値を持つことを示しました。しかし、var を使うと、以下のように異なる結果が得られます。
// Use var to initialize a variable
var species = "man";

if (fullMoon) {
  // Attempt to create a new variable in a block
  var species = "cat";
  console.log(`It is a full moon. Presley is currently a ${species}.`);
}

console.log(`It is not a full moon. Presley is currently a ${species}.`);
Output
It is a full moon. Presley is currently a cat.
It is not a full moon. Presley is currently a cat.
出力されるのは、グローバル変数とブロックスコープされた変数であるcatの両方で同じ値になります。この現象の理由は、var は新しいローカル変数を作成するのではなく、同じスコープ内で再割り当てするからです。さらに、var キーワードは if を新しいスコープとして認識しません。変数値をオーバーライドしないコードを作成するには、ブロックスコープ変数を宣言することをお勧めします。
ホイスティング
上記の例では、var を使って変数を宣言し、それを初期化するために値を使用しました。その後、宣言して初期化した変数にさらにアクセスしたり、再割り当てしたりすることができます。宣言して初期化する前に変数を使おうとすると、未定義の値が返されます。
// Attempt to use a variable before its declaration
console.log(x);

// Variable task
var x = 300;
Output
undefined
varキーワードを省略すると、変数の宣言がなくなり、初期化のみを試されます。これを使おうとすると、ReferenceErrorが発生し、スクリプトの実行に失敗します。
// Attempt to use a variable before it is declared
console.log(x);

// Variable task without var
x = 300;
Output
ReferenceError: x is not defined
これは、ホイストと呼ばれるJavaScriptの動作のために発生しました。これが何を意味するかというと、変数や関数の宣言がスコープの先頭に移動するということです。最初の例では、初期化ではなく宣言がホイストされていたので、未定義を返しています。以下、私たちが書いたコードとJavaScriptからの解釈をさらに解剖してみます。
// The code we used
console.log(x);
var x = 300;

// JavaScript interpretation
var x;
console.log(x);
x = 300;
x はスクリプトが実行される前に JavaScript によってメモリに保存されました。x は最初に定義されずに呼び出されたままなので、出力は未定義であり、300ではありません。この結果、ReferenceErrorが発生してスクリプトが停止してしまいます。これは、varキーワードがvarの場所を変更しなかったにもかかわらず、巻き上げの原理を非常によく示しています。これは、コードを書くプログラマの間で問題となる動作です。ホイストはまた、以下の例にあるように、予測不可能な結果をもたらします。
// Initialize x in the global scope
var x = 300;

function hoist() {
  // this condition should not affect the outcome of our code
  if (false) {
    var x = 400;
  }
  console.log(x);
}

hoist();
Output
undefined
当初、この例では、x はグローバルに 300 として宣言されていました。しかし、if文が適用された場合、xは200に変更される可能性があります。条件が false であったため、x の値は影響を受けないままにしておくべきでした。しかし、それが hoist() 関数の先頭に持っていかれてしまい、結果的に値として undefined になってしまいました。これが、挙動が予測できないためにプログラムにバグが発生する原因の一つです。ブロックスコープされた let と const の別のセットを使用することもできますが、これは結果として hoisting にはなりません。以下の例を参照してください。
// We initiate x in the global scope
let x = true;

function hoist() {
  // Initiate x in the function scope
  if (3 === 4) {
    let x = false;
  }
  console.log(x);
}

hoist();
Output
true
変数をletとconstで2回宣言するとエラーになりますが、varでは結果が出ます。
// Try to overwrite a variable that is declared with var
var x = 2;
var x = 3;

console.log(x);
Output
3
// Attempt to overwrite a variable declared with let
let y = 2;
let y = 3;

console.log(y);
Output
Uncaught SyntaxError: Identifier 'y' has already been declared
In summary, when we introduce variables with var, they are exposed to hoisting since JavaScript may end up saving them in the memory. The result for the behavior may be code with some undefined variables. With let and const variables, however, we can avoid the problem since it will not allow declaration of a variable twice. They also do not allow using variables before declaring them.
JavaScript の定数
ほぼすべてのプログラミング言語で定数に遭遇することがあります。定数は変更も修正もできません。定数のJavaScript表現はconst識別子で表現されます。constに代入された値を再割り当てすることはできません。一般的に、const識別子は他の変数と区別するために大文字で書かれています。変数SPECIESをconstで定数として初期化することで、この概念を探ってみましょう。
// Assign the value to const
const SPECIES = "man";

// Try to reassign value
SPECIES = "cat";

console.log(SPECIES);
Output
Uncaught TypeError: Assignment to constant variable.
const値の宣言と初期化を同時に行う必要があります。
// Declare the constant but do not initialize it const DO; console.log(DO); Output Uncaught SyntaxError: Missing initializer in const declaration値が変更できない場合、それは不変と呼ばれ、変更可能なものは変異可能です。定数は、constで宣言されたオブジェクトのプロパティを変更することができるという点で、変異的です。
// Create a VEHICLE object with two properties
const VEHICLE = {
    color: "red",
    price: 25000
}

// Modify a property of VEHICLE
CAR.price = 30000;

console.log(CAR);
Output
{ color: 'red', price: 30000 }
定数を使って、プログラムのどの部分を再割り当てしてはいけないかを定義します。逆に、将来変更される可能性のある変数を宣言するには let を使用します。
最後に
このチュートリアルでは、変数の概念、変数の命名規則、変数内の値の再代入方法を探ってきました。また、このアプローチが他のプログラミング言語でどのように機能するかを比較することもできます。
Alibaba Cloudのアカウントをお持ちでない方は、アカウントを登録してください。アカウントにサインアップして、最大1200ドル相当の40以上の製品を無料でお試しください。Alibaba Cloudの利用から開始して、詳細を確認してください。
アリババクラウドは日本に2つのデータセンターを有し、世界で60を超えるアベラビリティーゾーンを有するアジア太平洋地域No.1(2019ガートナー)のクラウドインフラ事業者です。
アリババクラウドの詳細は、こちらからご覧ください。
アリババクラウドジャパン公式ページ

- 投稿日:2020-07-02T15:23:12+09:00
勉強
JavaScript で簡単なログイン画面のようなものを作る必要があったので、メモ代わりに記載する。
(github からサンプルとって動かすのはできたが仕組みが全く分からなかったので……)今まで読んでばかりで書いたことがなかったので、あえて投稿してみる
(なので内容はガンガン編集するかも……)使われている要素 (ライブラリ?フレームワーク?)
Runtime (環境)
- node.js
- deno
Web Applciation
- Express (Web アプリケーション・フレームワーク)
- Servest (deno で使う Http サーバーモジュール)
フレームワークとモジュールは違うのだろうか
View Engine (Template Engine ?)
- EJS
- React
- Vue.js
- 投稿日:2020-07-02T15:22:25+09:00
「JavaScript」のプロトタイプと継承
この記事では、JavaScriptのオブジェクトのプロトタイプ、その継承とチェーンについて説明するとともに、新しいプロトタイプを使ってオブジェクトを拡張するためにコンストラクタをどのように使うかを学びます。
本ブログは英語版からの翻訳です。オリジナルはこちらからご確認いただけます。一部機械翻訳を使用しております。翻訳の間違いがありましたら、ご指摘いただけると幸いです。
JavaScriptでのプロトタイプ
JSにおけるオブジェクトのデータ型、オブジェクトの作成、オブジェクトのプロパティの変更方法などについては、すでにご存知の方が多いと思います。プロトタイプを使用すると、各JavaScriptオブジェクトが内部プロパティとして[[プロトタイプ]]を含むという事実に基づいてオブジェクトを拡張することができます。これを実際に見るために、次のような空のプロジェクトを作成してみましょう。
let x = {};これはオブジェクトを作成するための実用的なメソッドですが、このようにオブジェクトのコンストラクタを使うアプローチもあります。
let x = new Object().プロパティ[[Prototype]]には二重の角括弧が付いていますが、これはその内部性を示すもので、つまりコード内では直接アクセスできません。したがって、オブジェクトの[[プロトタイプ]]を取得するにはgetPrototypeOf()メソッドを使用する必要があります。
Object.getPrototypeOf(x);このメソッドは以下の組み込みプロパティとメソッドを生成します。
Output
{constructor: ƒ, __defineGetter__: ƒ, __defineSetter__: ƒ, …}
protoプロパティを使って[[プロトタイプ]]を調べるのももっともです。protoメソッドはまた、オブジェクトの内部プロパティを生成します。
protoは、すべての利用可能なブラウザと普遍的に互換性があるわけではないレガシーな機能なので、プロダクションコードでは使用すべきではないことに注意してください。それにもかかわらず、このチュートリアルの目的のために、デモのために使用することはできますが、前記の感情を念頭に置いてください。
x.__proto__;PrototypeOf()を使用した場合と同じ出力が得られます。
Output
{constructor: ƒ, __defineGetter__: ƒ, __defineSetter__: ƒ, …}
理想的には、JavaScriptのすべてのオブジェクトは、2つ以上のオブジェクトをリンクできるように[[プロトタイプ]]を持つべきです。
作成されたすべてのJavaScriptオブジェクトや組み込みオブジェクトは、[[プロトタイプ]]プロパティで構成されています。この内部プロパティを使って、さらに下の方で探ってきたように、プロトタイププロパティを使って、お互いの間のオブジェクトを参照することができます。
継承
JavaScriptは、あなたがそのプロパティやメソッドにアクセスしようとするたびに、最初にオブジェクトを検索し、見つからなければ、その[[プロトタイプ]]に進みます。それでも[[プロトタイプ]]でプロパティにマッチするものがない場合、JavaScriptは、チェーン内のすべてのオブジェクトが検索の対象となるまで、リンクされたオブジェクトのプロトタイプからチェックを試みます。各チェーンの最後にはObject.prototypeが含まれており、Object.prototypeからメソッドやプロパティが継承されています。チェーンを越えて検索すると、常にnull出力が返されます。上の例では、Object からの継承を持つ空のオブジェクト x があります。もし Object が toString() のような関連するプロパティやメソッドを持っていれば、それらをすべて x に使用することができます。
x.toString();
Output
[object Object]
これは、x -> Objectと定義できそうなリンクが1つだけあるプロトタイプチェーンです。他のリンクがあるかどうかは、[[Prototype]]プロパティを2回チェーンすることで確認できます。他のチェーンがない場合、出力はnullです。
x.__proto__.__proto__;
Output
null
では、今回は別のタイプのオブジェクトを探っていきます。具体的には、すでにJavaScriptの配列に遭遇したことがある人は、他の組み込みメソッドであるpop()とpush()に慣れているはずです。この2つのメソッドは、新しい配列が作成されたときに常にアクセス可能です。その理由は、新しく作成されたすべての配列がArray.prototypeに固有のアクセシビリティを持っているからです。以下の行を使って、新しい配列を作成してみましょう。
let y = [];配列コンストラクタを使用して新しい配列を作成する方法もあります。
let y = new Array()このように新しい配列の[[プロトタイプ]]を調べてみると、Array.prototypeに関連付けられたすべてのプロパティを継承しているので、xオブジェクトに比べてはるかに多くのプロパティとメソッドを含んでいることがわかります。
y.__proto__;
[constructor: ƒ, concat: ƒ, pop: ƒ, push: ƒ, …]
私たちの配列にはプロトタイプのコンストラクタプロパティがありますが、これは鮮やかにArray()に設定されています。これは、オブジェクトのコンストラクタ関数を返すというもので、オブジェクトを構築するために関数を使うことができる仕組みです。
さらに、私たちの長いチェーンの中の2つのプロトタイプを次のような構文にチェーンすることができます: y -> Array -> Object。
Array.prototypeを調べると、以下のようになります。
y.__proto__.__proto__;
Output
{constructor: ƒ, __defineGetter__: ƒ, __defineSetter__: ƒ, …}
チェーンの中でObject.prototypeが参照されていることが観察されます。内部の[[Prototype]]でさらにテストを行い、コンストラクタ関数のprototypeプロパティと比較して、同じ結果が得られるかどうかを判断することができました。
y.__proto__ === Array.prototype;            // true
y.__proto__.__proto__ === Object.prototype; // true
isPrototypeOf() メソッドは、ここにも適用できます。
Array.prototype.isPrototypeOf(y);      // true
Object.prototype.isPrototypeOf(Array); // true
演算子の instanceof は、以下に示すように、プロトタイプ チェーン内のコンストラクタのプロトタイプ プロパティの外観をテストするために使用できるメソッドです。
y instanceof Array; // true要約すると、すべてのJavaScriptオブジェクトに隠された内部の[[Prototype]]プロパティがあることがわかりました。このようなプロパティはprotoメソッドを使ってアクセスできます。私たちは、コンストラクタの[[Prototype]]プロパティとメソッドを継承することでオブジェクトを拡張することができるという基本的な事実のために、オブジェクトを拡張することができます。チェーン化されると、チェーンに追加されたすべてのオブジェクトは、チェーンの最後までプロパティとメソッドを継承し、Object.prototypeで終了します。
コンストラクタ関数
基本的にコンストラクタ関数は、新しいJavaScriptオブジェクトを作成します。コンストラクタ関数をベースにした新しいインスタンスを起動するには、new演算子を使用します。しかし、JavaScript はまた、新しい Array() と新しい Date() のような組み込みのコンストラクタが含まれていますが、我々 を使用してオブジェクトを作成する新しいものを作成することも可能です。
たとえば、テキストに基づいている単純なロールプレイングゲームを作成しようとしている可能性があります。このゲームでは、プレイヤーはキャラクターと、医師、兵士、強盗などの関連するクラスを選択しなければなりません。
全てのキャラクターは、名前、レベル、ポイントなどの共通点を持っているので、キャラクターのコンストラクタは共通であることが望ましい。同時に、各キャラクターは、キャラクターごとに異なる能力にしかアクセスできないように制限されるものとする。この目的を達成するために、プロトタイプの継承とコンストラクタ関数を使用することになります。
まず、コンストラクタ関数が他の通常の関数と同じであることに注意してください。2つの間の重要な差別化は、コンストラクタは新しいキーワードを持つインスタンスによって呼び出されるということです。コンストラクタ関数の最初の文字を大文字にすることが JavaScript の要件です。例を参照してください。
// Initialize a constructor function for a new Actor
function Actor(name, level) {
  this.name = name;
  this.level = level;
}
この例では、name と level というパラメータで構成されるコンストラクタ関数 (Actor) を作成しています。テキスト・ゲームのすべてのキャラクタには名前と関連するレベルがあり、それらすべてが上記のコンストラクタ関数に含まれるプロパティを共有するのが理想的です。キーワード this は、作成された新しいインスタンスを示します。したがって、すべてのオブジェクトが name プロパティを持つようにするには、例に示したように this.name を name パラメータにも設定する必要があります。
では、new.nameを使って新しいインスタンスを構築してみましょう。
let actor1 = new Actor('Bjorn', 1);では、actor1をコンソールしてみて、新しいオブジェクトを作成したかどうか、そのプロパティはどうなるのかを観察してみましょう。
Output
Actor {name: "Bjorn", level: 1}
さらに、コンストラクタをActor()として出力するはずのactor1の[[Prototype]]を調べてみます。
Object.getPrototypeOf(actor1); Output constructor: ƒ Actor(name, level)act1.proto メソッドでも同じ結果が得られますが、前述したようにブラウザとの互換性が限られているため、あまり適切ではないことを覚えておいてください。
コンストラクタにはプロパティしか定義されていないので、まだメソッドを定義していません。JavaScriptでは、効率性とコードの可読性を向上させるために、プロトタイプのメソッドを定義する必要があります。
そこで、今回はプロトタイプを使ってActorのメソッドを定義してみましょう。今回はgreet()メソッドを使ってデモを行います。
characterSelect.js
// Add greet method to the Actor prototype
Actor.prototype.greet = function () {
  return `${this.name} says hello.`;
}
Actorはプロトタイプの一部としてgreet()メソッドを持つようになりました。したがって、hero1はActorのインスタンスを構成しているので、actor1も同様にメソッドを継承しなければなりません。
Actor1.greet();
Output
"Bjorn says hello."
必要であれば、アクターの[[プロトタイプ]]を検査してみると、greet()が利用できるようになっていることがわかります。しかし、アクターのためにキャラクタークラスを作成する必要があります。先に述べたように、ゲームのアクターは異なる能力を持っています。そのため、すべてのキャラクターの能力をアクターのコンストラクタに含めるのは非論理的です。この問題にどのようにアプローチするかというと、オリジナルのアクターに接続されたままの新しいコンストラクタ関数を作成します。
次に、あるコンストラクタのプロパティを別のコンストラクタにエクスポートするために call() メソッドを使用します。兵士と医師のコンストラクタを作成してみましょう。
// Initialize Soldier constructor
function Soldier(name, level, weapon) {
  // Chain constructor with call
  Actor.call(this, name, level);

  // Add a new property
  this.weapon = weapon;
}

// Initialize Doctor constructor
function Doctor(name, level, spell) {
  Doctor.call(this, name, level);

  this.spell = spell;
}
ご覧のように、アクターのプロパティを含むコンストラクタを作成しました。ここで、SoldierとDoctorに新しいメソッドを追加します。attack()メソッドはSoldierに、heal()メソッドはDoctorに適用されます。
Soldier.prototype.attack = function () {
  return `${this.name} attacks with the ${this.weapon}.`;
}

Doctor.prototype.heal = function () {
  return `${this.name} casts ${this.spell}.`;
}
2つのクラスをキャラクターに含めるように進めていきましょう。
characterSelect.js
const actor1 = new Soldier('Bjorn', 1, 'axe');
const actor2 = new Doctor('Kanin', 1, 'cure');
何が効果的かというと、以下のようになります。
act1を兵士として認識し、追加されたプロパティを認識します。
Soldier {name: "Bjorn", level: 1, weapon: "axe"}ここまで紹介してきたメソッドをSoldierのプロトタイプで使ってみましょう。
actor1.attack();
Console
"Bjorn attacks with the axe."
しかし、2つ目の方法で試してみると、以下のような結果が得られます。
actor1.greet();
Output
Uncaught TypeError: actor1.greet is not a function
明らかに、新しいメソッドはcall()では自動的に継承されません。プロトタイプをリンクするために必要なのは、Object.create()を使用することです。ただし、プロトタイプのために作成したメソッドの前に配置する必要があります。
Soldier.prototype = Object.create(Actor.prototype);
Doctor.prototype = Object.create(Actor.prototype);

// We add all other prototype methods below
ソルジャーやドクターのインスタンスにアクターのプロトタイプメソッドが追加されました。
Doctor.
actor1.greet();
Output
"Bjorn says hello."
以下は、キャラクター作成のための全体のコードです。
// Initialize constructor functions
function Actor(name, level) {
  this.name = name;
  this.level = level;
}

function Soldier(name, level, weapon) {
  Actor.call(this, name, level);

  this.weapon = weapon;
}

function Doctor(name, level, spell) {
  Actor.call(this, name, level);

  this.spell = spell;
}

// Link prototypes and add prototype methods
Soldier.prototype = Object.create(Actor.prototype);
Doctor.prototype = Object.create(Actor.prototype);

Actor.prototype.greet = function () {
  return `${this.name} says hello.`;
}

Soldier.prototype.attack = function () {
  return `${this.name} attacks with the ${this.weapon}.`;
}

Doctor.prototype.heal = function () {
  return `${this.name} casts ${this.spell}.`;
}

// Initialize individual character instances
const actor1 = new Soldier('Bjorn', 1, 'axe');
const actor2 = new Doctor('Kanin', 1, 'cure');
このチュートリアルで達成したことは、プロトタイプと継承の概念を実証することです。ベースとなるプロパティを持つ Actor クラスの作成に成功しました。次に、最初のコンストラクタを継承して、SoldierとDoctorのキャラクタークラスを作成しました。最後に、プロトタイプに新しいメソッドを追加し、各キャラクターのインスタンスを作成しました。
まとめ
従来のクラスベースのプログラミング言語とは異なり、JavaScriptはプロトタイプに基づいています。私たちはそのプロトタイプを探求し、[[Prototype]]プロパティを使ってオブジェクトをチェーンにつなげる方法を学びました。また、チェーンを介してプロトタイプのプロパティを継承してきました。
Alibaba Cloudのアカウントをお持ちでない方は、アカウントを登録してください。アカウントにサインアップして、最大1200ドル相当の40以上の製品を無料でお試しください。Alibaba Cloudの詳細については、「Get Started with Alibaba Cloud」を参照してください。
アリババクラウドは日本に2つのデータセンターを有し、世界で60を超えるアベラビリティーゾーンを有するアジア太平洋地域No.1(2019ガートナー)のクラウドインフラ事業者です。
アリババクラウドの詳細は、こちらからご覧ください。
アリババクラウドジャパン公式ページ
- 投稿日:2020-07-02T14:28:11+09:00
JavaScript でサーバ上にある画像をダウンロードする
何をしたいの
既存のサイトやウェブアプリ上にある画像を取得してきて zip したい。
サーバ上にある画像をダウンロードするコード
ここは素直に XMLHttpRequestで取得する。
const getImage = (imageUrl) => {
  return new Promise((resolve, reject) => {
    const xhr = new XMLHttpRequest();
    xhr.open('GET', imageUrl, true);
    xhr.responseType = "blob";
    xhr.onload = (e) => {
      // 取得した画像データが e.currentTarget.response にある
      resolve(e.currentTarget.response);
    };
    xhr.send();
  });
};
ダウンロードしたものを zip にまとめる
JSZip というライブラリを使うと簡単。
const generateZip = (images) => {
  return new Promise((resolve, reject) => {
    const zip = new JSZip();
    images.forEach((imageData, i) => {
      zip.file(`image${String(i).padStart(3, '0')}`, imageData);
    });
    zip.generateAsync({ type: "blob" }).then(resolve);
  });
};
画像だけまとめているけど、
zip.file(ファイル名, ファイルの内容)を使ってテキストファイル等別のファイルも纏められる。組み合わせるとこうなる
const imageUrls = [
  'https://chrysanthemum94.example.com/imageA.png',
  'https://chrysanthemum94.example.com/imageB.png',
  'https://chrysanthemum94.example.com/imageC.png',
];
Promise.all(
  imageUrls.map((url) => {return getImage(url);})
).then((blobs) => {
  generateZip(blobs).then((zip) => {
    console.log(URL.createObjectURL(zip))
  });
});
まぁ、でも
一般にこういうのってサーバサイドで生成させる方が簡単な気はする。
静的なサイトなら最初からそういう zip ファイルを提供する方がいいだろうし。
サーバサイドをうんぬんするのが難しい事由がある場合に。
- 投稿日:2020-07-02T14:28:11+09:00
JavaScript でサーバ上にある画像を zip でまとめてダウンロードする
何をしたいの
既存のサイトやウェブアプリ上にある画像を取得してきて zip したい。
サーバ上にある画像をダウンロードするコード
ここは素直に XMLHttpRequestで取得する。
const getImage = (imageUrl) => {
  return new Promise((resolve, reject) => {
    const xhr = new XMLHttpRequest();
    xhr.open('GET', imageUrl, true);
    xhr.responseType = "blob";
    xhr.onload = (e) => {
      // 取得した画像データが e.currentTarget.response にある
      resolve(e.currentTarget.response);
    };
    xhr.send();
  });
};
ダウンロードしたものを zip にまとめる
JSZip というライブラリを使うと簡単。
const generateZip = (images) => {
  return new Promise((resolve, reject) => {
    const zip = new JSZip();
    images.forEach((imageData, i) => {
      zip.file(`image${String(i).padStart(3, '0')}`, imageData);
    });
    zip.generateAsync({ type: "blob" }).then(resolve);
  });
};
画像だけまとめているけど、
zip.file(ファイル名, ファイルの内容)を使ってテキストファイル等別のファイルも纏められる。組み合わせるとこうなる
const imageUrls = [
  'https://chrysanthemum94.example.com/imageA.png',
  'https://chrysanthemum94.example.com/imageB.png',
  'https://chrysanthemum94.example.com/imageC.png',
];
Promise.all(
  imageUrls.map((url) => {return getImage(url);})
).then((blobs) => {
  generateZip(blobs).then((zip) => {
    console.log(URL.createObjectURL(zip))
  });
});
まぁ、でも
一般にこういうのってサーバサイドで生成させる方が簡単な気はする。
静的なサイトなら最初からそういう zip ファイルを提供する方がいいだろうし。
サーバサイドをうんぬんするのが難しい事由がある場合に。
- 投稿日:2020-07-02T14:08:56+09:00
スムーススクロールの実装
スムーススクロールとは
ページ内をスクロールする挙動のこと。
ボタンを押したらリンク先までスクロールされる。(Topに戻るなど)HTML
aタグ
hrefでスクロール先をid指定する。<ul class="menu"> <li class="menu-profile "> <a href="#profile-box" class="menu-list">PROFILE</a> </li> <li class="menu-skill"> <a href="#skill-box" class="menu-list">SKILL</a> </li> <li class="menu-works"> <a href="#works-box" class="menu-list">WORKS</a> </li> <li class="menu-contact"> <a href="#contact-box" class="menu-list">CONTACT</a> </li> </ul> ------------------------------------ <div id="profile-box" class="box"> <div id="skill-box" class="box"> <div id="works-box" class="box"> <div id="contact-box" class="box">JavaScript
$(function(){
  // aタグをクリックし、href属性に # から始まるリンクが設定してあったら発動
  $('a[href^=#]').click(function(){
    // クリックしたaタグのhref属性(リンク先URI)を取得し、変数に格納
    var href= $(this).attr("href");
    // 上で取得した値が#か空白だったら'html'を、それ以外だったら先ほど取得したhref属性の値を変数に格納
    var target = $(href == "#" || href == "" ? 'html' : href);
    // 変数targetのページトップからの位置を取得し、変数に格納
    var position = target.offset().top;
    // 0.4秒でスクロール
    var speed = 400;
    // scrollTopに上で取得した位置を設定し、ヌルヌルとスクロールさせる
    $('body,html').animate({scrollTop:position}, speed, 'swing');
    // a要素のデフォルトの機能を無効化する
    return false;
  });
});
- 投稿日:2020-07-02T13:08:03+09:00
スクロール時、グローバルメニューの固定
ポートフォリオにグローバルメニューを導入しました。
イメージ
HTML
JSで
#global-navを取得する部分が<nav id="global-nav">になります。<nav id="global-nav"> <ul class="menu"> <li class="menu-profile "> <a href="#profile-box" class="menu-list">PROFILE</a> </li> <li class="menu-skill"> <a href="#skill-box" class="menu-list">SKILL</a> </li> <li class="menu-works"> <a href="#works-box" class="menu-list">WORKS</a> </li> <li class="menu-contact"> <a href="#contact-box" class="menu-list">CONTACT</a> </li> </ul> </nav>CSS
グローバルメニューが画面上に達した時、
.m_fixedが付与される。
.m_fixedが付与された時、position: fixed;で固定する。/* --------------------------------------------- グローバルメニュー ------------------------------------------------ */ #global-nav { background: #fff; width: 100%; } #global-nav.m_fixed { left: 0; position: fixed; top: 0; }JavaScript
#global-navを取得し、if文でグローバルメニューが画面上部に達した時、m_fixedクラスの追加。
達していない時、削除の処理をかく。var navPos = jQuery( '#global-nav' ).offset().top; // グローバルメニューの位置 var navHeight = jQuery( '#global-nav' ).outerHeight(); // グローバルメニューの高さ jQuery( window ).on( 'scroll', function() { if ( jQuery( this ).scrollTop() > navPos ) { // もしscrollTopの位置がnavPosより大きければ jQuery( 'body' ).css( 'padding-top', navHeight ); jQuery( '#global-nav' ).addClass( 'm_fixed' ); // m_fixed追加 } else { jQuery( 'body' ).css( 'padding-top', 0 ); jQuery( '#global-nav' ).removeClass( 'm_fixed' ); // m_fixed削除 } });

- 投稿日:2020-07-02T12:04:16+09:00
ウェブ版「Sign In WIth Apple」をFirebaseで実装するには
はじめに
当記事は、FirebaseのAuthenticationを用いて、Apple IDでユーザーログインをする方法について記載していきます。
※記事の中でコードの紹介はしておりませんが、筆者はSwiftではなく、Javascriptで実装をした後、この記事を書いています。Firebase公式ドキュメントがAppleの仕様変更に対応しておらず(2020年7月2日現在)、幾らか時間がかかったので、同様の実装を検討されてる方のお役に立てたら幸いです。
結論だけ先に言うと、
apple-developer-domain-association.txt
がApple側でダウンロード出来なくなっており、生成した秘密鍵の情報をFirebaseに入力することでApple IDのソーシャルログインが実装できます。Apple IDによるログインについて
GoogleやFacebookによる、ソーシャルログインのように、Apple IDを用いてサイトログインをすることが出来ます。
AppStoreのガイドラインによると、サードパーティやソーシャルログインのみでログイン機能を実装している全てのiOSアプリは2020年6月30日までに、Apple IDによるログインを、ログイン方法の一つとして加える必要があり、私もその流れの中で今回実装をしました。Apple ID認証の大きな特徴としては、
・Apple IDに登録しているメールアドレスだけでなく、Appleがランダムで生成したアドレスを利用してログイン出来る(その安全性はAppleが担保)
・スマートフォン限定ですが、「顔認証」「指紋認証」によるログインが可能以上が挙げられます。
FIrebaseとAppleの連携
※実装にはAppleのデベロッパー登録が必要です。
①AppleDeveloperサイトへアクセス
②「Identifiers」の項からApp Idを作成
※法人でApple Developer登録している人は管理者権限のアカウントのみApp Id作成ボタンが表示されます
通常のiOSアプリ、あるいはウェブサイトにログイン機能をつける場合は、「App」をクリック。
識別情報の入力に加えて、「Sign In WIth Apple」の設定をします。
③「Identifiers」の項からService Idを作成
先ほど、App Idを作った手順と同様に、今度はService Idを作成します。
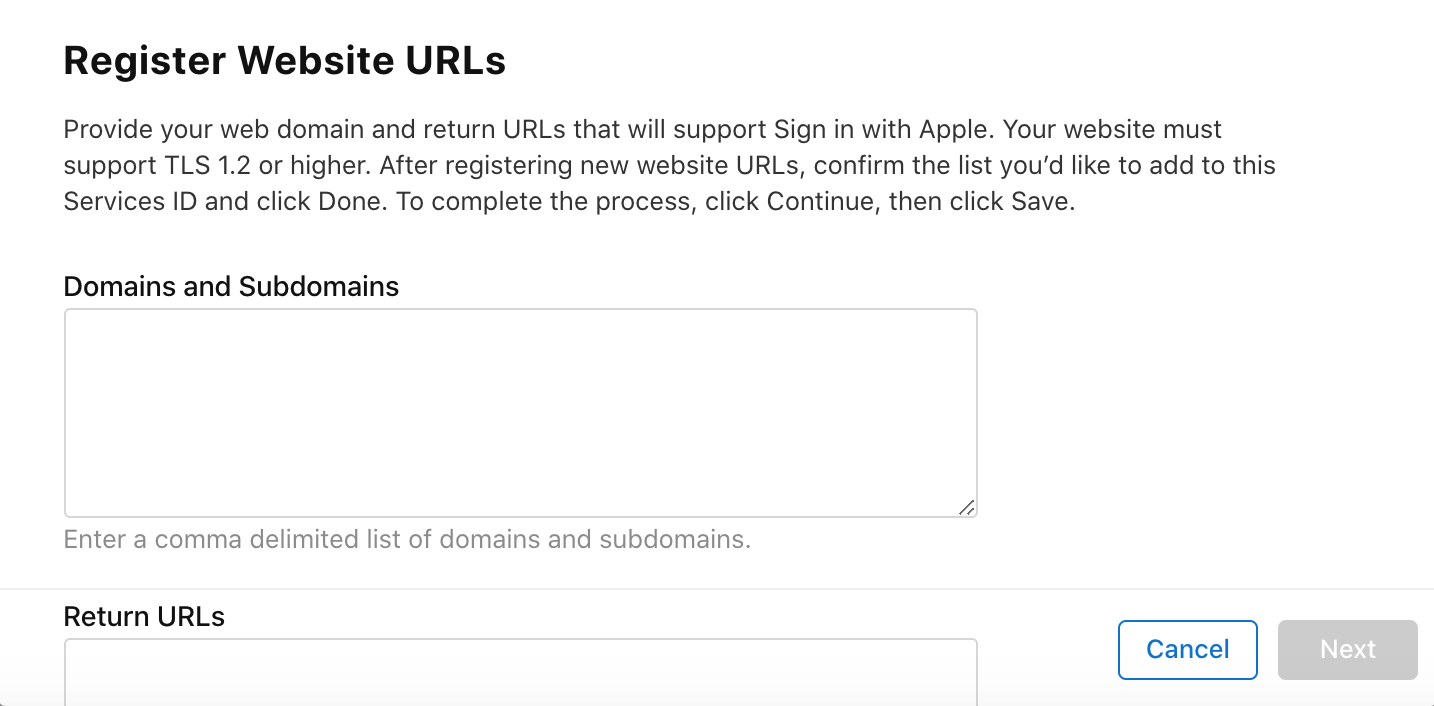
Idの登録後に再度作成したService Idをクリックすると、下記写真のような設定画面が現れます。
Domeins and Subdomainsには、ログイン後にリダイレクトするサービスサイトのドメイン(例えばgoogle.comやApple.comなど)を入力。
Return URLsには、
https://YOUR_FIREBASE_PROJECT_ID.firebaseapp.com/__/auth/handlerを入力します。
FirebaseのプロジェクトIDはコンソール画面等で確認できるので、事前に控えておくと良いでしょう。リダイレクト先には既にサーバーに上がっているサイトを指定することが前提になります(ローカルホストを指定するとAppleに弾かれるため)。
④秘密鍵の取得
Apple Developer側で行う最後の作業です。
「Keys」の項をクリックし、新しく秘密鍵を生成します。先ほどと同様に、「Sign In With Apple」を指定
秘密鍵生成の対象とするApp Idを指定した後、登録をすると、秘密鍵のダウンロードページが表示されます。
こちらのダウンロードページは一度のみの表示で、誤ってブラウザを閉じてしまった場合などは最初から秘密鍵を作り直すことになるので要注意です。
同ページにKeyIdなどの情報が表示されているので、ダウンロードと合わせて控えておきます。⑤Firebaseの設定
Firebase Authenticationの「Sign-in Methods」にて、下記写真のようにApple IDによる、ソーシャルログインを有効にします。
その際に、
・サービスID(手順の③で作成した「Service Id」の識別子)
・AppleチームID
・キーID(手順の④の秘密鍵のDLページで控えたID)
・秘密鍵の中身を入力します。
上記を余すことなく入力出来たら、
AppleとFirebaseの連携は完了です!!おわりに
私の所属するチームはFirebaseUIを利用して、ログインページを作っています。
Apple IDでログインする場合、他のソーシャルログイン(Google,Facebookなど)と若干Configのコードの書き方が異なるので注意です。(詳しくはGitHubを)こちらの記事を参考にさせていただきました。
ありがとうございます!
・Appleでサインインとは?
・Sign In with Apple on Firebase
・FirebaseUI


- 投稿日:2020-07-02T10:40:49+09:00
GAS Calendarの予定削除
GAS Calendarの予定削除
カレンダーを全て取得して
ある日程から先の予定を全て削除する。Exceptionエラーとなり、操作できないと表示されるが
何度か繰り返すと予定は削除された。コード.gsfunction Delete_CalendarEvents() { var calendars = CalendarApp.getAllCalendars(); const startTime = new Date('2020/7/3 7:00:00'); const endTime = new Date('2021/1/1 12:00:00'); for (var i in calendars) { var id = calendars[i].getId(); var calendar = CalendarApp.getCalendarById(id); //Logger.log(id) var events = calendar.getEvents(startTime, endTime); for (var i in events) { var event = events[i]; event.deleteEvent(); } } }
- 投稿日:2020-07-02T09:44:51+09:00
[Node.js] Expressサーバーのタイムアウト時間を変更する
デフォルト Expressでは、リクエストのタイムアウトデフォルト値が2分に設定されています。 タイムアウト時間を設定 以下のように、オプションとしてtimeoutが用意されています。そちらの値を…
- 投稿日:2020-07-02T09:32:35+09:00
getElementByIdとgetElementByClassNameの違い
const aaa = document.getElementsByClassName("aaa");
console.log(aaa);
//
const bbb = document.getElementById("bbb");
console.log(bbb);
上記は同じように見える少なくともjQueryで書くと多分こう
const aaa = $(".aaa");
console.log(aaa);
const bbb = $("#bbb");
console.log(bbb);
aaaもbbbもオブジェクトを返してくれる。
しかしプレーンのjavascriptはそうはいかない。
getElementByIdはオブジェクトを返してくれる(jQueryのように)が
getElementsByClassNameはHTMLCollection(配列っぽいもの)を返す。const aaa = document.getElementsByClassName("aaa"); console.log(aaa); ↓ HTMLCollection { 0: p.aaa, length: 1 }const bbb = document.getElementById("bbb"); console.log(bbb); ↓ <p id="bbb">これの何が重要か
getElementByIdはオブジェクトを返してくれる(jQueryのように)が
getElementsByClassNameはHTMLCollection(配列っぽいもの)を返す。と書いたが、これのせいでgetElementByClassNameでは「addEventListener」などの指定ができない。
配列のようになっているのでconst aaa = document.getElementsByClassName("aaa")[0]; ↓ <p class="aaa">としなければ動かない。
対処法
(まず皆がどうやっているのかを知りたいが。。。)
全てをIDにするのは無理なので、「querySelector」を使うと良いかもしれない。
const ccc = document.querySelector('.ccc');
console.log(ccc);
↓
<p class="ccc">
querySelectorの参考URL
https://developer.mozilla.org/ja/docs/Web/API/Document/querySelector
まとめ
プレーンのJavaScriptを勉強しているがわからないことが山ほど出てきてjQueryに依存しすぎていた感が否めない。。。
- 投稿日:2020-07-02T09:17:16+09:00
JavaScriptの関数学習に特化したサイト作りました【JavaScript関数ドリル】
詳細
詳細は以下の記事にまとめているので、詳しくはそちらもご覧になっていただけたらと思います^^
概要
以下のような悩みを持っている方に向けて、「JavaScript関数ドリル」という、JavaScriptの関数学習に特化したサイトを作りました^^
- 「JavaScriptの関数の仕組み頭では理解したけど、自分で作れない…」
- 「JavaScriptの関数の知識を定着させたいから、たくさんの関数の問題を解きたい!」
内容としては「JavaScriptの関数の課題をひたすら解く」という感じです。
現在は「初級編」だけを用意している状態で、今後は「中級編」「上級編」を随時追加していく予定です。
興味がある方は、最初の方に張ったリンク先のページで、サイトの全体像のイメージを動画でも解説しているので、そちらもご覧になっていただけたらと思います^^
- 投稿日:2020-07-02T05:04:15+09:00
Git 使い方 git push origin masterまで
Gitでのpushまでの道のり
gitの学習メモ
pushまでの手順。githubのアカウントは持っている前提。
1、リポジトリの作成
・リモートリポジトリ
・GitHubにログイン
・画面右上+ボタンを押す。
・New repositoryを選択
・リポジトリ名を付ける
・Create Repositoryを押す・ローカルリポジトリ
・ローカルのソースコードのあるディレクトリに移動
・git init でローカルリポジトリ作成リモートリポジトリの指定
・git remote add origin https ~ .git
・https ~ .git は GitHubの作ったリポジトリのCodeのページのHTTPSのボタン押したところのやつadd、commit、push
ソースコードの変更をローカルリポジトリに追加し、リモートリポジトリにローカルリポジトリを反映する。
・git add . ( . は全部のファイルって意味)
・git commit -m "何を変更したかとかのメッセージ"・git push origin master
これでリモートリポジトリへの反映
- 投稿日:2020-07-02T00:05:50+09:00
Javascript クラスの書き方
Javascript クラスの書き方。
var Foo = (function(name) {
    var privates = new WeakMap();

    function Foo(name) {
        privates.set(this, {});

        privates.get(this).prop = 1;
        privates.get(this).name = name;
    }
    Foo.prototype._share = 'share';
    Foo.prototype.changeShare = function(newValue) { Foo.prototype._share = newValue; };
    Foo.prototype.method = function() { return privates.get(this).prop; };
    Foo.prototype.say = function() { console.log(privates.get(this).name); };

    return Foo;
})();

var foo1 = new Foo('aaa');
var foo2 = new Foo('bbb');
foo1.say(); // aaa
foo2.say(); // bbb
console.log(foo1.name); // undefined
console.log(foo1.say === foo2.say); // true
console.log(foo1._share === foo2._share); // true
console.log(foo1._share); // share
console.log(foo2._share); // share

/*foo1.share = 'change';*/
foo1.changeShare('change!');
console.log(foo1._share); // change!
console.log(foo2._share); // change!

console.log(foo1.hasOwnProperty("_share")); // false
console.log(foo2.hasOwnProperty("_share")); // false
- private 変数ができる。
- 共通の変数ができる。(_share)
- 外から無理プチこんだら終わりだが、js はそんなもんなので、どうしようもない。
参考元:https://webkatu.com/archives/private-property/
以上。