- 投稿日:2020-07-02T22:23:52+09:00
自前ビデオチャットサーバーを立てる
はじめに
外部につながらないネットワークの中でビデオチャットをしたい
参考にしたところ
nginxを立てる
準備
- macにVirtualBoxをインストール
- CentOS7をインストール(minimal)
- ネットワークはブリッジにしておく
- dockerをいれる(https://docs.docker.com/engine/install/centos/) ## テスト
# docker run -d 80:80 nginx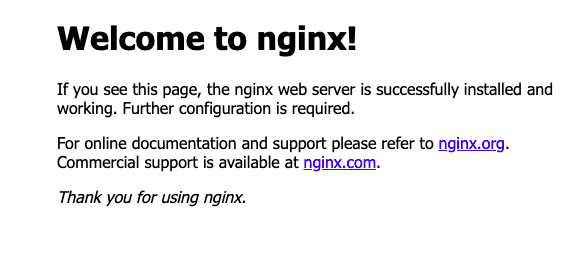
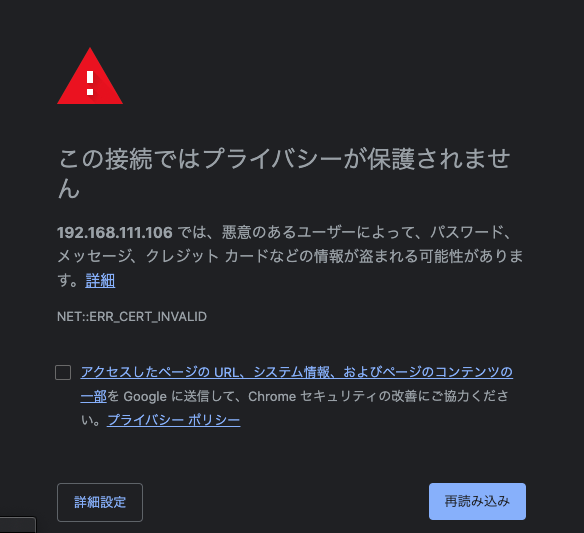
HTTPSのための証明書を準備する
[root@localhost nginx]# mkdir ssl
[root@localhost nginx]# openssl genrsa 2048 > ssl/key.pem
Generating RSA private key, 2048 bit long modulus
.........+++
..........................+++
e is 65537 (0x10001)
[root@localhost nginx]# openssl req -new -key ssl/key.pem > ssl/cacert.pem
You are about to be asked to enter information that will be incorporated
into your certificate request.
What you are about to enter is what is called a Distinguished Name or a DN.
There are quite a few fields but you can leave some blank
For some fields there will be a default value,
If you enter '.', the field will be left blank.
-----
Country Name (2 letter code) [XX]:JP
State or Province Name (full name) []:
Locality Name (eg, city) [Default City]:
Organization Name (eg, company) [Default Company Ltd]:
Organizational Unit Name (eg, section) []:
Common Name (eg, your name or your server's hostname) []:
Email Address []:

Please enter the following 'extra' attributes
to be sent with your certificate request
A challenge password []:
An optional company name []:
[root@localhost nginx]# openssl x509 -days 3650 -req -signkey ssl/key.pem < ssl/cacert.pem > ssl/cert.pem
Signature ok
subject=/C=JP/L=Default City/O=Default Company Ltd
Getting Private key
- confの変更
conf.d/default.confserver { listen 443 ssl; ssl_certificate /etc/nginx/ssl/cert.pem; ssl_certificate_key /etc/nginx/ssl/key.pem; location / { index index.html index.htm; root /usr/share/nginx/html; } }
- 動作確認
# docker run -p 443:443 -p 80:80 -v $(pwd)/ssl:/etc/nginx/ssl -v $(pwd)/conf.d:/etc/nginx/conf.d nginx
https://qiita.com/colomney/items/887f9ea7b68a3b427060
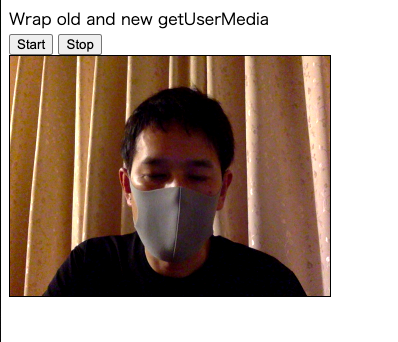
を参考にしてchromeで表示できるようにするカメラをブラウザから使う
- 参考:https://html5experts.jp/mganeko/19728/
index.html<!doctype html> <html> <head> <meta http-equiv="Content-Type" content="text/html; charset=UTF-8"> <title>Wrap old and new getUserMedia</title> </head> <body> Wrap old and new getUserMedia<br /> <button type="button" onclick="startVideo();">Start</button> <button type="button" onclick="stopVideo();">Stop</button> <br /> <video id="local_video" autoplay style="width: 320px; height: 240px; border: 1px solid black;"></video> </body> <script type="text/javascript"> var localVideo = document.getElementById('local_video'); var localStream = null; // --- prefix ----- navigator.getUserMedia = navigator.getUserMedia || navigator.webkitGetUserMedia || navigator.mozGetUserMedia || navigator.msGetUserMedia; // ---------------------- video handling ----------------------- // start local video function startVideo() { getDeviceStream({video: true, audio: false}) .then(function (stream) { // success localStream = stream; playVideo(localVideo, stream); }).catch(function (error) { // error console.error('getUserMedia error:', error); return; }); } // stop local video function stopVideo() { pauseVideo(localVideo); stopLocalStream(localStream); } function stopLocalStream(stream) { let tracks = stream.getTracks(); if (! tracks) { console.warn('NO tracks'); return; } for (let track of tracks) { track.stop(); } } function getDeviceStream(option) { if ('getUserMedia' in navigator.mediaDevices) { console.log('navigator.mediaDevices.getUserMadia'); return navigator.mediaDevices.getUserMedia(option); } else { console.log('wrap navigator.getUserMadia with Promise'); return new Promise(function(resolve, reject){ navigator.getUserMedia(option, resolve, reject ); }); } } function playVideo(element, stream) { if ('srcObject' in element) { element.srcObject = stream; } else { element.src = window.URL.createObjectURL(stream); } element.play(); element.volume = 0; } function pauseVideo(element) { element.pause(); if ('srcObject' in element) { element.srcObject = null; } else { if (element.src && (element.src !== '') ) { window.URL.revokeObjectURL(element.src); } element.src = ''; } } </script> </html># docker run -p 443:443 -v $(pwd)/ssl:/etc/nginx/ssl -v $(pwd)/conf.d:/etc/nginx/conf.d -v $(pwd)/html:/usr/share/nginx/html nginx
シグナリングサーバーを立てる
https://nodejs.org/ja/docs/guides/nodejs-docker-webappを参考にdockerでnode.jsを動かす
Dockerfile
FROM node:12 # アプリケーションディレクトリを作成する WORKDIR /usr/src/app # アプリケーションの依存関係をインストールする # ワイルドカードを使用して、package.json と package-lock.json の両方が確実にコピーされるようにします。 # 可能であれば (npm@5+) COPY package*.json ./ RUN npm install # 本番用にコードを作成している場合 # RUN npm install --only=production # アプリケーションのソースをバンドルする COPY signaling.js ./ # サーバー証明書 COPY ssl /etc/ssl CMD [ "node", "signaling.js" ]package.json{ "name": "node-signaling-server", "version": "1.0.0", "description": "Sigaling Server by Node.js on Docker", "author": "First Last <first.last@example.com>", "main": "signaling.js", "scripts": { "start": "node signaling.js" }, "dependencies": { "ws": "^7.3.0" } }httpsを使っていので、WebSocketもSecure WebSocketにする必要があります。
(証明書はnginxと同じもをとりあえず使用)signaling.js"use strict"; let fs = require('fs'); let https = require('https'); let webSocketServer = require('ws').Server; let port = 3001; let httpsServer = https.createServer({ cert: fs.readFileSync('/etc/ssl/cert.pem'), ca: fs.readFileSync('/etc/ssl/cacert.pem'), key: fs.readFileSync('/etc/ssl/key.pem') }).listen(port); let wssServer = new webSocketServer({ server: httpsServer }); console.log('secure websocket server start. port=' + port); wssServer.on('connection', function(wss) { console.log('-- secure websocket connected --'); wss.on('message', function(message) { wssServer.clients.forEach(function each(client) { if (isSame(wss, client)) { console.log('- skip sender -'); } else { client.send(message); } }); }); }); function isSame(ws1, ws2) { // -- compare object -- return (ws1 === ws2); }".dockerignore"node_modules npm-debug.logビルドと実行
# docker build . -t node-signaling-server
# docker run -d -p 3001:3001 node-signaling-server
1対1でつなげる
- 基本的にhttps://html5experts.jp/mganeko/20013/をなぞっている
- https://github.com/mganeko/webrtcexpjp/blob/master/basic2016/ws_signaling_1to1_trickle.htmlこちらを元にwssにして、サーバーアドレスを固定にした。
wc_1to1.html<!doctype html> <html> <head> <meta http-equiv="Content-Type" content="text/html; charset=UTF-8"> <title>WebSocket Signaling 1to1</title> </head> <body> WebSocket Signaling 1to1 (trickle ICE)<br /> <button type="button" onclick="startVideo();">Start Video</button> <button type="button" onclick="stopVideo();">Stop Video</button> <button type="button" onclick="connect();">Connect</button> <button type="button" onclick="hangUp();">Hang Up</button> <div> <video id="local_video" autoplay style="width: 160px; height: 120px; border: 1px solid black;"></video> <video id="remote_video" autoplay style="width: 160px; height: 120px; border: 1px solid black;"></video> </div> <p>SDP to send:<br /> <textarea id="text_for_send_sdp" rows="5" cols="60" readonly="readonly">SDP to send</textarea> </p> <p>SDP received: <!-- <button type="button" onclick="onSdpText();">Receive remote SDP</button> --> <br /> <textarea id="text_for_receive_sdp" rows="5" cols="60"></textarea> </p> </body> <script type="text/javascript"> let localVideo = document.getElementById('local_video'); let remoteVideo = document.getElementById('remote_video'); let localStream = null; let peerConnection = null; let textForSendSdp = document.getElementById('text_for_send_sdp'); let textToReceiveSdp = document.getElementById('text_for_receive_sdp'); // --- prefix ----- navigator.getUserMedia = navigator.getUserMedia || navigator.webkitGetUserMedia || navigator.mozGetUserMedia || navigator.msGetUserMedia; RTCPeerConnection = window.RTCPeerConnection || window.webkitRTCPeerConnection || window.mozRTCPeerConnection; RTCSessionDescription = window.RTCSessionDescription || window.webkitRTCSessionDescription || window.mozRTCSessionDescription; // -------- websocket ---- // please use node.js app // // or you can use chrome app (only work with Chrome) // https://chrome.google.com/webstore/detail/simple-message-server/bihajhgkmpfnmbmdnobjcdhagncbkmmp // let wsUrl = 'wss://192.168.111.106:3001/'; let ws = new WebSocket(wsUrl); ws.onopen = function(evt) { console.log('ws open()'); }; ws.onerror = function(err) { console.error('ws onerror() ERR:', err); }; ws.onmessage = function(evt) { console.log('ws onmessage() data:', evt.data); let message = JSON.parse(evt.data); if (message.type === 'offer') { // -- got offer --- console.log('Received offer ...'); textToReceiveSdp.value = message.sdp; let offer = new RTCSessionDescription(message); setOffer(offer); } else if (message.type === 'answer') { // --- got answer --- console.log('Received answer ...'); textToReceiveSdp.value = message.sdp; let answer = new RTCSessionDescription(message); setAnswer(answer); } else if (message.type === 'candidate') { // --- got ICE candidate --- console.log('Received ICE candidate ...'); let candidate = new RTCIceCandidate(message.ice); console.log(candidate); addIceCandidate(candidate); } }; // ---------------------- media handling ----------------------- // start local video function startVideo() { getDeviceStream({video: true, audio: false}) .then(function (stream) { // success localStream = stream; playVideo(localVideo, stream); }).catch(function (error) { // error console.error('getUserMedia error:', error); return; }); } // stop local video function stopVideo() { pauseVideo(localVideo); stopLocalStream(localStream); } function stopLocalStream(stream) { let tracks = stream.getTracks(); if (! tracks) { console.warn('NO tracks'); return; } for (let track of tracks) { track.stop(); } } function getDeviceStream(option) { if ('getUserMedia' in navigator.mediaDevices) { console.log('navigator.mediaDevices.getUserMadia'); return navigator.mediaDevices.getUserMedia(option); } else { console.log('wrap navigator.getUserMadia with Promise'); return new Promise(function(resolve, reject){ navigator.getUserMedia(option, resolve, reject ); }); } } function playVideo(element, stream) { if ('srcObject' in element) { element.srcObject = stream; } else { element.src = window.URL.createObjectURL(stream); } element.play(); element.volume = 0; } function pauseVideo(element) { element.pause(); if ('srcObject' in element) { element.srcObject = null; } else { if (element.src && (element.src !== '') ) { window.URL.revokeObjectURL(element.src); } element.src = ''; } } // ----- hand signaling ---- function onSdpText() { let text = textToReceiveSdp.value; if (peerConnection) { console.log('Received answer text...'); let answer = new RTCSessionDescription({ type : 'answer', sdp : text, }); setAnswer(answer); } else { console.log('Received offer text...'); let offer = new RTCSessionDescription({ type : 'offer', sdp : text, }); setOffer(offer); } textToReceiveSdp.value =''; } function sendSdp(sessionDescription) { console.log('---sending sdp ---'); textForSendSdp.value = sessionDescription.sdp; /*--- textForSendSdp.focus(); textForSendSdp.select(); ----*/ let message = JSON.stringify(sessionDescription); console.log('sending SDP=' + message); ws.send(message); } function sendIceCandidate(candidate) { console.log('---sending ICE candidate ---'); let obj = { type: 'candidate', ice: candidate }; let message = JSON.stringify(obj); console.log('sending candidate=' + message); ws.send(message); } // ---------------------- connection handling ----------------------- function prepareNewConnection() { let pc_config = {"iceServers":[]}; let peer = new RTCPeerConnection(pc_config); // --- on get remote stream --- if ('ontrack' in peer) { peer.ontrack = function(event) { console.log('-- peer.ontrack()'); let stream = event.streams[0]; playVideo(remoteVideo, stream); }; } else { peer.onaddstream = function(event) { console.log('-- peer.onaddstream()'); let stream = event.stream; playVideo(remoteVideo, stream); }; } // --- on get local ICE candidate peer.onicecandidate = function (evt) { if (evt.candidate) { console.log(evt.candidate); // Trickle ICE の場合は、ICE candidateを相手に送る sendIceCandidate(evt.candidate); // Vanilla ICE の場合には、何もしない } else { console.log('empty ice event'); // Trickle ICE の場合は、何もしない // Vanilla ICE の場合には、ICE candidateを含んだSDPを相手に送る //sendSdp(peer.localDescription); } }; // --- when need to exchange SDP --- peer.onnegotiationneeded = function(evt) { console.log('-- onnegotiationneeded() ---'); }; // --- other events ---- peer.onicecandidateerror = function (evt) { console.error('ICE candidate ERROR:', evt); }; peer.onsignalingstatechange = function() { console.log('== signaling status=' + peer.signalingState); }; peer.oniceconnectionstatechange = function() { console.log('== ice connection status=' + peer.iceConnectionState); if (peer.iceConnectionState === 'disconnected') { console.log('-- disconnected --'); hangUp(); } }; peer.onicegatheringstatechange = function() { console.log('==***== ice gathering state=' + peer.iceGatheringState); }; peer.onconnectionstatechange = function() { console.log('==***== connection state=' + peer.connectionState); }; peer.onremovestream = function(event) { console.log('-- peer.onremovestream()'); pauseVideo(remoteVideo); }; // -- add local stream -- if (localStream) { console.log('Adding local stream...'); peer.addStream(localStream); } else { console.warn('no local stream, but continue.'); } return peer; } function makeOffer() { peerConnection = prepareNewConnection(); peerConnection.createOffer() .then(function (sessionDescription) { console.log('createOffer() succsess in promise'); return peerConnection.setLocalDescription(sessionDescription); }).then(function() { console.log('setLocalDescription() succsess in promise'); // -- Trickle ICE の場合は、初期SDPを相手に送る -- sendSdp(peerConnection.localDescription); // -- Vanilla ICE の場合には、まだSDPは送らない -- }).catch(function(err) { console.error(err); }); } function setOffer(sessionDescription) { if (peerConnection) { console.error('peerConnection alreay exist!'); } peerConnection = prepareNewConnection(); peerConnection.setRemoteDescription(sessionDescription) .then(function() { console.log('setRemoteDescription(offer) succsess in promise'); makeAnswer(); }).catch(function(err) { console.error('setRemoteDescription(offer) ERROR: ', err); }); } function makeAnswer() { console.log('sending Answer. Creating remote session description...' ); if (! peerConnection) { console.error('peerConnection NOT exist!'); return; } peerConnection.createAnswer() .then(function (sessionDescription) { console.log('createAnswer() succsess in promise'); return peerConnection.setLocalDescription(sessionDescription); }).then(function() { console.log('setLocalDescription() succsess in promise'); // -- Trickle ICE の場合は、初期SDPを相手に送る -- sendSdp(peerConnection.localDescription); // -- Vanilla ICE の場合には、まだSDPは送らない -- }).catch(function(err) { console.error(err); }); } function setAnswer(sessionDescription) { if (! peerConnection) { console.error('peerConnection NOT exist!'); return; } peerConnection.setRemoteDescription(sessionDescription) .then(function() { console.log('setRemoteDescription(answer) succsess in promise'); }).catch(function(err) { console.error('setRemoteDescription(answer) ERROR: ', err); }); } // --- tricke ICE --- function addIceCandidate(candidate) { if (peerConnection) { peerConnection.addIceCandidate(candidate); } else { console.error('PeerConnection not exist!'); return; } } // start PeerConnection function connect() { if (! peerConnection) { console.log('make Offer'); makeOffer(); } else { console.warn('peer already exist.'); } } // close PeerConnection function hangUp() { if (peerConnection) { console.log('Hang up.'); peerConnection.close(); peerConnection = null; pauseVideo(remoteVideo); } else { console.warn('peer NOT exist.'); } } </script> </html>複数接続
package.json{ "name": "node-signaling-server", "version": "1.0.0", "description": "Sigaling Server by Node.js on Docker", "author": "First Last <first.last@example.com>", "main": "signaling.js", "scripts": { "start": "node signaling.js" }, "dependencies": { "socket.io": "^2.3.0" } }signaling.js"use strict"; const fs = require('fs'); const https = require('https'); const httpsServer = https.createServer({ cert: fs.readFileSync('/etc/ssl/cert.pem'), ca: fs.readFileSync('/etc/ssl/cacert.pem'), key: fs.readFileSync('/etc/ssl/key.pem') }); const io = require('socket.io')(httpsServer); const port = 3002; httpsServer.listen(port); console.log('secure signaling server started on port:' + port); // This callback function is called every time a socket // tries to connect to the server io.on('connection', function(socket) { // ---- multi room ---- socket.on('enter', function(roomname) { socket.join(roomname); console.log('id=' + socket.id + ' enter room=' + roomname); setRoomname(roomname); }); function setRoomname(room) { socket.roomname = room; } function getRoomname() { var room = socket.roomname; return room; } function emitMessage(type, message) { // ----- multi room ---- var roomname = getRoomname(); if (roomname) { console.log('===== message broadcast to room -->' + roomname); socket.broadcast.to(roomname).emit(type, message); } else { console.log('===== message broadcast all'); socket.broadcast.emit(type, message); } } // When a user send a SDP message // broadcast to all users in the room socket.on('message', function(message) { var date = new Date(); message.from = socket.id; console.log(date + 'id=' + socket.id + ' Received Message: ' + JSON.stringify(message)); // get send target var target = message.sendto; if (target) { console.log('===== message emit to -->' + target); socket.to(target).emit('message', message); return; } // broadcast in room emitMessage('message', message); }); // When the user hangs up // broadcast bye signal to all users in the room socket.on('disconnect', function() { // close user connection console.log((new Date()) + ' Peer disconnected. id=' + socket.id); // --- emit ---- emitMessage('user disconnected', {id: socket.id}); // --- leave room -- var roomname = getRoomname(); if (roomname) { socket.leave(roomname); } }); });wc_multi.htmlこちらは参照先のソースのhttp->httpsにしてアドレス指定しただけなので割愛します
- 投稿日:2020-07-02T18:05:17+09:00
scoopでnodeとnpmインストールする方法のメモ
今更ながらscoopでnodeとnpmをインストールする方法のまとめ
scoopインストール
Powershellを管理者権限で起動して以下を実行(細かい説明は省略)
スクリプト実行許可> Set-ExecutionPolicy RemoteSigned -Scope Processscoopインストール> iex (new-object net.webclient).downloadstring('https://get.scoop.sh')scoopコマンドの確認(Usage出ればOK)> scoopscoopでnvmインストール
scoopでnvmをインストール。
main bucketにありますnvmインストール> scoop install nvmnvmコマンドの確認(バージョンが出ればOK)> nvm versionnvmの本体は
C:\Users\{ログインユーザ}\scoop\apps\nvm\current\nvm.exe
追加される環境変数はNVM_HOMEnvmでnode.jsインストール
nvmでnode.jsをインストール(npmも入ります)
インストール可能なバージョンを確認> nvm list available | CURRENT | LTS | OLD STABLE | OLD UNSTABLE | |--------------|--------------|--------------|--------------| | 14.5.0 | 12.18.2 | 0.12.18 | 0.11.16 | | 14.4.0 | 12.18.1 | 0.12.17 | 0.11.15 | | 14.3.0 | 12.18.0 | 0.12.16 | 0.11.14 | | 14.2.0 | 12.17.0 | 0.12.15 | 0.11.13 | | 14.1.0 | 12.16.3 | 0.12.14 | 0.11.12 | ~以下、略~LTSの最新版
12.18.2を入れます。nodeのインストール> nvm install 12.18.2インストールしただけだとまだ使えないので、使用するバージョンを指定します。
※ここで環境変数やPATHが追加されますnodeの利用バージョン指定> nvm use 12.18.2nodeの本体は
C:\Users\{ログインユーザ}\scoop\apps\nvm\current\nodejs\nodejs\node.exe
追加される環境変数はNVM_SYMLINKnodeのバージョン確認> node -vnpmのバージョン確認> npm -v
- 投稿日:2020-07-02T17:34:27+09:00
Express事始め
expressをやってみる
expressはnode.jsをいい感じに使えるようにしてくれるフレームワークです。
https://expressjs.com/ja/hello world
expressはnodeのコアモジュールを拡張しているので、httpモジュールのように書ける。
app.jsconst express = require('express') const app = express() app.get('/', (req, res) => { res.writeHead(200) res.write('Hello,World') res.end() }) app.listen(3001)express独自のメソッドを使用して実装するならば、下記。
app.jsconst express = require('express') const app = express() app.get('/', (req, res) => { res.status(200).send('Hello, world') }) app.listen(3001)上記でlocalhost:3001にアクセスできる。
完結!ちなみにhttpモジュールではGET/POSTどちらも受け付けていたが、
上記の実装だとGETのみ受け付ける。(後ほど詳しく触れます)ミドルウェアを利用する
Expressは最低限の機能しか持たないため、ミドルウェアを組み込む事になる。
ミドルウェアを作成するには、下記のようなfunctionを作成する。・通常の処理
function(req, res, next) {
   // 何かしらの処理
   next()
}
・エラー処理
function(err, req, res, next) {
   // 何かしらの処理
  next()
}
next()を呼び出すことで、次の制御に移行する。
上記のミドルウェアを利用する場合はuseメソッドを使用する。
const express = require('express')
const app = expresss()

app.use((req, res, next) => {
})

app.listen(3001)
実際に使ってみた例が下記。アクセスしたユーザーエージェントをconsole.log(ターミナル上)で表示してくれる。
app.jsconst middlewear = require('./module') const express = require('express') const app = express() app.use(middlewear) app.get('/', (req, res) => { res.status(200).send('Hello, World') }) app.listen(3001)module.jsmodule.exports = function(req, res, next) { const ua = req.headers['user-agent'] console.log(ua) next() }ルーティング
app.メソッド(パス, コールバック)で実装する。メソッド ・・・
GET,POSTなどを小文字で指定する。
パス ・・・URLのパス。正規表現での指定可
コールバック ・・・メソッドやパスが一致した場合に発動するfunctionを指定名前付きパラメータも利用できる。コロン付きで指定すればOK!
app.get('/post/:id', (req, res) => {
  console.log(req.params.id)
})
下記実装後、 localhost:3001/post/31にアクセスすると、 ターミナル上に31と表示される。
const express = require('express')
const app = express()

app.get('/post/:id', (req, res) => {
  console.log(req.params.id)
  res.status(200).send('ok,hello')
})

app.listen(3001)
/post/:id?というように正規表現を使う事で、
- /post/31
- /post/
- /post
などにも該当させることができる。
/post/:id*であれば
- /post/31
- post/31/plusなどがヒットする。
Custom Matching Parameterというものもある。
/post/:id(\\d+)であれば、数値のみのマッチングのため
/user/123はマッチするが、
/user/abcはヒットしない。expressは内部で
path-to-regexpというパッケージを使用している為、
そのドキュメントを見れば詳しいことがわかる。
https://www.npmjs.com/package/path-to-regexpルーティングのモジュール化
ある程度のアプリの規模になるとルーティングが肥大化するため、モジュール化する。
const router = express.Router()実際の使用例
const router = require('express').Router()

// ミドルウェア どのルートでも走る
router.use((req, res, next) => {
  console.log('ミドルウェアです')
  next()
})

router.get('/', (req, res) => {
   res.send('/')
   console.log('第一ルーティング')
})

router.get('/about', (req, res) => {
   res.send('/about')
   console.log('第二ルーティング')
})

module.exports = router
routerはミドルウェアなので、
app.useで使用する。app.jsconst express = require('express') const app = exppress() app.use('/user', require('./router/user.js')) app.listen(3001)
/user/にアクセスすると 「第一ルーティング」がconsole.logに出力され、
/user/aboutにアクセスすると「第二ルーティング」がconsole.logに出力される。【参考サイト】
https://expressjs.com/ja/
https://dev.classmethod.jp/articles/express_router_param_get/
https://qiita.com/kibinag0/items/8936476e99ed50279b83
- 投稿日:2020-07-02T15:17:17+09:00
【備忘録】 Node.js ( heroku + github )で遊ぶときにやること
はじめに
遊ぶときにいつも詰まるので、自分用メモとしてまとめる。
遊び始めのハードルを下げるのが目的。
たぶんこれがあれば5分くらいで遊び始められるはず。前提
パスワードは忘れててもリセットすれば良いので、そんなに心配しなくて良い。
ログインメールアドレスすら忘れたとかなら作るしかねぇ。最小構成の構築
GitHub
ログインする
https://github.com/loginリモートリポジトリを作る
https://github.com/new
あとで変更できるので、名前はテキトーに決めて始めちゃう。(作ってるうちにイメージが変わっていくことも多いし)
変更したいとき → Qiita - Githubリポジトリ名変更Sourcetree
(Sourcetreeじゃなくても良いけど、もうインストールしてあるので。)
クローンする
- 起動>リモート
- 自分のリポジトリの一覧とか出てくるので、そこからクローンする。
node.jsのスケルトンプロジェクトを生成する
- 「ターミナルで開く」を押下
npm install -g express#expressの導入(PC自体に)npm install -g express-generator#ジェネレータを導入(PC自体に)express --view=pug sampleapp#ジェネレータでスケルトンを導入(対象プロジェクト配下に)- sampleappディレクトリ配下だと面倒なので、ディレクトリ構造を一段上にあげる。
npm install#依存関係の解消(対象プロジェクト配下)npm start#試しに起動してみる- http://localhost:3000/ #稼動確認してみよう
- ctrl + C #終了
参考にした情報: Qiita - Node.js + Express入門
参考にした情報: Qiita - Windows10 + Express & Pug(旧JadeVSCodeを開く
(VSCodeじゃなくても良いけど、もうインストールしてあるので。)
- 「Fiderで表示」を押下
- 対象のディレクトリをドラッグ&ドロップでVSCodeを開く
Visual Studio Code
gitignore作る
githubライブラリからパクる: https://github.com/toptal/gitignore/blob/master/templates/Node.gitignoreなお間違えてすでにpushしてたら以下を実行する
git rm -r --cached .参考: Qiita - git管理している途中から.gitignoreを追加して、その設定を反映させる方法
SourceTree
add -> commit -> push
(なんかVSCodeから操作する拡張あると思うけど、後で考える。)heroku
ログインする
https://id.heroku.com/logincreate new app
https://dashboard.heroku.com/new-app
あとで変更できるので名前はテキトーに決めて始めちゃう。(作ってるうちにイメージが変わっていくことも多いし)
変更したいとき → Qiita - herokuのアプリ名(URL)変更方法【10秒でできる】pipelineはちょっとわかんないからパス。(後で調べて理解できたら追記する。きっと追記しない。)
Deployment method
1. 「GitHubアイコン」を押下
「Connect to GitHub」を押下
流れに身をまかせる。(リポジトリを指定する)
「connect」の押下を忘れずに・・・
Automatic deploys
「Enable Automatic Deploys」を押下しとく。(自動デプロイの有効化)
もう少しだけ丁寧に設定した場合はこっち → Qiita - 【備忘録】GitHub経由でHerokuにデプロイするまでの流れManual deploy
「Deploy Branch」で手動デプロイする。
(このままだとpushしないとデプロイされないので、初回は稼動確認もかねて、手動でデプロイする。)
稼動確認
以下がherokuで表示されていることを確認する。
以下リンクから対象appに飛んでなんやかんやすれば行ける。
https://dashboard.heroku.com/apps/
ダメなら、デプロイエラーか実行時エラー。
まずは手動デプロイして、様子をみる。
デプロイ成功してれば、実行時エラーなので、heroku経由でログを見ながらリクエストを飛ばしてみよう。ちょっとしたtips
環境変数
パスワードやAPIキーなど、githubには公開したくない情報の管理方法として、環境変数を使う場合の方法。
heroku
# 環境変数一覧 $ heroku config --app "app_name" # 環境変数名を指定して参照 $ heroku config:get ENV_VAR_NAME --app "app_name" # 追加 (一応addも使えます) $ heroku config:set ENV_VAR_NAME="value" --app "app_name" # 削除 (一応removeも使えます) $ heroku config:unset ENV_VAR_NAME --app "app_name"Node.js
なお、.envは、.gitignoreに指定しておくこと。(GitHubで公開されている.gitignoreなら、既に含まれているはず。).env# これはコメント行 KEY1=VALUE1 KEY2=VALUE2 KEY3=VALUE3app.jsとかrequire('dotenv').config(); if (typeof process.env.KEY1 == 'undefined') { console.error('Error: "KEY1" is not set.'); console.error('Please consider adding a .env file with KEY1.'); process.exit(1); } console.log(process.env.KEY1); //=> VALUE1参考: GitHub - 環境変数の代わりに .env ファイルを使用する (dotenv)
npm uninstall
入れてみたのものの、要らないモジュールだったときに。
npm uninstall @@@@@@@参考:Qiita - npmのuninstallコマンドを忘れがちなのでメモ
ルーティング
Express でのルーティング - Express.js
app.useとapp.getは混同しがちだが、挙動が全然違うので注意。
- app.use: app.jsで基本使う感じ。他のjsで処理を任せるときに使う。
- app.get: 渡されたurlをベースとして、相対パス記載する感じ。ページへの遷移を記載するイメージ。
app.js// 基本的な書き方 const routerUsers = require('./routes/users'); //ここで指定したのと同じ名前のjsファイルを作成する app.use('/users', routerUsers); // 以下はおまけ // 正規表現が利用可能 app.get(/.*fly$/, function (req, res) { res.send('/.*fly$/') }) // URL内の指定された値を取得するってのもできる // リクエストURL: http://localhost:3000/users/34/books/8989 // req.params: { "userId": "34", "bookId": "8989" } app.get('/users/:userId/books/:bookId', function (req, res) { res.send(req.params) })routes/users.js// app.jsで基本的な書き方をした場合 var express = require('express'); var router = express.Router(); router.get('/', function(req, res, next) { res.render('user', { title: 'Express' }); // 一つ目の引数で指定した名前のpugファイルをviewsフォルダに用意 }); module.exports = router;views/user.pugextends layout block content h1= title p Welcome to #{title}pugファイルの書き方
ここに書くにはちょっとボリューミーなので、参考文献を載せとくだけにする。
始まりの終わり
あとは好きにしてくれー
以上。


- 投稿日:2020-07-02T09:44:51+09:00
[Node.js] Expressサーバーのタイムアウト時間を変更する
デフォルト Expressでは、リクエストのタイムアウトデフォルト値が2分に設定されています。 タイムアウト時間を設定 以下のように、オプションとしてtimeoutが用意されています。そちらの値を…
- 投稿日:2020-07-02T06:24:40+09:00
爆速! AWS EC2(Amazon Linux)環境でHTTPS環境を建てる方法 (Caddy)
EC2でHTTPS化するの面倒
HTTPSは人権!
でもEC2環境だと。ロードバランサーやCDNをつけてやるのはお金がかかる!
かといって、Let’s Encryptのコマンド叩きたくない! Nginxを触るのも面倒!
そういうことよくありませんか?そんなお悩みCaddyなら解決します!
Caddyを使えば、Let’s Encryptの証明書をとってきて、自動でリダイレクトまでやってくれる!
HTTP/2対応! Golangで書かれててなんかすごい気がする!
さああなたも試しましょう!環境
マシン: EC2 t2.micro インスタンス
OS: Amazon Linux (Amazon Linux 2 AMI (HVM), SSD Volume Type - ami-0a1c2ec61571737db)
How to
ドメインの購入と、EC2のIP固定と、ドメインのAレコードをEC2のIPに向けるのは省略!
あともちろんセキュリティグループの設定で、ポート80と443はパブリックアクセスするのを忘れずに!できた人は、SSHでEC2に入ります。
その後以下のコマンドを実行!
$ sudo amazon-linux-extras install epel

$ sudo yum install caddy

$ cd /etc/caddy/conf.d

$ sudo vim xxx.conf
以下の通りに編集!
example.jp {
  # 公開するディレクトリのパスを書くだけ
  root /var/www/public
}
$ sudo service caddy start $ sudo service caddy statusなんとこれだけで対応したドメインでHTTPS化をして、HTTPからのリダイレクトもやってくれる...
つよい...リバースプロキシしたい!
Node.jsとかで書いたAPIをHTTPSで出したいけど、リバースプロキシは面倒!
そんなお悩みもCaddyで解決!
さきほどのxxx.confを以下の通りにするだけ!example.jp { # proxy パス プロキシするアドレスとポート proxy / localhost:8080 # socket.ioを使用する場合は、websocketを追記するだけ! proxy /socket.io localhost:8080 { websocket } }※conf書き換えたら、ちゃんとリスタートしよう
$ sudo service caddy restartNginxなら数行書かないと対応しないWebSocketも一行で対応!
これは便利!インスタンスが再起動しても動かしたい
このままだとインスタンスの再起動を行うと自動的に上がってこないので、その方法も紹介
$ sudo systemctl enable caddy

ちゃんと確認も...
$ systemctl is-enabled caddy
まとめ
これなら、AWSの無料枠のEC2でも気軽にHTTPS化!
タノシイ!※ プロダクション環境では、もう少しちゃんとした方がいいです
※ Caddyのドキュメントわかりずらいと思うの自分だけ?
※ Amazon Linuxの例がなかったので書いてみた