- 投稿日:2020-05-22T23:43:25+09:00
S3+Cloudfront+Route53でSPAを公開したときにハマったこと
tl;dr
- やはりまだACMの証明書はバージニア北部にリージョン設定しておかないとCloudFrontに設定できない
- S3のバケット名はドメイン名完全一致じゃないとだめ
- S3の
Static website hostingを設定したときに出てくるエンドポイントをCloudFrontのOrigin Domain Nameに設定しないとStatic website hostingの設定を素通りする、何も効かないやってたこと
- S3 + CloudFront + Route53 で静的ホスティングサイトを作成する
- アップするものはReact(create-react-app)で作成したSPAのbuildファイル
- CIで自動的に〜とかちょっとすっ飛ばしたかったので手動でS3のバケットに挙げる
ハマったこと
やはりまだACMの証明書はバージニア北部にリージョン設定しておかないとCloudFrontに設定できない
お名前.comでドメイン取得したので、互いにサイトを行ったり来たりで取得した。
最初は四苦八苦あって証明書は取れたもののCloudFrontで設定ができない。いろいろ調べてみると
米国東部 (バージニア北部)us-east-1にリージョンを設定して証明書を取得しないといけないそう。ここでメインドメイン(example.com)の証明書を取得できていないことにも気づいたので、ワイルドカードを使ったドメイン(*.example.com)と一緒にドメインを追加して証明書を取得。あとはCloudFrontとRoute53の設定をして完了。
S3のバケット名はドメイン名完全一致じゃないとだめ
まあこれは色んなサイトにも書いてあるし公式も説明してる感じなので調べてみてください
まあそんなこんなでルートにアクセスしたらビルド内容の表示ができました。
S3の
Static website hostingを設定したときに出てくるエンドポイントをCloudFrontのOrigin Domain Nameに設定しないとStatic website hostingの設定を素通りする、何も効かないこいつが一番わからなかった。
前提として、SPAなので用意したバケット直下のindex.htmlを全てのアクセスに関してレスポンスしたい。
その設定がS3のStatic website hostingでできるそう。
でもいくら設定してもできなかった。なんでかなと思ってCloudFrontとかいろいろ確認してみてやっと理解。
CloudFrontの
Origin Domain Nameに設定していたものが、example.com.s3.amazonaws.comだった。S3のStatic website hosting設定画面に表示されているエンドポイントはexample.com.s3-hoge-ap-northeast-1.amazonaws.comのようにリージョン名がついているものだった。S3のエンドポイントをCloudFront側に設定して完了。
これで一旦Static website hostingの設定は反映されるように。最後に
ただここからまだredirect設定(ドメインのあとのパスは残しつつレスポンスはバケット直下のindex.htmlみたいなやつ)をしないといけなくて、そこがちょっとうまく行かず。一旦ここまでをメモとして残しておく。
- 投稿日:2020-05-22T22:55:11+09:00
TypeScriptでinput要素の型を拡張する
最近、やっと実務でTypeScriptを使う機会がありました。戸惑ったところでしたので記事にしておきます。
環境
$ npx create-react-app react-ts-app --typescript普通のやーつ
エラー
input[type="text"]に
autofocusをつけたら下記のように怒られました。Property 'autofocus' does not exist on type 'DetailedHTMLProps<InputHTMLAttributes<HTMLInputElement>, HTMLInputElement>'. TS2322無くても問題はありませんが、ユーザビリティを考えると諦めきれなかったので拡張します。
1. 拡張を記述するファイルを追加
ディレクトリ
├── node_modules
├── package-lock.json
├── package.json
├── public
├── src
├── tsconfig.json
src配下にファイルを追加します。フォルダ名もファイル名も多分なんでもいいです?
├── node_modules
├── package-lock.json
├── package.json
├── public
├── src
    ├── type
        ├── react.ts
├── tsconfig.json
2. react.tsに拡張を記述
react.tsimport 'react'; declare module 'react' { interface InputHTMLAttributes<T> extends HTMLAttributes<T> { autocomplete?: boolean; autofocus?: boolean; // こいつらも一緒に追加 tabindex?: boolean; } }TypeScriptの型はデフォルトで
./node_modules/@types/react/index.d.tsに記述してあります。
interface InputHTMLAttributes<T> extends HTMLAttributes<T>の部分はこちらのファイルを参照しました。./node_modules/@types/react/index.d.ts├── node_modules ├── @types ├──react ├──index.d.ts ├── package-lock.json ├── package.json ├── public ├── src ├── tsconfig.jsonあとは普通のinterface、型宣言です。当たり前ですが、
autocomplete等にもHTMLで有効な型が決まってるのでそれに合わせてください。
参考 : MDN 入力欄 (フォーム入力) 要素declare
アンビエント宣言というらしいです。恥ずかしながら初めて知りました。
参考 : TypeScriptの翻訳機が知らないような機能を使う時は、アンビエント宣言をしておく3. tsconfig.jsonにreact.tsを読むように追記
tsconfig.json{ "compilerOptions": { "typeRoots": ["./node_modules/@types", "./src/type"] }, "include": ["src"] }いらない部分は端折ってます。
"./node_modules/@types"を書かないとnodo_modules配下の型設定を読み込まないので書いてください。そのあとに先ほど作成したreact.tsのディレクトリ"./src/type"を書きます。4. npm start
$ npm startサーバーを立てるとエラーが消え、
autofocusもコンパイルできました。npm startをしたまま操作していた方は、一度落として再実行してください。注意点
- create-react-appはコンパイルする対象が
"./src"配下になっているので、プロジェクトのルートに新規ディレクトリを作成して型拡張を記述しても動きません。- 途中でも書きましたが、拡張したい型は
./node_modules/@types/react/index.d.tsから探してきてください。参考
- 投稿日:2020-05-22T22:55:11+09:00
tinput要素の型を拡張して使える属性を増やす
最近、やっと実務でTypeScriptを使う機会がありました。フォーム周りを作成している際、inputに
autofocusなどの属性を追加したところコンパイルエラーが出てしまいました。戸惑ったところでしたので記事にしておきます。環境
$ npx create-react-app react-ts-app --typescript普通のやーつ
エラー
input[type="text"]に
autofocusをつけたら下記のように怒られました。Property 'autofocus' does not exist on type 'DetailedHTMLProps<InputHTMLAttributes<HTMLInputElement>, HTMLInputElement>'. TS2322無くても問題はありませんが、ユーザビリティを考えると諦めきれなかったので拡張します。
1. 拡張を記述するファイルを追加
ディレクトリ
├── node_modules
├── package-lock.json
├── package.json
├── public
├── src
├── tsconfig.json
src配下にファイルを追加します。フォルダ名もファイル名も多分なんでもいいです?
├── node_modules
├── package-lock.json
├── package.json
├── public
├── src
    ├── type
        ├── react.ts
├── tsconfig.json
2. react.tsに拡張を記述
react.tsimport 'react'; declare module 'react' { interface InputHTMLAttributes<T> extends HTMLAttributes<T> { autocomplete?: boolean; tabindex?: boolean;// こうゆうのも一緒に追加 } }TypeScriptの型はデフォルトで
./node_modules/@types/react/index.d.tsに記述してあります。
interface InputHTMLAttributes<T> extends HTMLAttributes<T>の部分はこちらのファイルを参照しました。./node_modules/@types/react/index.d.ts├── node_modules ├── @types ├──react ├──index.d.ts ├── package-lock.json ├── package.json ├── public ├── src ├── tsconfig.jsonあとは普通のinterface、型宣言です。当たり前ですが、
autocomplete等にもHTMLで有効な型が決まってるのでそれに合わせてください。
参考 : MDN 入力欄 (フォーム入力) 要素declare
アンビエント宣言というらしいです。恥ずかしながら初めて知りました。
参考 : TypeScriptの翻訳機が知らないような機能を使う時は、アンビエント宣言をしておく3. tsconfig.jsonにreact.tsを読むように追記
tsconfig.json{ "compilerOptions": { "typeRoots": ["./node_modules/@types", "./src/type"] }, "include": ["src"] }いらない部分は端折ってます。
"./node_modules/@types"を書かないとnodo_modules配下の型設定を読み込まないので書いてください。そのあとに先ほど作成したreact.tsのディレクトリ"./src/type"を書きます。4. npm start
$ npm startサーバーを立てるとエラーが消え、
autofocusもコンパイルできました。npm startをしたまま操作していた方は、一度落として再実行してください。注意点
- create-react-appはコンパイルする対象が
"./src"配下になっているので、プロジェクトのルートに新規ディレクトリを作成して型拡張を記述しても動きません。- 途中でも書きましたが、拡張したい型は
./node_modules/@types/react/index.d.tsから探してきてください。参考
- 投稿日:2020-05-22T22:55:11+09:00
input要素の型を拡張して使える属性を増やす
最近、やっと実務でTypeScriptを使う機会がありました。フォーム周りを作成している際、inputに
autofocusなどの属性を追加したところコンパイルエラーが出てしまいました。戸惑ったところでしたので記事にしておきます。環境
$ npx create-react-app react-ts-app --typescript普通のやーつ
エラー
input[type="text"]に
autofocusをつけたら下記のように怒られました。Property 'autofocus' does not exist on type 'DetailedHTMLProps<InputHTMLAttributes<HTMLInputElement>, HTMLInputElement>'. TS2322無くても問題はありませんが、ユーザビリティを考えると諦めきれなかったので拡張します。
1. 拡張を記述するファイルを追加
ディレクトリ
├── node_modules
├── package-lock.json
├── package.json
├── public
├── src
├── tsconfig.json
src配下にファイルを追加します。フォルダ名もファイル名も多分なんでもいいです?
├── node_modules
├── package-lock.json
├── package.json
├── public
├── src
    ├── type
        ├── react.ts
├── tsconfig.json
2. react.tsに拡張を記述
react.tsimport 'react'; declare module 'react' { interface InputHTMLAttributes<T> extends HTMLAttributes<T> { autofocus?: boolean; autocomplete?: boolean;// こうゆうのも一緒に追加 } }TypeScriptの型はデフォルトで
./node_modules/@types/react/index.d.tsに記述してあります。
interface InputHTMLAttributes<T> extends HTMLAttributes<T>の部分はこちらのファイルを参照しました。./node_modules/@types/react/index.d.ts├── node_modules ├── @types ├──react ├──index.d.ts ├── package-lock.json ├── package.json ├── public ├── src ├── tsconfig.jsonあとは普通のinterface、型宣言です。当たり前ですが、
autofocus等にもHTMLで有効な型が決まってるのでそれに合わせてください。
参考 : MDN 入力欄 (フォーム入力) 要素declare
アンビエント宣言というらしいです。恥ずかしながら初めて知りました。
参考 : TypeScriptの翻訳機が知らないような機能を使う時は、アンビエント宣言をしておく3. tsconfig.jsonにreact.tsを読むように追記
tsconfig.json{ "compilerOptions": { "typeRoots": ["./node_modules/@types", "./src/type"] }, "include": ["src"] }いらない部分は端折ってます。
"./node_modules/@types"はデフォルトの設定です。そのあとに先ほど作成したreact.tsのディレクトリ"./src/type"を書きます。4. npm start
$ npm startサーバーを立てるとエラーが消え、
autofocusもコンパイルできました。npm startをしたまま操作していた方は、一度落として再実行してください。注意点
- create-react-appはコンパイルする対象が
"./src"配下になっているので、プロジェクトのルートに新規ディレクトリを作成して型拡張を記述しても動きません。- 途中でも書きましたが、拡張したい型は
./node_modules/@types/react/index.d.tsから探してきてください。参考
- 投稿日:2020-05-22T22:55:11+09:00
<TypeScript> input要素の型を拡張し、使える属性を増やす
最近、やっと実務でTypeScriptを使う機会がありました。フォーム周りを作成している際、inputに
autofocusなどの属性を追加したところコンパイルエラーが出てしまいました。戸惑ったところでしたので記事にしておきます。環境
$ npx create-react-app react-ts-app --typescript普通のやーつ
エラー
input[type="text"]に
autofocusをつけたら下記のように怒られました。Property 'autofocus' does not exist on type 'DetailedHTMLProps<InputHTMLAttributes<HTMLInputElement>, HTMLInputElement>'. TS2322無くても問題はありませんが、ユーザビリティを考えると諦めきれなかったので拡張します。
1. 拡張を記述するファイルを追加
ディレクトリ
├── node_modules
├── package-lock.json
├── package.json
├── public
├── src
├── tsconfig.json
src配下にファイルを追加します。フォルダ名もファイル名も多分なんでもいいです?
├── node_modules
├── package-lock.json
├── package.json
├── public
├── src
    ├── type
        ├── react.ts
├── tsconfig.json
2. react.tsに拡張を記述
react.tsimport 'react'; declare module 'react' { interface InputHTMLAttributes<T> extends HTMLAttributes<T> { autofocus?: boolean; autocomplete?: boolean;// こうゆうのも一緒に追加 } }TypeScriptの型はデフォルトで
./node_modules/@types/react/index.d.tsに記述してあります。
interface InputHTMLAttributes<T> extends HTMLAttributes<T>の部分はこちらのファイルを参照しました。./node_modules/@types/react/index.d.ts├── node_modules ├── @types ├──react ├──index.d.ts ├── package-lock.json ├── package.json ├── public ├── src ├── tsconfig.jsonあとは普通のinterface、型宣言です。当たり前ですが、
autofocus等にもHTMLで有効な型が決まってるのでそれに合わせてください。
参考 : MDN 入力欄 (フォーム入力) 要素declare
アンビエント宣言というらしいです。恥ずかしながら初めて知りました。
参考 : TypeScriptの翻訳機が知らないような機能を使う時は、アンビエント宣言をしておく3. tsconfig.jsonにreact.tsを読むように追記
tsconfig.json{ "compilerOptions": { "typeRoots": ["./node_modules/@types", "./src/type"] }, "include": ["src"] }いらない部分は端折ってます。
"./node_modules/@types"はデフォルトの設定です。そのあとに先ほど作成したreact.tsのディレクトリ"./src/type"を書きます。4. npm start
$ npm startサーバーを立てるとエラーが消え、
autofocusもコンパイルできました。npm startをしたまま操作していた方は、一度落として再実行してください。注意点
- create-react-appはコンパイルする対象が
"./src"配下になっているので、プロジェクトのルートに新規ディレクトリを作成して型拡張を記述しても動きません。- 途中でも書きましたが、拡張したい型は
./node_modules/@types/react/index.d.tsから探してきてください。参考
- 投稿日:2020-05-22T15:01:13+09:00
ShopifyアプリをTypescriptで開発する方法
はじめに
Shopifyアプリとは、Shopifyストアに機能を追加するWebアプリケーションです。
下記URLのチュートリアルでは、Node.js、React、GraphQLを使用して埋め込みShopifyアプリを構築するプロセスについて説明されておりますが、Typescriptで開発したいと思い、実装する方法を調べて実現できたのでご紹介したいと思います。https://shopify.dev/tutorials/build-a-shopify-app-with-node-and-react
開発環境
下記環境で確認しています。
- Mac
- VSCode
- node.js
- Shopify App CLI
プロジェクト作成
Shopify App CLIでベースのnodeのプロジェクトを作成します。
- PublicかCustomを選択します。
% shopify create node --name=starter-embedded-app
? What type of app are you building? (Choose with ↑ ↓ ⏎, filter with 'f')
> 1. Public: An app built for a wide merchant audience.
  2. Custom: An app custom built for a single client.
- 次にどの開発ストア向けで作成するか選択します。
% shopify create node --name=starter-embedded-app
? What type of app are you building? (You chose: Public: An app built for a wide merchant audience.)
Organization [Shopify Partnerアカウントのビジネス名]
? Select a Development Store (Choose with ↑ ↓ ⏎, filter with 'f')
  1. xn-xxxxx1.myshopify.com
> 2. xn-xxxxx2.myshopify.com
- プロジェクトが生成されます。
% shopify create node --name=starter-embedded-app
? What type of app are you building? (You chose: Public: An app built for a wide merchant audience.)
Organization [Shopify Partnerアカウントのビジネス名]
? Select a Development Store (You chose: xn-xxxxx2.myshopify.com)
✓ node v14.3.0
✓ npm 6.14.4
┏━━ Cloning into starter-embedded-app... ━━━━━━━━━━━━━━━━━━━━━━━━━━━━━━━━━━━━━━━━━━━━━━━━━━━━━━━━━━━━━━━━━━━━━━━━━━━━━━━━━━━━━━━━━━━━━━━━━━━━━━━━━━━━━━━━━━━━━━━━━━━━━━━━━━━━━━━━━━━━━━━━━━━━━━━━━━━━━━━━━━━
┃ Cloning into 'starter-embedded-app'...
┃ remote: Enumerating objects: 3, done.
remote: Counting objects: 100% (3/3), done.
remote: Compressing objects: 100% (3/3), done.
remote: Total 1071 (delta 0), reused 0 (delta 0), pack-reused 1068
Receiving objects: 100% (1071/1071), 1.83 MiB | 1.97 MiB/s, done.
Resolving deltas: 100% (720/720), done.
┃                                                                                                                                                                                                       100%
┗━━━━━━━━━━━━━━━━━━━━━━━━━━━━━━━━━━━━━━━━━━━━━━━━━━━━━━━━━━━━━━━━━━━━━━━━━━━━━━━━━━━━━━━━━━━━━━━━━━━━━━━━━━━━━━━━━━━━━━━━━━━━━━━━━━━━━━━━━━━━━━━━━━━━━━━━━━━━━━━━━━━━━━━━━━━━━━━━━━━━━━━━━━━━━━━━ (3.11s) ━━
✓ Cloned into starter-embedded-app
┏━━ Installing dependencies with npm... ━━━━━━━━━━━━━━━━━━━━━━━━━━━━━━━━━━━━━━━━━━━━━━━━━━━━━━━━━━━━━━━━━━━━━━━━━━━━━━━━━━━━━━━━━━━━━━━━━━━━━━━━━━━━━━━━━━━━━━━━━━━━━━━━━━━━━━━━━━━━━━━━━━━━━━━━━━━━━━━━━━━━
┃ ✓ 37 npm dependencies installed
┗━━━━━━━━━━━━━━━━━━━━━━━━━━━━━━━━━━━━━━━━━━━━━━━━━━━━━━━━━━━━━━━━━━━━━━━━━━━━━━━━━━━━━━━━━━━━━━━━━━━━━━━━━━━━━━━━━━━━━━━━━━━━━━━━━━━━━━━━━━━━━━━━━━━━━━━━━━━━━━━━━━━━━━━━━━━━━━━━━━━━━━━━━━━━━━━ (53.38s) ━━
✓ Dependencies installed
✓ .env saved to project root
✓ starter-embedded-app was created in your Partner Dashboard https://partners.shopify.com/xxxxx/apps/xxxxx
⭑ Run shopify serve to start a local server
⭑ Then, visit https://partners.shopify.com/xxxxx/apps/xxxxx/test to install starter-embedded-app on your Dev Store
- アプリを起動し、アプリをストアにインストールして動作を確認します。
Typescript開発セットアップ
Typescript開発で必要なパッケージをインストールします。
※ 先にncuで既存パッケージの最新化もします。
※ typescriptに関しては、最新の3.9.3ではエラーがでてたのでバージョンを3.8.3に指定してインストールしています。% ncu -u % npm install % npm install --save-dev typescript@3.8.3 ts-node @types/node @types/react @types/react-dom @types/koa @types/koa-session @types/koa-router @types/js-cookietsconfig.json, tsconfig.server.json, next-env.d.ts, nodemon.json ファイルを作成します。
tsconfig.json{ "compilerOptions": { "target": "esnext", "module": "esnext", "jsx": "preserve", "lib": ["dom", "es2017"], "baseUrl": ".", "moduleResolution": "node", "strict": true, "allowJs": true, "noEmit": true, "allowSyntheticDefaultImports": true, "esModuleInterop": true, "skipLibCheck": true, "noUnusedLocals": true, "noUnusedParameters": true, "isolatedModules": true, "removeComments": false, "preserveConstEnums": true, "sourceMap": true, "forceConsistentCasingInFileNames": true, "resolveJsonModule": true }, "exclude": ["dist", ".next", "out", "next.config.js"], "include": ["next-env.d.ts", "**/*.ts", "**/*.tsx"] }tsconfig.server.json{ "extends": "./tsconfig.json", "compilerOptions": { "module": "commonjs", "outDir": "dist", "target": "es2017", "isolatedModules": false, "noEmit": false }, "include": ["server/**/*.ts"] }nodemon.json{ "watch": ["server"], "exec": "ts-node --project tsconfig.server.json server/server.ts", "ext": "js ts" }next-env.d.ts/// <reference types="next" /> /// <reference types="next/types/global" />package.jsonを下記の通り編集します。
package.json〜省略〜 "scripts": { "test": "jest", "dev": "NODE_ENV=development nodemon", "build": "next build && tsc --project tsconfig.server.json && cp server/index.js dist/", "start": "NODE_ENV=production node dist/index.js" }, 〜省略〜JSファイルをTS/TSXファイルに変更する
JSファイルをTS/TSXファイルに変更して、エラー箇所を修正していきます。
- pages/index.js は pages/index.tsx にリネームのみ
- pages/_app.js は pages/_app.tsx にリネームし、下記の通り編集します。
pages/_app.tsx〜省略〜 import translations from "@shopify/polaris/locales/en.json"; declare var API_KEY: string; // 追加 const client = new ApolloClient({ 〜省略〜 const { Component, pageProps } = this.props; const shopOrigin = Cookies.get("shopOrigin") ?? "error"; // 変更 return ( 〜省略〜
- server/server.js は server/server.ts にリネームし、下記の通り編集します。
server/server.ts〜省略〜 import session from "koa-session"; // import * as handlers from "./handlers/index"; コメントアウト dotenv.config(); const port = parseInt(process.env.PORT || '8081', 10); // 変更 const dev = process.env.NODE_ENV !== "production"; 〜省略〜 const handle = app.getRequestHandler(); const SHOPIFY_API_SECRET = process.env.SHOPIFY_API_SECRET ?? "error"; // 変更 const SHOPIFY_API_KEY = process.env.SHOPIFY_API_KEY ?? "error"; // 変更 const SCOPES = process.env.SCOPES ?? "error"; // 変更 app.prepare().then(() => { 〜省略〜 async afterAuth(ctx) { //Auth token and shop available in session //Redirect to shop upon auth const shop = ctx.session?.shop; // 変更 ctx.cookies.set("shopOrigin", shop, { httpOnly: false, secure: true, sameSite: "none" }); ctx.redirect("/"); } 〜省略〜上記の必要最低限の修正のみで初期プロジェクトは動作するようになると思います。
エラーを回避する修正しかしていないので、適宜修正してください。まとめ
ここまで変更を加えたときのフォルダ構成は下記の通りになります。
starter-embedded-app
├── .dependabot
│   └── config.yml
├── .editorconfig
├── .env
├── .env.example
├── .eslintignore
├── .eslintrc.js
├── .gitignore
├── .npmrc
├── .prettierignore
├── .shopify-cli.yml
├── .stylelintignore
├── .stylelintrc.js
├── .travis.yml
├── LICENSE.md
├── README.md
├── next-env.d.ts
├── next.config.js
├── nodemon.json
├── package-lock.json
├── package.json
├── pages
│   ├── _app.tsx
│   └── index.tsx
├── server
│   ├── handlers
│   │   ├── client.js
│   │   ├── index.js
│   │   ├── mutations
│   │   │   ├── get-one-time-url.js
│   │   │   └── get-subscription-url.js
│   │   └── register-webhooks.js
│   ├── index.js
│   └── server.ts
├── tsconfig.json
└── tsconfig.server.json
あとは、チュートリアルに沿って機能を追加していけば、Typescriptでも開発できることが確認できると思います。
本記事のリポジトリは下記においてますので何かの参考になれば幸いです。
https://github.com/winuim/starter-embedded-app参考サイト
Shopify App CLI でアプリを開発する
TypeScript Next.js example
Custom server with TypeScript + Nodemon example
- 投稿日:2020-05-22T11:27:26+09:00
React Nativeでredux-persistを簡単に導入
React Nativeでアプリを開発するときに、デバイスのストレージにデータを保存したいときに、Storeの永続化に使えるredux-persistが便利です。
しかし、さほど複雑なデータを扱わなくとも、Reduxの導入が必須になります。
個人的には、Reduxを導入するには複雑なファイル群がどうしてもハードル高く思ってしまいました。
世界一シンプルなReactNative + Reduxチュートリアル①
この記事を参考して、とってもシンプルにReduxを導入できました。
とっても助かりました。上記踏まえて、
・ インターフェイス上1Tapで複数のStateを変更するイベント処理をView側の関数に入れて、一旦中継してからStoreへ渡すようにする
・ redux-persistの導入を加えることを加味したコードの一部をご紹介します。
事前準備
必要なライブラリをインストール
npm install --save redux react-redux redux-persist react-native-asyncstorageコード部分
redux部分
actions.js, reducers.js, store.jsを一つのファイルにまとめます
redux-persistを導入し、AsyncStorageに保存します。redux.js// redux.js import { combineReducers, createStore } from 'redux'; import { persistReducer, persistStore } from 'redux-persist'; import { AsyncStorage } from 'react-native'; // actions.js export const addItem = (inputText1, inputText2) => ({ type: 'ADD_ITEM', inputText1: inputText1, inputText2: inputText2 }); export const deleteItem = (targetIndex) => ({ type: 'DELETE_ITEM', targetIndex: targetIndex }); const INITIAL_STATE = { listData: [], currentIndex: 0, } // reducers.js const reducer = (state = INITIAL_STATE, action) => { switch (action.type) { case 'ADD_ITEM': const newList = { inputText1: action.inputText1, inputText2: action.inputText2, key: state.currentIndex + 1 } return { ...state, listData: [...state.listData, newList], currentIndex: state.currentIndex + 1 } case 'DELETE_ITEM': const targetIndex = action.targetIndex + 1; console.log(targetIndex) const newlistData = state.listData.filter(function(v){ return v.key != targetIndex; }); console.log(newlistData) return { ...state, listData: newlistData, } default: return state; } } export const reducers = combineReducers({ listData: reducer }) // store.js const persistConfig = { key: 'MAIN', storage: AsyncStorage, } const persistedReducer = persistReducer(persistConfig, reducers) const store = createStore(persistedReducer) export const persistor = persistStore(store) export default store console.log(store)スクリーンの部分
一部のStoreには渡さないstateのイベントはここの中で完結します。
Screen.jsimport React from 'react'; import { Text, View, ScrollView, FlatList } from 'react-native'; import { Input, Button, ListItem } from 'react-native-elements'; import { connect } from 'react-redux'; import { addItem, deleteItem } from './redux'; import { store } from './redux'; class MainScreen extends React.Component { constructor(props) { super(props); this.state = { inputText1: "", imageText2: "", targetIndex: "" }; } addData = () => { this.props.addItem(this.state.inputText1, this.state.inputText2) this.setState({inputText: "", imageUrl: ""}); } deleteData = (item) => { const targetIndex = item.key - 1; this.props.deleteItem(targetIndex) } render() { let listContents = this.props.listData; return ( <React.Fragment> <ScrollView> <FlatList data={listContents} extraData={this.state} renderItem={({item}) => <ListItem key={"listItem_" + item.key} title={item.inputText1 + item.inputText2} onPress={() => this.deleteData(item)} /> } keyExtractor={(item, index) => "todo_" + item.index} /> </ScrollView> <View> <Input onChangeText={(text) => this.setState({inputText1: text})} value={this.state.inputText1} keyboardType="default" returnKeyType="done" /> <Input onChangeText={(text) => this.setState({inputText2: text})} value={this.state.inputText2} keyboardType="default" returnKeyType="done" /> <Button title="Add" onPress={this.addData} /> </View> </React.Fragment>); } } const mapStateToProps = state => ({ listData: state.listData.listData }) const mapDispatchToProps = { addItem, deleteItem } export default connect(mapStateToProps, mapDispatchToProps)(Screen)書き出す部分
必要なものをインポートし、PersistGateを加えます。
App.jsimport React from 'react'; import { Provider } from "react-redux"; import store, { persistor } from "./redux"; import { PersistGate } from 'redux-persist/integration/react' import MainScreen from './Screen'; export default class App extends React.Component { render () { return ( <Provider store={store}> <PersistGate loading={null} persistor={persistor}> <Screen /> </PersistGate> </Provider> ) } }
- 投稿日:2020-05-22T08:47:35+09:00
CSSをMATERIAL-UIのmakeStylesで書き換える
Reactの学習をしていて
CSS in JSなるものに出会ったので、
基本的な内容ながらまとめておきたいと思います。普通のCSS(CSSファイル形式で書いたCSS)をMATERIAL-UIのmakeStylesで書き換える、ちょっとした手がかりのつもりです。
知れること・知れないこと
知れること
- CSSファイルの形式で書かれたスタイルをMATERIAL-UIのmakeStylesで書き換える方法
知れないこと
- MATERIAL-UI以外の実装方法
CSS in JSの是非CSS in JS って?
字のごとく
JSの中でCSSを書くスタイルの一つの書き方(おそらく総称)。
フロントエンドフレームワークで出てくるコンポーネントの概念とともに検討され始めた書き方らしいです。
ざっくり言うと、「コンポーネント単位で実装するんだったら、CSSもコンポーネント単位で書いた方がよくない?(CSSをわざわざファイル分けするのは管理上適切ではないのでは?)」と言ったことらしい。参考
styled-componentsで変わるReactコンポーネントのスタイリング元々のCSSの記述
以下のような
タグのスタイルを今回対象にしてみます。
※こちらのCSSファイルの内容自体は以下のサイトのものほぼほぼそのままです。
CSSで実装するタグクラウドのサンプルtag.css.taggroup ul { margin: 0; padding: 0; list-style: none; } .taggroup ul li { display: inline-block; margin: 0 .3em .3em 0; padding: 0; } .taggroup ul li a { display: inline-block; max-width: 100px; height: 28px; line-height: 28px; padding: 0 1em; background-color: #fff; border: 1px solid #aaa; border-radius: 3px; white-space: nowrap; text-overflow: ellipsis; overflow: hidden; color: #333; font-size: 13px; text-decoration: none; transition: .2s; } .taggroup ul li a:hover { background-color: #555; color: #fff; }CSSファイルで書いた場合は、
以下のようにファイルを読み込んでclassNameにクラス名を付与して利用します。TagCss.jsimport React from 'react'; import Container from '@material-ui/core/Container'; import Grid from '@material-ui/core/Grid'; import Box from '@material-ui/core/Box'; import "./Tag.css"; const TagCss = () => { return ( <> <Container> <Grid container> <Grid item xs={12} sm={12} md={12} lg={12}> <Box textAlign="center" mt={5}> <Box mb={1}>CSS</Box> <div className="taggroupcss"> <ul> <li><a href="#">JavaScript</a></li> <li><a href="#">React</a></li> </ul> </div> </Box> </Grid> </Grid> </Container> </> ) } export default TagCss;
TagCssの表示例をもう一度
MATERIAL-UIのmakeStylesで書き換えた例
これをMATERIAL-UIのmakeStylesで書き換えると、一つのjsファイルにまとめて記載できるという寸法です。
Tag.jsimport React from 'react'; import Container from '@material-ui/core/Container'; import Grid from '@material-ui/core/Grid'; import Box from '@material-ui/core/Box'; import { makeStyles } from '@material-ui/core'; const Tag = () => { const classes = tagStyle(); return ( <> <Container> <Grid container> <Grid item xs={12} sm={12} md={12} lg={12}> <Box textAlign="center" mt={5}> <Box mb={1}>makeStyles(CSS in JS)</Box> <div className={classes.taggroup}> <ul> <li><a href="#">JavaScript</a></li> <li><a href="#">React</a></li> </ul> </div> </Box> </Grid> </Grid> </Container> </> ) } const tagStyle = makeStyles(() => ({ taggroup: { "& ul": { margin: "0", padding: "0", listStyle: "none", "& li": { display: "inline-block", margin: "0 .3em .3em 0", padding: "0", "& a": { display: "inline-block", maxWidth: "100px", height: "28px", lineHeight: "28px", padding: "0 1em", backgroundColor: "#fff", border: "1px solid #aaa", borderRadius: "3px", whitespace: "nowrap", textOverflow: "ellipsis", overflow: "hidden", color: "#333", fontSize: "13px", textDecoration: "none", transition: ".2s", "&:hover": { backgroundColor: "#555", color: "#fff" } } } } } })); export default Tag;
Tagの表示例
(書き換えただけなんだからTagCssと同じ表示のされ方をしないとおかしいですね)
書き換えのポイント
makeStyleの基本的な使い方は以下が参考になります。
React: Material-UI 4.0のコンポーネントへのCSS設定はwithStyles()からmakeStyles()に
公式一つ目のサイトから書式の説明を拝借すると以下のような感じです。
const フック関数 = makeStyles((theme) => ({
  クラス: {
    プロパティ: 文字列の設定値,
    // 他のプロパティの定め
  },
  // 他のクラス
}));
(今回前述した例は、引数の
themeなしバージョンです)ポイント : プロパティをキャメルケースに変更して書く
例えば
tag.css.taggroup ul { margin: 0; padding: 0; list-style: none; }の
list-styleは、tag.jsconst tagStyle = makeStyles(() => ({ taggroup: { "& ul": { margin: "0", padding: "0", listStyle: "none", ~~以下省略~~といった風に
listStyleに変更します。
参考 : material-uiの見た目を調整する3つの方法などなど。また、実は、以下のようにプロパティを文字列として扱っても表示は同じになります。
tag.jsconst tagStyle = makeStyles(() => ({ taggroup: { "& ul": { margin: "0", padding: "0", "list-style": "none", ~~以下省略~~最悪、元のCSSの中身を"だか'で囲みまくったら、書き換え可能ってことですね。(是非はともかく……)
〜〜〜
少し余談ですが、ベンダプレフィックスが必要なプロパティの場合は、試した限りは文字列として扱った書き換えしかできなさそうでした。(ベンダプレフィックス→-webkit-など).exp { -webkit-transition: .2s; }なんてのがあったら
const expStyle = makeStyles(() => ({
    exp: {
        "-webkit-transition": ".2s";
    }
}));
とします。
まあ、文字列で書き換える前に、本当に
ベンダプレフィックス(-webkit-)が必要なのかどうかは見ておいた方がいいでしょうね。
参考 : そのベンダープレフィックス、いつまでつけてるの?ポイント : 絞り込みは&を使う!
tag.css.taggroup ul li { display: inline-block; margin: 0 .3em .3em 0; padding: 0; }上記のように、taggroupクラスを使った要素の中のulの中のliと、
スタイルを指定する範囲を絞り込んでいく場合。(割と分からなかった)(答えはすでに書いてあるわけですが)入れ子構造にして文字列として&でつなげていけばOKです。
・上記書き換え分の抜粋tag.jsconst tagStyle = makeStyles(() => ({ taggroup: { "& ul": { ~~省略~~ "& li": { display: "inline-block", margin: "0 .3em .3em 0", padding: "0", ~~省略~~
a:hoverなんかも、このやり方で記述可能です。
・a:hoverの部分の抜粋tag.jsconst tagStyle = makeStyles(() => ({ taggroup: { ~~省略~~ "& a": { ~~省略~~ "&:hover": { backgroundColor: "#555", color: "#fff" } ~~省略~~ちなみに、
SCSSやSASSでスタイルを書いている人にとっては、&でつなげるというのは割と自然な考え方のようです。参考
[SCSS]便利な&(アンパサンド)の使い方メモ
【Sass】親セレクタを参照する&や+の使い方その他
アニメーションの書き方にも、多少コツが必要そうです。
何度も出している参考記事
React: Material-UI 4.0のコンポーネントへのCSS設定はwithStyles()からmakeStyles()に
(こちらの記事ではひな形のアプリケーションのCSSをmakeStyleに書き換えたものが載っていて、アニメーションについても言及されています)おわりに
「いや、別に無理して書き換えなくてもCSSのままでもいいんじゃない?」 と言う話は実際あるようですが、「CSSで書いていたものが、
CSS in JSだと全く検討もつかない!」というのは、ちょっと癪だったので、いろいろ調べてみました。
(書き換えることに集中したため詳しいCSS in JSの是非までは追求していないです)
CSS in JSのメリットの話(動的にスタイルを変更できるなど)といった発展的な話まではでできていませんが、最初に書いたように、この記事がmakeStyles(その他)を使うときのちょっとした手がかりになってもらえたら嬉しいです!!以上になります!
- 投稿日:2020-05-22T02:17:18+09:00
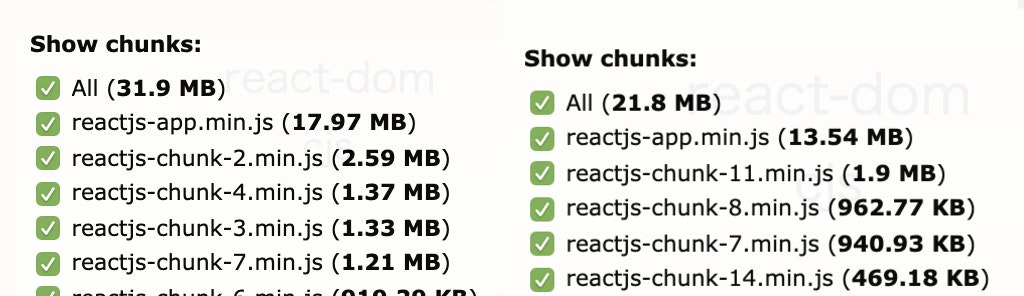
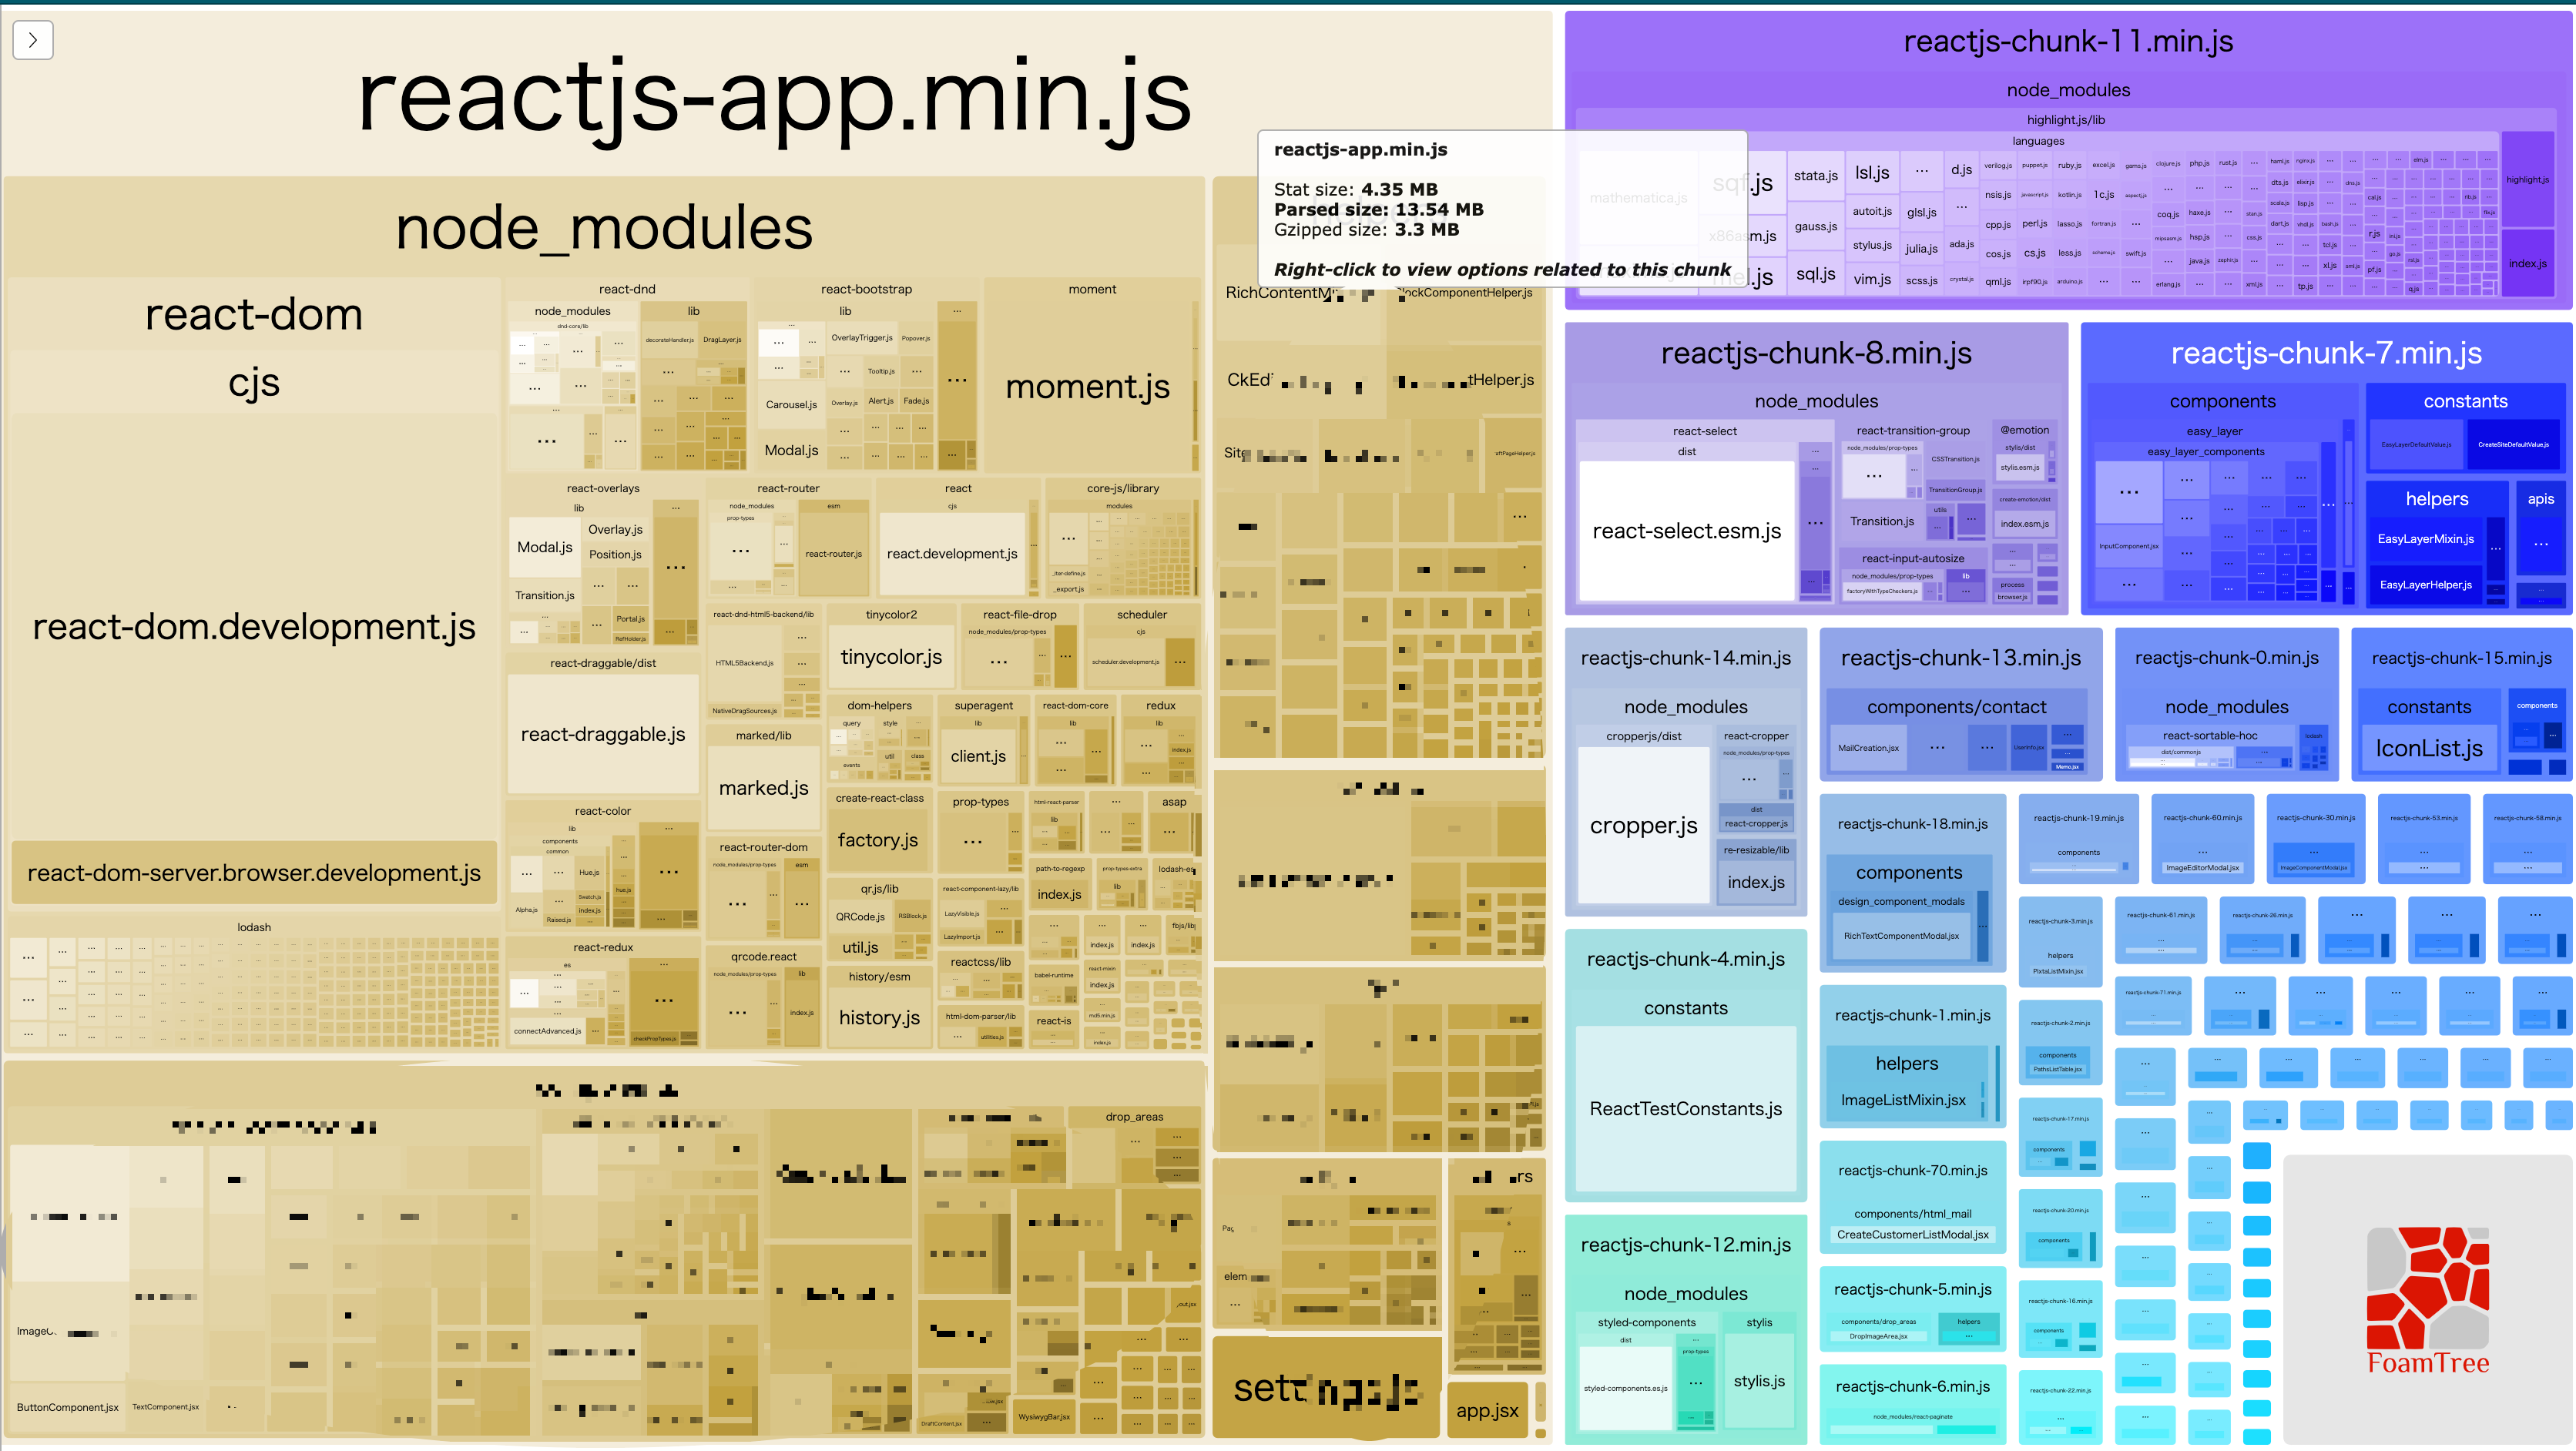
[Tips] Webpackでビルドしたバンドルファイルのサイズを減らす
webpack-bundle-analyzerでモジュールのサイズを可視化する
lodash.jsのサイズを減らす
import _ from 'lodash';
// _.clone(...)
全てのlodash関数などがbundleされてしまいます。
→使用する関数のみをimportするように変更します
import {keys, clone} from 'lodash';
バンドルファイルのサイズが変わらない

Why?

import {keys, clone} from 'lodash';

// ビルドした後

var lodash = require('lodash');
var keys = lodash.keys;
var clone = lodash.clone;
解決:default style imports
import keys from 'lodash/keys';
import clone from 'lodash/clone';
メリット:使用する関数のみがimportされる
デメリット:コードが長くなる→import {keys, clone}を使いたい
transform-importsプラグイン導入
{
  "plugins": [
    ["transform-imports", {
      "my-library\/?(((\\w*)?\/?)*)": {
        "transform": "my-library/${1}/${member}",
        "preventFullImport": true
      }
    }]
  ]
}
 ["transform-imports", {
  "react-bootstrap": {
    "transform": "react-bootstrap/lib/${member}",
    "preventFullImport": true
  },
  "lodash": {
    "transform": "lodash/${member}",
    "preventFullImport": true
  }
}]
→
import {keys, clone}を使えるようになる
moment.jsのサイズを減らす
  new webpack.ContextReplacementPlugin(
     /moment[/\\]locale$/,
     /ja/
  )
require('./locale/' + name + '.js')
Dynamic Import
import data from '../data'
// ...
if(condition) {
  run(data)
}
// ...
↓↓↓↓
使う時のみファイルをimportするif(condition) { import('../data').then(({ default: data}) => { run(data) }) }
chunkファイル自動作成
ClassComponent → Functional Component(React)
// Functional Component
const MyComponent = props => <div>{props.name}</div>;
// Class Component class MyComponent extends React.Component { render() { return <div>{this.props.name}</div>; } }
ES5にビルドした後
// Functional Component - 133byte
var MyComponent = function MyComponent(props) {
  return /*#__PURE__*/React.createElement("div", null, props.name);
};
// Class Component - 3.5kb function _instanceof(left, right) { if (right != null && typeof Symbol !== "undefined" && right[Symbol.hasInstance]) { return !!right[Symbol.hasInstance](left); } else { return left instanceof right; } } function _typeof(obj) { "@babel/helpers - typeof"; if (typeof Symbol === "function" && typeof Symbol.iterator === "symbol") { _typeof = function _typeof(obj) { return typeof obj; }; } else { _typeof = function _typeof(obj) { return obj && typeof Symbol === "function" && obj.constructor === Symbol && obj !== Symbol.prototype ? "symbol" : typeof obj; }; } return _typeof(obj); } function _classCallCheck(instance, Constructor) { if (!_instanceof(instance, Constructor)) { throw new TypeError("Cannot call a class as a function"); } } function _defineProperties(target, props) { for (var i = 0; i < props.length; i++) { var descriptor = props[i]; descriptor.enumerable = descriptor.enumerable || false; descriptor.configurable = true; if ("value" in descriptor) descriptor.writable = true; Object.defineProperty(target, descriptor.key, descriptor); } } function _createClass(Constructor, protoProps, staticProps) { if (protoProps) _defineProperties(Constructor.prototype, protoProps); if (staticProps) _defineProperties(Constructor, staticProps); return Constructor; } function _inherits(subClass, superClass) { if (typeof superClass !== "function" && superClass !== null) { throw new TypeError("Super expression must either be null or a function"); } subClass.prototype = Object.create(superClass && superClass.prototype, { constructor: { value: subClass, writable: true, configurable: true } }); if (superClass) _setPrototypeOf(subClass, superClass); } function _setPrototypeOf(o, p) { _setPrototypeOf = Object.setPrototypeOf || function _setPrototypeOf(o, p) { o.__proto__ = p; return o; }; return _setPrototypeOf(o, p); } function _createSuper(Derived) { var hasNativeReflectConstruct = _isNativeReflectConstruct(); return function () { var Super = _getPrototypeOf(Derived), result; if (hasNativeReflectConstruct) { var NewTarget = _getPrototypeOf(this).constructor; result = Reflect.construct(Super, arguments, NewTarget); } else { result = Super.apply(this, arguments); } return _possibleConstructorReturn(this, result); }; } function _possibleConstructorReturn(self, call) { if (call && (_typeof(call) === "object" || typeof call === "function")) { return call; } return _assertThisInitialized(self); } function _assertThisInitialized(self) { if (self === void 0) { throw new ReferenceError("this hasn't been initialised - super() hasn't been called"); } return self; } function _isNativeReflectConstruct() { if (typeof Reflect === "undefined" || !Reflect.construct) return false; if (Reflect.construct.sham) return false; if (typeof Proxy === "function") return true; try { Date.prototype.toString.call(Reflect.construct(Date, [], function () {})); return true; } catch (e) { return false; } } function _getPrototypeOf(o) { _getPrototypeOf = Object.setPrototypeOf ? Object.getPrototypeOf : function _getPrototypeOf(o) { return o.__proto__ || Object.getPrototypeOf(o); }; return _getPrototypeOf(o); } var MyComponent = /*#__PURE__*/function (_React$Component) { _inherits(MyComponent, _React$Component); var _super = _createSuper(MyComponent); function MyComponent() { _classCallCheck(this, MyComponent); return _super.apply(this, arguments); } _createClass(MyComponent, [{ key: "render", value: function render() { return /*#__PURE__*/React.createElement("div", null, this.props.name); } }]); return MyComponent; }(React.Component);
Functional Componentを使ったら 3.5kbから133byteになる
Webpack3 → Webpack4
ビルド時間: 10%アップ
ファイルのサイズ: あまり変わらない
結果
ご清聴ありがとうございました