- 投稿日:2020-05-17T22:36:15+09:00
Blender 2.8.2 で Tensorflow2.0(CPU) をインストールし、HelloWorld (Windows10)
やり方
Blender のデフォルトで Python が入っているので、それに対し
pip instlallするだけでいい。
自分の環境では、一種のエラーと一種の警告が出たので、参考としてメモを残す。最初に、TensorFlow を Blender の Python にインストールする。
Powershell を使う。# Blender の Python がある場所へ移動 cd 'C:\Program Files\Blender Foundation\Blender 2.82\2.82\python\bin\' # 念のため、pip をアップグレード .\python.exe -m pip install --user --upgrade pip # TensorFlow 2.0 の 2.2.0 をインストール (5分くらい?) .\python.exe -m pip install tensorflow==2.2.0 # python インタプリンタを起動し、TensorFlow が使えるか確認する .\python.exeTensorFlow が入っていることを確認。
.\python.exe -m pip list | Select-String tensor

tensorboard            2.2.1
tensorboard-plugin-wit 1.6.0.post3
tensorflow             2.2.0
tensorflow-estimator   2.2.0
Pythonインタプリンタで TensorFlow のインポート、おそらくエラーが出る。
import tensorflow as tfエラーが出るとき
以下のエラーが出ると思われる。
ImportError: Could not find the DLL(s) 'msvcp140_1.dll'. TensorFlow requires that these DLLs be installed in a directory that is named in your %PATH% environment variable. You may install these DLLs by downloading "Microsoft C++ Redistributable for Visual Studio 2015, 2017 and 2019" for your platform from this URL: https://support.microsoft.com/help/2977003/the-latest-supported-visual-c-downloadsこれは、https://support.microsoft.com/ja-jp/help/2977003/the-latest-supported-visual-c-downloads ここの x64 ダウンロードで解決(場合によりx86)。
参考: https://tialight.com/?p=881
警告が出る
以下のような、GPU が無いという内容
2020-05-17 21:49:28.438207: W tensorflow/stream_executor/platform/default/dso_loader.cc:55] Could not load dynamic library 'cudart64_101.dll'; dlerror: cudart64_101.dll not found
2020-05-17 21:49:28.443044: I tensorflow/stream_executor/cuda/cudart_stub.cc:29] Ignore above cudart dlerror if you do not have a GPU set up on your machine.
今回は CPU なので無視。
Blender の Python コンソールで Hello World
import tensorflow as tf
tf.print("Hello World!")
Window>Toggle System Consoleからコンソールを確認し、Hello World!が表示されていたら完了。今回は TensorFlow が Blender で動くか確かめたかったので CPU。
高速実行がしたくなったら GPU の導入についても検討していきたい。参考資料
- 投稿日:2020-05-17T22:36:15+09:00
Blender 2.8.2 で TensorFlow 2.0(CPU) をインストールし、HelloWorld (Windows10)
やり方
Blender のデフォルトで Python が入っているので、それに対し
pip instlallするだけでいい。
自分の環境では、一種のエラーと一種の警告が出たので、参考としてメモを残す。最初に、TensorFlow を Blender の Python にインストールする。
Powershell を使う。# Blender の Python がある場所へ移動 cd 'C:\Program Files\Blender Foundation\Blender 2.82\2.82\python\bin\' # 念のため、pip をアップグレード .\python.exe -m pip install --user --upgrade pip # TensorFlow 2.0 の 2.2.0 をインストール (5分くらい?) .\python.exe -m pip install tensorflow==2.2.0 # python インタプリンタを起動し、TensorFlow が使えるか確認する .\python.exeTensorFlow が入っていることを確認。
.\python.exe -m pip list | Select-String tensor

tensorboard            2.2.1
tensorboard-plugin-wit 1.6.0.post3
tensorflow             2.2.0
tensorflow-estimator   2.2.0
Pythonインタプリンタで TensorFlow のインポート、おそらくエラーが出る。
import tensorflow as tfエラーが出るとき
以下のエラーが出ると思われる。
ImportError: Could not find the DLL(s) 'msvcp140_1.dll'. TensorFlow requires that these DLLs be installed in a directory that is named in your %PATH% environment variable. You may install these DLLs by downloading "Microsoft C++ Redistributable for Visual Studio 2015, 2017 and 2019" for your platform from this URL: https://support.microsoft.com/help/2977003/the-latest-supported-visual-c-downloadsこれは、https://support.microsoft.com/ja-jp/help/2977003/the-latest-supported-visual-c-downloads ここの x64 ダウンロードで解決(場合によりx86)。
参考: https://tialight.com/?p=881
警告が出る
以下のような、GPU が無いという内容
2020-05-17 21:49:28.438207: W tensorflow/stream_executor/platform/default/dso_loader.cc:55] Could not load dynamic library 'cudart64_101.dll'; dlerror: cudart64_101.dll not found
2020-05-17 21:49:28.443044: I tensorflow/stream_executor/cuda/cudart_stub.cc:29] Ignore above cudart dlerror if you do not have a GPU set up on your machine.
今回は CPU なので無視。
Blender の Python コンソールで Hello World
import tensorflow as tf
tf.print("Hello World!")
Window>Toggle System Consoleからコンソールを確認し、Hello World!が表示されていたら完了。今回は TensorFlow が Blender で動くか確かめたかったので CPU。
高速実行がしたくなったら GPU の導入についても検討していきたい。参考資料
- 投稿日:2020-05-17T22:23:30+09:00
(備忘録)Docker ComposeでTensorFlow + Flask + Nginx環境構築時のメモ
はじめに
自分の備忘録用です
Docker ComposeでTensorFlow + Flask + Nginxの環境を作る時のメモです。
ちょうど、TensorFlowを使ったアプリの備忘録
を作っていましたが、切り出して整理しようと思った次第です。。。
この手順を実行すれば、TensorFlow使ったWeb APIが動くはずです
自分用に作った記事なので、分かりにくい点や情報、技術が古いかもしれませんがご了承ください参考資料
この記事を作るにあたって参考にさせて頂きました
- docker-composeでgunicorn+nginx+flaskを動かしてみた話
- DockerでDjangoの開発環境を再構築!!!!
- Docker入門(第六回)〜Docker Compose〜
- 初心者向けdocker-composeコマンド逆引き
- docker-compose コマンドまとめ
- Dockerコマンド よく使うやつ
- Docker一括削除コマンドまとめ
環境 ※以下のVerでなくても動くと思いますが、古いのでご注意下さい
 Ubuntuバージョン$ cat /etc/os-release NAME="Ubuntu" VERSION="18.04.4 LTS (Bionic Beaver)" ID=ubuntu ID_LIKE=debian PRETTY_NAME="Ubuntu 18.04.4 LTS" VERSION_ID="18.04" HOME_URL="https://www.ubuntu.com/" SUPPORT_URL="https://help.ubuntu.com/" BUG_REPORT_URL="https://bugs.launchpad.net/ubuntu/" PRIVACY_POLICY_URL="https://www.ubuntu.com/legal/terms-and-policies/privacy-policy" VERSION_CODENAME=bionic UBUNTU_CODENAME=bionicDockerバージョン$ docker version Client: Docker Engine - Community Version: 19.03.8 API version: 1.40 Go version: go1.12.17 Git commit: afacb8b7f0 Built: Wed Mar 11 01:25:46 2020 OS/Arch: linux/amd64 Experimental: false Server: Docker Engine - Community Engine: Version: 19.03.8 API version: 1.40 (minimum version 1.12) Go version: go1.12.17 Git commit: afacb8b7f0 Built: Wed Mar 11 01:24:19 2020 OS/Arch: linux/amd64 Experimental: false containerd: Version: 1.2.13 GitCommit: 7ad184331fa3e55e52b890ea95e65ba581ae3429 runc: Version: 1.0.0-rc10 GitCommit: dc9208a3303feef5b3839f4323d9beb36df0a9dd docker-init: Version: 0.18.0 GitCommit: fec3683Docker-Composeバージョン$ docker-compose version docker-compose version 1.25.5, build unknown docker-py version: 4.2.0 CPython version: 3.7.4 OpenSSL version: OpenSSL 1.1.1c 28 May 2019
※なぜかbuild unknown。時間掛かりそうだったので諦めました
ディレクトリ構成
適当に作っています$\tiny{※凝視したらダメです}$
ゴミファイルが多いですが、Githubに置いてあります。
ソースディレクトリ構成dk_tensor_fw ├── app_tensor │ ├── Dockerfile │ ├── exeWhatMusic.py │ ├── inputFile │ │ └── ans_studyInput_fork.txt │ ├── mkdbAndStudy.py │ ├── requirements.txt │ ├── studyModel │ │ ├── genre-model.hdf5 │ │ ├── genre-tdidf.dic │ │ ├── genre.pickle │ ├── tfidfWithIni.py │ └── webQueApiRunServer.py ├── docker-compose.yml ├── web_nginx ├── Dockerfile └── nginx.confdocker-composeでローカル環境作るのに必要なファイル
docker-compose.ymlversion: '3' services: ########### Appサーバ設定 ########### app_tensor: container_name: app_tensor # サービス再起動ポリシー restart: always # ビルドするdockerファイルが格納されたディレクトリ build: ./app_tensor volumes: # マウントするディレクトリ - ./app_tensor:/dk_tensor_fw/app_tensor ports: # ホスト側のポート:コンテナ側のポート - 7010:7010 networks: - nginx_network ########### Appサーバ設定 ########### ########### Webサーバ設定 ########### web-nginx: container_name: web-nginx build: ./web_nginx volumes: # マウントするディレクトリ - ./web_nginx:/dk_tensor_fw/web_nginx ports: # ホストPCの7020番をコンテナの7020番にポートフォワーディング - 7020:7020 depends_on: # 依存関係を指定。web-serverの起動より前にapp-serverを起動するようになる - app_tensor networks: - nginx_network ########### Webサーバ設定 ########### networks: nginx_network: driver: bridge※ (参考)上記でポート番号を指定していますが、以下のコマンドで確認してます。
(参考)空いているポートの調べ方# 空いているポート調べる(何も表示されなければ空いてる) netstat -an | grep 7010Dockerfile←Apサーバ側(Gunicorn)FROM ubuntu:18.04 WORKDIR /dk_tensor_fw/app_tensor COPY requirements.txt /dk_tensor_fw/app_tensor RUN apt-get -y update \ && apt-get -y upgrade \ && apt-get install -y --no-install-recommends locales curl python3-distutils vim ca-certificates \ && curl https://bootstrap.pypa.io/get-pip.py -o get-pip.py \ && python3 get-pip.py \ && pip install -U pip \ && localedef -i en_US -c -f UTF-8 -A /usr/share/locale/locale.alias en_US.UTF-8 \ && apt-get clean \ && rm -rf /var/lib/apt/lists/* \ && pip install -r requirements.txt --no-cache-dir ENV LANG en_US.utf8 CMD ["gunicorn", "webQueApiRunServer:app", "-b", "0.0.0.0:7010"]requirements.txtFlask==1.1.0 gunicorn==19.9.0 Keras>=2.2.5 numpy==1.16.4 pandas==0.24.2 pillow>=6.2.0 python-dateutil==2.8.0 pytz==2019.1 PyYAML==5.1.1 requests==2.22.0 scikit-learn==0.21.2 sklearn==0.0 matplotlib==3.1.1 tensorboard>=1.14.0 tensorflow>=1.14.0 mecab-python3==0.996.2以下のpythonソースが機械学習済みのモデルを使ってある事柄を類推し、
Jsonのレスポンスを返すWeb API本体です。実際の類推しているモジュール(exeWhatMusic)
は外から読み込んでいますwebQueApiRunServer.pyimport flask import os import exeWhatMusic #ポート番号 TM_PORT_NO = 7010 # initialize our Flask application and pre-trained model app = flask.Flask(__name__) app.config['JSON_AS_ASCII'] = False # <-- 日本語の文字化け回避 @app.route('/recommend/api/what-music/<how_music>', methods=['GET']) def get_recom_music(how_music): recoMusicInfos = getRecoMusicMoji(how_music) return flask.jsonify({'recoMusicInfos': recoMusicInfos}) # オススメの楽曲名を返す def getRecoMusicMoji(how_music): recMusicName, predict_val = exeWhatMusic.check_genre(how_music) #JSON作成 recoMusicInfoJson = [ { 'id':1, 'recoMusicMoji':recMusicName, 'predict_val':predict_val, 'how_music':how_music } ] return recoMusicInfoJson if __name__ == "__main__": print(" * Flask starting server...") app.run(threaded=False, host="0.0.0.0", port=int(os.environ.get("PORT", TM_PORT_NO)))Dockerfile←Webサーバ側(Nginx)FROM nginx:latest RUN rm /etc/nginx/conf.d/default.conf COPY nginx.conf /etc/nginx/conf.dnginx.confupstream app_tensor_config { # コンテナのサービス名を指定すると名前解決してくれる server app_tensor:7010; } server { listen 7020; root /dk_tensor_fw/app_tensor/; server_name localhost; location / { try_files $uri @flask; } location @flask { proxy_set_header Host $host; proxy_set_header X-Real-IP $remote_addr; proxy_redirect off; proxy_pass http://app_tensor_config; } # redirect server error pages to the static page /50x.html error_page 500 502 503 504 /50x.html; location = /50x.html { root /usr/share/nginx/html; } # 静的ファイルの要求をstaticにルーティング ←使ってませんので不要です。 location /static/ { alias /dk_tensor_fw/app_tensor/satic/; } }出来上がった環境の確認
ビルド&backgroundで起動
$ docker-compose up -d --builddocker-compose イメージ情報を表示
$ docker-compose images
Container          Repository           Tag       Image Id       Size
-----------------------------------------------------------------------
app_tensor   dk_tensor_fw_app_tensor   latest   3b916ea797e0   2.104 GB
web-nginx    dk_tensor_fw_web-nginx    latest   175c2596bb8b   126.8 MB
作り方が悪いのか結構容量大きいような
コンテナの一覧表示
$ docker-compose ps
   Name                 Command               State               Ports
------------------------------------------------------------------------------------
app_tensor   gunicorn webQueApiRunServe ...   Up      0.0.0.0:7010->7010/tcp
web-nginx    nginx -g daemon off;             Up      0.0.0.0:7020->7020/tcp, 80/tcp
コンテナに接続(Apサーバ側)
$ docker-compose exec app_tensor /bin/bash
root@ba0ce565430c:/dk_tensor_fw/app_tensor#
Apサーバ側のコンテナに入れました。。。
TensorFlowとかKeras入っているか中身を確認
出力結果の表示が長いのでいくつか省きました
root@ba0ce565430c:/dk_tensor_fw/app_tensor# pip3 list
Package                Version
---------------------- -----------
absl-py                0.9.0
Flask                  1.1.0
gunicorn               19.9.0
Keras                  2.3.1
Keras-Applications     1.0.8
Keras-Preprocessing    1.1.2
matplotlib             3.1.1
mecab-python3          0.996.2
numpy                  1.16.4
pandas                 0.24.2
Pillow                 7.1.2
pip                    20.1
python-dateutil        2.8.0
pytz                   2019.1
PyYAML                 5.1.1
requests               2.22.0
requests-oauthlib      1.3.0
rsa                    4.0
scikit-learn           0.21.2
six                    1.14.0
sklearn                0.0
tensorboard            2.2.1
tensorboard-plugin-wit 1.6.0.post3
tensorflow             2.2.0
tensorflow-estimator   2.2.0
(省略)
TensorFlow、Kerasなど一通り入っているようです。。。
Webサーバ側のコンテナに接続
$ docker-compose exec web-nginx /bin/bash
root@d6971e4dc05c:/#
Webサーバ側のコンテナにも入れました。
一応、Webサーバ(Nginx)が起動しているか確認します。
root@d6971e4dc05c:/# /etc/init.d/nginx status
[ ok ] nginx is running.
Nginxも起動しているようです。
一旦ここまでで実行環境の確認しました。
以下のようにWEB APIが叩ければWEB API側の実行環境できてると思います。。。Web_API実行例http://localhost:7020/recommend/api/what-music/切なくて誰かの幸せ願う歌Web API実行例
ツールは色々あるので何でも良いと思いますが、GIFのようにJSONで返ってきます。その他のコマンド(備忘です)
※参考資料そのままです。詳細は参考資料等見て下さい
サービス停止
$ docker-compose stopサービス開始
$ docker-compose start環境をクリーンにしたい時
# 停止&削除
# コンテナ・ネットワーク
docker-compose down

コンテナ・ネットワーク・イメージ
docker-compose down --rmi all

# コンテナ・ネットワーク・ボリューム
docker-compose down -v
- 投稿日:2020-05-17T15:01:01+09:00
Keras-SSDで転移学習-顔検出-
はじめに
やりたいなって思うことがあって単純な顔検出ができるモデルを作ろうと思ったけれども、keras-ssdの事前学習モデルはPascal VOCデータで学習させたもので、分類できる21クラスの中にpersonは入っているけどfaceは入っていない。なのでFDDBデータセットを使って顔検出ができるモデルを転移学習させてつくった。普段はWebサービスのアクセスログなどをメインに分析したりしている人間なので、畑違いの画像系のモデルを作るのに苦労した…。CNNについてふわっとした理解はしているけど、SSDやYOLOなど物体検出についてはほとんど知らない。ディープラーニングなんもわからん。
SSD
詳細は元論文とか他の方のわかりやすい記事を見てほしい。私は知らない。。。
参考:
物体検出についての歴史まとめ
【物体検出】SSD(Single Shot MultiBox Detector)とは
上記記事らによると入力画像上で畳み込みネットワークを1回だけ実行し、特徴マップを計算します。特徴マップ上に小さな3×3サイズの畳み込みカーネルを実行して、bounding box と分類確率を予測します。
とか
その後登場したYOLO(You Only Look Once)とSSD(Single Shot Multibox Detector)では、「画像をグリッドで分割して、それぞれのグリッドに対して固定されたいくつかのバウンディングボックスの当てはまり具合を見てみよう」という方針を採っている。
とか書いてる。
よくわからんけどCNNモデル(keras-ssdはVGG16っぽい)で特徴マップ作って、特徴マップ上を四角(bounding box)でいっぱい分割して四角ごとに分類確率を出して確率高い四角が答えだ!っていう理解でいいのだろうか。まあ理論知る前に"とりあえず試そう"精神でいこう。環境
Google Colaboratory
GPU持っていないので。。。
Google Driveをマウントして、drive上のディレクトリのファイルとか使う。Keras/TensorFlowで実装されたSSD
ここからとってくる↓
https://github.com/rykov8/ssd_keras
Google Colaboratoryで以下のコマンドを実行。!git clone https://github.com/rykov8/ssd_keras.gitすると、drive上にssd_kerasフォルダが保存される。
ここにkerasのssd実装のコードとか学習済み重みのファイルが入ってたりする。(weights_SSD300.hdf5)
この学習済みの重みは以下のようなデータで学習していて21クラス分類ができる。学習データセット:Pascal VOC
検出クラス:21クラス
"background", "aeroplane", "bicycle", "bird", "boat", "bottle", "bus", "car", "cat", "chair", "cow", "diningtable", "dog", "horse", "motorbike", "person", "pottedplant", "sheep", "sofa", "train", "tvmonitor"人を検出するpersonは入っているけど、顔を検出するものは入っていない!
なので転移学習させて顔を検出するようなモデルを作ることにする。データセット
データセットはFDDBを使う。
http://vis-www.cs.umass.edu/fddb/
5171人に自然な動きを捉えたデータだそうな。
アノテーションもある。
この2つのリンクからダウンロード。
画像が入ったoriginalPicsとアノテーションファイルが入ったFDDB-foldsをゲットできる。
アノテーションのファイル名はFDDB-fold-xx-ellipseList.txt。
フォーマットは以下。format: ... <image name i>#画像ファイル名 <number of faces in this image =im>#顔の数 <face i1>#顔の中心座標、長径・短径、傾き角度 <face i2>#顔の中心座標、長径・短径、傾き角度 ... <face im> ...これらデータをdrive上のssd_kerasフォルダに移してデータの準備は完了。
パッケージ
ssd_kerasはtensorflow 1.xじゃないとエラー出ちゃうとか見たので、バージョンを指定してインストールし直す。tensorflow 1.xでGPUを使うにはtensorflow-gpuを使用する必要があるそう。
パッケージダウンロード!pip install scipy==1.1.0 !pip uninstall tensorflow !pip uninstall tensorflow-gpu !pip install tensorflow-gpu==1.14 !pip install keras==1.2.2 !pip install opencv-python==3.1.0.5パッケージインポート# 必要パッケージのimport import cv2 import keras from keras.applications.imagenet_utils import preprocess_input from keras.backend.tensorflow_backend import set_session from keras.models import Model from keras.preprocessing import image import matplotlib.pyplot as plt import numpy as np import pickle from random import shuffle from scipy.misc import imread from scipy.misc import imresize import tensorflow as tf from ssd import SSD300 from ssd_training import MultiboxLoss from ssd_utils import BBoxUtility from PIL import Image from lxml import etree from xml.etree import ElementTree import math import os import glob from google.colab.patches import cv2_imshowアノテーションファイルをxmlに変換
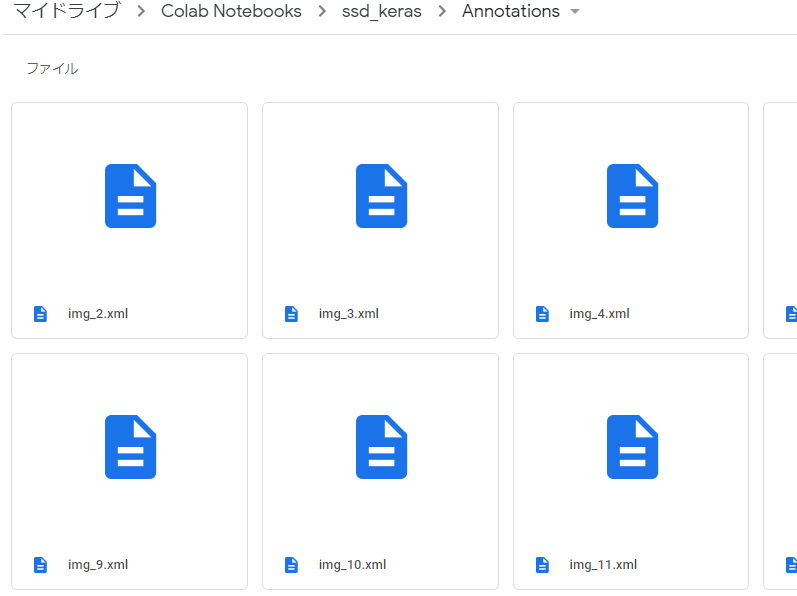
ssd_kerasで転移学習しやすいように、アノテーションファイルをxmlファイルに変換する。
このコードをほとんど丸パクる↓
https://github.com/kuangliu/FDDB/blob/master/FDDBtoXML.pyxmlファイル作成関数os.makedirs('Annotations', exist_ok=True)#xmlを保存するフォルダを作っておく save_dir='/content/drive/My Drive/Colab Notebooks/ssd_keras/Annotations' def writeXML(imName, faces, H, W, C): annotation = etree.Element('annotation') folder = etree.SubElement(annotation, 'folder').text='VOC2007' filename = etree.SubElement(annotation, 'filename').text=imName+'.jpg' source = etree.SubElement(annotation, 'source') database = etree.SubElement(source, 'database').text='The FDDB Database' annno = etree.SubElement(source, 'annotation').text='FDDB' image = etree.SubElement(source, 'image').text='Dummy' flickrid = etree.SubElement(source, 'flickrid').text='Dummy' owner = etree.SubElement(annotation, 'owner') flickrid2 = etree.SubElement(owner, 'flickrid').text='Dummy' name = etree.SubElement(owner, 'name').text='Dummy' size = etree.SubElement(annotation, 'size') width = etree.SubElement(size, 'width').text=str(W) height = etree.SubElement(size, 'height').text=str(H) depth = etree.SubElement(size, 'depth').text=str(C) segmented = etree.SubElement(annotation, 'segmented').text='0' for face in faces: obj = etree.SubElement(annotation, 'object') name2 = etree.SubElement(obj, 'name').text='face' pose = etree.SubElement(obj, 'pose').text='Unspecified' truncated = etree.SubElement(obj, 'truncated').text='0' difficult = etree.SubElement(obj, 'difficult').text='0' bndbox = etree.SubElement(obj, 'bndbox') xmin = etree.SubElement(bndbox, 'xmin').text=str(face[0]) ymin = etree.SubElement(bndbox, 'ymin').text=str(face[1]) xmax = etree.SubElement(bndbox, 'xmax').text=str(face[2]) ymax = etree.SubElement(bndbox, 'ymax').text=str(face[3]) tree = etree.ElementTree(annotation) tree.write(save_dir+'/'+imName.split('/')[-1]+".xml",pretty_print=True)アノテーションファイル(.txt)をすべて読み込んで、この関数を適用させて/Annotationsフォルダにxmlファイルを保存していく。
xmlファイル作成anno_dir='/content/drive/My Drive/Colab Notebooks/ssd_keras/FDDB-folds' pic_dir='/content/drive/My Drive/Colab Notebooks/ssd_keras/originalPics' # アノテーションtxtファイルファイルリストの取得 file_list=[os.path.split(f)[1] for f in glob.glob(anno_dir+'/*ellipseList.txt')] print(file_list) print('file Cnt: ', len(file_list)) for file in file_list: print(file) f = open(anno_dir+'/'+file) ''' #txtファイルの中身 2002/08/31/big/img_18008 ファイル名 4 顔の数 53.968100 38.000000 -1.494904 31.598276 55.596600 1 座標とか角度1 56.000000 37.000000 -1.460399 202.152999 122.034200 1 座標とか角度2 54.558400 39.000000 1.396263 293.611040 133.853600 1 座標とか角度3 44.000000 34.000000 -1.442216 391.131100 168.266900 1 座標とか角度4 ここで1ファイル分 2002/08/22/big/img_249 ファイル名 1 顔の数 92.731568 55.547794 1.319755 133.877336 101.823201 1 座標とか角度1 ''' while True: line = f.readline()#実行するたびに1行ずつ読み取っていく。最初はファイル名 if not line: break line = line.strip() imName = pic_dir+'/'+line # idx = line.rfind('/') # imName = line[idx+1:] print('processing ' + imName) # '2002/08/11/big/img_591' im = cv2.imread(imName+'.jpg') H, W, C = im.shape faceNum = int(f.readline().strip())#実行するたびに1行ずつ読み取っていく。これは1ファイルの情報行数 faces = [] for faceIdx in range(faceNum): #実行するたびに1行ずつ読み取っていく。faceNum行分実行。これは座標とか角度 line = f.readline().strip() splited = line.split() r1 = float(splited[0]) r2 = float(splited[1]) angle = float(splited[2]) cx = float(splited[3]) cy = float(splited[4]) rectH = 2*r1*(math.cos(math.radians(abs(angle)))) rectW = 2*r2*(math.cos(math.radians(abs(angle)))) lx = int(max(0, cx - rectW/2)) ly = int(max(0, cy - rectH/2)) rx = int(min(W-1, cx + rectW/2)) ry = int(min(H-1, cy + rectH/2)) faceIdx = 0 faces.append((lx,ly,rx,ry)) writeXML(imName, faces, H, W, C) f.close()これでxmlファイルの作成完了。
xmlファイルをひとまとめ
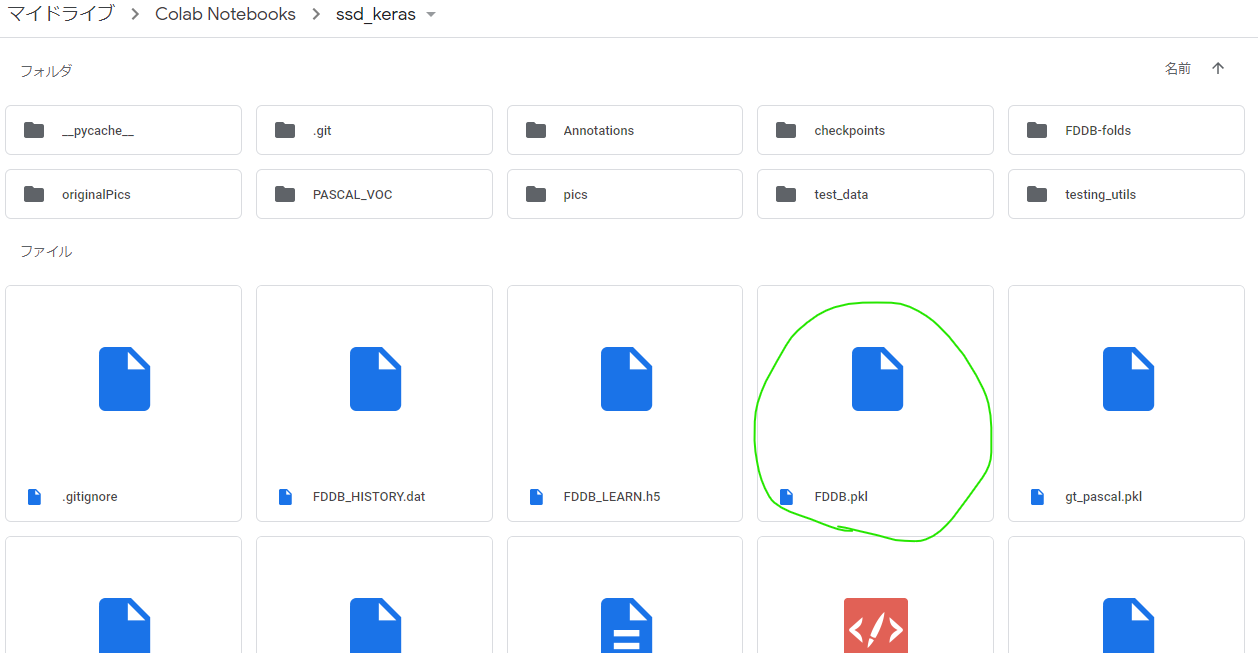
次にxmlファイルを1つのpklファイルにまとめる作業を行う。
この作業のためのコードは最初にgit cloneして作成されたssd_kerasフォルダ内に入っている。(ssd_keras/PASCAL_VOC/get_data_from_XML.py)
コードと合わせて以下の記事を参考に実施。
記事:物体検出アルゴリズム(SSD : Single Shot MultiBox Detector)を学習させてみる
もともとのコードは21クラス分類のために作られているが、今回は顔かそうでないかの2クラス分類なので19クラス分は消しちゃった。xml群を1つのpklにまとめるクラスclass XML_preprocessor(object): def __init__(self, data_path): self.path_prefix = data_path self.num_classes = 1 self.data = dict() self._preprocess_XML() def _preprocess_XML(self): filenames = os.listdir(self.path_prefix+'/') for filename in filenames: print(filename) tree = ElementTree.parse(self.path_prefix +'/' + filename) root = tree.getroot() bounding_boxes = [] one_hot_classes = [] size_tree = root.find('size') width = float(size_tree.find('width').text) height = float(size_tree.find('height').text) for object_tree in root.findall('object'): for bounding_box in object_tree.iter('bndbox'): xmin = float(bounding_box.find('xmin').text)/width ymin = float(bounding_box.find('ymin').text)/height xmax = float(bounding_box.find('xmax').text)/width ymax = float(bounding_box.find('ymax').text)/height bounding_box = [xmin,ymin,xmax,ymax] bounding_boxes.append(bounding_box) class_name = object_tree.find('name').text one_hot_class = self._to_one_hot(class_name) one_hot_classes.append(one_hot_class) image_name = root.find('filename').text bounding_boxes = np.asarray(bounding_boxes) one_hot_classes = np.asarray(one_hot_classes) image_data = np.hstack((bounding_boxes, one_hot_classes)) self.data[image_name] = image_data def _to_one_hot(self,name): one_hot_vector = [0] * self.num_classes # faceかそうでないかだけ分類 if name == 'face': one_hot_vector[0] = 1 else: print('unknown label: %s' %name) return one_hot_vectorxml群を1つのpklにまとめるクラスを全xmlに対して適用して保存xml_dir='/content/drive/My Drive/Colab Notebooks/ssd_keras/Annotations' data = XML_preprocessor(xml_dir).data pkl_dir='/content/drive/My Drive/Colab Notebooks/ssd_keras' pickle.dump(data,open(pkl_dir+'/'+'FDDB.pkl','wb'))完成。
いざ学習
ssd_kerasフォルダ内にSSD_training.pyがあるので、学習はそのコードをもとに実施。
ちょこちょこFDDB学習用に修正している。
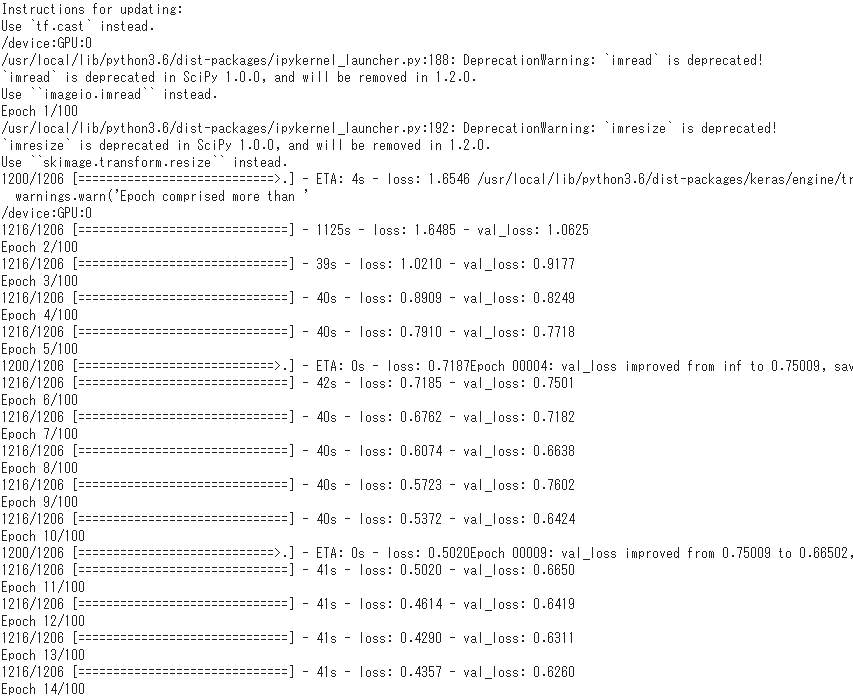
ここでも物体検出アルゴリズム(SSD : Single Shot MultiBox Detector)を学習させてみるを参考にさせていただいた。学習用コード_自分なりの解釈をコメントしている%%time os.makedirs('checkpoints', exist_ok=True)#学習途中の重みも保存するためのフォルダ作成 checkpoints_dir='/content/drive/My Drive/Colab Notebooks/ssd_keras/checkpoints' np.set_printoptions(suppress=True) NUM_CLASSES = 2 input_shape = (300, 300, 3) # 計算済みのデフォルトボックスの位置を保存したprior_boxes_ssd300を読み込む # SSDは画像上に大きさや形の異なるデフォルトボックスを乗せ、その枠ごとに予測値を計算 # VGGやResNetのような画像分類で大きな成果をあげたネットワーク構造を用いて画像から特徴マップを抽出 # そして特徴マップの位置毎に候補を用意(SSD論文ではdefault boxと呼ばれている) priors = pickle.load(open('prior_boxes_ssd300.pkl', 'rb')) # バウンティボックス bbox_util = BBoxUtility(NUM_CLASSES, priors) # FDDBデータの情報まとめたファイル gt = pickle.load(open('FDDB.pkl', 'rb')) keys = sorted(gt.keys()) num_train = int(round(0.8 * len(keys))) train_keys = keys[:num_train] val_keys = keys[num_train:] num_val = len(val_keys) class Generator(object):# pkl上にpathも含めているのでpath_prefixは消した def __init__(self, gt, bbox_util, batch_size, train_keys, val_keys, image_size, saturation_var=0.5, brightness_var=0.5, contrast_var=0.5, lighting_std=0.5, hflip_prob=0.5, vflip_prob=0.5, do_crop=True, crop_area_range=[0.75, 1.0], aspect_ratio_range=[3./4., 4./3.]): self.gt = gt self.bbox_util = bbox_util self.batch_size = batch_size self.train_keys = train_keys self.val_keys = val_keys self.train_batches = len(train_keys) self.val_batches = len(val_keys) self.image_size = image_size self.color_jitter = [] if saturation_var: self.saturation_var = saturation_var self.color_jitter.append(self.saturation) if brightness_var: self.brightness_var = brightness_var self.color_jitter.append(self.brightness) if contrast_var: self.contrast_var = contrast_var self.color_jitter.append(self.contrast) self.lighting_std = lighting_std self.hflip_prob = hflip_prob self.vflip_prob = vflip_prob self.do_crop = do_crop self.crop_area_range = crop_area_range self.aspect_ratio_range = aspect_ratio_range # 画像のチャンネル数変えたり明度変えたりして学習用の画像を増やしているのかな??関数群 def grayscale(self, rgb): return rgb.dot([0.299, 0.587, 0.114]) def saturation(self, rgb): gs = self.grayscale(rgb) alpha = 2 * np.random.random() * self.saturation_var alpha += 1 - self.saturation_var rgb = rgb * alpha + (1 - alpha) * gs[:, :, None] return np.clip(rgb, 0, 255) def brightness(self, rgb): alpha = 2 * np.random.random() * self.brightness_var alpha += 1 - self.saturation_var rgb = rgb * alpha return np.clip(rgb, 0, 255) def contrast(self, rgb): gs = self.grayscale(rgb).mean() * np.ones_like(rgb) alpha = 2 * np.random.random() * self.contrast_var alpha += 1 - self.contrast_var rgb = rgb * alpha + (1 - alpha) * gs return np.clip(rgb, 0, 255) def lighting(self, img): cov = np.cov(img.reshape(-1, 3) / 255.0, rowvar=False) eigval, eigvec = np.linalg.eigh(cov) noise = np.random.randn(3) * self.lighting_std noise = eigvec.dot(eigval * noise) * 255 img += noise return np.clip(img, 0, 255) def horizontal_flip(self, img, y): if np.random.random() < self.hflip_prob: img = img[:, ::-1] y[:, [0, 2]] = 1 - y[:, [2, 0]] return img, y def vertical_flip(self, img, y): if np.random.random() < self.vflip_prob: img = img[::-1] y[:, [1, 3]] = 1 - y[:, [3, 1]] return img, y # 画像のアスペクト比変えたりして、それに合うようにBBOXも変えている感じ?? def random_sized_crop(self, img, targets): img_w = img.shape[1] img_h = img.shape[0] img_area = img_w * img_h random_scale = np.random.random() random_scale *= (self.crop_area_range[1] - self.crop_area_range[0]) random_scale += self.crop_area_range[0] target_area = random_scale * img_area random_ratio = np.random.random() random_ratio *= (self.aspect_ratio_range[1] - self.aspect_ratio_range[0]) random_ratio += self.aspect_ratio_range[0] w = np.round(np.sqrt(target_area * random_ratio)) h = np.round(np.sqrt(target_area / random_ratio)) if np.random.random() < 0.5: w, h = h, w w = min(w, img_w) w_rel = w / img_w w = int(w) h = min(h, img_h) h_rel = h / img_h h = int(h) x = np.random.random() * (img_w - w) x_rel = x / img_w x = int(x) y = np.random.random() * (img_h - h) y_rel = y / img_h y = int(y) img = img[y:y+h, x:x+w] new_targets = [] for box in targets: cx = 0.5 * (box[0] + box[2]) cy = 0.5 * (box[1] + box[3]) if (x_rel < cx < x_rel + w_rel and y_rel < cy < y_rel + h_rel): xmin = (box[0] - x_rel) / w_rel ymin = (box[1] - y_rel) / h_rel xmax = (box[2] - x_rel) / w_rel ymax = (box[3] - y_rel) / h_rel xmin = max(0, xmin) ymin = max(0, ymin) xmax = min(1, xmax) ymax = min(1, ymax) box[:4] = [xmin, ymin, xmax, ymax] new_targets.append(box) new_targets = np.asarray(new_targets).reshape(-1, targets.shape[1]) return img, new_targets # 上の関数群使って学習させる画像を生成する関数かな??前処理とかも実施している def generate(self, train=True): print(tf.test.gpu_device_name()) while True: # 1epochごとに画像の順番をシャッフル if train:# 学習の時は学習用ファイルを使う shuffle(self.train_keys) keys = self.train_keys else: shuffle(self.val_keys) keys = self.val_keys inputs = [] targets = [] for key in keys: img_path = key #print(img_path) img = imread(img_path).astype('float32') y = self.gt[key].copy() if train and self.do_crop: img, y = self.random_sized_crop(img, y) img = imresize(img, self.image_size).astype('float32') # boxの位置は正規化されているから画像をリサイズしても # 教師信号としては問題ない らしいです if train: shuffle(self.color_jitter) for jitter in self.color_jitter: if len(img.shape) == 2:#グレイスケール画像の場合エラーが出るので3チャンネルの画像に変換する img=cv2.cvtColor(img, cv2.COLOR_GRAY2RGB) img = jitter(img) if self.lighting_std: img = self.lighting(img) if self.hflip_prob > 0: img, y = self.horizontal_flip(img, y) if self.vflip_prob > 0: img, y = self.vertical_flip(img, y) # 訓練データ生成時にbbox_utilを使っているのはここだけらしい y = self.bbox_util.assign_boxes(y) inputs.append(img) targets.append(y) # 1 iter 分終わったら返す if len(targets) == self.batch_size: tmp_inp = np.array(inputs) tmp_targets = np.array(targets) inputs = [] targets = [] # 前処理。preprocess_input()の中ではモデルによって画像の正規化、ImageNetデータセットのRGB各チャンネルごとの平均値を引く、などの処理が行われているようです。 # VGG16では画像をRGBからBGRに変換し、スケーリングせずにImageNetデータセットに対して各カラーチャネルをゼロ中心にします。 yield preprocess_input(tmp_inp), tmp_targets gen = Generator(gt, bbox_util, 16, train_keys, val_keys, (input_shape[0], input_shape[1]), do_crop=False) # 学習済みモデル読み込み model = SSD300(input_shape, num_classes=NUM_CLASSES) model.load_weights('weights_SSD300.hdf5', by_name=True) # 再学習しないレイヤー freeze = ['input_1', 'conv1_1', 'conv1_2', 'pool1', 'conv2_1', 'conv2_2', 'pool2', 'conv3_1', 'conv3_2', 'conv3_3', 'pool3']#, # 'conv4_1', 'conv4_2', 'conv4_3', 'pool4'] # 再学習しないように設定 for L in model.layers: if L.name in freeze: L.trainable = False def schedule(epoch, decay=0.9): return base_lr * decay**(epoch) # driveの容量が危ないので5 epochずつ保存することにする callbacks = [keras.callbacks.ModelCheckpoint(checkpoints_dir + '/weights.{epoch:02d}-{val_loss:.2f}.hdf5', verbose=1,monitor='val_loss',save_best_only=True,mode='min', save_weights_only=True,period=5), keras.callbacks.LearningRateScheduler(schedule)] base_lr = 3e-4 optim = keras.optimizers.Adam(lr=base_lr) # neg_pos_ratio:ハードネガティブマイニング負例と正例の最大の比 model.compile(optimizer=optim, loss=MultiboxLoss(NUM_CLASSES, neg_pos_ratio=2.0).compute_loss) nb_epoch = 100 # 学習 # ミニバッチごとに入力の前処理を行うのでfit_generatorを使う history = model.fit_generator(gen.generate(True), gen.train_batches, nb_epoch, verbose=1, callbacks=callbacks, validation_data=gen.generate(False), nb_val_samples=gen.val_batches, nb_worker=1) model.save('FDDB_LEARN.h5') with open('FDDB_HISTORY.dat', 'wb') as file_pi: pickle.dump(history.history, file_pi)scipyは古いバージョンを使っているので、「scipyのimreadとかimsizeは重複した名前だし、将来的に消えるから代わりに別のツールを使うことを推奨するぞ」とか警告がいっぱい出るけどフルシカト。
学習が進むぞ。1h 24min 56sで学習終わった。
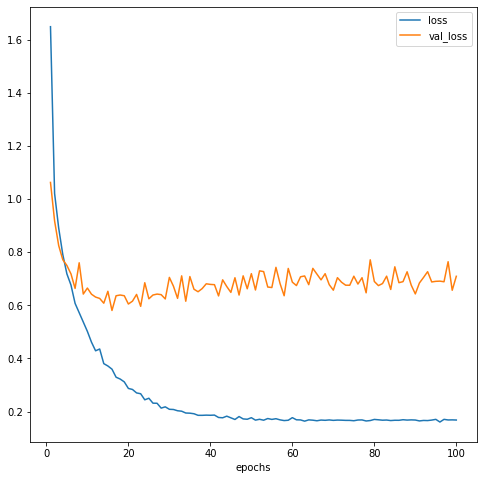
epochとlossの関係をplotしてみる。学習過程の可視化plt.clf() plt.xlabel('epochs') plt.plot(np.arange(1, len(history.history['loss'])+1), history.history['loss'], label='loss') plt.plot(np.arange(1, len(history.history['loss'])+1), history.history['val_loss'], label='val_loss') plt.legend() plt.show() print(min(history.history['val_loss']))
20 epochあたりの時にval_lossが最も低そうなので、/checkpointsフォルダにある19 epochの重みを使用することにする。作成したモデルで顔検出をやってみる
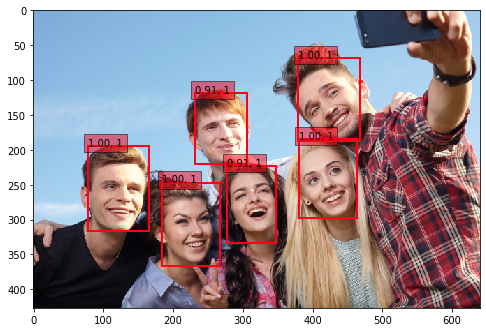
画像は写真ACさんから1枚使用させていただきました。
# 学習済みモデル読み込み
model = SSD300(input_shape, num_classes=NUM_CLASSES)#NUM_CLASSES=2
model.load_weights(checkpoints_dir+'/'+'weights.19-0.60.hdf5', by_name=True)#19epochの重み

# 画像とBBOXを可視化する関数
def plot_img_bbox(img_path):
  inputs = []
  images = []
  img = image.load_img(img_path, target_size=(300, 300))
  img = image.img_to_array(img)
  images.append(imread(img_path))
  inputs.append(img.copy())
  # 前処理
  inputs = preprocess_input(np.array(inputs))

  preds = model.predict(inputs, batch_size=1, verbose=1)
  results = bbox_util.detection_out(preds)

  for i, img2 in enumerate(images):
    img = img2.copy()
    if len(img.shape) == 2:
      img = cv2.cvtColor(img, cv2.COLOR_GRAY2RGB)
    # Parse the outputs.
    det_label = results[i][:, 0]
    det_conf = results[i][:, 1]
    det_xmin = results[i][:, 2]
    det_ymin = results[i][:, 3]
    det_xmax = results[i][:, 4]
    det_ymax = results[i][:, 5]

    # Get detections with confidence higher than 0.6.
    top_indices = [i for i, conf in enumerate(det_conf) if conf >= 0.6]

    top_conf = det_conf[top_indices]
    top_label_indices = det_label[top_indices].tolist()
    top_xmin = det_xmin[top_indices]
    top_ymin = det_ymin[top_indices]
    top_xmax = det_xmax[top_indices]
    top_ymax = det_ymax[top_indices]

    colors = plt.cm.hsv(np.linspace(0, 1, NUM_CLASSES)).tolist()

    plt.imshow(img / 255.)
    currentAxis = plt.gca()

    for i in range(top_conf.shape[0]):
        xmin = int(round(top_xmin[i] * img.shape[1]))
        ymin = int(round(top_ymin[i] * img.shape[0]))
        xmax = int(round(top_xmax[i] * img.shape[1]))
        ymax = int(round(top_ymax[i] * img.shape[0]))
        score = top_conf[i]
        label = int(top_label_indices[i])
        # label_name = voc_classes[label - 1]
        display_txt = '{:0.2f}, {}'.format(score, label)
        coords = (xmin, ymin), xmax-xmin+1, ymax-ymin+1
        color = colors[label]
        currentAxis.add_patch(plt.Rectangle(*coords, fill=False, edgecolor=color, linewidth=2))
        currentAxis.text(xmin, ymin, display_txt, bbox={'facecolor':color, 'alpha':0.5})

    plt.show()

img_path = '/content/drive/My Drive/Colab Notebooks/ssd_keras/pics/315222_s.jpg'
plot_img_bbox(img_path)
顔を検出しているぞ。やったぜ!おわりに
いやーこのへんは門外漢だから転移学習をするだけでけっこう苦労したぜ…。
特にPascal VOCデータセット以外を転移学習させている記事があんまり見つけられなくて、FDDB用にコードを修正するのにけっこう試行錯誤した…。
でも良い勉強になったからよし!
これでやりたいことの1歩目を踏み出せた。以上!