- 投稿日:2020-03-20T23:13:25+09:00
[Swift] @_exportedの挙動調査
はじめに
Swiftの
@_exportedについて、その挙動を調査したのでまとめる。
@_exportedとは
- _がプレフィックスとしてついており、Swiftで公式には公開されていないAttribute
- 以下のようにimport文で利用可能
@_exported import Foo挙動調査
前提
以下のような3階層のモジュール構成を考える。
├── Main
│   └── Main.swift
├── SubModule
│   ├── SubModule1.swift
│   └── SubModule2.swift
└── SubSubModule
    └── SubSubModule.swift
同一モジュール内への影響調査
SubModule1.swiftにて、
@_exported import SubSubModuleを記述する。
ファイルをまたいでSubModule2.swiftでもSubSubModule.swiftのAPIが利用できる。├── Main │ └── Main.swift ├── SubModule │ ├── SubModule1.swift // @_exported import SubSubModuleを記述 │ └── SubModule2.swift // SubSubModule.swiftのAPIが利用できる └── SubSubModule └── SubSubModule.swift上位モジュールへの影響調査
さらに、Main.swiftにて、
import SubModuleを記述する。
モジュールをまたいでMain.swiftでもSubModule.swiftのAPIが利用できる。├── Main │ └── Main.swift // import SubModuleを記述、SubSubModule.swiftのAPIが利用できる ├── SubModule │ ├── SubModule1.swift // @_exported import SubSubModuleを記述 │ └── SubModule2.swift └── SubSubModule └── SubSubModule.swiftおわりに
@_exportedをimportに付与すると、同一モジュール内でのimportが不要になる- また、上位モジュールが下位モジュールをimportでインポートした場合、下位モジュールで
@_exportedでimportされている孫関係にあたる下位モジュールもimportされる- 以下のように、UIKitをimportするだけで、FoundationをimportしなくてもFoundationのAPIが利用できることから、UIKit内部で
@_exported import Foundationが定義されていると推測されるimport UIKit import Foundation // import不要参考
- https://forums.swift.org/t/exported-and-fixing-import-visibility/9415
- https://stackoverflow.com/questions/41000256/what-is-import-func-struct-class-and-exported-in-swift
- https://stackoverflow.com/questions/33558995/what-is-the-exported-attribute-in-swift
- https://medium.com/eureka-engineering/create-merged-framework-to-cut-appstartuptime-72ee67b2bbab
- 投稿日:2020-03-20T19:07:53+09:00
デフォルトTableViewサンプル集(swift)
はじめに
TableViewを使うときは毎回セルとかヘッダー・フッターのカスタムクラス作ったりしてたけどデフォルトのやつでも色々できるやん?ってことで色々作ってみました。
Cell Style AccessoryType Color Cell Selected Color
Separator Style Table Style Grouped Detail Color Section TableViewControllerを使うか否か
画面にtableViewしか表示しないって場合は基本的には
UITableViewControllerを使う方が便利なのでできるだけUITableViewControllerを使います。便利機能
- tableViewのひも付けとかしなくてもいい
- var clearsSelectionOnViewWillAppear: Bool
- var refreshControl: UIRefreshControl?
- 編集モードの時に
func setEditing(_ editing: Bool, animated: Bool)オーバーライドしなくてもいい- キーボード表示時に自動でスクロールしてくれる
- static cell が使える
- セーフエリアまわりもなんかいい感じにしてくれる
Cell Style
UITableViewCellには下記のStyleがあります。
- default (Basic)
- value1 (Right Detail)
- value2 (Left Detail)
- subtitle (Subtitle)
こんな感じ。
default (Basic) 以外は detail テキストも設定できる。value2 (Left Detail) 以外は image も設定できる。
下記のように設定
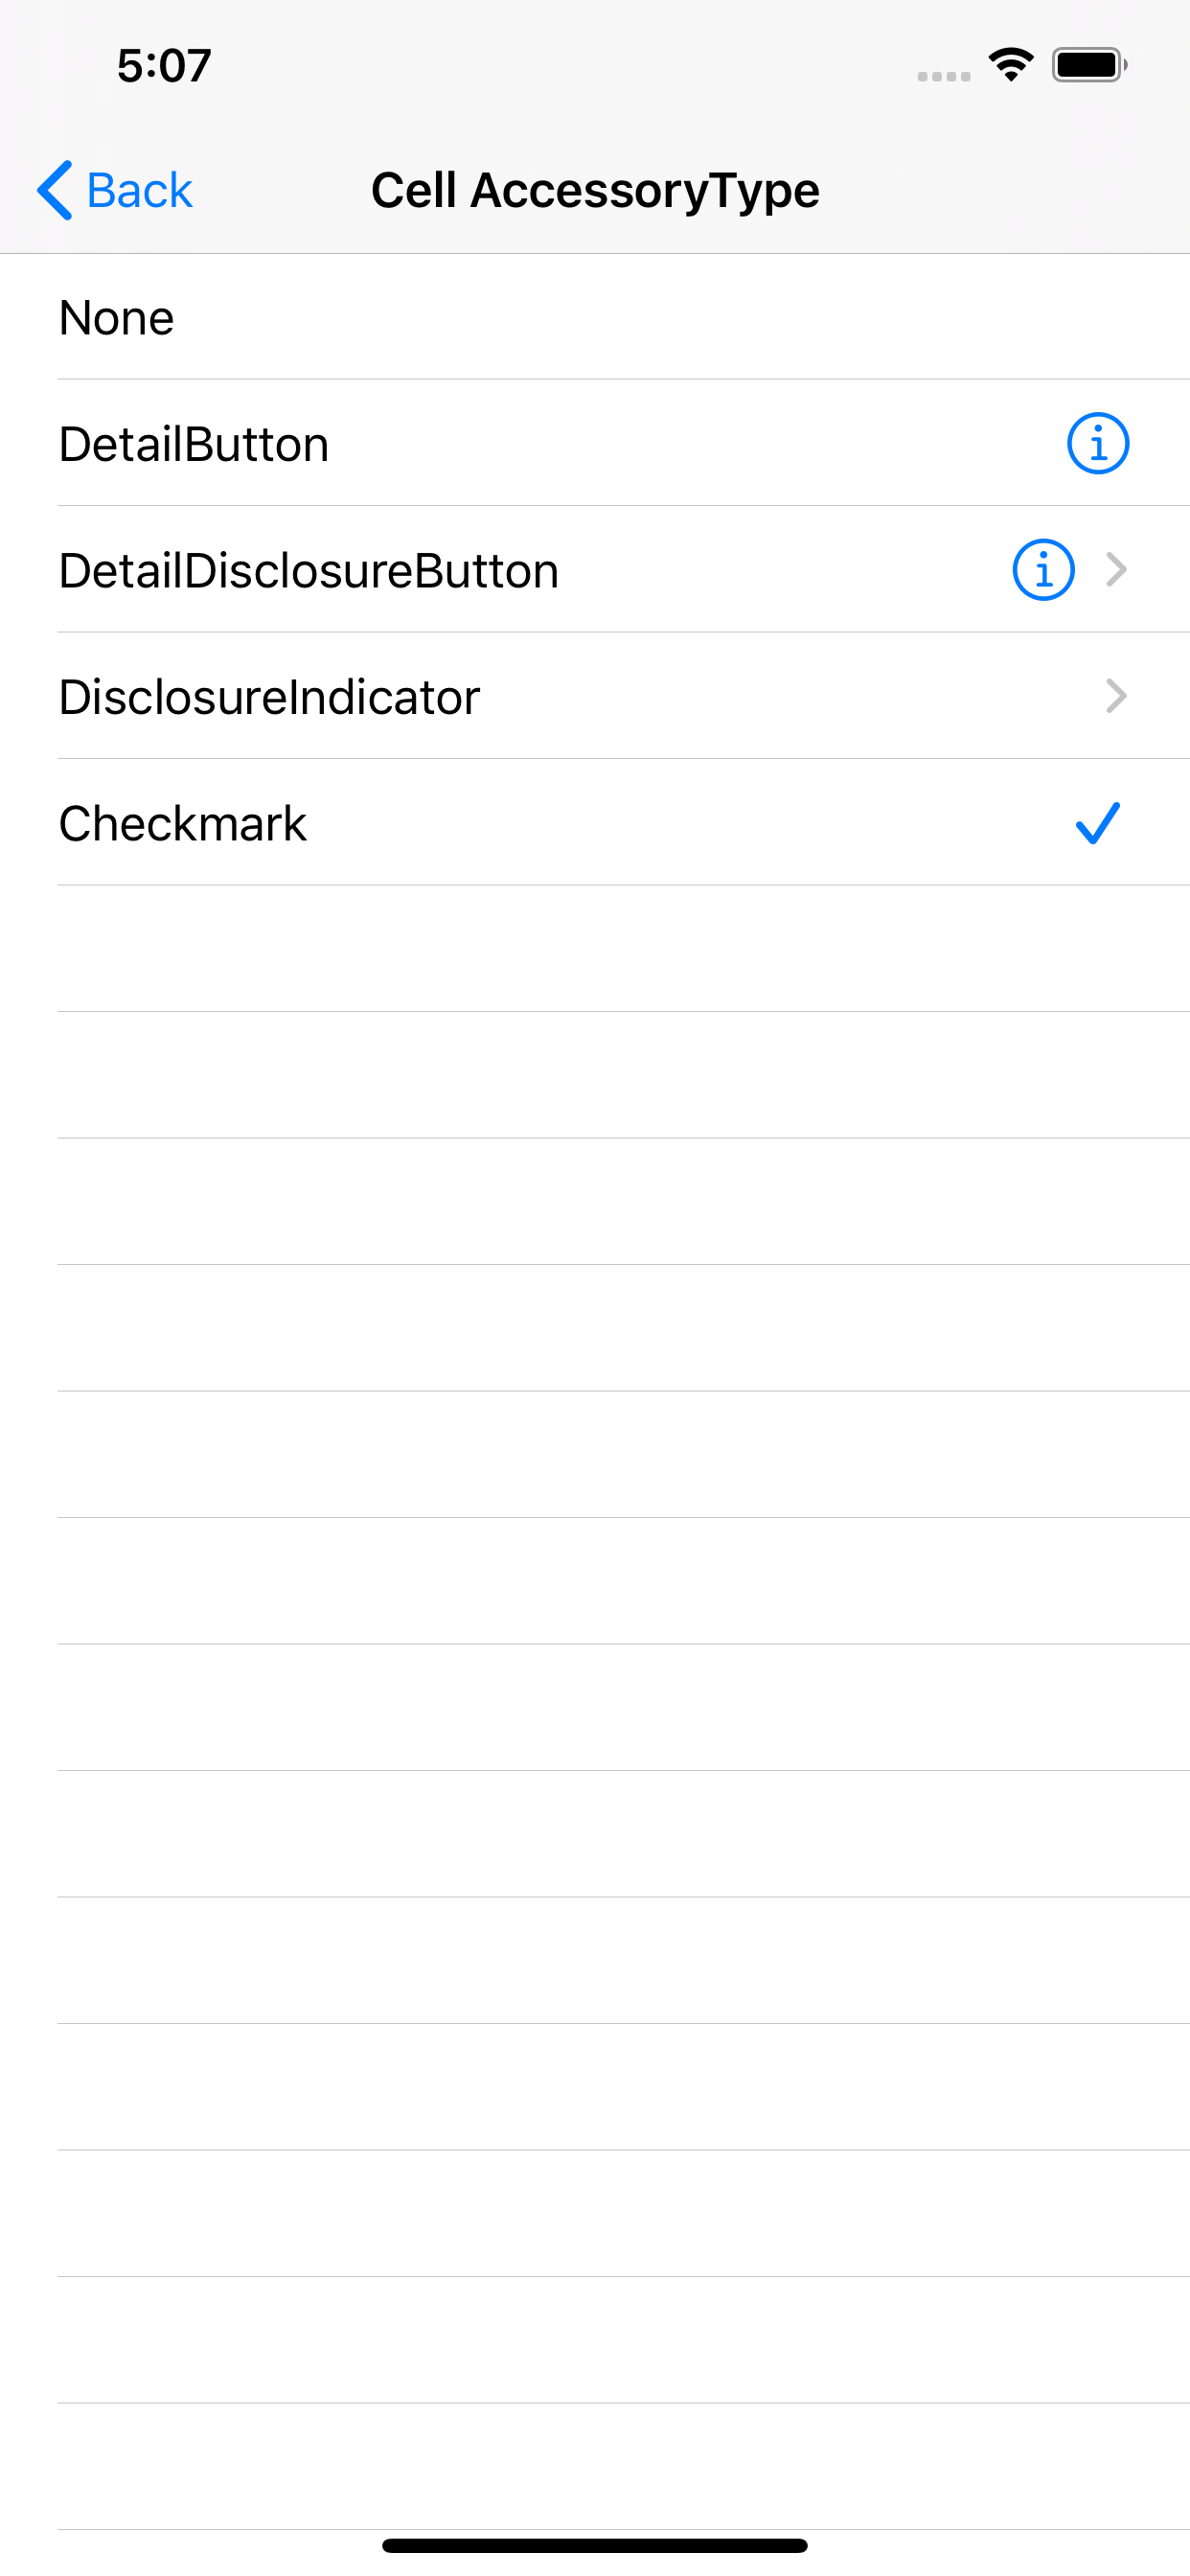
cell.textLabel?.text = "title"
cell.detailTextLabel?.text = "detail"
cell.imageView?.image = UIImage(named: "sample")
Cell AccessoryType
UITableViewCellには下記のAccessoryTypeがあります。
- none
- disclosureIndicator
- detailDisclosureButton
- checkmark
- detailButton
こんな感じ。
下記のように設定(もしくは Storyboard で設定)
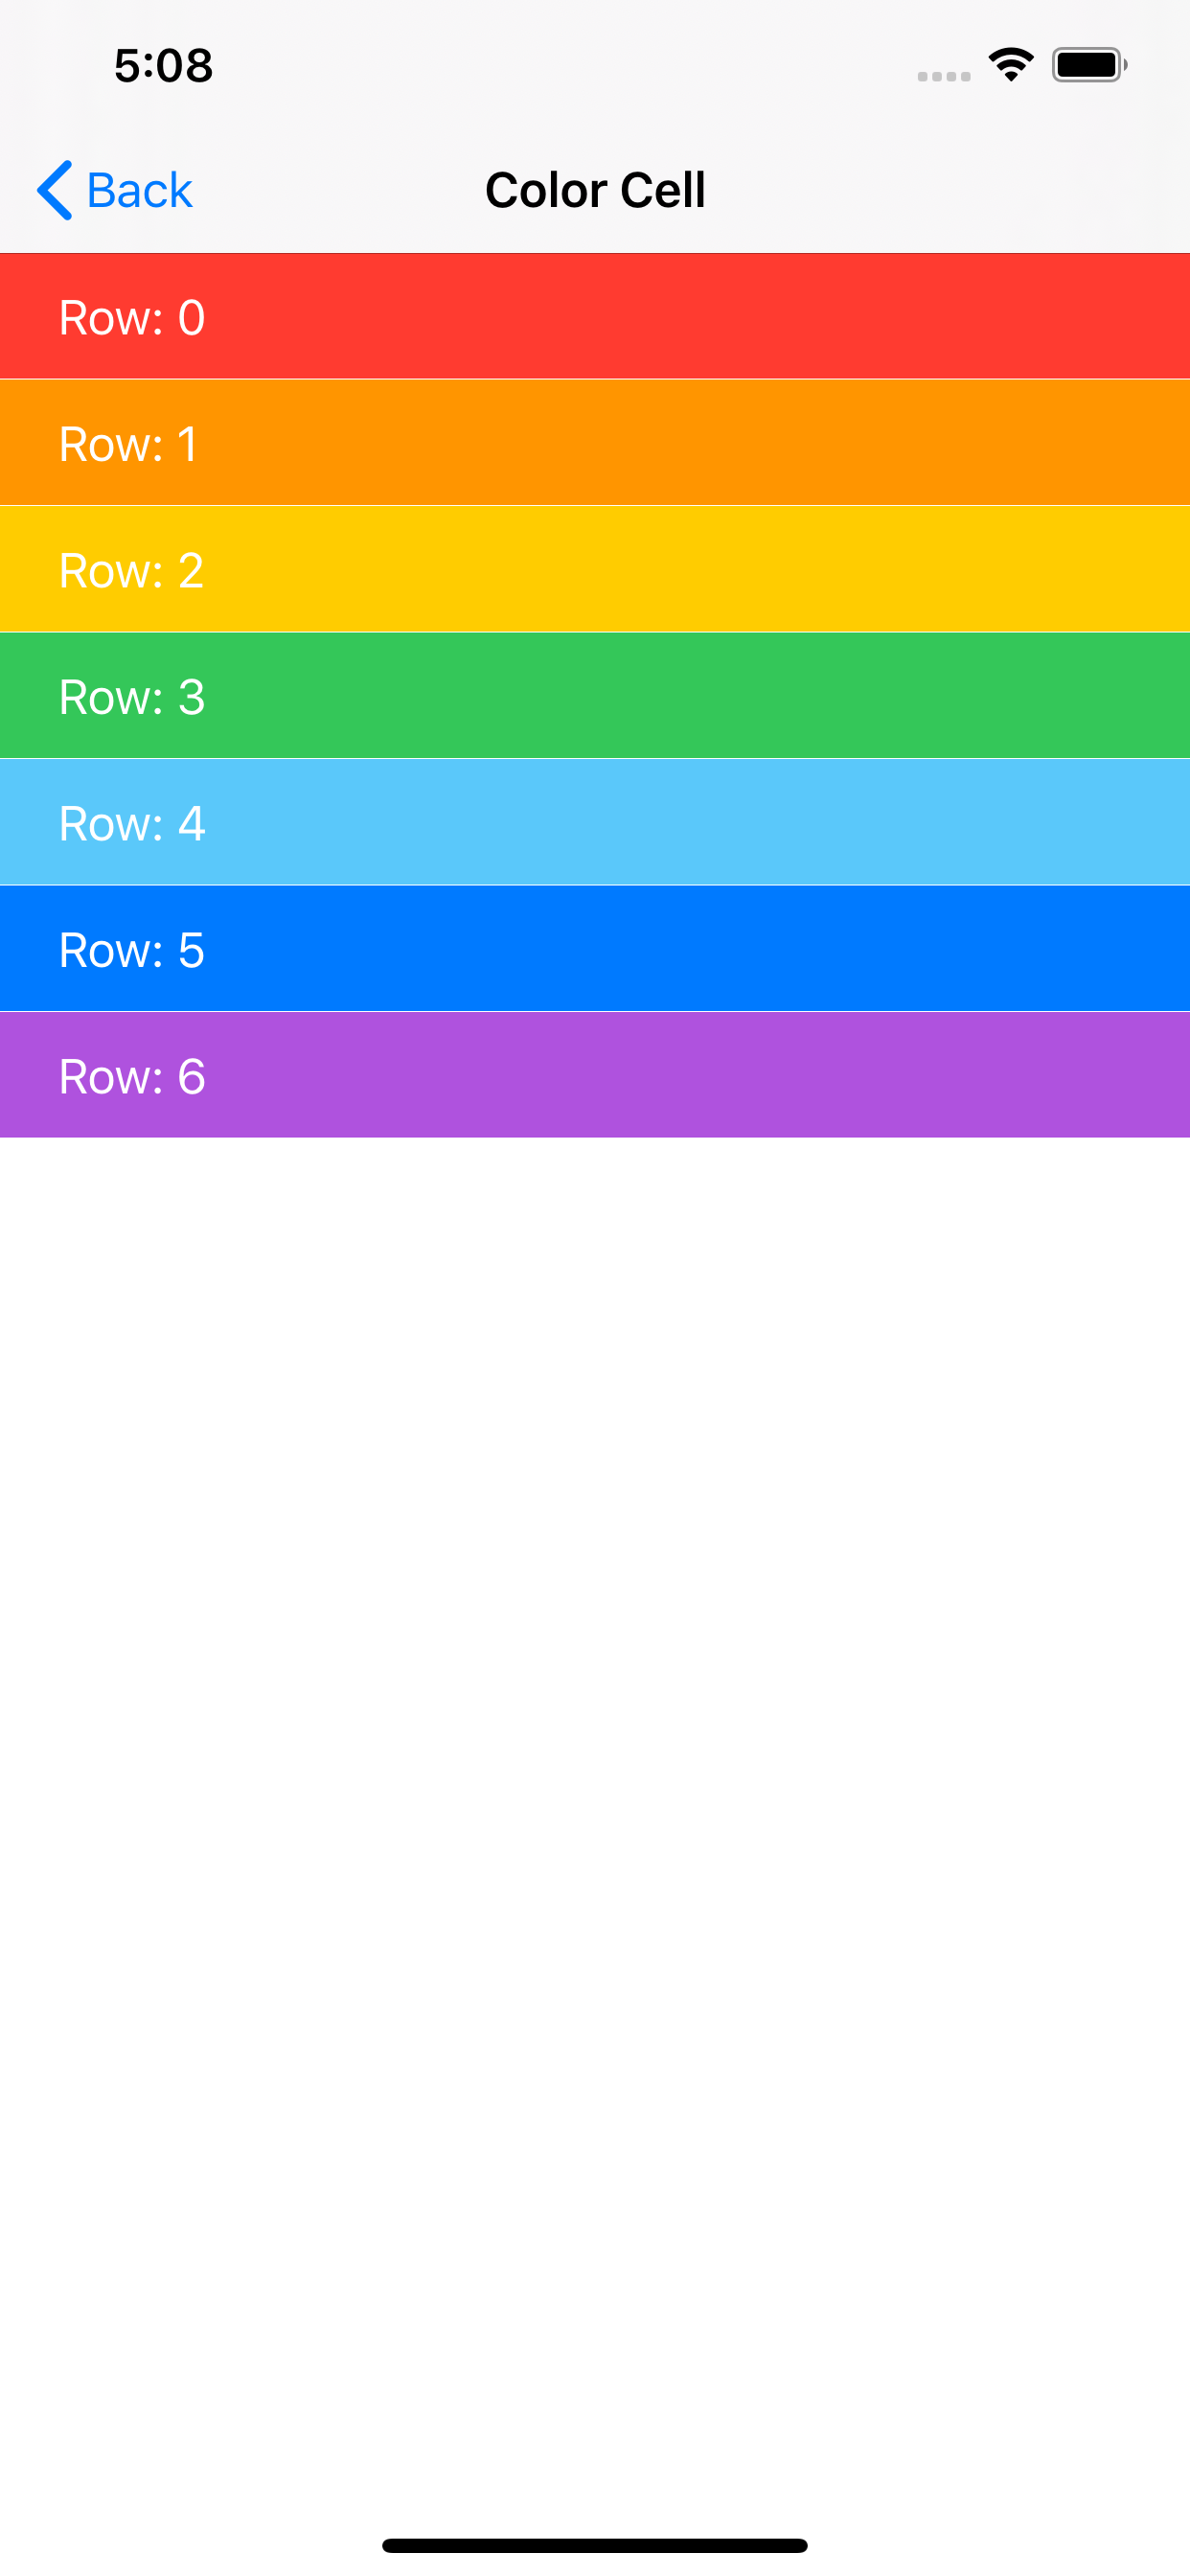
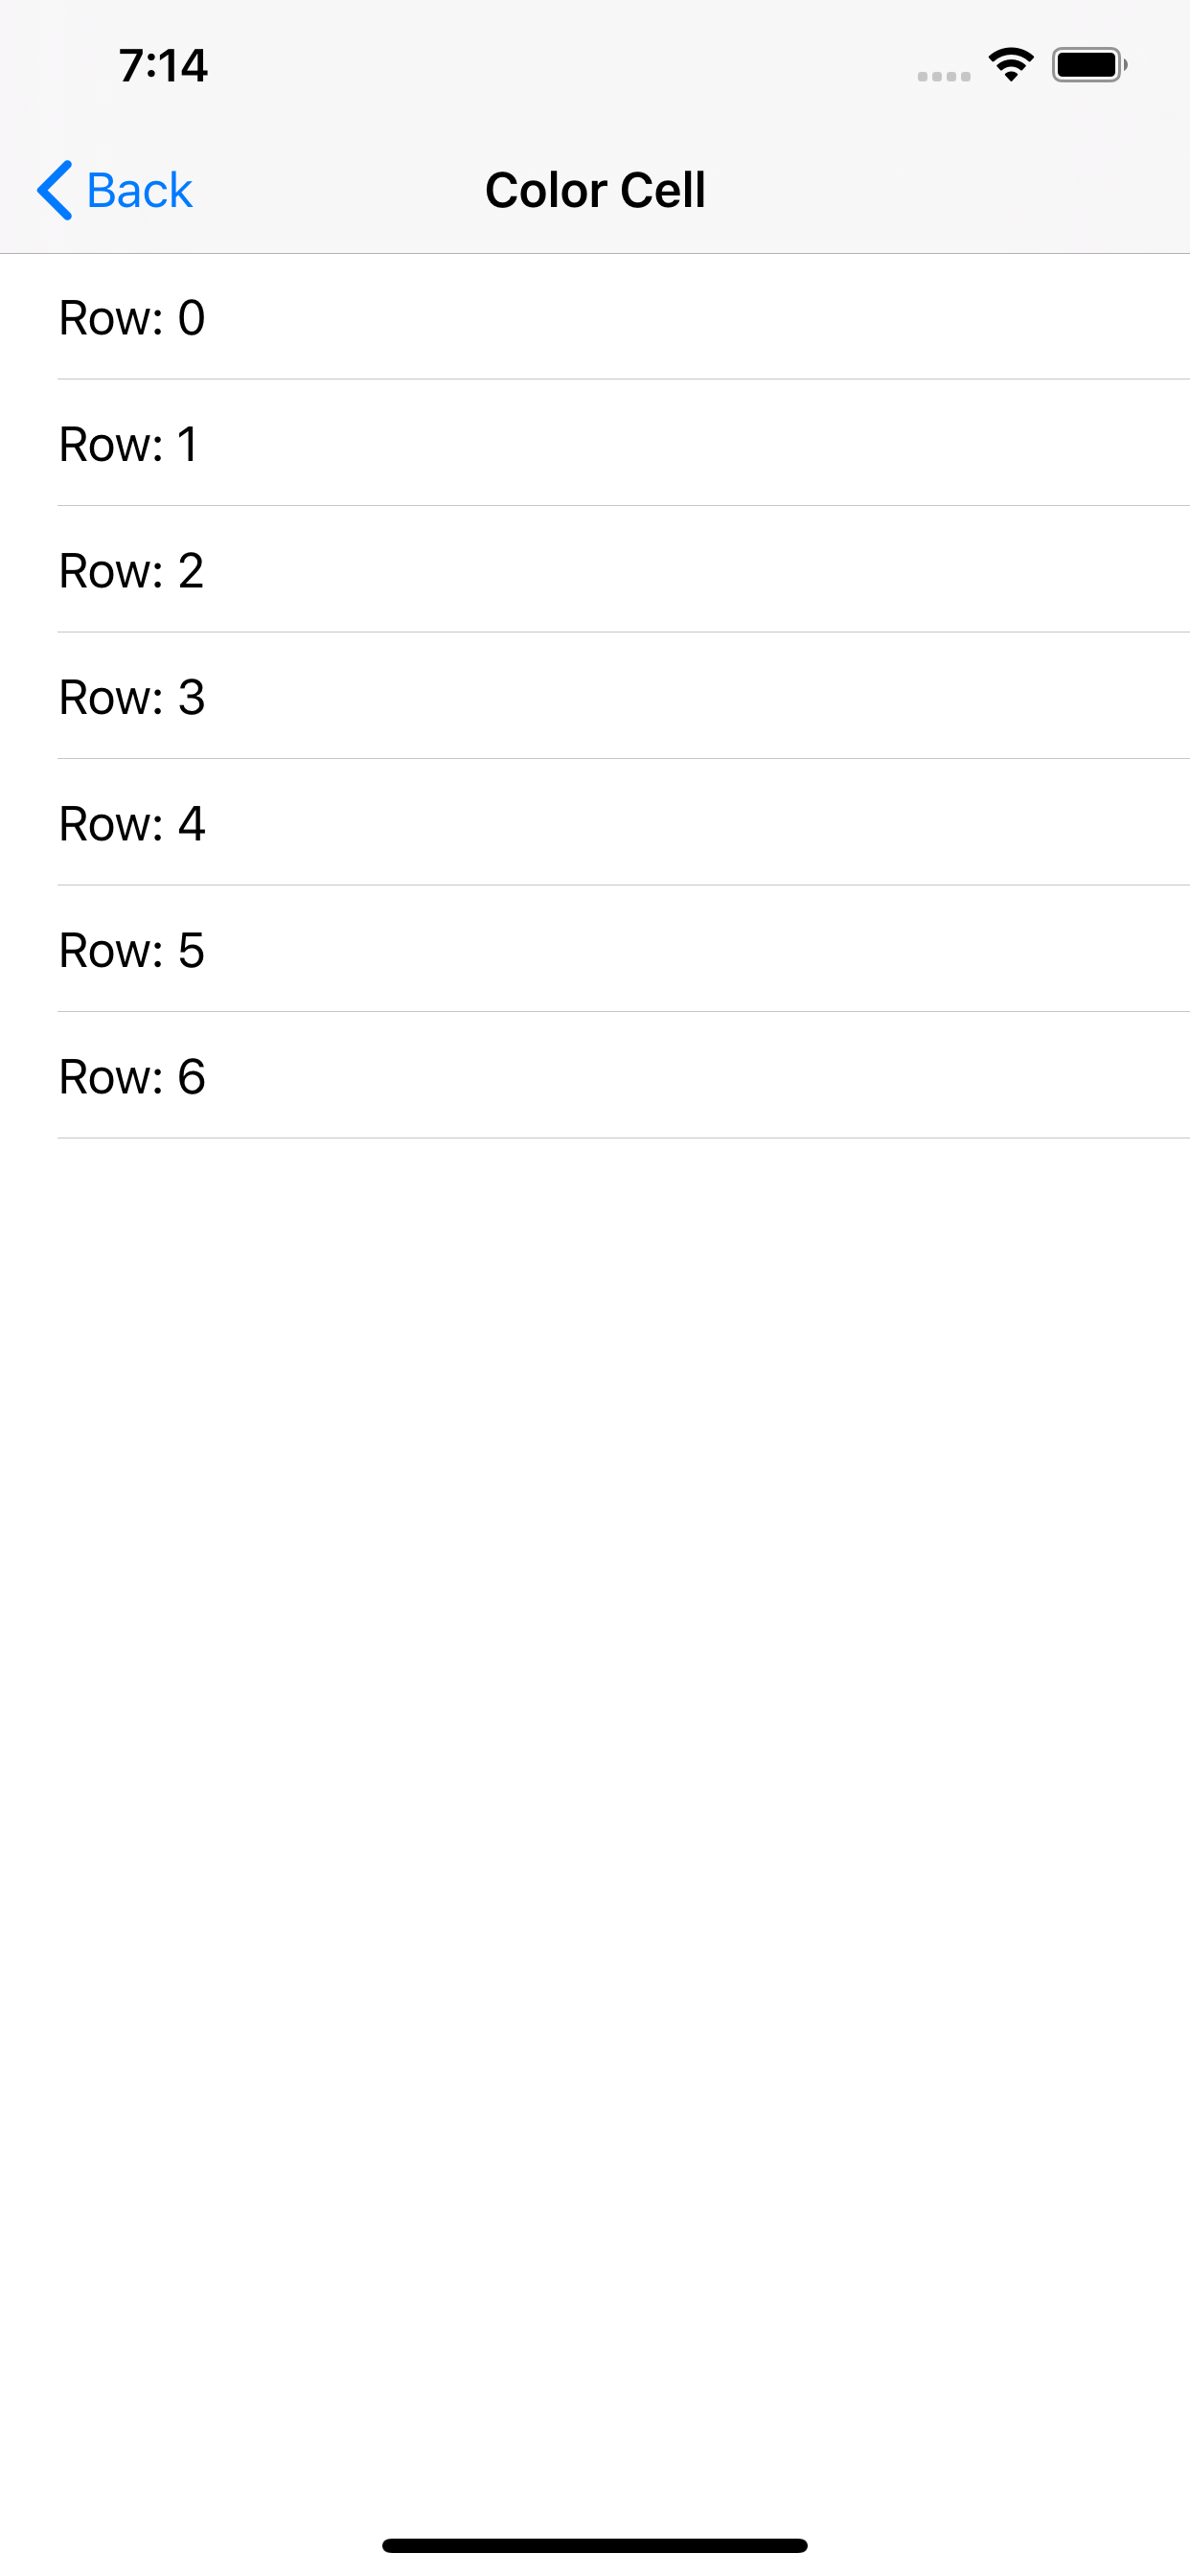
cell.accessoryType = .noneCell 背景色
UITableViewCellの背景色を設定する。こんな感じ。
下記のように設定
if cell.backgroundView == nil {
  cell.backgroundView = UIView()
}
cell.backgroundView?.backgroundColor = .red
上記のように
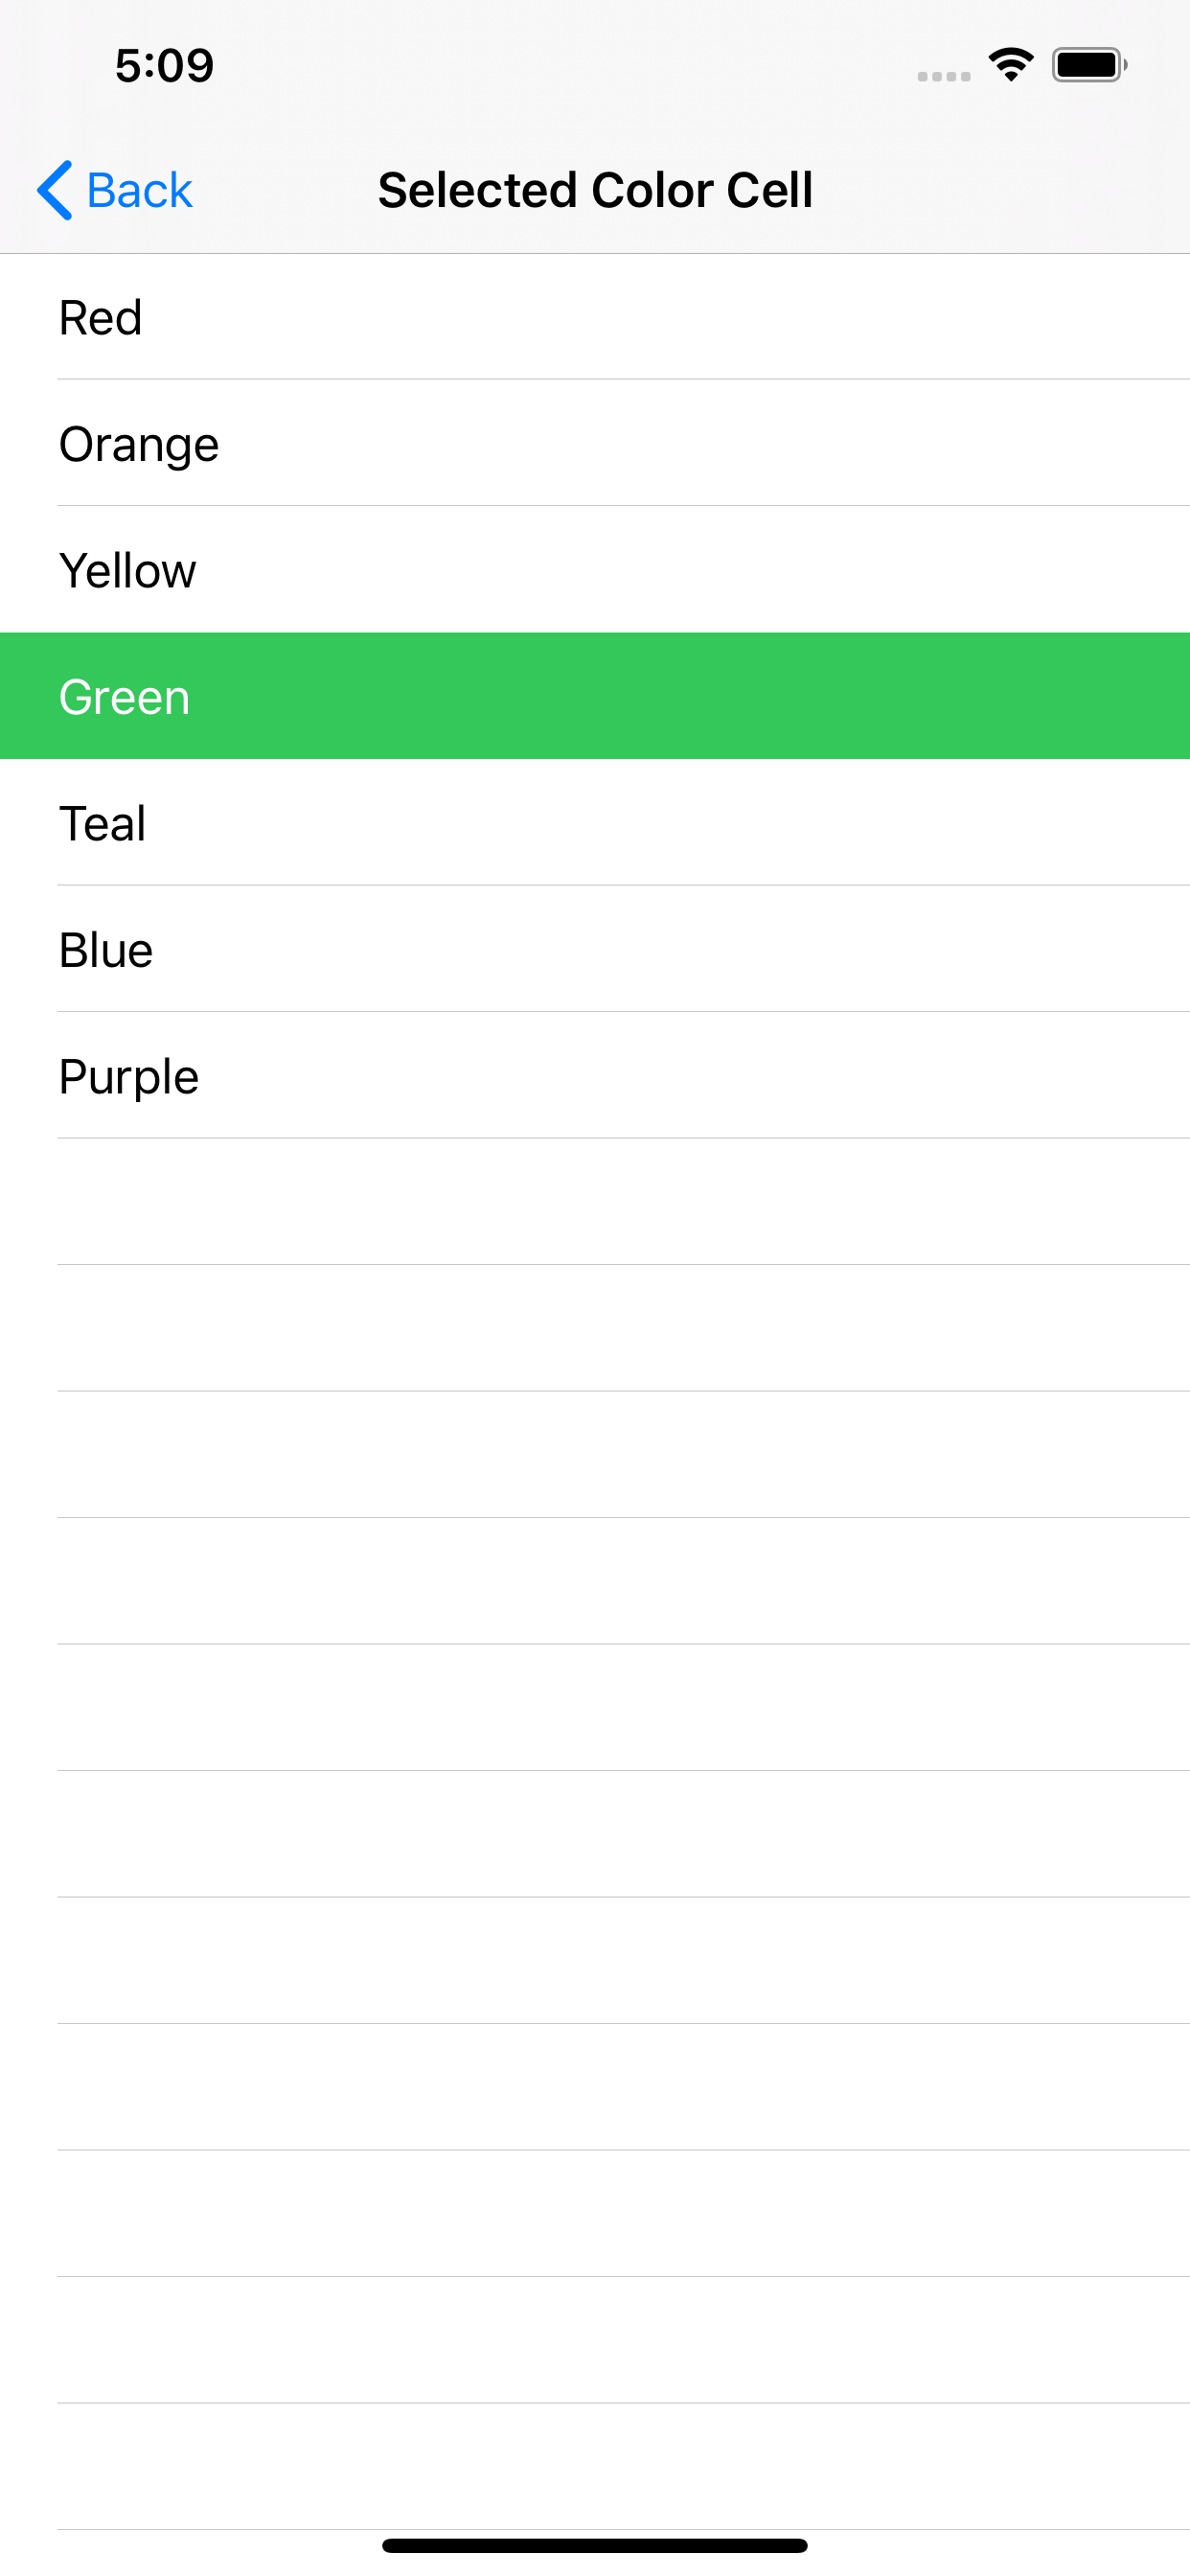
backgroundViewを設定する。確かcell.backgroundColor = .redはダメだった気がするけど動いた(勝手にいい感じにしてくれるのかも??)Cell 選択時の背景色
UITableViewCellの選択時の背景色を設定する。こんな感じ。
下記のように設定
let v = UIView()
v.backgroundColor = .red
cell.selectedBackgroundView = v
選択時の背景色の設定はよくわからない...
cell.selectedBackgroundView?.backgroundColor = .redではダメだったリファレンスに下記のように書いてあるが別に
nilでもなかった...Default is nil for cells in UITableViewStylePlain, and non-nil for UITableViewStyleGrouped.
Separator
Style
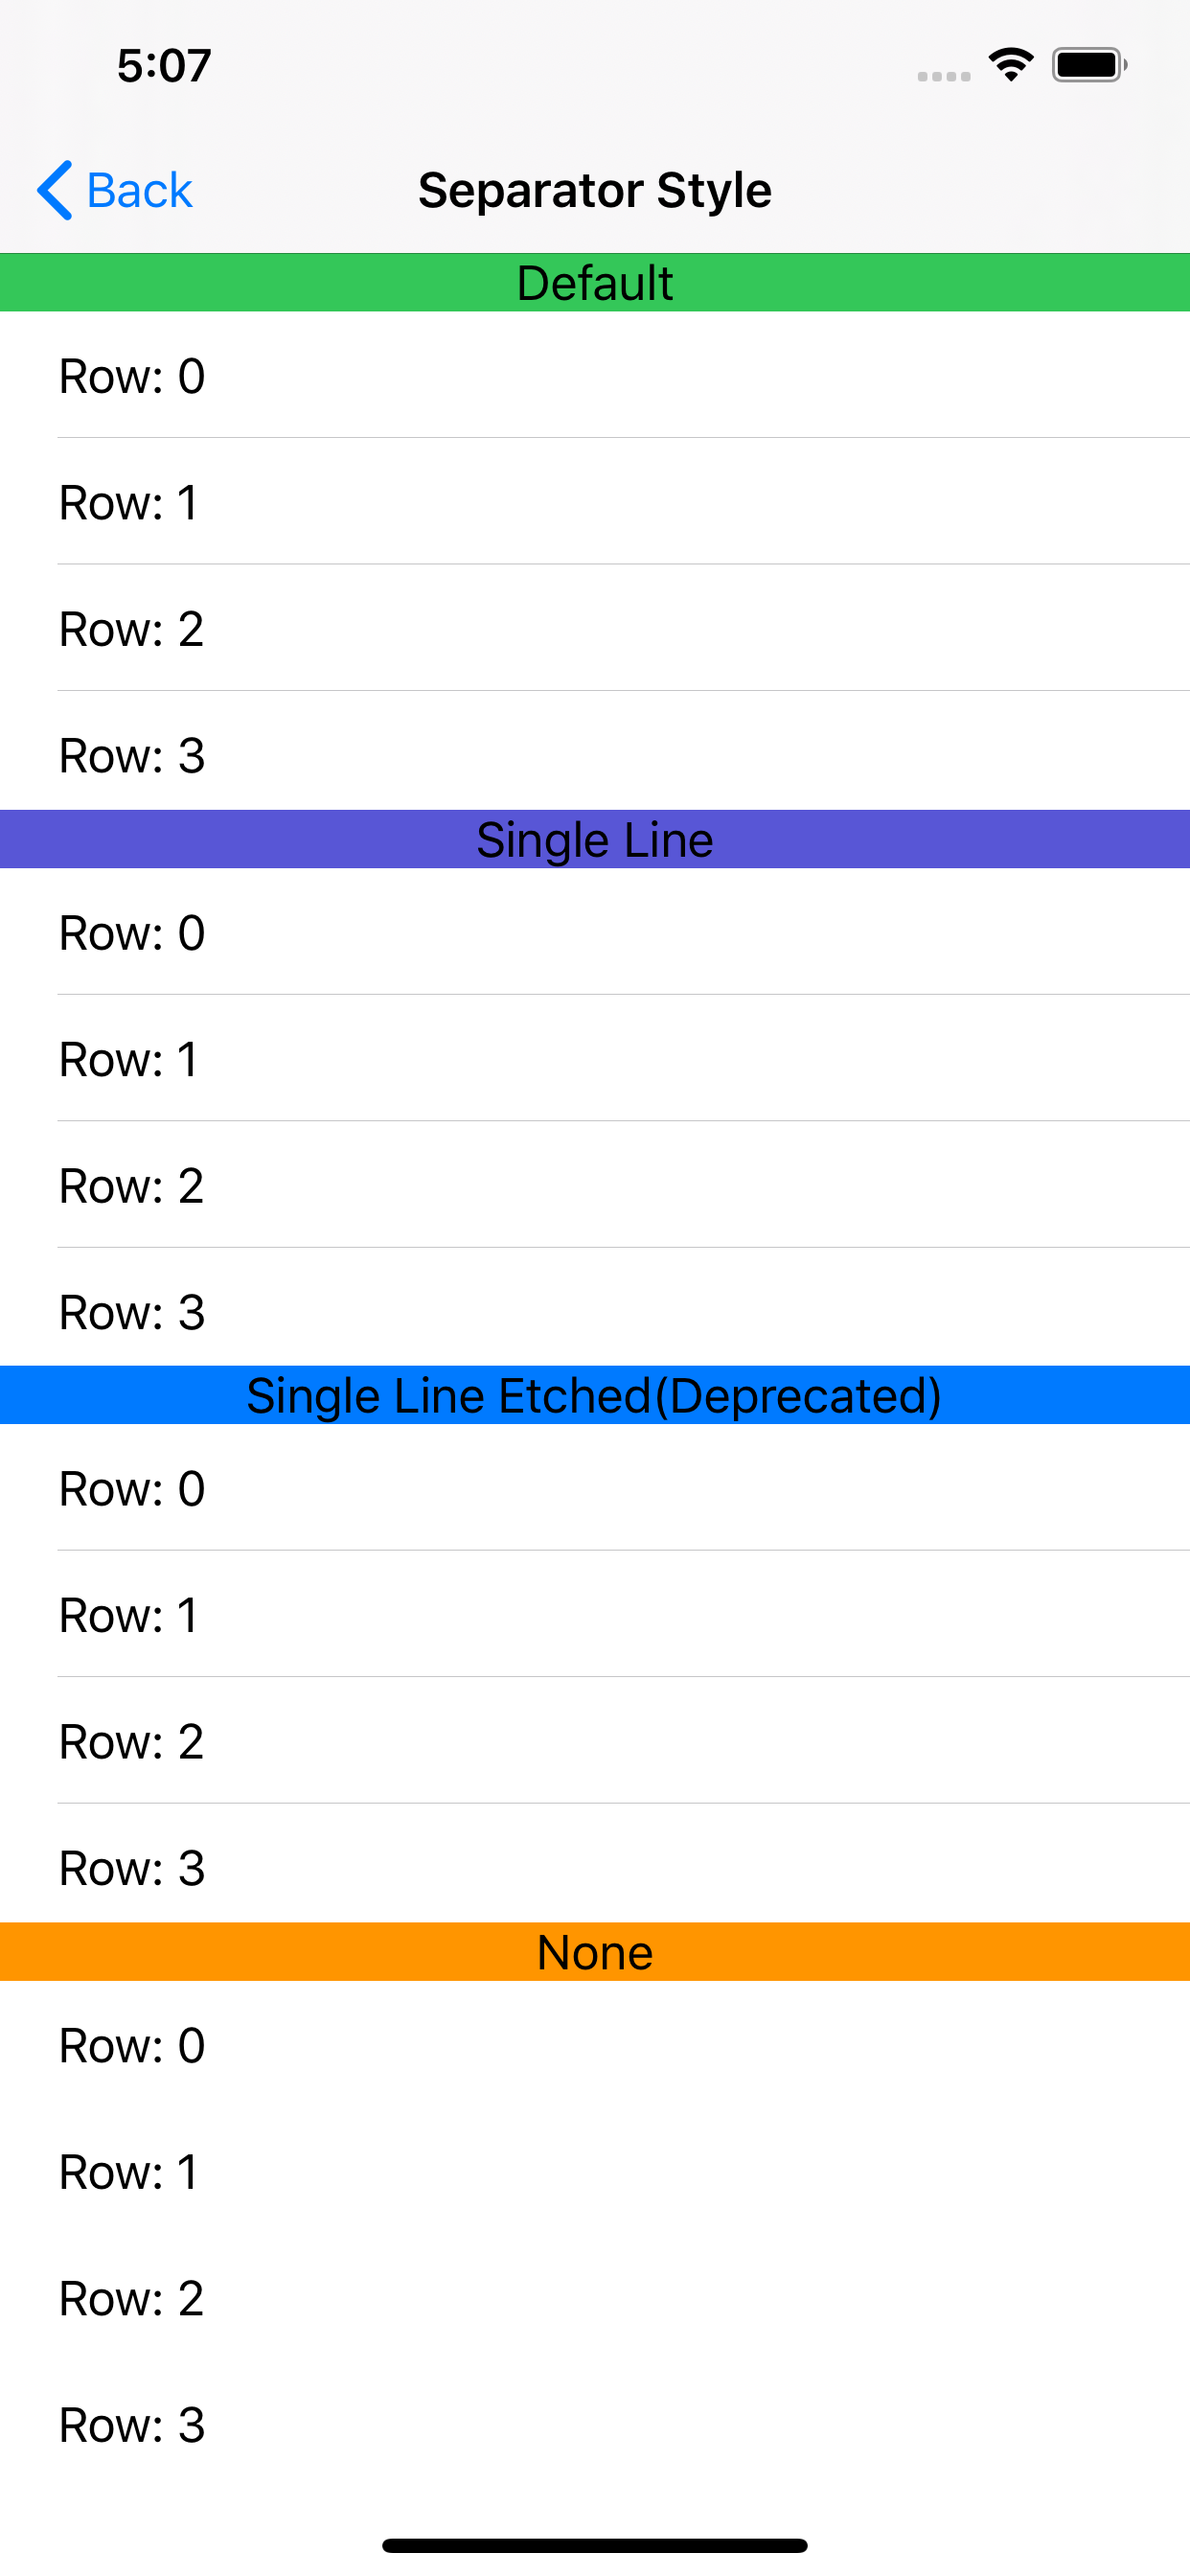
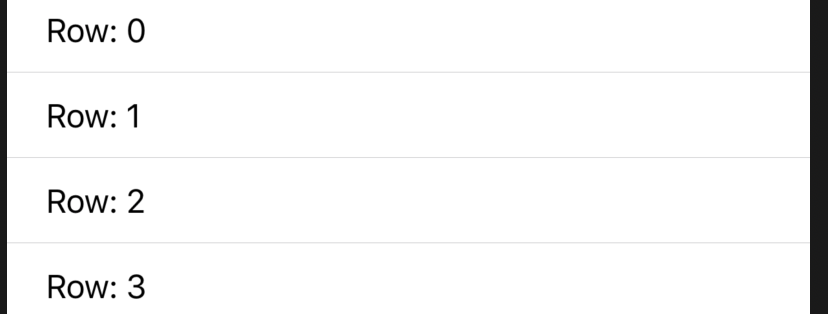
UITableViewには下記のSeparatorStyleがあります。
- none
- singleLine (Default)
- singleLineEtched (deprecated)
こんな感じ。
Storyboard で設定する場合は Default も含めて4パターンあるが Default は
singleLineなので変わらない。また、singleLineEtchedは Deprecated になっておりこちらもsingleLine同様の見た目になった。(tableViewのスタイルをGroupedにしても変化なし)なので
SeparatorStyleは下記の2パターンのみ
- none
- singleLine
下記のように設定(もしくは Storyboard で設定)
tableView.separatorStyle = .noneColor
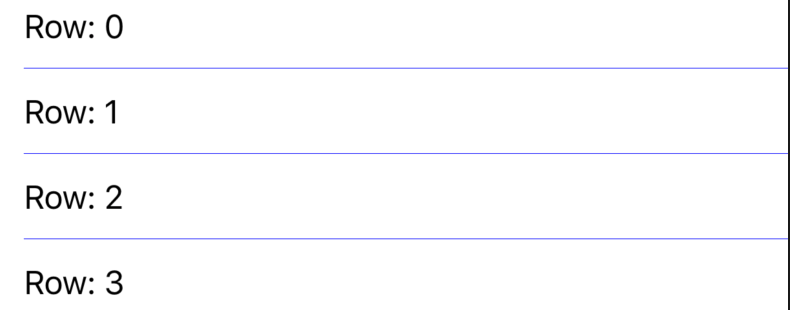
区切り線も色も設定できるが、セルごとの設定は不可。
こんな感じ。
下記のように設定(もしくは Storyboard で設定)
tableView.separatorColor = .blueInset
区切り線の
insetはセルごとの設定も可。こんな感じ。
テーブルに設定 セルごとに設定 下記のように設定(もしくは Storyboard で設定)
// すべて同じ値を設定する場合
tableView.separatorInset = .zero
// セルごとに設定する場合
cell.separatorInset = .init(top: 0, left: 15 * CGFloat(indexPath.row), bottom: 0, right: 0)
小技(セルがない部分の区切り線を消す)
下記のようにするとセルがない部分の区切り線を消すことができる
tableView.tableFooterView = UIView()
通常 footer設定 Table Style
UITableViewには下記のStyleがあります。
- plain
- grouped
- insetGrouped
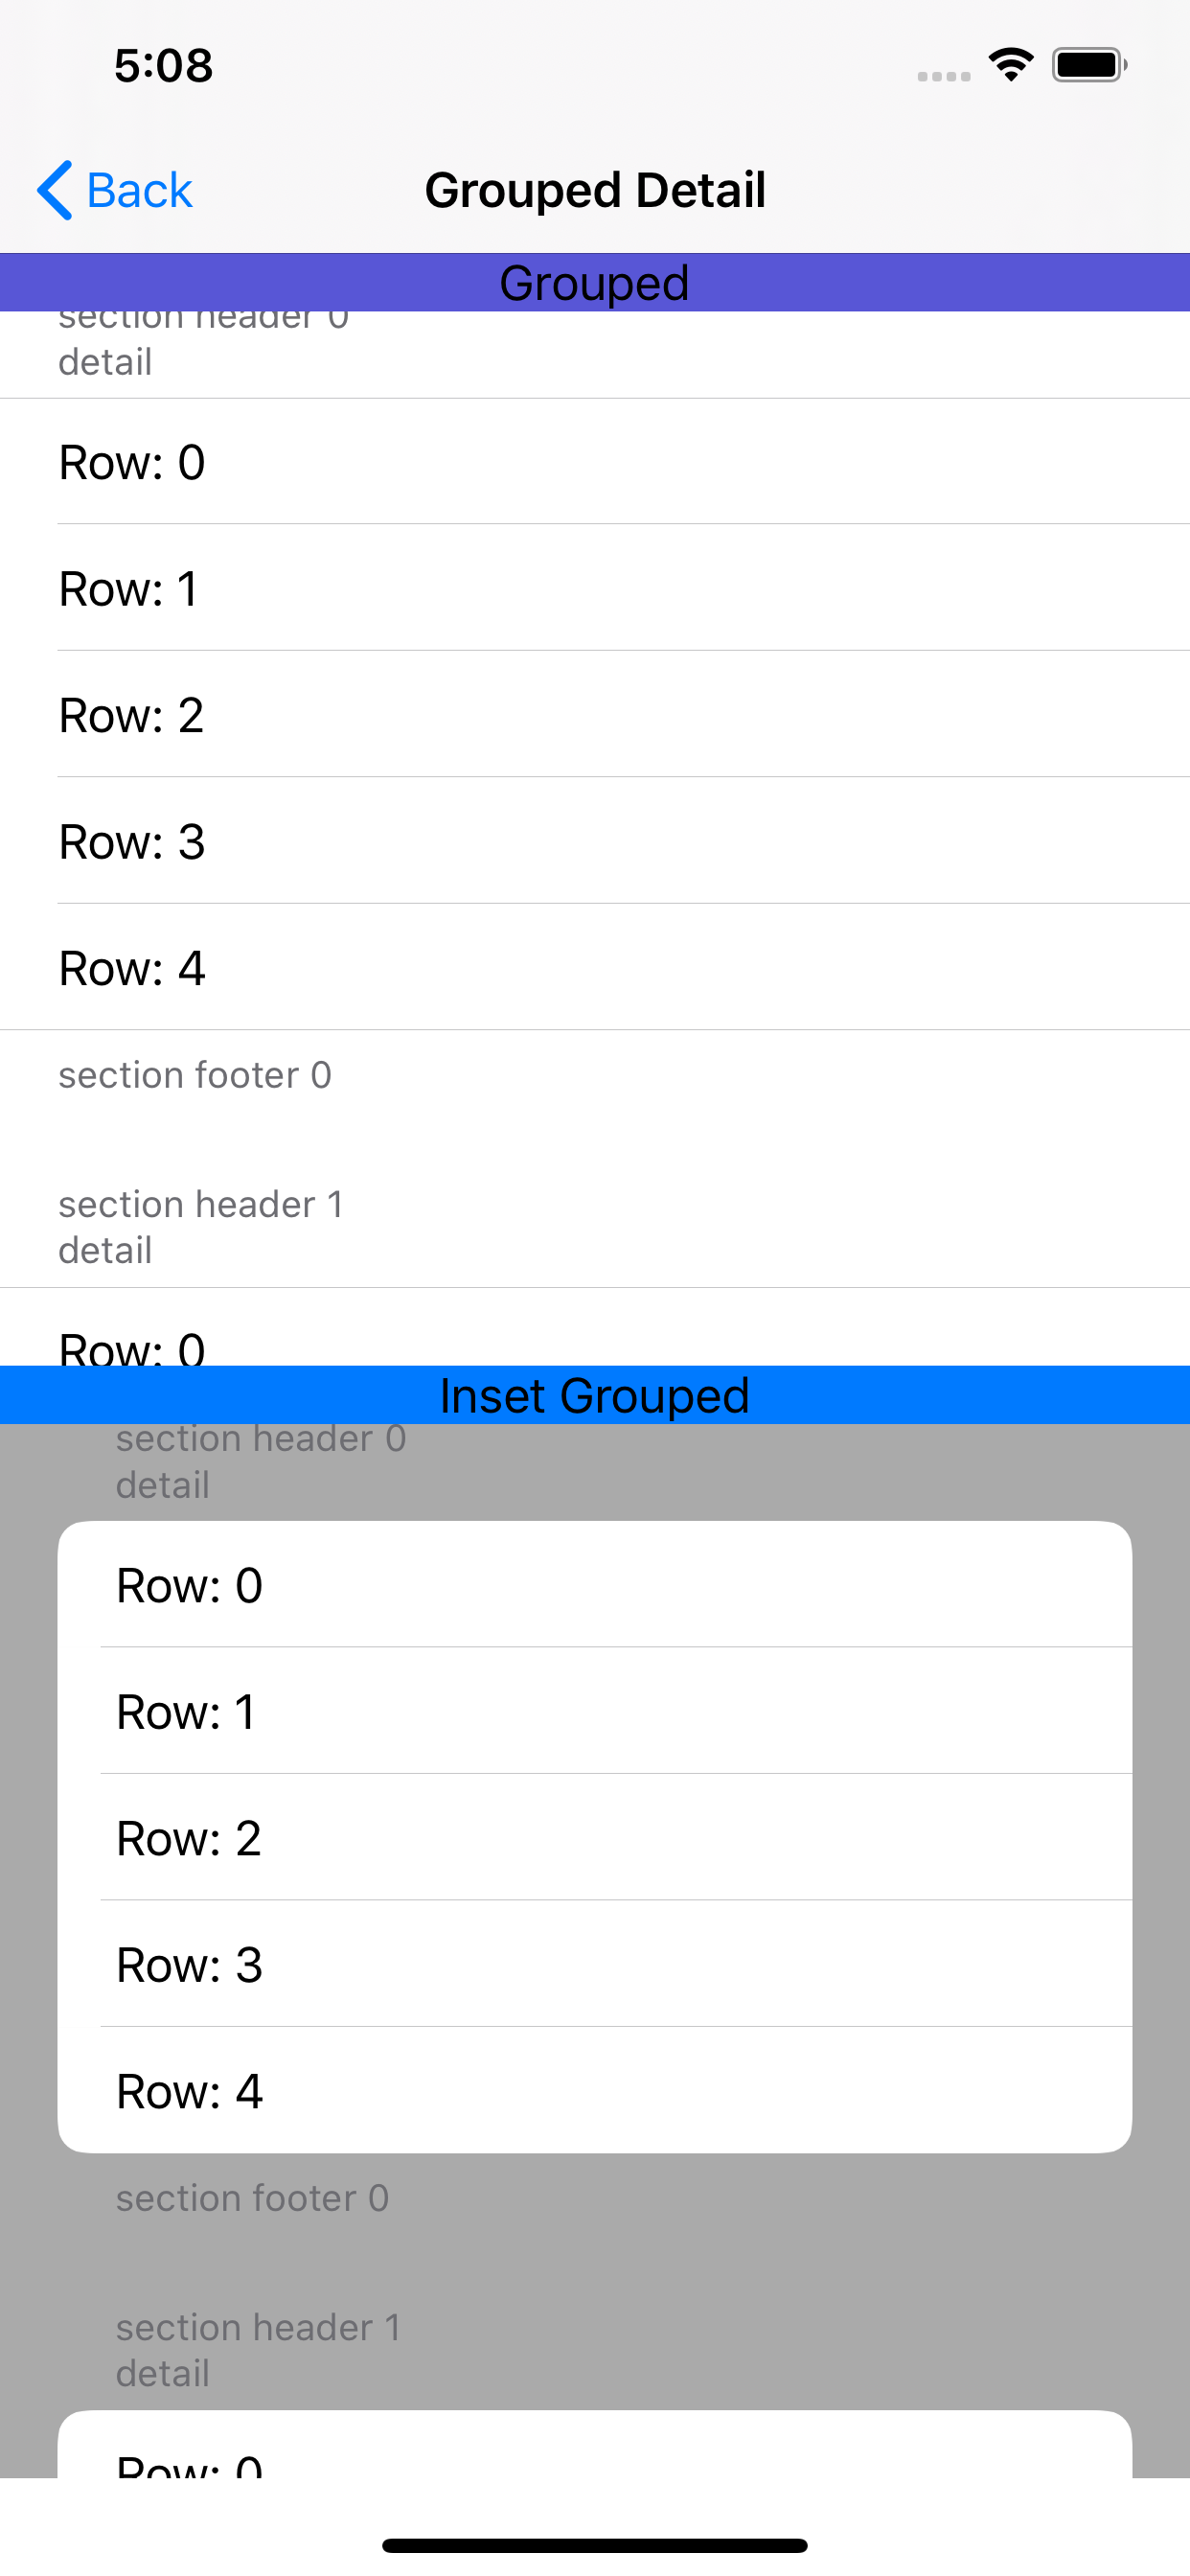
こんな感じ。(Plain とか表示してるのは TableView とは関係ないただの label です)
instGroupedはそのままだとわかりにくいのでtableViewの背景色を変えています。
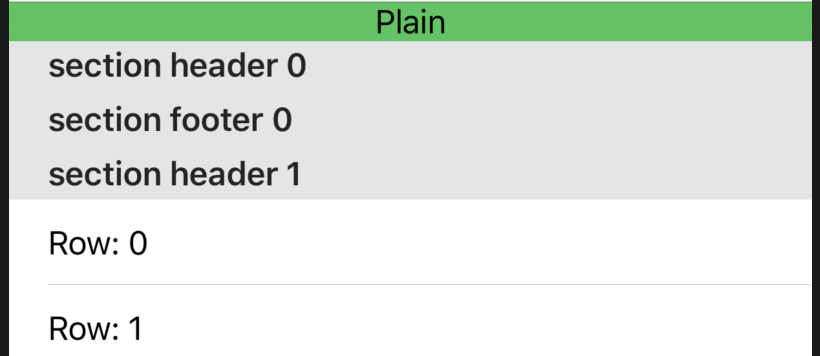
ぱっと見わかりにくいですが下記のようにヘッダー・フッターを設定すると違いがわかります。
func tableView(_ tableView: UITableView, titleForHeaderInSection section: Int) -> String? {
  return "section header \(section)"
}

func tableView(_ tableView: UITableView, titleForFooterInSection section: Int) -> String? {
  return "section footer \(section)"
}
plainの場合スクロールしてもヘッダー部分は固定される。
groupedとinsetGroupedの場合スクロールするとヘッダー部分も一緒にスクロールされる。ヘッダーの文字はすべて大文字になる。
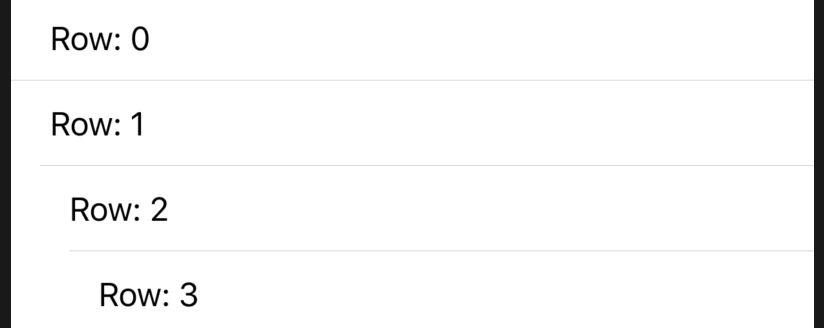
grouped insetGrouped 小技(ヘッダー・フッターの文字色を変える)
下記のようにするとヘッダー・フッターの文字色を設定できる
func tableView(_ tableView: UITableView, willDisplayHeaderView view: UIView, forSection section: Int) {
  (view as? UITableViewHeaderFooterView)?.textLabel?.textColor = .red
}

func tableView(_ tableView: UITableView, willDisplayFooterView view: UIView, forSection section: Int) {
  (view as? UITableViewHeaderFooterView)?.textLabel?.textColor = .blue
}
こんな感じ
Grouped の detailText 設定
groupedとinsetGroupedの場合ヘッダー部分にdetailTextLabelを設定できる。If you configured your table view with the group style, you can also configure the detailTextLabel property.
こんな感じ(ヘッダーは大文字にならない)
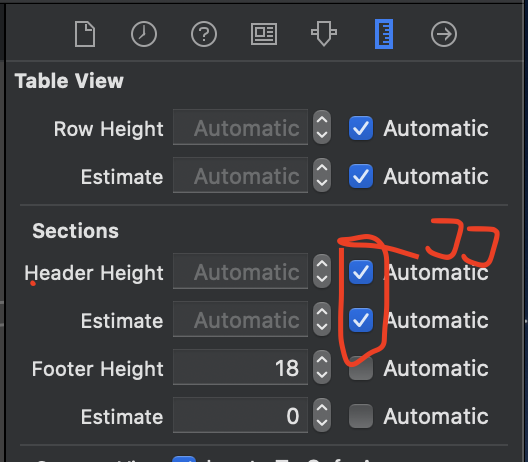
下記のように設定する。
Storyboardで Sections のところの Automatic にチェックをつける
これをしておかないと
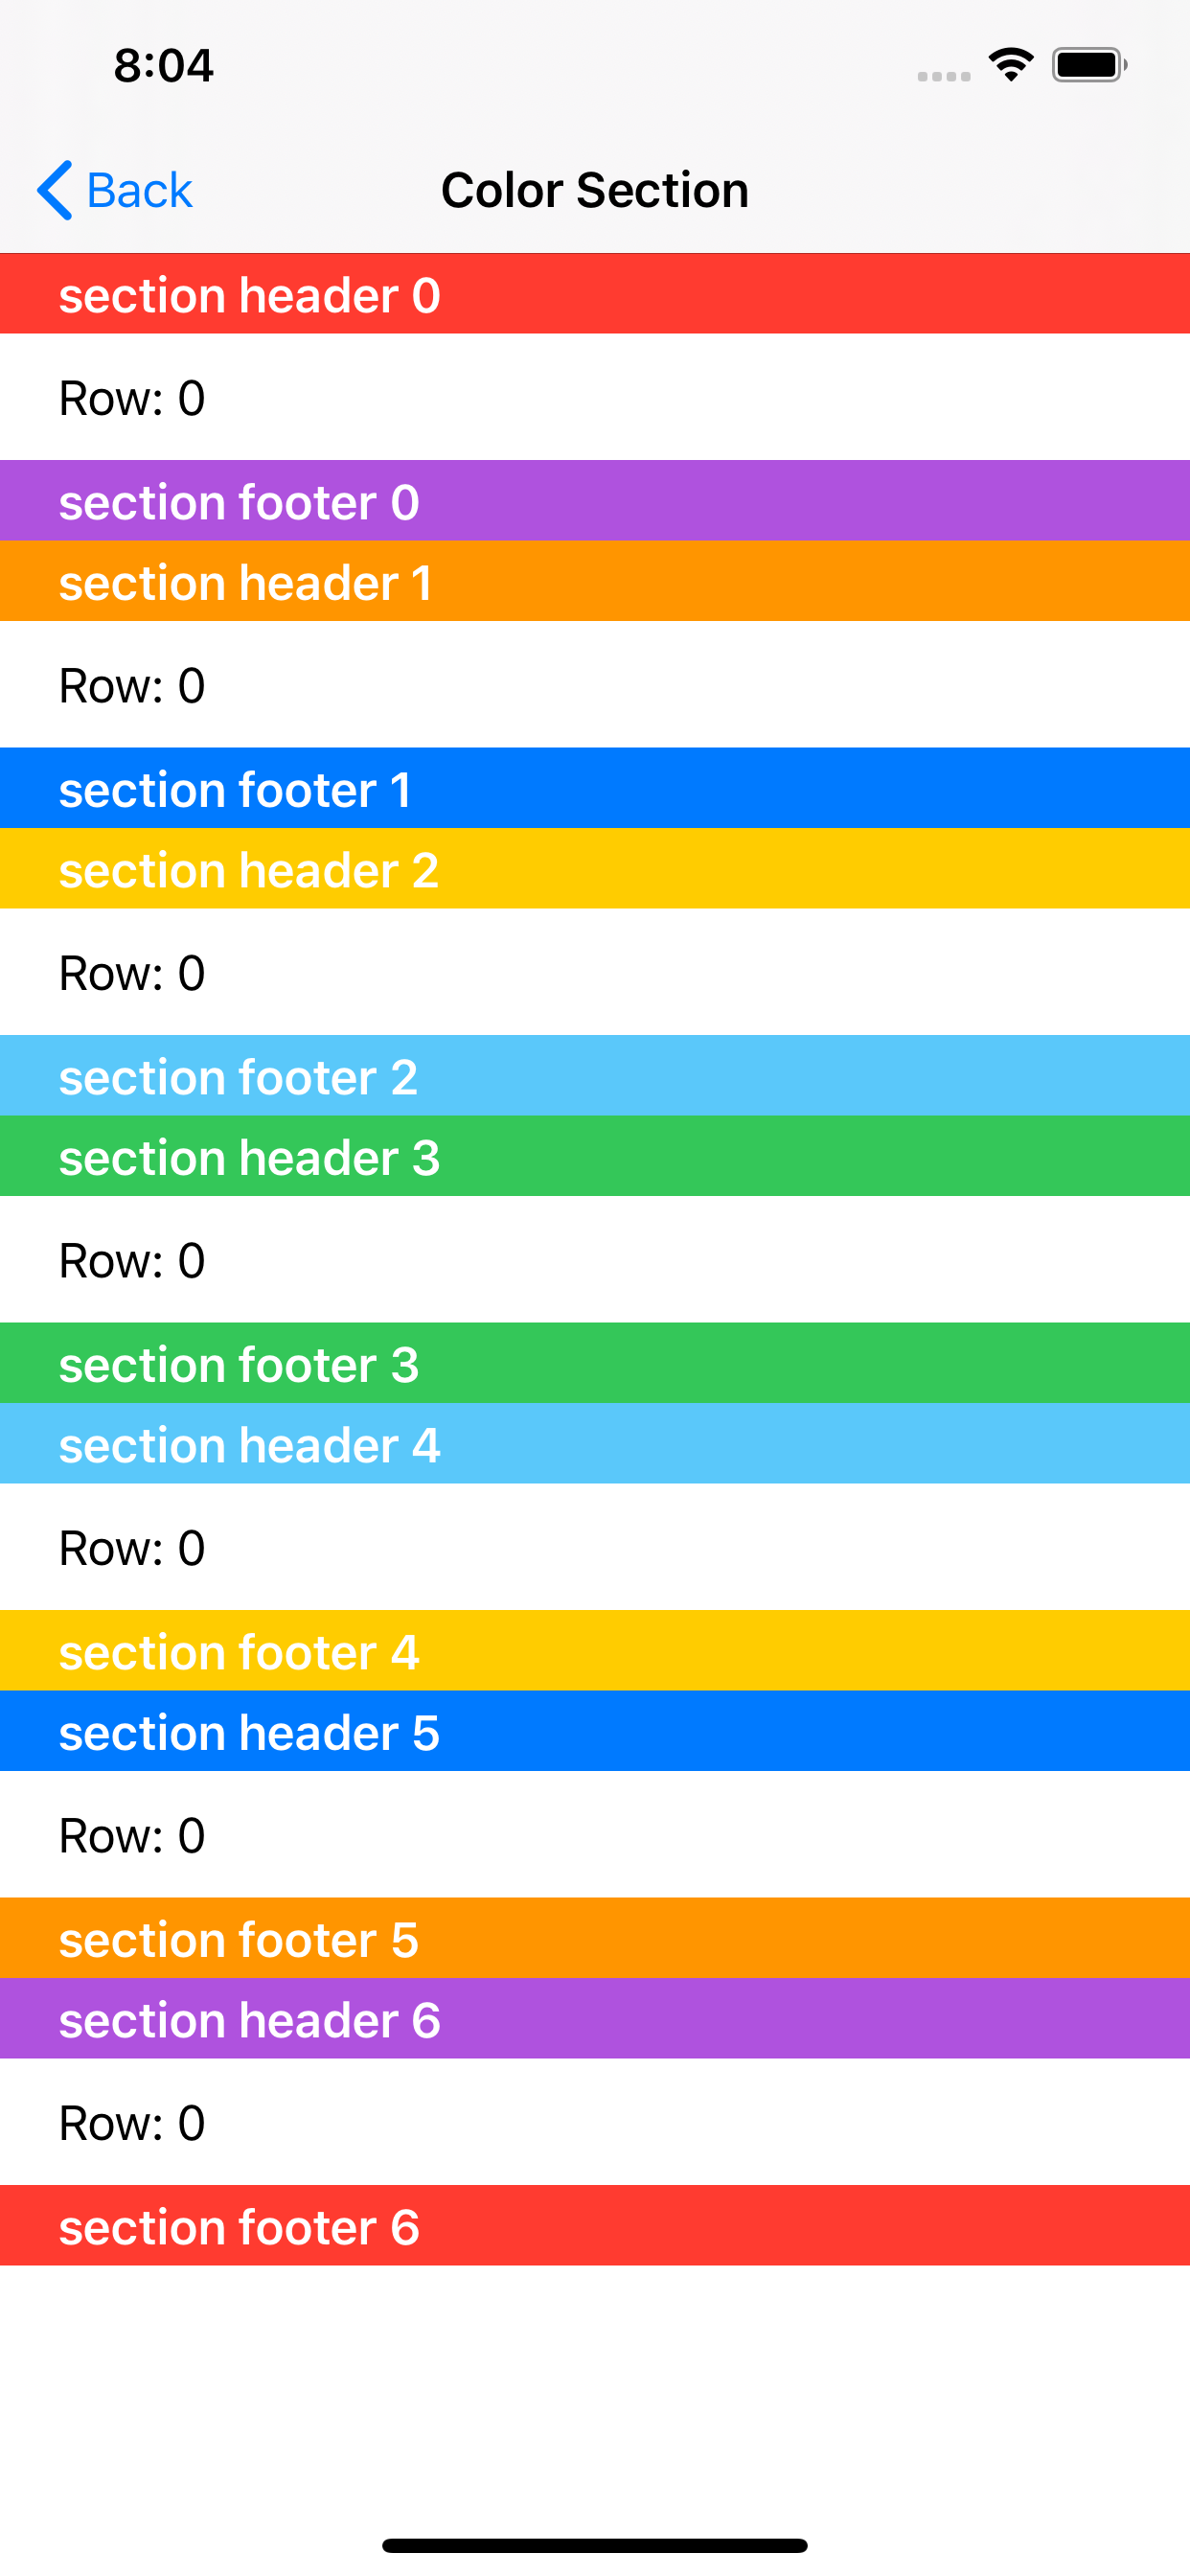
textLabelとdetailTextLabelが重なったりする。func tableView(_ tableView: UITableView, viewForHeaderInSection section: Int) -> UIView? { var header = tableView.dequeueReusableHeaderFooterView(withIdentifier: "header") if header == nil { header = UITableViewHeaderFooterView(reuseIdentifier: "header") } header?.textLabel?.text = "section header \(section)" header?.detailTextLabel?.text = "detail" return header }Section Color (ヘッダー・フッター)
セクションのヘッダー・フッターの背景色を設定する。
こんな感じ
下記のように設定する。
override func tableView(_ tableView: UITableView, viewForHeaderInSection section: Int) -> UIView? {
  var header = tableView.dequeueReusableHeaderFooterView(withIdentifier: "header")
  if header == nil {
    header = UITableViewHeaderFooterView(reuseIdentifier: "header")
  }
  if header?.backgroundView == nil {
    header?.backgroundView = UIView()
  }
  header?.backgroundView?.backgroundColor = .red
  return header
}

override func tableView(_ tableView: UITableView, viewForFooterInSection section: Int) -> UIView? {
  var footer = tableView.dequeueReusableHeaderFooterView(withIdentifier: "footer")
  if footer == nil {
    footer = UITableViewHeaderFooterView(reuseIdentifier: "footer")
  }
  if footer?.backgroundView == nil {
    footer?.backgroundView = UIView()
  }
  footer?.backgroundView?.backgroundColor = .red
  return footer
}
さいごに
カスタムクラスをつくらなくてもわりと色々できそう。
Table関連はよく使うけど実装方法忘れたりするのでもっと充実させたい。
プルリクくれてもええんやで


- 投稿日:2020-03-20T15:20:20+09:00
FlutterでURLSchemeを使って他のアプリ(例: Twitter)を開く(開けない場合の回避策も)
Flutterで個人開発をしている村松龍之介と申します。
(仕事ではiOSアプリのネイティブアプリ開発を行っています)今回は、アプリに自分のTwitterアカウントのリンクを載せようと思いました。
最初は普通にURLを貼って、ブラウザで開くようにしていたのですが、アプリ入ってるならアプリが開いた方が良いよね…と思い実装した備忘録です。URLを開くためにurl_launcherパッケージを使う
まず、URLを開くために必要な
url_launcherパッケージを導入済みでなければ導入します。
url_launcher | Flutter Package簡単に書きますと、
pubspec.yamlファイルのdependenciesに1行追記します。
VS Codeですと、⌘ + S で保存すればflutter pub getが自動で走りますのでインストールできます。
Android Studioでもおそらく同じ?dependencies: url_launcher: ^5.4.2 # <-導入時点で最新のバージョンで良いかと思います他のアプリを開きたいファイル(クラス)に実装します
ここではTwitterのプロフィールページを例に用います。
url_launcherパッケージをインポート
import 'package:url_launcher/url_launcher.dart';URLを開く
launch(url)関数で引数に設定したURLを開けます。
非同期な関数なのでawaitを使っています。final url = 'twitter://user?screen_name=riscait' // <-Twitterアプリのユーザープロフ画面を開くURLScheme await launch(url);開くことのできないURLが入ってくる可能性がある場合は
canLaunch(url)で調べることができます。if (await canLaunch(url)) { await launch(url); } else { // 任意のエラー処理 }URLを開けなかったときのためのセカンドURLを用意
final url = 'twitter://user?screen_name=riscait' // <-Twitterアプリのユーザープロフ画面を開くURLScheme
final secondUrl = 'https://twitter.com/riscait' // <-Twitterアプリのユーザープロフ画面を開くURL

if (await canLaunch(url)) {
  await launch(url);
} else if (secondUrl != null && await canLaunch(secondUrl)) {
    // 最初のURLが開けなかった場合かつセカンドURLが有って開けた場合
  await launch(secondUrl);
} else {
    // 任意のエラー処理
}
メソッド化
/// 第2引数のURLを開く。開けないURLだった場合は第2引数のURLを開く
Future _launchURL(String url, {String secondUrl}) async {
    if (await canLaunch(url)) {
      await launch(url);
    } else if (secondUrl != null && await canLaunch(secondUrl)) {
      await launch(secondUrl);
    } else {
      // 任意のエラー処理
    }
}
ボタンで使用する一例
RaisedButton(
  child: const Text('Twitterを開く'),
  onPressed: () => _launchURL(
    'twitter://user?screen_name=riscait',
    secondUrl: 'https://twitter.com/riscait',
  ),
),
iOSのためにinfo.plistを編集する
これでAndroidではTwitterアプリがインストールされていれば開かれることを確認しました!
しかし、iOSに対応する場合にはもう一手間必要です。
info.plistを開きます。
下記のように1行追加します。<key>LSApplicationQueriesSchemes</key> <array> <string>itms</string> <string>twitter</string> <!-- この1行を追加 --> </array>僕の環境下では
LSApplicationQueriesSchemesが既に存在しましたが、なかった場合は、5行全部追記しましょう!<plist version="1.0"> <dict> <!-- この間に追記すればOK --> </dict>以上です。無事、アプリが開ければ嬉しく思います!
TwitterのURL Schemeについてはこちらのサイトに詳しく載っておりました?
【2019】Twitter公式Appのスキーム一覧 │ えぐぷと!ご覧いただきありがとうございました!
蛇足
蛇足ですが、Flutterアプリをリリースできたので良かったらインストールしてみてもらえると嬉しいです?♂️
iOS: 「レストル-有給休暇管理」をApp Storeで
Android: 審査中です…!
- 投稿日:2020-03-20T14:56:00+09:00
Firebase UIで簡単Sign in with Apple対応
はじめに
Firebaseを使ってソーシャルログインをやっているけど、まだSign in with Appleにまだ対応していないぞというそこのあなた!
朗報です。
あなたがFirebase UIを使ってソーシャルログインを実装していたら数分で対応できちゃいます。
ログイン画面のデザイン細かく変えたいしFirebase UIなんて使ってねーよという方はごめんなさい。本記事の対象外です。
使用するライブラリ
FirebaseUI for iOS — Auth
https://github.com/firebase/FirebaseUI-iOS/blob/master/Auth/README.md対応方法
前準備
Firebase UIのReadmeにも記載されている「iOS で Apple を使用して認証する」を読んで設定をONにします。
特に躓くポイントはないと思われます。https://firebase.google.com/docs/auth/ios/apple#comply-with-apple-anonymized-data-requirements
「「Apple でサインイン」して Firebase で認証する」の項目以降は、実施しなくていいです。Firebase UIが全部いい感じにやってくれますからね。(ダメ開発者まっしぐら)
ソース修正
ドキュメントに従ってappleAuthProviderを追加するだけ。
// Objective-C
@import FirebaseUI;

/* ... */

NSArray<id<FUIAuthProvider>> *providers = @[
  [[FUIEmailAuth alloc] init],
  [[FUIGoogleAuth alloc] init],
  [FUIOAuth appleAuthProvider],//ここが重要
];
self.authUI.providers = providers;
と思ったけど、Sign in with AppleはiOS13からしか動作しないのでiOS13より下もきちんと考慮するとiOSバージョンを確認してから追加すること。
    NSMutableArray<id<FUIAuthProvider>> *providers = [NSMutableArray arrayWithObjects:
                                                      [[FUIGoogleAuth alloc] init],
                                                      [[FUIEmailAuth alloc] init],
                                                      nil
                                                      ];
    if (@available(iOS 13.0, *)) {
        if ([UIDevice currentDevice].systemVersion.floatValue >= 13.0) {
            // iOS 13以上の場合のみsign in with appleを追加
            [providers addObject:[FUIOAuth appleAuthProvider]];
        }
    }
    self.authUI.providers = [providers copy];
こちらの記事でavailableでOSバージョン確認する方法だと対応できないとあったので特に確認せず参考にさせてもらっています。(面倒くさがりですみません)
https://qiita.com/qinyong/items/aa348f266c05794c36b2