- 投稿日:2020-03-20T23:13:25+09:00
[Swift] @_exportedの挙動調査
はじめに
Swiftの
@_exportedについて、その挙動を調査したのでまとめる。
@_exportedとは
- _がプレフィックスとしてついており、Swiftで公式には公開されていないAttribute
- 以下のようにimport文で利用可能
@_exported import Foo挙動調査
前提
以下のような3階層のモジュール構成を考える。
├── Main
│   └── Main.swift
├── SubModule
│   ├── SubModule1.swift
│   └── SubModule2.swift
└── SubSubModule
    └── SubSubModule.swift
同一モジュール内への影響調査
SubModule1.swiftにて、
@_exported import SubSubModuleを記述する。
ファイルをまたいでSubModule2.swiftでもSubSubModule.swiftのAPIが利用できる。├── Main │ └── Main.swift ├── SubModule │ ├── SubModule1.swift // @_exported import SubSubModuleを記述 │ └── SubModule2.swift // SubSubModule.swiftのAPIが利用できる └── SubSubModule └── SubSubModule.swift上位モジュールへの影響調査
さらに、Main.swiftにて、
import SubModuleを記述する。
モジュールをまたいでMain.swiftでもSubModule.swiftのAPIが利用できる。├── Main │ └── Main.swift // import SubModuleを記述、SubSubModule.swiftのAPIが利用できる ├── SubModule │ ├── SubModule1.swift // @_exported import SubSubModuleを記述 │ └── SubModule2.swift └── SubSubModule └── SubSubModule.swiftおわりに
@_exportedをimportに付与すると、同一モジュール内でのimportが不要になる- また、上位モジュールが下位モジュールをimportでインポートした場合、下位モジュールで
@_exportedでimportされている孫関係にあたる下位モジュールもimportされる- 以下のように、UIKitをimportするだけで、FoundationをimportしなくてもFoundationのAPIが利用できることから、UIKit内部で
@_exported import Foundationが定義されていると推測されるimport UIKit import Foundation // import不要参考
- https://forums.swift.org/t/exported-and-fixing-import-visibility/9415
- https://stackoverflow.com/questions/41000256/what-is-import-func-struct-class-and-exported-in-swift
- https://stackoverflow.com/questions/33558995/what-is-the-exported-attribute-in-swift
- https://medium.com/eureka-engineering/create-merged-framework-to-cut-appstartuptime-72ee67b2bbab
- 投稿日:2020-03-20T22:06:44+09:00
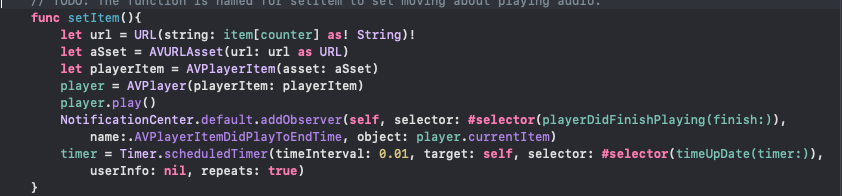
Swift における、Object、Methodを連結、作成する方法、AVPlayer で、外部URLのファイルを再生する方法。
ViewController.swift における、言わば、script における functionの連結。
import UIKit
import Avfoundation
class ViewController: UIViewController
のあと、Button Action の中や、
override func viewDidLoad(){
} 内に置いて。
から、
に、self.~の形で発進し、func ~(){} で受け取る
また、題材の
の形で、いずれのカッコの中にもおかず、class ViewControler : UIController の直下にセットしデクレアしておく。
二種類のNSArrayは、viewDidLoad(){} 内に置いて、item = ["url","url2","url3"]
songName = ["title1","title2","title3"]
として置き、counter = 0などとし、item[counter]、songName[counter]で取り出す。


- 投稿日:2020-03-20T19:07:53+09:00
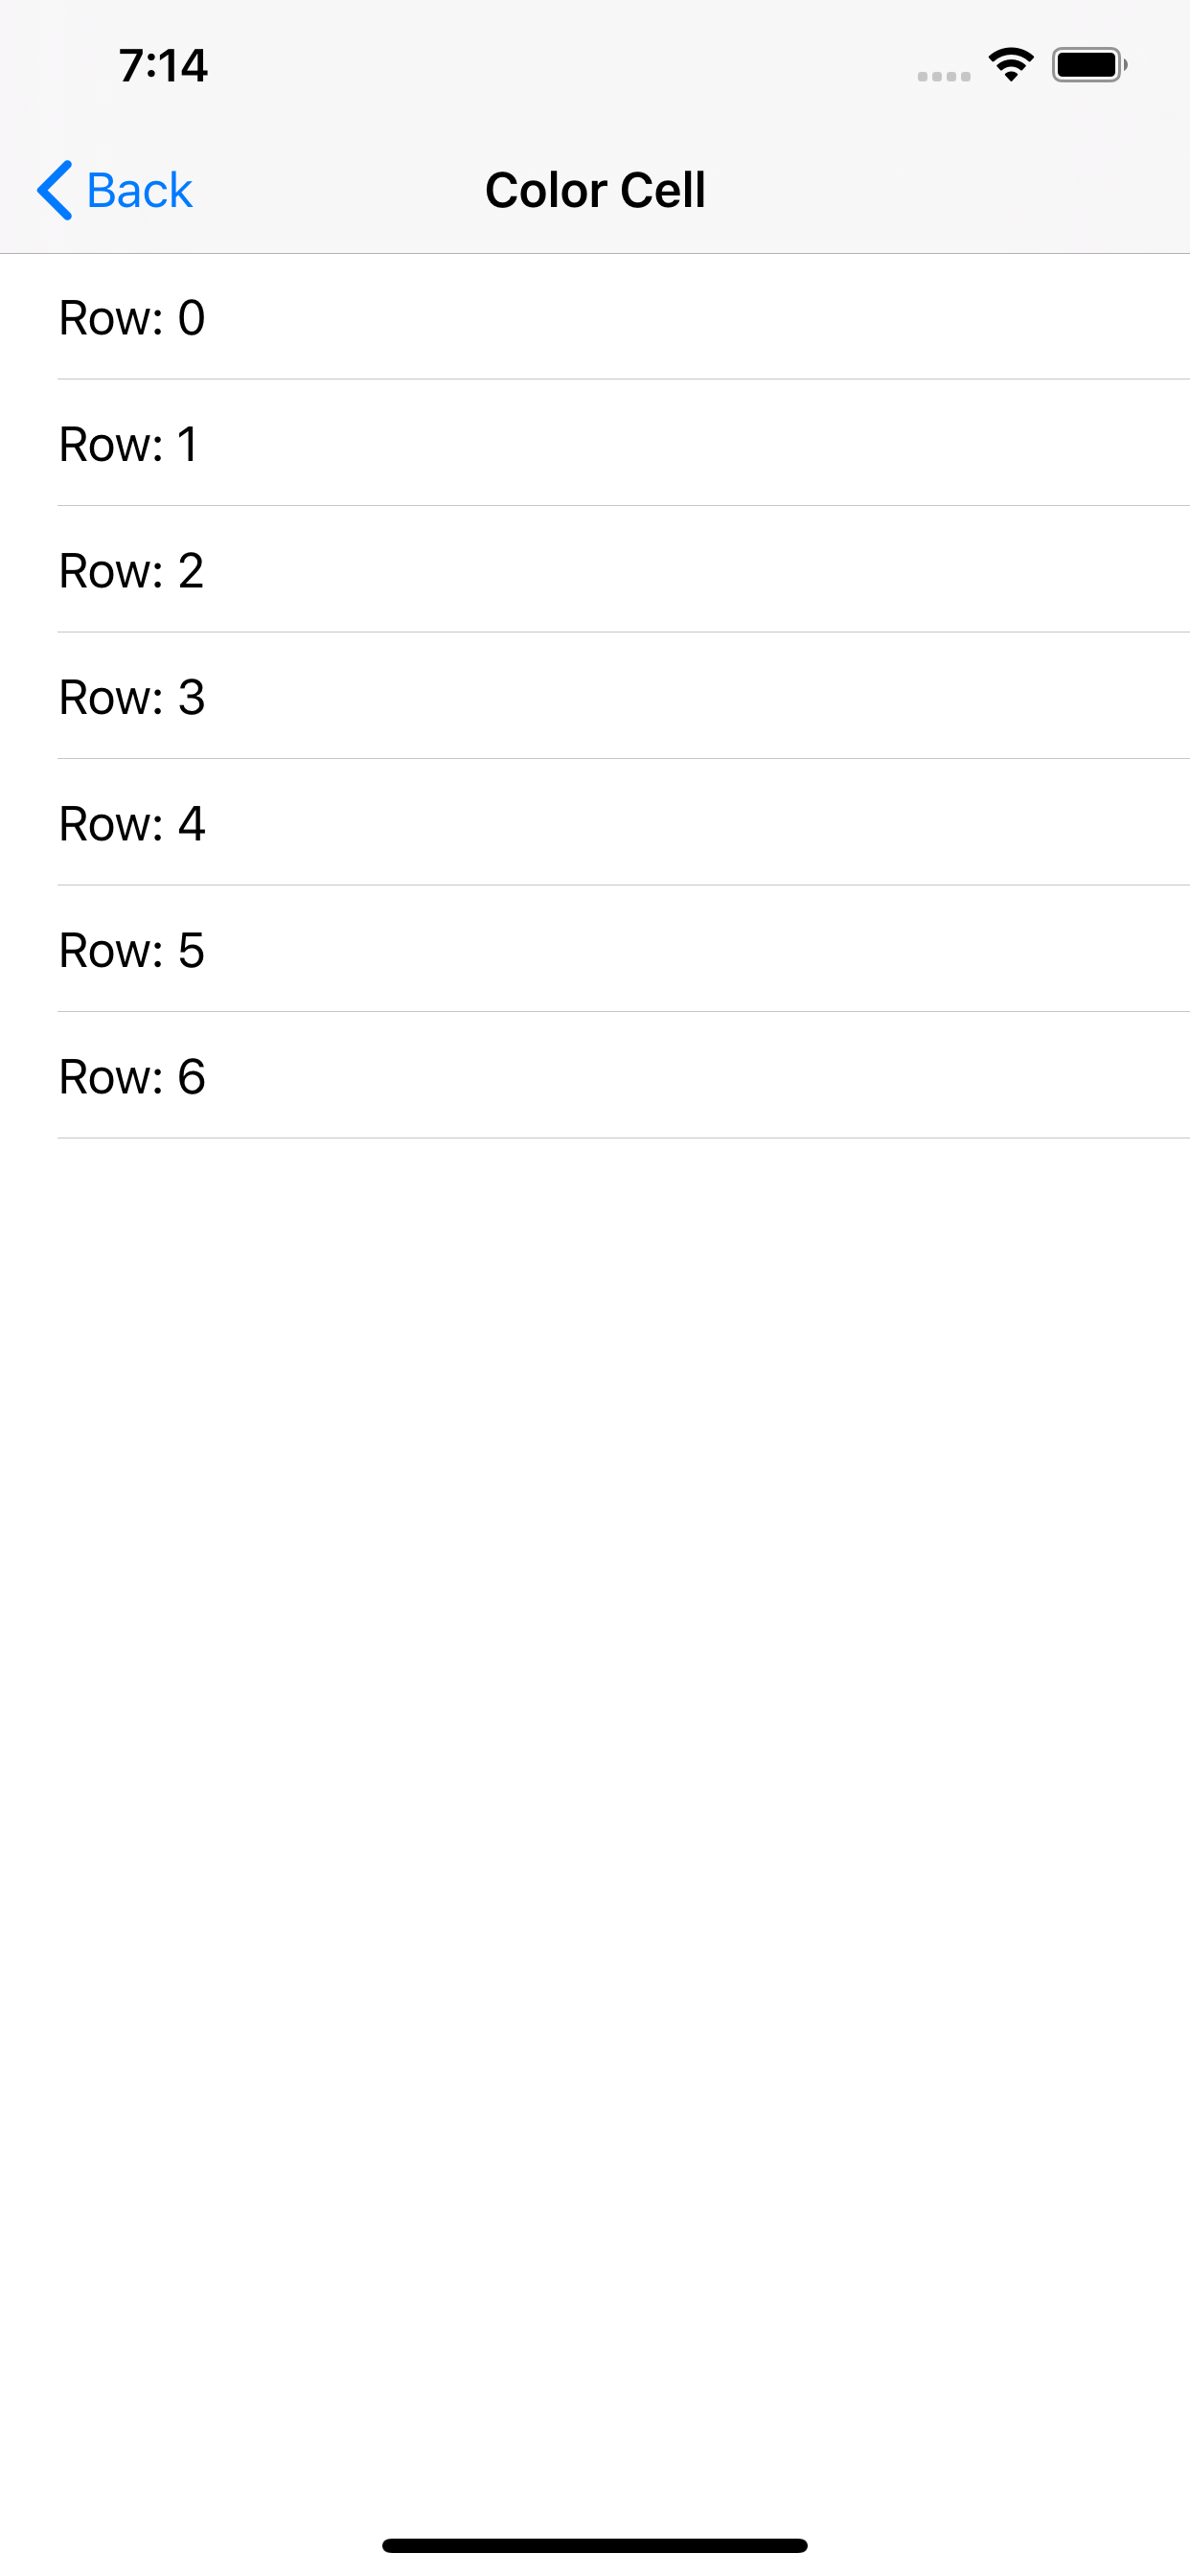
デフォルトTableViewサンプル集(swift)
はじめに
TableViewを使うときは毎回セルとかヘッダー・フッターのカスタムクラス作ったりしてたけどデフォルトのやつでも色々できるやん?ってことで色々作ってみました。
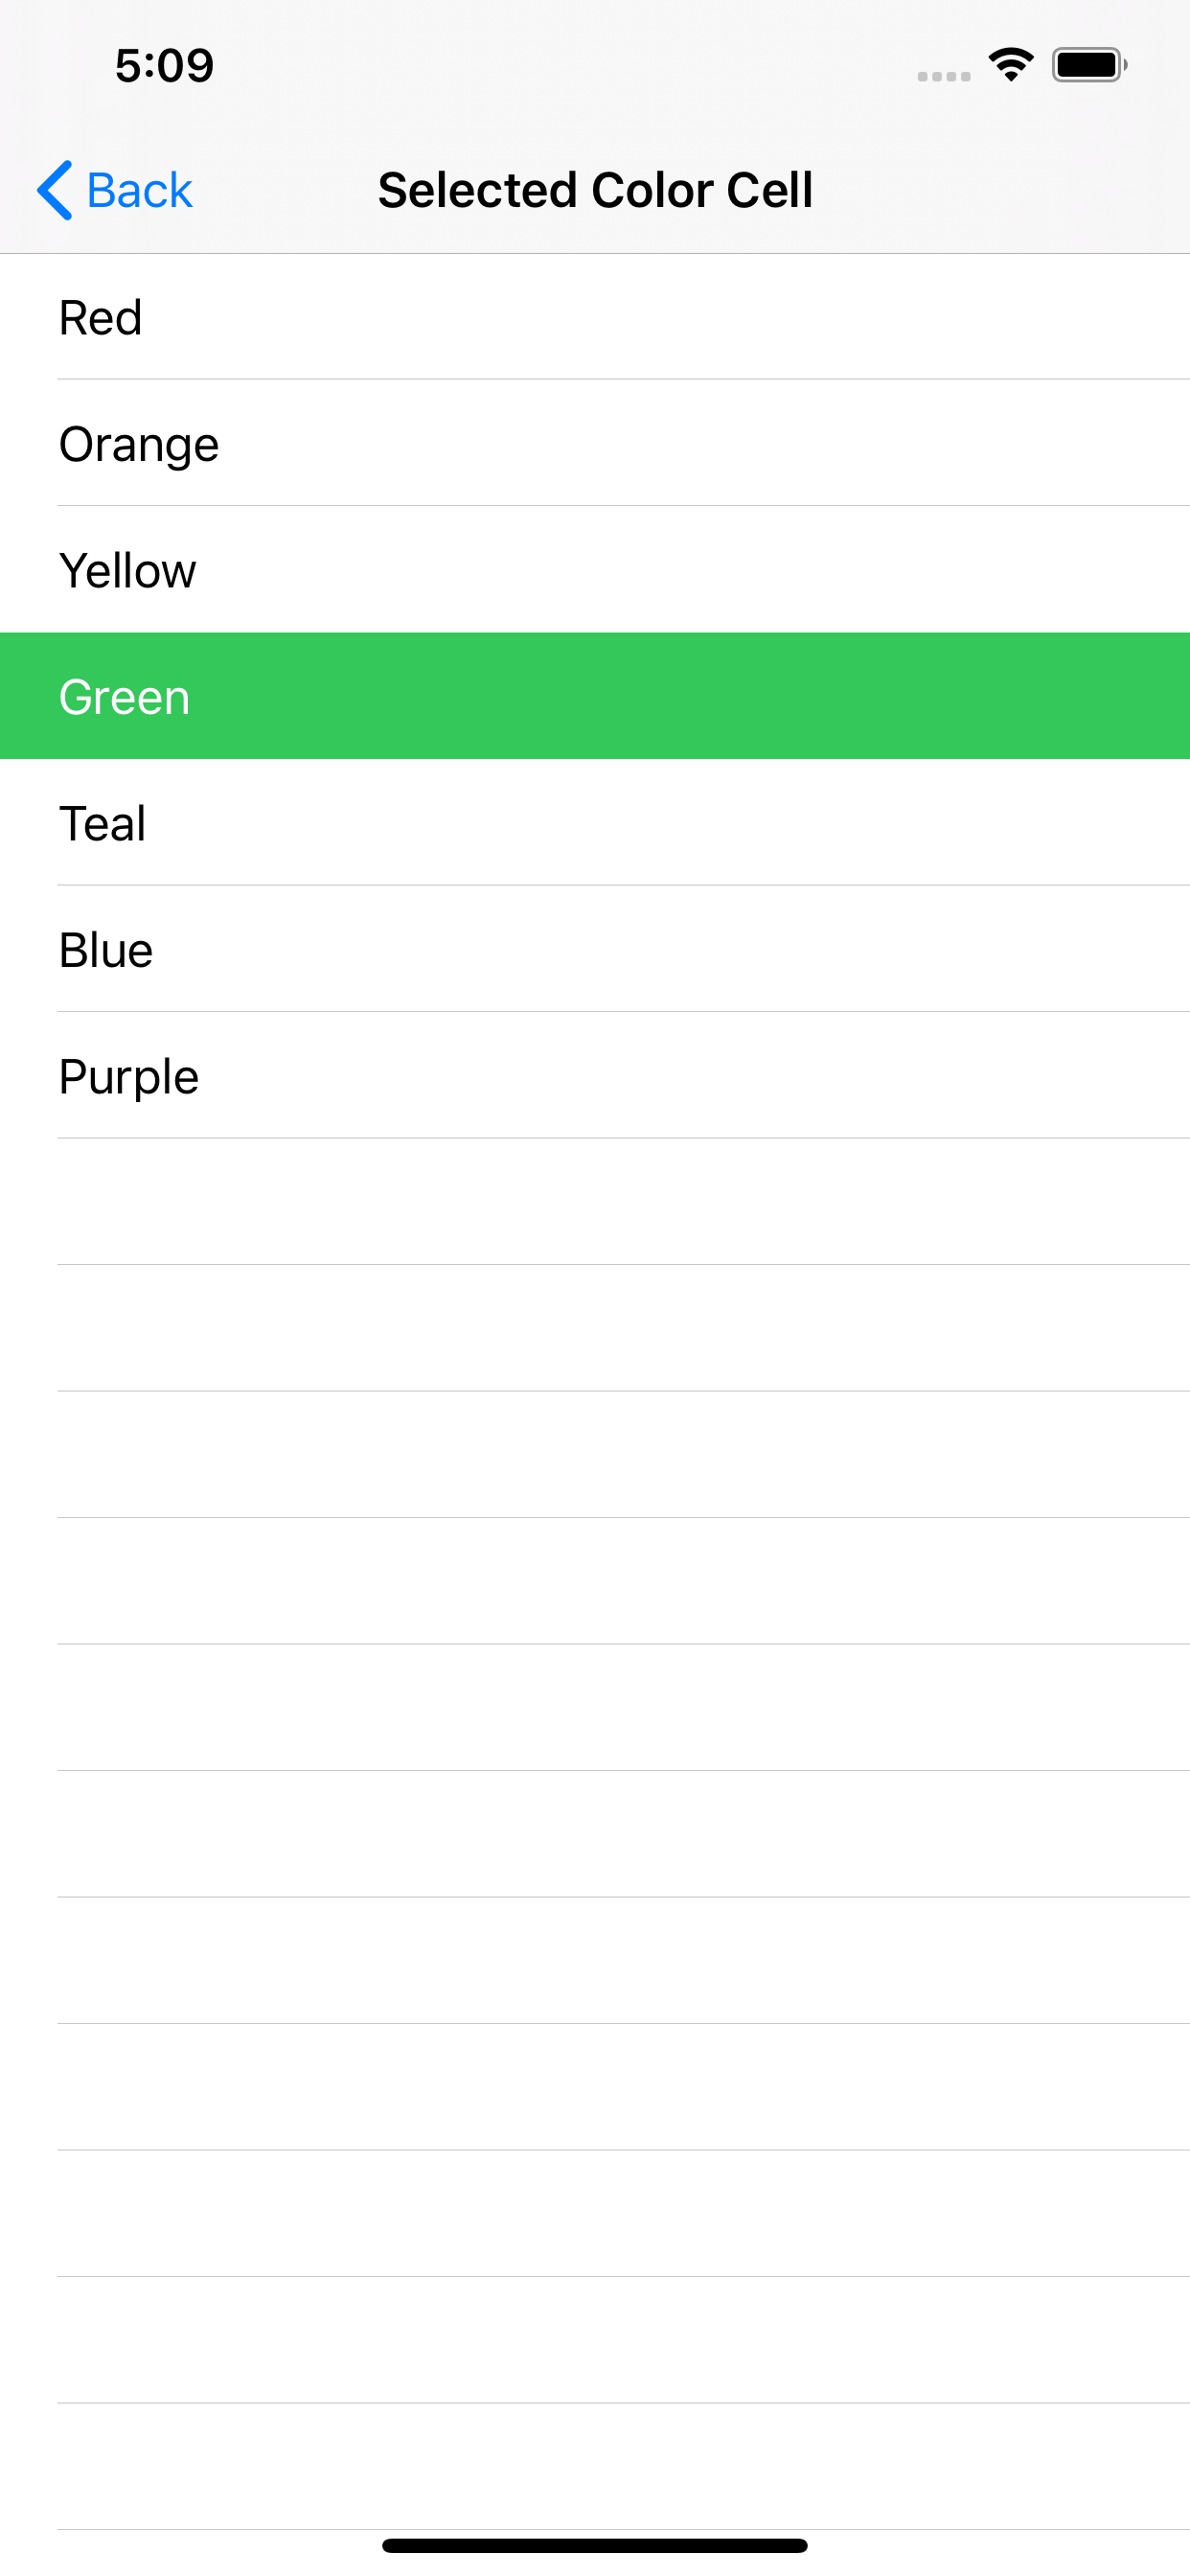
Cell Style AccessoryType Color Cell Selected Color
Separator Style Table Style Grouped Detail Color Section TableViewControllerを使うか否か
画面にtableViewしか表示しないって場合は基本的には
UITableViewControllerを使う方が便利なのでできるだけUITableViewControllerを使います。便利機能
- tableViewのひも付けとかしなくてもいい
- var clearsSelectionOnViewWillAppear: Bool
- var refreshControl: UIRefreshControl?
- 編集モードの時に
func setEditing(_ editing: Bool, animated: Bool)オーバーライドしなくてもいい- キーボード表示時に自動でスクロールしてくれる
- static cell が使える
- セーフエリアまわりもなんかいい感じにしてくれる
Cell Style
UITableViewCellには下記のStyleがあります。
- default (Basic)
- value1 (Right Detail)
- value2 (Left Detail)
- subtitle (Subtitle)
こんな感じ。
default (Basic) 以外は detail テキストも設定できる。value2 (Left Detail) 以外は image も設定できる。
下記のように設定
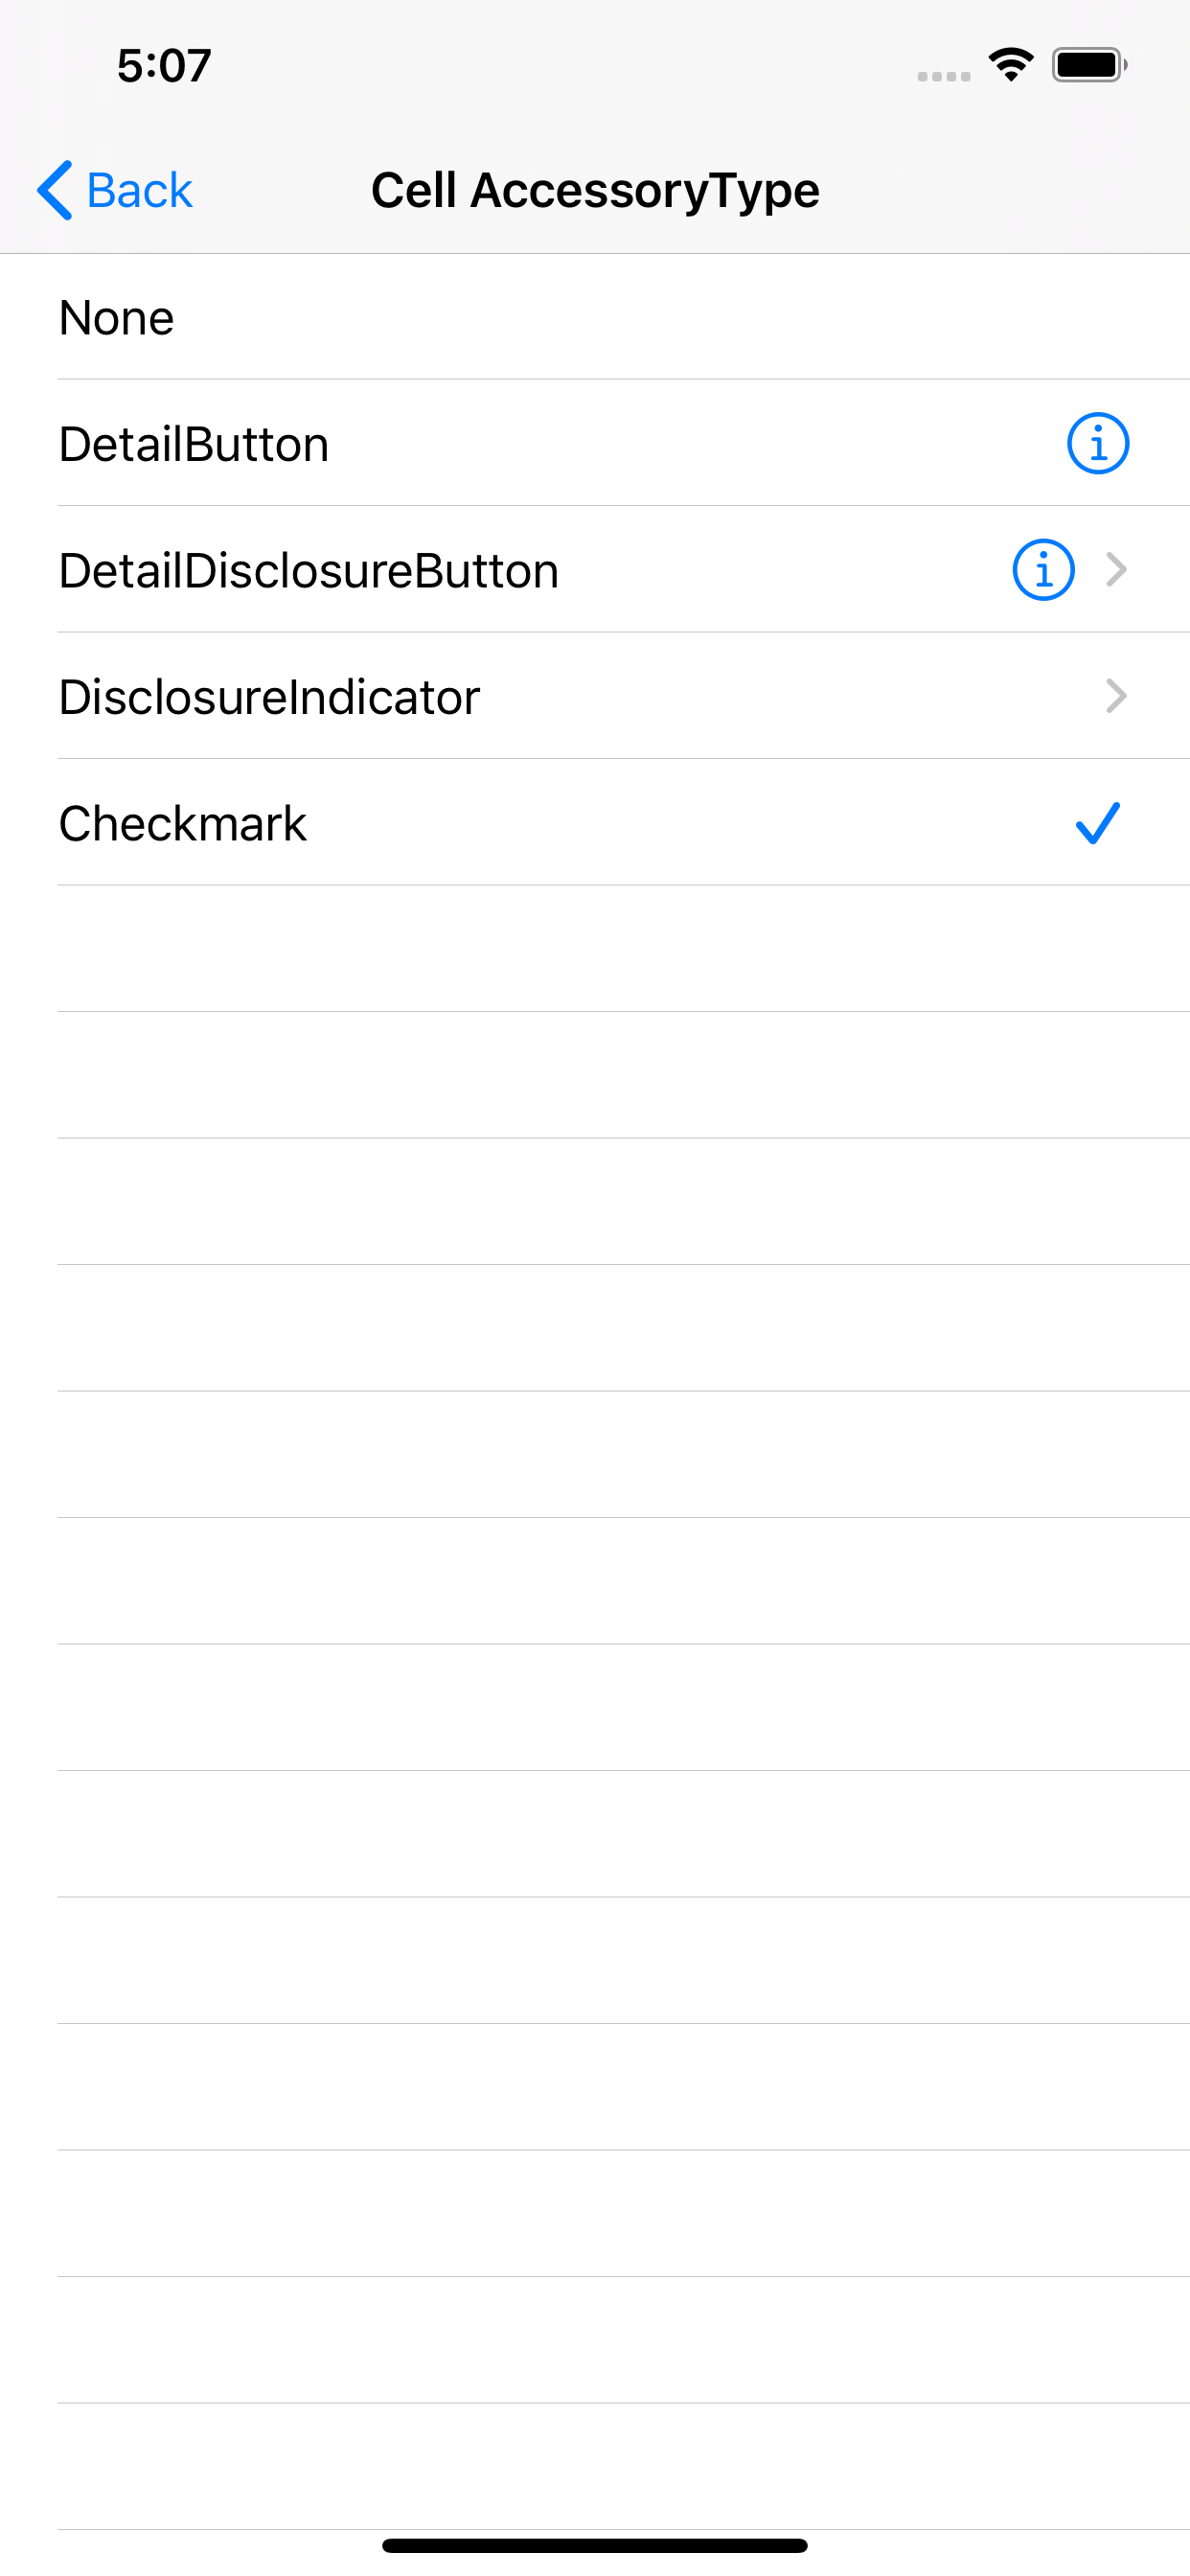
cell.textLabel?.text = "title"
cell.detailTextLabel?.text = "detail"
cell.imageView?.image = UIImage(named: "sample")
Cell AccessoryType
UITableViewCellには下記のAccessoryTypeがあります。
- none
- disclosureIndicator
- detailDisclosureButton
- checkmark
- detailButton
こんな感じ。
下記のように設定(もしくは Storyboard で設定)
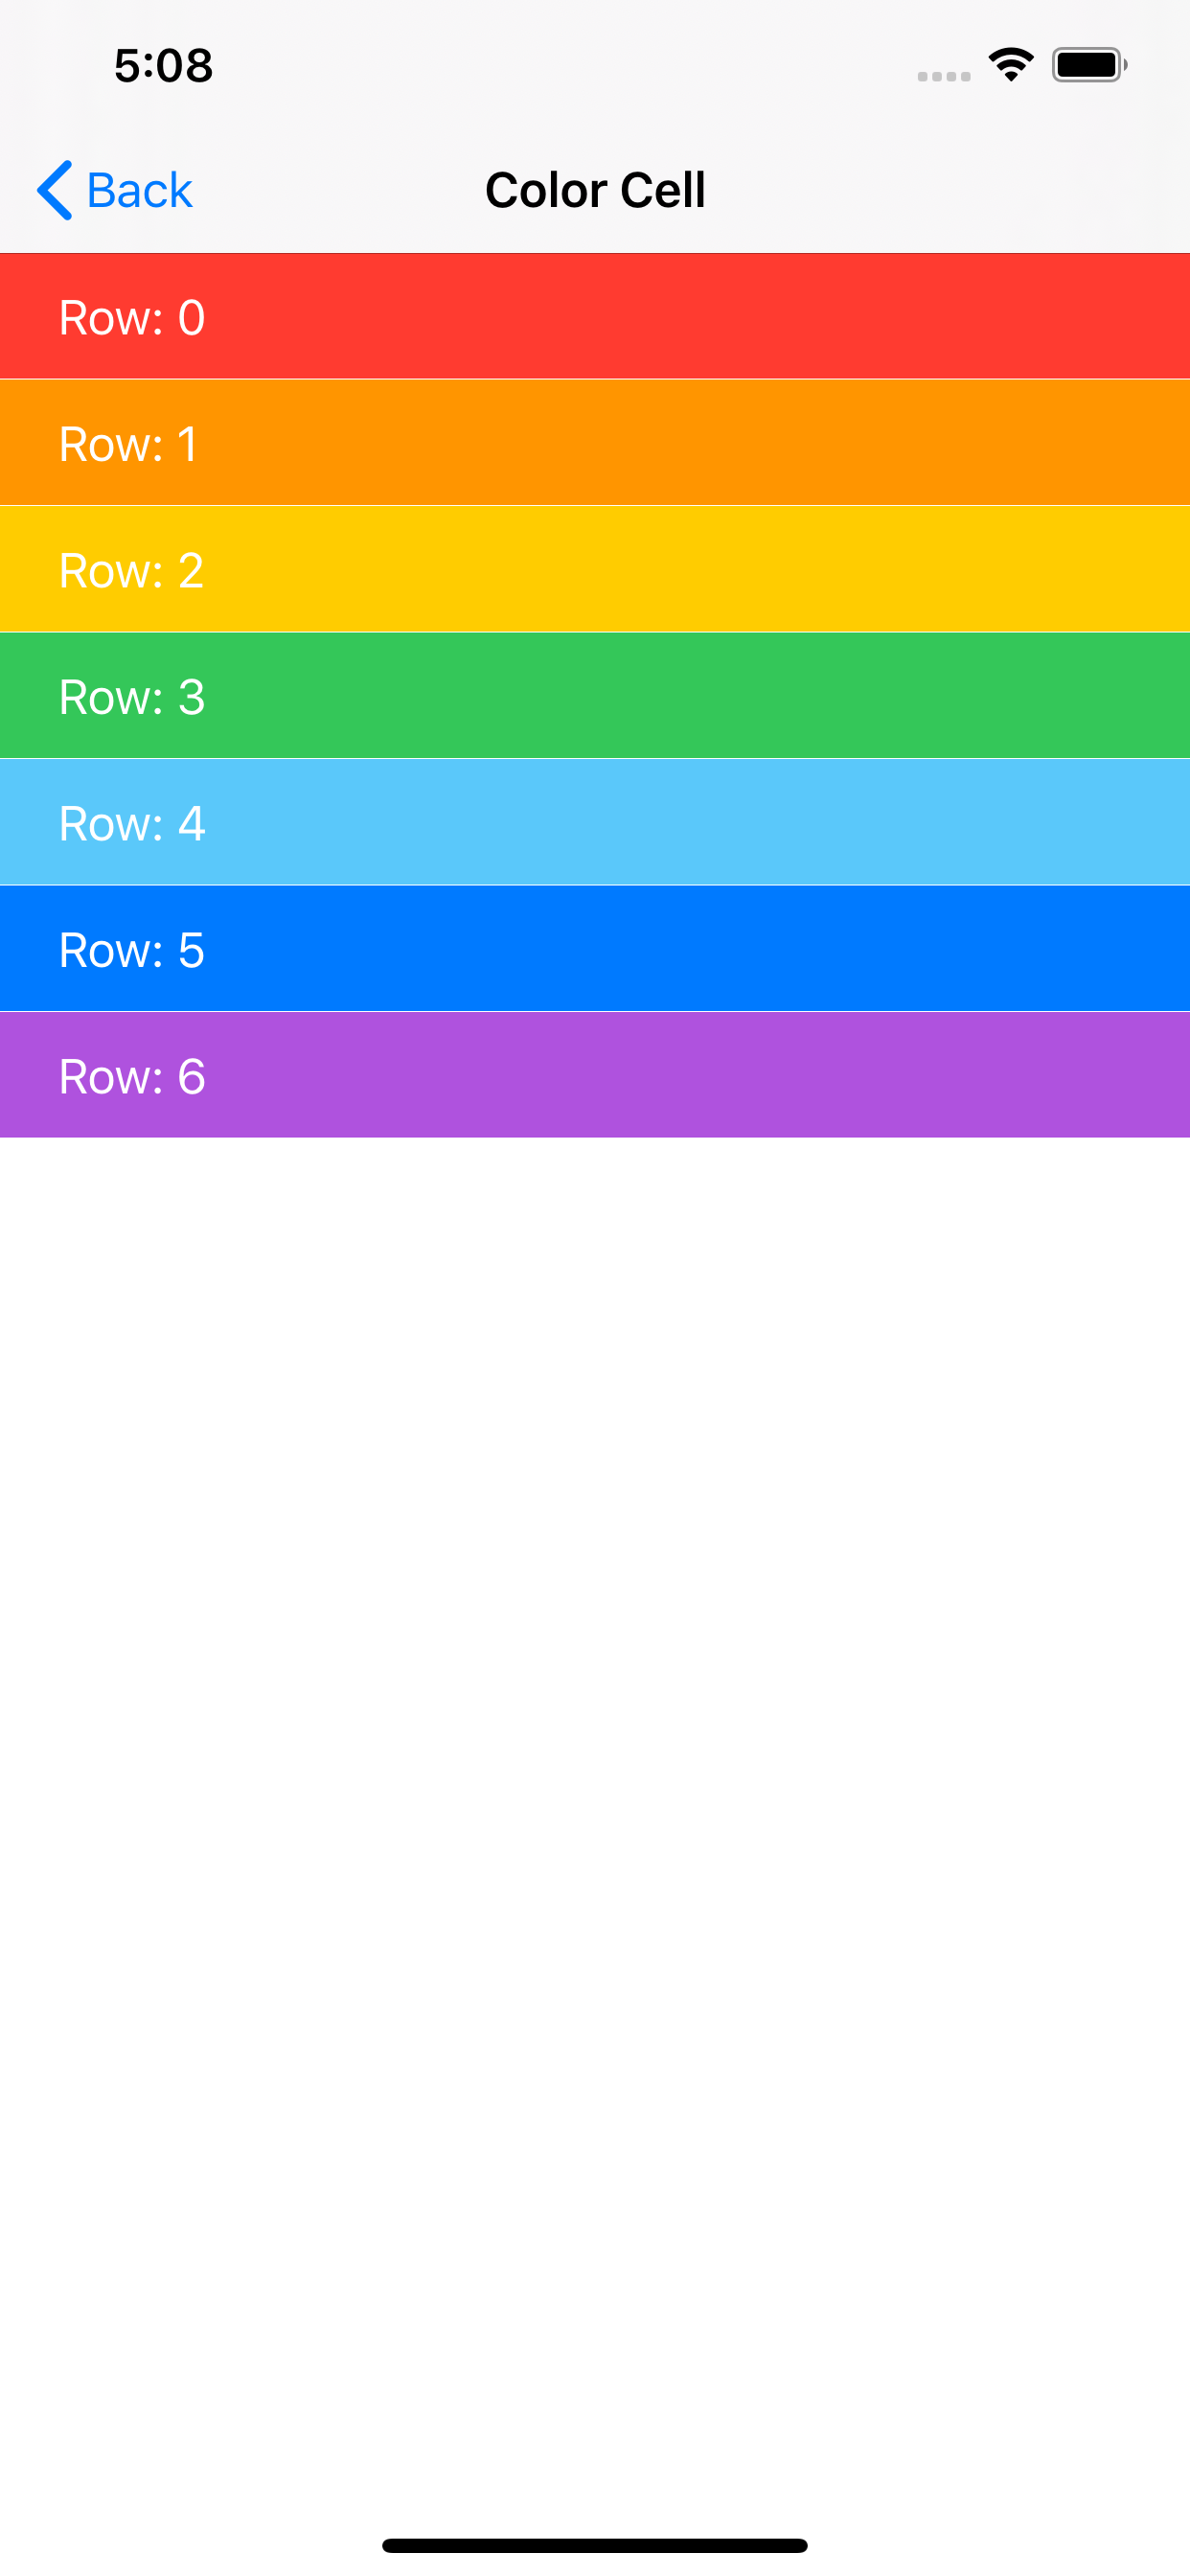
cell.accessoryType = .noneCell 背景色
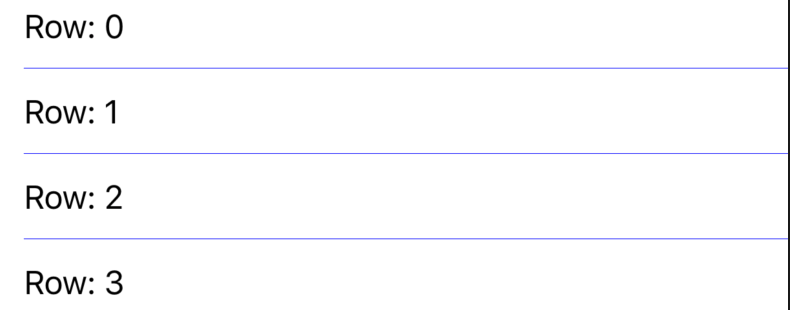
UITableViewCellの背景色を設定する。こんな感じ。
下記のように設定
if cell.backgroundView == nil {
  cell.backgroundView = UIView()
}
cell.backgroundView?.backgroundColor = .red
上記のように
backgroundViewを設定する。確かcell.backgroundColor = .redはダメだった気がするけど動いた(勝手にいい感じにしてくれるのかも??)Cell 選択時の背景色
UITableViewCellの選択時の背景色を設定する。こんな感じ。
下記のように設定
let v = UIView()
v.backgroundColor = .red
cell.selectedBackgroundView = v
選択時の背景色の設定はよくわからない...
cell.selectedBackgroundView?.backgroundColor = .redではダメだったリファレンスに下記のように書いてあるが別に
nilでもなかった...Default is nil for cells in UITableViewStylePlain, and non-nil for UITableViewStyleGrouped.
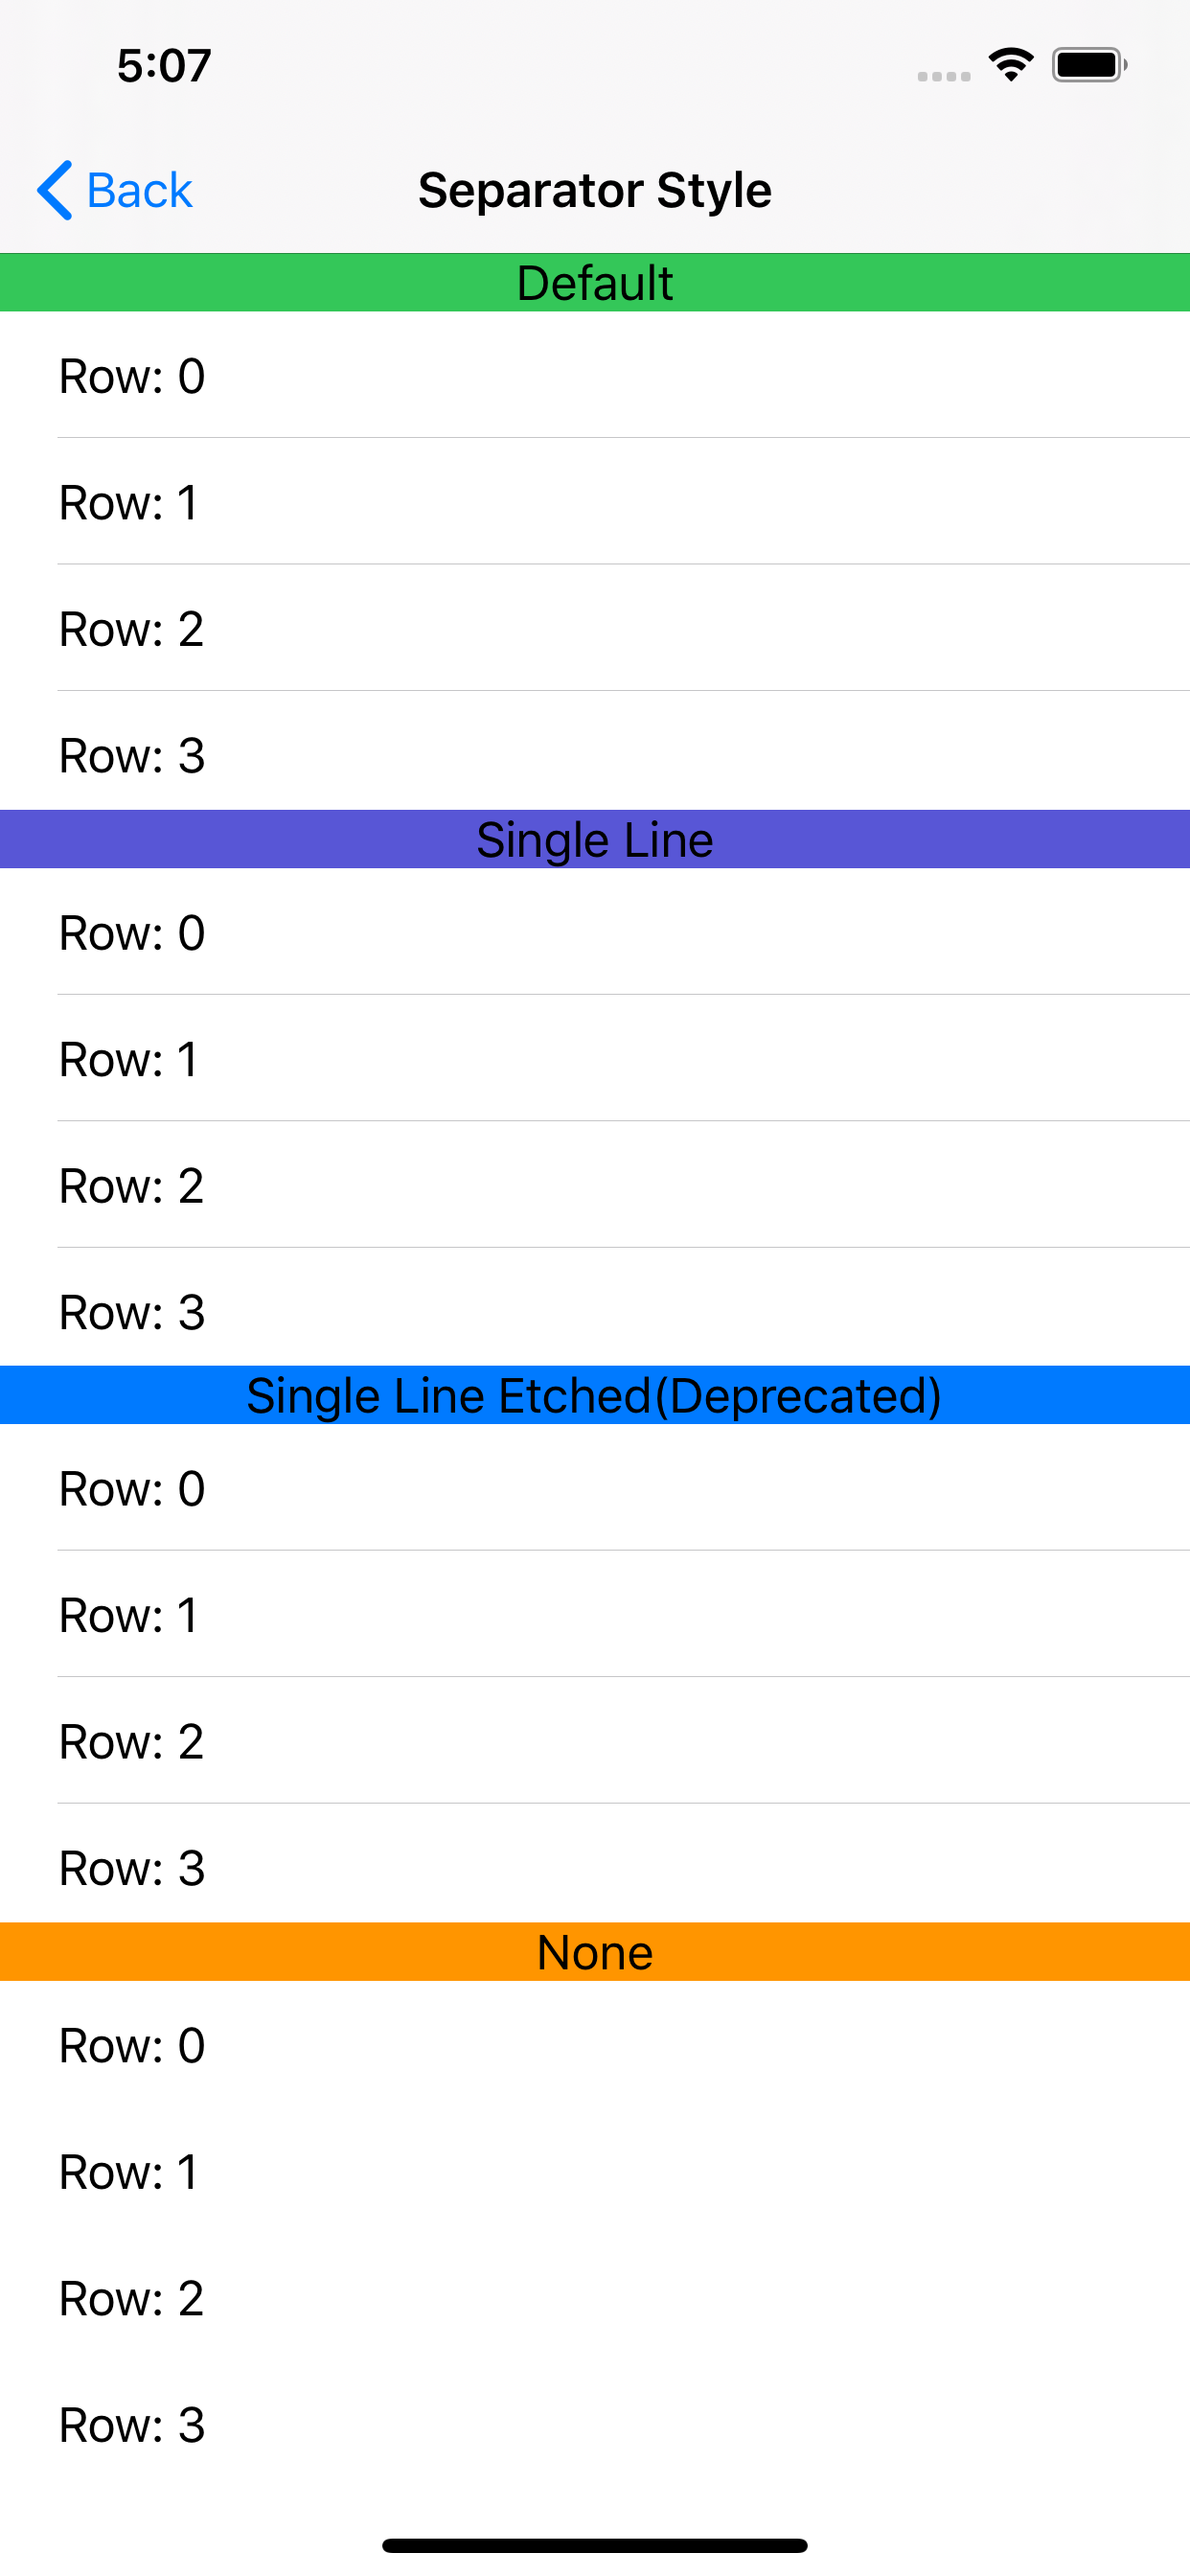
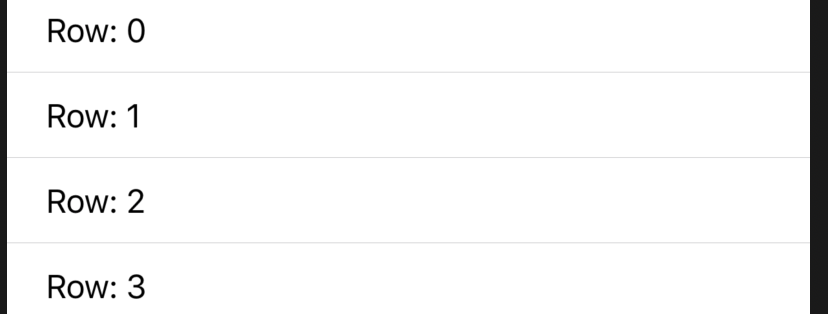
Separator
Style
UITableViewには下記のSeparatorStyleがあります。
- none
- singleLine (Default)
- singleLineEtched (deprecated)
こんな感じ。
Storyboard で設定する場合は Default も含めて4パターンあるが Default は
singleLineなので変わらない。また、singleLineEtchedは Deprecated になっておりこちらもsingleLine同様の見た目になった。(tableViewのスタイルをGroupedにしても変化なし)なので
SeparatorStyleは下記の2パターンのみ
- none
- singleLine
下記のように設定(もしくは Storyboard で設定)
tableView.separatorStyle = .noneColor
区切り線も色も設定できるが、セルごとの設定は不可。
こんな感じ。
下記のように設定(もしくは Storyboard で設定)
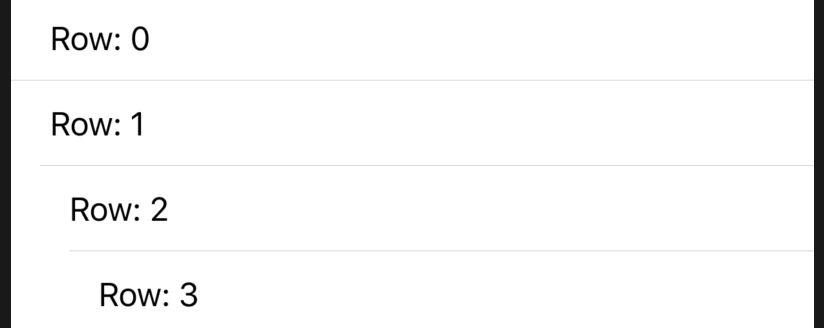
tableView.separatorColor = .blueInset
区切り線の
insetはセルごとの設定も可。こんな感じ。
テーブルに設定 セルごとに設定 下記のように設定(もしくは Storyboard で設定)
// すべて同じ値を設定する場合
tableView.separatorInset = .zero
// セルごとに設定する場合
cell.separatorInset = .init(top: 0, left: 15 * CGFloat(indexPath.row), bottom: 0, right: 0)
小技(セルがない部分の区切り線を消す)
下記のようにするとセルがない部分の区切り線を消すことができる
tableView.tableFooterView = UIView()
通常 footer設定 Table Style
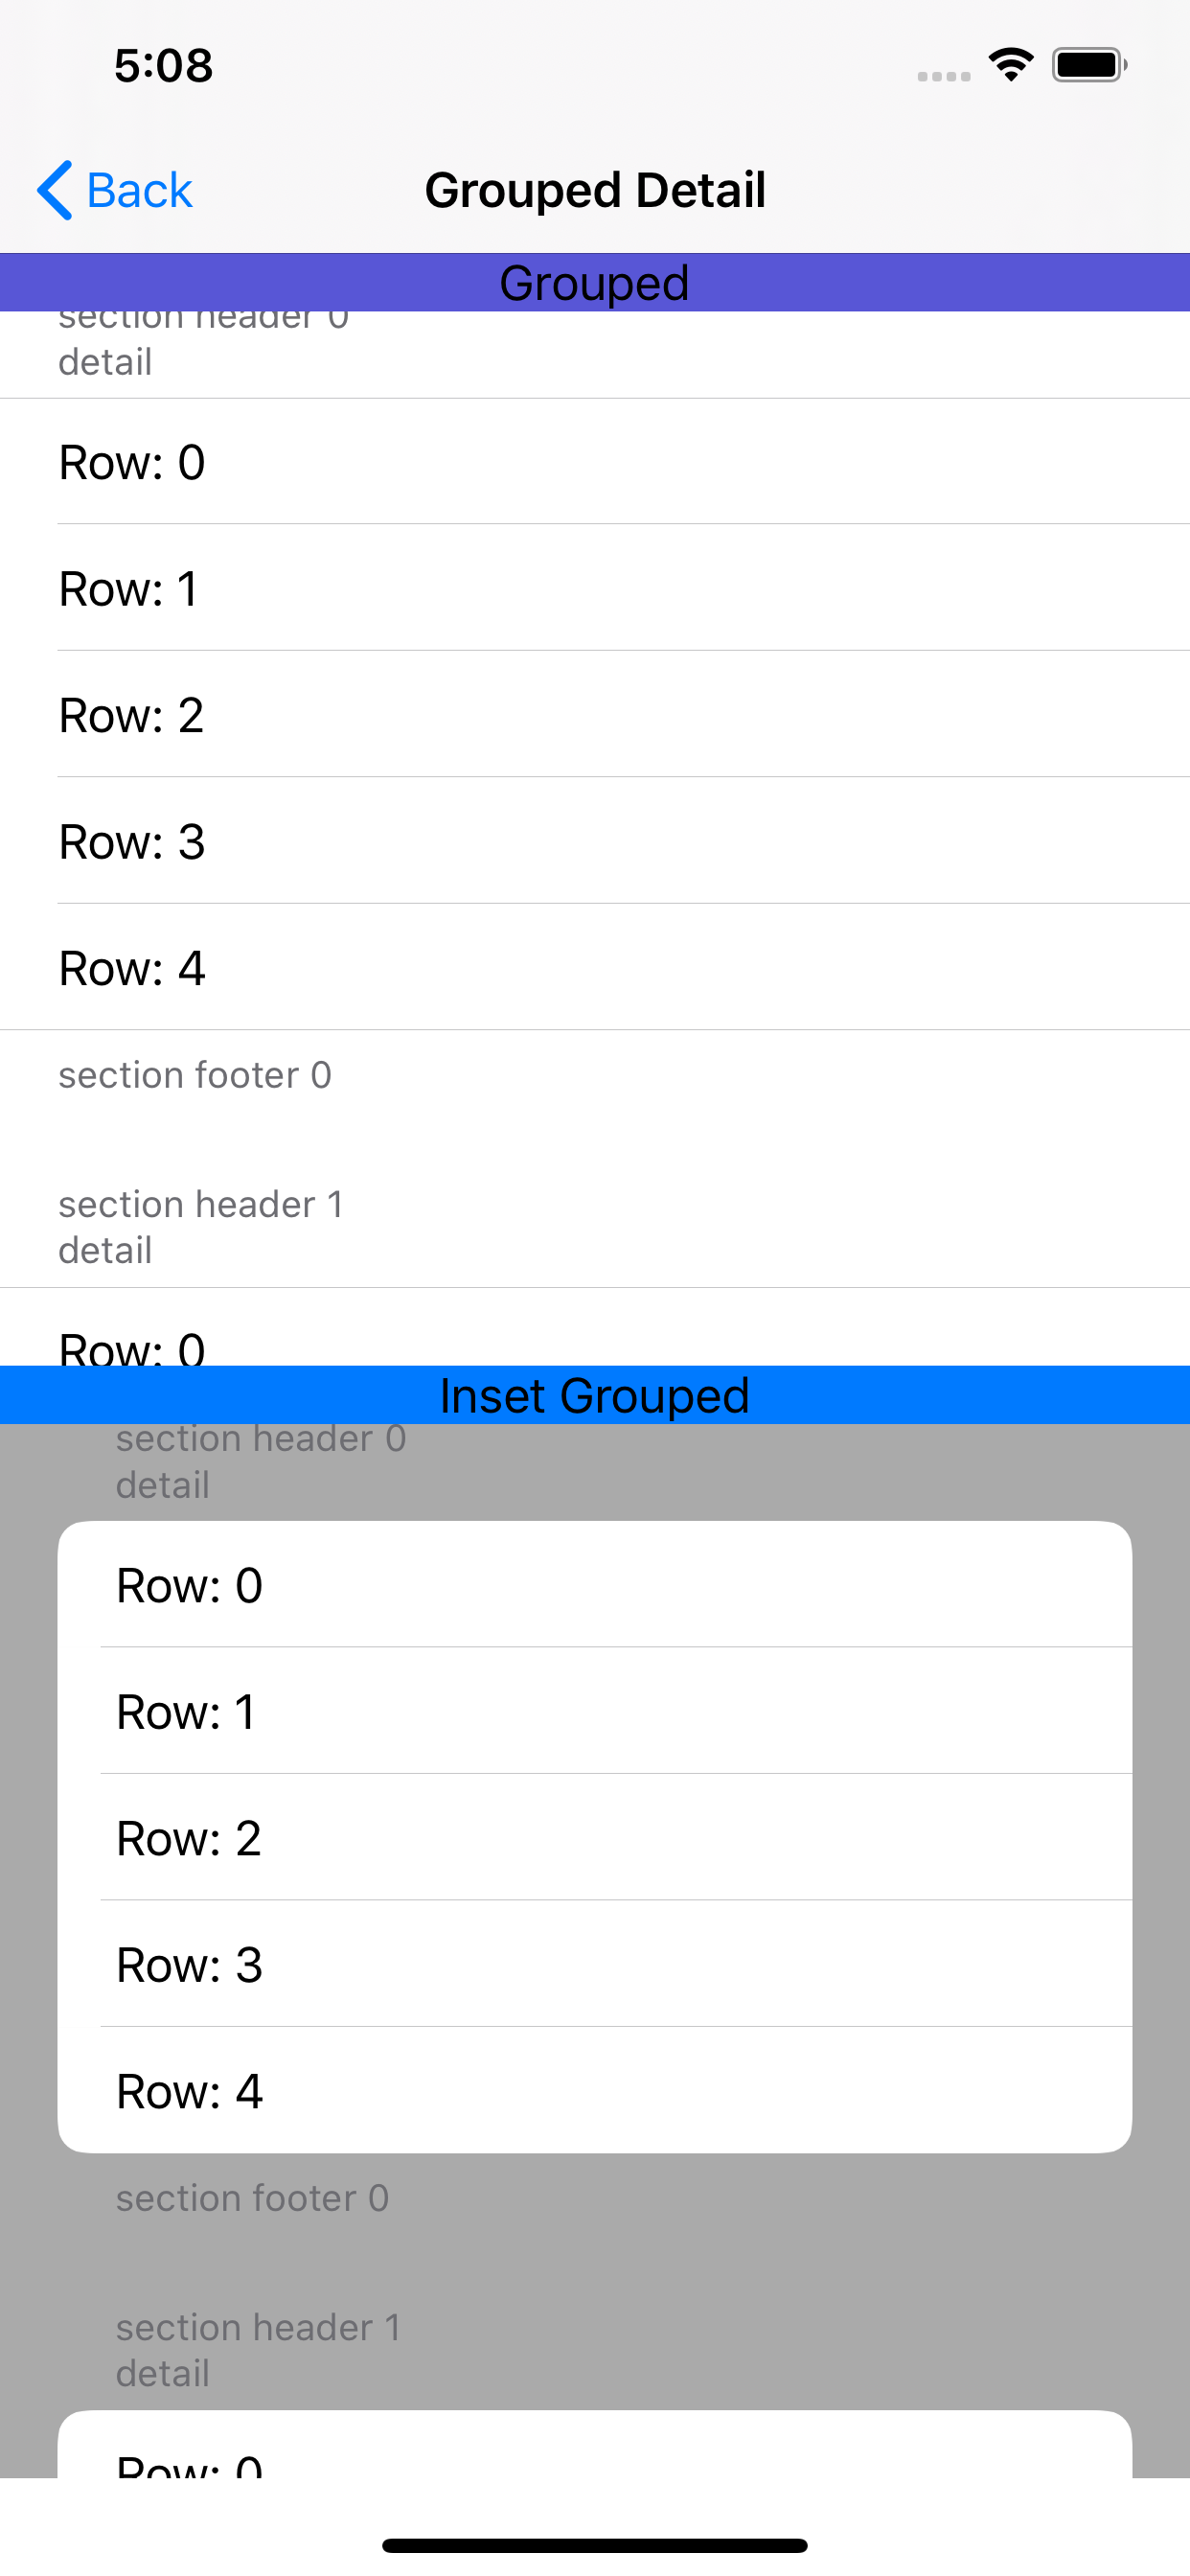
UITableViewには下記のStyleがあります。
- plain
- grouped
- insetGrouped
こんな感じ。(Plain とか表示してるのは TableView とは関係ないただの label です)
instGroupedはそのままだとわかりにくいのでtableViewの背景色を変えています。
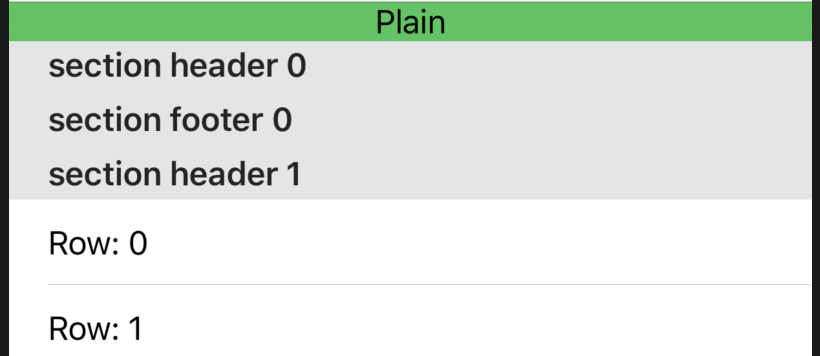
ぱっと見わかりにくいですが下記のようにヘッダー・フッターを設定すると違いがわかります。
func tableView(_ tableView: UITableView, titleForHeaderInSection section: Int) -> String? {
  return "section header \(section)"
}

func tableView(_ tableView: UITableView, titleForFooterInSection section: Int) -> String? {
  return "section footer \(section)"
}
plainの場合スクロールしてもヘッダー部分は固定される。
groupedとinsetGroupedの場合スクロールするとヘッダー部分も一緒にスクロールされる。ヘッダーの文字はすべて大文字になる。
grouped insetGrouped 小技(ヘッダー・フッターの文字色を変える)
下記のようにするとヘッダー・フッターの文字色を設定できる
func tableView(_ tableView: UITableView, willDisplayHeaderView view: UIView, forSection section: Int) {
  (view as? UITableViewHeaderFooterView)?.textLabel?.textColor = .red
}

func tableView(_ tableView: UITableView, willDisplayFooterView view: UIView, forSection section: Int) {
  (view as? UITableViewHeaderFooterView)?.textLabel?.textColor = .blue
}
こんな感じ
Grouped の detailText 設定
groupedとinsetGroupedの場合ヘッダー部分にdetailTextLabelを設定できる。If you configured your table view with the group style, you can also configure the detailTextLabel property.
こんな感じ(ヘッダーは大文字にならない)
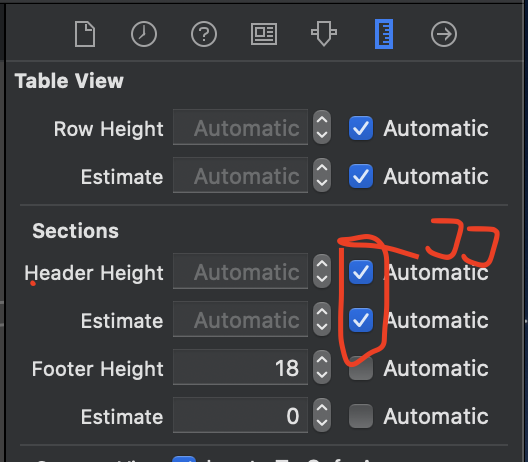
下記のように設定する。
Storyboardで Sections のところの Automatic にチェックをつける
これをしておかないと
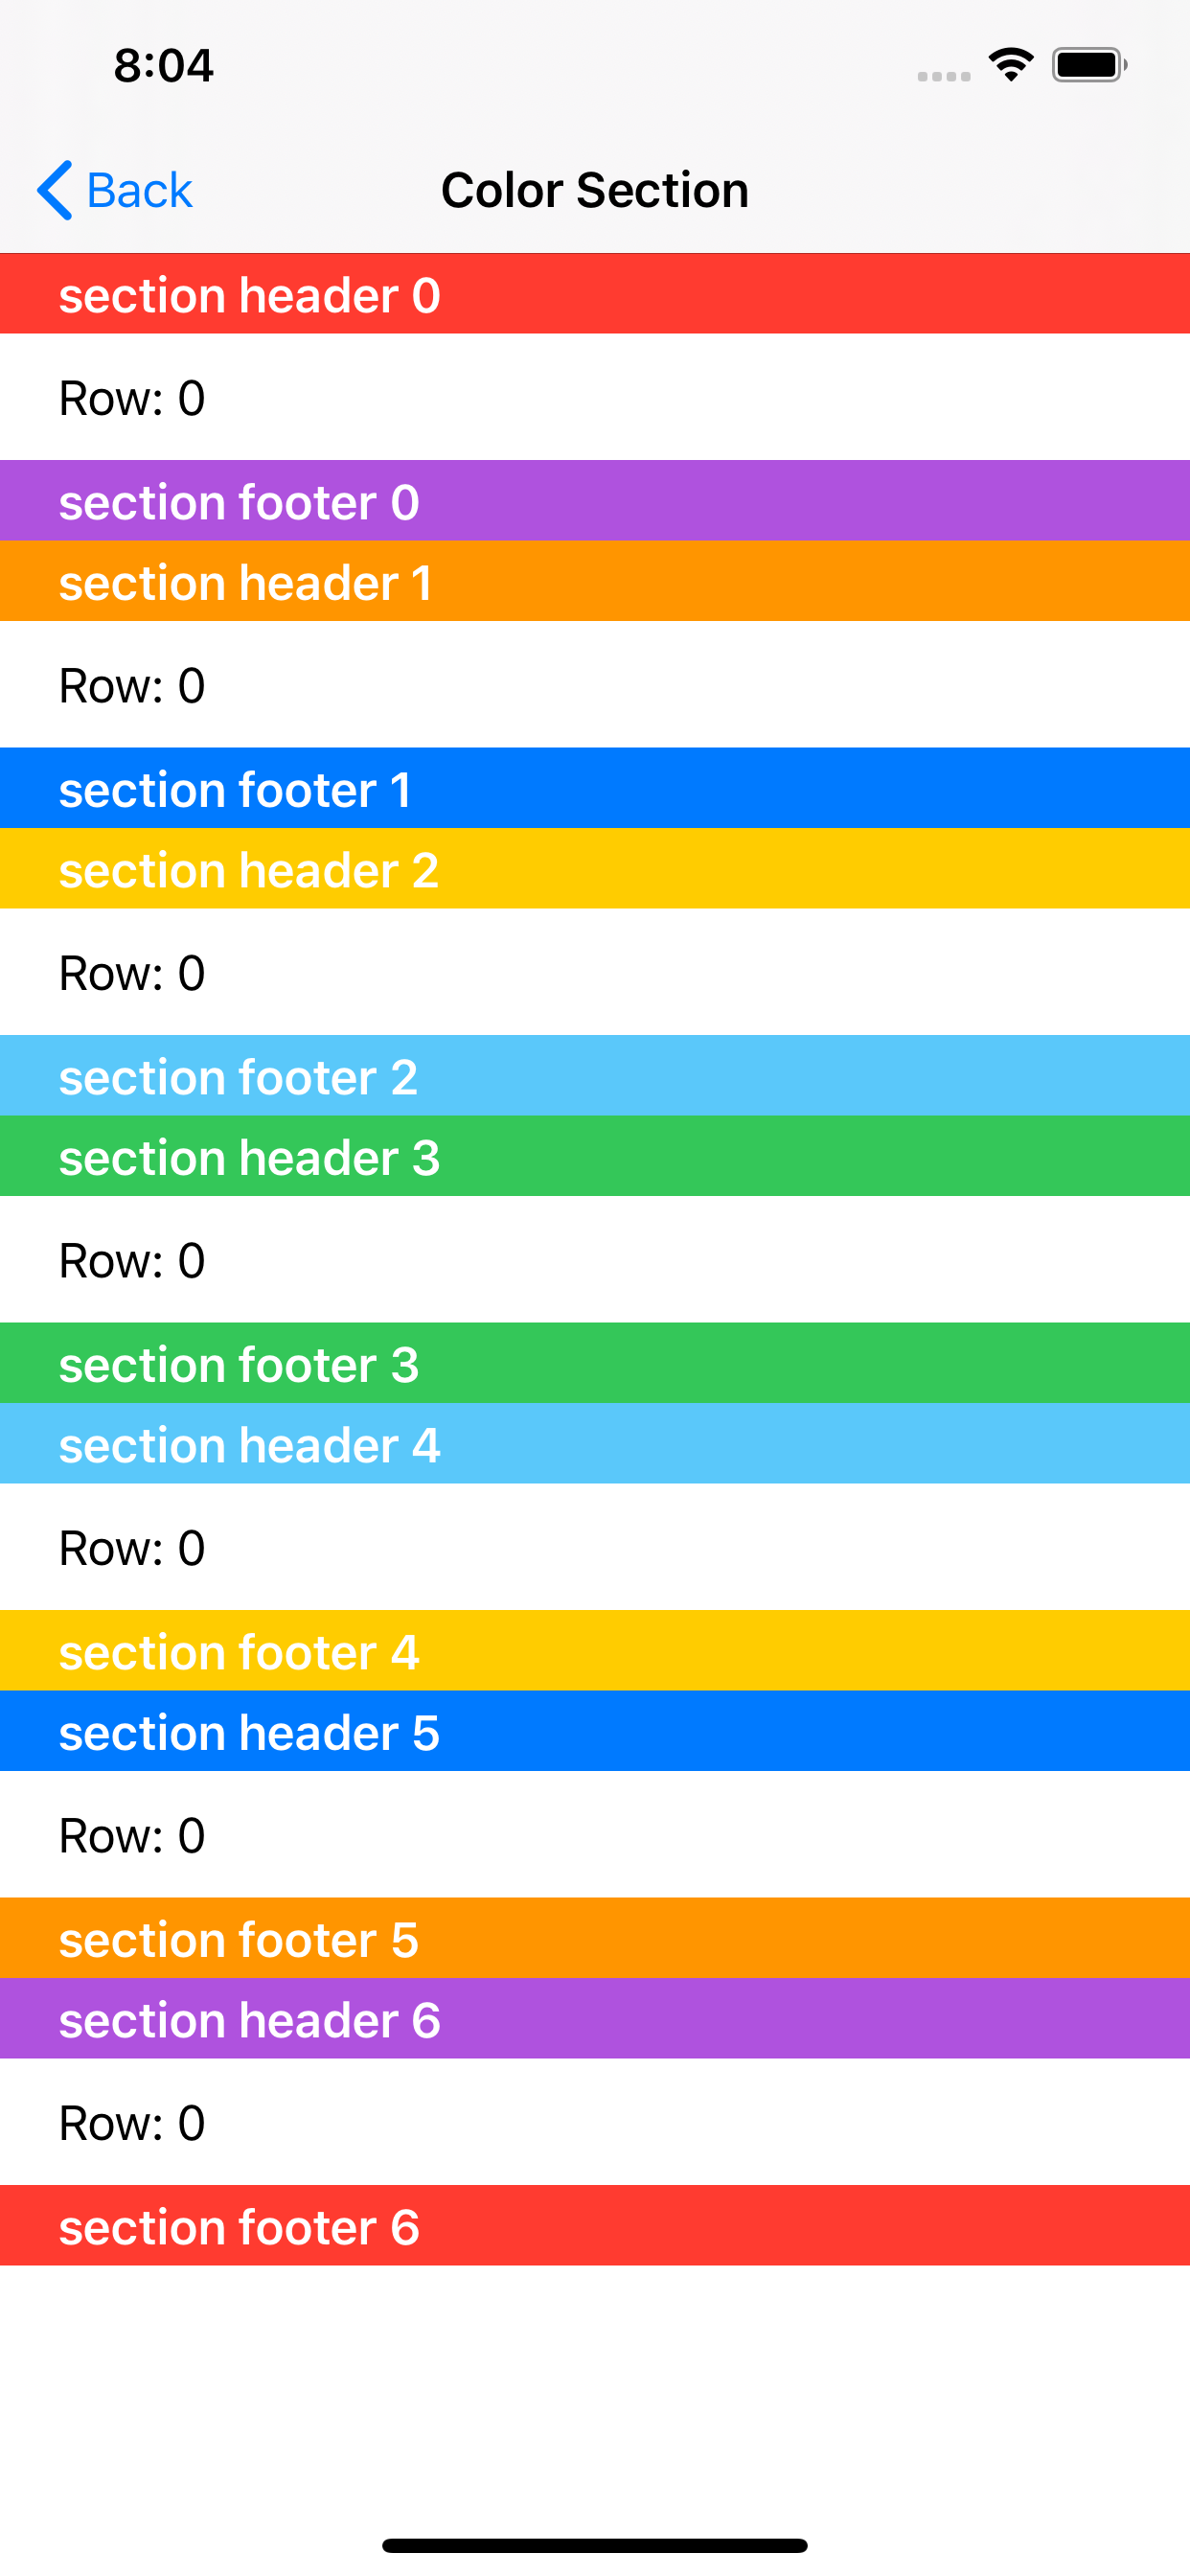
textLabelとdetailTextLabelが重なったりする。func tableView(_ tableView: UITableView, viewForHeaderInSection section: Int) -> UIView? { var header = tableView.dequeueReusableHeaderFooterView(withIdentifier: "header") if header == nil { header = UITableViewHeaderFooterView(reuseIdentifier: "header") } header?.textLabel?.text = "section header \(section)" header?.detailTextLabel?.text = "detail" return header }Section Color (ヘッダー・フッター)
セクションのヘッダー・フッターの背景色を設定する。
こんな感じ
下記のように設定する。
override func tableView(_ tableView: UITableView, viewForHeaderInSection section: Int) -> UIView? {
  var header = tableView.dequeueReusableHeaderFooterView(withIdentifier: "header")
  if header == nil {
    header = UITableViewHeaderFooterView(reuseIdentifier: "header")
  }
  if header?.backgroundView == nil {
    header?.backgroundView = UIView()
  }
  header?.backgroundView?.backgroundColor = .red
  return header
}

override func tableView(_ tableView: UITableView, viewForFooterInSection section: Int) -> UIView? {
  var footer = tableView.dequeueReusableHeaderFooterView(withIdentifier: "footer")
  if footer == nil {
    footer = UITableViewHeaderFooterView(reuseIdentifier: "footer")
  }
  if footer?.backgroundView == nil {
    footer?.backgroundView = UIView()
  }
  footer?.backgroundView?.backgroundColor = .red
  return footer
}
さいごに
カスタムクラスをつくらなくてもわりと色々できそう。
Table関連はよく使うけど実装方法忘れたりするのでもっと充実させたい。
プルリクくれてもええんやで


- 投稿日:2020-03-20T18:36:58+09:00
Firestoreで指定の条件にマッチするDocumentだけ削除する
self.db.collection("orders").whereField("uid", isEqualTo: self.user.uid).getDocuments { (snapshot, error) in
                snapshot?.documents.forEach({ (doc) in
                    doc.reference.delete()
                })
            }
- 投稿日:2020-03-20T04:20:59+09:00
SwiftUIでWebViewを使う(WKWebViewのObservableObject化)
SwiftUIでWebViewを使うを参考にした。
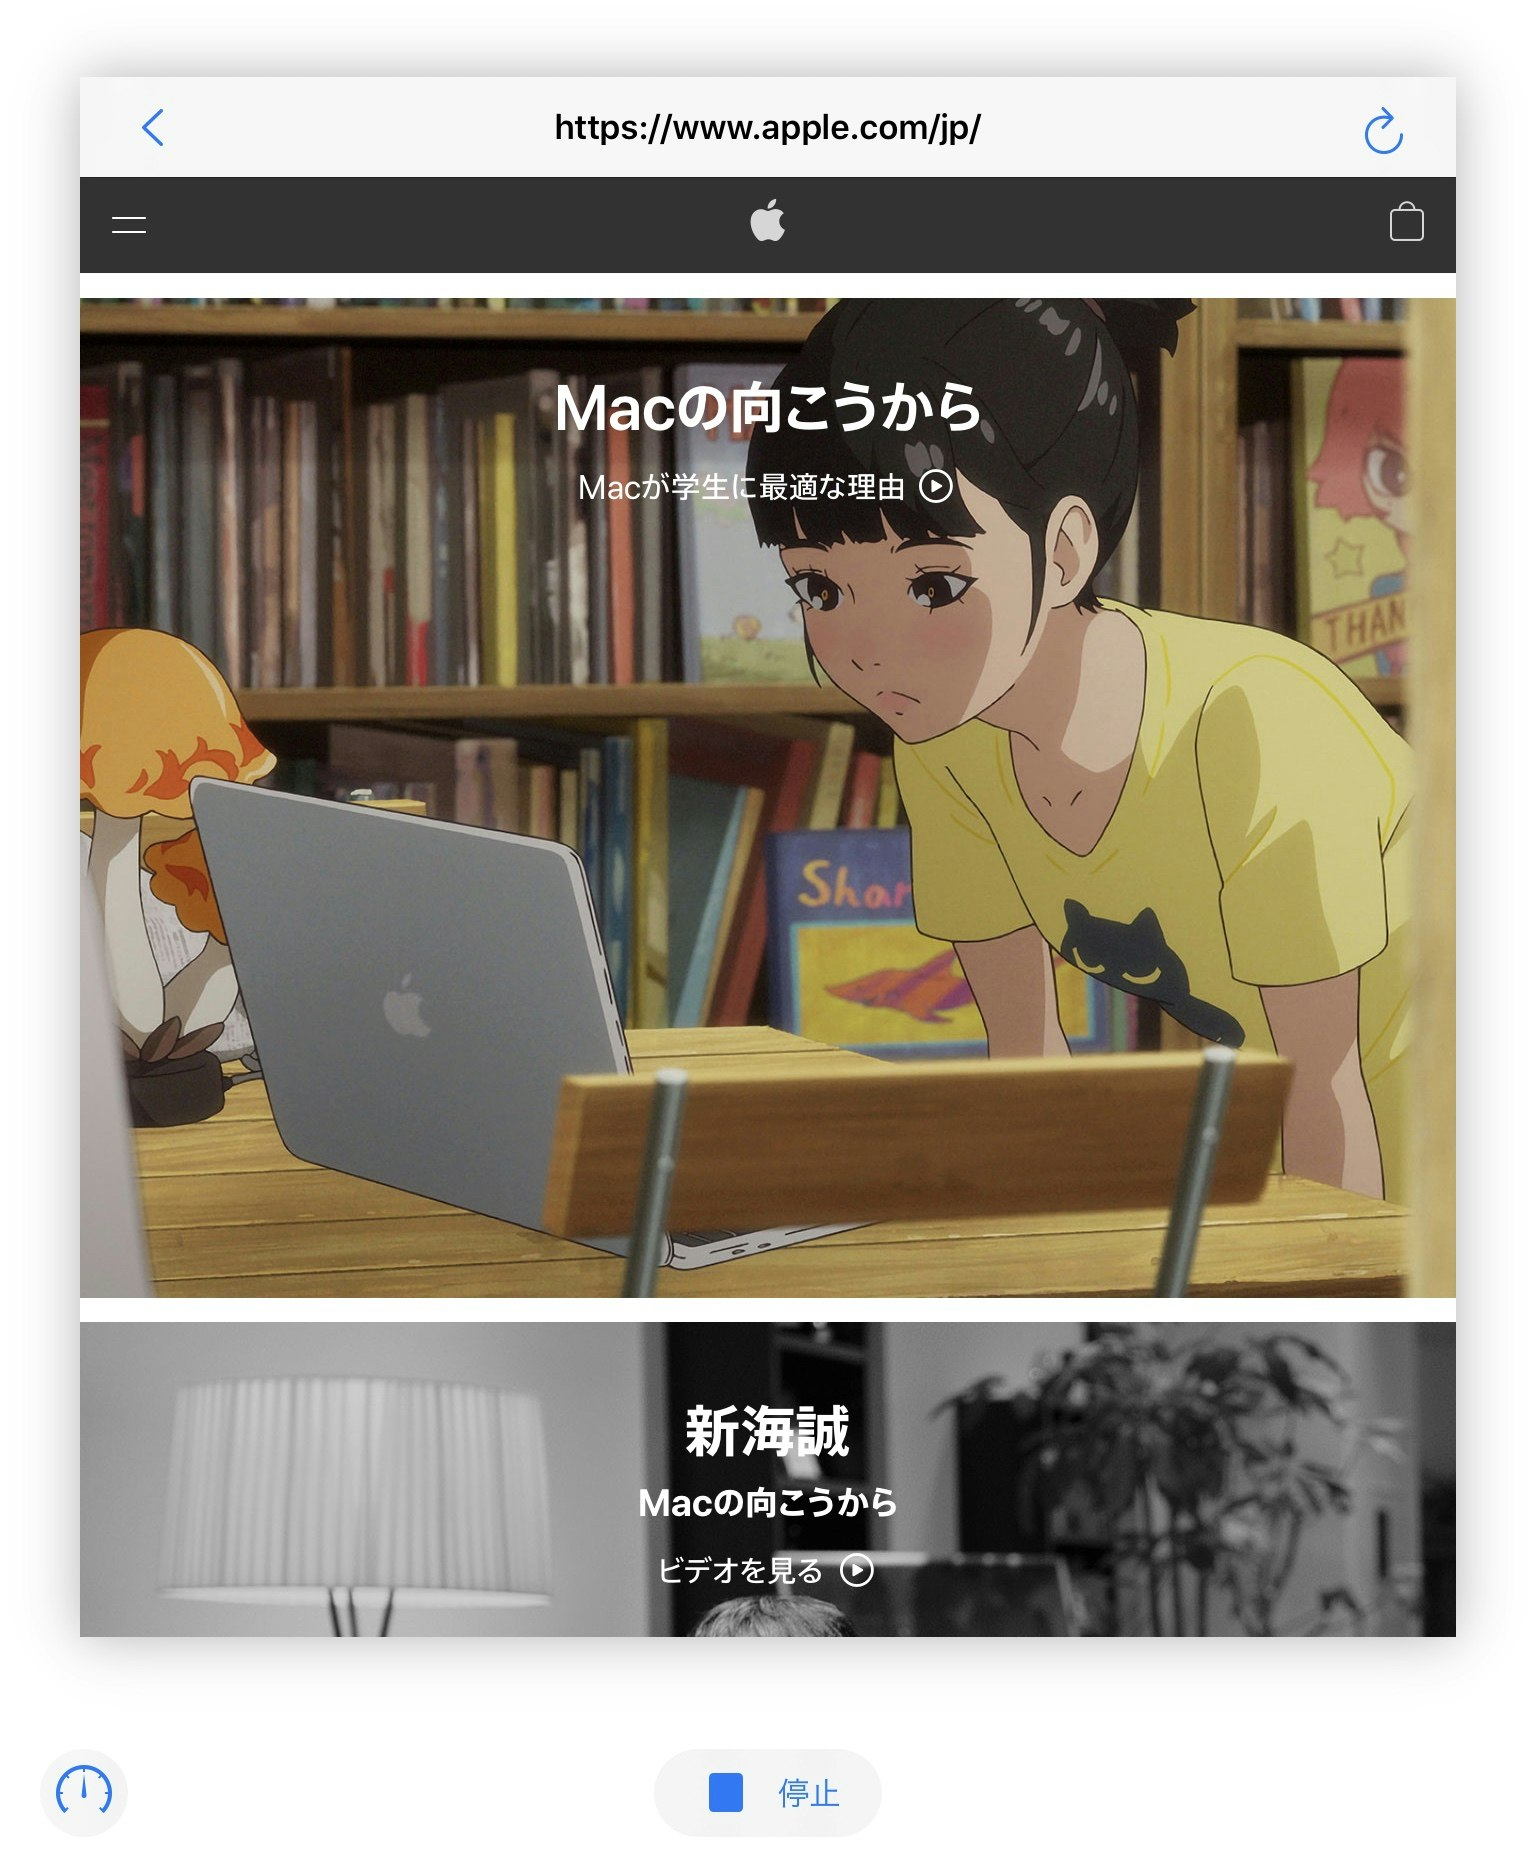
import SwiftUI
import WebKit

public class SUIWebBrowserObject: WKWebView, WKNavigationDelegate, ObservableObject {
    private var observers: [NSKeyValueObservation?] = []

    private func subscriber<Value>(for keyPath: KeyPath<SUIWebBrowserObject, Value>) -> NSKeyValueObservation {
        observe(keyPath, options: [.prior]) { object, change in
            if change.isPrior {
                self.objectWillChange.send()
            }
        }
    }

    private func setupObservers() {
        observers = [
            subscriber(for: \.title),
            subscriber(for: \.url),
            subscriber(for: \.isLoading),
            subscriber(for: \.estimatedProgress),
            subscriber(for: \.hasOnlySecureContent),
            subscriber(for: \.serverTrust),
            subscriber(for: \.canGoBack),
            subscriber(for: \.canGoForward)
        ]
    }

    public override init(frame: CGRect = .zero, configuration: WKWebViewConfiguration = WKWebViewConfiguration()) {
        super.init(frame: frame, configuration: configuration)
        navigationDelegate = self
        setupObservers()
    }

    public required init?(coder: NSCoder) {
        super.init(coder: coder)
        navigationDelegate = self
        setupObservers()
    }
}

public struct SUIWebBrowserView: UIViewRepresentable {
    public typealias UIViewType = UIView

    private var browserObject: SUIWebBrowserObject

    public init(browserObject: SUIWebBrowserObject) {
        self.browserObject = browserObject
    }

    public func makeUIView(context: Self.Context) -> Self.UIViewType {
        browserObject
    }

    public func updateUIView(_ uiView: Self.UIViewType, context: Self.Context) {
        //
    }
}

struct WebBrowser: View {
    @ObservedObject var browser = SUIWebBrowserObject()

    init(address: String) {
        guard let a = address.addingPercentEncoding(withAllowedCharacters: .urlQueryAllowed) else { return }
        guard let u = URL(string: a) else { return }
        browser.load(URLRequest(url: u))
    }

    func ItemImage(systemName: String) -> some View {
        Image(systemName: systemName)
            .imageScale(.large).aspectRatio(contentMode: .fit)
            .frame(width: 32, height: 32)
    }

    var Title: Text {
        Text(verbatim: browser.url?.absoluteString.removingPercentEncoding ?? "")
    }

    var LItems: some View {
        HStack {
            Button(action: {
                self.browser.goBack()
            }) {
                ItemImage(systemName: "chevron.left")
            }.disabled(!browser.canGoBack)
        }
    }

    var TItems: some View {
        HStack {
            Button(action: {
                if self.browser.isLoading {
                    self.browser.stopLoading()
                } else {
                    self.browser.reload()
                }
            }) {
                ItemImage(systemName: browser.isLoading
                    ? "xmark"
                    : "arrow.clockwise"
                )
            }
        }
    }

    var body: some View {
        NavigationView {
            SUIWebBrowserView(browserObject: browser)
                .navigationBarTitle(Title, displayMode: .inline)
                .navigationBarItems(leading: LItems, trailing: TItems)
        }.navigationViewStyle(StackNavigationViewStyle())
    }
}

struct ContentView: View {
    var body: some View {
        WebBrowser(address: "https://www.apple.com/jp/")
    }
}
WKWebViewをObservableObject化した
SUIWebBrowserObjectと、そのビューワーとなるSUIWebBrowserViewを使って自由なUIのカスタムウェブブラウザを簡単に作れるようになった。