- 投稿日:2019-11-24T22:00:33+09:00
ElasticSearch + Elastalertでエラーログ検出時に通知したい
PreRequirement
Kibana
ElasticSearchInstall Elastalert
Elastalert公式はYelp製で下記で提供されているhttps://github.com/Yelp/elastalert
また、下記でDocker版も提供されている
https://github.com/bitsensor/elastalertElasticSearchが動作している状態で、下記コマンドを実施するとElastalertが起動する
git clone https://github.com/bitsensor/elastalert.git; cd elastalert
docker run -d -p 3030:3030 \
    -v `pwd`/config/elastalert.yaml:/opt/elastalert/config.yaml \
    -v `pwd`/config/config.json:/opt/elastalert-server/config/config.json \
    -v `pwd`/rules:/opt/elastalert/rules \
    -v `pwd`/rule_templates:/opt/elastalert/rule_templates \
    --name elastalert bitsensor/elastalert:latest
実際にアラートあげる設定をまとめる予定
- 投稿日:2019-11-24T20:35:37+09:00
DockerでRails環境を構築するときに発生したエラー
Webpacker configuration file not found
Rails6.0を使う場合、webpackerが標準になっているので,webpackerをインストールしていない場合,以下のエラーが出ます。
Webpacker configuration file not found /app_name/config/webpacker.yml. Please run rails webpacker:install Error: No such file or directory @ rb_sysopen - /app_name/config/webpacker.yml (RuntimeError)webpackerを使うためにはYarnが必要です。
そこでDockerfileに以下を追加してYarnをインストール必要があります。DockerfileRUN curl -sS https://dl.yarnpkg.com/debian/pubkey.gpg | apt-key add - RUN echo "deb https://dl.yarnpkg.com/debian/ stable main" | tee /etc/apt/sources.list.d/yarn.list RUN apt-get update && apt-get install -y yarnYarnをインストールした後、以下でwebpackerをインストールすれば大丈夫。
docker-compose run web bundle exec rails webpacker:installError: Cannot render console from Allowed networks
docker compose upした時に以下のエラーがlogに出ました。
Cannot render console from 172.20.0.1! Allowed networks: 127.0.0.1, ::1, 127.0.0.0/127.255.255.255どうやら、アクセス元のIPアドレスが 127.0.0.1の場合だけ使えるというセキュリティがかかっているようですが、http://localhost でアクセスしても間にDockerが挟まっているため、Railsからみたときのアクセス元が127.0.0.1にならないためこのエラーが出ているようです。
ですので、以下をdevelopment.rbに追記することで、172.20.0.1をホワイトリストに登録すれば対処できます。
development.rbconfig.web_console.whitelisted_ips = '172.20.0.1'
- 投稿日:2019-11-24T17:28:00+09:00
Kubernetes上でdocker-androidを動かすためのyaml
---
apiVersion: v1
kind: Service
metadata:
 name: android
spec:
 type: NodePort
 ports:
   - name: android-vnc
     port: 6080
     nodePort: 30680
   - name: android-console
     port: 5554
     nodePort: 30554
   - name: android-adb
     port: 5555
     nodePort: 30555
   - name: android-appium
     port: 4723
     nodePort: 30723
 selector:
   app: android
---
apiVersion: v1
kind: Pod
metadata:
 name: android
 labels:
   app: android
spec:
 containers:
 - name: android
   image: budtmo/docker-android-x86-8.0
   securityContext:
     privileged: true
   ports:
     - name: android-vnc
       containerPort: 6080
     - name: android-console
       containerPort: 5554
     - name: android-adb
       containerPort: 5555
     - name: android-appium
       containerPort: 4723
   resources:
     requests:
       memory: "2048Mi"
       cpu: "2000m"
     limits:
       memory: "4192Mi"
       cpu: "4000m"
- 投稿日:2019-11-24T16:47:42+09:00
GitHub Actions上でFirestoreエミュレータを立ち上げてテストする
エミュレータを使ってCircle CI上でテストされている方はいらっしゃるのですが、GitHub Actionsでの情報は見かけなかったのでまとめてみます。
大まかな流れは以下の通りです。
- firestoreエミュレータ入りのDockerfileを書く
- firestoreエミュレータを立ち上げるdocker-compose.ymlを書く
- GitHub Actionsのワークフロー上でdocker-composeを実行してテスト
なお、エミュレータはJavaで実装されているので、Javaの実行環境が無ければあらかじめインストールしておいてください。
セットアップ
まずは
firebase initでFirestoreをプロジェクトにセットアップします。コマンドを実行するとどれをセットアップするかを聞かれるので、Firestoreを選択します。その後、セキュリティルールやインデックスファイルの名前を指定できますが、とりあえずエンター連打でデフォルトのまま進みます。$ firebase init (略) ? Which Firebase CLI features do you want to set up for this folder? Press Space to select features, then Enter to confirm your choices. Firestore: Deploy rules and create indexes for Firestore === Project Setup (略) ? Please select an option: Use an existing project(ここでは既存のプロジェクトを選択していますが、新しく作っても以降の操作は同じです。) (略) === Firestore Setup (略) ? What file should be used for Firestore Rules? firestore.rules (略) ? What file should be used for Firestore indexes? firestore.indexes.json i Writing configuration info to firebase.json... i Writing project information to .firebaserc... i Writing gitignore file to .gitignore... ✔ Firebase initialization complete!これで、プロジェクトに以下のファイルが生成されているはずです。
- firebase.json
- firestore.index.json
- firestore.rules
次にエミュレータをセットアップします。今回は説明のために先ほどのFirestoreセットアップと手順を分けましたが、実際はfirebase initで同時に行っても大丈夫です。
firebase initで
Emulatorsを選択すると、どのエミュレータをセットアップするか聞かれるので、Firestoreを選択します。あとは先ほどと同じように連打でOKですが、Would you like to download the emulators now?ではYを選択してください。そうすると、エミュレータのjarが落ちてきます。$ firebase init (略) ? Which Firebase CLI features do you want to set up for this folder? Press Space to select features, then Enter to confirm your choices. Emulators: Set up local emulators for Firebase features (略) === Emulators Setup ? Which Firebase emulators do you want to set up? Press Space to select emulators, then Enter to confirm your choices. (Press <space> to select, <a> to toggle all, <i> to invert selection) Firestore ? Which port do you want to use for the firestore emulator? 8080 ? Would you like to download the emulators now? Yes i Writing configuration info to firebase.json... i Writing project information to .firebaserc... ✔ Firebase initialization complete!
firebase.jsonにエミュレータの項目が追加されているはずです。"firestore": { "rules": "firestore.rules", "indexes": "firestore.indexes.json" + }, + "emulators": { + "firestore": { + "port": 8080 + } } }ちゃんと動くか試してみましょう。以下のコマンドでエミュレータが起動します。
$ firebase emulators:start --only firestore
i  emulators: Starting emulators: firestore
i  firestore: Serving ALL traffic (including WebChannel) on http://localhost:8080
⚠  firestore: Support for WebChannel on a separate port (8081) is DEPRECATED and will go away soon. Please use port above instead.
i  firestore: Emulator logging to firestore-debug.log
✔  firestore: Emulator started at http://localhost:8080
i  firestore: For testing set FIRESTORE_EMULATOR_HOST=localhost:8080
✔  All emulators started, it is now safe to connect.
portを
8080に設定したので、localhost:8080をlistenしています。HTTPリクエストを投げると、動いているかどうかが確認できます。$ curl http:localhost:8080 Okセキュリティルールとテストを書いてみる
エミュレータが準備できたので、試しにセキュリティルールとそのテストを書いてみましょう。何かしらのプロジェクト一覧のうち、自分がオーナーであるプロジェクトだけが読み書きできるルールは以下のようになります。
rules_version = '2'; service cloud.firestore { match /databases/{database}/documents { match /projects/{projectID} { allow read, write: if resource.data.ownerId == request.auth.uid; } } }このセキュリティルールに対するテストは以下のようになります。Cloud FirestoreのSecurity RulesをCircleCIで自動テストする - ninjinkun's diaryを参考にJestで書いてみました。
import * as firebase from '@firebase/testing';

describe('/projects', () => {
    const uid = 'alice';
    const db = firebase.initializeTestApp({
        auth: { uid, email: 'alice@example.com' },
        projectId: 'my-test-project'
      }).firestore();
    const projectCollection = db.collection('projects');

  it('can not list all projects', async () => {
    await firebase.assertFails(projectCollection.get());
  });

  it('can list own projects', async () => {
    await firebase.assertSucceeds(
      projectCollection.where('ownerId', '==', uid).get()
    );
  });
});
Dockerの設定
ここまでで、ローカルでエミュレータが動くのを確認しました。次にこのエミュレータをDockerコンテナ上で動くようにします。firestore local emulator を docker-composeで動かす - Qiitaを参考にしました。
FROM node:10-alpine
WORKDIR /usr/src/app
RUN apk add --no-cache openjdk8-jre
RUN npm i -g firebase-tools && firebase setup:emulators:firestore
先ほどは
firebase initでエミュレータを設定しましたが、Dockerfileではsetup:emulatorsコマンドを利用しています。多分どちらでも同じだと思います。docker-compose.ymlも書きます。セキュリティルールを読み込みたいので、カレントディレクトリをマウントしておきましょう。
version: '2'
services:
  firestore:
    build: .
    ports:
      - '8080:8080'
    volumes:
      - .:/usr/src/app
    working_dir: /usr/src/app
    command: 'firebase emulators:start --only firestore'
もしホスト側のポートを8080以外にする場合は、テスト実行側でFIRESTORE_EMULATOR_HOST環境変数を設定してください。
注意点として、エミュレータはデフォルトではlocalhostからのリクエストからしか受け付けないため、コンテナ外からのアクセスがそのままだとできません。そこで、
firebase.jsonを以下のように書き換えます。"emulators": { "firestore": { + "host": "0.0.0.0", "port": 8080 } }これでコンテナ外からもアクセスできるようになります。
docker-compose upで、コンテナ上でエミュレータが起動します。$ docker-compose up firestore Starting firebase-todoapp_firestore_1 ... done Attaching to firebase-todoapp_firestore_1 firestore_1 | i emulators: Starting emulators: firestore firestore_1 | i firestore: Serving ALL traffic (including WebChannel) on http://0.0.0.0:8080 firestore_1 | ⚠ firestore: Support for WebChannel on a separate port (8081) is DEPRECATED and will go away soon. Please use port above instead. firestore_1 | i firestore: Emulator logging to firestore-debug.log firestore_1 | ✔ firestore: Emulator started at http://0.0.0.0:8080 firestore_1 | i firestore: For testing set FIRESTORE_EMULATOR_HOST=0.0.0.0:8080 firestore_1 | ✔ All emulators started, it is now safe to connect.GitHub Actions Workflowの設定
最後にWorkflowを設定します。オフィシャルのNodejsワークフローを参考に、以下のように設定しました。
name: Firebase CI

on: [push]

jobs:
  build:
    runs-on: ubuntu-latest

    strategy:
      matrix:
        node-version: [12.x]

    steps:
      - uses: actions/checkout@v1
      - name: docker-compose up
        run: docker-compose up -d
      - name: Use Node.js ${{ matrix.node-version }}
        uses: actions/setup-node@v1
        with:
          node-version: ${{ matrix.node-version }}
      - name: yarn install, build, and test
        run: |
          yarn install
          yarn tslint
          yarn test
          yarn build
        env:
          CI: true
docker-compose upでエミュレータが起動され、yarn testで先ほど書いたセキュリティルールを含むテストが実行されます。テスト実行開始までにエミュレータが上がっている保証はありませんが、惑星よりも重いことで有名なyarn installを実行している間にまず間違いなく上がるので良しとしましょう。気になる方は定期的にcurlを叩いてレスポンスが返ってくるまで待つシェルスクリプトを書いたりすると良いと思います。これでGitHub Actions上でFirestoreエミュレータを立ち上げてテストができるようになりました。実行時間は(Dockerfileのビルドからやっているので)docker-compose upが1分、yarn installが3分ぐらいです。
キャッシュをちゃんとやればもっと早くなるはずなので、調べたらまた記事を書きたいと思います。
- 投稿日:2019-11-24T14:11:14+09:00
【Docker】とにかく触ってみる(04)
最初に
前回までで、また色々と設定を変更したため、もう一度インスタンスを新規に作り直しました。
こうやってサクサクと新規環境が出来るAWSは本当に便利ですね。
本番環境を運用していく上では、個人利用するためには費用面で非常に怖いですが、学習のためと割り切りさえすれば作っては消して作っては消してと重宝しています。以前はVM使っていたけれど、初期設定の時間が案外バカにならないので、今はAWSを使っています。
Dockerのインストール
この作業は流石に慣れて来ました。
teratermsudo yum install -y yum-utils device-mapper-persistent-data lvm2 sudo yum-config-manager --add-repo https://download.docker.com/linux/centos/docker-ce.repo sudo yum install -y docker-ce docker-ce-cli containerd.io sudo systemctl start docker sudo systemctl enable docker docker --version実行結果Docker version 19.03.5, build 633a0eaDockerイメージの確認
Dockerイメージの確認
teratermsudo docker images実行結果REPOSITORY TAG IMAGE ID CREATED SIZEubuntuの取得
teratermsudo docker run --name waka_taka -it -d --rm ubuntu /bin/bash実行結果Unable to find image 'ubuntu:latest' locally latest: Pulling from library/ubuntu 7ddbc47eeb70: Pull complete c1bbdc448b72: Pull complete 8c3b70e39044: Pull complete 45d437916d57: Pull complete Digest: sha256:6e9f67fa63b0323e9a1e587fd71c561ba48a034504fb804fd26fd8800039835d Status: Downloaded newer image for ubuntu:latest ebde7c101359d3dd5bce57fdba711491905ef1e8a645eb598503b047dc3b77c6Dockerコミット
teratermsudo docker exec -it waka_taka /bin/bash実行結果root@ebde7c101359:/#root@ebde7c101359root@ebde7c101359:/# cd /tmp/ root@ebde7c101359:/tmp# dd if=/dev/zero of=tempfile bs=1M count=10 10+0 records in 10+0 records out 10485760 bytes (10 MB, 10 MiB) copied, 0.00568905 s, 1.8 GB/s root@ebde7c101359:/tmp# ll total 10240 drwxrwxrwt. 1 root root 22 Nov 24 04:39 ./ drwxr-xr-x. 1 root root 17 Nov 24 04:37 ../ -rw-r--r--. 1 root root 10485760 Nov 24 04:39 tempfile root@ebde7c101359:/tmp#Dockerの勉強していて付いていかなくなるのって、Dockerの知識というよりもOSやアプリの知識が追いついていないことだとよく痛感します。
この作業は普通にUbuntuのコマンド知識だけど、10Mのダミーファイルを作るなど本を見ながらないとさっぱり分からないですし。。。teratermsudo docker commit waka_taka waka_taka:ver191124 sudo docker images実行結果(Before)REPOSITORY TAG IMAGE ID CREATED SIZE ubuntu latest 775349758637 3 weeks ago 64.2MB実行結果(After)REPOSITORY TAG IMAGE ID CREATED SIZE waka_taka ver191124 8c1a957e93ff 10 seconds ago 74.7MB ubuntu latest 775349758637 3 weeks ago 64.2MBコミットしたイメージの内容確認
teratermsudo docker run -it waka_taka:ver191124 /bin/bash実行結果root@bb4b397ad531:/# cd /tmp/root@bb4b397ad531root@bb4b397ad531:/tmp# ll total 10240 drwxrwxrwt. 1 root root 22 Nov 24 04:39 ./ drwxr-xr-x. 1 root root 18 Nov 24 04:51 ../ -rw-r--r--. 1 root root 10485760 Nov 24 04:39 tempfile先に作成したダミーファイルが存在していることを確認出来ます。
teratermsudo docker history waka_taka:ver191124実行結果IMAGE CREATED CREATED BY SIZE COMMENT 8c1a957e93ff 10 minutes ago /bin/bash 10.5MB 775349758637 3 weeks ago /bin/sh -c #(nop) CMD ["/bin/bash"] 0B <missing> 3 weeks ago /bin/sh -c mkdir -p /run/systemd && echo 'do… 7B <missing> 3 weeks ago /bin/sh -c set -xe && echo '#!/bin/sh' > /… 745B <missing> 3 weeks ago /bin/sh -c [ -z "$(apt-get indextargets)" ] 987kB <missing> 3 weeks ago /bin/sh -c #(nop) ADD file:a48a5dc1b9dbfc632… 63.2MBDockerをPUSH
次回、新しいEC2を構築したときに、このDockerイメージをPULLして確認してみるので、Docker HUBにPUSHしておきます。
teratermsudo docker login ------------------------------------------- Login with your Docker ID to push and pull images from Docker Hub. If you don't have a Docker ID, head over to https://hub.docker.com to create one. ------------------------------------------- Username: <Username> Password: <Password>実行結果WARNING! Your password will be stored unencrypted in /root/.docker/config.json. Configure a credential helper to remove this warning. See https://docs.docker.com/engine/reference/commandline/login/#credentials-store Login Succeededteratermsudo docker tag ubuntu wakataka3/dummy_ubuntu:ver191124 sudo docker push wakataka3/dummy_ubuntu:ver191124実行結果The push refers to repository [docker.io/wakataka3/dummy_ubuntu] e0b3afb09dc3: Mounted from library/ubuntu 6c01b5a53aac: Mounted from library/ubuntu 2c6ac8e5063e: Mounted from library/ubuntu cc967c529ced: Mounted from library/ubuntu ver191124: digest: sha256:134c7fe821b9d359490cd009ce7ca322453f4f2d018623f849e580a89a685e5d size: 1152新しい知識を習得するのは楽しいのだけど、新しいことを覚えたら以前覚えていたときのことがトコロテンのように記憶から抜けていってしまうので、牛歩で進もうと思います。
この備忘録も自分の役には立っていますが、他の方が読みやすいよう整理して行ければ良いと思っていますので。最後に
今回はDockerイメージのコミットしか確認していませんが、正直脳のキャパを超えたので別稿で続きを記載しようと思います。
Automated Buildについて興味はあるけれど、GitHubに対して凄くトラウマがあるので、後回しにする予定です。
便利機能なのは知っているのですが、理屈から入ってしまったので、便利さよりも難しさの方が印象に残っているのですよね・・・IT技術については、習うより慣れろの方が本当に良いと思いますわ。
- 投稿日:2019-11-24T14:11:14+09:00
【Docker】とにかく触ってみる(05)
最初に
前回までで、また色々と設定を変更したため、もう一度インスタンスを新規に作り直しました。
こうやってサクサクと新規環境が出来るAWSは本当に便利ですね。
本番環境を運用していく上では、個人利用するためには費用面で非常に怖いですが、学習のためと割り切りさえすれば作っては消して作っては消してと重宝しています。以前はVM使っていたけれど、初期設定の時間が案外バカにならないので、今はAWSを使っています。
Dockerのインストール
この作業は流石に慣れて来ました。
teratermsudo yum install -y yum-utils device-mapper-persistent-data lvm2 sudo yum-config-manager --add-repo https://download.docker.com/linux/centos/docker-ce.repo sudo yum install -y docker-ce docker-ce-cli containerd.io sudo systemctl start docker sudo systemctl enable docker docker --version実行結果Docker version 19.03.5, build 633a0eaDockerイメージの確認
teratermsudo docker images実行結果REPOSITORY TAG IMAGE ID CREATED SIZEubuntuの取得
teratermsudo docker run --name waka_taka -it -d --rm ubuntu /bin/bash実行結果Unable to find image 'ubuntu:latest' locally latest: Pulling from library/ubuntu 7ddbc47eeb70: Pull complete c1bbdc448b72: Pull complete 8c3b70e39044: Pull complete 45d437916d57: Pull complete Digest: sha256:6e9f67fa63b0323e9a1e587fd71c561ba48a034504fb804fd26fd8800039835d Status: Downloaded newer image for ubuntu:latest ebde7c101359d3dd5bce57fdba711491905ef1e8a645eb598503b047dc3b77c6Dockerコミット
teratermsudo docker exec -it waka_taka /bin/bash実行結果root@ebde7c101359:/#root@ebde7c101359root@ebde7c101359:/# cd /tmp/ root@ebde7c101359:/tmp# dd if=/dev/zero of=tempfile bs=1M count=10 10+0 records in 10+0 records out 10485760 bytes (10 MB, 10 MiB) copied, 0.00568905 s, 1.8 GB/s root@ebde7c101359:/tmp# ll total 10240 drwxrwxrwt. 1 root root 22 Nov 24 04:39 ./ drwxr-xr-x. 1 root root 17 Nov 24 04:37 ../ -rw-r--r--. 1 root root 10485760 Nov 24 04:39 tempfile root@ebde7c101359:/tmp#Dockerの勉強していて付いていかなくなるのって、Dockerの知識というよりもOSやアプリの知識が追いついていないことだとよく痛感します。
この作業は普通にUbuntuのコマンド知識だけど、10Mのダミーファイルを作るなど本を見ながらないとさっぱり分からないですし。。。teratermsudo docker commit waka_taka waka_taka:ver191124 sudo docker images実行結果(Before)REPOSITORY TAG IMAGE ID CREATED SIZE ubuntu latest 775349758637 3 weeks ago 64.2MB実行結果(After)REPOSITORY TAG IMAGE ID CREATED SIZE waka_taka ver191124 8c1a957e93ff 10 seconds ago 74.7MB ubuntu latest 775349758637 3 weeks ago 64.2MBコミットしたイメージの内容確認
teratermsudo docker run -it waka_taka:ver191124 /bin/bash実行結果root@bb4b397ad531:/# cd /tmp/root@bb4b397ad531root@bb4b397ad531:/tmp# ll total 10240 drwxrwxrwt. 1 root root 22 Nov 24 04:39 ./ drwxr-xr-x. 1 root root 18 Nov 24 04:51 ../ -rw-r--r--. 1 root root 10485760 Nov 24 04:39 tempfile先に作成したダミーファイルが存在していることを確認出来ます。
teratermsudo docker history waka_taka:ver191124実行結果IMAGE CREATED CREATED BY SIZE COMMENT 8c1a957e93ff 10 minutes ago /bin/bash 10.5MB 775349758637 3 weeks ago /bin/sh -c #(nop) CMD ["/bin/bash"] 0B <missing> 3 weeks ago /bin/sh -c mkdir -p /run/systemd && echo 'do… 7B <missing> 3 weeks ago /bin/sh -c set -xe && echo '#!/bin/sh' > /… 745B <missing> 3 weeks ago /bin/sh -c [ -z "$(apt-get indextargets)" ] 987kB <missing> 3 weeks ago /bin/sh -c #(nop) ADD file:a48a5dc1b9dbfc632… 63.2MBDockerをPUSH
次回、新しいEC2を構築したときに、このDockerイメージをPULLして確認してみるので、Docker HUBにPUSHしておきます。
teratermsudo docker login ------------------------------------------- Login with your Docker ID to push and pull images from Docker Hub. If you don't have a Docker ID, head over to https://hub.docker.com to create one. ------------------------------------------- Username: <Username> Password: <Password>実行結果WARNING! Your password will be stored unencrypted in /root/.docker/config.json. Configure a credential helper to remove this warning. See https://docs.docker.com/engine/reference/commandline/login/#credentials-store Login Succeededteratermsudo docker tag ubuntu wakataka3/dummy_ubuntu:ver191124 sudo docker push wakataka3/dummy_ubuntu:ver191124実行結果The push refers to repository [docker.io/wakataka3/dummy_ubuntu] e0b3afb09dc3: Mounted from library/ubuntu 6c01b5a53aac: Mounted from library/ubuntu 2c6ac8e5063e: Mounted from library/ubuntu cc967c529ced: Mounted from library/ubuntu ver191124: digest: sha256:134c7fe821b9d359490cd009ce7ca322453f4f2d018623f849e580a89a685e5d size: 1152新しい知識を習得するのは楽しいのだけど、新しいことを覚えたら以前覚えていたときのことがトコロテンのように記憶から抜けていってしまうので、牛歩で進もうと思います。
この備忘録も自分の役には立っていますが、他の方が読みやすいよう整理して行ければ良いと思っていますので。最後に
今回はDockerイメージのコミットしか確認していませんが、正直脳のキャパを超えたので別稿で続きを記載しようと思います。
Automated Buildについて興味はあるけれど、GitHubに対して凄くトラウマがあるので、後回しにする予定です。
便利機能なのは知っているのですが、理屈から入ってしまったので、便利さよりも難しさの方が印象に残っているのですよね・・・IT技術については、習うより慣れろの方が本当に良いと思いますわ。
- 投稿日:2019-11-24T14:10:29+09:00
【Docker】とにかく触ってみる(04)
最初に
前回までで、また色々と設定を変更したため、もう一度インスタンスを新規に作り直しました。
こうやってサクサクと新規環境が出来るAWSは本当に便利ですね。
本番環境を運用していく上では、個人利用するためには費用面で非常に怖いですが、学習のためと割り切りさえすれば作っては消して作っては消してと重宝しています。以前はVM使っていたけれど、初期設定の時間が案外バカにならないので、今はAWSを使っています。
Dockerのインストール
この作業は流石に慣れて来ました。
teratermsudo yum install -y yum-utils device-mapper-persistent-data lvm2 sudo yum-config-manager --add-repo https://download.docker.com/linux/centos/docker-ce.repo sudo yum install -y docker-ce docker-ce-cli containerd.io sudo systemctl start docker sudo systemctl enable docker docker --version実行結果Docker version 19.03.5, build 633a0eaDockerイメージの確認
Dockerイメージの確認
teratermsudo docker images実行結果REPOSITORY TAG IMAGE ID CREATED SIZEubuntuの取得
teratermsudo docker run --name waka_taka -it -d --rm ubuntu /bin/bash実行結果Unable to find image 'ubuntu:latest' locally latest: Pulling from library/ubuntu 7ddbc47eeb70: Pull complete c1bbdc448b72: Pull complete 8c3b70e39044: Pull complete 45d437916d57: Pull complete Digest: sha256:6e9f67fa63b0323e9a1e587fd71c561ba48a034504fb804fd26fd8800039835d Status: Downloaded newer image for ubuntu:latest ebde7c101359d3dd5bce57fdba711491905ef1e8a645eb598503b047dc3b77c6Dockerコミット
teratermsudo docker exec -it waka_taka /bin/bash実行結果root@ebde7c101359:/#root@ebde7c101359root@ebde7c101359:/# cd /tmp/ root@ebde7c101359:/tmp# dd if=/dev/zero of=tempfile bs=1M count=10 10+0 records in 10+0 records out 10485760 bytes (10 MB, 10 MiB) copied, 0.00568905 s, 1.8 GB/s root@ebde7c101359:/tmp# ll total 10240 drwxrwxrwt. 1 root root 22 Nov 24 04:39 ./ drwxr-xr-x. 1 root root 17 Nov 24 04:37 ../ -rw-r--r--. 1 root root 10485760 Nov 24 04:39 tempfile root@ebde7c101359:/tmp#Dockerの勉強していて付いていかなくなるのって、Dockerの知識というよりもOSやアプリの知識が追いついていないことだとよく痛感します。
この作業は普通にUbuntuのコマンド知識だけど、10Mのダミーファイルを作るなど本を見ながらないとさっぱり分からないですし。。。teratermsudo docker commit waka_taka waka_taka:ver191124 sudo docker images実行結果(Before)REPOSITORY TAG IMAGE ID CREATED SIZE ubuntu latest 775349758637 3 weeks ago 64.2MB実行結果(After)REPOSITORY TAG IMAGE ID CREATED SIZE waka_taka ver191124 8c1a957e93ff 10 seconds ago 74.7MB ubuntu latest 775349758637 3 weeks ago 64.2MBコミットしたイメージの内容確認
teratermsudo docker run -it waka_taka:ver191124 /bin/bash実行結果root@bb4b397ad531:/# cd /tmp/root@bb4b397ad531root@bb4b397ad531:/tmp# ll total 10240 drwxrwxrwt. 1 root root 22 Nov 24 04:39 ./ drwxr-xr-x. 1 root root 18 Nov 24 04:51 ../ -rw-r--r--. 1 root root 10485760 Nov 24 04:39 tempfile先に作成したダミーファイルが存在していることを確認出来ます。
teratermsudo docker history waka_taka:ver191124実行結果IMAGE CREATED CREATED BY SIZE COMMENT 8c1a957e93ff 10 minutes ago /bin/bash 10.5MB 775349758637 3 weeks ago /bin/sh -c #(nop) CMD ["/bin/bash"] 0B <missing> 3 weeks ago /bin/sh -c mkdir -p /run/systemd && echo 'do… 7B <missing> 3 weeks ago /bin/sh -c set -xe && echo '#!/bin/sh' > /… 745B <missing> 3 weeks ago /bin/sh -c [ -z "$(apt-get indextargets)" ] 987kB <missing> 3 weeks ago /bin/sh -c #(nop) ADD file:a48a5dc1b9dbfc632… 63.2MBDockerをPUSH
次回、新しいEC2を構築したときに、このDockerイメージをPULLして確認してみるので、Docker HUBにPUSHしておきます。
teratermsudo docker login ------------------------------------------- Login with your Docker ID to push and pull images from Docker Hub. If you don't have a Docker ID, head over to https://hub.docker.com to create one. ------------------------------------------- Username: <Username> Password: <Password>実行結果WARNING! Your password will be stored unencrypted in /root/.docker/config.json. Configure a credential helper to remove this warning. See https://docs.docker.com/engine/reference/commandline/login/#credentials-store Login Succeededteratermsudo docker tag ubuntu wakataka3/dummy_ubuntu:ver191124 sudo docker push wakataka3/dummy_ubuntu:ver191124実行結果The push refers to repository [docker.io/wakataka3/dummy_ubuntu] e0b3afb09dc3: Mounted from library/ubuntu 6c01b5a53aac: Mounted from library/ubuntu 2c6ac8e5063e: Mounted from library/ubuntu cc967c529ced: Mounted from library/ubuntu ver191124: digest: sha256:134c7fe821b9d359490cd009ce7ca322453f4f2d018623f849e580a89a685e5d size: 1152新しい知識を習得するのは楽しいのだけど、新しいことを覚えたら以前覚えていたときのことがトコロテンのように記憶から抜けていってしまうので、牛歩で進もうと思います。
この備忘録も自分の役には立っていますが、他の方が読みやすいよう整理して行ければ良いと思っていますので。最後に
今回はDockerイメージのコミットしか確認していませんが、正直脳のキャパを超えたので別稿で続きを記載しようと思います。
Automated Buildについて興味はあるけれど、GitHubに対して凄くトラウマがあるので、後回しにする予定です。
便利機能なのは知っているのですが、理屈から入ってしまったので、便利さよりも難しさの方が印象に残っているのですよね・・・IT技術については、習うより慣れろの方が本当に良いと思いますわ。
- 投稿日:2019-11-24T13:23:08+09:00
【Docker】とにかく触ってみる(03)
最初に
本学習はAWS上に構築したCentOSで試しているので、勉強が終わったら毎回環境を削除しています。
そのため、復習も兼ねて個人的に必要だと思うことは毎回再掲します。何度も同じコマンド打つことで、何をやっているか理解出来るようになると思うし、再度本を読み直したときに気づきもあると思いますので。
Dockerのインストール
teratermsudo yum install -y yum-utils device-mapper-persistent-data lvm2 sudo yum-config-manager --add-repo https://download.docker.com/linux/centos/docker-ce.repo sudo yum install -y docker-ce docker-ce-cli containerd.io sudo systemctl start docker sudo systemctl enable docker docker --version実行結果Docker version 19.03.5, build 633a0eaDockerイメージの確認
teratermsudo docker images実行結果REPOSITORY TAG IMAGE ID CREATED SIZEalpineのCreate
teratermsudo docker create --name status-test -it alpine /bin/sh実行結果Unable to find image 'alpine:latest' locally latest: Pulling from library/alpine 89d9c30c1d48: Pull complete Digest: sha256:c19173c5ada610a5989151111163d28a67368362762534d8a8121ce95cf2bd5a Status: Downloaded newer image for alpine:latest 0afd7f38645918b1f24eb7b9a53d9c6497a5f6bc3e85a0b967d3c318cbf32e2calpineのRUN(起動)
teratermsudo docker start status-test sudo docker inspect status-test実行結果[ { "Id": "0afd7f38645918b1f24eb7b9a53d9c6497a5f6bc3e85a0b967d3c318cbf32e2c", "Created": "2019-11-24T02:52:35.609871364Z", "Path": "/bin/sh", "Args": [], "State": { "Status": "running", "Running": true, "Paused": false, "Restarting": false, (後略)alpineのSTOP(停止)
teratermsudo docker stop status-test sudo docker ps -a実行結果CONTAINER ID IMAGE COMMAND CREATED STATUS PORTS NAMES 0afd7f386459 alpine "/bin/sh" 12 minutes ago Exited (137) About a minute ago status-testalpineをDocker Hubへアップロード
teratermsudo docker login ------------------------------------------- Login with your Docker ID to push and pull images from Docker Hub. If you don't have a Docker ID, head over to https://hub.docker.com to create one. ------------------------------------------- Username: <Username> Password: <Password>実行結果WARNING! Your password will be stored unencrypted in /root/.docker/config.json. Configure a credential helper to remove this warning. See https://docs.docker.com/engine/reference/commandline/login/#credentials-store Login Succeededteratermsudo docker images実行結果REPOSITORY TAG IMAGE ID CREATED SIZE alpine latest 965ea09ff2eb 4 weeks ago 5.55MBteratermsudo docker tag alpine wakataka3/alpine:ver191124 sudo docker push wakataka3/alpine:ver191124実行結果The push refers to repository [docker.io/wakataka3/alpine] 77cae8ab23bf: Mounted from library/alpine ver191124: digest: sha256:e4355b66995c96b4b468159fc5c7e3540fcef961189ca13fee877798649f531a size: 528コンテナシェルへの接続
teratermsudo docker run --name connect-test -it -d ubuntu /bin/bash実行結果Unable to find image 'ubuntu:latest' locally latest: Pulling from library/ubuntu 7ddbc47eeb70: Pull complete c1bbdc448b72: Pull complete 8c3b70e39044: Pull complete 45d437916d57: Pull complete Digest: sha256:6e9f67fa63b0323e9a1e587fd71c561ba48a034504fb804fd26fd8800039835d Status: Downloaded newer image for ubuntu:latest 0208b2c2a3b6416c66a0404702cb02283ff63e4dae24c4e31eb0c2a923cb8242teratermsudo docker attach connect-test実行結果root@0208b2c2a3b6:/#root@0208b2c2a3b6ll実行結果total 4 drwxr-xr-x. 1 root root 6 Nov 24 03:19 ./ drwxr-xr-x. 1 root root 6 Nov 24 03:19 ../ -rwxr-xr-x. 1 root root 0 Nov 24 03:19 .dockerenv* drwxr-xr-x. 2 root root 4096 Oct 29 21:25 bin/ drwxr-xr-x. 2 root root 6 Apr 24 2018 boot/ drwxr-xr-x. 5 root root 360 Nov 24 03:19 dev/ drwxr-xr-x. 1 root root 66 Nov 24 03:19 etc/ drwxr-xr-x. 2 root root 6 Apr 24 2018 home/ drwxr-xr-x. 8 root root 96 May 23 2017 lib/ drwxr-xr-x. 2 root root 34 Oct 29 21:25 lib64/ drwxr-xr-x. 2 root root 6 Oct 29 21:25 media/ drwxr-xr-x. 2 root root 6 Oct 29 21:25 mnt/ drwxr-xr-x. 2 root root 6 Oct 29 21:25 opt/ dr-xr-xr-x. 112 root root 0 Nov 24 03:19 proc/ drwx------. 2 root root 37 Oct 29 21:25 root/ drwxr-xr-x. 1 root root 21 Oct 31 22:20 run/ drwxr-xr-x. 1 root rootこの状態からは「CTRL+P」→「CTRL+Q」で抜けることができる
root@0208b2c2a3b6read escape sequenceubuntuから抜けた場合は、起動した状態が持続される
teratermsudo docker ps実行結果CONTAINER ID IMAGE COMMAND CREATED STATUS PORTS NAMES 0208b2c2a3b6 ubuntu "/bin/bash" 4 minutes ago Up 4 minutes connect-testattachとexecの違い
attach
teratermsudo docker attach connect-test実行結果root@0208b2c2a3b6:/#root@0208b2c2a3b6exitteratermsudo docker ps -a実行結果CONTAINER ID IMAGE COMMAND CREATED STATUS PORTS NAMES 0208b2c2a3b6 ubuntu "/bin/bash" 10 minutes ago Exited (127) 59 seconds ago connect-testteratermsudo docker attach connect-test実行結果You cannot attach to a stopped container, start it first※ startさせないと、接続できません
exec
teratermsudo docker start connect-test sudo docker exec -it connect-test /bin/bash実行結果root@0208b2c2a3b6:/#root@0208b2c2a3b6exitteratermsudo docker exec -it connect-test /bin/bash実行結果root@0208b2c2a3b6:/#※ startさせずに接続できます
MySQLを使ってみる
ここまでで、本に記載通りの動作は出来ることを確認出来たので、ネットで調べながらMySQLを使ってみたいと思います。
まだ、Dockerfileの書き方や、Docker Composeまで行っていないけれど、これくらいであれば、トライアンドエラーで行けると思いますので、、、teratermsudo docker pull mysql実行結果Using default tag: latest latest: Pulling from library/mysql d599a449871e: Pull complete f287049d3170: Pull complete 08947732a1b0: Pull complete 96f3056887f2: Pull complete 871f7f65f017: Pull complete 1dd50c4b99cb: Pull complete 5bcbdf508448: Pull complete a59dcbc3daa2: Pull complete 13e6809ab808: Pull complete 2148d51b084d: Pull complete 93982f7293d7: Pull complete e736330a6d9c: Pull complete Digest: sha256:c93ba1bafd65888947f5cd8bd45deb7b996885ec2a16c574c530c389335e9169 Status: Downloaded newer image for mysql:latest docker.io/library/mysql:latestteratermsudo docker images実行結果REPOSITORY TAG IMAGE ID CREATED SIZE mysql latest d435eee2caa5 26 hours ago 456MB ubuntu latest 775349758637 3 weeks ago 64.2MB alpine latest 965ea09ff2eb 4 weeks ago 5.55MB wakataka3/alpine ver191124 965ea09ff2eb 4 weeks ago 5.55MBteratermsudo docker run --name mysql -e MYSQL_ROOT_PASSWORD=x4zdvWFp6JAU -d -p 3306:3306 mysql※このMySQLは使い捨てのため、パスワードを記載していますが、本来公開してはいけないものです。
実行結果dcce3f2ee783fab667b27f79b9023ead566cb0f9d1b5164021e6759603da3fa8teratermsudo docker ps実行結果CONTAINER ID IMAGE COMMAND CREATED STATUS PORTS NAMES dcce3f2ee783 mysql "docker-entrypoint.s…" About a minute ago Up About a minute 0.0.0.0:3306->3306/tcp, 33060/tcp mysqlteratermsudo docker exec -it dcce3f2ee783 bash実行結果root@dcce3f2ee783:/#teratermmysql -u root -p Enter password: x4zdvWFp6JAU実行結果Welcome to the MySQL monitor. Commands end with ; or \g. Your MySQL connection id is 11 Server version: 8.0.18 MySQL Community Server - GPL Copyright (c) 2000, 2019, Oracle and/or its affiliates. All rights reserved. Oracle is a registered trademark of Oracle Corporation and/or its affiliates. Other names may be trademarks of their respective owners. Type 'help;' or '\h' for help. Type '\c' to clear the current input statement.無事「起動確認」までは出来ました。
最後に
MySQLの構築だけは出来たけれど、このMySQLに外部から接続する方法が分からないので、現状実用性がないですな。
今回の目標は、あくまで環境構築だったので、次回からまた本の通り実機確認してみようと思います。
- 投稿日:2019-11-24T11:03:04+09:00
Vue.js + Express + Sequelize + DockerでCRUD搭載のTodoリストを作ってみる
Vue.js + Express + Sequelize + DockerでCRUD搭載のTodoリストを作ってみる
この記事に書いてあること
- Expressの実装例
- Vue.jsの実装例
- 実行環境として利用するDockerコンテナの作り方
- Sequelizeの導入方法、簡単な使い方
- 拙い日本語
しがないエンジニアが人生初アドベントカレンダー参加となりますので、諸々ご容赦頂けますと幸いです。
対象者
細かい説明は割愛していますが、初心者向けに書いてます。
「ゴリゴリにDocker使った環境構築が知りたい!」とか、
「俺はSequelizeなんか使わずにSQLを一つずつ組むね!」とか、
「ここどうなってるかもうちょい細かく説明してほしい」みたいな人にはあまり適してません。あくまで、
記事をなぞっていくだけで手軽にCRUDがVue.js+Expressが体験できるっていうのを目的にしています。
各種バージョン
Docker for mac 19.03.5
Node.js 12.13.0
express 4.16.1
Sequelize-cli 5.5.1
vue-cli 4.0.5DBはsqlite3を利用(なんでもいいけど)
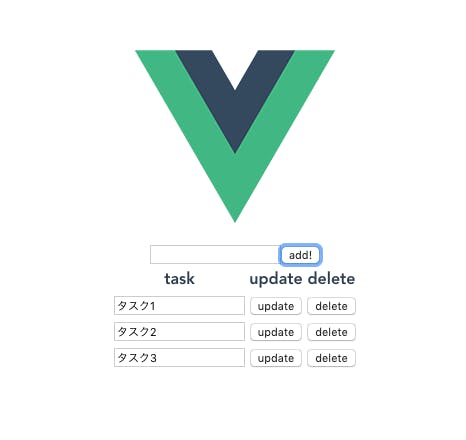
作るもの
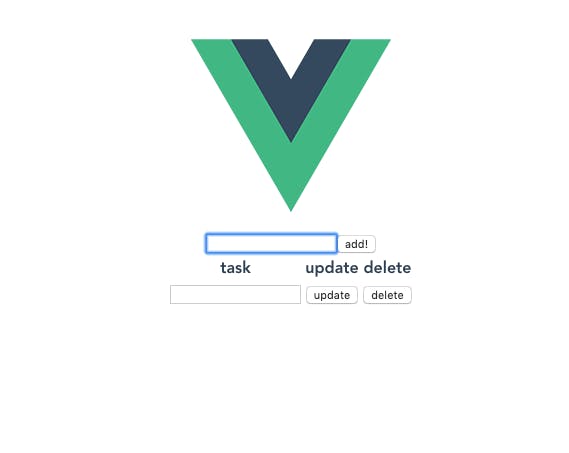
CRUD機能を搭載した簡単なTodoリストを作ります。
完成イメージはこんな感じです。
各種説明
Docker
言わずと知れたコンテナマン。コンテナの概念やメリットの説明は割愛。今回環境はこれで構築。
(ベストプラクティスを知りたい)Vue.js
みんな大好きフロントフレームワーク。特に難しいことはしません。
(vue-cliを使って雛形を作成)Node.js
みんな大好きサーバーサイドで動くJavaScript。特に難しいことはしません。
Sequelize
Nodeで使えるORM。RailsのActiveRecordみたいな物だと思ってもらえればOK。
特に難しいことはしません全体的なファイル構成
ファイル構成はこんな感じ。
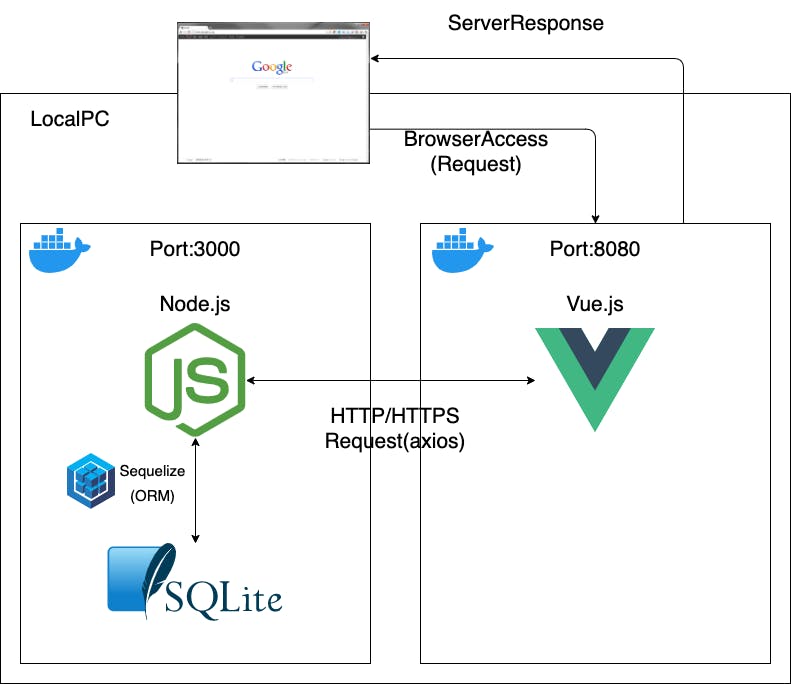
rootディレクトリ配下をコンテナごとに区切り、後々コンテナにマウントしてあげる。rootDir/ ┣ docker-compose.yml ┣ vue/ ┃ ┣ Dockerfile ┃ ┗ frontapp/ ┃ ┗ Vue.jsの雛形ファイル群が入ってくる ┗ node/ ┣ Dockerfile ┗ Expressの雛形ファイル群が入ってくる全体構成
全体構成はこんな感じです。
基本Vue.jsコンテナがリクエストを受けて、axiosでNode.jsコンテナにサーバ通信しています。
SQLiteを使っているので、DBアクセスはNode.jsコンテナ内で処理されるようなイメージ。
Node.jsの準備
早速開始、と行きたいところですが、まずは実行環境を構築。
Dockerhubから引っ張ってきてもいいのですが、せっかくなのでDockerfileを書いてあげましょう。
今回はとりあえず各種プログラムが実行できる環境が前提なので、コンテナ内は環境のみ。
ソースファイルはコンテナイメージに含めず、docker-composeを使って後でマウントしてあげることにします。node/DockerfileFROM node:12.13 RUN npm install -g express-generator sequelize-cliDockerfileの記述が終わったら一旦、Dockerfileからコンテナイメージを作成。
コンテナ起動時にローカルのディレクトリをマウントし、コンテナ内のデータが永続化できるようにします。docker build node/. -t serverapp:latest docker run -itd --rm --name serverapp -v $PWD/node:/node serverapp:latestコンテナの起動が完了したら、コンテナ内にログインする。
docker exec -it serverapp /bin/bashコンテナログイン後、expressコマンドを実行し、雛形ファイル群を作成。
cd /node
express .
npm install --save sequelize sqlite3 cors nodemon
npm install
docker runを実行した際にローカルのフォルダをマウントしているので、
ローカルのnode/以下にexpressの雛形ファイル群ができているはず。続いて、DBを作成するためにコンテナに入ったまま
sequelize initを実行し、
CRUDに必要なtaskモデルを作成する準備をします。sequelize initinit実行後、一旦コンテナからログアウトし、ローカルで
config/config.jsonを下記のように修正。config/config.json{ "development": { "username": "root", "password": null, "database": "database_development", "host": "127.0.0.1", "dialect": "sqlite", "storage": "./data/development.sqlite3", "operatorsAliases": false }, "test": { "username": "root", "password": null, "database": "database_test", "host": "127.0.0.1", "dialect": "sqlite", "storage": "./data/test.sqlite3", "operatorsAliases": false }, "production": { "username": "root", "password": null, "database": "database_production", "host": "127.0.0.1", "dialect": "sqlite", "storage": "./data/production.sqlite3", "operatorsAliases": false } }Sequelizeのデータが保存される
./dataを作成する。mkdir dataもう一度コンテナにログインし、
taskモデルを作成します。docker exec -it serverapp /bin/bash sequelize model:create --name task --underscored --attributes taskname:string sequelize db:migrateマイグレーションが無事に成功すればtaskモデルが作成されます。
これでNode.jsの準備は完了。雛形準備に利用したコンテナは停止します。docker stop serverapp続いてフロントVue.js側を準備します。
Vue.jsの準備
Node側と同様にDockerfileを記述。
vue/DockerfileFROM node:12.13 RUN npm install -g @vue/cliDockerfileを元にコンテナイメージを作成。起動し、ローカルのフォルダをマウント。
docker build vue/. -t frontapp:latest
docker run -itd --rm --name frontapp -v $PWD/vue:/vue frontapp:latest
Node側同様、Vue.jsの雛形ファイル群を作成するため、一度コンテナ内にログインします。
docker exec -it frontapp /bin/bashコンテナログイン後、下記コマンドを実行。オプションは
defaultで問題ありません。
その後の選択肢としては、yarnとnpmが出てくるけど、個人的にはnpmのが使いやすいのでそちらで。cd /vue vue create frontapp以上でVue.js側の準備は終了。Node.js側同様に、一度コンテナは停止します。
docker stop frontappdocker-compose.ymlの準備
Node.jsとVue.jsそれぞれのコンテナを起動する際、composeファイルがあると起動/終了が楽なので、
docker-compose.ymlを下記のように記入。docker-compose.ymlversion: "3" services: node: build: node/. volumes: - ./node:/node working_dir: /node command: ["npm", "start"] ports: - "3000:3000" vue: build: vue/. volumes: - ./vue:/vue working_dir: /vue/frontapp command: ["npm", "run", "serve"] ports: - "8080:8080"プロジェクトのカレントディレクトリで、
docker-composeコマンドを実行し、
Node.jsのコンテナとVue.jsのコンテナを起動する。docker-compose up -d # コンテナ終了は docker-compose downブラウザで3000ポートにアクセスしExpressの画面、8080ポートにアクセスしVue.jsの画面が表示されれば、開発用コンテナの構築は完了です。
localhost:3000
localhost:8080
docker-composeコマンドで初回起動時にコンテナイメージが再ビルドされ、
docker runで起動した時のコンテナイメージとは別の名前でイメージ化されるため、docker runコマンドで起動した時のコンテナイメージは不要のため削除します。docker rmi serverapp:latest docker rmi frontapp:latest実行環境の作成はこれにて終了。次から各種機能の実装に入っていきます。
Node.js
まずはサーバサイドの処理から実装します。
処理実装に入る前に、ソースコード変更時に自動的にNodeが再起動されるように少しだけ工夫。
app.jsとdocker-compose.ymlを修正します。node/app.js... var indexRouter = require("./routes/index"); var usersRouter = require("./routes/users"); var cors = require("cors"); var app = express(); app.use(cors()); ... app.listen(3000, function() { console.log("Node server is started"); }); module.exports = appdocker-compose.yml... working_dir: /node command: ["./node_modules/.bin/nodemon", "app"] ports: ...Node.jsの初期状態だとVueからのリクエストを受けられない(エラーがでてしまう)ので、
インストールしたcorsモジュールを追加して、corsを許可する必要があります。
また、nodemonを利用しファイル変更を検知、ファイルが変更されたら自動でサーバが再起動されるようにします。
設定を反映するため、一度コンテナ再起動を実行。docker-compose down docker-compose up -dコントローラーの新規追加がめんどくさいので最初から用意されている
index.jsを利用します。
実装内容としてはこんな感じ。node/routes/index.jsvar express = require("express"); var router = express.Router(); const db = require("../models/index"); // Read router.get("/", async function(req, res, next) { try { const result = await db.task.findAll({}); res.send(result); } catch (err) { res.status(500).send(err); } }); //Create router.post("/task", async function(req, res, next) { try { const result = await db.task.create({ taskname: req.body.task }); res.send(result); } catch (err) { res.status(500).send(err); } }); //Update router.put("/task/:id", async function(req, res, next) { try { const result = await db.task.update( { taskname: req.body.task }, { where: { id: req.params.id } } ); res.send(result); } catch (err) { res.status(500).send(err); } }); //Delete router.delete("/task/:id", async function(req, res, next) { try { const result = await db.task.destroy({ where: { id: req.params.id } }); res.send({ result: result }); } catch (err) { res.status(500).send(err); } }); module.exports = router;送られてきたパラメータをそのままDBに登録するっていう簡単なCRUD処理の一覧です。
一つずつ説明していきます。// Read router.get("/", async function(req, res, next) { try { const result = await db.task.findAll({}); res.send(result); } catch (err) { res.status(500).send(err); } });getで
/にアクセスされた際に、taskテーブルから全てデータを引っ張ってくるように実装。
DBのtaskテーブルから全てデータを引っ張ってくるのに、sequelizeのfindAllというメソッドを使用します。
取得したデータをres.sendを使用して、リクエスト元に戻してあげます。router.post("/task", async function(req, res, next) { try { const result = await db.task.create({ taskname: req.body.task }); res.send(result); } catch (err) { res.status(500).send(err); } });postで
/taskにアクセスした際に、リクエストのbody内容をDBのtaskテーブルに登録。
sequelizeのcreateというメソッドを利用します。router.put("/task/:id", async function(req, res, next) { try { const result = await db.task.update( { taskname: req.body.task }, { where: { id: req.params.id } } ); res.send(result); } catch (err) { res.status(500).send(err); } });putで
/task/:idにアクセスした際に、idに紐づくレコードをupdateする処理。
sequelizeのupdateメソッドを利用し、リクエストのbody内容でデータを更新します。router.delete("/task/:id", async function(req, res, next) { try { const result = await db.task.destroy({ where: { id: req.params.id } }); res.send({ result: result }); } catch (err) { res.status(500).send(err); } });deleteで
/task/:idにアクセスした際に、idに紐づくレコードを削除する処理。
sequelizeのdestroyメソッドを利用。Node.js側CRUDの処理は実装完了です。続いて、Vue.js側の実装。
Vue.js
デフォルトでHelloWorld.vueというコンポーネントが存在しているので、そこに肉付けしていくことにします。
まずは各種部品を設置。vue/frontapp/src/components/HelloWorld.vue<template> <div class="hello"> <form> <input type="text" style="display:none" /> <input type="text" /> <input type="button" value="add!" /> </form> <table align="center" border="0"> <tr> <th>task</th> <th>update</th> <th>delete</th> </tr> <tr> <td> <input type="text" /> </td> <td> <input type="button" value="update" /> </td> <td> <input type="button" value="delete" /> </td> </tr> </table> </div> </template> <script> export default { name: "HelloWorld" } </script> <!-- Add "scoped" attribute to limit CSS to this component only --> <style scoped> h3 { margin: 40px 0 0; } ul { list-style-type: none; padding: 0; } li { margin: 0 10px; } a { color: #42b983; } .table { height: 100%; text-align: center; } </style>上の基本系を修正します。今の時点だとこんな感じ。
まずはGETで
/にアクセスした際に、apiアクセスを行う部分を実装する。vue/frontapp/src/components/HelloWorld.vue<script> import axios from "axios"; export default { name: "HelloWorld", data: () => ({ tasks: [], }), created: async function() { try { const result = await axios.get("http://localhost:3000"); this.tasks = result.data; } catch (err) { alert(JSON.stringify(err)); } } } ...
createdを定義しておくことで、ページが読み込まれた時に処理を実行することが可能。
createdでもmountedでもどっちでもいいけど、今回の用途にはcreatedの方が適任ですね。
下記記事で詳しく書かれていたので、気になる人は参照してみてください。Vuejs APIアクセスはcreatedとmountedのどちらで行う?
axiosは非同期で実行されるので、処理を同期的に行うためにawaitで実行。
実行結果としてresult.dataが戻ってくるので、data内のtasksの内容をAPI実行結果に変更する。続いてtask追加処理を実装。まず入力されたデータにアクセスできるようにする必要があるため、
テキストボックスをv-modelでdataと紐づけます。vue/frontapp/src/components/HelloWorld.vue... <form> <input type="text" style="display:none" /> <input v-model="currentTask" type="text" /> <input type="button" value="add!" /> </form> ... <script> import axios from "axios"; export default { name: "HelloWorld", data: () => ({ tasks: [], currentTask: "" }), ...こうすることで
inputに入力されたデータが、data内currentTaskに反映され、関数内からデータが参照可能となります。
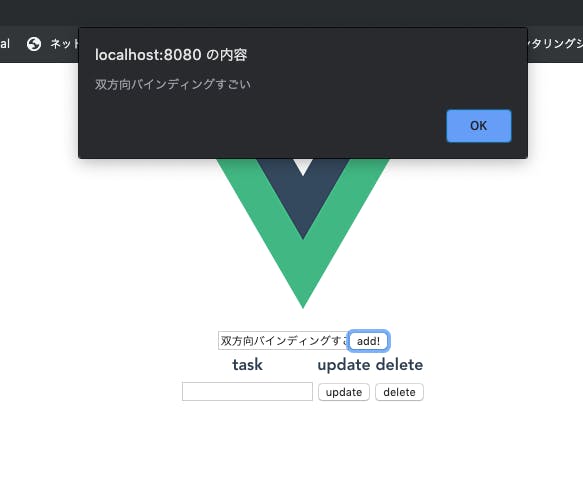
次に@clickイベントを実装し、ボタンが押された時に関数を呼び出すよう修正。vue/frontapp/src/components/HelloWorld.vue... <form> <input type="text" style="display:none" /> <input v-model="currentTask" type="text" /> <input type="button" value="add!" @click="taskCreate" /> </form> ... <script> ... created: async function() { try { const result = await axios.get("http://localhost:3000"); this.tasks = result.data; } catch (err) { alert(JSON.stringify(err)); } }, methods: { taskCreate: async function() { alert(this.currentTask); } } }; </script>こうすることで、ボタンが押された時に、
taskCreateを呼び出すことが可能です。
仮実装としてボタンを押すと、テキストボックス内に入力したデータの内容をalert表示するように実装してます。
何かしらテキストボックスに入力し、ボタンを押したタイミングでalertが表示されてくればOK。
取得したデータをサーバに送信するため、
taskCreate関数の続きを実装していく。vue/frontapp/src/components/HelloWorld.vue<script> ... methods: { taskCreate: async function() { try { const result = await axios.post("http://localhost:3000/task", { task: this.currentTask }); this.tasks.push(result.data); this.currentTask = ""; } catch (err) { alert(JSON.stringify(err)); } } ...node.js側で定義したタスク追加の処理(/task)に繋げる。
サーバ処理終了後に下記部分で動的にtasksにデータを追加。this.tasks.push(result.data); // data内tasks配列に戻り値(追加したデータ)を追加 this.currentTask = ""; // data内currentTaskとテキストボックスが双方向でバインドされているので、currentTaskを空にすることでテキストボックスが空になるこれで、入力されたデータがサーバにリクエストで送られ、データ保存が可能となります。
このままだとデータを追加しても追加したデータが表示されないので、data内のtasksと<tr>をv-modelを利用し紐づけます。
HelloWorld.vueのtable部分を下記のように変更。vue/frontapp/src/components/HelloWorld.vue<table align="center" border="0"> <tr> <th>task</th> <th>update</th> <th>delete</th> </tr> <tr v-for="(task, index) in tasks" :key="task.id"> <td> <input v-model="task.taskname" type="text" /> </td> <td> <input type="button" value="update" /> </td> <td> <input type="button" value="delete" /> </td> </tr> </table>
v-forを利用することでtasksの数だけ<tr>が生成されます。
こうすることで、ページ読み込み時にサーバからデータが取得され、今まで追加したタスクが出てくるようになり、
ボタンを押した時にもタスクが画面に追加されるようになる。
これでタスク追加に関しては実装終了。続いてタスク削除を実装します。
まずは関数を用意。vue/frontapp/src/components/HelloWorld.vue<script> ... methods: { taskCreate: async function() { try { const result = await axios.post("http://localhost:3000/task", { task: this.currentTask }); this.tasks.push(result.data); this.currentTask = ""; } catch (err) { alert(JSON.stringify(err)); } }, taskDelete: async function(id, index) { try { await axios.delete("http://localhost:3000/task/" + id); this.currentTask = ""; this.tasks.splice(index, 1); } catch (err) { alert(JSON.stringify(err)); } } }
taskDelete関数を追加しました。taskのidと配列のindexを引数に持ってあげます。
呼び出し部分はこんな感じ。vue/frontapp/src/components/HelloWorld.vue<tr v-for="(task, index) in tasks" :key="task.id"> <td> <input v-model="task.taskname" type="text" /> </td> <td> <input type="button" value="update" /> </td> <td> <input type="button" value="delete" @click="taskDelete(task.id, index)" /> </td> </tr>こうすることで、リクエスト先のURLが動的に作られます。
タスクのidが2だった場合は、リクエスト先はaxios.delete("http://localhost:3000/task/" + 2);となり、
タスクのidが10だった場合は、リクエスト先はaxios.delete("http://localhost:3000/task/" + 10);となります。また、配列のindexを引数に持ってあげることによって、spliceメソッドを使って配列を操作することができ、画面のデータを非同期で変更可能です。
this.tasks.splice(index, 1);
// [{タスク1},{タスク2},{タスク3},{タスク4}]
// indexに2が渡された場合は、
// [{タスク1},{タスク2},{タスク4}]
// このように配列が操作される
最後にタスク修正した際の処理を実装する。まずは関数の用意から。
vue/frontapp/src/components/HelloWorld.vue<script> ... taskUpdate: async function(id, val) { try { await axios.put("http://localhost:3000/task/" + id, { task: val }); alert("タスクを修正しました"); this.currentTask = ""; } catch (err) { alert(JSON.stringify(err)); } }呼び出し部分はこんな感じ。
vue/frontapp/src/components/HelloWorld.vue<tr v-for="(task, index) in tasks" :key="task.id"> <td> <input v-model="task.taskname" type="text" /> </td> <td> <input type="button" value="update" @click="taskUpdate(task.id, task.taskname)" /> </td> <td> <input type="button" value="delete" @click="taskDelete(task.id, index)" /> </td> </tr>
taskUpdateを呼び出す時に、タスクのID、タスク名を引数で渡してあげることにより、
対象のタスクのみアップデートがかかるようにします。CRUDの全体が出来上がった最終形のHelloWorld.vueとしてはこんな感じ。
<template>
  <div class="hello">
    <form>
      <input type="text" style="display:none" />
      <input v-model="currentTask" type="text" />
      <input type="button" value="add!" @click="taskCreate" />
    </form>
    <table align="center" border="0">
      <tr>
        <th>task</th>
        <th>update</th>
        <th>delete</th>
      </tr>
      <tr v-for="(task, index) in tasks" :key="task.id">
        <td>
          <input v-model="task.taskname" type="text" />
        </td>
        <td>
          <input
            type="button"
            value="update"
            @click="taskUpdate(task.id, task.taskname)"
          />
        </td>
        <td>
          <input
            type="button"
            value="delete"
            @click="taskDelete(task.id, index)"
          />
        </td>
      </tr>
    </table>
  </div>
</template>
<script>
import axios from "axios";
export default {
  name: "HelloWorld",
  data: () => ({
    tasks: [],
    currentTask: ""
  }),
  created: async function() {
    try {
      const result = await axios.get("http://localhost:3000");
      this.tasks = result.data;
    } catch (err) {
      alert(JSON.stringify(err));
    }
  },
  methods: {
    taskCreate: async function() {
      try {
        const result = await axios.post("http://localhost:3000/task", {
          task: this.currentTask
        });
        this.tasks.push(result.data);
        this.currentTask = "";
      } catch (err) {
        alert(JSON.stringify(err));
      }
    },
    taskDelete: async function(id, index) {
      try {
        await axios.delete("http://localhost:3000/task/" + id);
        this.currentTask = "";
        this.tasks.splice(index, 1);
      } catch (err) {
        alert(JSON.stringify(err));
      }
    },
    taskUpdate: async function(id, val) {
      try {
        await axios.put("http://localhost:3000/task/" + id, {
          task: val
        });
        alert("タスクを修正しました");
        this.currentTask = "";
      } catch (err) {
        alert(JSON.stringify(err));
      }
    }
  }
};
</script>

<!-- Add "scoped" attribute to limit CSS to this component only -->
<style scoped>
h3 {
  margin: 40px 0 0;
}
ul {
  list-style-type: none;
  padding: 0;
}
li {
  margin: 0 10px;
}
a {
  color: #42b983;
}
.table {
  height: 100%;
  text-align: center;
}
</style>
以上で完成です!
作ってみた感想
Vue.jsのバインディングが思っていた以上に使いやすく、非常に簡単にフロントの実装ができました。
規模が大きくなってきたらVuexとかライフサイクルとか考えないといけないこともあるけど、
この程度の規模のアプリケーションであれば、簡単に作ることができるのが良いですね。あと、ただ実装するだけだと面白く無いので実行環境はDockerにしたのも◯。
汎用的な実行コンテナとして使えるので、チュートリアル的な使い方には非常に適任。
構築も簡単なので非常に使いやすかったかと。Sequelizeの導入がちょっとだけめんどくさいけど、一度やってしまえばRailsチックにDB操作ができるので、
SQL書かずに手軽にDB操作したい!って人にはおすすめです。明日は@kazukimatsumotoさんの番です。よろしくおねがいします!


- 投稿日:2019-11-24T04:53:32+09:00
【Nuxt.js】Dockerコンテナ上のサーバーにlocalhostでアクセスした時に出るERR_EMPTY_RESPONSEを解決する方法
Nuxt.jsで開発したアプリのImageからDockerコンテナを起動
前提として、
Nuxt.jsで開発したアプリのImage(イメージ名:test)をビルドしたこととします。
Dockerfileを作成して、Imageをビルドする方法は下の記事にまとめているので、参考にしていただけると幸いです。参考:https://qiita.com/arthur_foreign/items/fca369c1d9bde1701e38
早速、
docker runで作成したImageからコンテナを起動しましょう。$ docker run --rm -p 3000:3000 test yarn run v1.13.0 $ nuxt start ℹ Listening on: http://localhost:3000/localhostにアクセスするとERR_EMPTY_RESPONSEのエラーが起きる
localhostでアクセスしましたが、
ERR_EMPTY_RESPONSEのエラーが出てしまいました。Nuxt.jsでERR_EMPTY_RESPONSEが出る原因
本エラーの原因としては、ホストマシンとDockerコンテナのlocalhostは異なっているため、Dockerコンテナ内のサーバーを
yarn dev等で、localhostでアクセス出来る状態にすると、ホストマシンからlocalhostへアクセスした場合にエラーが起きました。補足すると、Dockerコンテナもホストマシン(自分のPC)同様、以下のような使い方をしています。
Docker コンテナは localhost:8000 や 0.0.0.0:8376 のような一般的なポートを割り当てて使います。
引用:http://docs.docker.jp/v1.11/engine/installation/mac.html原因における厳密な解説は、下の記事にしっかりまとめられているので非常に参考になりました。
参考:https://qiita.com/amuyikam/items/01a8c16e3ddbcc734a46※本記事では、Nuxt.jsをDockerコンテナ上のサーバーにlocalhostでアクセス出来る状態に出来ることが目的なのと、既に原因を調査されている方がいたので、この辺の説明は割愛させていただきました。(本記事で起きた問題の原因への理解については、上記記事で補完出来るかと思います。)
また、Docker上のアプリに対して、localhostでアクセス出来ないもう1つの原因としては以下の引用のママですね。
デフォルトでは、Nuxt の開発サーバーのホストは localhost(ホストマシン内からのみアクセスが可能)です。
引用:https://ja.nuxtjs.org/faq/host-port/Nuxt.jsでERR_EMPTY_RESPONSEを解決する方法
ホストの 0.0.0.0 は、ホストマシンの 外部 の接続(例えば LAN)にアクセス可能なホストアドレスを解決するよう Nuxt に伝えるためにデザインされています。
引用:https://ja.nuxtjs.org/faq/host-port/
package.jsonやnuxt.config.jsに、上記の設定を追記することで、ホストマシンからDockerコンテナ上のサーバーにlocalhostでアクセスすることが出来ます。以下が設定のソースコードです。
nuxt.config.jsexport default { server: { host: '0.0.0.0' } }package.json"config": { "nuxt": { "host": "0.0.0.0" } }他にも設定方法は色々ありますが、公式ドキュメントを参考にするといいかと思います。
参考:https://ja.nuxtjs.org/faq/host-port/
Imageを再構築してDockerコンテナを起動してlocalhostに再度アクセスする
test2というImage名でビルドしたという前提で話を進めます。実際に、そのImageからDockerコンテナを起動しましょう。
$ docker run --rm -p 3000:3000 test2
yarn run v1.13.0
$ nuxt start
ℹ Listening on: http://172.17.0.2:3000/
これで、localhostにアクセスしても、
ERR_EMPTY_RESPONSEのエラーは出なくなりました。

- 投稿日:2019-11-24T03:47:44+09:00
vagrant+docker-compose環境を構築
主に自分用メモです。
仮想マシン(VirtualMachine / VM)とDockerの違いについては以下を参照ください。
「Docker」を全く知らない人のために「Docker」の魅力を伝えるための「Docker」入門また、使い方の参考は入門 Dockerが良いです。こちらはDocker技術のキャッチアップにも役立ちます。
しかも設計についても解説しており非常に勉強になります。
入門ですがしっかりした内容なのでより軽いものであれば他のものでも。ゴール
Vagrantfileを記述し、vagrantでssh接続した際にdockerとdocker-composeが動作できる環境を構築します。
目的
vagrantを用いることで、仮想マシンを構築することができます。
また、Vagrantfileを用いることで、その仮想環境の共有が容易にできるようになります。dockerとdocker-composeも同時にセットアップし、
今後に向けてdocker-compose.ymlによって複数コンテナの自動セットアップまでの導線を用意します。余談ですが、筆者はvagrantを用いず、windows環境で直にdocker-composeを動かした際に
volumeのオプションのパスがうまく設定できずハマりました。
dockerはlinux技術を元に構築されており、それをwindows上で無理やり起動しているため少し躓きます。
そんな悲しいことにもならないように、開発環境はvagrant環境の上で構築したいものです。筆者環境
macOS Catalina 10.15.1
ディレクトリ❯ tree . ├── Vagrantfile └── data事前準備
下記をインストールしておくこと
Vagrantのプラグインをインストール
以下をターミナルで実行します。
vagrant plugin install vagrant-vbguest
vagrant plugin install vagrant-docker-compose❯ vagrant plugin install vagrant-vbguest Installing the 'vagrant-vbguest' plugin. This can take a few minutes... Fetching: micromachine-3.0.0.gem (100%) Fetching: vagrant-vbguest-0.21.0.gem (100%) Installed the plugin 'vagrant-vbguest (0.21.0)'! ❯ vagrant plugin install vagrant-docker-compose Installing the 'vagrant-docker-compose' plugin. This can take a few minutes... Fetching: vagrant-docker-compose-1.5.1.gem (100%) Installed the plugin 'vagrant-docker-compose (1.5.1)'!プラグインインストール確認
❯ vagrant plugin list
vagrant-docker-compose (1.5.1, global)
vagrant-vbguest (0.21.0, global)
Vagrantfileの作成
カレントディレクトリのVagrantfileに基づいてvagrantはセットアップを行います。
そのため、適当なフォルダを作り、その中にVagrantfileの作成すると良いでしょう。Vagrantfileの中身は今回以下です。(備忘録の記述が多いです。)
Vagrantfile# -*- mode: ruby -*- # vi: set ft=ruby : # All Vagrant configuration is done below. The "2" in Vagrant.configure # configures the configuration version (we support older styles for # backwards compatibility). Please don't change it unless you know what # you're doing. Vagrant.configure("2") do |config| # The most common configuration options are documented and commented below. # For a complete reference, please see the online documentation at # https://docs.vagrantup.com. # Every Vagrant development environment requires a box. You can search for # boxes at https://vagrantcloud.com/search. config.vm.box = "bento/ubuntu-18.04" config.vm.box_version = "201910.20.0" config.ssh.insert_key = false # Disable automatic box update checking. If you disable this, then # boxes will only be checked for updates when the user runs # `vagrant box outdated`. This is not recommended. # config.vm.box_check_update = false # Create a forwarded port mapping which allows access to a specific port # within the machine from a port on the host machine. In the example below, # accessing "localhost:8080" will access port 80 on the guest machine. # NOTE: This will enable public access to the opened port config.vm.network "forwarded_port", guest: 80, host: 5000 # Create a forwarded port mapping which allows access to a specific port # within the machine from a port on the host machine and only allow access # via 127.0.0.1 to disable public access # config.vm.network "forwarded_port", guest: 80, host: 8080, host_ip: "127.0.0.1" # Create a private network, which allows host-only access to the machine # using a specific IP. config.vm.network "private_network", ip: "192.168.33.10" # Create a public network, which generally matched to bridged network. # Bridged networks make the machine appear as another physical device on # your network. # config.vm.network "public_network" # Share an additional folder to the guest VM. The first argument is # the path on the host to the actual folder. The second argument is # the path on the guest to mount the folder. And the optional third # argument is a set of non-required options. config.vm.synced_folder "./data", "/vagrant" # Provider-specific configuration so you can fine-tune various # backing providers for Vagrant. These expose provider-specific options. # Example for VirtualBox: # config.vm.provider "virtualbox" do |vb| # Display the VirtualBox GUI when booting the machine # vb.gui = true # Customize the amount of memory on the VM: vb.memory = "4096" end # # View the documentation for the provider you are using for more # information on available options. # Enable provisioning with a shell script. Additional provisioners such as # Puppet, Chef, Ansible, Salt, and Docker are also available. Please see the # documentation for more information about their specific syntax and use. config.vm.provision "shell", privileged: false, inline: <<-SHELL sudo timedatectl set-timezone Asia/Tokyo sudo apt-get update # sudo apt-get install -y apache2 SHELL # if Vagrant.has_plugin?("vagrant-proxyconf") # config.proxy.http = "http://hogeproxy:8080/" # config.proxy.https = "https://hogeproxy:8080/" # config.proxy.no_proxy = "localhost,127.0.0.1,.example.com" # end # install Docker config.vm.provision :docker # Install the following plug-ins in advance # $ vagrant plugin install vagrant-docker-compose config.vm.provision :docker_compose, compose_version: "1.24.1" #, yml: "docker-compose.yml" endこちらを参考にして作成。
共有フォルダについて補足
config.vm.synced_folderでホストOSとゲストOS間で共有フォルダを設定しています。上記の設定では、ローカルマシンの Vagrantfile があるディレクトリ内の data フォルダと
仮想マシン内の /vagrant ディレクトリを共有しています。
書式config.vm.synced_folder {host_path}, {guest_path}, option...起動
Vagrantfileの配置されているディレクトリで
vagrant upで起動します。起動確認
vagrant statusで現在の起動状態が確認できます。「running」であれば成功です。❯ vagrant status Current machine states: default running (virtualbox)ゲストOSへのSSHアクセス方法
以下のVagrantfileの配置されているディレクトリで
vagrant sshで接続します。またはVagrantfileで設定したIP(デフォルト: 192.168.33.10)へSSHでアクセスできます。
デフォルトでは以下の設定になります。
ID: vagrant
PW: vagrantdocker, docker-compose確認
vagrant@vagrant:~$ docker -v
Docker version 19.03.5, build 633a0ea838

vagrant@vagrant:~$ docker-compose -v
docker-compose version 1.24.1, build 4667896b
停止
vagrant haltで停止します。VM削除
vagrant環境を作り直したい場合に利用
vagrant destroyvagrant関連のプロセスをキルしたい場合
ps -ef |grep VBox | awk '{print $2}' | xargs kill
参考: https://stackoverflow.com/a/16876318
- 投稿日:2019-11-24T01:51:13+09:00
コマンドラインでdockerに入門
// install
$ brew cask install docker

$ docker --version
Docker version 19.03.5, build 633a0ea

// これは自動でよしなにイメージをとってきてコンテナを作ってくれる
$ docker run hello-world

// Docker Hubからimageをとってくる
$ docker pull alpine

// とってきたimageがある
 $ docker image ls
REPOSITORY          TAG                 IMAGE ID            CREATED             SIZE
alpine              latest              965ea09ff2eb        4 weeks ago         5.55MB

// コンテナを作る
 $ docker create -it alpine

// コンテナがある
 $ docker container ls
CONTAINER ID        IMAGE               COMMAND             CREATED             STATUS              PORTS               NAMES
e1dd4b1c20a6        alpine              "/bin/sh"           43 seconds ago      Up 19 seconds                           charming_gates

// コンテナ起動
$ docker start e1d(コンテナID、ほかとかぶってなければ3文字ですむ)
e1d

// コンテナストップ
$ docker stop e1d

// 消えてる
 $ docker container ls
CONTAINER ID        IMAGE               COMMAND             CREATED             STATUS              PORTS               NAMES

// 動いてないものも見たいとき
$ docker container ls -a
CONTAINER ID        IMAGE               COMMAND             CREATED             STATUS                            PORTS               NAMES
e1dd4b1c20a6        alpine              "/bin/sh"           2 minutes ago       Exited (137) About a minute ago                       charming_gates

// コンテナ名を変えられる
$ docker rename sleepy_chatelet hoge

$ docker container ls -a
CONTAINER ID        IMAGE               COMMAND             CREATED             STATUS                            PORTS               NAMES
e1dd4b1c20a6        alpine              "/bin/sh"           3 minutes ago       Exited (137) About a minute ago                       charming_gates

// alpineの中に入る
docker run -it alpine bin/sh

// exitで出れる。

// コンテナを消す
$ docker rm e1d

// 消えてる
$ docker container ls -a
CONTAINER ID        IMAGE               COMMAND             CREATED             STATUS              PORTS               NAMES
参考文献
すごく参考になりました。これがなければ、dockerに入門してみようということにならなかったかもしれません。スタートのハードルが下がりスタートできました。
#マンガでわかるDocker ① 〜概念・基本コマンド編〜 【ダウンロード版】 #技術書典 - 湊川あいの、わかば家。 - BOOTH参考サイト
p17-p31 PHPのローカル開発環境をサクッと作ってみよう - マンガでわかるDocker サポートサイト
- 投稿日:2019-11-24T01:00:30+09:00
Nuxt TypeScript を docker-compose で構築する
はじめに
Nuxt TypeScript でセットアップの手順は公式にて公開しているが、docker-composeを用いた構築の情報が少なかったので纏めてみた。
また、Ver.2.9以降からTypeScriptへの導入手順が変わり、個人的に少し躓いた部分もあったのでその点も踏まえて共有しようと思う。
1. 実行環境
- macOS Catalina Ver.10.15.1
- Docker version 19.03.4, build 9013bf5
- docker-compose version 1.24.1, build 4667896b
- Nuxt.js Ver.2.10.2
- node.js 12.13.0-alpine
2. 前提条件
- Nuxt.js のバージョンが 2.9 以上である事。
- PC内に docker, docker-compose, node.js がインストールされている事。
docker , docker-compose , node.js がインストールされていない場合は下記を実行すると良い。
2.1. Docker のインストール
Docker をインストールする為に DockerHub にアクセスし、
Docker.dmgをダウンロードする。
※ DockerHubを初めて利用する場合はアカウント作成が必要である。
Docker.dmgを起動すると、Dockerのインストールが行われるので、インストール完了後に Docker を Applications にコピーする。また、他の方法としてHomebrewと呼ばれるパッケージ管理システムを用いてインストールする事ができる。以下にインストール手順を示す。
# Homebrew をインストール
$ /usr/bin/ruby -e "$(curl -fsSL https://raw.githubusercontent.com/Homebrew/install/master/install)"

# Homebrew が正しくインストールされているかどうか確認する
$ brew doctor

# Docker をインストールする
$ brew install docker
$ brew cask install docker
docker, Homebrew のバージョンの確認は以下のコマンドを実行する事で確認できる。
# Docker
$ docker --version
Docker version 19.03.4, build 9013bf5

# Homebrew
$ brew --version
Homebrew 2.1.16
Homebrew/homebrew-core (git revision 00c2c; last commit XXXX-XX-XX)
Homebrew/homebrew-cask (git revision 9e283; last commit XXXX-XX-XX)
2.2. docker-compose のインストール
docker-compose のインストールは以下のコマンドを実行すると良い。
$ curl -L https://github.com/docker/compose/releases/download/1.3.1/docker-compose-`uname -s`-`uname -m` > /usr/local/bin/docker-compose

# docker-compose コマンドを実行できるように、権限を設定する。
$ chmod +x /usr/local/bin/docker-compose
補足:実行中、
Permission deniedエラーが表示された場合、/usr/local/binディレクトリが書き込み可能が許可されていない可能性がある。その際、Compose のインストールをスーパーユーザで行う必要がある。sudo -iを実行してから、上記の2つのコマンドを実行し、exitする。3. Nuxt.js 環境構築
TypeScript に変換する前に、まず Nuxt.js のプロジェクトを作成する必要があるので作成手順に関して説明する。
3.1. ファイル構成
今回のファイル構成は以下の通りである。1つのディレクトリに異なるファイルが複数混同する事を避けるため、project ディレクトリを新規し、その中に
Dockerfileを作成する。また、Nuxt.js のプロジェクト内のファイル階層も綺麗にしたかったので、
srcディレクトリを新規作成し、その中に纏めている。以下に、ファイル構成を示す。
.
├── README.md
├── docker-compose.yml
└── project
    ├── Dockerfile
    ├── README.md
    ├── node_modules
    ├── nuxt.config.ts
    ├── package.json
    ├── src
    │   ├── assets
    │   ├── components
    │   ├── layouts
    │   ├── middleware
    │   ├── pages
    │   ├── plugins
    │   ├── static
    │   ├── store
    │   └── vue-shim.d.ts
    ├── tsconfig.json
    ├── yarn-error.log
    └── yarn.lock
3.2. Dockerfile
はじめに、Dockerfileを作成する。
node.jsに関しては、DockerHub にイメージが公開されているのでそれを使用する。Dockerfile# イメージ指定 FROM node:12.13.0-alpine # コマンド実行 RUN apk update && \ apk add git && \ npm install -g @vue/cli nuxt create-nuxt-app && \今回はイメージの軽量化の為に、
alpineを使用した。※ alpine : Alpine Linuxと呼ばれる、
BusyBoxとmuslをベースにしたLinuxディストリビューションを指す3.3. docker-compose.yml
次に、docker-compose.ymlを作成する。
docker-compose.ymlversion: '3' services: node: # Dockerfileの場所 build: context: ./ dockerfile: ./project/Dockerfile working_dir: /home/node/app/project # ホストOSとコンテナ内でソースコードを共有する volumes: - ./:/home/node/app # コンテナ内部の3000を外部から5000でアクセスする ports: - 5000:3000 environment: - HOST=0.0.0.03.4. dockerイメージ作成
Dockerfile, docker-compose.ymlを作成後、以下のコマンドを実行し docker イメージを作成する。
$ docker-compose build実行後、イメージができているかどうかは以下のコマンドで確認できる。
$ docker images
REPOSITORY                    TAG              IMAGE ID        CREATED       SIZE
docker-nuxt-typescript_node   latest           7f8324973b48    3 days ago    434MB
node                          12.13.0-alpine   5d187500daae    3 weeks ago   80.1MB
3.5. Nuxt.jsの起動
コンテナ内で
npm、yarnコマンドを実行したい場合は下記の様に指定する。$ docker-compose run --rm <Container Name> <Command>以下のコマンドを実行し、Nuxt.jsを起動させセットアップを行う。
$ docker-compose run --rm nuxt npx create-nuxt-app ./project
Project name (your-title)
Project description (My wicked Nuxt.js project)
Author name (author-name)
Choose the package manager
> Yarn
  Npm
Choose UI framework (Use arrow keys)
> None
  Ant Design Vue
  Bootstrap Vue
  Buefy
  Bulma
  Element
  Framevuerk
  iView
  Tachyons
  Tailwind CSS
  Vuetify.js
Choose custom server framework (Use arrow keys)
> None (Recommended)
  AdonisJs
  Express
  Fastify
  Feathers
  hapi
  Koa
  Micro
# スペースで選択する事ができる。(Enterキーではないので注意)
Choose Nuxt.js modules
>(*) Axios
 ( ) Progressive Web App (PWA) Support
Choose linting tools
>(*) ESLint
 ( ) Prettier
 ( ) Lint staged files
Choose test framework
> None
  Jest
  AVA
Choose rendering mode (Use arrow keys)
  Universal (SSR) // WEB SITE
> Single Page App // WEB APPLICATION
Choose development tools
>(*) jsconfig.json (Recommended for VS Code)
上記の設定は、筆者がセットアップに選択したものである。設定に関しては各々で必要なものを導入すると良い。
3.6. コンテナの立ち上げ
以下のコマンドを実行し、コンテナを起動させる。
$ docker-compose run node npm run dev # OR $ docker-compose run node yarn run dev起動後、http://localhost:5000/ にアクセスし、サンプルアプリ画面が確認できれば一旦完了である。
4. TypeScript化
最後に、Nuxt.js を TypeScript に変更する手順について説明する。
4.1. @nuxt/typescript-build, @nuxt/typescript-runtime のインストール
TypeScript化を進める前に、まずはじめに
@nuxt/typescript-build、@nuxt/typescript-runtimeの2つを以下のコマンドを実行してインストールする。
(どちらか一方でも動くが、今回は両方インストールしておく)※ @nuxt/typescript-build :
nuxt buildで TypeScript を扱うためのもの。
※ @nuxt/typescript-runtime : Node.js 環境下で TypeScript を処理するためのもの。$ docker-compose run node npm install --save-dev @nuxt/typescript-build $ docker-compose run node npm install @nuxt/typescript-runtime # OR $ docker-compose run node yarn add --dev @nuxt/typescript-build $ docker-compose run node yarn add @nuxt/typescript-runtime
@nuxt/typesに関しては、上記の2つに内包されているのでインストールをする必要は無い。4.2. tsconfig.json の作成
Nuxt.js で作成されている
jsconfig.jsonを削除し、tsconfig.jsonを新規作成する。
tsconfig.jsonのソースは以下の通りである。tsconfig.json{ "include": [ "./src/**/*" ], "compilerOptions": { "target": "esnext", "module": "esnext", "moduleResolution": "node", "lib": [ "esnext", "esnext.asynciterable", "dom" ], "esModuleInterop": true, "experimentalDecorators": true, "allowJs": true, "sourceMap": true, "strict": true, "noEmit": true, "baseUrl": ".", "paths": { "~/*": [ "./src/*" ], "@/*": [ "./src/*" ] }, "types": [ "@types/node", "@nuxt/types", "@nuxtjs/axios" ] }, "exclude": [ "node_modules" ] }今回は、プロジェクト内のディレクトリを
srcディレクトリに移動させているので、include、pathsなどの設定を変更している。4.3. nuxt.config.ts の作成
次に、
nuxt.config.jsを削除し、nuxt.config.tsを新規作成する。
nuxt.config.tsのソースは以下の通りである。nuxt.config.tsimport { Configuration } from '@nuxt/types' const nuxtConfig: Configuration = { mode: 'universal', buildModules: ['@nuxt/typescript-build'], server: { port: 5000, host: 'localhost', }, head: { title: process.env.npm_package_name || '', meta: [ { charset: 'utf-8' }, { name: 'viewport', content: 'width=device-width, initial-scale=1' }, { hid: 'description', name: 'description', content: process.env.npm_package_description || '' } ], link: [ { rel: 'icon', type: 'image/x-icon', href: '/favicon.ico' } ] }, loading: { color: '#fff' }, css: [ ], plugins: [ ], typescript: { typeCheck: true, ignoreNotFoundWarnings: true }, modules: [ '@nuxtjs/axios', '@nuxtjs/eslint-module', ], build: { extend(config, ctx) { } }, srcDir: 'src/' } module.exports = nuxtConfigVer.2.9からは、
nuxt.config.ts内の Configuration の型定義が@nuxt/typesからExportされるようになった為、はじめに Import している。
また、追加された buildModules に@nuxt/typescript-buildを指定している。buildModulesに変更になった事で、build内で使用するmoduleをdevDependenciesに指定できるようになった。4.4. vue-shim.d.ts の作成
vue-shim.d.tsは、記述されているコードを TypeScript として認識させる為に必要となるファイルである。しかし、.vueファイル中にインポート等をする必要は無く、srcディレクトリ内にあれば問題ない。
vue-shim.d.tsのソースは以下の通りである。vue-shim.d.tsdeclare module "*.vue" { import Vue from "vue"; export default Vue; }4.5. package.json の修正
package.jsonは、Nuxt.js のセットアップ時に作成されるが、TypeScript が適用されていないのでその点を修正する。修正する部分としてはpackage.json内のscriptsが、nuxt コマンドなので、そこをnuxt-tsコマンドに変更する。
修正後のソースは以下の通りである。package.json# 一部省略 { ... "scripts": { "dev": "nuxt-ts", "build": "nuxt-ts build", "start": "nuxt-ts start", "generate": "nuxt-ts generate", "lint": "eslint --ext .js,.vue --ignore-path .gitignore ." } ... }4.6. Nuxt TypeScript の実行
変更を踏まえ、再度 Nuxt.js を起動する。
$ docker-compose run node yarn run dev
yarn run v1.19.1
$ nuxt-ts

   ╭─────────────────────────────────────────────╮
   │                                             │
   │   Nuxt.js v2.10.2                           │
   │   Running in development mode (universal)   │
   │                                             │
   │   Listening on: http://localhost:5000/      │
   │                                             │
   ╰─────────────────────────────────────────────╯

ℹ Preparing project for development
ℹ Initial build may take a while
✔ Builder initialized
✔ Nuxt files generated
ℹ Starting type checking service...
ℹ Using 1 worker with 2048MB memory limit

✔ Client
  Compiled successfully in 13.16s

✔ Server
  Compiled successfully in 11.98s

ℹ No type errors found
ℹ Version: typescript 3.6.4
ℹ Time: 11648ms
ℹ Waiting for file changes
ℹ Memory usage: 254 MB (RSS: 315 MB)
上記を見て貰うと、
nuxt-tsコマンドで実行している事が確認できる。
実行後、先程と同じく http://localhost:5000/ にアクセスし画面が表示する事を確認する。以上で、TypeScript化は完了である。
5. まとめ
今回は、Nuxt TypeScript を docker-comnpose で構築した。Ver.2.9 からの変更で docker-compose 下で動かなくなった人を少しでもサポートできるなら幸いである。
また、今回のサンプルは GitHub に公開しているので、何か不明点や修正点があれば随時対応していこうと思う。
◆追記◆
11/24 : Githubのproject/README.mdを英語翻訳化しました。
- 投稿日:2019-11-24T00:30:22+09:00
Dockerイメージ削除時に Error: No such image
不要なイメージを削除しようとしたらエラーが発生した。
$ docker images
REPOSITORY                 TAG                 IMAGE ID            CREATED             SIZE
<none>                     <none>              7236d7baccf7        24 hours ago        1.19GB
ruby                       2.6.1               99ef552a6db8        8 months ago        876MB

$ docker rmi 723
Error: No such image: 723
どうやら、リポジトリ+タグ で指定すると削除できるらしい。
$ docker rmi <none>:<none>
bash: syntax error near unexpected token `newline'
うん。ダメだよね、知ってた。
docker pruneで消せるかな?$ docker images prune REPOSITORY TAG IMAGE ID CREATED SIZE $ docker images REPOSITORY TAG IMAGE ID CREATED SIZE <none> <none> 7236d7baccf7 24 hours ago 1.19GB ruby 2.6.1 99ef552a6db8 8 months ago 876MBダメかぁ・・・
docker system pruneで削除してみる。$ docker system prune WARNING! This will remove: - all stopped containers - all networks not used by at least one container - all dangling images - all dangling build cache Are you sure you want to continue? [y/N] y Deleted Networks: docker_default Deleted Images: deleted: sha256:476ecb9f768812b356cbb920474edbb9321d2d84739e47726d3a15bf7b448e2b $ docker images REPOSITORY TAG IMAGE ID CREATED SIZE ruby 2.6.1 99ef552a6db8 8 months ago 876MB消せた!
ファイルシステムからイメージを削除しても消せるらしいけど、そちらは未検証。
- 投稿日:2019-11-24T00:06:20+09:00
【Docker】とにかく触ってみる(02)
最初に
前回に続き、実機にて動作確認をしてみます。
使いこなせれば非常に便利なのだろうけれど、アプリ側の知識にはトンと弱くて恩恵を受けられる程の知識を持ち合わせていないのが辛いところです。
DockerfileのCOPY命令、ADD命令
前回まで起動していたsome-nginxを停止させ、削除します。
teratermsudo docker stop some-nginx sudo docker rm some-nginxteratermcurl http://13.231.216.59:8080/実行結果curl: (7) Failed to connect to 13.231.216.59 port 8080: Connection refusedサーバが停止していることが確認出来ます。
設定ファイルの取り出す(docker cpコマンド)
続いて、Webサーバを起動し直します。
teratermsudo docker run --name some-nginx -d -p 8080:80 nginxホストマインのファイルをコンテナ内にコピーしたり、コンテナ内のファイルをホストマシンにコピーしたりします。
まずは、作業ディレクトリを作ります。
teratermmkdir copy_conf cd copy_conf/ pwd実行結果/home/centos/copy_confコンテナ内のファイルをホストマシンにコピーする
teratermsudo docker cp some-nginx:/etc/nginx/conf.d/default.conf ./ ls実行結果default.confteratermvi default.conf実行結果server { listen 80; server_name localhost; #charset koi8-r; #access_log /var/log/nginx/host.access.log main; location / { root /usr/share/nginx/html; index index.html index.htm; } #error_page 404 /404.html; # redirect server error pages to the static page /50x.html # error_page 500 502 503 504 /50x.html; location = /50x.html { root /usr/share/nginx/html; } (後略)listenポートを8080に変更し、Dockerfileを作成する。
teratermsudo vi Dockerfile --------------------------------- FROM nginx:latest COPY default.conf /etc/nginx/conf.d/default.confビルドを実行します。
teratermsudo docker build --no-cache=true -t nginx:ver191123 .実行結果Sending build context to Docker daemon 4.096kB Step 1/2 : FROM nginx:latest ---> 231d40e811cd Step 2/2 : COPY default.conf /etc/nginx/conf.d/default.conf ---> 1fc99ad7f21b Successfully built 1fc99ad7f21b Successfully tagged nginx:ver191123teratermsudo docker stop some-nginx sudo docker rm some-nginx sudo docker images実行結果REPOSITORY TAG IMAGE ID CREATED SIZE nginx ver191123 1fc99ad7f21b About a minute ago 126MB nginx latest 231d40e811cd 14 hours ago 126MB hello-world latest fce289e99eb9 10 months ago 1.84kB docker/whalesay latest 6b362a9f73eb 4 years ago 247MB waka_whalesay ver1 6b362a9f73eb 4 years ago 247MBteratermsudo docker run --name some-nginx -d -p 8080:8080 nginx:ver191123teratermcurl http://13.231.216.59:8080/実行結果<!DOCTYPE html> <html> <head> <title>Welcome to nginx!</title> <style> body { width: 35em; margin: 0 auto; font-family: Tahoma, Verdana, Arial, sans-serif; } </style> </head> <body> <h1>Welcome to nginx!</h1> <p>If you see this page, the nginx web server is successfully installed and working. Further configuration is required.</p> <p>For online documentation and support please refer to <a href="http://nginx.org/">nginx.org</a>.<br/> Commercial support is available at <a href="http://nginx.com/">nginx.com</a>.</p> <p><em>Thank you for using nginx.</em></p> </body> </html>コンテナのライフサイクル
Create
teratermsudo docker create --name status-test -it alpine /bin/sh実行結果Unable to find image 'alpine:latest' locally latest: Pulling from library/alpine 89d9c30c1d48: Pull complete Digest: sha256:c19173c5ada610a5989151111163d28a67368362762534d8a8121ce95cf2bd5a Status: Downloaded newer image for alpine:latest 187880697c83421a524a3e64431f8916876e11f3fdd0dc0caa8a0feb4352b983プロセスを確認します
teratermsudo docker ps実行結果CONTAINER ID IMAGE COMMAND CREATED STATUS PORTS NAMES 3569f4d577cc nginx:ver191123 "nginx -g 'daemon of…" 7 minutes ago Up 7 minutes 80/tcp, 0.0.0.0:8080->8080/tcp some-nginx先に起動させていたnginxが動いていたので停止させます。
teratermsudo docker stop some-nginx sudo docker rm some-nginx sudo docker ps実行結果CONTAINER ID IMAGE COMMAND CREATED STATUS PORTS NAMES「ps -a」を実行させて全部のプロセスを表示させてみます。
teratermsudo docker ps -a実行結果CONTAINER ID IMAGE COMMAND CREATED STATUS PORTS NAMES 187880697c83 alpine "/bin/sh" 4 minutes ago Created status-test (後略)STATUSがCreatedであることが確認出来ました。
RUN
teratermsudo docker start status-test sudo docker ps実行結果CONTAINER ID IMAGE COMMAND CREATED STATUS PORTS NAMES 187880697c83 alpine "/bin/sh" 7 minutes ago Up 3 seconds status-testSTATUSが「Up 3 seconds」であることが確認出来ました。
teratermsudo docker inspect status-test実行結果[ { "Id": "187880697c83421a524a3e64431f8916876e11f3fdd0dc0caa8a0feb4352b983", "Created": "2019-11-23T14:50:23.658978723Z", "Path": "/bin/sh", "Args": [], "State": { "Status": "running", "Running": true, "Paused": false, "Restarting": false, "OOMKilled": false, "Dead": false, "Pid": 9951, "ExitCode": 0, "Error": "", "StartedAt": "2019-11-23T14:57:49.761739954Z", "FinishedAt": "0001-01-01T00:00:00Z" }, "Image": "sha256:965ea09ff2ebd2b9eeec88cd822ce156f6674c7e99be082c7efac3c62f3ff652", "ResolvConfPath": "/var/lib/docker/containers/187880697c83421a524a3e64431f8916876e11f3fdd0dc0caa8a0feb4352b983/resolv.conf", "HostnamePath": "/var/lib/docker/containers/187880697c83421a524a3e64431f8916876e11f3fdd0dc0caa8a0feb4352b983/hostname", "HostsPath": "/var/lib/docker/containers/187880697c83421a524a3e64431f8916876e11f3fdd0dc0caa8a0feb4352b983/hosts", "LogPath": "/var/lib/docker/containers/187880697c83421a524a3e64431f8916876e11f3fdd0dc0caa8a0feb4352b983/187880697c83421a524a3e64431f8916876e11f3fdd0dc0caa8a0feb4352b983-json.log", "Name": "/status-test", "RestartCount": 0, "Driver": "overlay2", "Platform": "linux", "MountLabel": "", "ProcessLabel": "", "AppArmorProfile": "", "ExecIDs": null, "HostConfig": { "Binds": null, "ContainerIDFile": "", "LogConfig": { "Type": "json-file", "Config": {} }, "NetworkMode": "default", "PortBindings": {}, "RestartPolicy": { "Name": "no", "MaximumRetryCount": 0 }, "AutoRemove": false, "VolumeDriver": "", "VolumesFrom": null, "CapAdd": null, "CapDrop": null, "Capabilities": null, "Dns": [], "DnsOptions": [], "DnsSearch": [], "ExtraHosts": null, "GroupAdd": null, "IpcMode": "private", "Cgroup": "", "Links": null, "OomScoreAdj": 0, "PidMode": "", "Privileged": false, "PublishAllPorts": false, "ReadonlyRootfs": false, "SecurityOpt": null, "UTSMode": "", "UsernsMode": "", "ShmSize": 67108864, "Runtime": "runc", "ConsoleSize": [ 0, 0 ], "Isolation": "", "CpuShares": 0, "Memory": 0, "NanoCpus": 0, "CgroupParent": "", "BlkioWeight": 0, "BlkioWeightDevice": [], "BlkioDeviceReadBps": null, "BlkioDeviceWriteBps": null, "BlkioDeviceReadIOps": null, "BlkioDeviceWriteIOps": null, "CpuPeriod": 0, "CpuQuota": 0, "CpuRealtimePeriod": 0, "CpuRealtimeRuntime": 0, "CpusetCpus": "", "CpusetMems": "", "Devices": [], "DeviceCgroupRules": null, "DeviceRequests": null, "KernelMemory": 0, "KernelMemoryTCP": 0, "MemoryReservation": 0, "MemorySwap": 0, "MemorySwappiness": null, "OomKillDisable": false, "PidsLimit": null, "Ulimits": null, "CpuCount": 0, "CpuPercent": 0, "IOMaximumIOps": 0, "IOMaximumBandwidth": 0, "MaskedPaths": [ "/proc/asound", "/proc/acpi", "/proc/kcore", "/proc/keys", "/proc/latency_stats", "/proc/timer_list", "/proc/timer_stats", "/proc/sched_debug", "/proc/scsi", "/sys/firmware" ], "ReadonlyPaths": [ "/proc/bus", "/proc/fs", "/proc/irq", "/proc/sys", "/proc/sysrq-trigger" ] }, "GraphDriver": { "Data": { "LowerDir": "/var/lib/docker/overlay2/6755d90e601c3c2f52dfc346b784849c08effa6bb044c5596dffe455346cb8af-init/diff:/var/lib/docker/overlay2/b9afc7ee51311b5d58dcb942ec6aa427d3f9c1f3231eecc412101fd2b4985ff3/diff", "MergedDir": "/var/lib/docker/overlay2/6755d90e601c3c2f52dfc346b784849c08effa6bb044c5596dffe455346cb8af/merged", "UpperDir": "/var/lib/docker/overlay2/6755d90e601c3c2f52dfc346b784849c08effa6bb044c5596dffe455346cb8af/diff", "WorkDir": "/var/lib/docker/overlay2/6755d90e601c3c2f52dfc346b784849c08effa6bb044c5596dffe455346cb8af/work" }, "Name": "overlay2" }, "Mounts": [], "Config": { "Hostname": "187880697c83", "Domainname": "", "User": "", "AttachStdin": true, "AttachStdout": true, "AttachStderr": true, "Tty": true, "OpenStdin": true, "StdinOnce": true, "Env": [ "PATH=/usr/local/sbin:/usr/local/bin:/usr/sbin:/usr/bin:/sbin:/bin" ], "Cmd": [ "/bin/sh" ], "Image": "alpine", "Volumes": null, "WorkingDir": "", "Entrypoint": null, "OnBuild": null, "Labels": {} }, "NetworkSettings": { "Bridge": "", "SandboxID": "aaa7e81f3483672dee2c06d82550f8923ab42c01bbf4513d48943e24f5e395fb", "HairpinMode": false, "LinkLocalIPv6Address": "", "LinkLocalIPv6PrefixLen": 0, "Ports": {}, "SandboxKey": "/var/run/docker/netns/aaa7e81f3483", "SecondaryIPAddresses": null, "SecondaryIPv6Addresses": null, "EndpointID": "77956a02f61310b923fb113dd191723b7edac1eb787203d0c1a9fd2d4508ad10", "Gateway": "172.17.0.1", "GlobalIPv6Address": "", "GlobalIPv6PrefixLen": 0, "IPAddress": "172.17.0.2", "IPPrefixLen": 16, "IPv6Gateway": "", "MacAddress": "02:42:ac:11:00:02", "Networks": { "bridge": { "IPAMConfig": null, "Links": null, "Aliases": null, "NetworkID": "a1b010467244e6fd76fff24ac146dcaf319426661873e8889b0b051f7d0c1886", "EndpointID": "77956a02f61310b923fb113dd191723b7edac1eb787203d0c1a9fd2d4508ad10", "Gateway": "172.17.0.1", "IPAddress": "172.17.0.2", "IPPrefixLen": 16, "IPv6Gateway": "", "GlobalIPv6Address": "", "GlobalIPv6PrefixLen": 0, "MacAddress": "02:42:ac:11:00:02", "DriverOpts": null } } } } ]Pause
teratermsudo docker pause status-test sudo docker ps実行結果CONTAINER ID IMAGE COMMAND CREATED STATUS PORTS NAMES 187880697c83 alpine "/bin/sh" 12 minutes ago Up 4 minutes (Paused) status-testteratermsudo docker inspect status-test実行結果[ { "Id": "187880697c83421a524a3e64431f8916876e11f3fdd0dc0caa8a0feb4352b983", "Created": "2019-11-23T14:50:23.658978723Z", "Path": "/bin/sh", "Args": [], "State": { "Status": "paused", "Running": true, (後略)最後に
尻切れトンボですが、実機で確認すると、書籍からは分からないくらいに納得できるので、ほんの少しだけDockerに触れられたと思います。
だけど、ライフサイクルというのは超苦手分野なので、一度まっさらな環境で0からDockerの環境を作り直してみたいと思います。
AWS上のCentOSを使っているのですが、初期状態にすぐに治せるのはありがたい限りですね。