- 投稿日:2020-08-23T21:29:55+09:00
DHHのクロスプラットフォームアプリ・アーキテクチャ
DHH(Ruby on Rails作者)による「Basecamp」スマホアプリのアーキテクチャ解説記事について、所感をメモ。
記事
Basecamp 3 for iOS: Hybrid Architecture
https://m.signalvnoise.com/basecamp-3-for-ios-hybrid-architecture/所感
ざっくりいえば「画面遷移はネイティブ / 画面の中身はHTML」というように役割分担したアーキテクチャになっている(実際はもっと細かいが)。HTMLを使ったスマホアプリはUXが問題になりやすいが、これによってうまく回避している。
確かに静的なテキストや図、ちょっとしたUIなどを表示するだけであれば、HTMLもネイティブもほぼ区別はつかない。むしろWebフロントエンドのための数々のフレームワークを活用でき、ネイティブより早くきれいにできる場合すらある。しかし、ネイティブのインタラクションや画面遷移をHTMLが模倣することは難しい(AndroidのバックキーやiOSのスワイプバックの扱いの問題もある)。そこで画面遷移周りをネイティブに任せることで問題を回避している。
基本的にReact NativeやFlutter等のフレームワークは使わない構成ではあるが、フレームワークの寿命に引っ張られないで済む。iOSとAndroidからWebViewがなくならない限り可能な構成である。
Webアプリともコードが共通化できる利点もある。
また、ほかのアプリへ画面を移植しなければならない場合もやりやすいと考えられる。たとえば、「Unity製ゲームへ画面を移植してほしい」と依頼された場合、React NativeやFlutterで書かれた画面であれば、プロジェクト構成を大きくいじることになる。かなりの時間がかかってデグレもあり得る。しかし、HTMLで書かれていればWebViewで表示してあげればよく、デグレも起こりにくい。
- 投稿日:2020-08-23T20:20:33+09:00
【Android】RecyclerViewの使い方メモ
RecyclerViewの作り方
- RecyclerViewを使うたびに忘れるので、メモ用にまとめます。
手順
依存関係の追加
- まずは依存関係の追加。他の記事だと、v7のサポートライブラリを使ってるものがありますが、API 29からdeprecatedされてるので、androidxを入れましょう。
build.gradleimplementation 'androidx.recyclerview:recyclerview:1.1.0'工程
layout
- RecyclerViewのレイアウト
- listの1個のレイアウトファイル
RecyclerViewのAdapaterクラス
ViewHolderクラス
layoutManeger
layout
RecyclerViewのレイアウト
サンプルコード
<?xml version="1.0" encoding="utf-8"?>
<LinerLayout xmlns:android="http://schemas.android.com/apk/res/android"
    xmlns:tools="http://schemas.android.com/tools"
    android:layout_width="match_parent"
    android:layout_height="match_parent"
    tools:context=".view.MainMenuFragment">

    // RecyclerView
    <androidx.recyclerview.widget.RecyclerView
        android:id="@+id/recyclerview"
        android:layout_width="match_parent"
        android:layout_height="match_parent"/>
</LinerLayoutt>
listの1個のレイアウトファイル
- リストアイテムのレイアウトをlayoutフォルダに作成します。
- 特にコードで何か特別なことをしないといけない訳ではない。
サンプルコード
    <androidx.appcompat.widget.LinearLayoutCompat
        xmlns:android="http://schemas.android.com/apk/res/android"
        android:layout_width="match_parent"
        android:layout_height="wrap_content"
        android:orientation="vertical">

        <ImageView
            android:id="@+id/image"
            android:layout_width="match_parent"
            android:layout_height="wrap_content"
            android:src="@android:drawable/alert_dark_frame" />

        <TextView
            android:id="@+id/name"
            android:layout_width="wrap_content"
            android:layout_height="wrap_content"
            android:layout_marginLeft="20dp" />

    </androidx.appcompat.widget.LinearLayoutCompat>
コード
RecyclerViewのAdapaterクラスの作成
- Adapterとは、のちに出てくる
ViewHolderの作成や入れ替えなどを担当するクラス。サンプルコード
class RecyclerViewAdapter(val list: List<Item>) : RecyclerView.Adapter<RecyclerViewAdapter.RecyclerViewHolder>() {

    class RecyclerViewHolder(view: View): RecyclerView.ViewHolder(view) {
        val imageView = view.findViewById<ImageView>(R.id.image)
        val NameText = view.findViewById<TextView>(R.id.name)
    }

    // ViewHolderを作成している。
    override fun onCreateViewHolder(parent: ViewGroup, viewType: Int): RecyclerViewHolder {
        val rowView = LayoutInflater.from(parent.context).inflate(R.layout.list_item, parent, false)
        return RecyclerViewHolder(rowView)
    }

    // ViewHolderの中身を変更。
    override fun onBindViewHolder(holder: RecyclerViewHolder, position: Int) {

        holder.nameText.text = list[position].name
    }

    override fun getItemCount(): Int = list.size
}
- Activity側の処理
class MainActivity : AppCompatActivity() {

    private lateinit var recyclerView: RecyclerView
    private lateinit var viewAdapter: RecyclerView.Adapter<*>
    private lateinit var layoutManager: RecyclerView.LayoutManager

    override fun onCreate(savedInstanceState: Bundle?) {
        super.onCreate(savedInstanceState)
        setContentView(R.layout.activity_main)

        layoutManager = LinearLayoutManager(this)
        viewAdapter = RestaurantListAdapter(list)
        recyclerView = view.findViewById<RecyclerView>(R.id.restaurant_list).also {
            it.layoutManager = layoutManager
            it.adapter = viewAdapter
        }
    }
}
- 投稿日:2020-08-23T17:25:26+09:00
AWS IoT + Cognito + IAM + Amplifyでユーザ認証・IoTデバイスと通信するAndroidアプリ
目的
IoTデバイス(例えばLEDや各種センサ、それらを接続したRaspberry Piなど)をモバイルアプリから操作したい時、あるユーザが所有しているデバイス以外は操作できないようにデバイスとユーザは一意に紐付けられている必要があります。
上記を実現するためにAWS IoT・Cognito・IAM・Amplifyを使用してユーザ認証機能を実装し、ユーザに紐付けられたデバイスとMQTTメッセージを双方向にやり取りできるAndroidアプリを作成します。ソースコード→GitHub
使用環境
- Windows 10
- Android Studio 4.0.1
- Kotlin 1.4.0
- Amplify CLI 4.27.3
- Pixel 3a(Android 10)
前提条件
- AWSアカウント作成済み
- AWS IAMユーザ作成済み
- Amplify導入済み
AWS IoT
モノを作成する
ここで作成したモノの名前は、ユーザ名やMQTTクライアントIDとして使用します。
開発者ガイドの下記ページを参考に、AWS IoTコンソールを操作してモノを作成します。例として「testuser」というモノを作成しました。
タイプやグループは設定しなくてもOKです。
なお、本来はここで証明書を作成してモノに割り当て、証明書と秘密鍵をダウンロード、デバイスに保存して使用します。
今回はデバイスの代わりにコンソール内のテストクライアントを使用して動作確認するので説明を省略します。ポリシーを作成する
AWS IoT Coreポリシーをモノに割り当てると、デバイスに対してAWS IoTで実行できる操作を許可・拒否することができます。
例としてポリシー名を「testpolicy」とし、「ステートメントを追加」欄でアドバンストモードにして下記を入力します。
下記のポリシーは認証情報が割り当てられたデバイスだけが「デバイス名/*」トピックにアクセスすることを許可します。
*はワイルドカードなので、例えばモノの名前が「testuser」の場合「testuser/to」にも「testuser/from」にもアクセスできます。
ポリシーの書き方は下記ページを参照してください。<your-region>、<your-aws-account>は自分の環境に合わせて変更してください。
{
  "Version": "2012-10-17",
  "Statement": [
    {
      "Effect": "Allow",
      "Action": [
        "iot:Connect"
      ],
      "Resource": [
        "*"
      ],
      "Condition": {
        "Bool": {
          "iot:Connection.Thing.IsAttached": [
            "true"
          ]
        }
      }
    },
    {
      "Effect": "Allow",
      "Action": "iot:Subscribe",
      "Resource": [
        "arn:aws:iot:<your-region>:<your-aws-account>:topicfilter/${iot:Connection.Thing.ThingName}/*"
      ]
    },
    {
      "Effect": "Allow",
      "Action": [
        "iot:Publish",
        "iot:Receive"
      ],
      "Resource": [
        "arn:aws:iot:<your-region>:<your-aws-account>:topic/${iot:Connection.Thing.ThingName}/*"
      ]
    }
  ]
}
AWS IoT エンドポイント
AWS IoTコンソールの左メニューから「設定」を開き、エンドポイントをメモしておきます。
プロジェクトの作成
Android Studioでプロジェクトを作成します。
例としてプロジェクト名は「SignedInPubSub」、パッケージ名は「com.example.signedinpubsub」とします。
テンプレートは「Empty Activity」にしました(あとで適宜Viewを追加します)。
プロジェクトの設定はAmplifyを設定した後で行いますので、一旦ここまでで保存しておきます。
AWS Amplify
コマンドプロンプトなどで先ほど作成したプロジェクトのルートディレクトリまで移動し、下記コマンドを実行します。
>amplify initいくつか質問されますので答えていくとルートディレクトリに開発環境が追加されます。
続いて、下記コマンドを実行します。>amplify add auth同様に質問に答えます。
domain name prefixはデフォルト値でOKです。
下記コマンドを実行して設定した環境をアップロードします。>amplify pushブラウザからAWS Amplifyコンソールを開き、作成したアプリ(SignedInPubSub)を選択し、
「Backend environments」->「Authentication」をクリックします。
「View in Cognito」をクリックしてCognitoユーザープールへ移動します。
AWS Cognito
ユーザープール
ユーザープールIDをメモしておきます。
左メニューから「全般設定」->「ポリシー」をクリックし、下図の通り設定して変更を保存します。
左メニューから「全般設定」->「ユーザーとグループ」->「ユーザーの作成」をクリックします。
ユーザ名はAWS IoTで作成したモノの名前(ここではtestuser)と一致させます。
左メニューから「全般設定」->「アプリクライアント」をクリックし、末尾に「_app_client」が付いているものを削除します。
また、末尾に「_app_clientWeb」が付いているアプリクライアントIDをメモしておきます。
「詳細を表示」をクリックし、下記項目を有効にして変更を保存します。
左メニューから「アプリの統合」->「アプリクライアントの設定」をクリックし、下図の通り設定します。
Amplifyで入力した仮のサインイン/サインアウトURIが入っていますのでそれぞれ「https」を「com.example.signedinpubsub」へ書き換えます。
URLの先頭部分(URLスキーム)はWebブラウザを使ってサインインした後でアプリに戻ってくるために必要になるので、アプリ固有のものを指定します。
ちなみに今回はURLスキームとしてAndroidアプリのパッケージ名を指定しましたが、一般的なもの以外であれば何でもOKです。
左メニューから「アプリの統合」->「ドメイン名」をクリックし、ドメインのプレフィックスをメモしておきます。
IDプール
上メニューから「フェデレーティッドアイデンティティ」をクリックします。
Amplifyが自動的にIDプールを作成していますのでクリックします。
このページの通りに作っている場合は、「signedinpubsubccd*****_identitypool_ccd*****__dev」のような名前になっているはずです。
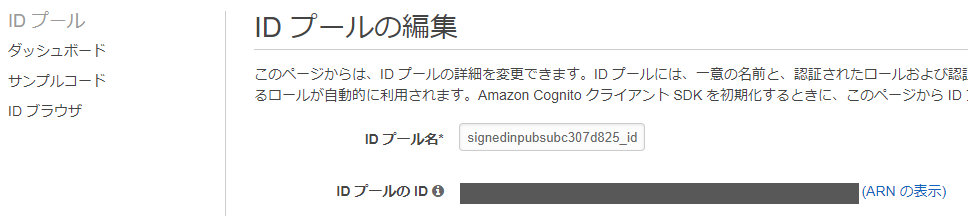
次に右上にある「IDプールの編集」をクリックします。
IDプールのIDをメモしておきます。
「認証フローの設定」を開き、メッセージをクリックします。
また、先ほどユーザープールで削除したアプリクライアントと同じIDが設定されている認証プロバイダを削除します。
AWS IAM
AWS IAMコンソールに移動します。
左メニューから「アクセス管理」->「ロール」をクリックします。
Amplifyが作成したロールが表示されているので、authRole、unauthRoleそれぞれにIAMポリシーを割り当てます。
まずはunauthRoleをクリックし、「アクセス制限」->「ポリシーをアタッチします」をクリックします。
検索欄に「deny」と入れ、「AWSDenyAll」にチェックを入れて「ポリシーのアタッチ」をクリックします。
続いてauthRoleも同様に、検索欄に「IoTFull」と入れて「AWSIoTFullAccess」にチェックを入れて「ポリシーのアタッチ」をクリックします。
これで認証済みのユーザはAWS IoTでのあらゆる操作が可能になります。
今回はすでに用意されているポリシーを割り当てましたが、実際の運用では必要な操作のみ許可するべきです。
詳しくは下記ページを参照してください。IAM ロール - AWS Identity and Access Management
Androidアプリの作成
再びAndroid Studioでの作業です。
下記ページを参考にAndroidアプリの設定を行います。Project Setup - Create your application - Amplify Docs
build.gradle
build.gradle(Project:SignedInPubSub)を開き、repositioriesにmavenCentral()を追記します。
build.gradle(Project:SignedInPubSub)buildscript { repositories { ... mavenCentral() } } allprojects { ... repositories { ... mavenCentral() } ... }続いてbuild.gradle(Module:app)を開き、compileOptionsとdependenciesを追記します。
build.gradle(Module:app)android { ... compileOptions { // Support for Java 8 features coreLibraryDesugaringEnabled true sourceCompatibility JavaVersion.VERSION_1_8 targetCompatibility JavaVersion.VERSION_1_8 } } dependencies { ... implementation 'com.amazonaws:aws-android-sdk-iot:2.17.1' implementation 'com.amplifyframework:core:1.1.2' implementation 'com.amplifyframework:aws-auth-cognito:1.1.2' implementation 'com.auth0.android:jwtdecode:2.0.0' coreLibraryDesugaring 'com.android.tools:desugar_jdk_libs:1.0.10' ... }エディタ上側に下図の表示が出ます。右にある「Sync Now」をクリックします。
amplifyconfiguration.json
Amplifyが自動的に作成しています。デフォルトだと「プロジェクトのルートディレクトリ\app\src\main\res\raw」にあります。
下記のように修正します。
<>で囲まれた部分は上記でメモしておいたIDなどに変更します。amplifyconfiguration.json{ "UserAgent": "aws-amplify-cli/2.0", "Version": "1.0", "auth": { "plugins": { "awsCognitoAuthPlugin": { "UserAgent": "aws-amplify-cli/0.1.0", "Version": "0.1.0", "IdentityManager": { "Default": {} }, "CredentialsProvider": { "CognitoIdentity": { "Default": { "PoolId": "<your-identify-pool-id>", "Region": "<your-region>" } } }, "CognitoUserPool": { "Default": { "PoolId": "<your-user-pool-id>", "AppClientId": "<your-app-client-id>", "Region": "<your-region>" } }, "Auth": { "Default": { "OAuth": { "WebDomain": "<your-domain-prefix>.auth.<your-region>.amazoncognito.com", "AppClientId": "<your-app-client-id>", "SignInRedirectURI": "com.example.signedinpubsub://signin/", "SignOutRedirectURI": "com.example.signedinpubsub://signout/", "Scopes": [ "openid", ] }, "authenticationFlowType": "USER_SRP_AUTH" } } } } } }awsconfiguration.json
amplifyconfiguration.jsonと同様に修正します。
awsconfiguration.json{ "UserAgent": "aws-amplify-cli/0.1.0", "Version": "0.1.0", "IdentityManager": { "Default": {} }, "CredentialsProvider": { "CognitoIdentity": { "Default": { "PoolId": "<your-identify-pool-id>", "Region": "<your-region>" } } }, "CognitoUserPool": { "Default": { "PoolId": "<your-user-pool-id>", "AppClientId": "<your-app-client-id>", "Region": "<your-region>" } }, "Auth": { "Default": { "OAuth": { "WebDomain": "<your-domain-prefix>.auth.<your-region>.amazoncognito.com", "AppClientId": "<your-app-client-id>", "SignInRedirectURI": "com.example.signedinpubsub://signin/", "SignOutRedirectURI": "com.example.signedinpubsub://signout/", "Scopes": [ "openid", ] }, "authenticationFlowType": "USER_SRP_AUTH" } } }strings.xml
TextView等に表示する文字を定義します。
strings.xml<resources> <string name="app_name">SignedInPubSub</string> <string name="text_connecting">Connecting…</string> <string name="text_reconnecting">Reconnecting…</string> <string name="text_connected">Connected.</string> <string name="text_disconnected">Disconnected.</string> <string name="text_connect">Connect</string> <string name="text_publish">Publish</string> <string name="text_subscribe">Subscribe</string> <string name="text_disconnect">Disconnect</string> </resources>activity_main.xml
画面のレイアウトを定義します。
activity_main.xml<?xml version="1.0" encoding="utf-8"?> <androidx.constraintlayout.widget.ConstraintLayout xmlns:android="http://schemas.android.com/apk/res/android" xmlns:app="http://schemas.android.com/apk/res-auto" xmlns:tools="http://schemas.android.com/tools" android:layout_width="match_parent" android:layout_height="match_parent" tools:context=".MainActivity"> <Button android:id="@+id/buttonConnect" android:layout_width="wrap_content" android:layout_height="wrap_content" android:layout_marginStart="16dp" android:layout_marginTop="28dp" android:enabled="false" android:text="@string/text_connect" app:layout_constraintEnd_toStartOf="@+id/buttonDisconnect" app:layout_constraintStart_toStartOf="parent" app:layout_constraintTop_toTopOf="parent" /> <Button android:id="@+id/buttonDisconnect" android:layout_width="wrap_content" android:layout_height="wrap_content" android:layout_marginTop="28dp" android:enabled="false" android:text="@string/text_disconnect" app:layout_constraintEnd_toStartOf="@+id/buttonPublish" app:layout_constraintStart_toEndOf="@+id/buttonConnect" app:layout_constraintTop_toTopOf="parent" /> <Button android:id="@+id/buttonPublish" android:layout_width="wrap_content" android:layout_height="wrap_content" android:layout_marginTop="28dp" android:enabled="false" android:text="@string/text_publish" app:layout_constraintEnd_toStartOf="@+id/buttonSubscribe" app:layout_constraintStart_toEndOf="@+id/buttonDisconnect" app:layout_constraintTop_toTopOf="parent" /> <Button android:id="@+id/buttonSubscribe" android:layout_width="wrap_content" android:layout_height="wrap_content" android:layout_marginTop="28dp" android:layout_marginEnd="16dp" android:enabled="false" android:text="@string/text_subscribe" app:layout_constraintEnd_toEndOf="parent" app:layout_constraintStart_toEndOf="@+id/buttonPublish" app:layout_constraintTop_toTopOf="parent" /> <TextView android:id="@+id/textViewStatus" android:layout_width="345dp" android:layout_height="40dp" android:layout_marginStart="32dp" android:layout_marginTop="16dp" android:layout_marginEnd="32dp" app:layout_constraintEnd_toEndOf="parent" app:layout_constraintHorizontal_bias="1.0" app:layout_constraintStart_toStartOf="parent" app:layout_constraintTop_toBottomOf="@+id/buttonConnect" /> <TextView android:id="@+id/textViewMessage" android:layout_width="345dp" android:layout_height="540dp" android:layout_marginStart="32dp" android:layout_marginTop="32dp" android:layout_marginEnd="32dp" app:layout_constraintEnd_toEndOf="parent" app:layout_constraintHorizontal_bias="1.0" app:layout_constraintStart_toStartOf="parent" app:layout_constraintTop_toBottomOf="@+id/textViewStatus" /> </androidx.constraintlayout.widget.ConstraintLayout>AndroidManifest.xml
AndroidManifest.xml<?xml version="1.0" encoding="utf-8"?> <manifest xmlns:android="http://schemas.android.com/apk/res/android" package="com.example.signedinpubsub"> <uses-permission android:name="android.permission.INTERNET"/> <application android:name=".Initialization" android:allowBackup="true" android:icon="@mipmap/ic_launcher" android:label="@string/app_name" android:roundIcon="@mipmap/ic_launcher_round" android:supportsRtl="true" android:theme="@style/AppTheme"> <activity android:name=".MainActivity" android:launchMode="singleInstance"> <intent-filter> <action android:name="android.intent.action.MAIN" /> <category android:name="android.intent.category.LAUNCHER" /> </intent-filter> <intent-filter> <action android:name="android.intent.action.VIEW" /> <category android:name="android.intent.category.DEFAULT" /> <category android:name="android.intent.category.BROWSABLE"/> <data android:scheme="com.example.signedinpubsub" /> </intent-filter> </activity> </application> </manifest>Constants.kt
プログラム内で使用する定数を記述するクラス「Constants」を作成します。
<>で囲まれた部分は、上記でメモしておいたIDなどに変更します。Constants.ktpackage com.example.signedinpubsub class Constants { companion object{ const val LOG_TAG = "SignedInPubSub" const val AUTH_LOG_TAG = "AuthQuickStart" const val CALLBACK_SCHEME = "com.example.signedinpubsub" const val AWS_IOT_ENDPOINT = "<your-iot-endpoint>" const val AWS_IOT_POLICY = "testpolicy" const val AWS_COGNITO_USER_POOL_ID = "cognito-idp.<your-region>.amazonaws.com/<your-user-pool-id>" const val AWS_COGNITO_POOL_ID = "<your-identify-pool-id>" val REGION = Regions.AP_NORTHEAST_1 // Change to your region } }Initialization.kt
アプリ起動時にAmplifyプラグインを初期化するクラス「Initialization」を作成します。
Initialization.ktpackage com.example.signedinpubsub import android.app.Application import android.util.Log import com.amplifyframework.AmplifyException import com.amplifyframework.auth.cognito.AWSCognitoAuthPlugin import com.amplifyframework.core.Amplify class Initialization: Application() { override fun onCreate() { super.onCreate() // Amplifyの初期化(アプリ起動時に1回だけ実施) try { Amplify.addPlugin(AWSCognitoAuthPlugin()) Amplify.configure(applicationContext) Log.i(Constants.LOG_TAG, "Initialized Amplify") } catch (error: AmplifyException) { Log.e(Constants.LOG_TAG, "Could not initialize Amplify", error) } } }MainActivity.kt
メイン画面での処理です。
MainActivity.ktpackage com.example.signedinpubsub import android.content.Intent import android.os.Bundle import android.util.Log import android.widget.Button import android.widget.TextView import androidx.appcompat.app.AppCompatActivity import com.amazonaws.auth.CognitoCachingCredentialsProvider import com.amazonaws.mobileconnectors.iot.AWSIotMqttClientStatusCallback import com.amazonaws.mobileconnectors.iot.AWSIotMqttManager import com.amazonaws.mobileconnectors.iot.AWSIotMqttQos import com.amazonaws.regions.Region import com.amazonaws.services.cognitoidentity.AmazonCognitoIdentityClient import com.amazonaws.services.cognitoidentity.model.GetIdRequest import com.amazonaws.services.iot.AWSIotClient import com.amazonaws.services.iot.model.* import com.amplifyframework.auth.AuthSession import com.amplifyframework.auth.cognito.AWSCognitoAuthSession import com.amplifyframework.auth.result.AuthSessionResult import com.amplifyframework.core.Amplify import com.auth0.android.jwt.DecodeException import com.auth0.android.jwt.JWT import java.io.UnsupportedEncodingException import kotlin.collections.HashMap class MainActivity : AppCompatActivity() { override fun onCreate(savedInstanceState: Bundle?) { super.onCreate(savedInstanceState) setContentView(R.layout.activity_main) // ユーザ認証の有効期限切れまたは未認証の場合はWebブラウザを開いて認証 Amplify.Auth.signInWithWebUI( this, { result -> // サインイン成功 Log.i(Constants.AUTH_LOG_TAG, result.toString()) fetchSession() }, { error -> // サインイン失敗 Log.i(Constants.AUTH_LOG_TAG, error.toString()) } ) } // Webブラウザで認証した後戻ってきた時の処理 override fun onNewIntent(intent: Intent?) { super.onNewIntent(intent) if(intent?.scheme != null && Constants.CALLBACK_SCHEME == intent.scheme) { Amplify.Auth.handleWebUISignInResponse(intent) } } // セッションを取得 private fun fetchSession() { Amplify.Auth.fetchAuthSession( { session -> // ユーザ名とユーザIDトークンのペアを取得 val pair = getUserNameAndIdToken(session) if(pair != null){ val thingName = pair.first val idToken = pair.second // 認証情報プロバイダの初期化 val credentialsProvider = CognitoCachingCredentialsProvider( applicationContext, Constants.AWS_COGNITO_POOL_ID, Constants.REGION ) // 認証情報プロバイダにユーザプールIDと認証済みユーザをマッピング val logins: MutableMap<String, String> = HashMap() logins[Constants.AWS_COGNITO_USER_POOL_ID] = idToken credentialsProvider.logins = logins Thread { // AWS IoTクライアントの作成 val client = AWSIotClient(credentialsProvider) client.setRegion(Region.getRegion(Constants.REGION)) // モノが作成されているか確認 val listThingsReq = ListThingsRequest() val listThings = client.listThings(listThingsReq) var hasAdded = false for (i in listThings.things) { if (i.thingName == thingName) { hasAdded = true } } // モノが作成されていない場合はユーザ名で作成する if (!hasAdded) { try{ val thingReq = CreateThingRequest() thingReq.thingName = thingName client.createThing(thingReq) }catch(error: Exception){ Log.e(Constants.LOG_TAG, "Could not create the thing.", error) } } // Cognito IDの取得 val getIdReq = GetIdRequest() getIdReq.logins = credentialsProvider.logins getIdReq.identityPoolId = Constants.AWS_COGNITO_POOL_ID val cognitoIdentity = AmazonCognitoIdentityClient(credentialsProvider) cognitoIdentity.setRegion(Region.getRegion(Constants.REGION)) val getIdRes = cognitoIdentity.getId(getIdReq) // プリンシパルがモノに割り当てられているか確認 val listPrincipalThingsReq = ListPrincipalThingsRequest() listPrincipalThingsReq.principal = getIdRes.identityId val listPrincipalThings = client.listPrincipalThings(listPrincipalThingsReq) var hasAttached = false for (i in listPrincipalThings.things) { if (i == thingName) { hasAttached = true } } // プリンシパルが割り当てられていない場合はモノにプリンシパルを割り当てる if (!hasAttached){ try{ val policyReq = AttachPolicyRequest() policyReq.policyName = Constants.AWS_IOT_POLICY // AWS IoTにアクセスするためのポリシー policyReq.target = getIdRes.identityId // Cognito ID client.attachPolicy(policyReq) // ポリシーをCognito IDに割り当てる val principalReq = AttachThingPrincipalRequest() principalReq.principal = getIdRes.identityId // プリンシパル(Cognito ID) principalReq.thingName = thingName // モノの名前 client.attachThingPrincipal(principalReq) // プリンシパルをモノに割り当てる }catch(error: Exception){ Log.e(Constants.LOG_TAG, "Could not attach the principal to the thing.", error) } } // MQTTクライアントを作成 val mqttManager = AWSIotMqttManager(thingName, Constants.AWS_IOT_ENDPOINT) mqttManager.keepAlive = 10 val buttonConnect: Button = findViewById(R.id.buttonConnect) val buttonDisconnect: Button = findViewById(R.id.buttonDisconnect) val buttonSubscribe: Button = findViewById(R.id.buttonSubscribe) val buttonPublish: Button = findViewById(R.id.buttonPublish) val textViewStatus: TextView = findViewById(R.id.textViewStatus) val textViewMessage: TextView = findViewById(R.id.textViewMessage) runOnUiThread { buttonConnect.isEnabled = true // 接続可能になった時、Connectボタンを有効にする // Connectボタンがクリックされた時の処理 buttonConnect.setOnClickListener { buttonConnect.isEnabled = false try { mqttManager.connect(credentialsProvider) { status, throwable -> Log.d(Constants.LOG_TAG, "Status = $status") runOnUiThread { when (status) { AWSIotMqttClientStatusCallback.AWSIotMqttClientStatus.Connecting -> { textViewStatus.text = getString(R.string.text_connecting) } AWSIotMqttClientStatusCallback.AWSIotMqttClientStatus.Connected -> { textViewStatus.text = getString(R.string.text_connected) buttonDisconnect.isEnabled = true buttonPublish.isEnabled = true buttonSubscribe.isEnabled = true } AWSIotMqttClientStatusCallback.AWSIotMqttClientStatus.Reconnecting -> { if (throwable != null) { Log.e(Constants.LOG_TAG, "Connection error.", throwable) } textViewStatus.text = getString(R.string.text_reconnecting) } AWSIotMqttClientStatusCallback.AWSIotMqttClientStatus.ConnectionLost -> { if (throwable != null) { Log.e(Constants.LOG_TAG, "Connection error.", throwable) } textViewStatus.text = getString(R.string.text_disconnected) buttonConnect.isEnabled = true } else -> { textViewStatus.text = getString(R.string.text_disconnected) buttonConnect.isEnabled = true } } } } } catch (error: Exception) { Log.e(Constants.LOG_TAG, "Subscription error.", error) } } // Disconnectボタンがクリックされた時の処理 buttonDisconnect.setOnClickListener { buttonDisconnect.isEnabled = false buttonPublish.isEnabled = false buttonSubscribe.isEnabled = false buttonConnect.isEnabled = true try { mqttManager.disconnect() } catch (error: Exception) { Log.e(Constants.LOG_TAG, "Disconnect error.", error) } } // Publishボタンがクリックされた時の処理 buttonPublish.setOnClickListener { try { mqttManager.publishString("{\"message\":\"Test.\"}", "$thingName/to", AWSIotMqttQos.QOS1) } catch (error: Exception) { Log.e(Constants.LOG_TAG, "Publish error.", error) } } // Subscribeボタンがクリックされた時の処理 buttonSubscribe.setOnClickListener { buttonSubscribe.isEnabled = false try { mqttManager.subscribeToTopic( "$thingName/from", AWSIotMqttQos.QOS1 ) { topic, data -> runOnUiThread { // トピックにメッセージが発行された時のみ実行 try { val message = String(data) textViewMessage.text = message } catch (error: UnsupportedEncodingException) { Log.e(Constants.LOG_TAG, "Message encoding error.", error) } } } } catch (error: Exception) { Log.e(Constants.LOG_TAG, "Subscription error.", error) } } } }.start() } }, { error -> Log.e(Constants.AUTH_LOG_TAG, error.toString()) } ) } // ユーザ名とユーザIDトークンの取得 private fun getUserNameAndIdToken(session: AuthSession): Pair<String, String>? { val cognitoAuthSession = session as AWSCognitoAuthSession // セッション取得 when (cognitoAuthSession.identityId.type) { // セッション取得が成功した場合はユーザ名とユーザIDトークンのペアを返す AuthSessionResult.Type.SUCCESS -> { val tokens = cognitoAuthSession.userPoolTokens.value if(tokens != null){ val idToken = tokens.idToken // ユーザIDトークン try{ val jwt = JWT(idToken) val token = jwt.toString() val name = jwt.getClaim("cognito:username").asString() if(name != null) return Pair(name, token) }catch(error: DecodeException){ Log.e(Constants.LOG_TAG, "Could not decode tokens.", error) } } } // セッション取得に失敗した場合はnullを返す AuthSessionResult.Type.FAILURE -> { Log.i(Constants.AUTH_LOG_TAG, "IdentityId not present because: " + cognitoAuthSession.identityId.error.toString()) } } return null } }動作確認
AWS IoTコンソールの左メニューから「テスト」をクリックします。
トピックのサブスクリプション欄に「testuser/to」と入力し、「トピックへのサブスクライブ」をクリックします。
アプリを起動するとWebブラウザが開きサインインを要求されるので、あらかじめ作成しておいたユーザ名「testuser」でサインインします。
ユーザ認証に成功するとConnectボタンが押せるようになります(少し時間がかかります)。
Connectボタンを押すとMQTTクライアントへ接続します。
MQTTクライアントへの接続が成功すると、Disconnectボタン、Publishボタン、Subscribeボタンが有効になります。
Publishボタンを押すとトピック「testuser/to」へメッセージが送られ、AWS IoTコンソール上にメッセージが表示されます。
Subscribeボタンを押すとトピック「testuser/from」からのメッセージ待ち状態になります。
トピックを「testuser/from」に書き換えて、「トピックに発行」をクリックします。
アプリにメッセージが表示されます。
Amplifyが内部で大部分の処理をやってくれているので、ほとんどドキュメント通りに進めていくことでサインイン機能を実装できました。
参考にしたWebサイト


- 投稿日:2020-08-23T16:21:27+09:00
スマホ(Android)をPCにつないでブラウザの要素の検証をする
はじめに
デプロイしたWEBサイトをスマホ(Android)で表示するとどうしても思ったデザインにならないので
どうにかしてスマホで開いているブラウザをDevtool(F12ツール)で見れないか調べてたらChromeなら見れました。
忘れないようにメモ。Android 端末のリモート デバッグを行う
https://developers.google.com/web/tools/chrome-devtools/remote-debugging?hl=ja手順
- スマホの設定から「開発者向けオプション」→「USBデバッグ」を有効にする
- スマホをPCにUSB接続
- chrome://inspect/#devices にアクセス
- 「Device」と「Remote Target#LOCALHOST」が表示される
- 初めての接続の場合はスマホのドライバがPCにインストールされる
- スマホ側にデバッグを許可しますか?的なポップアップが出るので許可を選択
- しばらくすると「Remote Target#LOCALHOST」の下にスマホ側Chromeで表示しているタブの一覧が表示される
気を付けること
手順通りならchrome://inspect/#devices にアクセスすると「Remote Target#LOCALHOST」には接続してるデバイスの情報が表示されるはずですが太字の部分が原因で表示されず戸惑いました。
おわりに
PCからDevtoolでCSSを見てみるとデプロイしたはずのデザインが反映されていませんでした。
結果的にただキャッシュが効いてしまっていただけでした。。
ということでブラウザの閲覧履歴の削除から「Cookieとサイトデータ」と「キャッシュされた画像とファイル」にチェックを入れて削除。
時間かかりそうだったので過去24時間にしましたがそれでも数分かかりました。
- 投稿日:2020-08-23T16:18:10+09:00
Android Studio で Material Icon をさっくり取り込む
はじめに
- Android Studio 3.4 の機能で
Resource Managerが追加されています。この
Resource Managerを利用する事で、Material Icon をアプリにお手軽に取り込む事ができます。Resource Managerに関する詳しい説明はこちら
順序
Step1:準備
- Android Studio 4.0 を利用してアプリケーションを作成
Step2:Resource Manager を開く
- Android Studio 4.0 であれば、画面左端に縦書きで
Resource Managerという選択エリアがあります。- 無ければメニュー ->
Tools->Resource Managerを選択- これで今のアプリ内で利用しているリソース一覧が表示されます。
Step3:+ボタンからリソースを追加
- 左上+ボタンからリソースの追加が行えます。
- 今回は画面解像度を気にしなくていい
Vector Assetsとして取り込む手順にしてみます。+からVector Assetsを選択するとConfigure Vector Assetが表示されます。
Step4:取り込みたいIconを選択
Asset TypeはClip Artを選択Clip Artボタンを選択する事で、Material Iconの一覧から取り込むことが可能です。- 使用したいアイコンを選び、サイズを指定することで利用する事ができます。
あとは、利用したい箇所に
ImageViewに入れるとか、いろいろ利用してください。
Material Icon は Apache License 2.0.のライセンスとなっていますので、リリースの際は決め事にしたがっておきましょう。まとめ
- 簡単にMaterial Iconを取り込むことが出来ます。
- 個人開発の場合、ちょっと画像を入れたいけど良いサイズがとか・・・、というプログラミング以外のところで悩む事が多かったりします。
- Material Icon の表現をうまくつかって良いアプリを作っていきたいですね。


- 投稿日:2020-08-23T13:07:03+09:00
MotionLayoutで元のVisibilityを保持したままアニメーションを実行する
はじめに
MotionLayoutは手軽にアニメーションを管理出来てとても便利なんですが、デフォルトの動作だと元のvisibilityを無視してアニメーションを実行するとViewが表示されてしまいます。こんな感じ↓
ですが、利用する際はINVISIBLEやGONEの場合はその非表示の状態を維持したままアニメーションさせたい場合がほとんどだと思いますので、今回はそのやり方を説明します。
やり方
修正前のコード
まず前述のGIFはこのようなコードで実装されています。
app/build.gradle// NOTE: MotionLayoutを利用するにはconstraintlayout:2.0.0以上を利用します implementation 'androidx.constraintlayout:constraintlayout:2.0.0'MainActivity.ktclass MainActivity : AppCompatActivity() { override fun onCreate(savedInstanceState: Bundle?) { super.onCreate(savedInstanceState) setContentView(R.layout.activity_main) // NOTE: アニメーションを開始 hello1.setOnClickListener { if (motion.currentState == R.id.start) { motion.transitionToEnd() }else { motion.transitionToStart() } } // NOTE: 非表示にする hello2.setOnClickListener { it.visibility = View.INVISIBLE } } }activity_main.xml<?xml version="1.0" encoding="utf-8"?> <androidx.constraintlayout.widget.ConstraintLayout xmlns:android="http://schemas.android.com/apk/res/android" xmlns:app="http://schemas.android.com/apk/res-auto" xmlns:tools="http://schemas.android.com/tools" android:layout_width="match_parent" android:layout_height="match_parent" tools:context=".MainActivity"> <androidx.constraintlayout.motion.widget.MotionLayout android:id="@+id/motion" android:layout_width="0dp" android:layout_height="0dp" app:layout_constraintTop_toTopOf="parent" app:layout_constraintBottom_toBottomOf="parent" app:layout_constraintStart_toStartOf="parent" app:layout_constraintEnd_toEndOf="parent" app:layoutDescription="@xml/hello_motion_scene"> <TextView android:id="@+id/hello1" android:layout_width="wrap_content" android:layout_height="wrap_content" android:text="Hello World! 1" /> <TextView android:id="@+id/hello2" android:layout_width="wrap_content" android:layout_height="wrap_content" android:text="Hello World! 2" /> </androidx.constraintlayout.motion.widget.MotionLayout> </androidx.constraintlayout.widget.ConstraintLayout>xml/hello_motion_scene.xml<?xml version="1.0" encoding="utf-8"?> <MotionScene xmlns:android="http://schemas.android.com/apk/res/android" xmlns:app="http://schemas.android.com/apk/res-auto"> <ConstraintSet android:id="@+id/start"> <Constraint android:id="@+id/hello1" android:layout_width="wrap_content" android:layout_height="wrap_content" android:layout_marginTop="50dp" app:layout_constraintTop_toTopOf="parent" app:layout_constraintStart_toStartOf="parent" app:layout_constraintEnd_toStartOf="@id/hello2" /> <Constraint android:id="@+id/hello2" android:layout_width="wrap_content" android:layout_height="wrap_content" android:layout_marginTop="50dp" app:layout_constraintTop_toTopOf="parent" app:layout_constraintStart_toEndOf="@id/hello1" app:layout_constraintEnd_toEndOf="parent" /> </ConstraintSet> <ConstraintSet android:id="@+id/end"> <Constraint android:id="@+id/hello1" android:layout_width="wrap_content" android:layout_height="wrap_content" app:layout_constraintBottom_toBottomOf="parent" app:layout_constraintEnd_toStartOf="@id/hello2" app:layout_constraintStart_toStartOf="parent" android:layout_marginBottom="50dp" /> <Constraint android:id="@+id/hello2" android:layout_width="wrap_content" android:layout_height="wrap_content" app:layout_constraintBottom_toBottomOf="parent" app:layout_constraintStart_toEndOf="@id/hello1" app:layout_constraintEnd_toEndOf="parent" android:layout_marginBottom="50dp" /> </ConstraintSet> <Transition app:constraintSetEnd="@id/end" app:constraintSetStart="@+id/start" app:duration="600" /> </MotionScene>修正後のコード
visibilityを保持したコードにする場合は
app:visibilityMode="ignore"を追加してあげるだけ。xml/hello_motion_scene.xml<?xml version="1.0" encoding="utf-8"?> <MotionScene xmlns:android="http://schemas.android.com/apk/res/android" xmlns:app="http://schemas.android.com/apk/res-auto"> <ConstraintSet android:id="@+id/start"> <Constraint android:id="@+id/hello1" android:layout_width="wrap_content" android:layout_height="wrap_content" android:layout_marginTop="50dp" app:layout_constraintTop_toTopOf="parent" app:layout_constraintStart_toStartOf="parent" app:layout_constraintEnd_toStartOf="@id/hello2" app:visibilityMode="ignore" /> <Constraint android:id="@+id/hello2" android:layout_width="wrap_content" android:layout_height="wrap_content" android:layout_marginTop="50dp" app:layout_constraintTop_toTopOf="parent" app:layout_constraintStart_toEndOf="@id/hello1" app:layout_constraintEnd_toEndOf="parent" app:visibilityMode="ignore" /> </ConstraintSet> <ConstraintSet android:id="@+id/end"> <Constraint android:id="@+id/hello1" android:layout_width="wrap_content" android:layout_height="wrap_content" app:layout_constraintBottom_toBottomOf="parent" app:layout_constraintEnd_toStartOf="@id/hello2" app:layout_constraintStart_toStartOf="parent" android:layout_marginBottom="50dp" app:visibilityMode="ignore" /> <Constraint android:id="@+id/hello2" android:layout_width="wrap_content" android:layout_height="wrap_content" app:layout_constraintBottom_toBottomOf="parent" app:layout_constraintStart_toEndOf="@id/hello1" app:layout_constraintEnd_toEndOf="parent" android:layout_marginBottom="50dp" app:visibilityMode="ignore" /> </ConstraintSet> <Transition app:constraintSetEnd="@id/end" app:constraintSetStart="@+id/start" app:duration="600" /> </MotionScene>
これでアニメーション実行後に勝手に表示されることなく、visibilityを制御できるようになりました!


- 投稿日:2020-08-23T09:50:26+09:00
[iOS] [Android] [Crashlytics] Fabric SDKを使っているアプリはそろそろヤバイ
Crashlyticsを利用中のアプリについて、Fabric SDKを組み込んでいる場合、2020年11月15日までにSDKを入れ替えてリリースしないと、Firebase Crashlyticsでクラッシュレポートを見ることができない、ということになります。
Firebase Crashlyticsの公式ドキュメントより:
注: Fabric SDK は非推奨になりました。
Fabric SDK がアプリのクラッシュを報告するのは 2020 年 11 月 15 日までとなります。
この日をもって、Fabric SDK と古いバージョンの Firebase Crashlytics SDK はアプリのクラッシュの送信を停止します。
引き続き Firebase コンソールでクラッシュ レポートを表示するには、Firebase Crashlytics SDK のバージョンを Android の場合は 17.0.0 以降に、iOS の場合は 4.0.0 以降に、Unity の場合は 6.15.0 以降にアップグレードしてください。https://firebase.google.com/docs/crashlytics/get-started?hl=ja
Firebase Crashlytics SDKへの移行手順はこちらにあります。
https://firebase.google.com/docs/crashlytics/upgrade-sdk?hl=ja
- 投稿日:2020-08-23T00:50:48+09:00
Nuxt + Vue + Cordovaでアプリ開発をしよう!
こんにちは、フロントエンドの初心者のYちゃんです。スマートフォン向けのアプリケーションを作るために、自分の使えるフレームワークであるVueやNuxtを使ってやろうと思っていろいろ調べていると、Cordovaというフレームワークでアプリケーションを作れるというのを知って、いろいろ試したんですが、いろいろ詰まったので備忘録的に書き記しておこうと思います。
開発環境
私はWindowsでもろもろをやる変態エンジニアなのでいろいろ詰まってた感はあります。
- Windows 10 Pro Insider Preview 2004 Build 20190.1000(変態なのでInsider Previewerですがあまり気にしないでくださいw 普通のWindowsで十分だと思いますw)
- Android Studio Ver 4.0.1
- とりあえずインストールするだけでOK
- Node.js v12.18.2
- yarn 1.22.4
- Git for Windows 2.27.0
- Windows上で軽くUnixコマンドを扱うために入れています。
package.json内なんかでUnixコマンドを使うことがあるためです。なお、これはインストール時の設定によって変わるので、使えるようにしている場合とそれ以外の場合とで二通り紹介します。そもそもなぜNuxt + Vue + Cordova?
Vue + Cordovaでええやん、と思う人は結構いると思うんですが、私自身フロントエンド初心者で東京都 新型コロナウイルス感染症対策サイトからフロントエンドを触り始めたので、扱えるフレームワークがNuxtとVue(とVuetify)なのです。調べれば解決するでしょうがVue単体を切り離して使う方法がわからないですし、自分の中でVueを使うならNuxtとセットという固定概念が出来てしまっているということでNuxt + Vue + Cordovaという選択肢に行き着いたのです。
開発開始
Gradleのインストール(設置)
Gradleというオープンソースのビルド自動化ツールを導入しておく必要があります。Android Studioが入っている時点で導入されているというお話があったんですが、結局わからなかったのでマニュアルインストールします。
Gradleは6.6が最新版なんですが、2020/08/22現在、最新版をインストールしても後のビルドの段階では6.5を使っているようなので、別に6.5でいいと思います。なので、今回は6.5をインストールしていきます。
ここにアクセスすると直接6.5のバイナリが落とせます。落とせたら、zipなので普通に開いてあげます。
この、gradle-6.5をそのままCドライブ直下にコピーしちゃいましょう。(Gradleの公式ドキュメントにはそう書いてあったので別にいいはず)
パスを通さなければなりませんが、次の章でまとめてやります。環境変数の設定
Windowsなので、環境変数がいろいろめんどくさいです(Linuxなんかと違って
exportなんかが使えないので)。とりあえず[スタートボタン]->[設定]->[システム]->[詳細情報]から関連設定の[システムの詳細設定]を開き、一番下の[環境変数]まで行きましょう。そこまでいけば環境変数を設定できます。わからなければ、ここら辺の記事はいろんなところにたくさんあるので、ここでは解説しません...
編集するのはユーザー環境変数です。まずは先ほどCドライブ直下に配置したgradleのパスを通します。
ユーザー環境変数のPathの中に入り、未使用の部分をダブルクリックするか右上の新規ボタンよりPathを追加していきます。
C:\gradle-6.5\binを追加してあげればよいです。つぎにJDKのパスを通します。Android Studioをインストールした時点でJDKも同時にインストールしてくれるので、特に何もなければそれを使いましょう。学生はOracleからJDKを落とすのが難しいのでありがたい限りです。
それではAndroid Studioの設定からJDKのパスを取得しましょう。何もプロジェクトを作っていなければ右下の[Configure]->[Default Project Structure...]から、
すでにプロジェクトを作っていて、上のような初期画面が開かない場合は[File]->[Other Settings]->[Default Project Structure...]から、
以下の画面にアクセスできます。
この中のJDK locationをコピーします。
Gradleの時と同じようPathを追加していきます。
ここで注意ですが、先ほどコピーしたものを貼り付けるだけでなく、"\bin"を付け加えてください。でなければちゃんとパスが通りません。
以下の図、した二つの欄のようにできていれば、OKを押し、大本の環境変数画面もOKを押しましょう。コマンドプロンプトなどから"gradle -v"コマンドと"java -version"コマンドを叩き、それぞれが動けば大丈夫です。
GradleとJDKのパスを通すだけではありません。一つ設定しなければならない環境変数があります。
ANDROID_HOMEです。先ほどのAndroid StudioのDefault Project Stractureに戻りましょう。まずはここのAndroid SDK locationをコピーします。
そして今度はユーザーの環境変数枠の中の[新規]ボタンより、環境変数を設定していきましょう。以下のようにすれば大丈夫です。(今回はそのまま貼り付ければ大丈夫です)OKを押して設定しましょう。
これにて環境変数の設定は終了です。この環境変数が設定できているかを確認するのはCordovaが動くかどうかなので今のところは確認できません...一応環境変数に関するウィンドウとコマンドプロンプトなどはすべて閉じておきましょう。(反映されないことがあるので)Nuxtプロジェクトの作成
では、Nuxtプロジェクトを作っていきます。あれ、Cordovaのプロジェクトじゃないの?と思うかもしれませんが、それは後で作ります。
yarn create nuxt-app <project name>まぁここはNuxtの公式ドキュメントにも書いてありますし、特に困ることはなさそうですね。
そのあとの設定は自由でいいですが、一つだけ注意点があって、Rendering modeはSPAにしましょう。Universalにして、SSGでも動くんですが、SPAのほうが事故らないはずです(axiosとか使ってる場合は特に...?私は初心者なのでまだ事故ったことがまだない...)。まぁ、あとからnuxt.config.js内のmodeを書き換えれるので結局どっちを選んでもあんまり変わりませんが...w
今回はプロジェクトネームをcordova-testとしました。
無事に生成できれば、cdしてプロジェクトディレクトリに入りましょう。
nuxt.config.jsを手直しする題の通りです。
nuxt.config.jsに以下のものを足したり、書き換えたりします。
headの中にscript: [{ src: "cordova.js" }]を足す
linkの下にでも足しておきましょう。これによってcordovaで動作します。
buildの中にpublicPath: "/nuxt/"を足す
cordovaが_nuxtというディレクトリを認識できない(正確には_を認識できない)ので、それに対応するために書き換えます。
routerを新設し、mode: "hash"を足す
routerという項目がデフォルトではないので付け加えてあげます。この設定はよくわからないんですが、/index.htmlが開かれないようにするためのよう...?いずれにせよcordovaにとって悪影響を及ぼすから変えなければならないようです。buildの下にでも入れておいてあげましょう。
modeをspaにする
プロジェクト作成の時点でSPAを選択している人は不要です。また、俺は/私はSSGで行くんや!って人は別にuniversalでもいいと思います。(確認した限りだと動くには動くようなので...どんな問題があるかは私にはわからないのでお勧めはしないです...)
これで一通り手直しは終わりました。
package.jsonのscriptを手直しする
generateコマンドの修正とcordova-run-androidのようなコマンドを作ります。
まずはgenerateの修正から。"generate": "nuxt generate && rm app/www/* -r && cp dist/* app/www/ -r && replace '/nuxt/' 'nuxt/' app/www -r"
appディレクトリはCordovaのものです。後で作ります。なお、app以外のディレクトリで作成した場合はすべて別の名前に書き換えてください。コマンドを解説していきます。
nuxt generateはごく普通の、NuxtでHTMLやJSなんかを生成するコマンドです。
次のrm app/www/* -r&& cp dist/* app/www/ -rでは、cordovaプロジェクトのディレクトリにあるwwwというHTMLやCSS、JS、画像ファイルといったものを入れておくディレクトリの中身をいったん全削除し、先ほどのnuxt generateでdistディレクトリ内に生成されたものと入れ替えています。
最後にreplace '/nuxt/' 'nuxt/' app/www -rでは、Cordovaはルートディレクトリの都合上、/nuxt/が使えないので、nuxt/に置き換えています。なお、これはGit for WindowsでUnixコマンドを使えるようになっている人向けのコマンドです。Linuxなどでも使用可能な形になっています。では、次にWindows標準コマンドを使ったバージョンを貼っておきます。
"generate-by-windows": "nuxt generate && del /s /q app\\www\\* && xcopy /e dist\\ app\\www && replace '/nuxt/' 'nuxt/' app/www -r"
generate-by-windowsとしましたが、これを使う場合は普通のgenerateコマンドとは分けたほうがいいです。(windowsでしか使えないコマンドをいれているわけなので)
なお、どちらにも出てくるreplaceコマンドについてですが、これはyarn add replaceでプロジェクト自体にくっつけるか、
yarn global add replaceでグローバルに埋め込むかすれば使えます。個人的にはプロジェクト自体にくっつけたほうが、ほかの環境に移った時なんかは楽だと思います。
次に
cordova-run-androidコマンドです。
WindowsなのでAndroidのコマンドのみ追加しますが、Mac使ってiOS版もビルドするのであれば、androidの部分をiosに変えてあげればいいです。"cordova-run-android": "cd app && cordova build android && cordova run android"これを実行するだけでビルドから実機(orエミュレータ)での実行まで自動でできるようになります。
修正はここまでです、いよいよビルドに向かいます...!Cordovaプロジェクトの作成
さて、ようやくCordovaプロジェクト作成の区域に入りました。
まずは、Cordovaをインストールしましょう。yarn global add cordovaこれでcordovaコマンドを実行できるようになりました。
次に、Nuxtプロジェクトのルートで以下を実行しましょう。cordova create app <識別子> <application name>識別子ってなに?って思うかもしれませんが、Androidアプリを日常的に作っている人とかならわかるかもしれません。
逆引きドメイン スタイル識別子というやつです。もっと???となるかもしれませんが、com.example.helloworldみたいな、ドメインを逆にした感じのやつです。実在するものでなくてもいいようです。ストアにアプリ申請するときなんかに使われます(数百万とあるアプリを識別し、同一の識別子を持つことがないようにする...データ保管のディレクトリ名に使われたりするので...)
何も決まっていなければ適当でいい気がします。(あんまり適当なこと言えないけど...w)ディレクトリは確実に指定しないといけないようですが、識別子やアプリ名は何も指定しないと、それぞれ
io.cordova.hellocordova、HelloCordovaになるようです。
今回は、ディレクトリはappで固定、識別子はcom.example.cordova_test、アプリ名はcordova-testにしてみます。(確か識別子に-は使えない...)
あっさりと終ります。それでは、appディレクトリにcdして、platformを追加しましょう。今回はAndroidのみやります。
これでビルド準備が整いました...!いざ、ビルド...!
Nuxtプロジェクトのルートに戻ります。そこで、さっき設定を変更した
yarn generate(oryarn generate-by-windows)とyarn cordova-run-androidを実行していきます。実機で実行したい場合は、
yarn cordova-run-androidを実行する前にでもデバッグモードをオンにしたスマホをUSBでつないであげるとよいでしょう。
上の画像がちょうどそうですが、
runしてもエミュレータも実機もなかった場合は失敗して終わります(apkはあるのであとは実機に流し込むだけです)まとめ
いかがでしょうか。ネット上で2つほど記事を見かけ、参考にして試してみようと思っていたところ、案外詰まった(javaとかgradleとかもろもろ)ので、自分が見て後で環境を再構築できるように書き残しました。ほかの方の参考にもなれば。
ところでNuxt + Vue + Cordovaの組み合わせ、かなり便利なのでちょっと推していきたいです。(開発環境ではNuxtで自動リロード/ビルド等があり、そしてCordovaでアプリ化できるというのがかなり良い)おまけ
実際にアプリをインストールしてみました。Vuetify Logoは何があったんだろう...w
問題点(追記)
今のままの状態だとCordovaのプラグインを使用することができません。これを解決する必要があります。
参考文献


