- 投稿日:2020-11-25T21:00:17+09:00
【AI】LobeからExportしたモデルの使い方
➊はじめに
前回は『
【AI】LobeでMNISTをやってみた』にて、AI側については一切プログラミングすることなく、推論エンジンをローカルPCにデプロイしました。また、Local APIを介してアプリと推論エンジンの通信を行いました。
➋今回やること
Lobeから
TensorFlow(saved_model)形式でエクスポートし、そのモデルを利用できるか確認してみたいと思います。今回はLobeが用意した➎Lobe-APIを使用する方法と、➏tensorflowライブラリを使用する方法の2種類を検証したいと思います。
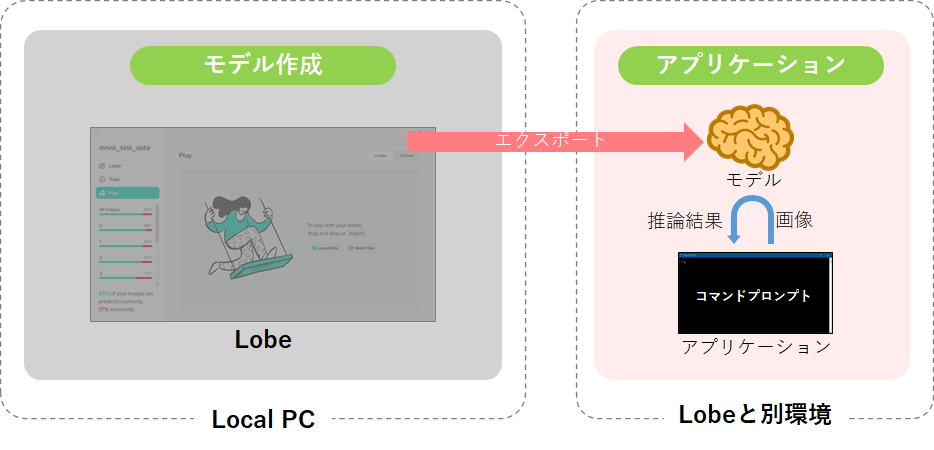
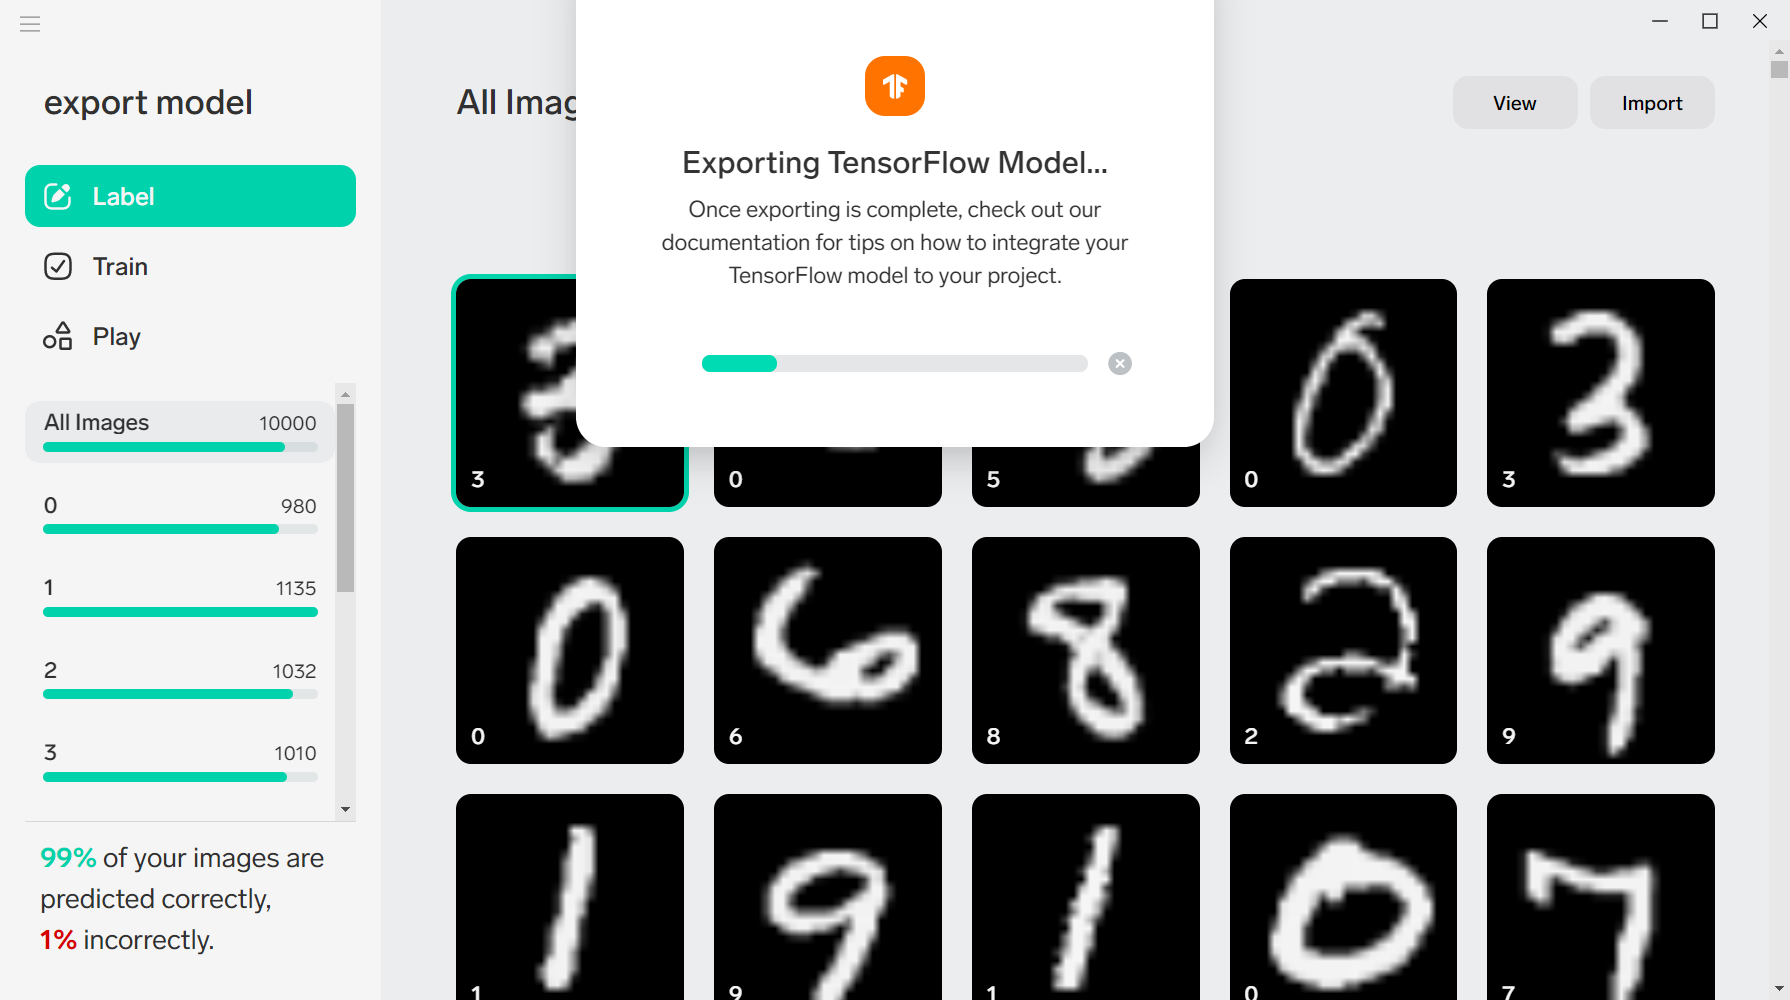
➌Lobeからエクスポート
■エクスポート形式
Lobeからのエクスポート形式は、以下4つに対応しています。
今回は「TensorFlow 1.15 SavedModel」を検証します。
Export 説明 TensorFlow 1.15 SavedModel TensorFlowのSavedModelは、TensorFlow 1.xを実行するPythonアプリケーションで使用される標準形式であり、TensorFlow Webサービスにデプロイして、APIとしてクラウド上で推論を実行できます。 AndroidまたはRaspberryPi モデルをTensorFlowLiteとしてエクスポートして、モバイルおよびIoTアプリケーションで使用します。 Apple iOS モデルをCoreMLとしてエクスポートして、iOS、iPad、およびMacアプリを開発します。 ローカルAPI LobeはローカルAPIをホストして、RESTエンドポイントを介してモデルを呼び出します。このオプションを使用して、アプリの開発中に予測を実行するサービスをモックします。 ■エクスポート実施
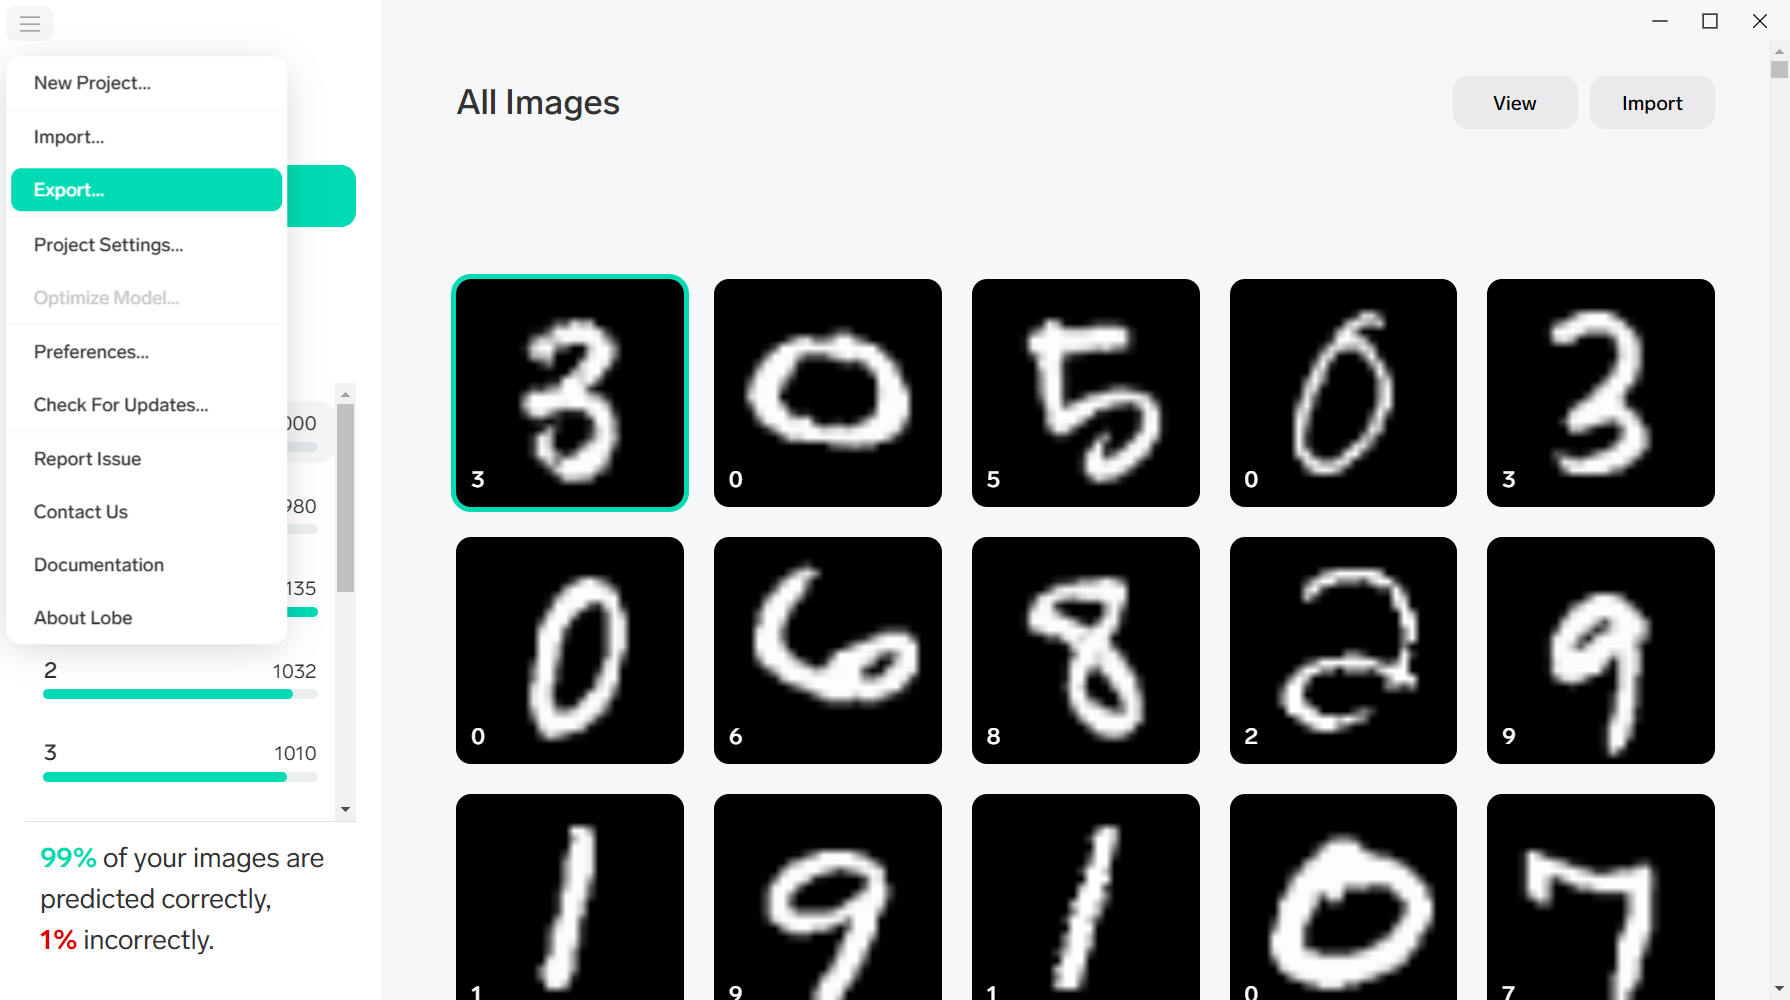
■Lobeから対象PJを開いて、[
Export]を押下します。
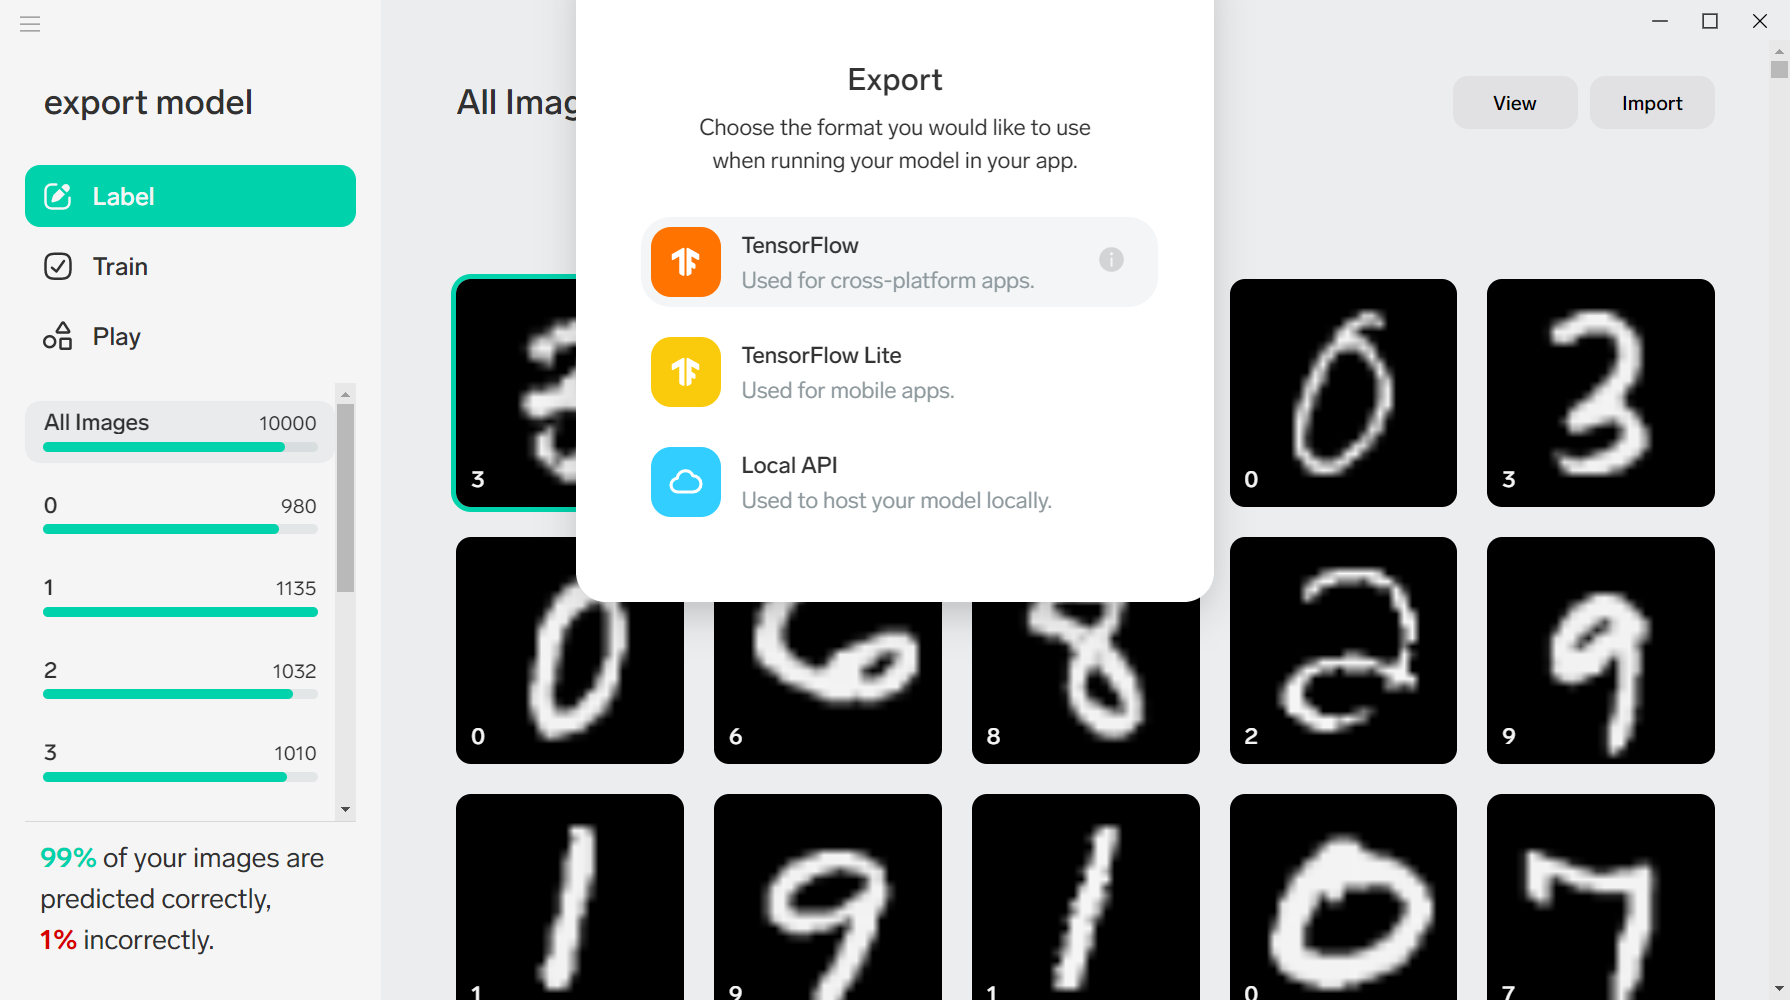
■[
TensorFlow]を押下します。
■書き出しフォルダを選択するとExportが始まります。
■エクスポート結果
SavedModel形式については、TensorFlow:「SavedModel形式の使用」等をご参考ください。export model │ ├─example │ │ │ ├─README.md │ ├─requirements.txt │ └─tf_example.py │ ├─variables │ │ │ ├─variables.data-00000-of-00001 │ └─variables.index │ ├─saved_model.pb └─signature.json➍Lobe-APIとは
Lobeは、Exportしたモデルを簡単に読み込むためのライブラリ
Lobe-APIを用意しています。このLobe-APIを使うと以下の通りイメージファイル、URL、画像データから直接推論が可能となります。ただし、Lobe-APIをインストールするとtensorflowのバージョンが1.15にデグレードされてしまうので注意が必要です。詳細はここ → Lobe-API:https://github.com/lobe/lobe-python
OPTION 1:イメージファイルから推論する場合from lobe import ImageModel model = ImageModel.load('path/to/ExportFolder') result = model.predict_from_file('path/to/file.png')
OPTION 2:URLから推論する場合from lobe import ImageModel model = ImageModel.load('path/to/ExportFolder') result = model.predict_from_url('http://path/to/file.png')
OPTION 3:Pillow imageから推論する場合from lobe import ImageModel from PIL import Image model = ImageModel.load('path/to/ExportFolder') img = Image.open('path/to/file.png') result = model.predict(img)➎【使い方1】Lobe-APIを使用
では、早速
Lobe-APIを使って推論を実施させたいと思います。■python仮想環境構築
まず、anacondaのcondaコマンドを使用して、python仮想環境[
lober1]を作ります。
Lobe-APIはpython=3.7以上でないと動かないため以下のように設定します。2020/11現在、Google ColabのPythonバージョンは3.6.9なので、Google ColabではLobe-APIは使えませんでした。
仮想環境[lober1]構築C:\Lobe test>conda create -n lober1 python=3.7 C:\Lobe test>conda activate lober1■Lobe-APIのインストール
依存関係にあるライブラリも合わせて自動でインストールされます。
Lobe-APIインストール(lober1) C:\Lobe test>pip install git+https://github.com/lobe/lobe-python■Lobe-APIが返却する推論結果数を変更
Lobe-APIのデフォルトでは、推論結果を「認識率ベスト5までのクラスをソート」して返却してきます。
推論結果をどの様に使うかによりますが、今回は全クラス返却するように変更します。
仮想環境[lober1]下にインストールされたライブラリを修正します。C:\Users\[username]\anaconda3\envs\lober1\Lib\site-packages\lobe_results.py
「_results.py」のLine20を以下の様に修正します。_results.py20: top_predictions = confidences.argsort()[-5:][::-1] ← ベスト5のみに絞っている ↓↓↓↓ 20: top_predictions = confidences.argsort()[:][::-1] ← 全クラスに変更■サンプルプログラム
src01.py############################################################ # Lobeで作ったモデルを使う方法 1 ############################################################ import tensorflow as tf from lobe import ImageModel print("tensorflow : ", tf.__version__) ############################################################ # Export Model読込 ############################################################ model = ImageModel.load('export model') #----------------------------------------------------- # OPTION 1: イメージファイルから推論する場合 #----------------------------------------------------- print('■OPTION 1: Predict from an image file') result = model.predict_from_file('sample.png') pred = result.prediction sorted_labels = sorted(result.labels) conf = sorted_labels[int(result.prediction)][1] print('predict :', pred) print('confidence: {:1.010f}'.format(conf)) for label, conf in (sorted(result.labels)): print(label, '{:1.030f}'.format(conf)) print() #----------------------------------------------------- # OPTION 2: URLから推論する場合 #----------------------------------------------------- print('■OPTION 2: Predict from an image url') result = model.predict_from_url('https://qiita-image-store.s3.ap-northeast-1.amazonaws.com/0/405376/4f9c554d-f3f5-fc8d-2e08-30e8eb6079a4.png') pred = result.prediction sorted_labels = sorted(result.labels) conf = sorted_labels[int(result.prediction)][1] print('predict :', pred) print('confidence: {:1.010f}'.format(conf)) for label, conf in (sorted(result.labels)): print(label, '{:1.030f}'.format(conf)) print() #----------------------------------------------------- # OPTION 3: Pillow imageから推論する場合 #----------------------------------------------------- print('■OPTION 3: Predict from Pillow image') from PIL import Image img = Image.open('sample.png') result = model.predict(img) pred = result.prediction sorted_labels = sorted(result.labels) conf = sorted_labels[int(result.prediction)][1] print('predict :', pred) print('confidence: {:1.010f}'.format(conf)) for label, conf in (sorted(result.labels)): print(label, '{:1.030f}'.format(conf)) print()■サンプルデータ
以下のサンプルデータを「sample.png」として「src01.py」と同じフォルダに保存してください。
サンプルデータ:sample.png
サンプル画像URL:https://qiita-image-store.s3.ap-northeast-1.amazonaws.com/0/405376/4f9c554d-f3f5-fc8d-2e08-30e8eb6079a4.png
■プログラミング実行結果
src01.py実行結果(lober1) C:\Lobe test>python src01.py tensorflow : 1.15.4 ■OPTION 1: Predict from an image file predict : 9 confidence: 0.9999991655 0 0.000000000000000000004691450972 1 0.000000000000000000000000000000 2 0.000000000000000000204086976737 3 0.000000000000000000000101685206 4 0.000000000000000012389047993676 5 0.000000000000000000010694401651 6 0.000000000000000000000000045193 7 0.000000881124378793174400925636 8 0.000000000000000404111716429163 9 0.999999165534973144531250000000 ■OPTION 2: Predict from an image url predict : 9 confidence: 0.9999991655 0 0.000000000000000000004691450972 1 0.000000000000000000000000000000 2 0.000000000000000000204086976737 3 0.000000000000000000000101685206 4 0.000000000000000012389047993676 5 0.000000000000000000010694401651 6 0.000000000000000000000000045193 7 0.000000881124378793174400925636 8 0.000000000000000404111716429163 9 0.999999165534973144531250000000 ■OPTION 3: Predict from Pillow image predict : 9 confidence: 0.9999991655 0 0.000000000000000000004691450972 1 0.000000000000000000000000000000 2 0.000000000000000000204086976737 3 0.000000000000000000000101685206 4 0.000000000000000012389047993676 5 0.000000000000000000010694401651 6 0.000000000000000000000000045193 7 0.000000881124378793174400925636 8 0.000000000000000404111716429163 9 0.999999165534973144531250000000➏【使い方2】TensorFlowライブラリを使用
Lobe-APIを使用せずに、tensorflowライブラリを使って推論する方法です。■python仮想環境構築
anacondaを利用してpython仮想環境[
lober2]を作ります。仮想環境[lober2]構築(lober1) C:\Lobe test>conda deactivate C:\Lobe test>conda create -n lober2 python=3.7 C:\Lobe test>conda activate lober2 (lober2) C:\Lobe test>conda install tensorflow pillow■サンプルプログラム
src02.py############################################################ # Lobeで作ったモデルを使う方法 2 ############################################################ import json import numpy as np import tensorflow as tf from PIL import Image from tensorflow.keras.preprocessing.image import img_to_array print("tensorflow : ", tf.__version__) export_holder = 'export model/' ############################################################ # Export Model読込 ############################################################ # https://www.tensorflow.org/guide/saved_model # signature読込 sig_holder = export_holder + 'signature.json' with open(sig_holder, 'r') as f: signature = json.load(f) inputs = signature.get('inputs') outputs = signature.get('outputs') # モデルの学習画像サイズを取得 input_width, input_height = inputs['Image']['shape'][1:3] # model読込 model = tf.saved_model.load(export_holder) infer = model.signatures['serving_default'] ############################################################ # 画像データ読込 ############################################################ imgPIL = Image.open('sample.png') imgPIL = imgPIL.convert('RGB') imgPIL = imgPIL.resize((input_width, input_height)) x = img_to_array(imgPIL) / 255 x = x[None, ...] ############################################################ # 推論 ############################################################ predict = infer(tf.constant(x)) # 推論結果 predict = infer(tf.constant(x))['Prediction'][0] print('predict :', predict.numpy().decode()) # 確率 confidence = infer(tf.constant(x))['Confidences'][0] confidence = confidence.numpy() print('confidence: {:1.010f}'.format(confidence[int(predict)])) print() for i, conf in enumerate(confidence): print(i, '{:1.030f}'.format(conf)) print()■サンプルデータ
以下のサンプルデータを「sample.png」として「src02.py」と同じフォルダに保存してください。
サンプルデータ:sample.png
■プログラミング実行結果
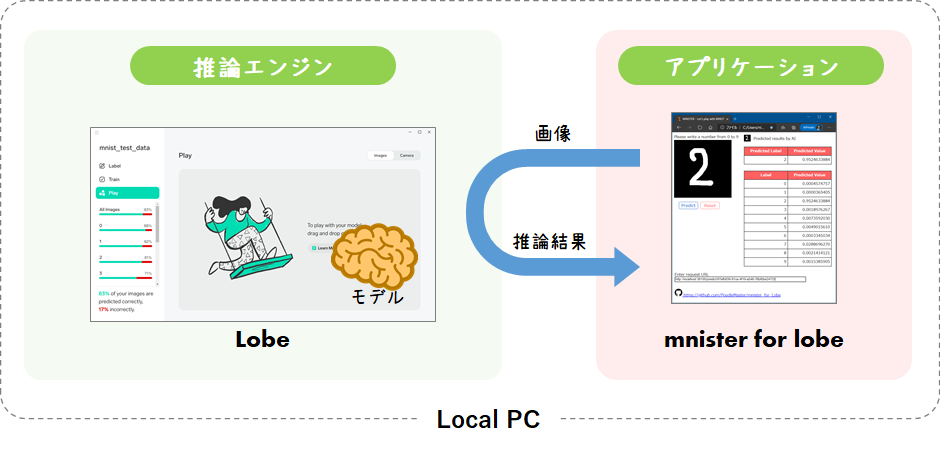
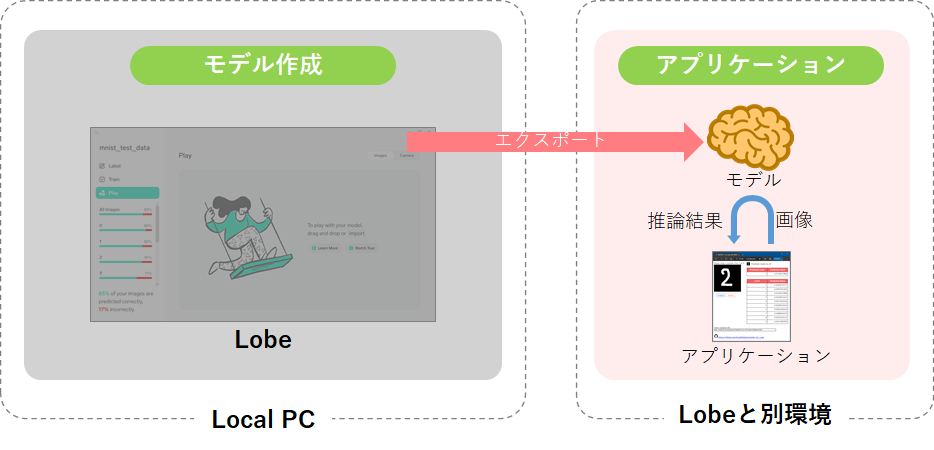
src02.py実行結果(lober1) C:\Lobe test>python src02.py tensorflow : 2.1.0 predict : 9 confidence: 0.9999991655 0 0.000000000000000000004691540637 1 0.000000000000000000000000000000 2 0.000000000000000000204095532887 3 0.000000000000000000000101689472 4 0.000000000000000012389331716626 5 0.000000000000000000010694728000 6 0.000000000000000000000000045193 7 0.000000881154619492008350789547 8 0.000000000000000404117883887810 9 0.999999165534973144531250000000➐手書きアプリケーション
せっかくなので、いつもの手書きwebツールの
mnisterをTensorflowモデルを読み込めるように改造してみました。こちらは【使い方2】のTensorFlowライブラリを使用する方法でモデルを利用しています。ダウンロードは以下から取得可能となっていますので、ぜひご参考ください。※「mnister_for_tensorflow」アプリケーションを動作させる場合は、LobeのTensorFlow Exportモデルを各自用意する必要があります。モデルの作り方は『
【AI】LobeでMNISTをやってみた』と『本項➌』を参考にすれば簡単に実行できます。■システム図
■ダウンロード
mnister_for_Tensorflowを格納するディレクトリに移動後、以下のgit cloneコマンドを打ち込んでmnister_for_TensorflowツールをGETしてください。実行方法などはREADME.mdをご参照ください。
commandgit clone https://github.com/PoodleMaster/mnister_for_tensorflow
Github : https://github.com/PoodleMaster/mnister_for_tensorflow➑以上
LobeからエクスポートしたTensorFlowモデルは、APIなども用意されており、問題なく簡単に利用することができました。
microsoftの『
Lobe』やGoogleの『Teachable Machine』など、AIプログラミングすることなく、誰でも簡単にモデルを構築できたり、推論結果からモデルの更新ができるようになってきました。これからは、益々AIでどんなサービスができるかが重要視される時代になっていくんでしょうね…お疲れ様でした。


- 投稿日:2020-11-25T17:47:29+09:00
TensorFlow.kerasのModel.fit()実行時におけるsteps_per_epoch
概要
TensorFlow.keras(以下tf.keras)ではModel.fit()を実行してモデルの訓練を行います。
そのModel.fit()の引数にsteps_per_epochという項目があり、これにどんな値を与えれば良いのかを確認します。データ拡張などでImageDataGeneratorを使用することを前提としています。ImageDataGenerator
tf.keras内のデータ拡張を簡単に行うことができるクラスです。ImageDataGeneratorは指定したバッチサイズ・画像の加工内容で無限にバッチを生成することができます。このバッチ生成は訓練時に行われるため、大規模データセットや比較的大きなバッチサイズでも使用するメモリを少なくし訓練を可能にします。
train.py# インスタンスの作成 (画像の加工内容の指定) train_datagen = ImageDataGenerator( rescale=1./255, rotation_range=30, width_shift_range=0.2, height_shift_range=0.2, shear_range=0.1, zoom_range=0.2, horizontal_flip=True, fill_mode='nearest' ) train_generator = train_datagen.flow_from_directory( TRAIN_DATA_DIR, # データセットがあるディレクトリ target_size=(IMG_WIDTH, IMG_HEIGHT), color_mode='rgb', classes=CLASSES, # クラスの配列 ['dog', 'cat']など class_mode='categorical', batch_size=BATCH_SIZE # 1回のバッチ生成で作る画像数 )ImageDataGeneratorはこのように使われます。classesは与えなくても自動的にディレクトリの構成で判断してくれる機能も備わっています。また、訓練データに対するgeneratorと検証データに対するgeneratorをそれぞれ用意することが一般的です。
ImageDataGeneratorを使用したfit()
ここからが本題です。以下はModel.fit()の実行例です。
train.py# modelは作成したModelクラスのインスタンス (省略) history = model.fit_generator( train_generator, steps_per_epoch=STEPS_PER_EPOCH, # ? epochs=EPOCHS, validation_data=validation_generator, validation_steps=VALIDATION_STEPS # ? )第一引数には訓練データのgeneratorを指定します。その他で意味がわかりくいのはsteps_per_epochとvalidation_stepなどだと思います。
steps_per_epoch
各エポックのイテレーション回数を指定します。イテレーションは簡単に言うと各エポックで重みを更新する回数です。通常バッチごとに重みが更新されるので、各エポックでバッチを生成する回数に等しいです。steps_per_epochの値は1以上のint型であればどんな値でもエラーは出ないと思われます。デフォルトの値(None)は、画像数 ÷ バッチサイズで与えられます。
例を示すと以下になります。
1000(訓練用画像数) ÷ 10(バッチサイズ) = 100(steps_per_epoch)簡単な計算ですが注意があります。
もし、「データ拡張を使用して画像数を3倍にした」と解説を添えた場合に、上の計算の総画像数はどうなるでしょうか?これを1000と3000のどちらに定義するのかが曖昧なのです。
色々な解説記事を見てみると、記事によってまちまちだと感じます。
なので、自分が実験で何を比較したいかなどを考えてから設定すべきなのかなーとも思います。それとも、デフォルトの値が生の訓練用画像数を用いて計算していることから「画像数を○倍にした」という解説自体がナンセンスなんでしょうか?自分には答えは出せません...。どちらにしろ理解していることが重要だと思うので今回記事にさせていただきました。
ぼやき:研究で作成した小さなデータセットでデフォルトの値だと学習曲線がガタガタで何が起きているかわからない...
validation_steps
Model.fit()実行時に各epochの終了時点で検証データに対するlossとaccuracyが計算されます。その際に何回バッチを生成して値を求めるかをvalidation_stepsに与えます。デフォルト(None)ではsteps_per_epochと同様にデータセットの検証データの画像を全て使いきるような値に設定されます。( 検証用画像数 ÷ バッチサイズ )。検証用データには画像加工などを施さないことが一般的なので、こちらはNoneを指定して問題ないと思います。
補足
以前はImageDataGeneratorのデータ拡張を使用した際の訓練はModel.fit_generator()が使用されていましたが、現在はModel.fit()もgeneratorを使用した訓練のサポートがされているため、そちらを使おうという方針になっています。(2020/11/25)
※記事に誤りがあった場合は修正または削除で対応します※
参考
