- 投稿日:2020-08-12T20:30:24+09:00
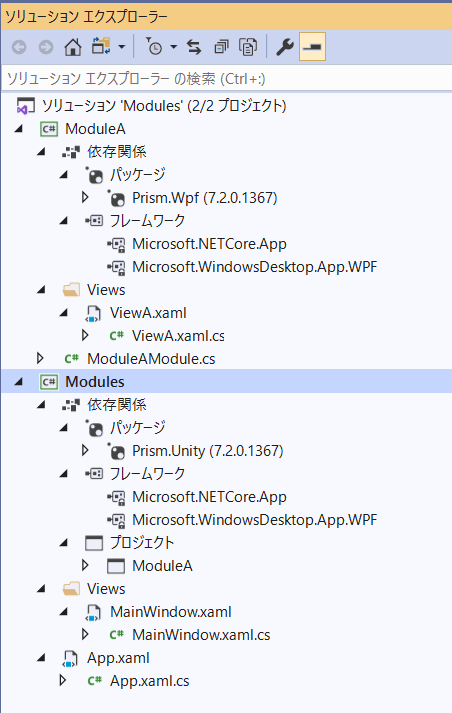
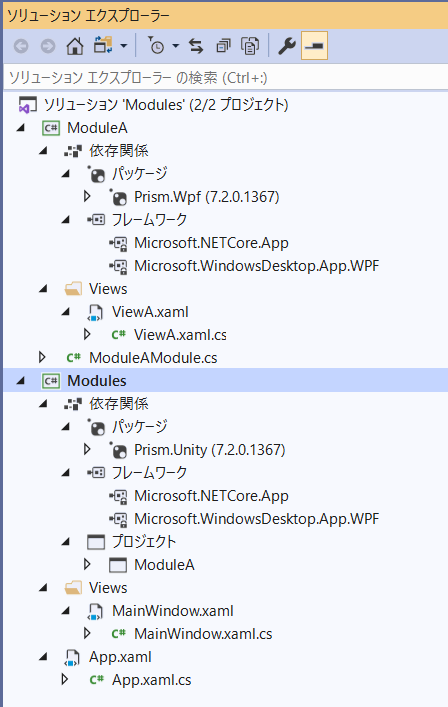
C# Prism WPF 公式サンプル(.NET Core版)を動かしてみる
Prism の公式サンプル を動かしてみました。
ソースを見ただけではイメージが付きにくいので画面をキャプションしておきます。動作させた環境
Windows 10
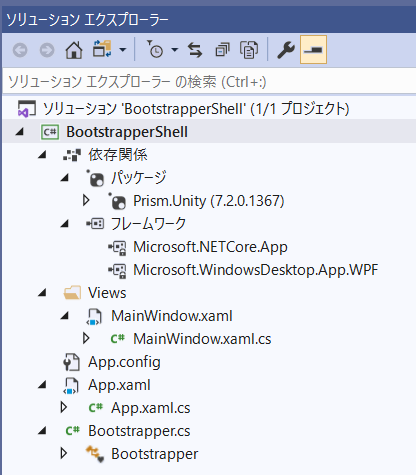
Microsoft Visual Studio Community 201901-BootstrapperShell
基本的なブートストラップとシェルを作成する
Topic : Bootstrapper and the Shell
Description : Create a basic bootstrapper and shell
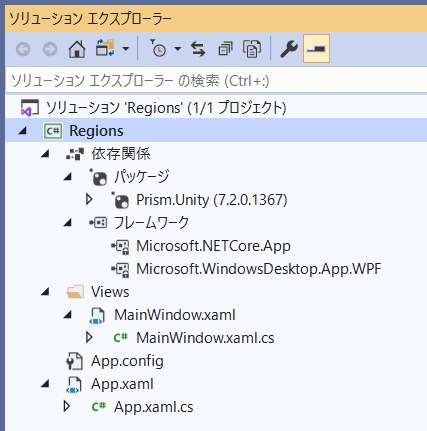
02-Regions
リージョンを作成する
Topic : Regions
Description : Create a region
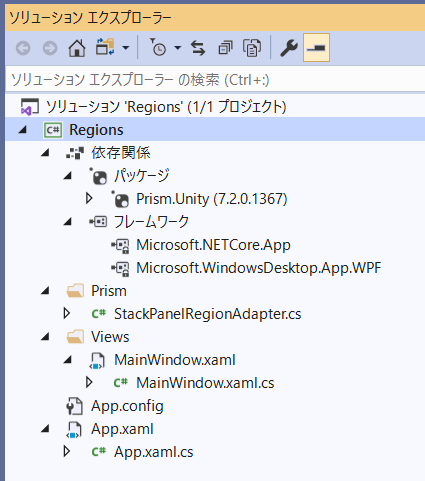
03-CustomRegions
StackPanelのカスタムリージョンアダプターを作成する
Topic : Custom Region Adapter
Description : Create a custom region adapter for the StackPanel
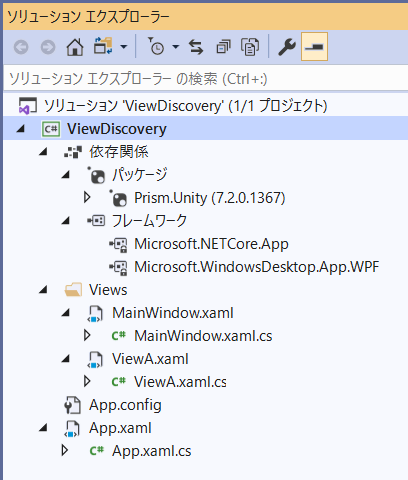
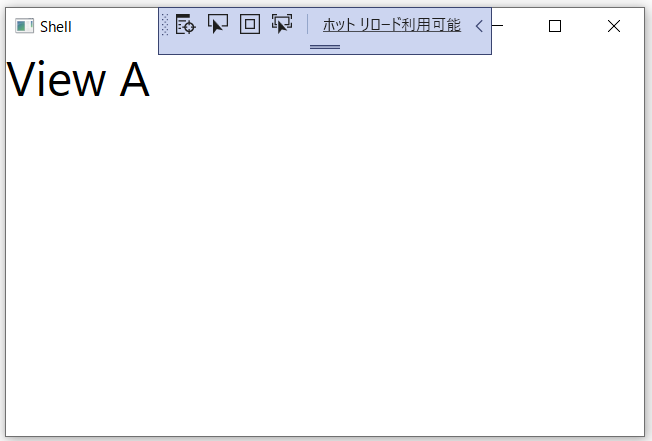
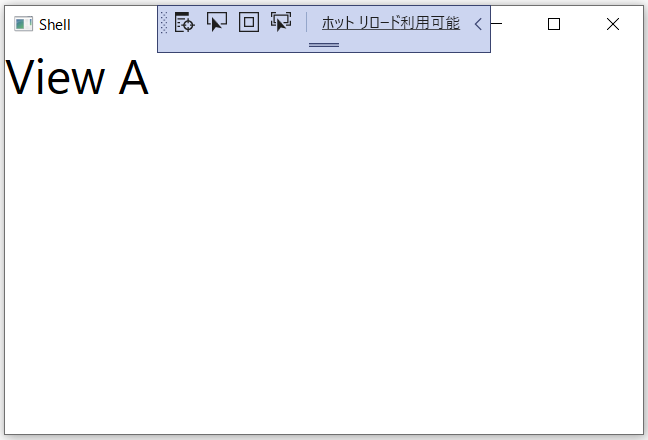
04-ViewDiscovery
View Discoveryでビューを自動的に注入する
Topic : View Discovery
Description : Automatically inject views with View Discovery
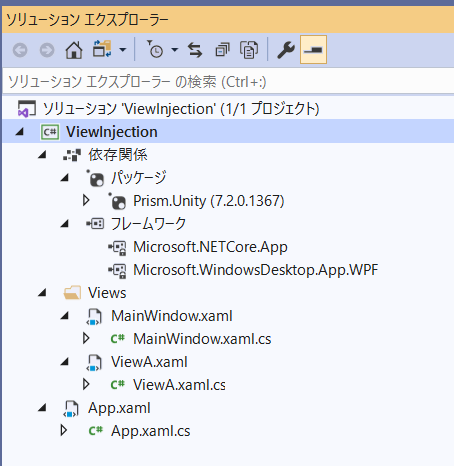
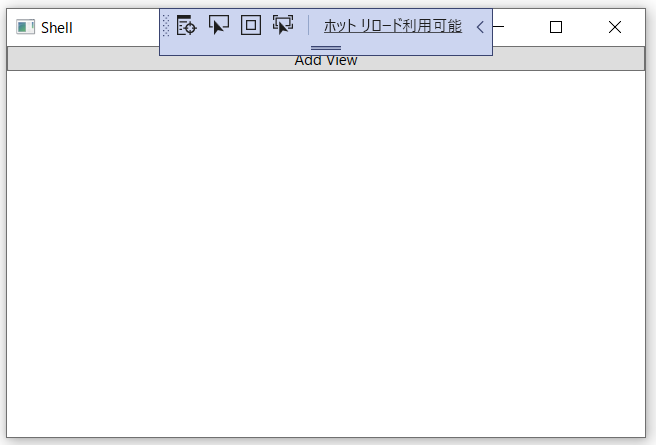
05-ViewInjection
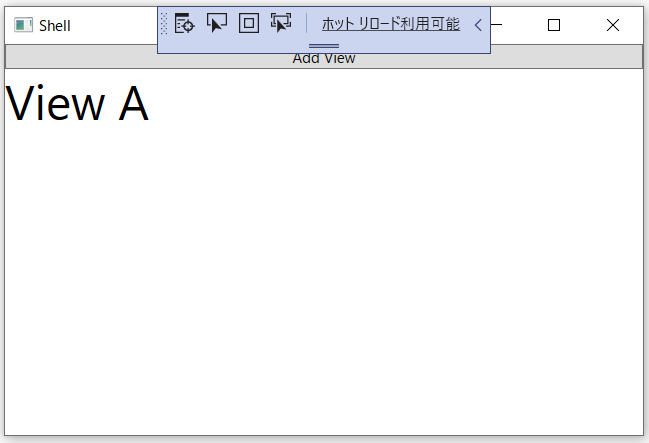
ビューインジェクションを使用して手動でビューを追加および削除する
Topic : View Injection
Description : Manually add and remove views using View Injection
[Add View]ボタンをクリックすると
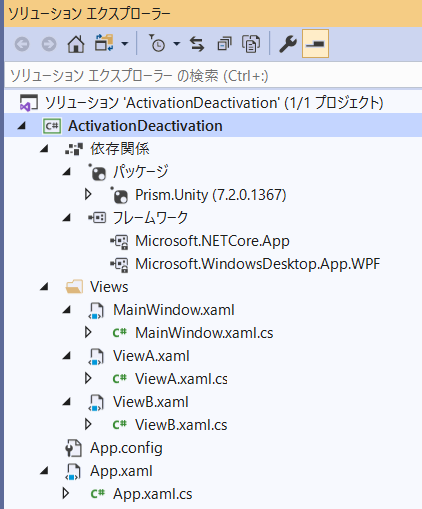
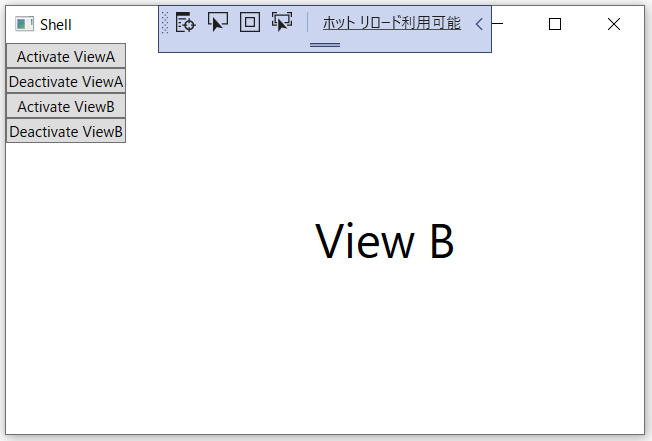
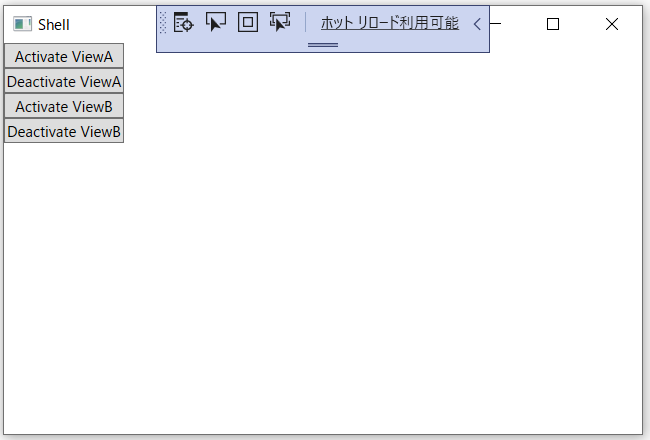
06-ViewActivationDeactivation
ビューを手動でアクティブ化および非アクティブ化する
Topic : View Activation/Deactivation
Description : Manually activate and deactivate views
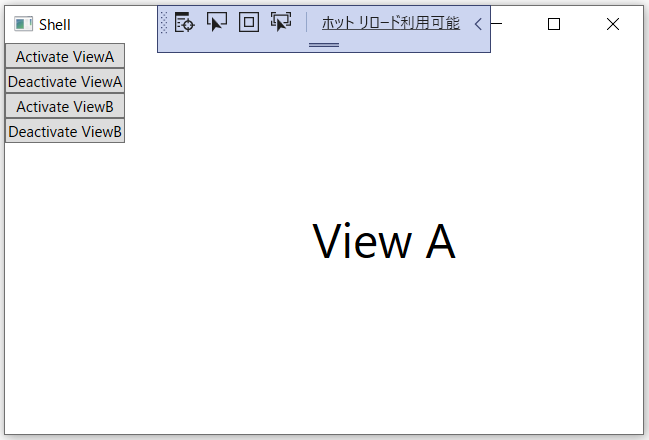
[Diactivate ViewA]ボタンをクリックすると
[Activate ViewB]ボタンをクリックすると
[Diactivate ViewB]ボタンをクリックすると
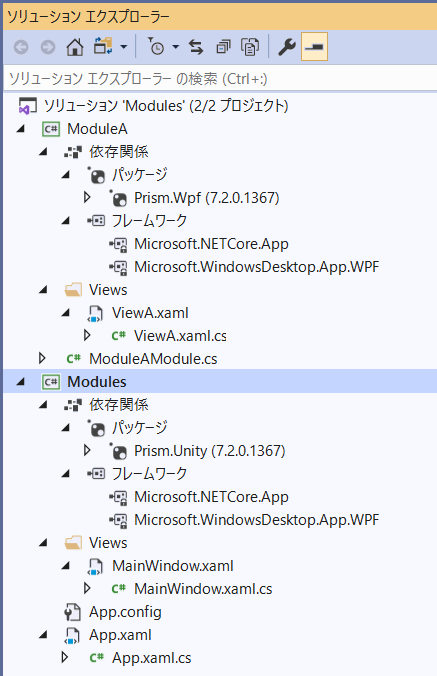
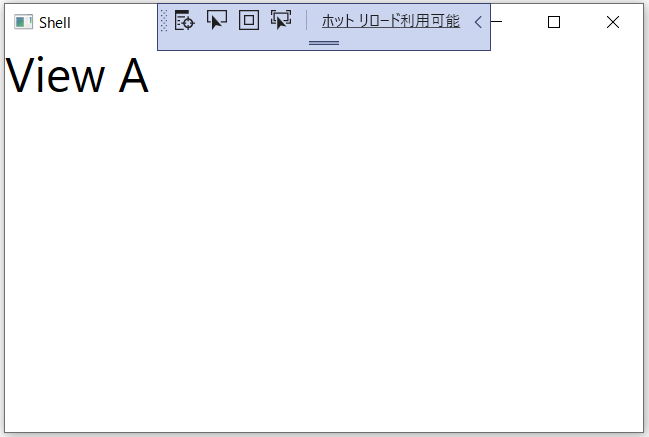
07-Modules - AppConfig
App.configファイルを使用してモジュールをロードする
Topic : Modules with App.config
Description : Load modules using an App.config file
07-Modules - Code
コードを使用してモジュールをロードする
Topic : Modules with Code
Description : Load modules using code
07-Modules - Directory
ディレクトリからモジュールをロードする
Topic : Modules with Directory
Description : Load modules from a directory
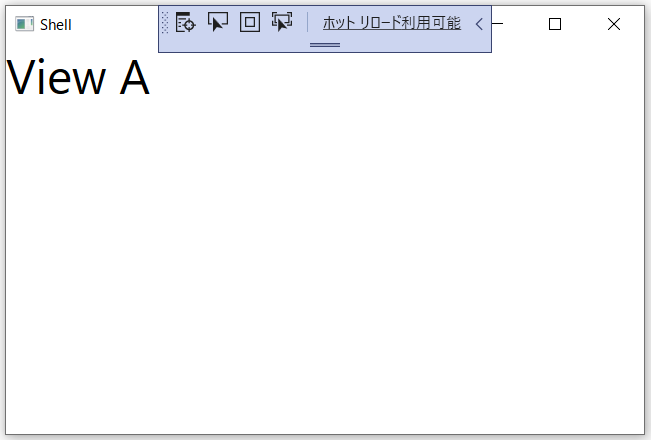
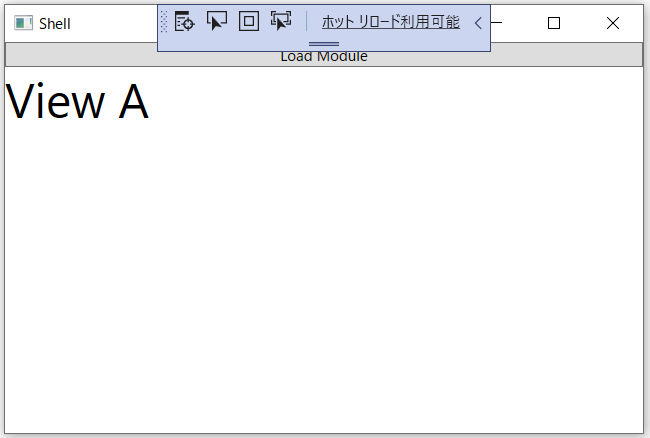
07-Modules - LoadManual
IModuleManagerを使用して手動でモジュールを読み込む
Topic : Modules loaded manually
Description : Load modules manually using the IModuleManager
[Load Module]ボタンをクリックすると
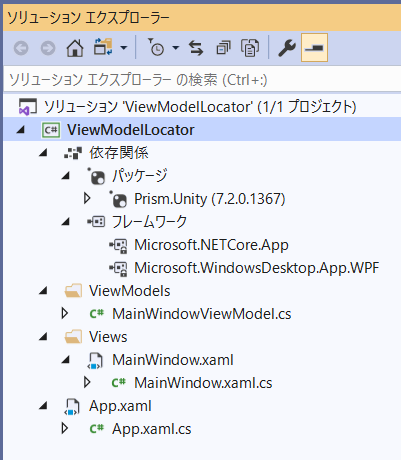
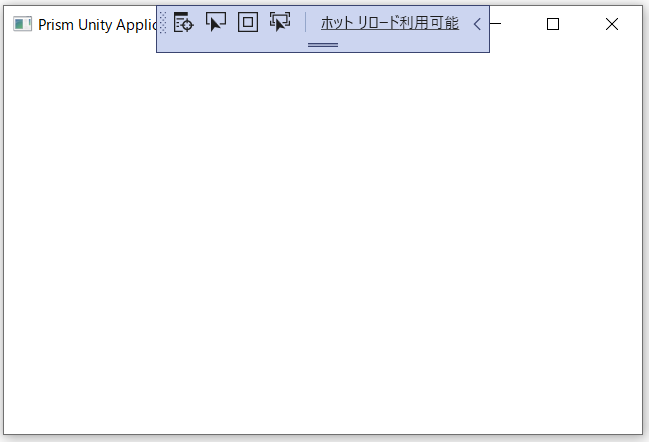
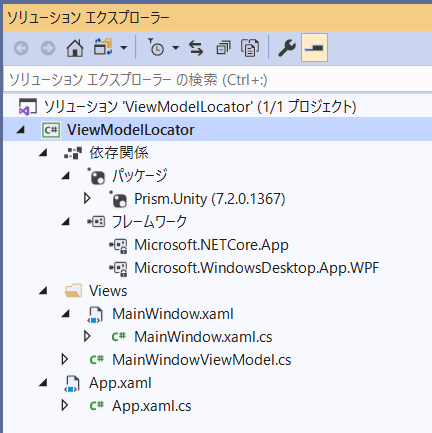
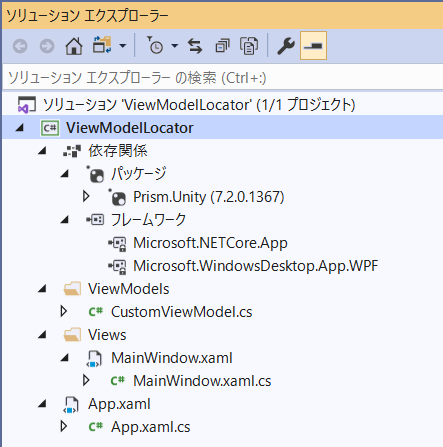
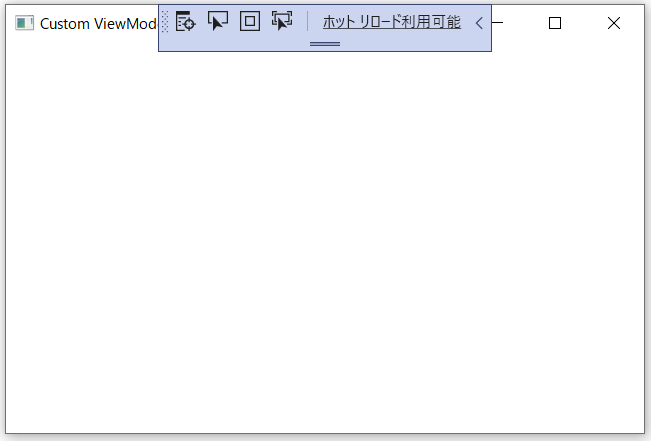
08-ViewModelLocator
ViewModelLocatorの使用
Topic : ViewModelLocator
Description : using the ViewModelLocator
09-ChangeConvention
ViewModelLocatorの命名規則を変更する
Topic : ViewModelLocator - Change Convention
Description : Change the ViewModelLocator naming conventions
10-CustomRegistrations
特定のビューのViewModelを手動で登録する
Topic : ViewModelLocator - Custom Registrations
Description : Manually register ViewModels for specific views
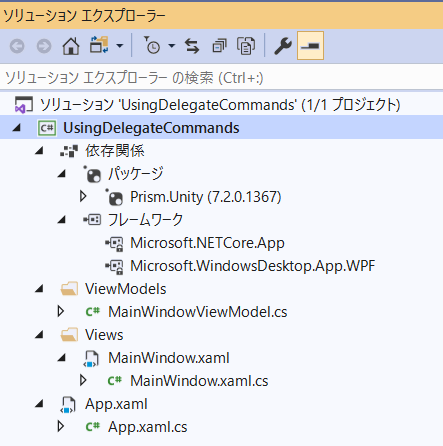
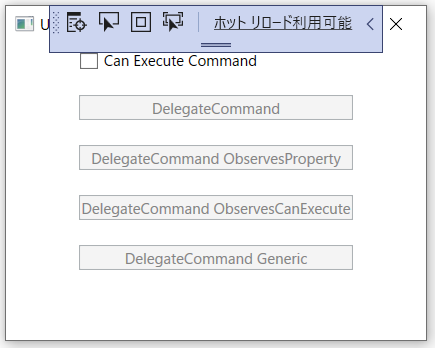
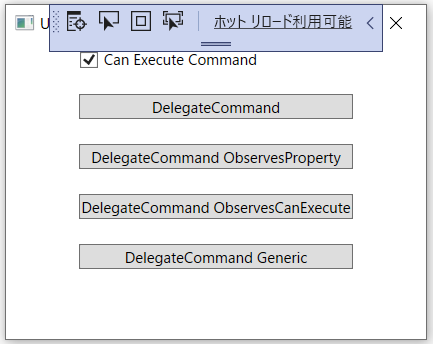
11-UsingDelegateCommands
DelegateCommandおよびDelegateCommand を使用する
Topic : DelegateCommand
Description : Use DelegateCommand and DelegateCommand
[Can Execute Command]をチェックすると
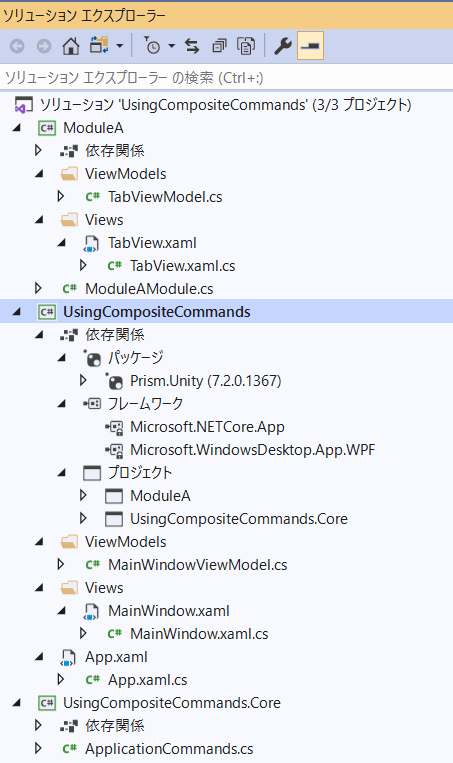
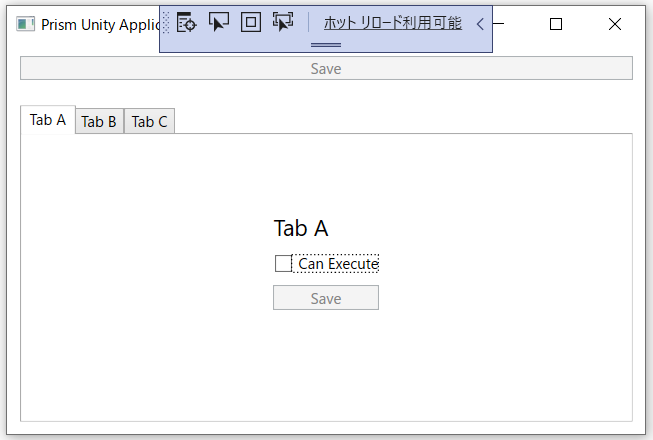
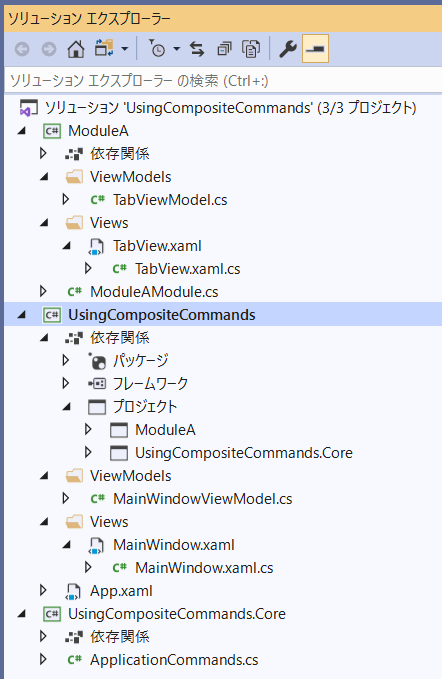
12-UsingCompositeCommands
CompositeCommandsを使用して複数のコマンドを単一のコマンドとして呼び出す方法を学ぶ
Topic : CompositeCommands
Description : Learn how to use CompositeCommands to invoke multiple commands as a single command
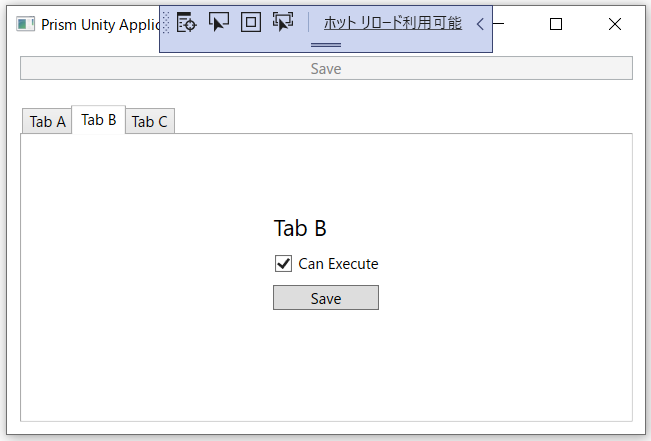
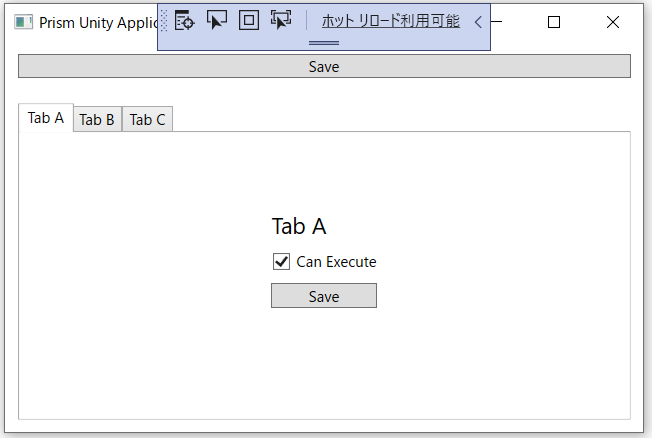
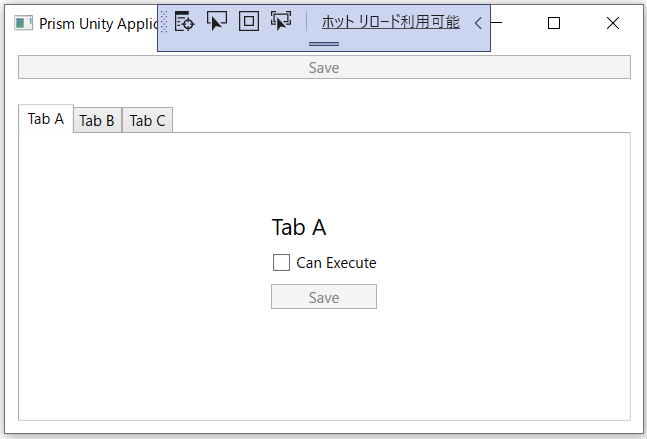
[Can Execute]のチェックを解除すると
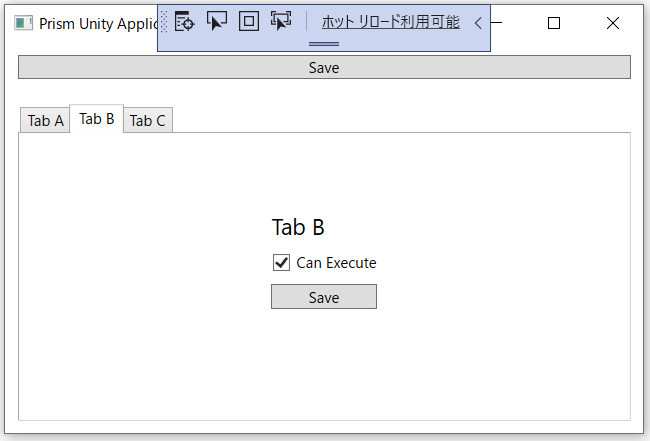
[Tab B]を選択すると
13-IActiveAwareCommands
コマンドをアクティブにして、アクティブなコマンドのみを呼び出す
Topic : IActiveAware Commands
Description : Make your commands IActiveAware to invoke only the active command
[Can Execute]のチェックを解除すると
[Tab B]を選択すると
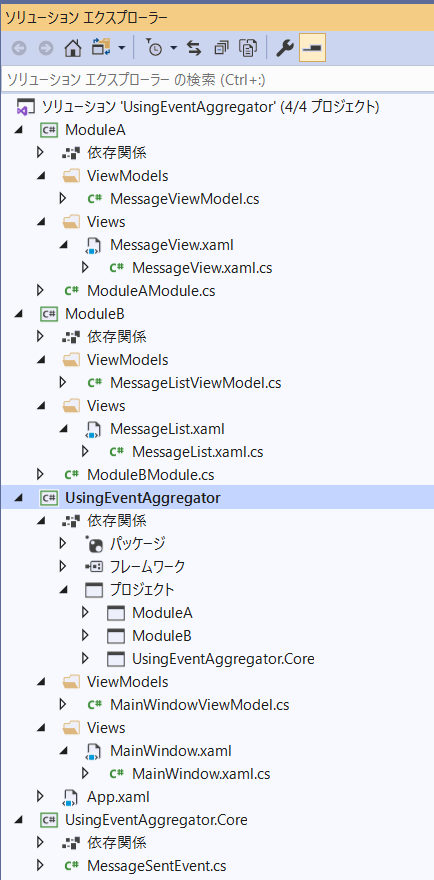
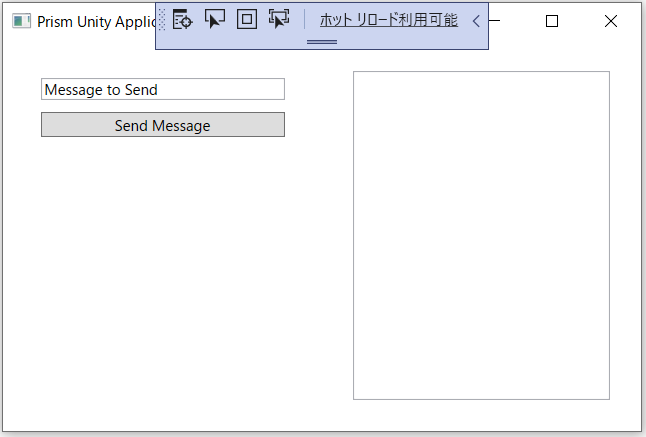
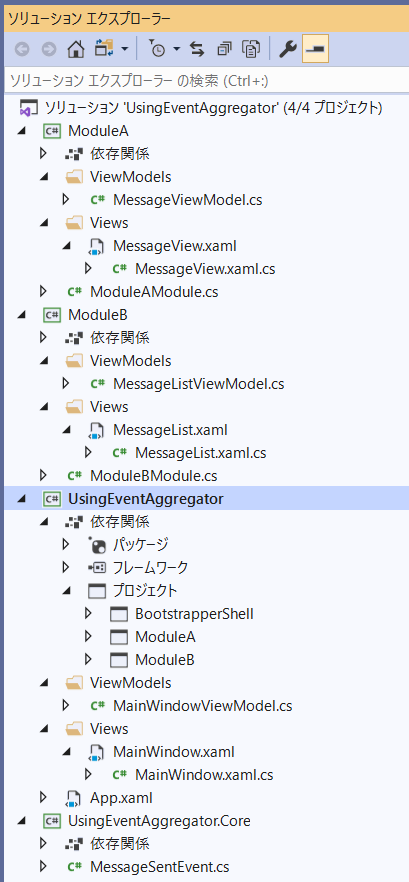
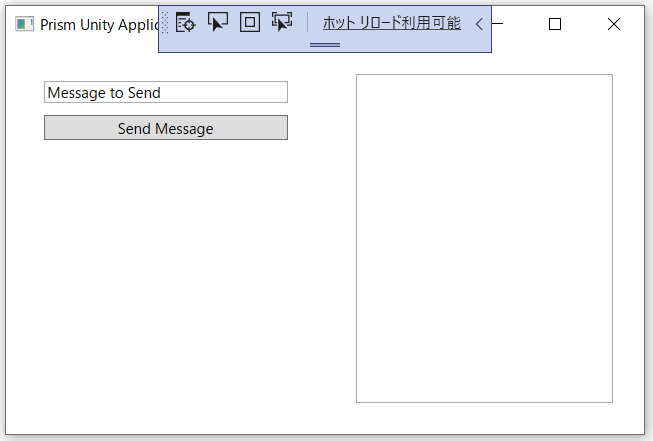
14-UsingEventAggregator
IEventAggregatorの使用
Topic : Event Aggregator
Description : Using the IEventAggregator
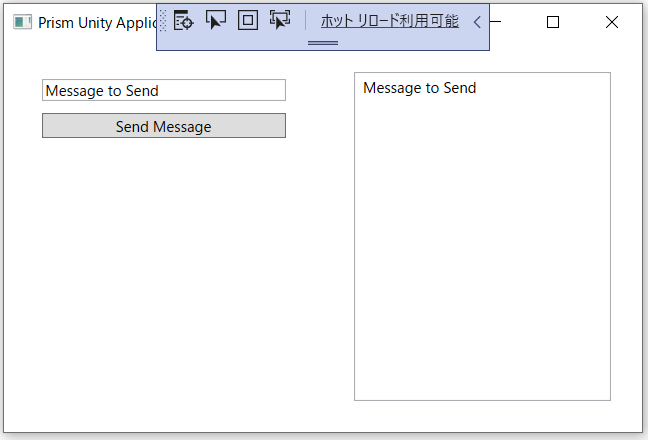
[Send Message]ボタンをクリックすると
15-FilteringEvents
イベントをサブスクライブするときのイベントのフィルタリング
Topic : Event Aggregator - Filter Events
Description : Filtering events when subscribing to events
[Send Message]ボタンをクリックしても変化は認められない
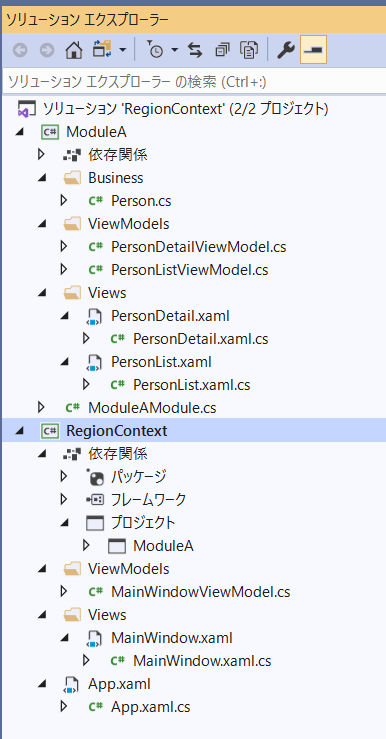
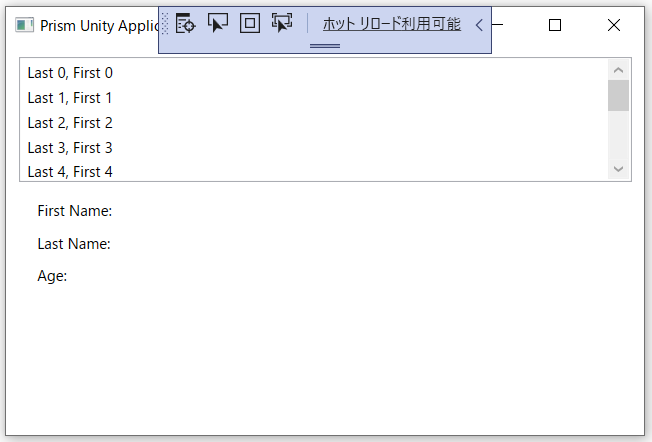
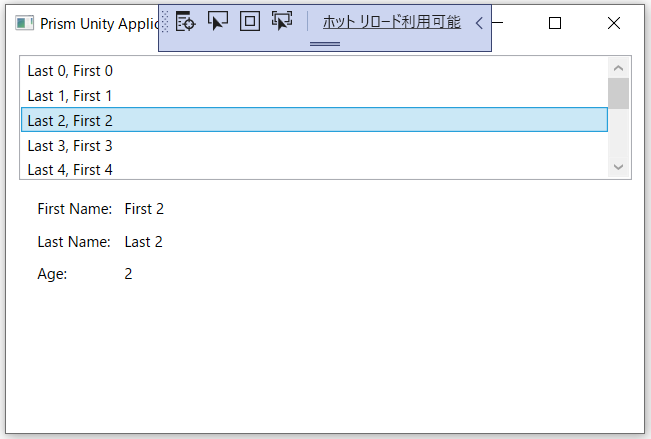
16-RegionContext
RegionContextを使用してネストされた領域にデータを渡す
Topic : RegionContext
Description : Pass data to nested regions using the RegionContext
ListBox の行を選択すると
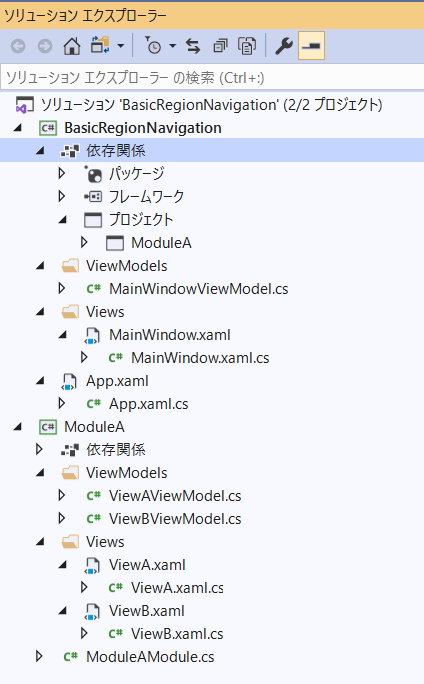
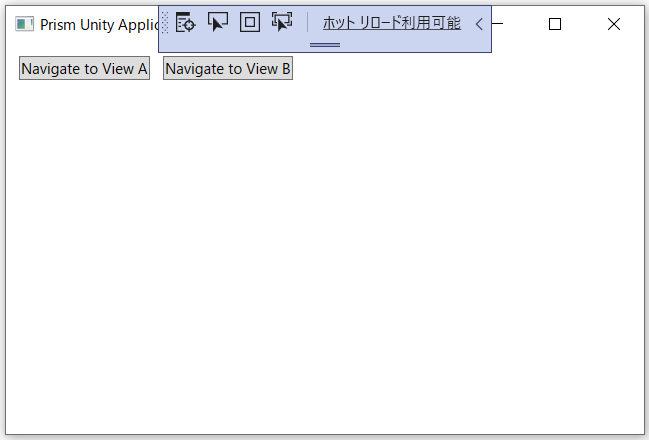
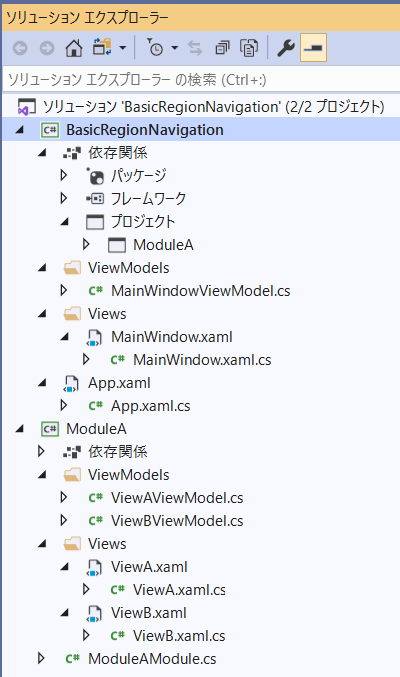
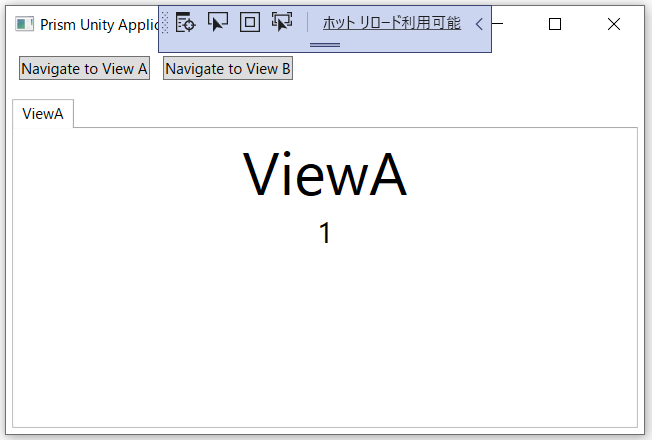
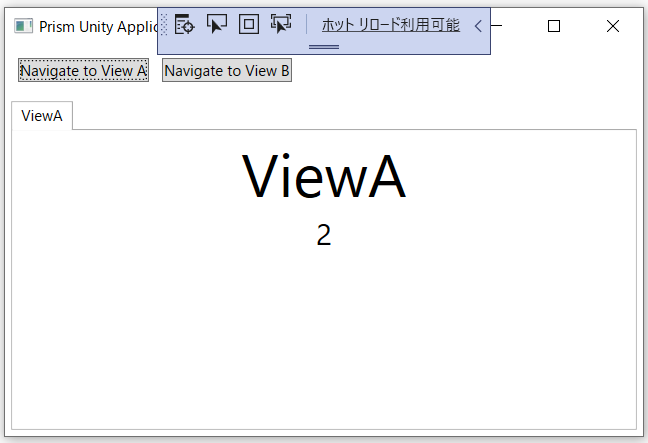
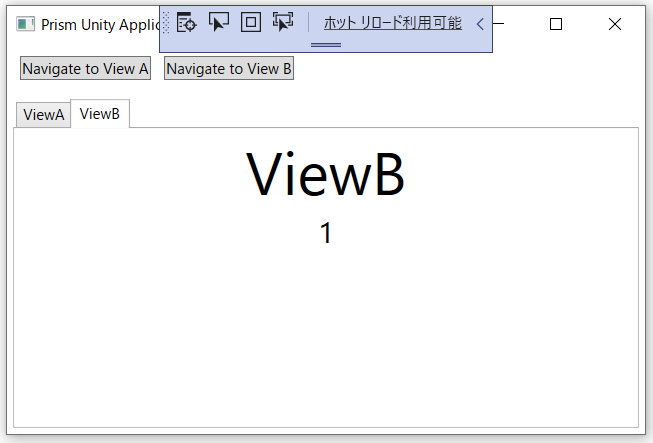
17-BasicRegionNavigation
基本的なリージョンナビゲーションの実装方法を見る
Topic : Region Navigation
Description : See how to implement basic region navigation
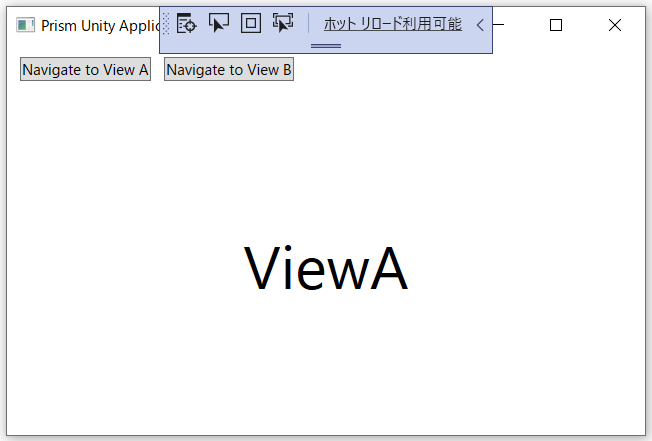
[Navigate to View A]ボタンをクリックすると
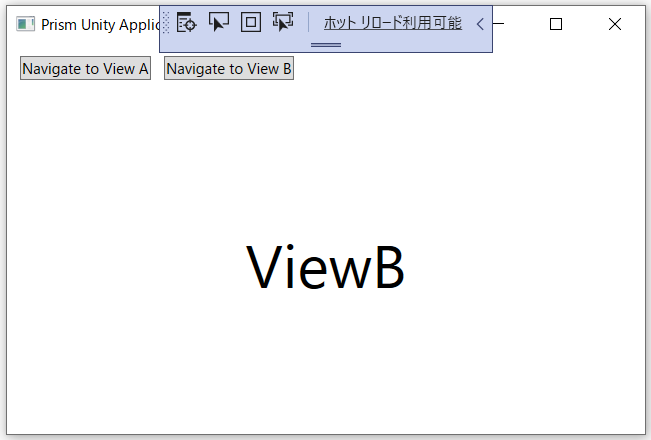
[Navigate to View B]ボタンをクリックすると
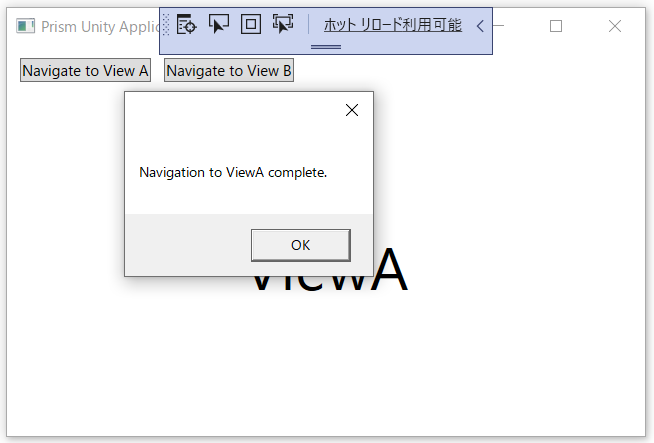
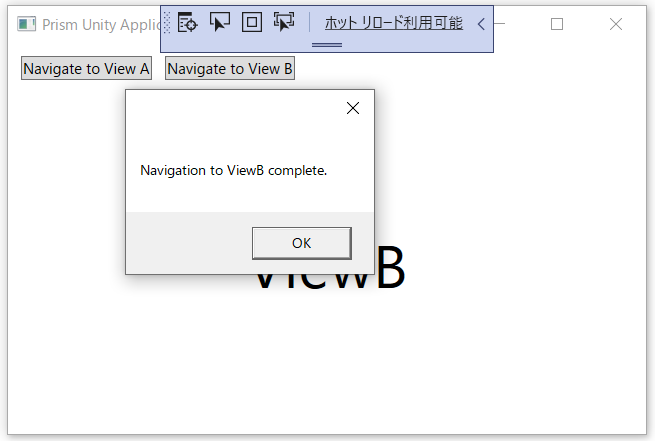
18-NavigationCallback
ナビゲーションが完了したときに通知を受け取る
Topic : Navigation Callback
Description : Get notifications when navigation has completed
[Navigate to View A]ボタンをクリックすると
[Navigate to View B]ボタンをクリックすると
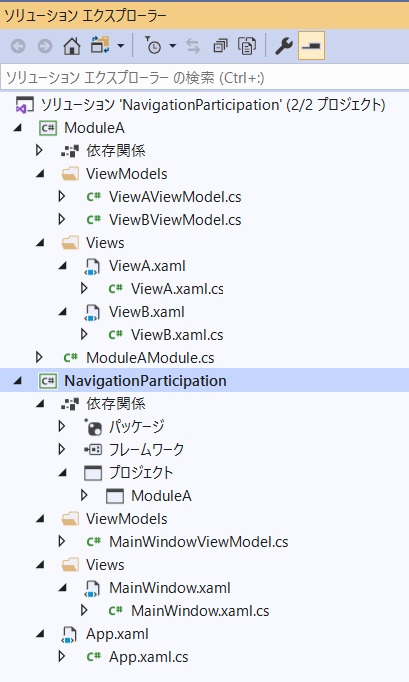
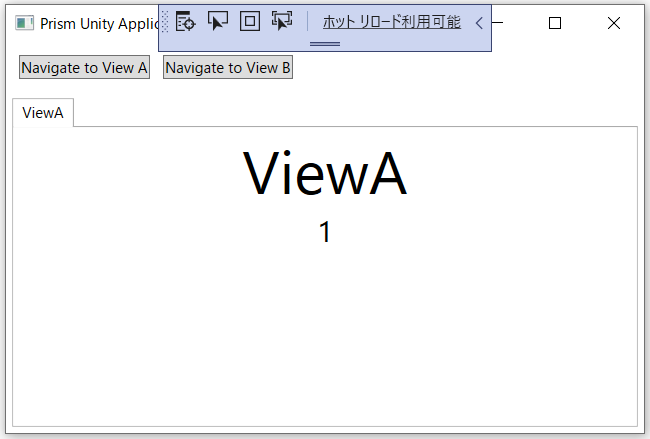
19-NavigationParticipation
INavigationAwareによるViewおよびViewModelナビゲーションへの参加について学ぶ
Topic : Navigation Participation
Description : Learn about View and ViewModel navigation participation with INavigationAware
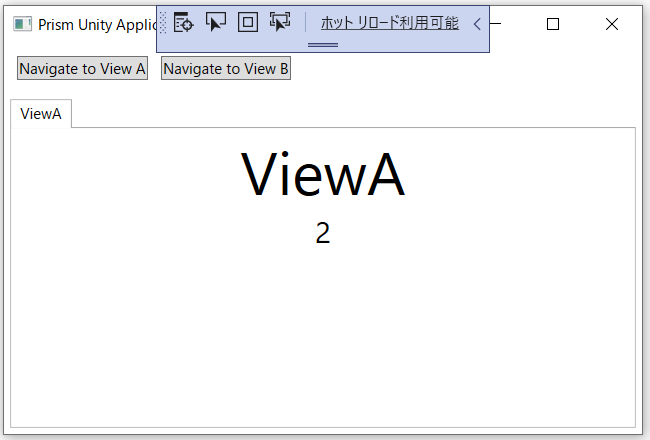
[Navigate to View A]ボタンをクリックすると
もう一度[Navigate to View A]ボタンをクリックすると
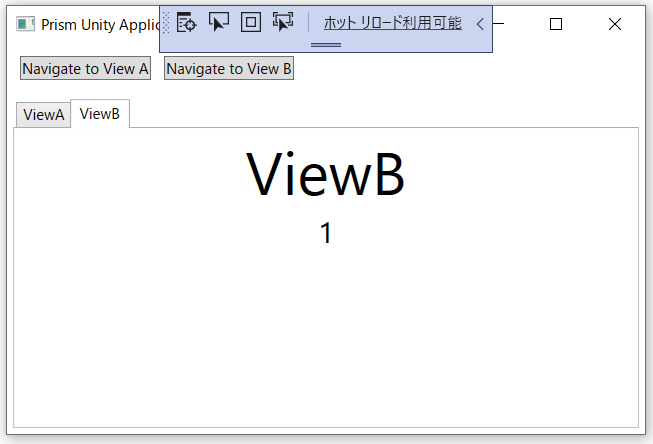
[Navigate to View B]ボタンをクリックすると
20-NavigateToExistingViews
ナビゲーション中にビューインスタンスを制御する
Topic : Navigate to existing Views
Description : Control view instances during navigation
[Navigate to View A]ボタンをクリックすると
もう一度[Navigate to View A]ボタンをクリックすると
[Navigate to View B]ボタンをクリックすると
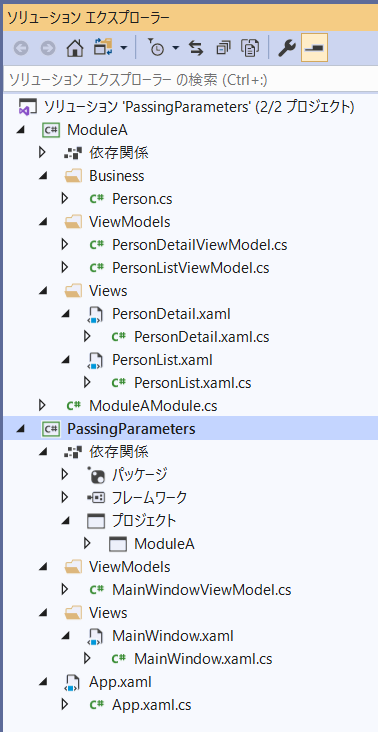
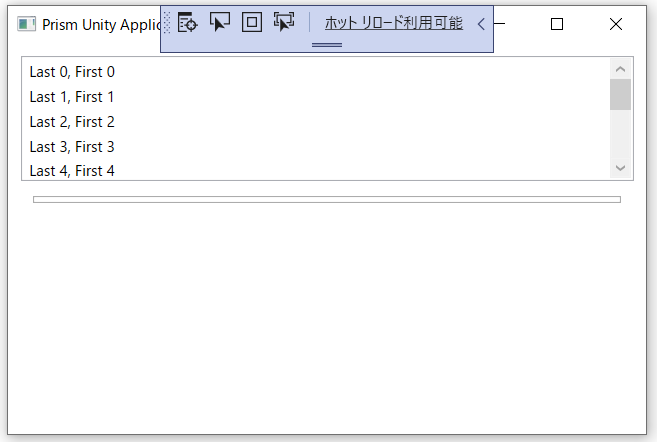
21-PassingParameters
View / ViewModelから別のView / ViewModelにパラメーターを渡す
Topic : Passing Parameters
Description : Pass parameters from View/ViewModel to another View/ViewModel
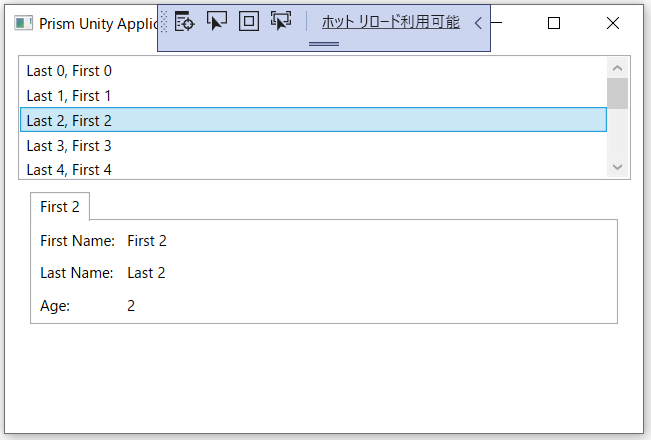
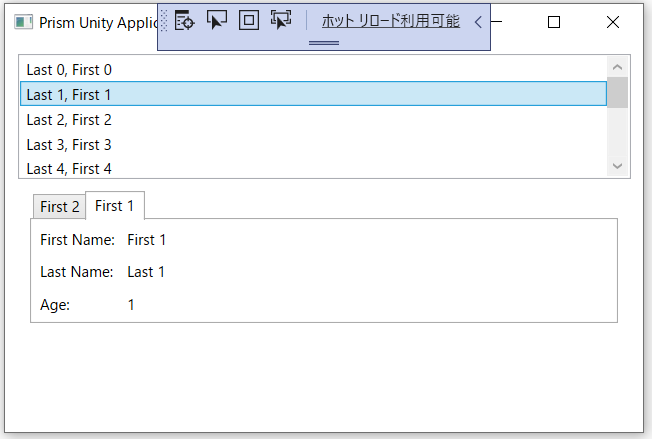
ListBox の行を選択すると
ListBox の別の行を選択すると
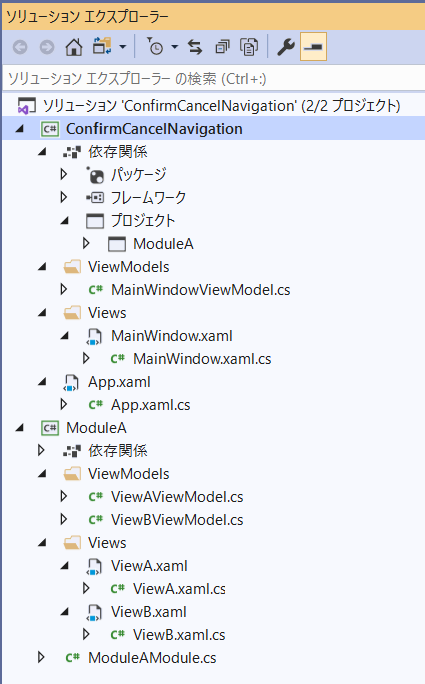
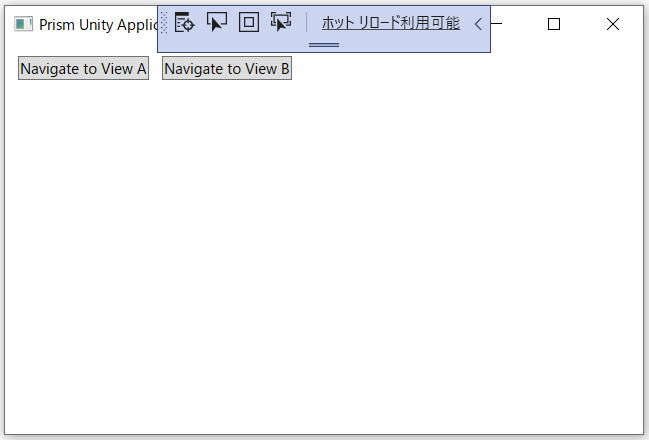
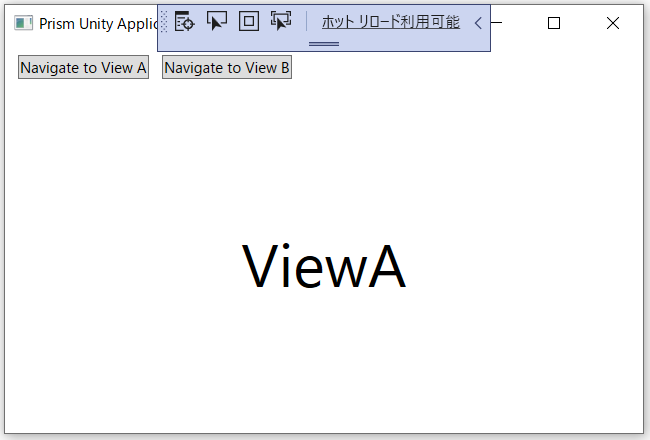
22-ConfirmCancelNavigation
インターフェイスを使用してナビゲーションを確認またはキャンセルする
Topic : Confirm/cancel Navigation
Description : Use the IConfirmNavigationReqest interface to confirm or cancel navigation
[Navigate to View A]ボタンをクリックすると
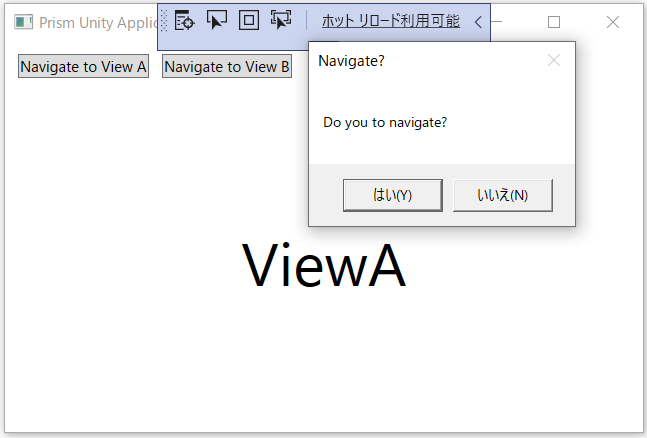
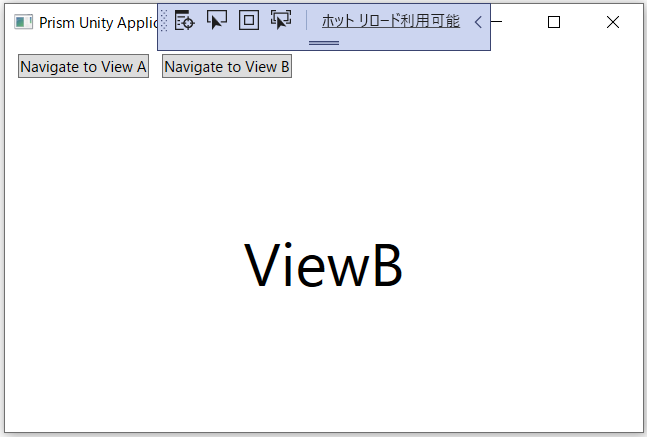
[Navigate to View B]ボタンをクリックすると
[はい]をクリックすると
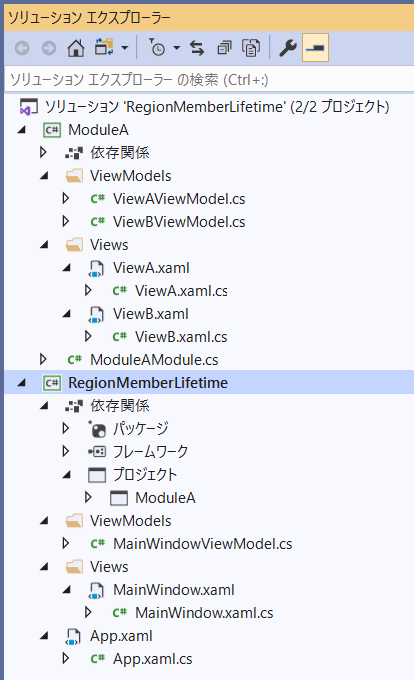
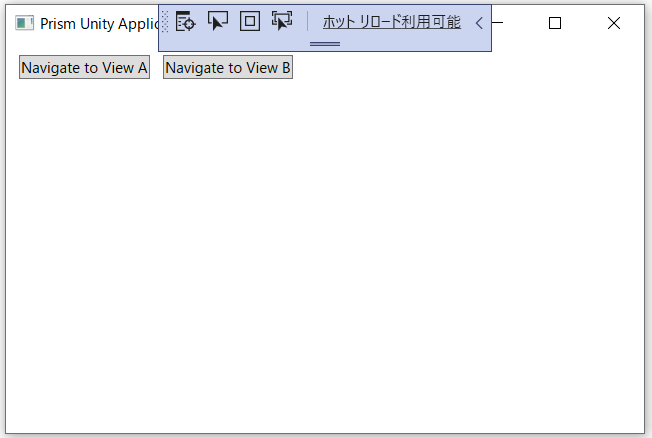
23-RegionMemberLifetime
IRegionMemberLifetimeでメモリからビューを自動的に削除する
Topic : Controlling View lifetime
Description : Automatically remove views from memory with IRegionMemberLifetime
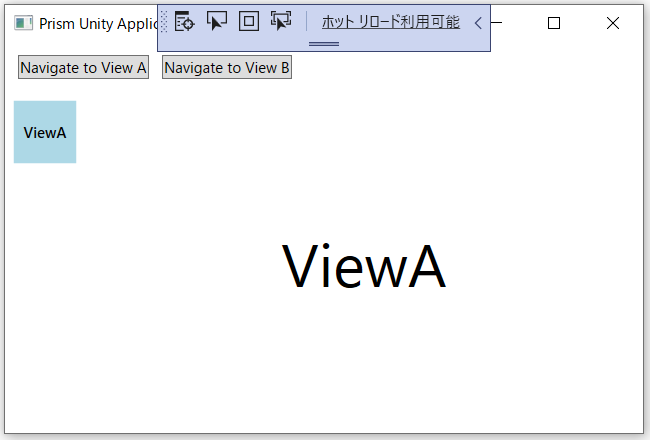
[Navigate to View A]ボタンをクリックすると
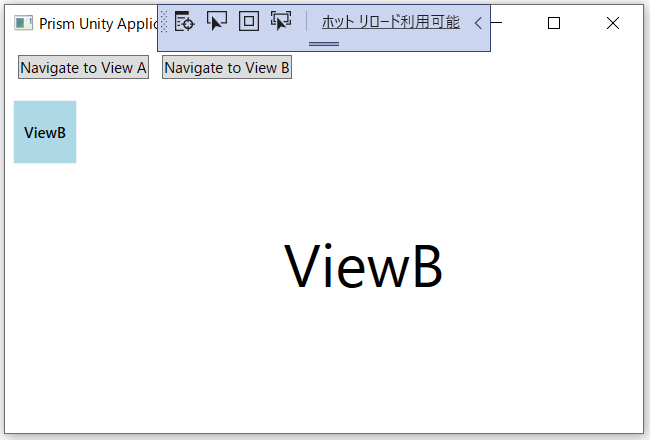
[Navigate to View B]ボタンをクリックすると
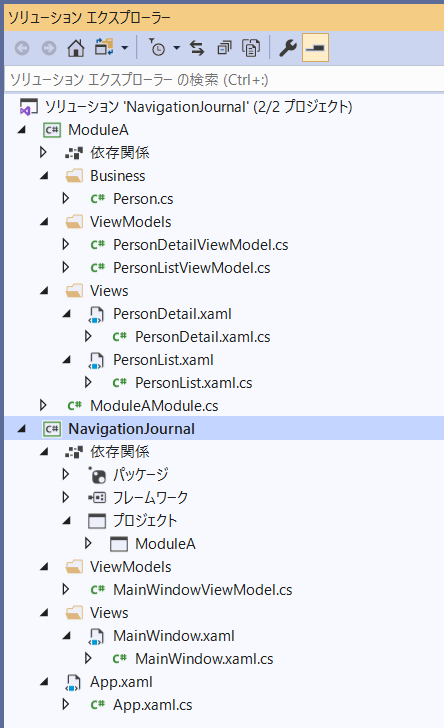
24-NavigationJournal
ナビゲーションジャーナルの使用方法を学ぶ
Topic : Navigation Journal
Description : Learn how to use the Navigation Journal
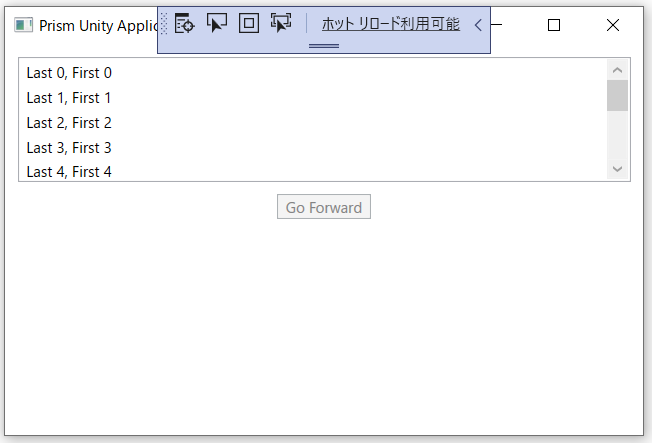
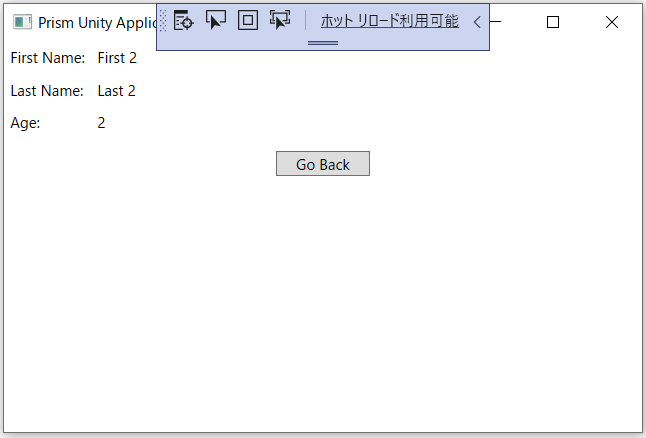
ListBox の行を選択すると
[Go Back]ボタンをクリックすると
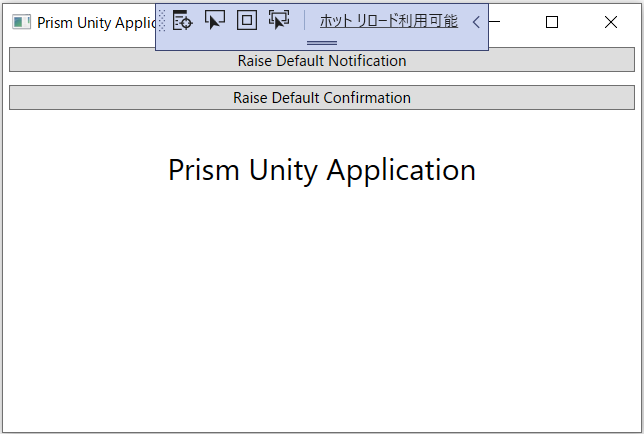
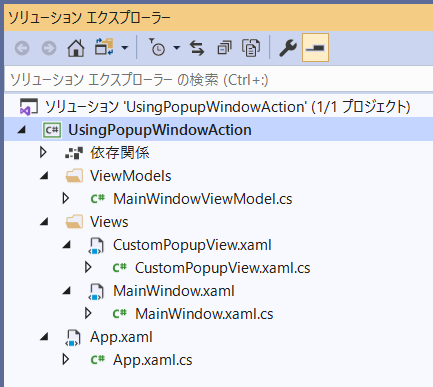
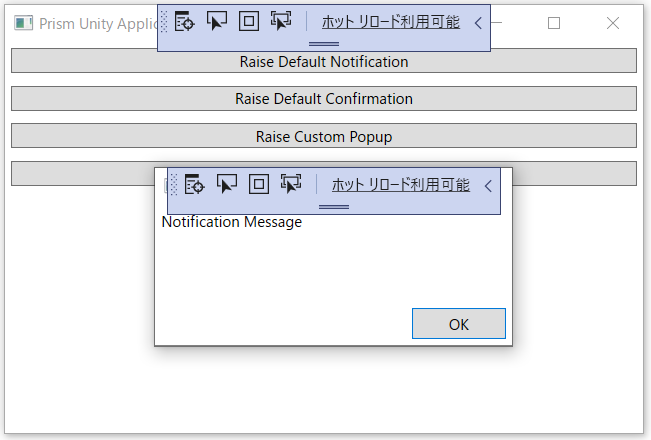
25-NotificationRequest
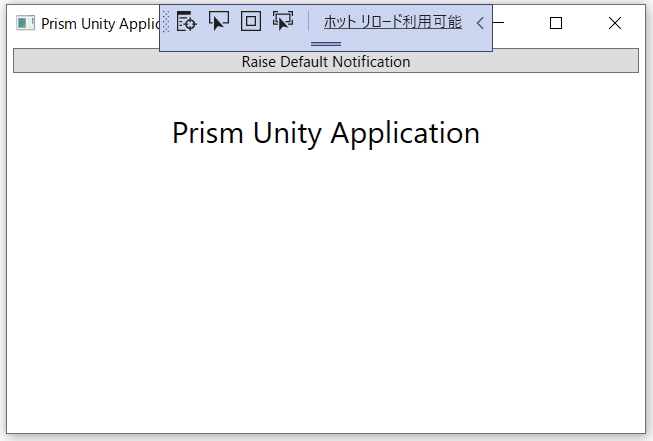
InteractionRequestを使用してポップアップを表示する方法を学ぶ
Topic : Interactivity - NotificationRequest
Description : Learn how to show popups using an InteractionRequest
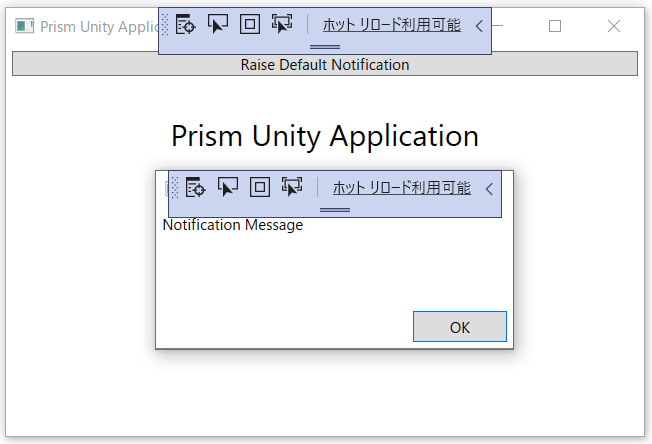
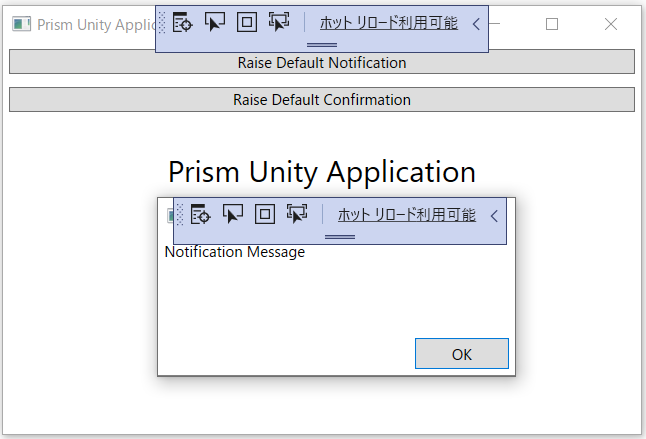
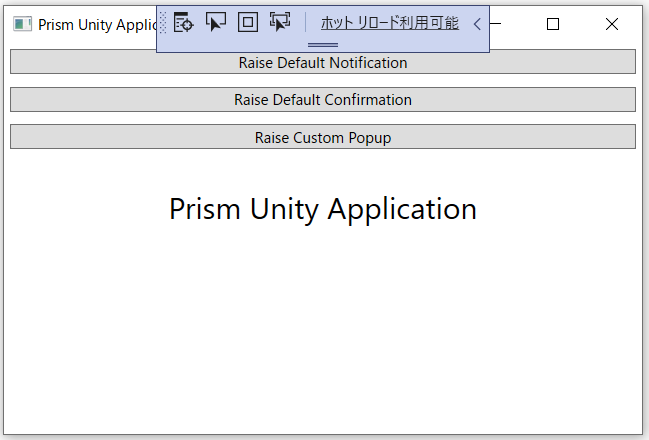
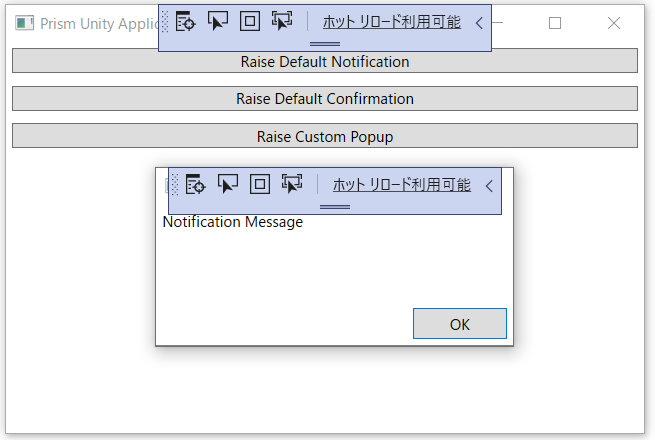
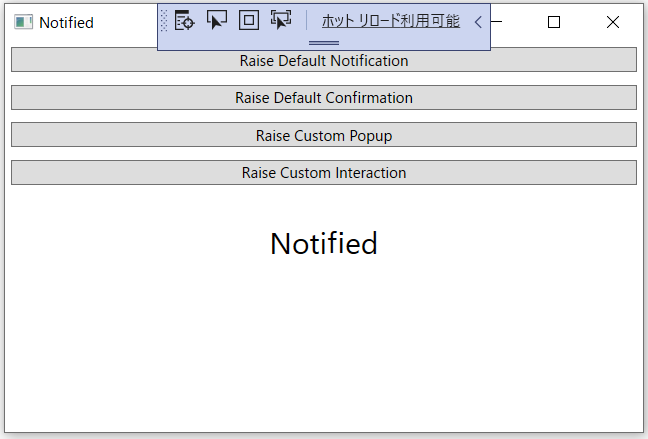
[Raise Default Notification]ボタンをクリックすると
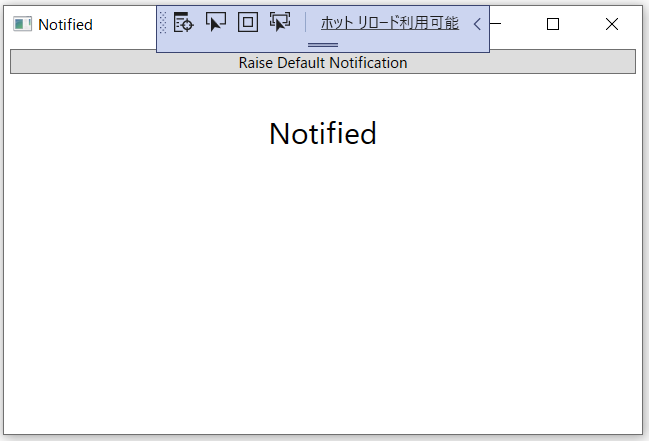
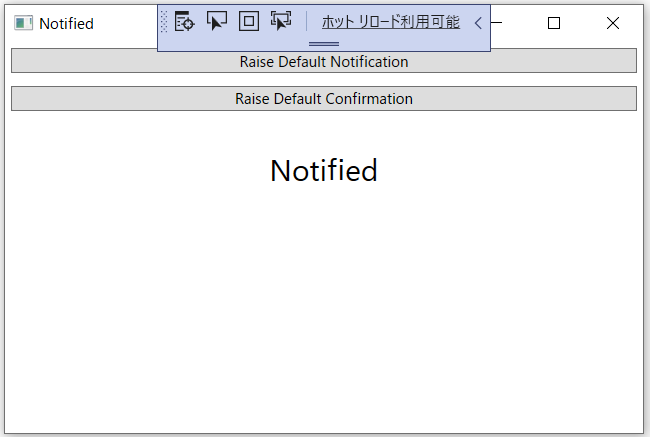
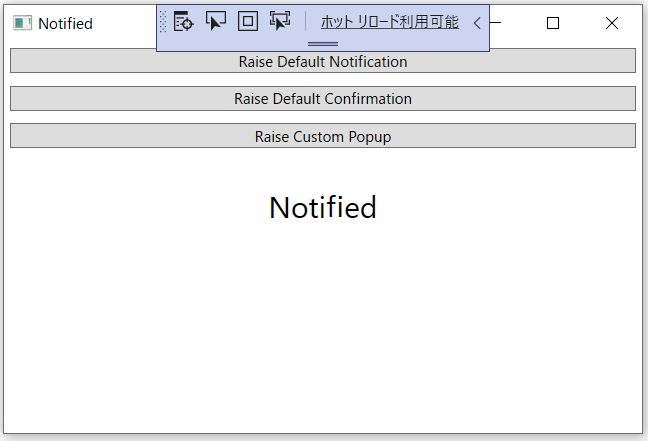
[OK]をクリックすると
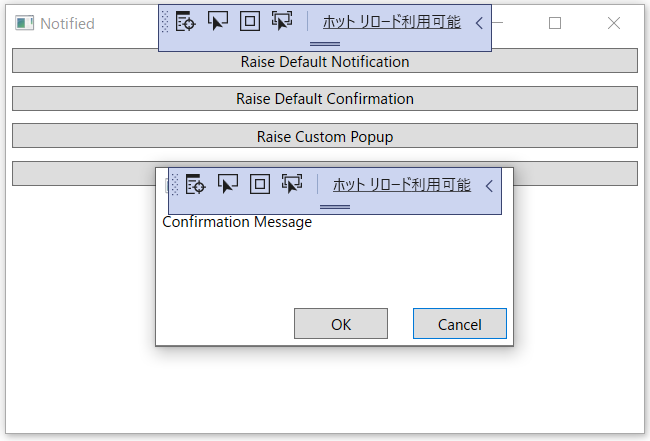
26-ConfirmationRequest
ConfirmationRequestを使用して確認ダイアログを表示する方法を学ぶ
Topic : Interactivity - ConfirmationRequest
Description : Learn how to prompt a confirmation dialog using a ConfirmationRequest
[Raise Default Notification]ボタンをクリックすると
[OK]をクリックすると
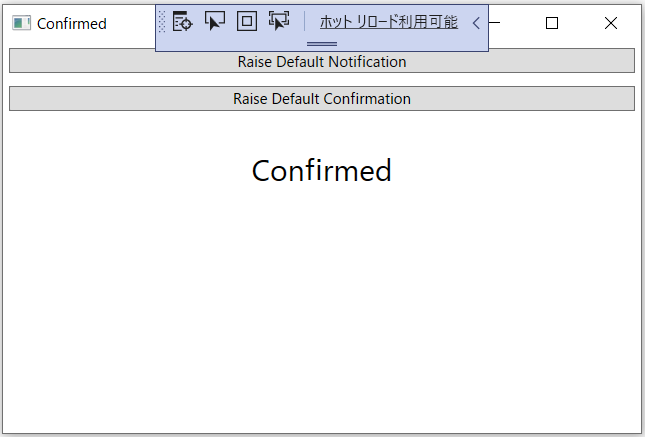
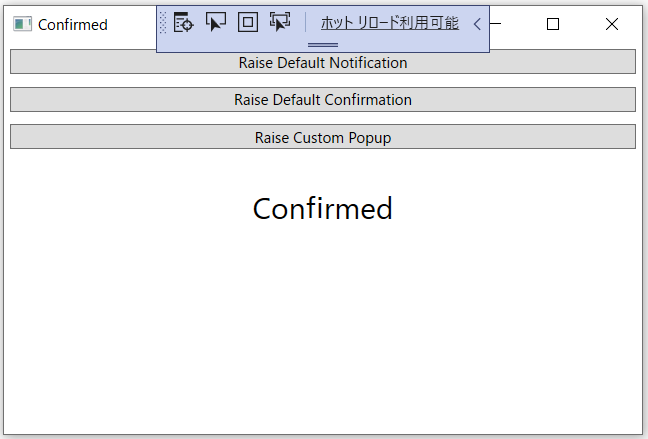
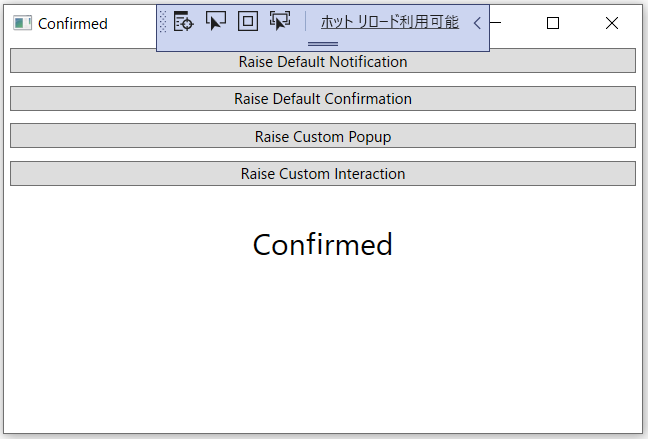
[Raise Default Confirmation]ボタンをクリックすると
[OK]をクリックすると
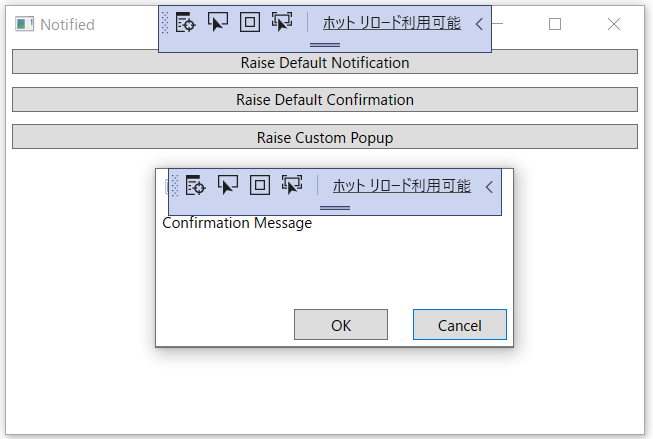
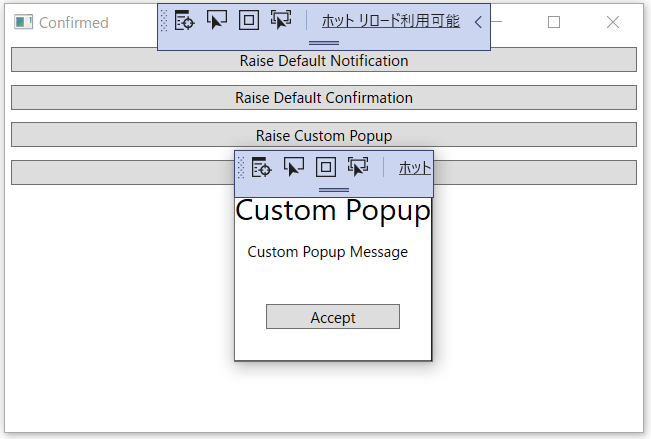
27-CustomContent
InteractionRequestで表示されるダイアログに独自のコンテンツを使用する方法を学ぶ
Topic : Interactivity - Custom Content
Description : Learn how to use your own content for a dialog shown with InteractionRequest
[Raise Default Notification]ボタンをクリックすると
[OK]をクリックすると
[Raise Default Confirmation]ボタンをクリックすると
[OK]をクリックすると
[Raise Custom Popup]ボタンをクリックすると
[Accept]をクリックすると
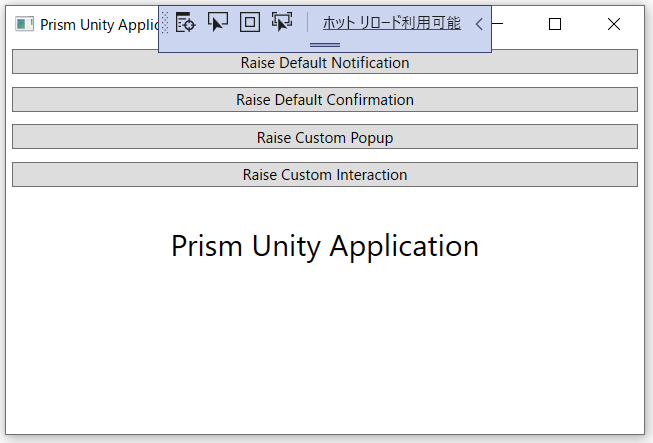
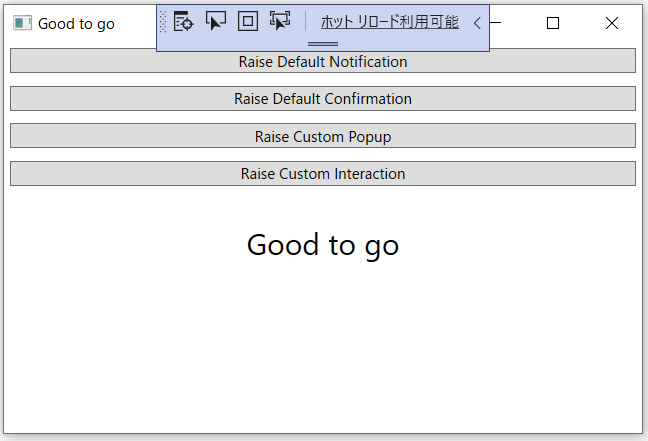
28-CustomRequest
InteractionRequestで使用する独自のカスタムリクエストを作成する
Topic : Interactivity - Custom Request
Description : Create your own custom request to use with an InteractionRequest
[Raise Default Notification]ボタンをクリックすると
[OK]をクリックすると
[Raise Default Confirmation]ボタンをクリックすると
[OK]をクリックすると
[Raise Custom Popup]ボタンをクリックすると
[Accept]をクリックすると
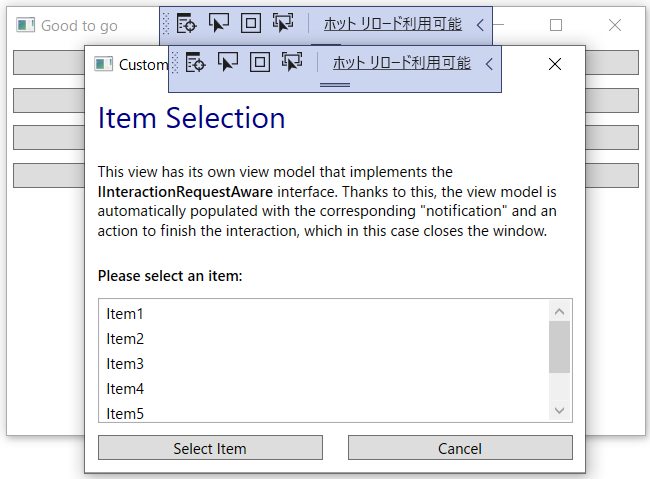
[Raise Custom Interaction]ボタンをクリックすると
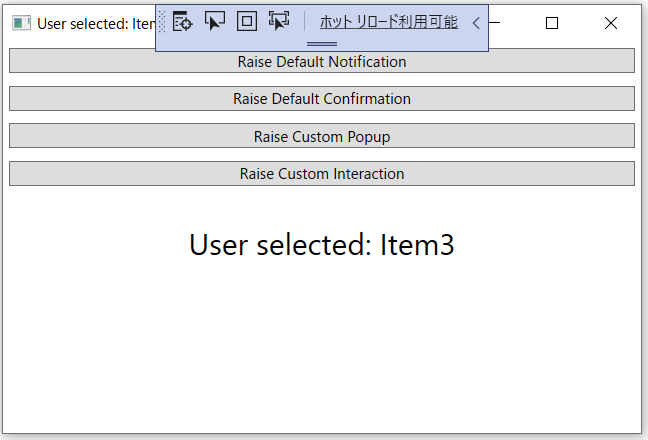
ListBox から Item を選択して [Select Item]ボタンをクリックすると
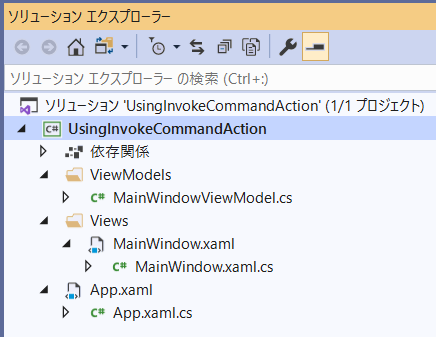
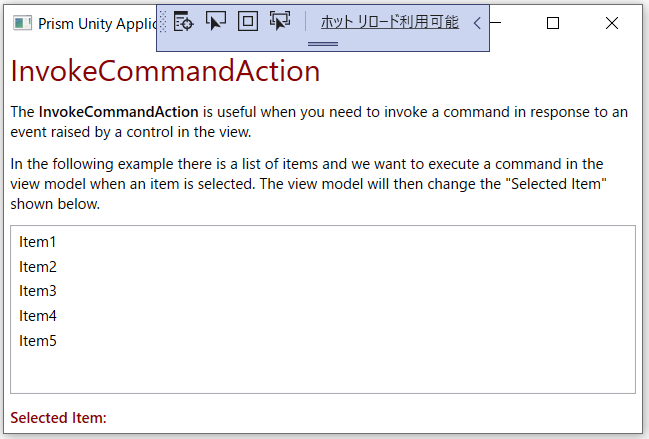
29-InvokeCommandAction
任意のイベントに応答してコマンドを呼び出す
Topic : Interactivity - InvokeCommandAction
Description : Invoke commands in response to any event
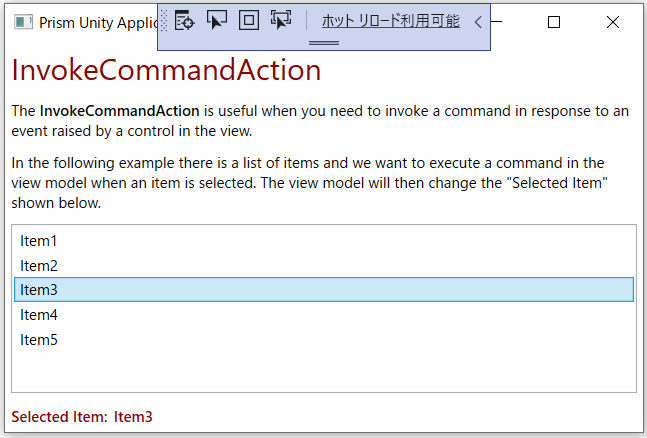
ListBoxから行を選択すると


- 投稿日:2020-08-12T18:58:28+09:00
Prism WPF の View Composition を学ぶ
PRISM LIBRARY の Documentation から WPF の View Composition の箇所を学んでみます。
そのまんまの翻訳ですが、メモとして。
日本語がへんなところは英語に戻ってそれなりに理解。。。Prism Library for WPFを使用したユーザーインターフェイスの作成
Composing the User Interface Using the Prism Library for WPFPrism Library for WPFを使用したユーザーインターフェイスの作成
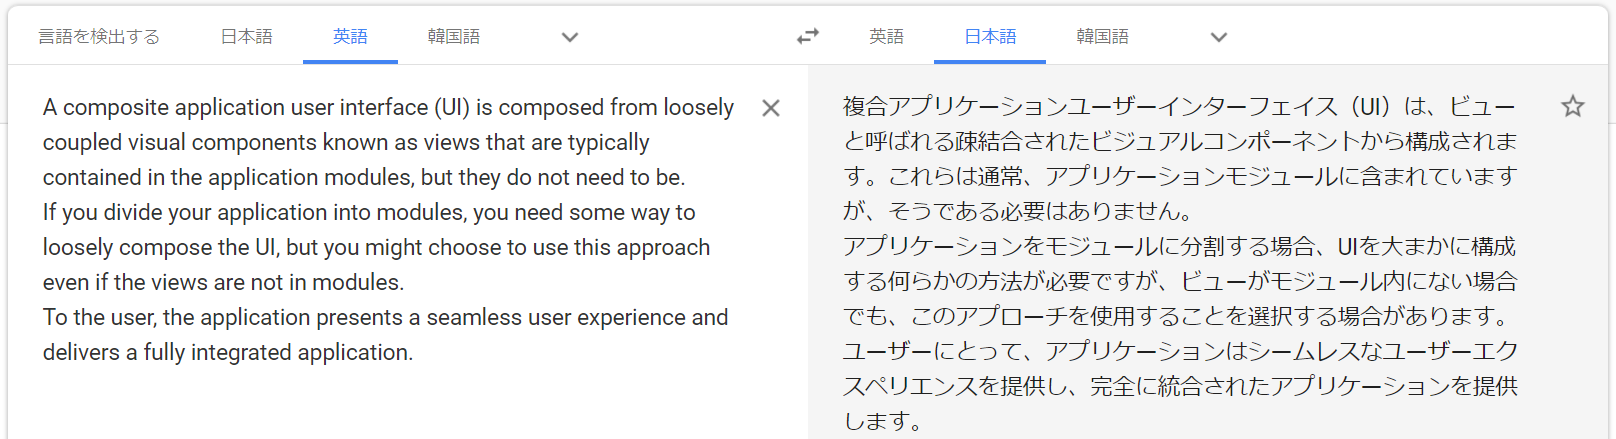
A composite application user interface (UI) is composed from loosely coupled visual components known as views that are typically contained in the application modules, but they do not need to be.
If you divide your application into modules, you need some way to loosely compose the UI, but you might choose to use this approach even if the views are not in modules.
To the user, the application presents a seamless user experience and delivers a fully integrated application.
複合アプリケーションユーザーインターフェイス(UI)は、ビューと呼ばれる疎結合されたビジュアルコンポーネントから構成されます。
これらは通常、アプリケーションモジュールに含まれていますが、そうである必要はありません。
アプリケーションをモジュールに分割する場合、UIを大まかに構成する何らかの方法が必要ですが、ビューがモジュール内にない場合でも、このアプローチを使用することを選択する場合があります。
ユーザーにとって、アプリケーションはシームレスなユーザーエクスペリエンスを提供し、完全に統合されたアプリケーションを提供します。
To compose your UI, you need an architecture that allows you to create a layout composed of loosely coupled visual elements generated at run time.
Additionally, the architecture should provide strategies for these visual elements to communicate in a loosely coupled fashion.
UIを構成するには、実行時に生成される疎結合された視覚要素で構成されるレイアウトを作成できるアーキテクチャが必要です。
さらに、アーキテクチャは、これらの視覚要素が疎結合の方法で通信するための戦略を提供する必要があります。
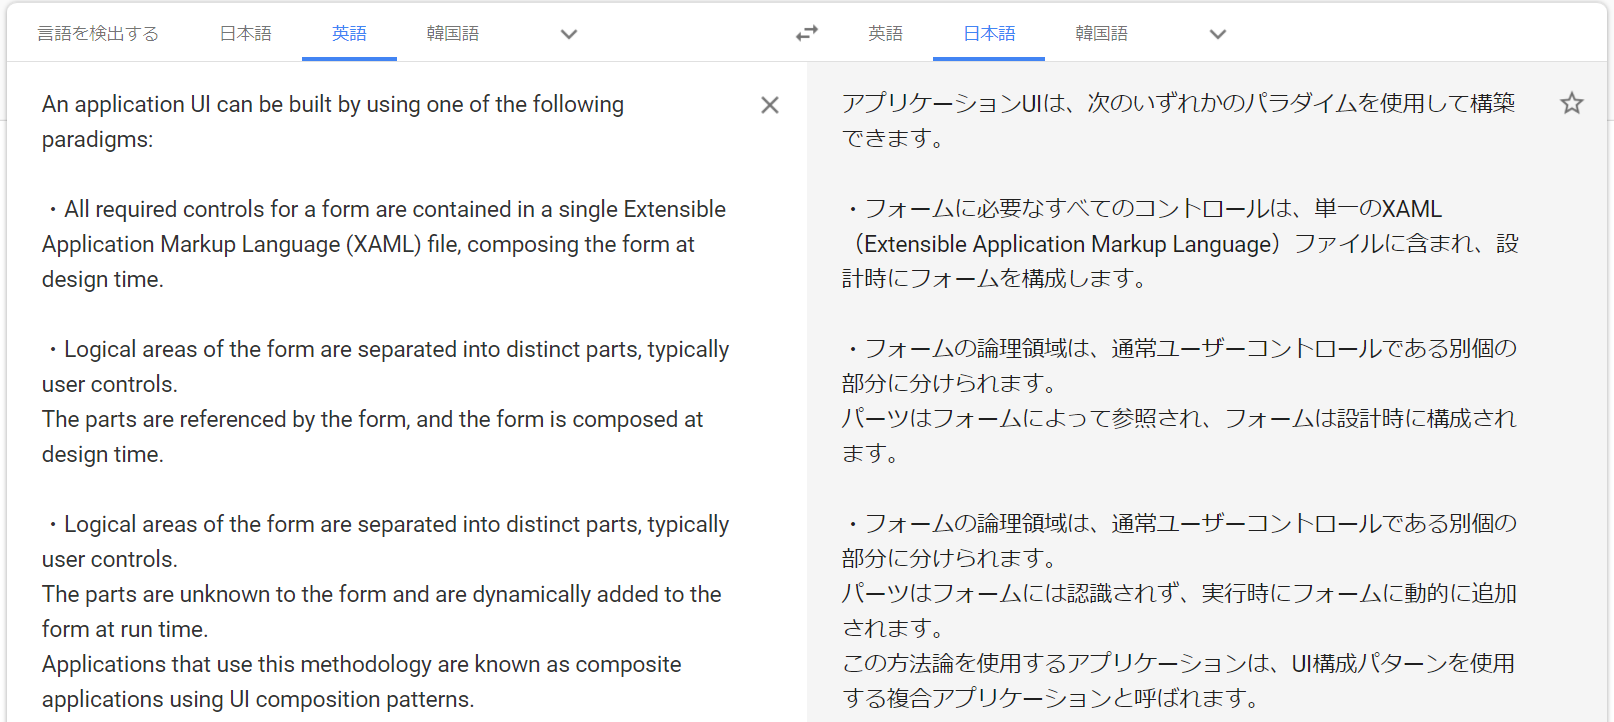
An application UI can be built by using one of the following paradigms:

・All required controls for a form are contained in a single Extensible Application Markup Language (XAML) file, composing the form at design time.

・Logical areas of the form are separated into distinct parts, typically user controls.
The parts are referenced by the form, and the form is composed at design time.

・Logical areas of the form are separated into distinct parts, typically user controls.
The parts are unknown to the form and are dynamically added to the form at run time.
Applications that use this methodology are known as composite applications using UI composition patterns.
アプリケーションUIは、次のいずれかのパラダイムを使用して構築できます。
・フォームに必要なすべてのコントロールは、単一のXAML(Extensible Application Markup Language)ファイルに含まれ、設計時にフォームを構成します。
・フォームの論理領域は、通常ユーザーコントロールである別個の部分に分けられます。
パーツはフォームによって参照され、フォームは設計時に構成されます。・フォームの論理領域は、通常ユーザーコントロールである別個の部分に分けられます。
パーツはフォームには認識されず、実行時にフォームに動的に追加されます。
この方法論を使用するアプリケーションは、UI構成パターンを使用する複合アプリケーションと呼ばれます。
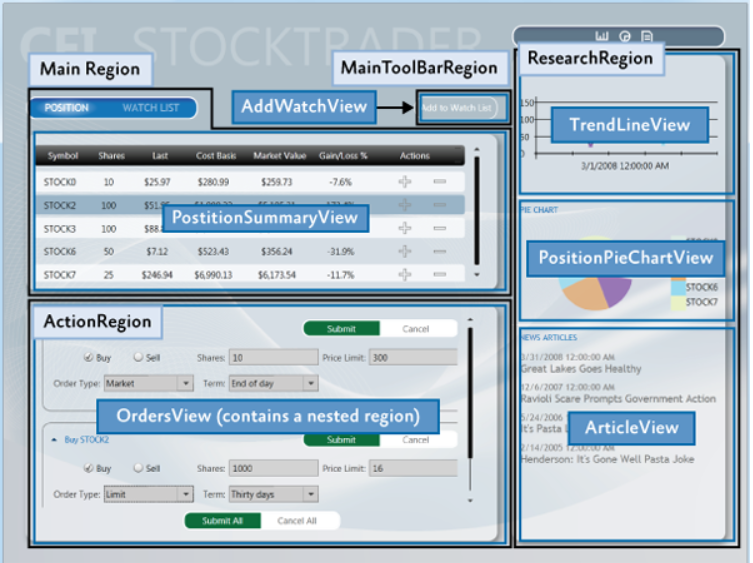
Below is a picture of an app.
It is composed by loading multiple views that come from different modules into regions exposed by the shell, as shown in the following illustration.
以下はアプリの写真です。
次の図に示すように、異なるモジュールからの複数のビューをシェルによって公開された領域にロードすることによって構成されます。
UI Layout Concepts
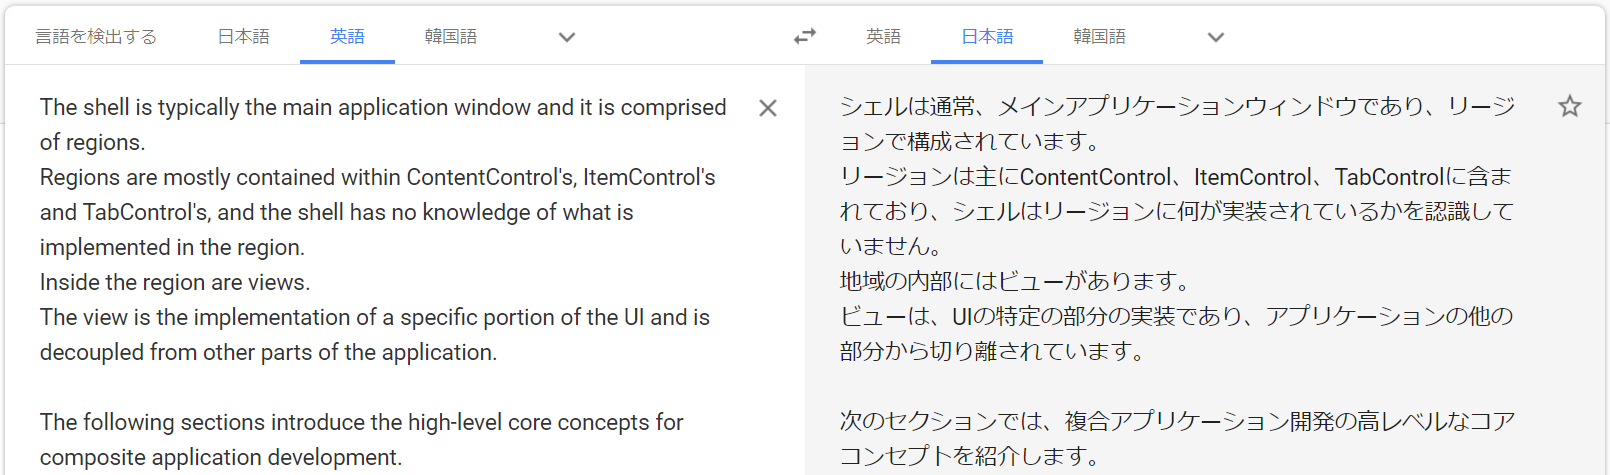
The shell is typically the main application window and it is comprised of regions.
Regions are mostly contained within ContentControl's, ItemControl's and TabControl's, and the shell has no knowledge of what is implemented in the region.
Inside the region are views.
The view is the implementation of a specific portion of the UI and is decoupled from other parts of the application.

The following sections introduce the high-level core concepts for composite application development.
シェルは通常、メインアプリケーションウィンドウであり、リージョンで構成されています。
リージョンは主にContentControl、ItemControl、TabControlに含まれており、シェルはリージョンに何が実装されているかを認識していません。
地域の内部にはビューがあります。
ビューは、UIの特定の部分の実装であり、アプリケーションの他の部分から切り離されています。次のセクションでは、複合アプリケーション開発の高レベルなコアコンセプトを紹介します。
Shell
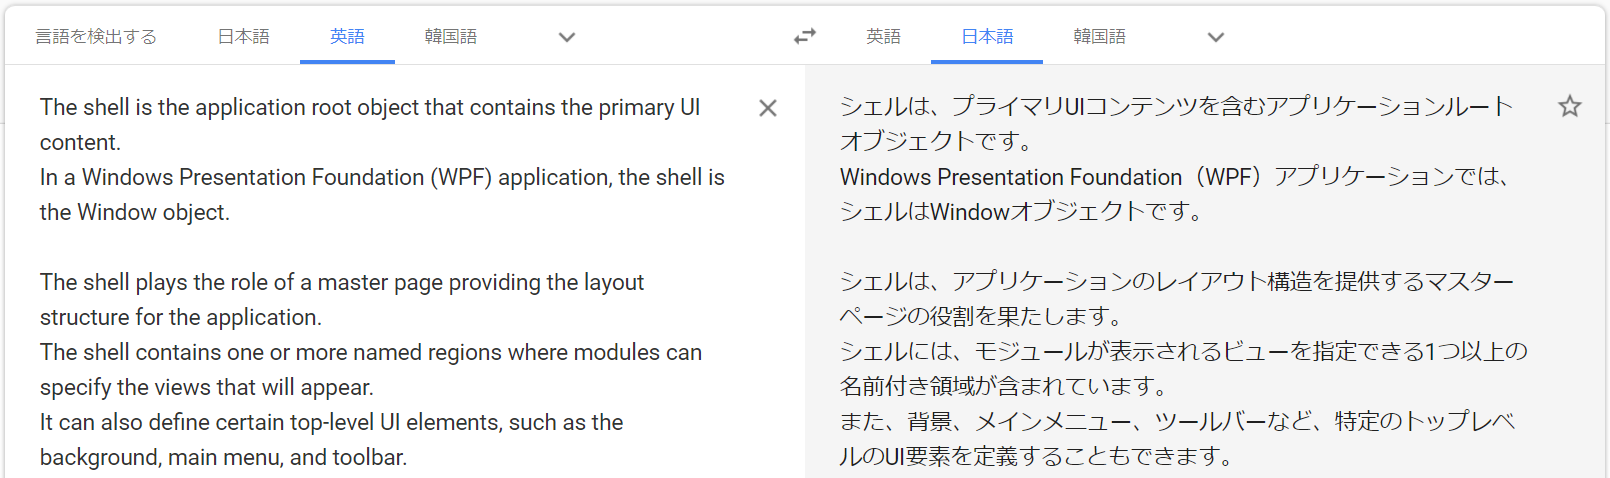
The shell is the application root object that contains the primary UI content.
In a Windows Presentation Foundation (WPF) application, the shell is the Window object.

The shell plays the role of a master page providing the layout structure for the application.
The shell contains one or more named regions where modules can specify the views that will appear.
It can also define certain top-level UI elements, such as the background, main menu, and toolbar.
シェルは、プライマリUIコンテンツを含むアプリケーションルートオブジェクトです。
Windows Presentation Foundation(WPF)アプリケーションでは、シェルはWindowオブジェクトです。シェルは、アプリケーションのレイアウト構造を提供するマスターページの役割を果たします。
シェルには、モジュールが表示されるビューを指定できる1つ以上の名前付き領域が含まれています。
また、背景、メインメニュー、ツールバーなど、特定のトップレベルのUI要素を定義することもできます。
The shell defines the overall appearance of the application.
It might define styles and borders that are present and visible in the shell layout itself, and it might also define styles, templates, and themes that will be applied to the views that are plugged into the shell.

Typically, the shell is a part of the WPF application project.
The assembly that contains the shell might or might not reference the assemblies that contain the views to be loaded in the shell's regions.
シェルは、アプリケーションの全体的な外観を定義します。
シェルレイアウト自体に存在し、表示されるスタイルと境界線を定義し、シェルにプラグインされているビューに適用されるスタイル、テンプレート、テーマを定義することもできます。通常、シェルはWPFアプリケーションプロジェクトの一部です。
シェルを含むアセンブリは、シェルの領域にロードされるビューを含むアセンブリを参照する場合としない場合があります。Views
Views are the main unit of UI construction within a composite application.
You can define a view as a user control, page, data template, or custom control.
A view encapsulates a portion of your UI that you would like to keep as decoupled as possible from other parts of the application.
You can choose what goes in a view based on encapsulation or a piece of functionality, or you can choose to define something as a view because you will have multiple instances of that view in your application.

Because of the content model of WPF, there is nothing specific to the Prism Library required to define a view.
The easiest way to define a view is to define a user control.
To add a view to the UI, you simply need a way to construct it and add it to a container.
WPF provides mechanisms to do this. The Prism Library adds the ability to define a region into which a view can be dynamically added at run time.
ビューは、複合アプリケーション内のUI構築の主要な単位です。
ビューは、ユーザーコントロール、ページ、データテンプレート、またはカスタムコントロールとして定義できます。
ビューは、アプリケーションの他の部分から可能な限り分離したままにしたいUIの一部をカプセル化します。
カプセル化または機能の一部に基づいてビューの内容を選択するか、アプリケーションにそのビューの複数のインスタンスがあるため、ビューとして何かを定義することを選択できます。WPFのコンテンツモデルのため、ビューの定義に必要なプリズムライブラリに固有のものはありません。
ビューを定義する最も簡単な方法は、ユーザーコントロールを定義することです。
ビューをUIに追加するには、ビューを作成してコンテナに追加する方法が必要です。
WPFはこれを行うためのメカニズムを提供します。 Prism Libraryは、実行時にビューを動的に追加できる領域を定義する機能を追加します。Composite Views
A view that supports specific functionality can become complicated.
In that case, you might want to divide the view into several child views and have the parent view handle constructing itself by using the child views as parts.
The application might do this statically at design time, or it might support having modules add child views through a contained region at run time.
When you have a view that is not fully defined in a single view class, you can refer to that as a composite view.
In many situations, a composite view is responsible for constructing the child views and for coordinating the interactions between them.
You can design child views that are more loosely coupled from their sibling views and their parent composite view by using the Prism Library commands and the event aggregator.
特定の機能をサポートするビューは複雑になる可能性があります。
その場合、ビューをいくつかの子ビューに分割し、子ビューをパーツとして使用して親ビューハンドル自体を構築することができます。
アプリケーションはこれを設計時に静的に実行するか、実行時に含まれる領域を介してモジュールに子ビューを追加させることをサポートする場合があります。
単一のビュークラスで完全に定義されていないビューがある場合、そのビューを複合ビューとして参照できます。
多くの状況で、複合ビューは子ビューの作成と子ビュー間の相互作用の調整を担当します。
Prism Libraryコマンドとイベントアグリゲーターを使用して、兄弟ビューとその親複合ビューからより疎結合な子ビューを設計できます。Regions
Regions are enabled in the Prism Library through a region manager, regions, and region adapters.Prism Libraryでは、リージョンマネージャー、リージョン、リージョンアダプターを介してリージョンが有効になります。
Region Manager
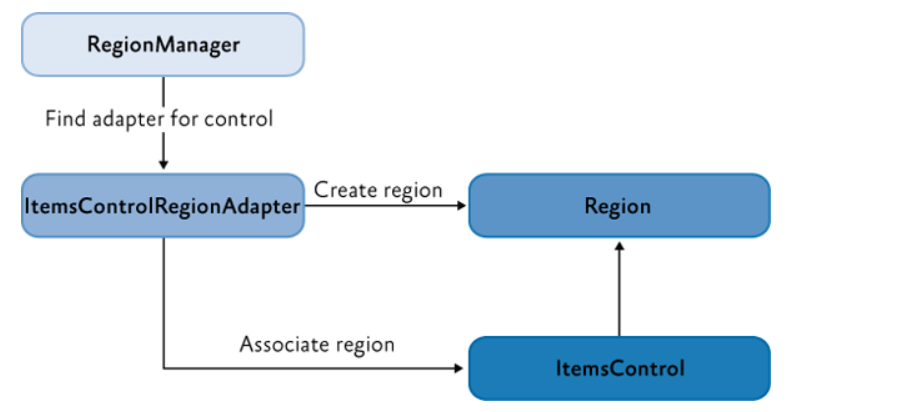
The RegionManager class is responsible for creating and maintaining a collection of regions for the host controls.
The RegionManager uses a control-specific adapter that associates a new region with the host control.
The following illustration shows the relationship between the region, control, and adapter set up by the RegionManager.
RegionManagerクラスは、ホストコントロールの領域のコレクションの作成と維持を担当します。
RegionManagerは、新しい領域をホストコントロールに関連付けるコントロール固有のアダプターを使用します。
次の図は、RegionManagerによって設定された領域、コントロール、およびアダプター間の関係を示しています。
The RegionManager can create regions in code or in XAML.
The RegionManager.RegionName attached property is used to create a region in XAML by applying the attached property to the host control.

Applications can contain one or more instances of a RegionManager.
You can specify the RegionManager instance into which you want to register the region.
This is useful if you want to move the control around in the visual tree and do not want the region to be cleared when the attached property value is removed.

The RegionManager provides a RegionContext attached property that permits its regions to share data.
RegionManagerは、コードまたはXAMLで領域を作成できます。
RegionManager.RegionName添付プロパティを使用して、添付プロパティをホストコントロールに適用することにより、XAMLで領域を作成します。アプリケーションには、RegionManagerの1つ以上のインスタンスを含めることができます。
リージョンを登録するRegionManagerインスタンスを指定できます。
これは、ビジュアルツリー内でコントロールを移動する必要があり、添付されたプロパティ値が削除されたときに領域がクリアされないようにする場合に役立ちます。RegionManagerは、リージョンがデータを共有できるようにするRegionContext添付プロパティを提供します。
Region Implementation
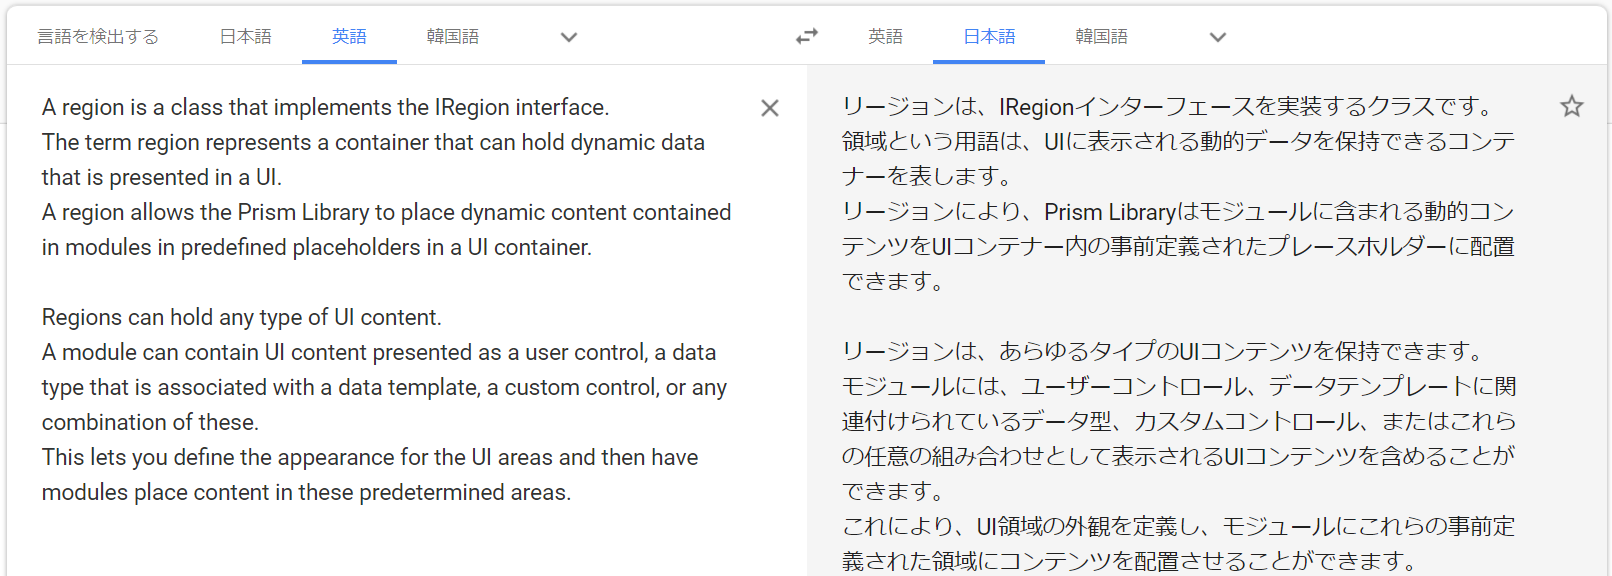
A region is a class that implements the IRegion interface.
The term region represents a container that can hold dynamic data that is presented in a UI.
A region allows the Prism Library to place dynamic content contained in modules in predefined placeholders in a UI container.

Regions can hold any type of UI content.
A module can contain UI content presented as a user control, a data type that is associated with a data template, a custom control, or any combination of these.
This lets you define the appearance for the UI areas and then have modules place content in these predetermined areas.
リージョンは、IRegionインターフェースを実装するクラスです。
領域という用語は、UIに表示される動的データを保持できるコンテナーを表します。
リージョンにより、Prism Libraryはモジュールに含まれる動的コンテンツをUIコンテナー内の事前定義されたプレースホルダーに配置できます。リージョンは、あらゆるタイプのUIコンテンツを保持できます。
モジュールには、ユーザーコントロール、データテンプレートに関連付けられているデータ型、カスタムコントロール、またはこれらの任意の組み合わせとして表示されるUIコンテンツを含めることができます。
これにより、UI領域の外観を定義し、モジュールにこれらの事前定義された領域にコンテンツを配置させることができます。
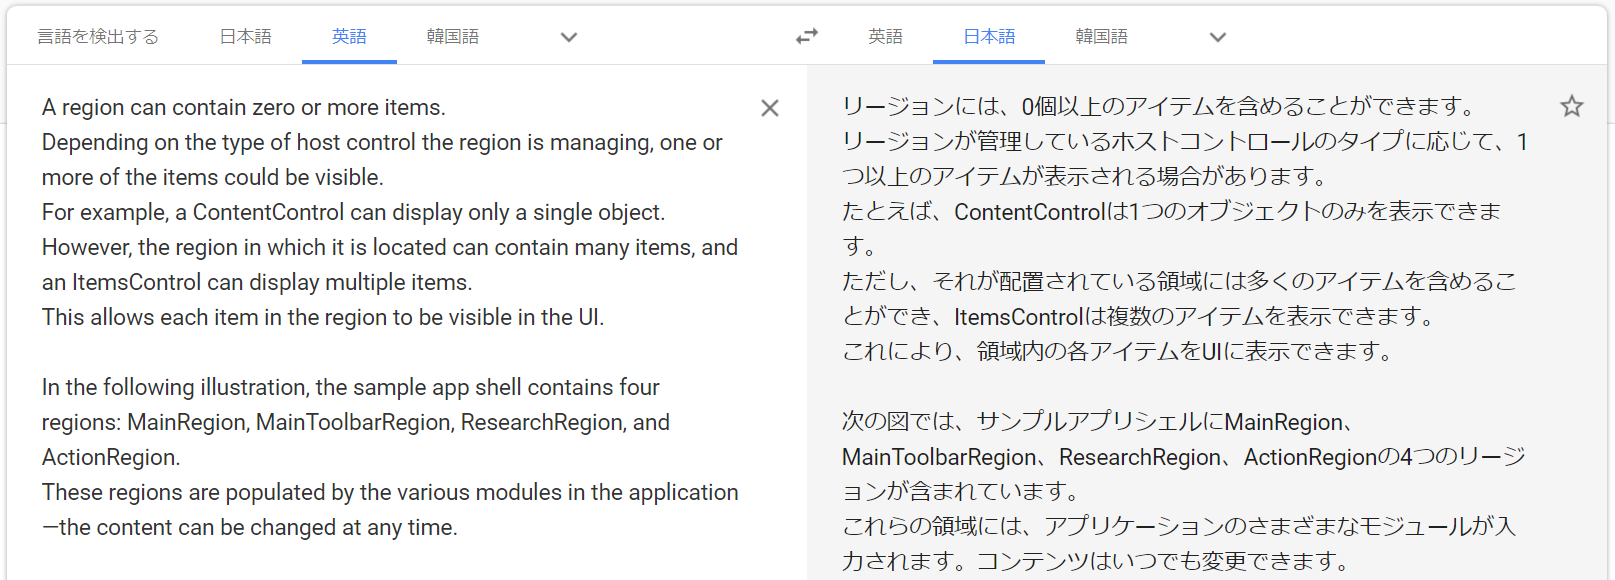
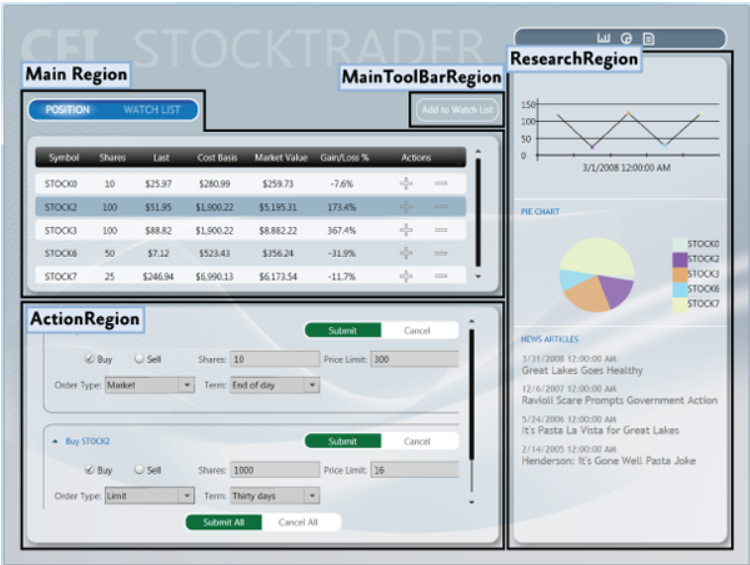
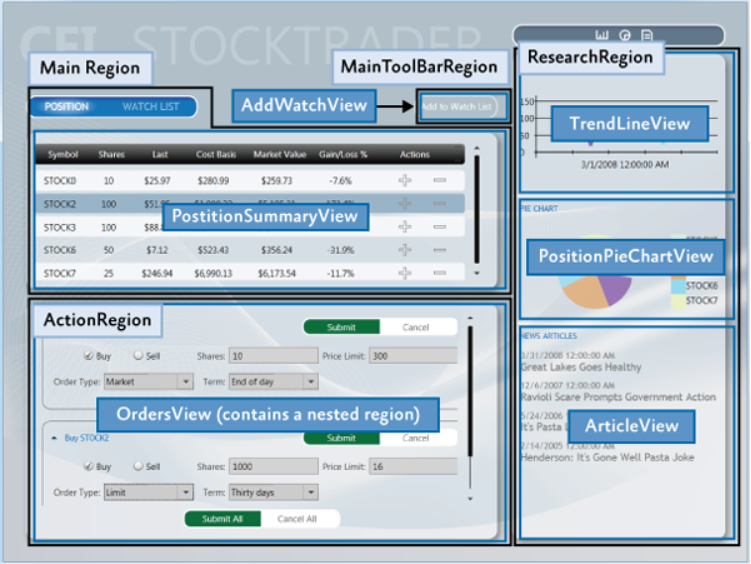
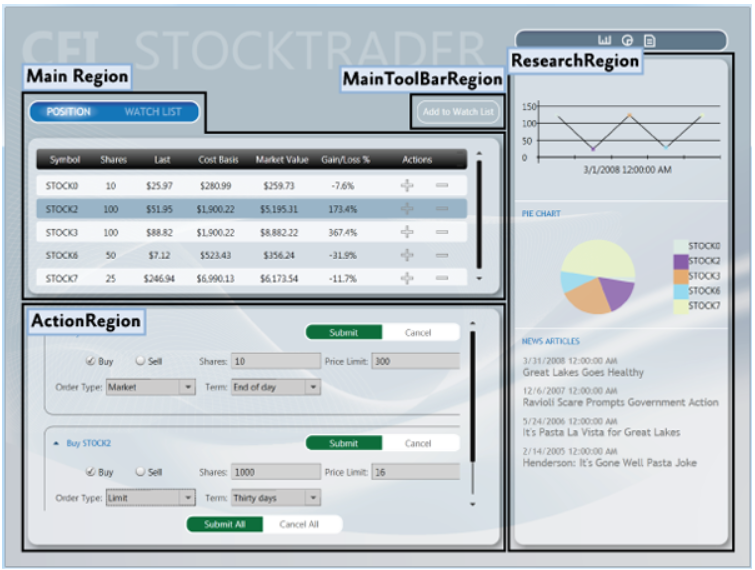
A region can contain zero or more items.
Depending on the type of host control the region is managing, one or more of the items could be visible.
For example, a ContentControl can display only a single object.
However, the region in which it is located can contain many items, and an ItemsControl can display multiple items.
This allows each item in the region to be visible in the UI.

In the following illustration, the sample app shell contains four regions: MainRegion, MainToolbarRegion, ResearchRegion, and ActionRegion.
These regions are populated by the various modules in the application—the content can be changed at any time.
リージョンには、0個以上のアイテムを含めることができます。
リージョンが管理しているホストコントロールのタイプに応じて、1つ以上のアイテムが表示される場合があります。
たとえば、ContentControlは1つのオブジェクトのみを表示できます。
ただし、それが配置されている領域には多くのアイテムを含めることができ、ItemsControlは複数のアイテムを表示できます。
これにより、領域内の各アイテムをUIに表示できます。次の図では、サンプルアプリシェルにMainRegion、MainToolbarRegion、ResearchRegion、ActionRegionの4つのリージョンが含まれています。
これらの領域には、アプリケーションのさまざまなモジュールが入力されます。コンテンツはいつでも変更できます。
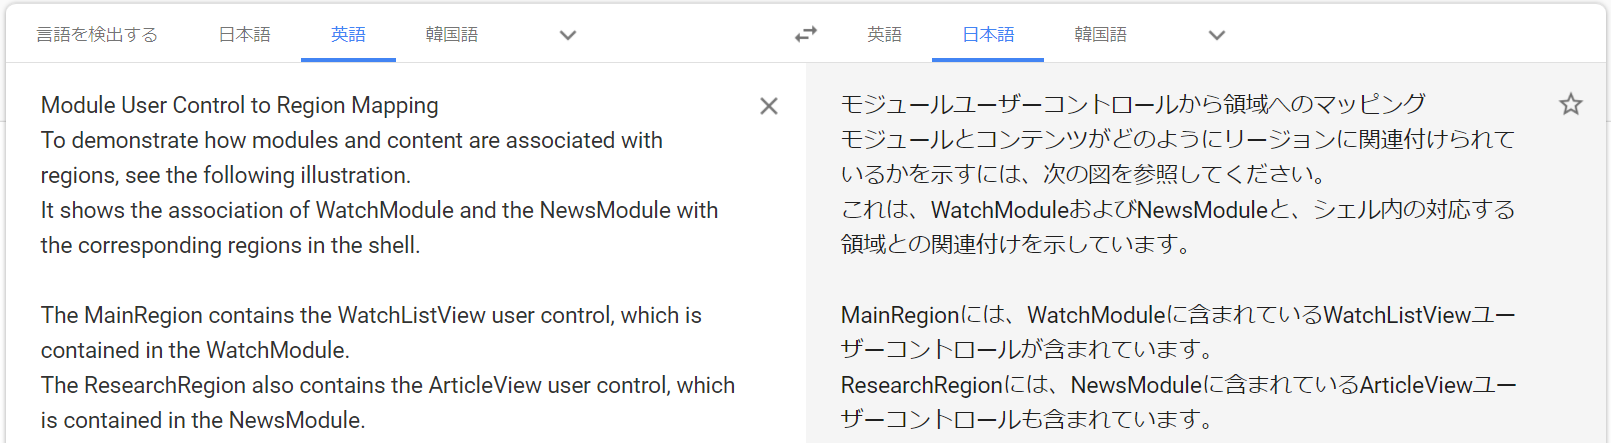
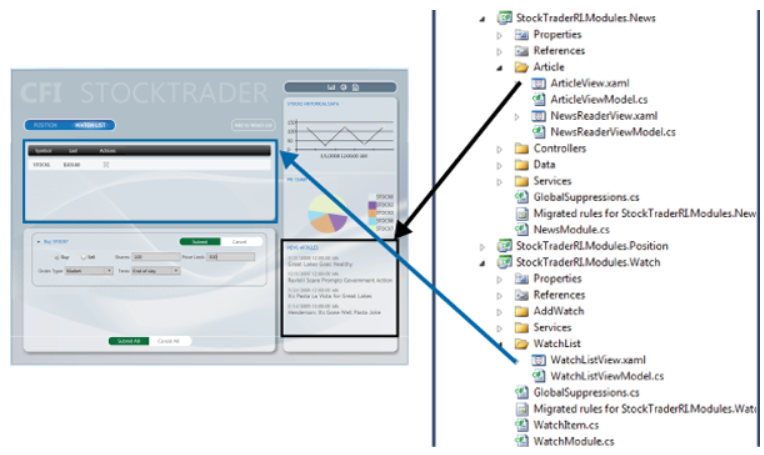
Module User Control to Region Mapping
To demonstrate how modules and content are associated with regions, see the following illustration.
It shows the association of WatchModule and the NewsModule with the corresponding regions in the shell.

The MainRegion contains the WatchListView user control, which is contained in the WatchModule.
The ResearchRegion also contains the ArticleView user control, which is contained in the NewsModule.
モジュールユーザーコントロールから領域へのマッピング
モジュールとコンテンツがどのようにリージョンに関連付けられているかを示すには、次の図を参照してください。
これは、WatchModuleおよびNewsModuleと、シェル内の対応する領域との関連付けを示しています。MainRegionには、WatchModuleに含まれているWatchListViewユーザーコントロールが含まれています。
ResearchRegionには、NewsModuleに含まれているArticleViewユーザーコントロールも含まれています。
In applications created with the Prism Library, mappings like this will be a part of the design process because designers and developers use them to determine what content is proposed to be in a specific region.
This allows designers to determine the overall space needed and any additional items that must be added to ensure that the content will be viewable in the allowable space.
Prism Libraryで作成されたアプリケーションでは、このようなマッピングは設計プロセスの一部になります。デザイナーと開発者がそれらを使用して、特定の領域にあると提案されているコンテンツを決定するためです。
これにより、デザイナーは必要な全体的なスペースと、コンテンツが許容されるスペースで確実に表示されるようにするために追加する必要がある追加のアイテムを決定できます。
Default Region Functionality
While you do not need to fully understand region implementations to use them, it might be useful to understand how controls and regions are associated and the default region functionality:
for example, how a region locates and instantiates views, how views can be notified when they are the active view, or how view lifetime can be tied to activation.

The following sections describe the region adapter and region behaviors.
それらを使用するために領域の実装を完全に理解する必要はありませんが、コントロールと領域がどのように関連付けられているか、およびデフォルトの領域の機能を理解しておくと役立つ場合があります。
たとえば、リージョンがビューを見つけてインスタンス化する方法、ビューがアクティブビューになったときにビューに通知する方法、ビューの有効期間をアクティブ化に関連付ける方法などです。次のセクションでは、リージョンアダプターとリージョンの動作について説明します。
Region Adapter
To expose a UI control as a region, it must have a region adapter.
Region adapters are responsible for creating a region and associating it with the control.
This allows you to use the IRegion interface to manage the UI control contents in a consistent way.
Each region adapter adapts a specific type of UI control. The Prism Library provides the following three region adapters:

・ContentControlRegionAdapter.
This adapter adapts controls of type System.Windows.Controls.ContentControl and derived classes.
・SelectorRegionAdapter.
This adapter adapts controls derived from the class System.Windows.Controls.Primitives.Selector, such as the System.Windows.Controls.TabControl control.
・ItemsControlRegionAdapter.
This adapter adapts controls of type System.Windows.Controls.ItemsControl and derived classes.
Region Adapter
UIコントロールを領域として公開するには、領域アダプタが必要です。
リージョンアダプタは、リージョンを作成し、それをコントロールに関連付けます。
これにより、IRegionインターフェイスを使用して、UIコントロールのコンテンツを一貫した方法で管理できます。
各リージョンアダプターは、特定のタイプのUIコントロールを適合させます。 Prism Libraryは、次の3つのリージョンアダプターを提供します。・ContentControlRegionAdapter。
このアダプターは、System.Windows.Controls.ContentControlタイプのコントロールと派生クラスを適合させます。
・SelectorRegionAdapter。
このアダプターは、System.Windows.Controls.TabControlコントロールなど、System.Windows.Controls.Primitives.Selectorクラスから派生したコントロールを適合させます。
・ItemsControlRegionAdapter。
このアダプターは、System.Windows.Controls.ItemsControlタイプのコントロールと派生クラスを適合させます。
Region Behaviors
The Prism Library introduces the concept of region behaviors.
These are pluggable components that give a region most of its functionality.
Region behaviors were introduced to support view discovery and region context (described later in this topic).
Additionally, behaviors provide an effective way to extend a region's implementation.
Region Behaviors
Prism Libraryは、リージョンの動作の概念を導入しています。
これらは、リージョンのほとんどの機能を提供するプラグイン可能なコンポーネントです。
領域の動作は、ビューの検出と領域のコンテキストをサポートするために導入されました(このトピックで後ほど説明します)。
さらに、動作は、リージョンの実装を拡張する効果的な方法を提供します。
A region behavior is a class that is attached to a region to give the region additional functionality.
This behavior is attached to the region and remains active for the lifetime of the region.
For example, when an AutoPopulateRegionBehavior is attached to a region, it automatically instantiates and adds any ViewTypes that are registered against regions with that name.
For the lifetime of the region, it keeps monitoring the RegionViewRegistry for new registrations.
It is easy to add custom region behaviors or replace existing behaviors, either on a system-wide or a per-region basis.

The next sections describe the default behaviors that are automatically added to all regions.
One behavior, the SelectorItemsSourceSyncBehavior, is only attached to controls that derive from the Selector.
リージョンの動作は、リージョンに追加機能を提供するためにリージョンにアタッチされるクラスです。
この動作はリージョンに関連付けられ、リージョンの存続期間中アクティブのままです。
たとえば、AutoPopulateRegionBehaviorがリージョンにアタッチされると、その名前のリージョンに対して登録されているすべてのViewTypeが自動的にインスタンス化されて追加されます。
リージョンの存続期間中、RegionViewRegistryを監視して新しい登録を探します。
システム全体またはリージョンごとに、カスタムリージョンの動作を追加したり、既存の動作を置き換えたりするのは簡単です。次のセクションでは、すべてのリージョンに自動的に追加されるデフォルトの動作について説明します。
1つの動作であるSelectorItemsSourceSyncBehaviorは、セレクターから派生したコントロールにのみアタッチされます。
Registration Behavior
The RegionManagerRegistrationBehavior is responsible for making sure that the region is registered to the correct RegionManager.
When a view or control is added to the visual tree as a child of another control or region, any region defined in the control should be registered in the RegionManager of the parent control.
When the child control is removed, the registered region is unregistered.
Registration Behavior
RegionManagerRegistrationBehaviorは、リージョンが正しいRegionManagerに登録されていることを確認する責任があります。
ビューまたはコントロールが別のコントロールまたは領域の子としてビジュアルツリーに追加された場合、コントロールで定義された領域は、親コントロールのRegionManagerに登録する必要があります。
子コントロールが削除されると、登録された領域は登録解除されます。
Auto-Population Behavior
There are two classes responsible for implementing view discovery.
One of them is the AutoPopulateRegionBehavior.
When it is attached to a region, it retrieves all view types that are registered under the name of the region.
It then creates instances of those views and adds them to the region.
After the region is created, the AutoPopulateRegionBehavior monitors the RegionViewRegistry for any newly registered view types for that region name.

If you want to have more control over the view discovery process, consider creating your own implementation of the IRegionViewRegistry and the AutoPopulateRegionBehavior.
Auto-Population Behavior
ビュー検出の実装を担当する2つのクラスがあります。
それらの1つはAutoPopulateRegionBehaviorです。
リージョンにアタッチされている場合、リージョンの名前で登録されているすべてのビュータイプを取得します。
次に、それらのビューのインスタンスを作成し、それらをリージョンに追加します。
リージョンが作成された後、AutoPopulateRegionBehaviorはRegionViewRegistryを監視して、そのリージョン名に新しく登録されたビュータイプを探します。ビュー検出プロセスをさらに制御したい場合は、IRegionViewRegistryとAutoPopulateRegionBehaviorの独自の実装を作成することを検討してください。
Region Context Behaviors
The region context functionality is contained within two behaviors: the SyncRegionContextWithHostBehavior and the BindRegionContextToDependencyObjectBehavior.
These behaviors are responsible for monitoring changes to the context that were made on the region, and then synchronizing the context with a context dependency property attached to the view.
Region Context Behaviors
リージョンコンテキスト機能は、SyncRegionContextWithHostBehaviorとBindRegionContextToDependencyObjectBehaviorの2つの動作に含まれています。
これらの動作は、リージョンで行われたコンテキストへの変更を監視し、コンテキストをビューに関連付けられているコンテキスト依存関係プロパティと同期させる役割を果たします。
Activation Behavior
The RegionActiveAwareBehavior is responsible for notifying a view if it is active or inactive.
The view must implement IActiveAware to receive these change notifications.
This active aware notification is one-directional (it travels from the behavior to the view).
The view cannot affect its active state by changing the active property on the IActiveAware interface.
Activation Behavior
RegionActiveAwareBehaviorは、ビューがアクティブか非アクティブかをビューに通知します。
これらの変更通知を受信するには、ビューにIActiveAwareを実装する必要があります。
このアクティブ対応の通知は一方向です(動作からビューに移動します)。
IActiveAwareインターフェイスのアクティブプロパティを変更しても、ビューはアクティブ状態に影響を与えません。
Region Lifetime Behavior
The RegionMemberLifetimeBehavior is responsible for determining if an item should be removed from the region when it is deactivated.
The RegionMemberLifetimeBehavior monitors the region's ActiveViews collection to discover items that transition into a deactivated state.
The behavior checks the removed items for IRegionMemberLifetime or the RegionMemberLifetimeAttribute (in that order) to determine if it should be kept alive on removal.
Region Lifetime Behavior
RegionMemberLifetimeBehaviorは、非アクティブ化されたときにアイテムをリージョンから削除する必要があるかどうかを決定します。
RegionMemberLifetimeBehaviorは、領域のActiveViewsコレクションを監視して、非アクティブ状態に遷移するアイテムを検出します。
この動作は、IRegionMemberLifetimeまたはRegionMemberLifetimeAttributeの削除されたアイテムを(この順序で)チェックして、削除された後も維持するかどうかを決定します。
If the item in the collection is a System.Windows.FrameworkElement, it will also check its DataContext for IRegionMemberLifetime or the RegionMemberLifetimeAttribute.

The region items are checked in the following order:

1. IRegionMemberLifetime.KeepAlive value
2. DataContext's IRegionMemberLifetime.KeepAlive value
3. RegionMemberLifetimeAttribute.KeepAlive value
4. DataContext's RegionMemberLifetimeAttribute.KeepAlive value
コレクション内の項目がSystem.Windows.FrameworkElementの場合、そのDataContextでIRegionMemberLifetimeまたはRegionMemberLifetimeAttributeを確認します。
リージョンアイテムは次の順序でチェックされます。
- IRegionMemberLifetime.KeepAlive値
- DataContextのIRegionMemberLifetime.KeepAlive値
- RegionMemberLifetimeAttribute.KeepAlive値
- DataContextのRegionMemberLifetimeAttribute.KeepAlive値
Control-Specific Behaviors
The SelectorItemsSourceSyncBehavior is used only for controls that derive from Selector, such as a tab control in WPF.
It is responsible for synchronizing the views in the region with the items of the selector, and then synchronizing the active views in the region with the selected items of the selector.
Control-Specific Behaviors
SelectorItemsSourceSyncBehaviorは、WPFのタブコントロールなど、セレクターから派生するコントロールにのみ使用されます。
リージョン内のビューをセレクターのアイテムと同期し、リージョン内のアクティブなビューをセレクターの選択したアイテムと同期します。Extending the Region Implementation
リージョン実装の拡張
The Prism Library provides extension points that allow you to customize or extend the default behavior of the provided APIs.
For example, you can write your own region adapters, region behaviors, or change the way the Navigation API parses URIs.
Prism Libraryは、提供されたAPIのデフォルトの動作をカスタマイズまたは拡張できる拡張ポイントを提供します。
たとえば、独自のリージョンアダプターやリージョンの動作を記述したり、Navigation APIがURIを解析する方法を変更したりできます。View Composition
View composition is the constructing of a view. In composite applications, views from multiple modules have to be displayed at run time in specific locations within the application UI.
To achieve this, you need to define the locations where the views will appear and how the views will be created and displayed in those locations.

Views can be created and displayed in the locations either automatically through view discovery, or programmatically through view injection.
These two techniques determine how individual views are mapped to named locations within the application UI.
ビューの構成は、ビューの構築です。 複合アプリケーションでは、複数のモジュールのビューを、実行時にアプリケーションUI内の特定の場所に表示する必要があります。
これを実現するには、ビューが表示される場所と、それらの場所でビューが作成および表示される方法を定義する必要があります。ビューは、ビューの検出を通じて自動的に、またはビューの挿入を通じてプログラムによって、ロケーションに作成および表示できます。
これら2つの手法は、個々のビューがアプリケーションUI内の名前付きの場所にどのようにマップされるかを決定します。View Discovery
In view discovery, you set up a relationship in the RegionViewRegistry between a region's name and the type of a view.
When a region is created, the region looks for all the ViewTypes associated with the region and automatically instantiates and loads the corresponding views.
Therefore, with view discovery, you do not have explicit control over when the views that correspond to a region are loaded and displayed.
ビューの検出では、RegionViewRegistryでリージョンの名前とビューのタイプとの関係を設定します。
リージョンが作成されると、リージョンはそのリージョンに関連付けられているすべてのViewTypeを探し、対応するビューを自動的にインスタンス化してロードします。
したがって、ビューの検出では、リージョンに対応するビューがいつ読み込まれて表示されるかを明示的に制御することはできません。View Injection
In view injection, your code obtains a reference to a region, and then programmatically adds a view into it.
Typically, this is done when a module initializes or as a result of a user action.
Your code will query a RegionManager for a specific region by name and then inject views into it.
With view injection, you have more control over when views are loaded and displayed.
You also have the ability to remove views from the region. However, with view injection, you cannot add a view to a region that has not yet been created.
ビューインジェクションでは、コードが領域への参照を取得し、プログラムによって領域にビューを追加します。
通常、これは、モジュールが初期化されるとき、またはユーザーアクションの結果として行われます。
コードは、RegionManagerに名前で特定の領域をクエリし、ビューをその領域に挿入します。
ビューインジェクションを使用すると、ビューをロードして表示するタイミングをより詳細に制御できます。
また、リージョンからビューを削除することもできます。 ただし、ビューの挿入では、まだ作成されていない領域にビューを追加することはできません。Navigation
The Prism Library 7.1 contains Navigation APIs.
The Navigation APIs simplify the view injection process by allowing you to navigate a region to an URI.
The Navigation API instantiates the view, adds it to the region, and then activates it.
Additionally, the Navigation API allows navigating back to a previously created view contained in a region. For more information about the Navigation APIs, see Navigation.
Prism Library 7.1には、ナビゲーションAPIが含まれています。
Navigation APIは、URIにリージョンをナビゲートできるようにすることで、ビューインジェクションプロセスを簡素化します。
Navigation APIはビューをインスタンス化し、それを領域に追加してから、アクティブ化します。
さらに、Navigation APIを使用すると、領域に含まれている以前に作成したビューに戻ることができます。 ナビゲーションAPIの詳細については、ナビゲーションを参照してください。When to Use View Discovery vs. View Injection
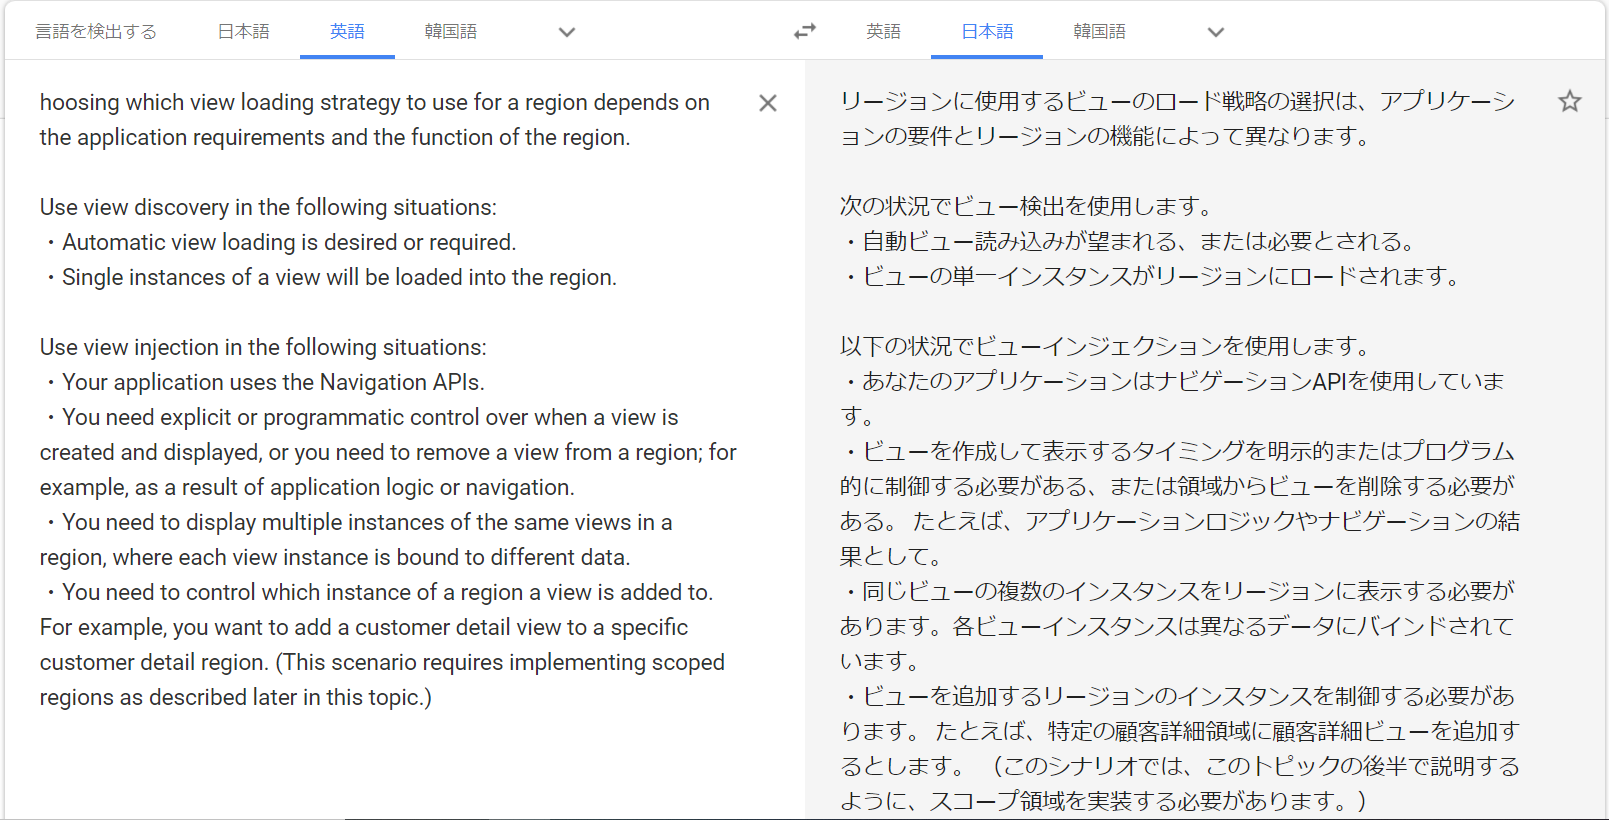
hoosing which view loading strategy to use for a region depends on the application requirements and the function of the region.

Use view discovery in the following situations:
・Automatic view loading is desired or required.
・Single instances of a view will be loaded into the region.

Use view injection in the following situations:
・Your application uses the Navigation APIs.
・You need explicit or programmatic control over when a view is created and displayed, or you need to remove a view from a region; for example, as a result of application logic or navigation.
・You need to display multiple instances of the same views in a region, where each view instance is bound to different data.
・You need to control which instance of a region a view is added to. For example, you want to add a customer detail view to a specific customer detail region. (This scenario requires implementing scoped regions as described later in this topic.)
リージョンに使用するビューのロード戦略の選択は、アプリケーションの要件とリージョンの機能によって異なります。
次の状況でView Discoveryを使用します。
・自動ビュー読み込みが望まれる、または必要とされる。
・ビューの単一インスタンスがリージョンにロードされます。以下の状況でView Injectionを使用します。
・あなたのアプリケーションはナビゲーションAPIを使用しています。
・ビューを作成して表示するタイミングを明示的またはプログラム的に制御する必要がある、または領域からビューを削除する必要がある。 たとえば、アプリケーションロジックやナビゲーションの結果として。
・同じビューの複数のインスタンスをリージョンに表示する必要があります。各ビューインスタンスは異なるデータにバインドされています。
・ビューを追加するリージョンのインスタンスを制御する必要があります。 たとえば、特定の顧客詳細領域に顧客詳細ビューを追加するとします。 (このシナリオでは、このトピックの後半で説明するように、スコープ領域を実装する必要があります。)UI Layout Scenarios
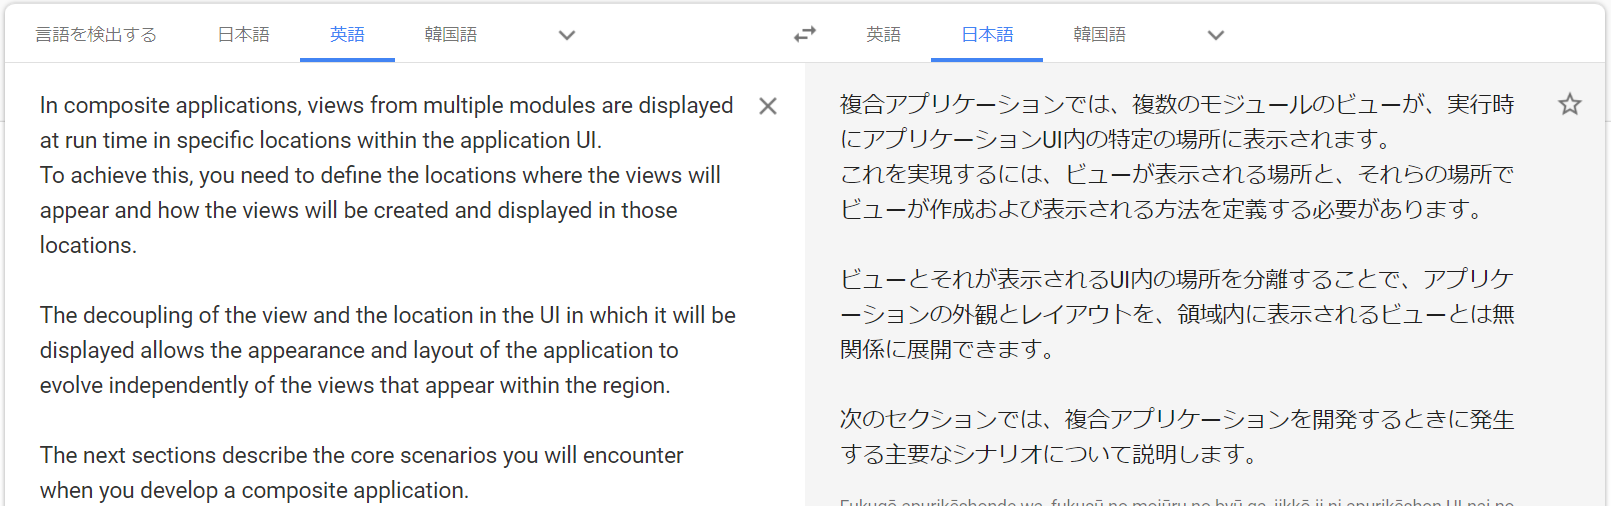
In composite applications, views from multiple modules are displayed at run time in specific locations within the application UI.
To achieve this, you need to define the locations where the views will appear and how the views will be created and displayed in those locations.

The decoupling of the view and the location in the UI in which it will be displayed allows the appearance and layout of the application to evolve independently of the views that appear within the region.

The next sections describe the core scenarios you will encounter when you develop a composite application.
複合アプリケーションでは、複数のモジュールのビューが、実行時にアプリケーションUI内の特定の場所に表示されます。
これを実現するには、ビューが表示される場所と、それらの場所でビューが作成および表示される方法を定義する必要があります。ビューとそれが表示されるUI内の場所を分離することで、アプリケーションの外観とレイアウトを、領域内に表示されるビューとは無関係に展開できます。
次のセクションでは、複合アプリケーションを開発するときに発生する主要なシナリオについて説明します。
Implementing the Shell
The shell is the application root object in which the primary UI content is contained.
In a WPF application, the shell is the Window object.

A shell can contain named regions where modules can specify the views that will appear.
It can also define certain top-level UI elements, such as the main menu and toolbar. The shell defines the overall structure and appearance for the application, and is similar to an ASP.NET master page control.
It could define styles and borders that are present and visible in the shell layout itself, and it could also define styles, templates, and themes that are applied to the views that are plugged into the shell.
シェルは、プライマリUIコンテンツが含まれるアプリケーションルートオブジェクトです。
WPFアプリケーションでは、シェルはWindowオブジェクトです。シェルには、モジュールが表示されるビューを指定できる名前付き領域を含めることができます。
また、メインメニューやツールバーなど、特定のトップレベルのUI要素を定義することもできます。 シェルは、アプリケーションの全体的な構造と外観を定義し、ASP.NETマスターページコントロールに似ています。
シェルレイアウト自体に存在し、表示されるスタイルと境界線を定義できます。また、シェルに接続されているビューに適用されるスタイル、テンプレート、テーマを定義することもできます。
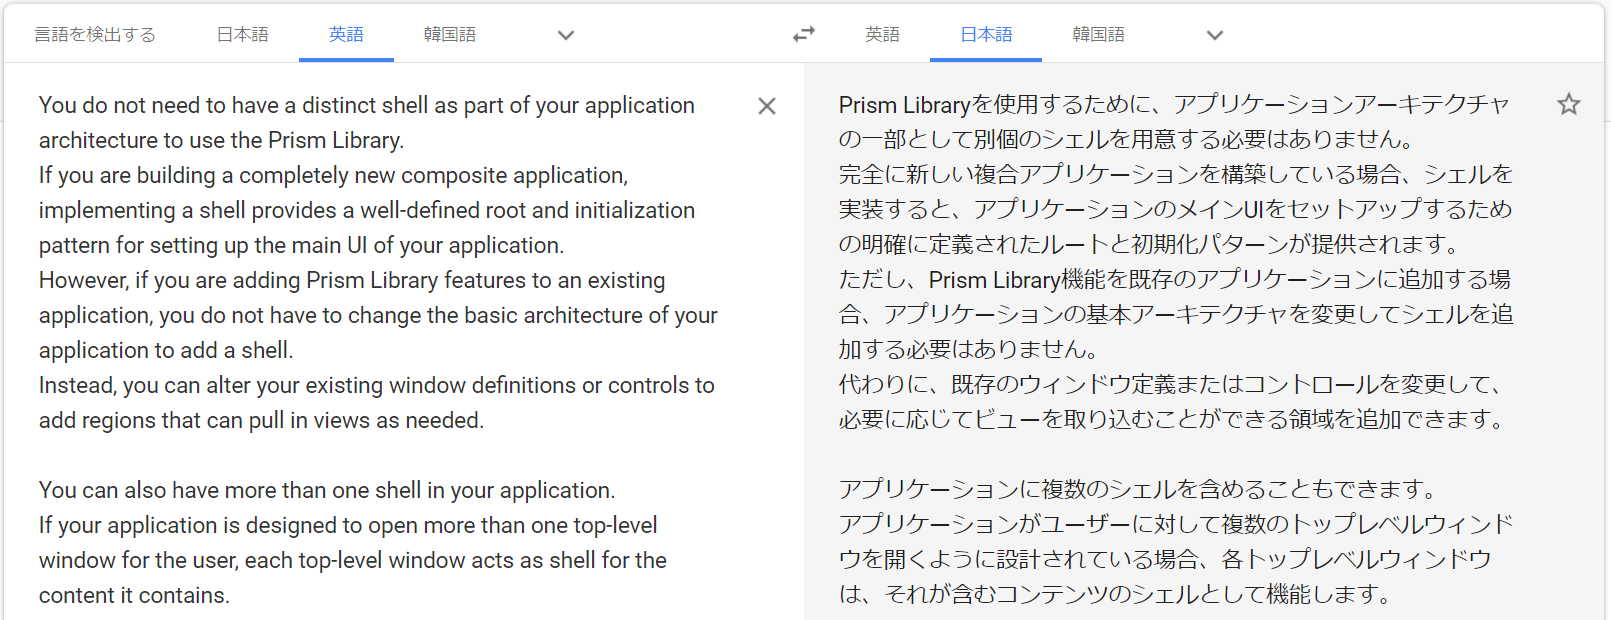
You do not need to have a distinct shell as part of your application architecture to use the Prism Library.
If you are building a completely new composite application, implementing a shell provides a well-defined root and initialization pattern for setting up the main UI of your application.
However, if you are adding Prism Library features to an existing application, you do not have to change the basic architecture of your application to add a shell.
Instead, you can alter your existing window definitions or controls to add regions that can pull in views as needed.

You can also have more than one shell in your application.
If your application is designed to open more than one top-level window for the user, each top-level window acts as shell for the content it contains.
Prism Libraryを使用するために、アプリケーションアーキテクチャの一部として別個のシェルを用意する必要はありません。
完全に新しい複合アプリケーションを構築している場合、シェルを実装すると、アプリケーションのメインUIをセットアップするための明確に定義されたルートと初期化パターンが提供されます。
ただし、Prism Library機能を既存のアプリケーションに追加する場合、アプリケーションの基本アーキテクチャを変更してシェルを追加する必要はありません。
代わりに、既存のウィンドウ定義またはコントロールを変更して、必要に応じてビューを取り込むことができる領域を追加できます。アプリケーションに複数のシェルを含めることもできます。
アプリケーションがユーザーに対して複数のトップレベルウィンドウを開くように設計されている場合、各トップレベルウィンドウは、それが含むコンテンツのシェルとして機能します。Sample Shell
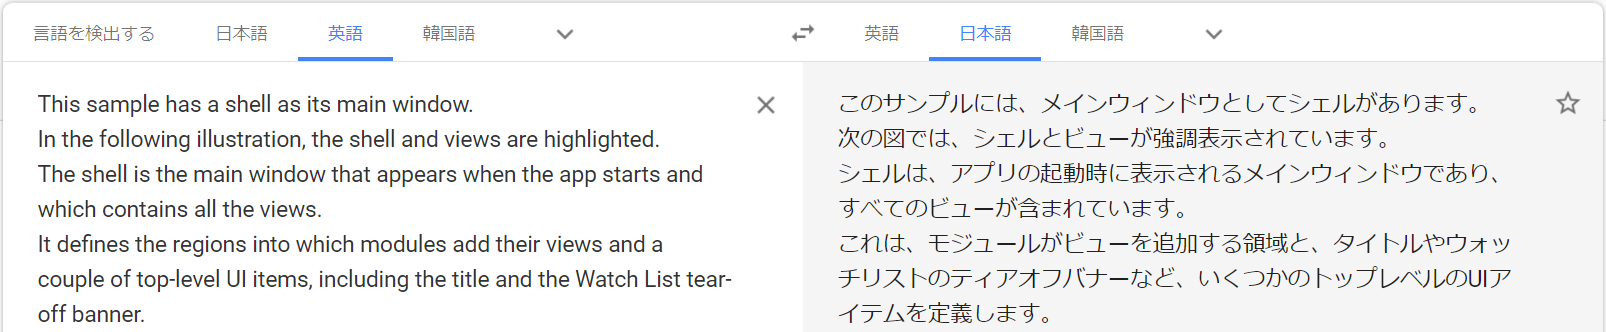
This sample has a shell as its main window.
In the following illustration, the shell and views are highlighted.
The shell is the main window that appears when the app starts and which contains all the views.
It defines the regions into which modules add their views and a couple of top-level UI items, including the title and the Watch List tear-off banner.
このサンプルには、メインウィンドウとしてシェルがあります。
次の図では、シェルとビューが強調表示されています。
シェルは、アプリの起動時に表示されるメインウィンドウであり、すべてのビューが含まれています。
これは、モジュールがビューを追加する領域と、タイトルやウォッチリストのティアオフバナーなど、いくつかのトップレベルのUIアイテムを定義します。
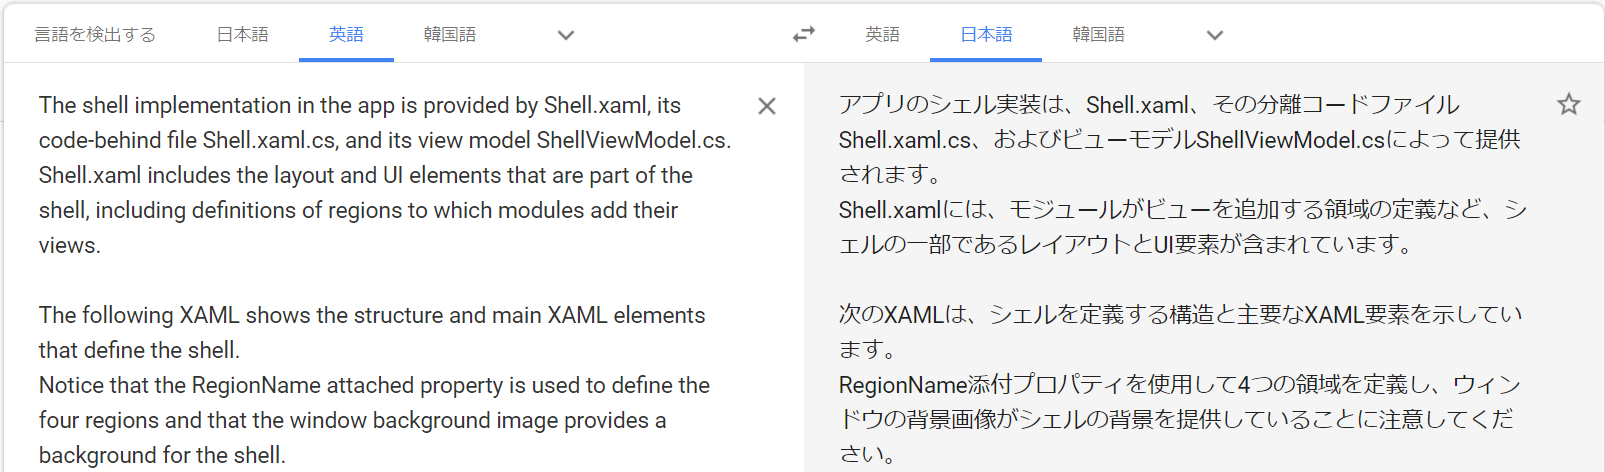
The shell implementation in the app is provided by Shell.xaml, its code-behind file Shell.xaml.cs, and its view model ShellViewModel.cs.
Shell.xaml includes the layout and UI elements that are part of the shell, including definitions of regions to which modules add their views.

The following XAML shows the structure and main XAML elements that define the shell.
Notice that the RegionName attached property is used to define the four regions and that the window background image provides a background for the shell.
アプリのシェル実装は、Shell.xaml、その分離コードファイルShell.xaml.cs、およびビューモデルShellViewModel.csによって提供されます。
Shell.xamlには、モジュールがビューを追加する領域の定義など、シェルの一部であるレイアウトとUI要素が含まれています。次のXAMLは、シェルを定義する構造と主要なXAML要素を示しています。
RegionName添付プロパティを使用して4つの領域を定義し、ウィンドウの背景画像がシェルの背景を提供していることに注意してください。<!--Shell.xaml (WPF) --> <Window x:Class="StockTraderRI.Shell"> <!--shell background --> <Window.Background> <ImageBrush ImageSource="Resources/background.png" Stretch="UniformToFill"/> </Window.Background> <Grid> <!-- logo --> <Canvas x:Name="Logo" ...> <TextBlock Text="CFI" ... /> <TextBlock Text="STOCKTRADER" .../> </Canvas> <!-- main bar --> <ItemsControl x:Name="MainToolbar" prism:RegionManager.RegionName="{x:Static inf:RegionNames.MainToolBarRegion}"/> <!-- content --> <Grid> <Controls:AnimatedTabControl x:Name="PositionBuySellTab" prism:RegionManager.RegionName="{x:Static inf:RegionNames.MainRegion}"/> </Grid> <!-- details --> <Grid> <ContentControl x:Name="ActionContent" prism:RegionManager.RegionName="{x:Static inf:RegionNames.ActionRegion}"/> </Grid> <!-- sidebar --> <Grid x:Name="SideGrid"> <Controls:ResearchControl prism:RegionManager.RegionName="{x:Static inf:RegionNames.ResearchRegion}" /> </Grid> </Grid> </Window>
The implementation of the Shell code-behind file is very simple.
The Shell is exported so that when your App object creates it, its dependencies will be and added.
シェル分離コードファイルの実装は非常に簡単です。
シェルがエクスポートされるので、アプリオブジェクトがシェルを作成すると、その依存関係が追加されます。// Shell.xaml.cs [Export] public partial class Shell : Window { public Shell() { InitializeComponent(); } }
The minimal code in the code-behind file illustrates the power and simplicity of the composite application architecture and loose coupling between the shell and its constituent views.分離コードファイル内の最小限のコードは、複合アプリケーションアーキテクチャの力と単純さ、およびシェルとその構成要素ビュー間の疎結合を示しています。
Defining Regions
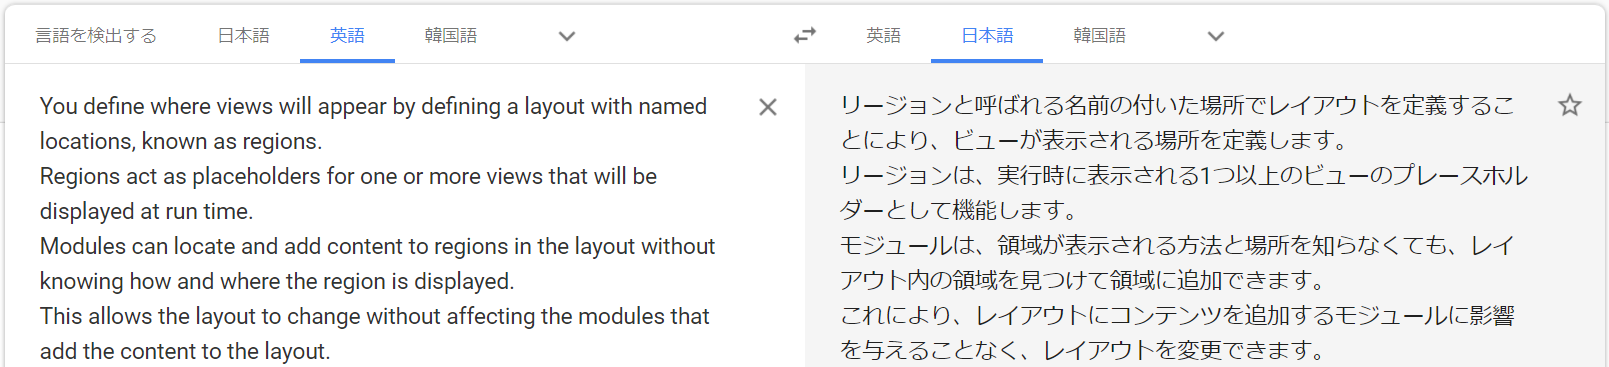
You define where views will appear by defining a layout with named locations, known as regions.
Regions act as placeholders for one or more views that will be displayed at run time.
Modules can locate and add content to regions in the layout without knowing how and where the region is displayed.
This allows the layout to change without affecting the modules that add the content to the layout.
リージョンと呼ばれる名前の付いた場所でレイアウトを定義することにより、ビューが表示される場所を定義します。
リージョンは、実行時に表示される1つ以上のビューのプレースホルダーとして機能します。
モジュールは、領域が表示される方法と場所を知らなくても、レイアウト内の領域を見つけて領域に追加できます。
これにより、レイアウトにコンテンツを追加するモジュールに影響を与えることなく、レイアウトを変更できます。
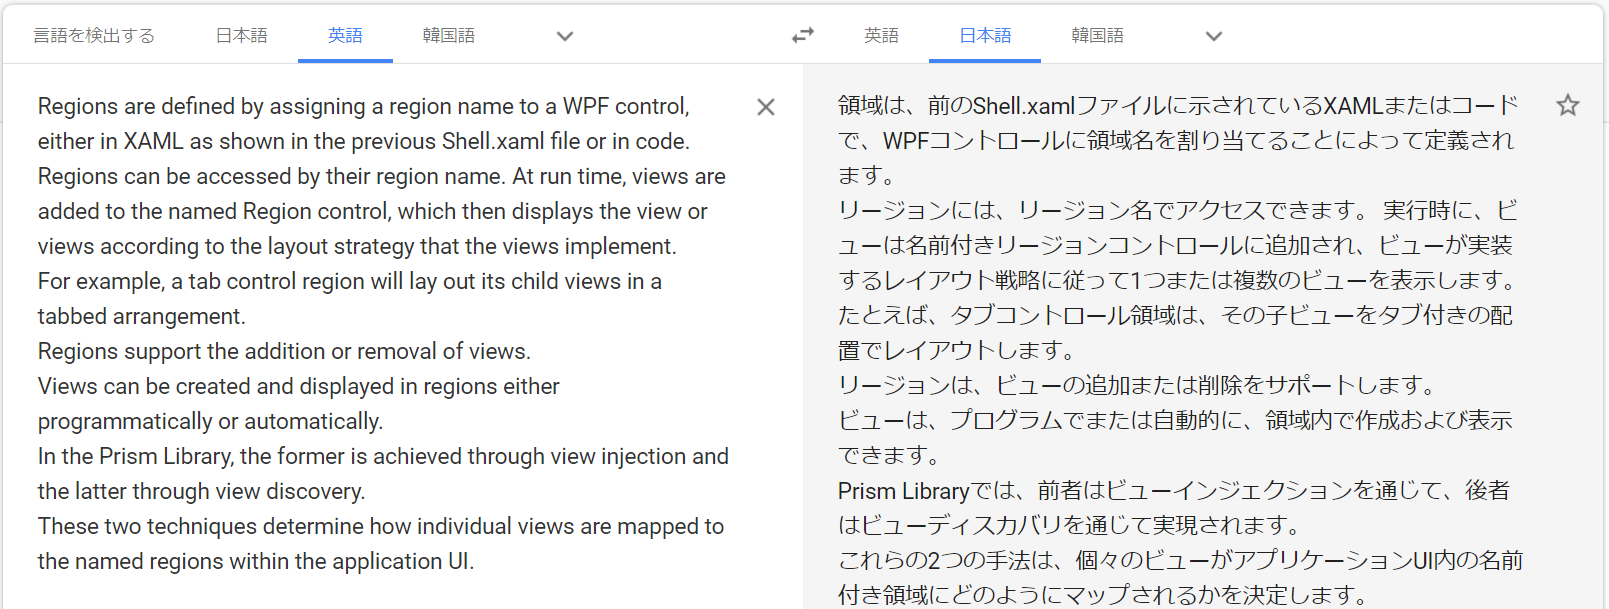
Regions are defined by assigning a region name to a WPF control, either in XAML as shown in the previous Shell.xaml file or in code.
Regions can be accessed by their region name. At run time, views are added to the named Region control, which then displays the view or views according to the layout strategy that the views implement.
For example, a tab control region will lay out its child views in a tabbed arrangement.
Regions support the addition or removal of views.
Views can be created and displayed in regions either programmatically or automatically.
In the Prism Library, the former is achieved through view injection and the latter through view discovery.
These two techniques determine how individual views are mapped to the named regions within the application UI.
領域は、前のShell.xamlファイルに示されているXAMLまたはコードで、WPFコントロールに領域名を割り当てることによって定義されます。
リージョンには、リージョン名でアクセスできます。 実行時に、ビューは名前付きリージョンコントロールに追加され、ビューが実装するレイアウト戦略に従って1つまたは複数のビューを表示します。
たとえば、タブコントロール領域は、その子ビューをタブ付きの配置でレイアウトします。
リージョンは、ビューの追加または削除をサポートします。
ビューは、プログラムでまたは自動的に、領域内で作成および表示できます。
Prism Libraryでは、前者はビューインジェクションを通じて、後者はビューディスカバリを通じて実現されます。
これらの2つの手法は、個々のビューがアプリケーションUI内の名前付き領域にどのようにマップされるかを決定します。
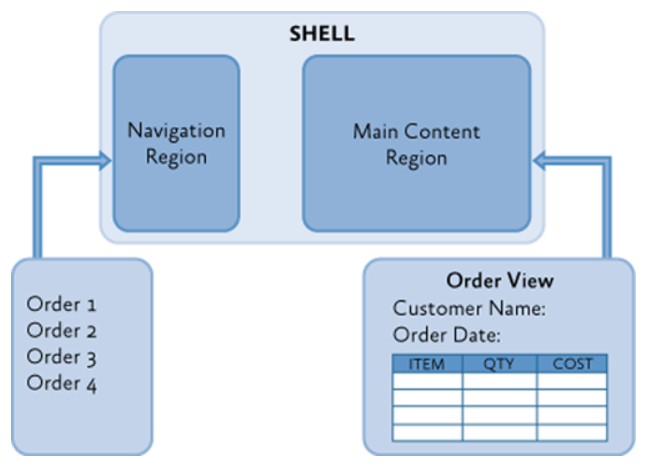
The shell of the application defines the application layout at the highest level;
for example, by specifying the locations for the main content and the navigation content, as shown in the following illustration.
Layout within these high-level views is similarly defined, allowing the overall UI to be recursively composed.
アプリケーションのシェルは、アプリケーションのレイアウトを最高レベルで定義します。
たとえば、次の図に示すように、メインコンテンツとナビゲーションコンテンツの場所を指定します。
これらの高レベルビュー内のレイアウトも同様に定義され、UI全体を再帰的に構成することができます。
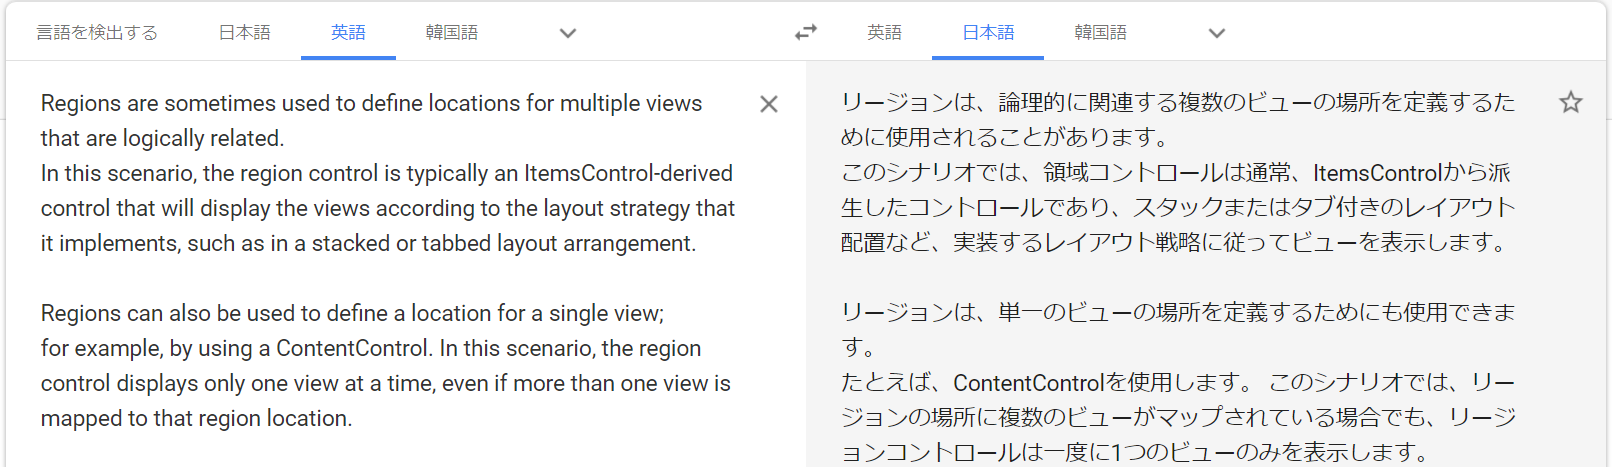
Regions are sometimes used to define locations for multiple views that are logically related.
In this scenario, the region control is typically an ItemsControl-derived control that will display the views according to the layout strategy that it implements, such as in a stacked or tabbed layout arrangement.

Regions can also be used to define a location for a single view;
for example, by using a ContentControl. In this scenario, the region control displays only one view at a time, even if more than one view is mapped to that region location.
リージョンは、論理的に関連する複数のビューの場所を定義するために使用されることがあります。
このシナリオでは、領域コントロールは通常、ItemsControlから派生したコントロールであり、スタックまたはタブ付きのレイアウト配置など、実装するレイアウト戦略に従ってビューを表示します。リージョンは、単一のビューの場所を定義するためにも使用できます。
たとえば、ContentControlを使用します。 このシナリオでは、リージョンの場所に複数のビューがマップされている場合でも、リージョンコントロールは一度に1つのビューのみを表示します。Sample App Shell Regions
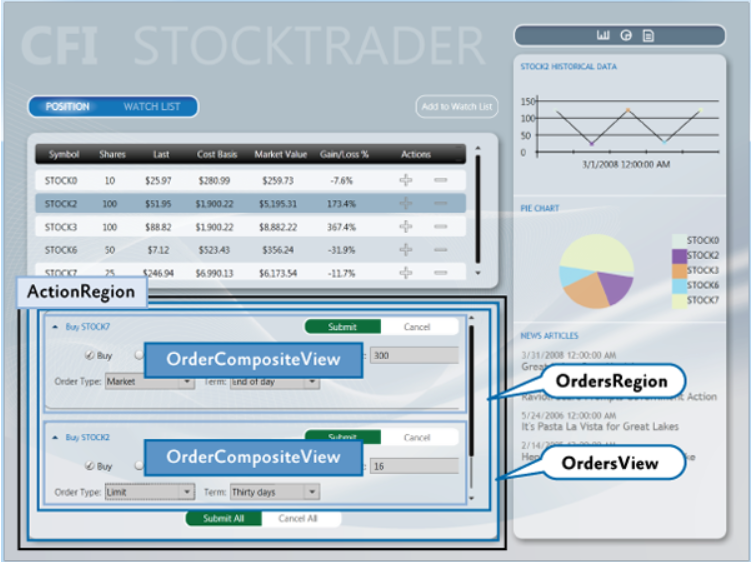
A multiple-view layout is also demonstrated in the example app ui when the application is buying or selling a stock.
The Buy/Sell area is a list-style region that shows multiple buy/sell views (OrderCompositeView) as part of its list, as shown in the following illustration.
マルチビューレイアウトは、アプリケーションが株を売買する場合のサンプルアプリuiにも示されています。
購入/販売エリアは、次の図に示すように、リストの一部として複数の購入/販売ビュー(OrderCompositeView)を表示するリストスタイルの領域です。
The shell's ActionRegion contains the OrdersView.
The OrdersView contains the Submit All and Cancel All buttons as well as the OrdersRegion.
The OrdersRegion is attached to a ListBox control which displays multiple OrderCompositeViews.
シェルのActionRegionにはOrdersViewが含まれています。
OrdersViewには、Submit AllボタンとCancel Allボタン、およびOrdersRegionが含まれています。
OrdersRegionは、複数のOrderCompositeViewを表示するListBoxコントロールにアタッチされます。Adding a Region in XAML
A region is a class that implements the IRegion interface.
The region is the container that holds content to be displayed by a control.

The RegionManager supplies an attached property that you can use for simple region creation in XAML.
To use the attached property, you must load the Prism Library namespace into the XAML and then use the RegionName attached property.
The following example shows how to use the attached property in a window with an AnimatedTabControl.

Notice the use of the x:Static markup extension to reference the MainRegion string constant.
This practice eliminates magic strings in the XAML.
リージョンは、IRegionインターフェースを実装するクラスです。
リージョンは、コントロールによって表示されるコンテンツを保持するコンテナです。RegionManagerは、XAMLでの簡単な領域の作成に使用できる添付プロパティを提供します。
添付プロパティを使用するには、Prism LibraryネームスペースをXAMLにロードしてから、RegionName添付プロパティを使用する必要があります。
次の例は、AnimatedTabControlのあるウィンドウで添付プロパティを使用する方法を示しています。MainRegion文字列定数を参照するためのx:Staticマークアップ拡張の使用に注意してください。
これにより、XAMLのマジックストリングが削除されます。<!-- (WPF) --> <Controls:AnimatedTabControl x:Name="PositionBuySellTab" prism:RegionManager.RegionName="{x:Static inf:RegionNames.MainRegion}"/>Adding a Region by Using Code
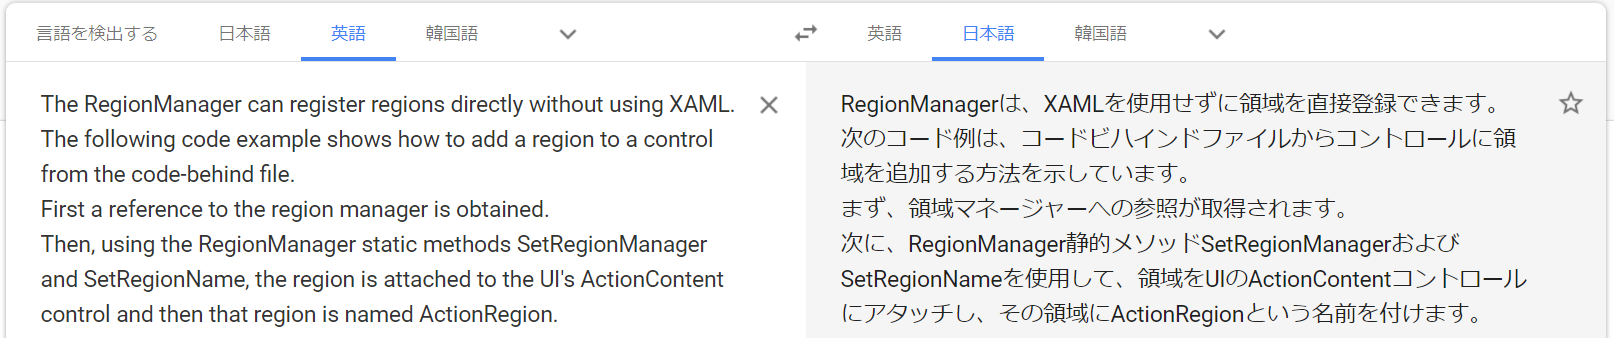
The RegionManager can register regions directly without using XAML.
The following code example shows how to add a region to a control from the code-behind file.
First a reference to the region manager is obtained.
Then, using the RegionManager static methods SetRegionManager and SetRegionName, the region is attached to the UI's ActionContent control and then that region is named ActionRegion.
RegionManagerは、XAMLを使用せずに領域を直接登録できます。
次のコード例は、コードビハインドファイルからコントロールに領域を追加する方法を示しています。
まず、領域マネージャーへの参照が取得されます。
次に、RegionManager静的メソッドSetRegionManagerおよびSetRegionNameを使用して、領域をUIのActionContentコントロールにアタッチし、その領域にActionRegionという名前を付けます。IRegionManager regionManager = ServiceLocator.Current.GetInstance<IRegionManager>(); RegionManager.SetRegionManager(this.ActionContent, regionManager); RegionManager.SetRegionName(this.ActionContent, "ActionRegion");Displaying Views in a Region When the Region Loads
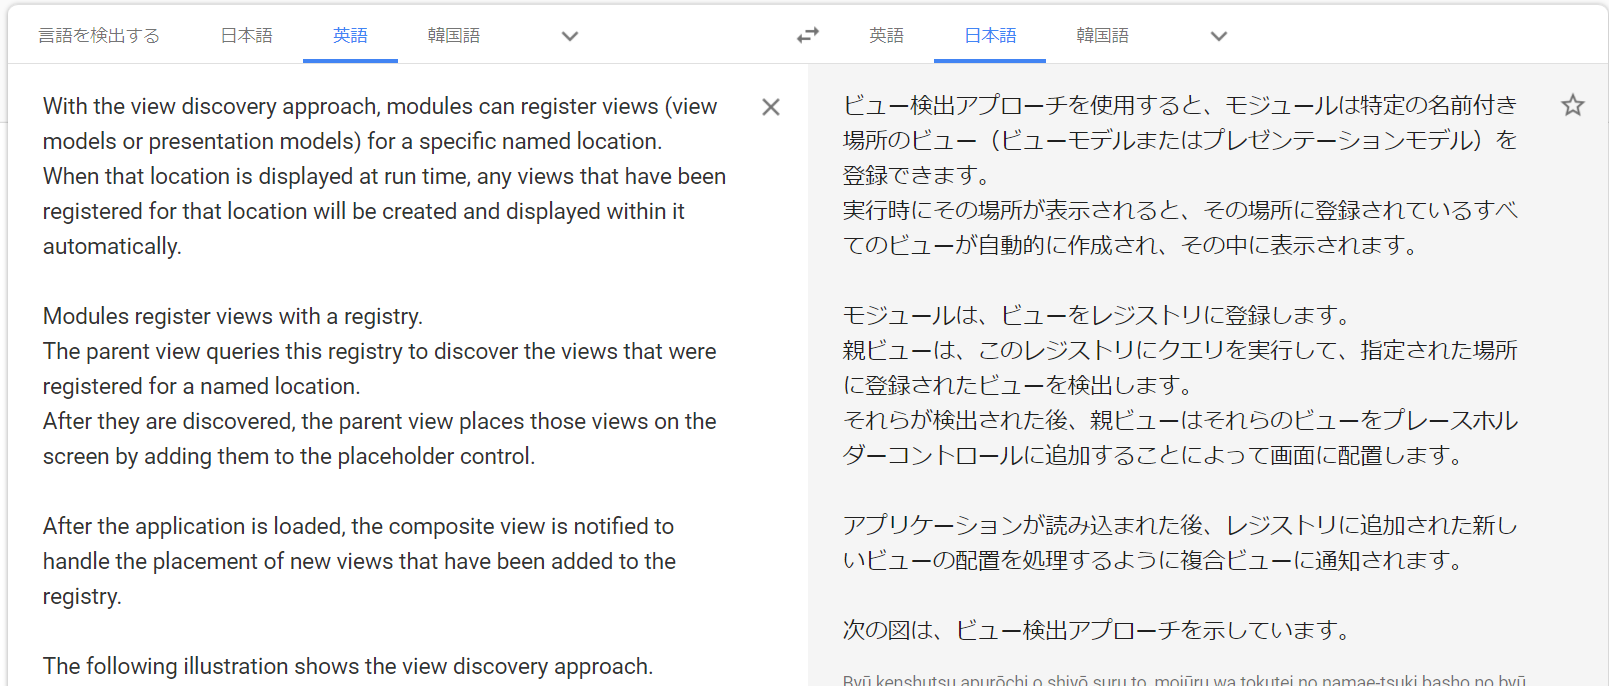
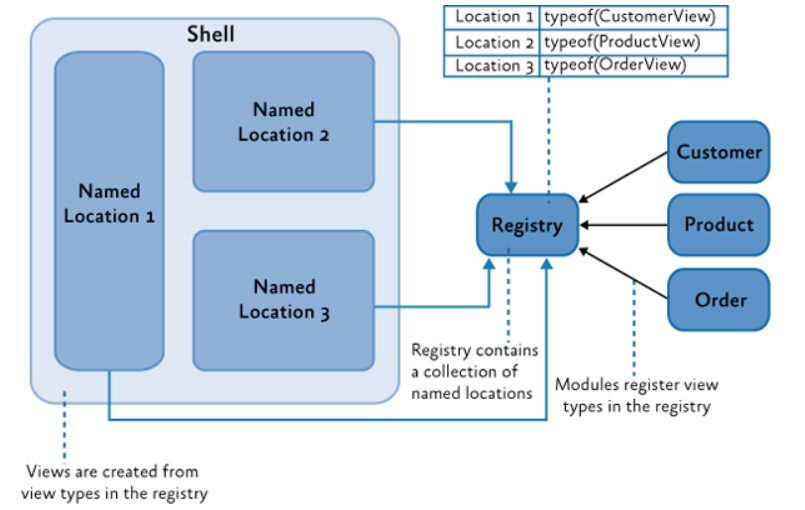
With the view discovery approach, modules can register views (view models or presentation models) for a specific named location.
When that location is displayed at run time, any views that have been registered for that location will be created and displayed within it automatically.

Modules register views with a registry.
The parent view queries this registry to discover the views that were registered for a named location.
After they are discovered, the parent view places those views on the screen by adding them to the placeholder control.

After the application is loaded, the composite view is notified to handle the placement of new views that have been added to the registry.

The following illustration shows the view discovery approach.
ビュー検出アプローチを使用すると、モジュールは特定の名前付き場所のビュー(ビューモデルまたはプレゼンテーションモデル)を登録できます。
実行時にその場所が表示されると、その場所に登録されているすべてのビューが自動的に作成され、その中に表示されます。モジュールは、ビューをレジストリに登録します。
親ビューは、このレジストリにクエリを実行して、指定された場所に登録されたビューを検出します。
それらが検出された後、親ビューはそれらのビューをプレースホルダーコントロールに追加することによって画面に配置します。アプリケーションが読み込まれた後、レジストリに追加された新しいビューの配置を処理するように複合ビューに通知されます。
次の図は、ビュー検出アプローチを示しています。
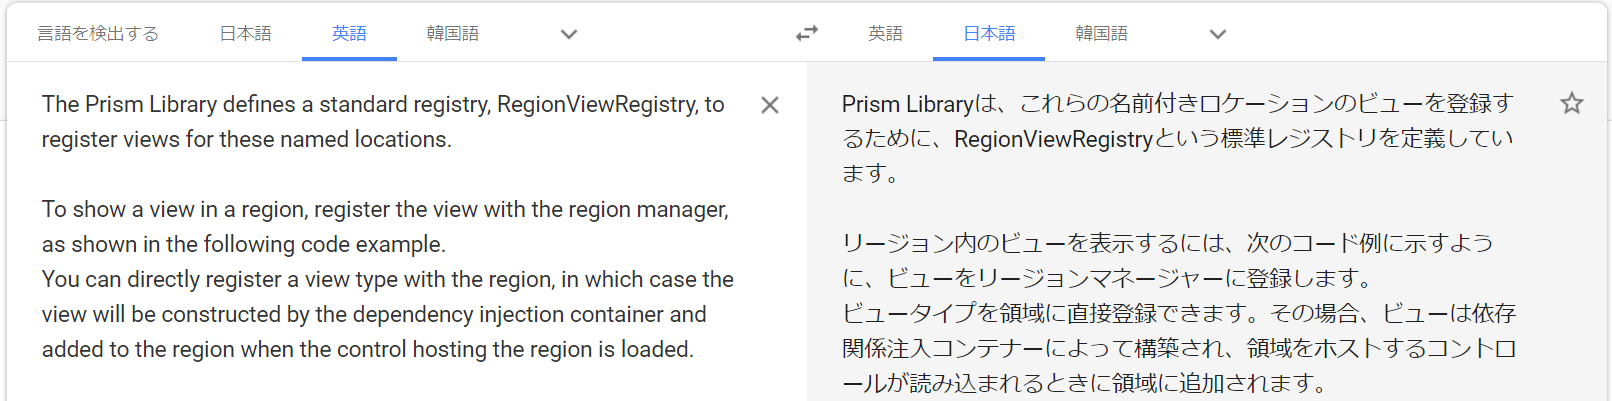
The Prism Library defines a standard registry, RegionViewRegistry, to register views for these named locations.

To show a view in a region, register the view with the region manager, as shown in the following code example.
You can directly register a view type with the region, in which case the view will be constructed by the dependency injection container and added to the region when the control hosting the region is loaded.
Prism Libraryは、これらの名前付きロケーションのビューを登録するために、RegionViewRegistryという標準レジストリを定義しています。
リージョン内のビューを表示するには、次のコード例に示すように、ビューをリージョンマネージャーに登録します。
ビュータイプを領域に直接登録できます。その場合、ビューは依存関係注入コンテナーによって構築され、領域をホストするコントロールが読み込まれるときに領域に追加されます。// View discovery this.regionManager.RegisterViewWithRegion("MainRegion", typeof(EmployeeView));
Optionally, you can provide a delegate that returns the view to be shown, as shown in the next example.
The region manager will display the view when the region is created.
オプションで、次の例に示すように、表示するビューを返すデリゲートを提供できます。
リージョンが作成されると、リージョンマネージャがビューを表示します。// View discovery this.regionManager.RegisterViewWithRegion("MainRegion", () => this.container.Resolve<EmployeeView>());Displaying Views in a Region Programmatically
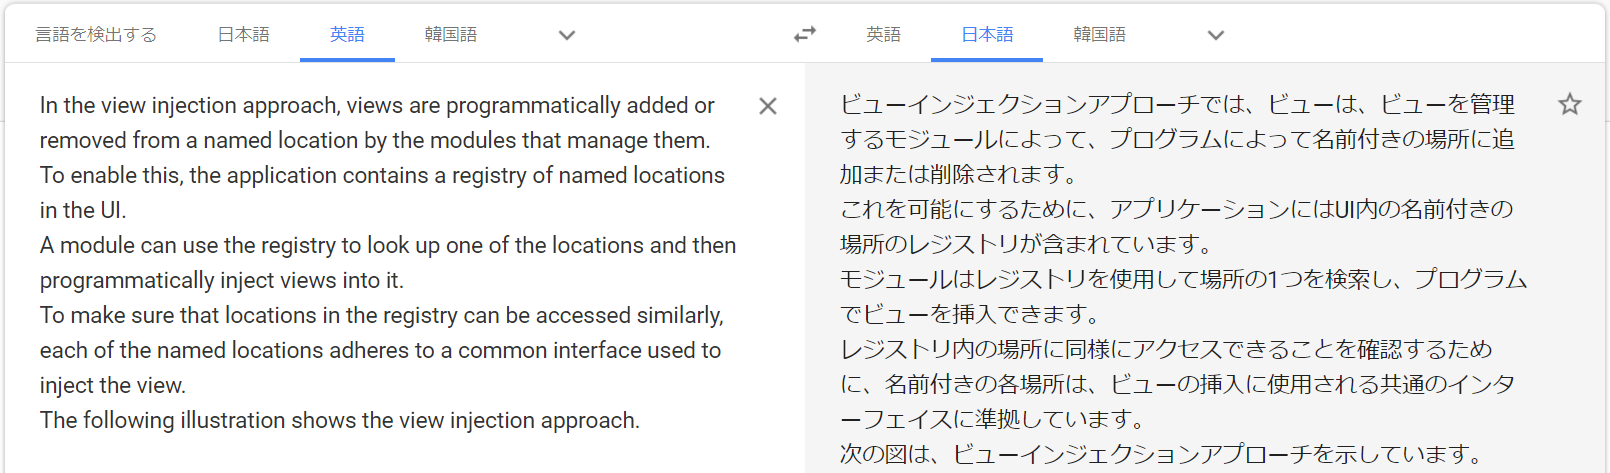
In the view injection approach, views are programmatically added or removed from a named location by the modules that manage them.
To enable this, the application contains a registry of named locations in the UI.
A module can use the registry to look up one of the locations and then programmatically inject views into it.
To make sure that locations in the registry can be accessed similarly, each of the named locations adheres to a common interface used to inject the view.
The following illustration shows the view injection approach.
538/5000
ビューインジェクションアプローチでは、ビューは、ビューを管理するモジュールによって、プログラムによって名前付きの場所に追加または削除されます。
これを可能にするために、アプリケーションにはUI内の名前付きの場所のレジストリが含まれています。
モジュールはレジストリを使用して場所の1つを検索し、プログラムでビューを挿入できます。
レジストリ内の場所に同様にアクセスできることを確認するために、名前付きの各場所は、ビューの挿入に使用される共通のインターフェイスに準拠しています。
次の図は、ビューインジェクションアプローチを示しています。
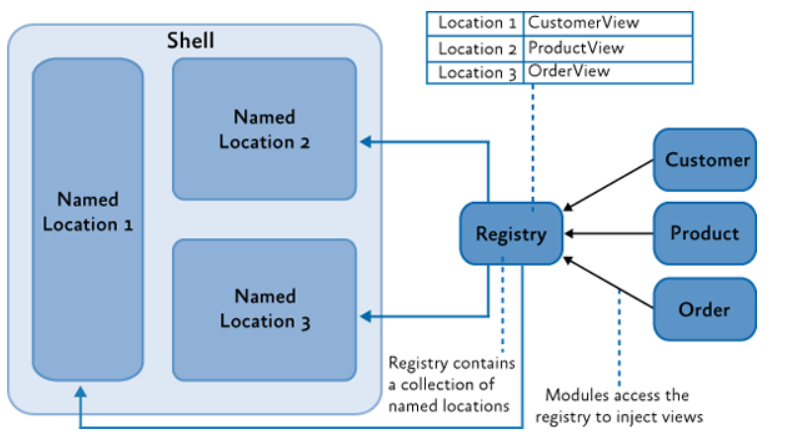
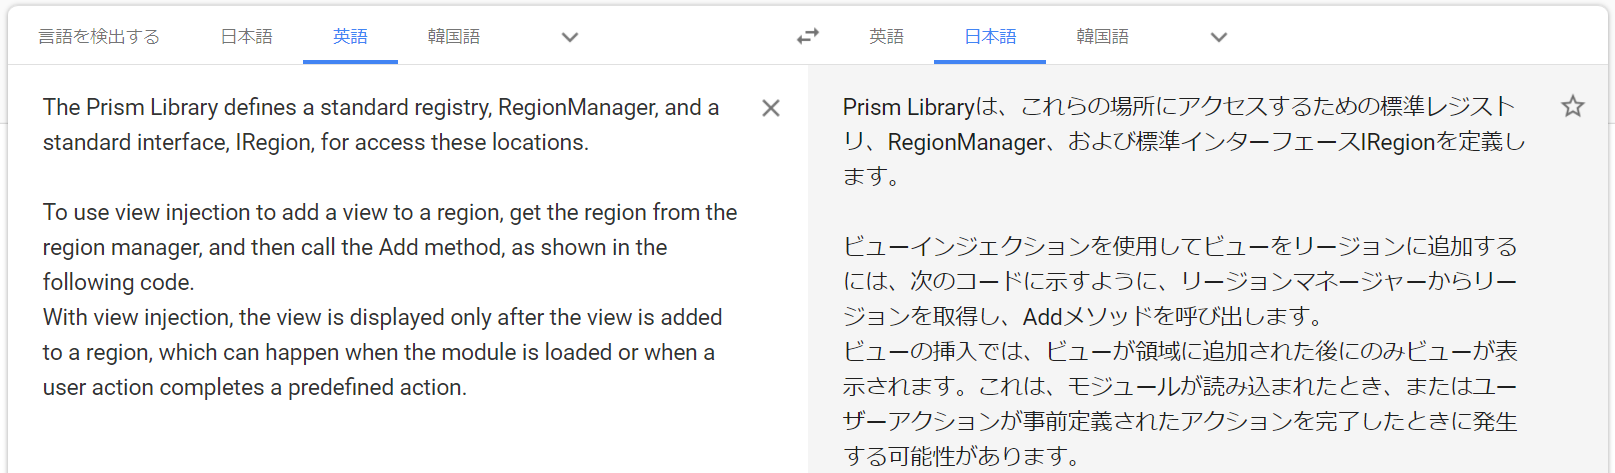
The Prism Library defines a standard registry, RegionManager, and a standard interface, IRegion, for access these locations.

To use view injection to add a view to a region, get the region from the region manager, and then call the Add method, as shown in the following code.
With view injection, the view is displayed only after the view is added to a region, which can happen when the module is loaded or when a user action completes a predefined action.
Prism Libraryは、これらの場所にアクセスするための標準レジストリ、RegionManager、および標準インターフェースIRegionを定義します。
ビューインジェクションを使用してビューをリージョンに追加するには、次のコードに示すように、リージョンマネージャーからリージョンを取得し、Addメソッドを呼び出します。
ビューの挿入では、ビューが領域に追加された後にのみビューが表示されます。これは、モジュールが読み込まれたとき、またはユーザーアクションが事前定義されたアクションを完了したときに発生する可能性があります。// View injection IRegion region = regionManager.Regions["MainRegion"]; var ordersView = container.Resolve<OrdersView>(); region.Add(ordersView, "OrdersView"); region.Activate(ordersView);Ordering Views in a Region
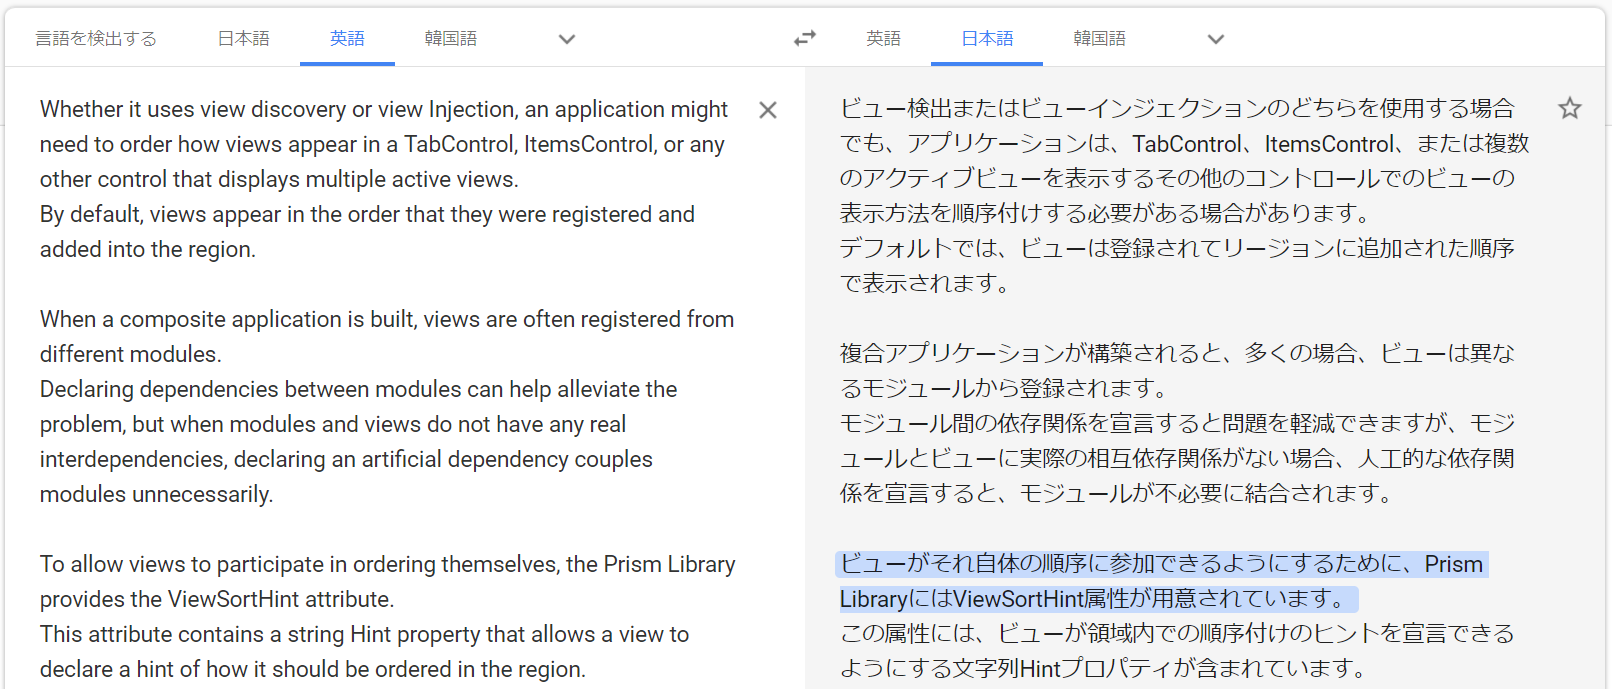
Whether it uses view discovery or view Injection, an application might need to order how views appear in a TabControl, ItemsControl, or any other control that displays multiple active views.
By default, views appear in the order that they were registered and added into the region.

When a composite application is built, views are often registered from different modules.
Declaring dependencies between modules can help alleviate the problem, but when modules and views do not have any real interdependencies, declaring an artificial dependency couples modules unnecessarily.

To allow views to participate in ordering themselves, the Prism Library provides the ViewSortHint attribute.
This attribute contains a string Hint property that allows a view to declare a hint of how it should be ordered in the region.
ビュー検出またはビューインジェクションのどちらを使用する場合でも、アプリケーションは、TabControl、ItemsControl、または複数のアクティブビューを表示するその他のコントロールでのビューの表示方法を順序付けする必要がある場合があります。
デフォルトでは、ビューは登録されてリージョンに追加された順序で表示されます。複合アプリケーションが構築されると、多くの場合、ビューは異なるモジュールから登録されます。
モジュール間の依存関係を宣言すると問題を軽減できますが、モジュールとビューに実際の相互依存関係がない場合、人工的な依存関係を宣言すると、モジュールが不必要に結合されます。ビューがそれ自体の順序に参加できるようにするために、Prism LibraryにはViewSortHint属性が用意されています。
この属性には、ビューが領域内での順序付けのヒントを宣言できるようにする文字列Hintプロパティが含まれています。
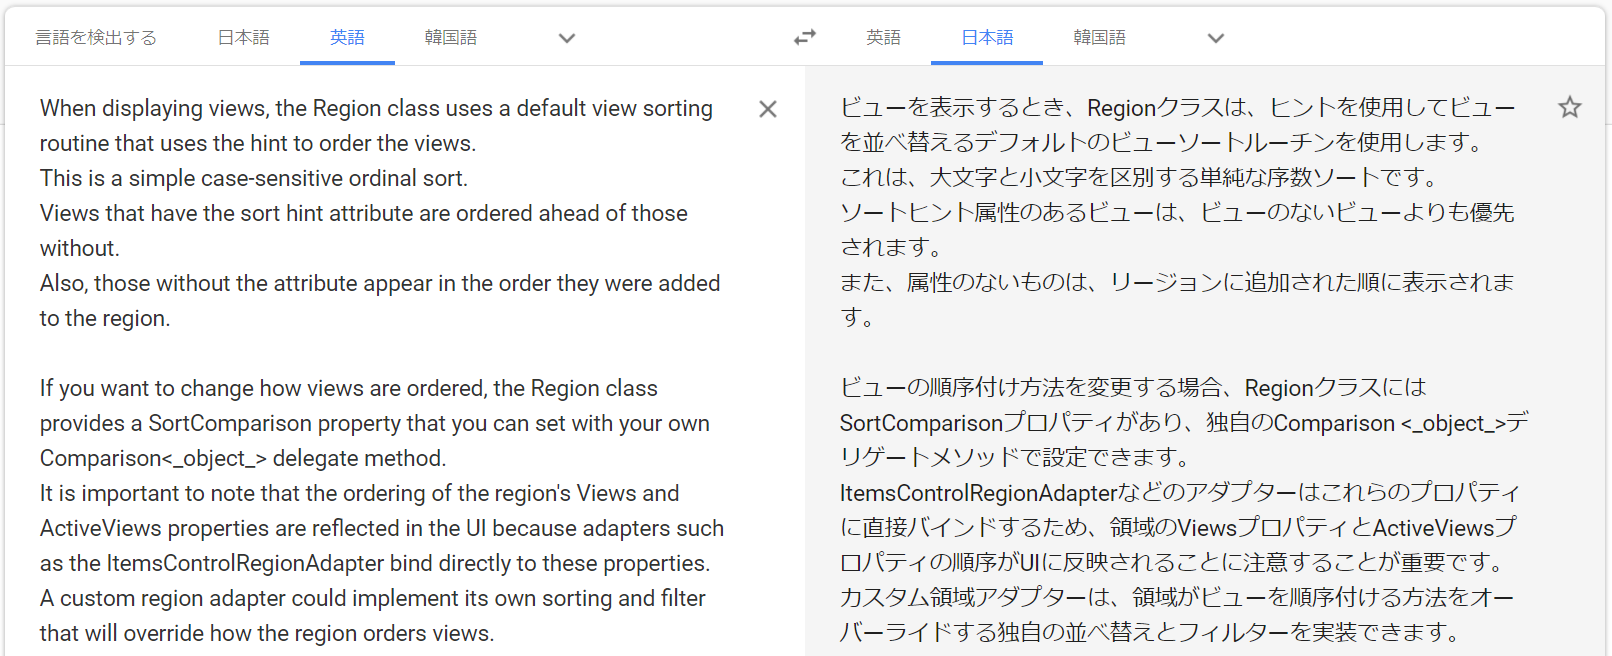
When displaying views, the Region class uses a default view sorting routine that uses the hint to order the views.
This is a simple case-sensitive ordinal sort.
Views that have the sort hint attribute are ordered ahead of those without.
Also, those without the attribute appear in the order they were added to the region.

If you want to change how views are ordered, the Region class provides a SortComparison property that you can set with your own Comparison<_object_> delegate method.
It is important to note that the ordering of the region's Views and ActiveViews properties are reflected in the UI because adapters such as the ItemsControlRegionAdapter bind directly to these properties.
A custom region adapter could implement its own sorting and filter that will override how the region orders views.
ビューを表示するとき、Regionクラスは、ヒントを使用してビューを並べ替えるデフォルトのビューソートルーチンを使用します。
これは、大文字と小文字を区別する単純な序数ソートです。
ソートヒント属性のあるビューは、ビューのないビューよりも優先されます。
また、属性のないものは、リージョンに追加された順に表示されます。ビューの順序付け方法を変更する場合、RegionクラスにはSortComparisonプロパティがあり、独自のComparison <object>デリゲートメソッドで設定できます。
ItemsControlRegionAdapterなどのアダプターはこれらのプロパティに直接バインドするため、領域のViewsプロパティとActiveViewsプロパティの順序がUIに反映されることに注意することが重要です。
カスタム領域アダプターは、領域がビューを順序付ける方法をオーバーライドする独自の並べ替えとフィルターを実装できます。Sharing Data Between Multiple Regions
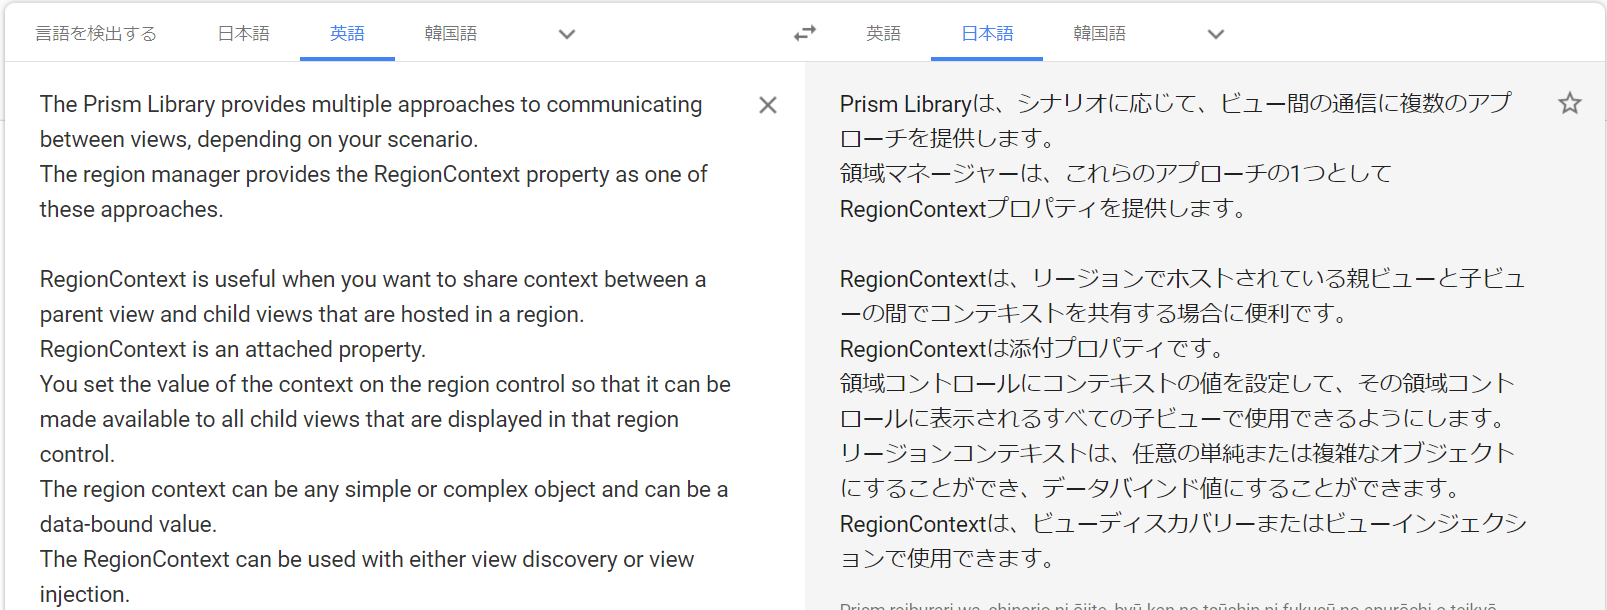
The Prism Library provides multiple approaches to communicating between views, depending on your scenario.
The region manager provides the RegionContext property as one of these approaches.

RegionContext is useful when you want to share context between a parent view and child views that are hosted in a region.
RegionContext is an attached property.
You set the value of the context on the region control so that it can be made available to all child views that are displayed in that region control.
The region context can be any simple or complex object and can be a data-bound value.
The RegionContext can be used with either view discovery or view injection.
Prism Libraryは、シナリオに応じて、ビュー間の通信に複数のアプローチを提供します。
領域マネージャーは、これらのアプローチの1つとしてRegionContextプロパティを提供します。RegionContextは、リージョンでホストされている親ビューと子ビューの間でコンテキストを共有する場合に便利です。
RegionContextは添付プロパティです。
領域コントロールにコンテキストの値を設定して、その領域コントロールに表示されるすべての子ビューで使用できるようにします。
リージョンコンテキストは、任意の単純または複雑なオブジェクトにすることができ、データバインド値にすることができます。
RegionContextは、ビューディスカバリーまたはビューインジェクションで使用できます。
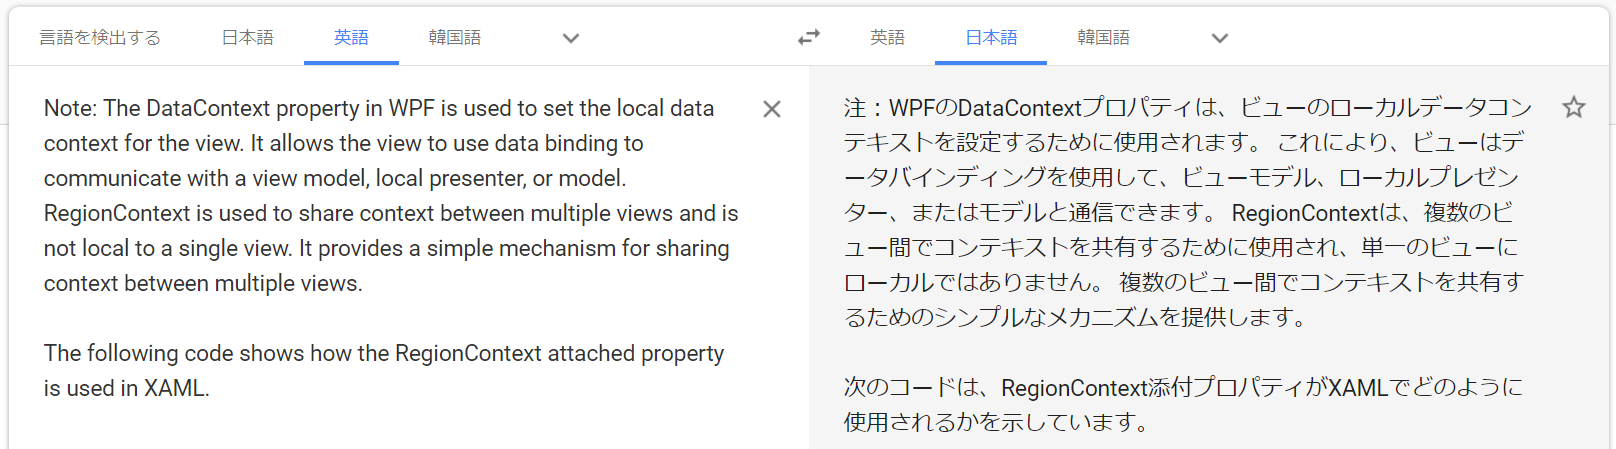
Note: The DataContext property in WPF is used to set the local data context for the view. It allows the view to use data binding to communicate with a view model, local presenter, or model. RegionContext is used to share context between multiple views and is not local to a single view. It provides a simple mechanism for sharing context between multiple views.

The following code shows how the RegionContext attached property is used in XAML.
注:WPFのDataContextプロパティは、ビューのローカルデータコンテキストを設定するために使用されます。 これにより、ビューはデータバインディングを使用して、ビューモデル、ローカルプレゼンター、またはモデルと通信できます。 RegionContextは、複数のビュー間でコンテキストを共有するために使用され、単一のビューにローカルではありません。 複数のビュー間でコンテキストを共有するためのシンプルなメカニズムを提供します。
次のコードは、RegionContext添付プロパティがXAMLでどのように使用されるかを示しています。
<TabControl AutomationProperties.AutomationId="DetailsTabControl"
    prism:RegionManager.RegionName="{x:Static local:RegionNames.TabRegion}"
    prism:RegionManager.RegionContext="{Binding Path=SelectedEmployee.EmployeeId}"
...>
You can also set the RegionContext in code, as shown in the following example.次の例に示すように、RegionContextをコードで設定することもできます。
RegionManager.Regions["Region1"].Context = employeeId;
To retrieve the RegionContext in a view, the GetObservableContext static method of the RegionContext class is used.
It passes the view as a parameter and then accesses its Value property, as shown in the following code example.
ビューでRegionContextを取得するには、RegionContextクラスのGetObservableContext静的メソッドを使用します。
次のコード例に示すように、ビューをパラメーターとして渡し、そのValueプロパティにアクセスします。private void GetRegionContext() { this.Model.EmployeeId = (int)RegionContext.GetObservableContext(this).Value; }
The value of the RegionContext can be changed from within a view by simply assigning a new value to its Value property.
Views can opt to be notified of changes to the RegionContext by subscribing to the PropertyChanged event on the ObservableObject that is returned by the GetObservableContext method.
This allows multiple views to be kept in synchronization when their RegionContext is changed.
The following code example demonstrates subscribing to the PropertyChanged event.
RegionContextの値は、Valueプロパティに新しい値を割り当てるだけで、ビュー内から変更できます。
ビューは、GetObservableContextメソッドによって返されるObservableObjectのPropertyChangedイベントをサブスクライブすることにより、RegionContextへの変更の通知を受け取ることを選択できます。
これにより、RegionContextが変更されたときに複数のビューの同期を維持できます。
次のコード例は、PropertyChangedイベントのサブスクライブを示しています。ObservableObject<object> viewRegionContext = RegionContext.GetObservableContext(this); viewRegionContext.PropertyChanged += this.ViewRegionContext_OnPropertyChangedEvent; private void ViewRegionContext_OnPropertyChangedEvent(object sender, PropertyChangedEventArgs args) { if (args.PropertyName == "Value") { var context = (ObservableObject<object>) sender; int newValue = (int)context.Value; } }
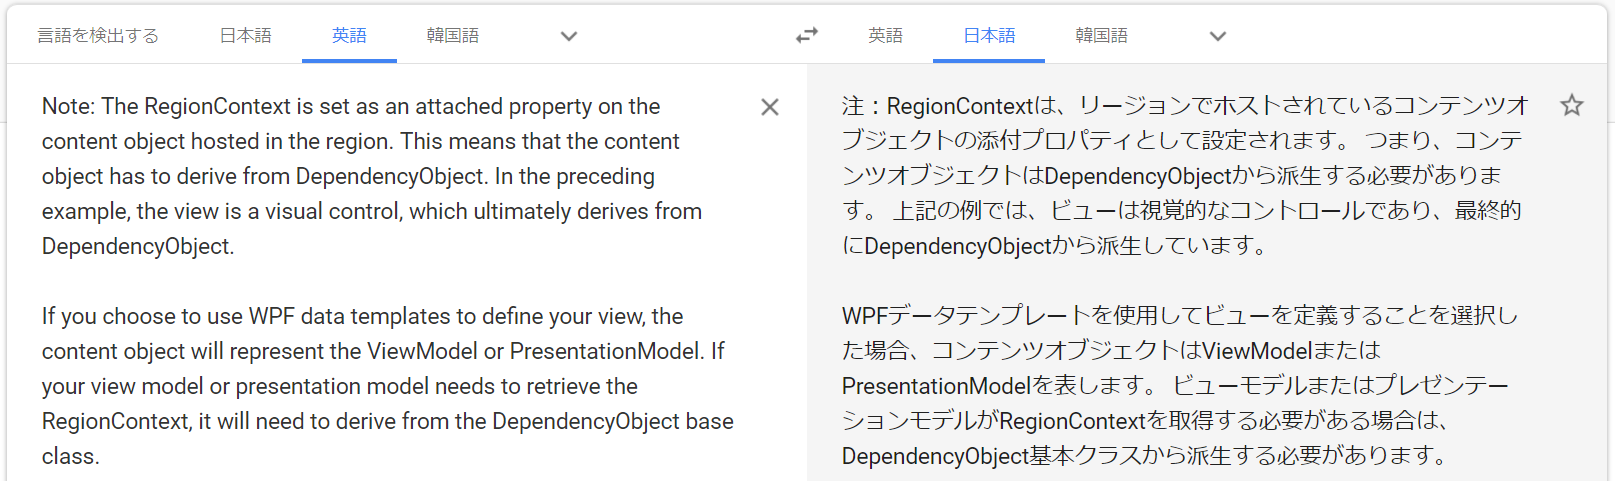
Note: The RegionContext is set as an attached property on the content object hosted in the region. This means that the content object has to derive from DependencyObject. In the preceding example, the view is a visual control, which ultimately derives from DependencyObject.

If you choose to use WPF data templates to define your view, the content object will represent the ViewModel or PresentationModel. If your view model or presentation model needs to retrieve the RegionContext, it will need to derive from the DependencyObject base class.
注:RegionContextは、リージョンでホストされているコンテンツオブジェクトの添付プロパティとして設定されます。 つまり、コンテンツオブジェクトはDependencyObjectから派生する必要があります。 上記の例では、ビューは視覚的なコントロールであり、最終的にDependencyObjectから派生しています。
WPFデータテンプレートを使用してビューを定義することを選択した場合、コンテンツオブジェクトはViewModelまたはPresentationModelを表します。 ビューモデルまたはプレゼンテーションモデルがRegionContextを取得する必要がある場合は、DependencyObject基本クラスから派生する必要があります。
Creating Multiple Instances of a Region
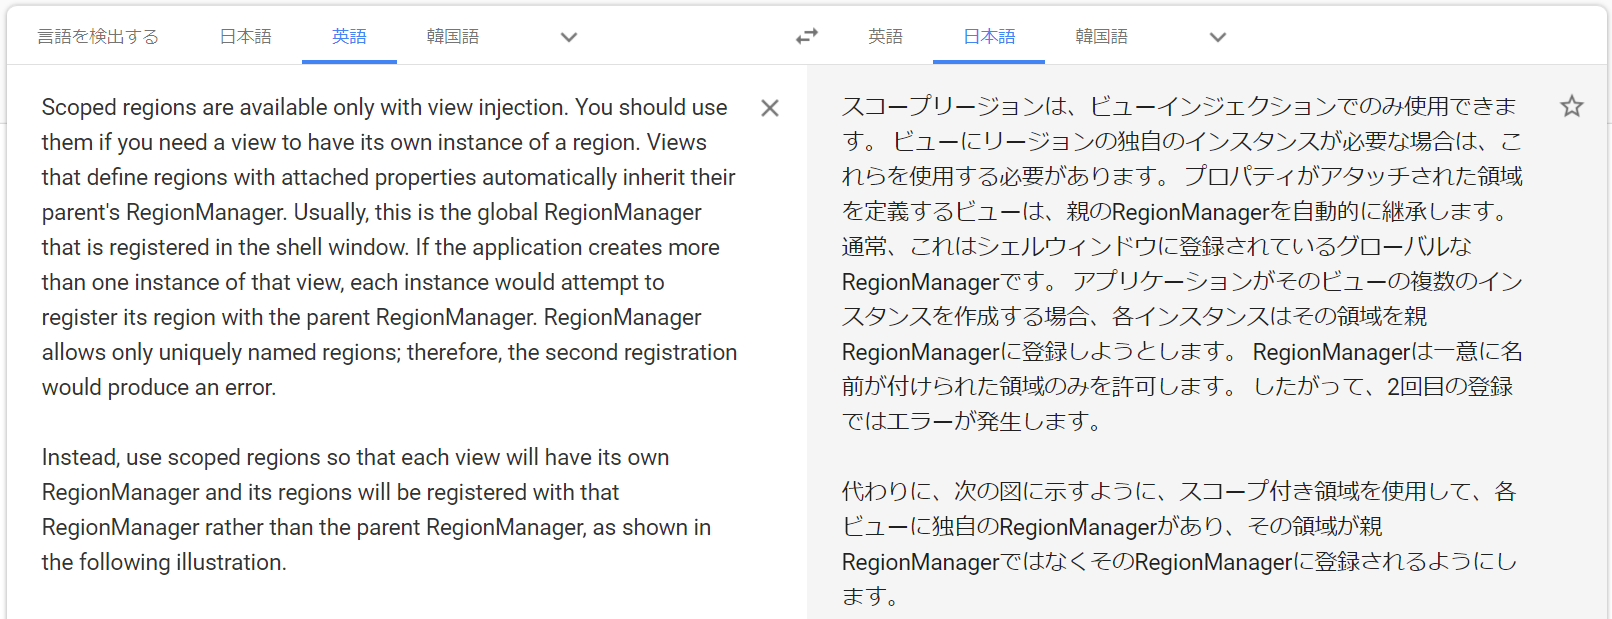
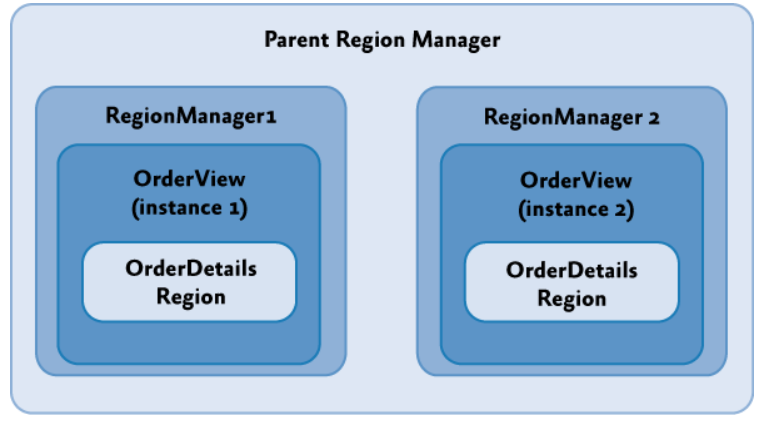
Scoped regions are available only with view injection. You should use them if you need a view to have its own instance of a region. Views that define regions with attached properties automatically inherit their parent's RegionManager. Usually, this is the global RegionManager that is registered in the shell window. If the application creates more than one instance of that view, each instance would attempt to register its region with the parent RegionManager. RegionManager allows only uniquely named regions; therefore, the second registration would produce an error.

Instead, use scoped regions so that each view will have its own RegionManager and its regions will be registered with that RegionManager rather than the parent RegionManager, as shown in the following illustration.
スコープリージョンは、ビューインジェクションでのみ使用できます。 ビューにリージョンの独自のインスタンスが必要な場合は、これらを使用する必要があります。 プロパティがアタッチされた領域を定義するビューは、親のRegionManagerを自動的に継承します。 通常、これはシェルウィンドウに登録されているグローバルなRegionManagerです。 アプリケーションがそのビューの複数のインスタンスを作成する場合、各インスタンスはその領域を親RegionManagerに登録しようとします。 RegionManagerは一意に名前が付けられた領域のみを許可します。 したがって、2回目の登録ではエラーが発生します。
代わりに、次の図に示すように、スコープ付き領域を使用して、各ビューに独自のRegionManagerがあり、その領域が親RegionManagerではなくそのRegionManagerに登録されるようにします。
To create a local RegionManager for a view, specify that a new RegionManager should be created when you add your view to a region, as illustrated in the following code example.ビューのローカルRegionManagerを作成するには、次のコード例に示すように、ビューをリージョンに追加するときに新しいRegionManagerを作成するように指定します。
IRegion detailsRegion = this.regionManager.Regions["DetailsRegion"];
View view = new View();
bool createRegionManagerScope = true;
IRegionManager detailsRegionManager = detailsRegion.Add(view, null, createRegionManagerScope);
The Add method will return the new RegionManager that the view can retain for further access to the local scope.Addメソッドは、ローカルスコープにさらにアクセスするためにビューが保持できる新しいRegionManagerを返します。


- 投稿日:2020-08-12T16:36:01+09:00
(Tera Term をダミー接続するための) Windows 名前付きパイプ サーバー
動機
Tera Term のマクロ言語 (Tera Term Language) の通信コマンドのほとんどはなにがしかのホストに接続していないと実行できません。職場の Windows 10 デスクトップ環境には Tera Term が入っていて TTL の通信コマンドの動作を実行させて確かめたいのですが、開発系でないので気安く接続できるようなホストはありません。
Tera Term は名前付きパイプに接続でき、 Windows に .NET が入っていればローカルに名前付きパイプ サーバーを立てられるそうなので、試みてみました。
参考文献
- Powershellで名前付きパイプを扱う - じゅんじゅんのきまぐれ
- NamedPipeServerStream クラス (System.IO.Pipes) | Microsoft Docs
- エコーバックせずに文字列を入力する(Console.ReadKey) - Programming/.NET Framework/Tips - 総武ソフトウェア推進所
- [C#]処理ループ内でキー入力を受け付ける – エンジニ屋
- 非同期名前付きパイプの基礎 / クライアントSide - Neareal)
- .NETで名前付きパイプを試す(4) - 複数のクライアントに対応したサーバにする - いちろぐ
実装
C# および .NET の学習が不十分なので、これで問題ないのか心もとないですが、動作はしているようです。
基本的に文献 1. の非同期バージョンを C# に書き直しただけですが、クライアントからの入力をエコーするのではなく、双方向から入力できるようにしてみました。その際に参考になったのが文献 3. と 4. です。
なお、文献 1. の同期バージョンの PowerShell スクリプト1を実行すると Ctrl + C も Ctrl + Break もきかなくなることもあり、不慣れな C# にチャレンジしてみました2。
PipeServer.csusing System; using System.IO; using System.IO.Pipes; using System.Text; using System.Threading; using System.Threading.Tasks; class PipeServer { private NamedPipeServerStream pipe; private byte[] buffer; PipeServer(string name) { this.pipe = new NamedPipeServerStream(name, PipeDirection.InOut, 1, PipeTransmissionMode.Byte, PipeOptions.Asynchronous); this.buffer = new byte[512]; } private void ConnectCallback(IAsyncResult result) { Console.WriteLine("Connected."); // this.pipe.EndWaitForConnection(result); ((NamedPipeServerStream)result.AsyncState).EndWaitForConnection(result); } private void ReadCallback(IAsyncResult result) { int len = ((NamedPipeServerStream)result.AsyncState).EndRead(result); if (len > 0) Console.Write(Encoding.UTF8.GetString(this.buffer, 0, len)); } async private void WriteCallback(IAsyncResult result) { ((NamedPipeServerStream)result.AsyncState).EndWrite(result); while (!result.IsCompleted) await Task.Delay(10); } async private void ReadingThread() { while (this.pipe.IsConnected) { IAsyncResult ar = this.pipe.BeginRead(this.buffer, 0, this.buffer.Length, this.ReadCallback, this.pipe); while (!ar.IsCompleted) await Task.Delay(10); } } static void Main(string[] args) { PipeServer server = new PipeServer(args[0]); try { IAsyncResult ar = server.pipe.BeginWaitForConnection(server.ConnectCallback, server.pipe); Console.WriteLine("Waiting for client connection at \\\\.\\pipe\\" + args[0] + " ..."); while (!ar.IsCompleted) Thread.Sleep(100); Thread t = new Thread(server.ReadingThread); t.Start(); byte[] buf; ConsoleKeyInfo cki; while (server.pipe.IsConnected) { if (Console.KeyAvailable) { cki = Console.ReadKey(true); buf = Encoding.UTF8.GetBytes(new char[1] { (char)cki.KeyChar }); if (buf.Length > 0) ar = server.pipe.BeginWrite(buf, 0, buf.Length, server.WriteCallback, server.pipe); while (!ar.IsCompleted) Thread.Sleep(10); } } } finally { server.pipe.Close(); } } }これらのコールバック メソッドはそのコールバック メソッドを指定したメソッドの最後の引数のオブジェクトを
result.AsyncStateで受け取れるらしいのですが、当該の引数のオブジェクトの型にキャストしてやらなければメンバーにアクセスできないようです。 (文献 5.)使い方
C>C:\Windows\Microsoft.NET\Framework\v4.0.30319\csc.exe PipeServer.cs

C>PipeServer.exe test
PipeServer.exeの引数にパイプの名前 (例test) を指定します。 Tera Term の 新しい接続 の ホスト に例として\\.\pipe\testと入力して接続します。接続後、 Tera Term 側でキー入力すると対応する文字が
PipeServer.exe側のコンソールに出ます。その逆も同様です。なお、 Enter キーを押しても入力されるのは
CR(Ctrl + M) のみのようです。「改行」するには Ctrl + M, Ctrl + J と入力しなければなりません。Tera Term で 接続断 を選択するかコンソールで Ctrl + C を入力して接続を切ります。
改良版
名前付きパイプはパイプ ストリームを複数もつことができ、それぞれにクライアントを接続できます。よって、名前付きパイプを介して二つの Tera Term のインスタンスで通信できれば所期の目的は達成できることに気が付きました。また、文献 2. をもうすこし丁寧に見直したら、うってつけのメソッドがありました。
PipeServer2.csusing System; using System.IO.Pipes; using System.Threading; using System.Threading.Tasks; class PipeServer { private static void ConnectCallback(IAsyncResult result) { ((NamedPipeServerStream)result.AsyncState).EndWaitForConnection(result); } static void Main(string[] args) { string name = args[0]; Console.WriteLine("Waiting for client connection at \\\\.\\pipe\\" + name + " ..."); using (NamedPipeServerStream stream1 = new NamedPipeServerStream(name, PipeDirection.InOut, 2, PipeTransmissionMode.Byte, PipeOptions.Asynchronous), stream2 = new NamedPipeServerStream(name, PipeDirection.InOut, 2, PipeTransmissionMode.Byte, PipeOptions.Asynchronous)) { IAsyncResult ar = stream1.BeginWaitForConnection(ConnectCallback, stream1); while (!ar.IsCompleted) Thread.Sleep(100); ar = stream2.BeginWaitForConnection(ConnectCallback, stream2); while (!ar.IsCompleted) Thread.Sleep(100); Console.WriteLine("Connected."); while (stream1.IsConnected && stream2.IsConnected) { Task.WaitAll(new [] { stream1.CopyToAsync(stream2), stream2.CopyToAsync(stream1), }); } } } }使い方
C>C:\Windows\Microsoft.NET\Framework\v4.0.30319\csc.exe PipeServer2.cs

C>PipeServer2.exe test
PipeServer2.exeの引数にパイプの名前 (例test) を指定します。Tera Term を二つ起動してそれぞれの 新しい接続 の ホスト に例としては
\\.\pipe\testと入力して接続します。パイプ名は同一ですが、それぞれが別々のパイプ ストリームにつながります。接続後、一方の Tera Term でキー入力すると対応する文字が他方の Tera Term に出ます。
こちらの方法では XMODEM などのファイル転送もできそうだと思いましたが、やってみるとうまくいきませんでした3。ところが、自家用 PC にて com0com を用いてファイル転送を行ってもまったく同様にうまくいきませんでした。 よって、この実装固有の問題ではないようです。
Tera Term で 接続断 を選択するかコンソールで Ctrl + C を入力して接続を切ります。
- 投稿日:2020-08-12T13:38:52+09:00
[Shopify] API (REST) ページネーション
今日はShopifyのページネーションに関してまとめます。 コードのは解説は
ASP.Net Core 3.1C#になります。ページネーション?
ページネーションとは訳の通りページ送りです。例えば、APIを介してなにかをリクエストした際に100万行のデータが返ってきても処理しきれない、レスポンスを返すShopifyのサーバーからしても負荷が大きすぎるため、分散(ページにわけて)レスポンス(依頼に対しての返信)をします。
たとえば、Shopifyにある
customersavedsearch内にいる顧客一覧を取得する際に、10万人の顧客情報がある、なんてこともあります。
customersavedsearchの詳細はこちら
https://shopify.dev/docs/admin-api/rest/reference/customers/customersavedsearch#other-2020-07そして、10万人いるのですが、デフォルトで50人、最大で250人づつしか返してくれません。なので、ページ送りをする必要があります。
ページ送りの仕組み(ざっくり)
Shopifyにリクエスト(依頼)を送ると、レスポンス(返信)のヘッダー部分に次のページを示す値が付帯されています。その次ページの値を読み取って、次のリクエストを送るという仕組みです。
じゃ、
loopすればいいな、と思うかもしれませんが、このリクエストをループで処理すると、ShopifyのApi上限を超えることもありますので注意が必要です。RESTAPIの場合1秒間に2リクエストを上限としていますので、数秒間隔でリクエストを送るように制御することをお勧めします。上限に関しては下記を参照ください。
https://shopify.dev/concepts/about-apis/rate-limitsリクエストプロパティ (Shopify Api Serviceにリクエスト)
Shopify APIにリクエストを送信する際に指定できるパラメターは下記です。
例: 1ページに3レコード返してほしい時
https://{yourshop}.myshopify.com/admin/api/2020-07/customer_saved_searches/{customer_saved_search_id}/customers.json?limit=3上記は初期リクエスト時に1ページにいくつのレコードを返してほしいか指定するときに使います。
次のページを参照したいというときは
page_infoも指定する必要があります。page_infoの値はAPIレスポンスに含まれるヘッダー情報を読み取る必要があります。(それは後ほど)リクエスト時に指定できるページネーションに関するプロパティは下記です。
プロパティ 説明 page_infoページを指定するID。APIレスポンスに含まれるページIDをここで指定します。 limit返してほしいレコード数を指定 fields返してほしいプロパティを指定(サポートされているAPIは限定されています) レスポンスプロパティ (Shopify Api Serviceからのレスポンス)
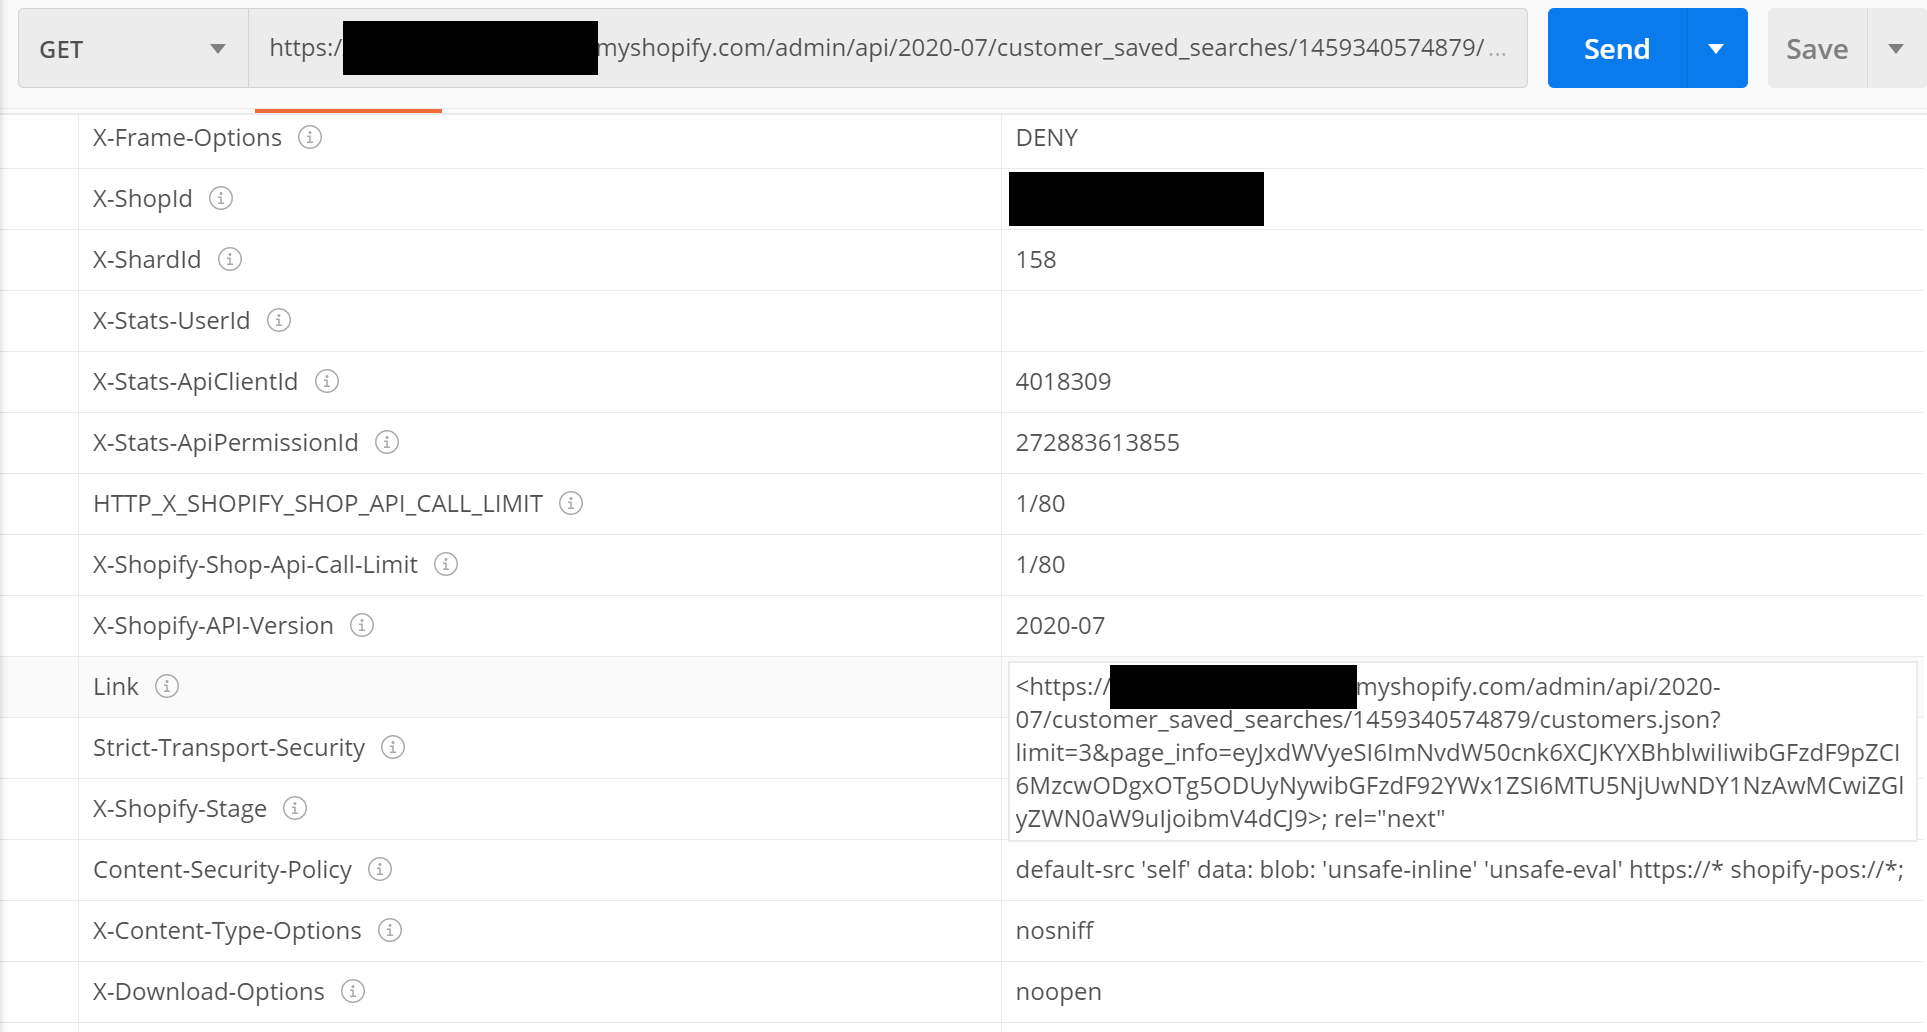
postmanのリクエストとレスポンスは下記です
下記のヘッダープロパティーを解読します。ヘッダー内のプロパティは
Linkです。次のページがない時はLinkプロパティー自体がありません。<https://{yourshop}.myshopify.com/admin/api/2020-07/customer_saved_searches/{customer_saved_search_id}/customers.json?limit=3&page_info=eyJxdWVyeSI6ImNvdW50cnk6XCJKYXBhblwiIiwibGFzdF9pZCI6MzcwODgxOTg5ODUyNywibGFzdF92YWx1ZSI6MTU5NjUwNDY1NzAwMCwiZGlyZWN0aW9uIjoibmV4dCJ9>; rel="next"上記の値から page_info= 部分を読み取ります。
page_infoの抽出
下記のコードで抽出しています。
  public string ExtractPageInfo(string url)
        {
            // return string that is page_info=
            var pageInfo = "";

            // strip down <>
            url = url.Replace("<", "");
            url = url.Replace(">", "");

            var key = "page_info=";

            Match match = Regex.Match(url, key, RegexOptions.IgnoreCase);

            if (match.Success)
            {

                var length = key.Length;

                pageInfo = url.Substring(match.Index + length, url.Length - (match.Index + length));
            }

            return pageInfo;
        }
解説
実際のコードで解説したいと思います。 下記の環境はASP.NET Core 3.1 C#です。
全体(とりあえず)
まず全体のコードは下記です。
 public async Task<ShopifyCustomerSavedSearcheCustomers> GetListOfUsersEmailInShopifyCustomerSavedSearcheAsync(string storeUrl,
            string nameOfCustomerSavedSearches, string pageInfo)
        {
            // read 250 at time

            var endPoint = apiVersion + "/customer_saved_searches/" + nameOfCustomerSavedSearches + "/customers.json";

            var store = _organizationHandlers.GetOrganization(storeUrl);

            var rawStoreLog = new Dictionary<string, string>();
            rawStoreLog.Add("Store", JsonConvert.SerializeObject(store));

            _telemetry.TrackEvent("customer_saved_searches.json - store", rawStoreLog);

            var ShopifyCustomerSavedSearcheCustomers = new ShopifyCustomerSavedSearcheCustomers();

            try
            {
                using (var httpClient = new HttpClient())
                {
                    httpClient.DefaultRequestHeaders.Accept.Add(new MediaTypeWithQualityHeaderValue("application/json"));
                    httpClient.DefaultRequestHeaders.Add("X-Shopify-Access-Token", store.AccessToken);

                    var requestUrl = "https://" + storeUrl + endPoint + "?limit=250&fields=email,first_name,last_name";

                    if(!string.IsNullOrEmpty(pageInfo))
                    {
                        requestUrl += "&page_info=" + pageInfo;
                    }

                    using (var response = await httpClient.GetAsync(requestUrl))
                    {
                        string apiResponse = await response.Content.ReadAsStringAsync();

                        // Try and get link property of the header
                        var apiHeaderCollectionLinkKeyValuePairs = from l in response.Headers where l.Key == "Link" select l;
                        var apiHeaderCollectionLinkKeyValuePairString = "";

                        if (apiHeaderCollectionLinkKeyValuePairs.Any())
                        {
                            // Insert page_info (if any)
                            apiHeaderCollectionLinkKeyValuePairString = apiHeaderCollectionLinkKeyValuePairs.FirstOrDefault().Value.First();
                        }

                        var rawLog = new Dictionary<string, string>();
                        rawLog.Add("ApiResponse", apiResponse);

                        _telemetry.TrackEvent("customer_saved_searches.json", rawLog);

                        ShopifyCustomerSavedSearcheCustomers = JsonConvert.DeserializeObject<ShopifyCustomerSavedSearcheCustomers>(apiResponse);

                        // Append page_info
                        ShopifyCustomerSavedSearcheCustomers.link = apiHeaderCollectionLinkKeyValuePairString;
                    }
                }

                return ShopifyCustomerSavedSearcheCustomers;
            }
            catch (Exception e)
            {
                var log = new Dictionary<string, string>();
                log.Add("Message", e.Message);

                _telemetry.TrackEvent("GetShopifyCustomerSavedSearchesAsync", log);
            }

            return ShopifyCustomerSavedSearcheCustomers;

        }


    }
メソッドの定義
まずはこちらから
public async Task<ShopifyCustomerSavedSearcheCustomers> GetListOfUsersEmailInShopifyCustomerSavedSearcheAsync(string storeUrl,
            string nameOfCustomerSavedSearches, string pageInfo)
こちらのメセッドの入力値に pageInfoを設けています。ここでの想定はpageInfo自体をこのメソッドに渡しています。注意点としては、このメソッド自体でページネーションの処理は行っていません。あくまでの独立性を担保するためにページネーションを実際に行うメソッドはもうひとつ上のレイヤーにおいています。
オブジェクトの準備
次の部分でこれから行う処理に使われるオブジェクトを作っておきます。
var endPoint = apiVersion + "/customer_saved_searches/" + nameOfCustomerSavedSearches + "/customers.json";

            var store = _organizationHandlers.GetOrganization(storeUrl);

            var rawStoreLog = new Dictionary<string, string>();
            rawStoreLog.Add("Store", JsonConvert.SerializeObject(store));

            _telemetry.TrackEvent("customer_saved_searches.json - store", rawStoreLog);

            var ShopifyCustomerSavedSearcheCustomers = new ShopifyCustomerSavedSearcheCustomers();
ここでは、DBに保存しているマーチャント情報の取得と、エラー検知・デバグ用のApplication Insightへログを記載しています。
レスポンス受ける用のクラスを準備
ShopifyCustomerSavedSearcheCustomersは受用のオブジェクトで下記のように定義しています。
  public class ShopifyCustomerSavedSearcheCustomers
    {
        public List<ShopifyCustomerSavedSearcheCustomer> customers { get; set; }
        public string link { get; set; }
    }

    public class ShopifyCustomerSavedSearcheCustomer
    {
        public string email { get; set; }
        public string first_name { get; set; }
        public string last_name { get; set; }
    }
Shoify API Request
次から実際にShopifyへリクエストしている部分です。
  try
            {
                using (var httpClient = new HttpClient())
                {
                    httpClient.DefaultRequestHeaders.Accept.Add(new MediaTypeWithQualityHeaderValue("application/json"));
                    httpClient.DefaultRequestHeaders.Add("X-Shopify-Access-Token", store.AccessToken);

                    var requestUrl = "https://" + storeUrl + endPoint + "?limit=250&fields=email,first_name,last_name";

                    if(!string.IsNullOrEmpty(pageInfo))
                    {
                        requestUrl += "&page_info=" + pageInfo;
                    }

                    using (var response = await httpClient.GetAsync(requestUrl))
                    {
                        string apiResponse = await response.Content.ReadAsStringAsync();

                        // Try and get link property of the header
                        var apiHeaderCollectionLinkKeyValuePairs = from l in response.Headers where l.Key == "Link" select l;
                        var apiHeaderCollectionLinkKeyValuePairString = "";

                        if (apiHeaderCollectionLinkKeyValuePairs.Any())
                        {
                            // Insert page_info (if any)
                            apiHeaderCollectionLinkKeyValuePairString = apiHeaderCollectionLinkKeyValuePairs.FirstOrDefault().Value.First();
                        }

                        var rawLog = new Dictionary<string, string>();
                        rawLog.Add("ApiResponse", apiResponse);

                        _telemetry.TrackEvent("customer_saved_searches.json", rawLog);

                        ShopifyCustomerSavedSearcheCustomers = JsonConvert.DeserializeObject<ShopifyCustomerSavedSearcheCustomers>(apiResponse);

                        // Append page_info
                        ShopifyCustomerSavedSearcheCustomers.link = apiHeaderCollectionLinkKeyValuePairString;
                    }
                }

                return ShopifyCustomerSavedSearcheCustomers;
            }
            catch (Exception e)
            {
                var log = new Dictionary<string, string>();
                log.Add("Message", e.Message);

                _telemetry.TrackEvent("GetShopifyCustomerSavedSearchesAsync", log);
            }
Shoify API Request (ヘッダー)
上記のコードをさらに詳しく見てみます。
 using (var httpClient = new HttpClient())
                {
                    httpClient.DefaultRequestHeaders.Accept.Add(new MediaTypeWithQualityHeaderValue("application/json"));
                    httpClient.DefaultRequestHeaders.Add("X-Shopify-Access-Token", store.AccessToken);

                    var requestUrl = "https://" + storeUrl + endPoint + "?limit=250&fields=email,first_name,last_name";

                    if(!string.IsNullOrEmpty(pageInfo))
                    {
                        requestUrl += "&page_info=" + pageInfo;
                    }

                    using (var response = await httpClient.GetAsync(requestUrl))
                    {
                        string apiResponse = await response.Content.ReadAsStringAsync();

                        // Try and get link property of the header
                        var apiHeaderCollectionLinkKeyValuePairs = from l in response.Headers where l.Key == "Link" select l;
                        var apiHeaderCollectionLinkKeyValuePairString = "";

                        if (apiHeaderCollectionLinkKeyValuePairs.Any())
                        {
                            // Insert page_info (if any)
                            apiHeaderCollectionLinkKeyValuePairString = apiHeaderCollectionLinkKeyValuePairs.FirstOrDefault().Value.First();
                        }

                        var rawLog = new Dictionary<string, string>();
                        rawLog.Add("ApiResponse", apiResponse);

                        _telemetry.TrackEvent("customer_saved_searches.json", rawLog);

                        ShopifyCustomerSavedSearcheCustomers = JsonConvert.DeserializeObject<ShopifyCustomerSavedSearcheCustomers>(apiResponse);

                        // Append page_info
                        ShopifyCustomerSavedSearcheCustomers.link = apiHeaderCollectionLinkKeyValuePairString;
                    }
                }

                return ShopifyCustomerSavedSearcheCustomers;
            }
ここではヘッダー部分にAccessTokenを指定し、リクエスト用のUrl文字列を生成しています。もしpageInfoが空白またはnullでなければ、リクエスト用URLの文字列最後に追加します。
httpClient.DefaultRequestHeaders.Accept.Add(new MediaTypeWithQualityHeaderValue("application/json"));
                    httpClient.DefaultRequestHeaders.Add("X-Shopify-Access-Token", store.AccessToken);

                    var requestUrl = "https://" + storeUrl + endPoint + "?limit=250&fields=email,first_name,last_name";

 if(!string.IsNullOrEmpty(pageInfo))
                    {
                        requestUrl += "&page_info=" + pageInfo;
                    }
レスポンスの処理
次は実際のリクエスト行い、帰ってきた値に対して処理を行います。今回はヘッダー部分にあるLinkというプロパティーも読み込んでいます。このLinkは次のページがなければレスポンスの値に含まれませんので
linq構文で検索を行い結果にあるか確認をします.Any()部分です。そのあとはデバグ用にレスポンスの文字列そのものをapplication insightに記録し、事前に定義したオンジェクトに対してjsonをマッピングしています。そして最後のlinkの値を付随しています。
 using (var response = await httpClient.GetAsync(requestUrl))
                    {
                        string apiResponse = await response.Content.ReadAsStringAsync();

                        // Try and get link property of the header
                        var apiHeaderCollectionLinkKeyValuePairs = from l in response.Headers where l.Key == "Link" select l;
                        var apiHeaderCollectionLinkKeyValuePairString = "";

                        if (apiHeaderCollectionLinkKeyValuePairs.Any())
                        {
                            // Insert page_info (if any)
                            apiHeaderCollectionLinkKeyValuePairString = apiHeaderCollectionLinkKeyValuePairs.FirstOrDefault().Value.First();
                        }

                        var rawLog = new Dictionary<string, string>();
                        rawLog.Add("ApiResponse", apiResponse);

                        _telemetry.TrackEvent("customer_saved_searches.json", rawLog);

                        ShopifyCustomerSavedSearcheCustomers = JsonConvert.DeserializeObject<ShopifyCustomerSavedSearcheCustomers>(apiResponse);

                        // Append page_info
                        ShopifyCustomerSavedSearcheCustomers.link = apiHeaderCollectionLinkKeyValuePairString;
このようにレスポンスのヘッダー値を確認してページネーションを行います。
本日は以上です。
募集
トランスコスモス技術研究所では引き続きShopifyに関わる開発人員やプロジェクトマネージャーを募集しています。こちらをご参照ください。
http://t-rnd.com/Jobs/
- 投稿日:2020-08-12T12:37:01+09:00
【C#】 Encoding.GetEncoding()の主要な表記
概要
テキスト ファイルを操作するコンソール アプリを作成していて、ファイルの文字コード指定方法をオプション化するために、Encoding.GetEncoding()で指定可能な主要な表記を調べてみた。
要約
- WebNameでの指定
- Case-insensitive
UTF-8LEUTF-8BEは定義されていない。(当たり前)Encoding.UnicodeUTF-16UTF-16LEUCS-2は等価。Encoding.UTF32UTF-32UTF-32LEは等価。UCS-1UCS-4は定義されていないが、UCS-2は定義されている。
- BOM無しの表記は定義されていない。
UTF-8NUTF-16NUTF-32Nなどは、日本固有のローカルルルルルールのため定義されていない。- UNICODE系は基本BOMあり。
- ただし、
UTF-7にはBOMは存在しない。- BOM無しを作る場合は個別のクラスで new する必要がある。
UTF-7 ⇒~~new UTF7Encoding();
UTF7Encoding コンストラクター (System.Text) | Microsoft Docs- UTF-8 ⇒
new UTF8Encoding(bool encoderShouldEmitUTF8Identifier);
UTF8Encoding コンストラクター (System.Text) | Microsoft Docs
encoderShouldEmitUTF8IdentifierがfalseでBOMなし- UTF-16 ⇒
new UnicodeEncoding(bool bigEndian, bool byteOrderMark);
UnicodeEncoding コンストラクター (System.Text) | Microsoft Docs
byteOrderMarkがfalseでBOMなし- UTF-32⇒
new UTF32Encoding(bool bigEndian, bool byteOrderMark);
UTF32Encoding コンストラクター (System.Text) | Microsoft Docs
byteOrderMarkがfalseでBOMなし- UNICODEに限らず、BOMなしの場合は
Encoding.GetPreamble()は 要素数0のbyte配列 を返す。
(UNICODEに限らず、null はない。)。Encoding.DefaultはOSのシステム文字コード。
- CLRのEncodingではない。
- 日本語版Windowsだと Shit-JIS 。
- 欧米版Windowsだと Windows-1252 。
- 最近のLinuxやmacだと UTF-8 (予想)。
S-JISは定義されていない。CP932MS932WINDOWS-31Jは定義されていない。 (当たり前)主要な表記一覧取得結果
code class CodePage WindowsCodePage GetPreamble() EncodingName HeaderName BodyName WebName Encoding.GetEncoding(1252) SBCSCodePageEncoding 1252 1252 (0) 西ヨーロッパ言語 (Windows) Windows-1252 iso-8859-1 Windows-1252 Encoding.GetEncoding(932) DBCSCodePageEncoding 932 932 (0) 日本語 (シフト JIS) iso-2022-jp iso-2022-jp shift_jis Encoding.GetEncoding(65001) UTF8Encoding 65001 1200 EF BB BF (3) Unicode (UTF-8) utf-8 utf-8 utf-8 Encoding.GetEncoding("s-jis") n/a n/a n/a n/a n/a n/a n/a n/a Encoding.GetEncoding("shift-jis") DBCSCodePageEncoding 932 932 (0) 日本語 (シフト JIS) iso-2022-jp iso-2022-jp shift_jis Encoding.GetEncoding("cp932") n/a n/a n/a n/a n/a n/a n/a n/a Encoding.GetEncoding("ms932") n/a n/a n/a n/a n/a n/a n/a n/a Encoding.GetEncoding("windows-31j") n/a n/a n/a n/a n/a n/a n/a n/a Encoding.GetEncoding("utf-7") UTF7Encoding 65000 1200 (0) Unicode (UTF-7) utf-7 utf-7 utf-7 Encoding.GetEncoding("utf-8") UTF8Encoding 65001 1200 EF BB BF (3) Unicode (UTF-8) utf-8 utf-8 utf-8 Encoding.GetEncoding("utf-16") UnicodeEncoding 1200 1200 FF FE (2) Unicode utf-16 utf-16 utf-16 Encoding.GetEncoding("utf-16be") UnicodeEncoding 1201 1200 FE FF (2) Unicode (Big-Endian) utf-16BE utf-16BE utf-16BE Encoding.GetEncoding("utf-16le") UnicodeEncoding 1200 1200 FF FE (2) Unicode utf-16 utf-16 utf-16 Encoding.GetEncoding("utf-32") UTF32Encoding 12000 1200 FF FE 00 00 (4) Unicode (UTF-32) utf-32 utf-32 utf-32 Encoding.GetEncoding("utf-32be") UTF32Encoding 12001 1200 00 00 FE FF (4) Unicode (UTF-32 ビッグ エンディアン) utf-32BE utf-32BE utf-32BE Encoding.GetEncoding("utf-32le") UTF32Encoding 12000 1200 FF FE 00 00 (4) Unicode (UTF-32) utf-32 utf-32 utf-32 Encoding.GetEncoding("utf-7n") n/a n/a n/a n/a n/a n/a n/a n/a Encoding.GetEncoding("utf-8n") n/a n/a n/a n/a n/a n/a n/a n/a Encoding.GetEncoding("utf-16n") n/a n/a n/a n/a n/a n/a n/a n/a Encoding.GetEncoding("utf-16ben") n/a n/a n/a n/a n/a n/a n/a n/a Encoding.GetEncoding("utf-16len") n/a n/a n/a n/a n/a n/a n/a n/a Encoding.GetEncoding("utf-32n") n/a n/a n/a n/a n/a n/a n/a n/a Encoding.GetEncoding("utf-32ben") n/a n/a n/a n/a n/a n/a n/a n/a Encoding.GetEncoding("utf-32len") n/a n/a n/a n/a n/a n/a n/a n/a Encoding.GetEncoding("ucs-1") n/a n/a n/a n/a n/a n/a n/a n/a Encoding.GetEncoding("ucs-2") UnicodeEncoding 1200 1200 FF FE (2) Unicode utf-16 utf-16 utf-16 Encoding.GetEncoding("ucs-4") n/a n/a n/a n/a n/a n/a n/a n/a Encoding.GetEncoding("S-JIS") n/a n/a n/a n/a n/a n/a n/a n/a Encoding.GetEncoding("SHIFT-JIS") DBCSCodePageEncoding 932 932 (0) 日本語 (シフト JIS) iso-2022-jp iso-2022-jp shift_jis Encoding.GetEncoding("CP932") n/a n/a n/a n/a n/a n/a n/a n/a Encoding.GetEncoding("MS932") n/a n/a n/a n/a n/a n/a n/a n/a Encoding.GetEncoding("WINDOWS-31J") n/a n/a n/a n/a n/a n/a n/a n/a Encoding.GetEncoding("UTF-7") UTF7Encoding 65000 1200 (0) Unicode (UTF-7) utf-7 utf-7 utf-7 Encoding.GetEncoding("UTF-8") UTF8Encoding 65001 1200 EF BB BF (3) Unicode (UTF-8) utf-8 utf-8 utf-8 Encoding.GetEncoding("UTF-16") UnicodeEncoding 1200 1200 FF FE (2) Unicode utf-16 utf-16 utf-16 Encoding.GetEncoding("UTF-16BE") UnicodeEncoding 1201 1200 FE FF (2) Unicode (Big-Endian) utf-16BE utf-16BE utf-16BE Encoding.GetEncoding("UTF-16LE") UnicodeEncoding 1200 1200 FF FE (2) Unicode utf-16 utf-16 utf-16 Encoding.GetEncoding("UTF-32") UTF32Encoding 12000 1200 FF FE 00 00 (4) Unicode (UTF-32) utf-32 utf-32 utf-32 Encoding.GetEncoding("UTF-32BE") UTF32Encoding 12001 1200 00 00 FE FF (4) Unicode (UTF-32 ビッグ エンディアン) utf-32BE utf-32BE utf-32BE Encoding.GetEncoding("UTF-32LE") UTF32Encoding 12000 1200 FF FE 00 00 (4) Unicode (UTF-32) utf-32 utf-32 utf-32 Encoding.GetEncoding("UTF-7N") n/a n/a n/a n/a n/a n/a n/a n/a Encoding.GetEncoding("UTF-8N") n/a n/a n/a n/a n/a n/a n/a n/a Encoding.GetEncoding("UTF-16N") n/a n/a n/a n/a n/a n/a n/a n/a Encoding.GetEncoding("UTF-16BEN") n/a n/a n/a n/a n/a n/a n/a n/a Encoding.GetEncoding("UTF-16LEN") n/a n/a n/a n/a n/a n/a n/a n/a Encoding.GetEncoding("UTF-32N") n/a n/a n/a n/a n/a n/a n/a n/a Encoding.GetEncoding("UTF-32BEN") n/a n/a n/a n/a n/a n/a n/a n/a Encoding.GetEncoding("UTF-32LEN") n/a n/a n/a n/a n/a n/a n/a n/a Encoding.GetEncoding("UCS-1") n/a n/a n/a n/a n/a n/a n/a n/a Encoding.GetEncoding("UCS-2") UnicodeEncoding 1200 1200 FF FE (2) Unicode utf-16 utf-16 utf-16 Encoding.GetEncoding("UCS-4") n/a n/a n/a n/a n/a n/a n/a n/a Encoding.Default DBCSCodePageEncoding 932 932 (0) 日本語 (シフト JIS) iso-2022-jp iso-2022-jp shift_jis Encoding.UTF7 UTF7Encoding 65000 1200 (0) Unicode (UTF-7) utf-7 utf-7 utf-7 Encoding.UTF8 UTF8Encoding 65001 1200 EF BB BF (3) Unicode (UTF-8) utf-8 utf-8 utf-8 Encoding.Unicode UnicodeEncoding 1200 1200 FF FE (2) Unicode utf-16 utf-16 utf-16 Encoding.BigEndianUnicode UnicodeEncoding 1201 1200 FE FF (2) Unicode (Big-Endian) utf-16BE utf-16BE utf-16BE Encoding.UTF32 UTF32Encoding 12000 1200 FF FE 00 00 (4) Unicode (UTF-32) utf-32 utf-32 utf-32 上記の表は改行点の制御のために見せるために、
- ZERO WIDTH SPACE (ゼロ幅スペース ​) ⇒ 改行の誘発
- WORD JOINER (単語結合子 ⁠) ⇒ 改行の禁止
- NO-BREAK SPACE (ノーブレークスペース  ) ⇒ pading
を一部使用しています。
(要約:コピペ注意)検証サンプルコード
Program.csusing System; using System.Text; public class Test { public static void Main() { Action<string, Func<Encoding>> act = delegate(string name, Func<Encoding> getEncoding) { string encInfo = null; try { Encoding encoding = getEncoding(); encInfo = string.Format("{0}, {1}, {2}, {3}, {4}, {5}, {6}, {7}", new Object[]{ encoding.GetType().Name, encoding.CodePage, encoding.WindowsCodePage, new Func<string>(delegate () { byte[] data = encoding.GetPreamble(); StringBuilder sb = new StringBuilder(); if(data == null) { sb.Append("(null)"); } else { sb.Append(BitConverter.ToString(data).Replace("-", " ")); sb.Append(" "); sb.Append(string.Format("({0})", new object[]{data.Length})); } return sb.ToString(); })(), encoding.EncodingName, encoding.HeaderName, encoding.BodyName, encoding.WebName, }); } catch(Exception e) { encInfo = e.Message; // encInfo = "*************************"; } Console.WriteLine("{0} => {1}", new object[]{name, encInfo}); }; Action<int> acti = delegate(int cp) { act(string.Format("Encoding.GetEncoding({0})", new object[]{cp}), delegate() { return Encoding.GetEncoding(cp); }); }; Action<string> acts = delegate(string name) { act(string.Format("Encoding.GetEncoding(\"{0}\")", new object[]{name}), delegate() { return Encoding.GetEncoding(name); }); }; Action<string, Encoding> acte = delegate(string name, Encoding encoding) { act(string.Format("{0}", new object[]{name}), delegate() { return encoding; }); }; Console.WriteLine(string.Format("OS: {0}", System.Environment.OSVersion.ToString())); Console.WriteLine(); acti(1252); acti(932); acti(65001); acts("s-jis"); acts("shift-jis"); acts("cp932"); acts("ms932"); acts("windows-31j"); acts("utf-7"); acts("utf-8"); acts("utf-16"); acts("utf-16be"); acts("utf-16le"); acts("utf-32"); acts("utf-32be"); acts("utf-32le"); acts("utf-7n"); acts("utf-8n"); acts("utf-16n"); acts("utf-16ben"); acts("utf-16len"); acts("utf-32n"); acts("utf-32ben"); acts("utf-32len"); acts("ucs-1"); acts("ucs-2"); acts("ucs-4"); acts("S-JIS"); acts("SHIFT-JIS"); acts("CP932"); acts("MS932"); acts("WINDOWS-31J"); acts("UTF-7"); acts("UTF-8"); acts("UTF-16"); acts("UTF-16BE"); acts("UTF-16LE"); acts("UTF-32"); acts("UTF-32BE"); acts("UTF-32LE"); acts("UTF-7N"); acts("UTF-8N"); acts("UTF-16N"); acts("UTF-16BEN"); acts("UTF-16LEN"); acts("UTF-32N"); acts("UTF-32BEN"); acts("UTF-32LEN"); acts("UCS-1"); acts("UCS-2"); acts("UCS-4"); acte("Encoding.Default", Encoding.Default); acte("Encoding.UTF7", Encoding.UTF7); acte("Encoding.UTF8", Encoding.UTF8); acte("Encoding.Unicode", Encoding.Unicode); acte("Encoding.BigEndianUnicode", Encoding.BigEndianUnicode); acte("Encoding.UTF32", Encoding.UTF32); } }windows出力例OS: Microsoft Windows NT 6.2.9200.0 Encoding.GetEncoding(1252) => SBCSCodePageEncoding, 1252, 1252, (0), 西ヨーロッパ言語 (Windows), Windows-1252, iso-8859-1, Windows-1252 Encoding.GetEncoding(932) => DBCSCodePageEncoding, 932, 932, (0), 日本語 (シフト JIS), iso-2022-jp, iso-2022-jp, shift_jis Encoding.GetEncoding(65001) => UTF8Encoding, 65001, 1200, EF BB BF (3), Unicode (UTF-8), utf-8, utf-8, utf-8 Encoding.GetEncoding("s-jis") => 's-jis' はサポートされたエンコード名ではありません。カスタム エンコーディングの定義の詳細は、Encoding.RegisterProvider メソッドのドキュメントを参照してください。 パラメーター名:name Encoding.GetEncoding("shift-jis") => DBCSCodePageEncoding, 932, 932, (0), 日本語 (シフト JIS), iso-2022-jp, iso-2022-jp, shift_jis Encoding.GetEncoding("cp932") => 'cp932' はサポートされたエンコード名ではありません。カスタム エンコーディングの定義の詳細は、Encoding.RegisterProvider メソッドのドキュメントを参照してください。 パラメーター名:name Encoding.GetEncoding("ms932") => 'ms932' はサポートされたエンコード名ではありません。カスタム エンコーディングの定義の詳細は、Encoding.RegisterProvider メソッドのドキュメントを参照してください。 パラメーター名:name Encoding.GetEncoding("windows-31j") => 'windows-31j' はサポートされたエンコード名ではありません。カスタム エンコーディングの定義の詳細は、Encoding.RegisterProvider メソッドのドキュメントを参照してください。 パラメーター名:name Encoding.GetEncoding("utf-7") => UTF7Encoding, 65000, 1200, (0), Unicode (UTF-7), utf-7, utf-7, utf-7 Encoding.GetEncoding("utf-8") => UTF8Encoding, 65001, 1200, EF BB BF (3), Unicode (UTF-8), utf-8, utf-8, utf-8 Encoding.GetEncoding("utf-16") => UnicodeEncoding, 1200, 1200, FF FE (2), Unicode, utf-16, utf-16, utf-16 Encoding.GetEncoding("utf-16be") => UnicodeEncoding, 1201, 1200, FE FF (2), Unicode (Big-Endian), utf-16BE, utf-16BE, utf-16BE Encoding.GetEncoding("utf-16le") => UnicodeEncoding, 1200, 1200, FF FE (2), Unicode, utf-16, utf-16, utf-16 Encoding.GetEncoding("utf-32") => UTF32Encoding, 12000, 1200, FF FE 00 00 (4), Unicode (UTF-32), utf-32, utf-32, utf-32 Encoding.GetEncoding("utf-32be") => UTF32Encoding, 12001, 1200, 00 00 FE FF (4), Unicode (UTF-32 ビッグ エンディアン), utf-32BE, utf-32BE, utf-32BE Encoding.GetEncoding("utf-32le") => UTF32Encoding, 12000, 1200, FF FE 00 00 (4), Unicode (UTF-32), utf-32, utf-32, utf-32 Encoding.GetEncoding("utf-7n") => 'utf-7n' はサポートされたエンコード名ではありません。カスタム エンコーディングの定義の詳細は、Encoding.RegisterProvider メソッドのドキュメントを参照してください。 パラメーター名:name Encoding.GetEncoding("utf-8n") => 'utf-8n' はサポートされたエンコード名ではありません。カスタム エンコーディングの定義の詳細は、Encoding.RegisterProvider メソッドのドキュメントを参照してください。 パラメーター名:name Encoding.GetEncoding("utf-16n") => 'utf-16n' はサポートされたエンコード名ではありません。カスタム エンコーディングの定義の詳細は、Encoding.RegisterProvider メソッドのドキュメントを参照してください。 パラメーター名:name Encoding.GetEncoding("utf-16ben") => 'utf-16ben' はサポートされたエンコード名ではありません。カスタム エンコーディングの定義の詳細は、Encoding.RegisterProvider メソッドのドキュメントを参照してください。 パラメーター名:name Encoding.GetEncoding("utf-16len") => 'utf-16len' はサポートされたエンコード名ではありません。カスタム エンコーディングの定義の詳細は、Encoding.RegisterProvider メソッドのドキュメントを参照してください。 パラメーター名:name Encoding.GetEncoding("utf-32n") => 'utf-32n' はサポートされたエンコード名ではありません。カスタム エンコーディングの定義の詳細は、Encoding.RegisterProvider メソッドのドキュメントを参照してください。 パラメーター名:name Encoding.GetEncoding("utf-32ben") => 'utf-32ben' はサポートされたエンコード名ではありません。カスタム エンコーディングの定義の詳細は、Encoding.RegisterProvider メソッドのドキュメントを参照してください。 パラメーター名:name Encoding.GetEncoding("utf-32len") => 'utf-32len' はサポートされたエンコード名ではありません。カスタム エンコーディングの定義の詳細は、Encoding.RegisterProvider メソッドのドキュメントを参照してください。 パラメーター名:name Encoding.GetEncoding("ucs-1") => 'ucs-1' はサポートされたエンコード名ではありません。カスタム エンコーディングの定義の詳細は、Encoding.RegisterProvider メソッドのドキュメントを参照してください。 パラメーター名:name Encoding.GetEncoding("ucs-2") => UnicodeEncoding, 1200, 1200, FF FE (2), Unicode, utf-16, utf-16, utf-16 Encoding.GetEncoding("ucs-4") => 'ucs-4' はサポートされたエンコード名ではありません。カスタム エンコーディングの定義の詳細は、Encoding.RegisterProvider メソッドのドキュメントを参照してください。 パラメーター名:name Encoding.GetEncoding("S-JIS") => 'S-JIS' はサポートされたエンコード名ではありません。カスタム エンコーディングの定義の詳細は、Encoding.RegisterProvider メソッドのドキュメントを参照してください。 パラメーター名:name Encoding.GetEncoding("SHIFT-JIS") => DBCSCodePageEncoding, 932, 932, (0), 日本語 (シフト JIS), iso-2022-jp, iso-2022-jp, shift_jis Encoding.GetEncoding("CP932") => 'CP932' はサポートされたエンコード名ではありません。カスタム エンコーディングの定義の詳細は、Encoding.RegisterProvider メソッドのドキュメントを参照してください。 パラメーター名:name Encoding.GetEncoding("MS932") => 'MS932' はサポートされたエンコード名ではありません。カスタム エンコーディングの定義の詳細は、Encoding.RegisterProvider メソッドのドキュメントを参照してください。 パラメーター名:name Encoding.GetEncoding("WINDOWS-31J") => 'WINDOWS-31J' はサポートされたエンコード名ではありません。カスタム エンコーディングの定義の詳細は、Encoding.RegisterProvider メソッドのドキュメントを参照してください。 パラメーター名:name Encoding.GetEncoding("UTF-7") => UTF7Encoding, 65000, 1200, (0), Unicode (UTF-7), utf-7, utf-7, utf-7 Encoding.GetEncoding("UTF-8") => UTF8Encoding, 65001, 1200, EF BB BF (3), Unicode (UTF-8), utf-8, utf-8, utf-8 Encoding.GetEncoding("UTF-16") => UnicodeEncoding, 1200, 1200, FF FE (2), Unicode, utf-16, utf-16, utf-16 Encoding.GetEncoding("UTF-16BE") => UnicodeEncoding, 1201, 1200, FE FF (2), Unicode (Big-Endian), utf-16BE, utf-16BE, utf-16BE Encoding.GetEncoding("UTF-16LE") => UnicodeEncoding, 1200, 1200, FF FE (2), Unicode, utf-16, utf-16, utf-16 Encoding.GetEncoding("UTF-32") => UTF32Encoding, 12000, 1200, FF FE 00 00 (4), Unicode (UTF-32), utf-32, utf-32, utf-32 Encoding.GetEncoding("UTF-32BE") => UTF32Encoding, 12001, 1200, 00 00 FE FF (4), Unicode (UTF-32 ビッグ エンディアン), utf-32BE, utf-32BE, utf-32BE Encoding.GetEncoding("UTF-32LE") => UTF32Encoding, 12000, 1200, FF FE 00 00 (4), Unicode (UTF-32), utf-32, utf-32, utf-32 Encoding.GetEncoding("UTF-7N") => 'UTF-7N' はサポートされたエンコード名ではありません。カスタム エンコーディングの定義の詳細は、Encoding.RegisterProvider メソッドのドキュメントを参照してください。 パラメーター名:name Encoding.GetEncoding("UTF-8N") => 'UTF-8N' はサポートされたエンコード名ではありません。カスタム エンコーディングの定義の詳細は、Encoding.RegisterProvider メソッドのドキュメントを参照してください。 パラメーター名:name Encoding.GetEncoding("UTF-16N") => 'UTF-16N' はサポートされたエンコード名ではありません。カスタム エンコーディングの定義の詳細は、Encoding.RegisterProvider メソッドのドキュメントを参照してください。 パラメーター名:name Encoding.GetEncoding("UTF-16BEN") => 'UTF-16BEN' はサポートされたエンコード名ではありません。カスタム エンコーディングの定義の詳細は、Encoding.RegisterProvider メソッドのドキュメントを参照してください。 パラメーター名:name Encoding.GetEncoding("UTF-16LEN") => 'UTF-16LEN' はサポートされたエンコード名ではありません。カスタム エンコーディングの定義の詳細は、Encoding.RegisterProvider メソッドのドキュメントを参照してください。 パラメーター名:name Encoding.GetEncoding("UTF-32N") => 'UTF-32N' はサポートされたエンコード名ではありません。カスタム エンコーディングの定義の詳細は、Encoding.RegisterProvider メソッドのドキュメントを参照してください。 パラメーター名:name Encoding.GetEncoding("UTF-32BEN") => 'UTF-32BEN' はサポートされたエンコード名ではありません。カスタム エンコーディングの定義の詳細は、Encoding.RegisterProvider メソッドのドキュメントを参照してください。 パラメーター名:name Encoding.GetEncoding("UTF-32LEN") => 'UTF-32LEN' はサポートされたエンコード名ではありません。カスタム エンコーディングの定義の詳細は、Encoding.RegisterProvider メソッドのドキュメントを参照してください。 パラメーター名:name Encoding.GetEncoding("UCS-1") => 'UCS-1' はサポートされたエンコード名ではありません。カスタム エンコーディングの定義の詳細は、Encoding.RegisterProvider メソッドのドキュメントを参照してください。 パラメーター名:name Encoding.GetEncoding("UCS-2") => UnicodeEncoding, 1200, 1200, FF FE (2), Unicode, utf-16, utf-16, utf-16 Encoding.GetEncoding("UCS-4") => 'UCS-4' はサポートされたエンコード名ではありません。カスタム エンコーディングの定義の詳細は、Encoding.RegisterProvider メソッドのドキュメントを参照してください。 パラメーター名:nameideon出力例OS: Unix 4.9.0.12 Encoding.GetEncoding(1252) => CP1252, 1252, 1252, (0), Western European (Windows), Windows-1252, iso-8859-1, Windows-1252 Encoding.GetEncoding(932) => CP932, 932, 932, (0), Japanese (Shift-JIS), iso-2022-jp, iso-2022-jp, shift_jis Encoding.GetEncoding(65001) => UTF8Encoding, 65001, 1200, EF BB BF (3), Unicode (UTF-8), utf-8, utf-8, utf-8 Encoding.GetEncoding("s-jis") => 's-jis' is not a supported encoding name. For information on defining a custom encoding, see the documentation for the Encoding.RegisterProvider method. Parameter name: name Encoding.GetEncoding("shift-jis") => CP932, 932, 932, (0), Japanese (Shift-JIS), iso-2022-jp, iso-2022-jp, shift_jis Encoding.GetEncoding("cp932") => 'cp932' is not a supported encoding name. For information on defining a custom encoding, see the documentation for the Encoding.RegisterProvider method. Parameter name: name Encoding.GetEncoding("ms932") => 'ms932' is not a supported encoding name. For information on defining a custom encoding, see the documentation for the Encoding.RegisterProvider method. Parameter name: name Encoding.GetEncoding("windows-31j") => 'windows-31j' is not a supported encoding name. For information on defining a custom encoding, see the documentation for the Encoding.RegisterProvider method. Parameter name: name Encoding.GetEncoding("utf-7") => UTF7Encoding, 65000, 1200, (0), Unicode (UTF-7), utf-7, utf-7, utf-7 Encoding.GetEncoding("utf-8") => UTF8Encoding, 65001, 1200, EF BB BF (3), Unicode (UTF-8), utf-8, utf-8, utf-8 Encoding.GetEncoding("utf-16") => UnicodeEncoding, 1200, 1200, FF FE (2), Unicode, utf-16, utf-16, utf-16 Encoding.GetEncoding("utf-16be") => UnicodeEncoding, 1201, 1200, FE FF (2), Unicode (Big-Endian), utf-16BE, utf-16BE, utf-16BE Encoding.GetEncoding("utf-16le") => UnicodeEncoding, 1200, 1200, FF FE (2), Unicode, utf-16, utf-16, utf-16 Encoding.GetEncoding("utf-32") => UTF32Encoding, 12000, 1200, FF FE 00 00 (4), Unicode (UTF-32), utf-32, utf-32, utf-32 Encoding.GetEncoding("utf-32be") => UTF32Encoding, 12001, 1200, 00 00 FE FF (4), Unicode (UTF-32 Big-Endian), utf-32BE, utf-32BE, utf-32BE Encoding.GetEncoding("utf-32le") => UTF32Encoding, 12000, 1200, FF FE 00 00 (4), Unicode (UTF-32), utf-32, utf-32, utf-32 Encoding.GetEncoding("utf-7n") => 'utf-7n' is not a supported encoding name. For information on defining a custom encoding, see the documentation for the Encoding.RegisterProvider method. Parameter name: name Encoding.GetEncoding("utf-8n") => 'utf-8n' is not a supported encoding name. For information on defining a custom encoding, see the documentation for the Encoding.RegisterProvider method. Parameter name: name Encoding.GetEncoding("utf-16n") => 'utf-16n' is not a supported encoding name. For information on defining a custom encoding, see the documentation for the Encoding.RegisterProvider method. Parameter name: name Encoding.GetEncoding("utf-16ben") => 'utf-16ben' is not a supported encoding name. For information on defining a custom encoding, see the documentation for the Encoding.RegisterProvider method. Parameter name: name Encoding.GetEncoding("utf-16len") => 'utf-16len' is not a supported encoding name. For information on defining a custom encoding, see the documentation for the Encoding.RegisterProvider method. Parameter name: name Encoding.GetEncoding("utf-32n") => 'utf-32n' is not a supported encoding name. For information on defining a custom encoding, see the documentation for the Encoding.RegisterProvider method. Parameter name: name Encoding.GetEncoding("utf-32ben") => 'utf-32ben' is not a supported encoding name. For information on defining a custom encoding, see the documentation for the Encoding.RegisterProvider method. Parameter name: name Encoding.GetEncoding("utf-32len") => 'utf-32len' is not a supported encoding name. For information on defining a custom encoding, see the documentation for the Encoding.RegisterProvider method. Parameter name: name Encoding.GetEncoding("ucs-1") => 'ucs-1' is not a supported encoding name. For information on defining a custom encoding, see the documentation for the Encoding.RegisterProvider method. Parameter name: name Encoding.GetEncoding("ucs-2") => UnicodeEncoding, 1200, 1200, FF FE (2), Unicode, utf-16, utf-16, utf-16 Encoding.GetEncoding("ucs-4") => 'ucs-4' is not a supported encoding name. For information on defining a custom encoding, see the documentation for the Encoding.RegisterProvider method. Parameter name: name Encoding.GetEncoding("S-JIS") => 'S-JIS' is not a supported encoding name. For information on defining a custom encoding, see the documentation for the Encoding.RegisterProvider method. Parameter name: name Encoding.GetEncoding("SHIFT-JIS") => CP932, 932, 932, (0), Japanese (Shift-JIS), iso-2022-jp, iso-2022-jp, shift_jis Encoding.GetEncoding("CP932") => 'CP932' is not a supported encoding name. For information on defining a custom encoding, see the documentation for the Encoding.RegisterProvider method. Parameter name: name Encoding.GetEncoding("MS932") => 'MS932' is not a supported encoding name. For information on defining a custom encoding, see the documentation for the Encoding.RegisterProvider method. Parameter name: name Encoding.GetEncoding("WINDOWS-31J") => 'WINDOWS-31J' is not a supported encoding name. For information on defining a custom encoding, see the documentation for the Encoding.RegisterProvider method. Parameter name: name Encoding.GetEncoding("UTF-7") => UTF7Encoding, 65000, 1200, (0), Unicode (UTF-7), utf-7, utf-7, utf-7 Encoding.GetEncoding("UTF-8") => UTF8Encoding, 65001, 1200, EF BB BF (3), Unicode (UTF-8), utf-8, utf-8, utf-8 Encoding.GetEncoding("UTF-16") => UnicodeEncoding, 1200, 1200, FF FE (2), Unicode, utf-16, utf-16, utf-16 Encoding.GetEncoding("UTF-16BE") => UnicodeEncoding, 1201, 1200, FE FF (2), Unicode (Big-Endian), utf-16BE, utf-16BE, utf-16BE Encoding.GetEncoding("UTF-16LE") => UnicodeEncoding, 1200, 1200, FF FE (2), Unicode, utf-16, utf-16, utf-16 Encoding.GetEncoding("UTF-32") => UTF32Encoding, 12000, 1200, FF FE 00 00 (4), Unicode (UTF-32), utf-32, utf-32, utf-32 Encoding.GetEncoding("UTF-32BE") => UTF32Encoding, 12001, 1200, 00 00 FE FF (4), Unicode (UTF-32 Big-Endian), utf-32BE, utf-32BE, utf-32BE Encoding.GetEncoding("UTF-32LE") => UTF32Encoding, 12000, 1200, FF FE 00 00 (4), Unicode (UTF-32), utf-32, utf-32, utf-32 Encoding.GetEncoding("UTF-7N") => 'UTF-7N' is not a supported encoding name. For information on defining a custom encoding, see the documentation for the Encoding.RegisterProvider method. Parameter name: name Encoding.GetEncoding("UTF-8N") => 'UTF-8N' is not a supported encoding name. For information on defining a custom encoding, see the documentation for the Encoding.RegisterProvider method. Parameter name: name Encoding.GetEncoding("UTF-16N") => 'UTF-16N' is not a supported encoding name. For information on defining a custom encoding, see the documentation for the Encoding.RegisterProvider method. Parameter name: name Encoding.GetEncoding("UTF-16BEN") => 'UTF-16BEN' is not a supported encoding name. For information on defining a custom encoding, see the documentation for the Encoding.RegisterProvider method. Parameter name: name Encoding.GetEncoding("UTF-16LEN") => 'UTF-16LEN' is not a supported encoding name. For information on defining a custom encoding, see the documentation for the Encoding.RegisterProvider method. Parameter name: name Encoding.GetEncoding("UTF-32N") => 'UTF-32N' is not a supported encoding name. For information on defining a custom encoding, see the documentation for the Encoding.RegisterProvider method. Parameter name: name Encoding.GetEncoding("UTF-32BEN") => 'UTF-32BEN' is not a supported encoding name. For information on defining a custom encoding, see the documentation for the Encoding.RegisterProvider method. Parameter name: name Encoding.GetEncoding("UTF-32LEN") => 'UTF-32LEN' is not a supported encoding name. For information on defining a custom encoding, see the documentation for the Encoding.RegisterProvider method. Parameter name: name Encoding.GetEncoding("UCS-1") => 'UCS-1' is not a supported encoding name. For information on defining a custom encoding, see the documentation for the Encoding.RegisterProvider method. Parameter name: name Encoding.GetEncoding("UCS-2") => UnicodeEncoding, 1200, 1200, FF FE (2), Unicode, utf-16, utf-16, utf-16 Encoding.GetEncoding("UCS-4") => 'UCS-4' is not a supported encoding name. For information on defining a custom encoding, see the documentation for the Encoding.RegisterProvider method. Parameter name: name Encoding.Default => UTF8Encoding, 65001, 1200, EF BB BF (3), Unicode (UTF-8), utf-8, utf-8, utf-8 Encoding.UTF7 => UTF7Encoding, 65000, 1200, (0), Unicode (UTF-7), utf-7, utf-7, utf-7 Encoding.UTF8 => UTF8Encoding, 65001, 1200, EF BB BF (3), Unicode (UTF-8), utf-8, utf-8, utf-8 Encoding.Unicode => UnicodeEncoding, 1200, 1200, FF FE (2), Unicode, utf-16, utf-16, utf-16 Encoding.BigEndianUnicode => UnicodeEncoding, 1201, 1200, FE FF (2), Unicode (Big-Endian), utf-16BE, utf-16BE, utf-16BE Encoding.UTF32 => UTF32Encoding, 12000, 1200, FF FE 00 00 (4), Unicode (UTF-32), utf-32, utf-32, utf-32結論
一般的な表記が一応対応しており、大文字小文字も吸収してくれるので、コンソールが受け取った引き数をそのまま直接Encoding.GetEncoding()に渡しても良さそう。アプリ側で特にフィルタリングする場合、場合によってはパラメータを制限することになるので、フィルタリングする必要がなく丸投げできるのはありがたい。特に
UTF-16LEUTF-16BEの表記は普通に使いたかったので。ただ、BOMの有無の吸収については悩みどころ。。。余談
最近私がjavascriptナイズされており、無名関数まわりがあまりC#らしくない書き方になっています。
callback関数を関数の引数に取りたい、 即時実行関数を書きたい などの参考にもなるかもです。また、
ラムダ式のありがたみを体感するために、あえてdelegateで記述しています。
ぶっちゃけjavascript同様、タイプ数が大幅に減るわけではなく、厳密な動作の違いや可読性面の方が気になる感じです。個人的には予約語があることで関数である自己主張の高いdelegateも結構良いと感じております。
尚、三項演算子型推論は 宗教上の理由 で使えません。参考
Encoding.GetEncoding メソッド (System.Text) | Microsoft Docs
https://docs.microsoft.com/ja-jp/dotnet/api/system.text.encoding.getencoding?view=netframework-4.5Encoding.WebName プロパティ (System.Text) | Microsoft Docs
https://docs.microsoft.com/ja-jp/dotnet/api/system.text.encoding.webname?view=netframework-4.5#System_Text_Encoding_WebNameEncodingInfo.GetEncoding メソッド (System.Text) | Microsoft Docs
https://docs.microsoft.com/ja-jp/dotnet/api/system.text.encodinginfo.getencoding?view=netframework-4.5ISO/IEC 10646#文字符号化方式 - Wikipedia
https://ja.wikipedia.org/wiki/ISO/IEC_10646#%E6%96%87%E5%AD%97%E7%AC%A6%E5%8F%B7%E5%8C%96%E6%96%B9%E5%BC%8F
- 投稿日:2020-08-12T01:29:06+09:00
【WPF XAML】自作UserControlのプロパティはバインドできない?
WPFのXAMLを書いていた時にハマったのでメモ。
(2020.8.12追記)当方.NET Framework 4.8を使用しています。Visibilityをバインドしたかった
自作のUserControlのVisibilityをバインドするコードを書きました。
MyUserControlVisibilityを通じて、MyUserControlのVisibilityを変更出来るようにしようとしています。MainWindow.xaml<Window x:Name="Test" x:Class="MyNamespace.MainWindow" xmlns="http://schemas.microsoft.com/winfx/2006/xaml/presentation" xmlns:x="http://schemas.microsoft.com/winfx/2006/xaml" xmlns:d="http://schemas.microsoft.com/expression/blend/2008" xmlns:mc="http://schemas.openxmlformats.org/markup-compatibility/2006" xmlns:local="clr-namespace:MyNamespace" mc:Ignorable="d" Title="テスト"> <Window.DataContext> <local:MainWindowUserControl/> </Window.DataContext> <local:MyUserControl x:Name="MyControl1" Visibility="{Binding MyUserControlVisibility, Mode=TwoWay}"/> </Window>MainWindow.xaml.cs// usingは省略。Prismを使用しています namespace MyNamespace { public class MainWindowViewModel : BindableBase { private Visibility _MyUserControlVisibility = Visibility.Hidden; public Visibility MyUserControlVisibility { get { return _MyUserControlVisibility; } set { SetProperty(ref _MyUserControlVisibility, value); } } } public class MainWindow : Window { public MainWindow() { InitializeComponent(); } } }しかし、これでは動作せず、無視されまてしまいました。
DataTriggerに書き換えてみる
DataTriggerで発火させれば動くのではと思い、書き換えてみます。
MainWindow.xaml<Window x:Name="Test" x:Class="MyNamespace.MainWindow" xmlns="http://schemas.microsoft.com/winfx/2006/xaml/presentation" xmlns:x="http://schemas.microsoft.com/winfx/2006/xaml" xmlns:d="http://schemas.microsoft.com/expression/blend/2008" xmlns:mc="http://schemas.openxmlformats.org/markup-compatibility/2006" xmlns:local="clr-namespace:MyNamespace" mc:Ignorable="d" Title="テスト"> <Window.DataContext> <local:MainWindowUserControl/> </Window.DataContext> <local:MyUserControl x:Name="MyControl1"> <local:MyUserControl.Style> <Style TargetType="local:MyUserControl"> <!--TargetTypeをUserControlにしても変わらない--> <Setter Property="Visibility" Value="Visible"/> <Style.Triggers> <DataTrigger Binding="{Binding MyUserControlVisibility}" Value="Hidden"> <Setter Property="Visibility" Value="Hidden"/> </DataTrigger> </Style.Triggers> </Style> </local:MyUserControl.Style> </local:MyUserControl> </Window>が、あえなく撃沈。またもや無視されてしまいます。
(一応解決)Gridに入れる
目的のUserControlをGridに入れて、GridのVisibilityをバインドしてみます。
MainWindow.xaml<Window x:Name="Test" x:Class="MyNamespace.MainWindow" xmlns="http://schemas.microsoft.com/winfx/2006/xaml/presentation" xmlns:x="http://schemas.microsoft.com/winfx/2006/xaml" xmlns:d="http://schemas.microsoft.com/expression/blend/2008" xmlns:mc="http://schemas.openxmlformats.org/markup-compatibility/2006" xmlns:local="clr-namespace:MyNamespace" mc:Ignorable="d" Title="テスト"> <Window.DataContext> <local:MainWindowUserControl/> </Window.DataContext> <Grid Visibility="{Binding MyUserControlVisibility, Mode=TwoWay}"> <local:MyUserControl x:Name="MyControl1"/> </Grid> </Window>これだと希望通りの動作をしてくれました。が、Gridで挟むって……メモリの無駄遣い感があって非常に嫌です。
2020.8.12追記……(解決)UserControlを定義する側でバインドする
その後、MyUserControlを定義するXAMLの方でVisibilityをバインドしてみました。
MyUserControl.xaml<UserControl x:Class="MyNamespace.MyUserControl" xmlns="http://schemas.microsoft.com/winfx/2006/xaml/presentation" xmlns:x="http://schemas.microsoft.com/winfx/2006/xaml" xmlns:mc="http://schemas.openxmlformats.org/markup-compatibility/2006" xmlns:d="http://schemas.microsoft.com/expression/blend/2008" xmlns:local="clr-namespace:MyNamespace" mc:Ignorable="d" Visibility="{Binding Visibility}"/> <UserControl.DataContext> <local:MyUserControlViewModel/> </UserControl.DataContext> </UserControl>MyUserControl.xaml.cs// usingは省略 namespace MyNamespace { public class MyUserControlViewModel : BindableBase { private Visibility _Visibility = Visibility.Hidden; public Visibility Visibility { get { return _Visibility; } set { SetProperty(ref _Visibility, value); } } } public class MyUserControl : UserControl { public MyUserControl() { InitializeComponent(); } } }MainWindow.xaml.cs// usingは省略 namespace MyNamespace { public class MainWindowViewModel { private MyUserControlViewModel _MyControl1VM; public MyUserControlViewModel MyControl1VM { get { return _MyControl1VM; } set { SetProperty(ref _MyControl1VM, value); } } public class MainWindow : Window { public MainWindow() { InitializeComponent(); MainWindowViewModel VM = DataContext; VM.MyControl1VM = MyControl1.DataContext; } } }これだとちゃんと動いてくれました。
MyUserControlのViewModelの方にVisibilityプロパティを定義出来るのは、オブジェクト指向的にも美味しいですね。多分これが一番綺麗だと思います。ウソですごめんなさい(泣)
DataContextまわりをXAMLで設定するように変更し、少しだけスリムにしました。(2020.8.13追記)終わりに
自作UserControlに限ってバインドがうまくできないのですが、バグなのでしょうか。それとも仕様?
WPFのXAMLはBinding関連でエラーが起こっても基本的に例外を吐かず、デバッグ実行時に出力ログを残すのみのほんわか仕様となっています。立派なエラーなのですから、もう少し主張して欲しい所なのですが。MSさん、いかがでしょう?
(2020.8.12修正)