要件 ディレクトリ構造が以下のようになっている時に、item/_idページのOGPでそのアイテムの名前とか画像とかを動的に表示させたい! (item/1, 2, ... で表示させるものを変える) -item |-_id.vue |-new.vue |... OGP実装 基本 基本的な実装は[この記事]を参考にしてください。どちゃくそわかりやすく書かれています。(https://qiita.com/amishiro/items/b7260116b282d2cf2756) 本題 上の記事を読んでいただいて nuxt.config.jsにデフォルトのogp設定済み のような環境になってからここを読み始めてください。 恐らく、item/_id.vue内でitem情報をapi等から取得してきていると思いますが、そのデータを用いてmetaタグの中身を書いていきます。 _id.vueに組み込むmixinを以下のように書きます。 ogpMixin.js export default { data() { return { meta: { title: "", description: "", type: "", url: "", image: "" }, // ベースとなるurl。自分の環境に合わせてください。 base: "https://example.net" }; }, head() { // 相対パスを取得。例えば'/item/1'とか const path = this.$route.path; ---------------------------------------- // 点線内は書かない // 組込先(item/_id)に次のようなデータがあるという設定を示す item: { name: '~~~', explanation: '~~~', image: '~~~' }, ---------------------------------------- // ここでmetaの中身を更新 this.meta.title = this.item.name; this.meta.description = this.item.explanation; this.meta.type = "article"; this.meta.url = this.base + path; this.meta.image = this.item.image; // ここから先でmetaタグを書いていく return { title: this.meta.title, meta: [ { hid: "description", name: "description", content: this.meta.description}, { hid: "og:description", property: "og:description", content: this.meta.description}, { hid: "og:title", property: "og:title", content: this.meta.title }, { hid: "og:type", property: "og:type", content: this.meta.type }, { hid: "og:url", property: "og:url", content: this.meta.url }, { hid: "og:image", property: "og:image", content: this.meta.image }, { name: "twitter:title", content: this.meta.title } ] }; } }; ポイントはhead()内で処理を行うことです。 ogpで探しにくるボットはクライアントサイドの処理を待ってくれないので、クライアントサイドでのみ行われるmouted()等で書くとうまく実行されません(ページのmetaタグは表示されるが、ogpが表示されない) もし参考になったらいいね!お願いします!!
ディレクトリ構造が以下のようになっている時に、item/_idページのOGPでそのアイテムの名前とか画像とかを動的に表示させたい! (item/1, 2, ... で表示させるものを変える)
item/_id
-item
|-_id.vue
|-new.vue
|...
基本的な実装は[この記事]を参考にしてください。どちゃくそわかりやすく書かれています。(https://qiita.com/amishiro/items/b7260116b282d2cf2756)
上の記事を読んでいただいて
のような環境になってからここを読み始めてください。
恐らく、item/_id.vue内でitem情報をapi等から取得してきていると思いますが、そのデータを用いてmetaタグの中身を書いていきます。
_id.vueに組み込むmixinを以下のように書きます。
export default {
  data() {
    return {
      meta: {
        title: "",
        description: "",
        type: "",
        url: "",
        image: ""
      },
      // ベースとなるurl。自分の環境に合わせてください。
      base: "https://example.net"
    };
  },
  head() {
    // 相対パスを取得。例えば'/item/1'とか
    const path = this.$route.path;

    ----------------------------------------
    // 点線内は書かない
    // 組込先(item/_id)に次のようなデータがあるという設定を示す
    item: {
      name: '~~~',
      explanation: '~~~',
      image: '~~~'
    },
    ----------------------------------------

    // ここでmetaの中身を更新
    this.meta.title = this.item.name;
    this.meta.description = this.item.explanation;
    this.meta.type = "article";
    this.meta.url = this.base + path;
    this.meta.image = this.item.image;

    // ここから先でmetaタグを書いていく
    return {
      title: this.meta.title,
      meta: [
        { hid: "description", name: "description", content: this.meta.description},
        { hid: "og:description", property: "og:description", content: this.meta.description},
        { hid: "og:title", property: "og:title", content: this.meta.title },
        { hid: "og:type", property: "og:type", content: this.meta.type },
        { hid: "og:url", property: "og:url", content: this.meta.url },
        { hid: "og:image", property: "og:image", content: this.meta.image },
        { name: "twitter:title", content: this.meta.title }
      ]
    };
  }
};
ポイントはhead()内で処理を行うことです。 ogpで探しにくるボットはクライアントサイドの処理を待ってくれないので、クライアントサイドでのみ行われるmouted()等で書くとうまく実行されません(ページのmetaタグは表示されるが、ogpが表示されない)
もし参考になったらいいね!お願いします!!
Vue.jsでマークダウン入力&表示ができるページを作る こんなページを作ります。mavon-editorを使うと簡単にできました。 インストール npm install marked mavon-editor 実装 import marked from 'marked' import mavonEditor from 'mavon-editor' import 'mavon-editor/dist/css/index.css' Vue.use(mavonEditor) export default { // 以下略 こんな感じで埋め込み対象のページで import しつつ、 data: () => ({ mavonEditor: { externalLink: { markdown_css: function() { return '/static/css/markdown/github-markdown.min.css' }, hljs_js: function() { return '/static/js/highlightjs/highlight.min.js' }, katex_css: function() { return '/static/css/katex/katex.min.css' }, katex_js: function() { return '/static/js/katex/katex.min.js' }, }, // ツールバーにどのボタンを追加するか toolbars: { bold: true, italic: true, header: true, underline: true, strikethrough: true, mark: true, superscript: true, subscript: true, quote: true, ol: true, ul: true, link: true, code: true, table: true, fullscreen: true, readmodel: true, htmlcode: true, help: true, undo: true, redo: true, navigation: true, alignleft: true, aligncenter: true, alignright: true, subfield: true, preview: true, }, }, // マークダウンの内容を格納する変数 body: '', // 以下、他の変数など }), でエディターの設定を行い、 computed: { compiledMarkdownBody: function() { return marked(this.body) }, // 以下、他のメソッド等 }, でマークダウンをHTMLで表示させる処理を追加。 あとは、 <mavon-editor language="ja" v-model="body" :counter="65535" :externalLink="mavonEditor.externalLink" :toolbars="mavonEditor.toolbars" ></mavon-editor> でエディターの表示、 <span v-html="compiledMarkdownBody"></span> でエディターで入力された内容の表示を行うことができました。
こんなページを作ります。mavon-editorを使うと簡単にできました。
npm install marked mavon-editor
import marked from 'marked'
import mavonEditor from 'mavon-editor'
import 'mavon-editor/dist/css/index.css'
Vue.use(mavonEditor)
export default {
  // 以下略
こんな感じで埋め込み対象のページで import しつつ、
import
data: () => ({
  mavonEditor: {
    externalLink: {
      markdown_css: function() {
        return '/static/css/markdown/github-markdown.min.css'
      },
      hljs_js: function() {
        return '/static/js/highlightjs/highlight.min.js'
      },
      katex_css: function() {
        return '/static/css/katex/katex.min.css'
      },
      katex_js: function() {
        return '/static/js/katex/katex.min.js'
      },
    },
    // ツールバーにどのボタンを追加するか
    toolbars: {
      bold: true,
      italic: true,
      header: true,
      underline: true,
      strikethrough: true,
      mark: true,
      superscript: true,
      subscript: true,
      quote: true,
      ol: true,
      ul: true,
      link: true,
      code: true,
      table: true,
      fullscreen: true,
      readmodel: true,
      htmlcode: true,
      help: true,
      undo: true,
      redo: true,
      navigation: true,
      alignleft: true,
      aligncenter: true,
      alignright: true,
      subfield: true,
      preview: true,
    },
  },

  // マークダウンの内容を格納する変数
  body: '',

  // 以下、他の変数など
}),
でエディターの設定を行い、
computed: {
  compiledMarkdownBody: function() {
    return marked(this.body)
  },
  // 以下、他のメソッド等
},
でマークダウンをHTMLで表示させる処理を追加。
あとは、
<mavon-editor
  language="ja"
  v-model="body"
  :counter="65535"
  :externalLink="mavonEditor.externalLink"
  :toolbars="mavonEditor.toolbars"
></mavon-editor>
でエディターの表示、
<span v-html="compiledMarkdownBody"></span>
でエディターで入力された内容の表示を行うことができました。
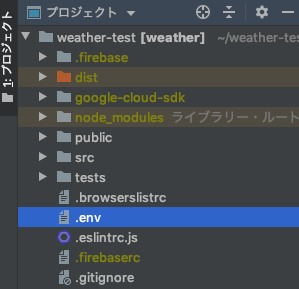
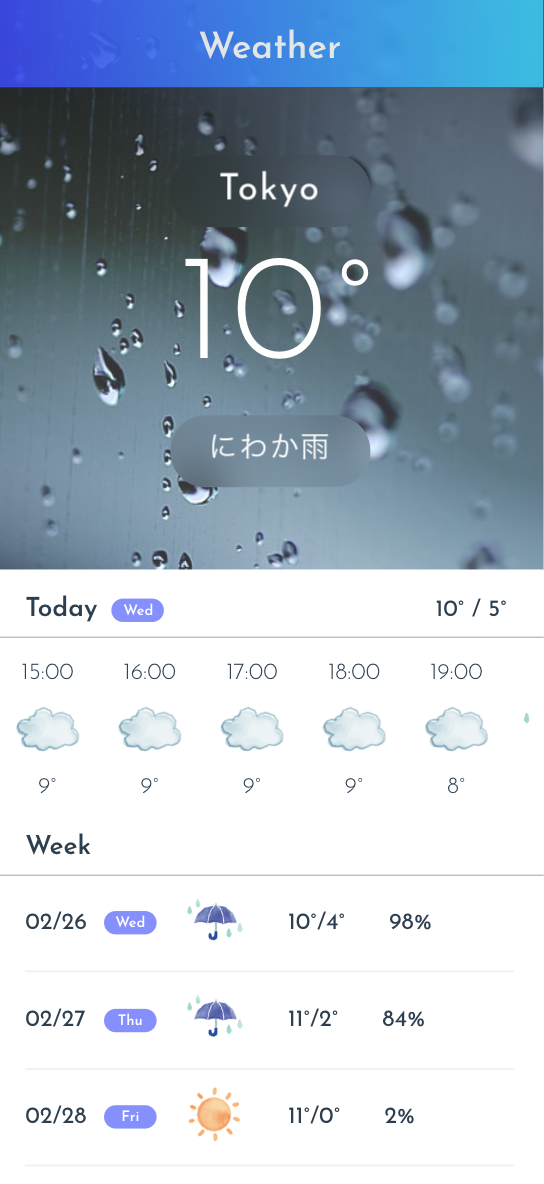
やりたいこと Vue.jsでお天気アプリを作成したのでgithubにあげたらAPIKeyも一緒にあがってしまったので隠したい 手順 プロジェクト直下にenvファイルをつくる 変数を定義する .env # openweathermap VUE_APP_API_URL_WEATHER = https://cors-anywhere.herokuapp.com/http://api.openweathermap.org/data/2.5/weather?id=1850147&units=metric&appid=APIキー # forecast VUE_APP_API_URL_FORECAST = https://cors-anywhere.herokuapp.com/https://api.darksky.net/forecast/APIキー/35.6895,139.6917?lang=ja&units=si 呼ぶ process.env.変数名 で呼び出せる getWeather() { this.$axios .get(process.env.VUE_APP_API_URL_WEATHER, {}) .then(result => { this.weather = Weather.create(result); }) .catch(error => { console.log(error); }); }, 確認 ちゃんと表示されました?
Vue.jsでお天気アプリを作成したのでgithubにあげたらAPIKeyも一緒にあがってしまったので隠したい
# openweathermap
VUE_APP_API_URL_WEATHER = https://cors-anywhere.herokuapp.com/http://api.openweathermap.org/data/2.5/weather?id=1850147&units=metric&appid=APIキー

# forecast
VUE_APP_API_URL_FORECAST = https://cors-anywhere.herokuapp.com/https://api.darksky.net/forecast/APIキー/35.6895,139.6917?lang=ja&units=si
process.env.変数名 で呼び出せる
process.env.変数名
getWeather() {
    this.$axios
        .get(process.env.VUE_APP_API_URL_WEATHER, {})
        .then(result => {
          this.weather = Weather.create(result);
        })
        .catch(error => {
          console.log(error);
        });
    },
ちゃんと表示されました?
結論 vueのdispatchで第三引数を渡したい時は、第二引数に オブジェクトを用いる。 例 ショッピングカートに、商品情報とユーザー情報の2つをdispatchの引数として入れる。 失敗例 以下のように第一引数に path, 第二引数に item, 第三引数に userIdを入れたところうまくいかなかった。 this.$store.dispatch('shop/addCart', this.item, this.userId) 成功例 第二引数をオブジェクトにすることで、複数の値を格納することができた。 this.$store.dispatch('shop/addCart', { item: this.item, userId: this.userId })
vueのdispatchで第三引数を渡したい時は、第二引数に オブジェクトを用いる。
オブジェクト
ショッピングカートに、商品情報とユーザー情報の2つをdispatchの引数として入れる。
以下のように第一引数に path, 第二引数に item, 第三引数に userIdを入れたところうまくいかなかった。
path
item
userId
this.$store.dispatch('shop/addCart', this.item, this.userId)
第二引数をオブジェクトにすることで、複数の値を格納することができた。
this.$store.dispatch('shop/addCart', {
  item: this.item,
  userId: this.userId
})