- 投稿日:2020-06-21T23:50:46+09:00
Rubyの配列操作
map
人数が5人以上のgroupのidを配列で返すイメージ
ids = groups.map{ |group| group.id if group.count >= 5}

#=> [1, 2, nil, 4, ・・・]
条件に当てはまらない要素はnilになる
.reject(&:blank?)
配列からnilと空文字を無くす
ids = groups.map{ |group| group.id if group.count >= 5}.reject(&:blank?)

#=> [1, 2, 4, ・・・]
filter_map
上記をまとめて。Ruby2.7から利用可能
ids = groups.filter_map{ |group| group.id if group.count >= 5}

#=> [1, 2, 4, ・・・]
join
連結した文字列を返す。引数に入れた文字列を挟み込みことができる
['A','B','C'].join
#=> "ABC"

['A','B','C'].join('|')
#=> "A|B|C"
- 投稿日:2020-06-21T23:30:12+09:00
Rails によるカスタム例外の設定とエラーハンドリング
Rails で例外を発生させたい際は,
raise...つまり RuntimeError をよく使用するかと思います。しかし,サービス上の制約から,特定の状況下で例外を発生させる場合,
raiseだけでは物足りなくなる時があります。
raiseでは「何かまずいことが起きてしまいました!」程度のことしか伝えてくれません。まぁ,引数に渡す message を見れば理解できるかもですが...兎にも角にも,特定の状況下に対する例外が存在するなら,その例外に対して名前を付けてあげましょう。
カスタム例外を設定すると,発生時に「何に対する例外か」がパッと理解できるようになりますし,特定の動作に誘導することも容易になりますので,良いことづくめです!
- 参考 URL 等
□ 本文
■ 前提情報
使用するアプリケーション
Railsチュートリアルで作成する SampleApp における、users_controller の
users#editに着目して実装します。app/controllers/users_controller.rbclass UsersController < ApplicationController before_action :correct_user, only: [:edit, :update] #... private #... # 正しいユーザーかどうか確認 def correct_user # GET /users/:id/edit # PATCH /users/:id @user = User.find(params[:id]) redirect_to(root_url) unless current_user?(@user) end #... endカスタム例外の設定規則
StarndardErrorを継承する- クラス名の末尾に
Errorを付ける■ カスタム例外の設定方法
実装自体は,とても単純なのですが,設定場所にいくつか種類がありますので,紹介していきます。
実装例1: 発生ファイルに直接設定
その名の通り,例外が発生するファイル自身に設定します。
特定のクラスに強く結びつける方法であることから,Model 層や Service 層で見かけたりします。
app/controllers/users_controller.rbclass UsersController < ApplicationController class NotPermittedError < StandardError; end before_action :correct_user, only: [:edit, :update] #... private #... def correct_user @user = User.find(params[:id]) raise NotPermittedError, "あなたにリクエスト権限がありません" unless current_user?(@user) end #... end実装例2: app/ 配下に設定
自作の module を app/ 配下に設定します。
validators や services と同じ考え方で配置する感じですかね。
app/errors/application_error.rbmodule ApplicationError class NotPermittedError < StandardError; end endapp/controllers/users_controller.rbclass UsersController < ApplicationController before_action :correct_user, only: [:edit, :update] #... private #... def correct_user @user = User.find(params[:id]) raise ApplicationError::NotPermittedError, "あなたにリクエスト権限がありません" unless current_user?(@user) end #... end実装例3: lib/ 配下に設定
lib ディレクトリの存在目的から見ると,王道パターンかも。
なお,lib 直下の配置が気になる場合,適宜ディレクトリを挟んで設定してください。
config/application.rb#... Bundler.require(*Rails.groups) # ↓ 追加コード require_relative '../lib/exception.rb' module SampleApp #... endlib/exception.rbmodule Application class Error < StandardError; end class NotPermittedError < Error; end endapp/controllers/users_controller.rbclass UsersController < ApplicationController before_action :correct_user, only: [:edit, :update] #... private #... def correct_user @user = User.find(params[:id]) raise ApplicationError::NotPermittedError, "あなたにリクエスト権限がありません" unless current_user?(@user) end #... end■ エラーハンドリング
さて,これでカスタム例外は作成完了ですが,仕上げが残っています。
このままでは,例外を発生させたままです。
ユーザ側から見ると 500 エラー画面が出てきて,なぜ強制終了したのか理由がわかりませんし,サービスの操作感として連続性が失われるのも避ける必要があります。元のコードでは,不正なアクセスをしたユーザに対して,root_url にリダイレクトさせていますので,カスタム例外が発生した際は,同じようにリダイレクトさせましょう。
また、例外を握り潰さないために、サーバ側に理由を説明するためのログを残しましょう。
app/controllers/application_controller.rbclass ApplicationController < ActionController::Base #... rescue_from Application::NotPermittedError, with: :redirect_root_page def redirect_root_page Rails.logger.info "ルート URL にリダイレクト: #{exception.message}" if exception redirect_to root_url, flash: { danger: "閲覧権限がありません" } end #... end※ シンプルに表記することを目的として application_controller.rb に記入していますが,色々追加されるファイルでもあるため,concerns に切り出すと尚可読性が高まるでしょう。
□ 余談
OSS におけるカスタム例外の設定方法も調べてみると,見事にバラバラだったので,プロジェクト毎に設定方法が異なるかもしれない

具体的な命名も設定場所も異なるため、プロジェクトに合わせて、柔軟に対応しましょう。
今回使用した PR です→カスタム例外の設定 by masayuki-0319 · Pull Request #9 · masayuki-0319/sample_app
- 投稿日:2020-06-21T23:18:59+09:00
Rails アセットプレコンパイル時のエラー'ActionView::Template::Error (The asset "application.css" is not present in the asset pipeline.'の解消方法
背景
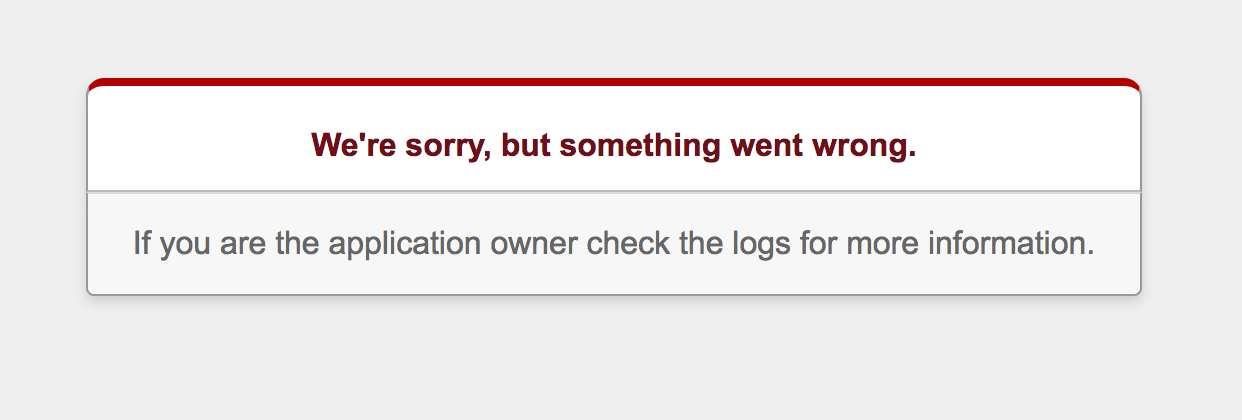
- 作成したRailsアプリケーションをデプロイしてページにアクセスしたところ、以下のエラー画面が出てアクセスできなかった。
- そこで、log/production.rbを確認したところ、以下のエラーが出ていた
log/production.rbActionView::Template::Error (The asset "application.css" is not present in the asset pipeline.):このエラーの解決に非常に手間取ったので、正しい方法かはわからないですが、自分の環境での解決策をシェアします。
環境
Rails 5.2.4
Ruby 2.6.4解決策
config/environments/production.rbを以下のように編集したら直った
# Do not fallback to assets pipeline if a precompiled asset is missed.
- config.assets.compile = false
+ config.assets.compile = true
参考文献
- 投稿日:2020-06-21T20:44:22+09:00
dockerイメージ内にyarnをインストールする
背景
Dockerを利用して作成したRailsアプリ(v5.2.4)を本番環境にデプロイする際、アセットをプリコンパイルしようとしたところ、以下のエラーがでて実行できなかった。
$docker-compose run web bundle exec rake assets:precompile RAILS_ENV=productionStarting excite-map_db_1 ... done Yarn executable was not detected in the system. Download Yarn at https://yarnpkg.com/en/docs/instal解消方法
Dockerfileに以下を追加
RUN curl https://deb.nodesource.com/setup_12.x | bash
RUN curl https://dl.yarnpkg.com/debian/pubkey.gpg | apt-key add -
RUN echo "deb https://dl.yarnpkg.com/debian/ stable main" | tee /etc/apt/sources.list.d/yarn.list

RUN apt-get update && apt-get install -y nodejs yarn postgresql-client
参考
- 投稿日:2020-06-21T20:07:47+09:00
【hidden_field】rails hidden_field を使って情報を送ろう!!!!
【ゴール】
hidden_fieldを使って情報を送る
【メリット】
■ paramaterの理解度向上
■ hidden_fieldの使い方理解
■ MVCの理解度向上【開発環境】
■ Mac OS catalina
■ Ruby on Rails (5.2.4.2)
■ Virtual Box:6.1
■ Vagrant: 2.2.7【実装】
アプリケーション作成
※「scaffold」で一気に作成
mac.terminal$ rails new hidden_lesson $ rails g scaffold Item name:string text:text price:integer amount:integer $ rails db:migrateアプリケーション調整
※ルートを追記
※homeにitemsのindexページが来るように
※postメソッドで確認画面へのルートを作成config/routes.rbroot 'items#index' post 'items/confirm' => 'items#confirm'※views/itemsにconfirm.html.erbを作成
※items/_form.html.erbを編集
※hidden_fieldでUserには見えないようにページで情報を保持します!!!items/confirm.html.erb<h3>Confirm page</h3> <%= form_with model:@item do |form| %> <div class="field"> <%= form.label :name %> <%= @item.name %> <%= form.hidden_field :name %> </div> <div class="field"> <%= form.label :text %> <%= @item.text %> <%= form.hidden_field :text %> </div> <div class="field"> <%= form.label :price %> <%= @item.price %> <%= form.hidden_field :price %> </div> <div class="field"> <%= form.label :amount %> <%= @item.amount %> <%= form.hidden_field :amount %> </div> <div class="actions"> <%= form.submit %> </div> <% end %>items/_form.html.erb<%= form_with(model: item, local: true) do |form| %> #これを↓に変更 <%= form_with(model: item, local: true, url: items_confirm_path) do |form| %>以上です。商品詳細画面遷移前に確認画面が挟まれているはずです。
【合わせて読みたい】
■form_withに関して
https://qiita.com/tanaka-yu3/items/50f54f5d4f4b8dfe19f3■local: trueに関して
https://qiita.com/hayulu/items/5bf26656d7433d406ede■確認画面作成に関して
https://qiita.com/tomoharutt/items/7959d28764912c64562f■formの引数が2つの場合
https://qiita.com/tanaka-yu3/items/94d2b9fccc9577756127
- 投稿日:2020-06-21T18:50:05+09:00
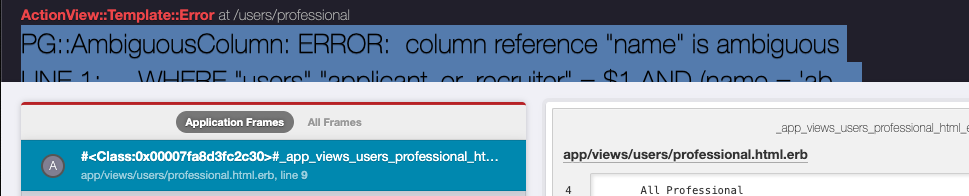
【Rails】PG::AmbiguousColumn: ERROR: column reference "name" is ambiguous
【Rails】PG::AmbiguousColumn: ERROR: column reference "name" is ambiguous
アソシエーションが張られた同じカラム名を持つ2つのモデルでそのカラム名を使ったメソッドを定義したところ上記のエラーが出ました。その際の対応内容をまとめます。
目次
動作環境
OS : macOS 10.14.6
ruby : 2.6.5
Rails : 5.2.4.2状況
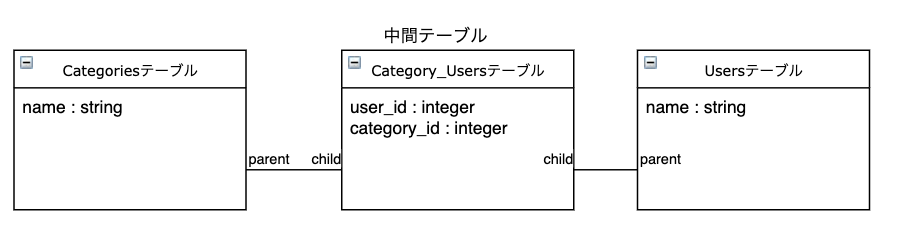
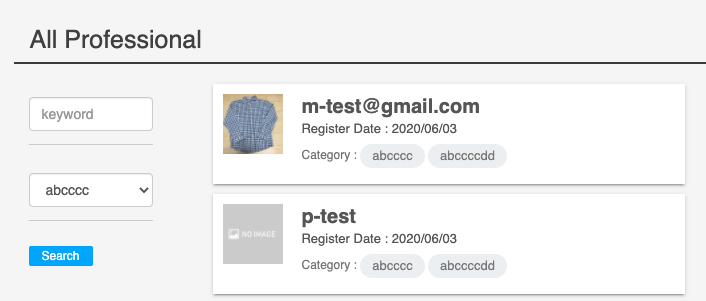
カテゴリモデルとユーザモデルはそれぞれnameという同じ名前のカラム名を持ち,多対多のアソシエーションが張られている状況です。
ここで
ユーザモデルとカテゴリモデルでそれぞれにモデルのスコープメソッドを定義しています。
category.rbclass Category < ApplicationRecord has_many :category_users, dependent: :destroy has_many :users, through: :category_users, source: :user #検索画面で選択したキーワード名から該当のキーワードを取得するメソッド scope :select_category, ->(category) { where('name = ?', category) } enduser.rbclass User < ApplicationRecord has_many :category_users, dependent: :destroy has_many :categories, through: :category_users, source: :category #カテゴリモデルのスコープ`select_category'を呼び出している scope :category_users, ->(category) { joins(:categories).merge(Category.select_category(category)) } endこの状態でキーワードを選択して実行すると
PG::AmbiguousColumn: ERROR: column reference "name" is ambiguousというエラーが出ます.解決策
上記のエラーは
nameカラムが曖昧だというエラーです。
そこでカテゴリモデルのスコープメソッドにテーブル名を付けます。category.rbclass Category < ApplicationRecord has_many :category_users, dependent: :destroy has_many :users, through: :category_users, source: :user # name -> categories.nameとすることでカテゴリテーブルのnameカラムと明示する scope :select_category, ->(category) { where('categories.name = ?', category) } end無事、検索ができました。
原因
下記のSQLログの末尾を見ると
Where name = 'abcc..'にテーブル名が付いていないことがわかる.: SELECT "users".* FROM "users" INNER JOIN "category_users" ON "category_users"."user_id" = "users"."id" INNER JOIN "categories" ON "categories"."id" = "category_users"."category_id" WHERE name = 'abccccdd'つまり,
UserモデルからCategoryモデルのスコープメソッドを呼び出した際に,ActiveRecordではどちらのテーブルのnameか判別することができないためエラーが発生したと考える
- 投稿日:2020-06-21T18:22:22+09:00
VPSでRailsアプリを動かすまでの全手順【Rails6, Capistrano, Puma, Nginx, MySQL, HTTPS】
VPSを契約してRailsアプリを動かすまでの手順をまとめました。
似たような記事はいくつかありますが、本記事には以下のような特長があります。
- ツールのバージョンが比較的新しい
- Ruby2.7系、Rails6系、MySQL8系、CentOS7系
- アプリケーションサーバーにPumaを使用
- GitHubのプライベートリポジトリで管理されているアプリでもデプロイできる
- 独自ドメインに対応
- HTTPSに対応
- Railsアプリの開発環境をDockerで作成
以下、設定方法です。
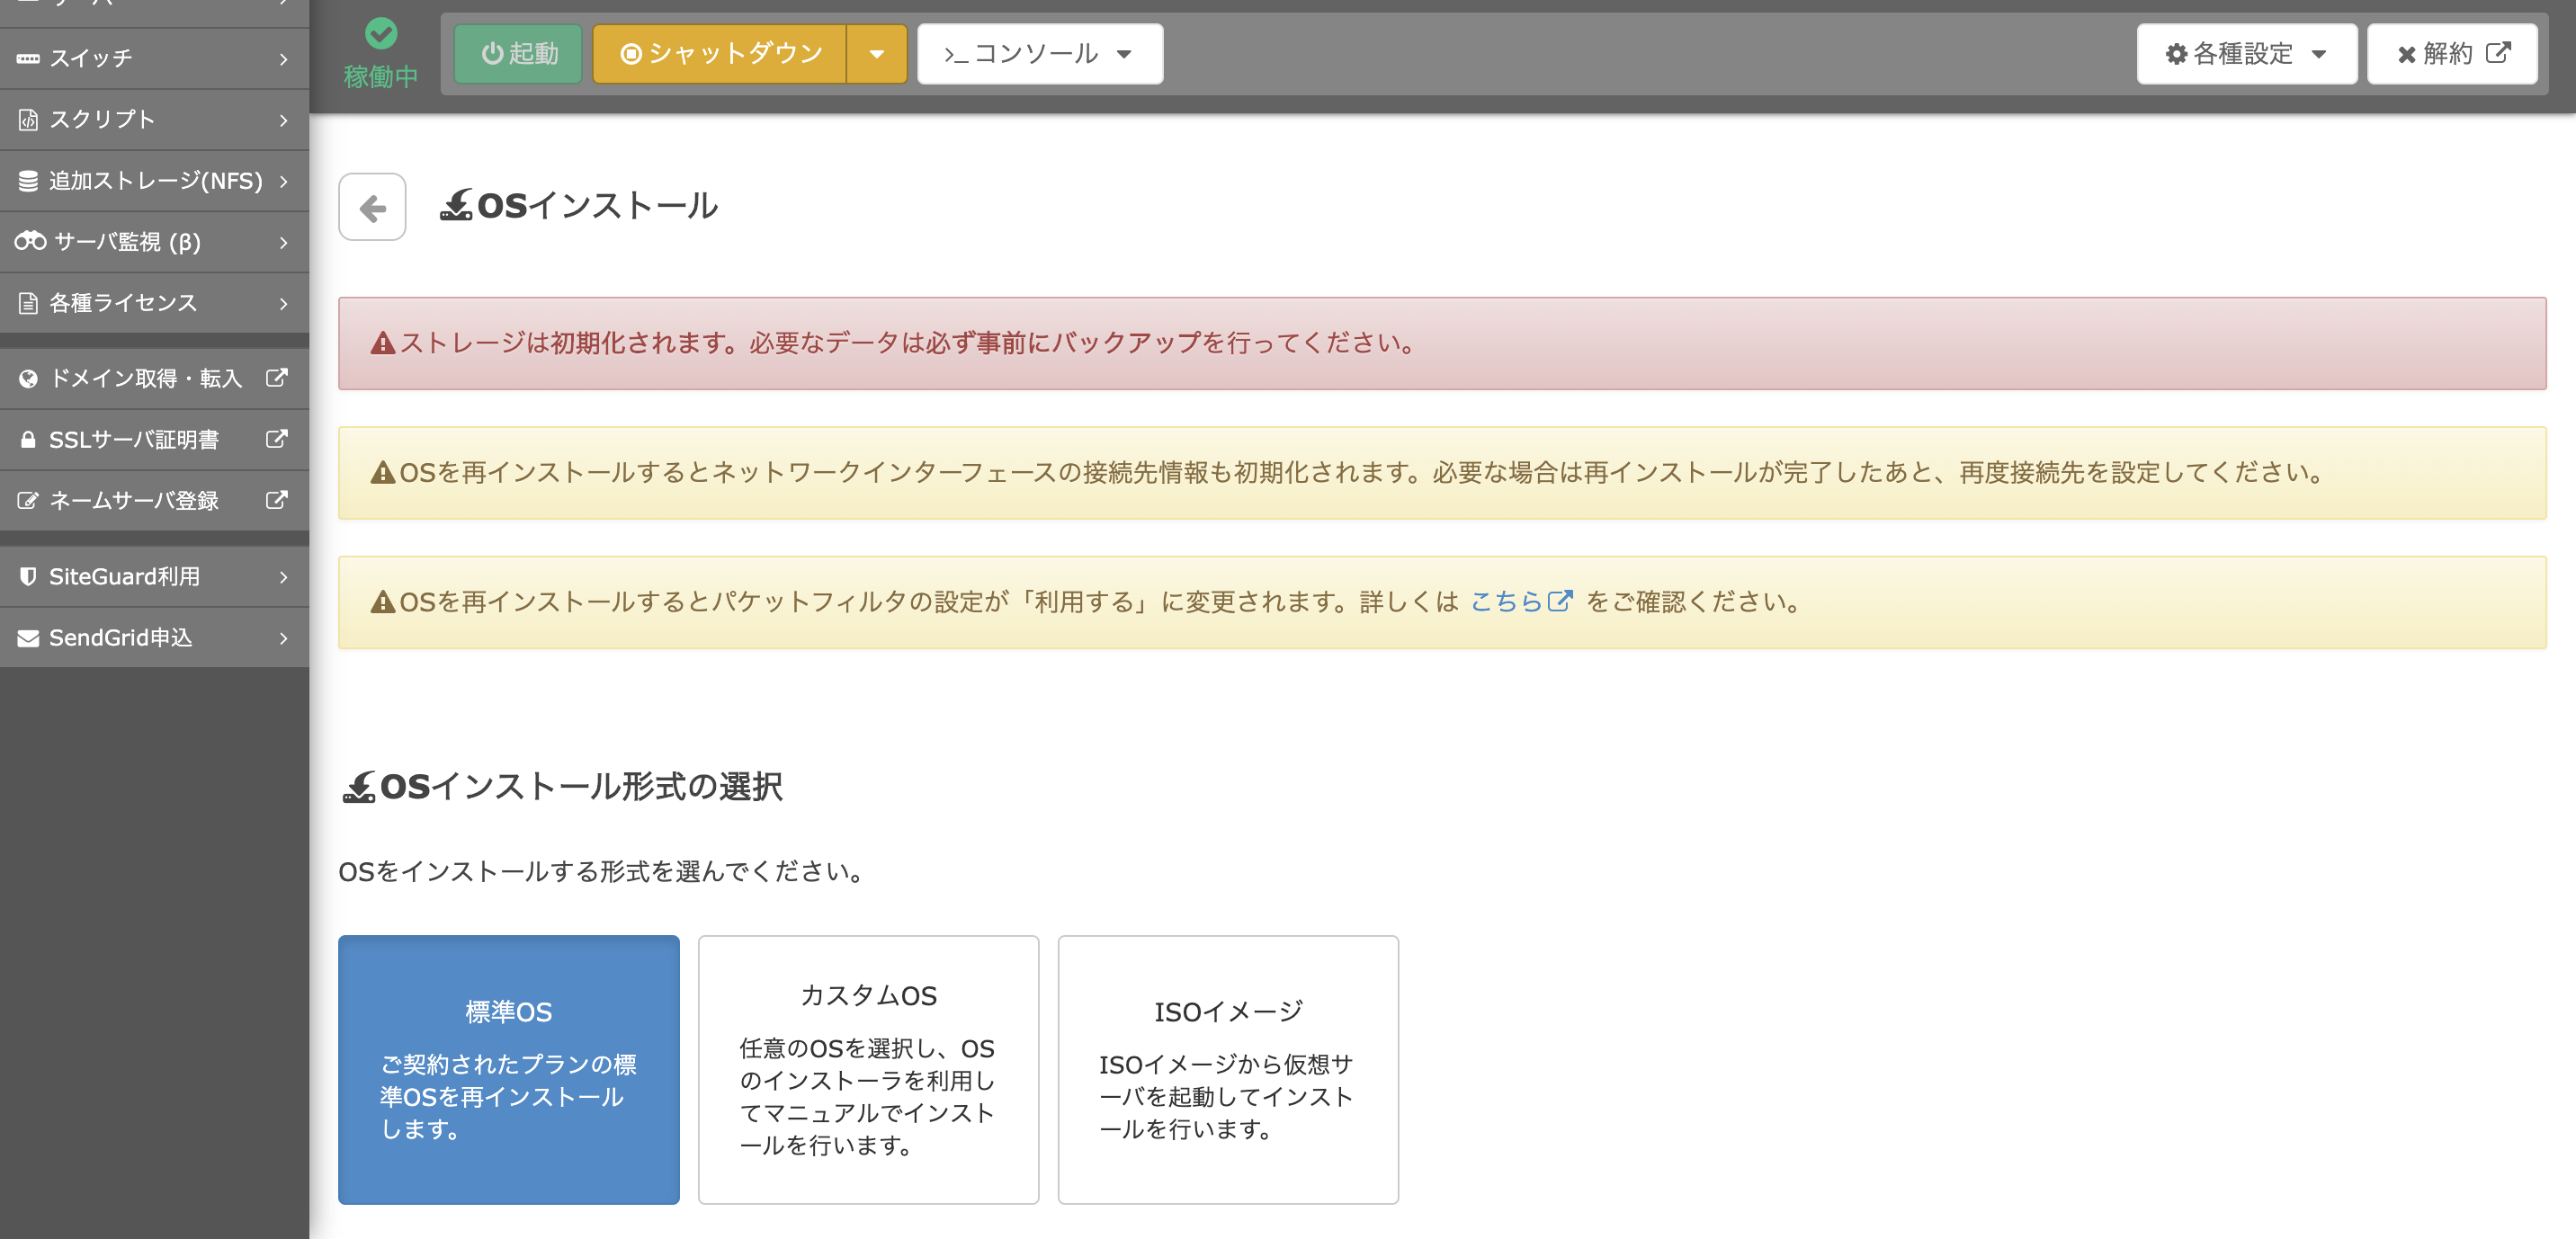
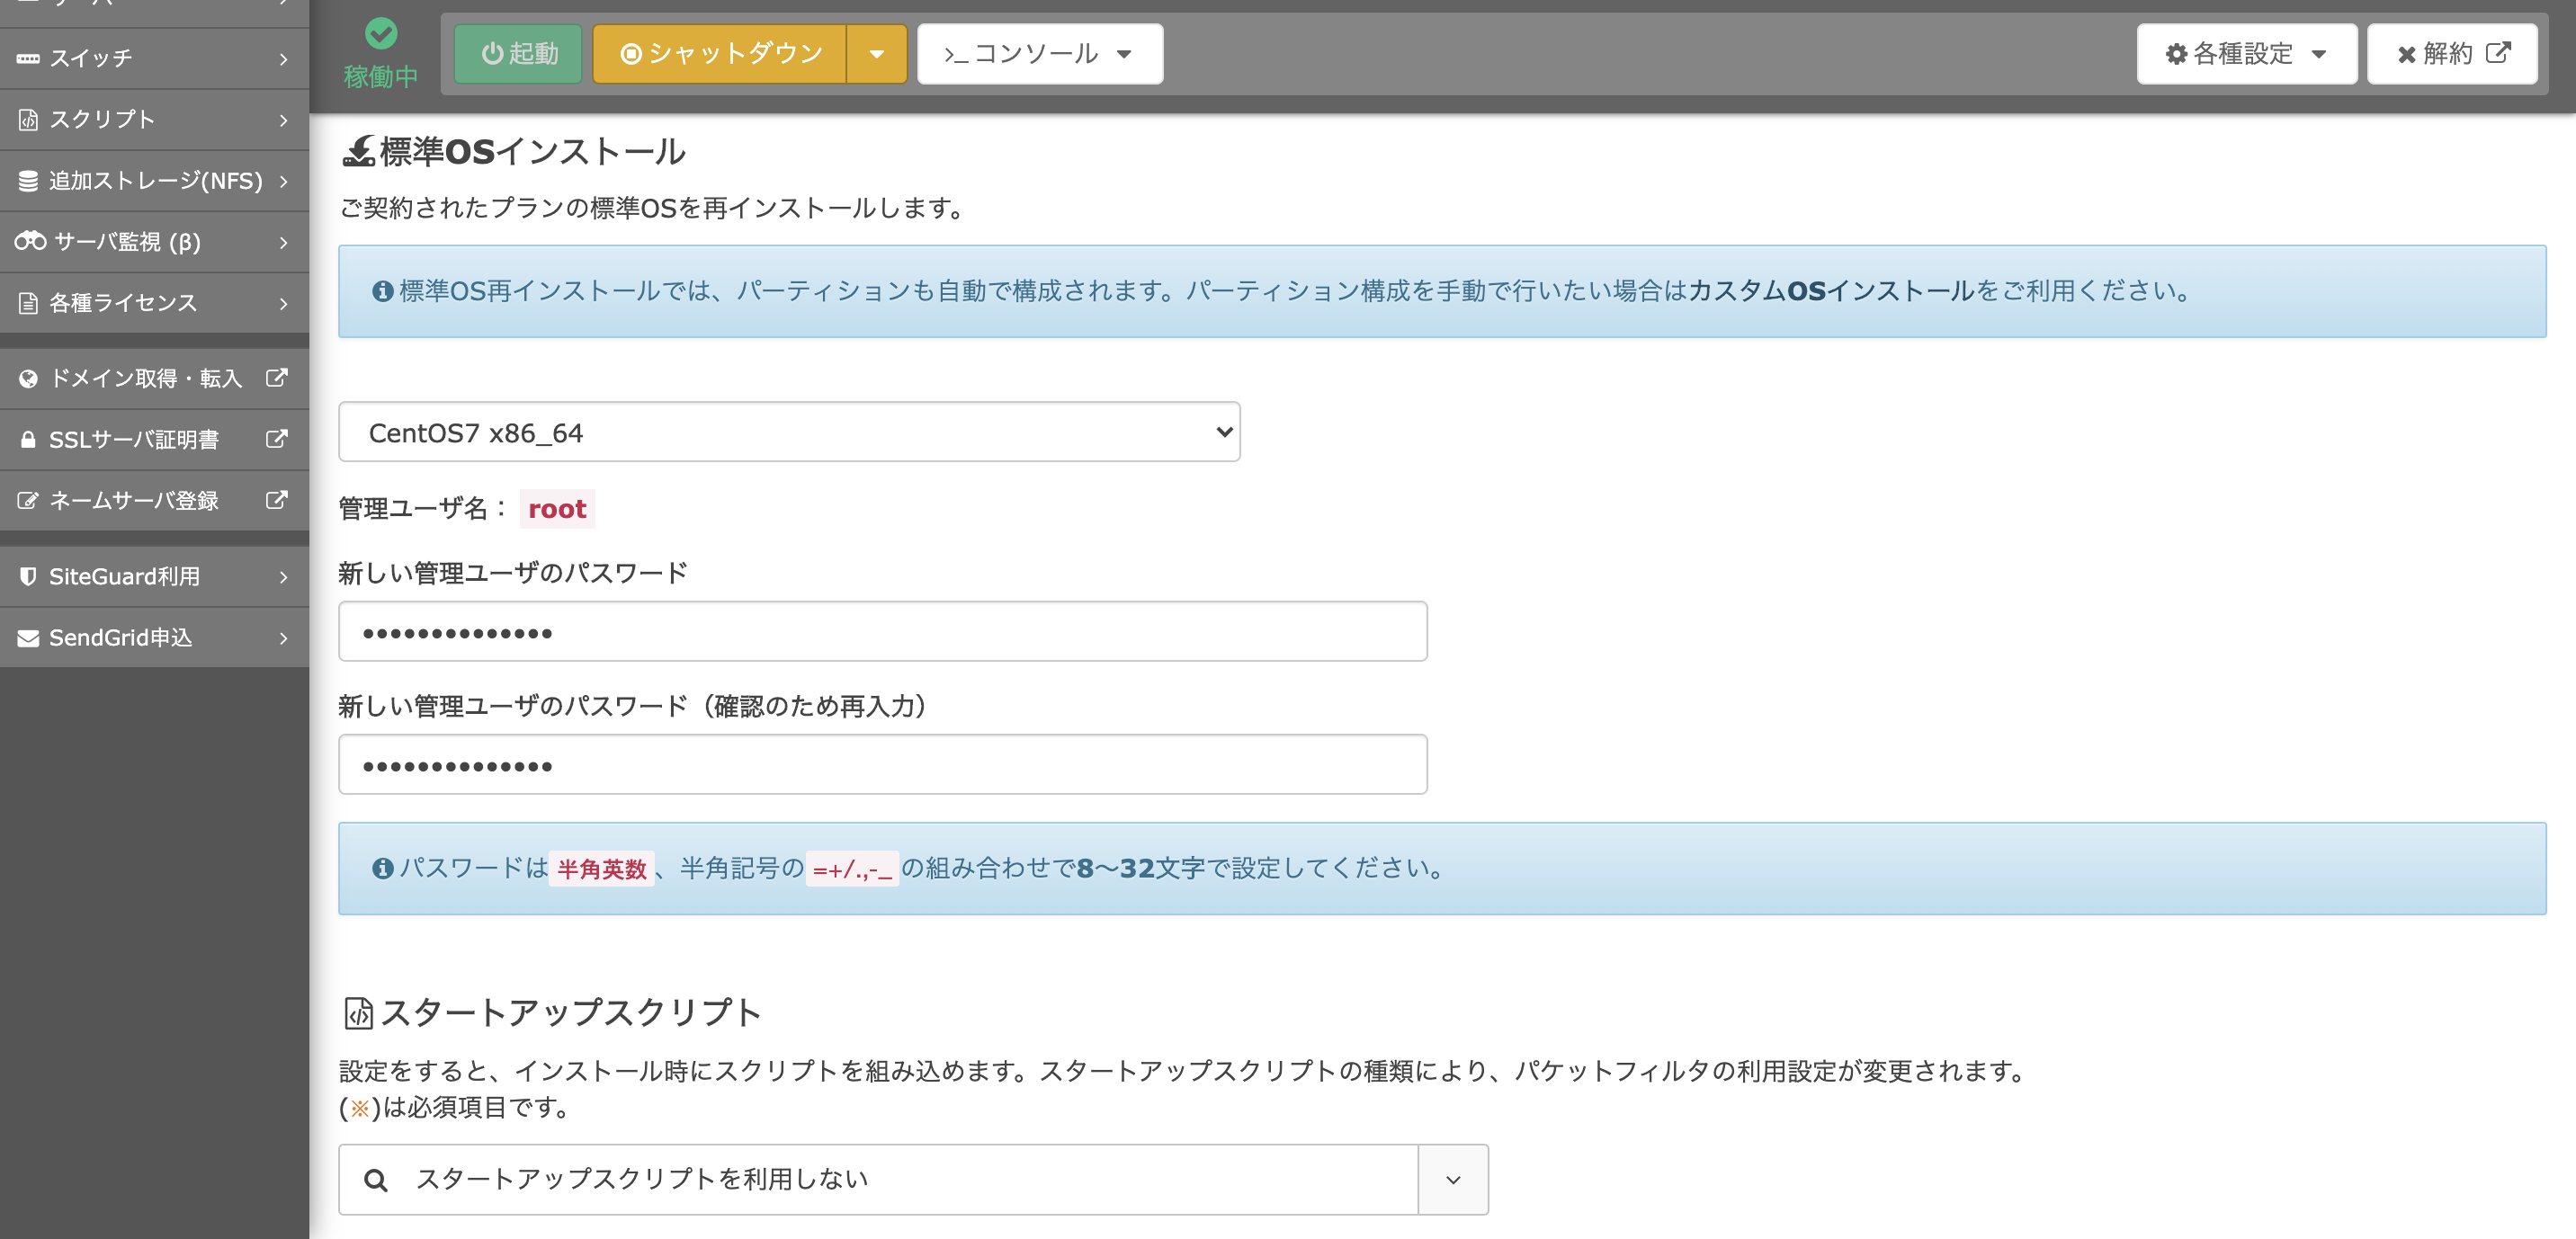
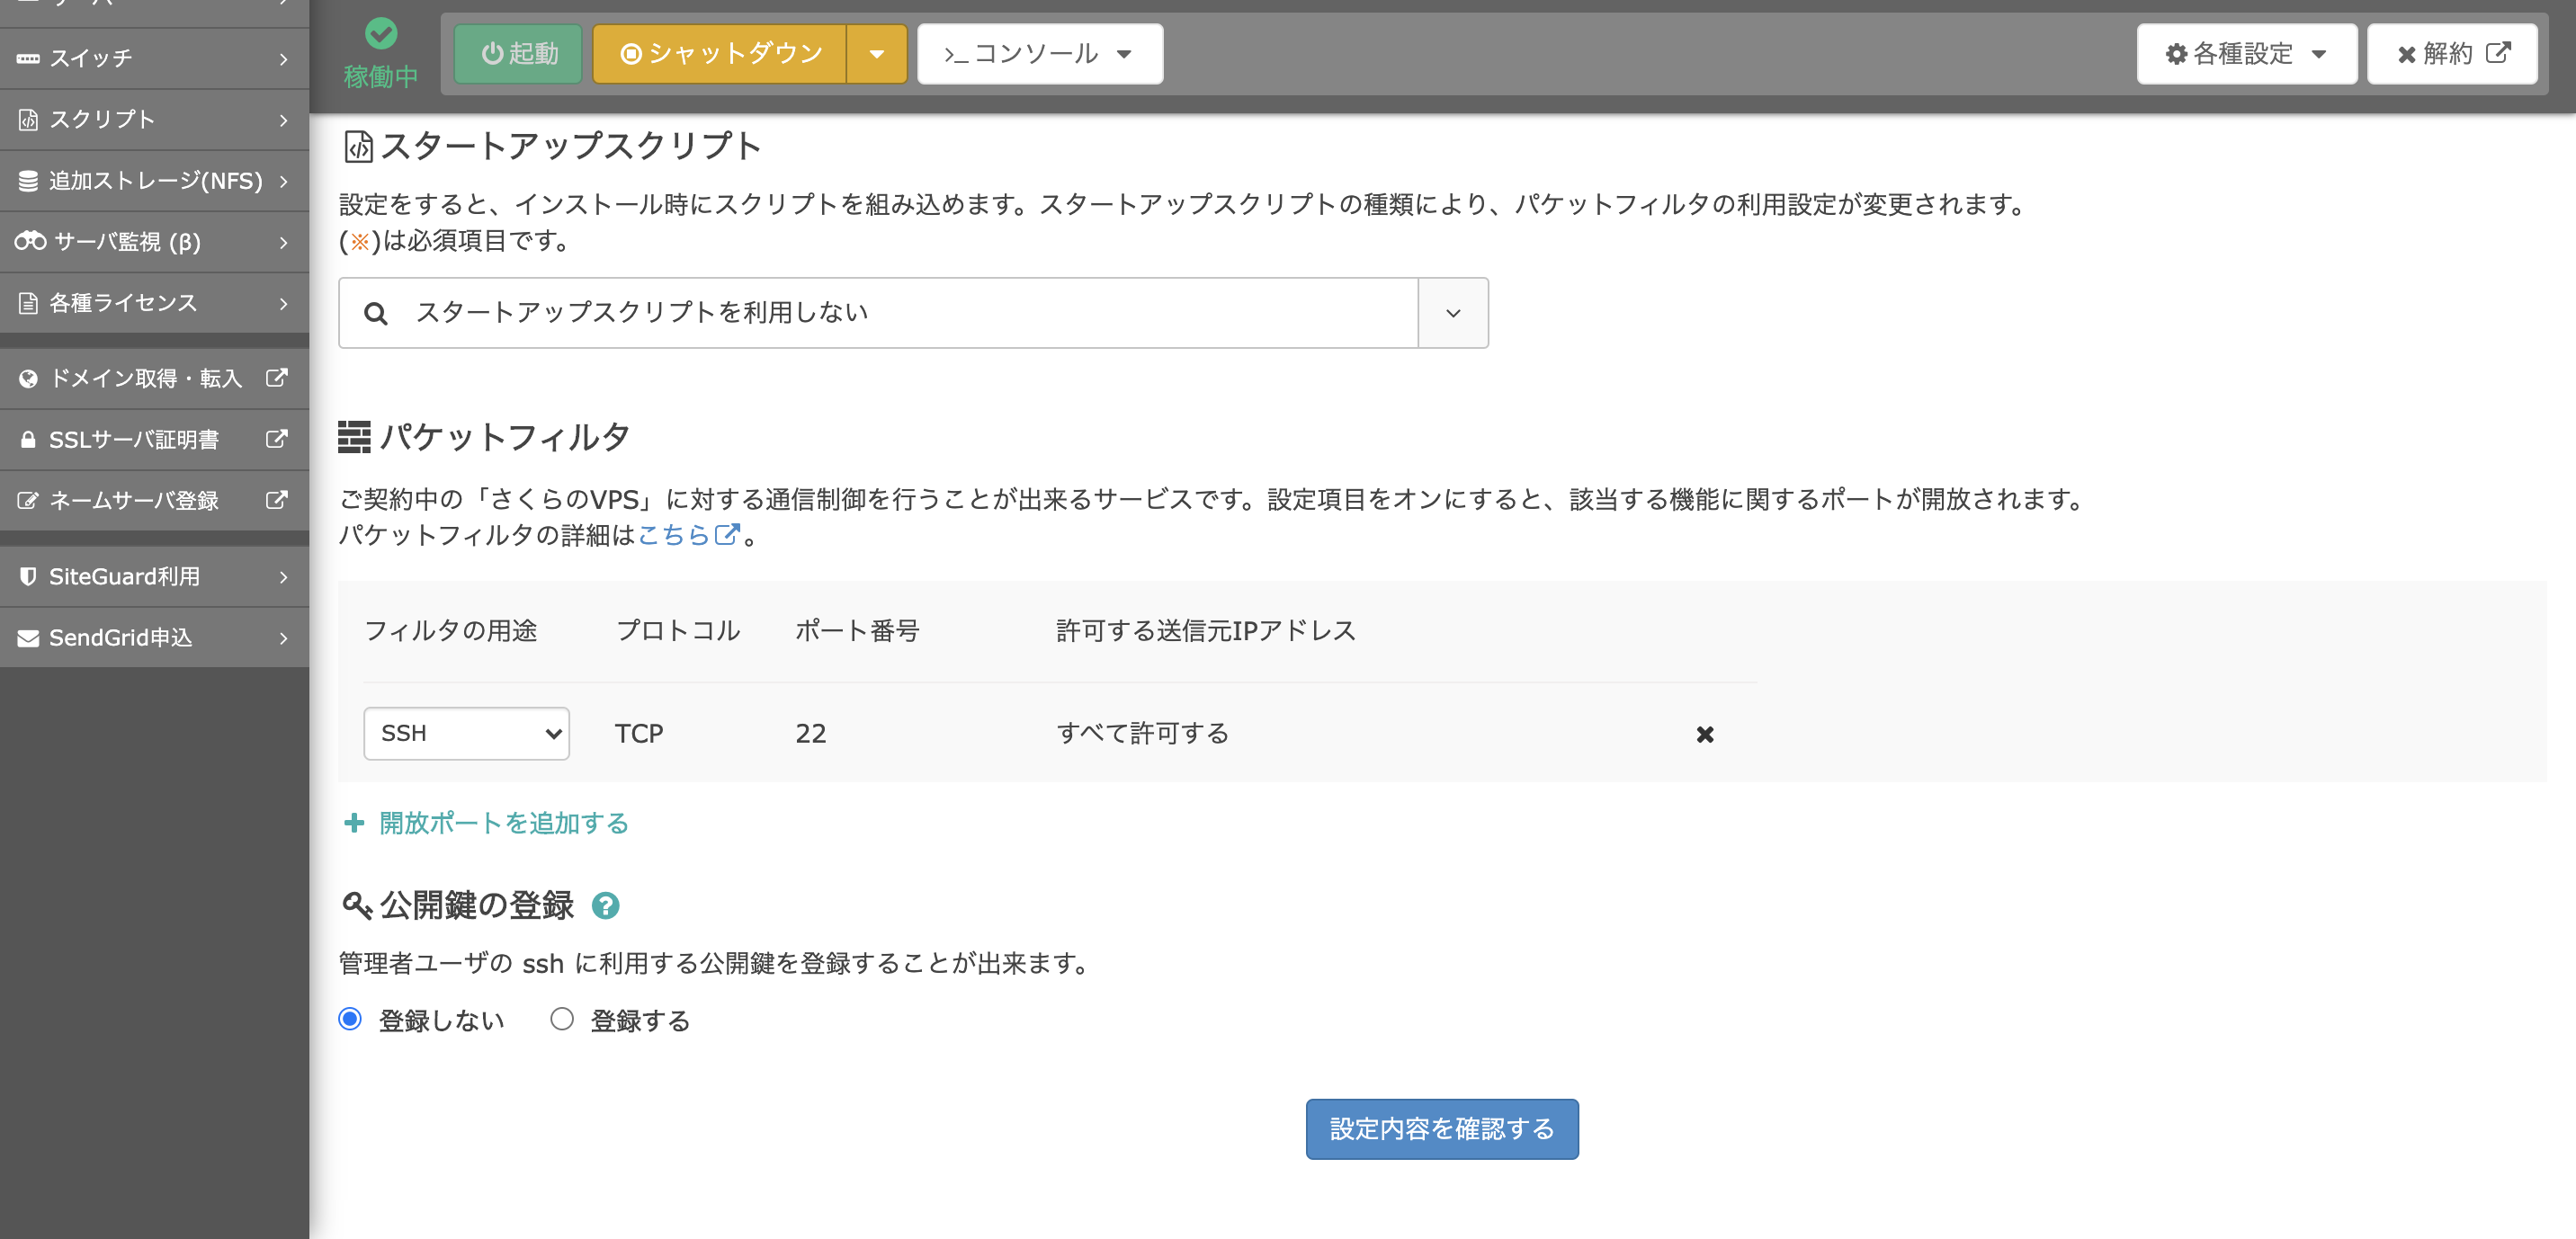
OSインストール
VPSサービスのコンパネからCentoOS7をインストールします。(以下はさくらのVPSの場合のキャプチャです)
rootユーザーでログイン
$ ssh root@xxx.xxx.xxx.xxx #ipアドレス

The authenticity of host 'xxx.xxx.xxx.xxx (xxx.xxx.xxx.xxx.xxx)' cant be established.
ECDSA key fingerprint is SHA256:+CMQV+bQVjTp+CJcpoj1u+J6LS24dAUWjv3tkxFYBSE.
Are you sure you want to continue connecting (yes/no)? #yesを入力
Password? # 先ほど作成したパスワードを入力

$ yum update -y
一般ユーザーを作成
$ adduser vpsuser
$ passwd vpsuser
Changing password for user vpsuser.
New password: #パスワードを設定
$ usermod -G wheel vpsuser # 作成したユーザーをwheelグループに追加
$ visudo # パスワードなしでsudoできるように設定を修正
## Same thing without a password - # %wheel ALL=(ALL) NOPASSWD: ALL + %wheel ALL=(ALL) NOPASSWD: ALL$ exit$ ssh vpsuser@xxx.xxx.xxx.xxx #ipアドレス $ sudo -l # パスワードなしでsudoできることを確認ポート変更&rootユーザーでログインできないようにする
$ sudo vi /etc/ssh/sshd_config/etc/ssh/sshd_config- #PermitRootLogin yes + PermitRootLogin no - Port 22 + Port 50022$ sudo systemctl restart sshd.service $ exit$ ssh vpsuser@xxx.xxx.xxx.xxx # デフォルトのポートでログインできないことを確認 ssh: connect to host xxx.xxx.xxx.xxx port 22: Connection refused $ ssh root@xxx.xxx.xxx.xxx -p 50022 # rootユーザーでログインできないことを確認 permission denied... $ ssh vpsuser@xxx.xxx.xxx.xxx -p 50022 # 50022番ポートでログインできることを確認 SAKURA Internet [Virtual Private Server SERVICE]Firewallの設定
$ sudo vi /usr/lib/firewalld/services/ssh.xml # ssh接続のポート番号変更に対応/usr/lib/firewalld/services/ssh.xml- <port protocol="tcp" port="22"/> + <port protocol="tcp" port="50022"/>$ sudo systemctl start firewalld #firewallを起動 $ sudo systemctl enable firewalld.service #firewallの自動起動設定 $ sudo firewall-cmd --list-all # 許可されている接続を確認 $ sudo firewall-cmd --add-service=http --permanent #http接続を許可 $ sudo firewall-cmd --add-service=https --permanent # https接続を許可 $ sudo firewall-cmd --reload # 設定を反映 $ sudo firewall-cmd --list-all $ sudo systemctl reboot #OSを再起動SSHキーペアでログインできるようにする
キーペアを作成
$ cd ~/.ssh
$ mkdir sakura_vps
$ cd sakura_vps
$ ssh-keygen -f id_rsa
公開鍵をサーバーに登録
$ cat ~/.ssh/sakura_vps/id_rsa.pub | pbcopy
$ ssh vpsuser@xxx.xxx.xxx.xxx -p 50022 #ipアドレス
$ cd .ssh # or mkdir .ssh → cd .ssh
$ vi authorized_keys # クリップボードにコピーした公開鍵を登録
$ chmod 600 authorized_keys
$ chmod 700 ~/.ssh
$ exit
接続確認
$ ssh -i ~/.ssh/sakura_vps/id_rsa vpsuser@xxx.xxx.xxx.xxx -p 50022
$ exit
ssh configの設定
$ vim ~/.ssh/config~/.ssh/configHost sakura_vps HostName xxx.xxx.xxx.xxx # ipアドレス Port 50022 User vps_user IdentityFile ~/.ssh/sakura_vps/id_rsa$ ssh sakura_vpsNginxをインストール
$ sudo vim /etc/yum.repos.d/nginx.repo/etc/yum.repos.d/nginx.repo[nginx] name=nginx repo baseurl=http://nginx.org/packages/centos/7/$basearch/ gpgcheck=0 enabled=1$ sudo yum info nginx #インストールできるnginxのバージョンが良い感じになっていることを確認 $ sudo yum -y --enablerepo=nginx install nginx $ nginx -v $ sudo systemctl start nginx #起動 $ sudo systemctl enable nginx.service #自動起動設定(さくらのVPSのみ)
コンパネからパケットフィルタの設定を変更し、80番、443番ポートを開放する必要があります。ブラウザでipアドレスにアクセスして、nginxの初期画面が表示されることを確認
ドメインの紐付けと公開ディレクトリの設定
hoge.comというドメインを紐付け、hoge.comにアクセスがあった時のルートディレクトリを設定します。ネームサーバーの設定
ドメインレジストラ(お名前ドットコムなど)の管理画面とVPSのコンパネからドメインの設定をします。設定方法はお使いのサービスによって異なるため割愛。
VPS側の設定
$ sudo mkdir -p /var/www/html/hoge $ cd /var/www/html/hoge $ sudo vim index.html/var/www/html/hoge/index.htmlhello from hoge.com$ cd /etc/nginx/conf.d $ sudo vim hoge.com.conf/etc/nginx/conf.d/hoge.com.confserver { listen 80; server_name hoge.com; location / { root /var/www/html/hoge; index index.html index.htm index.php; } error_page 500 502 503 504 /50x.html; location = /50x.html { root /usr/share/nginx/html; } }$ sudo systemctl restart nginxhttp://hoge.com にアクセスして、作成したファイルが表示されれば成功。
ブラウザのキャッシュでhttpsにリダイレクトされてしまうと場合は、シークレットモード等で確認。HTTPS対応
$ sudo yum install -y certbot $ sudo systemctl stop nginx $ sudo certbot certonly --standalone -d hoge.com # メールアドレスとか聞かれるので答える $ sudo systemctl start nginx $ sudo vim /etc/nginx/conf.d/hoge.com.conf/etc/nginx/conf.d/hoge.com.confserver { listen 80; server_name hoge.com; return 301 https://$host$request_uri; } server { listen 443 ssl; server_name hoge.com; ssl_certificate /etc/letsencrypt/live/hoge.com/fullchain.pem; ssl_certificate_key /etc/letsencrypt/live/hoge.com/privkey.pem; location / { root /var/www/html/hoge; index index.html index.htm index.php; } }$ sudo systemctl restart nginxhttp://hoge.com にアクセスして https://hoge.com にリダイレクトされれば成功
MySQLをインストール
MariaDBを削除
$ sudo yum remove -y mariadb-libs
$ rm -rf /var/lib/mysql
インストール
MySQL8系を入れていきます。
$ sudo rpm -ivh https://dev.mysql.com/get/mysql80-community-release-el7-2.noarch.rpm
$ sudo yum repolist all | grep mysql
$ sudo yum install -y mysql-community-server
$ mysql --version
起動設定
$ sudo systemctl start mysqld.service
$ sudo systemctl enable mysqld.service
初期設定
$ sudo grep password /var/log/mysqld.log #初期パスワードを確認(KckBT<u4#Tyc)
2020-06-15T03:05:59.186510Z 6 [Note] [MY-010454] [Server] A temporary password is generated for root@localhost: KckBT<u4#Tyc
$ mysql_secure_installation
Securing the MySQL server deployment.

Enter password for user root: # ログファイルから取得した初期パスワードを入力

The existing password for the user account root has expired. Please set a new password.

New password: # rootユーザの新規パスワードを入力(大文字小文字英数字+特殊文字で8文字以上で設定)

Re-enter new password: # 確認用にもう一度入力
The 'validate_password' plugin is installed on the server.
The subsequent steps will run with the existing configuration
of the plugin.
Using existing password for root.

Estimated strength of the password: 100
Change the password for root ? ((Press y|Y for Yes, any other key for No) : y # 本当にパスワードを変更して良いかの確認

By default, a MySQL installation has an anonymous user,
allowing anyone to log into MySQL without having to have
a user account created for them. This is intended only for
testing, and to make the installation go a bit smoother.
You should remove them before moving into a production
environment.

Remove anonymous users? (Press y|Y for Yes, any other key for No) : y # 匿名ユーザー(名前もパスワードも設定されていないユーザー。デフォルトで設定されているけどセキュリティ上消した方が良い)を削除
Success.


Normally, root should only be allowed to connect from
'localhost'. This ensures that someone cannot guess at
the root password from the network.

Disallow root login remotely? (Press y|Y for Yes, any other key for No) : y # localhost以外からrootアカウントでログインできないようにする
Success.

By default, MySQL comes with a database named 'test' that
anyone can access. This is also intended only for testing,
and should be removed before moving into a production
environment.


Remove test database and access to it? (Press y|Y for Yes, any other key for No) : y # testデータベースを削除
 - Dropping test database...
Success.

 - Removing privileges on test database...
Success.

Reloading the privilege tables will ensure that all changes
made so far will take effect immediately.

Reload privilege tables now? (Press y|Y for Yes, any other key for No) : y # リロードして設定を反映する
Success.

All done!
状態確認
$ mysql -u root -p
mysql> status
--------------
mysql  Ver 8.0.20 for Linux on x86_64 (MySQL Community Server - GPL)

Connection id:      11
Current database:
Current user:       root@localhost
SSL:            Not in use
Current pager:      stdout
Using outfile:      ''
Using delimiter:    ;
Server version:     8.0.20 MySQL Community Server - GPL
Protocol version:   10
Connection:     Localhost via UNIX socket
Server characterset:    utf8mb4
Db     characterset:    utf8mb4
Client characterset:    utf8mb4
Conn.  characterset:    utf8mb4
UNIX socket:        /var/lib/mysql/mysql.sock
Binary data as:     Hexadecimal
Uptime:         8 min 41 sec

Threads: 2  Questions: 16  Slow queries: 0  Opens: 131  Flush tables: 3  Open tables: 49  Queries per second avg: 0.030
--------------

mysql> show variables like "chara%";
+--------------------------+--------------------------------+
| Variable_name            | Value                          |
+--------------------------+--------------------------------+
| character_set_client     | utf8mb4                        |
| character_set_connection | utf8mb4                        |
| character_set_database   | utf8mb4                        |
| character_set_filesystem | binary                         |
| character_set_results    | utf8mb4                        |
| character_set_server     | utf8mb4                        |
| character_set_system     | utf8                           |
| character_sets_dir       | /usr/share/mysql-8.0/charsets/ |
+--------------------------+--------------------------------+

mysql> show variables like '%time_zone%';
+------------------+--------+
| Variable_name    | Value  |
+------------------+--------+
| system_time_zone | JST    |
| time_zone        | SYSTEM |
+------------------+--------+
mysql8から、デフォルトの文字コードがutf8mb4になっています。特にいじらなくてOK。
またsystem_time_zoneがJST、time_zoneがSYSTEM(system_time_zoneを参照する、という意味)で、どちらもJSTなのでタイムゾーンの設定はこのままでOK。認証方式を変更
MySQL8から標準の認証方式がcaching_sha2_passwordというものに変更されており、このままだとRailsでエラーが発生するみたいなので修正。
mysql> select user, plugin from mysql.user;
mysql> alter user 'root'@'localhost' identified with mysql_native_password by 'P@ssw0rd!!'; # rootユーザーの認証方式を変更
mysql> exit
$ sudo vi /etc/my.cnf # 今後作成するユーザーのデフォルトの認証方式を修正- # default_authentication_plugin=mysql_native_password + default_authentication_plugin=mysql_native_password$ sudo systemctl restart mysqldデータベースと専用ユーザーを作成
$ mysql -u root -p-- データベースを作成 CREATE DATABASE service1_db DEFAULT CHARACTER SET utf8mb4 COLLATE utf8mb4_general_ci; -- ユーザーを作成 CREATE USER 'dbuser'@'localhost' IDENTIFIED BY 'set_your_password_here'; -- 作成したユーザーに作成したデータベースの操作権限を付与 GRANT ALL PRIVILEGES ON service1_db.* TO 'dbuser'@'localhost'; -- 設定を反映 FLUSH PRIVILEGES; -- データベース一覧を表示 SHOW DATABASES; -- ユーザー一覧を表示 SELECT host, user FROM mysql.user; exitGitをインストール
$ git --version # もしインストールされていなければ以下を実行
$ sudo yum -y install git
Rubyをインストール
rbenvをsystemwideにインストール
$ sudo git clone git://github.com/sstephenson/rbenv.git /usr/local/rbenv # rbenv
$ sudo git clone git://github.com/sstephenson/ruby-build.git /usr/local/rbenv/plugins/ruby-build # rbenv installコマンドを叩くために必要なライブラリ
$ sudo yum -y install bzip2 gcc openssl-devel readline-devel zlib-devel #関連パッケージ
https://blog.adachin.me/archives/2182
visudoを修正
$ sudo visudo- Defaults secure_path = /sbin:/bin:/usr/sbin:/usr/bin + Defaults secure_path = /sbin:/bin:/usr/sbin:/usr/bin:/usr/local/rbenv/bin:/usr/local/rbenv/shims + Defaults env_keep += "RBENV_ROOT"rbenvのセットアップ
$ sudo rbenv init -
$ sudo vim /etc/profile
export RBENV_ROOT=/usr/local/rbenv export PATH="$RBENV_ROOT/bin:$PATH" eval "$(rbenv init -)"上記をファイル末尾に追加することで、どのユーザーからもrbenvが
/user/local/rbenvにインストールされていることがわかるようになります。読み込み
$ su -
$ source /etc/profile
$ exit
$ exit
rootユーザーに切り替えてから
sourceコマンドを実行する必要があるようです。Rubyをインストール
$ ssh sakura_vps
$ rbenv install -l
$ sudo rbenv install 2.7.1
$ sudo rbenv rehash
$ sudo rbenv global 2.7.1
一度ログアウトした後、再度ログインしてrubyのバージョンを確認
$ exit
$ ssh sakura_vps
$ ruby -v
ruby 2.7.1p83 (2020-03-31 revision a0c7c23c9c) [x86_64-linux]
Bundlerをインストール
$ sudo gem install bundlerNode.js、Yarnをインストール
$ sudo yum install -y nodejs # 古いバージョンのnodejsがインストールされる
$ sudo npm install -g n
$ sudo n stable # 最新安定版のnodejsがインストールされる
$ yum remove -y nodejs # 古いnodejsを削除する
$ exec $SHELL -l
$ node -v
$ npm -v
$ sudo npm install -g yarn
$ yarn -v
Railsアプリを作成
ここからしばらくローカルでの作業です。
前提
Docker for macがインストールされている。
You're on Railsを表示
$ mkdir sample_ror6 $ cd sample_ror6 $ touch Dockerfile docker-compose.yml Gemfile Gemfile.lockDockerfileFROM ruby:2.7.1 RUN curl -sS https://dl.yarnpkg.com/debian/pubkey.gpg | apt-key add - \ && echo "deb https://dl.yarnpkg.com/debian/ stable main" | tee /etc/apt/sources.list.d/yarn.list RUN apt-get update -qq && apt-get install -y nodejs vim yarn zsh RUN mkdir /app_name ENV APP_ROOT /app_name WORKDIR $APP_ROOT COPY ./Gemfile $APP_ROOT/Gemfile COPY ./Gemfile.lock $APP_ROOT/Gemfile.lock RUN bundle install COPY . $APP_ROOT RUN chsh -s /bin/zshdocker-compose.ymlversion: "3" services: db: image: mysql:8.0 command: mysqld --default-authentication-plugin=mysql_native_password environment: - MYSQL_ALLOW_EMPTY_PASSWORD=1 volumes: - mysql_data:/var/lib/mysql ports: - "3306:3306" web: build: . command: /bin/sh -c "rm -f tmp/pids/server.pid && bundle exec rails s -p 3000 -b '0.0.0.0'" volumes: - .:/app_name ports: - "3000:3000" links: - db volumes: mysql_data:Gemfilesource 'https://rubygems.org' gem 'rails', '6.0.3'Gemfile.lock# 空$ docker-compose run web rails new . --force --database=mysql --skip-bundle #mysql2が無いって怒られるけどOK $ docker-compose build $ docker-compose run web rails webpacker:installconfig/database.ymldefault: &default adapter: mysql2 encoding: utf8mb4 charset: utf8mb4 collation: utf8mb4_general_ci pool: <%= ENV.fetch("RAILS_MAX_THREADS") { 5 } %> timeout: 5000 username: root host: db development: <<: *default database: app_name_development test: <<: *default database: app_name_test production: <<: *default # mysqlの設定のところで入力した情報を以下に記述 database: service1_db host: localhost username: dbuser password: set_your_password_here$ docker-compose up $ docker-compose exec web rails db:createhttp://localhost:3000 にアクセスして、Yay! You’re on Rails!を確認
適当なページを作成
$ docker-compose exec web rails g controller tests indexconfig/routes.rbRails.application.routes.draw do get 'tests/index' root to: 'tests#index' endhttp://localhost:3000 にアクセスして表示を確認
コミット
.gitignore### Rails ### *.rbc capybara-*.html .rspec /public/system /coverage/ /spec/tmp *.orig rerun.txt pickle-email-*.html # Ignore all logfiles and tempfiles. /log/* /tmp/* !/log/.keep !/tmp/.keep # TODO Comment out this rule if you are OK with secrets being uploaded to the repo config/initializers/secret_token.rb config/master.key # Only include if you have production secrets in this file, which is no longer a Rails default # config/secrets.yml # dotenv, dotenv-rails # TODO Comment out these rules if environment variables can be committed .env .env.* ## Environment normalization: /.bundle /vendor/bundle # these should all be checked in to normalize the environment: # Gemfile.lock, .ruby-version, .ruby-gemset # unless supporting rvm < 1.11.0 or doing something fancy, ignore this: .rvmrc # if using bower-rails ignore default bower_components path bower.json files /vendor/assets/bower_components *.bowerrc bower.json # Ignore pow environment settings .powenv # Ignore Byebug command history file. .byebug_history # Ignore node_modules node_modules/ # Ignore precompiled javascript packs /public/packs /public/packs-test /public/assets # Ignore yarn files /yarn-error.log yarn-debug.log* .yarn-integrity # Ignore uploaded files in development /storage/* !/storage/.keep # Others config/database.ymlhttps://www.toptal.com/developers/gitignore
$ git add -A
$ git commit -m'First commit'
VscodeRemoteDevelopmentの設定
やりたい人だけ以下を参考に設定
VSCode Remote Containerが良い - QiitaGitHubにSSH公開鍵を登録
すでに登録済みの場合はとばしてください。
$ mkdir -p ~/.ssh/github $ cd ~/.ssh/github $ ssh-keygen -f id_rsa $ vim ~/.ssh/config~/.ssh/configHost github.com #ここが「github」だと動かないので注意 HostName github.com Port 22 IdentityFile ~/.ssh/github/id_rsa User git$ pbcopy < id_rsa.pub #公開鍵をクリップボードにコピーその後以下の手順でGitHubに登録
- GitHubにログイン
- 右上のアイコン > Settings > SSH and GPG keys に移動
- New SSH keyをクリック
- クリップボードにコピーした公開鍵をペーストして保存
GitHubにリポジトリを作成してPush
- GitHubにログイン
- 画面右上のアイコン > Your repositoriesをクリック
- Newをクリック
- リポジトリ名を入力し Create repository をクリック
$ git remote add origin git@github.com:<githubのアカウント名>/<リポジトリ名>.git
$ git push -u origin master
Capistranoでデプロイ
サーバーにファイルを配置
Personal API tokenを取得
https://github.com/settings/tokens にアクセスして、トークンを取得します。
Generate new tokenをクリックして、repoの部分だけ全てチェックしました。設定
Gemfilegroup :development do gem 'capistrano' gem 'ed25519' gem 'bcrypt_pbkdf' end$ bundle install $ bundle exec cap installconfig/deploy.rb# 共通の設定を記述 set :application, "sample_ror6" set :repo_url, 'https://set_personal_api_token_here:@github.com/d0ne1s/sample_ror6.git' set :deploy_to, "/var/www/html/hoge"config/deploy/production.rb# production環境固有の設定を記述 server "hoge.com", user: "vpsuser", port: '50022', roles: %w{app db web}$ ssh sakura_vps $ sudo chown -R vpsuser /var/www/html/hoge $ exit $ vim ~/.ssh/config~/.ssh/configHost hoge.com HostName 111.222.33.44 Port 50022 User vpsuser IdentityFile ~/.ssh/sakura_vps/id_rsa
production.rbに記入したドメインと同名のホストがconfigに登録されていれば、デプロイのたびにパスワードを入力したり、OSを起動するたびに秘密鍵をssh-agentに登録する手間が省けます。$ bundle exec cap production deployrbenv
Gemfilegroup :development do gem 'capistrano-rbenv' end$ bundle install # gemのインストール後はローカルサーバーの再起動を忘れずにCapfilerequire "capistrano/rbenv"config/deploy.rbset :rbenv_type, :system set :rbenv_ruby, '2.7.1' #rails6から.ruby-version内の記述が変わっていて File.read('.ruby-version').strip では動かないので注意 set :rbenv_path, '/usr/local/rbenv'$ bundle exec cap production deployエラーが出なければ成功
Bundlerでgemをインストール
Gemfilegroup :development do gem 'capistrano-bundler' end$ bundle install # gemのインストール後はローカルサーバーの再起動を忘れずにCapfilerequire "capistrano/bundlerconfig/deploy.rbappend :linked_dirs, '.bundle' # gemの保存先をシンボリックリンクにして、gemをリリース間で共有サーバーに
mysql-develをインストールしてデプロイ。gemをインストールするので、初回は時間がかかります。$ ssh hoge.com $ sudo yum install -y mysql-devel $ exit $ bundle exec cap production deployRailsの設定
- 共有ファイル、ディレクトリの定義
- デプロイのたびにmigrationを行う
- デプロイのたびにassetコンパイルを行う
Gemfilegroup :development do gem 'capistrano-rails' end$ bundle install # gemのインストール後はローカルサーバーの再起動を忘れずにCapfilerequire "capistrano/rails/assets" require "capistrano/rails/migrations"config/deploy.rb# capistrano3.5からはsetではなくappendを使う append :linked_files, "config/database.yml", "config/master.key" append :linked_dirs, ".bundle", "log", "tmp/pids", "tmp/cache", "tmp/sockets"$ ssh hoge.com $ mkdir /var/www/html/hoge/shared/config $ exit $ scp config/master.key config/database.yml hoge.com:/var/www/html/hoge/shared/config$ bundle exec cap production deploypumaを起動
Gemfilegem 'puma', '~> 4.1' # 元からある。念のため確認。 group :development do gem 'capistrano3-puma' end$ bundle installCapfilerequire "capistrano/puma" install_plugin Capistrano::Pumaconfig/deploy.rb# "capistrano/puma"で提供されるpuma:restartコマンドでは、うまく行かなかった # puma:restartの後にpuma:stop→puma:startを走らせるタスクを作って対応 namespace :deploy do task :puma_restart_again do invoke 'puma:stop' invoke! 'puma:start' end end after 'puma:restart', 'deploy:puma_restart_again'$ bundle exec cap production puma:config # サーバー上に設定ファイルが作られる $ ssh hoge.com $ sudo vim /var/www/html/hoge/shared/puma.rb/var/www/html/hoge/shared/puma.rb# 末尾に以下を追加 daemonize true$ bundle exec cap production deployローカルから以下のコマンドが使えるようになります。
$ bundle exec cap production puma:start
$ bundle exec cap production puma:stop
nginxとpumaの連携
$ ssh hoge.com $ sudo vim /etc/nginx/conf.d/hoge.com.conf # 以下のように書き換える/etc/nginx/conf.d/hoge.com.confupstream puma-production { server unix:/var/www/html/hoge/shared/tmp/sockets/puma.sock; } server { listen 80; server_name hoge.com; return 301 https://$host$request_uri; } server { listen 443 ssl; server_name hoge.com; ssl_certificate /etc/letsencrypt/live/hoge.com/fullchain.pem; ssl_certificate_key /etc/letsencrypt/live/hoge.com/privkey.pem; root /var/www/html/hoge/current/public; location / { try_files $uri @app; } location @app { proxy_set_header Host $http_host; proxy_set_header X-Real-IP $remote_addr; proxy_set_header X-Forwarded-Host $host; proxy_set_header X-Forwarded-For $proxy_add_x_forwarded_for; proxy_pass http://puma-production; } }$ sudo systemctl restart nginxhttps://hoge.com にアクセスして、表示を確認。
Railsアプリのトップページが表示されたら、これで終了です。
おつかれさまでした。参考
- 投稿日:2020-06-21T18:18:48+09:00
minitestでモック、スタブする(RR、WebMock、MiniTest::Mockを使う)
この記事について
仕事で、railsのテストフレームワークにminitestを使っています。そして、railsプロジェクトの中では、モックやスタブをするときに、RR、WebMockといったgemや、minitest標準のモックであるMiniTest::Mockが使われています。
テストを書くときに、モックやスタブの書き方に戸惑うことが多くありました。
この記事では、テストダブルとはどんなものか、モックとスタブの違いはなにか、RR、WebMock、MiniTest::Mockそれぞれの使い方について記述します。テストダブル(モック、スタブ)とは
まず、テストダブルとはどんなものでしょう。また、モック、スタブの違いはなんでしょう。
- テストダブルとは、ソフトウェアテストにおいて、テスト対象が依存しているコンポーネントを置き換える代用品(ダブルは代役、影武者を意味する)
- モックもスタブも、テストダブルの一種
テストダブルの5つのバリエーション
テストダブルは、xUnit Test Patternの書籍によると、5つのバリエーションがあります。
1. テストスタブ
- テスト対象コードが依存する実際のコンポーネントを置き換えるために使用する
- テスト時の呼び出しときに、あらかじめ決められた値を返すように設定する
2. テストスパイ
- テスト対象コードが実行された時の間接的な出力をキャプチャし、後のテストによる検証のために保存する
- 呼び出しに基づく情報を記録するスタブ
3. モックオブジェクト
- テスト対象コードが実行される際に、テスト対象コードからの間接的な出力を検証するために使用するオブジェクト
- 間接出力の検証に重きが置かれる
- 期待した呼び出しが行われたかを検証できる(どんな引数で呼ばれたか、など)
4. フェイクオブジェクト
- テスト対象コードの依存コンポーネントを置き換えるオブジェクト
- 依存コンポーネントと同じ機能を実装しているが、よりシンプルな方法で実装されている
- フェイクを利用する一般的な理由は、実際の依存コンポーネントがまだ利用できない、遅すぎる、または副作用があるためにテスト環境で使用できない、などがある
5. ダミーオブジェクト
- テスト対象コードのメソッドシグネチャの中に、パラメータとしてオブジェクトを必要とする場合に、ダミーオブジェクトを使う(テストもテスト対象コードでもこのオブジェクトを気に掛けていない場合)
私は、スタブとモックをよく混同していましたが、スタブは依存するコンポーネントを置き換えるものであり、モックはテスト対象コードからの出力が期待通りであるか検証するものである、ということを理解しました。
参考
Test Double / xUnit Patterns.com
wiki テストダブル
自動テストのスタブ・スパイ・モックの違いRR
RRは、Rubyのテストダブルのフレームワークのgemです。
読み方は、'Double Ruby'と読むそうです。
RRにはアダプタが用意されているので、RSpec、Test::Unit、MiniTest/MiniSpecなどのテストフレームワークと統合することができるようです。GitHub:https://github.com/rr/rr
公式:http://rr.github.io/rr/RR is a test double framework that features a rich selection of double techniques and a terse syntax.
(訳:RRは、豊富なダブルテクニックと簡潔な構文を特徴とするテストダブルフレームワークです。)RRの使い方
RRには、モック、スタブ、プロキシ、スパイが実装されています。
RRのGitHubページのサンプル通りですが、こんな感じで書けます。スタブ
stubで、スタブする(実際の呼び出しを置き換える)ことができます。# 何も返さないメソッドをスタブする stub(object).foo stub(MyClass).foo # 常に値を返すスタブメソッド stub(object).foo { 'bar' } stub(MyClass).foo { 'bar' } # 特定の引数で呼び出されたときに値を返すスタブメソッド stub(object).foo(1, 2) { 'bar' } stub(MyClass).foo(1, 2) { 'bar' }詳細はstubのページ参照。
モック
mockで、期待した呼び出しが行われるか検証するモックを作成できます。# メソッドが呼ばれることを期待する # objectのfooメソッドが呼ばれることを期待する mock(object).foo mock(MyClass).foo # メソッドに期待値を作成し、常に指定した値を返すようにスタブする # objectのfooメソッドが'bar'を返すことを期待する mock(object).foo { 'bar' } mock(MyClass).foo { 'bar' } # 特定の引数を持つメソッドに期待値を作成し、それを返すためにスタブを作成する # objectのfooメソッドが引数1, 2で呼ばれ、'bar'を返すことを期待する mock(object).foo(1, 2) { 'bar' } mock(MyClass).foo(1, 2) { 'bar' }詳細はmockページ参照。
スパイ
stubと、assert_receivedやexpect(xxx).to have_receivedの記述を組み合わせて、スパイ(呼び出された情報を記録するスタブ)が書けるようです。
(公式GitHubには、Test::UnitとRspecでの書き方はありましたが、minitestでの書き方は載っていませんでした。)# RSpec stub(object).foo expect(object).to have_received.foo # Test::Unit stub(object).foo assert_received(object) {|o| o.foo }プロキシ
proxyを使うと、メソッドを完全にオーバーライドせずにインターセプトして新しい戻り値を設定したスタブやモックが作れるようです。# 既存のメソッドを完全にオーバーライドせずにインターセプトして # 既存の値から新しい戻り値を取得する stub.proxy(object).foo {|str| str.upcase } stub.proxy(MyClass).foo {|str| str.upcase } # 上記の例でやってることに加えて、さらに期待値のモックを作成する mock.proxy(object).foo {|str| str.upcase } mock.proxy(MyClass).foo {|str| str.upcase } # クラスの新しいメソッドをインターセプトし、戻り値にダブルを定義する stub.proxy(MyClass).new {|obj| stub(obj).foo; obj } # 上記の例でやってることに加えて、.newに期待値のモックを作成する mock.proxy(MyClass).new {|obj| stub(obj).foo; obj }詳細はmock.proxy、stub.proxyページ参照。
クラスのインスタンス
any_instance_ofで、インスタンス作成時にメソッドをスタブしたりモックできます。また、stub.proxyを使うと、インスタンスそのものにアクセスできるようになります。# MyClass のインスタンスの作成時にメソッドをスタブする any_instance_of(MyClass) do |klass| stub(klass).foo { 'bar' } end # インスタンス自体にアクセスできるようにする別の方法 # MyClass.newされたインスタンスobjをスタブしている stub.proxy(MyClass).new do |obj| stub(obj).foo { 'bar' } end詳細は#any_instance_ofページ参照。
Pureなモックオブジェクト
モックのためだけにオブジェクトを使用したい場合は、空のオブジェクトを作成することで可能です。
mock(my_mock_object = Object.new).helloショートカットとして
mock!を使うこともできます。# 空の #hello メソッドを持つ新しいモックオブジェクトを作成し、そのモックを取得する # モックオブジェクトを #subject メソッドで取得できる my_mock_object = mock!.hello.subject#dont_allow
#dont_allowは#mockの逆で、ダブルには絶対にコールされないという期待を設定します。ダブルが実際に呼び出された場合、TimesCalledErrorが発生します。dont_allow(User).find('42') User.find('42') # raises a TimesCalledErrorその他
RRは
#method_missingを使ってメソッドの期待値を設定しているそうです。これにより、#should_receiveや#expectsメソッドを使う必要がありません。
また、引数の期待値を設定するために#withメソッドを使う必要がないそうです。(使いたければ使えます)mock(my_object).hello('bob', 'jane') mock(my_object).hello.with('bob', 'jane') # withがついているが上と同じRRは、ブロックを使って戻り値を設定することをサポートしています。(お好みで、
#returnsを使うことができます)mock(my_object).hello('bob', 'jane') { 'Hello Bob and Jane' } mock(my_object).hello('bob', 'jane').returns('Hello Bob and Jane') # returnsがついているが上と同じ
#times、#at_least、#at_most、#any_timesメソッドでモックの期待する呼び出し回数を調整できます。#with_any_argsでどんな引数での呼び出しも許容したり、#with_no_argsで引数なしの呼び出しを期待したり、#neverでメソッドが呼ばれないことを期待したりできます。
もっと詳しい情報は、API overviewを参照ください。WebMock
WebMockは、RubyでHTTPリクエストのスタブやモックを設定するためのgemです。
RRとの違いは、HTTPリクエストに特化している部分でしょうか。GitHub:https://github.com/bblimke/webmock
Library for stubbing and setting expectations on HTTP requests in Ruby.
機能として、以下を提供しています。
- HTTP リクエストを低レベルの http クライアントの lib レベルでスタブ化 (HTTP ライブラリを変更する際にテストを変更する必要はない)
- HTTP リクエストに対する期待値の設定と検証
- メソッド、URI、ヘッダ、ボディに基づいたリクエストのマッチング
- 異なる表現における同じ URI のスマートマッチング (エンコードされた形式と非エンコードされた形式)
- 異なる表現での同じヘッダのスマートなマッチング
- Test::Unit、RSpec、minitest のサポート
WebMockの使い方
WebMockのGitHubページのサンプルから、使い方を抜粋します。
スタブ
stub_requestでリクエストをスタブすることができます。uri のみに基づくスタブ付きリクエストとデフォルトのレスポンス
stub_request(:any, "www.example.com")    # スタブ(anyを使う)
Net::HTTP.get("www.example.com", "/")    # ===> Success
メソッド、URI、ボディ、ヘッダに基づいたスタブリクエスト
# スタブ
stub_request(:post, "www.example.com").
  with(body: "abc", headers: { 'Content-Length' => 3 })

uri = URI.parse("http://www.example.com/")
req = Net::HTTP::Post.new(uri.path)
req['Content-Length'] = 3
res = Net::HTTP.start(uri.host, uri.port) do |http|
  http.request(req, "abc")
end    # ===> Success
リクエストボディをハッシュと照合
ボディが、URL-Encode、JSON、XML のいずれかのとき、リクエストボディをハッシュと照合できます。
# スタブ
stub_request(:post, "www.example.com").
  with(body: {data: {a: '1', b: 'five'}})

RestClient.post('www.example.com', "data[a]=1&data[b]=five",
  content_type: 'application/x-www-form-urlencoded')    # ===> Success
RestClient.post('www.example.com', '{"data":{"a":"1","b":"five"}}',
  content_type: 'application/json')    # ===> Success
RestClient.post('www.example.com', '<data a="1" b="five" />',
  content_type: 'application/xml')    # ===> Success
hash_includingを使うと、部分的なハッシュとリクエストボディを照合できます。# bodyをhash_includingで部分的なハッシュで照合 # bodyが全て一致していなくても照合できる stub_request(:post, "www.example.com"). with(body: hash_including({data: {a: '1', b: 'five'}})) RestClient.post('www.example.com', "data[a]=1&data[b]=five&x=1", :content_type => 'application/x-www-form-urlencoded') # ===> Successクエリパラメータの照合
ハッシュでクエリパラメータを照合できます。
# スタブ
stub_request(:get, "www.example.com").with(query: {"a" => ["b", "c"]})

RestClient.get("http://www.example.com/?a[]=b&a[]=c")    # ===> Success
ボディと同様、
hash_includingで部分ハッシュとクエリパラメータと照合できます。stub_request(:get, "www.example.com"). with(query: hash_including({"a" => ["b", "c"]})) RestClient.get("http://www.example.com/?a[]=b&a[]=c&x=1") # ===> Success
hash_excludingを使うと、クエリパラメータ に含まれていない状態に照合できます。stub_request(:get, "www.example.com"). with(query: hash_excluding({"a" => "b"})) RestClient.get("http://www.example.com/?a=b") # ===> Failure RestClient.get("http://www.example.com/?a=c") # ===> Successカスタムレスポンスを返すスタブ
to_returnでカスタムレスポンスを返すスタブを設定できます。# スタブ stub_request(:any, "www.example.com"). to_return(body: "abc", status: 200, headers: { 'Content-Length' => 3 }) Net::HTTP.get("www.example.com", '/') # ===> "abc"エラーをraiseする
# クラスで宣言された例外のraise
stub_request(:any, 'www.example.net').to_raise(StandardError)
RestClient.post('www.example.net', 'abc')    # ===> StandardError

# 例外インスタンスのraise
stub_request(:any, 'www.example.net').to_raise(StandardError.new("some error"))

# 例外メッセージで例外をraise
stub_request(:any, 'www.example.net').to_raise("some error")
to_timeoutで、タイムアウト例外のraiseもできます。stub_request(:any, 'www.example.net').to_timeout RestClient.post('www.example.net', 'abc') # ===> RestClient::RequestTimeout繰り返すリクエストに複数の異なるレスポンス
リクエストが繰り返された時、複数の異なるレスポンスを返すことができます。
また、to_return、to_raise、to_timeoutをthenでつないで複数のレスポンスを返したり、timesを使ってレスポンスを返す回数と指定することもできます。stub_request(:get, "www.example.com"). to_return({body: "abc"}, {body: "def"}) Net::HTTP.get('www.example.com', '/') # ===> "abc\n" Net::HTTP.get('www.example.com', '/') # ===> "def\n" # すべてのレスポンスが使用された後、最後のレスポンスが無限に返される Net::HTTP.get('www.example.com', '/') # ===> "def\n"ネットワークへのリアルリクエストを許可または無効化
WebMock.allow_net_connect!で、実際のネットワークへのリクエストを許可できます。WebMock.disable_net_connect!で無効化することもできます。
特定のリクエストを許可しながら、外部リクエストを無効にすることもできます。# 実際のネットワークへのリクエストを許可 WebMock.allow_net_connect! stub_request(:any, "www.example.com").to_return(body: "abc") Net::HTTP.get('www.example.com', '/') # ===> "abc" Net::HTTP.get('www.something.com', '/') # ===> /.+Something.+/ # 実際のネットワークへのリクエストを無効化 WebMock.disable_net_connect! Net::HTTP.get('www.something.com', '/') # ===> Failure他にも、様々な方法で、スタブすることができます。他の使い方のサンプルコードはStubbingページを参照ください。
期待値の設定(モック)
WebMockのGitHubページには、Test::Unit、RSpecでの期待値の設定方法の記述はありましたが、minitestについて記述がありませんでした。
minitestは、Test::Unitと同様の書き方ができそうです(参考)。Test::Unit/minitest
assert_requestedやassert_not_requestedを使います。require 'webmock/test_unit' stub_request(:any, "www.example.com") uri = URI.parse('http://www.example.com/') req = Net::HTTP::Post.new(uri.path) req['Content-Length'] = 3 res = Net::HTTP.start(uri.host, uri.port) do |http| http.request(req, 'abc') end assert_requested :post, "http://www.example.com", headers: {'Content-Length' => 3}, body: "abc", times: 1 # ===> Success assert_not_requested :get, "http://www.something.com" # ===> Success assert_requested(:post, "http://www.example.com", times: 1) { |req| req.body == "abc" }スタブを使って期待値を設定するためには、以下のように書きます。
stub_get = stub_request(:get, "www.example.com")
stub_post = stub_request(:post, "www.example.com")

Net::HTTP.get('www.example.com', '/')

assert_requested(stub_get)
assert_not_requested(stub_post)
Rspec
expectとhave_requestedを組み合わせて書きます。require 'webmock/rspec' expect(WebMock).to have_requested(:get, "www.example.com"). with(body: "abc", headers: {'Content-Length' => 3}).twice expect(WebMock).not_to have_requested(:get, "www.something.com") expect(WebMock).to have_requested(:post, "www.example.com"). with { |req| req.body == "abc" } # Note that the block with `do ... end` instead of curly brackets won't work! # Why? See this comment https://github.com/bblimke/webmock/issues/174#issuecomment-34908908 expect(WebMock).to have_requested(:get, "www.example.com"). with(query: {"a" => ["b", "c"]}) expect(WebMock).to have_requested(:get, "www.example.com"). with(query: hash_including({"a" => ["b", "c"]})) expect(WebMock).to have_requested(:get, "www.example.com"). with(body: {"a" => ["b", "c"]}, headers: {'Content-Type' => 'application/json'})
a_requestとhave_been_madeを組み合わせて以下のようにも書けます。expect(a_request(:post, "www.example.com"). with(body: "abc", headers: {'Content-Length' => 3})). to have_been_made.once expect(a_request(:post, "www.something.com")).to have_been_made.times(3) expect(a_request(:post, "www.something.com")).to have_been_made.at_least_once expect(a_request(:post, "www.something.com")). to have_been_made.at_least_times(3) expect(a_request(:post, "www.something.com")).to have_been_made.at_most_twice expect(a_request(:post, "www.something.com")).to have_been_made.at_most_times(3) expect(a_request(:any, "www.example.com")).not_to have_been_made expect(a_request(:post, "www.example.com").with { |req| req.body == "abc" }). to have_been_made expect(a_request(:get, "www.example.com").with(query: {"a" => ["b", "c"]})). to have_been_made expect(a_request(:get, "www.example.com"). with(query: hash_including({"a" => ["b", "c"]}))).to have_been_made expect(a_request(:post, "www.example.com"). with(body: {"a" => ["b", "c"]}, headers: {'Content-Type' => 'application/json'})).to have_been_madeスタブを使って期待値を設定するためには、以下のように書きます。
stub = stub_request(:get, "www.example.com") # ... make requests ... expect(stub).to have_been_requested詳細は期待値の設定ページを参照ください。
その他
WebMock.reset!で現在のスタブとリクエストの履歴をすべてリセットしたり、WebMock.reset_executed_requests!で実行されたリクエストのカウンタのみをリセットできます。
WebMock.disable!やWebMock.enable!で、WebMock を無効にしたり有効にしたり、一部の http クライアントアダプタのみを有効にすることができます。
他の機能については、WebMockのGitHubページのサンプルコードを参照ください。MiniTest::Mock
最後に、MiniTest::Mockは、minitestに含まれているモックオブジェクトのフレームワークです。
公式ドキュメント:http://docs.seattlerb.org/minitest/Minitest/Mock.html
A simple and clean mock object framework.
All mock objects are an instance of Mock.
(シンプルでクリーンなモックオブジェクトフレームワークです。すべてのモックオブジェクトは MiniTest::Mockのインスタンスです。)MiniTest::Mockの使い方
スタブ
オブジェクトをスタブする
stubは、Minitest::Mock のオブジェクト拡張です。
スタブが有効なのはブロック内のみで、ブロックの最後にスタブはクリーンアップされます。また、スタブする前にメソッド名が存在している必要があります。
stub_any_instanceメソッドは、クラスのインスタンス上にメソッドスタブを作成できます。minitest-stub_any_instance_ofのgemを導入すると使うことができます。
- stub:オブジェクトのメソッドをスタブする
- stub_any_instance_of:クラスのインスタンスメソッドをスタブする
stubのサンプルコードです。require 'minitest/autorun' # スタブする対象のクラス class Hello def say 'Hello!' end end hello = Hello.new # helloオブジェクトのsayメソッドが'Hello, this is from stub!'を返すようにスタブする hello.stub(:say, 'Hello, this is from stub!') do hello.say #==> "Hello, this is from stub!" end # ブロックを抜けるとスタブは無効になる hello.say #==> "Hello!"
stub_any_instanceを使うと、インスタンスメソッドのスタブを以下のように書けます。インスタンスメソッドのスタブを書くときはこちらの方が使える場面が多そうです。require 'minitest/autorun' require 'minitest/stub_any_instance' # minitest-stub_any_instance_ofのgemも必要 # スタブする対象のクラス class Hello def say 'Hello!' end end # Helloクラスの任意のインスタンスのsayメソッドが'Hello, this is from stub!'を返すようにスタブする Hello.stub_any_instance(:say, 'Hello, this is from stub!') do Hello.new.say #==> "Hello, this is from stub!" end # ブロックを抜けるとスタブは無効になる Hello.new.say #==> "Hello!"モック
expectメソッド
`expect(name, retval, args = [], &blk)
メソッド名(name)が呼ばれ、オプションで引数(args)またはブロック(blk)を指定し、戻り値(retval)を返すことを期待します。require 'minitest/autorun' @mock.expect(:meaning_of_life, 42) @mock.meaning_of_life # => 42 @mock.expect(:do_something_with, true, [some_obj, true]) @mock.do_something_with(some_obj, true) # => true @mock.expect(:do_something_else, true) do |a1, a2| a1 == "buggs" && a2 == :bunny end引数は、'==='演算子を使って期待される引数と比較されるので、より具体的な期待値が少なくて済むようになっています。(含まれるか?で比較される)
require 'minitest/autorun'

# users_any_stringメソッドがStringに含まれる場合、trueを返す
@mock.expect(:uses_any_string, true, [String])
@mock.uses_any_string("foo") # => true
@mock.verify  # => true(期待通りにモックが呼ばれたのでtrueになる)

@mock.expect(:uses_one_string, true, ["foo"])
@mock.uses_one_string("bar") # => raises MockExpectationError(期待通りにモックが呼ばれなかったため)
メソッドが複数回呼ばれる場合は、それぞれに新しい期待値を指定します。これらは定義した順番で使用されます。
require 'minitest/autorun'

@mock.expect(:ordinal_increment, 'first')
@mock.expect(:ordinal_increment, 'second')

@mock.ordinal_increment # => 'first'
@mock.ordinal_increment # => 'second'
@mock.ordinal_increment # => raises MockExpectationError "No more expects available for :ordinal_increment"
verifyメソッド
すべてのメソッドが期待通りに呼び出されたことを確認します。期待通りに呼ばれたら
trueを返します。モックオブジェクトが期待通りに呼ばれなかった場合、MockExpectationErrorを発生させます。詳しくは、MiniTest::Mockページを参照ください。
最後に
RRもWebMockも、公式ドキュメントに十分な使い方のサンプルが掲載されていたので、一読してみると良さそうです。MiniTest::Mockの情報量は少なめだったので、
irbやrails cでmockやstubの動きを確認してみると、想像がつきやすくなると思いました。(実行時に、require 'minitest/autorun'が必要です。)参考情報
RR / GitHub
RRのページ
WebMock / GitHub
MiniTest::Mock
MiniTest stub
minitest-stub_any_instance
Mock、Stub勉強会(ruby)
自動テストのスタブ・スパイ・モックの違い
Test Double / xUnit Patterns.com
minitest で stub, mock を使う
wiki テストダブルxUnit Test Pattern
テストダブルのバリエーションを調べていると、こちらのxUnit Test Patterns: Refactoring Test Codeの書籍がよく出てきました。
英語版しか出版されていないようですが、Webで内容を確認できました(英語です)。
http://xunitpatterns.com
- 投稿日:2020-06-21T17:17:15+09:00
Ajaxを使った非同期通信化実装STEP
1.jQueryを記述するFile作成
- app/assets/javascripts内にcomment.js(非同期通信を行うcontroller名.js)を作成。
2.イベントの発火を設定
- pictweetのcomment-formが送信された時、のイベント設定
comment.js$(function(){ $('#new_comment').on('submit', function(e) { e.preventDefault(); var formData = new FormData(this); var url = $(this).attr('action') $.ajax({ url: url, type: 'POST', data: formData, dataType: 'json', processData: false, contentType: false }) }) })
- フォームが送信された時、というイベントを設定したい場合は、form要素を取得してonメソッドを使う。
- フォームが送信される時、何も設定していない状態(デフォルトの状態)だとフォームを送信するための通信が行われるため、preventDefault()を使用してデフォルトのイベントを止めます。
- FormData
*new FormData(フォーム要素)とすることでFormDataを作成できます。 今回FormDataオブジェクトの引数はthisとなっていますが、イベントで設定したfunction内でthisを利用した場合は、イベントが発生したノード要素を指します。今回の場合は、new_commentというIDがついたフォームの情報を取得しています。
3.非同期通信で保存する
comment.js$(function(){ $('#new_comment').on('submit', function(e) { e.preventDefault(); var formData = new FormData(this); var url = $(this).attr('action') $.ajax({ url: url, type: 'POST', data: formData, dataType: 'json', processData: false, contentType: false }) }) })
- attrメソッド:要素が持つ指定属性の値を返します。今回はイベントが発生した要素のaction属性の値を取得しており、今回のaction属性にはフォームの送信先のurlの値が入っています。 これでリクエストを送信する先のURLを定義することができました。
- processDataオプション: デフォルトではtrueになっており、dataに指定したオブジェクトをクエリ文字列に変換する。
- contentTypeオプション: サーバにデータのファイル形式を伝えるヘッダ。こちらはデフォルトでは「text/xml」でコンテンツタイプをXMLとして返してきます。 ajaxのリクエストがFormDataのときはどちらの値も適切な状態で送ることが可能なため、falseにすることで設定が上書きされることを防ぎます。
4.コメントを保存し、respond_toを使用してHTMLとJSONの場合で処理を分ける
comments_controller.rbdef create @comment = Comment.create(comment_params) respond_to do |format| format.html { redirect_to tweet_path(params[:tweet_id]) } format.json end end
- ローカル変数commentは、スコープの関係でこの後のjbuilder側で使用できないので、インスタンス変数@commentに編集します
5. jbuilderを使用して、作成したメッセージをJSON形式で返す
views/comments/create.json.jbuilderjson.text @comment.text json.user_id @comment.user.id json.user_name @comment.user.nicknameこうすることによってJavaScriptファイルに返ってきたデータをjbuilderで定義したキーとバリューの形で呼び出して使うことができます。
6.返ってきたJSONを
doneメソッドで受取り、HTMLを作成するcomment.js$(function(){ function buildHTML(comment){ var html = `<p> <strong> <a href=/users/${comment.user_id}>${comment.user_name}</a> : </strong> ${comment.text} </p>` return html; } $('#new_comment').on('submit', function(e){ e.preventDefault(); var formData = new FormData(this); var url = $(this).attr('action'); $.ajax({ url: url, type: "POST", data: formData, dataType: 'json', processData: false, contentType: false }) .done(function(data){ var html = buildHTML(data); $('.comments').append(html); $('.textbox').val(''); $('.form__submit').prop('disabled', false); }) }) });
$('.form__submit').prop('disabled', false);は、htmlの仕様でsubmitボタンを一度押したらdisabled属性という、ボタンが押せなくなる属性が追加されいるので、falseで解除。7.エラー時の処理を行う
comment.js.done(function(data){ var html = buildHTML(data); $('.comments').append(html); $('.textbox').val(''); $('.form__submit').prop('disabled', false); }) .fail(function(){ alert('error'); })
- 投稿日:2020-06-21T16:52:30+09:00
git push herokuで Precompiling assets failed.の対処法
はじめに
GitHubにgit pushした後、
Herokuにgit push herokuをした際にremote: ! remote: ! Precompiling assets failed. remote: !とエラーが発生した。
環境
Rails(5.1.4)
エラーを確認する
//省略
 Running: rake assets:precompile
remote:        Yarn executable was not detected in the system.
remote:        Download Yarn at https://yarnpkg.com/en/docs/install
remote:        rake aborted!
remote:        Sprockets::FileNotFound: couldn't find file 'html2canvas/dist/html2canvas.js' with type 'application/javascript'
//省略
remote:  !
remote:  !     Precompiling assets failed.
remote:  !
エラーを見るとyarnがインストールが出来ていないと表示があります。
ローカル環境ではyarnはインストールされているはずになんでだろうと調べてみました。解決方法
Rails5.1以上ではyarnサポートされていないため,
yarnを機能させるためには`Heroku上にyarnをインストールしないといけない。rubyビルドパックではyarn installがないためにエラーが発生してしまうそうです。ではどうすればいいか、、、、。
解決方法は私の場合、至って簡単でした。
下記のコマンドを叩けば解決しました。$ heroku buildpacks:add --index 1 heroku/nodejsHeroku buildpacksheroku/nodejsが追加されます。
これを叩けばHeroku上にyarnがinstallされ
再度、git push herokuにエラーが吐き出される事なく成功します。$ heroku buildpacks ====Buildpack URLs 1. heroku/nodejs 2. heroku/ruby$heroku buildpacksで確認すると
heroku/nodejsが追加されていると思います。
これで完了です。終わりに
今回のエラーは初歩的なことかもしれませんが
基本的にRailsだけでgit push herokuをしていた方。
javascript、パッケージがHeroku上にインストールできない、などのHeroku上でのprecomplieエラーの解決に
手助けできたらなと思います。参考URL
https://www.bokukoko.info/entry/2017/12/07/000000
https://qiita.com/eRy-sk/items/cee652a24f67498bfe9f
- 投稿日:2020-06-21T15:38:13+09:00
診断アプリの作る方法(jQueryのみで実装)
概要
https://shindans.herokuapp.com
診断アプリを作りました。
こんな感じ
こちらの診断アプリをJS(jQuery)のみで実装したので記事をしました。まずは、ビューを用意する。
#wrapper
  .question
    %h1.title ソーシャルスタイル診断
    %ul.questions
      %li.textBox
        %span.text Q1. 冷静で人からの指示は嫌い
        %label.yes
          %input.typeA.typeD{:name => "q01", :type => "radio"}>/
          YES
        %label.no
          %input.typeB.typeC{:name => "q01", :type => "radio"}>/
          NO
      %li.textBox
        %span.text Q2. 自分の話をすることを好む
        %label.yes
          %input.typeB.typeA{:name => "q02", :type => "radio"}>/
          YES
        %label.no
          %input.typeC.typeD{:name => "q02", :type => "radio"}>/
          NO
      %li.textBox
        %span.text Q3. 周りの意見を大事にする方だ
        %label.yes
          %input.typeC.typeD{:name => "q03", :type => "radio"}>/
          YES
        %label.no
          %input.typeA.typeB{:name => "q03", :type => "radio"}>/
          NO
      %li.textBox
        %span.text Q4. 情報を集めたり分析することが得意だ
        %label.yes
          %input.typeD.typeC{:name => "q04", :type => "radio"}>/
          YES
        %label.no
          %input.typeA.typeB{:name => "q04", :type => "radio"}>/
          NO
      %li.textBox
        %span.text Q5. 戦略立案や勝負事への興味が強い
        %label.yes
          %input.typeA.typeD{:name => "q05", :type => "radio"}>/
          YES
        %label.no
          %input.typeB.typeC{:name => "q05", :type => "radio"}>/
          NO
      %li.textBox
        %span.text Q6. ノリがよくムードメーカーだと言われる
        %label.yes
          %input.typeB.typeC{:name => "q06", :type => "radio"}>/
          YES
        %label.no
          %input.typeA.typeD{:name => "q06", :type => "radio"}>/
          NO
      %li.textBox
        %span.text Q7. 気配り上手、聞き上手と言われる
        %label.yes
          %input.typeC.typeD{:name => "q07", :type => "radio"}>/
          YES
        %label.no
          %input.typeA.typeB{:name => "q07", :type => "radio"}>/
          NO
      %li.textBox
        %span.text Q8. 感情を表に出すのは、苦手だ
        %label.yes
          %input.typeD.typeA{:name => "q08", :type => "radio"}>/
          YES
        %label.no
          %input.typeC.typeB{:name => "q08", :type => "radio"}>/
          NO
    %button 診断する
  .result.ResultA
    .ResultA__recommend あなたの性格は・・・・
    .ResultA__Amenu
      .ResultA__Amenu__text 前進型・行動派
    %p あなたは迅速かつ合理的に仕事を進めるタイプです。ビジネスライクな性格で、プロセスよりも結果を重視し、決断力に優れています。経営者に多いタイプに多いとされます。
    = image_tag("close-up-face-fashion-fine-looking-450212.jpg", width: "306px",class: "image")
  .result.ResultB
    .ResultB__recommend あなたの性格は・・・・
    .ResultB__Bmenu
      .ResultB__Bmenu__text 直感型・感覚派
    %p あなたは、周りから注目されることを好むタイプです。ビジネス面では、自ら先頭に立って人を率いていく傾向にあります。
    = image_tag("men-s-white-button-up-dress-shirt-708440.jpg", width: "306px",class: "image")
  .result.ResultC
    .ResultC__recommend あなたの性格は・・・・
    .ResultC__Cmenu
      .ResultC__Cmenu__text 温和型・協調派
    %p あなたは、どこにいてもみんなの調停役になるタイプです。周囲の気持ちに敏感で、自分の話をするよりも相手の話に耳を傾ける傾向にあります。
    = image_tag("woman-wearing-teal-dress-sitting-on-chair-talking-to-man-2422280.jpg", width: "306px",class: "image")
  .result.ResultD
    .ResultD__recommend あなたの性格は・・・・
    .ResultD__Dmenu
      .ResultD__Dmenu__text 分析型・思考派
    %p あなたは、独特の価値観や雰囲気を持っていて、周囲に影響されにくいマイペースな人です。仕事においては、データの収集や分析に黙々と取り組みます。
    = image_tag("person-using-a-laptop-3183131.jpg", width: "306px",class: "image")
次にJS(jQuery)を用意する。
$(function(){
  //ボタンがクリックされた時
  $("button").on("click", function(){
  //一度結果を非表示にする
    $(".result").hide();
    //問題数を取得
    var qNum = $("ul li").length;
    if( $("ul li input:checked").length < qNum ){
      //全てチェックしていなかったらアラートを出す
      alert("未回答の問題があります");
    }
    else {
        //チェックされているinputの数を取得
        var typeANum = $(".typeA:checked").length,
            typeBNum = $(".typeB:checked").length,
            typeCNum = $(".typeC:checked").length,
            typeDNum = $(".typeD:checked").length,
            typeENum = $(".typeD:checked").length;
        if( typeANum >= typeBNum && typeANum >= typeCNum && typeANum >= typeDNum && typeANum >= typeENum) {
            $(".ResultA").fadeIn();
        } else if( typeBNum >= typeANum && typeBNum >= typeCNum && typeBNum >= typeDNum && typeBNum >= typeENum) {
            $(".ResultB").fadeIn();
        } else if( typeCNum >= typeANum && typeCNum >= typeBNum && typeCNum >= typeDNum && typeCNum >= typeENum) {
            $(".ResultC").fadeIn();
        } else if( typeDNum >= typeBNum && typeDNum >= typeCNum && typeDNum >= typeANum && typeDNum >= typeENum) {
            $(".ResultD").fadeIn();
        } else if( typeENum >= typeBNum && typeENum >= typeCNum && typeENum >= typeANum && typeENum >= typeDNum) {
            $(".ResultE").fadeIn();
      }
    }
  });
});
解説
ちょい説明します。
  .result.ResultA
    .ResultA__recommend あなたの性格は・・・・
    .ResultA__Amenu
      .ResultA__Amenu__text 前進型・行動派
    %p あなたは迅速かつ合理的に仕事を進めるタイプです。ビジネスライクな性格で、プロセスよりも結果を重視し、決断力に優れています。経営者に多いタイプに多いとされます。
    = image_tag("close-up-face-fashion-fine-looking-450212.jpg", width: "306px",class: "image")
回答結果となる
.result.ResultAは、CSSでdisplay: none;により普段は非表示にしています。if( typeANum >= typeBNum && typeANum >= typeCNum && typeANum >= typeDNum && typeANum >= typeENum) { $(".ResultA").fadeIn();もし
.typeAが.typeB.typeC.typeD.typeEよりinputの数(.length)が多い場合は、$(".ResultA").fadeIn();fadeInメソッドで、非表示にされていた
.result.ResultAをフェードイン表示させます。
こんな感じで.typeB以下のif文が同じ要領で続きます。
これを応用すれば、色んな診断アプリを作れそうです。
補足
hamlからHTMLに変換する場合は、以下の記事を参考にしてください。
https://qiita.com/chezou/items/0e9bd4f9eb8314dc2aec#hamlhtml%E5%A4%89%E6%8F%9B
- 投稿日:2020-06-21T14:58:15+09:00
【Rails】ancestryを用いた多階層カテゴリー機能の実装『Bootstrap3でウィンドウ作ってみた編』
目標
開発環境
・Ruby: 2.5.7
・Rails: 5.2.4
・Vagrant: 2.2.7
・VirtualBox: 6.1
・OS: macOS Catalina前提
下記実装済み。
・Slim導入
・Bootstrap3導入
・Font Awesome導入
・ログイン機能実装
・投稿機能実装
・多対多のカテゴリー機能実装
・多階層カテゴリー機能実装(準備編)
・多階層カテゴリー機能実装(seed編)
・多階層カテゴリー機能実装(作成フォーム編)
・多階層カテゴリー機能実装(編集フォーム編)1.コントローラーを編集
homes_controller.rb# 追記 def category_window @children = Category.find(params[:parent_id]).children end【解説】
① Ajax通信で送られてきたパラメーターに対応するカテゴリーの、子カテゴリーを抽出し、インスタンス変数に代入する。
@children = Category.find(params[:parent_id]).children2.
json.jbuilderファイルを作成・編集ターミナル$ touch app/views/homes/category_window.json.jbuildercategory_window.json.jbuilderjson.array! @children do |children| json.id children.id json.name children.name end【解説】
①
get_category_childrenアクションで抽出したレコードを繰り返し処理し、配列を作成する。json.array! @children do |children|② 各IDと名前を
①で作成した配列に格納する。json.id children.id json.name children.name◎ 親カテゴリー(ビジネス)にマウスが乗っている場合の返り値
[
  {
    "id": 2,
    "name": "金融"
  },
  {
    "id": 6,
    "name": "経済"
  },
  {
    "id": 9,
    "name": "経営"
  },
  {
    "id": 13,
    "name": "マーケティング"
  },
]
◎ 子カテゴリー(金融)にマウスが乗っている場合の返り値
[
  {
    "id": 3,
    "name": "株"
  },
  {
    "id": 4,
    "name": "為替"
  },
  {
    "id": 5,
    "name": "税金"
  },
]
3.ルーティングを追加
routes.rb# 追記 get 'get_category/new', to: 'homes#category_window', defaults: { format: 'json' }4.ビューを編集
application.html.slimbody header nav.navbar.navbar-default.navbar-fixed-top .container-fluid ul.nav.navbar-nav.navbar-right li.dropdown role='presentation' a.dropdown-toggle data-toggle='dropdown' href='#' role='button' aria-expanded='false' i.fas.fa-list-ul span | カテゴリーから探す span.caret ul.dropdown-menu role='menu' li role='presentation' - Category.where(ancestry: nil).each do |parent| = link_to parent.name, root_path, id: "#{parent.id}", class: 'parent-category' br li role='presentation' class='children-list' br li role='presentation' class='grandchildren-list'【解説】
※Bootstrapの書き方については省略します。
① ancestryの値が
nil、つまり親カテゴリーを全て抽出し、プルダウンメニューに表示する。- Category.where(ancestry: nil).each do |parent| = link_to parent.name, root_path, id: "#{parent.id}", class: 'parent-category'② 子カテゴリーを表示する場所を用意する。
li role='presentation' class='children-list'③ 孫カテゴリーを表示する場所を用意する。
li role='presentation' class='grandchildren-list'5.JavaScriptファイルを作成・編集
ターミナル$ touch app/assets/javascripts/category_window.jscategory_window.js$(function() { function buildChildHTML(children) { let html = ` <a class="children-category" id="${children.id}" href="/"> ${children.name} </a> `; return html; } $('.parent-category').on('mouseover', function() { let id = this.id; $('.children-category').remove(); $('.grandchildren-category').remove(); $.ajax({ type: 'GET', url: '/get_category/new', data: { parent_id: id, }, dataType: 'json', }).done(function(children) { children.forEach(function(child) { let html = buildChildHTML(child); $('.children-list').append(html); }); }); }); function buildGrandChildHTML(children) { let html = ` <a class="grandchildren-category" id="${children.id}" href="/"> ${children.name} </a> `; return html; } $(document).on('mouseover', '.children-category', function() { let id = this.id; $.ajax({ type: 'GET', url: '/get_category/new', data: { parent_id: id, }, dataType: 'json', }).done(function(children) { children.forEach(function(child) { let html = buildGrandChildHTML(child); $('.grandchildren-list').append(html); }); $(document).on('mouseover', '.children-category', function() { $('.grandchildren-category').remove(); }); }); }); });【解説】
① 子カテゴリーのHTMLを作成する。
function buildChildHTML(children) {
  let html = `
    <a class="children-category" id="${children.id}" href="/">
      ${children.name}
    </a>
  `;
  return html;
}
② どの親カテゴリーにマウスが乗っているかによって、子カテゴリーの表示内容を変更する。
  $('.parent-category').on('mouseover', function() {
    let id = this.id;
    $('.children-category').remove();
    $('.grandchildren-category').remove();
    $.ajax({
      type: 'GET',
      url: '/get_category/new',
      data: {
        parent_id: id,
      },
      dataType: 'json',
    }).done(function(children) {
      children.forEach(function(child) {
        let html = buildChildHTML(child);
        $('.children-list').append(html);
      });
    });
  });
◎ 親カテゴリーにマウスが乗った時に発火するイベントを作成する。
$('.parent-category').on('mouseover', function() {});◎
category_window.json.jbuilderから送られてきたIDを、変数へ代入する。let id = this.id;◎ とりあえず子カテゴリー以下を削除しておく。
$('.children-category').remove();
$('.grandchildren-category').remove();
◎ パラメーター(parent_id)に先ほど作成した変数を設定して、
category_windowアクションを非同期で実行する。$.ajax({ type: 'GET', url: '/get_category/new', data: { parent_id: id, }, dataType: 'json', })◎ Ajax通信が成功した場合は対応する子カテゴリーのHTMLを作成し、表示する。
.done(function(children) {
  children.forEach(function(child) {
    var html = buildChildHTML(child);
    $('.children-list').append(html);
  });
});
③孫カテゴリーのHTMLを作成する。
function buildGrandChildHTML(children) {
  var html = `
    <a class="grandchildren-category" id="${children.id}" href="/">
      ${children.name}
    </a>
  `;
  return html;
}
④ どの子カテゴリーにマウスが乗っているかによって、孫カテゴリーの表示内容を変更する。(
③とほぼ同じなので説明は省略)$(document).on('mouseover', '.children-category', function() { var id = this.id; $.ajax({ type: 'GET', url: '/get_category/new', data: { parent_id: id, }, dataType: 'json', }).done(function(children) { children.forEach(function(child) { var html = buildGrandChildHTML(child); $('.grandchildren-list').append(html); }); $(document).on('mouseover', '.children-category', function() { $('.grandchildren-category').remove(); }); }); });注意
turbolinksを無効化しないとプルダウンメニューが非同期で動作しないので、必ず無効化しておきましょう。
- 投稿日:2020-06-21T11:31:20+09:00
[Rails]アプリケーションの日時表示を日本時間にする方法
Railsの時間基準
Railsの時間基準はデフォルトで協定時(UTC)となっています。
今回はこれを日本時間に修正する方法をまとめています。タイムゾーン設定の記述
設定方法はシンプルです。
Railsのなかにあるapplication.rbの中身を編集するだけ!application.rb# 省略 class Application < Rails::Application # Initialize configuration defaults for originally generated Rails version. config.time_zone = 'Tokyo' #ここを追加 # Settings in config/environments/* take precedence over those specified here. # Application configuration can go into files in config/initializers # -- all .rb files in that directory are automatically loaded after loading # the framework and any gems in your application. config.generators do |g| g.stylesheets false g.javascripts false g.helper false g.test_framework false end end # 省略application.rbを更新した際は、サーバを再起動する必要があります。再起動しましょう。
# ctrl + cでサーバを終了
# その後、再度サーバを起動
$ rails s
これでアプリケーションの日時は日本基準に変化します。
参考にしてください!
- 投稿日:2020-06-21T11:03:34+09:00
Dockerfile、docker-compose.ymlの中身で使われるコマンドや意味の説明
コンテナ
仮想環境そのもの。
イメージ
Dockerコンテナを実行する際に必要なもの。
Dockerfile
Dockerのイメージを自動で作成してくれるファイル。
Docker compose
複数のコンテナからなるサービスを構築、実行する手順を自動的にし、管理を用意にする機能。docker compose hogehoge というコマンドを実行することで、そのファイルから設定を読みこんえ全てのコンテナを起動することができる。
Dockerfileの中身でよく使われるコマンド
FROM
使用するイメージとバージョン
エラー以外何も吐かないようにする
-y
全てyesで実行する設定
RUN
コマンドの実行
WORKDIR
作業ディレクトリ先の設定
COPY
コピー元とコピー先のファイルまたはディレクトリを指定
docker-compose.ymlで使われるコマンド
service
アプリケーションを動かすための各要素のこと。
通常はwebとdb(Mysql、Postgresql)と名前をつける。rm -f tmp/pids/server.pid
pidはプロセスIDのこと。pidはそもそも開発用サーバーを起動するときにtmp/pids/server.pidに書き込まれる。終了するときにserver.pidが削除される。
server.pidが書かれているとサーバーが起動中と判断される。rails sが実行できないときにserver.pidを削除するとうまくいく可能性がある。終了する際にはrmによって削除する必要がある。ports
ports: - "3000:3000"コンテナ内のポート3000番をホストの3000番にマッピングする。コンテナ内に立てたサーバにhttp://localhost:3000でアクセスできるようになる。
これがないとコンテナにアクセスできない。
例えば、下記のようにするとhttp://localhost:3001でコンテナ内に立てたサーバにアクセスできる。ports: - "3001:3000"volumes
volumes:
      - ./db/mysql/volumes:var/lib/mysql
データを永続化するためにある。
コンテナは消すことができるが、仮装環境を捨ててしまうとデータベースも一緒に破棄されてしまう。volumesを捨てるとデータを永続化することができる。
ホストの./db/mysql/volumesをコンテナ内の/var/lib/mysqlにマウント(同期)するという意味。
Dockerのコンテナとローカルのファイルを同期している。つまりdockerのコンテナが破棄されてもローカルのファイルが残っているという事になる。.がホストのディレクトリ全てを意味している。
- 投稿日:2020-06-21T11:03:34+09:00
Dockerfile、docker-compose.ymlの説明
コンテナ
仮想環境そのもの。
イメージ
Dockerコンテナを実行する際に必要なもの。
Dockerfile
Dockerのイメージを自動で作成してくれるファイル。
Docker compose
複数のコンテナからなるサービスを構築、実行する手順を自動的にし、管理を用意にする機能。docker compose hogehoge というコマンドを実行することで、そのファイルから設定を読みこんえ全てのコンテナを起動することができる。
Dockerfileの中身でよく使われるコマンド
FROM
使用するイメージとバージョン
エラー以外何も吐かないようにする
-y
全てyesで実行する設定
RUN
コマンドの実行
WORKDIR
作業ディレクトリ先の設定
COPY
コピー元とコピー先のファイルまたはディレクトリを指定
docker-compose.ymlで使われるコマンド
service
アプリケーションを動かすための各要素のこと。
通常はwebとdb(Mysql、Postgresql)と名前をつける。rm -f tmp/pids/server.pid
pidはプロセスIDのこと。pidはそもそも開発用サーバーを起動するときにtmp/pids/server.pidに書き込まれる。終了するときにserver.pidが削除される。
server.pidが書かれているとサーバーが起動中と判断される。rails sが実行できないときにserver.pidを削除するとうまくいく可能性がある。終了する際にはrmによって削除する必要がある。ports
ports: - "3000:3000"コンテナ内のポート3000番をホストの3000番にマッピングする。コンテナ内に立てたサーバにhttp://localhost:3000でアクセスできるようになる。
これがないとコンテナにアクセスできない。
例えば、下記のようにするとhttp://localhost:3001でコンテナ内に立てたサーバにアクセスできる。ports: - "3001:3000"volumes
volumes:
      - ./db/mysql/volumes:var/lib/mysql
データを永続化するためにある。
コンテナは消すことができるが、仮装環境を捨ててしまうとデータベースも一緒に破棄されてしまう。volumesを捨てるとデータを永続化することができる。
ホストの./db/mysql/volumesをコンテナ内の/var/lib/mysqlにマウント(同期)するという意味。
Dockerのコンテナとローカルのファイルを同期している。つまりdockerのコンテナが破棄されてもローカルのファイルが残っているという事になる。.がホストのディレクトリ全てを意味している。
- 投稿日:2020-06-21T10:19:19+09:00
ancestryを用いた多階層カテゴリー機能の実装『編集フォーム編』
目標
開発環境
・Ruby: 2.5.7
・Rails: 5.2.4
・Vagrant: 2.2.7
・VirtualBox: 6.1
・OS: macOS Catalina前提
下記実装済み。
・Slim導入
・Bootstrap3導入
・Font Awesome導入
・ログイン機能実装
・投稿機能実装
・多対多のカテゴリー機能実装
・多階層カテゴリー機能実装(準備編)
・多階層カテゴリー機能実装(seed編)
・多階層カテゴリー機能実装(作成フォーム編)実装
1.コントローラーを編集
books_controller.rbdef edit unless @book.user == current_user redirect_to books_path end @category_parent_array = Category.category_parent_array_create end def update if @book.update(book_params) book_categories = BookCategory.where(book_id: @book.id) book_categories.destroy_all BookCategory.maltilevel_category_create( @book, params[:parent_id], params[:children_id], params[:grandchildren_id] ) redirect_to @book else @category_parent_array = Category.category_parent_array_create render 'edit' end end【解説】
① 中間テーブルから編集する本に対応するレコードを全て抽出し、削除する。
book_categories = BookCategory.where(book_id: @book.id)
book_categories.destroy_all
2.ビューを編集
books/edit.html.slim/ 追記 .category-form = label_tag 'ジャンル' = select_tag 'parent_id', options_for_select(@category_parent_array), class: 'form-control', id: 'parent-category' i.fas.fa-chevron-down br注意
turbolinksを無効化しないとセレクトボックスが非同期で動作しないので、必ず無効化しておきましょう。
- 投稿日:2020-06-21T10:19:19+09:00
【Rails】ancestryを用いた多階層カテゴリー機能の実装『編集フォーム編』
目標
開発環境
・Ruby: 2.5.7
・Rails: 5.2.4
・Vagrant: 2.2.7
・VirtualBox: 6.1
・OS: macOS Catalina前提
下記実装済み。
・Slim導入
・Bootstrap3導入
・Font Awesome導入
・ログイン機能実装
・投稿機能実装
・多対多のカテゴリー機能実装
・多階層カテゴリー機能実装(準備編)
・多階層カテゴリー機能実装(seed編)
・多階層カテゴリー機能実装(作成フォーム編)実装
1.コントローラーを編集
books_controller.rbdef edit unless @book.user == current_user redirect_to books_path end @category_parent_array = Category.category_parent_array_create end def update if @book.update(book_params) book_categories = BookCategory.where(book_id: @book.id) book_categories.destroy_all BookCategory.maltilevel_category_create( @book, params[:parent_id], params[:children_id], params[:grandchildren_id] ) redirect_to @book else @category_parent_array = Category.category_parent_array_create render 'edit' end end【解説】
① 中間テーブルから編集する本に対応するレコードを全て抽出し、削除する。
book_categories = BookCategory.where(book_id: @book.id)
book_categories.destroy_all
2.ビューを編集
books/edit.html.slim/ 追記 .category-form = label_tag 'ジャンル' = select_tag 'parent_id', options_for_select(@category_parent_array), class: 'form-control', id: 'parent-category' i.fas.fa-chevron-down br注意
turbolinksを無効化しないとセレクトボックスが非同期で動作しないので、必ず無効化しておきましょう。続編
- 投稿日:2020-06-21T09:38:55+09:00
Rails プレゼンターを導入する
プレゼンターを導入する
プレゼンターとはView部分にあるロジックのHTMLコードを精製する役割を担います。
要はview部分をスッキリさせようぜってもんです。
プレゼンターはデコレーターとも呼ばれます。GemではDraper,Cellsなどが使われているようですが、
Gemを今回は使わずに実装をしていきます。helperはあかんのか?
ビューで使用するメソッドなのでヘルパーメソッドとして定義するのは自然です。
でもhelperはグローバルに定義される、メリットとデメリットがあります。
プロジェクトが大きくなるにつれて名前が衝突するリスクが増してしまいます。今回は以下のコードに含まれるロジック部分を分離していきます。
犯罪者リストのロジックです。
arrested?(逮捕されているか?)でtrueの場合は☑️をつけ、
そうでない場合は空欄の□となります。<% @members.each do |m| %> <%= m.arrested? ? raw("☑") : raw("☐") %>Modelに関するプレゼンターを作る
まずすべてのプレゼンターの祖先となるModelPresenterクラスを作ります。
呼び出し専用のobject属性とview_context属性が定義されています。app/presenters/model_presenter.rbclass ModelPresenter attr_reader :object, :view_context delegate :raw, to: :view_context def initialize(object, view_context) @object = object @view_context = view_context end end次にmodel_presenterクラスを継承してMemberプレゼンタークラスを作ります。
member_presenter.rbclass StaffMemberPresenter < ModelPresenter endERBテンプレートを編集
このクラスを用いてERBテンプレートを編集します。
MemberPresenterクラスのインスタンスを生成します。newメソッドの1つ目の引数にはMemberオブジェクト。
2つ目の引数には疑似変数selfを指定しています。
selfではRailsで定義されているすべてのヘルパーメソッドを利用できます。<% @members.each do |m| %> <% p = MemberPresenter.new(m, self) %> <%= m.arrested? ? raw("☑") : raw("☐") %>Presenterをにメソッドを定義する
ここで先ほど作ったMemberPresenterクラスにインスタンスメソッドを定義していきます。
member_presenter.rbclass MemberPresenter < ModelPresenter def arrested_mark object.arrested? ? view_context.raw("☑") : view_context.raw("☐") end endERBテンプレートを書き換える
今までのプレゼンターを利用してview部分をスッキリとさせます
<% @members.each do |m| %>
  <% p = MemberPresenter.new(m, self) %>
    <%= p.arrested_mark %>
変更箇所には以下のようなコードが埋め込まれています。
m.arrested? ? raw("☑") : raw("☐")こんな感じでviewをスッキリさせることができました。
delegateを用いるともう少し簡潔にかけるのでその記事はまた書きたいと思います。
本日は以上です。
- 投稿日:2020-06-21T09:30:25+09:00
irbとpryの違いについて
irbはRuby付属の対話的環境。標準搭載。
pryはgem。Railsのデバックにはpryがオススメらしい。
イメージとしては、irbよりpryの方が少しリッチ。(そんなに変わらないが)
- 投稿日:2020-06-21T06:55:58+09:00
rails test環境構築(RSpec)
RSpec準備
Gemfilegroup :development, :test do gem 'rspec-rails' gem 'rails-controller-testing' gem 'factory_bot_rails' gem 'faker' end group :development do gem 'web-console' #記述済みの可能性あり endGemfile記述後Terminal$ bundle install $ rails g rspec:install #RSpec用設定ファイルの作成.rspec--format documentationTerminalで下記で実行可能
$ bundle exec rspecspecディレクトリ配置
- specファイルの命名規則 specファイルは対応するクラス名_spec.rbと命名。
- factory_bot導入のため、factoriesディレクトリを作成。
- factoriesディレクトリにダミー情報を作成するために、それぞれusers.rb, groups.rb, messages.rb...etcを作成。
factory_botでダミー作成
下記、chat-spaceにて、messageモデルのテストを行う例。
spec/factories/groups.rbFactoryBot.define do factory :group do name {Faker::Team.name} end end #ダミーグループspec/factories/users.rbFactoryBot.define do factory :user do password = Faker::Internet.password(min_length: 8) name {Faker::Name.last_name} email {Faker::Internet.free_email} password {password} password_confirmation {password} end end #ダミーユーザー作成spec/factories/messages.rbFactoryBot.define do facroty :message do content = {Faker::Lorem.sentence} image {File.open("#{Rails.root}/public/images/test_image.jpg")} user group end end #ダミーメッセージ作成rails_helper.rbRSpec.configure do |config| config.include FactoryBot::Syntax::Methods #FactoryBotの記法を省略するためMessage modelのtest
message_spec.rbrequire 'rails_helper' RSpec.describe Message, type: :model do describe '#create' do context 'messageを保存できる場合' do it "メッセージがあれば保存できる" do expect(build(:message, image: nil)).to be_valid end it "imageがあれば保存できる" do expect(build(:message, content: nil)).to be_valid end it "メッセージと画像があれば保存できる" do expect(build(:message)).to be_valid end end context 'messageを保存できない場合' do it "メッセージも画像も無いと保存できない" do message = build(:message, content: nil, image: nil) message.valid? expect(message.errors[:content]).to include("を入力してください") end it "group_idが無いと保存できない" do message = build(:message, group_id: nil) message.valid? expect(message.errors[:group]).to include("を入力してください") end it "user_idが無いと保存できない" do message = build(:message, user_id: nil) message.valid? expect(message.errors[:user]).to include("を入力してください") end end end endControllerテスト手順
deviseをrspecで使用できるように準備
/spec/support/controller_macros.rbmodule ControllerMacros def login(user) @request.env["devise.mapping"] = Devise.mappings[:user] sign_in user end end/spec/rails_helper.rbRSpec.configure do |config| Dir[Rails.root.join('spec/support/**/*.rb')].each { |f| require f } config.include Devise::Test::ControllerHelpers, type: :controller config.include ControllerMacros, type: :controller #〜省略〜 end
- specディレクトリにcontrollersディレクトリを作成し、xxxxs_controller_spec.rbファイルを作成。(xxxxsはtestしたいcontroller名)
- 以下Messages controllerのtest方法を記述。
spec/controllers/messages_controller_spec.rbrequire 'rails_helper' describe MessagesController do end

- 投稿日:2020-06-21T04:10:29+09:00
ProgateのRailsレッスンⅥ反省点
今日の反省点(ProgateのRailsⅥをやってみて)
find_byメソッドの使い方をちゃんと理解してなかった。
これは特定の投稿を受け取れるようにするメソッド。
qiita.rb@post = Post_find_by(カラム名: params[:content])これでカラム名の投稿を@postが受け取ることが出来る。
Linkの際、変数変換を使うことを忘れていた。
qiita.rb<%= link_to(post.content, "/posts/#{post.id}") %>学習環境ではeach文のあとだからpostになるという認識。
form_tagメソッドの意味と使い方。
これは入力フォームを送信するときに使うもの。
qiita.rb<%= form_tag("飛ばすリンク先") do %> <text area> < % end %>タグをdoとendの間に囲む。
createアクションの中身
これは中身に書くコードがわからなかったという話。
状況としては、name="〇〇"(じゃあこの場合はcontent)のフォーム入力内容を受け取りたい時。
ハッシュを使って書くんだよね。qiita.rbdef create @post = Post.new(content: params[:content]) @post.save redirect_to("/posts/index") endはい、contentの入力内容を@postで受け取って、保存するね。
そしたら/posts/indexに飛ばしますわ、よろしくってやつですね。この辺がProgateのRuby on RailsⅥをやってみて出てこなかった。
そして後半の方もわかってなかったので、ⅣとⅤも復習必須。現在プログラミングを初めて1ヶ月。
7月からスクールに通うので、それまでに基礎を叩き込みたい。
理解が遅くてほんとに悔しいな。。。努力は必ず報われる。 もし報われない努力があるとすれば、それはまだ努力とは言えない。
- 投稿日:2020-06-21T00:43:17+09:00
progateで習得したrailsの基礎知識まとめ
どんな人向けの記事か
- Railsを学び始めて間もない人
- Railsで初めてアプリを作ろうとしている人
- Rails慣れはしているけど少し復習したい人
どんな記事か
Rails初学者である筆者が、先日修了したprogateのRailsコースで学んだことを並べていく記事です。
ところどころ他記事の情報で補完しているため、progate運営が表現・説明した内容とは異なる箇所もそれなりにあります。各種概念
サーバー
クライアント(ブラウザ)の要求に応じてデータを提供するコンピュータ。
Railsで作ったアプリをブラウザで表示するためには、このサーバーを起動させる必要がある。ビュー
ページの見た目を作るためのHTMLファイル。ブラウザとRailsのやりとりの中で、Railsからビューが返されることで、ページが表示される。
拡張子は.html.erb。erbはEmbedded Rubyの略で、HTMLファイルにRubyスクリプトを埋め込むための仕組み。
下記のコントローラ・ルーティングと同様に、ページを作成するのに必要な3つの要素のうちの1つ。コントローラ
ブラウザにビューを返すためのもの。コントローラは目的に合わせてそれぞれ作成される。
例えば投稿に関する機能とユーザーに関する機能はそれぞれ別のコントローラファイルで規定される。アクション
コントローラ内の、ブラウザに返すビューを見つけ出すための機能。コントローラファイル内でメソッドとして表現される。
ルーティング
送信されたURLに対して、「どのコントローラ」の「どのアクション」で処理するかを決める、対応表のようなもの。
データベース
データを保存しておくための場所。
テーブル
データベース内でデータを管理している表。行ごとのデータをレコード、列ごとのデータをカラムと呼ぶ。
モデル
データベースとのやりとりを行うクラス。モデルのインスタンスを作り、それを保存する工程を経ることでデータをテーブルに格納できる。
マイグレーションファイル
データベースに変更を指示するためのファイル。
コーディング
ビューファイルで使うコード
<% %>
ex)<%= @post %>HTMLファイルにRubyコードを埋め込む際に、コードの前後に表記する。コードをブラウザに表示させたい場合は、コードの前後に
<%= %>と表記する。link_toメソッド
<%= link_to("表示する文字", "URL") %>
ex) <%= link_to("投稿一覧", "/posts/index")%>
リンクを作成する。HTMLファイルで使う。
第3引数に{method: "post"}を追加することで、postとして定義されているルーティングにマッチするようになる。form_tag
<%= form_tag("URL") do %>
 データ
<% end %>

ex)
<%= form_tag("/posts/update") do %>
 <textarea name="content"><%= @post.content %><textarea>
  <input type="submit" value="投稿">
<% end %>
フォームに入力されたデータを、指定したURLに送信することができる。
しかしform_tag単体では意味がなく、textareaタグ(またはinputタグ)にname属性を指定することにより、name属性をキーとしたハッシュをアクション側に伝えることができる。
余談だが、上記のようにtextareaタグの間に値を置いておくことで、フォームを再入力する際にもともと入力していた内容の続きから入力できたりする。errors.full_messages
<% インスタンス名.errors.full_messages.each do |message| %>
  <%= message %>
<% end %>

ex)
<% @posts.errors.full_messages.each do |message| %>
  <%= message %>
<% end %>
エラーメッセージを出力する。saveメソッドを呼び出した際にバリデーションに失敗すると、Railsでは自動的にエラーメッセージが生成されるようになっているため、each文を用いることですべて表示することができる。
yield
views/layout/application.html.erb<%= yield %>各ビューファイルは、application.html.erb内に表記されたyieldに代入される。
application.html.erbはサイト全体に適用するレイアウトを記載するビューファイル。コントローラファイルで使うコード
@変数
@post = "hogehoge"コントローラファイルで定義をすると、ビューファイルでRubyコードの埋め込みをする際に利用できるようになる。
newメソッド
モデル名.new(カラム名: 値)
ex) post = Post.new(content: "hogehoge")
モデルからインスタンスを作成する。
saveメソッド
インスタンス名.save
ex) post.save
作成したインスタンスをテーブルに保存する。
allメソッド
モデル名.all
ex) posts = Post.all
テーブル内の全てのレコードを取得する。
find_byメソッド
モデル名.find_by(カラム名: 値)
ex) post = Post.find_by(id: 1)
ある条件に合致するデータを1つ取得する。
whereメソッド
モデル名.where(カラム名: 値)
ex) posts = Post.where(id: 1)
ある条件に合致する複数のデータを取得する。
redirect_toメソッド
redirect_to("URL")
ex) redirect_to("/posts/index")
指定したページに転送することができる。
renderメソッド
render("フォルダ名/ファイル名")
ex) render("posts/edit")
別のアクションを経由せずに、直接ビューを表示することができる。
データの保存に失敗したときなどによく使われる。orderメソッド
モデル名.order(カラム名: :並び替えの順序)
ex) @posts = Post.all.order(created_at: :desc)
取得したデータの並び替えを行う。:desc は降順、:asc は昇順を表す。
destroyメソッド
インスタンス名.destroy
ex) post.destroy
指定したデータ(インスタンス)をデータベースから削除する。
変数session
session[:キー名] = 値
ex) session[:user_id] = @user.id
ページを移動してもログインユーザーの情報を保持し続けるためのもの。
nilを代入するとログイン状態ではないようにすることができる。params
ex1) @id = params[:id]
ex2) @post = Post.new(content: params[:content])
用例1. ルーティングで設定したURLの :○○ の値を取得する。
用例2. name="○○"がついたフォームの入力内容を受け取る。before_action
before_action 全アクションで共通する処理 ex) before_action :set_current_user, {only: [:edit, :update]}どのアクションを呼び出す前でも、必ず記述した処理が実行される。ファイルの一番上に記述する。
{only: [:アクション名]} を用いることで、処理が実行されるアクションを限定することができる。ルーティングファイルで使うコード
getメソッド
アプリ名/config/routes.rbget "URL" => "コントローラ名#アクション名" ex) get "/posts/index" => "posts#index"指定した情報を取得する。データベースを変更しない場合は大体getを使う。getと下記のpostは、HTTPメソッドと呼ばれている。
postメソッド
アプリ名/config/routes.rbpost "URL" => "コントローラ名#アクション名" ex) post "/posts/create" => "posts#create"データベースを変更する際、sessionの値を変更する際に使うメソッド。
HTTPメソッドは他にもいろいろあるらしいが、まだ学んでいないのでここでは省略。名前付きパラメータ
アプリ名/config/routes.rbget "posts/:id" => "posts#show"ルーティングのURL部分に : で始まる文字列を置くと、その文字列はパラメータとして認識される。
そのため、この例でいえば、/posts/○○ のようなすべてのURLをshowアクションに誘導することができる。
その関係で /posts/index のようなルーティングは、/posts/:id のルーティングに引っかからないようその前に記述する必要がある。モデルファイルで使うコード
validates
validates :検証するカラム名, {検証する内容} ex) validates :content, {presence: true}不正なデータがデータベースに保存されないように、データをチェックする(バリデーション)。
主な検証内容は以下の通り。
検証内容 意味 presecse: true そのカラムの値が存在するかどうかをチェックする length: {maximum: 文字数} 規定した文字数以上のデータは保存できないようにする uniqueness: true 重複したデータがデータベースに存在するかどうかチェックする マイグレーションファイルで使うコード
add_column :テーブル名, :カラム名, :データ型 ex) add_column :users, :image_name, :string既存のテーブルにカラムを追加する。changeメソッドの中に書く。
コマンドライン
rails new アプリ名
入力したアプリの名前と同名のフォルダが作成され、その中に開発に必要なフォルダやファイルが用意される。
rails server
サーバーの起動。
rails g controller コントローラ名 アクション名
コントローラの作成。gはgenerateでも可。
コントローラ名とアクション名は、HTTPメソッド(URL)と同じ名前を付けることが多い。
rails g model モデル名 カラム名:データ型
マイグレーションファイルとモデルファイルの作成。
モデル名は単数形かつ一文字目を大文字にする。
rails g migration ファイル名
マイグレーションファイルのみを作成。
ファイル名は add_image_name_to_users などの分かりやすい名前にする。
rails db:migrate
データベースへのマイグレーションファイルの反映。
マイグレーションファイルを作ったのにこれを実行しないとエラーが発生する。
まとめ
progateはよいです。
参考にした記事
参考にした書籍