- 投稿日:2020-06-21T22:03:36+09:00
YouTube APIでSuperChatを取得してUnity上でお札を降らせる
YouTubeのスーパーチャットに反応してUnity上でお札が降るようにしてみます。
1から書くわけではなく、出来合いのものを組み合わせて完成させます。※随分前に実装したので、記憶が曖昧です。間違ってたらすみません。
使用ツール
UnityでYoutube Liveのコメント・スパチャを取得できるツール
完成形
スパチャでお札舞うスクリプト、今日の配信で試しに動かしたら無事に動いた。アタッチしてるオブジェクト変えたから非表示しても大丈夫。
— 大福らな?4/24 21:00 エヴァ同時視聴 (@daifuk_lana) April 22, 2020
ちなみにQiita初見プレイ配信、記事最後までかけませんでした・・・・・・酔って喋って終わりました・・・・・・#バーチャルモーションキャプチャー #EVMC4U pic.twitter.com/zwRxHdb95L方法
今回使用するツールの使い方にも書いてありますが、YoutubeCommentのBeginGetComments()関数を呼ぶことでコメント取得を開始でき、OnCommentで新しいコメントがコールバックされ、OnSuperChatでスーパーチャット投稿時にコールバックが呼ばれます。その通りに実装しますが、今回はパーティクルを呼び出して紙幣を降らせることにします。
上記使用ツールをUnityにインポートしましたら、パーティクルを実装していきます。
私はこちらを参考にパーティクルを実装しました。実装後、使用ツールを説明に従って使用可能な状態にしておきます。
その後、スーパーチャットに反応してパーティクルを起動させるよう実装していくわけですが、インポートした使用ツールのExampleフォルダにcsファイルがありますので、こちらを改変していくのが簡単ですので、その前提で進めます。
まずクラスの開始時に「ParticleSystem particle;」などと宣言しておき、先程実装したパーティクルのGameObjectを代入しておきます。
particle = GameObject.Find("hogehoge").GetComponent();という感じでしょうか。updateの中ではFindしないみたいな話はここでは割愛します。その後、Start内でparticle.Stop();として予め対象のパーティクルを止めておきます。うまいこと設定で止められるならそれでも良いです。
そして、OnSuperChatメソッド内でparticle.Play();(particleの部分は宣言した変数名)と書けば、スーパーチャットが飛ぶたびにパーティクルが実行されます。
YouTubeのAPIはすぐ使い切ってしまうため、そのあたりは調べるなり計算するなりで、自分が最大限使う時間を考慮して取得間隔を設定してください。
上記ツールのYouTube CommentスクリプトのGet Comment Intervalで設定して下さい(秒)。
ちなみに、24時間連続稼働の想定だと60秒に一回の取得です。【参考】
YouTube Data APIの使用量上限についてよろしくおねがいします(酔っているのでこのへんで)
- 投稿日:2020-06-21T21:10:46+09:00
C# - Media Foundation で手軽に動画サムネイル作成
ちょっと動画のサムネイル作りたいと思いたったんですが、大体出てくる情報がFFmpegやDirectShowばかりで、どちらも若干面倒そうなので、もっと手軽なものは無いのかなーと探したら、Microsoft Media Foundation がありました。
Media Foundationは、公式ページの翻訳を持ってくると、
Microsoft Media Foundationは、Windows Vista以降でデジタルメディアを使用するためのアプリケーションとコンポーネントの開発を可能にします。
Media FoundationはWindows向けの次世代マルチメディアプラットフォームであり、開発者、消費者、コンテンツプロバイダーは、強化された堅牢性、比類のない品質、シームレスな相互運用性を備えたプレミアムコンテンツの新しい波を受け入れることができます。まあ、イメージとしてはDirectShowの新しいバージョン的な感じでしょうか。Windows Vista以降なら使えるそうで、今時Win7は問題外だし、バンバン使って問題ないでしょう。当然Windows限定なので、他OSメインの方には申し訳ありません。
で、公式のサンプルを探したところ、VideoThumbnail Sample と今回の用途にピッタリのものがありました。ただ、元がC++なのと、色々と余計な処理が盛られてて判りにくいので、参考にしつつもバッサリと欲しい部分以外は切り捨てます。僕はただ動画から画像を取得したいだけなんだ…
サンプル作成
さて、それではサンプル作成に入ります。
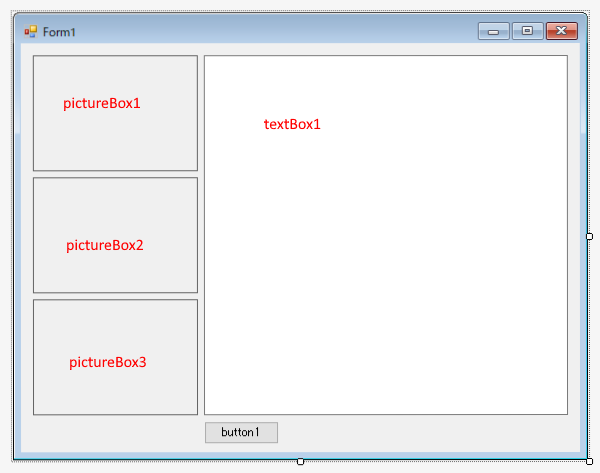
とりあえず適当に WindowsForms でフォームを作ることにします。適当にフォーム作成
なんの捻りもやる気もないフォームですが、勘弁してください。
PictureBoxは、
- BorderStyle:FixedSingle
- SizeMode:StretchImage
に設定しています。
SharpDX.MediaFoundation のインストール
次に、C#から普通にMedia Foundationを使用しようと思うと大変なので、今回はNuGetから SharpDX.MediaFoundationをインストールします。
コード
さて、いよいよコードになります。
using System;
using System.Drawing;
using System.Windows.Forms;
using System.Diagnostics;
using SharpDX.MediaFoundation;
using System.Runtime.InteropServices;

namespace VideoThumbnail
{
    public partial class Form1 : Form
    {
        [DllImport("Kernel32.dll", EntryPoint = "RtlMoveMemory", CallingConvention = CallingConvention.StdCall)]
        private static extern void RtlMoveMemory(IntPtr Destination, IntPtr Source, [MarshalAs(UnmanagedType.U4)] int Length);

        public Form1()
        {
            InitializeComponent();

            //MediaFoundation使用前にMediaManager.Startupが必要
            MediaManager.Startup();
        }

        protected override void OnFormClosed(FormClosedEventArgs e)
        {
            //MediaFoundation終了処理
            MediaManager.Shutdown();

            base.OnFormClosed(e);
        }

        /// <summary>
        /// 動画の指定位置から画像を取得し、Bitmapオブジェクトを作成する。
        /// </summary>
        /// <param name="moviePath">動画ファイルパス</param>
        /// <param name="positionOfPercent">取得する再生位置(0~100%)</param>
        /// <returns>作成したBitmapオブジェクト</returns>
        private Bitmap CreateVideoBitmap(string moviePath, double positionOfPercent)
        {
            var stopwatch = Stopwatch.StartNew();
            SourceReader reader = null;
            try
            {
                using (var attr = new MediaAttributes(1))
                using (var newMediaType = new MediaType())
                {
                    //SourceReaderに動画のパスを設定
                    attr.Set(SourceReaderAttributeKeys.EnableVideoProcessing.Guid, true);
                    reader = new SourceReader(moviePath, attr);

                    //出力メディアタイプをRGB32bitに設定
                    newMediaType.Set(MediaTypeAttributeKeys.MajorType, MediaTypeGuids.Video);
                    newMediaType.Set(MediaTypeAttributeKeys.Subtype, VideoFormatGuids.Rgb32);
                    reader.SetCurrentMediaType(SourceReaderIndex.FirstVideoStream, newMediaType);

                    //元のメディアタイプから動画情報を取得する
                    // duration:ビデオの総フレーム数
                    // frameSize:フレーム画像サイズ(上位32bit:幅 下位32bit:高さ)
                    // stride:フレーム画像一ライン辺りのバイト数
                    var mediaType = reader.GetCurrentMediaType(SourceReaderIndex.FirstVideoStream);
                    var duration = reader.GetPresentationAttribute(SourceReaderIndex.MediaSource, PresentationDescriptionAttributeKeys.Duration);
                    var frameSize = mediaType.Get(MediaTypeAttributeKeys.FrameSize);
                    var stride = mediaType.Get(MediaTypeAttributeKeys.DefaultStride);
                    var rect = new Rectangle()
                    {
                        Width = (int)(frameSize >> 32),
                        Height = (int)(frameSize & 0xffffffff)
                    };

                    //取得する動画の位置を設定
                    var mulPositionOfPercent = Math.Min(Math.Max(positionOfPercent, 0), 100.0) / 100.0;
                    reader.SetCurrentPosition((long)(duration * mulPositionOfPercent));

                    //動画から1フレーム取得し、Bitmapオブジェクトを作成してメモリコピー
                    int actualStreamIndex;
                    SourceReaderFlags readerFlags;
                    long timeStampRef;
                    using (var sample = reader.ReadSample(SourceReaderIndex.FirstVideoStream, SourceReaderControlFlags.None, out actualStreamIndex, out readerFlags, out timeStampRef))
                    using (var buf = sample.ConvertToContiguousBuffer())
                    {
                        int maxLength;
                        int currentLength;
                        var pBuffer = buf.Lock(out maxLength, out currentLength);
                        var bmp = new Bitmap(rect.Width, rect.Height, System.Drawing.Imaging.PixelFormat.Format32bppRgb);
                        var bmpData = bmp.LockBits(rect, System.Drawing.Imaging.ImageLockMode.WriteOnly, System.Drawing.Imaging.PixelFormat.Format32bppRgb);
                        RtlMoveMemory(bmpData.Scan0, pBuffer, stride * rect.Height);
                        bmp.UnlockBits(bmpData);
                        buf.Unlock();
                        return bmp;
                    }
                }
            }
            finally
            {
                if (reader != null) reader.Dispose();

                stopwatch.Stop();
                textBox1.AppendText($"process time {stopwatch.ElapsedMilliseconds} msec ({moviePath})\r\n");
            }
        }

        private void button1_Click(object sender, EventArgs e)
        {
            pictureBox1.Image = CreateVideoBitmap(@"C:\test\mov_hts-samp003.mp4", 75);
            pictureBox2.Image = CreateVideoBitmap(@"C:\test\mov_hts-samp004.mp4", 75);
            pictureBox3.Image = CreateVideoBitmap(@"C:\test\mov_hts-samp005.mp4", 75);
        }
    }
}
公式のサンプルよりは大分シンプルになったかなと思います。WindowsForms用にBitmapオブジェクトにしていますが、WPFで使うならWriteableBitmap辺りに置き換えれば多分行けると思います。
注意点としては、
- CreateVideoBitmap を呼び出す前に MediaManager.Startup を呼び出す
- 終了前に MediaManager.Shutdown を呼び出す
の二つです。
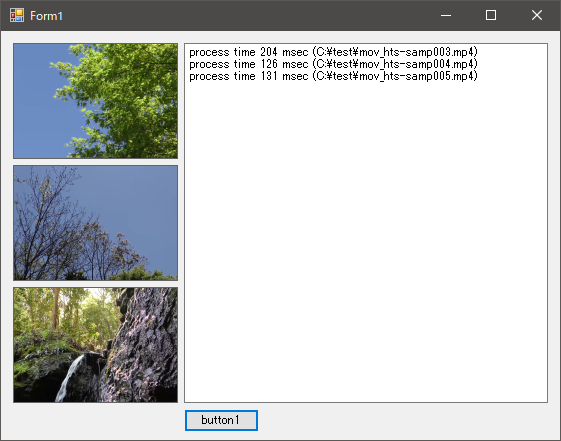
動画ファイル以外が指定された場合や、例外処理等は全く考慮してないので、実際に使う場合はきちんと例外対応を入れてください。ちなみに、サンプルではPictureBoxに設定したBitmapの解放をしてないので、連続でボタンをクリックするとメモリリークします(笑)実行結果
やりましたね!速度もまあこんなもんでしょう。
ちなみに、動画に対応するコーデックはインストールしてないと多分失敗します。
ビルドするとSharpDX関連のDLLが色々出力されますが、サンプルは SharpDX.dll と SharpDX.MediaFoundation.dll があればとりあえず動作します。サンプル動画は、下記サイトのものを使わせて頂きました。
HYBRID CREATIVE MOVIE サクラ

- 投稿日:2020-06-21T11:32:27+09:00
C#非同期・並列処理いろいろ
(An English version of this article is also available.)
C#ではいくつかの並列処理の方法が用意されていますが、それらに関してのメモです。C#が備える非同期・並列処理を網羅的にカバーしているわけではありませんが、個人的に使用しているものを中心に書いています。
タスク系
async/await処理
特に入出力関連で、
async処理は広く行われていますので、C#をそれなりに利用している人は必ずといって見たことがある処理だと思います。構文的には以下のようになります。
private async Task Caller()
{
  await DoProcess();
}

private async Task DoProcess()
{
  // 処理
}
上記の場合は普通に
awaitをかけているだけなので、事実上、同期処理と変わりません。これ役に立つのはプロセスを非同期的に行う必要があり、呼び出し側でその他の処理を行う余地がある場合です。例えば、以下のようなプロセスの場合、await processの部分で、処理が終了するまで待機します。private async Task Caller() { var process = DoProcess(); // 他のことを継続して実行 await process; } private async Task DoProcess() { // 非同期処理 }
asyncを使う場合は、戻り値はTaskを使用します。Taskを使用する場合、戻り値を指定することはできませんので、戻り値を返したい場合は型を指定し、次のようにします。private async Task Caller() { var process = DoProcess(); // 他のことを継続して実行 await process; } private async Task<int> DoProcess() { int x; // 非同期処理 return x; }尚、
awaitを使うのには呼び出し側がasyncで定義されている必要がありますが、そうでない場合は、以下のような構文が利用できます。private Task Caller() { DoProcess().Wait(); } private async Task DoProcess() { // 非同期処理 }非同期メソッドが戻り値を持つ場合は、
.Wait()の代わりに.Resultを使います。private Task Caller() { var result = DoProcess().Result; } private async Task<int> DoProcess() { int x; // 非同期処理 return x; }
asyncで定義されたメソッドにおいて、awaitが使われていないと警告が出ます。これは以下で抑制できます。private async Task Caller() { await Task.CompletedTask; }この形式は、非同期的な処理(入出力等)完了する時間が特定できない場合の処理などにおいて役に立ちますが、並列処理としての使用は非常に冗長的になり、あまり快適にはなりません。そういった場合は他の方法を使用します。
BackgroundWorker
もう一つ非同期の処理を実現する方法として、BackgroundWorkerがあります。これはWindows Formで非同期処理を実現したい場合において、使用できる(GUIの更新を伴う
asyncやawaitの使用は安全ではないため)ので代わりに使用できる他、進捗ステータスのレポート、終了処理、キャンセル処理など定義することも可能で機能は多いのですが、その分、冗長な記述が必要になります。処理中のライフタイムの管理が細かくできる点から、あるまとまった処理があり、それを一つの処理として非同期処理に回したい、という場合において便利に使用できる機能です。
並列系
PLINQ(コレクションに対しての並列実行)
LINQは言わずもがな、C#が備える強力な機能ですが、これの並列処理版が用意されています。これをPLINQといいます。
PLINQにおいては
.AsParallelを入れることにより、並列的なデータ取り出し等を行うことができます。var data = source.AsParallel().Where(n => n % 10 == 0).Select(n => n);この場合においてはライブラリ側でコレクションが精査され、並列処理が安全、またはメリットがあるという結果になった場合において、並列処理になります。そうでなければ逐次的に実行されます。
どの程度の並行処理を行うか、という設定は
.WithDegreeOfParallelism()で調整します。var data = source.AsParallel().WithDegreeOfParallelism(2).Where(n => n % 10 == 0).Select(n => n);ネットワークリソースアクセスが絡む場合など、同時アクセスに制約がある場合に使用できます。これが指定されない場合、コア数を元に自動的に設定されます。
この状態においては順序に関しては保証されないので、順序が重要になってくる場合は
.AsOrdered()を使用します。var data = source.AsParallel().AsOrdered.Where(n => n % 10 == 0).Select(n => n);これは使用しない場合に比べ、オーバーヘッドがより高くなります。
データの取り出しの他、何らかの処理をしたい、という場合があるかと思いますが、その場合は.ForAll()を使うことができます。
これを使用すると、コレクションに対し、ラムダ式を指定し、非同期的に処理を行うことができます。
source.AsParallel().ForAll(p => {
  p.value = p.value * 2;
});
この実行時に
.AsOrdered()も使用することができますが、並列処理が開始される順序は既知である場合においても処理が実際に終了する時間は開きが出てくるため、必ずしも順序が保全されて出てくるとは限りませんので、この場合は後ほどソートなどを行う必要が出てくると思います。Parallel処理(Task Parallel Library)
PLINQはコレクションに対して行うことのできる処理ですが、汎用的に並列処理を使用するための機構として、Task Parallel Libraryというものが用意されています。
これは以下のような構文を持ちます。
Parallel.ForEach(source, p => {
  p.value = p.value * 2
});
PLINQと似ていますが、これは実際にはPLINQが同じ機構を利用しているためです。PLINQでは用意されていない機構として、
Parallel.Forも使用できます。Parallel.For(0, 100, index => { // 処理 });これはForループに似た機構を並列的に実行することができます。
ロック
並列的に実行しながら、他のコレクションに結果を追加していきたい、というようなニーズがあるかと思います。例えば次のようなシーンです。
source.AsParallel().ForAll(p => {
  p.value = p.value * 2;
  result.Add(p);
});
これはこのままだと問題が発生します。というのも、
result.Add(p)の実行タイミングによっては正常に追加されないからです。このような場合は、データをロックする必要があります。
source.AsParallel().ForAll(p => {
  p.value = p.value * 2;
  lock(result)
  {
    result.Add(p);
  }
});
その他
C#ではその他、よりローレベルなスレッド処理を実現するための機構が用意されています。より複雑な処理などを行うために必要な処理を実装するためにはこれらを使用することになります。
資料
マイクロソフトの資料で非同期・並列処理に関しては非常に詳しくまとめられています。
また、上記の資料にはここでは取り上げていない、それぞれの機能の更に詳細なメソッドやパラメーターなども説明されています。
文中で紹介した、BackgroundWorkerについては以下を参照して下さい。
最後に
多彩なデータを取り扱う場合に置いて非同期処理や並列処理は重要になります。非同期、並列処理は複雑になりがちですが、C#ではそれを簡単に実装するための機構が用意されています。解決する課題によって使用可能なツールが多数用意されているので、この記事がその活用の入り口になれればと考えております。
- 投稿日:2020-06-21T10:25:21+09:00
Ubuntu 20.04 に Posgtgres12 をインストール後 C# + Npgsql でアクセスしてみる
目的
Ubuntu 20.04 に Posgtgres をインストールする
VsCode + C# + Npgsql + .NET Core SDK 3.1 でアクセスしてみるインストールの準備
・必要なパッケージをインストールする
$ sudo apt-get install curl ca-certificates gnupg・鍵を入れる
$ sudo curl https://www.postgresql.org/media/keys/ACCC4CF8.asc | sudo apt-key add -・リポジトリの参照リストに追記する。
aptのリポジトリを順にみていくとv13まであるようだ
※http://apt.postgresql.org/pub/repos/apt/dists/focal-pgdg/13/$ sudo apt-add-repository 'deb http://apt.postgresql.org/pub/repos/apt focal-pgdg main'/etc/apt/sources.list (の最後の行)に
deb http://apt.postgresql.org/pub/repos/apt focal-pgdg main
# deb-src http://apt.postgresql.org/pub/repos/apt focal-pgdg main
が追加されるが apt update の時に以下のエラーが発生する
N: リポジトリ 'http://apt.postgresql.org/pub/repos/apt focal-pgdg InRelease' がアーキテクチャ
'i386' をサポートしないため設定ファイル 'main/binary-i386/Packages' の取得をスキップ
これを避けるために以下の様に [arch=amd64] を追加する
deb [arch=amd64] http://apt.postgresql.org/pub/repos/apt focal-pgdg main
# deb-src [arch=amd64] http://apt.postgresql.org/pub/repos/apt focal-pgdg main
リポジトリを更新後にPostgresをインストールする
※postgresql-13 のレポジトリは今日現在では使用不可のようだ
$ sudo apt update
$ sudo apt install postgresql-12 pgadmin4
※RDT + Virtual Box 環境では pgadmin4 は起動しない
※エラーが出た事だけ確認インストールログでメモったほうが良さげな項目
設定ファイルの位置 -> /etc/postgresql/12/main/
ログの位置 -> /var/log/postgresql/
pg_ctlcluster 12 main start
※ pg_ctlcluster - start/stop/restart/reload a PostgreSQL cluster
デフォルトのmax_connectionsを選択しています ... 100
デフォルトの shared_buffers を選択しています ... 128MB
selecting default time zone ... Asia/Tokyo設定ファイルの修正
/etc/postgresql/12/main/postgresql.conf の修正
#コメントアウト
#listen_addresses = 'localhost' # what IP address(es) to listen on;

#以下に修正
listen_addresses = '*'           # what IP address(es) to listen on;
※IPアドレスは環境に合わせてください・・・
/etc/postgresql/12/main/pg_hba.conf を以下に修正
# "local" is for Unix domain socket connections only
#local   all             all                                     peer
local   all             all                                       md5
# IPv4 local connections:
#host    all             all             127.0.0.1/32            md5
host    all             all             192.168.5.0/24            md5
# IPv6 local connections:
#host    all             all             ::1/128                 md5
# Allow replication connections from localhost, by a user with the
#replication privilege.
#local   replication     all                                     peer
#host    replication     all             127.0.0.1/32            md5
#host    replication     all             ::1/128                 md5
上記2ファイルを修正後pgsqlを再起動する
$ sudo pg_ctlcluster 12 main restart
※ man pg_ctlcluster より
※ pg_ctlcluster - start/stop/restart/reload a PostgreSQL cluster
サンプルDBの作成
PostgreSQL Sample Databaseより
PostgreSQL DVD Rental sample databaseをDL後
$ su - postgres
$ unzip dvdrental.zip
$ createdb --locale=C --encoding=UTF-8 --template=template0 -U postgres dvdrental
$ pg_restore -U postgres -d dvdrental dvdrental.tar
$ psql -l
                                         データベース一覧
   名前    |  所有者  | エンコーディング |  照合順序   | Ctype(変換演算子) |     アクセス権限
-----------+----------+------------------+-------------+-------------------+-----------------------
 dvdrental | postgres | UTF8             | C           | C                 |
 postgres  | postgres | UTF8             | ja_JP.UTF-8 | ja_JP.UTF-8       |
 template0 | postgres | UTF8             | ja_JP.UTF-8 | ja_JP.UTF-8       | =c/postgres          +
           |          |                  |             |                   | postgres=CTc/postgres
 template1 | postgres | UTF8             | ja_JP.UTF-8 | ja_JP.UTF-8       | =c/postgres          +
           |          |                  |             |                   | postgres=CTc/postgres

$ psql -U postgres
ユーザ postgres のパスワード:
psql (12.3 (Ubuntu 12.3-1.pgdg20.04+1))
"help"でヘルプを表示します。

postgres=# \c dvdrental
データベース"dvdrental"にユーザ"postgres"として接続しました。
dvdrental=# \d
                       リレーション一覧
 スキーマ |            名前            |     型     |  所有者
----------+----------------------------+------------+----------
 public   | actor                      | テーブル   | postgres
 public   | actor_actor_id_seq         | シーケンス | postgres
 public   | actor_info                 | ビュー     | postgresq
 public   | address                    | テーブル   | postgres
 public   | address_address_id_seq     | シーケンス | postgres
 public   | category                   | テーブル   | postgres
 ~
アクセス環境の設定
$ su - postgres
$ psql -U postgres
ユーザ postgres のパスワード:
postgres=# create role demo with login password 'passwd';
postgres=# grant connect on database dvdrental to demo;
postgres=# \c dvdrental
※サンプル用のために、全権限を全テーブルに許可する
postgres=# grant all on all tables in schema public to demo;
postgres=# grant all on all sequences in schema public to demo;
postgres=# grant all on all functions in schema public to demo;

postgres=# grant select on actor to demo;
postgres=# grant all on database dvdrental to demo;
サンプルを試してみる
※ Ubuntu2004、Win10 共に同一コードで動作を確認
・VSCode を立ちあげて適当なフォルダを選択する
・コンソールから作成したフォルダ以下で dotnet new console
~/code/pg0001$ ls
Program.cs bin pg0001.csproj objSystem.Data.SqlClient&Npgsqlを追加する
表示メニュー
-> コマンドパレット
-> nuget
-> Nuget package Manager:Add Pckage
-> System.Data.SqlClient を入力後 enter
-> System.Data.SqlClient を選択
-> 4.8.1 を選択-> Npgsqlを入力後 enter
-> Npgsql を選択
-> 4.1.3.1 を選択pg0001.csproj に以下を追加する(上記で追加後 restore ボタン で追加される)
<ItemGroup>
<PackageReference Include="System.Data.SqlClient" Version="4.8.1"/>
<PackageReference Include="Npgsql" Version="4.1.3.1"/>
</ItemGroup>
※launch.json
実行->デバックなしで実行 を選択したときに作成されるusing System; using Npgsql; using System.Data; using System.Data.SqlClient; namespace pg0001 { class Program { static void Main(string[] args) { var constr = @"Server=192.168.5.44;Port=5432;User Id=demo;Password=passwd;Database=dvdrental"; NpgsqlConnection con = new NpgsqlConnection(constr); con.Open(); try { NpgsqlDataAdapter da = new NpgsqlDataAdapter("select count(*) as cnt from actor;", con); DataSet ds = new DataSet(); da.Fill(ds, "actor"); DataTable tbl = ds.Tables["actor"]; foreach(DataRow row in tbl.Rows) { Console.WriteLine(row[0].ToString()); } } finally { con.Close(); } } } }参考にしたサイトはこちら
Ubuntu 12.10 > Repository
PostgreSQL packages for Debian and Ubuntu
PostgreSQL データベース接続ユーザーの作成
[PostgreSQL] よく使うコマンドまとめ
ロールにテーブルやビューなどに対する権限を追加する(GRANT)
18.アクセス権の付与
PostgreSQLで全てのテーブルにGRANT ALLする方法
Npgsql 4.1.3.1
Npgsql/Installation
.NETライブラリ「Npgsql」によるPostgreSQLの活用
Ubuntu 18.04 に .NET Core SDK 3.1 をインストールする
- 投稿日:2020-06-21T10:25:21+09:00
Ubuntu 20.04 に Posgtgres をインストール後 C# + Npgsql でアクセスしてみる
目的
Ubuntu 20.04 に Posgtgres をインストールする
VsCode + C# + Npgsql + .NET Core SDK 3.1 でアクセスしてみるインストールの準備
・必要なパッケージをインストールする
$ sudo apt-get install curl ca-certificates gnupg・鍵を入れる
$ sudo curl https://www.postgresql.org/media/keys/ACCC4CF8.asc | sudo apt-key add -・リポジトリの参照リストに追記する。
aptのリポジトリを順にみていくとv13まであるようだ
※http://apt.postgresql.org/pub/repos/apt/dists/focal-pgdg/13/$ sudo apt-add-repository 'deb http://apt.postgresql.org/pub/repos/apt focal-pgdg main'/etc/apt/sources.list (の最後の行)に
deb http://apt.postgresql.org/pub/repos/apt focal-pgdg main
# deb-src http://apt.postgresql.org/pub/repos/apt focal-pgdg main
が追加されるが apt update の時に以下のエラーが発生する
N: リポジトリ 'http://apt.postgresql.org/pub/repos/apt focal-pgdg InRelease' がアーキテクチャ
'i386' をサポートしないため設定ファイル 'main/binary-i386/Packages' の取得をスキップ
これを避けるために以下の様に [arch=amd64] を追加する
deb [arch=amd64] http://apt.postgresql.org/pub/repos/apt focal-pgdg main
# deb-src [arch=amd64] http://apt.postgresql.org/pub/repos/apt focal-pgdg main
リポジトリを更新後にPostgresをインストールする
※postgresql-13 のレポジトリは今日現在では使用不可のようだ
$ sudo apt update
$ sudo apt install postgresql-12 pgadmin4
※RDT + Virtual Box 環境では pgadmin4 は起動しない
※エラーが出た事だけ確認インストールログでメモったほうが良さげな項目
設定ファイルの位置 -> /etc/postgresql/12/main/
ログの位置 -> /var/log/postgresql/
pg_ctlcluster 12 main start
※ pg_ctlcluster - start/stop/restart/reload a PostgreSQL cluster
デフォルトのmax_connectionsを選択しています ... 100
デフォルトの shared_buffers を選択しています ... 128MB
selecting default time zone ... Asia/Tokyo設定ファイルの修正
/etc/postgresql/12/main/postgresql.conf の修正
#コメントアウト
#listen_addresses = 'localhost' # what IP address(es) to listen on;

#以下に修正
listen_addresses = '*'           # what IP address(es) to listen on;
※IPアドレスは環境に合わせてください・・・
/etc/postgresql/12/main/pg_hba.conf を以下に修正
# "local" is for Unix domain socket connections only
#local   all             all                                     peer
local   all             all                                       md5
# IPv4 local connections:
#host    all             all             127.0.0.1/32            md5
host    all             all             192.168.5.0/24            md5
# IPv6 local connections:
#host    all             all             ::1/128                 md5
# Allow replication connections from localhost, by a user with the
#replication privilege.
#local   replication     all                                     peer
#host    replication     all             127.0.0.1/32            md5
#host    replication     all             ::1/128                 md5
上記2ファイルを修正後pgsqlを再起動する
$ sudo pg_ctlcluster 12 main restart
※ man pg_ctlcluster より
※ pg_ctlcluster - start/stop/restart/reload a PostgreSQL cluster
サンプルDBの作成
PostgreSQL Sample Databaseより
PostgreSQL DVD Rental sample databaseをDL後
$ su - postgres
$ unzip dvdrental.zip
$ createdb --locale=C --encoding=UTF-8 --template=template0 -U postgres dvdrental
$ pg_restore -U postgres -d dvdrental dvdrental.tar
$ psql -l
                                         データベース一覧
   名前    |  所有者  | エンコーディング |  照合順序   | Ctype(変換演算子) |     アクセス権限
-----------+----------+------------------+-------------+-------------------+-----------------------
 dvdrental | postgres | UTF8             | C           | C                 |
 postgres  | postgres | UTF8             | ja_JP.UTF-8 | ja_JP.UTF-8       |
 template0 | postgres | UTF8             | ja_JP.UTF-8 | ja_JP.UTF-8       | =c/postgres          +
           |          |                  |             |                   | postgres=CTc/postgres
 template1 | postgres | UTF8             | ja_JP.UTF-8 | ja_JP.UTF-8       | =c/postgres          +
           |          |                  |             |                   | postgres=CTc/postgres

$ psql -U postgres
ユーザ postgres のパスワード:
psql (12.3 (Ubuntu 12.3-1.pgdg20.04+1))
"help"でヘルプを表示します。

postgres=# \c dvdrental
データベース"dvdrental"にユーザ"postgres"として接続しました。
dvdrental=# \d
                       リレーション一覧
 スキーマ |            名前            |     型     |  所有者
----------+----------------------------+------------+----------
 public   | actor                      | テーブル   | postgres
 public   | actor_actor_id_seq         | シーケンス | postgres
 public   | actor_info                 | ビュー     | postgresq
 public   | address                    | テーブル   | postgres
 public   | address_address_id_seq     | シーケンス | postgres
 public   | category                   | テーブル   | postgres
 ~
アクセス環境の設定
$ su - postgres
$ psql -U postgres
ユーザ postgres のパスワード:
postgres=# create role demo with login password 'passwd';
postgres=# grant connect on database dvdrental to demo;
postgres=# \c dvdrental
※サンプル用のために、全権限を全テーブルに許可する
postgres=# grant all on all tables in schema public to demo;
postgres=# grant all on all sequences in schema public to demo;
postgres=# grant all on all functions in schema public to demo;

postgres=# grant select on actor to demo;
postgres=# grant all on database dvdrental to demo;
サンプルを試してみる
※ Ubuntu2004、Win10 共に同一コードで動作を確認
・VSCode を立ちあげて適当なフォルダを選択する
・コンソールから作成したフォルダ以下で dotnet new console
~/code/pg0001$ ls
Program.cs bin pg0001.csproj objSystem.Data.SqlClient&Npgsqlを追加する
表示メニュー
-> コマンドパレット
-> nuget
-> Nuget package Manager:Add Pckage
-> System.Data.SqlClient を入力後 enter
-> System.Data.SqlClient を選択
-> 4.8.1 を選択-> Npgsqlを入力後 enter
-> Npgsql を選択
-> 4.1.3.1 を選択pg0001.csproj に以下を追加する(上記で追加後 restore ボタン で追加される)
<ItemGroup>
<PackageReference Include="System.Data.SqlClient" Version="4.8.1"/>
<PackageReference Include="Npgsql" Version="4.1.3.1"/>
</ItemGroup>
※launch.json
実行->デバックなしで実行 を選択したときに作成されるusing System; using Npgsql; using System.Data; using System.Data.SqlClient; namespace pg0001 { class Program { static void Main(string[] args) { var constr = @"Server=192.168.5.44;Port=5432;User Id=demo;Password=passwd;Database=dvdrental"; NpgsqlConnection con = new NpgsqlConnection(constr); con.Open(); try { NpgsqlDataAdapter da = new NpgsqlDataAdapter("select count(*) as cnt from actor;", con); DataSet ds = new DataSet(); da.Fill(ds, "actor"); DataTable tbl = ds.Tables["actor"]; foreach(DataRow row in tbl.Rows) { Console.WriteLine(row[0].ToString()); } } finally { con.Close(); } } } }参考にしたサイトはこちら
Ubuntu 12.10 > Repository
PostgreSQL packages for Debian and Ubuntu
PostgreSQL データベース接続ユーザーの作成
[PostgreSQL] よく使うコマンドまとめ
ロールにテーブルやビューなどに対する権限を追加する(GRANT)
18.アクセス権の付与
PostgreSQLで全てのテーブルにGRANT ALLする方法
Npgsql 4.1.3.1
Npgsql/Installation
.NETライブラリ「Npgsql」によるPostgreSQLの活用
Ubuntu 18.04 に .NET Core SDK 3.1 をインストールする
- 投稿日:2020-06-21T05:34:39+09:00
【C#/UWP】{x:Bind} と {Binding} の違い
{x:Bind}
画面内のコントロール間で入力を同期させたい場合や、1画面で完結するアプリケーションで使用します。
バインドしている値が変更されても、すぐに画面が変更されるわけではありません。画面の更新をしたい場合は、Bindings.Update()を呼びます。使用例
SampleData.csはSamplePage.xaml.cs内でインスタンスを生成しています。
一画面で完結するアプリケーションの場合、画面が破棄されないのでインスタンスも破棄されません。SamplePage.xaml<Page> <!--...省略--> <Grid> <StackPanel HorizontalAlignment="Center" VerticalAlignment="Center"> <!--SampleDataのプロパティをバインディング--> <Slider x:Name="Slider1" Value="{x:Bind SampleData.SliderValue, Mode=TwoWay}"/> <!--コントロール(Slider1)のプロパティを直接バインディング--> <Slider x:Name="Slider2" Value="{x:Bind Slider1.Value, Mode=TwoWay}"/> </StackPanel> </Grid> </Page>Null値の設定
null.xaml<!--参照したプロパティの値がnullの場合、TargetNullValueの値を使う--> <TextBox Text="{x:Bind SampleData.NullData, TargetNullValue='(null)'}"/>{Binding}
DataContext(Resource)を追加して、それを参照する場合に使用します。
例えば、画面間でデータを受け渡す場合や、ナビゲーターなどによって画面の内容を差し替える場合です。
または、コントロールの内容を動的に変化させたい場合にも使用します。使用例
- データを保持するオブジェクト(HogeData.csなど)を作成します。
- そのインスタンスをApp.xamlに作成します。(アプリケーション起動時に一回だけ作成されます)
- 画面が切り替わるタイミングで、HogeData.csの内容を更新します。
- 参照したい画面にバインドします。
1)HogeData.cspublic class HogeData : INotifyPropertyChanged { private string _text = "Default"; public string HogeText { get => _text; set { if (_text == value) return; _text = value; // データを更新したことを通知する this.PropertyChanged?.Invoke(this, new PropertyChangedEventArgs(nameof(HogeText))); } } public event PropertyChangedEventHandler PropertyChanged; }2)App.xaml<Application x:Class="TemplateApp.App" xmlns="http://schemas.microsoft.com/winfx/2006/xaml/presentation" xmlns:x="http://schemas.microsoft.com/winfx/2006/xaml"> <Application.Resources> <!--xmlnsは、HogeData.csの名前空間--> <HogeData xmlns="using:TemplateApp.Datas" x:Key="HogeDataInstance"/> </Application.Resources> </Application>3)Hoge.cs// 例えば、ナビゲーターの項目を押したタイミングで、HogeDataの内容を更新する var hogeData = Application.Current.Resources["HogeDataInstance"] as HogeData; hogeData.HogeText = "hogehoge";4)Page.xaml<Page ...省略 DataContext="{StaticResource HogeDataInstance}" mc:Ignorable="d"> <Grid> <Button Content="{Binding HogeText, Mode=OneWay}"/> </Grid> </Page>動的にコントロールの値を変更する
sample.xaml<!--動的にコントロールの値を変更する--> <!--RelativeSourceは、相対的にプロパティを指定する方法--> <TextBox Text="cyan" Background="{Binding Text, RelativeSource={RelativeSource Self}, UpdateSourceTrigger=PropertyChanged}"/>Null値の設定
null.xaml<!--参照したリソースがなかった場合、FallbackValueの値を使う--> <TextBox Text="{Binding Path=NoWhere, FallbackValue='(not bound)'}"/>Mode
バインディングするときに
Modeを設定できます。
Mode 説明 OneWay データが画面へ反映されます
(Bindingの規定値)TwoWay データが画面へ、画面からデータ(オブジェクト)へ双方向に反映されます OneTime バインドが確立したときに一度だけ、データが画面へ反映されます
(x:Bindの規定値)参考
UWPアプリ開発101 第2版:WindowsForms開発者のためのC#/XAMLによるUWPアプリ開発入門(VisualStudio2017対応版) (BluewaterSoft) Kindle版