- 投稿日:2020-05-19T22:52:18+09:00
DynamoDBにあるデータをnode.js(AWS Lambda)を使って更新する方法
DynamoDBに保存しているデータに対して更新する処理を作る際に詰まったので軽くまとめました。
ざっくり実装
booksテーブルに保存されているデータのうち、特定のauthorIdとcreatedAtに一致するデータのcontent情報を更新したいとする
'use strict';

const AWS = require("aws-sdk");
const dynamoDb = new AWS.DynamoDB({apiVersion: '2012-08-10'});
const tableName = "books";

const queryParams = (authorId, createdAt, content) => {
  return {
    TableName: tableName,
    Key: { // 更新対象のデータを絞るための条件を指定
      'authorId': {S: authorId}, // Primary partition key どうも型の指定が必要らしい
      'createdAt': {N: String(createdAt)} // Primary sort key どうも型の指定が必要らしい
    },
    // setで更新対象のkeyを指定する。 この場合、contentに入っているデータを、引数で渡されたもので更新する
    UpdateExpression: 'set content = :content',
    ExpressionAttributeValues: {
      ':content': {S: content}, // どうも型の指定が必要らしい
    },
    ReturnValues:"UPDATED_NEW"
  };
};

// ファイル名がcreatedAt_startAt_endAt.mp4という命名で
exports.handler = (event, context, callback) => {
  const [authorId, createdAt, content] = event.resources; // eventからデータが取れると仮定
  const params = queryParams(authorId, createdAt, content);

  dynamoDb.updateItem(params, (err, dynamoData) => {
    if (err) {
      console.log(JSON.stringify(err));
    } else {
      console.log(dynamoData); // 更新した結果が出力される
    }
    callback(null, );
  });
};
注意点
- 対象のデータを検索するには
Primary partition keyとPrimary sort keyしか使えないっぽい
- その他のKeyでfilterするのは無理っぽそう
- 検索パラメータのKeyやExpressionAttributeValuesのvalueは実際に格納しているデータの型(Number, Stringなど)を指定する必要があるっぽい
- queryするときのフィルタ条件ではそういう必要はなかったと思うので、割とややこしい
参考
- 投稿日:2020-05-19T21:11:48+09:00
Denoとはなにか - 実際につかってみる
はじめに
Denoというものが面白そうだったので、これを書きたいと思います。Denoとはなにか
↑かわいい
Deno(ディーノ)という名前について、聞いたことがありますでしょうか。私も最近まで知りませんでしたが、実はv1.0がリリースされたのが2020/5/13とごく最近のことです。開発自体は2年前から行われておりましたが、結構新しめの技術です。
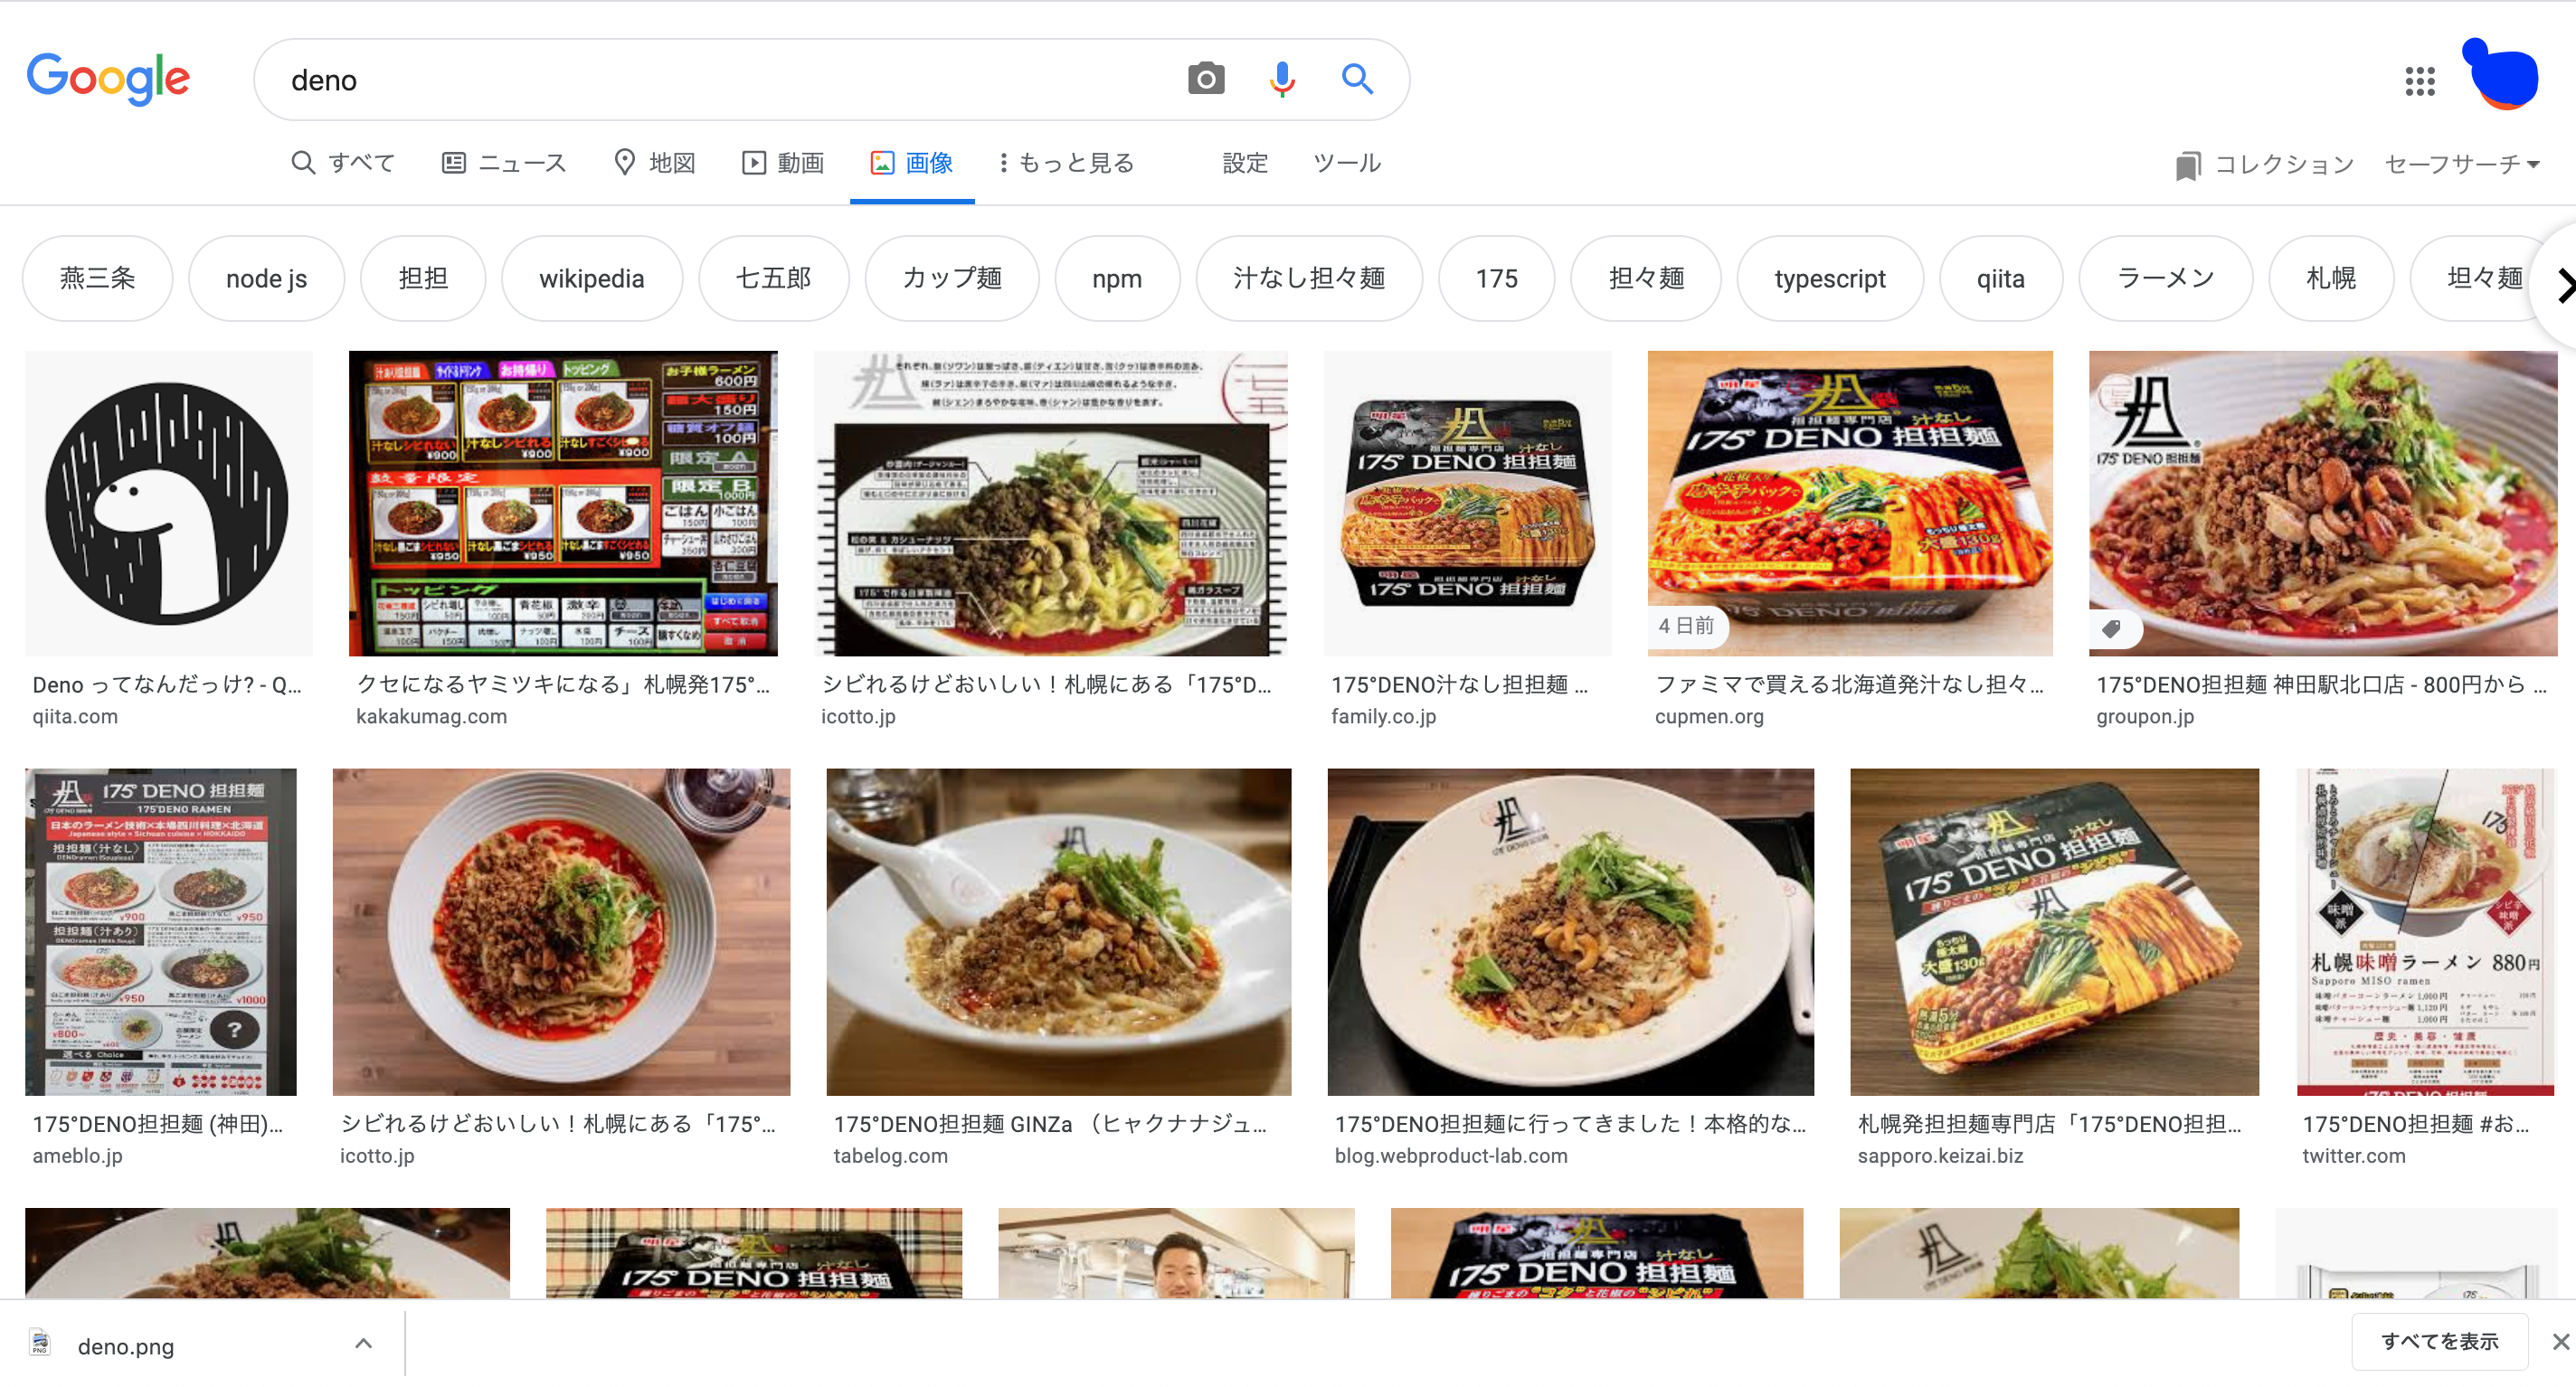
その証拠(?)にDenoでググると担々麺ばっかりでてきます。(2019/5/18現在)
結局Denoってなんなの?
Denoは、Node.jsの製作者であるRyan Dahlによって作られた、新しいJS/TSランタイムです。すっごい雑に説明すると、Node.jsのイケてなかったところを改良したものがDenoになります。Denoって文字を並べ替えるとNodeになりますね。const deno = 'node'.split('').sort().join('')Denoがつくられた背景
DenoはJSConf EU 2018でのRyan Dahlによる講演「Node.jsに関する10の反省点」において発表されました。10 Things I Regret About Node.js - Ryan Dahl - JSConf EU
Node.js における設計ミス By Ryan DahlRyan Dahlは講演の中で、自身が開発し
Node.jsにおける10個の後悔している点について言及しました。それらの設計ミスに基づいて開発されたのが、Denoです。実際にDenoを使ってみる?
なにはともあれ、実際に
Denoを使ってみてNode.jsとの違いについて見ていきましょう。インストール
まずはインストールをします。私はMacを使っているので、
Homebrewを使用してインストールしました。$ brew install deno以下のコマンドで正しくインストールされたか確認してみましょう。
$ deno -V
deno 1.0.0
Denoを実行する
Denoを簡単に実行してみるために、公式のサンプルコードを利用してみます。$ deno run https://deno.land/std/examples/welcome.ts Download https://deno.land/std/examples/welcome.ts Warning Implicitly using master branch https://deno.land/std/examples/welcome.ts Compile https://deno.land/std/examples/welcome.ts Welcome to Deno ?恐竜さんが出てきました。可愛いですね?
2回目以降の動作は、初回と変わってきます。
$ deno run https://deno.land/std/examples/welcome.ts
Welcome to Deno ?
DownloadやCompileなどの行がなくなっていますね。
今回のように、リモートのURLを実行した場合にはローカルにキャッシュされ2回目以降は素早く実行することができます。
これは後ほど出てくるimportでパッケージを読み込むときと同じです。変更点1 TypeScriptをそのままサポート
先程実行したプログラム自体はとても簡単なものでしたが、早速
Node.jsとの変更点が含まれています。
先程実行したプログラムhttps://deno.land/std/examples/welcome.tsの拡張子を見ると、TypeScriptのコードであることがわかります。
従来では、TypeScriptを実行するには、npmでインストールして、ルート配下にtsconfig.jsonを設置して、コンパイルして...といった作業が必要でした。
しかし、Denoならそのような設定はすべて必要ありません。デフォルトでTypeScriptをサポートしているので、そのまま実行することができます。サンプルコードを見てみる
簡単なプログラムだけではつまらないので、次はローカルにサーバーを立ててみます。以下のコードは公式サイトからのコピペで持ってきました。
8000ポートでサーバを立てて、Hello Worldと表示させます。import { serve } from "https://deno.land/std@0.50.0/http/server.ts"; const s = serve({ port: 8000 }); console.log("http://localhost:8000/"); for await (const req of s) { req.respond({ body: "Hello World\n" }); }次に、下記のコードが
Node.jsで書いた同じようなコードです。const http = require('http'); const server = http.createServer((req, res) => { res.end('Hello World'); }); server.listen(8000)この2つのコードを比べていきましょう。
変更点2 npmがない
と、先にコードの方を提出しましたが、その前にやることがありましたね。
まずはnpm initでpackage.jsonを作ってそれから...えっDenoでは必要ないって?そうなんです、
Denoはインストールさえ済ませれば先に見たようにそのままコードを実行することができます。
驚くなかれ、そもそもDenoにはnpmがありません。
npmがないということは当然node_modulesやpackage.jsonなんてものも存在しません。
node_modulesってかなり巨大なファイルでしたし、こいつがなくなるだけでフォルダ構成が結構スッキリしてくるんじゃないでしょうか。
node_modulesとpackage.jsonの採用は、Node.jsの設計ミスとしても上げられていた点です。では、
npmを使用しないとなれば、どのようにして外部モジュールを使用するのでしょうか。
その答えは、サンプルコードにもあるように、importにURLを渡します。import { serve } from "https://deno.land/std@0.50.0/http/server.ts";これは、
Denoで外部モジュールを使用する唯一の方法です。もうnpm installは必要としません。
ダウンロードは実行時に行われ、結果はキャッシュされます。変更点2 requireがなくなった
関連して、今まで
Node.jsで利用されてきたrequireが廃止されました。Node.js
const http = require('http');Deno
import { serve } from "https://deno.land/std@0.50.0/http/server.ts";CommonJSの代わりに
ES Module(importとexport)をデフォルトのモジュールとシステムとして使用します。変更点3 トップレベルのawait
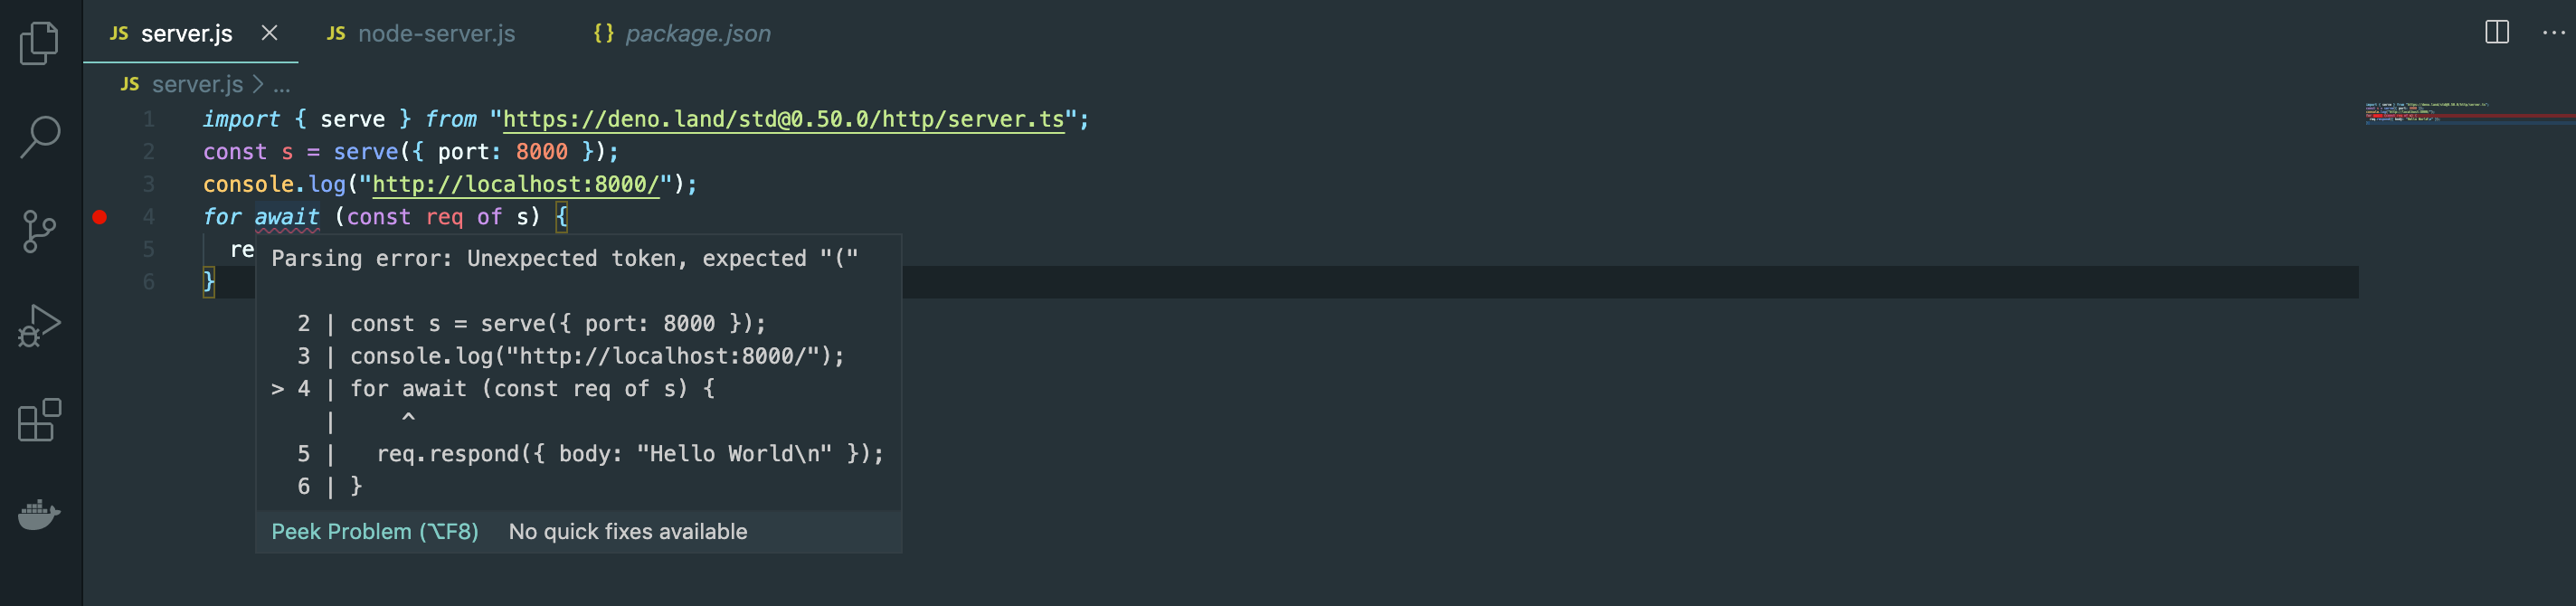
あ!サンプルコードのこの部分、間違ってますよ!ほら!
for await (const req of s) {
  req.respond({ body: "Hello World\n" });
}
awaitはasync関数の中でしか動作できないんですよー、ほらVSCodeだって怒ってる。
...え、これができるようになった?
そうです、もう
await使いたさにわざわざasync関数で囲む必要はありません。やったね。実行してみる
コードベースでの変更点はここまでにして、実際にコードを実行してローカルサーバを立ち上げてみましょう。
deno runで実行できます。$ deno run server $ deno run server.js Download https://deno.land/std@0.50.0/http/server.ts Compile https://deno.land/std@0.50.0/http/server.ts Download https://deno.land/std@0.50.0/encoding/utf8.ts Download https://deno.land/std@0.50.0/io/bufio.ts Download https://deno.land/std@0.50.0/testing/asserts.ts Download https://deno.land/std@0.50.0/async/mod.ts Download https://deno.land/std@0.50.0/http/_io.ts Download https://deno.land/std@0.50.0/io/util.ts Download https://deno.land/std@0.50.0/path/mod.ts Download https://deno.land/std@0.50.0/path/win32.ts Download https://deno.land/std@0.50.0/path/posix.ts Download https://deno.land/std@0.50.0/path/common.ts Download https://deno.land/std@0.50.0/path/separator.ts Download https://deno.land/std@0.50.0/path/interface.ts Download https://deno.land/std@0.50.0/path/glob.ts Download https://deno.land/std@0.50.0/path/_constants.ts Download https://deno.land/std@0.50.0/path/_util.ts Download https://deno.land/std@0.50.0/fmt/colors.ts Download https://deno.land/std@0.50.0/testing/diff.ts Download https://deno.land/std@0.50.0/path/_globrex.ts Download https://deno.land/std@0.50.0/async/deferred.ts Download https://deno.land/std@0.50.0/async/delay.ts Download https://deno.land/std@0.50.0/async/mux_async_iterator.ts Download https://deno.land/std@0.50.0/textproto/mod.ts Download https://deno.land/std@0.50.0/http/http_status.ts Download https://deno.land/std@0.50.0/bytes/mod.ts error: Uncaught PermissionDenied: network access to "0.0.0.0:8000", run again with the --allow-net flag at unwrapResponse ($deno$/ops/dispatch_json.ts:43:11) at Object.sendSync ($deno$/ops/dispatch_json.ts:72:10) at Object.listen ($deno$/ops/net.ts:51:10) at listen ($deno$/net.ts:152:22) at serve (https://deno.land/std@0.50.0/http/server.ts:261:20) at file:///Users/asaiippei/deno-test/server.js:2:11外部モジュールをインストールするとことまでは良かったのですが、エラーが発生してしまいました。
変更点4 セキュリティルールの変更
なぜエラーが発生したのでしょうか。
実は、Denoデフォルトでセキュアであり、明示的に有効にしない限り、ファイル、ネットワーク、環境変数等にアクセスすることができません。ネットワークを許可するには
--allow-netフラグを付与して実行する必要があります。
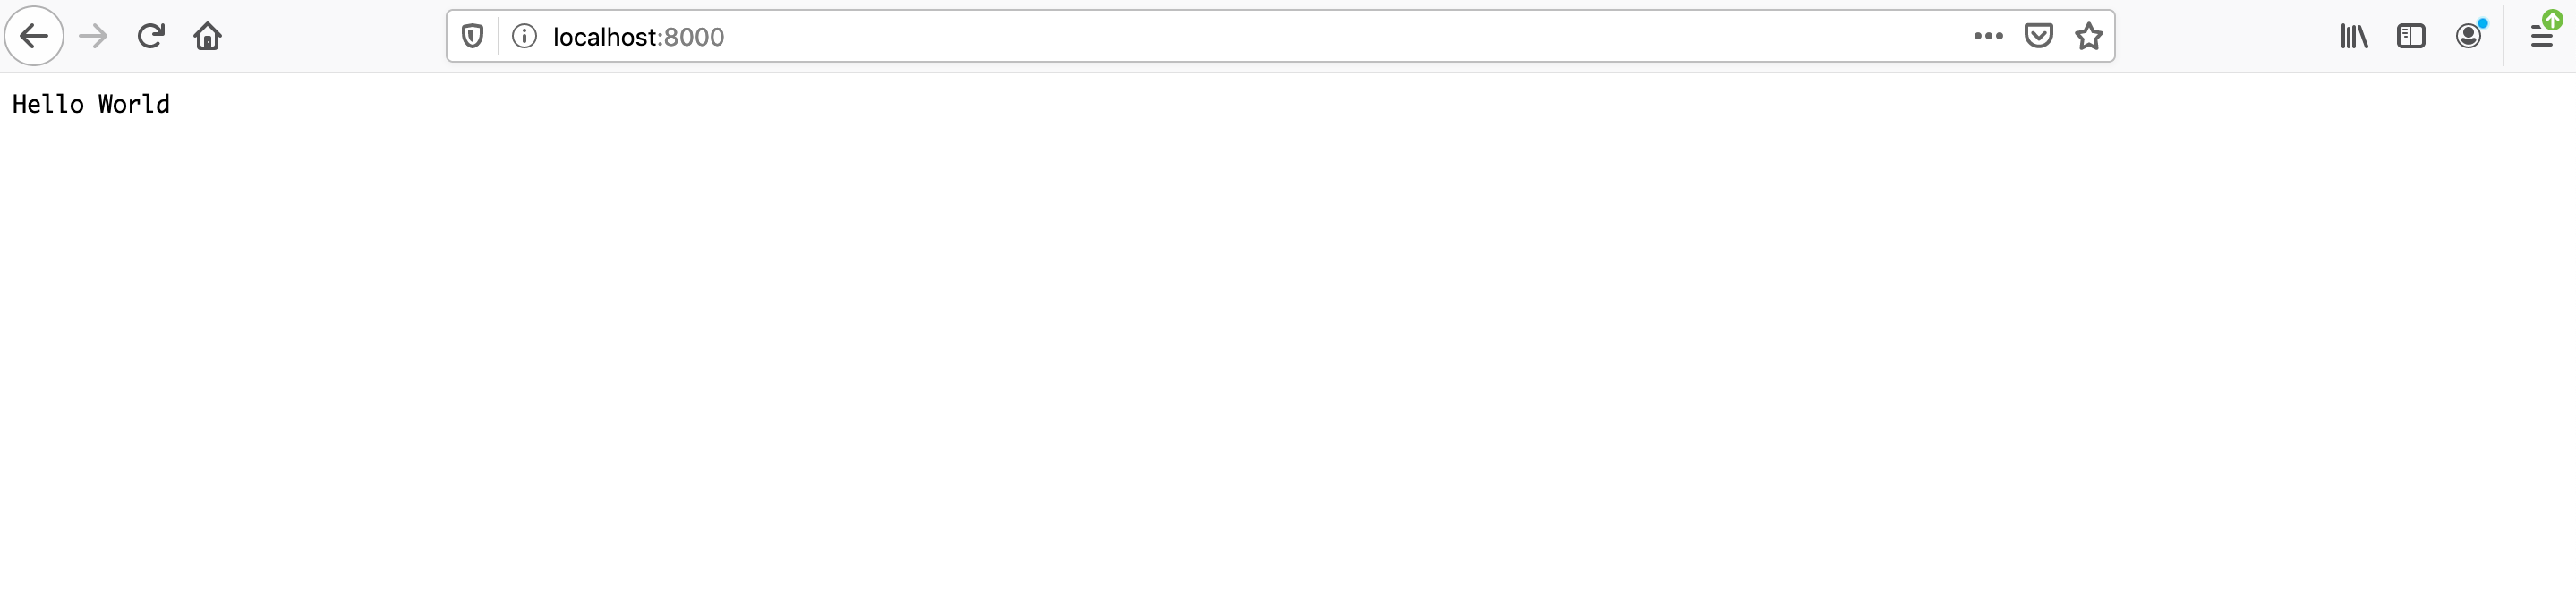
もう一度やってみましょう。$ deno run --allow-net server.js http://localhost:8000/無事成功しましたね。
http://localhost:8000/にアクセスすると次のように表示されているはずです!
変更点5 Web APIの実装によるブラウザとの互換性の向上
Web APIはWebブラウザに組み込まれている機能です。ブラウザやコンピュータの環境の情報を取得し、これを使って役に立つややこしい事を行えるようにするものです。
代表的なものでいえば、DOM,Canvas API,Storage,fetch APIなどがあります。これらのAPIは日常的に使用していて、JavaScriptを覚えたての頃はJavaScript標準のモノだと思いこんでしまうほどですが、
Node.jsではこれらを使用することはできません。理由は簡単で、これらのAPIはブラウザ(Google Chrome, Firefox)で利用できるものであり、Node.jsはブラウザではないからです。Node.jsの場合
例えば、次のように
Node.jsでFetch APIを利用しようとすると失敗します。fetch('https://pokeapi.co/api/v2/pokemon/') .then(res => res.json()) .then(data => console.log(data) )$ node node-fetch.js node-fetch.js:2 fetch('https://pokeapi.co/api/v2/pokemon/1') ^ ReferenceError: fetch is not defined at Object.<anonymous> (/Users/asaiippei/deno-test/node-fetch.js:2:1) at Module._compile (internal/modules/cjs/loader.js:955:30) at Object.Module._extensions..js (internal/modules/cjs/loader.js:991:10) at Module.load (internal/modules/cjs/loader.js:811:32) at Function.Module._load (internal/modules/cjs/loader.js:723:14) at Function.Module.runMain (internal/modules/cjs/loader.js:1043:10) at internal/main/run_main_module.js:17:11
fetchが定義されていないと怒られていますね。
これを解決するには、外部モジュールであるnode-fetchをインストールする必要があります。npm i node-fetch// これを追加 const fetch = require('node-fetch') fetch('https://pokeapi.co/api/v2/pokemon/') .then(res => res.json()) .then(data => console.log(data) )$ node node-fetch.js { count: 964, next: 'https://pokeapi.co/api/v2/pokemon/?offset=20&limit=20', previous: null, results: [ { name: 'bulbasaur', url: 'https://pokeapi.co/api/v2/pokemon/1/' }, { name: 'ivysaur', url: 'https://pokeapi.co/api/v2/pokemon/2/' }, { name: 'venusaur', url: 'https://pokeapi.co/api/v2/pokemon/3/' }, { name: 'charmander', url: 'https://pokeapi.co/api/v2/pokemon/4/' }, { name: 'charmeleon', url: 'https://pokeapi.co/api/v2/pokemon/5/' }, { name: 'charizard', url: 'https://pokeapi.co/api/v2/pokemon/6/' }, { name: 'squirtle', url: 'https://pokeapi.co/api/v2/pokemon/7/' },Denoの場合
Denoの場合には、標準でFetch APIがサポートされているため、インストールすることなく使用することができます。const res = await fetch('https://pokeapi.co/api/v2/pokemon/1') const json = res.json() const data = await json console.log(data)おっと、実行するときには
--allow-netフラグを渡すことを忘れないでください!$ deno run --allow-net fetch.js { count: 964, next: "https://pokeapi.co/api/v2/pokemon/?offset=20&limit=20", previous: null, results: [ { name: "bulbasaur", url: "https://pokeapi.co/api/v2/pokemon/1/" }, { name: "ivysaur", url: "https://pokeapi.co/api/v2/pokemon/2/" }, { name: "venusaur", url: "https://pokeapi.co/api/v2/pokemon/3/" }, { name: "charmander", url: "https://pokeapi.co/api/v2/pokemon/4/" }, { name: "charmeleon", url: "https://pokeapi.co/api/v2/pokemon/5/" }, { name: "charizard", url: "https://pokeapi.co/api/v2/pokemon/6/" }, { name: "squirtle", url: "https://pokeapi.co/api/v2/pokemon/7/" },
fetch APIの他にも幅広いWeb APIを実装していることにより、ブラウザとの互換性を向上させました。Denoによるテスト
Denoにはテストランナーも含まれています。
Deno.testを呼ぶことでテストをすることができます。Deno.test("hello world", () => { const x = 1 + 2; if (x !== 3) { throw Error("x should be equal to 3"); } });標準テストモジュールから、アサーションを使用することができます。
import { assertEquals } from "https://deno.land/std/testing/asserts.ts";

Deno.test("hello world", () => {
  const x = 2 + 2;
  assertEquals(x, 3);
});
テストを実行するときは、
Deno testです。$ deno test test.js Download https://deno.land/std/testing/asserts.ts Warning Implicitly using master branch https://deno.land/std/testing/asserts.ts Compile https://deno.land/std/testing/asserts.ts Download https://deno.land/std/fmt/colors.ts Download https://deno.land/std/testing/diff.ts Warning Implicitly using master branch https://deno.land/std/testing/diff.ts Warning Implicitly using master branch https://deno.land/std/fmt/colors.ts Compile file:///Users/deno-test/.deno.test.ts running 1 tests test hello world ... FAILED (5ms) failures: hello world AssertionError: Values are not equal: [Diff] Actual / Expected - 4 + 3 at assertEquals (https://deno.land/std/testing/asserts.ts:167:9) at test.js:5:3 at asyncOpSanitizer ($deno$/testing.ts:36:11) at Object.resourceSanitizer [as fn] ($deno$/testing.ts:70:11) at TestApi.[Symbol.asyncIterator] ($deno$/testing.ts:264:22) at TestApi.next (<anonymous>) at Object.runTests ($deno$/testing.ts:346:20) failures: hello world test result: FAILED. 0 passed; 1 failed; 0 ignored; 0 measured; 0 filtered out (5ms)初回なのでダウンロードとコンパイルが入りますね。
テストも失敗しているので修正しておきましょう。import { assertEquals } from "https://deno.land/std/testing/asserts.ts"; Deno.test("hello world", () => { const x = 1 + 2; assertEquals(x, 3); });2回目以降のテストはすぐに実行できます。
$ deno test test.js
running 1 tests
test hello world ... ok (6ms)

test result: ok. 1 passed; 0 failed; 0 ignored; 0 measured; 0 filtered out (8ms)
これでOKですね。
おわりに
新しいJavaScriptのランタイムである
Denoについてざっくりと触れてみました。
いつの日か、Node.jsに取って代わる日が来るのでしょうか、とても気になりますね。

- 投稿日:2020-05-19T17:49:12+09:00
Mongo APIを採用したCosmosDBに対して要求したコマンドのRU消費量を知るには
背景
CosmosDBは1秒間に利用できるRU(リクエストユニット)は任意の値をユーザーで定義できるため、CosmosDBが消費できるRUの値を大きくすればどんなクエリも安定的に処理できる。しかし、なるべく多くのコマンドを少ないコストで捌きたい場合、自分が要求するコマンドによってどの程度のRUが消費されるかを知り、コマンドに対してRUの消費量が大きければコマンド内容を調整してなるべく少ないRUで同一の結果が得られるように対処しなければならない。ここではnode.jsを採用したプロジェクトにおいてCosmosDBへ要求したコマンドがどの程度RUを消費したのかを調査する方法を示す。
Node環境下でRUの消費量を知るには
CosmosDBに対してgetLastRequestStatisticsと呼ばれるCosmosDBにだけ利用できるカスタムコマンドを呼び出すことでRUの消費量を知ることができる。Nodeを使用している環境でgetLastRequestStatisticsコマンドを呼び出すにはdbオブジェクトのcommandメソッドを使用すればよい。具体的なコードを以下に示す。
getLastRequestStatistics.jsconst mongodb = require("mongodb") const mongoClient = require("mongodb").MongoClient; const connectstring = "CosmosDB接続文字列" const dbname = "データベース名" async function getLastRequestStatistics() { const client = await mongoClient.connect(connectstring,{useUnifiedTopology: true}) const db = client.db(dbname) //計測したいコマンドを記述する。以下は全件検索をするコマンドの例。 try { const testcursor = db.collection("コレクション名").find({}) await testcursor.forEach((doc)=>{ //console.log(doc) }) } catch(error) { console.log(error) } //直前に実行したコマンドのRU消費量を知るためにgetLastRequestStatisticsコマンドを実行する const result = await db.command({ getLastRequestStatistics: 1 }) console.log(`result:${result['CommandName']}`) console.log(`requestCharge:${result['RequestCharge']}`) await client.close() } getLastRequestStatistics().catch((reason)=>{console.log(reason)})上記のように計測したいコマンドの実行、getLastRequestStatisticsコマンドの順でコマンドを実行することで特定のコマンドのRU消費量をしることができる。CosmosDBを利用する場合、本番環境で想定外のRUを消費しないために事前に自分のコマンドがどの程度のRUを消費するのかを一つ一つ確認することをおすすめする。
参考ページ
https://docs.microsoft.com/ja-jp/azure/cosmos-db/find-request-unit-charge
- 投稿日:2020-05-19T17:33:19+09:00
Ubuntuでnodeをインストールする
vagrantで起動したUbuntuにnodeをインストール。
aptでinstallできるがバージョンが古い。
nvmを使うか、nパッケージを使うか。
今回は、nパッケージを使う。ubuntuバージョン:
bento/ubuntu-16.04nパッケージの場合
sudo apt install -y nodejs npmsudo npm install -g nsudo n ltsここでは、lts(LTSバージョンの最新)を指定。
バージョンを直接書くこともできる。結果
cp: cannot stat '/usr/local/n/versions/node/12.16.3/lib': No such file or directory
cp: cannot stat '/usr/local/n/versions/node/12.16.3/include': No such file or directory
cp: cannot stat '/usr/local/n/versions/node/12.16.3/share': No such file or directory
(´・ω・`)は?
以前はできた。
直接的な解決方法が分からなかったが、tar.xzファイルの解凍を
うまくできていないみたいだったのでwget https://nodejs.org/dist/v12.16.3/node-v12.16.3-linux-x64.tar.xzこれで直接ファイルをダウンロード。
tar -Jxvf node-v12.16.3-linux-x64.tar.xzこれで直接ファイルを解凍
cd node-v12.16.3-linux-x64
sudo cp  * /usr/local/n/versions/node/12.16.3
sudo cp -r * /usr/local/n/versions/node/12.16.3
nパッケージのところにファイルとフォルダをコピー
sudo n ltsインストールする。
installed : v12.16.3 (with npm 6.14.4)結果、成功した模様。
node -v確認も成功。
- 投稿日:2020-05-19T17:22:29+09:00
Node.js SDKを使ってImage Searchを使った商品の類似検索を試す【検索編】
今回の目的(Node.js SDKを使って検索してみる)
前回、Image Searchの設定と画像取り込みまで終わりました。今回は、前回作ったImage Searchにプログラムでアクセスしてみようと思います。
実装環境の構築
今回はYarnを使ってでプロジェクト作成します。Yarnの開発環境が整っていない方はインストールを行っておいてください。(サンプルはYarnで作成していますが、npmでも構いません)
参考:Windows+Scoopの場合
PS C:\Users\user> scoop install yarnNode.js プロジェクトの作成
それでは、Node.jsのプロジェクトを作ってみましょう
プロジェクトディレクトリの作成
PS C:\Users\user\Documents> mkdir node-sample


    Directory: C:\Users\user\Documents

Mode                 LastWriteTime         Length Name
----                 -------------         ------ ----
d----          2020/05/19    15:59                node-sample

PS C:\Users\user\Documents> cd .\node-sample\
PS C:\Users\user\Documents\node-sample>
Node プロジェクトの作成
PS C:\Users\user\Documents\node-sample> yarn init
yarn init v1.22.4
question name (node-sample): alibaba-imagesearch-demo
question version (1.0.0):
question description: image search demo
question entry point (index.js):
question repository url:
question author: morozumi.h
question license (MIT):
question private:
success Saved package.json
Done in 30.04s.
PS C:\Users\user\Documents\node-sample>
PS C:\Users\user\Documents\node-sample> tree /F フォルダー パスの一覧: ボリューム Windows ボリューム シリアル番号は 9411-0B65 です C:. │ search01.jpg │ index.js │ package.json │ yarn.lock │ └─node_modules │ .yarn-integrity PS C:\Users\user\Documents\node-sample>依存関係の追加
Alibaba CloudのSDKを追加します。
PS C:\Users\user\Documents\node-sample> yarn add @alicloud/pop-core
yarn add v1.22.4
info No lockfile found.
[1/4] Resolving packages...
[2/4] Fetching packages...
[3/4] Linking dependencies...
[4/4] Building fresh packages...
                                                                                                                        success Saved lockfile.
success Saved 10 new dependencies.
info Direct dependencies
└─ @alicloud/pop-core@1.7.9
info All dependencies
├─ @alicloud/pop-core@1.7.9
├─ @types/node@12.12.39
├─ bignumber.js@4.1.0
├─ debug@3.2.6
├─ httpx@2.2.3
├─ json-bigint@0.2.3
├─ kitx@1.3.0
├─ sax@1.2.4
├─ xml2js@0.4.23
└─ xmlbuilder@11.0.1
Done in 2.56s.
PS C:\Users\user\Documents\node-sample> yarn add @alicloud/imagesearch-2019-03-25 yarn add v1.22.4 [1/4] Resolving packages... [2/4] Fetching packages... [3/4] Linking dependencies... [4/4] Building fresh packages... success Saved lockfile. success Saved 1 new dependency. info Direct dependencies └─ @alicloud/imagesearch-2019-03-25@1.0.0 info All dependencies └─ @alicloud/imagesearch-2019-03-25@1.0.0 Done in 2.38s.PS C:\Users\user\Documents\node-sample> yarn add json-to-form-data yarn add v1.22.4 [1/4] Resolving packages... [2/4] Fetching packages... [3/4] Linking dependencies... [4/4] Building fresh packages... success Saved lockfile. success Saved 1 new dependency. info Direct dependencies └─ json-to-form-data@1.0.0 info All dependencies └─ json-to-form-data@1.0.0 Done in 1.78s. PS C:\Users\user\Documents\node-sample>前回作成したImage Searchにアクセスする
アクセスキーとシークレットキーは前回作成したものを使用します。
また、リージョンとエンドポイントについては、以下の表から設定します。今回は日本(東京)を設定します。
リージョン エンドポイント シンガポール imagesearch.ap-southeast-1.aliyuncs.com 中国 (香港) imagesearch.cn-hongkong.aliyuncs.com 日本 (東京) imagesearch.ap-northeast-1.aliyuncs.com オーストラリア (シドニー) imagesearch.ap-southeast-2.aliyuncs.com index.jsconst Client = require('@alicloud/imagesearch-2019-03-25') const jtfd = require('json-to-form-data') const fs = require('fs') const accessKey = 'XXXXXXXXXXXXXXXX' const seacretKey = 'YYYYYYYYYYYYYYY' const client = new Client({ accessKeyId : accessKey, accessKeySecret : seacretKey, endpoint : 'http://imagesearch.ap-northeast-1.aliyuncs.com', apiVersion : '2019-03-25' }) const options = { method : 'POST', "Content-Type" : 'application/x-www-form-urlencoded; charset=UTF-8' } const picContent = fs.readFileSync('./search01.jpg').toString('base64') // 画像の検索 const searchRequest = { InstanceName: 'itemsearch', PicContent: picContent }; const searchData = jtfd(searchRequest) client.searchImage(searchData, options).then(value => { console.log("Result: ", JSON.stringify(value,null,4)); }).catch(err => { console.log("Error Message: ", err); });result.json{ "Msg": "success", "Head": { "DocsFound": 11, "DocsReturn": 10, "SearchTime": 100 }, "RequestId": "A099A070-40B4-4021-9722-B8C138636FCD", "Auctions": [ { "CategoryId": 9, "PicName": "12.jpg", "CustomContent": "k1:v12,k2:v211,k3:v311", "ProductId": "1011", "SortExprValues": "3.07306838035583;217" }, { "CategoryId": 9, "PicName": "11.jpg", "CustomContent": "k1:v11,k2:v210,k3:v310", "ProductId": "1010", "SortExprValues": "2.97270393371582;222" }, { "CategoryId": 9, "PicName": "09.jpg", "CustomContent": "k1:v09,k2:v208,k3:v308", "ProductId": "1008", "SortExprValues": "2.87724995613098;238" }, { "CategoryId": 9, "PicName": "10.jpg", "CustomContent": "k1:v10,k2:v209,k3:v309", "ProductId": "1009", "SortExprValues": "2.79507827758789;235" }, { "CategoryId": 9, "PicName": "02.jpg", "CustomContent": "k1:v02,k2:v201,k3:v301", "ProductId": "1001", "SortExprValues": "2.67687916755676;251" }, { "CategoryId": 9, "PicName": "05.jpg", "CustomContent": "k1:v05,k2:v204,k3:v304", "ProductId": "1004", "SortExprValues": "2.67470407485962;249" }, { "CategoryId": 9, "PicName": "06.jpg", "CustomContent": "k1:v06,k2:v205,k3:v305", "ProductId": "1005", "SortExprValues": "2.66586232185364;254" }, { "CategoryId": 9, "PicName": "04.jpg", "CustomContent": "k1:v04,k2:v203,k3:v303", "ProductId": "1003", "SortExprValues": "2.63756942749023;255" }, { "CategoryId": 9, "PicName": "01.jpg", "CustomContent": "k1:v01,k2:v200,k3:v300", "ProductId": "1000", "SortExprValues": "2.57631182670593;270" }, { "CategoryId": 9, "PicName": "07.jpg", "CustomContent": "k1:v07,k2:v206,k3:v306", "ProductId": "1006", "SortExprValues": "2.52564144134521;253" } ], "PicInfo": { "CategoryId": 9, "AllCategories": [ { "Id": 0, "Name": "Tops" }, { "Id": 1, "Name": "Dress" }, { "Id": 2, "Name": "Bottoms" }, { "Id": 3, "Name": "Bag" }, { "Id": 4, "Name": "Shoes" }, { "Id": 5, "Name": "Accessories" }, { "Id": 6, "Name": "Snack" }, { "Id": 7, "Name": "Makeup" }, { "Id": 8, "Name": "Bottle" }, { "Id": 9, "Name": "Furniture" }, { "Id": 20, "Name": "Toy" }, { "Id": 21, "Name": "Underwear" }, { "Id": 22, "Name": "Digital device" }, { "Id": 88888888, "Name": "Other" } ], "Region": "140,474,36,578" }, "Code": 0, "Success": true }前回、管理画面から投げた結果と同じ結果が出力されました。Node.jsでも簡単に検索する事ができました。
- 投稿日:2020-05-19T17:22:29+09:00
Node.js SDKを使ってImage Searchの類似検索を試す【検索編】
今回の目的(Node.js SDKを使って検索してみる)
前回、Image Searchの設定と画像取り込みまで終わりました。今回は、前回作ったImage Searchにプログラムでアクセスしてみようと思います。
実装環境の構築
今回はYarnを使ってでプロジェクト作成します。Yarnの開発環境が整っていない方はインストールを行っておいてください。(サンプルはYarnで作成していますが、npmでも構いません)
参考:Windows+Scoopの場合
PS C:\Users\user> scoop install yarnNode.js プロジェクトの作成
それでは、Node.jsのプロジェクトを作ってみましょう
プロジェクトディレクトリの作成
PS C:\Users\user\Documents> mkdir node-sample


    Directory: C:\Users\user\Documents

Mode                 LastWriteTime         Length Name
----                 -------------         ------ ----
d----          2020/05/19    15:59                node-sample

PS C:\Users\user\Documents> cd .\node-sample\
PS C:\Users\user\Documents\node-sample>
Node プロジェクトの作成
PS C:\Users\user\Documents\node-sample> yarn init
yarn init v1.22.4
question name (node-sample): alibaba-imagesearch-demo
question version (1.0.0):
question description: image search demo
question entry point (index.js):
question repository url:
question author: morozumi.h
question license (MIT):
question private:
success Saved package.json
Done in 30.04s.
PS C:\Users\user\Documents\node-sample>
PS C:\Users\user\Documents\node-sample> tree /F フォルダー パスの一覧: ボリューム Windows ボリューム シリアル番号は 9411-0B65 です C:. │ search01.jpg │ index.js │ package.json │ yarn.lock │ └─node_modules │ .yarn-integrity PS C:\Users\user\Documents\node-sample>依存関係の追加
Alibaba CloudのSDKを追加します。
PS C:\Users\user\Documents\node-sample> yarn add @alicloud/pop-core
yarn add v1.22.4
info No lockfile found.
[1/4] Resolving packages...
[2/4] Fetching packages...
[3/4] Linking dependencies...
[4/4] Building fresh packages...
                                                                                                                        success Saved lockfile.
success Saved 10 new dependencies.
info Direct dependencies
└─ @alicloud/pop-core@1.7.9
info All dependencies
├─ @alicloud/pop-core@1.7.9
├─ @types/node@12.12.39
├─ bignumber.js@4.1.0
├─ debug@3.2.6
├─ httpx@2.2.3
├─ json-bigint@0.2.3
├─ kitx@1.3.0
├─ sax@1.2.4
├─ xml2js@0.4.23
└─ xmlbuilder@11.0.1
Done in 2.56s.
PS C:\Users\user\Documents\node-sample> yarn add @alicloud/imagesearch-2019-03-25 yarn add v1.22.4 [1/4] Resolving packages... [2/4] Fetching packages... [3/4] Linking dependencies... [4/4] Building fresh packages... success Saved lockfile. success Saved 1 new dependency. info Direct dependencies └─ @alicloud/imagesearch-2019-03-25@1.0.0 info All dependencies └─ @alicloud/imagesearch-2019-03-25@1.0.0 Done in 2.38s.PS C:\Users\user\Documents\node-sample> yarn add json-to-form-data yarn add v1.22.4 [1/4] Resolving packages... [2/4] Fetching packages... [3/4] Linking dependencies... [4/4] Building fresh packages... success Saved lockfile. success Saved 1 new dependency. info Direct dependencies └─ json-to-form-data@1.0.0 info All dependencies └─ json-to-form-data@1.0.0 Done in 1.78s. PS C:\Users\user\Documents\node-sample>前回作成したImage Searchにアクセスする
アクセスキーとシークレットキーは前回作成したものを使用します。
また、リージョンとエンドポイントについては、以下の表から設定します。今回は日本(東京)を設定します。
リージョン エンドポイント シンガポール imagesearch.ap-southeast-1.aliyuncs.com 中国 (香港) imagesearch.cn-hongkong.aliyuncs.com 日本 (東京) imagesearch.ap-northeast-1.aliyuncs.com オーストラリア (シドニー) imagesearch.ap-southeast-2.aliyuncs.com index.jsconst Client = require('@alicloud/imagesearch-2019-03-25') const jtfd = require('json-to-form-data') const fs = require('fs') const accessKey = 'XXXXXXXXXXXXXXXX' const seacretKey = 'YYYYYYYYYYYYYYY' const client = new Client({ accessKeyId : accessKey, accessKeySecret : seacretKey, endpoint : 'http://imagesearch.ap-northeast-1.aliyuncs.com', apiVersion : '2019-03-25' }) const options = { method : 'POST', "Content-Type" : 'application/x-www-form-urlencoded; charset=UTF-8' } const picContent = fs.readFileSync('./search01.jpg').toString('base64') // 画像の検索 const searchRequest = { InstanceName: 'itemsearch', PicContent: picContent }; const searchData = jtfd(searchRequest) client.searchImage(searchData, options).then(value => { console.log("Result: ", JSON.stringify(value,null,4)); }).catch(err => { console.log("Error Message: ", err); });result.json{ "Msg": "success", "Head": { "DocsFound": 11, "DocsReturn": 10, "SearchTime": 100 }, "RequestId": "A099A070-40B4-4021-9722-B8C138636FCD", "Auctions": [ { "CategoryId": 9, "PicName": "12.jpg", "CustomContent": "k1:v12,k2:v211,k3:v311", "ProductId": "1011", "SortExprValues": "3.07306838035583;217" }, { "CategoryId": 9, "PicName": "11.jpg", "CustomContent": "k1:v11,k2:v210,k3:v310", "ProductId": "1010", "SortExprValues": "2.97270393371582;222" }, { "CategoryId": 9, "PicName": "09.jpg", "CustomContent": "k1:v09,k2:v208,k3:v308", "ProductId": "1008", "SortExprValues": "2.87724995613098;238" }, { "CategoryId": 9, "PicName": "10.jpg", "CustomContent": "k1:v10,k2:v209,k3:v309", "ProductId": "1009", "SortExprValues": "2.79507827758789;235" }, { "CategoryId": 9, "PicName": "02.jpg", "CustomContent": "k1:v02,k2:v201,k3:v301", "ProductId": "1001", "SortExprValues": "2.67687916755676;251" }, { "CategoryId": 9, "PicName": "05.jpg", "CustomContent": "k1:v05,k2:v204,k3:v304", "ProductId": "1004", "SortExprValues": "2.67470407485962;249" }, { "CategoryId": 9, "PicName": "06.jpg", "CustomContent": "k1:v06,k2:v205,k3:v305", "ProductId": "1005", "SortExprValues": "2.66586232185364;254" }, { "CategoryId": 9, "PicName": "04.jpg", "CustomContent": "k1:v04,k2:v203,k3:v303", "ProductId": "1003", "SortExprValues": "2.63756942749023;255" }, { "CategoryId": 9, "PicName": "01.jpg", "CustomContent": "k1:v01,k2:v200,k3:v300", "ProductId": "1000", "SortExprValues": "2.57631182670593;270" }, { "CategoryId": 9, "PicName": "07.jpg", "CustomContent": "k1:v07,k2:v206,k3:v306", "ProductId": "1006", "SortExprValues": "2.52564144134521;253" } ], "PicInfo": { "CategoryId": 9, "AllCategories": [ { "Id": 0, "Name": "Tops" }, { "Id": 1, "Name": "Dress" }, { "Id": 2, "Name": "Bottoms" }, { "Id": 3, "Name": "Bag" }, { "Id": 4, "Name": "Shoes" }, { "Id": 5, "Name": "Accessories" }, { "Id": 6, "Name": "Snack" }, { "Id": 7, "Name": "Makeup" }, { "Id": 8, "Name": "Bottle" }, { "Id": 9, "Name": "Furniture" }, { "Id": 20, "Name": "Toy" }, { "Id": 21, "Name": "Underwear" }, { "Id": 22, "Name": "Digital device" }, { "Id": 88888888, "Name": "Other" } ], "Region": "140,474,36,578" }, "Code": 0, "Success": true }前回、管理画面から投げた結果と同じ結果が出力されました。Node.jsでも簡単に検索する事ができました。
- 投稿日:2020-05-19T11:45:05+09:00
nodenvをアップデートする
anyenvで管理してるnodenvのアップデート方法。
nodenv updateでサクッといけると思ったが、いけなかったので備忘録。結論
一度アンインストールして再インストールする。
$ anyenv uninstall nodenv
$ anyenv install nodenv
これで
nodenv install -lすれば最新版までリストアップされるはず。試したこと
1. anyenvをアップデートする
anyenvをアップデートしたら、管理下のnodenvも自動的にアップデートされるのでは?との思いで決行。
$ brew upgrade anyenv変化なし。撃沈。
2. nodenvアップデートコマンドを実行する
nodenvにもアップデートコマンドがあるのかなと思い、勢いで実行。
$ nodenv updateそんなコマンドはありませんでした。ちゃんとhelpを確認しましょう
$ nodenv help
Usage: nodenv <command> [<args>]

Some useful nodenv commands are:
   commands    List all available nodenv commands
   local       Set or show the local application-specific Node version
   global      Set or show the global Node version
   shell       Set or show the shell-specific Node version
   install     Install a Node version using node-build
   uninstall   Uninstall a specific Node version
   rehash      Rehash nodenv shims (run this after installing executables)
   version     Show the current Node version and its origin
   versions    List installed Node versions
   which       Display the full path to an executable
   whence      List all Node versions that contain the given executable

See `nodenv help <command>' for information on a specific command.
For full documentation, see: https://github.com/nodenv/nodenv#readme
3. 一度アンインストールして再インストール
こちらの記事にすべて書いてありました。
anyenvによるnode.jsの更新 | ゴンの気まぐれなるままに
ありがたや。
$ anyenv uninstall nodenv
$ anyenv install nodenv
無事アップデート完了。
- 投稿日:2020-05-19T11:25:49+09:00
Scoop で Node.js の LTS版をインストールする
導入
あらかじめ、Scoop をインストールしておきましょう。https://scoop.sh/
PowerShell を起動し、下記でインストール可能です。git を入れていない場合はいれましょう。
scoopのインストールPS C:\Users\tkondou> iwr -useb get.scoop.sh | iex PS C:\Users\tkondou> Set-ExecutionPolicy RemoteSigned -scope CurrentUser PS C:\Users\tkondou> scoop install git探す
scoop search で検索できます。 nodejs で検索してみましょう。
検索方法PS C:\Users\tkondou> scoop search nodejs 'main' bucket: nodejs-lts (12.16.3) nodejs (14.2.0)インストールする
scoop install nodejs-lts でインストールできます。
nodejsインストールPS C:\Users\tkondou> scoop install nodejs-lts Installing 'nodejs-lts' (12.16.3) [64bit] Loading node-v12.16.3-win-x64.7z from cache Checking hash of node-v12.16.3-win-x64.7z ... ok. Extracting node-v12.16.3-win-x64.7z ... done. Linking ~\scoop\apps\nodejs-lts\current => ~\scoop\apps\nodejs-lts\12.16.3 Persisting bin Persisting cache Running post-install script... 'nodejs-lts' (12.16.3) was installed successfully!node を動かす
コマンドプロンプトを再起動し、
node コマンドにパスが通っているか確認してみましょう。nodeの確認PS C:\Users\tkondou> node --version v12.16.3 PS C:\Users\tkondou> node Welcome to Node.js v12.16.3. Type ".help" for more information. >問題ないですね。うまくいかない場合は、コマンドプロンプトを再起動してくださいね。
nodeのインストール場所
scoopの下にnode.exeが入るみたいですね。
nodeの場所PS C:\Users\tkondou> which node C:\Users\tkondou\scoop\apps\nodejs-lts\current\node.EXEちなみに、which コマンドは、 scoop install which で入れました。
Scoop の良さ
nodejs の公式サイトのLTS版である 12.16.3 が入りました。
Scoop は、管理者権限も不要なので、さくさく導入できて良い感じです。便利ですね。
また、Chocolateyに比べ、最新が維持されている感じがします。
使っていくことにします。
- 投稿日:2020-05-19T01:21:23+09:00
PythonでAES-CBC 暗号化、複合化 Node.js版も追記します。
サンプルプログラム(AES暗号化、複合化)の流れ
まず、ライブラリをインストール
pip install pycryptoクライアント側(サンプルプログラムでは暗号化する側です)
. 初期ベクトル(16バイトであること)、鍵
+α PBKDFを使用する場合、導出鍵を生成するためのパスワードも用意。
. 暗号化 → バイナリデータができる
. バイナリデータ(暗号化データ)を、Base64や16進数に変換して、URLエンコードできる形にしサーバーに送信サーバー側(サンプルプログラムでは複合化する側です)
. URL デコード
. Base64や16進数をバイナリに変換する処理
. 暗号化した側と同じ初期ベクトル、鍵等を用意。初期ベクトルは固定値として持つより、暗号化する側と複合化する側しか知りえない方法で、毎回異なるものを生成するようにした方が安全。
. 複合化要点、注意点
初期ベクトル、ソルト、パスワードを用意します。初期ベクトルは固定値であるよりも毎回ランダムに生成するのが推奨されています。
ここでは例として、初期ベクトルを 現在のタイムスタンプ → 16進数で表示 → sha512 にダイジェストしています。全体の流れをつかむために生成方法は適当に考えました。
以下、初期ベクトル、ソルト、パスワードはそのまま使用しないように。
クライアント側(暗号化する方)
# -*- coding: utf-8 -*-
import base64
import urllib.parse
from Crypto.Cipher import AES
from Crypto.Protocol.KDF import PBKDF2
from Crypto.Util import Padding
import requests
from datetime import datetime,timedelta,timezone
import hashlib

#初期ベクトルの作成(生成法はsha512にを使うという感じで、適当に考えました) 16進数 bytes型に変換するので、文字数は偶数にしておくこと
JST = timezone(timedelta(hours=9),"JST")
now = hex(int(datetime.now(JST).timestamp()))
hs = hashlib.sha512(now.encode()).hexdigest()
hex_iv = hs[0:100]
#ソルト 16進数 bytes型に変換するので、文字数は偶数にしておくこと
hex_salt = "39ccc779ab356eb43b4f37aedbc891d2f891756710b7856d21a2fd691483fb17"
secret_key = "asd@dfdfdsds"


def encrypt(plainText):
    #初期ベクトルの長さは16 byteでないといけない
    iv = bytes.fromhex(hex_iv)[:AES.block_size]
    #ストレッチ回数 この数字が大きいほど暗号強度が強く、暗号化・複合化の実行速度が遅くなる
    secure_levels = 100
    #ソルト 長さの制約は特になし
    salt = bytes.fromhex(hex_salt)

    #導出鍵生成   AESの場合、鍵の長さは 16 bytes(AES-128), 24 bytes(AES-192), 32bytes(AES-256) のいずれかでなければならない
    key = PBKDF2(password=secret_key, salt=salt, dkLen=16, count=secure_levels)

    # Chipher作成
    cipher = AES.new(key, AES.MODE_CBC, iv)

    #パディング
    data = plainText.encode()
    padding = AES.block_size - len(data) % AES.block_size
    data += (chr(padding) * padding).encode()

    #暗号化
    encrypted = cipher.encrypt(data)

    print(f"encrypted = {encrypted}\n")

    #binary to HEX
    hex_data = encrypted.hex()
    print(f"hex_data : binary to HEX = {hex_data}\n")

    # Base64エンコード
    base64_encoded = base64.b64encode(hex_data.encode())
    print(f"base64_encoded : Hex to Base64 = {base64_encoded.decode()}\n")

    # URL エンコード 今回は必要ありませんが、必要あれば随時URLエンコード
    # url_encoded = urllib.parse.quote(base64_encoded)

    return base64_encoded


if __name__ == "__main__":
    plainText = "暗号化のテストを行います。"
    print(f"\nPlain text = {plainText}\n")

    #暗号化
    encrypted = encrypt(plainText)

    #送信
    requests.get("http://localhost:5000/get",params={"text" : encrypted,"now" : now})
サーバー側(複合化する方)
# -*- coding: utf-8 -*-
import base64
import json
import urllib.parse
from Crypto.Cipher import AES
from Crypto.Protocol.KDF import PBKDF2
from Crypto.Util import Padding
from flask import Flask, render_template, request
import hashlib

app = Flask(__name__)


#ソルト 16進数。bytes型に変換するので、文字数は偶数にしておくこと
hex_salt = "39ccc779ab356eb43b4f37aedbc891d2f891756710b7856d21a2fd691483fb17"
secret_key = "asd@dfdfdsds"


def decrypt(base64encoded_value,now):
    # URL デコード 今回は必要ありませんが、他言語等で必要な場合は随時URLデコード
    # url_decoded = urllib.parse.unquote(base64encoded_value)
    # print(f"url_decoded = {url_decoded}")

    # Base64デコード
    hex_data = base64.b64decode(base64encoded_value).decode()
    print(f"hex_data : Base64 to Hex = {hex_data}\n")

    # HEX → binary
    encrypted_data = bytes.fromhex(hex_data)
    print(f"encrypted_data : Hex to binary = {encrypted_data}\n")

    #初期ベクトルの長さは16 byteでないといけない
    hs = hashlib.sha512(now.encode()).hexdigest()
    hex_iv = hs[0:100]
    iv = bytes.fromhex(hex_iv)[:AES.block_size]
    #ストレッチ回数 この数字が大きいほど暗号強度が強く、暗号化・複合化の実行速度が遅くなる
    secure_levels = 100
    #ソルト 長さの制約は特になし
    salt = bytes.fromhex(hex_salt)

    #導出鍵生成
    key = PBKDF2(password=secret_key, salt=salt, dkLen=16, count=secure_levels)

    # Chipher作成
    cipher = AES.new(key, AES.MODE_CBC, iv)

    #複合化
    decrypted = cipher.decrypt(encrypted_data)

    #アンパディング
    response = decrypted[0: -int(decrypted[-1])].decode('utf-8')
    return response

#Get Parameter 取得
@app.route('/get')
def get():
    text = ""
    if "text" in request.args and "now" in request.args:
        base64encoded_value = request.args.get('text')
        now = request.args.get('now')
        print(f"\nbase64encoded_value = {base64encoded_value}\n")

        #復号化
        decrypted_data = decrypt(base64encoded_value,now)
        print(f"decrypted_data = {decrypted_data}\n")

    else:
        return json.dumps({"message": "send message"})

    return json.dumps({"message": "OK"})


if __name__ == "__main__":
    app.run(host='0.0.0.0',port=5000)